Up next in 10

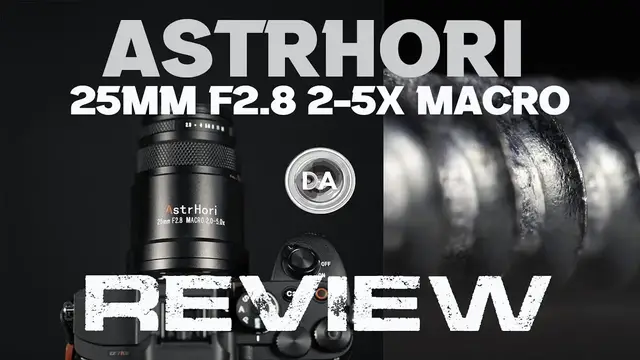
AstrHori 25mm F2.8 2-5x Ultra Macro Review | 5x Macro on the Cheap!
Jan 30, 2024

Photographer Dustin Abbott shares a thorough, real world review of the new AstrHori 25mm F2.8 2-5x Ultra Macro lens | Read the Text Review: | Visit the Image Gallery: | Purchase the AstrHori 25mm F2.8 2-5x Macro @ AstrHori Store http://tinyurl.com/BuyAH25macro | B&H Photo https://bhpho.to/3HrXv4A | Amazon https://amzn.to/48WXCB0 | Amazon Canada https://amzn.to/3HvdZJa | Amazon UK https://amzn.to/3U1IsWY | Amazon Germany https://amzn.to/3U7Bvng
Check out the DA Merch here: https://bit.ly/TWIMerch | Become a Patron: https://www.patreon.com/dustinabbott | On the Web: http://dustinabbott.net/ | Sign up for my Newsletter: http://bit.ly/1RHvUNp | Instagram: http://bit.ly/DLAinsta | Facebook: http://on.fb.me/1nuUUeH | Flickr: http://bit.ly/1UcnC0B | 500px: http://bit.ly/1Sy2Ngu Follow Craig @ https://www.instagram.com/craigstoffersen/
Want to support this channel? Use these affiliate links to shop at:
B&H Photo: http://bhpho.to/1TA0Xge
Adorama: https://howl.me/cjU0LKdp3LN
Camera Canada: http://bit.ly/DLACameraCan
Sony Canada: https://www.thesonyshop.ca/?ref=abbott
Amazon: https://amzn.to/3HrY64d
Amazon Canada: https://amzn.to/3qG1p18
Ebay: http://bit.ly/DustineBay
Into the AM Clothing: https://bit.ly/intotheAMda and use code DUSTIN10 for 10% off
Make a donation via Paypal: https://www.paypal.com/paypalme/dustinTWI
=============================
Table of Contents:
=============================
0:00 - intro
0:54 - Build and Features
Show More Show Less View Video Transcript
0:00
Hi, I'm Dustin Abbott. Lenses that reach up to 5x of macro magnification are very, very
0:17
rare and the new AstroHorror E 25mm F2.8 2-5x macro or ultra macro lens immediately becomes
0:27
the cheapest way to achieve a 5x level of macro magnification. Now ultra macro photography
0:33
is pretty challenging, but it certainly helps when you can jump into it for just $249. So
0:41
that makes this lens intriguing on that premise alone. So the question is, is the AstroHorror
0:47
E 25mm F2.8 2-5x macro lens worth it? Let's find out together
0:55
Now this lens comes in a variety of lens mounts. It comes in Sony E-mount, which is
0:59
what I've tested here. You can get it in Nikon Z, Canon RF, Leica L and then Fuji X mounts
1:07
Now obviously it's designed for full frame sensors. However, it can also be used on APS-C
1:13
where that 1.5x crop factor is going to give you a approximately 37.5mm effective angle
1:20
of view. This lens is all metal and it does feel fairly dense in the hand. It weighs in
1:25
at 474 grams or right over a pound. Part of the reason why it feels so dense in the
1:31
hand is the fact that it is going to extend and almost double in length when you get it
1:37
out to the 5x magnification level. And so that means all of that extra lens when it's
1:44
actually retracted is all there and so it feels fairly dense in the hand. So when you
1:49
zoom it out, so to speak to the 5x level of magnification, the lens grows from about 95
1:55
up to 174mm in length or about 6.5 inches. Now one thing that's really important to know
2:03
about a lens like this is that this is actually a fixed focus lens. What that means is that
2:09
this is a purely macro lens. You are only going to be able to operate from the 2 to
2:15
1 to 5 to 1 or the 2x to 5x macro range. Nothing outside of that. No one time magnification
2:24
no portrait distance and definitely no infinity. It is fixed focus and that means you're always
2:28
going to be operating at a very close focus distance when using this. Now obviously because
2:34
the lens becomes quite long, the minimum focus distance figure will be a little bit deceiving
2:40
but we're at how it practically works out and so all the time you're going to be working
2:44
really closely with this lens and that becomes really relevant in just a moment and something
2:48
else we'll talk about. Now the secondary ring here at the front is the aperture ring. Aperture
2:54
runs from f2.8 to f16. It is just full stop clicks there. The one thing to be aware of
3:00
that's true of any macro lens when you're working at this close of focus distance is
3:04
that physics does mess with the aperture so what you're controlling here is the physical
3:09
size of the aperture and so you can see the aperture closed down as you move from f2.8
3:14
towards f16, but as light enters into it the close focus distance does change the physics
3:20
of things. So basically just understand that at 5x level of magnification even at f2.8
3:28
aperture it behaves more like f12 and when you're shooting on a very high resolution
3:33
body as I am using the Sony a7R Mark V which is 61 megapixels that means that already diffraction
3:40
is starting to take a hit even at maximum aperture and if you stop it down particularly
3:45
towards f16 you're really going to see a softening of the image as a byproduct of that. It also
3:50
means that this kind of photography you have to have a lot of light and so you need to
3:55
find a way to get a lot of light on your subject because you're going to be working with very
4:00
small effective maximum apertures, not a lot of light reaching the sensor. Now the aperture
4:05
iris itself has eight blades. These blades are not curved so what that means is that
4:11
when you're stopped down in some situations you will see a slight octagonal shape to your
4:16
specular highlights. It's not a huge deal because the blade count is relatively high
4:21
but just know that it won't be perfectly circular in shape. Now a lens like this there are no
4:27
electronics that means that while most things operate fine there are certain information
4:33
that won't be communicated to the camera namely the lens designation, the aperture that's
4:38
chosen so some of those things you're going to have to guess at in post if you're looking
4:42
for that information or make notes otherwise. And if you're wanting to use something like
4:47
in-body image stabilization you'll have to manually set that but know that this is not
4:52
a lens you can use handheld basically under any circumstance. Depth of field is just too
4:57
tiny and it just isn't going to work so you're going to need a good steady tripod and some
5:01
good technique. Now while there is a front cap that is included here there is no lens
5:06
hood, there is no filter threads nor is there any kind of light included so if you're going
5:11
to want some kind of macro light assembly you're going to have to deal with that separately
5:15
So before we jump into the image quality breakdown let me just give you a few quick tips if you've
5:20
never done this type of photography. Depth of field is incredibly tiny when you're operating
5:24
at these kinds of magnification levels. So for example this shot is the edge of a knife
5:29
and this shot is the threads on just a tiny little screw. In other words depth of field
5:35
is really really small and so you're going to have to probably use some focus stacking
5:40
For example this result here just to get all of the word five, this is from an American
5:45
nickel five cent piece, to get all of that word five in focus I had to use five different
5:50
shots and then combine them in actually editing software to get enough depth of field to even
5:56
have all of that in focus. So just know that you're probably going to need to do that
6:02
And also because focus is fixed it means that you're not going to be able to change the
6:07
distance to your subject through just focus. It means you're going to have to move the
6:12
camera and so you're going to want an effective way to do that and that may include something
6:16
like focus rails. Very likely you're probably going to want to have the ability to have
6:21
a horizontal extension on your tripod and so that you can actually move the camera closer
6:26
to the subject because otherwise it gets really complicated to try to get your subject in
6:30
the position you need to get close enough to actually focus on it
6:35
And the other thing that I think is important to know with this kind of photography is to be patient. This is not the kind of photography you do quick and it takes a little bit more
6:44
effort but of course the results can be pretty astounding if you take the time
6:48
So when it comes to the image quality from the lens I'll give you a quick overview and then there will be a detailed image quality breakdown at the end of the video if you want
6:55
to jump ahead to that. It is time stamped in the description below
6:58
So actually there are ten elements in seven groups, a fairly simple optical formula and
7:03
the good news is that there really isn't much in terms of optical flaws here. There
7:08
is very very low vignette. I never actually saw vignette to be an issue with any of my
7:13
images. Distortion is basically non-existent. You can see actually from this shot of a two
7:19
dollar bill, here's the two dollar bill, here is the in God we trust section that we're
7:24
looking at and you can see however that all of those lines are nice and straight. No evidence
7:30
of distortion there. Now really important for this type of photography is that longitudinal
7:35
chromatic aberrations are very low. With such shallow depth of field and the need to get
7:39
a lot of light on your subject there will often be shiny reflective surfaces that pretty
7:44
commonly would show color fringing of some kind if this was not well controlled. Fortunately
7:50
it is well controlled here and you can see in these shots that there's even on very shiny
7:55
surfaces that there's really no fringing to see and here in a series from F2.8 to F16
8:02
we can see that throughout that whole range that the chromatic aberrations are well controlled
8:07
so great stuff there. There's also fairly good sharpness from F2.8 on. It's not the
8:14
sharpest macro lens that I've used and diffraction of course is softening because the magnification
8:19
is so high here. So the contrast is not amazing but at a pixel level but overall the images
8:25
do look detailed, they look contrasty. You know at the way that we actually look at images
8:31
they look just fine. The bokeh is also quite good and by the way very easy to get with
8:37
these levels of magnification. You can see in this shot for example of a needle and thread
8:41
that just a little bit of curvature of the spool of thread means that it's already completely
8:46
defocused and that just shows you how easy it is to defocus things and get nice bokeh
8:52
with a lens like this. So overall the image quality performance is actually quite good
8:57
I have no real complaints to give about that. In conclusion this is the type of photography
9:03
that feels really restrictive at first. You have to do extra things that you're not accustomed
9:08
to doing in other types of photography but it's something that gets increasingly fun
9:13
as you get into it. And as I've done this review it might feel kind of off-putting
9:18
some of the extra attention to detail that you have to give. But there's something about that that really does give a sense of fulfillment when you really nail an image that just sparkles
9:28
as a byproduct of using this. It's right in the dead of winter right now here in Ontario
9:33
Canada and this is actually a great type of winter photography option. You don't need
9:38
a whole lot going on. You can take very small objects and create a little tiny working space
9:45
and you can explore tiny worlds indoors. And so it's maybe a way to stir up those creative
9:49
juices during the long and otherwise maybe non-photography months of winter for you
9:56
Otherwise this lens is pretty great bang for the buck and the more that I used it the more
10:00
that I enjoyed using it as I began to work around some of the limitations and be able
10:06
to get the kind of unique images that frankly you just can't get any other way
10:11
I'm Dustin Abbott and if you want more information you can either look at the text review that
10:15
is linked in the description down below. There's an image gallery link there along with some
10:19
buying links. And if you want more information about the optical performance stay tuned right
10:24
now and we're going to jump into our deep dive. So first of all here we have an image that has not been corrected anyway and so this
10:41
shows that vignette is really not an issue. You can see that in the corners the corners
10:45
look nice and bright so no issue there. As noted previously this is a very close up shot
10:51
of a two dollar bill, American two dollar bill. And in this section you can see there's
10:56
lots of vertical lines going across the bill. And if we look towards the edges here you're
11:01
not really seeing any curvature of those lines. No distortion really to see here either
11:07
So to give you a little bit of perspective here is a look at that overall two dollar bill. So those vertical lines we were looking at is actually in this zone right here. Now
11:16
we're going to take a look at what two times magnification looks like of this group of
11:21
gentlemen here and then what five times magnification looks like. So obviously I took that previous
11:27
shot with a different lens as we can get no further away than this and still have any
11:32
kind of focus. So that shows us with this group at two times magnification and then
11:37
this is what it looks like at five times magnification. And that is obviously an extremely high level
11:44
of magnification on that single bill. So let's take a look here for those longitudinal chromatic
11:50
aberrations that are obviously going to be something that's really important to be controlled
11:53
in a macro lens. And particularly one that gets in this close because every bit of fringing
11:59
is just going to be exaggerated because the pixels are just so close. So we can see in
12:04
even these places where there's highlights of light kind of bouncing off there that there
12:09
is no fringing to be seen. And as we look here this is being our plane of focus as we
12:14
look before and then after the plane of focus just not really seeing any fringing there
12:20
Now this shot is at f 2.8 which would be the aperture that we would be most likely
12:24
to see fringing. You can see there are some really bright points and on these really really
12:28
bright areas I can see a little bit of fringing. And as you begin to stop the lens down that's
12:35
f4 they're reduced by f 5.6 here they are basically gone and so no longer an issue
12:44
And that honestly was the worst that I could find. You can see in this shot of all these
12:49
shiny areas that there's just no evidence of any fringing there. So a really strong
12:55
performance when it comes to controlling longitudinal chromatic aberrations. Now because diffraction
13:00
will come so early on a high resolution body like this which is 61 megapixels what I found
13:06
is that I've got f 2.8 on the left I've got f4 on the right and frankly I don't really
13:13
see much difference in terms of sharpness here. Depth of field obviously is going to
13:18
be a little bit larger with f4 and so maybe that's one reason to consider. I do think
13:24
there's a little bit better contrast if you look at the fibers that make up the paper
13:28
here but overall really not much of a difference. I've stopped down now to f 5.6 on the right
13:35
side and if we continue to examine again depth of field is going to increase so there's going
13:40
to be more that's in focus and there's a little bit better contrast in some of that writing
13:46
There's also some areas where it feels like diffraction has made the image a little bit
13:50
softer and so there is some give and take as you stop down. On down to f8 there on the
13:56
right side and what you can see is in the upper part of the image definitely diffraction
14:00
has reduced contrast somewhat. Now there is again there's more that's there's detail that's
14:06
present because of the depth of field increasing and so that may be one reason if you just
14:11
want you really need to increase that depth of field but you can see that there is some
14:15
give and take in other areas of the image due to the effects of diffraction just softening
14:22
the image just a little bit. Now here's our minimum aperture of f16 and you can see just
14:27
side by side there's not a tremendous amount of difference but you are going to see a difference
14:32
in areas near the edge of the frame and that's just largely because there's more in focus
14:37
and it allows the sharpness thus to be more consistent across the frame. Though you can
14:42
also see some areas near the center of the frame like this where diffraction has softened
14:48
the image where it frankly doesn't look anywhere as good as what f2.8 does here on the left
14:53
Now one oddity that I observed is that the if I use the metering in the camera it metered
15:00
correctly so we start at 1 30th of a second for f2.8 but what we should end up with is
15:07
a one second exposure at f16 which I manually shot here on the right you can see that it's
15:13
pretty dramatically overexposed. The image on the left is what the camera metered which
15:17
is actually two stops less at and so this is metering more like f8 rather than f16
15:25
I'm not quite sure what to make of that it could be just the effects of the physics on
15:31
the close focus it could also be that this aperture doesn't have as much variability
15:36
as what it shows and because you can only focus at minimum focus distance then there's
15:43
really no other kind of way to test that and so this is what it is so it's not a huge deal
15:49
but just note that you may not get all the way to f16 it seems like there's less variability
15:56
in the aperture range than what maybe there should be. So in conclusion let's talk about
16:00
the bokeh here and you can see that f2.8 on the left and then f5.6 on the right obviously
16:07
there's some trade off here f2.8 has such a shallow depth of field that very little
16:11
is in focus but the bokeh is very soft and more round. You stop on down to f5.6 a little
16:18
bit more is in focus so the image has a little bit more punch in one sense but at the same
16:23
time you can see that you're seeing that octagonal shape of the aperture iris and so the bokeh
16:28
isn't quite as soft or as pleasing. There's always trade offs when you're shooting images
16:32
and you just have to kind of determine what is most important to you. As I noted in my
16:37
intro you know this isn't the sharpest macro lens that I have used but for $250 it's pretty
16:44
great and obviously being able to get such high levels of magnification really give you
16:49
a lot of versatility in the kinds of things that you can capture. So thanks for sticking
16:54
around to the end and as always thanks for watching. Have a great day and let the light in