Up next in 10

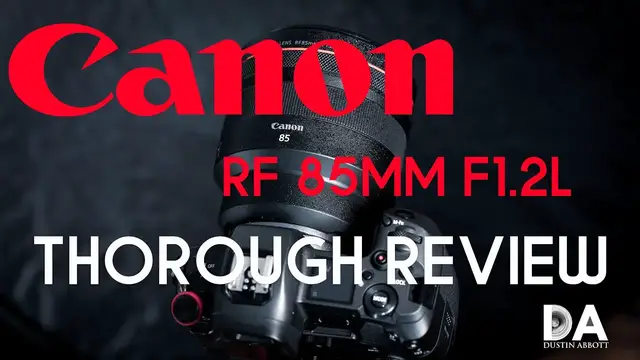
Canon RF 85mm F1.2L Definitive Review | 4K
Jul 19, 2023

Dustin Abbott's Canon RF 85mm F1.2L Definitive Review | Build and Handling 1:41 | Autofocus 9:37 | Video Performance 11:15 | Image Quality 17:11 | Summation 29:52 | Read the Text review: http://bit.ly/RF85LReview | Visit the Image Gallery: http://bit.ly/RF85Lig | Purchase the Canon RF 85mm F1.2L @ B&H Photo https://bhpho.to/30OevvZ | Amazon https://amzn.to/37oTQBd | Amazon Canada https://amzn.to/30OR4T4 | Amazon UK https://amzn.to/3aIV5wT | Amazon Germany https://amzn.to/2uwO8hO | Ebay http://bit.ly/RF85Lda
Purchase the Canon EOS R @ B&H Photo https://bhpho.to/2A6H9wI | Amazon https://amzn.to/2FasIvN | Amazon Canada https://amzn.to/2qDzCj7 | Amazon UK https://amzn.to/2AVnKPq | Amazon Germany https://amzn.to/2OzhErJ | Ebay http://bit.ly/eosRdla
Want to support this channel? Use these affiliate links to shop at:
B&H Photo: http://bhpho.to/1TA0Xge
Ebay: http://bit.ly/DustineBay
Make a donation via Paypal: paypal.me/dustinTWI
Get a discount off all Skylum Editing Software (Luminar, Aurora HDR, AirMagic) by using code DUSTINHDR at checkout: http://bit.ly/LuminarDLA
Become a Patron: https://www.patreon.com/dustinabbott | Check me out on: Personal Website: http://dustinabbott.net/ | Sign up for my Newsletter: http://bit.ly/1RHvUNp | Instagram: http://bit.ly/DLAinsta | Google+: http://bit.ly/24PjMzv | Facebook: http://on.fb.me/1nuUUeH | Twitter: http://bit.ly/1RyYxIH | Flickr: http://bit.ly/1UcnC0B | 500px: http://bit.ly/1Sy2Ngu
My filming setup: Sony a7R III: B&H Photo: https://bhpho.to/2D6ibNO or Amazon: http://amzn.to/2CNxOvH | or | Sony a9 @ B&H Photo: https://bhpho.to/2HyWIyt or Amazon: https://amzn.to/2s1vYE0
Tamron 28-75mm F2.8 RXD @B&H Photo: https://bhpho.to/2FA00la or Amazon https://amzn.to/2G2kaEr
Lights: Rotolight AEOS @B&H Photo https://bhpho.to/2IK7mqV | Genaray Contender @B&H Photo: https://bhpho.to/33HbGNM | and Aputure AL-MW: https://bhpho.to/2N3MtZV
DISCLAIMER: This video and description contains affiliate links, which means that if you click on one of the product links, I’ll receive a small commission. As an Amazon Associate I earn from qualifying purchases. This helps support the channel and allows me to continue to make videos like this. Thank you for the support!
Show More Show Less View Video Transcript
0:00
Hi, I'm Dustin Abbott and I'm here today to give you my thorough review of the Canon RF 85mm F1.2L
0:14
This is for Canon's EOS R system and full frame mirrorless bodies
0:19
I'm reviewing it on an EOS R camera body here today. This, of course, is the second of the major prime lenses from Canon that I have reviewed for the RF mount
0:30
including the 50mm F1.2L that I reviewed a couple of months ago
0:34
Another fantastic lens. Now, today we are doing the long format thorough review
0:40
And so at the end of the week, I'll be releasing the quick format kind of overview
0:44
if you're someone who just kind of wants the summary, the high points
0:48
And so stay tuned for that. this review, however, we're going to be diving deep into the nitty gritty of the performance
0:54
of this lens and trying to make a determination to help you decide whether or not this is a lens
0:59
for you. So obviously this is a physically large lens. It's a heavy lens, which we'll explore more
1:04
in just a second. It's also a very expensive lens at $2,699 US dollars or whatever the price tag is
1:12
in the market that you're in right now. This is a, in some cases, prohibitively expensive lens for
1:18
other people. You might be able to afford it if you're a working professional or you have more
1:23
kind of exposable cash. But at the same time, it's certainly going to be a lens you're going
1:28
to have to really think about if you want to acquire it. So in other words, the performance
1:33
has to really make the weight, the size, and the expense worth it. Is that the case? Well
1:39
that's what we're here to find out here today. The first place that we're going to start is by
1:44
taking a closer look at the physical design and what all is here in this lens. And so let's jump
1:50
in hands-on and give you a closer look. So the first thing that stood out to me when I pulled
1:54
the lens out of the box, of course, is the fact that it is a large lens. Now the length is not
2:00
necessarily exceptional. It's 4.62 inches or 117.3 millimeters, which is long for an 85 millimeter
2:08
lens, but that's not the thing that makes it so physically imposing. It's the diameter of the
2:13
lens, which is just massive around. And it's actually a really fortunate thing that the
2:20
EOS R has a better grip. So as you see, there is room to put my hand in there without my knuckles
2:26
dragging on the lens itself, because on a Sony body, this would be a serious issue. However
2:32
you do see that they've kind of wisely designed to where there is room here. If this thickness
2:37
extended back any further, you'd have a problem. And so kind of a clever design there, but the
2:42
diameter here is massive. It is over four inches in diameter, 103.2 millimeters. And so it actually
2:50
makes it wider than basically any of the opposing type lenses. For example, the Otis lens is 101
2:59
millimeters. And the older EF 85 millimeter F1.2 L Mark II is only 91 and a half millimeters in
3:09
diameter. And so diameter has definitely really grown. And what makes that interesting is that
3:14
it's an 82 millimeter filter thread, which is actually smaller than either the Otis or the
3:18
Sigma 85 millimeter F1.4 art. They both use an 86 millimeter, but you'll see that the actual
3:24
diameter of the lens is significantly wider than the filter thread. So that's not necessarily a
3:30
typical design in my experience. In terms of just the raw physicality of the lens, I'll put the
3:35
lens hood back on here for just a second. The lens hood itself is functional. It's not exceptional
3:41
particularly for a lens that's $2,700 US. It is, you know, plastic. It doesn't feel, you know
3:48
particularly premium in any way, shape or form. It's going to do the job. It's got a little lock
3:53
on it, but nothing particularly special there. Just to give you a little bit of a size comparison
3:59
This is a Sony, you know, kind of comparative 85 millimeter f1.4. This is the Samyang, but Samyang
4:08
is fairly close physically to the GM lens in terms of the, just the size dimensions of it. And so you
4:15
see how much larger the Canon lens is. And so it's, it's definitely a physically imposing kind
4:21
of lens. Now, in terms of what we've got here in weather sealing, a very nicely made lens
4:28
Like the 50 millimeter F1.2L, this has their shock resistance. And so while this is a plastic exterior, engineered plastics, polycarbonate, whatever you want to call it
4:39
it is designed with a lot of engineering inside. And so the lens actually feels premium
4:45
And part of that is probably just the fact that it is so heavy. But they have the shock resistance it's built in that will help the lens to take some knocks
4:53
and still optically remain centered and still keep being functional. So you've got a gasket here at the rear lens mount. You will note that this is a lens with a
5:04
fixed rear element, so you're not going to be able to use any kind of teleconverter or anything on
5:08
this lens. There's no space for one there. But beyond that, there are about 10 different seal
5:15
points at the switches, the rings, and then coming towards the front. Up front, you have a flooring
5:21
coating, so that makes it easier to clean, but it also helps with the weather resistance in general
5:28
So in terms of the switches that are here, you've got AF-MF, you have got a focus limiter
5:34
And so either it's just two positions, the full range, or excluding everything up to 1.5 meters
5:40
And so in this case, minimum focus distance is 0.85 meters or 2.79 feet
5:49
Our maximum magnification, 85 millimeter lenses are never impressive in this metric
5:54
you've got a 0.12 times magnification. And as you can see here, that's not a particularly high one
6:00
And this is about midway through the pack. But the focus limiter, if you don't need to focus up
6:06
close, eliminating the lot of focus capabilities. And so remember, this is an f1.2 lens. And so
6:13
although it's not a very big metric from 0.85 to 1.5 meters, because of such a narrow depth of
6:22
field, there are a lot of different focus positions. And if you eliminate those from the actual
6:28
autofocus, it does make a difference in speeding things up. And so certainly if that is, you know
6:36
if you don't need that close focus, it will give you faster focus speed by eliminating that
6:42
As far as other features, you've got the control ring here, which you can program to a variety of
6:47
different functions. It is very, very useful. I'm currently using it for exposure compensation
6:54
And so this time of year, it's snowy everywhere outside. Cameras tend to underexpose when you've
7:01
got a bright snowy background. And so just dialing in a bit of overexposure often makes a difference
7:08
One third, sometimes even two third stop is what's necessary. But having that on the fly is really
7:13
nice. Also when shooting portraits, to be able to kind of influence the what the desired outcome by
7:19
that is easy. But I mean, you can use it for a lot of other functions for aperture. And if you're
7:25
willing to pay an extra fee, they'll even de-click this. And so you can use it for like a de-clicked
7:29
type aperture. As it stands, there are, you know, regular detents all the way around. And so it
7:34
would function more like a traditional aperture ring if you're using it in that way. The focus
7:40
ring for such a large lens is not super wide, but you know, it's functional here. As far as the
7:46
actual focus action, this is focused by wire like all mirrorless lenses. And so when you input focus
7:53
you will get an on-screen distance window. And if you're using something like the focus guide
7:58
which I think is a great feature on the EOS R, you'll get that on there. And so focus is not bad
8:05
It's a little bit on the light side and it doesn have a particular amount of damping to it So you not gonna be fooled into thinking you using the Otis lens for manual focus however it gets the job done and fortunately you really don need it all that often So unlike the 50 millimeter f1 there is actually nine rather
8:25
than 10 aperture blades in the 85 millimeter and so overall the weight of the lens itself this is
8:32
actually a really hefty lens, even though it's a plastic exterior, 2.63 pounds or 1,195 grams
8:40
which actually only makes it five grams lighter than the Otis. And so this is a physically large
8:47
heavy lens, and that is going to be a factor for some shooters. It definitely is big. It definitely
8:53
is heavy. It is near Otis sizes in almost every detail. It's actually a little bit wider in
8:59
diameter than what the Otis lens is, and the weight is basically right there at it. We're
9:04
saved a little bit here on the Canon EOS R body in that it has a chunkier, more robust grip
9:11
If this lens was on Sony, it would be more of a challenge. On the OS R, it's not as bad
9:17
but this is still going to be a somewhat front-heavy lens. You're going to have to have
9:21
strong wrist if you're going to use this lens for an extended period of time. It's definitely
9:26
got some weight to it. Fortunately, as I said, though, the EOS R body is a good one ergonomically
9:33
and so it helps it to be a little bit more of a better balance when you come to using the lens
9:38
itself. Now, Canon chose to put its ring-type USM-type focus motor in this lens, like the 50
9:45
millimeter F1.2L that we reviewed a little while back. I think the reason why they chose the ring-type
9:51
focus motor rather than the nano USM is it seems to me that nano USM has been utilized where the
9:57
lens elements are smaller and lighter and it delivers really incredible performance. However
10:03
I think it might be a little underpowered in terms of torque for driving the massive glass elements
10:09
that make up a lens like this. And so they've chosen the USM motor. And so the advantage of USM
10:15
is that there is a lot of torque. It's able to drive the lens with focus speeds that if you're
10:20
coming for example from the EF version of the lens you're going to find it quite snappy. If you're
10:27
coming from some other alternatives you may not find it as snappy. For example if you're coming
10:32
from a 70 to 200 millimeter you're definitely going to notice that focus is a little bit more
10:37
gradual. In many situations and with most focus changes focus is fairly quick and that's particularly
10:43
true if you utilize the focus limiter. It does make a difference here and if you're not shooting
10:49
up close, it's definitely worth employing that focus limiter. However, you are going to find that
10:54
focus when you're making a major focus change. You'll definitely see that focus happening. You
11:00
can kind of hear the elements kind of move along rather than just that kind of that instantaneous
11:06
that the fastest lenses perform. It's kind of like they're there without, you don't see the process
11:11
you just see the end result. With this lens, like the 50 millimeter, you do see the process a little
11:16
bit. So first of all, let's take a look at the amount of noise that you're going to hear
11:20
particularly when it comes to recording video. So there's definitely some noise there. And if you're using the onboard microphone during video
11:40
pickup. Kind of the disadvantage of the ring type USM is it's never quite as quiet as nano USM or a
11:47
stepping motor and those are quieter and a little bit smoother for video. And so this is a lens that
11:53
in many ways is utilized, kind of optimized I should say, more for stills than for video when
11:59
it comes to the focus motor. And that's kind of the nature of the beast. It's probably appropriate
12:03
here as you know the primary usage of this is probably going to be more for stills than for
12:09
video, particularly when you're talking about the 1.7 times crop factor currently in 4K on an EOS
12:16
R type body, which makes the focal length really quite long for many situations. So beyond that
12:21
let's take a look at the focus accuracy. That's obviously really, really important. And it's one
12:26
of the areas that it could be distinguished from past generations of lenses where the advantage of
12:32
mirrorless focus systems and having focus points all across the frame could come into play. Let's
12:38
take a look. So let's talk about focus for a moment. The one complaint that I have here is that
12:45
sometimes near minimum focus, I had a hard time getting the focus to lock onto a foreground object
12:52
which is what I wanted here. And you can see that it went to the background, which admittedly is
12:56
somewhat busy, but I saw a pattern of this in a number of occasions. And so here is with basically
13:01
all points active. However, what surprised me is when I switched over and I put the focus point
13:07
a focus point just right here on the subject. You can see it still didn't really grab it. It reached
13:12
for something beyond there. I had to pull focus back and this is what I was looking for here
13:18
And so once, you know, I got things where I wanted it, focus is beautiful. However, I did see that
13:24
on a couple of occasions. Here's another example. I'm kind of looking upwards a little bit. I wanted
13:29
to get these foreground leaves, you know, against this background. So once again, it jumped to the
13:34
background. This is actually, it's the same image, believe it or not. It is the same shot, but you
13:40
know, obviously remarkably different when I get my focus where I wanted it to be. So obviously this
13:46
is much more desirable than what this is. If you put people in the frame, however, the focus is
13:52
fantastic. IAF works really well and out of about a hundred portrait shots that I took, they are all
14:00
perfectly focused. I might have a rare occasion where it grabbed a different eye than what I
14:05
wanted, but it always was accurately focused on an eye. And so really stunning performance for
14:11
portrait work with just always consistently well-focused results. And here, even though I'm
14:17
tracking action, you can see that it is still focused in on the eyes. And so we've got an
14:23
accurate result here. So I'm really impressed with the autofocus consistency for that kind of
14:28
situation. Here too, I wanted to grab obviously a, you know, kind of at a lower angle and I wanted
14:35
to grab this object, focus grabbed on immediately, no problem there, very accurate. Here is just kind
14:41
of in the living room type lighting and so not great lighting, but you can see that IAF worked
14:47
perfectly even at f1.2. I got very accurate results there. Now, of course, the advantage of the EOS R
14:54
with an f1.2 lens is that you really have great advantages when it comes to low light
14:58
performance with a sensitivity rating of down to minus six EV. And so we can see here, it's actually
15:05
here's where we could have used some image stabilization in the body because to get the
15:09
shutter speed in this kind of lighting, it was a low shutter speed. So you can see there's motion
15:14
blur. However, you can also see that focus was accurate and very low light. Here is actually
15:20
the lighting here actually exceeds the rating of the camera. This is a minus 6.17 EV rating
15:30
is what it calculates out to. But you can see that even in what was essentially a dark condition
15:35
there's nothing special about the image, but I was able to lock focus. Now, to be fair
15:41
on these kind of lighting conditions, I tried doing major focus changes. They were extremely slow
15:46
However, the fact that I could focus in essentially dark conditions is still impressive
15:52
And so as you can see, outside of that kind of close focus situation
15:56
you know, just a little bit outside of minimum focus distance, camera can be a little bit reluctant with this lens to focus under those conditions
16:03
And so that can be a little bit frustrating to me because that's a scenario that I often shoot in
16:08
Things get much rosier when you have a human subject in the frame and there it basically just doesn't miss regardless of where you're setting your focus point
16:16
And that of course is the huge advantage for portrait photographers, event photographers
16:20
and let face it this is going to be primarily a lens used by portrait and wedding and event photographers That really who it designed for If you looking for a general purpose lens you probably don need f1 and you certainly
16:34
don't need a lens that's this large or expensive. And so for its primary purpose, its intended
16:40
purpose, the autofocus works really, really well. I don't know that the focus speed, again
16:45
I don't know that this is going to be a top lens when it comes to tracking action. I think the
16:49
focus speed is good enough to keep up in some situations, but it's hard to tell right now
16:54
because we really don't have a body that it's designed for that has a really robust focus
17:00
system for tracking action and having a fast firm rate. And so I think that that is probably
17:07
something that's yet to be determined depending on future camera body deliveries. So the headline
17:13
feature here really is that this is the second lens that I'm aware of, at least in the non
17:19
super telephoto land to use Canon's proprietary technology that they debuted on the EF 35mm f1.2
17:29
L Mark II. And that was the blue spectrum refractive optics. And so it's a special
17:37
exotic, expensive lens element that basically really eliminates chromatic aberrations. And I found the EF35L Mark II to be what I called at the time that I reviewed it essentially like
17:50
an Otis lens with autofocus. So here we have another execution of that, the second that I'm
17:56
aware of in a prime lens that is under 100 millimeters. And so what we have found is that
18:04
once again, this element combined with the other elements of the optical formula really make for a
18:10
very special optical performance. And so let's jump in and let's take a close look at how good
18:16
the image quality really is from this amazing lens. So starting off, we'll take a look at the
18:22
distortion and the vignette. So as you can see on the distortion front, there is very little to see
18:26
here. This is uncorrected. It just looks fairly good. Vignette, you can definitely see there's
18:31
some fairly heavy shading in the corners. We'll take a look at after the standard correction
18:37
profile is applied here in Lightroom. You can see that it's lifting up. The vignette obviously
18:43
penetrates pretty close to the center of the frame, and so you can see that we're lifting up
18:48
exposure all across the frame. However, it does it nice and clean. Now, just to give you an idea of
18:53
how the vignette naturally clears, here's F1.2, and then at F2, you can see there's a significant
18:59
an improvement already naturally. F 2.8, a mild bit more, and so on from there. But by F2
19:07
basically any kind of real vignette considerations are eliminated. So looking here at the center of
19:13
the frame at F 1.2, we'll jump into a pixel level. You can see that the detail is really crisp here
19:19
and great resolution and contrast here and the fine details on this Deutschmark here. And so very
19:26
very good there. Moving to mid-frame here, we can also see that we still continue to have really
19:32
strong performance. You can see from the lines at the various places that everything is nice and
19:37
crisp. You're not seeing any evidence of any kind of bleeding or of any kind of chromatic aberrations
19:44
Then right down into the extreme corner, you can see that detail remains really fantastic
19:49
and micro contrast is exceptional here in the lens. Those blue spectrum refractive optic
19:56
that element really makes a big difference and you can tell it here in the micro contrast
20:01
So stepping out into the real world, this is F1.2 and at landscape aperture, I mean
20:06
look at the detail on this house way off on the distant shore. I mean, really impressive
20:12
wide open. I mean, here's some hotbed areas for chromatic aberrations. You're just not seeing it
20:18
and you can see from edge to edge, there's great detail there. It's really fantastic
20:23
Also at portrait distance f1.2, you can see we've got great detail
20:28
And it's worth noting here how shallow depth of field is here. Even at a distance of probably around 3 to 4 meters, you know, 13 feet or so in that range
20:39
you can see that the depth of field is shallow enough that this girl's eyes are in focus
20:45
This girl is not. Even though you can see that their faces are not on a hugely different plane of focus
20:50
and so that tells you how shallow depth of field is but upside here is it allows you to melt away
20:56
backgrounds very nicely even at full length distances. At more head and shoulders distances
21:01
depth of field is really really tiny but you can see just how much detail and micro contrast is
21:07
being rendered there even at f1.2. I mean frankly that's more skin detail than what I'm interested
21:14
in seeing on myself. I suspect the same would be true for you and your subjects. Here again
21:19
just kind of giving a look at how close a framing that is. But jumping back in here, you can see
21:25
that at this distance, even though my face is fairly squared with the camera, the right eye
21:30
is in focus, the left eye is not. And so as I've often said, f1.2 is actually, in these type of
21:37
situations, it's a much shallower depth of field than what portrait photographers actually need
21:42
it's really at the full length where f1.2 becomes valuable now if we can compare f1.4 so we're going
21:50
back to the uncorrected type results here so you can see that already there's been some vignette
21:55
lift and so if we look into the corner it's it's not really that resolution is particularly higher
22:01
here i mean it's already really fantastic here but that vignette lift does allow the textures to pop
22:07
a little bit more and so even though probably in a lab sense you're not getting a lot more
22:12
resolution in a practical sense, you are getting improvement because of the raising of vignette
22:17
And so if you don't mind shooting at f1.4 and losing that, you know, a little bit of advantage
22:23
you are getting a little bit better micro contrast here. I mean, look how great the detail looks on
22:28
that comparing the two. Now, just to give you a point of comparison, it's not an apples to apples
22:34
comparison, but what we've got is the RF lens here on the left. And this is the Samyang 85 millimeter
22:41
f1.4 AF lens on a Sony a7R Mark III. So R3 obviously has the advantage when it comes to the
22:49
actual amount of resolution here, but we can see that even despite that, I mean, look at like this
22:56
let's pop back in there, the 10 here compared to the 10 there, you can see how much it just kind
23:01
of stands out, that micro contrast. Likewise, the detail comparing these two, there's just a
23:07
significant difference in the amount of micro contrast you know in the ship it's really
23:12
impressive looking over here at the bill I don't find the disc the here at mid frame it's not as
23:19
pronounced and the fact that it's rendered a little bit larger you can see a little bit better
23:23
but you can see that the micro contrast just really favors the detail there on the RF lens
23:30
and if we move into the corner you can see that detail is just a lot crisper everything the
23:35
contrast remains really great whereas here you can see that there is some loss of contrast in
23:40
the lettering here and in the the building here it looks much softer by comparison. You can also
23:45
see even in this area here you can see just a little bit of evidence of fringing that you cannot
23:50
see here kind of a little bit of tiny bit of lateral fringing that's there that's just not
23:55
there on the RF lens. So moving from f1.4 to f2 what we see here is that things just are getting
24:01
better and better. At f2, this corner, this is without any correction, it just looks fabulous
24:08
I mean, fabulous. You couldn't ask for anything better than that. And of course, that's true
24:13
as we look across the frame. Everything just looks brighter and crisper yet. And it just
24:18
that popping of that looks really fantastic. So jumping back out to real world at this kind of
24:25
distance, you know, now we're getting both eyes in focus, but look how much detail is there in the
24:30
skin tones and in the various textures of my slightly receding hairline
24:35
Everything looks just really really fantastic I mean on the lips it really stunning how much detail this lens produces It not just on faces Here at f2 we can see that the detail of the textures of these barn buildings are just fantastic
24:51
And so it doesn't matter what the focus distance is. This lens just performs
24:55
It is very Otis-like in that regard. So let's talk about bokeh for a minute
25:00
Obviously, there is another version of this lens coming that's really designed around bokeh
25:06
And, however, I mean, there's nothing that's going to really put you off about this one either
25:11
And so what we see here, F1.2, amazing detail on the subject, but nice, you know, soft out-of-focus area
25:18
This time of year, of course, a lot of the branches are bare, so it makes it a tougher challenge, and I think it's handled it quite well here
25:26
Now when I did my six-way comparison of 85mm lenses for Sony platform, I actually favored the Bokeh from the Samyang most out of any of those
25:38
And so just to give you a look at how it compares here at f1.4, we can see that the, you know, I think the Canon looks probably every bit as good here
25:47
But here's what really blew my mind, and that's when I looked in at where the focus was right here near the edge of the frame
25:54
I mean, look at the difference between the way that the textures are rendered right here at the edge of the frame
26:00
It's just stunning how much difference it is. And so what you're getting with this RF lens is you're not giving up really anything on the bokeh area
26:07
while you're gaining this massive amount of resolution and micro contrast. It's really quite stunning
26:13
Here's another example just a little bit further out. And so F1.2, look at the just fabulous delineation and three-dimensional rendering of our subject here
26:24
You can see it just kind of pop right out of the frame. And so that is what really helps the lens to look exceptional
26:31
And here's another type example. You know, we've caught this, you know, again, it's a very narrow depth of field here
26:37
but it allows this image to become something unique, even though really all it is is roots sticking out of dirt with some snow in the background
26:44
It's nothing special, but a good lens can make something look special nonetheless
26:49
less. Now here's the same scene shot, a comparison between F1.2 and F2.8. And so you can see that
26:56
obviously the bokeh is incredibly soft at F1.2. At F2.8, it's still nice. You obviously can see
27:03
the circular shapes forming more. You can also see a nicely even circular shape here. And so stop
27:09
down a bit, you're getting nice, even geometry across the frame. So put this in the right setting
27:14
and of course it can combine for some really stunning portrait type work. Here at f1.2 we can
27:20
see that the focus on the eyes is just gorgeous so tons of detail there but then as we look towards
27:26
the out of focus area there's the beautiful creaminess behind there and I mean it just it's
27:32
really quite exceptional. So let's talk about flair for a moment. This lens kind of gives you some
27:38
options and obviously with a longer narrower angle of view here you have an option of most
27:45
situations whether or not you want to include sun in the frame and so you can see here I've just
27:49
made some very minor differences to put more of the sun in the frame or to keep more of it out and
27:55
so on the left side we'll just jump in for a second you can see that amazing micro contrast
27:59
here with the sun out of the frame and then I just moved a little bit and the lens does veil a fair
28:05
bit you can see also a little bit of a ghosting artifact down here and so you're going to have to
28:10
be you know kind of use it creatively however this to me is quite a desirable look here that veiling
28:16
and kind of the colors that come in it can really add a lot to your your portrait work and so you're
28:22
you know it's a trade-off on the left side here we've got this amazing crispness of the subject
28:27
that's not as defined here on the right side but you're also getting a great kind of global look
28:33
that's special. Now as you stop down the flare pattern becomes a little bit more defined as you
28:40
can see and in this case whatever other flare artifacts are actually not in the frame any
28:45
longer but we can see here that I mean obviously detail is really fantastic but the flare pattern
28:51
is a little bit more defined. Here's one more example that shows that I mean to me this is a
28:56
desirable quality but it really depends on how you use it. Now if we look for video purposes you can
29:02
see that wide open you can see that veiling as you pass over the sun and but it's it's not
29:08
majorly impactful stop down however you will see much more defined ghosting artifact patterns and
29:14
so i like the flare performance better wide open or at wide apertures than what i do with it stop
29:20
down significantly now of course the headline optical specialty here is the inclusion of the
29:27
blue spectrum refractive optics and where that really really shows up is in something like this
29:32
I mean longitudinal chromatic aberrations are just obliterated here in this image and so the
29:38
byproduct of that is you're not seeing any purple fringing before the plane of focus no green
29:43
fringing after the plane of focus and what you end up with is this incredible micro contrast even at
29:48
f1.2 you can see that our contrast is essentially perfect it really does the trick so I think the
29:55
summation after we look at the image quality is essentially to say wow this is a very high
30:01
performing lens. It is at Zeiss Otis 85mm f1.4 levels and that lens has been the 85mm lens
30:10
that has impressed me the most when it comes to the optical performance. I think that the RF 85mm
30:16
f1.2L is very very close. The Otis may still have the slightest edge in the extreme corners
30:22
but there are some things here that the RF lens is doing even better and that resolution is so
30:28
incredible that unless you had them side by side, I don't know that you could tell the difference
30:33
Even if you had them side by side, I'm not sure you could tell a difference. And that's kind of
30:39
important when you consider that the Otis lens has been one of the very best optical instruments
30:46
ever made. And it's also a lens that costs nearly $2,000 more than this lens. This is a very
30:53
expensive lens. However, it does help to provide some perspective when you think that for $2,000
30:59
less, you're getting equal performance, maybe even better in a few metrics. You are getting
31:05
autofocus. You are getting a wider maximum aperture option of F1.2 and you're getting
31:11
weather sealing. Hmm. That's a pretty attractive package. This lens like the RF 50 millimeter F1.2L
31:18
leaves me wishing for a camera body that could really take advantage of the performance it has
31:24
I think it's going to be fabulous to throw this lens on when we get a high resolution EOS R type
31:32
body because I think it's going to be allowed to really shine there. There's so much potential to
31:37
be unlocked in this lens and I think that right now we're just scratching the surface of what it's
31:41
capable of doing. However, even scratching the surface, this is a really special lens. If you
31:46
are a portrait photographer, if you are a wedding or event photographer, this is a lens that is
31:52
probably worth getting an EOS R body over. It's that good, and it gives you a lot of hope for what
31:58
is left to come. At the same time, however, it's not a lens for everyone. It's too expensive. It's
32:03
too big. It's too heavy. It's not practical for everyone or for everyone's budget. However, if you
32:08
can deal with the size and you can afford the lens, this is a very, very special investment
32:14
that I suspect will give you images that will set your work apart for many years to come
32:19
I'm Dustin Abbott, and if you'll look in the description down below, you can find linkage to my full text review with lots of supporting evidence there
32:27
There's also linkage to the image gallery if you'd like to look at more photos or maybe look at some of the same photos for a little bit longer than a second or two
32:34
There's also buying links if you'd like to purchase one for yourself, as well as linkage to follow me on social media
32:39
to sign up for my newsletter, to become a patron. and if you haven't already, please click that subscribe button right here on YouTube
32:45
Thanks for watching. Have a great day