live_tv
Livestream Starting Soon
00
Hours
:
00
Minutes
:
00
Seconds
Up next in 10

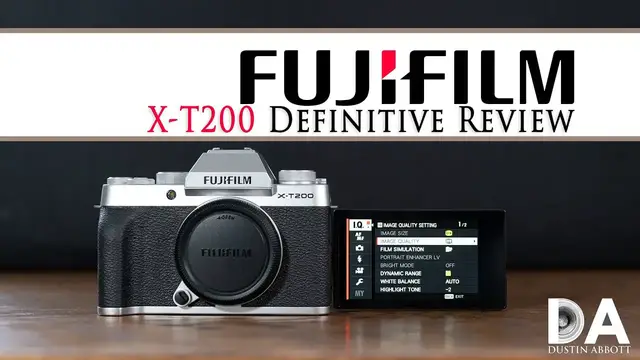
FUJIFILM X-T200 Definitive Camera Review | 4K
Jul 19, 2023

New features 02:38 | Focus System 09:12 | Video Performance 12:34 | Sensor Performance 14:19 | Conclusion 23:00 | Read the Text Review https://bit.ly/XT200Review | Visit the Image Gallery https://bit.ly/Xt200iq | Purchase the FUJIFILM X-T200 @ B&H Photo https://bhpho.to/36uIj5F | Amazon https://amzn.to/3ldcmmi | Camera Canada https://shrsl.com/2je4k | Amazon Canada https://amzn.to/3ldpubi | Amazon UK https://amzn.to/33tL2u3 | Amazon Germany https://amzn.to/30uYgVw | Ebay http://bit.ly/XT200DLA
Purchase the Fujinon XC 35mm F2 @ B&H Photo https://bhpho.to/36xoQRB | Amazon https://amzn.to/30yYVFt | Camera Canada https://shrsl.com/2je51 | Amazon Canada https://amzn.to/3cV3Fub | Amazon UK https://amzn.to/2HQbLbP
Purchase the Fujifilm X-T4 @B&H Photo https://bhpho.to/32hgQlQ | Amazon https://amzn.to/2OrdT9Y | Amazon Canada https://amzn.to/390tZAZ | Amazon UK https://amzn.to/2ZuIqKs | Amazon Germany https://amzn.to/2C5aKKJ | Ebay https://bit.ly/fujiXT4da
Purchase the Fujinon XF 35mm F2 @ B&H Photo https://bhpho.to/2QmE0yh | Amazon https://amzn.to/2TjDfI8 | Amazon Canada https://amzn.to/2RVqRfX | Amazon UK https://amzn.to/2PvXtQF | Amazon Germany https://amzn.to/2PypxTF | Ebay http://bit.ly/xf235
Purchase the FUJIFilm X-T3 @ B&H Photo https://bhpho.to/2Q5q0sz | Amazon https://amzn.to/2CRd1ab | Amazon Canada https://amzn.to/2Jvf1GA | Amazon UK https://amzn.to/2DggEaA | Amazon Germany https://amzn.to/2Rn4Jec | Ebay http://bit.ly/fujixT3
Want to support this channel? Use these affiliate links to shop at:
B&H Photo: http://bhpho.to/1TA0Xge
Ebay: http://bit.ly/DustineBay
Make a donation via Paypal: paypal.me/dustinTWI
Get a discount off all Skylum Editing Software (Luminar, Aurora HDR, AirMagic) by using code DUSTINHDR at checkout: http://bit.ly/LuminarDLA
Become a Patron: https://www.patreon.com/dustinabbott | Check me out on: Personal Website: http://dustinabbott.net/ | Sign up for my Newsletter: http://bit.ly/1RHvUNp | Instagram: http://bit.ly/DLAinsta | Google+: http://bit.ly/24PjMzv | Facebook: http://on.fb.me/1nuUUeH | Twitter: http://bit.ly/1RyYxIH | Flickr: http://bit.ly/1UcnC0B | 500px: http://bit.ly/1Sy2Ngu
My filming setup: Sony a7R III: B&H Photo: https://bhpho.to/2D6ibNO, Camera Canada https://shrsl.com/2ikpr, or Amazon: http://amzn.to/2CNxOvH | or | Sony a9 @ B&H Photo: https://bhpho.to/2HyWIyt, Camera Canada https://shrsl.com/2ikpx, or Amazon: https://amzn.to/2s1vYE0
Show More Show Less View Video Transcript
0:00
Hi, I'm Dustin Abbott and I'm here today to give you my definitive review of the Fujifilm
0:15
X-T200 and this is their kind of bargain tier mirrorless camera APS-C. Now this camera is a
0:24
little bit different than some of the Fuji cameras that I've reviewed before, namely that this has a
0:29
24 megapixel Bayer sensor rather than the 26 megapixel X-Trans sensor that is a little bit
0:35
more unique to Fuji. A Bayer type filter is a more common like what you'll see on you know Sony
0:41
or Canon or something similar like that. Now in many ways I think that while Fuji is unique and
0:49
their ability to compete on the high end when it comes to APS-C and you know their design in the
0:55
you know, X-T3 or X-T4. It really is a camera that is more complete than just about any other APS-C
1:02
camera out there. I've also tested some really high-end expensive APS-C specific lenses for
1:08
Fuji X-mount, including, you know, the 200 millimeter F2, which is a 6,000 US dollar lens
1:15
the 8 to 16 millimeter F2.8 that, you know, is discounted down to around 2000 and was even
1:22
higher previously. So obviously those are lenses that are operating at a price point that really
1:28
basically no other APS-C lenses are. And while I do think that there is a market for Fuji there at
1:35
the upper tier, I think that as I've noted in my review, for example, of the X-T4, once you start
1:41
getting up into that plateau, you have really an opportunity to strongly consider full frame options
1:47
from other systems as an alternative to that. But on the lower tier, I think that Fuji actually has
1:54
somewhat of an advantage, mostly because they have the most complete APS-C lens system and
2:01
kind of support specifically around APS-C. And so I think that a lot of that and that trickle-down
2:07
effect as we see on the X-T200 allows it to be actually a fairly complete, though very compact
2:14
camera. And so I think that this may be somewhat of a sweet spot if you are interested in some of
2:20
the Fuji strengths. However, you're not interested in going to the more high-end stuff. Now today we
2:25
are doing the definitive review, which means we're going to take a look at everything in detail
2:30
give you a lot of actual samples and examples of what I'm talking about. If you want a faster
2:36
more to the point review, check out the standard review and it might be more your speed. We're
2:40
We're going to start off today, however, by taking a look at the physical design and the feature set here and going in closer hands-on with the camera
2:48
Let's take a look. So one of the top things that stands out about the X-T200 is the fact that it actually is really, really compact in a day when you don't often see that
2:58
But despite being really compact, obviously it's small for some with hands my size
3:05
But at the same time, it does have a fairly functional grip, just as long as you're okay with resting kind of the pinky underneath
3:13
You could use something like a grip extender if you wanted a little bit more there. But really, this is designed for people that want to travel small and light
3:21
Now, our physical standout here is this truly massive touchscreen LCD, which really occupies a good chunk of the real estate of the back of the camera
3:31
This is a three and a half inch screen, which is huge for this size
3:36
And it's also nice resolution. It is 2.76 million dots of resolution
3:42
And so that makes it really extremely useful, whether you're navigating menus where everything
3:47
is nice and bright and detailed. Now you do have the ability now to control your menus via touch
3:53
And so it used to be you could just control your Q menu, but now even your basic menus
3:58
you can control via touch. I do think that they might need to do a slight redesign. Your amount of screen space here per
4:07
option is fairly small and so maybe a slight redesign of the menu with a recognition of the
4:13
fact that all of this is now touch enabled. But certainly this is a nice step in the right
4:18
direction. Now one kind of odd thing when it comes to the menus is that when it comes to mapping out
4:24
buttons. The two buttons back here are just left blank. And so there is no dedicated Q or quick
4:30
menu button. So I've assigned that to one of these. And, and so, I mean, that's obviously that's
4:37
you know, useful enough putting it at a typical spot, but I think it would be more useful if they
4:42
actually assigned some kind of label, you know, as you could remember, you know, Sony will use like
4:47
C1 and C2. And I think something like that would have been useful. I've assigned the second button
4:52
to assigning manual focus, continual AF, single AF, etc. as a part of that. Now, Fuji cameras are
5:00
always known for their physical controls. And while we do still have a number of physical
5:06
controls here, I don't find ergonomically that things are quite up to what I come to expect from
5:13
Fuji bodies. First of all, all of the dials that are here, they're just not as smooth an operation
5:21
is what I've come to expect from Fuji. And over here, for example, you know, what looks like a
5:27
dual level dial is actually, one of them is just a lever to release the flash up. And I will note
5:33
by the way, on the flash, it does pop up nice and high here, which, you know, helps it to get up
5:38
above a lens, which is a good thing. This actual dial here, however, it's not something you can
5:43
assign to multiple uses. It is just there for choosing a, you know, your various options for
5:51
your basically picture styles. And so, I mean, you don't really have a lot of options for flexibility
5:56
there. Neither do you seem to have the ability to change the basic values of these dials here
6:02
And so you have aperture up front and you have, you know, shutter back here, depending on what
6:08
mode you're in or exposure compensation, kind of depending on, you know, again, what mode you're
6:14
actually in, but less flexibility for how you actually set those up. I will also note that
6:20
these top buttons, if you have larger hands, particularly the video record button is just
6:25
so tiny and flush that it is really not very easy to find by feel Now I do think the Fuji did a good job even though they took up most of the real estate with the LCD They put a few useful things here including
6:38
you know, a little thumbstick joystick there that is still useful and a couple of buttons here
6:45
And so all of that is useful. On the side, we do have USB-C along with a micro HDMI out
6:53
They're really utilizing USB-C for a number of things. You can, in fact, charge the camera via
6:59
that, which is useful. You can also use an adapter to use USB-C to attach headphones
7:05
and then over on this other side, you do have a microphone input, which obviously is useful
7:11
on a camera like this. Now, any of these cameras that have a bottom mount card slot, which in this
7:20
case, you've got battery door and card slot. My primary, you know, reason why I hate this design
7:26
is the fact that if you have a quick release plate of any kind on there for use with a tripod
7:32
it means that you cannot open this door. I mean, it will restrict the movement of that. And so you
7:38
have to physically remove the QR plate. So for example, particularly if I'm shooting video segments
7:43
having to do that every time I want to pull off a bit of video is just really a it's a pain and so
7:50
I don't love that design but unfortunately it's pretty common in cameras this size. Now our basic
7:56
physical specifications here we have 121 millimeters in width, 83.7 millimeters in height, and then just
8:06
55 millimeters in terms of depth. The whole thing with a memory card and the battery weighs in at
8:12
370 grams. Now, most of the time you're going to find it coming with this 15 to 45 millimeter lens
8:18
It's a power zoom lens. I really, really don't like it. However, you know, if you don't have
8:24
lenses, being able to get this for basically next to no money is certainly a, you know, that's a
8:31
valuable thing to get. So overall, you know, you've got this classic, you know, aesthetic that a lot
8:36
of people, including myself, really like about Fuji cameras. There's about three different color
8:40
finishes, all of which I think are quite handsome. I'm partial to the silver as well. And so if you're
8:46
looking for a really compact, lightweight camera, this really does have a lot of features that are
8:51
packed into a very compact body with the headline being this amazing articulating LCD screen. It's a
8:57
similar screen to what's on the X-T4, but of course the X-T4 is operating at a much higher price point
9:03
than this particular camera. And so, you know, to have such a beautiful screen on such an
9:09
inexpensive camera like this is certainly a selling feature. Now moving beyond that to the
9:15
autofocus system, again we get some trickle down effect that really sets the X-T200 ahead from the
9:22
X-T100 that had a far less robust autofocus system. In this case we have you know retained
9:29
the 425 selectable AF point hybrid AF you know that gives you both hybrid of phase detect and
9:36
contrast AF. And so while it's, I don't think it's as sophisticated as what's on the higher end
9:43
cameras, it certainly is an autofocus system that gets the job done. And I, you know, I was reminded
9:49
you know, when looking at a less expensive camera at how year after year, you know, back when I was
9:55
reviewing, you know, DSLR APS-C cameras, it seemed like year after year, we would get yet another
10:00
version of Canon's, you know, 9 AF point system and all of those cameras. And so anyway, to have
10:08
a 425 point AF system that has points basically all across the frame is of course really, really
10:14
nice. Not to say that all is flawless here. I do note that compared to some of the other Fuji
10:21
cameras that our sensitivity is only down to minus two exposure value rather than minus three
10:27
and that's really not all that impressive a figure when you consider that you know canon's eos r
10:32
has sensitivity down to minus six ev and so that's what that tells you is this is not going to be an
10:40
amazing focus system in low light situations now they have cut off the upper shutter speed at one
10:47
four thousandth of a second with the mechanical shutter however you actually do have an option
10:52
like on the higher end bodies to utilize an electronic shutter that gives you a cutoff at a
10:58
much higher 1 32 thousandth of a second and so there can be situations you can switch over to
11:04
you know maybe if you're shooting with wide aperture primes and you want to um you want to
11:09
be able to re keep you know below the the shutter limits you not overexpose and so you can certainly
11:16
do that by switching to the electronic shutter and having more flexibility on that front for that
11:21
Now, you do have a fairly decent capacity for tracking here, mostly because you have so many
11:27
AF points across the frame. However, the limiting principle, as is so often the case with Fuji
11:33
cameras, is the buffer depth. And with a freshly formatted card with kind of optimal circumstances
11:40
I was only able to get 17 RAW files before the buffer filled, and not much higher, only 24 JPEGs
11:48
before the buffer filled there. And so, you know, when you have, you do have up to eight frames per
11:54
second burst rate, but of course that means that in RAWs, you've only got a couple of seconds before
11:59
the buffer fills and about three seconds in a JPEG mode before the buffer fills. And so you have to
12:05
be really intentional about when you're going to press that shutter button, because if you mistime
12:10
it, the buffer is going to fill before you actually catch the action that you are looking for. And so
12:15
you know a lot of good I would say with the focus system but I'm reminded that this is not a high-end
12:22
specialist camera this is a you know lower end general purpose camera that while it on paper it
12:27
has a number of the specs there are some limiting factors that you know keep you from really
12:31
achieving the fullness of the potential that you might expect. Now at the same time we also have
12:38
some pretty decent video specs here up to including the ability to record 4k 30 which you know I do
12:45
know that for example with some of the you know equivalent Canon cameras that
12:50
even if you have 4k it's it's you know capped off at around 24 frames per
12:54
second so you do have a little bit more flexibility there what you don't have and
12:59
frankly none of us really expected to have in a camera like this is things like F and and so there are some aspects that they put there to distinguish the model I also note that you only have 15 minutes of
13:13
recording before shutoff in 4K 30, and then you get the more typical 30-minute limit if you're
13:19
shooting in 1080. Now, while the 4K footage looks pretty good, I didn't really think that the 1080
13:27
footage looks all that great. It's not particularly detailed as you can see, a little bit mushy on the
13:32
textures. And so I wasn't all that impressed by that. I think that the 4k 30 footage is much more
13:38
desirable. And while there isn't in-body image stabilization, they do have a new feature with
13:43
the X200 that they call digital gimbal. And so as you can see between these two shots, it's only
13:49
available at 1080p, unfortunately. And it also comes with a fairly heavy crop factor to achieve
13:57
that digital stabilization. And so what I found is that it did a fairly good job of muffling some
14:03
movements, but if you do any kind of panning as a part of your movement, it feels really stiff
14:09
you know, like it's kind of been fixed and all of a sudden swings over. And so there are
14:13
limitations to it. Bottom line is if you want gimbal-like footage, buy a gimbal and you'll get
14:19
the footage that you are looking for. So as I mentioned up top, we have a 24 megapixel
14:25
Beyer sensor here. And so we're going to do a quick breakdown of the strengths and weaknesses
14:30
of this particular sensor. Let's jump in and let's take a look. So we're going to start off by taking
14:35
a look at dynamic range and we'll start by first looking at highlight recovery. What is the most
14:40
challenging for any of these modern cameras? So this is our base ISO. This is proper exposure
14:47
what we're looking for this gives us a baseline of you know seeing all the information the colors
14:52
the detail that should be in this particular still life shot so we have that base shot here on the
14:58
left on the right we have a one stop of overexposure and then we have recovered those highlights we can
15:05
see that no problems here with one stop of overexposure the colors are still consistent
15:10
Here, information is still there on the timer face, no problems. Now, we can see that even at a two-stop of overexposure, we are starting to lose a bit
15:20
of color information here. And so just the evenness of the cover of this book is being lost
15:26
And just the beginnings of information that we're starting to lose, the timer face still
15:31
looks okay. But here, we can see that we're starting to lose some information that's not being recovered
15:37
Now by three stops of overexposure we can really start to see the damage that is being done
15:43
We've got these hot spots that we've lost color information from here on the timer face
15:48
You can see that information is starting to be lost in both the color constancy but also
15:54
even in terms of some of the text and information that is being lost
15:59
Unrecovered highlights here on the book faces and just information that is just being destroyed
16:05
from being blown out and being unable to be recovered. Now by four stops of overexposure
16:11
we have a, you know, entirely unusable image. You can just see that it's just incapable of bringing
16:17
back that information. And instead we just have a not very credible looking, looks like a shot
16:23
that's been overexposed and, you know, unsuccessfully tried to recover. Now, of course, the trick up a
16:29
Fuji sleeve is that if you go away from base ISO, which is 200 in this case, and you go up to ISO
16:35
400 on the X-T200, you can engage what's called DR200. And what happens is that the camera actually
16:42
samples the highlights from the base ISO while getting the shadow information from the current
16:48
ISO value. And so what that does is it gives you additional headroom and so that you can actually
16:53
recover highlights much more successfully. So in both of these cases, this is actually a three-stop
16:57
overexposure. And so this is at base ISO. This is at ISO 400 with DR 200 engaged. And so we can see
17:05
how much more information you're retaining. I mean, obviously much more information in the cover of
17:10
the book. If we look at the timer face, you can just see we've got much better contrast, much more
17:16
information that has been retained down in this, you know, kind of picture on the spine of the book
17:21
You can see how much more information has been retained. And so this obviously is a really
17:26
really useful feature that I strongly recommend you use if you're a Fuji shooter. Just for a bit
17:31
of, you know, kind of perspective on how much we're recovering highlights, this is the original that
17:37
is recovered here on the right. And so you can see just how blown out everything was. You would
17:42
quickly look at this and say that's unusable, but you can see that due to that DR200 and its
17:47
flexibility, it is in fact usable. And we actually have quite a natural recovery of all of that
17:53
seemingly lost information. So here's an example of, you know, the real world usefulness of that
17:58
you know, in this particular shot, sky is completely blown out. Even some of the information
18:03
on the surface of the bridge is blown out and lost. But we can see here that by, you know
18:10
just pulling down the highlight slider in Lightroom, I've been able to fully recover that sky
18:15
adding a lot of visual interest to the image. And I've also pulled back more information and
18:20
more contrast on the bridge surface. You can actually see more information down in the water
18:26
below. And so it just made for a much more vibrant, useful image. And I actually find this to be much
18:31
more useful than, say, for example, shooting HDR these days, because there's enough information to
18:36
you know, to get the dynamic range that I want. But, you know, anytime you have trees and any kind
18:42
of wind, any kind of moving subject, you tend to have, you know, some ghosting from things moving
18:48
around in between your exposures. And so this to me is a much more useful technique. And of course
18:54
it's just a matter of pulling sliders. It's not any kind of additional steps here
18:59
Now on the other end of the spectrum, I actually find that shadow recovery is quite a strength for
19:04
this little Fuji sensor. We can see here that basically all of the grip information has been
19:10
completely lost. This is a four-stop underexposure, but we can see on the right side that after just
19:16
dialing that exposure back in in post. We've retained all of that information
19:21
that was seemingly lost, and we've retained it with no real additional noise
19:27
that has been introduced. Everything still looks really, really nice and clean
19:30
And so I am definitely a fan of the ability to recover shadows on this particular camera Now once again that gives me some flexibility when it comes to post you know in this particular image you know I had some I did have some
19:43
metering issues with this camera. So in this case, it was to me fairly severely underexposed
19:48
but because of good shadow recovery, I still had a lot of latitude for creating my final image here
19:55
And so I pulled open those shadows. I recovered some of that lost information and, you know
19:59
I got an end result that I'm quite happy with. Likewise here I wanted to slightly underexpose
20:05
because I didn't want to lose the information in the beautiful sky and so I was able to pull down
20:09
that highlight information and get some of the unique colors that were there in the sky
20:14
the striations in the early morning. But then I was also able through shadow recovery to be able to
20:20
you know expose my foreground here this kind of marshy area and the foreground foliage and to
20:27
reintroduce that information and once again I've got an end result that I'm quite happy with
20:32
Now the X-T200 has an unusually restricted ISO range for a modern camera. Base ISO is only ISO 200
20:40
and max ISO is 12,800 so a much smaller range and I think that Fuji is obviously elected to be
20:48
quite conservative with this but as we're going to see they've done a good job of making basically
20:53
that whole ISO range quite useful. So going up to ISO 400, we can see that everything looks as we
20:59
expect, basically the same. Another stop up to ISO 800. And once again, everything still is looking
21:06
nice and clean. At ISO 1600, there is just the beginnings of, you know, a fine amount of noise
21:13
but you know, it's basically not even detectable, hardly at a pixel level. So still perfectly
21:18
useful and note that contrast here on the grip portion of the camera it all looks quite good
21:26
At ISO 3200 we're seeing just a little bit more of that noise but it's really fine it's not a
21:32
deterrent to me really in any particular way. At ISO 6400 you can see we still have good you know
21:39
color fidelity we have still have good contrast here in the grip and we can see that while there's
21:43
bit more of that fine noise it's not really anything destructive so finally at you know ISO
21:49
12800 we can see that there isn't real any real discoloration there's no kind of color banding or
21:57
cast that has come into our shadow area we can see still good information on our camera here
22:05
color fidelity still looks quite good and we can see that while the noise pattern has gotten a
22:10
little bit rougher here in the shadows. It's really, again, it's more like a film grain. It's
22:15
not particularly destructive. So overall, I would say that I would use the whole ISO range here
22:20
without hesitation. Now, a lot of people like Fuji because of the colors, particularly for the JPEGs
22:26
Now, I'm more of a raw shooter myself, and so maybe it impacts me a little bit less, but Fuji
22:31
is popular among those that really like to dial in a certain JPEG look, you know, kind of a style
22:35
that they have maybe a film emulation. And so Fuji allows them to do that
22:41
and to get really nice color right out of camera. And so while these are raw images
22:46
I think you can agree that the colors look good. They're rich without being oversaturated
22:54
And so overall, I think that I can see why a lot of people do favor Fuji colors
23:00
So really at the end of the day, I think sensor performance is actually pretty good here
23:04
by utilizing the DR200 or even the DR400. If you take the ISO value up even higher
23:12
it gives you definitely more flexibility in terms of being able to retain those highlights. And so
23:17
you can get nice dynamic range if you utilize that. The ISO value is fairly constricted here
23:23
but frankly, it's usable all throughout it. And so I'll give them a pass on that. And of course
23:29
a lot of people really do appreciate the unique color that you can get out of Fuji bodies
23:33
and so at the end of the day you know while there are limitations here this is really a fairly
23:38
complete little camera now when it first came to market not all that many months ago it released
23:45
at an msrp with the you know the 15 to 45 millimeter kit lens which as i noted is not
23:52
much of a lens but if you have no lenses it's certainly better to have something than nothing
23:56
but you know it retailed at a price point of 799 us dollars and frankly i think that that was a
24:04
little bit high uh you know for one thing you could move up to the much more complete xt30
24:10
that uh you know just for the the camera itself but you could move up to that camera for 899 us
24:18
dollars so only a hundred dollars of differentiating and i think the fuji agreed because they have
24:23
It seems like they have established a somewhat permanent $300 price reduction
24:29
And so at $799, I feel like that was a bit overpriced
24:33
At $499, which the price is currently at the time of this review, I think that's a fantastic
24:38
bargain for this camera. That's a lot of camera for $500, you know, particularly including a lens
24:44
And so I think that it becomes much more compelling. If you have an appreciation for kind of the vintage aesthetic of Fujifilm cameras
24:53
you like Fuji colors, you know, I think that this is kind of a sweet spot if you want a small and
24:59
lightweight kit. You know, pairing it with some of the f2 and f2.8 prime lenses that Fuji has
25:05
I think is best case scenario. It gives you, you know, fast autofocus, gives you good detail in
25:11
your images, but everything stays really small and light. And so if you're backpacking, if you're
25:16
traveling and you want a small and light option, there's a lot, I think, to recommend the XT200
25:22
It certainly has limitations as any kind of lower tier camera does, but at the same time
25:27
I think that Fuji has been fairly generous in giving us a fairly complete feature set here
25:33
that makes this a pretty compelling bargain option. I'm Dustin Abbott, and if you'll look in the description down below, you can see my full text review
25:41
There's also linkage to an image gallery if you want to look at some photos that I have taken
25:45
either of the camera or with the camera. And beyond that, there are buying links if you'd like to purchase one for yourself
25:50
Also, Link is there to follow me on social media or to become a patron, to sign up for
25:55
my newsletter. And if you haven't already, please click that subscribe button right here on YouTube
25:59
Thanks for watching. Have a great day