Up next in 10


New features 02:18 | IBIS Discussion 11:49 | Shutter and Burst Mode 14:28 | Focus System 18:05 | Sensor Performance 21:52 | Conclusion and Alternatives 30:21 | Read the Text Review https://bit.ly/Xt4Review | Visit the Image Gallery https://bit.ly/XT4Images | Purchase the Fujifilm X-T4 @B&H Photo https://bhpho.to/32hgQlQ | Amazon https://amzn.to/2OrdT9Y | Amazon Canada https://amzn.to/390tZAZ | Amazon UK https://amzn.to/2ZuIqKs | Amazon Germany https://amzn.to/2C5aKKJ | Ebay https://bit.ly/fujiXT4da
Purchase the Fujinon XF 35mm F2 @ B&H Photo https://bhpho.to/2QmE0yh | Amazon https://amzn.to/2TjDfI8 | Amazon Canada https://amzn.to/2RVqRfX | Amazon UK https://amzn.to/2PvXtQF | Amazon Germany https://amzn.to/2PypxTF | Ebay http://bit.ly/xf235
Purchase the FUJIFilm X-T3 @ B&H Photo https://bhpho.to/2Q5q0sz | Amazon https://amzn.to/2CRd1ab | Amazon Canada https://amzn.to/2Jvf1GA | Amazon UK https://amzn.to/2DggEaA | Amazon Germany https://amzn.to/2Rn4Jec | Ebay http://bit.ly/fujixT3
Want to support this channel? Use these affiliate links to shop at:
B&H Photo: http://bhpho.to/1TA0Xge
Ebay: http://bit.ly/DustineBay
Make a donation via Paypal: paypal.me/dustinTWI
Get a discount off all Skylum Editing Software (Luminar, Aurora HDR, AirMagic) by using code DUSTINHDR at checkout: http://bit.ly/LuminarDLA
Become a Patron: https://www.patreon.com/dustinabbott | Check me out on: Personal Website: http://dustinabbott.net/ | Sign up for my Newsletter: http://bit.ly/1RHvUNp | Instagram: http://bit.ly/DLAinsta | Google+: http://bit.ly/24PjMzv | Facebook: http://on.fb.me/1nuUUeH | Twitter: http://bit.ly/1RyYxIH | Flickr: http://bit.ly/1UcnC0B | 500px: http://bit.ly/1Sy2Ngu
My filming setup: Sony a7R III: B&H Photo: https://bhpho.to/2D6ibNO or Amazon: http://amzn.to/2CNxOvH | or | Sony a9 @ B&H Photo: https://bhpho.to/2HyWIyt or Amazon: https://amzn.to/2s1vYE0
Tamron 28-75mm F2.8 RXD @B&H Photo: https://bhpho.to/2FA00la or Amazon https://amzn.to/2G2kaEr
Lights: Rotolight AEOS @B&H Photo https://bhpho.to/2IK7mqV | Genaray Contender @B&H Photo: https://bhpho.to/33HbGNM | and Aputure AL-MW: https://bhpho.to/2N3MtZV
Show More Show Less View Video Transcript
0:00
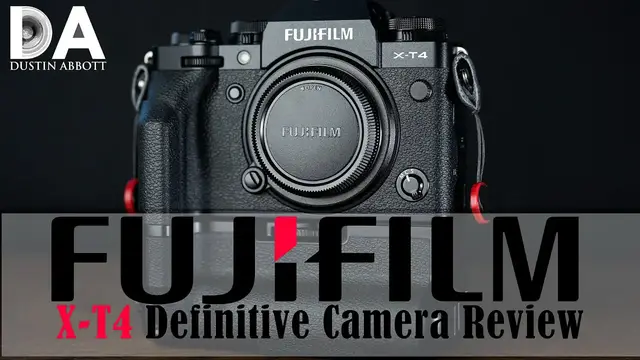
Hi, I'm Dustin Abbott, and I'm here today to give you my definitive review of the Fuji XT4 camera body
0:18
Now, I realize that the XT4 is not a brand new release at this point
0:21
However, due to COVID-19, it's taken me a little while to get my hands on a copy
0:27
But now, after spending about a month with it, I feel like. I can give you a verdict and my opinion on how much of an improvement this is over a camera like the XT3
0:37
Now, when I did my review of the XT3, I was basically brand new to the Fuji system
0:42
And so I actually had the opportunity to review it while at the same time covering two lenses that I actually thought were really fantastic
0:51
One was the 35 millimeter F2 on the less expensive end. But then I also was using their highest in lens at the same time, which was the 200 millimeter F2
0:59
OIS lens. So obviously a really exceptional lens to test the tracking abilities. In this case
1:06
I have primarily used the 40, or excuse me, the 50 to 140 millimeter F2.8, so not as extremely
1:14
a good lens. A good one, however, and I will be delivering a review of this lens as well
1:20
And so during that interim period, however, I have reviewed several other cameras, including
1:25
the XT30 along the way. I've used several XT3s. I've gone through some of their firmware
1:29
upgrade cycles and I've also reviewed about 10 different Fuji lenses during that time
1:36
So as a byproduct, I've been able to get greater familiarity with the system and also to get a
1:41
better sense of how it compares across the board with the other systems that I review on
1:47
And that becomes relevant as we move towards the end. First of all, however, I do want to take you on a bit of a tour of the XT4 body itself and
1:55
explore what has changed from the XT3 and whether or I'm going to take you on a bit of a tour of a tour of the XT4 body itself and
1:59
whether or not this is a good upgrade choice for you if you already have an XT3 body
2:05
And so we're going to jump in and take a look at that. Now, first of all, I do want to say that if you want a quicker overview-type review
2:12
I will be doing that at the end of the week and so you can look for the standard review
2:16
Today, we're going to look at things a little bit more thoroughly, though, as a part of that. So we'll start by taking a look at those physical improvements and take you on a little bit of a tour of the body itself
2:25
and draw some conclusions there. Let's jump in. Let's take a look. So let's take a quick look at some of the physical changes here to the XT4 and just an examination of the camera body itself
2:36
So if you look at the front of the camera, obviously there's going to be a change to the branding there. But for the most part, the two cameras look more similar than different
2:44
Top view is pretty close to the same. You've still got buttons, you know, these buttons that can be programmed to different functions on the top and at the front
2:53
which, I mean, as far as physical controls, Fuji bodies have a lot of great physical
2:58
physical controls if that's your thing. Some people will find all of this overwhelming. Other people will think it's fantastic. And so you know, you kind of know where you fall out. But top view looks pretty similar. And so you've got your on-off that is connected into the shutter button. One thing that we do have changed here as far as this dial here, the bottom half of the dial, and so there's a couple of these kind of two-layer dials here. So the bottom portion of this dial, which is controlled from the front. It originally
3:28
or at least on the XT3, it had various metering modes that were there
3:34
And so in this case, we have just kind of simplified down to doing stills and movies
3:38
probably something that people might change on the fly more often. And it also allows you to have kind of two complete different setups for movie control based on that
3:48
So, I mean, that's probably a positive change. And so on the top of that, you have got your choices basically on either manually selecting a shutter speed
3:56
or going into the various shutter-related modes, you know, bulb, aperture priority, you know, things like that
4:05
Over on this side, you have the top dial, you have the ability to choose your ISO value
4:11
and so from a range of 160, which is base ISO on these Fuji bodies, up to 12,800
4:18
and then you'd have to go into, you know, kind of an expanded type mode. In both of these cases, we have a locking mechanism
4:24
So for you to use it, you need to either unlock it or if you're someone who that's not a problem, you just want to leave it unlocked, great
4:33
But once you click in that lock mode, it will keep it from being moved inadvertently
4:39
On the other side, you have got options for basically how you're going to handle your shutter
4:44
So, you know, going from single to continuous low to continuous high speed
4:51
You have choices to bracket. you've got HDR and even a panoramic mode
4:57
One of the dial here on the front that is worth paying attention to that you do need to pay it really strong attention to
5:03
And that is that this little dial right here allows you to choose between manual focus
5:07
continuous auto focus, and single shot. And so just pay attention to that
5:13
On the back, we have a few different things that mostly the buttons are not necessarily in new positions
5:20
in terms of the physical placement, but the default function of those buttons has changed
5:26
So namely we have got the Q menu up here rather than right above the little joystick
5:32
which was where it was before. Of course, because Fugibodies can be customized
5:37
if you are an XT3 user and you've gotten really familiar with button placement
5:42
you can just reprogram everything to work as you desired. I can't say for myself that I found it
5:47
a necessary or positive change. Most cameras have a Q button in this
5:52
vicinity so I actually liked it better there myself but you know your mileage may vary on that
5:58
Our headline change here of course is that they have gone to a canon style fully variable
6:03
adjustable LCD screen here and so instead of just being tilting or moving to the side you have
6:11
a full range so of course you can monitor from the front with it it's useful if you're shooting
6:16
from the side or down low. The one advantage that I do find with an articulating
6:22
screen like this is that a lot of times if you are shooting in a vertical mode and down low
6:28
you know, being able to tilt it like this is an extra option that, for example, you don't
6:32
have on a Sony body tilting the same way. Other headline change is to the battery itself
6:39
to where we have moved up to a more robust battery pack here that is going to give you a lot more
6:46
power and it's rated for 500 shots. Typically, you can exceed that fairly easily. It kind of
6:51
depends on what you're doing with it, but that's certainly a welcome change. The other thing
6:56
that I do like is that it's like Sony. It's quite simple to charge the battery right within the body
7:02
and you can even do that off of a, you know, using USBC, but you can actually do that even off of a
7:08
portable power bank or anything like that. It doesn't require a power send function. Also under
7:14
this port is a micro-hdmI port, so that's going to be your video out. And up top here, we have got a
7:21
mic input and we have got a remote input and you'll note what is missing is a headphone monitoring
7:28
jack which is a little surprising for a you know really a video-centric body in many ways they do have
7:35
a dongle that you can use where you can use the USB C port as a kind of multi-purpose port and
7:42
run a headphone output from that but obviously you're not always going to have that along
7:47
as opposed to just having a port right on the body itself. One of the thing I do want to highlight here is we have a little bit different grip, and of course that's due to having it to accommodate a slightly larger battery pack
8:02
And so as a result, it also means that we have new battery grips
8:07
And the battery grip here is nice. I like the design of it
8:11
It feels good in the hand. Grip is, you know, it's fairly good
8:16
It's not as, I wouldn't say it's as good as, say, a can grip. but it feels robust in the hand now
8:22
And of course you have the ability to reciprocate some of the various controls here
8:30
And so that helps there. You also have the ability to control kind of your draw
8:35
If you're wanting a boost mode, you know, if you're really tracking a lot of high-end action
8:40
you can get an extra amount of power coming from that. The other advantage here is that if you are using the battery grip
8:48
you do get that headphone monitoring port as a part of that
8:52
So one reason to consider that, obviously. And then you can of course put a couple of battery packs in there and thus extend your battery life even more thoroughly Now the one thing that I do miss when you have like a battery grip on here is that I as a gear reviewer I really really strongly prefer having Arka Swiss compatibility
9:12
Now, not to say that the camera body is either. So I tend to go more with a grip extender that's Arca Swiss compatible
9:17
So I can go quickly onto a tripod either for testing but also for filming, which, you know, I do a lot of work
9:25
And so, I mean, obviously that's an additional accessory you could go for, but, you know, as far as the battery grip works, it feels good in the hand
9:33
And I think that, you know, you're likely to be happy with it if a battery grip is your preferred way to handle things
9:40
Overall, not a lot of exterior physical changes to this camera body
9:44
Some of the big changes, of course, are inside, most notably the in-body image stabilization, which is a hugely desirable trait added to that
9:53
some better auto focus performance, a few tweaks here and there. But largely what we have is a very
10:00
functional camera with a lot of physical controls that's just gotten a little bit better in this
10:05
upgrade. So of course, it is really here where a lot of the headline highlights are as far as
10:12
the delivery of some physical improvements, including a fully articulating LCD screen. Of course
10:19
the ibis is a big thing, which will get more to more in just a second. But of course
10:23
course an upgraded battery and then those ergonomic changes which ergonomic changes there's some
10:29
good some bad for me and i don't necessarily understand the need to move the cue button not a big
10:35
fan of that of course you can program it back to the other other original spot but you know where
10:41
its current position is it's just not a place where i've ever seen a quick menu button on any
10:46
camera system that i've used and so i'm not necessarily crazy about that a change there and so as far as
10:52
Some people I know really do like the dual mode being able to switch from a completely different setup for stills and movies right there
11:00
And so I think that that is probably a positive change. And so overall, you know, some good changes and some changes that I am about
11:08
But overall, of course, this already was a really fantastic camera. It's a fantastic camera, however, if you like a lot of physical controls
11:16
So I don't consider these XT3, XT4 bodies to really be fantastic
11:22
if you are new to cameras because I think that people that are not experienced photographers
11:28
are going to find the sheer number of physical controls to be a little bit intimidating
11:33
and not necessarily intuitive if they don't really know what they're doing on that front
11:38
And so, yeah, I think that your opinion of the physical controls of this body are really going
11:43
to depend on your experience level. I'd rather like them myself, but I recognize that your mileage may vary
11:49
Now, of course, as I've noted, the headline improvement here, the thing that was at the very top of my wish list after reviewing the XT3 was to have in-body image stabilization
11:59
And of course, we have done that, making the XT4 kind of a hybrid between the XT3 and then the XH1 in terms of kind of bringing some of the best of both of those worlds together
12:11
Now, in this case, the Ibus is rated up to 6.5 stops, which is a lot, higher than what a lot of, uh, higher than what a lot of, uh
12:19
lens is rated. I'm going to say two things on this front
12:23
First of all, I do find that I can tell a difference compared to Sony's embody image stabilization
12:29
And so I do think that it is better than what that is. It's just a little bit more stability, a little bit more functionality, and I think that it's a little bit better at the extremes, either extreme wide in or into the telephoto range
12:41
Whereas I find that the Sony ibis to this point is really best in kind of a standard range of somewhere
12:49
between about, let's say, 20 to 150 millimeters. And outside of that range, you know, you don't get as good a performance
12:57
And that's true to some degree here. I just think that the margins are broader on the Fuji system
13:04
But my second point that I want to make is that I still find that there's a practical limit
13:09
You can say 6.5 stops, but, you know, theoretically that means that, you know, for example
13:14
I just did a review of a Viltrox 33 millimeter F1. So roughly a 50 millimeter lens and so you know by you know using those kind of of standard
13:25
definitions I should be able to hold exposures way down you know with with stability down into
13:33
you know a second or two exposure that's just not happening not with any kind of reliability and so
13:40
I you know and even with a 200 millimeter lens I think that I'm going to be running up against a pretty
13:47
standard around one tenth of a second and maybe get a few at one eighth maybe even every now and then
13:53
at a quarter but not lower than that and so I you know I think that the effectiveness of this
13:59
these systems is really how well they work in your normal range of operation not when you try to
14:04
use them at some kind of extreme I think you're going to be disappointed if you expect six and a half
14:09
stops at the extremes but if you use it within standard use it's a it's an effective system and so kudos to
14:16
them for a nice execution on that. Now another thing that has been improved here, tweaked really
14:23
is that while we have a similar focus system to the XT3, there is a couple of things that are supposed
14:28
to bring some improvements here. One of those I notice more than the other. And so the first thing
14:36
that is supposed to bring improvements is that there is a whole new shutter system as a part of the
14:41
XT4. So I will first point out that I like the shutter, even if you're not, you're not
14:46
talking about using it in some kind of extreme fashion. I really like the performance of the
14:51
shutter. It has a really nice, smooth and quiet feel to it. You can tell that it's really
14:57
beautifully damped. And so it really, there's a difference. And it was funny, I did a portrait
15:02
session switching between an A7R3 and the XT4. And so my subject says, wow, I can really tell
15:09
a difference in that camera, the shutter sounds really different. And that, of course, is the
15:14
new mechanical shutter in this. So by damping that and giving it a better quality shutter, they've been able to accomplish a few things
15:21
First is that this is now rated up to 15 frames per second using mechanical shutter, which is pretty awesome
15:28
I mean, that is making it competitive with even a slightly better than a camera even like the Sony A9 Mark 2
15:39
where its strength is really when it comes to the electronic shutter, not so much the mechanical shutter
15:44
With the electronic shutter, there's some different modes here. So it's when I say you can get up to 20 seconds kind of in standard full frame
15:52
You can go into a sport mode and get up to 30 frames per second, you know, in the electronic shutter
15:58
So you have the ability to actually get really tremendous burst rates with the XT4
16:04
Where it falls apart when compared to a higher end camera like the A9 or the A9 Mark 2
16:09
and I'm very familiar with the A9 having owned one for some time, is that you really
16:14
really start to hit your buffer limits really, really fast. And so for example, if you're shooting raw files
16:21
let's say even at that mechanical shutter, you're getting somewhere around 35 raw files
16:26
And so at 15 frames per second, it means you have a little over two seconds of burst
16:31
which means that you use that up almost too fast for most kinds of fast action
16:36
And so what you're going to find yourself needing to do if you really want raw files
16:40
is you're actually gonna want to detune that a little bit, and get fewer frames per second and a little bit longer of burst rate
16:48
And so there is a limiting principle there. And so I found that it ran out way too fast for me when kind of doing my dog sequences
16:55
that I typically do to test focus. And so as a byproduct of that, I had to switch to just shooting JPEGs where the limits are
17:02
much higher and I could actually get a full, you know, five or six second run without running
17:07
out of frames. And so there is the limiting principle there. And, you know, when you're getting up into, for example, the
17:14
like the sport mode and that 30 frames per second on a electronic shutter
17:20
Your problem is you're still somewhere around 35 to 37 frames. You're literally getting just a hair over a second and you've filled that buffer
17:29
So that's definitely a limiting principle that I think Fuji needs to work on is developing a better kind of processing flow rate
17:37
And that may mean, I don't know if that means going to a different kind of card
17:41
But somewhere or another, they've got to increase that pipeline. if they really want to have a competitive sports camera because right now this is a JPEG sports camera. It's not a raw sports camera
17:51
But I do really love the the feel of the mechanical shutter and the other advantage there by improving the quality of the shutter and damping it better is that it now rated up to 300 actuations which is definitely a pro figure and so kudos to them on that front now when it comes to the focus system the
18:09
focus system is highly similar however it has been improved by some some I in IAF and a
18:18
little bit faster focus acquisition times and so when it comes to the focus tracking
18:23
and I've already noted kind of the limiting principle of the buffer
18:27
But as far as the actual focus tracking, first of all, I will note, I got a little bit spoiled when I tested the XT3
18:34
because I was testing the tracking with the 200mm F2, which is an exceptionally good lens and definitely better than this lens
18:41
So I didn't get as fantastic as results. So I think that's less about the XT4 body
18:46
and more about the quality of the lens I put in front of it. You know, we've got a 1,500 lens instead of a $6,000 lens
18:53
this time around. So I found that as far as focus quality, I had mostly really great results
19:00
I do find that there is a few more drop frames than what I see with, say, a camera like the A9
19:05
which I'm very familiar with. And so, you know, my expectations are maybe a little bit higher
19:12
than what they used to be on that. And so I did notice, as you can see here, that periodically
19:16
there will be a front or a back kind of swing. And that could be lens specific. It could be camera
19:22
specific. I suspect that again with a higher-end lens like the 200 millimeter F2 I probably would get a
19:28
little bit better tracking but that's this is a good good lens and so I think it's fairly
19:33
representative. The other thing where they say there is an improvement is when it comes to
19:37
IAF. Now this is one area where I do feel that Fuji has lost a little bit of ground compared to
19:44
either Sony or Canon. At the time that the XT3 was released it was before firmware 3.0 on the
19:50
Sony bodies are full-time IAF and at that point you know Canon had released the OOSR but IAF was still
19:59
pretty primitive on it at that front at that point so over the cycle since that point the
20:05
XT3 received multiple updates that you know enabled better IAF performance as did the
20:11
Sony you know third generation bodies and the Canon EOSR both the Sony and the Canon
20:18
are vastly improved, Fuji, I think the gap has widened a little bit more
20:23
to where I just don't find Fuji as good. So case being when I was shooting side by side
20:29
I was shooting in Sony A7R3, so it's not my A9 in terms of autofocus performance
20:34
and I was shooting a Viltrox, 85mm F1.8 Mark 2. So a fairly inexpensive third-party lens
20:41
I still found that the Sony combination had much better eye tracking
20:47
and consistency tracking the eye than what the Fuji did with a much more expensive lens mounted on the front
20:53
I had a $400 lens mounted on the Sony, a $600 lens mounted on the Fuji
20:59
So it should be advantage Fuji, right? Not really. And so what I found is that rather than saying kind of glued onto the eye
21:07
as the subject moved around or as I went to compose, I found that it jumped some
21:12
And so sometimes it would jump down onto the body. It would get stuck sometimes on the nose
21:16
and between the two eyes and the tracking. And I also found that my actual focus results, while good
21:23
were not as good, not as perfect as what the Sony combination was
21:27
I'm finding now with either Sony or Canon with a good portrait lens
21:31
my keeper rate for quality of focus is essentially 100%. I would say with Fuji, we're probably more in the 85% to 90%
21:39
So it's not quite as good. There is room for more improvement here
21:44
At the moment of the review, I believe I have the one point. firmware here, the most recent available
21:50
And so, you know, it's still a little bit behind when it comes to that
21:54
So let's take a look at the sensor. The sensor, of course, is a 26 megapixel, and it is the same X-Trans system that is basically
22:04
in the XT3, XT30. And so this is the third camera that I have reviewed with a variance of this sensor in it
22:11
It is a good sensor in a lot of ways. As far as APSC goes, there's only one
22:16
vulnerability that I want to kind of point out. And that is that with the X-Trans system and the way
22:22
that it works compared to a Bayer sensor, I do find that sharpening is a little bit more complicated
22:28
on Fuji than what it is on other camera systems. And so you just, you really have to sharpen
22:33
kind of using the right software and with the right technique. Otherwise, you can get some weird
22:40
almost like painterly type swirls when viewed at a pixel level. And so it's something that I
22:46
that software manufacturers have been working to improve and I do think that it's better
22:50
but that is the one I think limiting principle here of the X-trans system as compared or sensor as compared
22:59
to a Bayer you know a layered Bayer says sensor or something like that is that it is a little more
23:04
difficult to sharpen let's jump on let's take a look at a few a few images we'll look at dynamic
23:10
range ISO performance and so that you can you know get a sense out of that let's jump in and take a look
23:15
of that. So we'll quickly run up through some of the ISO settings and so I've got obviously
23:20
base ISO which is higher here at 160 so there are a few limitations that come with that
23:25
and so like the the XT3 actually moved to ISO 160 from the base ISO of 200 previously
23:34
and so that's retained here at the XT4. So as we begin to move up our ISO we can see as far as
23:41
noise at 800 there is a little bit a little bit more
23:45
noise, but it's fairly close. We can see that there is maybe a tiny bit of loss of contrast
23:52
here as we climb up the ISO ladder. Overall, a clean result at ISO 800. So if we can compare
24:00
800 with 1600, we can see that there's just a little bit more visible noise. At this stage
24:06
though, no color banding. Nothing really terribly destructive here that is taking place. Shadow still
24:12
look fairly smooth. Moving on up to 3200 here on the right side, we still have a fairly clean
24:19
result. You can see a little bit more, you know, the noise pattern is just getting a little bit
24:24
rougher. However, I can just see the tiniest hint of some discoloration that's coming in there
24:30
but overall it's fairly non-destructive, certainly still fairly useful. Moving on up to 6,400
24:38
we can see just a, again, more roughness, a little bit more
24:42
discoloration here in the shadowed area that we're seeing. And so, I mean, obviously, the higher
24:48
you climb, the less useful it gets. You can see a little bit more roughness in the shadow here
24:54
And if we move on up to 12,800, you can see that now, this is the limit on the dial. You can
24:59
go up a little bit higher just in the settings. But here's what I consider the practical limit
25:03
You can see that we're starting to get quite rough in certain areas. And if we go back to
25:08
compare, we can see that compared to the base ISO, we've got a lot more
25:12
roughness in our shadows. We've also lost some of the highlights here where the image
25:17
just looks a little bit duller by comparison. Now you've got two options when you
25:21
approach dynamic range here. Just you know using the standard dynamic range
25:25
from the camera we can see that if we start to under expose the image, here is
25:30
under exposure by about two stops here and we can see that we are able to pull
25:35
everything back. Shadow information looks pretty good and looking out here, still everything is fairly clean. If we move up
25:42
up to a three-stop shadow recovery. We can see that still we're doing fairly good
25:48
if you look inside here. Everything is, you know, that information is still coming back
25:53
We can see looking into our shadow area. There's not a lot of additional noise
25:57
You can see it, but pretty good in terms of shadow recovery
26:01
If we go to a four-stop shadow recovery and you can see the under-exposed image to begin with
26:06
you can see that you're still able to pull most of that information back. And, you know, it does come at a cost of some addition
26:12
noise that is being introduced and a little bit of color banding, but shadow recovery on this
26:18
sensor is actually fairly good. Now if we start to overexpose the image, obviously overexpose
26:24
you've got hot spots in areas like this. At two stops of overexposure, we're able to recover
26:30
that on the face of our timer here. You can see we've still got a fairly even pattern
26:35
And these areas where some of these letters have been lost, they're being able to be recovered just
26:39
fine down here on our books, we're able to draw back that information at two stops
26:44
Now between two and three stops, we start to see things fall apart. And so at the two stops
26:49
we're able to recover this hot spot without a problem. At three stops, not so much
26:54
Then on the face of the timer you can see that instead of that even pattern we got a really uneven recovery and some of these letters are not fully coming back We can also see here that
27:06
you know, here the outline looks clean. Here, some information is being lost. And so that is the
27:13
unfortunate, you know, side effect as you hit the limits of pulling down those highlights
27:18
Now, fortunately, Fuji does give you some options. And so if you go up to ISO 400, they have
27:24
what's known as DR 200, and then at ISO 800, which I'm going to demonstrate here, they have DR
27:31
400. So essentially what happens here is that at ISO 800, we're actually taking the, in this case
27:39
with an under exposure, we're actually taking the shadow information from the base ISO, and so ISO 160
27:46
and retaining the highlights from the exposure here. So the byproduct of that is that you have an
27:52
enhanced dynamic range. You have a little bit higher cost in terms of the noise because it's at
27:57
ISO 800, but what we're going to see is you've actually got retaining better dynamic range and
28:03
better shadow recovery if we compare to what we did at base ISO. And here you can see what I mean
28:08
If we look at the DR 400 result compared to the base ISO result, first of all, if we look at the
28:13
clock face, we can see that we've actually pulled back more information to where it's actually
28:18
much sharper looking, much better contrast. If you look at the grip
28:22
here on the old camera you can see how much more contrast has been retained and so
28:28
your trade-off is yes there's a little bit more noise but globally looking at
28:32
the image the image is brighter more contrasty more visually pleasing now it's
28:37
even more obvious if we go and look at the highlights here we have that same
28:41
three-stop over exposure that we looked at before but whereas as we had started
28:45
to lose and create hot spots and had that uneven finish on the clock face
28:51
Here what we can find is a much more natural looking result, and it's particularly obvious if we go back to compare with the base ISO
28:57
So base ISO on the left, you can see, as I've said, it's just, you know, there's color information, there's highlight information that's been lost, very uneven, kind of unnatural looking finish
29:08
And you can see with the DR 400 that we have got a much, much cleaner, more natural looking result, both on a global and an individual level
29:17
And you can see there is that superior contrast and better detailed
29:21
shows up. Now in this case because we're pulling down the highlight information
29:25
our shadows look really clean already as it is and so byproduct of that is
29:30
definitely if you want better dynamic range in situations experiment with these
29:34
other DR modes because it's going to give you more effective results. And so
29:38
here I mean a lot of people really love Fuji colors and the images you can
29:42
produce on this sensor and so you can see just in a variety of situations you're
29:46
able to produce nicely detailed nicely colored images and obviously obviously the amount of resolution again is going to be somewhat dependent on the lens that you use
29:55
But it certainly is capable of producing beautiful looking images and a variety of situations
30:01
and with colors that a lot of people find natural and pleasing
30:06
So obviously as a portrait system, it also produces really nice images
30:10
And with every system, you have to learn to process the color to get the most out of it
30:14
But I think that we can agree that there is a lot of beautiful colors here and ability to produce
30:20
really, really nice portrait images as well. And so as you can see, I think this is a competitive sensor
30:25
It's, you know, I've done head-to-head comparisons that you can see, say, with, you know
30:29
the most recent Sony sensor in the A6400. And so it's, you know, it's a fairly comparable
30:36
Sony has a little bit better dynamic range, maybe a little bit better high ISO performance
30:41
but not by a whole lot. And, of course, Fuji wins for having a little bit higher resolution to draw from on that
30:49
And so overall, I think it's competitive. In conclusion, if APSC is your priority, obviously Fuji's advantage in its ecosystem is that they design explicitly for outside of medium format
31:02
They're designing purely for APSC. So as a result, you have a broader range of native glass at both, typically at both a, you know, a less expensive price point for maybe a smaller maximum aperture and then, you know, a more expensive price point
31:16
and then, you know, a more expensive price point for a larger maximum aperture
31:21
They've got a full range of pro zooms and a lot of great prime lenses as a byproduct
31:27
And so they have the advantage baked in of really designing for APSC
31:31
And so if you look solely in the APSC and at APSC lenses
31:36
Fuji comes out looking really good. The problem is that you don't have to just look at APSC
31:43
And for example, just as a mental exercise, I thought, you know what, I'm going to price out looking at a Sony A73 with the very, very good Tamron 28 to 75 millimeter and 70 to 180 millimeter F2.8 lenses, which both those lenses, by the way, deliver a superior optical performance to either the 16 to 55 F2.8 or to this lens, the 50 to 140 millimeter F2.8. They are kind of the closest equivalent lenses
32:13
So what I found is that if I price out all three of those lenses
32:19
are all two of those lenses and then the camera. And so from current prices at B&H photo
32:25
it runs between $4 and $500 more expensive to go with the Fuji combination
32:31
And that's due in large part to while the XT4 body is a little bit cheaper
32:36
basically $200, $100 to $200 cheaper than what the Sony A7 three body is the lenses are considerably more expensive and you know for example the
32:49
the tamron 70 to 180 millimeter lens which a lens that optically dust this lens by the way
32:55
it you know it clocks in at you know around 1,100 bucks this lens is 1600 bucks and then the
33:02
16 to 55 is 1100 dollars the you know tamron 2875 is about 880 dollars and so by the time
33:10
you price all that in you actually are spending more and because of Tamron third party development giving lightweight lenses, if you
33:19
do the weight of the body plus the two lenses, you actually are about 140 grams lighter
33:26
with the full frame combination. And so cheaper and lighter and it leaves you wondering, okay, where's the advantage of going APSC
33:36
Now that's not to say that the XT4 doesn't have some advantages. It certainly has faster burst rate
33:41
It has a superior viewfinder. It, you know, has a very competitive set of video features here that are well-matched
33:49
And some people definitely prefer Fuji color to Sony. But at the end of the day, I think that probably the single greatest weakness, as I've become more familiar with Fuji, this is where I think the weakness in the system lies
34:02
And that is that it's too closed. There isn't enough third-party development
34:07
There is not the lenses from Sigma and Tamron and Samron and San
34:11
that give you autofocus options at a lower price point, but that often help to
34:16
level down the prices of first-party lenses or at least give you competent third-party
34:22
alternatives. And that is where Fuji is really missing out. And I think, my opinion
34:27
that if Fuji wants to continue to be competitive in the marketplace, they're going to have
34:31
to work on that a bit and open up a little bit to allow third-party development, even though it
34:37
may cost them in some of their lens sales, it's what will make the whole system less of
34:41
a niche player and maybe bring it into the mainstream because this really is a great camera
34:46
There are some great lenses to pair with it. I still don't find that video performance is to the same level
34:53
And when it comes to autofocus tracking, some of those same limitations about IAF and consistency
34:58
not as smooth in the focus racks, but in many ways this is a very, very competitive camera
35:03
that basically does everything pretty well. It's probably the most well-rounded APSC camera out there
35:09
My point is that you don't have to solo. buy APSC and get similar end results in terms of weight and cost and maybe even better performance
35:18
Something to think about. I'm Dustin Abbott and if you look in the description down below
35:22
there is a linkage to my full text review with a lot of sample images and dealing with things
35:28
in a thorough fashion if you want to check that out. There's also a image gallery if you want to
35:33
look at various photos that I've taken with this combination. And of course beyond that, there is
35:37
buying links there. If you'd like to purchase one for yourself, there's also linkage to follow me
35:41
on social media to become a patron or to sign up for my newsletter
35:44
And if you haven't already, please click that subscribe button right here on YouTube
35:48
Thanks for watching. Have a great day
#Computers & Electronics
#Camera & Photo Equipment