0:00
Hi, I'm Dustin Abbott and I'm here to talk to you about one of the classic lenses for an M42 mount that a lot of photographers have discovered is also still a great lens to use in the modern era
0:19
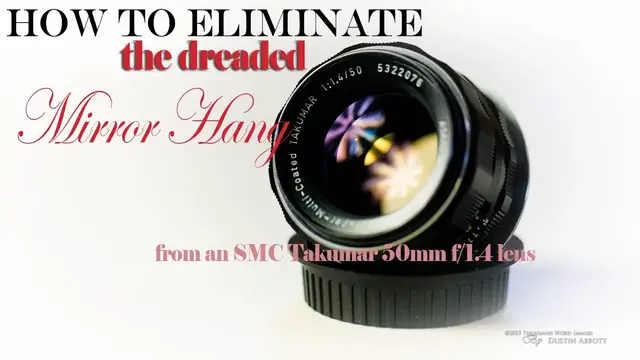
I'm talking about the Azaheim Pentax SMC Takumar, or super multi-coated Takumar 50mm f1.4 lens
0:31
If you're like me, you started using this lens perhaps on a crop sensor body and discovered that with an inexpensive adapter that it works great
0:41
But then if you made the switch to full frame, many of you have discovered that there is an issue that crops up with some of these vintage lenses with a full frame sensor or a full frame body
0:52
And that is that you have some towards infinity focus that you can have what's known as a mirror hang where the actual flange, rear flange of the lens can actually catch some on the mirror itself and prevent it from actually returning
1:06
And so a lot of photographers fear damaging their actual camera bodies
1:11
And so I just want to show you a very, very quick and easy way to fix this problem, to
1:17
make this lens work without any kind of hanging on your actual camera body And so I going to use a Canon 6D full frame body for this and a cheap and expensive adapter off of eBay You can find one for or less and outside of that all you need is a bit of
1:35
double-sided tape and some scissors and we'll quickly get to work and show you how easy it is
1:40
to accomplish that. Okay our process is really really simple here. We're just going to take
1:44
and get a bit of this double-sided tape and just cut some thin strips. Not too wide because
1:52
we don't want them to show outside of the flange of the lens itself. And so once we have got that
2:00
and I'd recommend cutting about five or six small pieces. I've already done it here, and so we're
2:04
not going to go through the whole process. But here we see on the actual adapter itself, what
2:09
I'm going to do is I'm going to take that double-sided tape, and I'm just going to put little
2:13
strips along here. And what that does, it achieves two purposes. Number one, it just moves that
2:18
adapter out just a fraction of space to where it no longer catches on the actual mirror of the
2:25
lens itself. And then also once this is mounted, and I recommend having an individual adapter for
2:32
the lens rather than swapping it out, just so when you've got it on there and you've got your
2:36
double-sided tape in place, it also makes sure that you have a nicely secure fit there that's
2:43
going to hold on nice and tightly And so that it Just a matter of adding on that double tape in between Just remember it in between the lens and then the adapter itself And so you leaving the rear of the adapter completely unaffected all you done is just really add just a little bit of space in between the lens itself and the adapter so you moving the lens
3:05
itself just a little bit further out and so that that flange is no longer coming back at infinity
3:11
and impacting as you can see it's not a problem when you're towards minimum focus because that
3:17
rear element it is moving forward but towards infinity it's towards its most recessed position
3:23
by all it takes is just that little simple addition and it will eliminate the hang on the
3:28
mirror itself and so after an operation of just a couple of minutes adding on the double-sided
3:33
tape in between the actual lens mount and the adapter that we're using we find that although
3:39
it's just it's minuscule it creates just enough space that now I can take the lens and I can mount
3:46
it on the body where it was hanging before, I can focus all the way out to infinity, then
3:51
take the picture without any kind of hang or any kind of issue
3:56
And also still at the same time, through a little bit of hyperfocal technique, I'm able
4:01
to retain a full infinity focus as well. And if you're not familiar with that, just look up hyperfocus and still I'm focused to
4:10
infinity and I'm stopped down a few stops to around f4 to f5.6, I have no problem with having
4:17
infinity focus and still having Chris Images And one extra bonus of this is that by moving that away from the sensor just a little bit it also means that i have a little bit closer minimum focus
4:30
distance and so that's always a plus with the 50 millimeter lens love to get close to things and
4:35
throw them out of focus and so here's a very quick easy and expensive way where you can make that
4:41
SMC Takumar 50mm f1.4 lens work on your modern DSLR full frame body
4:50
These images are all ones that I took the day of doing this review with the lens mounted on the
4:55
camera. Most of these have been shot at either f1.4 or f2 other than one of the landscape images
5:02
where I shot with a deeper depth of field f5.6. But as you can see, this lens still has a lot of
5:08
artistic merit mounted on a modern camera. Even this image is only f1.4 and you can see it still
5:14
looks pretty good. And so none of these images have received any kind of post-processing but
5:19
are just the way that they came out of the camera. And so I think you can see by looking at these
5:24
that there still is a lot of beauty in this lens. And so if you can get one and make this simple
5:29
adjustment, you will have a fully functional manual focus lens for your modern DSLR full frame body
5:35
I hope this has helped you out if you haven't already please subscribe
5:41
have a great day, bye bye