Up next in 10


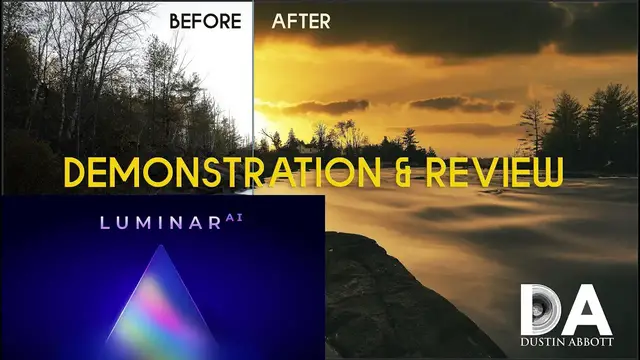
Photographer Dustin Abbott demonstrates the new Luminar Ai Update 2 photo editing software in detail and renders his verdict on it. Get Luminar AI and special upgrades right now by visiting this address: http://bit.ly/luminarAIda | Use Coupon Code DUSTINHDR for $10 off ($15 CDN) | Looking to upgrade from an earlier version of Luminar? click here: https://skylum.evyy.net/c/1302817/1015290/3255
Purchase AuroraHDR 2019: https://macphun.evyy.net/c/1302817/513351/3255 | Use Coupon Code DUSTINHDR for $10 off ($15 CDN)
Purchase Luminar 4: http://bit.ly/Luminar4DLA | Use Coupon Code DUSTINHDR for $10 off ($15 CDN)
Want to support this channel? Use these affiliate links to shop at:
B&H Photo: http://bhpho.to/1TA0Xge
Ebay: http://bit.ly/DustineBay
Make a donation via Paypal: paypal.me/dustinTWI
Get a discount off all Skylum Editing Software (Luminar, Aurora HDR, AirMagic) by using code DUSTINHDR at checkout: http://bit.ly/LuminarDLA
Become a Patron: https://www.patreon.com/dustinabbott | Check me out on: Personal Website: http://dustinabbott.net/ | Sign up for my Newsletter: http://bit.ly/1RHvUNp | Instagram: http://bit.ly/DLAinsta | Google+: http://bit.ly/24PjMzv | Facebook: http://on.fb.me/1nuUUeH | Twitter: http://bit.ly/1RyYxIH | Flickr: http://bit.ly/1UcnC0B | 500px: http://bit.ly/1Sy2Ngu
My filming setup: Sony a7R III: B&H Photo: https://bhpho.to/2D6ibNO or Amazon: http://amzn.to/2CNxOvH | or | Sony a9 @ B&H Photo: https://bhpho.to/2HyWIyt or Amazon: https://amzn.to/2s1vYE0
Tamron 28-75mm F2.8 RXD @B&H Photo: https://bhpho.to/2FA00la or Amazon https://amzn.to/2G2kaEr
Lights: Rotolight AEOS @B&H Photo https://bhpho.to/2IK7mqV | Genaray Contender @B&H Photo: https://bhpho.to/33HbGNM | and Aputure AL-MW: https://bhpho.to/2N3MtZV
Show More Show Less View Video Transcript
0:00
Hi, I'm Dustin Abbott and I'm here today to give you a software review and demonstration
0:15
and that's of the new Luminar AI. I've done a number of previous Luminar reviews and this
0:22
case while often I kind of time them when they have some kind of major release
0:26
I didn't really have time to fit that into my schedule at the time
0:30
and I've also wanted to see how they did at kind of fleshing out and improving the software
0:37
because Luminar is really great about kind of innovating new features and very good at marketing
0:44
but they haven't always been great at kind of fine-tuning some of the quirks that are left in the software
0:51
and so I did reserve a little bit of judgment and so I could include that as a part of my observations today
0:56
Now Luminar, if you're not familiar with the software, like a number of other pieces of software, is basically trying to become a Adobe Lightroom slash Photoshop replacement
1:11
And so I've watched these companies over the years is that, first of all, they try to basically create a clone of Lightroom
1:20
And so, kind of then emphasizing their marketing being around that when Lightroom and Adobe products begin to move to a cloud subscription type model
1:29
that you could actually own the software and thus not have an ongoing subscription cost, which was a good starting point
1:38
People are looking for Lightroom alternatives. But at the same time, just trying to create a clone of something doesn't necessarily mean that you end up with a great product
1:49
And you don't necessarily have an identity. What I have seen with Luminar is that I think that they are starting to get their identity
1:57
Now, whether you're going to like that identity or not is going to be completely up to your taste
2:01
But it's clear that they have really started to focus in on the idea of automation
2:06
with a recognition that, you know, not all photographers these days want to invest in the
2:13
very steep learning curve of something like Photoshop, that in many cases, they don't want
2:18
to be bothered with things like masking or, you know, really kind of getting deep into all the
2:24
different aspects of, you know, affecting the tone curve or, you know, trying to create different
2:30
kinds of looks and split toning, all of those things on their own, but rather that in many
2:35
cases, people just want to quickly improve their photos. And we live in the day, of course, where
2:40
a lot of people are, you know, taking the primary camera that they use is their phone and they're
2:45
accustomed to having, you know, filters that they can apply right there and tweak the end product
2:51
So I think that Luminar is kind of seizing on that, but taking it to a whole new level to where
2:55
there's a lot of automation of things that used to be very time consuming. And we're going to explore
3:00
some of those here today. And so I do think I'm glad to see them kind of honing in on that unique
3:05
identity. And again, the kind of editing I'm about to show you, it's not necessarily for everyone
3:11
It's not, you know, just making fine improvements to, you know, basic photographic qualities
3:19
which you can do that. The tools are there just like they are in Lightroom. You know
3:23
all those same kind of tools are here, but really it's about making major changes and the real
3:28
strength of Luminar, particularly Luminar AI, is in all these different automated processes
3:34
So let's jump in and let's demonstrate a few of those and so that you can get a sense of what
3:39
this software can do and what its limitations are. Let's jump in, let's take a look
3:45
So first of all, when you open up Luminar AI, what I really like is the fact that they are
3:51
really starting to develop their own kind of unique look and identity. Rather than trying
3:56
to be just a Lightroom clone. When you open up, first of all, you start in the template
4:01
tab here, we'll call it that. And so just even in terms of the way that things are presented here
4:08
it looks more like, you know, maybe an app in terms of the icons and, you know, more of an
4:14
illustrative kind of look rather than just, you know, sliders and text. And so, and this
4:20
one of the things that they'll do is that they'll give you some, you know, recommendations of a few
4:24
different kind of template sets that might fit your particular image. But you also have a variety
4:32
of other options. As you can see, there's a lot of different templates and of course the capability
4:37
of getting even more templates that you can download or purchase. So in this case, I'm going
4:44
to select the Sunsets collection and I've looked through a few of these different ones and I liked
4:50
the look of the Toscana here. Now, in some cases, you know, just using the actual preset may be
4:58
enough. And, you know, we're here to talk about skies today, but in this case, as you can see
5:04
and I will point out this, everything in Luminar has a slider associated with it for strength
5:11
We can see where we started. And so in this case, I don't actually need to replace the sky
5:15
even though the image is kind of flat and the sky is blown out through, you know, the AI magic here
5:21
we've been able to really influence the sky and produce something that I like
5:27
Another thing you may have noticed here is that rendering is not lightning fast
5:31
And I will add the caveat that I am doing a 4K screen recording
5:36
and so it does slow down things a bit because it's requiring a lot of processing power
5:41
but just note that that is one of my chief complaints with Luminar that it continues to
5:46
be slower in operation than say what Lightroom is. So if we go over into the edit tab I really like
5:53
what they have done here. Once again they have their own kind of unique look and so they've
5:57
got a lot of different tools and as they've added more and more functionality and particularly more
6:01
of these AI type tools they've needed to you know kind of redesign their structure so it doesn't
6:07
become overly complex. And so they've got things organized under essentials, then a creative
6:12
section, portrait, and then professional down here at the bottom. All of these, of course
6:18
can be expanded. And so for example, under enhance, this is an AI thing. And so you have a couple of
6:25
options here. You have accent. And so if we slide that all the way over, we can see that it does
6:30
some kind of localized contrast ratios. And if we take it off altogether, we can see what it is
6:37
done here, you know, kind of just through selective processing is, you know, really illuminating
6:42
things in the foreground. And then there is a separate sky enhancer that focuses on the sky
6:48
portion of the image. In this case, I actually kind of liked what it had already done with the
6:53
preset. And so I like a little of the foreground. I want to leave a little bit of mystery there
6:57
Now for this particular image, one of the things that I want to do is I want to go down into the
7:02
professional tab into the optics. There's a little bit of bulge there in the actual horizon
7:09
and so I just want to straighten that out just a little bit. And then to complete that work
7:15
I'm going to come back up here, and I'm going to go to AI composition. Now, in this case
7:21
I'm actually not going to use the AI portion of it, which it would kind of suggest a certain crop
7:27
because there a couple of things I want to do here First of all I going to change this to 16 9 type ratio and I just want to get basically to the tip of that cloud there And then also I want to grab this and just do a little
7:41
minor adjustment to straightening out the horizon. And so once I'm done with that, I can just click
7:47
on it again, and that will then apply whatever changes have been done. I don't see any reason
7:53
why this shouldn't be essentially an instantaneous process. And so this is one of those areas where
7:59
It's a little bit slower than what I would like. Then you have an option
8:03
You can either go into the Export tab. You can also get to that by right-clicking and clicking Export
8:09
and that opens up the dialog box for the options of exporting the image that you've done
8:14
Now, for the second image, this is not an uncommon situation here
8:19
I have opened up an image where I like the potential of the image. I've done a long exposure here with a river coming downstream towards
8:27
and there's some interesting things here including the house there up on the bank above the river
8:31
some interesting things in the foreground but the image is really flat and of course the sky
8:35
is essentially featureless and so first of all here again in this sunsets collection and this
8:42
is the original templates i was just kind of clicking through them and i looked at different
8:48
ones and i just immediately liked the look of what's happening here in terms of kind of a split
8:55
toning effect and warming things up. So from here I'm going to jump over into the edit tab
9:01
and in this case while I like the basic look here of the image in terms of tonality the sky of
9:08
course is really really just featureless. So I'm going to grab this sky selection box and it will
9:16
drop down and show me a number of different sky options. You can add more, you can download more
9:21
you can add your own and more on that in just a moment. In this case though I'm going to select
9:27
something that kind of suits the tonality of what I've already started to do in the image
9:31
and that's adding in this sunset. Now this takes a few seconds to process but it's understand
9:38
there's a lot going on in this case it's a little more justifiable and that it is having to mask
9:42
the whole image and then pick up on you know this actual sky and integrate it you know masking all
9:49
of these various things here. And you can see that it does quite a good job. So if I go down here
9:56
I can see that I have a lot of different tools that will drop down in terms of refining the mask
10:03
you know, changing the relighting here. And so it starts off on the 20. It kind of does a pre-selection
10:08
again, AI selecting what should and shouldn't be done. And so if I were to relight the whole thing
10:14
It's a little too moody if I have no relighting. The foreground light may be a little bit intense and matching
10:22
And so just somewhere around where they selected is actually kind of an appropriate level
10:28
and it helps me to not get anything too blown out there. Now, one of the new tools that they have added is the reflection amount
10:36
And so that obviously is going to be really useful in certain images, a little bit less so here
10:42
I basically want some of this sky and its lighting reflected on the water
10:48
However, there's a certain amount of that that was naturally there, and so I find that it affects things less
10:54
But you can see that that kind of golden glow is taken out of the water without it
10:59
And so I'm going to pull that back up because I like the overall effect here that it creates
11:04
Now closing that, I'm going to go back up here to the Enhance, and I'm going to play just a little bit with what we get here
11:12
because what you can see is that it will open up the, you know, open up kind of localized contrast
11:18
And so in this case, I like a little bit more of the punch it's added to the image
11:22
And we can play with the sky enhancer. It doesn't always improve things from where it was
11:29
but, you know, the nice thing about a slider is you can kind of play around with something and adjust it to taste
11:34
And so we can take that back off. And I kind of like just the brighter, more punchy kind of sky effect
11:40
now one other thing that I'll do to this image I'm liking it already a lot but I wouldn't mind
11:46
just adding a little bit more warmth and so I'm going to the light here tab and opening that up
11:52
and then I also think that I'll open up the shadows just a little bit and so then one other
11:59
thing that you can play with is this smart contrast and so you can either you know allow
12:04
it to really do its thing and determine you know at 100 adding more kind of as you can see punch
12:11
into the image itself a little much maybe but you know bringing that back down to a more gradual area
12:18
allows us to have a nice dynamic looking image so just as a reminder of what we started with
12:24
because you may have forgotten we started with a really kind of flat featureless type image and we
12:29
have created something that is full of of warmth and punch and just allowed the basic you know
12:36
contours of this image to really pop and shine so I really like what we've been able to accomplish
12:41
there so here's another image that isn't all that impressive if you open it up in its original kind
12:47
of raw shape here and so I just want to give you a little bit more of a dramatic example here
12:52
so there is potential in this image even though you can't really see it necessarily and so first
12:58
of all it suggests in the templates the natural skies collection and so I took a look at that and
13:04
there were some things that I liked and one of those was this crack of dawn that as you can see
13:10
has opened up the image some and so exposed a little bit of the shadow area intensified the
13:15
sky a little bit and so it's it's a nice starting place I like the overall tonality of what we see
13:20
here so let's jump into edit so in this case you know the sky is not necessarily uninteresting here
13:26
but it is relatively bland. And so we're going to play with their sky selection tool once again
13:32
Now in this case, I'm going to select something a little bit more dramatic. And so we're going to choose this really intense sky. They call this Sunset Clouds 2. Once again, there are a few
13:42
seconds. I'm going to estimate it's usually around 15 to 20 seconds of rendering time while, you know
13:48
you kind of does all the masking and those things behind the scenes. When you consider how much work
13:52
is being done however it's really not too bad. Now in this case the masking is not what I would
13:59
call perfect and so we're going to do a few things to kind of help with that. First of all there is
14:05
a mask refinement tab so if I move the global we'll just do it at 100% to kind of see what it
14:12
accomplishes here. You'll see that up here we have a you know a little bit of pulsing while it works
14:18
the magic. But what you can see is that already there's definitely some improvement to the overall
14:23
masking look here. Here I'm going to also work at closing some of those gaps. And then if I pull up
14:31
the fixed details slider here also, you know, slowly but surely we're refining that mask down
14:39
and getting a better end result. So after we've asked it to do these extra kind of layers of
14:45
So essentially what you're doing is accepting more time spent while it works a little bit harder at masking
14:51
Now, the problem is here that the render doesn't necessarily show how good things are
14:56
So if we actually zoom in to a 100% magnification and give it a second to render
15:03
which it this kind of thing that kind of bugs me the time spent but we can see that actually it done a much better job than what the you know the full kind of global render shows us
15:14
that now we've actually got a really nice and clean job of actually masking off this area
15:21
But you don't see it until you allow it to actually do its render
15:25
So another thing that you can do to adjust the sky just to taste is that you've got a few options here
15:30
Now in this case, because this is a deep depth of field image already, I don't want the sky to be defocused
15:38
Now if it were a case where the sky was really kind of out of focus, it should be as a part of the image
15:43
It would be one thing to do that. Obviously that's an extreme. But in this case, I see no reason to defocus the sky because it really should be in focus due to the actual rendering of the image itself
15:57
One thing you can do, however, that will help to bring a little less intensity to if the effect is a little too extreme
16:06
is you can use this atmospheric haze slider and pull it up
16:11
And what you're going to see is, I'll bring it up to 100% just so we can see an exaggerated effect
16:15
and then we'll bring it back down to taste. What you can see is that basically it's kind of washing out, kind of de-hazing
16:22
or excuse me, going the opposite of de-hazing to where it's adding that haze in
16:26
And so in this case, if I reduce that down to a more manageable level, I can end up with a nice sky that is a little bit more balanced to the image itself
16:38
And then since we are doing this for video, I'm going to switch to a 16-9 crop and I'll just crop up to where it's barely over the top of those trees and it gives me a good mix of sky and then some foreground in terms of the road itself
16:57
And so again, clicking that will allow it to do its work and I wish it would do that work a little bit faster, but that's the areas where there's still room for improvement
17:08
But what we have got, once again, is that we've got an image that started off, you know, not worth looking at
17:15
And the byproduct is we've got an image here that is worth looking at at the end of the day
17:21
And so I think that that is the value of, you know, what Luminar can do for your work
17:27
Let's take a look at one more landscape image and just show you a couple of other things
17:31
So once again, opening up on the template tab, we can see that, you know, as always, it suggests a few things
17:38
and often I kind of like some of the things that it does suggest, not in every case
17:42
Now in this case, I clicked the simple tab here and I like what it has done, it is just added, it's subtle
17:49
and in this case, what's what I wanna start with is something subtle, it's just added some extra contrast
17:54
and then saturation into the image itself. Now in the edit tab, I'm gonna go to sky once again
18:00
because again, the sky is just kind of flat and we've also got some uneven kind of polarizing effect
18:06
the sky because I was actually testing some variable neutral density filters when I shot
18:13
this particular image. And I find that they do produce sometimes an uneven polarizing effect
18:17
in the sky. So in this case, I'm going to actually bypass the included and I'm going to go to one of
18:25
my own. And I shoot a number I'm going to drag over for a second. I can just see that I shoot
18:31
kind of sky type things all the time. And, you know, a lot of times trying to avoid anything
18:36
else in the sky, just the sky itself. And so I have these as, you know, just an option to draw
18:41
from. And so in this case, I'm going to grab this. Something too intense doesn't work with this
18:48
particular image. And so I found a kind of a muted, slightly more pastel kind of sky does kind of work
18:56
with the image and more so as we get towards the end. So I like the sky for the image. I think it's
19:02
done a pretty good job right off the bat for the masking, so I'm not too concerned about that
19:06
But I did want to test out something else to show you this, because there are a couple of trailers
19:12
that have been added to, or not added to this image, but were parked here, that really to me
19:18
kind of detract from the overall look. So they have something they call erase here, and essentially
19:23
it's like in Photoshop, you know, you can use different to kind of spot removal. And so in this
19:31
case, it works just slightly different from what does Photoshop in that you can actually paint the
19:37
individual areas you want removed. And then it doesn't kind of real time do it. It allows you to
19:43
finish refining that. And I actually, at first I, you know, it wasn't what I was accustomed to, but
19:48
I actually kind of liked it because it allowed me to really kind of refine some of the stuff that I
19:54
wanted to remove. So once you've selected all of those things, then you click erase and it starts
20:00
doing its work, you know, and so it's going to try to do some sampling, some cloning. But again
20:06
it's all about automating those processes. And so I think that that's a great aspect of the
20:13
software itself. As you can see, it's not, nothing is incredibly fast in terms of the render. And
20:19
again, that's the chief complaint that I have. And so as we can see, it has done a, you know
20:24
actually quite a good job. There's a little bit of a repetitive pattern here that is maybe a little
20:30
bit unnatural and so you could break that up with doing more but for our basic purposes here we can
20:35
just go with that and so it's a tool once again that while not fast it actually does a a good job
20:41
for you now one of the things that i wanted to add to this particular image is down here under the
20:47
creative tab and it is under something called mood and under mood you actually have the ability to
20:52
choose different luts and and so luts or lookup tables are something that we've kind of adopted
20:59
from, you know, really more from kind of video toning and processing. But in this case, it's
21:07
also an interesting effect to be able to add to images. And I like to do this after you've actually
21:12
if you've added a sky, to do some kind of toning effect that kind of ties everything all together
21:18
So as you can see, as per usual, there's a lot of different LUTs that are available here. You can
21:24
download other LUTs, you can upload your own, et cetera, et cetera. And so in this case, I am going
21:30
to choose the Long Beach. And so, you know, once again, everything is on a slider and you're able
21:37
to control the intensity of everything, which is a real advantage, particularly over say like
21:42
you know, Lightroom type presets that it's basically all or nothing. And I really like
21:47
the ability to be able to control how much that I want. And so, you know, I could go to an extreme
21:53
100% is too much, obviously. And then if I'm going to bring it down to just a little bit more moderate level
22:02
and here's something that I like. So we'll choose somewhere around in this area about here
22:10
And the only other thing that I would basically probably do to this image is that going back again under that light tab
22:15
and maybe just opening up these foreground shadows just a little bit
22:20
and so I can see a little bit more of that detail that is there
22:24
That's maybe a little too much, we'll bring it down to somewhere around 20
22:28
and I think that that's going to produce an end result that I like
22:31
So finally I wanted to take a look at Portager, and in this case we're really going to test this
22:37
because this is a 102 megapixel file out of the you know medium format 100 And so once again there various templates that are suggested In this case I just going to grab the close collection
22:54
and we are going to take a look at the midday. So this is something that kind of stood out to me
22:59
that I liked the beginning look here. Then we're going to refine it more as we jump in
23:04
So in the edit tab, we're going to focus on this portrait section here
23:09
And so we'll start by taking a look at the face. Now, the face, we're going to tweak the face light here a little bit
23:19
And again, you can go to extremes. We'll just, you know, show you just for demonstration
23:24
I mean, obviously that is, that's a little bit unnatural. It's more of like a spotlight type effect
23:28
So I'm going to bring that down to, you know, somewhere in a more moderate zone
23:33
let's say some here around 34. And so again, I think the improvement to the face light is good
23:40
We'll take a quick peek here to where it was obviously underlit before. And so we've got some
23:45
nice, you know, bringing out the highlights of the face here. So let's zoom in close here before we
23:50
go to the next stage, because I want to take a look at the Eye Enhancer AI tab that they have
23:57
So again, very high resolution here, which is fantastic for our purposes, being able to see
24:02
everything but you know obviously the render does take a little bit more time so in this case if i
24:08
bring the eye enhancer all the way down to nothing you can see that our the irises are kind of flat
24:13
and featureless here and then if we drag it all the way up and give it a second to render we're
24:20
going to see that you can see it's really brought out the information in the iris and it's it's
24:25
actually quite a great effect there and so i actually like that at a pretty high intensity
24:30
because it's just brought out some interesting things about the eye and not in an unnatural kind
24:36
of way. Now at this huge magnification level, obviously we can see that there are a few skin
24:41
blemishes here. And so the next thing that we're going to do is we're going to go and we're going
24:47
to use another AI tool called skin defects removal. So I'm going to click that and allow it to do its
24:53
work. And so this takes a few seconds because it's obviously having to locate all those spots
24:58
and then it is eliminating them. Now, at a pixel level, this tool still needs a little bit of refinement
25:08
It's better than what I've seen before, but what we can see is that it has
25:12
in the process of removing the defects, it's also removed all of the skin texture
25:18
And so I don't necessarily love that aspect of it. And so at the same time, most of the time you're not looking at a pixel level
25:28
and so you won't necessarily pick up on that but our actual skin kind of refining or smoothing
25:34
again if we take that all the way up to 100 it is you know to me it's a little bit too much
25:41
smoothing you can see we're starting to lose some of that texture information and so again I kind of
25:45
like it at more of a moderate type amount somewhere here around 59 or so to where we're not losing all
25:53
of that kind of information that is there. Now, another tool that we have here is the shine
25:58
removal. And so what that is basically going to do is that if we bring that up, it's just going to
26:03
kind of balance out the areas of highlight and just kind of smooth out the tonal gradations there
26:11
And we're going to just look at the composition tool because they have this AI composition
26:17
which if we click that it's going to actually you know kind of look for what would be the most
26:23
pleasing crop here and so i'm going to click that we can see that it's basically selected a
26:30
kind of rule of thirds type effect for the eyes if we go back i'll do it this way i'm going to
26:35
click that off and there is a history of everything and so you can go back and select any step along
26:40
the way. These are non-destructive edits and so I can go from that to applying all the various
26:48
steps that we have done and end up at this end result, which I suspect you will agree is a vast
26:54
improvement. And so as you can see, there's a lot of good stuff there. There are a lot of great
26:59
tools, a lot of great automated processes, and I think that they're refining those to where they
27:04
work better than what I've seen previously. So I am glad to see some refining of that
27:08
Now, my major criticisms basically are all around the rendering speed, be it the on-screen render, be it the time it takes to export images
27:19
So where I want to see refinement is in that because I feel like at this stage, it's slower than the alternative pieces of software that I use
27:27
It does a lot of great things, and some of the delays, like all the masking, I understand
27:31
but in some cases doing more basic things I think that they can improve that to where you have more
27:38
of a real-time render for that but in terms of what I really do like I really do like the new
27:44
kind of clean look that makes them less of a Lightroom clone and starts to forge their own
27:48
identity. I really love the fact that even with all of these AI features that everything has a
27:55
slider you can control the intensity of what you do and that allows you to you know you can go to
28:01
an extreme as we did in our demonstration to see how things work and then bring it back to a more
28:06
reasonable level. I love the lookup table integration. It's something unique that they have
28:12
that can really give you an overall look and also it can give you a consistent look across
28:17
a set of images if you so desire and even connect them into then to what you're doing on a video
28:24
front giving you kind of an integrated look across your whole package which is of course the point of
28:29
lookup tables. I also like the fact that I really see improvement in the portrait AI tools to where
28:36
they're becoming increasingly useful, I think. And while I personally tend towards doing things on a
28:44
more subtle kind of level, I'm not an extreme editor typically, I really like that those tools
28:51
are there and in many cases doing a really great job and expediting something that I know how to do
28:57
all these things. I've got, you know, over a decade's worth of Photoshop experience. I know
29:02
how to do all these things manually, but being able to automate them obviously is beneficial
29:06
even to someone like myself and to someone who doesn't know how to do all these things in
29:11
Photoshop, for example, it's going to be incredibly useful. And so I really like the direction they're
29:17
going. I would just like to see them do it all faster in terms of rendering speed. I'm Dustin
29:23
Abbott. If you look in the description down below, you can find links to where you can get more
29:27
information. And right now they are running a special that coincides with a new update that
29:33
has just been released that adds some of the things that we saw today. And as a part of that
29:38
you get a discounted price. You also are able to get some, you know, sometimes some things thrown
29:43
in there, be it templates or presets, things like that that are thrown in. And if we use the coupon
29:48
code Dustin HDR at checkout one word Dustin HDR. You can get an additional discount on things there
29:56
Also, there is linkage to follow me on social media, to become a patron, to sign up for my
30:00
newsletter. And if you haven't already, please click that subscribe button right here on YouTube
30:05
Thanks for watching. Have a great day and let the light in
#Software
#Multimedia Software
#Travel & Transportation
#Event & Studio Photography