0:00
Hi, I'm Dustin Abbott, and I'm here today to give you a quick look behind the scenes of my set and where I do my recording here
0:25
I've been getting a lot of questions as of late as to what my setup is here in terms of lighting and what camera and lenses that I use for this
0:35
And so I decided that the best way to handle all of those questions would be to actually shoot an episode where I cover those things and also give credit to some of the great manufacturers of the products that I use as a part of my workflow
0:48
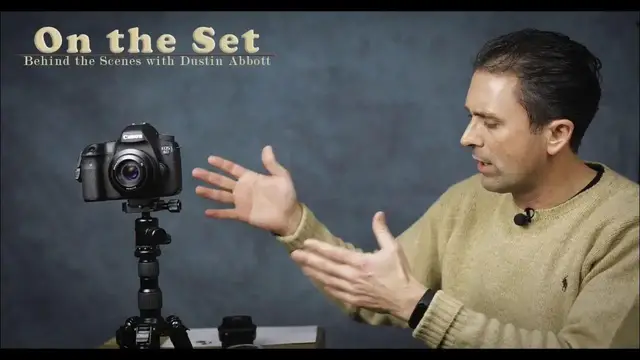
Now, as you can see in the time lapse as we come into the room that my studio space is a space that I share
0:55
with a classroom. My real job, day job, is I pastor a church. And so right now my studio is actually
1:05
in the teen class or youth area part of the church that I pastor. And so every week I've got to
1:11
set it up and tear it down. And so anyway, as a part of that, I do keep some backdrops kind of
1:19
set up. And on the note of the backdrops, I use backdrops from Impact. I've used a few
1:25
other different kinds of backdrops before. I find that the impact ones are very well made
1:31
and they're machine washable. They have islet hooks at the top, and so you can hang them in a
1:36
number of different ways. They are reversible, although, and right now I am using one of the
1:42
reverse sides. The reverse sides tend to be more faded, but, you know, for the kind of application
1:48
here that works well for me. And I find that as a price ratio, they're priced quite well, and I've
1:55
I bought cheaper ones off eBay before, but truthfully, they weren't much cheaper than what these ones were, and I found these ones to be higher grade
2:02
I throw a link to them down at BNH photo a link in the description down below You note that I also use some clips Sometimes you have an issue with backdrops particularly when you kind of going back and forth as I often do with getting some folds in there And so I just purchased some inexpensive clips that I use on the
2:21
side to help to just kind of stretch out the background and make sure that it's as smooth and clean as
2:26
possible. As far as my lighting, I actually have a total of four different lights that I will use
2:34
and sometimes I will also throw in one of those little loom cubes that I've reviewed
2:38
if I want to just throw light on a particular object. But as far as my main lighting, I primarily use the Impact Octocool
2:46
Same brand as the backdrops, and I'll throw a link to them down below. I actually did a review of those last year
2:52
And so they are six CFL lights in each one of the fixtures behind a nice big soft box in a diffuser
3:00
and I have the option of choosing ratios in terms of how many are actually
3:04
actually firing. So I've actually got two of those and then I've got a couple of Westcott soft boxes
3:09
They're smaller. It's a single, just massive like 400 watt equivalent CFL and those all daylight
3:15
temperature. So it makes it very easy when I record. I actually just set a daylight temperature
3:20
Kelvin balance and so that I get a consistent result on my lighting. And so I usually have the lights
3:27
fairly close to me as you can see in my setup and try to have a kind of a full light here that is
3:34
going to kind of illuminate my face and then more of a fill light and hair light from the
3:38
other side. Also, I try to have some good light on whatever gear that I'm talking about and so
3:44
that you can see that as a part of the setup as well. Now, beyond that, in terms of my recording
3:51
I actually record separately. I use a couple of different lav mics, one from Road, the Road Smart
3:57
Lab, and then also, which I've reviewed before, and then also there's another one, B-A-O-O-O-O-Chrystal
4:03
clip, that's what's on me at the moment. And I record either into an iPhone or an iPod and then I sync up the audio later
4:11
I use a Rhodes recording app their pro recording app that does a really clean job of giving me my audio and then I just sync it up later in post As far as my actual recording equipment I primarily use the 5D Mark 4
4:28
shooting for the main, you know, these kind of talking head segments
4:32
and then I'll often use a Canon 80D for the segments when I'm putting it on the gimbal
4:38
I use this U.N. crane motorized 3-axis gimbal, and so if I'm doing gimbal type shots
4:44
I usually use the ADD. It's a little lighter and a little more versatile for that, and it also has the articulating screen
4:51
And so the screen is not getting obstructed, like sometimes if I use the 5D Mark 4 in the same situation
4:58
So on the 5D Mark 4, I typically, for these segments, in the last several months, I've started shooting in 4K
5:05
and then I will downsample during my color grading stage to 1080P
5:10
That allows me to do a little bit of cropping and get also shoot at higher resolution
5:15
and so my end result of my 1080P has much more detail
5:19
I use either the CNA style, you know, log type profile, C-log, or the EOS HD C-log profile
5:30
And then I will add a color lookup table in post, typically, to add in a certain kind of look
5:36
or just tweak the S-curve to bring back detail, just to preserve a kind of a cleaner, more professional-looking image quality
5:45
And, you know, for all of the hoopla over the 4K out of the 5D Mark 4, it's actually, although it's huge, file size is huge, and that's still the same scenario
5:54
It's actually a fantastic file size or file format to work with and that it has pretty fantastic dynamic range, great detail, and, you know, it just, it grades quite well
6:06
And after people got overall the hype of criticizing it and actually started using the camera, they found that it works pretty well overall
6:13
Now, because there is a 1.7 times crop factor when you're shooting 4K on the 5D Mark 4
6:20
I used to shoot often with an 85 millimeter lens or a 50 millimeter lens
6:25
I switched to either using the typically the Canon 35 millimeter F1 Mark 2 Of course incredibly sharp and so it gives me great results And then also similarly I use the Tamron 45 millimeter F1
6:40
And I typically shoot these segments at F2 or F2.8 for this kind of setting
6:48
And so those lenses, they give me, with the crop factor, they give me a focal length that works pretty well
6:54
And at the same time, they also give really nice sharp, good quality
6:58
looking image and so that part is well. I have a variety of different tripods that I use as a part of the set
7:05
I've been using this. I did a review of this OBIN CT3535 kind of travel carbon fiber tripod
7:13
super light. So I use this a lot of times for when I'm demonstrating products because it's, it's
7:18
kind of out of the way. It's also small enough I can even put it on a table. And so a lot of times when
7:24
I'm posing shots, I'll put them on that. And then I've used often a, a
7:28
vanguard tripod for actual my main tripod. I'm in the process of using and reviewing another
7:35
open full-size carbon fiber tilting tripod. That's a pretty fantastic tripod that I'll report back
7:41
on you soon. And so overall, I think I've covered everything as a part of the overall set and
7:48
workflow here. It's not really all that super complicated. Just get good lighting, get a decent
7:53
backdrop and then of course canon's dpaf video tracking is fantastic for face tracking and so it makes
8:01
that part of the job a whole lot easier so hopefully this helps you out and knowing how i'm doing
8:07
what i'm doing here and maybe that will help you with your own production value on your own set if
8:13
you're trying to put together a youtube channel or just looking for some input i'm dustin abbott and if you'll
8:18
look in the description down below i'll have linkage there to shopping and purchasing all
8:23
of these things if you'd like. Of course, you can follow me on social media or subscribe for my
8:28
newsletter. And if you haven't already clicked that subscribe button here on YouTube, please do so
8:33
Thanks for watching. Have a great day