Up next in 10


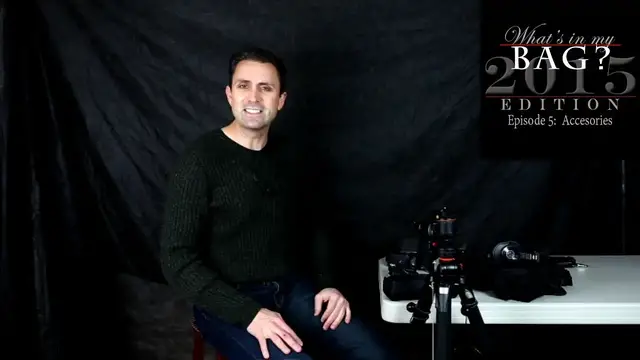
Photographer Dustin Abbott shares the final episode in the "What's in my Bag?" 2015 series. In this episode he looks at tripods, bags, straps and holsters, along with flash units, triggers, and modifiers.
Vanguard Tripod Review: http://bit.ly/1Ylg8aE
Lite Scoop Order Page: http://bit.ly/1KSr4Gj
Metz 64 AF-1 Review: http://bit.ly/1BUd10p
Yongnuo Triggers: http://bhpho.to/228fB0m
Want to support this channel? Use these affiliate links to shop at:
B&H Photo: http://bhpho.to/1TA0Xge
Amazon: https://www.amazon.com/shop/dustinabbott
Ebay: http://bit.ly/DustineBay
Make a donation via Paypal: paypal.me/dustinTWI
Get a discount off all Skylum Editing Software (Luminar, Aurora HDR, AirMagic) by using code DUSTINHDR at checkout: http://bit.ly/LuminarDLA
Become a Patron: https://www.patreon.com/dustinabbott | Check me out on: Personal Website: http://dustinabbott.net/ | Sign up for my Newsletter: http://bit.ly/1RHvUNp | Instagram: http://bit.ly/DLAinsta | Google+: http://bit.ly/24PjMzv | Facebook: http://on.fb.me/1nuUUeH | Twitter: http://bit.ly/1RyYxIH | Flickr: http://bit.ly/1UcnC0B | 500px: http://bit.ly/1Sy2Ngu
My filming setup: Sony a7R III: B&H Photo: https://bhpho.to/2D6ibNO or Amazon: http://amzn.to/2CNxOvH | or | Sony a9 @ B&H Photo: https://bhpho.to/2HyWIyt or Amazon: https://amzn.to/2s1vYE0
Tamron 28-75mm F2.8 RXD @B&H Photo: https://bhpho.to/2FA00la or Amazon https://amzn.to/2G2kaEr
Lights: Rotolight AEOS @B&H Photo https://bhpho.to/2IK7mqV | Genaray Contender @B&H Photo: https://bhpho.to/33HbGNM | and Aputure AL-MW: https://bhpho.to/2N3MtZV
Show More Show Less View Video Transcript
0:00
Hi, I'm Dustin Abbott and I'm here today to do the final of the series of videos I've been doing
0:14
kind of detailing what's in my bag or what's in my personal kit. And so, so far we've taken a look
0:20
at a variety of things including in episode one. We took a look at the various camera bodies that
0:25
I used. And if you missed that episode, you can check it out here. Also then in our second episode
0:32
we looked at wide angle lenses, lenses that in my personal kit run from 15 millimeters up to 35
0:38
millimeters. And if you missed that episode, check it out here. Then on our third series, we did
0:45
I took a look at general purpose lenses, what might be considered normal range from 35 millimeters
0:51
up to around 70 millimeters. And we looked at some of those lenses. And so if you missed that
0:56
take a look here. And then in our last episode that we did, episode four, we looked at telephoto
1:02
lenses and ran through a variety of those. And if you missed that, take a look here
1:07
In this final segment, I'm going to take a look at kind of some of the various pieces that you pick
1:12
up along the way. And as a photographer, there's a lot of different things that make life easy or
1:17
become necessary beyond just the basics of cameras and lenses. And so we'll look at just a few of
1:23
these quickly here today, including how I carry things, what I use for flash units and flash
1:28
modifiers, basic things like that. Before I do that though, I want to just extend a personal thank
1:34
you to all of you who have become subscribers to my channel and have come on board in 2015
1:41
I began 2015 with just a handful of subscribers and really kind of just starting out with a YouTube
1:46
channel and over this year you've really been very supportive and thousands of you have become
1:52
subscribers and have really helped to make this channel a success and I want to just say thank
1:57
you for that and look forward to better things in 2016. Starting with the lens that I am actually
2:04
filming with today and that is the new Canon 35mm f1.4 L mark ii lens and I've got a Sigma 35mm
2:13
f1.4 art to compare that with so that should be fun but let's jump in and take a look at things
2:20
here today first of all I'm filming right now on a Manfrotto tripod which is my tripod for several
2:27
years and it's still a good basic tripod Manfrotto makes great tripods I moved to my primary tripod
2:34
being this Vanguard in the past year I did a review of this particular tripod and why I chose
2:42
to go with it and I'll throw a link to that down below. But let me just throw in a couple of things
2:47
just maybe a couple of little helpful hints. One thing that I'm not as crazy about on Vanguard
2:51
tripods is the fact that these aren't really all that quick release, but also unlike the Manfrotto
2:57
which has a little kind of key that you can turn to put torque on it, this needs you to have change
3:02
or something similar. A coin works fine. The problem is I don't always have a coin in my pocket
3:07
because I use plastic most of the time. So what I've done is I just threw on a little
3:12
cutout washer here that works just fine. It's always there and plug in for that
3:18
Another reason why I like this particular tripod is because of the pistol grip that allows me to
3:23
get things very quickly into position. It's great for macro, great for a variety of things. And
3:28
I also, of course, test a lot of lenses. And so I'm being able to just kind of get that fine detail
3:34
say if I'm doing a calibration, it's really nice. On top of that it also has a release cable that you can have there to hook into the camera body and so that you have a remote cable release which is always nice to have It also has a little trigger right
3:53
here that will release the shutter release and allow you to take the picture. So that's a cool
3:57
feature. I also use a variety of these little ball bungees. They're available fairly cheap off of
4:02
Amazon or someplace similar. Just to secure things to my tripod, I have them on my various camera bags
4:10
Here's one of them here, and I'll talk more about that in just a moment. But I keep these here
4:14
because they're great for fastening just about anything to anything. And so they're great to
4:20
use for that. And so anyway, this Vanguard is my most common tripod that I use. I like it a lot
4:27
because it works very well in getting things into a horizontal position. And unlike my Manfrotto
4:32
even in the horizontal position, you have the capability of rotating up and down, and I've kind
4:38
of got it locked in a bad place. But anyway, here we go. And so if I'm shooting astrophotography and
4:43
shooting the night sky, I'm able to get it into the right position. This tripod, if you actually
4:48
want to know the model number, is the ABO Pro. It's the 283AT, and so it's a great combination
4:56
and you can get it as I did in a kit with the pistol grip that I use it with. Let's take a look
5:01
at this bag real quick. I use a number of bags for different purposes. This is the most common
5:06
one that I use. It's a backpack. It is actually a low pro and it's just very, very useful in a
5:13
number of ways. Number one, there's a couple of different layers that can be configured different
5:17
ways. And in this top pocket, which I have just fairly open, it's actually wide enough that I can
5:23
have a mounted 70-200mm f2.8 or even my Canon 100-400mm L Mark II lens on a body laid sideways
5:33
in there. But if you have a bigger set of glass, this chamber will open up to where you can actually
5:39
top load all the way down into the bottom. It's handy for that. It's got a nice slot here in the
5:45
front that I can slide an iPad into or other kind of gear, which is handy. The bottom can be
5:50
configured in the typical way with different, and so I can have lenses standing up, or as I often do
5:56
I have another body mounted there with room for an additional lens on the side. It's got a variety
6:01
of small pockets that I keep various things in. One tip that I might throw in that I do personally
6:08
I make sure always in all of the different bags that I have, there's two items and here they are
6:13
I always make sure to have a cleaning cloth in all of them. I also always carry backup SD cards
6:19
in all of the bags that I carry, even if it's not huge, because there's been a few occasions where I
6:24
was getting images off of a card. I got out into the field and realized that I had traveled to
6:30
wherever and I had no card in the camera. Now that never happens to me because I always have a backup
6:35
in my bag. The other thing that I like about this Lowepro backpack is the fact that it does have
6:42
a built-in rain cover, and so that's nice. It also has a placer on the bottom where I always carry
6:49
another accessory, and that is, it's from Joby. It's a GorillaPod, and it's just a little tripod
6:55
It has a little ball head on it that is stable enough that I can mount a full DSLR on it
7:01
and most of my lenses, if it's too crazy heavy, I might have a problem in, I definitely would have
7:07
a problem in balancing and shooting in a vertical position, but horizontal, it really does quite
7:12
well. But I never have had anyone look twice at me when I'm walking into a building or someplace
7:19
where they don want tripods This can go along with me anywhere that I go and that been true in countries that I traveled to in various places around the world and so it handy I don notice the weight I don notice even that it there but I always have a little tripod if necessary and so in a lot of ways it
7:36
a very versatile backpack and also it's comfortable to wear. Going in that theme of carrying things
7:43
I recently did a review of this Fast Fire camera strap and this has become my kind of go-to system
7:51
if I'm just out and carrying a camera and here and it has a nice quick release where it snaps into
7:58
my my cameras and it's ready to go and it also doesn't tie up the tripod mount on the bottom
8:03
and so I like the it's very adaptable it's comfortable and it's very durable and if you
8:10
didn't watch my review of it here's a link to that here beyond that I also often use a harness type
8:18
system. Cotton carrier is the best brand of these, but harness system allows you to carry heavy
8:26
amounts of weight with it mounted in this position, and I'm not going to put it all on right now
8:32
but I just do want to show you also that I have the addition that has a second mounting strap here
8:39
and so I can carry, and often when I'm shooting weddings, I'll be wearing this, and it gets a lot
8:44
of attention. Not always positive, but a lot of attention because it looks like I'm wearing a
8:48
bulletproof vest, which in some weddings is appropriate. But anyway, it allows me to, usually
8:53
in the front, I'll carry a camera with a 70-200mm f2.8 mounted on it. And in the side holster
9:00
typically a 24-70mm f2.8 zoom. And so that way I have two bodies. I'm ready to shoot any kind of
9:07
situation. The weight distribution of something like this is amazing. The way that it distributes
9:13
weight across your body. And so, for example, this summer, I was reviewing the Sigma 150 to 600
9:19
millimeter telephoto lens, the sport edition, and it is huge and it is heavy. And despite that
9:26
I walked, although it's big. And so the setup was like this. I walked in the Toronto zoo, which
9:32
is a massive zoo, getting sample photos. And I carried it for hours without really feeling the
9:37
weight. And so these kinds of systems are great. If you want to distribute weight or have multiple
9:43
bodies on hand. And I highly recommend a cotton carrier type harness if you don't have one and
9:50
going to shoot professionally. Beyond that, let me highlight just a couple of other things
9:54
My microphone that I'm wearing right now is my primary way of collecting audio. It's through
10:00
Rode. It is the SmartLav Plus. It goes right into my, and right now I'm recording to my iPhone
10:08
And then so I get, so even if I'm in the field, it doesn't matter. I don't have to worry about
10:12
environmental sound and the loud microphone does a great job of isolating my voice. It's an
10:17
inexpensive system that works very well for me. Also beyond that, when I'm doing video edits
10:24
I tend to use these studio monitors. This particular pair is from the brand Senil and
10:30
these are the SMH-1200s and I did a review actually earlier of the SMH-1000s. You can take a look at
10:39
those here and this is the newest version of those. They're extremely comfortable, very great
10:45
noise isolation and great quality sound. And so those are my personal choice right now and they're
10:52
far less expensive than things like Beats or something like that while just as good if not
10:57
better. Beyond that, let's just talk quickly about flashes. I have a whole lot of different flash
11:03
modifiers and I not going to go into all those today For this kind of film set I using fixed lights and light stands from westcott shot through soft boxes that work very very well then if i using flash units my flash uh like speed
11:19
light of choice is from metz it's the 64 af1 it puts out a tremendous amount of power it has a
11:27
guide rating of 64 which is very powerful. It will, it's actually the most powerful like portable
11:36
flash unit battery, you know, this type of flash unit on the market. And so it has great range. It
11:41
also will sync up into and narrow the beam down to accommodate up to 200 millimeters. And so it
11:48
works great if I'm shooting with a 70 to 200 lens. A lot of them top out at 124 millimeters. This goes
11:56
all the way up to 200. It also has a secondary flash head if you're doing bounce, which I almost
12:02
always am. It has a secondary fill flash unit in the front, which is very handy. It has a touch
12:07
screen, which makes it much easier to use. I replaced a Canon 580EX2 models with these
12:14
and these are much easier to use. And so I've been very happy with these Mets flashes. They put
12:20
out great light. They meter very well. And I have quite, well, not quite a few. I have several of
12:26
them that I use, either mounted on a camera or remotely triggered. For remote triggers, I use
12:34
the different ones from Yongnuo, and they are inexpensive, but they work super well. They give
12:41
me full ETTL mode. I have one that is kind of the command unit that will allow me to control
12:46
multiple different channels and do all of my configurations right there. Very quick
12:51
very easy to use and particularly handy if I have the flash units mounted in soft boxes where they're
12:57
not easy to get at. And so all of these triggers work well. They're inexpensive. I'll throw some
13:03
links to them down below. Also, some of you may have seen, I did a review earlier of the smaller
13:09
version of this. This is the one I did before was the LightScoop 2 by LightGenius. This is actually
13:16
the super scoop too. And I recently got this to augment the light scoop. These just mount onto a
13:22
flash unit and they help to really, really soften up your light source and give you a nice big
13:29
source of light. And so that's the way that it mounts on there. And so as a result, it shapes
13:35
the light. And so it comes out in a nice soft pattern. And I've actually been using this super
13:40
scoop too, quite often in conjunction with a translucent umbrella. And when I shoot it that
13:46
way the light is incredibly feathered and soft and is great really great for portrait work and
13:52
and so I'll throw a link I've actually got a the manufacturer of these products has been
13:58
kind enough that for any of my viewers there's actually a landing page that I'll throw a link
14:03
to down below you could go and take a look and get a great deal plus free shipping anywhere in
14:08
the world and so that's a nice bonus right there so anyway these are just a few of the various
14:14
gadgets and things that I use for either carrying or shooting with or to make life as a photographer
14:19
more easy and and so once again thanks for uh jumping in and joining me for this series there's
14:26
been a great response to it and and I really appreciate all that you as the viewer does and
14:31
I hope that some of this information that I've passed on through the what's in my bag series
14:35
will help you as a photographer and your buying and shooting decisions I'm Dustin Abbott if you
14:41
haven't already, please subscribe. Have a great day
#Hobbies & Leisure