Up next in 10


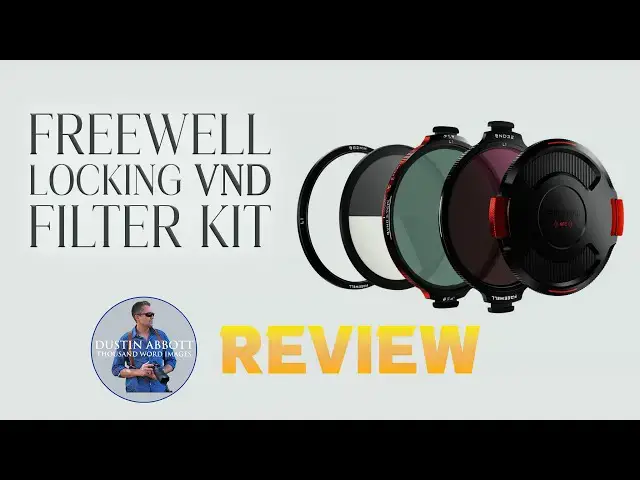
Freewell has a whole new design for their newest Variable Neutral Density filter system. Is the Locking VND a step in the right direction? | Purchase the Freewell Locking VND System or get more information here: https://tinyurl.com/BuyLockVND (use code "LOCK10" for 10% off).
Check out the DA Merch here: https://bit.ly/TWIMerch | Become a Patron: https://www.patreon.com/dustinabbott | On the Web: http://dustinabbott.net/ | Sign up for my Newsletter: http://bit.ly/1RHvUNp | Instagram: http://bit.ly/DLAinsta | Facebook: http://on.fb.me/1nuUUeH | Flickr: http://bit.ly/1UcnC0B | 500px: http://bit.ly/1Sy2Ngu Follow Craig @ https://www.instagram.com/craigstoffersen/
Want to support this channel? Use these affiliate links to shop at:
B&H Photo: http://bhpho.to/1TA0Xge
Adorama: https://howl.link/nt4zdz1goa7ql
Camera Canada: http://bit.ly/DLACameraCan
Sony Canada: https://www.thesonyshop.ca/?ref=abbott
Amazon: https://amzn.to/3HrY64d
Amazon Canada: https://amzn.to/3qG1p18
Ebay: http://bit.ly/DustineBay
Into the AM Clothing: https://bit.ly/intotheAMda and use code DUSTIN10 for 10% off
Fioboc Clothing: https://tinyurl.com/FiobocDA20 and us code DUSTIN20 for 20% off
Make a donation via Paypal: https://www.paypal.com/paypalme/dustinTWI
=============================
Table of Contents:
=============================
0:00 - Intro and Concept
Show More Show Less View Video Transcript
0:11
Hi, I'm Dustin Abbott. I have used and
0:13
reviewed a lot of Freewell's different
0:16
filters and filter systems over the past
0:19
six, seven years, something like that.
0:21
They are back with yet another new
0:23
filter system, and this is a locking VND
0:27
system. Now, unlike some previous
0:29
systems, this is really all about
0:31
circular filters, not square filters,
0:33
and as a result, it's a little bit more
0:35
of a compact system. It's going to be a
0:38
little bit easier to bring along if you
0:39
are just dealing with lenses that have
0:41
screw-in filters. Now, obviously, V&Ds
0:44
are most often going to be used for
0:46
those of you that shoot video to
0:48
particularly to be able to control the
0:50
amount of light coming in and so that
0:51
you can match shutter speed with what
0:54
you're looking for as far as your frame
0:56
rate on your actual footage. So, I'm
0:58
going to take a quick look at it at
0:59
that. However, for me, there's also
1:01
always the consideration of using
1:04
filters like this and particularly this
1:06
kit. It comes with both the VND, but
1:09
then also an ND32 filter to throw over
1:11
the top of that, which then allows
1:13
rather than going up to six stops to
1:15
allow you to go all the way up to 10
1:17
stops and even a bit beyond as we're
1:19
going to see. And so I'm going to look
1:20
at how it works for actually shooting
1:22
long exposures as well. So we'll look at
1:24
take a quick look at the system, see how
1:26
it works, and then we're going to pack
1:27
up and go out and see how it works for
1:30
actually shooting in the field. And at
1:32
the end of the video, I'll give you a
1:33
little bit of feedback after having used
1:35
the filters for a while at what I think
1:36
works, what I think doesn't work so
1:38
well. So, let's dive in. Let's take a
1:40
look. Okay, before I go into the field
1:42
to actually test the system, let's take
1:44
a quick look on how to actually do it.
1:47
So, I'm going to for this test today,
1:49
I'm going to be using the Schneider Cruz
1:51
Knox LK Samyang 14 to 24mm f2.8. This is
1:56
a great wide angle zoom. Now, it has a
1:58
77 millimeter rather than 82 millimeter
2:01
front filter thread. So, in this case,
2:02
I'm going to be using this adapter from
2:05
Freewell that is a 77 mm to 82 mm. And
2:09
so, first thing I'm going to do is just
2:11
going to screw that onto the filter
2:12
threads. Get it into place nice and
2:15
tight. From there, it's a matter of
2:16
getting into one of these very nice
2:18
cases and taking out the actual um
2:21
adapter here. So, I'm simply going to
2:24
pinch in on the sides to go onto that
2:27
adapter. Just that simple. In this case,
2:29
I'm going to rotate it and so it is top
2:31
facing and so I can actually see. So,
2:33
you have the option now of just sliding
2:35
this and that allows you to set the
2:37
various indeed levels. And then you can
2:39
adjust the whole filter to affect the
2:42
amount of uh polarization on that. And
2:45
so, it's a two-stage process there. You
2:47
can also add on other filters on top.
2:50
For example, their ND32 filter. You just
2:52
align the white line with this for the
2:55
the best seamless fit. So you just
2:58
squeeze that in, put it on and now you
3:00
can rotate that together and you can get
3:02
the ND32 effect. And so now you can do
3:06
variable all the way up to 10 stops
3:08
instead of moving up to just six stops.
3:11
Now you also have the option of using
3:13
their front cap here and so you have
3:15
some protection. This also has an NFC
3:18
code uh built right into it. So, if you
3:20
tap your phone on that will actually
3:22
take you to instructions and a clever
3:24
additional step do have the option of
3:26
adding on other filters. For example,
3:28
they have their snow mist filter. Um,
3:31
other mist filters that you can add on
3:34
there. As always, the presentation on
3:36
free well filters is topnotch. I like
3:38
the little addition here that if you
3:40
pull up on the strap, it helps to pull
3:41
the filter up for easy access and also
3:44
so you're not getting fingerprints on
3:45
there trying to reach down in for it.
3:47
So, the packaging is great, but is the
3:50
filter any good? Let's go out and find
3:52
out. All right, so I'm at the setting
3:54
where I am going to do a little bit of
3:57
shooting of the water that's coming down
3:59
over these rocks underneath these
4:01
bridges. Now, I'm going to be doing more
4:02
traditional photography, long exposure
4:05
here, just to demonstrate the
4:06
effectiveness of the filters in terms of
4:09
controlling the amount of time you can
4:11
have in your shutter speed. But then
4:13
also we're going to be taking a look at
4:14
if detail holds up, if uh color balance
4:17
and consistency holds up, some of those
4:19
other key things of evaluating actual
4:21
filter performance. Truth of the matter
4:23
is is that once you have the filters
4:25
mounted,
4:26
they're pretty easy to operate. Uh the
4:29
system works as far as the connection.
4:31
And beyond that, really what it boils
4:32
down to is the performance of the actual
4:34
filters themselves. So let's check out
4:36
and see how they do. All right, this is
4:37
the post shooting wrap-up here. So I
4:40
have been out I have shot video I have
4:42
shot uh stills long exposure for
4:44
photography and I have then gone through
4:47
the images and the clips to assess how
4:50
everything worked in the field and so I
4:52
have made some notes here about my
4:54
observations having actually used the
4:56
filter set. So, first of all, in terms
4:59
of just using it, I will say that once
5:01
you got everything mounted, the system
5:03
moves easily. And so, as per usual, I
5:06
Freewell impresses me very often with
5:09
their engineering on things, and it
5:11
seems like they have done a good job
5:12
once again of creating a system that is
5:14
very usable. You know, there's always a
5:16
tiny bit of a learning curve just as you
5:18
learn to align things and put things in
5:20
the right place, but once you get it
5:21
figured out, everything moves as it
5:23
should. Uh, I also appreciate the fact
5:25
that it's pretty easy to, you know,
5:27
particularly if you're using it on the
5:28
video end of things. As you can see
5:30
here, I'm making adjustments until I get
5:32
to the shutter speed that I wanted.
5:34
Before I shot this clip, I wanted I
5:36
wanted to shoot 4K 60. And so, I wanted
5:38
to match the shutter speed at 1/60th of
5:40
a second to get nice smooth footage. And
5:43
so, you can see in rotating that,
5:44
getting to where I wanted it. And then,
5:47
I was able to move into the clip and got
5:49
the results that I wanted. So, all good
5:51
on that front. So, in terms of using the
5:54
filter set, once you learn how to use
5:55
it, you get it set up. You know, it's
5:57
it's a great package and as noted in our
6:00
intro, it is it's quite small and
6:02
compact, so it's not hard to bring
6:04
along, particularly if you're just kind
6:05
of bringing along the main pieces for
6:06
it. How about some things that I like?
6:09
First of all, I was very impressed with
6:12
the color fastness. My early experience
6:14
with V&D filters um which stands for
6:17
variable neutral density was not great
6:20
in terms of the overall color
6:21
consistency. I found like the polarizing
6:23
effect was sometimes inconsistent and
6:25
thus the color balance wasn't always
6:27
great. Clearly things have improved and
6:29
these are very good on that front. Very
6:32
good color fastness and so that there
6:33
really wasn't a difference in the color
6:35
balance shooting without a filter and
6:37
then with the filter attached. I got
6:39
very similar results. I also found that
6:42
I was pleasantly surprised with the
6:44
overall sharpness. Again, I've not ever
6:46
been a fan of V&D filters. A lot of the
6:49
people that use V&D filters are
6:51
videographers. And in video, sharpness
6:54
matters obviously, but not to the same
6:56
degree as it does for photography where
6:58
you're going to be scrutinizing at 61
7:00
megapixels, which is, you know, way far
7:02
and above anything you're going to see
7:03
in 4K or even 8K for that matter. So
7:06
sometimes I wasn't impressed by how
7:08
sharpness held up as I moved towards
7:10
heavier levels of the ND effect. And so
7:13
in this case it sharpness held up fine.
7:16
So I really like that. Obviously I also
7:19
found that as always I'm impressed with
7:21
Freewell's presentation. And I know that
7:24
these days a lot of times packaging has
7:25
really gone more and more minimalistic
7:28
uh for varying reasons. But I do
7:31
appreciate the overall packaging and the
7:33
look of Freewell filters, which just
7:34
comes across to me as being really
7:36
topnotch in terms of presentation. I
7:39
also found that I got minimal vignetting
7:42
even when I was stacking some of these
7:43
filters on here. Now, to be fair, I'm
7:45
using a lens with a 77 uh millimeter
7:48
filter diameter filter threads. And so
7:51
that means I am stepping up a little bit
7:53
to 82 millimeters. At the same time,
7:55
however, as you can see here, even at 14
7:57
millimeters on this zoom, as I zoomed in
7:59
and out, I saw a little bit of extra
8:01
shading in the corners at 14
8:02
millimeters, but certainly not nothing
8:04
so heavy that I couldn't either ignore
8:07
it or uh, you know, it not be a
8:09
significant factor. And so, you know,
8:11
good news on that front as well. I
8:13
appreciate the fact that this particular
8:15
system is not bulky. A lot of add-on
8:18
filter systems originally, particularly
8:19
when you're talking about square
8:20
filters, they were massive. But then
8:22
even when you're talking about their own
8:24
K2 filter set, it um it was bigger
8:27
because it was still trying to
8:28
accommodate doing some square filters as
8:30
a part of the process as well. This is
8:32
just focused on circular filters. And so
8:35
as a byproduct, the system is, as I
8:37
mentioned, nice and compact, easy to
8:39
bring along. I also appreciate some of
8:42
the fine details like having the NFC in
8:45
the front cap and then in the rear cap,
8:48
having that built-in white balance kit
8:52
on that. It's just little, you know,
8:54
little details like that that just kind
8:55
of elevate the product and, you know,
8:57
may you may not use them every single
8:59
time, but the times when you do use
9:01
them, it's going to be like, yeah, I'm
9:02
glad I have that along. As far as things
9:05
that I don't like, you know, really
9:07
Freewell was the one that kind of
9:09
debuted the whole idea of a magnetic
9:11
filter system and then a magnetic V&D
9:14
filter system. So, the fact that they
9:16
have just completely abandoned magnetic
9:18
for, you know, their new locking thing,
9:20
yeah, it works. So, I like that. But at
9:23
the same time, it's like, well, I mean,
9:26
you guys pioneered the magnetic thing
9:28
and now you're completely abandoning it.
9:30
It just seemed a little bit odd to me.
9:31
Maybe that's just me. I also find that
9:34
obviously it's going to be a little bit
9:36
less versatile than the K2 system
9:38
because you don't have the ability to do
9:40
any of the square filters. So that means
9:41
you're not going to be able to do
9:42
anything like a graduated ND filter, you
9:45
know, where you need to slide things
9:46
down to get to the the proper level for
9:49
the horizon, for example. And that's
9:50
fine if you're not looking to do that
9:52
kind of thing. I do appreciate the fact
9:54
that it is more focused and particularly
9:56
probably for video use. And then thus
9:58
also it's going to be a lot cheaper. And
10:01
that leads us to our final section on
10:03
conclusion. I looked up the pricing on
10:05
all of this. And so they have two main
10:07
kit options. And so they have the first,
10:09
which is the lesser kit, which they call
10:11
the all day kit. It's going to retail
10:13
for about $250. And that uh basically
10:17
includes pretty much everything that
10:19
I've demonstrated outside of any kind of
10:21
mist filter being included. So it's a
10:23
pretty complete kit. It's got both the
10:25
ND32, it's got the very ND, it's got,
10:28
you know, all the various attachment
10:30
things that I've shown. And so, it's a
10:32
pretty comprehensive kit for $250. And I
10:35
will note that that's half the price of
10:36
the base K2 kit. So, feels pretty
10:39
reasonable there. And then they have
10:40
like what they call the mega kit for
10:42
$350.
10:44
And that is basically adding on both a
10:46
glow and then a snow mist filter. And so
10:49
only buy that kit really if you're
10:50
looking for some of those mist filters
10:52
because the the base filters themselves,
10:54
they cost about $80 if you're wanting to
10:56
buy other individual filters, be they
10:58
mist filters or other type ND filters.
11:01
You do have those options there. And so
11:03
basically what you're getting is a
11:04
discount on those two mist type filters.
11:08
That only makes sense if you really want
11:09
both of those filters. Otherwise, I
11:11
would say go with the base kit and add
11:13
on any kind of individual filter that
11:15
you might want. the end of the day, I am
11:18
impressed by the quality of the filters
11:19
in terms of the performance. The kit
11:21
works just fine. I mean, there's lots of
11:23
options out there for filters these
11:25
days. And so, I I mean, it must be a
11:27
challenge to be a filter maker to, you
11:28
know, kind of make yourself stand out
11:30
from the crowd. And so, at least they
11:32
are continuing to innovate and they're
11:33
trying some new things and it works. And
11:36
so, you're going to have to determine
11:36
for yourself whether or not the way that
11:38
this works is what you're looking for.
11:41
It does work. It produces good results.
11:43
Of course, there's lots of other kits
11:45
that also produce good results as well,
11:47
but it's always great to have more
11:48
options. If you want more information,
11:50
look in the description down below and
11:51
you can find linkage to going and
11:53
looking at the free well filter kits and
11:56
also some purchase links there if you'd
11:58
like to purchase for yourself. As
11:59
always, thanks for watching. Have a
12:01
great day and let the light in.