live_tv
Livestream Starting Soon
00
Hours
:
00
Minutes
:
00
Seconds
Up next in 10

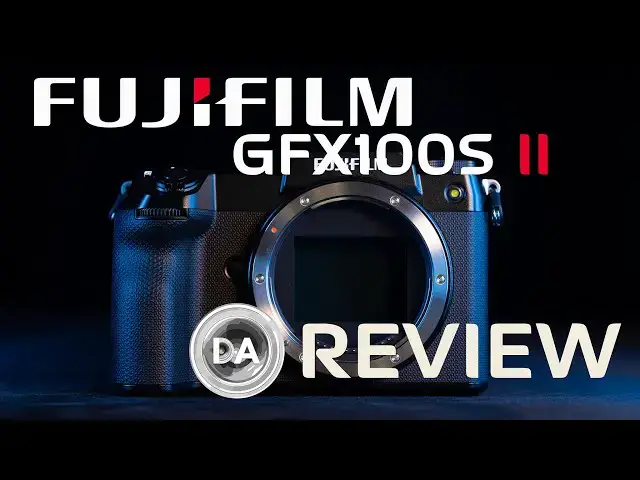
Fujifilm GFX100S II Medium Format Camera Review | Time to Switch?
Jul 30, 2024

Photographer Dustin Abbott shares a deep dive definitive review of the flagship Fujifilm GFX100S II medium format camera. It this the one worth switching to medium format over? | Read the Text Review: | Visit the Image Gallery: | Purchase the Fujifilm GFX100S II @ B&H Photo https://bhpho.to/3WsXQeD | Adorama https://howl.me/cmLUABvuTNo | Amazon https://amzn.to/3yhToY1 | Camera Canada https://shrsl.com/4mies | Amazon Canada https://amzn.to/3YqnyDe | Amazon UK https://amzn.to/3A6GbSA
Purchase the VG-GFX100 II Grip @B&H Photo https://bhpho.to/3ZqtLgV | Adarama https://howl.me/ckHTgp4kL6s | or Amazon https://amzn.to/450IvnH
Purchase the GF 55mm F1.7 R WR @ B&H Photo https://bhpho.to/3roC3cm | Adarama https://howl.me/ckHThLJkJE0 | Amazon https://amzn.to/3ruuWPC | Camera Canada https://shrsl.com/48lph | Amazon Canada https://amzn.to/3RBtkyf
Check out the DA Merch here: https://bit.ly/TWIMerch | Become a Patron: https://www.patreon.com/dustinabbott | On the Web: http://dustinabbott.net/ | Sign up for my Newsletter: http://bit.ly/1RHvUNp | Instagram: http://bit.ly/DLAinsta | Facebook: http://on.fb.me/1nuUUeH | Flickr: http://bit.ly/1UcnC0B | 500px: http://bit.ly/1Sy2Ngu Follow Craig @ https://www.instagram.com/craigstoffersen/
Want to support this channel? Use these affiliate links to shop at:
B&H Photo: http://bhpho.to/1TA0Xge
Camera Canada: http://bit.ly/DLACameraCan
Amazon: https://amzn.to/3HrY64d
Amazon Canada: https://amzn.to/3qG1p18
Ebay: http://bit.ly/DustineBay
Into the AM Clothing: https://bit.ly/intotheAMda and use code DUSTIN10 for 10% off
Make a donation via Paypal: https://www.paypal.com/paypalme/dustinTWI
=============================
Table of Contents:
=============================
Show More Show Less View Video Transcript
0:00
Hi, I'm Dustin Abbott and I'm here today to give you my Fujifilm GFX100S Mark II review
0:17
here today. A quick synopsis of what the GFX100S II is, it is a trickle down of the sensor and autofocus
0:25
improvements of the GFX100 Mark II that I reviewed last year. This is a slightly pared down, more affordable, less of a jack of all trades camera that is
0:34
a bit more focused on the photography side of things rather than the GFX100 Mark II's
0:40
more hybrid approach when it comes to video and even a little bit of sports activity
0:45
But still the GFX100S Mark II packs a lot of the goodness of the GFX100 Mark II into
0:51
a very good camera that retails for a whopping $2,500 less. So it's 50% less expensive and even more amazing if you're comparing it to the camera that
1:01
it's a true upgrade from, the GFX100S, it is actually got a long list of improvements
1:07
that we'll jump into in just a second and it's $1,000 less, which makes this a very
1:12
intriguing camera. If you are one of these people that have been kind of on the fence as to whether or not
1:16
to try out Fujifilm's medium format, bigger sensor camera. So if you're looking at it compared to the GFX100 Mark II, here are the list of the kind
1:27
of the main downgrades. It has only 7 frames versus 8 frames per second maximum burst speed, probably not a big deal
1:34
for you. It does have a lower resolution EVF, it is 5.76 million dots versus 9.44 million dots
1:43
and that viewfinder on the GFX100 Mark II is the best that I've ever used
1:48
It is pretty special. Much lower video specs here. We've got a maximum of just 4K30 versus all the way up to 8K30 in the GFX100 Mark II
1:58
We only have two SD UHS-II, but just SD cards here as compared to having a CFexpress type
2:04
B card in the other camera. We also have just a micro HDMI output versus a full HDMI
2:12
Again, more video centric in the GFX100 Mark II. And buffer depth because of that memory card limitation is much, much lower
2:21
Using the lossless compressed RAW kind of standard, which is my favorite file format
2:26
you're only getting 19 frames in the buffer here compared to 302 in the GFX100 Mark II
2:33
So obviously that's a pretty huge difference. If you're wanting to shoot action, this is just much less appealing in that regard
2:40
But if you look at the list of upgrades from the GFX100S, we have a new and improved sensor
2:46
inherited from the more expensive camera here. We now have a base ISO of 80, which is important for a number of reasons
2:52
While the viewfinder was a downgrade compared to the GFX100 Mark II, it at 5.76 million
2:58
dots, that's still quite a bit higher than the original GFX100S, which had only a 3.69
3:03
million dot viewfinder. That burst rate of only seven frames per second is two faster than the five frames per second
3:10
in the older model. This camera is lighter, believe it or not
3:15
It has better battery life. It has eight versus six stops of rated in-body image stabilization performance
3:22
It has that awesome new grip material that we found on the GFX100 Mark II
3:27
And most incredibly, it is actually a thousand dollars cheaper than the camera that it replaces
3:33
So it's pretty rare that you get a long list of upgrades and a price tag that's about 20
3:38
lower than what the previous generation was. So all of that is very, very impressive
3:43
So let's talk about what we have got here as far as this build and design
3:47
As noted, we've got that new Bichamontex wrap material here on the grip
3:52
I just love this stuff. It looks fantastic. It feels fantastic. It is a true upgrade of previous generation grip materials
4:01
The size here, as you can see, is moderate. It's basically the size of a big full-frame camera
4:07
It is 5.9 inches wide, 4.1 inches tall, and 3.4 inches deep
4:12
That's 150 millimeters by 104.2 millimeters by 87.2 millimeters. In the hand, I thought, you know what, this doesn't feel much different than my Z8
4:22
And so I looked up the specifications and found that when, although the cameras aren't
4:26
shaped identically, when I calculated the internal volume of the outside measurements
4:31
I found that this is actually smaller than what the Z8 is
4:36
And not only that, it weighs in at 883 grams or 1.9 pounds with the battery and the memory
4:42
cards installed. That is 27 grams lighter than the Nikon Z8. And so this is a camera that moves up to a much larger sensor, but it retains a body
4:53
size of basically a full full-frame camera. So that's really, really impressive
4:57
And I will note, this camera feels just fantastic in my hand
5:01
The grip just molds to my hands. It doesn't feel overly large
5:06
I think it's moderately sized enough that quite a few people would find it comfortable
5:10
Now, if you have really small hands, obviously, and you want to travel light, medium format
5:14
is not for you anyway. But this is maybe the most accessible point of entry that we've seen in terms of the body
5:20
style to Fuji's larger format layout. The actual layout itself, as far as the controls, the wheels, all of those things, it is basically
5:29
identical to the GFX100S, just a little bit of a different wrapper on the outside
5:36
Using the same batteries we've seen for a while now, it's the ubiquitous MPW235 battery
5:43
Here it is rated for 540 shots for stills, and they rate it at about 120 minutes, 2 hours
5:49
if you're recording 4K30 video. As noted previously, we do have, as far as memory card storage, we have dual UHS-II rated
5:58
SD card slots. We have several control wheels here, but what we don't have is a third wheel at the back
6:05
We do have a little bit of a navigation joystick, but I certainly would love to see either a
6:09
D-pad or a wheel. It seems like there's plenty of space for it. And so just a little bit more control right on the camera itself
6:17
There are a variety of customizable controls, some custom buttons in different places, up
6:22
on the top, here at the front, and most of the buttons or wheels themselves can be programmed
6:27
to a variety of functions. And nicely here, you do have the option of switching between a movie and a still setup
6:33
to where you can set up a custom layout for both different configurations
6:39
Now on the top, we do have a top mounted LCD screen that will be a passive screen when
6:45
the camera is powered off, so it will retain the information on there, which I actually
6:49
find useful. It's interesting. There's a lot of useful information that is displayed here
6:54
Now on the GFX 100 Mark II, there was a little bit of a tilt that actually was an improvement
6:58
in terms of the visibility. We've gone to the more standard flat configuration here, but still a very, very useful screen
7:07
Now at the back, we have a pretty typical LCD screen here
7:11
I believe it's 3.2 inches in size, 2.36 million dot. The biggest thing that I'm going to complain about here is that I have not seen one ounce
7:22
of progress on Fuji's touch capabilities in the now six plus years that I've been reviewing
7:27
Fuji bodies. I've reviewed, I believe this is the 14th Fuji camera that I've reviewed, and I have
7:33
seen zero improvement over all of that time on their actual touch capability
7:38
So once again, we have some limited touch. You can do some navigation of the Q menu
7:43
You can do touch to focus and touch to take a photo. However, it's not nearly as responsive as other cameras, and so there's a little bit
7:50
of input lag as you touch it, and also you have zero full menu navigation there
7:55
There's just a very limited number of ways that you can interact by text
7:59
As before, this is a tilting screen that will tilt on a couple of axis
8:04
It's okay, and I know that there's a huge argument out there about tilt versus articulating
8:08
I'm on the articulating camp, but you know, the screen is what it is
8:12
It does what it does. It's about what you would expect. What's been the case here
8:18
The viewfinder, as mentioned, is a downgrade from the GFX 100 Mark II, but it is still
8:23
very, very good. It has 5.76 million dots of resolution, but it's big, it's clear, it's very easy to use
8:33
It's engaging to look through. I will note that when you are shooting burst, that there is blackout between shots, so that
8:38
can make it a little bit more of a challenge of framing action, but you know, that is par
8:42
for the course. You can eliminate blackout, but you have to drop down to a very low speed, basically
8:50
frame rate, and so it's maybe not hardly worth it. I do want to point out before I move on from the build here that we have the IBIS and body
9:00
image stabilization that is inherited from the GFX 100 Mark II. It's rated at eight stops
9:05
That is just fantastic, and in real world operation, obviously, I was using this new
9:10
guy and it does have OSS in the lens or OIS in the lens itself, but I will point out that
9:16
I was able, I was just very pleasantly surprised by how stable of results I could get using
9:22
this 500 millimeter lens and with the 1.4 attached to it, that gets you up to in the
9:27
range of 700 millimeters. The fact that I could still get stable results with that is fantastic, but for video, you
9:34
can see here in this shot that even doing handheld video with just the 55 millimeter
9:38
F1.7, everything was nice and stable. It's really, really a fantastic system, and so as far as the handling goes, I mean, I
9:46
do have those minor complaints, but overall, this is a camera that handles very, very nicely
9:51
and frankly, it feels fantastic in the hand. There's nothing here that would turn me off from buying into this camera when it comes
9:59
to the overall controls, build, and handling. Now, unfortunately, I can't really say the same for the autofocus system
10:07
Now, to be fair, again, we are inheriting a slightly improved autofocus system from
10:12
the GFX 100 Mark II. We have the X-Processor 5 now that adds AI tracking both in stills and video for a wide
10:22
variety of subjects, selectable subjects that you can track and that it will recognize
10:28
and for a variety of things, it actually does a pretty good job of tracking and maintaining that
10:35
Even, I did some bird in flight work, and you can see here that it did a reasonably good job of identifying and then tracking the bird until it got too near the edge of
10:43
the frame, and again, because of that blackout, I couldn't frame quite as nicely as what I
10:47
would like, but if it got near the edge of the frame, it lost it towards the end of that
10:52
sequence and didn't quite get it back. The bigger problem here is that it's essentially a new coat of paint over the same AF system
11:01
that I have seen since the X-T3, and that is that it is a hybrid contrast phase detect
11:07
system with 425 selectable points. The hardware has remained pretty much the same here, and at this stage, Fujifilm is
11:15
desperately in need of an upgrade, not just in this, but in all of their cameras, because
11:20
the problem is that while that system I found to be fairly competitive six years ago, at
11:25
this stage, it's not competitive at all. Everyone else has dramatically improved, and this is still lagging behind
11:33
Now, relative to past medium format systems, this is a fantastic focus system, so it all
11:38
depends on the measuring stick that you're using there, but just note that this isn't
11:43
going to be as fast, reactive, or reliable as full-frame cameras, but it is notably improved
11:49
for when I started reviewing GFX as well. I found that there is fairly good AF accuracy on still subjects, either using the 55mm f1.7
12:00
which is the largest maximum aperture currently available, and in using this 500mm f5.6, which
12:06
obviously has very narrow depth of field at closer distances, I found that in both cases
12:10
I was able to get well-focused results. I was happy with that
12:15
There's some times that autofocus gets stuck, or in the case of the 500mm, it does a
12:19
little bit of an opposite rack in the wrong direction that will slow down focus for a
12:23
moment, but overall, it gets the job done, and the ability to track things, you can tell
12:29
that it's doing a pretty good job of staying locked on. Now, as far as the utter reliability of the AI tracking, I find that the keeper rate isn't
12:37
as high as what I expect from some other systems, and so there still is some shots that were
12:42
just a little bit off one direction or another, but the vast majority of them are well-focused
12:48
The biggest place where it falls apart is where there is movement. It's just not reactive enough
12:52
You can say it's autofocus system, you can say it's the focus motors, whatever you want
12:57
to blame it on, the reality is it's just not quite as good
13:00
So, for example, when trying to acquire Birds in Flight, it took some work to, and once
13:06
I could get locked on, then the AI could start to do its work, but it's that initial acquisition
13:11
that is just, it's just not like snappy and reactive in the way that I have come to expect
13:15
from the very good full-frame cameras. The other thing, obviously, here that we've already kind of touched on is that there is
13:22
very limited buffer depth compared to the GFX100 Mark II. So with the, here at seven frames per second, you can get as many as 184 JPEGs, but 30 compressed
13:33
RAWs and just 19 lossless compressed RAWs, and if you go down to, you know, full RAWs
13:39
plus JPEG, you're going to drop into like the 13 range. So obviously the buffer is going to fill really quickly, so you're going to have to
13:45
time your burst appropriately. As far as the Video AF, it's basically the same AF that I saw on the GFX100 Mark II
13:54
and it's got all of the same strengths and unfortunately a fair long list of weaknesses
13:59
as well. I find that you can see from just standard focus transitions, they're okay, but you'll
14:05
also note that unless there's a really obviously a contrast point for the focus to attach to
14:11
it will do some pulsing and hunting as it tries to make up its mind what it's going to focus on
14:16
It will get stuck sometimes and not move forward, and from this clip you can see I was trying
14:21
to touch to move focus, and you can see the dips as I touch the screen repeatedly, but
14:26
focus did not move for me, and I just find touch to focus in video to be really, really
14:31
unreliable and mostly just frustrating. So I mean, it will do the job basically
14:38
It doesn't do a lot of just jumping around if you're shooting at a still subject, so I appreciate that
14:43
That is a place where they've improved over past Fuji bodies, so there's a little more
14:47
stability in static shots, but when you're introducing focus changes, it's still just
14:52
not fantastic. And so auto focus I would say is easily still the weakest area of this camera despite the
14:59
improvements that they tout. Now on the video side of things, as mentioned, this is not as video focused as the GFX100
15:06
Mark II. So rather than having options ranging all the way up into 8K, we are limited at 4K30 here
15:13
A few less framing options, 169 or 179 are options at 4K
15:19
We do have good options when it comes to bit rates here, all the way up to 720 megabits
15:24
per second, and so obviously that can get you really, really high quality footage for editing
15:30
You do have the ability to shoot Apple ProRes format, however, there's a caveat for that
15:36
It is only if you attach a solid state drive SSD to the USB-C port, and so you cannot natively
15:43
record it in camera. You can also output some things via HDMI, but really it doesn't unlock a whole lot of
15:50
additional stuff other than being able to output raw footage. But as far as resolution or bit rate, it's the same as what we see in camera
16:03
You do have Fuji's F-Log2 here, and so some options there, waveforms, vectorscope, those
16:10
kind of things. But it's going to be the more basic standard approach to video, although you can still
16:18
get some really beautiful shots because of that amazing sensor and some good lenses that
16:23
you can attach to it. So finally, let's talk about the sensor
16:27
I'm going to include at the end of the video my breakdown of this sensor from the GFX100
16:31
Mark II. It is an identical sensor. It is a 102 megapixel BSI CMOS 2 sensor, and that sensor is fantastic
16:43
As far as what I've tested, it is the absolute top of the heap. The best quality I've ever tested, incredible amount of resolution, 11,648 by 8,736 pixels
16:55
102 megapixels is a massive amount, but in a full frame, excuse me, in a medium format
17:02
size sensor, it's really no problem at all. It's beautiful resolution. It comes at very few penalties otherwise, and the images are just wonderful to work with
17:14
And I can tell, even though I have tested dozens and dozens of cameras and shot with
17:18
many of them, I still, there's nothing quite like editing the files from this
17:23
Now those files can be large. It can be as large as in the 200 megabyte range per file
17:29
Though, if you're using my preferred format of their lossless compressed, they're 120
17:35
megabytes if you're shooting in 16 bit and it drops to 92 megabytes if you're shooting
17:39
in 14 bit. So you do have some flexibility to where if you're not overwhelmed by the size of it
17:45
The base ISO of 80, it not only opens up a little bit more dynamic range, but what it
17:50
also does is allows you to access Fuji's very useful DR 200 at just ISO 160, which
17:56
is fantastic. You're going to get cleaner results overall. And if you're shooting landscapes, that's where I would shoot in that range because
18:03
what it's going to allow you to do is to have a little bit more room in the highlights and
18:07
still have very, very clean shadows. And so you can get amazing dynamic range by doing that
18:12
And then obviously at ISO 320, you can open up the DR 400 and the DR 400 is going to sample
18:21
your, it's going to sample the shadows from the current level, but it will get the highlights
18:25
from two levels beneath that from the base ISO, which allows you to have just a lot of
18:29
headroom in the highlights. Very, very useful. I found as far as the ISO performance, it stays the, you know, the natural limit is
18:38
up to 12,800 and it actually stays surprisingly clean for 102 megapixels
18:43
I would consider images in many situations to be very useful even at 12,800 and less
18:49
than that. I mean, you're obviously going to see a little bit more grain, but it retains quite good
18:53
dynamic range, some flexibility from editing even at higher ISO values. As far as the dynamic range, well, photons to photos test the DR rated at 12.55 stops
19:07
For the older sensor that was in the GFX 100S, they rated it at 12.33
19:12
So there is a clear improvement here. And if you say, well, that doesn't sound super high to me, realize that in all of their bank
19:19
of tested cameras by their testing methods, there are only three cameras that are rated
19:25
higher for dynamic range. And those are even larger sensor, one Hasselblad and two phase one bodies that have medium
19:32
format, but have a larger sensor size than what a Fuji's medium format does
19:37
And so, I mean, this is pretty much the top of the heap of attainable useful cameras
19:41
And so it is, it is fantastic. Obviously now as has become ubiquitous across Fuji's most recent bodies, we have the real
19:49
Ace, which I really, really love as a new film simulation. I believe there's about 20 film simulations that are included there
19:58
Very useful. Colors, tonality, detail, contrast, all of those things are just exceptional
20:05
I love the images that come off of this and bottom line, there is no full frame sensor
20:09
that can match this performance. And again, if you want a deeper dive into that sensor performance, I will include that
20:14
at the end of the video here. My conclusion is this, this is probably the best argument for medium format yet
20:22
It is the same price as full frame. The body is no bigger
20:26
The IQ is top notch. Now, to be fair, full frame cameras will, that arrive near somewhere around that $5,000
20:33
price tag, they will have better autofocus, faster burst rates, deeper buffers, better
20:37
video specs, almost certainly. But none of them can match the pure imaging bliss that the GFX 100S Mark II provides at
20:46
that $5,000 price point. So it really comes down to what you're in photography to do
20:50
And if it's for you, it's all about the images, if you're a landscape photographer, architecture
20:55
you know, city, portraits, you know, that kind of thing. This is sweet because it is going to provide you images that you're just going to love
21:05
and you're going to love the editing process and what you can do with those images
21:10
And I think that that really makes a very compelling argument for medium format that
21:14
may just be enough to tempt people who have been sitting on the fence. You want more information, you can check out my text review that is linked in the description
21:21
down below. There's an image gallery there if you want to look at more photos
21:25
And if you want more information, you can stay with me right now as we dive into the
21:29
sensor breakdown. So here is our base setup, kind of our still life that we will use as a part of these tests
21:36
And so I just wanted you to take a moment to look at, number one, we'll take a look
21:40
here at shadow information. As you can see, the shadow is really consistent, dark there, and you can see very little noise here
21:48
If we take a look in this section here, we can see good contrast
21:52
We can see that there's no noise inside of there. And then as we look at these color swatches, we can see the way that they're supposed to
21:59
look shooting at base ISO, which is ISO 80. Now, typically I jump right to ISO 1600, which is five stops from base ISO
22:07
In this case, however, since base ISO is 80, five stops up is 1250
22:12
So just taking a quick look as we compare at a hundred percent magnification, the areas
22:17
for example, on here where we can see where there could be additional noise that is introduced
22:22
Now we can see that the shadows are not quite as dark. So there's just a little bit of uneven pixelation there, but without having them side to side
22:31
side by side, you probably wouldn't pick up on it. Likewise, here we can see the contrast looks the same
22:36
Color fastness is very good. There's not any kind of real noise that is there
22:40
And our color swatches, everything looks fine and normal. And this area here, which is where I start to see noise quite often, there's really not
22:47
much to see. So very, very clean at five stops up. So how about if we jump up to 5000, which is the equivalent of 6,400 on most cameras
22:56
It was at this stage where, for example, the 5DSR was just complete garbage
23:00
It was just noise everywhere. It was unusable. You can see in this case, though, with the modern advances and also a medium format
23:09
you can see that while there's a little bit of extra noise there, it still looks really
23:13
really fantastic. We have quite a consistent look overall in the shadows, though not as dark
23:18
And we can see that what noise is here is extremely fine
23:22
No issues with it at all. Details still looks great. Color fastness looks great
23:26
Not really much to complain about here. Now here I have the minimum native ISO and the maximum native ISO side by side
23:34
So we've got 80, we've got 12,800. You can see that looking at the images as a whole, they look very, very similar
23:40
I would say there is just a very, very slight drift towards magenta as far as the color balance
23:47
But overall, you can see that the images don't really look a whole lot different
23:51
And if we zoom into a 100% magnification, we can see the contrast still looks quite good
23:56
Obviously, detail is good. Not quite as good, but still looks quite good
24:01
There is obviously some additional noise in here, but it's very, very fine noise
24:06
Nothing radically bad. We can see that there is some uneven pixelation in terms of the shadow area, some lighter
24:12
pixels there. But by and large, it still looks very clean, even at 100% magnification
24:18
Here's an image shot at 12,800. And in particularly with using one of the Acros monochromes here, I think the image
24:25
really looks actually really great. And I certainly, even at a pixel level, you can see that the detail there is really, really nice
24:33
And if we look towards the area here, you can see some very fine noise that is there
24:39
But overall, it looks really nice and clean. You can see that there's really not a whole lot to be concerned about there
24:45
I think that is 100% usable. Now you can go on to an expanded range beyond that all the way up to 102,400
24:54
But I would go up probably another stop beyond this. But within the native range, I would not hesitate to use any of these settings
25:02
To me, that's a great looking image right there. Now for testing dynamic range, what we're going to do is starting with the highlights
25:09
we're going to move up adding overexposing, in this case, just by one stop, and then taking
25:14
that stop back out in post-processing. So this is the same image on the right
25:18
It's just had a minus one applied to the exposure. And so you can see that that brings us back down to normal
25:25
What we're going to look for as we progress is the ability to preserve places where textures
25:30
start to get blown out. For example, here in this dial, you can see that some of the texture information was lost
25:35
It's been regained in post. So that is our ability in post-processing to be able to correct for these things, which
25:42
is a byproduct of dynamic range. Now obviously at this one stop overexposure, no problems
25:48
We can get all of our color swatches back, get all of the highlight places back, no problem
25:52
at all. So here at two stops of overexposure, you can see that some things are really blown
25:59
out here at this point. And so let's take a look here at the front of the Pentax face
26:04
You can see that's really blown out in this dial that we looked at before
26:08
You can see, however, though, that we have basically been able to recover all of that information
26:13
So at two stops, this is nice and clean. You can see that some of the colors were starting to blow out, but you can see that we've been
26:19
able to recover them in post without any kind of issue. Now at three stops of overexposure, which you can see is extremely overexposed, our
26:27
ability to recover everything is now lost. You can see that some of the colors, they're not a hundred percent back
26:33
You can see, for example, here on this kind of pink color that while we have kind of a
26:39
darker frame where there's a little bit of shadow there where it's been fully recovered
26:43
you can see that in the center of it, a lot of that color swatch has been lost
26:47
And then likewise here, you can see that some of that texture information, it just hasn't
26:51
come back. It doesn't look as it should in the timer face here
26:56
Some of the color there has not been brought back either. Now, one of the things that is interesting about Fuji's cameras is that they have opening
27:02
up at ISO 160 in this case. So one full stop up, we have the ability to open up what's called DR 200
27:11
So in this case, what happens is that the shadow information is sampled from ISO 160
27:17
but it would sample the highlight information from one stop down. So in this case, ISO 80
27:22
And so going to that base ISO for the highlights. So as we can see, even though it's overexposed three stops as before, we can now recover
27:30
all of these things much, much better because we're basically recovering the equivalent
27:34
of like a two stop of overexposure rather than three stops because it's sampling from
27:40
one stop down as far as that. And so we can see, for example, in this color, rather than just having kind of the fringe
27:46
we can retain that full color. We can see here that we've got that texture information back without the loss of highlights
27:54
Now if we move on to ISO 320, it opens up DR 400, which is the upper limit there
28:00
So now rather than now we're taking the shadow information from ISO 320, but we're going
28:05
two stops back to the ISO 80 base ISO for the highlights
28:10
Now it's still three stops of overexposure, but what we can see here is that if we take
28:14
a look at some of these blown out high highlights, we can see that now there's even more of that
28:19
texture information that has been brought back. It just looks cleaner in general, just a little bit more consistent even in terms of the color
28:27
consistency here on the timer face. What that also means is that we could overexpose even a stop higher and basically get the equivalent
28:35
of this equivalent here, um, shooting at the DR 400 type setting
28:41
So it's always something that I enable and if I happen to think I'm going to need extra
28:46
dynamic range, I will adjust up my ISO and so that I bring back that flexibility
28:52
Now testing for shadow recovery is actually really, really simple here. I'm going to jump all the way to five stops, which is the maximum I test out to
29:00
You can see everything is deeply crushed in shadow by that point, but you can also see
29:04
with the recovery result on the right that it is a flawless recovery here when it comes
29:10
to recovering shadow information. We can see looking into this area right here, for example, all of this has come back
29:17
Detail looks great. Contrast looks great. There's no noise there in the shadows
29:21
Likewise, inside of here, all of that information comes right back out
29:25
Looks nice and clean. We can look here in the spine of the color swatches and we can see everything is recovered nicely
29:34
There's no color blotching. Uh, there's very little noise that is there. It just looks really, really fantastic
29:40
Not an amazing result. In fact, if we put the base ISO result here, which is just perfectly exposed, not been
29:46
touched at all on the left side and that fully recovered result, you can see the difference
29:50
in the shutter speed getting us to five stops of underexposure. You can see putting them side by side that they actually look remarkably similar as before
29:58
at the limits. I think that there's just a little bit of a shift towards magenta, but if we pop in
30:03
here to a pixel level, we can see that detail looks really remarkably good there
30:09
No problems there that texture information looks good. And what additional noise is here is just really, really fine
30:16
It's not going to be any kind of real issue. Even the contrast here in the shadows looks for the most part really remarkably good
30:23
This is an incredible recovery result for be underexposing to that degree
30:29
So having good dynamic range is very useful for giving you options when you post process
30:34
So for example, in this image, it was low directional autumn sun
30:38
And so my golfer buddy here was very strongly backlit here. And so I was working out of the shadows
30:45
So that's not obviously all that effective, but we can see that because of the good dynamic range, I was able to bring that exposure up on his face and on his body
30:54
And you can see now that I have a perfectly clean result with plenty of detail there
30:58
I've recovered all that information, but I still have the flexibility of having a nice
31:02
exposure to the rest of the image. This case on the right, obviously I've been able to bring up the shadow information
31:08
I've been able to show you a little bit more of what's going on outside
31:12
The question is whether or not that produces a better image. Sometimes seeing what's outside a window is really more distracting than just having a
31:20
kind of a blown out area where the light is coming into the scene
31:24
And so having more dynamic range is very useful. And I would say we have somewhere close to 12 and a half stops here for editing, but
31:31
it's not always the right choice to make. Sometimes leaving some mystery in the shadows or in the highlights is worth doing
31:38
In other shots, however, the ability to draw out shadow information and highlight information
31:43
produces a much nicer end result. So here on the left, you can see the kind of the native result because of that great
31:50
dynamic range. I was able to bring out the full potential of the sky, which looks quite lovely
31:54
There's nice gradations of color, some details from the clouds that we can't see here on
31:58
the left side. Then also in the shadow information, I've been able to just kind of pull them up to
32:03
taste where I'm exposing some of the information and the color there while leaving a little
32:07
bit of contrast with some shadow area. And those are the kind of options that having great dynamic range enables for you
32:14
Now, Fuji is known for having great color to begin with, and that is certainly truest
32:19
you're talking about their medium format where you just have really, really beautiful colors
32:24
that the camera can capture. For portraits here, you can see that the overall colors of the environment are very, very rich
32:31
While the colors of my subject look really great, they pop out. And as you can see, if we pop in there and look at a pixel level, you can see skin tones
32:39
look really nice. And obviously there's a huge amount of detail even at F1.7 from the new 55 millimeter F1.7
32:47
And of course, part of what makes medium format so special is its ability to have just
32:51
incredibly shallow depth of field. And in this case, obviously if I zoom in here and look at Nala, you can see that the depth
33:01
of field here is measured in just millimeters, very, very tiny. But then the bleed off to the background is just really, really gorgeous
33:09
And finally, I'll note there is one new film simulation here, and this one is called Rila Ace
33:15
And so it is a new one just debuting here on the GFX 100 Mark II
33:20
And so this image has been processed with it. You can see that it results in a really nice looking image, just another addition, another
33:27
option to give you a nice film type look to an image
33:31
And it shows up really nicely in this. So hopefully a look at the sensor dynamics has helped you to understand the camera a
33:37
little bit better and helped you to make a more informed decision. And while I've covered the GFX 100 Mark II in this breakdown, it is the exact same sensor
33:45
that's found in the GFX 100S Mark II. As always, thanks for watching
33:50
Have a great day and let the light in
#Visual Art & Design
#Photographic & Digital Arts
#Computers & Electronics
#Camera & Photo Equipment