Up next in 10

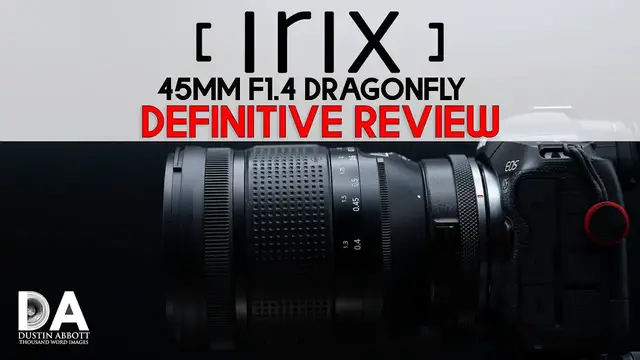
Irix 45mm F1.4 Dragonfly Definitive Review | 4K
Jul 19, 2023

Photographer Dustin Abbott shares a thorough review of the Irix 45mm F1.4 Dragonfly manual focus prime. | Video Sponsored by Ridge Wallet: https://www.ridge.com/DUSTIN Use Code “DUSTIN” for 10% off your order | Read the Text Review: https://bit.ly/IRIX45da | Visit the Image Gallery https://bit.ly/Irix45pics | Purchase an IRIX 45mm F1.4 @ B&H Photo https://bhpho.to/3fmSlKm | Amazon https://amzn.to/3m3p5tK | Amazon Canada https://amzn.to/31uhuLi | Amazon UK https://amzn.to/3foz0bW | Amazon Germany https://amzn.to/3sxktyp | Ebay https://ebay.us/IuKZBt
Check out the DA Merch here: https://bit.ly/TWIMerch
=============================
Table of Contents:
=============================
0:00 - Intro
4:36 - Build & Handling
6:57 - Focus Action
7:58 Image Quality Breakdown
20:25 Conclusion and Pricing
---------------------------------------------------------
Purchase a Canon EOS R6 @ B&H Photo https://bhpho.to/3dCt9g3 | Amazon https://amzn.to/3o0T4Tm | Camera Canada https://shrsl.com/2k730 | Amazon Canada https://amzn.to/3424pLc | Amazon UK https://amzn.to/2H9e6yj | Amazon Germany https://amzn.to/2T0BkJJ | Ebay http://bit.ly/EOSR6dla
Purchase a Canon EOS R5 @ B&H Photo https://bhpho.to/3iMH18x | Amazon https://amzn.to/33L3D53 | Camera Canada https://shrsl.com/2jqth | Amazon Canada https://amzn.to/3iEo6wE | Amazon UK https://amzn.to/3jLHol4 | Amazon Germany https://amzn.to/3nxaE1h | Ebay http://bit.ly/EOSR5dla
Want to support this channel? Use these affiliate links to shop at:
B&H Photo: http://bhpho.to/1TA0Xge
Show More Show Less View Video Transcript
0:00
Hi, I'm Dustin Abbott and I'm here today to give you my definitive review of the new
0:15
Irix 45mm f1.4 lens. Now it's available in a variety of mounts and that includes
0:23
for Canon EF, which I am reviewing here today, Nikon F, also Pentax K. And then there is a
0:31
variant of this lens that is about to be released for Fuji's GFX medium format system. And so it's
0:40
a little bit of an irony to me at this point in that Irix makes exclusively manual focus lenses
0:47
They are very nice manual focus lenses with very good quality focus action
0:53
However, they are persisting at this point in developing them only in DSLR type mounts
0:58
with the exception, obviously, with the new variant of this that is coming for the Fujifilm GFX system
1:06
But by and large, in the traditional systems, we have gotten only mounts like Canon EF that I'm using, not Canon's RF
1:13
even though as you can see I'm using it adapted to an RF body and I suspect if you are a Nikon
1:20
shooter you know bringing it to Nikon Z or Z is going to be you know the preferred way of handling
1:27
things for the simple reason that manual focus lenses just work a whole lot better on mirrorless
1:32
bodies so in this case you know by choosing to shoot it on the you know EOS R5 as I have here
1:38
as opposed to like a 5D Mark IV. What I'm gaining is that I've got all of the manual focus aids
1:44
including Canon's really effective focus guide, which I just find a lot of fun to use
1:51
And it produces really good and consistent results. Sometimes I'll still magnify, you know, just to visually confirm focus
1:58
or if I'm really critically trying to nail in a really small area
2:03
But overall, I find that it works quite effectively. And so I'm getting that
2:07
you have the ability to do overlays, and so you can show focus peaking. And then on top of that
2:13
in a lot of mirrorless bodies like this one, I am getting in-body image stabilization. So while
2:19
the lens itself does not have stabilization, I was able to get this shot, for example, at one-fifth
2:24
of a second handheld, which is obviously another asset. And one of the kind of hidden assets there
2:31
Whereas I find that a body with in-body image stabilization also allows you to have just a little bit more precision while manually focusing
2:40
Because in the viewfinder, you're eliminating some camera shake out of the equation
2:44
So definitely the preferred platform for me. And I suspect for a lot of potential IREX shooters
2:50
So I want to just kind of preface this video by strongly recommending that they begin to develop for these mirrorless mounts
2:56
as that I think they're, number one, there's room on these new mirrorless platforms for some good quality lenses
3:03
including manual focus lenses. And then also they're just a much more logical platform for shooting manual focus lenses in general
3:12
And in many cases, they have more robust video features, which lenses like this also make for effective video lenses
3:19
Now, they do have a complete cine version of this particular lens
3:24
and it's geared to allow for all of the various cine attributes
3:30
And so if you're looking for a cine version of the lens, that's a T1.5
3:35
and so definitely worth looking at if you're wholly wanting to do cinematography
3:40
In this case, however, though, you do have a lens that works quite well on these new mirrorless cameras
3:46
or even for DSLRs, but works really well for both video and stills if you're into manual focus
3:53
Now today we're doing the definitive review, so we'll jump into things in detail. If you would prefer a quicker overview, check out the standard review instead
4:02
Today's episode is brought to you by Ridge, the wallet redefined. Give your aching rear a break and ditch that bulky old wallet full of stuff you don't need
4:11
and move to a sleek aluminum, titanium, carbon fiber, or even their new 18 karat gold Ridge wallet
4:17
It takes up a little more room than a credit card, has RFID blocking technology to protect your valuable information, and comes with a lifetime warranty
4:27
Visit Ridge.com forward slash Dustin and use code Dustin to get 10% off your order, along with free shipping worldwide
4:36
I do want to thank Ridge for sponsoring today's video. We're going to start off by taking a look hands-on at what we've got here in terms of the build and the handling of the feature
4:46
So let's take a closer look at the Irix 45mm f1.4. And the first thing that stands out to me is that, as always with Irix lenses
4:55
it comes with a really nice molded case that offers both high protection value
5:00
but also is, because it's so tightly molded, it doesn't take up a lot of additional room, making it very useful
5:06
Now, the 45mm comes with a lens hood. It's just plastic, kind of a matte finish inside, not anything particularly special
5:15
and as you can see it is fairly long and deep to provide some protection value from stray light
5:20
Now this lens has their dragonfly finish and essentially what they've done is they've merged
5:26
a few of the elements from the original kind of bifurcated blackstone and dragonfly finish to where it has some components of both including that molded case but we have a mixture of metals and then you know various composites we do have weather sealing inside
5:42
including a gasket and then i believe four other seal points 77 millimeter filter thread up front
5:49
then we also have both their kind of unique lock and then unlock kind of tension mechanism for the
5:56
focus ring, which is kind of a uniquely Irix thing in a lens like this. You can see that all of the
6:03
various engravings there, they have a luminescent paint and that it also has this really unique
6:09
ridge and marker, which I find useful for focus pulls for video. So you kind of know where you're
6:14
going to end up. There's a unique rubberized texture to the focus ring and about 175 degrees
6:21
of focus throw. Overall, the build of it is nice. It's not a lightweight lens. It weighs in at 925
6:28
grams, and it is 105 millimeters in length, 87 millimeters in diameter. You have nine rounded
6:36
aperture blades inside, and you have a beautiful focus throw that makes this lens really quite a
6:43
joy to use out in the field if you don't mind manual focus. There's an electromagnetic aperture
6:48
iris and so that's all controlled from within the camera. So as far as the handling goes here
6:55
this is a lens that I really like and to me I think that the addition that we saw starting with
7:00
the 150 millimeter f2.8 which I reviewed now close to two years ago that they began to put this ridge
7:07
on the focus ring along with this kind of focus aid and I think it's a great feature because it
7:14
does allow you to at least get into the general area. If you're doing like a focus pull, for
7:19
example, in video, if you know roughly where you're going to end up with that, it allows you to get to
7:24
that spot and then worry about fine tuning through some other means. And so, and it's also, if you're
7:29
looking through the viewfinder, it does give you kind of a tactile feedback there of where you
7:34
roughly are in terms of focus. It's a great design. And one thing I will say for Irix is that they do
7:39
have some innovation in their designs. They do some different things with their lenses than what
7:44
other manufacturers do, which in my experience these days is fairly rare. So when it comes to
7:50
the actual image quality, before we jump in and we look in detail at the results, I want to kind of
7:56
maybe set the stage for that. Because anytime you have a wide aperture lens like this, an f1.4 or
8:03
larger lens, manufacturers basically have to make a choice. And so you have the option of trying to
8:10
correct for all the aberrations and to give, you know, very high contrast, high detail performance
8:16
at very wide apertures. Often that comes at a cost of the bokeh not being quite as soft and the
8:23
overall rending from the lens being, you know, a little less magical. The bokeh is not as creamy
8:29
for example. And so, you know, you gain the detail at a pixel level, but you lose a little
8:36
bit of the global rendering as a byproduct of that. And it's a bit of a tension that they have
8:40
to work. And some, in rare cases, I find that some lenses manage to balance those two things fairly
8:46
well. For the most part, though, the old school philosophy was designing lenses that had a little
8:52
less contrast wide open, but produced really kind of pleasing images to the eye on a global level
8:58
even if they weren't technically perfect. Lenses like Canon's classic EF 85mm f1.2L Mark II
9:05
I think is a great example of that. And then you have kind of the other end of the spectrum with
9:09
lenses like, say, some of the Sigma art lenses that are very highly corrected, very good performance
9:15
at f1.4 or maximum aperture, but sometimes people find them to be a little more, you know, clinical
9:21
a little less artful in their rendering, though I think that some of Sigma's more recent lenses have
9:26
found a better balance with all of that. And so Irix has kind of chosen a little bit more of that
9:33
classic profile and it sharpens up significantly as it stopped down as we'll see. But at wide open
9:40
it's not the highest contrast you know micro contrast lens that you might expect though
9:45
images globally still look really good. So let's take a look at that in detail and jump in. So first
9:50
of all let's take a look at our vignette and distortion. As you can see looking at the left
9:54
which is an uncorrected raw file, distortion is basically a non-issue. There is a mild
10:01
mild, less than a percent amount of barrel distortion, not going to be an issue under
10:06
any circumstance. So great job there. You can see the vignette is another story. Vignette is
10:11
certainly fairly heavy. However, it is a linear type of vignette. So it's just not all concentrated
10:17
in the corners. Byproduct of that is it cleans up pretty well by applying a plus 92 and sliding
10:24
the midpoint over to zero. So definitely a significant amount of vignette. Now if you want
10:31
to naturally shoot with a lot less vignette, stopping down to f2 as you can see makes a pretty
10:36
radical difference. Though in this case the vignette is a little bit more concentrated in the corners
10:41
but probably not enough to be a factor for many real world images. Now we can see as far as chromatic
10:48
aberrations go that lateral chromatic aberrations are very very minimal. You can see that it should
10:54
just be black and white, there should be no other colors, and you can see that
10:58
there's only the tiniest amount of fringing there, but you know we're looking at it even beyond a pixel level and so you not going to see that in any kind of real use Now we can see two things if we look at longitudinal chromatic aberrations First of all you can see that there is a mild amount of fringing
11:16
not much so for an f1.4 lens, mostly manifesting as just a little bit of green fringing after the
11:22
plane of focus. You can see on the right at f2 that that is mildly corrected but not entirely
11:29
But what you can really see is that at f1.4 there still is some spherical aberration
11:35
that is left uncorrected that makes everything have just a little bit of a haze on top of it
11:41
You can see that that clears up significantly at f2, not entirely, however. So that does become a
11:47
factor when we take a look at our resolution. So in this case, we're looking at a 200%
11:54
and you can see that actually the resolution is fairly good, and I think that's the reason why
11:59
in some cases, those that do just more kind of mechanical chart test show pretty good resolution
12:04
in the center of the frame. But while the resolution is good, the contrast is not. And so it
12:09
seems like there's just kind of a haze over all the textures that make them a little bit indistinct
12:14
Here at the midpoint f1.4, again, resolution is good. However, that haze is affecting our overall
12:21
contrast. Now, things not so good in the corner. You can just see that the acuity is not particularly
12:27
high at f1.4. So we can see this manifest out in a real world use. And so looking here at a pixel
12:35
level, and this is on a 45 megapixel, all of these are shown on a 45 megapixel Canon EOS R5 sensor
12:43
So chromatic aberration is not really an issue. It's not chromatic aberrations that are causing
12:48
the problem. It's those spherical aberrations that just kind of look like a little bit of Vaseline
12:53
is smeared over things. You know, resolution and contrast doesn't look too bad in that zone
12:59
but overall it's not particularly sharp. What we're going to see foreshadowed here, however
13:04
is that the trade-off is you get fantastic bokeh. Now put in certain situations, that becomes less
13:09
of an issue. So this image I think is actually quite striking, shot at f1.4. So it looks great
13:15
on a global level and really at a pixel level, even though depth of field is quite small
13:20
it really looks quite good and you can see that it's handled this bright light source you know
13:25
kind of a strong contrast in the scene it's actually handled quite well and for example on
13:30
this bright area here you don't see any kind of fringing. Now stepping down to f1.8 you can see
13:37
that it does increase the overall kind of contrast in terms of global like brightness of the image
13:43
when it's not impacting to the same degree however is the actual kind of micro contrast
13:49
of the fine textures, which really don't look significantly better down on the corner. Again
13:56
contrast in terms of brightness, but only a little bit more acuity that's coming into the image at
14:01
this point. Again, you will find that contrast does tend to be a little bit situational. So for
14:05
example, this is at F1.8, which we just saw, and I would say this looks really fantastic. And it's
14:12
a lower contrast situation, and so you get actually a better contrast result kind of
14:19
natively out of the lens. At f2 contrast is starting to improve a bit though it's not exceptional
14:26
Things look fairly good in the mid frame. Corners you know still looking fairly weak at this point
14:32
Again resolution is not too bad but contrast is fairly low and so acuity is not exceptional there
14:39
Now stopping down to f2.8 you can see all of a sudden we look pin sharp there in the center of
14:44
of the frame, exceptional resolution, exceptional contrast. Same is true at the mid-frame, which looks fantastic
14:52
And corners are now looking good, though not great, relative to the rest of the frame
14:57
At F4, that changes to where things are looking nice and crisp in the corners, and by F5.6
15:04
our result is now exceptional. And that's also true if we pop back to the middle
15:09
of the frame, where it's just jumping right off the chart at that point
15:13
So this translates into really great real world images at f5.6, you can see the detail on the contrast
15:20
And all of these various textures as the snow has lifted and just left, you know, the leftovers here
15:27
everything looks really fantastic. Look how finely delineated all of those needles are there
15:32
That's a really, really great looking result. Now this is a rare lens that in some ways
15:37
f22 looks a little bit better than wide open. f22 being minimum aperture. And you can see that we haven't lost all the details, which sometimes
15:47
they start to, you know, kind of just blur together and contrast is better. So overall
15:52
I actually prefer the end result at f22, which I rarely get to say. So our minimum focus distance
15:58
is 40 centimeters, which gives us a fairly good, it's not listed, but it's somewhere around 0.190.20
16:07
zero times magnification, certainly a very useful figure. As we can see, to be expected
16:13
our contrast and resolution is not great wide open. Stopping down to F2 visibly improves the
16:20
amount of contrast you've got there, which does allow the details to show up a little bit better
16:25
So our trade-off is really, really lovely, creamy bokeh. And so here at F1.4, you can see the detail
16:31
and contrast are acceptable here. There's a little bit of that spherical haze on there
16:35
but where that trades off is that the background blur is really special looking Here another example at F1 And so as you can see if we zoom into a pixel level it not wowing necessarily at a pixel level but the overall look of the
16:53
image is wow and the blur is incredibly creamy. Another case in point here this
16:59
is at f 2 and so this is actually somewhat of a challenging scene and you
17:03
can see that it's actually controlling the chromatic aberrations that would destroy this and again giving us actually quite nice contrast for this particular scene but again
17:14
even at f2 the rendering is really nice yet here's another shot at f1.4 and i included this because
17:21
all this is really is just a bit of moss on the side of a washed out bank you know like there's
17:26
not a whole lot going on here but yet the image still has a certain quality to it that i find
17:32
very visually appealing even though once again it's not necessarily exceptional on a pixel level
17:37
It's acceptable, it's not exceptional, but the look of the image is exceptional and this image
17:43
is another that I just think looks really really special and again detail looks pretty good but you
17:48
can see a little bit of that haze on the textures but it's just made something that's relatively
17:53
boring into a fairly artful end result due to the quality of the rendering. Now this is at f2.2 and
18:00
and so you can see that the bokeh quality is still very, very nice
18:04
but you can also see now that you're getting the contrast as well. So you do have some flexibility on how you use the lens
18:11
and achieve the kind of images that you want. Now, interestingly, you can actually increase the apparent contrast of the lens
18:19
simply by using the dehaze slider in Lightroom or something similar. And so, you know, it's f1.4
18:26
the image is not sharper obviously, but it gives that impression, particularly if you're not viewing
18:32
it at a pixel level, and that's just due to kind of removing a bit of that haze from the textures
18:38
whereas you can see that there is a reasonable amount of detail. You can actually see all of
18:42
the eyelashes there. They just, you know, aren't pinpoint crisp due to that spherical aberration
18:48
What I like, however, is that if you can layer your shot, this lens renders so very nice, so I've
18:54
shot through a few different textures towards the subject. So here at f1.4, I mean, the resolution
19:00
is acceptably good, but most importantly, the image itself is really, really pleasing for portrait
19:06
work. And if you process in a little bit more contrasty style, you can see here that, you know
19:12
contrast looks fairly decent and viewed globally, the lens, the image looks really sharp and the
19:18
overall rendering looks fantastic. This shot I did monochrome and I just, I mean, I just love this
19:24
shot. I think it looks fantastic. I mean, I'm actually reminded of some really good glass that
19:30
I've used, but you, you know, you have to kind of process to bring out the contrast because it's not
19:35
natively there to begin with. So finally, let's take a look at our flare resistance wide open F1.4
19:42
You can see some localized veiling, no real ghosting artifacts, however, and stop down to F11
19:48
there's less veiling but still no ghosting artifacts. Similarly with this image, same kind of truth, f1.4, a little bit of localized veiling and loss
19:57
of contrast stopping down to f11, that is gone. In neither case do you see any kind of real flare
20:05
issues and if we take a look at either wide open flare resistance you can see there is a little bit
20:13
of a ghosting pattern that's there, nothing too terribly destructive, however, and if we take a
20:19
look with it stopped down, the ghosting pattern doesn't really get that much worse and contrast
20:24
remains strong. So I think you can see what I was describing before we jumped into the actual
20:30
breakdown of the image quality itself, and that I actually really like the look of images that come
20:35
off of this lens. There's a quality to them that I appreciate, and so I'll put it this way. I really
20:40
love the images at a global level. I am some of it a pixel peeper and so I don't love them
20:46
necessarily on a technical pixel level. And so that's kind of the tension that I am facing here
20:53
and that you're going to have to weigh for yourself as a photographer, whether or not this approach
20:57
this style works for you. But if you determine that it is a lens that works for you, it is a
21:03
beautifully handling lens so long as you don't mind manually focusing. And it does produce, I
21:09
think really really pleasing results particularly on a global level which frankly that's the way
21:15
that we share our images for the most part anyway. This is a lens that can be had for right under
21:20
700 US dollars so it's not necessarily a price bargain but relative to a lot of f1.4 lenses
21:29
it's also hardly the most expensive and it does give you a very high grade of build and you know
21:34
nice overall performance for that price. I'm Dustin Abbott. If you look in the description
21:39
down below, you can find linkage to my full text review. There's also linkage to an image gallery
21:44
If you want to look at photos for a little longer, see if it works for you or not. Beyond that
21:48
there's linkage to follow me on social media, to become one of my patrons, or to sign up for my
21:52
newsletter. It comes out every Thursday. And of course, you can also purchase some of my channel
21:57
merchandise, get some DA gear if you haven't already. And of course, if you haven't clicked
22:03
that subscribe button, please do so. Be sure to ring that notification bell so you know when new
22:08
content drops. Thanks for watching. Have a great day and let the light in
#Arts & Entertainment