Up next in 10

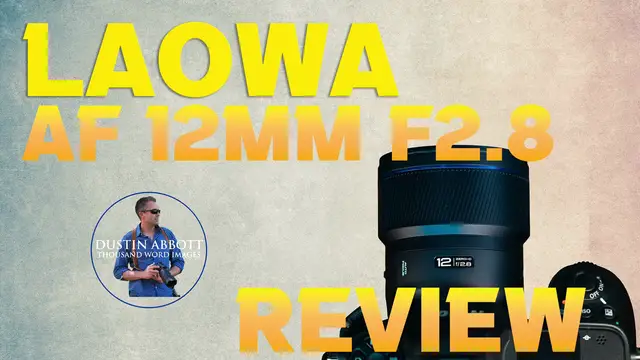
Laowa AF 12mm F28 Zero D Lite Review - New Wide Angle King
Jul 14, 2025

Photographer Dustin Abbott shares a deep dive review of the new Laowa AF 12mm F2.8 Zero D Lite - the smaller, more feature rich, better performing autofocus version of Laowa's classic. | This episode is sponsored by Fantom Tracker. Visit store.fantomwallet.com and use code DUSTIN20 for 20% off. | Read the Text Review: https://tinyurl.com/LaowaAF12mmDA | Purchase the Laowa AF 12mm F2.8 Zero D Lite @ B&H Photo https://bhpho.to/3TUwGw5 | Adorama https://howl.link/hn91kgxdhpd85 | Amazon https://amzn.to/4nA8oVZ | Camera Canada https://shrsl.com/4x7xr | Amazon Canada https://amzn.to/407kqw1 | Amazon UK https://amzn.to/4liYczJ | Amazon Germany https://amzn.to/4ktgKf7
Check out the DA Merch here: https://bit.ly/TWIMerch | Become a Patron: https://www.patreon.com/dustinabbott | On the Web: http://dustinabbott.net/ | Sign up for my Newsletter: http://bit.ly/1RHvUNp | Instagram: http://bit.ly/DLAinsta | Facebook: http://on.fb.me/1nuUUeH | Flickr: http://bit.ly/1UcnC0B | 500px: http://bit.ly/1Sy2Ngu Follow Craig @ https://www.instagram.com/craigstoffersen/
Want to support this channel? Use these affiliate links to shop at:
B&H Photo: http://bhpho.to/1TA0Xge
Adorama: https://howl.link/nt4zdz1goa7ql
Camera Canada: http://bit.ly/DLACameraCan
Sony Canada: https://www.thesonyshop.ca/?ref=abbott
Amazon: https://amzn.to/3HrY64d
Amazon Canada: https://amzn.to/3qG1p18
Ebay: http://bit.ly/DustineBay
Into the AM Clothing: https://bit.ly/intotheAMda and use code DUSTIN10 for 10% off
Fioboc Clothing: https://tinyurl.com/FiobocDA20 and us code DUSTIN20 for 20% off
Make a donation via Paypal: https://www.paypal.com/paypalme/dustinTWI
=============================
Table of Contents:
=============================
0:00 - Intro and Concept
Show More Show Less View Video Transcript
0:00
Hi, I'm Dustin Abbott and I'm here today to give you a review of the new Laowa Autofocusing
0:14
12mm f2.8 0D Lite lens. It was nearly a decade ago that I reviewed the first Laowa 12mm f2.8
0:24
zero d lens it was actually one of the first laowa lenses that i reviewed and at that point it was an
0:30
intriguing lens because it went wider than what just about anything else was going at that point
0:35
and did so fairly competently i actually ended up buying one at a later date to use adapted on
0:40
sony e-mount particularly using their magic shift converter to also give me a shifting lens option
0:47
fast forward to 2025 and we have got a lens that manages to not only have autofocus but it's also
0:53
smaller, it's lighter, it's cheaper, it has weather sealing, this has the ability to use
1:01
traditional filters up front. This is a lens that has a lot going for it for a price tag of about
1:07
$699. And to make things even more interesting, I asked for my loaner to come in a Nikon Z-mount
1:15
because I've never tested a Laowa lens on Nikon before. And while on Nikon Z-mount, it does
1:21
exacerbate one of Laowa's typical problems. Overall, this has been a really intriguing lens
1:27
and we'll break down why this could possibly be an option for you if you're looking for a wide
1:32
angle lens for Sony E-mount, Nikon Z-mount, and as we'll detail, even a few other options if you
1:39
don't mind manual focus. So we're going to dive in. We're going to take a look today right after
1:43
a word from our sponsor. Today's episode is sponsored by the all-new Phantom Tracker 2.0
1:49
Phantom has not only seriously upgraded the visual look of the card, but now we have a superior build quality made with tempered glass and metal alloys
1:57
This credit card size tracker can be locally tracked via a 90 decibel beeping noise
2:02
but also on a global level via Apple's Find My Network and its map
2:06
The addition of NFC means that you can also use the card to trigger an automation
2:10
Just tap it. The tracker fits perfectly in any wallet or bag and assures you won't lose your valuables
2:16
It has a built-in rechargeable battery that can be easily charged via any wireless charger, and a single charge can last up to six months
2:24
The Phantom Tracker 2.0 makes for a seriously cool gift. So visit store.phantomwallet.com and use code DUSTIN20 at checkout for 20% off
2:34
That's store.phantomwallet.com and use code DUSTIN20 for 20% off. So this copy of the Laowa 12mm f2.80d was loaned to me by Laowa. As always, they have had no input
2:48
on this review and will not see it before you do. My thoughts and conclusions are my own
2:54
So let's take a closer look at the build and handling here. As I mentioned in the intro
2:58
I'm testing the Nikon Z-mount version, which is autofocus. There's also an autofocus version for
3:04
Sony E-mount. In addition, however, there are manual focus options for Z-mount, E-mount, RF-mount
3:12
and L-mount. And apparently, Laowa obviously feels that there is a market for manual focus options
3:18
of the lens, even in the mounts where the autofocus version is available. For me, I'd prefer
3:22
autofocus, but obviously some of you, your mileage is going to vary. This is an extremely wide lens
3:28
It has a 122 degree angle of view, which is noticeably very wide. You're going to have to
3:34
make sure you don't get your feet in the frame. And if you aim at your feet, it's a long way down
3:39
Zero D stands for zero distortion. And in this case, you can see that lines look really great
3:45
even uncorrected. So a great lens for shooting interiors. So long as you're keeping the sensor
3:50
level and you're not tilting up and down, we're going to get some of that keystoning effect as
3:55
you would with any lens. There are also a couple of versions of the lens when it comes to the amount
4:00
of aperture blades. So you can either get five or 14 blades. This version is the five-bladed version
4:06
and frankly I don't see any reason to have anything but that. I think that the five blades is great
4:11
because it quickly creates great looking sun stars and frankly you're far more likely to get nice
4:17
sun stars with a wide-angle lens like this than you are to get round circular bokeh balls and so
4:23
I would stick with the five-bladed version myself. Again, your mileage may vary. I do love the new
4:29
Laowa design language. It is a kind of a very light cobalt blue overall finish. It looks different
4:36
from any other lens out there. The finish and the materials, even the textures and designs they've
4:40
used in the manual focus ring, it all looks uniquely Laowa. So it follows the design language I first
4:46
saw with the 10 millimeter f2.8 last year. And I think it's a great direction for them when it comes
4:52
to their design language. The older design language kind of looked a bit like maybe a classic Zeiss
4:58
lens. And so it was a nice look, I think, but it was a little bit maybe derivative, whereas this
5:04
feels very fresh and very unique. And so I'm a big fan of companies developing their own identity
5:11
when it comes to the design language of their lenses. Now, as mentioned before, this lens is
5:16
dramatically shrunk from the previous version. It is now 77.2 millimeters in diameter, right over
5:24
three inches and it's 80.6 millimeters in length or 3.09 inches. This is the largest version by the
5:31
way in the Nikon Z mount because Z mount itself of course is bigger. That is 33 millimeters shorter
5:37
than the first generation lens so that is a whole different sizing class of lens. It also is
5:44
significantly lighter weighing in at 390 grams or about 0.86 pounds. That's down from right at
5:51
basically 700 grams. And so we haven't quite halved the weight, but we are not far from that
5:58
And so again, a major accomplishment. So hearing all that, you might think, well, all they did is
6:02
just go to a plastic fantastic. That's really not the case here though. This again continues to feel
6:07
like basically almost all metals in the construction, right up to including the lens hood, which is
6:13
actually really premium feeling. Now the lens hood itself can be removed, which I certainly
6:19
appreciate. Their tolerances are just a little bit on the tight side, so sometimes it can be a little
6:24
bit kind of difficult in popping that free right there at the end, but the fact that you can remove
6:30
it is great, and it also means that you have much more flexibility when it comes to the 72 millimeter
6:36
filter threads up front, and that's a huge improvement over the first generation lens
6:40
where you could not use standard screw filters Now you can with that common 72 millimeter size That means that it opens up all kinds of new horizons easily when it comes to filtering doing long exposures for example you can see the
6:53
comparison here that the shot on the left with no filter it looks quite boring you add in that
6:59
movement of the water on the right side a much more interesting image and the difference is is
7:05
literally just quickly screwing on a filter that's all and so really really great you know have that
7:10
flexibility there. Now on the lens itself, we do have a gasket at the rear mount and then
7:17
Lawa touts what they call their frog eye coating up front, which is something akin to a flooring
7:23
coating. I'm not aware of any other internal seals, but at least we do have some degree of
7:27
weather sealing here. The manual focus ring itself moves nicely with good damping. It has about a
7:34
hundred degrees of focus throw and it does feel fairly linear. I tried going fast. I tried going
7:40
slow and it seems like I ended up at roughly the same place. And so I do appreciate that
7:45
Minimum focus distance here is 14 centimeters. And so you can get very close to your subject
7:50
because remember that's measured from the sensor about right here and you're able to achieve a 0.21
7:56
times magnification, which can be useful. Just know that you're only going to have three or four
8:01
centimeters of working distance. You're going to be really close to your subject at that point
8:06
With a price tag of $699, this, I think, represents a pretty good value
8:13
It feels like a premium lens, and the fact that we are operating now at a price tag several hundred dollars cheaper
8:19
than what Laowa was originally selling their lenses for, lenses like this means I think we're at a pretty great state of value
8:26
considering all the things that have been added here. So let's talk autofocus
8:31
Laowa doesn't really detail what kind of focus motor is found in these lenses. I suspect it is
8:37
some variation of an STM or stepping focus motor. What I have found both on the 10 millimeter f2.8
8:43
that I reviewed last year on Sony e-mount which was their first autofocusing lens and then on this
8:49
lens is that Laowa they waited a long time to do autofocus but they seem to have really jumped into
8:55
it feet first. They really have done an excellent job of developing good working focus motors that
9:02
are quiet, that are quick, and are accurate, and so I have no hesitation about that. You can see
9:07
from my formal test that here on Nikon that focus zips back and forth whether indoors or outdoors
9:13
with a good amount of speed. It's not perfectly smooth in the sense that you can feel it kind of
9:19
jumping back and forth, so it's not always damped at the extremes, but focus moves quickly and that's
9:24
what you want above all. In fact, when I tried to test this by shooting volleyball action, you can
9:29
see over this nearly 200 shots in the sequence of different types of action that if I looked at all
9:35
of them, I feel like all of them were well focused. Now, to be fair, with a very wide angle of view
9:41
like this, you're going to get a lot in focus at a time. However, you can tell that focus is at the
9:47
right point. And while most of what's in the frame is in focus, it is to lesser degrees than the actual
9:52
subject. So focus seems to be keeping up at least with this degree of action. So obviously that adds
9:58
to the usefulness of the lens itself. I was also able to focus even when I was up close to a subject
10:04
You can get very close obviously with the minimum focus distance and I was able to get accurate
10:08
focus even at close focus distances. So when it comes to stills I really don't have much to
10:14
complain about here. I found that autofocus got the job done and all of my images throughout the
10:20
sequence of shots that I took, they were all well focused. So great job on that front, Laowa
10:26
On the video side of things, my feelings are largely the same. What I found is that in doing
10:32
my autofocus pulls, that autofocus moved back and forth smoothly, confidently. I didn't see any
10:38
pulsing or any settling. So good job on that front. There is, in my opinion, a surprising amount of
10:44
focus breathing that's taking place here. Not that it's a massive amount of focus breathing, but for
10:48
such a wide angle of view, I'm surprised to really see much of anything at all. I don't think it's
10:53
enough to be a deal breaker and I didn't notice as much in smaller, less abrupt focus changes
10:59
but you obviously are going to see it in this type of test. When it comes to my hand test
11:03
I found that focus made the transition from hand to the eye and back with good confidence
11:09
so no issues there. And you can see in shots here that when I'm doing kind of more ordinary
11:14
focus transitions where I am moving along and allowing the camera to move focus as different
11:20
things come kind of on screen that it seems to do that without any kind of rapid or jarring type
11:27
movement. It's fairly cinematic in the process and as I walk with the lens I found that the focal
11:32
length is very interesting for that. When I set up for static shots I had no problem with focus
11:36
you know jumping around or doing anything that I didn't want it to do and even when focusing up
11:41
close. While that's a little bit more challenging, you can see here with this shot of the Lily that
11:46
it is doing the job that needs to do of adjusting focus down even at really, really close focus
11:51
distances. So once again, while Video F is maybe isn't perfect because of a little bit of focus
11:57
breathing, overall the effect here I think is very good. And this could be an extremely useful
12:02
video lens, obviously for a lot of different applications. That's a great focal length and
12:07
We don't really have a lot of options for it to compete directly with here on Nikon Z-Mount
12:12
A few more on Sony E-Mount, but even there, I think at this price tag and with this performance, it should be a welcome lens
12:19
So how about the image quality itself? This is an optical design of 16 elements in 9 groups
12:24
For those of you that are interested, this is a slightly different optical design, optical formula, than what was in the first generation lens
12:31
And if you think about it, that only stands to reason you can't have a lens that's 33 millimeters short or longer and have a similar optical design
12:38
And so things are there in different positions. It's one less group of elements that are here
12:46
This design now includes four extra low dispersion elements and then two aspherical elements
12:52
You can see that the MDF is pretty linear. It is very sharp in the center of the frame and then just progressively drops across the frame until you get to the corners there
13:02
And I found that that pretty much matched what I saw in the real world also
13:07
Now, the strength of this lens is obviously the low degree of distortion. And while that's harder to test at the test chart distances, I did find that there is a minimal amount of distortion even up close
13:18
And when I step back, for example, again, taking a look at all the interior walls, you
13:23
can see that everything looks nice and straight. So that is all great
13:27
I also found that while the amount of distortion is low the vignette is very heavy And that always allow a weakness anyway And as I mentioned in the intro I think it exacerbated by the fact that on Nikon Z it being the largest diameter mount that as of any of the full frame mounts it just means that
13:44
vignette is almost always worse on any third-party lenses. And in this case, vignette is extremely
13:50
heavy. Though in both cases, things could be worse. I do really like the LK Samyang 14-24mm f2.8
13:57
and I have used it quite a bit on my Z8 Adapted
14:02
And you can see, however, though, that there is massively more distortion at 14 millimeters
14:07
and massively more vignette at 14 millimeters on Z mount than what there is with this 12 millimeter lens
14:13
So, you know, everything is relative, but I think that that vignette is probably going to be
14:17
the single biggest factor in some cases of impacting your images. And I will note that it doesn't seem like Lowell
14:24
is getting full in-camera support on its lenses yet. And so JPEGs look pretty much the same as the
14:30
RAW files that I got back in Lightroom. I found that, again, depth of field not being very shallow
14:37
with a wide angle lens like this, longitudinal style chromatic aberration, not a problem
14:41
Lateral style chromatic aberration near the edges of the frame, a bit more of that, but I went
14:47
looking for it in my real world shots and I couldn't really find it. So I'm not really going
14:50
complain about that too much there. When it comes to the resolution, again, I'm using a 45 megapixel
14:56
Z8 here and I show the crops at 200% magnification. The center looks fantastic as the MTF advertised
15:03
The mid-frame is, I would only call it okay. It looks a little bit jittery to my eye. In the
15:09
corners, it's darker, obviously, and obviously going to be a bit softer there as the MTF chart
15:14
suggested. Now I tried going out at a little bit further distance on just a wall of barn board that
15:21
I've got. And what I found moving there is that I definitely noticed a difference if I was focused
15:26
in the center or at the edge of the frame. So if I focused in the center of the frame, center looks
15:30
great. Edge looks quite soft. If I focused at the edge of the frame, the edge looks better, not great
15:36
but better, but the center looks significantly softer. So that tells me we've got some field
15:41
curvature that is going on there. The good news is that the further you get away from your subject
15:45
the less likely that that becomes an issue because depth of field begins to solve that
15:50
And in fact, I found even at the very close distances, probably less than, it's definitely
15:55
less than two feet when testing on my test chart, that at that very close focus distance, even by
16:00
f5.6 depth of field, starting to align the corners with the center of the frame by f8, I saw what I
16:07
would consider to be kind of the peak sharpness with the most consistency across the frame
16:12
Now beyond that at f11 you're going to start to run into diffraction. Not bad at f11 by f22
16:18
A lot more obvious at that point and so you might want to avoid anything beyond f11 unless
16:23
absolutely necessary. The bokeh quality is only okay but frankly who cares. You're going to have
16:29
very few situations where you can create much bokeh from this lens. More important is the flare
16:35
resistance and I found that to be a bit of a mixed bag. Contrast always remains good so the
16:39
coatings are doing a good job there. There's only minimal ghosting when shooting at f2.8 and I
16:45
didn't find that disruptive. By the time I stopped it down significantly to f11 however that ghosting
16:50
pattern becomes more prominent and depending upon your orientation or your composition you're going
16:57
to find that that becomes more or less destructive depending on how you are composing so just watch
17:03
out for that. I didn't have a chance to test coma during this review period, but I did do on the 10
17:09
millimeter last year and then the previous 12 millimeter, and I found fairly consistent results
17:13
which I suspect will hold true here, and that is that there is minimal coma in the edges. I don't
17:19
think that's a major issue, particularly with such a wide angle of view. It's going to be so small
17:23
you probably won't notice it. More important is the heavy vignette, which could create some extra
17:28
noise in those corners when you're shooting at higher ISO values trying to get astro shots
17:33
So that's probably a bigger factor than the coma itself. Overall, however, there's more strengths
17:39
and weaknesses here. It is very hard to do a good job of engineering ultra wide angle lenses like
17:44
this. And frankly, particularly when you consider that they've managed to miniaturize the lens
17:49
the fact that it's improved over the previous generation, pretty impressive. So my conclusion
17:54
is this this while this isn't a perfect lens as we saw in some of our optical breakdown it is a
17:59
very competent lens that doesn't really have anything that i would consider a fatal flaw the
18:04
heavy vignette is probably the most disconcerting thing but you know to offset that you are getting
18:09
lower rate of distortion that probably you're going to get with any kind of competition at
18:14
this particular focal length and so that means it remains i think an intriguing option on all the
18:20
platform it's available for but in particular for Nikon Z mount and Sony E mount we're going to have
18:25
the autofocus option. On those other mounts you're going to have to deal with a manual focus lens
18:30
and while that's not a huge deal on a wide angle lens I think the versatility of autofocus sets
18:35
this apart. Very welcome however is a price tag that I think is very reasonable for what you're
18:41
getting here. This is a lens with beautiful build good autofocus and a strong optical performance
18:45
so I think that that's a pretty great package for about $699 US dollars. Now if you want more
18:51
information about the lens itself you can check out either my text review that's linked in the
18:55
description down below. There are some buying links there as well as a link to the image gallery
19:00
but if you want a deeper dive into the optics stay tuned with me right now we're going to jump
19:04
into that together. So as mentioned earlier it's a little bit hard to really evaluate distortion at
19:10
such a close focus distance as what I'm doing here, it does tend to exaggerate any kind of
19:16
distortion, even if it's a very slight tilt. And so you can see here, I don't know that this does
19:21
a full comparison. However, what we can see is that distortion is very, very low nonetheless
19:28
If we look at some real world examples here, you can see there's a slight tilt upward here. And so
19:32
you're going to get a little bit of keystoning effect, but all of the lines are really, really
19:36
straight. And if I hear where I'm not adjusted up and down, if you look at the various lines
19:41
as throughout this scene, all of them are nice and straight, even as we get closer to the camera
19:46
and more importantly, closer to the edge of the frame. Now, that being said, you still don't want
19:51
to compose with people near the edge of the frame. Wide angle lenses are going to naturally
19:56
exaggerate, particularly if an arm, for example, in this case is close to the camera. And so you
20:01
can see it's all out of proportion. You can get some, let's say, interesting images with lenses
20:07
like this, but most people are not going to appreciate if you put them near the edge of
20:12
the frame with this lens. Now, as noted, vignette is very heavy, and so it's going to be very strong
20:17
in the corners Probably expect to see about a stop less on the Sony E version but here on Nikon very very heavy vignette Now of course there can be moments where that a desirable effect
20:28
like in this image. I think that the natural vignette kind of draws the eye into the center
20:33
of the frame, and it adds to the charm of this image, but particularly if you're shooting on
20:38
snowy scenes or scenes where the sky is really uniform, you're going to find that you'll
20:43
definitely want to correct that vignette. Now, depth of field is scarcely small enough for it
20:50
to be any kind of real issue with longitudinal style chromatic aberration. And you can see there
20:54
isn't really any fringing to see before and after the plane of focus. There is a bit of lateral
21:00
chromatic aberration. You can see just a little bit of color fringing in what should be black and
21:04
white transitions, but it's not strong. And this is at a very high level of magnification
21:09
at 100% magnification in real-world images. I just wasn't really spotting it
21:14
So it's there, but I don't think it's going to be a real-world issue. So taking a look at the test chart and testing for resolution and contrast
21:22
this is a 45-megapixel Nikon Z8, and we're going to be looking at 200% level of magnification
21:28
So center of the frame looks fantastic. That's what the MTF chart suggested
21:33
It is super sharp, very high contrast in the center of the frame. However, you can see that quite quickly that begins to drop off
21:41
And so as we get towards the mid-frame, there's still a good amount of contrast, but the detail isn't as good
21:47
And as we kind of poke on down towards the corner, you can see the corners are darker, but they're also softer
21:54
Now, in this case, I did find that the left-hand corner looks a little bit better
21:58
And again, because I'm at such a close focus distance, any kind of little minor variation is going to exacerbate that
22:07
But the MTF chart suggests that the corners are going to be quite a bit softer than what the center of the frame is
22:13
That's what we find. So because I recognize the limitations of my testing setups here, I went out to a real-world shot just to give a little bit more perspective
22:22
So in the image on the left, I focused right here in the center of the frame. The image on the right, I focused over here on that lock
22:30
So first of all, if we look towards the center of the frame, we can see that the image that's focused in the center of the frame
22:36
super sharp in the center of the frame. The one that's focused on the side of the frame, towards the edge of the frame
22:42
you can see that in the center of the frame, it's a whole lot softer. Now, if we take a look over here with the focus on the lock
22:49
the image that is focused on the lock, it definitely looks better
22:53
It's not as crisp as what the center of the frame was. but it is better. Whereas here, where it was focused in the center of the frame
23:00
it is softer. So there is some field curvature at work here. And even if you're a bit further back
23:05
that's going to be a factor. The good news is, is that in real world landscape style images
23:10
probably never going to be a problem. So going back to the test chart in the center of the frame
23:15
at F4 here on the right, you can see the contrast is, it's even better. It's just
23:21
fantastic. The mid-frame is still not looking particularly better. It is mildly improved
23:28
but it is not significantly improved. And the same is true of that lower right corner
23:34
Upper left corner looks a tiny bit better. Now looking back to the mid-frame by f5.6
23:41
starting to look good there. And in the upper left corner where it is the strongest
23:46
it's looking quite good there. We'll take a look at a couple of other spots. This mid-frame is looking improved, better contrast at f5.6
23:54
Over on this side, by f5.6, it's looking good but not great
23:59
Stopping on down to f8, however, does allow what I would call the greatness to extend right to the corners
24:06
And now we can see, if we look at a variety of places, that we are getting quite a consistently good performance all across the frame
24:13
In this upper left corner where it's the strongest, it's now fantastic by f8
24:18
And so if you're shooting at smaller landscape apertures, you're going to get sharp results
24:22
Now you can see by f11, diffraction is starting to soften that image somewhat again
24:27
And then by the time you get to f22, which is the minimum aperture, diffraction is really, really softening the image
24:34
So I would say use f11. You're going to get tons of depth of field. I don't see any reason to shoot any smaller than f11 with this particular lens
24:42
That's where you're going to get your best performance. Now we can see because you can get so close to your subject, you can get a very good degree of magnification
24:50
And the up-close performance, particularly if you're near the sweet spot in the center of the frame, you can see it really looks quite good
24:57
The bokeh quality is only going to be so-so. I mean, you're never going to really strongly blur out a background, but you can see you can get a decent result here
25:06
It's still a little busy in the background. Here, once again, our subject is here
25:11
that looks fine but you can see that the background is not strongly defocused so don't buy this lens
25:17
to try to create bokeh with it. I do want to take a moment to highlight and praise how great it is to
25:23
be able to use filters easily with this lens. Obviously the one on the left without a filter
25:28
is much less interesting than the image on the right with the water filtered and giving you the
25:34
kind of painterly effects to it. Likewise in this image here obviously the image on the right is much
25:40
more visually interesting. Now, I have played with the color balance just to give it a more
25:44
interesting effect there and put a preset on there, but we can also see that it is doing a good job of
25:50
maintaining, I would say, similar levels of sharpness and detail even when being filtered
25:57
and so, I mean, it's great that we've got a lens that, you know, is going to give us a pretty
26:02
consistent performance. I love the sun stars from this lens. I think they look fantastic
26:07
I would see no reason to go for the 14-bladed version. I think the 5-bladed is great
26:14
You can see here that, you know, composed here, there is a little bit of a ghosting artifact that's hitting here
26:19
not really impacting the image too much, and contrast is held up
26:23
In this image, however, a different kind of composition, that's a much more negative effect
26:28
And you can see as I toggle between F11 and then F2.8, in this case, the large aperture here is much preferable
26:36
to the smaller aperture here where you're getting much more of this
26:40
kind of nonsense of ghosting effects. So just be careful with your composition
26:45
Overall, this lens is very interesting. It is, I think, sharp enough to get the job done
26:49
in any kind of situation. And it has that low distortion. There's a lot of value here
26:55
So thanks for sticking around to the very end. As always, thanks for watching
26:59
Have a great day and let the light in