0:10
>> Hi, I'm Dustin [music] Abbott. You've
0:11
seen in previous videos that I am into
0:14
the whole sauna cold plunge type
0:16
culture. And so, I have been doing all
0:19
of the ice ice packs kind of things to
0:21
keep my cold plunge at temperature and I
0:23
finally broke down decided that I was
0:25
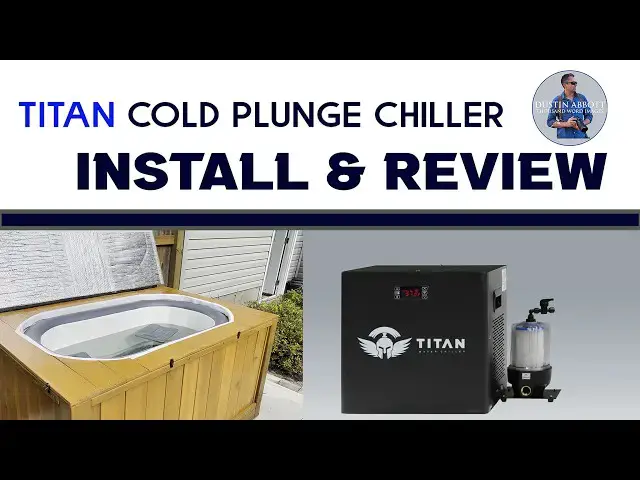
going to buy a chiller. And so, today as
0:28
I'm about to do the install work, I
0:29
thought you know what? I'll since I'm a
0:31
reviewer, I'm going to go ahead and
0:32
review this Titan chiller from Titan
0:35
Titan Wellness and I'll document the
0:38
installation process, give you feedback
0:40
on how it goes. Hopefully, this will
0:41
help some of you that might consider
0:43
doing something similar as you kind of
0:45
see my own journey with this and my
0:47
determination on how well it's going to
0:49
work. Now, quick caveat, while I am
0:50
wearing the t-shirt for the installation
0:52
that came in the box, this product was
0:55
not sent to me by Titan nor have they
0:57
asked me to do this review. I purchased
0:59
this my own money and this is more just
1:02
me kind of giving back to those of you
1:03
that might be interested seeing whether
1:05
or not this is something that will work
1:07
for you. So, all of that aside, we're
1:08
going to jump into the installation
1:10
which I have noticed already they did
1:11
send configurations for both a direct
1:14
connection which would work well if I
1:16
happen to have a Titan Wellness tub. I
1:19
don't, mine's a custom built design and
1:21
so, we also have the ability to just
1:23
have do it more drop-in status. I'm
1:25
going to try to do a little bit of a
1:26
hybrid because I do have an an outlet
1:28
hose where it would drain. I'm going to
1:30
try to use that to connect on one end to
1:32
allow flow to go through it and then
1:34
probably go over the top and dropping in
1:36
the secondary line. So, we'll see how
1:38
the installation goes. Let's jump in.
1:40
Now, one problem I'm going to try to
1:41
solve before I actually get in and start
1:43
hooking things up is that while I I'm
1:45
going to try to connect one hose
1:47
underneath coming out of the tub, I'm
1:48
going to need to come back in over the
1:50
top here. I do have a custom kind of
1:54
like hot tub cover that I had made for
1:56
this that goes over the top and so
1:59
rather than allow, you know, hot or cold
2:01
air to be getting into it, I'm probably
2:03
going to drill out through the side here
2:05
and try to run one of those hoses into
2:07
this corner and over the knees over the
2:09
top of the interior liner of the tub
2:12
inside and then drop down in there.
2:14
Okay, so I deflated the inner lining a
2:16
bit so I can get that out of the way. I
2:18
drilled through underneath here and so
2:21
that I could run the hose inside and
2:24
then importantly I had to cut through I
2:26
I have a lot of extra insulation in this
2:27
to help to maintain temperature. I've
2:29
got a lot of like 3-in rigid insulation
2:31
and then also a little bit of spray foam
2:34
in there as well to hit the cracks. And
2:35
so it very importantly after I'm done
2:37
I'm going to first duct tape up inside
2:40
on my plastic lining that is before we
2:42
get to the actual inflatable portion of
2:44
it. Make sure that I'm keeping any kind
2:46
of drafts from coming through there
2:47
particularly important in winter around
2:49
here. And then if I deem necessary I
2:51
will use a little bit of spray foam
2:52
around where I go in though that may be
2:55
necessary cuz they do have some really
2:56
good insulation around their actually
2:59
pipes here. And so I was able to force a
3:01
little of that up inside there. That
3:03
should help to insulate that line and of
3:04
course as long as water is circulating
3:06
it should keep it from freezing up.
3:08
Okay, now that I have both the
3:09
connection point potentially for the
3:11
outlet hose and then now for the inlet
3:13
hose I'm going to go ahead and reinflate
3:16
my inflatable inner portion and then
3:19
I'll be able to proceed with the actual
3:20
installation of the chiller. Okay, so
3:22
the hope is I'm going to be able to use
3:23
that as the outlet and then now I have
3:28
and inflated and that's going to be the
3:45
Okay, I'll do my prettying up here
3:48
in a moment but already it is operating
3:51
and it is starting to cool things.
3:54
Connections were fairly easy to make. No
3:57
other big complications there. And we
4:01
down here that it is doing the
4:03
circulating there. And right now, I've
4:06
started it and [music] temperature, as
4:08
you can see, of the water is sitting
4:11
here at about 50°. I'm wanting to take
4:13
it down to about 45. I can just hear the
4:16
fan kicking on from the coolant there.
4:19
And so, it is actually going to be
4:21
working at bringing that temperature
4:22
down now. All right, a few weeks have
4:24
gone by and so, I've been able to fully
4:26
evaluate the overall installation here
4:29
and not just how well it went at the
4:31
moment, but how it's actually held up at
4:33
least in the short term.
4:35
So, first of all, if you're doing this
4:37
installation and you're actually have
4:38
bought a Titan tub, it's going to be a
4:40
really, really simple setup. I mean,
4:42
it's the instructions are fairly easy to
4:44
follow and it's going to be pretty much
4:45
plug and play on a Titan tub itself.
4:50
Maybe some other tubs, I don't know. In
4:51
my case, as I've already demonstrated, I
4:54
have a little bit more of a custom setup
4:55
and so, it was a little less
4:57
straightforward. But I will say this,
4:58
there was a lot of different fittings
5:00
and pieces in here. And even though I
5:02
needed to, for example, I had a
5:05
actual section of rubber hose that I had
5:07
coming out of the the drain coming from
5:09
my tub that I was actually going to use
5:11
as my outlet and bring it around here.
5:13
And then needed to plug into that and
5:15
then create that or quick-release
5:16
fitting that comes with the Titan
5:18
chiller. But I was able to utilize some
5:21
of the pieces that they had in the box
5:23
and to create that. And so, certainly if
5:25
you just play around a little bit, I
5:27
suspect most people in most situations
5:29
should be able to figure it out even if
5:30
you don't have a lot of plumbing
5:33
The fittings themselves, at least at
5:34
this stage, do follow the instructions
5:36
and they include some Teflon tape to
5:38
wrap around the threads to help you to
5:40
get a nice tight fitting. If you'll
5:41
follow those instructions and do those
5:43
simple steps, their actual quick-release
5:47
different pieces here all seem to
5:49
connect nice and clean. I haven't had
5:51
any issues with leaking. Obviously,
5:52
you're going to have a little bit of
5:53
moisture from condensation if you're in
5:55
a hot environment and that cold water is
5:57
running through there. But, out the
6:00
hoses themselves are nicely insulated
6:02
and so you don't have an issue with
6:02
that. And I actually am going to wrap
6:05
the rubber hose section that I have
6:06
here. I've actually got an insulated
6:08
wrap that the next time I drain the tub
6:10
and I can move it, I'm going to get
6:11
behind there and wrap that to help with
6:12
any condensation coming off of that.
6:15
But, overall, I think the installation
6:16
process is fairly straightforward and
6:18
one thing I will say in their favor,
6:20
there was a lot in the box, a lot of
6:22
different fittings. I have a lot of
6:23
leftover pieces, which is maybe going to
6:25
help for one other problem that will
6:27
jump to in just a moment. So, there's
6:29
one other complication that I am going
6:32
to have to resolve come winter. Right
6:33
now, it's summer, everything is great
6:35
with the system as it is. But, my
6:36
original plan was to keep everything as
6:39
insulated as possible and so that I
6:41
could continue to operate this through
6:43
the winter because I'm trying to achieve
6:45
two things through investing in this
6:46
chiller. Obviously, one is to actually
6:49
control temperature through the chiller
6:50
portion, but also to use the circulation
6:53
pump. And in my case, I actually paid
6:55
the additional amount to have a UV
6:57
filter as a part of it as well. I'm
6:59
wanting to do everything I can to filter
7:01
the water because as it was, I was
7:03
having to completely drain and clean
7:05
this out about every 2 weeks because
7:07
there would be, you know, floaters
7:09
starting to come up in it and the water
7:11
would be getting murkier and a little
7:12
bit scarier going into. I'm doing this
7:14
for my health, you know, not as a health
7:16
risk. And so, I really wanted that
7:19
filtration portion as a part of it as
7:22
The complication is that during the
7:26
as I was talking to Titan's engineer,
7:29
during the winter, there's obviously
7:30
water that comes through the chiller
7:32
portion itself, but the chiller is not
7:33
going to be actually running during that
7:37
And so, there is a potential because
7:38
that water, some of it is held inside
7:41
and it's not circulating or moving
7:42
through, means that there is the
7:44
potential for that water to freeze and
7:46
do, you know, thus cause issues with
7:49
seals and leaks inside the actual
7:51
chiller unit itself. So, their
7:53
recommendation is that I eliminate the
7:55
chiller portion during the winter.
7:58
Of course, I still want to have the
8:00
filtration, the circulation pump running
8:06
that's fine except for it actually has a
8:10
power supply that plugs into the back of
8:13
It's not going to draw a lot of power
8:15
because it's only the pump itself is
8:17
only rated at 30 watts, but it actually
8:20
has a male end that's going into a
8:22
female plug in the back of the actual
8:25
chiller itself. Most, you know, adapters
8:27
that you would find tend to be, like,
8:29
for example, for laptops or things like
8:31
that. They're actually a male end that's
8:32
plugging into a female end to provide
8:35
So, I'm going to have to solve that.
8:37
Fortunately, the engineer believes that
8:38
they do have I haven't seen it listed on
8:40
their site, but he believes that they do
8:42
have available for purchase actual a
8:44
separate power supply that I could
8:46
purchase. And then that's going to
8:47
require a little bit of a fitting change
8:50
because I'm going to just be doing a
8:52
complete circulation loop and not going
8:54
through the chiller portion at all, but
8:56
just rather through that little pump as
8:57
well. And I'm probably going to find a
8:59
way to locate it inside my insulated
9:02
housing and so that I keep everything
9:04
under good insulation. Though, if that
9:06
water keeps moving, it probably should
9:10
So, for those of you that live in cold
9:11
climates, know that come winter, once
9:14
you hit that freezing point, you may
9:15
have to do some reconfiguring if you
9:17
want to have greater longevity in your
9:19
actual chiller portion. At that point,
9:21
we don't need to chill the water. In
9:23
fact, I'm going to have to drop a little
9:24
heater that I have into it that helps to
9:26
keep that temperature up at about 8° C,
9:29
mid-40s Fahrenheit, which is about where
9:31
I like to keep my cold plunge most of
9:33
the time. So, let's talk [music] power
9:37
When it's the circulation pump that is
9:39
running, I hooked it up to a power
9:41
station and I saw that I was drawing
9:43
about 40 watts on average with just the
9:46
circulation pump running. Now, when the
9:48
actual refrigeration kicks on as it is
9:50
at the moment and it's bringing the
9:52
temperature down, it's going to draw
9:53
about 300 watts of energy right under
9:56
that when the refrigeration kicks kicks
9:58
on. So, I ran it for about 2 hours. I
10:01
purposely set it to drop a few
10:03
temperature degrees of temperature cuz
10:05
my tub is well insulated. The chillers
10:08
only having to run just periodically on
10:10
for me, but I wanted to intentionally
10:12
make it run some to give you a typical
10:14
mix. And so, in the middle of the day,
10:18
watt hours of energy over that course of
10:21
time and so, that gives you a little bit
10:23
of an average of how much you might use
10:26
on a regular basis in terms of
10:29
Well, this will be the first video I've
10:31
ever done while submerged in water
10:34
temperature that's about 45°. But, I did
10:38
want to give you some feedback from
10:39
actually inside the tub over 2 weeks
10:42
after installation where I'm down in
10:44
water that is not only cold, but it's
10:46
also still clean. Let's talk about some
10:48
things that I like and some things that
10:50
I don't like and I'm try going to try to
10:52
get it right in one take even though I'm
10:54
trying not to submerge all the way to
10:56
cover the microphone. I uh I'm going to
10:58
get a little bit cold here after that.
11:00
But, as far as things that I like, at
11:02
this point, I would definitely have
11:03
already had to clean up the water. The
11:06
water is still nice and clean in here. I
11:08
still got to use the skimmer
11:09
periodically, things on your feet. It's
11:11
not going to get 100% of everything, but
11:13
it doesn't have the floaties, it's not
11:15
building up any kind of, you know, algae
11:17
or just the other stuff that's typically
11:21
Okay, 2 weeks in. Typically, this is
11:24
when I would be having to
11:26
definitely change the water because it
11:28
would have lots of floaters in it, but
11:31
look at this. Still looking pretty
11:34
And so, definitely the filtration is
11:37
helping a whole lot. I'm also loving
11:39
having a nice stable temperature. And
11:42
you have the ability to use an app if
11:44
you buy the app version, and so remotely
11:46
from anywhere because it's connected to
11:48
Wi-Fi here, I can actually moderate my
11:50
temperature. I can take it up and down.
11:52
When I go on vacation, I can allow it to
11:54
drift up a bit. But, when I set that
11:56
temperature, I can also set on the unit
11:58
itself how much it's going to fluctuate
12:01
before the actual compressor kicks in. I
12:03
think by default it's about 5° F.
12:05
I lowered it to about 2° cuz I like a
12:07
pretty consistent temperature in here.
12:09
And essentially, my wife and I have
12:11
negotiated a temperature that is
12:14
acceptable to both of us. And so, she
12:16
would like a little bit warmer, I would
12:17
like it a little bit colder. Though at
12:19
the moment, it's cold enough. And uh and
12:22
so, I we have it set at about 45, 46° F.
12:26
And so, all of that is good. The
12:28
temperature has stayed remarkably
12:29
stable, and I love not having to mess
12:31
with uh ice or ice packs. And one thing
12:35
I will note, definitely because mine is
12:38
so well insulated, as soon as I get in
12:40
here in my body temperature comes in
12:41
here, that's when I hear the compressor
12:43
kick on because it's the heat that I'm
12:44
bringing from my body inside the tub
12:46
that's more likely to raise the
12:47
temperature than external temperatures
12:49
because it's insulated well. And so, as
12:51
far as its basic functionality, it's
12:53
doing a great job in terms of both uh
12:56
keeping the water cold, but then also
12:58
keeping the water relatively clean.
13:00
Though there's going to be practical
13:03
What about some things that I don't
13:04
like? The main thing that's kind of
13:06
stood out to me is that I have found the
13:08
circulation pump a little bit whiny. And
13:10
so, I'm hearing it all the time. I'm
13:11
[music] intending to make a more
13:13
permanent fixture there at the end of
13:14
the tub to protect everything a bit
13:16
more. And hopefully as a part of that,
13:17
I'm going to try to have airflow through
13:19
there. And so, you know, it's it's not
13:22
causing any kind of issues for that.
13:23
But, I also I'm hoping to muffle that
13:25
sound a little bit. So, I don't love
13:28
I've got a really efficient tub, and so
13:30
but I did see that when the actual
13:33
uh refrigeration kicks on,
13:35
you know, 300 or 300 watts of draw is
13:38
significant. And so if you don't have a
13:40
well-insulated tub or you live in a very
13:43
it just be aware that it's going to cost
13:45
a little bit more to run it. And it's
13:46
not just that, there are some
13:48
consumables involved, most notably in
13:50
the filters themselves, which you can
13:52
buy from them. I haven't tried to source
13:54
them independently yet, but a three-pack
13:56
runs you somewhere under $40. You can
13:59
get a 10-pack for about $100. But, you
14:02
know, they're recommending that you
14:03
change those every uh 4 to 6 weeks, and
14:07
so that means that, you know, you're
14:09
going to run through some cost in
14:10
filters. So just be aware of that. And
14:13
then finally, I wish that there was a it
14:16
was maybe better insulated to handle
14:18
truly being outdoor. That was kind of my
14:19
understanding is that I could set this
14:21
up outdoor and keep it going all
14:22
outdoor. So I'm a little disappointed
14:24
that it's not really ready for winter
14:26
conditions, and I'm going to have to go
14:27
to an alternate solution, you know,
14:29
using some of their components for the
14:32
So that brings me to my conclusion. Cost
14:35
of this, depending on what unit you buy,
14:37
and this is the 1/3 horsepower, and so
14:39
you can get more powerful units
14:40
depending on your weather conditions.
14:43
So, you know, you're going to have to
14:44
use the calculus based on
14:45
on that. But for me, the cost runs
14:48
anywhere between 600 and 825 US dollars.
14:52
I got the more expensive version. I did
14:54
catch a 20% discount sale, but I got the
14:57
more expensive version because I did
15:00
want to have mainly I wanted the UV
15:02
light because I have definitely seen
15:04
lots of floaters in this over time. And
15:06
so I definitely wanted to do as much
15:08
filtration as possible. The Wi-Fi is
15:10
also, you know, a nice addition because
15:12
going through the menus on the unit is a
15:13
little bit clunky. So the Wi-Fi is a
15:15
cleaner process for that and using an
15:17
app. So anyway, I do appreciate all of
15:20
that. It comes with a 2-year warranty. I
15:21
wish it was a bit longer than that, but
15:23
you know, that's I think about standard
15:25
for the industry for these things.
15:27
So, at the end of the day, it's been a
15:28
positive experience. It's doing what I
15:30
want it to do. I found installation
15:32
pretty straightforward. And other than
15:33
those objections that I've raised, I
15:35
would say that this is at least in the
15:37
initial, this is a good buy. If you're
15:40
into cold plunging, this is a great way
15:41
to keep your water clean and to keep it
15:44
cold without having to mess with ice all
15:47
the time, without having to mess with
15:48
ice packs, and all the work that's
15:50
involved with that. I'm Dustin Abbott.
15:52
If you want more information, I will
15:53
throw a link to their website in the
15:55
description down below where you can go
15:56
and check it out for yourself. As
15:58
always, thanks for watching. Have a
16:00
And let the light in.