Up next in 10


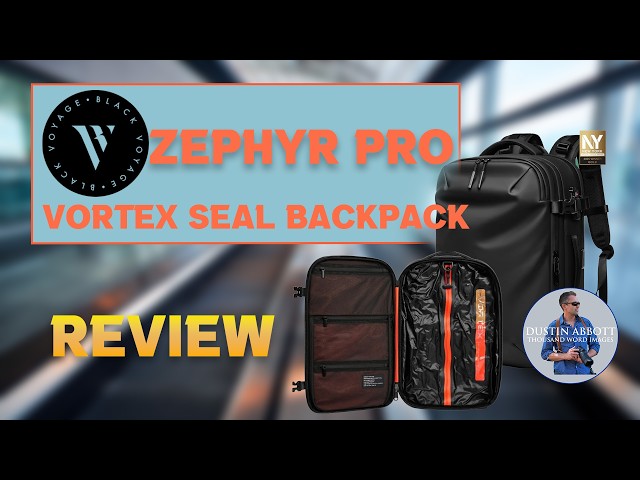
The Black Voyage Zephyr Pro is a cool travel backpack that utilizes Vortex vacuum seal technology to allow you to pack much more. Is it worth it? | Purchase the Zephyr Pro here: https://tinyurl.com/buyZephyrPro
Check out the DA Merch here: https://bit.ly/TWIMerch | Become a Patron: https://www.patreon.com/dustinabbott | On the Web: http://dustinabbott.net/ | Sign up for my Newsletter: http://bit.ly/1RHvUNp | Instagram: http://bit.ly/DLAinsta | Facebook: http://on.fb.me/1nuUUeH | Flickr: http://bit.ly/1UcnC0B | 500px: http://bit.ly/1Sy2Ngu Follow Craig @ https://www.instagram.com/craigstoffersen/
Want to support this channel? Use these affiliate links to shop at:
B&H Photo: http://bhpho.to/1TA0Xge
Adorama: https://howl.link/nt4zdz1goa7ql
Camera Canada: http://bit.ly/DLACameraCan
Sony Canada: https://www.thesonyshop.ca/?ref=abbott
Amazon: https://amzn.to/3HrY64d
Amazon Canada: https://amzn.to/3qG1p18
Ebay: http://bit.ly/DustineBay
Into the AM Clothing: https://bit.ly/intotheAMda and use code DUSTIN10 for 10% off
Fioboc Clothing: https://tinyurl.com/FiobocDA20 and us code DUSTIN20 for 20% off
Make a donation via Paypal: https://www.paypal.com/paypalme/dustinTWI
=============================
Table of Contents:
=============================
0:00 - Intro and Concept
1:14 - Specs and Design
2:31 - Dress Shirts
4:35 - Volume Packing
6:09 - Packing Technique
9:41 - Mixed Use Packing
12:10 - Yeti Test
12:51 - Fidlock Test
13:13 - Comfort Test
16:00 - What's Great
19:26 - What's Not Great
21:56 - Conclusion and Pricing
---------------------------------------------------------
Oben Tabletop Tripod shown in video: https://bhpho.to/3vL8YWy
My Cameras:
Purchase the Sony a7RV @ B&H Photo https://bhpho.to/3ZivNyZ | Adorama https://howl.me/cjNY1LU3gFH | Amazon https://amzn.to/3CRCDlq | Camera Canada https://shrsl.com/3vulf | Sony Canada https://bit.ly/BuyA7R5 | Amazon Canada https://amzn.to/3H8yeNH | Amazon UK https://amzn.to/3kbg5FM
Purchase the Sony Alpha 1 @ Camera Canada https://shrsl.com/2wdk2 | B&H Photo https://bhpho.to/3upRFZd | Adorama https://howl.me/cj2nQpjLBKW | Amazon https://amzn.to/3t1m8MD | Sony Canada https://bit.ly/BuySonyA1 |Amazon Canada https://amzn.to/3cVFrBB | Amazon UK https://amzn.to/2OtrjGe | Amazon Germany https://amzn.to/3d0GtMO | Ebay https://ebay.us/i371Vs
Canon EOS R5: B&H Photo https://bhpho.to/3iMH18x | Amazon https://amzn.to/33L3D53 | Camera Canada https://shrsl.com/2jqth
Purchase the Fujifilm X-H2 @ B&H Photo https://bhpho.to/3KAInTC | Adorama https://howl.me/cjyzbiO5lVp | Amazon https://amzn.to/41zMzKl | Camera Canada https://shrsl.com/4128o | Amazon Canada https://amzn.to/40gY4W7 | Amazon UK https://amzn.to/43Grn7a | Amazon Germany https://amzn.to/3L6hwjR
Get a discount off all Skylum Editing Software (Luminar, Aurora HDR, AirMagic) by using code DUSTINHDR at checkout: http://bit.ly/LuminarDLA
DISCLAIMER: This video and description contains affiliate links, which means that if you click on one of the product links, I’ll receive a small commission. As an Amazon Associate I earn from qualifying purchases.
Keywords: Black Voyage, Zephyr Pro, Cloudweave, Zephyr Pro review, Vortex, Vacuum Seal, Travel Backpack, Compression, 2-in-1, Peak Design Travel, PD Travel, 60L Travel, Travel Backpack, Daypack, Backpack, Review, Dustin Abbott, demonstration, photography, modular backpack, travel, business, Capture, Everyday, Sling,, letthelightin, DA, #letthelightin, #action, Coupon, Discount,
Show More Show Less View Video Transcript
0:10
Hi, I'm Dustin Abbott. I'm on a mission
0:12
this year to find the ultimate in travel
0:15
gear. I've got some major trips that are
0:16
upcoming this year, including uh a major
0:20
trip that I'm going to be taking to New
0:21
Zealand to visit my son who's there for
0:24
chiropractic college at the moment. And
0:26
so because of that, I'm someone that's
0:28
going to have very mixed travel needs.
0:30
You're here because this is a
0:31
photography primarily channel. And so as
0:33
a photographer, I need to travel with
0:35
all the typical things that people
0:37
travel with, but also some clothes. I
0:39
recently reviewed and in many ways
0:41
really liked the Peak Design twoin-one
0:44
travel backpack, but today I'm here to
0:47
review a challenger to that. a bag that
0:50
can expand anywhere from 30 to 60 L and
0:53
most importantly embraces a very
0:56
different kind of technology from Peak
0:58
Design and that is their Vortex vacuum
1:01
seal technology coming also with their
1:04
included pump that will allow you to
1:06
suck all the air out of there and pack
1:08
even more things into the backpack. This
1:11
is from Black Voyage and this is their
1:13
Zephr Pro backpack. I'm reviewing it in
1:16
the cloudwave finish. The backpack
1:18
itself weighs in at 5.18 lb or 2.36 kg.
1:23
It can accommodate a laptop up to 16 in.
1:27
The finish on it is rated at up to IPX8,
1:31
which means it can be submersed deeper
1:33
than 1 meter for at least 30 minutes.
1:36
All of the zippers are YKK, water
1:39
resistant zippers. And it's got a
1:42
variety of other technologies including
1:44
FID lock. It's got TSA lock on the side.
1:48
It's got an embedded uh port here for
1:51
doing USB and USBA charge ports. And
1:55
it's got 15 plus pockets, the ability to
1:58
carry all kinds of stuff. It's got
2:00
multiple grab points. It's got a hidden
2:03
rear compartment, and it will set you
2:05
back about $239.99
2:08
USD depending upon your configuration.
2:12
And it comes with a three-year warranty.
2:14
So, those are the basic stats that you
2:17
can pull off of any website. But the big
2:21
question is, how is it to pack in? How
2:23
is it to carry? How is its actual
2:25
functionality? I'm going to run a series
2:28
of tests to determine that and bring you
2:30
back my conclusion. All right, for one
2:32
of our tests here, we're going to try a
2:34
couple of shirts that I actually might
2:36
travel with. These are ones that are
2:38
supposed to be low wrinkling, and I know
2:40
from packing them along, they do fairly
2:42
well for that. We're going to see what
2:43
happens if I compress them down into the
2:46
case, leave them there for a day or two,
2:48
and then pull them back out. We'll see
2:50
if they look anything like this.
2:54
Okay, moment of truth. Let's see how
2:56
well these have packed. First of all,
2:57
taking a look in here, we can see that
3:00
there is still some vacuum seal, but I
3:02
can tell that there is a little bit more
3:04
air in there. This is after 24 hours.
3:06
And so they will say that that slow
3:09
release is part of allowing things to
3:11
come out and not really be uh wrinkled
3:13
in the process. Now, you have to use a
3:15
really firm amount of force when doing
3:17
that. They tell you it's designed for
3:19
that, so don't worry about it. All
3:21
right, shirt number one. And we can see
3:24
that this shirt comes out. It does have
3:28
some wrinkle to it. And so I'll hang it
3:31
up and see if it's the kind of wrinkles
3:33
that would fall out or not. This is
3:35
actually the more wrinkler-prone of the
3:37
two. This second shirt is more of, you
3:40
know, really kind of technical
3:41
materials. And so I can see that there
3:43
is some wrinkle pattern here on the back
3:46
where it's really been kind of
3:47
compressed down by the vacuum seal.
3:50
However, again, I'll hang it up for a
3:52
few hours and then check back in to see
3:54
if that's the kind of wrinkles that just
3:56
fall out of. So, how after 24 hours or
4:00
slightly more of being home hung up, did
4:02
our dress clothes recover? Well, there's
4:05
definitely still some wrinkles in this
4:07
shirt. Nothing that a quick press
4:09
couldn't bring out. I haven't done
4:10
anything like put it in a room with
4:11
steam or anything. Now, this shirt,
4:13
which I told you is a little bit more
4:15
technical, travels a little bit better.
4:18
It's probably wearable now after 24
4:20
hours or so of like that. Particularly
4:22
if I put it in a shower and a hotel room
4:25
with some steam, it definitely would be
4:26
perfectly wearable. So again, it really
4:28
comes down to the kind of fabrics that
4:30
go into the vacuum seal as to what they
4:33
look like when they come back out of the
4:35
seal. Okay, for our next test, we're
4:37
going to take a look at volume packing
4:39
and see if the vacuum seal actually
4:42
helps. They claim up to 58%
4:45
uh reduction of size for that. Most
4:48
reviewers that I've seen so far claim
4:50
that that's probably slightly
4:53
exaggerated, but I'm going to take a
4:54
look at how well the actual vacuum seal
4:56
works. And so, I've got a total of five
4:59
pair of pants that I'm going to try to
5:00
fit into this compartment along with
5:03
three golf shirts and then a total of
5:07
seven t-shirts. So, let's see how well
5:10
all of this fits into the bag. All
5:12
right. So, first of all, I wanted to see
5:14
how well all of this clothes would fit
5:17
into this bag without any kind of
5:19
vacine. So, I'm just setting it in that
5:21
same section on top. And with the
5:24
extension folded out, I do think that I
5:27
can obviously zip it up and I could in
5:29
theory fit all of that tightly in there.
5:32
But let's see how much we can reduce by
5:34
using the vacuum seal.
5:45
Okay. So, there's no question I did
5:47
definitely gain some space, but I can
5:49
see that it's going to require to get
5:51
the most out of this, it is going to
5:53
require a better kind of packing and it
5:55
may be more of a rolling rather than
5:57
folding. Now, obviously, I've got lots
6:00
of extra room for closing the bag now.
6:02
And I do have lots of nooks and crannies
6:04
around the edges where I could put
6:07
additional items in here. I still don't
6:09
have enough room for something like my
6:11
toiletry bag, though, and that's a big
6:12
deal to me.
6:28
Okay. Okay. So, by utilizing a more
6:30
effective packing technique, I've
6:32
obviously created a lot of uh more
6:35
usable space and a flatter surface that
6:38
is going to be more easy to fit things
6:40
into. The big question is this. Can I
6:42
fit my big toiletry bag into the space
6:45
that I've now created? Well, the short
6:47
answer is that it's not a great fit here
6:51
uh for this. It's obviously the wrong
6:52
shape for what I'm trying to accomplish
6:55
here. All right. No matter how I try to
6:57
play with this, it's not necessarily
7:00
going to be a great fit. Now, that being
7:03
said, in a pinch, you know, if I
7:06
absolutely had to get by with it, could
7:08
I zip this up and make it fit? Well, the
7:12
answer is yes. And obviously, I could
7:14
put a fair bit more in there and utilize
7:17
the built-in space here. And of course,
7:20
that's still leaving me room to pack in
7:22
this back section for essentials like,
7:26
you know, laptop and uh different things
7:29
like that, other pockets that there
7:31
still is plenty of room here that I
7:33
could fill those out. My iPad, for
7:35
example. Oh, yeah. It's not even tight
7:38
on there. It's no problem. And so,
7:40
obviously, we have been able to utilize
7:42
that effectively. Now, the next test
7:44
that I'm going to do is that while I'm
7:47
not necessarily concerned at the moment
7:49
cuz I'm not leaving on a trip on taking
7:52
this with me, just like we did with the
7:55
dressier clothes, we're going to see how
7:57
well after 24 hours the vacuum seal has
8:00
held up. And remember, I've got five
8:02
pair of pants and I've got 10 shirts in
8:04
there. We'll see how they look when they
8:06
come out of the seal in 24 hours. All
8:08
right, it's been longer than 24 hours,
8:12
more like 30 hours because of my
8:14
schedule today. But let's open her up
8:17
and see what we got inside.
8:23
So, as before, it has inflated a little
8:27
bit, but it feels like it's actually
8:29
less. It still has kind of like that
8:31
vacuum seal look to it. And if I release
8:34
here,
8:36
yeah, it definitely started to breathe a
8:38
little bit more. And so, let's take a
8:41
look at how things come out here of the
8:44
bag itself. So, here's a t-shirt.
8:48
Uh, I don't know, looked kind of
8:51
wrinkled to me.
8:55
It's obviously going to depend by
8:56
material. So, for example, this is a uh
9:00
this golf shirt is very, very resistant
9:02
to wrinkling. And so, things like that
9:05
obviously are going to pack well with
9:08
the kind of vacuum sealing that we're
9:09
talking about here. I'm interested also
9:12
when it comes to things like the pants.
9:14
And so, the pants here again, they look
9:18
um they're wrinkled, but not terribly.
9:20
So, uh, sometimes rolling them actually
9:23
contributes to that, them surviving
9:25
things like that a little bit better.
9:28
You know, I think that things like
9:29
t-shirts probably once they're laid out
9:31
and just the nature of, you know,
9:33
something cotton like that, it's
9:35
probably going to recover just fine,
9:37
more so than it would with, you know,
9:39
say a dress shirt like we've looked at
9:41
previously. Okay, on our final time
9:43
here, I'm actually going to do an
9:45
attempt like what how I would actually
9:47
pack for an event like this. Whereas
9:50
where I'm typically going away, it's
9:51
going to be a mix where I definitely
9:52
want my toiletry bag, I want my tech
9:54
bag, I'm going to take an e-reader and a
9:58
laptop here with me for work. And then
10:02
I'm going to have mixed clothes. And so
10:04
that's going to include at least one
10:06
pair of dress pants, some casual pants,
10:08
some dress shirts, a tie, a belt, and
10:11
then some more casual stuff, including
10:13
workout pants, workout shirt. Um, I've
10:16
got a golf shirt in here. And then I've
10:19
got socks, um, undershirts, and
10:21
underwear all here. So, we need to get
10:24
all of this into a bag in a way that's
10:26
going to make sense. Let's see how it
10:28
holds up to real packing.
10:55
Okay. Well, I have everything in there
10:57
packed and ready to go. Couple of tips
11:00
of things that I figured out that would
11:01
work better for me just in the way that
11:03
I pack. I layered in in the vacuum seal
11:06
compartment. I put a few items in there.
11:08
I put things that I didn't worry about
11:10
wrinkling. uh socks, undershirts, uh
11:13
workout shirt, um underwear. I also
11:16
packed into that space my workout pants.
11:18
Also, I also packed into that space my
11:21
camera because I picked up a tip from
11:23
another reviewer that once you do that
11:25
vacuum sealing, it locks everything into
11:27
place. It keeps it from moving around.
11:29
And that's a space where there is
11:30
padding all around. So, it's a good
11:32
place for protecting it, protecting
11:33
everything. And I still had room for
11:36
putting things into the tech department
11:38
or compartment here. And so my uh laptop
11:41
and my e-reader going into that space
11:44
along with where I could also put in a
11:46
power bank and a pump. And of course I
11:48
already have in there my tech bag with
11:50
has all of my cables and connections and
11:52
earphones and all of the things like
11:54
that. Still room in the top where I
11:56
could have easy access for things like a
11:58
passport um or you know maybe memory
12:01
cards or basic things for my phone. All
12:04
of those things accessible right there.
12:06
And overall, as I've got it all packed
12:08
here, the bag is actually packed tight,
12:10
as you can see from the time lapse. One
12:12
final priority for me is I need to be
12:14
able to bring my Yeti along. I'll either
12:16
have a hot tea in this in the morning
12:18
and then often in airports, I'll fill it
12:20
up with water, and I just want to be
12:22
able to take this with me if I'm
12:23
checking in a bag. Now, the side pocket
12:25
here initially would seem like that's a
12:27
no-go. However, it is designed where
12:29
there is this zipper that allows
12:31
elasticity to it. And not only even with
12:33
it full like this will it go uh all the
12:36
way in there, but it will do so very
12:39
very securely. You're going to see right
12:40
now that this is empty, but as I'm
12:42
moving the bag around, it is not
12:44
shifting at all. And so it does pass
12:47
that test and I'm able to squeeze that
12:49
in there even when the bag itself is
12:51
very full. One final thing I want to
12:53
note that's an advantage even when I'm
12:55
very heavily packed like this. Having a
12:57
FID lock here means that I can actually
13:00
attach in a one-handed operation here
13:03
and then if I go to loosen likewise I
13:06
can use a one-handed operation. Say this
13:08
hand I'm carrying a you know cup of
13:10
coffee or something. So being able to do
13:12
that onehanded is very useful. All
13:14
right, the final uh task with my heavy
13:16
load here is to go out and I'm going to
13:18
walk for about a mile, kilometer and a
13:21
half to uh determine 1.6 kilometers to
13:25
determine how it would be carrying this
13:26
kind of load uh as it's packed through
13:28
the airport and so I can give you some
13:30
feedback on how the actual strap quality
13:33
is in terms of comfort. Now, there is a
13:36
waist strap that is optional. I'm going
13:39
to do half of the trip with the waist
13:41
strap mounted. And the actual mounting
13:44
process is easier to do with the
13:47
backpack off obviously, but I did want
13:50
to demonstrate it with it on because it
13:52
is pretty straightforward. Just a matter
13:53
of um clicking these uh straps to
13:57
release. There is a just a point here
13:59
where it mounts on and then you can snap
14:01
that back into place. and so that it's
14:04
actually pulling some of that weight uh
14:07
down towards my lower back and taking a
14:09
little of the pressure point off my
14:11
chest. That being said, however, it is
14:14
not uh terribly uncomfortable right now
14:16
and I will make a few little minor
14:18
tweaks to make sure everything is
14:19
adjusted appropriately before I head out
14:21
and then I'll report back after I
14:23
return. Okay, I'm at the turning point.
14:26
I have gone 800 m or slightly over and
14:29
so that's the a half mile. We're going
14:31
to turn around and uh head back the
14:33
other direction. I have been wearing to
14:35
this point I have been wearing the waist
14:37
strap. I will remove that for the second
14:39
portion. I found that for myself it fit
14:42
best out of the three positions that the
14:44
center strap could go on. For me, the
14:46
lowest position hit kind of midchest
14:49
which was the best configuration for me.
14:52
So far, no problem as far as weight
14:54
distribution. Now, in full disclosure, I
14:56
am a regular rucker and I carry a
14:58
weighted vest of about 30 pounds
15:01
regularly and so carrying weight on my
15:03
back is not a big deal for me. But I'm
15:05
mostly determining whether or not these
15:07
straps are going to start to cut into
15:08
me. The real critical test will be now
15:10
as I remove the waist strap. And so
15:12
everything is up here on the top. Okay,
15:15
just finished up the uh mile 1.6 km and
15:18
so second half I did without the strap.
15:21
So, just relying on the uh upper
15:24
portion, I would say that overall
15:26
comfort was just fine. I would say it
15:29
falls somewhere in between the first
15:31
generation Peak Design travel backpack
15:33
and then their second generation 2in-1
15:35
travel backpack. The twoin- one has a
15:38
little bit more padding and I would say
15:39
is slightly more comfortable than this,
15:41
but definitely this is better in the
15:43
pressure points than what the first
15:44
generation Peak Design was. I would
15:46
often start to feel just kind of
15:48
pressure in my traps where they kind of
15:50
attach to my neck muscles and feel just
15:52
pressure on there. And after this uh
15:54
walk, which I would say represents
15:56
probably as long as what most people are
15:57
going to do under ordinary circumstances
16:00
wearing this travel backpack, I had no
16:02
problems at all. All right, so what's my
16:04
conclusion on the Black Voyage Zephyr
16:06
Pro travel backpack? Well, some of the
16:09
things that I think really stand out to
16:11
me that I like is that I did find that
16:14
the vacuum sealing does work. And one of
16:17
the things that is noted by those that,
16:19
you know, review more uh backpacks and
16:22
uh luggage than what I do is that the
16:24
vacuum seal here is robust. It lasts for
16:27
longer than what a lot of the
16:29
competitors do. And I found that
16:30
particularly if I packed it well, I
16:32
would come back 24 hours later and I
16:34
felt like there was very little
16:35
expansion there. And so in the case of
16:37
where I just did that hike, I was in at
16:39
about 30 hours. Um, from when I packed
16:42
it and sealed it up and everything was
16:44
still holding in place very nicely. The
16:46
cloud weave fabric that I've got as a
16:49
finish on this actually feels really
16:50
great. It has that has a kind of a
16:52
almost a liquid feel to it, which is
16:54
very soft, pleasing, but also nicely
16:57
weatherproof and sheds things well. I
16:59
also find on the back that there is a
17:02
honeycomb here designed that helps it to
17:04
breathe well. So that's good. Also
17:06
interesting to me is that the uh trolley
17:09
strap is upright, which to me is a
17:12
better configuration than having a
17:13
backpack on its side. And so I
17:15
definitely prefer that. I also prefer
17:17
that if if I've got, you know, my mug
17:21
packed into the side of this. Keeping
17:22
that upright is better for me. And so
17:25
that is good. I also like the kind of
17:28
sideways suitcase style packing that you
17:31
can do with this with the flap opening
17:33
up to the side allowing you access to
17:35
that full compartment as opposed to
17:37
zipping down from the top and having to
17:39
lay it back. The fid lock is handy as
17:42
we've noted if you need to do one-handed
17:44
operation. And I do appreciate that
17:46
unlike Peak Design for example, there is
17:49
an integrated TSA style lock here that
17:52
will allow you to lock your zippers in
17:54
place and give you a little bit more
17:55
security. I did note that this bag
17:57
scales up and down nicely. We've seen it
18:00
packed with a lot of stuff. All the junk
18:03
in front of me is all things that were
18:04
packed in this bag just a few minutes
18:06
ago. However, when it arrived to me, it
18:09
arrived really, really compressed down
18:11
and very, very flat. And so, if you need
18:13
to scale it down, the expansion, you can
18:15
zip that down and it becomes a much
18:17
smaller backpack. Doesn't look quite as
18:19
bulky on your back. So, I thought that
18:20
was good. I felt like the comfort level
18:23
overall was good. not outstanding, but
18:26
very good when it is packed heavy and I
18:28
could do my hike there um with the
18:31
backpack fully loaded and I didn't have
18:34
any issue with that. Couple of other
18:35
kind of cool features there is that here
18:38
in this front compartment here there is
18:41
a very cool center pouch that is
18:44
designed perfectly for holding something
18:46
like a passport and so makes it easy
18:49
access, easy to find. But if you're a
18:51
little bit paranoid about that, there is
18:53
also an interesting compartment here at
18:55
the back. You can actually zip down from
18:58
the middle and expose a compartment here
19:00
at the back where you could put, you
19:02
know, either just pack a few more items
19:03
into or hide a few valuables in
19:06
obviously with it up against your back
19:08
when you're carrying it around. No one's
19:10
ever going to get their hands in there.
19:12
So, that was a cool thing for that.
19:14
Another thing that's positive where you
19:16
know there's a little par paranoia these
19:18
days over tariffs and things like this.
19:20
If you're buying from the US market for
19:21
example it is shipping from a US
19:24
warehouse and so you're not having to
19:26
deal with that. So what about some
19:29
things that are not so great? Well, one
19:31
of the things I noted is while I think
19:33
that it's cool here that we have a port
19:36
on the side access to a power bank and
19:39
so you can plug in and charge things.
19:41
And so you have both a USBC and a USBA
19:44
port there um for easy access, but what
19:47
is missing is a pouch conveniently
19:50
located on the outside of the back bag
19:52
where you could slip a phone or
19:54
something similar that you're actually
19:55
charging from it. Now, just note with
19:58
that there are cables attached here
19:59
inside, but you're going to need to
20:00
provide your own power bank for that.
20:02
But it seems like a missed opportunity
20:04
to not have a pouch nearby that if
20:05
you're wanting to do a charge while
20:07
you're carrying the bag to have it right
20:09
there with uh charging your phone would
20:10
be good. Obviously, if you're packing
20:14
clothes particularly into that chamber
20:16
that are the compression chamber that
20:18
can wrinkle, they will wrinkle. And so,
20:22
um, one of the things that I did note on
20:23
that is that, you know, it's not some
20:25
kind of magic thing where you put it in
20:27
there and you compress it all down and
20:29
it comes out unrinkled. It definitely
20:30
comes out wrinkled. to use it
20:32
accordingly.
20:33
One thing that it I had to kind of wrap
20:35
my mind around is having not used a
20:38
vacuum seal space before is that it does
20:40
change the way that I pack. Like I'm
20:42
accustomed to having an open space and I
20:45
use cubes a lot for my packing.
20:47
Obviously, to make uh appropriate use
20:50
here of the vacuum seal portion, it's
20:53
going to make much more sense for you to
20:55
not use cubes and or if they're cubes to
20:59
make sure that they're more flat because
21:01
what's going to happen is everything you
21:03
pack into this. It's going to raise the
21:06
floor of your main packing chamber. And
21:09
in the other spaces, for example, back
21:12
here where I can put tech things like
21:14
laptops and other things like that,
21:16
there's not really going to be room in
21:18
there for me to pack something like
21:21
this. It's not going to fit very well in
21:23
there at all, particularly if I'm trying
21:24
to put anything in this space. And so,
21:26
that was going to work. Even something
21:28
like my tech pouch is probably a little
21:31
too thick for that. And again, it's
21:33
going to create issues here. And so,
21:35
really, those things need to go in the
21:36
main compartment. and that gets a little
21:39
bit complicated because of the race
21:42
floor with the vacuum ceiling. So, I
21:43
think that the vacuum sealing does work,
21:45
but for me, it's going to just require a
21:47
little bit of rethinking about the way
21:49
that I typically pack and maybe the
21:51
accessories that I would choose to put
21:53
into a bag like this if I were using it
21:56
on a regular basis. Now, when compared
21:58
to equivalent Peak Design product, the
22:00
value here does feel good. For the cloud
22:03
weave finish that I have reviewed here,
22:05
you're looking at about right under
22:07
$260,
22:09
about 360 Canadian. However, there is a
22:11
discount code in the description that
22:13
will save you another 10% off that. So,
22:15
and get you into the 230 range, 235
22:19
range. And so, I think as far as value
22:21
goes, particularly considering that
22:23
you're getting the vacuum sealing
22:24
technology and the included pump to go
22:27
with that, it feels like a pretty strong
22:29
value. particularly considering that
22:31
this is made of very robust materials.
22:34
However, while it does have a good long
22:37
warranty on it, it does not come with
22:38
the lifetime warranty that an equivalent
22:40
Peak Design product does. And so, that's
22:42
one thing to consider there. I would say
22:44
that my final conclusion if I were
22:46
choosing this versus one of the
22:48
equivalent bags that does not use the
22:50
vacuum seal technology is that I would
22:53
really want to make sure that I'm going
22:54
to consistently use that vacuum seal
22:56
technology. As someone who is a
22:58
photographer and who regularly travels
23:00
with photography gear, uh the system
23:02
that I use, sealing a camera into that
23:05
space is useful. But say if I wanted to
23:07
bring a separate camera bag along,
23:09
again, not having a big open space as I
23:12
would with say a Peak Design travel
23:15
backpack, it makes it a little bit more
23:17
complicated to bring that travel gear or
23:19
that photography gear along. And so I
23:22
think that um maybe it's a little bit
23:24
less good for photographers and better
23:26
for those that are just doing um you
23:28
know either overnight or you know
23:30
multiple day travel and you're wanting
23:31
to travel with just a backpack you're an
23:34
efficient packer and I would say in
23:36
particular if you're the person who buys
23:38
the kind of fabrics something more like
23:40
what I'm wearing at the moment that
23:42
travels really really well and is not
23:44
prone to wrinkling at all. you're the
23:45
kind of person that can take great
23:47
advantage of the vacuum sealing and just
23:49
get a lot more stuff into the bag
23:51
comparatively than what you could in a
23:53
different 60 L bag. So, my conclusion is
23:56
is that it is a great bag and a good
23:58
value for the money, but it is a great
24:00
bag for the right kind of consumer. And
24:02
hopefully this review has helped you to
24:04
determine whether or not you are that
24:06
type of consumer. You want more
24:08
information, there are links in the
24:09
description down below where you can
24:11
check it out for yourself. As always,
24:13
thanks for watching. Have a great day
24:15
and let the light in.
#Science