Up next in 10

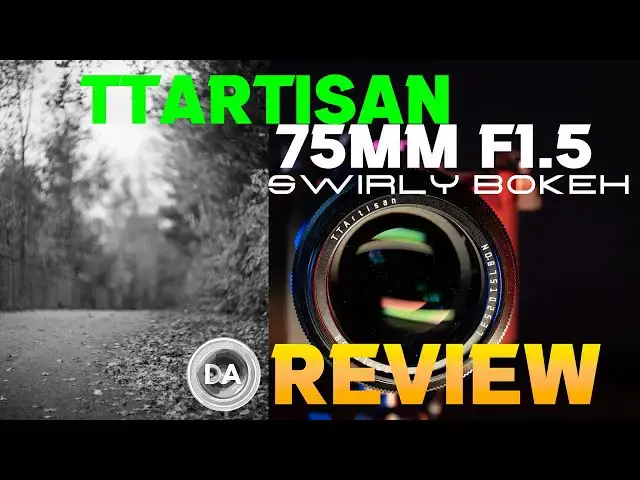
TTArtisan 75mm F1.5 Swirly Bokeh Review | A Biotar for 1/10th the Price?
Nov 12, 2024

Photographer Dustin Abbott shares a deep dive review into the extremely unique TTArtisan 75mm F1.5 Swirly Bokeh lens. | Read the Text Review: | Visit the Image Gallery: | Purchase the TTArtisan 75mm F1.5 Swirl @ Vitopal https://tinyurl.com/buyTTa75 | B&H Photo https://bhpho.to/3Yl9pVZ | Adorama https://howl.link/0x8izkjhx93ar | Amazon https://amzn.to/3YD8GAO | Amazon Canada https://amzn.to/3YP04HL | Amazon UK https://amzn.to/3YP04HL | Amazon Germany https://amzn.to/3YP04HL
Check out the DA Merch here: https://bit.ly/TWIMerch | Become a Patron: https://www.patreon.com/dustinabbott | On the Web: http://dustinabbott.net/ | Sign up for my Newsletter: http://bit.ly/1RHvUNp | Instagram: http://bit.ly/DLAinsta | Facebook: http://on.fb.me/1nuUUeH | Flickr: http://bit.ly/1UcnC0B | 500px: http://bit.ly/1Sy2Ngu Follow Craig @ https://www.instagram.com/craigstoffersen/
Want to support this channel? Use these affiliate links to shop at:
B&H Photo: http://bhpho.to/1TA0Xge
Adorama: https://howl.me/cjU0LKdp3LN
Camera Canada: http://bit.ly/DLACameraCan
Sony Canada: https://www.thesonyshop.ca/?ref=abbott
Amazon: https://amzn.to/3HrY64d
Amazon Canada: https://amzn.to/3qG1p18
Ebay: http://bit.ly/DustineBay
Into the AM Clothing: https://bit.ly/intotheAMda and use code DUSTIN10 for 10% off
Fioboc Cloting: https://tinyurl.com/FiobocDA20 and us code DUSTIN20 for 20% off
Make a donation via Paypal: https://www.paypal.com/paypalme/dustinTWI
=============================
Table of Contents:
=============================
0:00 - Intro
1:45 - In the AM
2:25 - Build and Features
6:39 - Manual Focus
7:57 - Image Quality Summary
12:37 - Conclusion and Pricing
13:39 - Optical Deep Dive
---------------------------------------------------------
Oben Tabletop Tripod shown in video: https://bhpho.to/3vL8YWy
My Cameras:
Purchase the Sony a7RV @ B&H Photo https://bhpho.to/3ZivNyZ | Adorama https://howl.me/cjNY1LU3gFH | Amazon https://amzn.to/3CRCDlq | Camera Canada https://shrsl.com/3vulf | Sony Canada https://bit.ly/BuyA7R5 | Amazon Canada https://amzn.to/3H8yeNH | Amazon UK https://amzn.to/3kbg5FM
Purchase the Sony Alpha 1 @ Camera Canada https://shrsl.com/2wdk2 | B&H Photo https://bhpho.to/3upRFZd | Adorama https://howl.me/cj2nQpjLBKW | Amazon https://amzn.to/3t1m8MD | Sony Canada https://bit.ly/BuySonyA1 |Amazon Canada https://amzn.to/3cVFrBB | Amazon UK https://amzn.to/2OtrjGe | Amazon Germany https://amzn.to/3d0GtMO | Ebay https://ebay.us/i371Vs
Canon EOS R5: B&H Photo https://bhpho.to/3iMH18x | Amazon https://amzn.to/33L3D53 | Camera Canada https://shrsl.com/2jqth
Purchase the Fujifilm X-H2 @ B&H Photo https://bhpho.to/3KAInTC | Adorama https://howl.me/cjyzbiO5lVp | Amazon https://amzn.to/41zMzKl | Camera Canada https://shrsl.com/4128o | Amazon Canada https://amzn.to/40gY4W7 | Amazon UK https://amzn.to/43Grn7a | Amazon Germany https://amzn.to/3L6hwjR
Get a discount off all Skylum Editing Software (Luminar, Aurora HDR, AirMagic) by using code DUSTINHDR at checkout: http://bit.ly/LuminarDLA
DISCLAIMER: This video and description contains affiliate links, which means that if you click on one of the product links, I’ll receive a small commission. As an Amazon Associate I earn from qualifying purchases.
Keywords: TTArtisan, 75mm, F1.5, swirl, swirly bokeh, TTArtisan 75mm review, M42, Sony Alpha 1, Sony a7RV, Fuji, Nikon, Canon, Review, mirrorless, Full Frame, Sports, Tracking, Dustin Abbott, Real World, Comparison, Handling, Focus, Portraits, Resolution, High ISO, Image Quality, Sample Images, Photography, 61MP, #letthelightin, #DA, #Alpha1, #A7RV
Show More Show Less View Video Transcript
0:10
hi I'm Dustin Abbott and I'm here today
0:12
to give you my review of a very unique
0:14
lens the new TT Artis 75mm
0:17
f1.5 swirly bokeh lens now I've long had
0:21
a love for vintage glass and have
0:24
pursued some of lenses like old Helios
0:27
and Jupiter lenses because they are able
0:30
of producing that kind of unique swirly
0:32
effect that can be very desirable or at
0:35
least unique if you're into that the TTR
0:38
75mm f1.5 is essentially a new version
0:41
of the Carl ice Jenna Batar
0:44
75mm f1.5 which is a very old lens
0:48
design in its original form over 80
0:50
years old and copies of which can cost
0:53
into the thousands of dollars if you can
0:55
find them on the used Market of course
0:57
anytime you're going after these old and
0:59
vintage lenses I can see looking inside
1:02
for example my Helios 442 is that I look
1:06
inside there I can see that there is a
1:08
bit of fungus that's growing inside you
1:11
know there's some mechanical issues it
1:13
kind of separates and comes apart a
1:15
little bit here that's the nature of
1:16
these be the Beast with these so be to
1:18
be able to get a new lens that has that
1:21
same Optical charm but has a little bit
1:23
better manufacturing and a whole lot
1:25
less Gunk going on in the inside it's
1:28
certainly very interesting particularly
1:29
when you can get get this lens for only
1:31
about 270 bucks and it is a lot of fun
1:34
however note that this is going to be a
1:36
different kind of review of a different
1:38
kind of lens because pretty much nothing
1:40
about this lens is conventional still
1:42
sound interesting well let's dive in and
1:44
let's find out today's episode is
1:46
brought to you by into the am a clothing
1:49
brand from Southern California that's
1:51
been a sponsor of this channel for years
1:53
they are most famous for their graphic
1:54
teas and hoodies designed by local
1:57
artist and I'm diving into their fall
1:59
collection like the this time warp tea
2:01
that I'm wearing and then layering up
2:02
with their Daybreak performance jacket
2:05
which is both water and wind resistant
2:07
and I need them both in an Ontario fall
2:10
Black Friday is just around the corner
2:12
and there are deals up to 60% off plus
2:15
use the code Dustin 10 for an additional
2:18
10% off visit intotheam.com
2:22
dustin1 for more
2:24
information so in terms of the basic
2:27
overall design here this is essentially
2:29
shaped like what they called the fat
2:31
version of the biotar that was sold from
2:33
1952 to
2:35
1967 it has looking at it a very
2:38
handsome kind of vintage design to it
2:40
that frankly really reminds me of a lens
2:43
like the recent Voit Lander 75mm f1.5
2:46
that I reviewed earlier this year
2:49
everything is all metal and glass here
2:50
so it does have some heft to it weighs
2:53
about 570 G or 20 o here and by my
2:58
measurements it is roughly 73 mm in
3:01
diameter by about 72 mm long with a 58
3:04
mm front filter thread now when you
3:07
focus towards the closest Focus you're
3:10
actually going to find that the lens
3:12
will extend a bit it will extend out
3:14
about an additional 10 millim so it is
3:16
not internally focusing it's at its
3:19
longest point when you are focused down
3:21
to minimum Focus now one big thing
3:23
you're going to have to deal with here
3:25
is that they have decided to go with the
3:28
classic um m42 Mount and that's not
3:32
Micro 4 seconds that is the old m42
3:35
screw Mount that goes back till I think
3:38
somewhere like the 20s it's a
3:40
long-standing mount but it is quite easy
3:42
to adapt but it means you're going to
3:45
have to have an adapter so you can adapt
3:47
it to a lot of different platforms uh
3:50
old dslrs you can have a thinner kind of
3:53
adapter but because here with mirrorless
3:55
the optical path needs to be further
3:57
forward you'll find that the adapter
3:59
you're going to need is going to have to
4:00
be fairly
4:02
chunky I've done it on Sony here and the
4:05
good news is that the adapters are quite
4:07
an expensive the one I'm using here cost
4:09
about 20 bucks and so nothing expensive
4:12
there but it is going to add some bulk
4:13
and some length there and a little bit
4:15
of price now one thing that I like about
4:17
the design here is that it actually
4:19
includes an allen key with the
4:21
recognition that as you adapt these
4:23
sometimes everything doesn't line up
4:24
perfectly you can actually use an allen
4:26
key you can loosen up three little
4:28
screws on here you can then rotate the
4:31
lens in its housing to where it's lined
4:33
up perfectly then tighten things back
4:35
down it's a good thoughtful touch there
4:37
which I appreciate now what's
4:39
interesting here is that you can
4:41
actually adapt this to a variety of
4:43
platforms as mentioned but that includes
4:45
in fujifilm's medium format you're
4:47
actually going to get the most
4:48
pronounced swirl effect there because
4:50
more of the image circle is being
4:52
exposed it'll also maybe look the
4:55
softest in some ways there for the same
4:57
reason likewise if you go to apsc You're
4:59
actually crop off a lot of the swirl
5:01
effect and you're going to retain the
5:03
more conventional sharper portion of the
5:06
image Circle just so just be aware of
5:08
that now the manual focus ring here is
5:10
very nicely implemented it has that kind
5:13
of knurled or scalloped feel to it all
5:16
metal everything moves very very
5:17
smoothly pretty much perfect damping I
5:20
really really like that ring about 200°
5:22
of rotation it's pretty sweet and so
5:24
they've done a great job with that up
5:26
front we have a nicely implemented
5:28
aperture ring it has has soft clicks
5:30
throughout and those clicks will mostly
5:33
be at the half stops at the earlier part
5:35
of the range and then after f5.6 they're
5:37
only at the full stops and of course you
5:40
have markings just at the full stops
5:42
along the way but you can feel those
5:44
clicks as you go inside we have an
5:46
aperture uh aperture Iris it's really
5:48
beautiful 13 rounded aperture blades and
5:51
as you can see here it looks pretty
5:52
sweet when you have it stopped down
5:55
minimum Focus distance here is 75 mm and
5:59
it has a fairly low magnification of
6:01
about 0.10 times so not incredibly
6:04
useful I will point out however that
6:06
there are plenty of adapters like Vell
6:08
adapter that I have that actually allows
6:10
you to uh rotate the adapter itself and
6:14
so you can extend that Optical path a
6:15
little bit further forward which will
6:17
allow you to get closer focused results
6:19
so you know just something to bear in
6:20
mind that for Fairly inexpensive if you
6:22
want more up close work you are able to
6:25
get that the lens I will note is pretty
6:28
soft when it's uh at minimum Focus
6:30
distance just so you know that now
6:32
obviously here there are no electronics
6:35
there's no weather ceiling there's
6:37
nothing like that now of course not
6:39
everyone is comfortable or with manual
6:41
focus or familiar with it so let me just
6:43
take a moment to talk about how this
6:44
lens works on a Sony camera which would
6:47
be very similar to how it would work on
6:48
a modern mirrorless Canon camera or or
6:52
Nikon camera it is actually quite easy
6:55
to manually focus on these platforms so
6:57
no there are no electronics so that
6:59
means that you're not going to get as
7:00
you start to rotate the ring you're not
7:02
going to get an automatic magnification
7:03
of the focus area but you can of course
7:06
manually mag magnify that area and so
7:08
you can visually confirm Focus quite
7:10
easy you can use Focus overlays and so
7:13
things like focus peaking um with or a
7:16
color overlay you're going to be able to
7:18
see those things because those are
7:20
actually handled from within the camera
7:22
and they will still work here you also
7:24
will be able to use mbody image
7:26
stabilization if your camera is so
7:28
equipped however you're going to need to
7:29
manually set the focal length so in this
7:32
case 75 mm and so that you can the body
7:36
camera body knows how to set the
7:37
adjustment there and if you don't you're
7:39
going to get some erratic results so be
7:41
sure to manually set that uh that focal
7:44
link for inbody image stabilization but
7:46
of course once you've done those things
7:48
I found that focusing was I had pretty
7:50
much perfect accuracy you just you know
7:52
take your time nail focus and it's
7:54
really no issue there so how about the
7:57
Optics here as mentioned this is a
7:59
completely different kind of lens and I
8:01
will give you a deep dive Optical
8:02
breakdown at the end of the video if
8:04
you're so interested we have an optical
8:06
design here A Very Old Optical design of
8:08
six elements in four groups very simple
8:11
two of those are high index elements the
8:14
MTF chart if you're just looking at MDF
8:16
charts looks pretty scary and of course
8:18
part of that is by design it uh it
8:21
actually is designed around having some
8:24
Optical flaws and that's part of the
8:26
overall charm and look that swirly
8:28
effect that people are going to buy this
8:30
lens for is actually the result of
8:31
optical defects which is why the MTF
8:33
chart doesn't look all that
8:35
fantastic now in some Matrix the lens
8:38
does quite well I found that it has very
8:40
low Distortion a tiny bit of barrel
8:41
Distortion that is negligible to fix I
8:44
used a plus three it has a quite a
8:47
minimal amount of vignette I used only a
8:49
plus 45 which is well under two stops so
8:52
no major issue there I also found that
8:54
there was basically no lateral comatic
8:57
aberration however you will definitely
8:59
see some longitudinal style fringing
9:02
particularly in high contrast situations
9:03
so you will see some fringing but above
9:06
all what you're going to get is very low
9:08
contrast this at f1.5 it very much has
9:11
that dreamy rendering as we
9:13
euphemistically call it a low amount of
9:16
contrast so there is enough pop in the
9:19
center of the frame that you can get a a
9:21
credible result that we'll talk more
9:23
about in just a moment so wide open at
9:26
f1.5 low contrast in the center but a
9:28
decent amount of detail very quickly
9:30
however as you go towards the mid-frame
9:32
you can see resolution drops and by the
9:34
time you get to the corners forget about
9:36
it it is very very soft there the center
9:40
will start to really sharpen off up and
9:41
then contrast will improve by F2 the
9:44
corner is going to still be very soft
9:46
and they don't get reasonably sharp they
9:48
never get exceptionally sharp but they
9:50
don't get reasonably sharp until about
9:52
f5.6 so f5.6 f8 are decent apertures if
9:56
you want to shoot more conventional
9:58
landscape tile style uh images where
10:01
just about everything is in focus and of
10:03
course as per usual defraction is going
10:05
to hit I'm using a high resolution uh 61
10:08
megapixel a7r Mark 5 for this and so by
10:11
f11 most lenses are looking softer and
10:14
then at minimum apture in this case F16
10:17
you can really see the effects of
10:18
defraction and it's very much softer
10:21
still now actually the nature of that
10:23
swirl effect it's not always going to be
10:25
present one of the cool things about
10:27
this lens is you really can create a
10:28
variet of different looks and so if you
10:31
get close to your subject you can
10:32
actually just have quite a soft and
10:34
creamy background as you can see from
10:35
this shot um when you have strong
10:38
blurred background it's just really
10:39
really soft when you start to get that
10:41
swirl effect is actually a little bit
10:43
further out it's typically in the 2 to 3
10:46
meter range that it is the most
10:48
pronounced and you can see as I pull
10:50
back and forth here through manual focus
10:52
that it kind of comes and goes and there
10:54
is a a Zone there where it is very
10:57
strongly pronounced for that reason your
10:59
probably going to want to compose with
11:01
your subject in the center of the frame
11:03
for one thing that allows you to get a
11:04
little bit more 3D separation so your
11:07
subject will be sharper and then also it
11:09
works best when you can put things on
11:11
either side of them to create the swirl
11:14
effect and so obviously it's also going
11:15
to work best if you have something that
11:17
is close to that that area that plane of
11:20
focus that you can defocus to create the
11:22
most desirable look so for the most part
11:25
this is a fairly conventional lens after
11:27
F2 just not a super sharp one but from
11:30
f1.5 to F2 it's it's quite interesting
11:33
in the looks that you can create now
11:35
when the sun's in the frame it will do a
11:36
few different things if you're stopped
11:38
down you'll mostly get lower contrast
11:40
some veiling effect as you can see from
11:42
this landscape shot but then also if
11:44
you're shooting at larger aperture
11:46
you're going to get some other kind of
11:47
ghosting type artifacts uh none of them
11:50
are actually terribly destructive and
11:52
some of them can be used artistically
11:54
and actually I would say that this is an
11:56
area where this lens works better than
11:58
what some of the older lenses is do I I
12:00
wouldn't say it's got full-blown modern
12:02
Coatings but it does seem to be a little
12:03
bit better in that regard maybe it helps
12:06
that it's not full of fungus and other
12:08
things that I tend to have to deal with
12:10
with some of the vintage
12:11
glass the color from the lens is mostly
12:14
good I do find that sometimes it's less
12:16
desirable in high contrast situations at
12:19
large apertures it tends to wash out a
12:21
bit and you can see that there's quite a
12:23
difference in the color from a large
12:25
aperture shot to a smaller aperture shot
12:28
in this comparison here here so overall
12:30
I mean lots of optical flaws but a lot
12:32
of very interesting character to the
12:34
lens which is obviously going to be the
12:37
whole reason why it is desirable so my
12:39
conclusion is this this is obviously a
12:41
quirky lens that is not conventional in
12:44
any way using an old Mount and an old
12:46
Optical design but it can be a blast if
12:49
you're tired of sterile overcorrected
12:52
modern lenses and you want something
12:54
with some vintage charm it's got that in
12:56
abundance and of course when you compare
12:58
it to the biotar biotar lens that it
13:01
emulates it is an incredible value that
13:03
biotar lens is going to cost you
13:05
probably 10 times as much as this
13:07
there's a good chance it won't be nearly
13:09
as in good a shape either of course it
13:11
will be a much better collector's item
13:13
and might be worth even more in the
13:15
future that's the luck of the draw but
13:17
if you don't want to spend huge money on
13:19
an old-fashioned lens well then you can
13:21
spend a fairly minimal amount of money
13:23
for a brand new lens if you want more
13:26
information you can check out my full
13:28
text review that's Linked In the
13:29
description down below and of course
13:31
right after this we're going to dive
13:33
into a closer look at the optical
13:36
performance stay tuned so starting with
13:38
a look at vignette and Distortion you
13:40
can see a very mild bulge due to some
13:43
Barrel Distortion uh not very hard to
13:45
correct at all it's nice and linear a
13:47
plus three take took care of all of that
13:49
you'll also see a bit of vignette in the
13:51
corners you can see again that cleared
13:53
up very nicely that's a plus 45 dialed
13:55
in there so in general the challenge for
13:58
this lens is going to be overall just
14:01
the contrast and detail so you can see
14:03
here that part of that is some chromatic
14:06
aberration you can see that there's just
14:08
a general glow kind of that dreamy look
14:11
everything but then also there is some
14:12
green fringing you can see out of the
14:14
plan of focus and out here you can see a
14:16
little bit of magenta fringing that will
14:18
really kind of vary now obviously this
14:21
is a less high contrast scene and so I
14:22
mean the corners are still soft as we're
14:24
going to see but as we take a look at
14:26
the chromy surfaces here you can see
14:28
there is a little bit of fringing a
14:30
little bit around the windows but it's
14:31
also not like huge and very strongly
14:34
pronounced and I would say that in
14:35
general the contrast looks a little bit
14:37
better as well of course looking out the
14:39
window is what it's all about getting
14:41
that swirly look out there here's
14:43
another shot where this is stopped down
14:46
a little bit this is about
14:48
f1.8 and you can see that again as we
14:50
get towards the edge of the frame that
14:52
there's a loss of contrast but again in
14:54
this lower contrast scene the detail
14:56
there is actually quite good you can see
14:58
and neither am I seeing a lot of
15:00
fringing on any of these shiny surfaces
15:03
inside here mostly just as you get
15:05
towards the edge of the the frame you
15:07
can see that the image starts to soften
15:10
now what we don't see is a lot of
15:12
lateral chromatic aberration and here
15:14
near the edge of the frame it's actually
15:15
a really clean transitions from black to
15:17
white so no issues there now I wanted to
15:20
show this image just for a moment to let
15:21
you know that I ran into this while I
15:24
was metering for my chart test and that
15:27
is that at smaller apertures you may or
15:29
may not always get consistent metering
15:31
and so you might just want to make sure
15:33
if you need to kind of bias Exposure One
15:35
Direction or another it's most likely
15:36
going to be adding some exposure because
15:38
as you can see here as I got towards the
15:40
smaller apertures the the camera tended
15:43
to meter wrong with this lens and it was
15:45
underexposing by uh pretty much a full
15:48
stop maybe even a hair more as you can
15:50
see here now we'll take a look at
15:52
resolution and sharpness this is on a 61
15:54
megapix Sony a7r Mark 5 and so you can
15:57
see even looking at it as a hole you're
15:59
going to see a real loss of contrast
16:01
there's quite a difference between here
16:03
and here as far as even just the general
16:05
contrast if we punch into this 200%
16:08
magnification there's actually a pretty
16:10
good detail that's there if you were to
16:12
REM able to remove the low contrast kind
16:14
of that Vaseline smear over the top of
16:17
things there's actually quite a good
16:18
amount of detail here in the center of
16:20
the frame as we move towards the
16:21
mid-frame however already that's
16:23
starting to fade and as we go down we
16:26
can see that again here it's there's a
16:29
diff quite a difference between the
16:30
contrast here and then here by the time
16:33
you get to the corners again it's not
16:35
that there's no resolution it's that
16:37
there is very very little contrast if we
16:40
take that in out into a real world shot
16:42
you can see the effect here and and so
16:45
in the center of the frame at
16:47
f1.5 really not too bad you can see
16:50
right here in a little Zone there's good
16:52
detail and contrast but very quickly you
16:55
can see how that all of that contrast
16:57
Fades away and as we get to towards the
16:59
edge you very much have that dreamy
17:01
effect which is part of the general look
17:03
that this lens exhibits so if you can
17:05
use that well and that's with composing
17:08
with your subject in the center of the
17:09
frame really pretty good there in terms
17:11
of detail and contrast on my wife's face
17:14
you can see already by the time you get
17:15
to her hands that it's starting to fade
17:18
and then there's kind of a general glow
17:19
everywhere else but it allows the the
17:22
look here to where there is a
17:23
three-dimensional pop because everything
17:25
else looks quite soft by comparison so
17:28
interestingly by the time you stop down
17:30
even to F2 you can see by looking at the
17:32
image as a whole it's already starting
17:33
to change just everything is starting to
17:35
look brighter and so in the center of
17:36
the frame it's like that smear has been
17:39
taken off and now you're able to see the
17:41
detail on the contrast so at f2 really
17:43
sharp center of the frame but you can
17:45
see that even though it's better you
17:47
know you're extending that zone of
17:49
sharpness out it's still going to drop
17:51
off and so as we see down here it's
17:55
better but you can see it's still quite
17:56
kind of dreamy and glowy in that corner
17:59
and as you get down towards the edge
18:00
it's basically like everything is still
18:01
in a fog it's just like the sun is
18:03
starting to come out and the fog is
18:05
brighter looking at f2.8 and then at F4
18:09
we can see that the corners really
18:11
haven't gotten sharper the contrast is
18:13
starting to improve but it's not quite
18:15
there yet going back to the center of
18:16
the frame and it's super sharp in the
18:18
center of the frame take a look over
18:19
here at the mid-frame by F4 you can see
18:22
that the mid-frame is looking really
18:23
crisp if we throw f5.6 in the mix now
18:26
you can see that that looks even sharper
18:28
still and if we pop down into the
18:30
corners you can see that the corner is
18:32
now starting to look acceptably sharp
18:34
though certainly not exceptionally sharp
18:36
things are just a little bit better by
18:38
f8 but you can see it's still not really
18:42
completely crisp although this Zone here
18:43
is starting to look quite good popping
18:45
over here we can see that this this
18:48
section out to here it is really really
18:50
sharp and as we look towards the edge
18:52
yeah really looks quite good here it's
18:54
only when you get right towards the the
18:56
outer edge where things start to soften
18:58
up
18:59
so after f8 by f11 image will be just
19:02
very slightly softer due to defraction
19:03
and then you can see by F-16 which is
19:06
there on the right the image is
19:07
softening up
19:09
significantly now if we take a look at
19:11
the up close performance here is our
19:13
minimum Focus distance shot and you can
19:15
see as you we' kind of expect there's
19:17
not a lot of contrast there you're
19:19
really going to need to stop down a bit
19:21
if you want better contrast in detail
19:23
and of course as you get further out you
19:25
start to get that blooming effect
19:27
elsewhere so the nature of the bouqu
19:29
really is going to vary upon where you
19:32
compose your image so for example in
19:33
this shot which I quite like you can see
19:36
that detail is not you know out of this
19:38
world but you can see there's a
19:39
reasonable amount of detail that's there
19:42
but the background is really really
19:44
creamy it's just blurred Away really
19:46
beautifully in this shot here we've got
19:48
the swirl effect and so this is about in
19:50
the right zone so I focused out about 2
19:52
to 3 m and in that zone you can see you
19:55
get that really pronounced kind of
19:57
circular swirl shape that is kind of the
20:00
desirable quality here's another shot
20:02
here and again composing where you can
20:04
get your subject as much towards the
20:06
center as possible because remember
20:08
there's a pretty tiny sweet spot of
20:10
sharpness so if you can get your subject
20:12
there and then you have things around
20:14
for you to kind of swirl with you can
20:17
really create some really beautiful
20:18
images so here you can see from this
20:21
particular shot where I just stood here
20:22
and I I just focused along so with a
20:25
complete defocus you can see just how
20:27
soft and creamy you can get the po now
20:29
as we start to move towards that zone
20:32
you can see the swirling effect starting
20:34
to take place if I focus past that zone
20:37
however you can see that in the
20:38
foreground you really don't get the
20:40
swirl effect you mostly just get a low
20:42
contrast type look so I wouldn't say
20:45
that foreground bokeh is nearly as
20:46
desirable it's going to be more that
20:48
background swirl that is going to kind
20:51
of Be The Sweet Spot for this so here
20:53
you can see a little bit more of a
20:54
conventional shot at this distance a
20:57
little bit closer there is a a little
20:58
bit of swirl effect but mostly it's just
21:00
a blurred out background although the
21:02
quality of the blur is really nice if I
21:04
step back just a little bit further you
21:07
can see how much more of that swirl
21:09
effect begins to take place now again
21:11
taking a look at flare resistance here
21:14
you can see with the sun right out of
21:15
the frame and shooting at a large
21:16
aperture we get this overall kind of
21:19
ghosting pattern here I mean again I
21:21
think that most people would find that
21:23
generally tasteful and useful in certain
21:26
situations I didn't love it as much stop
21:28
down in this shot where basically you
21:30
just end up losing contrast on the image
21:32
and so it looks like there's a a dust
21:35
storm that's blowing through or
21:36
something not nearly as desirable in my
21:38
opinion this shot I really like and so
21:40
here we do have some of that Prismatic
21:42
Haze and a little of that effect we saw
21:44
on a former image but even though
21:46
contrast and detail isn't great there's
21:48
kind of just a general glow to the image
21:50
that's really quite nice now if you're
21:52
not shooting into the Sun and you stop
21:54
The Lens down you can get nice color and
21:57
detail and you can see in this shot that
21:59
I was able to get detail pretty much all
22:01
throughout the frame and so this is I
22:04
believe around f6.3 or f8 and you can
22:08
see that that looks just like a
22:10
conventionally beautiful shot great
22:12
detail great contrast great color this
22:14
is a lens that has a lot of different
22:16
types of personality and so I think that
22:19
if you learn to use it to its strengths
22:21
you can really achieve a lot of
22:23
different looks so thanks for sticking
22:25
around to the end and hopefully a deep
22:27
dive into the optical performance has
22:29
let you know whether or not this TT
22:31
Artisan 75mm f1.5 swirly bouqu lens is
22:35
the lens for you as always thanks for
22:37
watching have a great day and let the
22:39
light in
Online Media
TV & Video
Visual Art & Design
Science