0:00
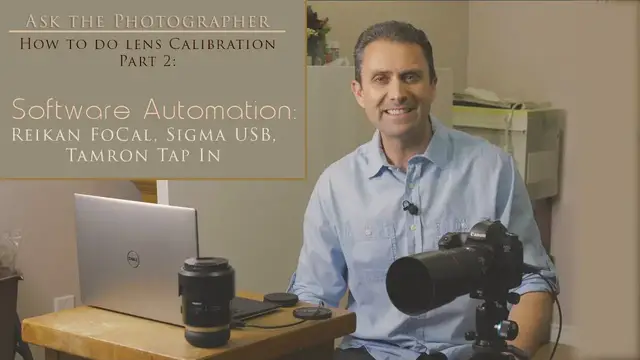
Hi, I'm Dustin Abbott and I'm here today to give you part two of this series on how to properly
0:18
calibrate or micro adjust AFMA autofocus on a camera. And in today's episode, we're specifically
0:27
going to look at how to accomplish that by using software that automates the process
0:34
Now, we're going to find out that as a part of doing this, there's a few things that you're
0:37
going to need. And so we'll start by running through those. For myself, for several years
0:43
now, about three or four years, I've been using a piece of software from a company called
0:47
Rykan. It's called Focal, and it automates the process. And so I recommend that you check out
0:54
They have different levels of the software, and I'll throw a link to it down in the description below
1:00
But its entire purpose is about lens calibration and automating that process
1:05
And it'll work on a number of different camera systems, but you might want to check out your
1:09
camera body that you're having, or camera bodies, and make sure that they're on the
1:13
list of supported cameras for it. And so that, of course, is the first step
1:17
Also note that some camera bodies, for example, my 6D or a Canon 80D, for example, it can fully
1:26
automate those processes in that you can just basically set up the test. You can click start
1:32
and it will run through the whole process. Some other cameras like 5D, the 5D series, for example
1:39
the 5DS or 5DSR or my 5D Mark IV, it's just a slightly bit more involved process in that it
1:46
requires you. For whatever reason, the camera firmware doesn't allow the software to actually
1:53
change the settings in the camera for doing AFMA, and so you actually have to manually enter the
1:59
values that it wants. It will prompt you to do so, and after you've changed it, you click OK
2:04
and the process continues on. So we'll look a little bit further at that process in just a few
2:09
moments. So what we're going to need is you're going to need a good test chart, and the test
2:14
chart is important because it gives a high contrast area for the software to lock on
2:22
Rykan has some specific test charts that are designed to work with the software. It will
2:28
also help you to make sure that everything is set up properly and that everything is framed in the
2:33
right way. You can run a test validation mode that will help you to set up the target. Beyond
2:40
that you're going to need a good light on your subject and so if you don't have
2:44
fixed lights of some kind or a very very bright room you're probably going to
2:49
need to go outside with this test just note that you have to watch for on a partly cloudy day if you have varying light that the software doesn like that and the more light really for the most part the better and if you
3:02
shooting a lens with a very wide aperture say f1.4 lens you can get away with a little bit less
3:09
light but if you're shooting a lens for example like one of the 150 to 600 millimeter lenses
3:14
and you're on that telephoto end and it only has a maximum aperture of f6.3 you're going to need a
3:20
lot more light to properly illuminate the subject. The other thing is you want to make sure that you
3:25
have a good stable tripod and that you're not bumping it or on a surface that flexes because
3:32
if you do so it's going to introduce vibration into the equation and again that's going to throw
3:37
the software off. And so those are a few things to watch out for. Now depending on your camera body
3:43
You're either going to need a USB 2.0 or a USB 3.0 cord
3:50
The one that came with your camera is just fine. Connect that up
3:54
And the other thing you're going to also need to make sure is that for Canon shooters, you're in AV mode
4:00
Or for Nikon shooters, you're in A mode. Because that is what is required
4:05
It's the only way that the software will work. And so just make sure that you get those kinds of things taken care of out of the way
4:12
You're going to want to make sure that the camera is lined up square with your test target
4:17
And you're going to want to make sure that the center point or if you're in live view mode
4:21
the center box is situated right in the middle of the target
4:25
And once you've gotten that set up and you can verify that, that you can run through a test in the software that will actually help you to get that set up
4:34
One final thing to watch for is if you're using a lens that has an image stabilizer
4:39
V, C, O, S, whatever the case may be, you're going to want to turn that off as you really
4:45
should if you're using that lens on a tripod at any point
4:49
And it will give you a warning about that. Now one other piece of information you're going to want to know is that Rykan has a recommendation
4:57
for how far away you should be when you run this test process
5:03
And they typically recommend somewhere around 50 times the focal length. So for example, if you're shooting with a 50 millimeter lens, that's going to give you
5:12
a focus distance of 250, basically will come out to 250 centimeters or 2.5 meters
5:21
And so that's basically the range that you want to be about 2.5 meters away
5:27
And that will give you the most kind of consistent results. So as we can see with the calibration of the 5D Mark IV, that it's a little bit different
5:37
a process using the Rykan Focal software. You can see I'm using Focal Pro and 2.4.5 version
5:46
So if we go to the automatic focus calibration this is what you get And I already shown you the target set up here and so we going to go ahead and just click start and and so it just gives you a notification that it going
6:01
to save your camera settings which is important of course so now what will begin to happen is that
6:07
it will begin to take photos and yze them and so you have some options in terms of whether you
6:14
want it to shoot RAW files, whether you want it to shoot JPEG files. And in fact, here on the 5D
6:19
Mark IV, you even have the ability to choose the dual pixel RAW files to get a little bit further
6:28
information. But once it has begun to compile information, what it will do is it will start
6:35
to give you feedback. Now with some cameras, you can just sit back and relax and let it do its
6:40
thing but other bodies like the 5d mark 4 will require you to physically interact and actually
6:45
change the setting on the camera and then to click okay once you have already done that and so that
6:52
process will continue and you will change the physical setting a few times while the software
6:58
begins to yze how consistently a result it's getting and so you can see that it's checking the
7:04
quality of focus down in this area and then it will start to give you feedback after this is run
7:10
for a few minutes. I'm going to speed up the process and we'll run through it together
7:16
We'll give you a value at the end that it is settled on and you can determine whether or not
7:22
that is a step in the right direction. So we'll come back and we'll look at that at the end and
7:27
And then also, we'll take a look at how you can also throw Sigma's USB dock or Tamron's console, tap-in console into the mix as well
7:39
Please review information on the screen. So there you see it's run through the process
7:45
Now, in this case, I actually feel like the value that was already in there, the value of plus one, is better than the value that it returned
7:52
But that's the reason why I will frequently run the Focal test
7:56
usually two or three times at least and try to get a consensus to make sure I'm getting the best
8:02
possible result. So what happens if you have one of the newer lenses from Sigma or Tamron and you
8:08
have their respective USB dock or tapping console? How do we make these two pieces of software work
8:15
together? But what you're going to want to do is that with either the Sigma or the Tamron console
8:21
what they allow you to do is to run calibration at different focus distances
8:26
And so you're going to want to go into the software and look at those recommended distances
8:30
for the individual one. So let's say that I am using the tap-in console, for example
8:37
and so it tells me that it wants to first shoot at a minimum focus distance that's quite close
8:42
So what I would then do is I would set up the calibration at that recommended distance and maybe run it a few times get a value you feel confident in in the camera And then what you going to do is you going to hook up the lens
8:55
to the actual tapping console or USB dock. You're going to go into that and you're going to change
9:02
that value for that focus distance to the one that you got running the calibration software
9:08
Now, here's an important step. Once you have entered that into the lens itself, you need to
9:13
go back into the camera body, go into the menu, and you need to zero out the calibration value that
9:20
you put into the camera itself. Because now, instead of having a value, just one value in
9:25
the camera body, you're going to have a value for that particular focus distance input into the lens
9:31
Then you can run it again at the medium distance, repeat that same process, and then run it again
9:37
at infinity and repeat that same process. At the end of running all of these calibrations, however
9:43
you're going to want to make sure that in the camera body itself, you have a zero value that
9:48
is input because with the USB dock or the tapping console, all of that AFMA information is actually
9:55
input into the lens itself. Thus, there is no additional calibration that is needed in the
10:01
camera body. And so if you'll run through that process, while it is a bit time consuming
10:06
I have found that it enables you to really unleash the potential of some of your third
10:11
party lenses. And for example, my 45, I have two of these prime lenses from Tamron, the 45 millimeter
10:18
and the 85 millimeter VC lenses. And I find that they are giving me the most consistent third party
10:24
autofocus performance that I've ever seen that really is right on par with first party options
10:31
and that same focal length. And so in conclusion, this hopefully will give you an idea of the process
10:36
that I personally use for calibrating lenses and will give you an idea of how the software
10:42
that I typically use works as well as how the tap-in or the USB dock, how those work
10:50
with third-party lenses as a part of that overall mix. Now, stay tuned for the final episode and in that final episode, if you're not interested
10:58
or you can't afford to invest in software to automate the process, I'm going to show
11:03
you an alternate method that I use that requires no extra software at all and how that you can
11:08
manually run focus calibration and still get very consistent results. I'm Dustin Abbott and if you
11:15
missed the first part in this series that helps you to understand what micro adjustment actually
11:20
is and why it's important, I'd encourage you to take a look at that episode. And of course
11:25
if you haven't already, please sign up for my newsletter or follow me on social media
11:29
And if you haven't already, please click that subscribe button. Thanks for watching