Up next in 10

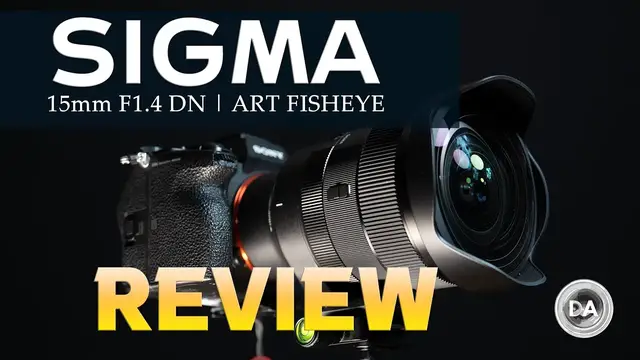
Sigma 15mm F1.4 DG DN ART Diagonal Fisheye Review | An Extreme Lens with Extreme Performance
Feb 26, 2024

Photographer Dustin Abbott shares a review of the new extreme fisheye lens from Sigma - the Sigma 15mm F1.4 DG DN | ART Diagonal Fisheye. Is this wild lens for you? | This video is sponsored by Fantom Duffel. Visit https://store.fantomwallet.com and use code DUSTIN20 to get 20% off | Read the Text Review: http://tinyurl.com/15DNFishDA | Visit the Image Gallery: http://tinyurl.com/15DNFishpics | Purchase the Sigma 15mm F1.4 Fisheye @ B&H Photo https://bhpho.to/3UT1cbK | Adorama https://howl.me/clG89bh3mcY | Amazon https://amzn.to/4bR4dzo | Camera Canada https://shrsl.com/4fhyx | Amazon Canada https://amzn.to/3wukZEb | Amazon UK https://amzn.to/3wule23 | Amazon Germany https://amzn.to/3wrY78h
Check out the DA Merch here: https://bit.ly/TWIMerch | Become a Patron: https://www.patreon.com/dustinabbott | On the Web: http://dustinabbott.net/ | Sign up for my Newsletter: http://bit.ly/1RHvUNp | Instagram: http://bit.ly/DLAinsta | Facebook: http://on.fb.me/1nuUUeH | Flickr: http://bit.ly/1UcnC0B | 500px: http://bit.ly/1Sy2Ngu Follow Craig @ https://www.instagram.com/craigstoffersen/
Want to support this channel? Use these affiliate links to shop at:
B&H Photo: http://bhpho.to/1TA0Xge
Adorama: https://howl.me/cjU0LKdp3LN
Camera Canada: http://bit.ly/DLACameraCan
Sony Canada: https://www.thesonyshop.ca/?ref=abbott
Amazon: https://amzn.to/3HrY64d
Amazon Canada: https://amzn.to/3qG1p18
Ebay: http://bit.ly/DustineBay
Into the AM Clothing: https://bit.ly/intotheAMda and use code DUSTIN10 for 10% off
Make a donation via Paypal: https://www.paypal.com/paypalme/dustinTWI
=============================
Table of Contents:
=============================
0:00 - Intro and Concept
0:58 - Fantom Duffel
1:49 - Build and Design
8:38 - Autofocus
9:45 - Video
10:29 - Image Quality Summary
14:39 - Conclusion and Pricing
16:09 - Optical Deep Dive
---------------------------------------------------------
Oben Tabletop Tripod shown in video: https://bhpho.to/3vL8YWy
My Cameras:
Purchase the Sony a7RV @ B&H Photo https://bhpho.to/3ZivNyZ | Adorama https://howl.me/cjNY1LU3gFH | Amazon https://amzn.to/3CRCDlq | Camera Canada https://shrsl.com/3vulf | Sony Canada https://bit.ly/BuyA7R5 | Amazon Canada https://amzn.to/3H8yeNH | Amazon UK https://amzn.to/3kbg5FM
Purchase the Sony Alpha 1 @ Camera Canada https://shrsl.com/2wdk2 | B&H Photo https://bhpho.to/3upRFZd | Adorama https://howl.me/cj2nQpjLBKW | Amazon https://amzn.to/3t1m8MD | Sony Canada https://bit.ly/BuySonyA1 |Amazon Canada https://amzn.to/3cVFrBB | Amazon UK https://amzn.to/2OtrjGe | Amazon Germany https://amzn.to/3d0GtMO | Ebay https://ebay.us/i371Vs
Canon EOS R5: B&H Photo https://bhpho.to/3iMH18x | Amazon https://amzn.to/33L3D53 | Camera Canada https://shrsl.com/2jqth
Purchase the Fujifilm X-H2 @ B&H Photo https://bhpho.to/3KAInTC | Adorama https://howl.me/cjyzbiO5lVp | Amazon https://amzn.to/41zMzKl | Camera Canada https://shrsl.com/4128o | Amazon Canada https://amzn.to/40gY4W7 | Amazon UK https://amzn.to/43Grn7a | Amazon Germany https://amzn.to/3L6hwjR
Get a discount off all Skylum Editing Software (Luminar, Aurora HDR, AirMagic) by using code DUSTINHDR at checkout: http://bit.ly/LuminarDLA
DISCLAIMER: This video and description contains affiliate links, which means that if you click on one of the product links, I’ll receive a small commission. As an Amazon Associate I earn from qualifying purchases.
Keywords: Sigma 15mm F1.4, Sigma 15mm Fisheye, #SIGMA, #SIGMA15mmF14DiagonalFisheyeArt, #SIGMAArt, #SIGMAArtPrime, #SIGMADGDNFisheye, Full Frame, Review, Sony Alpha 1, Sony a7RV, Review, Hands On, Dustin Abbott, Real World, Comparison, Sharpness, Bokeh, Flare Resistance, Autofocus, Image Quality, Sample Images, Video, Photography, let the light in, weathersealing, #letthelightin, DA
Show More Show Less View Video Transcript
0:00
Sigma continues to be one of the most daring companies out there when it comes to lens
0:15
design and their newest lens is maybe one of the most extreme yet. The 15mm f1.4 DG DN
0:23
art and this is a diagonal fisheye is really kind of a niche of an already niche market
0:30
It's the first auto focusing fisheye lens on Sony, I believe on L-mount as well. It's also
0:36
the world's first frame diagonal fisheye lens with an f1.4 maximum aperture. As you can see
0:43
that means that it's also beastly big, weighs three and a half pounds and it cost a whopping
0:49
$2,000. So is this extreme instrument a kind of lens for you? Well we'll find out in today's
0:56
review right after a word from our sponsor. Today's episode is brought to you by the
1:00
Phantom duffel a new unique convertible duffel bag that starts as a compact packable case
1:06
that easily fits into your luggage or carry-on bag but then converts into a 35 liter duffel
1:11
The exterior is made of 1680d ballistic nylon which is tough and weatherproof. The interior
1:17
has a high visibility reflective finish that allows you to easily see what's inside even in
1:22
a dim hotel room. A large foam pouch on the side has a cable pass-through to allow for charging
1:28
and the removable straps use a Fidlock system to easily and securely connect them. I've been
1:33
using it for the gym and it has room for my water bottle, a change of clothes, a basketball, my
1:38
massive shoes, a towel and a charger for my cell phone. Visit store.phantomwallet.com to check it
1:44
out and use code Dustin20 for 20% off when you're ready to check out. So the first thing to know
1:51
about this lens is that it has an incredibly wide 180 degree angle of view. I wanted to take a shot
1:57
of my feet. I was standing in the middle of a bridge that's about 12 foot wide and you can see
2:02
that just aiming down towards my feet I not only had my feet but I had all the width of the bridge
2:08
and the rails on either side in the frame as well and so it is incredibly wide. It's nearly 50
2:13
degrees wider than what the Laowa AF 10mm f2.8 that I just reviewed because that lens is a
2:19
rectilinear lens and so it is incredibly incredibly wide. I think that we can at least give some credit
2:27
for this lens existence to the fact that Sigma already made the 14mm f1.4R. As you can see from
2:34
this photo these lenses are virtually twins when it comes to their physical design and I suspect
2:40
that there is some shared engineering not just in the outer shell but probably some of the inner
2:44
working as well that allowed Sigma to leverage their engineering time and tooling to able to
2:51
produce two lenses and maybe you know between those two being a little bit more niche lenses
2:56
earn enough to justify the investment of time and energy into developing these lenses. Now the fish
3:03
eye lens is very slightly larger and heavier but they are very very similar in just about every
3:09
outer detail. Now this is a diagonal fish eye and so rather than being a circular fish eye where you
3:16
get a circular image with some of the you know the rectangular frame just blocked off this will
3:22
fill the frame and in fact you can really control the amount of distortion that you get by how you
3:27
compose your subject and also how much you tilt the camera. So for example in this shot where I
3:32
composed a horizon in the middle of the frame, the horizon is pretty straight. All it takes is just a
3:37
little bit of a tilt up however moving the subject higher in the frame more towards the edge and very
3:43
quickly you end up with that you know very circular horizon line. Now as noted this is a heavy lens
3:50
it weighs in at 1400 grams or 48 ounces which means it's heavier than a lens like the 70-200 f2.8
3:58
sport that Sigma recently released and they have attempted to try to keep the the weight moderately
4:04
down but I mean this lens it's made up of a mix of some metals and then what they call thermally
4:10
stable composite which is high in engineered plastics and so whether or not they try to keep
4:15
the weight down or not this is still a heavy lens and you will notice it by the way out in the field
4:19
that it feels hefty as you are carrying it out and of course unlike a 70-200 which is a longer more
4:25
slender lens a lot of the weight is concentrated right here and so as a result of that you do have
4:31
a tripod collar so again that's a shared design philosophy with the 14 millimeter f1.4. By the way
4:37
this is a removable tripod collar they do include a rubber sleeve that you can put over the top of
4:43
the exposed kind of metal screw points that are on there underneath that tripod collar but you can
4:49
put that sleeve on if you don't want to use it. The tripod collar itself obviously you can rotate it
4:54
there are some detents at the cardinal positions and it is arca swiss compatible in the foot
5:01
I did find because of this actual design that when I was just carrying the lens on a strap out hiking
5:08
it just tended to bump and rub in very uncomfortable ways so I actually rotated the tripod foot out of
5:14
the way. You can't remove it altogether if you're in a situation like that. The one other thing that
5:19
I will say about this particular tripod foot same as with the 14 millimeter f1.4 is that it is really
5:26
really close to the barrel and so if you're accustomed to kind of carrying a lens by the
5:30
tripod foot you can pretty much forget that here there just isn't really enough room to hang on
5:34
and for that matter if you're in the kind of straight up and down position kind of the default
5:39
position there is hardly room to get at the de-click switch for the aperture that is there
5:45
and so it the tripod foot and collar it is useful obviously for going onto a tripod it helps the
5:52
balance point to be better but at the same time it is inconvenient in some other situations
5:58
Now you can see up front that we have a very large curved front element here and so what that means
6:03
and there's also a fixed lens hood so what that means is that number one the lens cap has to go
6:09
over the top of this although it is a unique design with a pinch cap it also means that there is no
6:14
room for traditional screw-on filters here. Now at the lens mount there is a gel filter holder
6:20
there and then also in that lens cap there is actually a place to store a couple of gel filters
6:27
in there it's a little bit of a weird arrangement but it is it is an option that is there. The lens
6:32
as Sigma's better lenses do does come with a nice padded nylon case as well. Now when it comes to
6:39
some of the other features here this is a very feature-rich lens and so we have got an aperture
6:43
ring and we've got a variety of options with that we've got the ability to de-click the aperture if
6:48
so desired we also have the ability to use an aperture lock if you you know for example if you
6:55
don't want to go into the automatic mode you can lock yourself out of that and lock into the
6:59
aperture mode or if you hate aperture rings you can just put it in automatic mode and you can
7:04
lock it in place there and once the lock's in place you will not be able to come out of that
7:09
without unlocking it and so it means you're not going to inadvertently enter into a manual
7:13
aperture setting and so some nice options there we also have an AF-MF switch we have a focus hold
7:20
or custom button there on the side and you can program that function within the camera and then
7:24
in a unique Sigma feature we have got an manual focus lock and so that can be really useful for
7:30
example for astrophotography allows you to pre-focus the correct distance for the stars
7:36
lock that in place and that way when you go outside you've already got an infinity
7:40
focus ready to go and you can be sure that you're getting accurately focused results
7:44
for your shots at night other applications as well obviously but that is a useful feature to
7:49
have we also have a thorough weather sealing here starting with a gasket at the lens mount
7:54
internal seals at the switches and the rings and then a coating on the front element to help
7:59
it to be both water and oil resistant for fingerprints easier to clean all of those
8:05
things the aperture iris itself has 11 blades and so it helps to maintain a circular shape but I
8:11
will note it also produces a really nice looking sunburst or sun star effect when you stop the
8:16
lens down so overall this is a really nicely made lens it is you know professional grade in terms of
8:24
the build quality in terms of the various features that are here this has everything that you would
8:29
expect on like an equivalent sony g master lens and so it is a it's a very nice lens but it is
8:36
big and heavy and of course it is expensive so let's talk autofocus autofocus here is utilizing
8:42
sigma's newest and best high-end autofocus system they call it hla which stands for high
8:48
speed linear actuator it is a high speed linear motor and in this case although sure there are
8:53
some large elements in a design like this an f1.4 lens it's probably overkill here because
9:01
with a lens with a this wide of an angle of view a lot's going to be in focus all the time and so as
9:06
a byproduct I found that focus switches focus changes are basically instantaneous just snapping
9:12
from one to another autofocus is quiet it's confident zero problems there had no problem
9:19
locking on to eye detect on either human or animal subjects I was able to track that fine
9:25
at this point I'd be shocked if a lens doesn't do that because that has become such a well executed
9:30
piece of technology now on the video side of things the video af is really really reactive
9:36
now that's probably great because I think one application for this lens could be in doing like
9:40
extreme angles of sports you know skateboarding or things like that and so autofocus even in video
9:47
mode is really fast now for doing just basic focus pulls from one to another it's almost too
9:51
fast now you can detune that a bit in the settings of your camera if you so desire but there's plenty
9:56
of speed there for doing focus changes you can see here with my hand test you see that a bit that the
10:02
the focus goes so quickly from my hand to my eye that it's almost a bit abrupt there is a little
10:07
bit of focus breathing too that draws attention to that but autofocus here is extremely capable
10:12
this is in this case I would say almost an overpowered autofocus system which is much better
10:17
than an underpowered autofocus system by the way but you're not going to have any issues with that
10:22
so it does mean that you know sports photography is part of the equation here I think this lens
10:27
is perfectly capable of now on the image quality side of the equation we have 21 elements in 15
10:34
groups so that's obviously a lot of elements for a prime lens and that includes four FLD elements
10:40
three SLD elements and two aspherical elements and so a lot of exotic elements in the design
10:46
as well now obviously a lens like this is so extreme that doing my normal kind of chart
10:51
testing is impossible if I try to get close even close up to the chart you can see that it looks
10:56
something like this in fact in testing for vignette and distortion I use my garage one of
11:02
my garage doors and this is a 16 foot wide garage door I was about a foot away from it and still it
11:09
has so much in the frame that I actually had a little bit of of the the frame of the door itself
11:16
in there it's just it's incredibly wide angle of view and so in testing however I found that I
11:22
had less than two stops of vignette by the way I will do a detailed optical breakdown at the
11:27
end of the episode if you want to stay tuned for that but I'll give you a quick overview here
11:31
so under two stops of vignette the correction obviously as far as correcting the distortion
11:38
you're not going to be able to do that I'm just using the slider it wasn't capable of doing that
11:42
with a but there is a profile that Sigma will provide for the lens it actually defishes the
11:47
lens so as you can see you lose a lot of image but you're able to get back to a fairly much a
11:52
rectilinear angle of view and it's it works a little bit better on a less extreme image like
11:57
this landscape shot here and so I mean there I think there's a little bit of cost for doing that
12:02
but it it does quite a good job as you can see which it does add to the value of the lens
12:07
fringing is extremely well controlled you can see in this shot within my barrel sauna there's some
12:12
real high contrast areas and even at f1.4 I didn't see any kind of fringing around those areas I also
12:19
found that when I was looking at the edges of the frame and there's going to be a lot of stuff in
12:23
the edges of the frame with the lens like this that they're in bare branches and high contrast
12:27
areas zero problems no lateral chromatic aberrations there as well in this case I used
12:34
an outdoor test and I shot at 100 still 61 megapixels lots of resolution but trying to go
12:40
to 200 in real world scenarios it doesn't work quite as well as with my test chart but what I
12:45
did find is that even at f1.4 there is certainly sufficient sharpness all across the frame it
12:51
improves a little bit at f2 proves more noticeably by f2.8 and there you basically stay the same from
12:57
f2.8 through f8 and with just a little slight degradation at f11 results stay really strong
13:04
after f11 diffraction will soften the image a little bit now obviously a lens like this is not
13:10
good at drawing something close to it so for close-up work it's not amazing you can only close
13:15
or focus as closely as 38 and a half centimeters and you get a very very low 0.06 times magnification
13:24
now up close performance is a little bit softer doesn't have as much it's not optimized for that
13:29
kind of focus distance and so stopping down to f2.8 very radically improves the amount of contrast
13:34
that's available however you can get a decent amount of bokeh here and in this kind of unique
13:39
shot of Nala you can see that the background is reasonably creamy there and so if you can get
13:44
close to a subject you can get a fairly blurred out background though obviously that's not really
13:49
why you buy a lens like that it's maybe a nice extra for some unique and creative type shots
13:54
however more important is that this lens has amazing flare resistance and that's really key
14:00
in a lens like this where it's going to be very hard to keep bright lights out of the frame because
14:03
so much is in the frame but i found very very minimal impact for having the sun in the frame
14:09
even very bright very directional sun zero problems with that so i was very impressed with that and
14:16
this lens is being marketed by Sigma largely for astrophotography and so importantly there i found
14:22
that common performance was good and there is minimal kind of coma smear in the edges of the
14:27
frame and so that's very very well managed as well and so if that's a reason why you would consider
14:33
a lens like this you can know that it actually does perform well in that regard so in conclusion
14:40
obviously this is an extreme lens and it's for a very niche audience who is that audience well
14:45
according to Sigma it's astrophotographers for one i would say also good application is maybe
14:52
concert photographers those that are working in lower light situations that want kind of the
14:57
extreme options and unique look that can be provided by a fisheye type lens and so it can
15:03
be very useful and professional applications for that i would say that sports is also a nice option
15:09
the fact you have such quick autofocus does help in that regard and allows you to get maybe more
15:15
narrow depth of field shots or shoot in lower light conditions and still get a reasonable shutter
15:19
speed for stopping action so it could be another useful application for that for most people however
15:25
this is a curiosity it's an extreme instrument that is technically impressive and it is technically
15:30
impressive what Sigma has done here but it's probably too big and too expensive to appeal to
15:35
most people however for those that actually could use it and can use it well i suspect that this is
15:41
a lens that they will have a lot of fun with and that that happens to be you there's nothing that
15:47
i took away away from besides the obvious that it's big and it's expensive everything else about
15:52
the lens is it's pretty fantastic now if you want more information you can either look into the
15:58
description down below and get linkage to my full text review there's also links to an image gallery
16:02
there along with buying links and now stay tuned if you want the detailed breakdown into the optical
16:08
performance so let's start by taking a look at that 180 degree wild angle of view so in this shot
16:23
just out of curiosity i just reached my arm back with the camera and i took the shot while driving
16:28
and so you can see obviously i can't reach back very far and yet everything inside of my the front
16:34
of my truck is included including the side windows likewise in this shot that i mentioned earlier i
16:40
was just pointing down towards my feet and in this case the bridge is about 12 feet apart here it
16:45
looks like it's quite narrow but this is a very wide space and you can see that not only is the
16:51
two edges of the bridge included but all the way up these rails is included and of course quite a
16:57
distance ahead of my feet included there as well so it is really incredible how much gets in the
17:03
frame now with a diagonal fish eye you do have a lot of control over how much distortion is going
17:08
to be there so you can see here just by changing the composition by in the center if i put my
17:14
subject in the center of the frame and hold the camera basically straight you can see that i've
17:19
got a almost straight horizon line but by tilting the camera up just a little bit here by that moves
17:26
the subject up and introduces a little bit of tilt to the camera you can see that already we get a
17:31
pretty extreme curvature going on to the horizon line and of course if i moved it up even higher
17:36
that would be even more extreme now the nature of this lens means that i can't use test charts so
17:41
much and so i'm going to be relying on real world shots to try to create the various situations that
17:47
i can test these things so in this case i'm looking for fringing specifically looking for
17:52
longitudinal chromatic aberrations before and after the plane of focus so we can see in this
17:56
very high contrast transition zone no fringing there also very interestingly along here and then
18:03
also around the edges of this window these are all areas where i would anticipate seeing fringing
18:09
and you can see that they are extremely well controlled so a great job there and in a lens
18:15
like this you're going to get a lot obviously a lot of stuff in the frame all the time and so
18:19
obviously there's going to be a lot of edges and so including these bare branches so i'm very very
18:25
impressed by how little lateral chromatic aberration is here it's it's basically perfectly
18:30
controlled no issue with fringing near the edge of the frame in these transition zones at all so
18:35
really really high marks on both of those areas so as mentioned earlier trying to get a subject
18:41
where you can test a subject that is big enough and flat enough to be able to test for something
18:47
like vignette is difficult so i used my garage door here which is i measured it's just right
18:53
under 16 feet across you can see that even though setting up right in front of it i still got other
18:59
things in the frame you know a little bit of concrete beforehand a little bit of the the
19:04
frame at the top of the door here but it's about as good as i could find for getting a flat surface
19:09
for this so obviously when it comes to distortion distortion is part of the equation here and in
19:14
fact if i try to use the light room slider to correct for the distortion you can see that even
19:21
maxing it out it is reduced but there's still a massive amount of distortion that is left
19:27
but as far as correcting for the vignette i was able to do that by just introducing a plus 45 and
19:34
so less than two stops so that's not bad at all now i was surprised when i used the profile that
19:40
sigma sent me which will be freely available that it actually de-fished the lens though it there's
19:46
a little bit of complications that come with that we'll get to in just a moment so uh what
19:51
you can see here is that now we have a rectilinear design without any kind of vignette and fairly
19:56
straight lines now obviously you've lost a lot of image but i think you're probably still pretty
20:01
close to what a normal 15 millimeter lens its angle of view would produce and in fact the amount
20:08
of image that's lost was a little more exaggerated there because of the extreme amount of distortion
20:13
from being so close if you're a little bit more of a distant subject as we've got here you can
20:18
see that sure we have lost a significant portion here at the edges of the image but it's not nearly
20:23
as severe as what we saw there on the garage door so what you can see here is that you're not going
20:29
to eliminate like this is not a distortion here this is more kind of a keystoning effect just
20:35
because the lens is tilted up somewhat and so as a byproduct the lean is not going to go away but
20:41
what we can see is that the curvature of everything has gone away so that fisheye type distortion is
20:46
gone now what's interesting here is that if i cycle through my information here in lightroom you
20:52
can see that the full size image this was shot on the alpha 1 is 8640 by 5760 now on the right it
20:59
says it's still 8640 by 5760 even though obviously we have cropped off a significant portion of the
21:05
image due to correcting that so that intrigued me and so i dived in here and what i find and
21:12
what my theory is here is that after the profile is applied the image seems to be scaled back up
21:19
because what you can see is at a pixel level it's not really as sharp and as high contrast as what
21:25
it was before so there is a little bit that is lost through that process now i think it's more
21:31
exaggerated on the edges as we move back towards the center of the frame i don't see that anymore
21:35
but you can also see that the scale is not nearly as severe and so that effect is taking place here
21:42
and here those this is you know it's about the same size if we move over here this is obviously
21:48
much larger and so there's a portion of the image that has been you know stretched and corrected and
21:54
then i think scaled back up and so anyway it's a little bit of a weird bit of trickery going on
21:59
however it is a nice option because you are obviously getting the ability to have a d fish
22:05
version of your images as well now in this case i'm actually going to examine images at a hundred
22:10
percent i couldn't use a chart so i'm going out into the real world and trying to look at real
22:14
world images at 200 percent in the lesson controlled environment it just doesn't work as well
22:19
so i've got f 1.4 on the left i've got f2 on the right so let's take a look starting in the center
22:24
of the frame to see what we see so first of all you can see that the lens is very sharp even at
22:29
f 1.4 in the center of the frame we can see that as we stop it down the contrast does pick up a
22:35
little bit at f2 and you can see in areas like this uh old wagon wheel here you can see that it's
22:42
a little crisper and better defined now if we pop over to the edge of the frame we see basically a
22:47
similar story looking at the vehicles here you can see already i mean there's lots of detail and
22:51
contrast there the image is obviously a little bit brighter we've removed some vignette and i
22:56
think that some of the textures are just a little bit crisper as a result not a whole lot of
23:01
additional resolution i wouldn't say but a little bit better contrast and i would say a little bit
23:07
better definition in some of these areas both due to some of the shadows lifting somewhat
23:12
from the vignette but then also i think that the textures are just a little clearer there
23:16
now there's actually a more significant jump from f2 now on the left to f 2.8 on the right and if we
23:23
come back down here we can see on the right that textures are you know crisper still contrast is
23:29
better defined you can see even in this snow area here that it's just better resolved here along the
23:34
edge of the frame moving into the vehicles and these plants better resolved and then as we come
23:40
back towards the center of the frame we can see again like this area is definitely crisper still
23:45
and i'll go to the other side just so you can look there look at the mailbox you can see it's
23:50
better defined and as we move off towards the edges here just a little bit more detail in
23:55
everything now more traditional landscape apertures of f4 and f 5.6 frankly i don't see a
24:01
lot of difference after f 2.8 things stay pretty consistently uh the same from f 2.8 all the way
24:09
through f8 you can see that f8 continues to look fantastic f11 is still very good but you can see
24:16
it is very slightly softer due to the effects of diffraction and so we're starting that cycle now
24:22
towards losing some detail and contrast due to diffractions effects that difference is actually
24:27
more pronounced in that final stop from f11 to f16 where diffraction is really starting to
24:33
play havoc there and the image is still usable as you can see but it is considerably softer
24:37
than what we see over here at f11 all of these textures you can just see that there's less detail
24:43
in them you know look even in the amount of contrast on the car from left to the right side
24:48
and over here you can just see that we are starting to lose information though i would say
24:53
this lens is usable throughout its zoom range though i personally would keep it at f11 as a top
24:59
now as noted previously our maximum magnification is really low on this lens but also if you're
25:06
going to shoot up close it is nice to use a little bit smaller aperture than f1.4 the lens as we saw
25:13
is really sharp at infinity to f1.4 it is softer when you're up close and you can see that there's
25:18
a pretty radical difference between f1.4 and f2.8 in terms of the contrast on the image and and so
25:25
i would definitely if you want detail when you're up close i would stop down a little bit you can
25:30
however create some really uniquely either wacky images using that distortion creatively as i've
25:36
tried to do here but you can also see the quality of the bokeh blur is actually pretty decent for
25:41
a lens like this you would never expect a fisheye lens to be one producing bokeh but you know this
25:46
is an extreme unprecedented instrument here in this shot here there's less kind of extreme
25:51
exaggeration there you can also see however that at f1.4 it's it's usable but the contrast is
25:57
reduced here at that closer focus distance here's another shot to look at the bokeh quality and so
26:03
once again up close this is only at f1.4 and so you can see that you know the the contrast isn't
26:09
amazing but the quality of the blur is pretty good flare resistance was very impressive and
26:15
again it's very important in a lens like this because it's such a wide angle of view 180 degrees
26:21
means that you're going to have bright lights in the frame and so i could move the sun or the kind
26:25
of reframe with the sun in different positions this is at f1.4 no issues at all and then if i
26:31
begin to stop the lens down you can see that even at smaller apertures there was no issue there i
26:37
composed here again this is f11 there's a little bit of a ghosting artifact here not bad at all
26:42
however in this shot here you can see that we've got a nice sunburst effect going on and also the
26:50
flare resistance is quite good here's a shot at f1.4 and you can see the sun's right there in the
26:56
frame a different kind of image you can see the contrast is held up perfectly and because we're a
27:00
little bit further away that detail there is fantastic now perhaps most importantly for this
27:06
lens is a look at coma now this lens has a lot of really important strengths for shooting
27:11
astrophotography number one coma is extremely well controlled look how crisp those star points there
27:17
in the center but then if i pan off towards the edge they're almost as sharp right in the corners
27:22
of the frame that's really really impressive another advantage to this particular lens is
27:28
the fact that vignette is quite low even at f1.4 that means you're not introducing a lot of noise
27:33
and correcting for that vignette and then also the fact looking at this image now obviously this is
27:38
not a peak astro night the moon was still quite bright but it was the only clear night i had during
27:44
my test period and it was cloudy before the morning came but anyway i shot this image f1.4 this is only
27:52
iso 800 and a shutter speed of of two seconds so that means i'm completely eliminating the
27:59
possibility of any kind of stretching of the stars light trails forming i'm able to freeze
28:04
that quickly and also i'm keeping the iso down and so there is little noise in the image which
28:09
produces a better end result here's another shot here and i just wanted to quickly demonstrate
28:14
the different ways you can approach so obviously here once again you know star points look fantastic
28:19
that's all good i also have the option of doing that d fish option and recomposing to get a
28:24
rectilinear image obviously there's less in the frame that could be a good thing however depending
28:30
on you know whether how much you want to be in the frame but you can see that while there is a little
28:35
bit of stretching at the corners from that d fishing it still is very very usable and so as
28:41
a byproduct that's a nice secondary option for doing astrophotography overall however this is a
28:47
really really impressive instrument if you're serious about astro hey you've made it to the end
28:52
thanks for watching have a great day and let the light in
Science