Ahhh, it is nice to be reviewing another Voigtländer lens! My last Voigtländer review was back in 2020, and it was actually a review of the APO-Lanthar 50mm F2 that a subscriber had personally loaned me because I had no access to Voigtländer products here in Canada because of their not having a Canadian distributor (at least that I was aware of) and a complication with sending their products across the border from the US. Fortunately that has all changed for the better, and early this year I received an email that I was very happy to get – a “hello” from JCL Sales Group, the distributor for Voigtländer in Canada. They wanted to know if I was interested in doing more Voigtländer reviews, to which I responded, “absolutely!”
I’ve got a bit of soft spot for Voigtländer lenses, having owned three of them and currently using one that I do own (APO-Lanthar 65mm F2 Macro) on a regular basis. That has only grown since Zeiss has seemingly transitioned away from producing non-cine camera lenses, leaving Voigtländer as the only company filling that unique niche of premium manual focus lenses. Voigtländer is actually the oldest surviving lens maker, and is a company that traces its roots to Vienna, Austria, in the mid 1700s. Like Zeiss (a German company), the more modern lenses have been produced in Japan by Cosina, and there is just something special about their optical glass that produces gorgeous colors. Today’s review is of one of their newest lenses – the Voigtländer Nokton 50mm F1.0. I’m reviewing it on Sony E-mount, and while there are similar lenses for Canon RF and Nikon Z mounts, Voigtländer says that this new lens was exclusively developed for Sony. This is the most expensive lens currently made by Voigtländer, and the reason is all about that F1.0 maximum aperture. It’s extreme in every way, and I’ve reviewed very few lenses that match the light gathering potential of the Nokton F1 (as I’ll call it for brevity here). If you want my full thoughts on this lovely new lens, you can either watch my video review below, read the text review…or just keep reading.
Thanks to JCL Sales Group for sending me a review loaner of this lens. As always, this is a completely independent review. *The tests and most of the photos that I share as a part of my review cycle have been done with the Sony a7RV along with the Sony Alpha 1 that serve as my benchmark cameras for Sony lenses.
Voigtländer lenses follow a tried and true formula that has been true across the four different mounts that I’ve tested them on. This includes a premium build that is all metal and glass, well executed aperture and focus rings, electronic contacts to communicate EXIF data and to enable more manual focus aids, but no weather sealing. Their lenses tend to be more like classic Zeiss lenses in build but typically smaller and less extreme in size. All of this is true here, and while the Nokton 50mm isn’t a small lens, it is only moderately sized. It has that stubby profile that looks really great mounted on your camera.
There are two aspects of Voigtländer lenses that I enjoy: 1) the beautiful manual focus action and 2) the uniquely beautiful rendering and image quality. That F1.0 aperture allows for extremely shallow depth of field and a lot of lovely, creamy bokeh.
So is the new Nokton 50mm F1.0 worth the roughly $1900 USD price tag? That’s going to depend a lot on your priorities.
Keywords: Voigtländer, Voigtlander, Nokton, 50mm, F1, F1.0, F/1.0, Voigtländer Nokton 50mm F1.0, Nikon, Sony Alpha 1, Sony a7RV, Review, mirrorless, Full Frame, Sports, Tracking, Dustin Abbott, Real World, Comparison, Handling, Focus, Portraits, Resolution, High ISO, Image Quality, Sample Images, Photography, 61MP, #letthelightin, #DA, #Alpha1, #A7RV
DISCLAIMER: This article and description contains affiliate links, which means that if you click on one of the product links, I’ll receive a small commission. As an Amazon Associate I earn from qualifying purchases.
Ahhh, it is nice to be reviewing another Voigtländer lens! My last Voigtländer review was back in 2020, and it was actually a review of the APO-Lanthar 50mm F2 that a subscriber had personally loaned me because I had no access to Voigtländer products here in Canada because of their not having a Canadian distributor (at least that I was aware of) and a complication with sending their products across the border from the US. Fortunately that has all changed for the better, and early this year I received an email that I was very happy to get – a “hello” from JCL Sales Group, the distributor for Voigtländer in Canada. They wanted to know if I was interested in doing more Voigtländer reviews, to which I responded, “absolutely!”
I’ve got a bit of soft spot for Voigtländer lenses, having owned three of them and currently using one that I do own (APO-Lanthar 65mm F2 Macro) on a regular basis. That has only grown since Zeiss has seemingly transitioned away from producing non-cine camera lenses, leaving Voigtländer as the only company filling that unique niche of premium manual focus lenses. Voigtländer is actually the oldest surviving lens maker, and is a company that traces its roots to Vienna, Austria, in the mid 1700s. Like Zeiss (a German company), the more modern lenses have been produced in Japan by Cosina, and there is just something special about their optical glass that produces gorgeous colors. Today’s review is of one of their newest lenses – the Voigtländer Nokton 50mm F1.0. I’m reviewing it on Sony E-mount, and while there are similar lenses for Canon RF and Nikon Z mounts, Voigtländer says that this new lens was exclusively developed for Sony. This is the most expensive lens currently made by Voigtländer, and the reason is all about that F1.0 maximum aperture. It’s extreme in every way, and I’ve reviewed very few lenses that match the light gathering potential of the Nokton F1 (as I’ll call it for brevity here). If you want my full thoughts on this lovely new lens, you can either watch my video review below…or just keep reading.
Thanks to JCL Sales Group for sending me a review loaner of this lens. As always, this is a completely independent review. *The tests and most of the photos that I share as a part of my review cycle have been done with the Sony a7RV along with the Sony Alpha 1 that serve as my benchmark cameras for Sony lenses.
Voigtländer lenses follow a tried and true formula that has been true across the four different mounts that I’ve tested them on. This includes a premium build that is all metal and glass, well executed aperture and focus rings, electronic contacts to communicate EXIF data and to enable more manual focus aids, but no weather sealing. Their lenses tend to be more like classic Zeiss lenses in build but typically smaller and less extreme in size. All of this is true here, and while the Nokton 50mm isn’t a small lens, it is only moderately sized. It has that stubby profile that looks really great mounted on your camera.
There are two aspects of Voigtländer lenses that I enjoy: 1) the beautiful manual focus action and 2) the uniquely beautiful rendering and image quality. That F1.0 aperture allows for extremely shallow depth of field and a lot of lovely, creamy bokeh.
So is the new Nokton 50mm F1.0 worth the roughly $1900 USD price tag? That’s going to depend a lot on your priorities.
Build and Handling
There are essentially two different variations of the Voigtländer design language in use right now. We have a classic “knurled” style to the manual focus ring as seen on the also new Nokton 75mm F1.5 that I just reviewed (and my older APO-Lanthar 65mm F2) and then also a diamond pattern grip surface seen on the Nokton 50mm F1.0 (shown here in Sony e-Mount).
The diamond pattern grip and slightly updated design language is something new for Voigtländer, and I like it. It’s a bit more contemporary, but it looks and feels very premium, too. The word that I’m getting is that Voigtländer is going to use both styles to differentiate different mounts. All Z-mount lenses, for example, will get the scalloped look while Canon RF in particular will all have the diamond pattern. I’m not sure where that leaves Sony E-mount, as both styles currently exist there.
Sony E-mount lenses often have a taper to the mount, as the E-mount is fairly small relative to Canon RF and, in particular, Nikon Z mounts. The biggest problem with this is illustrated above, as Sony uses the smaller mount as a reason to make their cameras smaller and narrower than competitors. But the problem with many lenses is that when the lens flares back out to accommodate the optical design it creates a very narrow spot right where your knuckles flex around the grip. You can see from the shot above there isn’t much room between the grip and the lens barrel. For me there is no pinch, but my knuckles do touch the lens some while gripping the camera. That’s more of a Sony problem than a Voigtländer problem, however.
That narrow section of the lens has a hyperfocal markings (from F2 to F16) and also a thin ribbed section that gives additional style and grip for mounting/unmounting the lens.
The next section is the manual focus ring. It has that diamond pattern grip that I think both looks great and also has nice feel for focus. These Voigtländer focus rings are beautifully engineered, with the perfect balance between enough resistance for precision and enough freedom for smooth, gliding focus. There is roughly 180° of focus throw (rotation), which is about perfect, in my opinion. It’s long enough to allow for precision, but not so long that you have to make multiple rotations of the wrist to make major focus changes.
Markings are etched and painted, with red for Imperial (feet) and white for metric (Meters). The inner barrel will extend about 13mm during focus (this is not an internally focusing lens), with the extension coming towards the minimum focus side (the lens is fully retracted at infinity focus).
The third ring is the aperture ring, and it is located closest to the front of the lens. The aperture ring is the first I’ve used from Voigtländer that has a declick option. When clicked, there are detents on the one-third stop aperture positions from F1 to F16.
The process to switch from clicked to declicked is a little clunky. It involves pulling the very narrow ring beyond the aperture ring back towards the camera in a clutch type action, and then rotating that section 180°. It is nearly impossible to not also rotate the aperture ring at the same time. There are two raised ridged protrusions on these rotating sections to allow you to grip this ring, as it is very difficult to grip it anywhere else.
I’m really glad for the declick option, but I think Voigtländer needs to develop a more elegant solution for the process.
The aperture iris itself has a high blade count of 12. This is appreciated, as Voigtländer works with straight blades in their apertures, so a higher blade count helps retain a more circular shape at smaller apertures, though you will still see the points of this aperture iris in some specular highlights.
Up front we have a very common 67mm front filter thread size along with some badging regarding the lens designation.
There is an included narrow lens hood that threads onto those metal filter threads (no bayonet). A threaded lens hood can’t reverse for storage, so you’ll either choose to not use the hood or leave it threaded on all the time. The short length of it doesn’t means it isn’t much of a liability to leave it attached all the time. There’s enough room in there to get a finger in to rotate a filter if you’re using one (and using filters on a lens this fast will probably be necessary at times to give you more control over shutter speed).
At the rear of the lens you fill the electronic contacts that will communicate all relevant information to the camera. That will include EXIF information, information for IBIS (camera stabilization, if so equipped), and information for various manual focus aids. The lens basically handles as normal, save that there is no autofocus nor the ability to change the aperture from within the camera.
I see no weather sealing gasket there, and no weather sealing is claimed for the lens.
The Nokton F1 is on the small side of medium in terms of size, more squat than long. It is 79.3mm (3.12″) in diameter x 69.3mm (2.73″) in length. Due to the wide diameter and solid construction the weight is a little more substantial at 590g (20.8oz). Though Sony’s cameras aren’t large, this lens is an easy fit and balances well on them.
The minimum focus distance is 45cm. That’s on the low side of average, and the Nokton F1 has a 48° angle of view, which is a little wider than the average for a 50mm lens (typically 45-46°). The resulting magnification, while not listed, looks a little lower than the average of 0.15x. I would estimate it more at 0.13x.
The magnification level clearly isn’t particularly high, but you’ll obviously be able to strongly blur out backgrounds due to the huge maximum aperture. I stopped down to F2 for this shot to keep a bit more in focus, and you can still see how beautifully blurred the background is.
All in all, the Voigtländer Nokton 75mm F1 was pretty much exactly what I expected. A very solid build with gorgeous engineering, and you do have the added functionality of being able to declick the aperture. The extreme nature of this lens optically means that the price tag is higher than the typical Voigtländer lens, but there aren’t many quality F1 lenses out there. You buy a Voigtländer lens for different reasons that you buy a Sigma, and there is nothing here that will disappoint those who love and appreciate quality manual focus lenses.
Manual Focus on Sony (Alpha 1 and a7RV)
When I first moved to Sony bodies, I found them a wonderful platform for manual focus. They had IBIS (in-body-image-stabilization), good viewfinders, and much more manual focus aids than the DSLRs that I was accustomed to. Since that point, however, essentially the whole industry has shifted to mirrorless cameras, so those advantages aren’t as distinct anymore. But I still found the Nokon F1 an easy lens to use on my Sony bodies and found that I could easily nail focus despite the huge maximum aperture and narrow depth of field. Here’s a few reasons why:
EVF. An electronic viewfinder has a lot of advantages over an optical viewfinder when it comes to using manual focus lenses. You have the ability to see overlays, magnify the image to confirm focus, and as a byproduct I really didn’t have any misses. I don’t always love Sony’s viewfinders due to them going a bit weird when you half-depress the shutter for stabilization, but focus is still really easy due to the EVF.
Effective IBIS (Steadyshot Inside). Sony was a pioneer with IBIS, and while other companies have caught up and even surpassed them, having the ability to stabilize the viewfinder or LCD screen image while focusing makes manual focus much easier. You can hold that image still while you pull focus to the perfect point.
Useful manual focus aids. Sony’s options include the ability to have a color overlay to help to show what is in focus, though I will note that this works better when shooting at larger apertures and at close to medium distances. At longer distances where more is in focus, the color overlays can just become distracting, and just because a lot is in focus doesn’t yet mean that focus is where you want it. I prefer the secondary method, which is to enable an automatic magnification of the focus area whenever you turn the focus ring. This allows you to visually confirm focus is where you want it, and it is pretty foolproof. Sony’s system will both automatically magnify the focus area when you turn the focus ring and then also switch back to the full view when you go to depress the shutter so that you can ensure your composition is still what you want.
I own four different brands of camera (Sony, Canon, Nikon, and Fujifilm), and while I would say that I like Sony’s viewfinders the least in some ways, I still found manual focus with the Nokton F1 nice and easy…right down to focusing on a single blade of grass at F1.
It is worth noting that the beautiful focus ring also makes doing focus pulls during video a treat. There’s nothing quite like a well calibrated true manual focus ring for smooth pulls.
Image Quality Breakdown
The term “Nokton” in the name of this lens is a reference to “nocturnal”, and emphasizes its ability in low light due to the bright maximum aperture. The optical formula here is relatively simple, with just 9 elements in 7 groups. There are two different kinds of aspherical lenses in this design. The grinding aspherical lens stands out for having a very high refractive index.
There are some Voigtländer lenses that are exquisitely sharp at large apertures (typically the Lanthar lenses), while others like the Nokton 40mm F1.2 have more of a dual personality – a bit “dreamy” at large apertures while extremely sharp when stopped down. The Nokton 50mm F1.0 falls more into the latter category, though that’s to be expected for an F1.0 lens. Getting corner to corner sharpness and high contrast at F1.0 is beyond what is currently possible in lens design. What I find to be fairly universal among Voigtländer lenses is the gorgeous color rendition. I love their optical glass, and there’s something about the look of the images right out of the camera that is special. I often find that I do next to no processing or tweaking to images, as it is rather hard to improve on what is already there.
One little tip when using a lens like this. Underexposure just a bit (one third stop is often enough), as the slightly underexposed look really suits the look of the glass. The shot above is at F1.0 and is completely unedited. You can see just how special images look right out of the camera. The blend of the beautiful colors, defocused area, and then even the nature of the vignette creates very artful images.
On the technical side of things, there is little distortion but a significant amount of vignette at F1.0.
There is a very small amount of pincushion distortion (-2 to correct) but nearly 3 stops of vignette (+74 to correct). That’s actually not bad for an F1.0 lens shot wide open.
At F1.0 there is some definite color fringing (LoCA) before and after the plane of focus.
I did some fringing in certain real world shots, particularly those with high contrast transition areas, like the light coming in around these leaves.
Stopping down a bit helps with the fringing in most situations.
Control of Lateral CA was pretty much perfect. The transition from black to white is flawless near the edge of the frame.
Some of the typical flaws for extremely fast glass, but nothing deal breaking here to me. So how about sharpness and contrast? All of my chart tests are shot on the 61MP Sony a7RV sensor with crops shown at roughly 180% magnification. Here’s a look at the test chart.
And here are the F1.0 crops from across the frame:
There’s actually a decent amount of detail in the center of the frame considering this is an F1 lens, on 61MP, at nearly 200% magnification. But you can also see that some fringing is reducing contrast, giving the textures a bit of a “bloom” to them. The midframe and corners are a bit softer, though it is more a lack of contrast than a lack of sharpness.
If you use the lens to its advantage, it is capable of producing very usable amounts of sharpness even at F1.0, and that of course gives you the advantage of having a beautifully soft defocused background.
In higher contrast situations, however, the fringing and loss of contrast wont’ be as effective. You can see in the crops from the same image at F1.0 and at F2 that the extra contrast and detail at F2.0 is significant.
Stopping down to F1.4 will increase contrast a bit and eliminate a lot of the fringing. The image looks brighter and cleaner:
It’s not really sharp yet, though. Things sharpen up considerably by F2, but I will note that I needed to refocus to get proper results. There’s clearly a bit of focus shift. Look at how different the results are looking at the original focus point vs the refocus results.
Results are also looking much crisper in the corners when compared to the F1.4 results, though I’ll note that the sharpness profile shows a little bit of a rebound in the extreme corners vs about 5% into the frame. Look at the image on the right and you’ll see it looks better out at the edge (right side) when compared to the left side of that frame.
This really shows the dual nature of the lens. We have gone from a “dreamy” look at F1.0 (and to a lesser extent F1.4) to a very crisp result by F2. Stopping on down to F2.8 shows a very sharp result all across the image frame.
Landscape apertures of F4-F8 will be extremely sharp and high contrast across the frame. I’ve been consistently impressed by how good Voigtländer lenses are at the medium apertures.
As expected on a high resolution body, diffraction will hit after F8, softening the image a bit at F11 and more so at F16.
So sharpness and contrast will vary dependent on the aperture you choose, which does give you some flexibility with the kinds of images that you can create with the lens.
What’s fairly indisputable is that the bokeh and rendering from the lens is beautiful. You can really isolate your subject in very unique ways, as in this case where I’ve shot through the layers of an apple tree to isolate one budding apple.
Or this lock hanging against barn boards. There’s that tiny depth of field surrounded by a lot of creamy bokeh.
But even here, stopped down two full stops (F2), you can see that while the background is visible, it is beautifully soft.
This is the real reason, of course, that you buy a lens like this.
If you choose your subject well, it will seem to pop off the screen compared to the background.
Voigtländer lenses are perfect for those who don’t really want to spend time post processing images. The colors and rendering are so nice that they look great right out of camera. Most all of the images in this review have received next to no processing.
The only fly in the ointment for some may be the straight aperture blades and the effect this has on specular highlights (bokeh balls). You will see those straight blades, though the high blade count makes this less of an issue. Here’s a look at what F2.8 looks like:
The “Nokton” part of the equation means that this lens is useful for shooting in dim lighting conditions. The bright maximum aperture of F1.0 allows for uniquely special low light performance, allowing you to pretty much see in the dark. I shot into the deep recesses of my lens cabinet and was able to shoot at ISO 400 and still produce a relatively bright looking image of a lens several rows in that was completely in shadow.
Flare resistance isn’t bad for a lens with such a huge maximum aperture. While it is possible to see some mild ghosting, I was actually surprised by how little there was. It’s very difficult to point at the sun at F1.0 and not get a blown out image for obvious reasons. You’ll probably want to work with an ND filter if you are shooting in bright conditions.
Bright lights right out of frame were also handled fine. Here’s a shot with bright sunlight filtering into the frame (shot at F1.3).
Bottom line is that this is a pretty amazing lens optically, particularly for one that opens all the way to F1.0. The combination of usable sharpness, gorgeous colors, and nice bokeh is definitely special.
As you can probably tell, I’ve enjoyed my time spent with the Voigtländer Nokton 50mm F1.0. It’s an extreme optical instrument that also happens to be a lot of fun. The ability to do extreme subject isolation really gives you some creative options, and the lens makes it easy to product beautiful end results even in ordinary situations.
As per usual, the focus and aperture rings are perfectly executed, making manual focus and general handling great…if you love manual focus lenses.
Manual focus lenses have long been for a certain niche market. Many photographers have no interest in a lens without autofocus, and that’s okay. Voigtländer has managed to remain successful in the modern era because they are in touch with their actual audience. The Nokton F1 is a more extreme instrument than most Voigtländer lenses, and is much more expensive as a result. $1900 is a pretty steep price, particularly when they sell a 50mm F1.2 for just $800 USD. But what you are paying for here is that extra little bit of special that is found in the extremes, and perhaps that is worth it to you.
Keywords: Voigtländer, Voigtlander, Nokton, 50mm, F1, F1.0, F/1.0, Voigtländer Nokton 50mm F1.0, Nikon, Sony Alpha 1, Sony a7RV, Review, mirrorless, Full Frame, Sports, Tracking, Dustin Abbott, Real World, Comparison, Handling, Focus, Portraits, Resolution, High ISO, Image Quality, Sample Images, Photography, 61MP, #letthelightin, #DA, #Alpha1, #A7RV
DISCLAIMER: This article and description contains affiliate links, which means that if you click on one of the product links, I’ll receive a small commission. As an Amazon Associate I earn from qualifying purchases.
Fujifilm has long carved out their own unique path in the competitive mirrorless camera market. They’ve elected to focus on APS-C on one end and Medium Format at the other extreme, skipping the very popular full frame space altogether. Many of their APS-C cameras fall on the premium end of the spectrum in terms of performance and price, and I suspect they’ve been most vulnerable in the moderately priced space where Canon, Sony, Nikon, and Olympus have a number of popular models. The Fujifilm X-S10 is their answer to this problem, combining some of the higher end features from the premium X-T4 with a smaller size and simplified control setup more akin to the X-T200 than the X-T4. The X-S10 packs a good bit of what makes the X-T4 special into a smaller, cheaper (about $1000 USD) body, but also loses a few of the things that many Fuji shooters appreciate.
Here are some of the specifications of the X-S10:
26MP X-Trans BSI-CMOS sensor
5-axis in-body image stabilization
On-sensor phase detection
3″, 1.04M-dot fully articulating touchscreen
2.36M-dot OLED electronic viewfinder
30 fps burst shooting with crop (up to 20 fps without)
DCI and UHD 4K capture at up to 30p with F-Log support
External mic and headphone sockets
325 shots per charge using LCD
USB Power Delivery support
Single UHS-I card slot
Wi-Fi + Bluetooth
The headline feature here is that the X-S10 is one of the few Fuji cameras with In-Body-Image-Stabilization (IBIS), which has formerly been only on a couple of top models. Fuji had to develop a whole new miniaturized IBIS system to fit into the X-S10, but I can attest to the fact that it works well. What’s great about IBIS is that can be used on all your lenses, and in most cases it is rated for six stops of stabilization, which is excellent.
I focused mostly on two 50mm lenses during my review: the new high end Fujinon XF 50mm F1.0 WR lens along with the MUCH smaller and more affordable XF 50mm F2. I also did a little shooting with the Viltrox AF 56mm F1.4 as a comparison. In many ways I think the new X-S10 may be the most compelling mix of features to price in Fuji’s lineup. It has the same sensor and focus system as the much more expensive X-T4, and adding the IBIS into the mix makes it an easy pick over the X-T30 ($100 less). At the same time, however, this is essentially a repackaging of existing Fuji technologies, and there is nothing here that stands out as a notable improvement over anything I’ve seen from the company before. I still find the autofocus system behind the curve from the competition as well. But we’ll explore all of that in detail in this review. If you would prefer to watch your reviews, you can check out either the long format definitive review or the shorter standard review below:
The X-S10 is an interesting camera in that Fuji has taken a number of high end features and packed them into a considerably smaller body. The X-S10 is considerably lighter than, say, the X-T4 (415g vs 526g, body only), and is also 12mm smaller in width, almost 8mm shorter, but, interestingly, 1.5mm deeper (126 x 85.1 x 65.4mm).
It’s that last one that is the most interesting, as while Fuji has made the X-S10 smaller and lighter, they’ve also expanded the grip to give you a much more substantial grip, making this one of the better compact cameras to hold. That was very necessary while reviewing the XF 50mm F1.0, as that lens is very chunky and heavy.
If there was any downside to the deeper grip, it was unique to this combination, where the deep grip combined with a very wide lens made for a close fit for my fingers between the lens barrel and the grip of the camera. In most situations, though, I definitely appreciate a camera that I can really grip. There’s also a fair good thumb rest on the back of the camera that makes holding the camera fairly comfortable, though as always with a smaller camera body, I feel like my pinky must go underneath the camera as I don’t have room on the grip for all four fingers.
Viewed from the front, the X-S10 has a classic Fuji camera profile, though conspicuously missing is my favorite little control level for choosing between M/S/C (Manual, Single Shot, Continuous).
It’s a somewhat curious omission, as the lower-priced X-T30 has it. I find this control particularly important on Fuji bodies as Fuji lenses themselves almost never have an AF/MF switch, so that lever is the simplest, most direct way to enable MF. I had to go into menus to choose MF, which is obviously a slower process.
While I’m griping, I’ll detail my other main handling complaint. Like the X-T30, the X-S10 has only a single SD slot (and only UHS-1 compatible) that is located down in the battery compartment on the bottom of the camera. The camera could use faster data transfer, for one (as we’ll see in the autofocus/burst section), but that location means that if you ever work from a tripod (for video or stills) and mount a quick-release plate, you almost always have to remove or at least loosen the QR plate so it can be moved out of the way to access the battery compartment and memory card.
It may seem like a minor thing, but as someone who does major projects where I’m collecting a lot of video and stills for reviews, this gets really annoying. I MUCH prefer a memory card location on the side of the camera. The higher end X-T3/4 cameras have two card slots (UHS-II compatible) and a memory card compartment on the side.
The battery itself is the lower end NP-W126S Rechargeable Lithium-Ion, 8.4 VDC, 1260 mAh unit that is rated for 325 Shots, which is well beneath the 600 shot rating on the larger battery pack found in the X-T4. The larger grip on the X-S10 clearly has room for the larger battery, so this was obviously a choice made for market separation, though I will say that Fuji, has, for the most part, kept that kind of thing at a minimum.
One surprising area that they didn’t skimp on was on the frame of the camera, as, instead of being polycarbonate (plastic), it is actually the more premium magnesium alloy we see on higher end cameras.
This promises to make the camera more durable and professional grade, though that is counterbalanced by the reality that there is no weather-sealing in the camera body.
Sigh.
The realities of mid-level cameras, where you are sometimes delighted by what’s there and then frustrated by what is not.
On the positive note of what is here, we have a wonderful 3″ 1.04 million dot inch resolution fully articulating touchscreen, which is by far my preferred setup as it allows for front monitoring.
My anecdote here is that while filming the standard review video (which I did on the X-S10) I ran into an issue with that smaller battery (made worse by filming in the cold) which died prematurely on me. I would not have known this and would have wasted even more time with the rest of my monologue to a dead camera if I hadn’t seen the screen go black. That flexible screen gives you many more options for positions where you can film or photograph while still being able to see the screen. One other favorite of mine is to have the screen out to the side and facing up while using a gimbal. It makes monitoring much easier without resorting to an external monitor.
The touch capacity falls somewhere in between the Canon and Sony extremes (the two primary systems I shoot with personally). Canon has the best touchscreens; they are the most responsive and allow full menu navigation via touch. Sony has very limited touch capability, with touch essentially being limited to moving a focus point around or selecting a focus area (no menu navigation of any kind). Fuji falls in the middle currently, allowing you to select focus areas, touch to capture, and to navigate the Q (quick) menu, but no navigation of main menus and there is noticeable input lag when compared to the better response of Canon’s screens.
Speaking of that Q menu…
On the X-T30, the Q button was placed right on the thumb rest area, a serious ergonomic faux pas, so Fuji has wisely relocated the Q button from there. The new position (on top of the camera) works fine, though it won’t be intuitive for anyone who has used just about any other camera, well, ever. Every Q menu button I’ve previously seen has been located on the back of the camera, so it will take a while before you instinctively reach for it there.
There is also a dedicated ISO button there, which I certainly approve of.
You’ll also note that instead of the traditional Fujifilm control scheme that leverages retro-style dials for ISO, shutter, and exposure compensation, Fuji has opted for a more generic set of controls. This includes a mode dial similar to what you would see in many cameras and then front and rear dials to control things like shutter, aperture, or exposure compensation.
This more standard scheme feels a lot less “Fuji”, but will probably also make the X-S10 feel more accessible to those unfamiliar with the Fuji way of doing things and will probably also serve to make the camera less intimidating to those photographers put off by the more analog approach Fuji has taken in the past. Everything works fine, however, and you’ve still got a better ergonomic setup than what you’ll find on the Sony a6xxx series.
I don’t like the shutter button quite as well here, though. It’s fairly flush with the top of the camera, meaning that you have to depress it by shaping your finger a bit. I find the travel a little too long, making it harder to activate than other Fuji models, and that is further complicated by the fact that it is winter (in Canada!) and I’m often wearing gloves. That same observation also applies to the video record button located by the shutter button, which is very small and sits flush with the top of camera. Both of these buttons would be more useful if they were raised a bit and easier to find by touch.
The rear of the camera has a small joystick that helps navigation and selecting a focus point along with the standard compliment of buttons that one would expect to find back there.
The left side of the camera has three ports in two compartments. The top port is a clean, compact microphone input slotted nice and high that can also be used as a remote shutter release port. A dialogue on the LCD screen smartly pops up when you plug into the port asking if you want to select something other than a microphone input. You can jump directly into those menu settings if desired, or it will go away in a few seconds if you don’t want to change anything.
The second compartment has a micro-HDMI port along with a USB-C multipurpose port. The USB-C port can be used for everything from data transfer to internally charging the battery to even becoming the headphone monitoring jack via an included dongle in the box.
The top left side of the camera has a lever that will pop up the built-in flash, which has a 16.4′ (5 m) at ISO 100 guide number. Not particularly powerful, but useful in a pinch if you use it right. I only rarely use a built-in flash because they probably ruin more pictures than they help!
There’s also a dial there that is mostly used for selecting a film emulation style. This is a bigger deal on Fuji cameras than most other systems as they have more varied (and often better) emulations that can really give you a certain “look” for your JPEGs in camera. It’s particularly handy for those that prefer to shoot JPEG and not process RAWS, as the film emulation style doesn’t effect RAW images.
The headline feature here is that the X-S10 is one of the few Fuji models that has IBIS (In Body Image Stabilization). This is a hugely desirable feature, as it provides true sensor-based optical stabilization that works with all of your lenses. You can even input the focal length if you are using a manual focus or adapted lens and don’t have electronic contacts. Fuji had to miniaturize the IBIS system by about 35% to get it to work here, but it does work very well. It is CIPA rated at 6 stops of assistance, essentially right between the now discontinued X-H1 (5.5 stops) and the X-T4 (6.5 stops). I was able to get fairly repeatable results in this environment with one-third second exposures (and a 50mm lens, and with Fuji’s crop factor that is about a 76mm full frame equivalence), so that equals nearly 5 stops of assistance.
I probably could have gone a bit lower if I had tried, but the bigger value to me is the ability to have IBIS cover the “misses” when shutter speeds get a little too low and then also to help to smooth out video footage. It makes a big difference there, particularly when handholding static scenes or doing small pans. Walking with the camera still isn’t nearly as natural as using a gimbal, but it does help.
The IBIS system here is nice and mannerly. Fuji has done a nice job of executing things, and I’m impressed with the performance in this compact camera.
The viewfinder is a fairly typical 0.5″ number with 2.36 million dots of resolution and a 0.62x magnification. It works fairly well, but isn’t top tier (the X-T4’s has a higher 0.75x magnification and is higher resolution at 3.69 million dots of resolution. I’d call this average for the class. I’ve collected a lot of the technical specs into one document that you can see by clicking here if you like:
So, to recap, the main strengths here are 1) IBIS 2) Articulating LCD screen 3) Magnesium alloy body. The main weaknesses are 1) No weather sealing 2) No focus mode dial on the front and 3) Single UHS-1 SD slot located on the bottom. All told, however, this camera is pretty standard for its class, and undercuts the Sony a6600 (which also has IBIS) by about $400 USD. It feels good in the hands and has good ergonomics.
Fujifilm X-S10 Autofocus System
The Fujifilm X-S10 inherits the focus system we’ve seen on a number of Fuji cameras beginning with the X-T3. It’s a good AF system that is competitive on paper with alternatives from other brands, though with a few practical limitations where Fuji still lags. We’ve got a hybrid phase detect/contrast AF system, with 425 phase detect points that are selectable across the frame. Use the rear wheel to expand or contract the active focus/tracking area.
The thumbstick can be used to move the focus point around, and, if enabled, you can also touch on the screen even with your eye on the viewfinder to do the same. What I find less intuitive, however, compared to Sony and Canon is that even if you have all points active, the focus system will still search for focus only in the active “box”, which you still have to move around. I prefer the Canon/Sony approach where the camera scans for what it thinks your focus subject will be (its typically right!), and you can override the Ai scan by touching the area you want if necessary. The latter process is faster and more intuitive, and I wish that Fuji would adopt it. Once you’ve put the box on your subject, the camera will track it if you keep the shutter button half-depressed and move the camera around (or it moves), but you’ve got to manually select where to focus initially.
The focus system is capable of precision focus, however, even at F1.0:
Things are a bit more intuitive if the camera detects an eye, however, and it will automatically start tracking the eye even if the active focus area is not located there. This can be overridden if desired. Eye detect worked well and gave me good results.
I would say I had a better focus experience than I did on the X-T200, which was the last Fuji camera I reviewed.
Fujifilm’s AF system will track action fairly well, though without quite the same precision or as smooth a process as the newest Sony and Canon models. There’s a bit less sense of precision with the focus area (being able to visually see action being tracked) in the viewfinder, and a few more missed frames. I was able to get pretty good action results, though.
The limiting principle here, as always with Fuji cameras, is insufficient buffer depth. The shutter burst rate is good, with 8 FPS available with the mechanical shutter but a jump up to 20 FPS available with the electronic shutter. One can even stretch that up to 30 FPS in their “sports mode” that has an additional 1.25x crop factor (smaller files can move through the pipeline faster). All of these figures are nicely competitive, but shallow buffers limit the effectiveness of the burst rates. Here’s the breakdown:
So best case scenario is the slowest frame rate, where if you shoot JPEGs you can get a 13 second burst before the buffer fills. If you want RAW files, though, you are stuck at only 2 seconds of action. Worse, however, is if you want to take advantage of that great 20 FPS burst rate while being able to track action. If you are shooting RAWs, that is less than one second of action before the buffer fills, and even if you shoot JPEGs you end up with well less than two seconds of action that you can capture before filling the buffer.
This is a little harder to illustrate in a text review rather than video, but one of my bursts I managed to get 50 frames (20 FPS, shooting JPEGs). That did exceed the buffer rating a bit, but meant that after less than 2.5 seconds the frame rate was dropping.
If you look at the first five photos in this sequence, you can see the normal pace of capture, but you’ll see that the action seems to jump ahead in the final frame. That’s due to the frame rate dropping to a much slower pace, so there is a gap of missing frames in the sequence.
The bottom line is that there is a reason why you don’t see Fuji cameras on the sidelines of sporting events. They have to solve their buffer problems if they want to be considered serious action camera players. Good tracking is let down by the limitation of not being able to capture full sequences of action. To Fuji’s credit, however, it doesn’t have the painfully slow clearing of the buffer that equivalent Sony cameras have.
There is one other area that I continue to be disappointed with Fuji’s AF performance, and that is when it comes to video face tracking. I often will use the camera or lens that I’m testing to film one of my video segments so that viewers can see the look of footage, but I hesitate to do that with Fuji gear because there is typically a distracting amount of pulsing where autofocus inexplicably leaves my face and then pulses back. My audience hates it…and so do I! I did use the X-S10 for the standard video review, and would have stretches where things were good and then periods where suddenly there was a lot of pulsing.
With rival systems I almost never have an issue with this unless I’m working with a new lens that doesn’t have the final (retail) firmware and the autofocus is still in a beta stage.
Fuji has improved, and now has real time face and eye tracking during video, but unfortunately it just isn’t as sophisticated as the competition. Here’s hoping we see that change in the future.
The X-S10 allows you to configure the shutter so that the camera will automatically switch between mechanical and electronic shutters depending on shutter speed. The mechanical shutter has a lower-spec 1/4000th shutter speed limit, but that’s easily overcome by the switch to electronic where the shutter speed limit is a whopping 1/32,000th of a second. This switch happened often when I was reviewing the 50mm F1.0!
So, to recap, the strengths for the AF system are 1) good spread of AF points across the frame 2) good action tracking performance (and faster frame rate options than many competitors) 3) improved Eye AF and face tracking. Weaknesses include 1) Less consistent face tracking in video leading to occasional pulses 2) good tracking system let down by shallow buffers and 3) less intuitive full sensor scanning of subjects that requires more manual intervention than competing systems.
Fujifilm X-S10 Video Performance
Modern mirrorless cameras are amazing hybrid devices. They are not only capable stills cameras, but they are often surprisingly robust video platforms. The X-S10 definitely qualifies, giving filmmakers a lot of options for video capture and very nice quality footage. Here’s a look at the video specifications.
While 4K capture is limited to 30 FPS (X-T3 and X-T4 give you 60 FPS), I did note you have a choice between DCI and UHD framing (not all cameras give you that option). Another uncommon option is that you can select a slightly higher resolution DCI 2K framing (2048 x 1080) where you have more framerate options (up to 60 FPS), and at full HD you can select slow motion options like 120 and even 240 FPS for shorter bursts (though who shoots longer than 3 minutes of 240 FPS anyway?)
You also have a series of FLOG options if you want to grade footage, and I found the footage easy to edit and play with. Internal recording is limited to 8 bit footage, but the X-S10 can output 4:2:2 10-bit video via HDMI.
The quality of footage is good, and Fuji’s excellent color science works well for getting great looking footage.
On a practical level, I have only one real criticism of Fuji’s video performance, and that actually has to do with continuous autofocus while capturing video. I find that focus pulls from one subject to another are frequently not as smooth as what I see from either recent Sony bodies or Canon bodies with DPAF. One can often see a visible stepping instead of a smooth transition, and this is exaggerated by the fact that many of the Fuji catalog lenses were designed before video AF was a serious consideration and thus the AF performance for video is still pretty primitive by today’s standards. Even the brand-new Fujinon XF 50mm F1.0 was really disappointing for video AF, though that may be an extreme example. Bottom line is that a lot of Fuji lenses are due a refresh to make them actually good for video use.
Those minor criticisms aside, however, this is an amazing little video camera…and having an excellent IBIS system really adds to the flexibility of the platform for video users.
Fujifilm X-S10 Sensor Performance
The 26.1Mpx X-Trans sensor in the X-S10 is shared with its more expensive big brother X-T4. This is now the fourth Fujifilm camera I’ve tested that uses this sensor (X-T3, X-T30, X-T4, and X-S10), so it is pretty familiar by this point. The sensor was originally developed for the X-T3, where Fuji said of the X-T3’s sensor, “[with] a newly developed sensor, the X-T3 features an APS-C-format 26.1MP X-Trans CMOS 4 sensor, which has a back-illuminated design to afford smooth tonal rendering, improved low-light performance, and a low native ISO 160 setting. As an X-Trans sensor, it still utilizes the randomized pixel array, too, which provides a high degree of image quality and sharpness due to the omission of an optical low-pass filter. Versus conventional pixel patterns, the X-Trans design more closely mimics the organic nature of film in order to produce nuanced colors and tonal transitions, while also reducing moiré and aliasing.”
I’ve spent time with and reviewed most all of the competition, so, my quick conclusion is that this sensor is a competitive one but not a clear winner in any category. The Sony 24Mpx sensor in many of its cameras has a bit more dynamic range and slightly better ISO performance. Canon has the resolution win with 33Mpx in its M6 Mark II. I’ve also not personally seen any area where I find X-Trans to be superior in some way to Fuji’s more traditional 24 MP Bayer sensors (like on the X-T200 that I recently reviewed). Fuji says that the X-Trans sensor produces a more film-grain-like noise pattern, but frankly this seems a little hyperbolic. I don’t really see it.
If you don’t want the technicalities, here’s a brief summation of the sensor performance. The X-S10 has a smaller native ISO range than competing cameras (160-12,800), and this feels a little unnecessarily restrictive (uncompetitive?) at this point, as Fuji is attempting to compete not only with APS-C models but with lower-priced full frame cameras as well. It’s not unusual for such full frame models to have an ISO range from 100-56,200. I like to charitably call this Fuji being conservative and avoiding the marketing extremes. I have found that Fuji competes well with, say, Sony, across its native range but Sony continues to have usable results after 12,800.
Likewise, Fuji’s sensors don’t quite have the same amount of dynamic range as competing Sony sensors (close to a stop less DR at base ISO), though the Fuji sensors are more competitive at higher ISO values. I found that shadow recovery is clean, but I start to see highlight clipping earlier on. Fuji does have a feature called DR200/DR400 that open up at higher ISO values (320/640) that will sample the highlight information from the base ISO while taking the midtone and shadow information from the selected ISO value. This does help the dynamic range to be more competitive.
But the tradeoff is that many people love Fuji colors, and they include a number of their film emulations that can give a unique “feel” to images and/or video footage. Fuji also has a fantastic JPEG engine, so if you just want to take photos and not spend a lot of time editing them to get the look you want, you may really enjoy the Fuji approach. I’ll add to this that Fuji also has some of the best lens profiles that I’ve seen, and I find that the JPEGs from many lenses look better than what the RAW files suggest.
ISO Performance
The native ISO range of Fuji’s 26Mpx X-Trans sensor is more limited than alternatives from Sony or Canon, running from ISO 160 to 12,800, with an expanded range going down to ISO 80 and moving up to 51,200 on the high end. I personally don’t ever use expanded ISO ranges and consider them more marketing than actually useful.. The native range is usable throughout, and even images ISO 12,800 are perfectly usable in many situations. Here’s a look at an image and crop taken at ISO 12,800:
At ISO 800 there is a mild addition of noise only detectable in the shadows. There isn’t a lot of difference from base ISO, however, and moving on to ISO 1600 shows little difference. At ISO 3200 there is slightly less contrast and slightly more noise, and that pattern continues at ISO 6400 and 12,800, where the noise becomes rougher and more visible in shadow areas.
I have found that the Fuji and Sony results looked more similar than different, though I would say that I found the a6500’s noise pattern a little rougher. The Sony’s native range does extend up higher, however, without going into “expanded” modes, and it definitely gives a better result beyond 12,800 than what the X-S10 does if you select the “expanded” range.
Fuji claims that they are delivering “full-frame-equivalent” results with their APS-C X-Trans sensors. Obviously the recent full frame competitors have a much greater ISO range (up to a native ISO 52,800 + expanded) and also have more sensor to collect light on. I downsampled the resolution of the X-S10 down to the 20 MP level of the Canon EOS R6 that I recently reviewed (which should give some benefit to the Fuji), and I found that the Canon had better contrast (shadows remained deeper), less visible noise, and less color shift/banding. Here’s a crop that shows part of what I saw.
All things considered, though, Fuji is doing pretty well considering how many pixels are packed into the smaller APS-C sensor size. A rough calculation of the pixel density on its 1.53x crop factor sensor means that you would need a full frame camera with around 60 megapixels to have a similar pixel density (closer to that of the Sony a7RIV). The camera like the the a7R3 (42MP) has more megapixels in an absolute sense, but relative to sensor size it actually has less. Pixel pitch is a measurement of the distance between each individual pixel (from the center of one to the center of the next. The a7RIV has a pixel pitch of 3.76 µm; the X-S10 has a pixel pitch of 3.74 µm. So, while the ISO range is more limited (I don’t love the ISO 160 base ISO, though it is better than Fuji’s old ISO 200 base), Fuji does deliver fairly clean, usable results across the ISO range that is there.
Dynamic Range Performance
I value dynamic range within a camera in two specific areas: the ability to cleanly lift shadows without introducing noise or color banding and the ability to recover highlights without introducing “hot spots” where information has been permanently lost. The value of good dynamic range is in the margins of photography, as eliminating shadows or recovering blown out highlights doesn’t always produce the better image. Having good dynamic range (particularly if you shoot RAW), allows you a lot more creative vision over how the final image will turn out. In this shot, for example, I was able to get the bright snow, retain the sky information, and keep the shadow information in the trees.
Fuji has an extra trick up its sleeve to help you maximize dynamic range performance in such scenes, which we’ll get to in just a moment.
In my tests, I found that the X-S10 did an excellent job of recovering shadows very cleanly. Here we have an image that I purposefully underexposed by four stops. As you can see in the original RAW image, there is very little information left there. In post I added those four stops back into the recovered image. What we find is an image that has been recovered with very little penalty. Contrast looks good and the image is nice and bright.
As is often the case, however, highlight recovery lags behind shadow recovery. Even at 3 stops of recovered highlights there is damage done to the image with both “hotspots” (information that cannot be recovered) and every uneven, unnatural areas of the image.
Sony is about a 2/3rds of a stop better in this regard, but Fuji has one other trick that I previously mentioned. If you move beyond the base ISO to either ISO 320 or 640 (and beyond), two new options open up in the menu. These are DR200 and DR400. What these do is essentially split the sensor readout so that the shadow information is gathered from the current ISO setting while the highlight information comes from base ISO. At ISO 320 that gives you one additional stop in the highlights, while at ISO 640 you gain two. This allows you to overexpose the image slightly so that you have plenty of information in the shadows, but since there is one or two stops less exposure in the highlights, you have plenty of ability to recover blown out areas in post. I got a much better looking result using DR200 :
Note how much more detailed and natural the right (DR200) recovery result looks. I would pick the image on the right every time. It looks like a natural photograph despite the fairly radical recovery of highlights.
I certainly will often utilize this for landscape images when I’m shooting Fuji. It means that I can recover some sky information and get a more dynamic end result…even if there isn’t much going on in the sky!
That’s not to say that you should shoot this way all the time, as often retaining contrast and either crushed shadows or blown out highlights makes for a better photograph, but having this technique available to improve dynamic range certainly has its uses…just don’t go too crazy on those sliders!!
X-S10 Color
Color science is a fairly divisive topic. I’ve found that my work in comparing color science has been both popular and controversial. Here’s at least part of the reason why: people don’t all see color identically. This has become evident based on a number of photos that circulate around the Internet featuring a dress or sandals that people perceive to be very different colors. Part of this has to do with the way that people’s eyes process color (some have more red cones in the eye, others more green), but it also comes down to the reality that in the Internet age people view images on screens that vary widely in their color calibration and accuracy. I personally use high end 4K displays in my desktop array that are calibrated on a regular basis to make sure that colors are accurate, but when I release digital files to the internet, I lose all control over how and on what they are going to be viewed. Put simply: not everyone is seeing the same thing.
You have a lot of choices in camera for film emulations or “looks”, and, if you shoot RAW files, it is easy to choose those same options in your editing software (I primarily use Adobe products, myself). So, here’s a beautifully colored image where I’ve chosen Adobe’s Landscape profile.
Now Astia (Soft)
Now Classic Chrome
Provia
Velvia
Eterna (Cinema – a new addition to X-T4)
Classic Chrome is little less saturated but often has a tasteful look to it. I find Velvia (which is Vivid) is often too intense for me, but can be great for landscapes. Provia is the Standard, and it is fairly neutral. Astia is “Soft”, and it’s another one I like. Your mileage may vary, and what I like for one type of image is not necessarily what I like for another. Velvia looked great on this landscape image:
Velvia is terrible for portraits, though, leaving skin tones very oversaturated.
You’ve also got a lot of great options on the monochrome front, with classic film emulations but also the ability to go into the menus and tweak the look in several ways. For example, if I select Acros, I’ve got the added ability to select whether to apply a Yellow Filter (more contrast, darker skies), Red (slightly more extreme of yellow), or Green (for better skin tones). There is also an option to warm or cool the monochrome image in camera. You can move to near-sepia on the warm side and near-selenium on the cool side. Here’s a quick, available light portrait with Acros + Red filter.
You can also control grain (if that’s your thing) in camera as well. Most of these tweaks in-camera will only matter if you are shooting JPEGs. If you are shooting RAWs you can do all of this in post. Many that have chosen Fuji have done so for their ability to shoot JPEGs and get what they like right out of camera, and I think that may be one of the best selling points of the Fuji experience. As noted previously, the great film emulations also combine with excellent profile corrections for their lenses, allowing you to get maximum performance from your lenses. Here’s a straight from camera JPEG taken with the Fujinon XF 50mm F1.0 at F1.0.
It looks pretty great, giving the lens more contrast and punch than what an equivalent RAW file would. That’s a the Fuji JPEG value.
I would recommend checking out the Image Galleries page to get a sense of real-world performance – most of which has received minimal processing so you can assess camera performance rather than my editing expertise.
Conclusion
In many ways the FUJIFILM X-S10 is the most compelling package from Fuji right now if price is a consideration. It includes many of the features of the high-end X-T4, including IBIS, articulating screen, sensor, and focus system. It feels like many of the things that it lacks (no weather sealing, no 4K60, no dual card slots, fewer physical controls) are natural ways of distinguishing between a $1000 USD model (X-S10) and a $1700 model (X-T4), with few head-scratching moments that we sometimes get on Canon products where they have artificially crippled the lower end model for no apparent reason. In many ways the X-S10 ends up feeling like a “mini X-T4”, which is a good thing.
Fuji has elected to move to a more generic control scheme here, with fewer of the unique analog(ish) controls one associates with Fuji. That will make the camera slightly less endearing to Fuji aficionados but more accessible to the general public. I do give them excellent marks for fashioning a deep, functional grip on a compact camera.
There’s a lot to like here, and the flaws are mostly the typical Fuji flaws and are hardly unique to the camera itself. I would certainly choose the X-S10 over the X-T30, if nothing else because I think the in-body-image-stabilization and articulating screen are two major, important features that the X-S10 has and the X-T30 does. At the same time, however, Fuji’s hierarchy of camera models isn’t entirely clear, so I suspect there will be more than a few potential buyers who will be confused over whether they should elect for the X-S10 or the X-T30 based on name alone. If it were me, however, I’d happily spend the extra $100 and go for the X-S10. It’s a lot of power packed into a compact package, and has been one of my favorite Fujifilm models to date.
Purchasing your gear through B&H and these links helps fund this website and keeps the articles coming. You can also make a donation here if you would like. Visit my Amazon page for some of my gear of choice! Thank you for your support.
Great News! I can now offer a 5% discount on all purchases at Amplis Foto, Canada’s Leading Photographic Supplier. Please enter discount code: AMPLIS52018DA in your cart. It is good for everything in your cart, and is stackable with other coupons, too! It will take 5% off your entire order! Proceeds go towards keeping this site going and providing you with new reviews!
DISCLAIMER: This article and description contains affiliate links, which means that if you click on one of the product links, I’ll receive a small commission. As an Amazon Associate I earn from qualifying purchases.
Fujifilm has long carved out their own unique path in the competitive mirrorless camera market. They’ve elected to focus on APS-C on one end and Medium Format at the other extreme, skipping the very popular full frame space altogether. Many of their APS-C cameras fall on the premium end of the spectrum in terms of performance and price, and I suspect they’ve been most vulnerable in the moderately priced space where Canon, Sony, Nikon, and Olympus have a number of popular models. The Fujifilm X-S10 is their answer to this problem, combining some of the higher end features from the premium X-T4 with a smaller size and simplified control setup more akin to the X-T30 (and a bit of the X-T200). The X-S10 packs a good bit of what makes the X-T4 special into a smaller, cheaper (about $1000 USD) body, but also loses a few of the things that many Fuji shooters appreciate.
Here are some of the specifications of the X-S10:
26MP X-Trans BSI-CMOS sensor
5-axis in-body image stabilization
On-sensor phase detection
3″, 1.04M-dot fully articulating touchscreen
2.36M-dot OLED electronic viewfinder
30 fps burst shooting with crop (up to 20 fps without)
DCI and UHD 4K capture at up to 30p with F-Log support
External mic and headphone sockets
325 shots per charge using LCD
USB Power Delivery support
Single UHS-I card slot
Wi-Fi + Bluetooth
The headline feature here is that the X-S10 is one of the few Fuji cameras with In-Body-Image-Stabilization (IBIS), which has formerly been only on a couple of top models. Fuji had to develop a whole new miniaturized IBIS system to fit into the X-S10, but I can attest to the fact that it works well. What’s great about IBIS is that can be used on all your lenses, and in most cases it is rated for six stops of stabilization, which is excellent.
I focused mostly on two 50mm lenses during my review: the new high end Fujinon XF 50mm F1.0 WR lens along with the MUCH smaller and more affordable XF 50mm F2. I also did a little shooting with the Viltrox AF 56mm F1.4 as a comparison. In many ways I think the new X-S10 may be the most compelling mix of features to price in Fuji’s lineup. It has the same sensor and focus system as the much more expensive X-T4, and adding the IBIS into the mix makes it an easy pick over the X-T30 ($100 less). At the same time, however, this is essentially a repackaging of existing Fuji technologies, and there is nothing here that stands out as a notable improvement over anything I’ve seen from the company before. I still find the autofocus system behind the curve from the competition. If you want the full story, you can check out my text review of the lens or watch the video review on my YouTube channel. Or you can just check out the pretty pictures below.
Purchasing your gear through B&H and these links helps fund this website and keeps the articles coming. You can also make a donation here if you would like. Visit my Amazon page for some of my gear of choice! Thank you for your support.
Great News! I can now offer a 5% discount on all purchases at Amplis Foto, Canada’s Leading Photographic Supplier. Please enter discount code: AMPLIS52018DA in your cart. It is good for everything in your cart, and is stackable with other coupons, too! It will take 5% off your entire order! Proceeds go towards keeping this site going and providing you with new reviews!
DISCLAIMER: This article and description contains affiliate links, which means that if you click on one of the product links, I’ll receive a small commission. As an Amazon Associate I earn from qualifying purchases.
Every now and then, a lens maker delivers a “halo” project that in many ways is as much about showcasing engineering expertise as it is about delivering a practical product to the end-user. Car makers do the same, and those halo cars are almost never high volume models, but they bring attention to the brand that helps sale more practical vehicles. Canon did that several decades ago with the Canon EF 50mm F1.0L, a now rare collector’s item that I got the chance to review a number of years ago. Frankly, that lens wasn’t particularly impressive as a practical instrument (in my opinion), but some of the engineering triumphs there enabled the much more accessible EF 85mm F1.2L and 50mm F1.2L lenses that came later. Fuji has stepped up to the plate, and has tackled their own halo project in the Fujinon XF 50mm F1.0 WR lens. This isn’t an identical lens to what Canon did, however, as this is engineered for Fuji’s APS-C X-mount, and thus has a 76mm full frame equivalent focal length, so a narrower angle of view and a little bit less challenging to design.
Building an F1.0 lens definitely brings some prestige, but there are some overwhelming technical and engineering challenges that result in some unfortunate compromises. Here those manifest in a large, heavy lens (4x the weight of the XF 50mm F2!), cost ($1500 USD!), and some aberrations just too difficult to correct for. But what you also get some killer bokeh that is much nicer than what I saw on the Canon EF 50mm F1.0L.
The XF 50mm F1.0 is not going to be lens for everyone, but rather a niche lens that will probably mostly appeal to certain portrait photographers who appreciate the unique opportunities a lens with such a large maximum aperture affords. In some ways, however, this is an expert lens and it will take experts to get the best results from it. My hope in this review is to help you determine whether or not the XF 50mm F1.0 is the lens for you!
If you prefer to watch your reviews, you can check out either my long format definitive review or the standard video review.
Despite having only a moderate focal length, that huge maximum aperture means that the XF 50mm F1.0 is second only to the XF 200mm F2 (a radically different kind of lens) in size for a Fuji prime. It dwarfs alternative lenses like the XF 50mm F2 or Viltrox AF 56mm F1.4 for Fuji.
You can see how the specs break down in this comparison:
At 845g (1.86lb), the XF 50mm F1.0 weighs more than 4x that of the F2 lens, 3x the Viltrox, and over 2x heavier than the XF 56mm F1.2. At 103.5mm in length, it is obviously much, much longer than competing lenses, and is significantly wider too (87mm). The 77mm front filter thread is much larger than any competitor, too.
The heft of this lens means that it will be a poor balance on most Fuji bodies, and is probably best reserved for use on bodies like the X-T series. I used the X-S10 for this review, and the lens was somewhat overwhelming on the camera.
The exterior shell is mostly made of metal, which makes the plain, plastic lens hood feel a little cheap by comparison.
The lens has a thorough degree of weather sealing, starting with (but not limited to) a rear gasket; there are 11 seal points throughout the lens, which is an obvious improvement over an alternate lens like the XF 56mm F1.2.
There is the standard Fuji aperture ring, which has one-third stop detents and an option to move it into “A” and control aperture from inside the camera instead.
What you don’t have is any option to declick the aperture for video work, which will be a disappointment to some.
The aperture iris has nine rounded blades, and they do a good job of retaining a circular shape with the lens stopped down. Here’s a look at F1.0. F1.4, and F2.0:
You’ll note, too, that the geometry from the lens is better than usual, with minimal deformation along the edges of the frame, and a fairly even circular shape even at F1.4. This is going to be better than competing lenses.
What I’m not impressed by is the minimum focus distance, which only allows you to get as close as 70mm. This produces a rather pathetic 0.08x degree of magnification, which is one of the lowest figures I’ve ever seen from any lens.
Wide open performance at MFD has very low contrast, though that improve significantly by F2. The XF 50mm F2 has a significantly better 0.15x magnification, so this definitely isn’t a strength for the F1.0 lens.
There aren’t any switches on the barrel, just the two rings. The manual focus ring is nice and wind, and reasonably well damped, but focus action has visible stepping and isn’t much fun.
And that’s it! Not much here in terms of features, but the build quality is nice, it has good weather sealing, and is thus perhaps a better choice over the 56mm F1.2 for portrait photographers who shoot in a variety of weather conditions. This is a big, heavy lens, but it also comes with a professional grade build. It does lack an optical stabilizer, so unless you have one of Fuji’s cameras with IBIS, you probably won’t be doing much handholding of video with the lens. I was using Fuji’s new X-S10 body for this test, which fortunately does come with IBIS.
Autofocus Performance
I want to start this section by stating that developing an autofocusing F1.0 lens is a serious challenge. Things are slightly different when developing for APS-C, but when you look into the lens, you are going to see a LOT of glass nonetheless. A lens with this large an aperture has large, heavy elements (12 elements in 9 groups), and those heavy elements need a lot of torque to move the focusing group with both consistency and speed. You have to start momentum quickly and then stop that momentum quickly to achieve accurate focus, and that is much more a challenge with very large maximum apertures. Not to mention the fact that large aperture means small depth of field, putting more pressure on the lens/camera to achieve accurate focus. There’s a reason why most lenses with very large apertures are manual focus…
I’ll start with some basic praise, as Fuji has created a fully functional autofocusing F1.0 lens. As you can see from the photo above, the XF 50mm F1.0 is capable of picking out objects and accurately focusing on them. You can see that the background is highly blurred out (it’s another bridge beyond).
Eye AF also worked well, and even when I shot at F1.0, I got accurate focus on the eyes with the new X-S10 body that I used for the review.
But not everything is rosy. Fuji elected to use a DC motor, which, while probably providing the torque needed here, lacks any kind of refinement that most of us expect from modern lenses. There’s definitely noise in focus, and focus speed is only okay. Things are worse for video, where my standard test of focus pulls produced noisy results with visible stepping and a coarse quality of focus. I’m surprised that they didn’t go with something like multiple linear motors (like in the 90mm F2 or 200mm F2 lenses) to provide smoother, quieter focus. I suspect that they couldn’t overcome the technical challenges presented in the lens, but unfortunately autofocus is not going to feel premium in general and the lens probably won’t be a great choice for videographers.
The best I can say is that the focus gets the job done, but don’t expect the XF 50mm F1.0’s focus behavior to be the best in your kit even if the price of the lens suggests otherwise.
Fujinon XF 50mm F1.0 WR Image Quality
There’s a reason why you don’t see more autofocusing lenses with an F1.0 aperture – this is very, very hard to engineer. It’s also important to recognize that some of the observations here are relative to what happens to be your point of comparison. So, for some perspective: relative to the old Canon EF 50mm F1.0L that I referenced earlier, Fuji has done a great job of minimizing the weaknesses of a lens with huge glass. The XF 50mm F1.0 is relatively sharp at F1.0 and has fewer aberrations. It performs better against bright lights, and even has smoother bokeh. But it is no Canon RF 50mm F1.2L for Canon’s mirrorless or a Sigma 35mm F1.2 DN for Sony/Leica mirrorless. Those lenses are well corrected and incredibly sharp even at wide apertures. The XF 50mm F1.0 has much lower contrast and acuity at wide apertures, though there is a bit of a twist I’ll get to in a moment. This is more of a classic sharpness profile, where some aberrations are left uncorrected in order to produce softer, creamier bokeh…which the lens can produce in spades.
I remember the controversy that arose when it became clear that Canon’s cheap “nifty-fifty” (EF 50mm F1.8) was sharper at, say, F2, than the very expensive and premium EF 50mm F1.2L. For some photographers, that just demonstrated that the much more expensive lens was a “rip-off”, but those of us who had used both lenses knew that this didn’t tell the whole story. There was a “magic” to images from the F1.2 lens that the cheaper F1.8 lens could never replicate, and a lot of that came down to the unique rendering from the large elements in the L series lenses.
That’s also the case here. If you came looking for a lens that renders every fine detail at 100% magnification, you will probably be disappointed. But if you are here for a unique, beautiful rendering, you are going to be much, much happier.
But since my process is to really dissect image quality, I’ll do that as well. First, let’s start by taking a look at vignetting and distortion.
Vignette is actually surprisingly low for such a huge aperture, and is easily correctible (I used a +60 and slid the midpoint to 0 to manually correct, though Fuji’s profiles are great and that’s the easy route to go). Likewise the pincushion distortion is there but quite mild, and a tiny -1 correction was enough. High marks here, as both of these typical flaws are incredibly mild for such an extreme lens.
I was less impressed when I broke down the resolution. There’s a tension in large aperture lens design between correcting aberrations (producing high contrast and sharpness) and creamy bokeh (which benefits from some reduced contrast). Fuji’s engineers erred on the side of creamy bokeh, so contrast suffers. Here’s a look at my custom test chart:
The tests were done with a 26MP X-S10 body on a tripod with a two second delay to eliminate any vibration. In my video tests I show the chart results at 200% to better highlight subtle nuances, but these crops are a little lower (somewhere around 150% or so).
Here’s a look at the F1.0 results from across the frame:
What you see is that while resolution isn’t bad, there is what feels like a bit of Vaseline smeared over the lens, leaving everything looking a bit hazy. That’s the result of uncorrected spherical aberrations that reduce contrast.
On the plus side, I note that the resolution across the frame is actually fairly consistent, which points to relatively low field curvature. Lateral chromatic aberrations are also minimal, so there is little fringing of the white/black patterns near the edge of the frame.
After concluding my own review, I went and looked at a few others. At least one stated that contrast dramatically improved by F1.4, but I saw something more mild in my tests:
These chart results echo what I saw in the field, where wide aperture results also showed low contrast when closely inspected.
That low contrast means that acuity (ability to render fine details) isn’t fantastic on the lens at wide apertures. One reviewer commented that, “you can always add more contrast”, but that’s not really entirely true. Yes, you can add contrast via software (contrast sliders, tone curves, or even via layers), but the challenge is adding that contrast without fundamentally altering the global nature/look of the image. It’s not really that easy to do, and just increasing contrast doesn’t mean that you can create details that simply aren’t there. Achieving a higher contrast look on a local level without negatively impacting the global look of the image requires somewhat of an expert touch in editing, and I’m not sure that this is a skill that everyone has in their toolbox.
But that leads me to an interesting observation: Fuji is the one platform out of the various systems I test where people often go who want to shoot JPEGs and not mess with processing RAWs. In this case, I actually preferred the overall look of JPEGs over RAW files. Fuji is clearly doing a great job of correcting for the lens aberrations and optimizing images in the JPEG images, which showed a superior amount of contrast and detail while retaining a natural look to images. Here’s a case in point:
I would say that this JPEG file looks better than what I could get out of a RAW file, though someone who is an expert at professing Fuji files (I’m not) should surely be able to produce something similar. If I got RAW files that looked that good, I would be singing a different tune at this point.
There are still limitations, however. Even with a JPEG file you can tell from this infinity shot that acuity isn’t great, with a lot of the textures looking mushy.
The crop shows that contrast is still on the low side. Stopping down to a landscape aperture like F5.6 produces a radically better result:
I find that contrast improves more by F2, and starts looking good by F2.8:
I found that I started getting the kind of results I personally like at a pixel level around F2, where I can see the crisp details in the eyelashes and on the lips. The bokeh remains nice here, too.
There is some longitudinal chromatic aberration from the lens that also contributes to the lower contrast. You will most often see it in real-world images as fringing in bokeh regions, like the green lining around these Christmas tree lights:
I’ll also note, however, that these bokeh circles are much, much smoother than what I saw when reviewing the Canon EF 50mm F1.0L. It a lot of busyness in the circles in a pattern that I jokingly referred to as “Death-Star bokeh”. Other than the fringing, the bokeh is actually very smooth here.
You can also see it in this F1.4 portrait (the crop shows the green fringing around bare plants in the background):
The upside to these remaining aberrations, however, is that the bokeh is truly soft and creamy from the lens. This, to me, is the greatest optical strength of the lens.
If you want an ultra-sharp lens to use at small apertures, you can easily get that with cheaper lenses with smaller maximum apertures, but very few lenses are going to give you the creative depth of field options that the XF 50mm F1.0 is going to provide. I didn’t get to test it at the best time of year for creating amazing bokeh shots (snow is too bright!), but this is a lens that could do special things when used expertly by a portrait or wedding photographer. Here’s a few more bokeh shots to make the point.
By the way, the F1.0 aperture on an APS-C camera becomes a little complicated to define. The crop factor of the camera will make the lens behave similarly to what you would see from a 76mm F1.4 (ish) lens on a full frame camera, or, put differently, images under identical conditions taken with a 76mm F1.4 lens on a full frame camera would have a similar look to the XF 50mm F1.0. But an F1.0 aperture is just as physically large on an APS-C lens as it is on a full frame lens, so the light gathering potential is still F1.0 whether it be a full frame or APS-C camera, so this is a lens that can suck in a LOT of light. Fortunately many of Fuji’s cameras allow you to utilize an electronic shutter with a higher shutter speed than the typical maximum of 1/8000th second for mechanical shutters. In daylight conditions 1/8000th will often not be fast enough at F1.0. If you want to use flash sync and F1.0, prepare to either use some serious ND filters and/or HSS (High Speed Sync) on your flash.
The upside, however, is that the lens can suck in a massive amount of light and can easily focus in dim conditions. This shot was taken with only candlelight in an otherwise dark room with the subject mostly backlit (with a bit of rim lighting).
The F1.0 aperture allowed me to get a 1/10th second shutter speed at ISO 800 to get this shot. A lens with an F2.8 aperture would require an ISO of 6400 to achieve a similar amount of light, but obviously with some serious impact to image quality due to the 3 stop difference in ISO. That could make a serious difference in certain kinds of portrait or wedding work.
The lens does reasonably well in bright light situations, with the coatings keeping flare from being too destructive. It’s not flawless, but pretty good for a lens with such a large maximum aperture.
All told, the performance of this lens is (as I said at the beginning of this section) relative. Relative to your expectations, and relative to what you are comparing it to. It is worth nothing, however, that I actually found it sharper at comparative apertures to both the XF 50mm F2 and Viltrox 56mm F1.4 that I happened to have on hand at the same time, though not by a large margin. None of those lenses can compare to the amount of background blur you can achieve at portrait distances, however. If you value beautiful bokeh and rendering over supreme sharpness, you will probably like what you get out of the XF 50mm F1.0. You can check out more photos by visiting the image gallery here.
Conclusion
As I noted in my introduction, the Fujinon XF 50mm F1.0 WR is a lens for experts. It’s too large, too heavy, and too expensive to be a lens for the masses, and that leaves a smaller, more niche market of those willing to deal with greater cost and inconvenience in order to get uniquely special results. I see that audience as primarily being portrait and wedding photographers, as this lens gives them some creative opportunities few others afford.
The business of designing and creating a functional autofocusing lens with an F1.0 aperture is extremely challenging. My research suggests that this is just the second such lens after the Canon EF 50mm F1.0L. As one of the few reviewers who has reviewed both these lenses (the Canon is a rare collector’s item that I was loaned by an owner for review), I can say that the Fuji XF 50mm F1.0 is a more functional lens than the Canon. It has fewer compromises optically, though there are still some clear areas where practical performance was sacrificed on the altar of maximum aperture. A rare type of lens leads to some difficulty in evaluating it, as it has few direct competitors but still must be considered within the framework of existing alternatives. This isn’t a lens with the smoothest or best autofocus, it’s not particularly sharp wide open, and it’s large enough to bring some inconvenience, but it has beautifully soft bokeh and the ability to create unique images.
Viewed in this light, I can safely say that whether or not one is pleased with this lens will depend largely on both their expectations and what they plan to do with it. The images above and below this section could be taken with many lenses; purchasing this lens to primarily shoot it at smaller apertures would be, in my opinion, a waste.
But this quick shot I had my son take of me through a houseplant with a busy living room behind me shows in a minor way the creative options available at F1.0.
It’s a casual shot using only available light and a far from optimal scene, and yet the huge maximum aperture allows the shot to have some artistic value in a way that wouldn’t be possible with a lens with a smaller maximum aperture. Now imagine that in an optimal situation, with better lighting and a more pleasing scene (and subject!), and you’ll have an idea of what a lens like this can do. If your photography tends towards the artistic and you love to play with depth of field, then the Fujinon XF 50mm F1.0 WR might open up more creative options than you’ve previously had before and is worthy of your consideration.
Pros:
Nice build
Quality weathersealing
Autofocus is accurate
Beautiful, creamy bokeh
Huge maximum aperture affords creative opportunities
Purchasing your gear through B&H and these links helps fund this website and keeps the articles coming. You can also make a donation here if you would like. Visit my Amazon page for some of my gear of choice! Thank you for your support.
Great News! I can now offer a 5% discount on all purchases at Amplis Foto, Canada’s Leading Photographic Supplier. Please enter discount code: AMPLIS52018DA in your cart. It is good for everything in your cart, and is stackable with other coupons, too! It will take 5% off your entire order! Proceeds go towards keeping this site going and providing you with new reviews!
DISCLAIMER: This article and description contains affiliate links, which means that if you click on one of the product links, I’ll receive a small commission. As an Amazon Associate I earn from qualifying purchases.
Every now and then, a lens maker delivers a “halo” project that in many ways is as much about showcasing engineering expertise as it is about delivering a practical product to the end-user. Car makers do the same, and those halo cars are almost never high volume models, but they bring attention to the brand that helps sale more practical vehicles. Canon did that several decades ago with the Canon EF 50mm F1.0L, a now rare collector’s item that I got the chance to review a number of years ago. Frankly, that lens wasn’t particularly impressive as a practical instrument (in my opinion), but some of the engineering triumphs there enabled the much more accessible EF 85mm F1.2L and 50mm F1.2L lenses that came later. Fuji has stepped up to the plate, and has tackled their own halo project in the Fujinon XF 50mm F1.0 WR lens.
Building an F1.0 lens definitely brings some prestige, but there are some overwhelming technical and engineering challenges that result in some unfortunate compromises. Here those manifest in a large, heavy lens (4x the weight of the XF 50mm F2!), cost ($1500 USD!), and some aberrations just too difficult to correct for. But what you also get some killer bokeh that is much nicer than what I saw on the Canon EF 50mm F1.0L.
The XF 50mm F1.0 is not going to be lens for everyone, but rather a niche lens that will probably mostly appeal to certain portrait photographers who appreciate the unique opportunities a lens with such a large maximum aperture affords. In some ways, however, this is an expert lens and it will take experts to get the best results from it. I’ll elaborate more in my reviews, but you can check out some photos in the galleries here for now!
Purchasing your gear through B&H and these links helps fund this website and keeps the articles coming. You can also make a donation here if you would like. Visit my Amazon page for some of my gear of choice! Thank you for your support.
Great News! I can now offer a 5% discount on all purchases at Amplis Foto, Canada’s Leading Photographic Supplier. Please enter discount code: AMPLIS52018DA in your cart. It is good for everything in your cart, and is stackable with other coupons, too! It will take 5% off your entire order! Proceeds go towards keeping this site going and providing you with new reviews!
DISCLAIMER: This article and description contains affiliate links, which means that if you click on one of the product links, I’ll receive a small commission. As an Amazon Associate I earn from qualifying purchases.
Whenever the Canon EF 50mm f/L is mentioned photographer’s eyes light up. This lens was only made for about ten years, and only made in any kind of quantity for a few years, but has quickly attained legendary status among collectors and those that dream of owning one. After having used it for a few months, I am left to publish a review unlike no other I have ever done. This is a lens that isn’t going to be very practical for most users, but then again, who spends big money to collect practical things? Is the Canon EF 50mm f/1.0L more than just a collector’s item? Read on to find out.
Prefer to watch your reviews? I’ve got you covered!
Size and Build
There is a reason that every other full frame compatible 50mm lens has a smaller maximum aperture than this lens. Compared to the lenses of its era (1989-2000) it is massive! Its optical formula is 11 elements in 9 groups and includes two expensive aspherical elements. It has 8 aperture blades, but, as we’ll see in the bokeh section, these are not curved so the round aperture shape is lost fairly quickly. It is housed in a mostly metal body that is 91.5mm around and 81.5mm long (fat rather than long). Weight is 985g (ouch!) Canon’s other 50mm option at the time, the 50mm f/1.8, weighed a paltry 190g by comparison, making the 50mm f/1.0L a full 5 times heavier! Even the 50mm f/1.2L (click for my review) that would come much later (2007) weighs an insignificant 545g by comparison. These days lenses like the Sigma 50mm f/1.4 ART and the Zeiss Otus 1.4/55mm have equaled and even surpassed this lens in size, but there is no question that your wrists get a bit of workout with it and it will definitely feel front heavy on lighter camera bodies. It is worth noting that there was no direct replacement of this lens; the 50mm f/1.2L didn’t come for 7 more years. The current EF 50mm f/1.4 (sadly) came a few years later (sadly because this lens – now 23 years old – is still Canon’s lame duck de facto 50mm option). Needless to say that the extreme size, weight, and price of this lens (roughly $1800 at the time, much higher when inflation is considered today) did not help it become a big seller in its day.
But the size and weight of such a lens is not the main reason why no one makes a lens like this currently. The extreme nature of designing around such a large aperture brings other huge challenges, including autofocus and optical engineering. We’ll touch on those in a moment. Still, this was an engineering tour-de-force, and was a shot across the bow of Nikon showing just what Canon could do. That engineering expertise payed off in another lens with much broader appeal (hint: it still occupies the same body as this lens).
The lens includes the ES-79II hood, one of the older styles with snap-tabs instead of bayonet style. I’m not crazy about this style myself as it always feels a bit insecure to me. One other aspect of the lens hood I’m less than crazy about is how much it flares out. It can be reversed for storage, but makes the footprint of the lens much, much wider.
The view at the back of the lens is fairly unusual. Most lenses that I test these days are rear focusing (the rear element moves forwards and back), but the rear view of the 50mm f/1.0L reveals a solid, fixed chunk of glass. I’ve never seen a lens quite like it before (the 85L II is similar). The lens is not internally focusing, and there is an inner barrel at the front of the lens that extends forward as the lens is focused down towards minimum focus. This is called a floating focus system. On a positive note, it doesn’t rotate when focusing, so use of a polarizer won’t be affected (and you are going to need filters on this lens!) It uses a 72mm filter thread (very common among Canon L series primes). Unless you are shooting in very low light, be prepared to throw a filter on the front of this lens to reduce the amount of light hitting the sensor. In daylight you will be constantly exceeding even a 1/8000th shutter speed at f/1.0.
But the tradeoff for all of this is that this lens lets in more light than just about anything else ever made for a 35mm sensor. It lets in a full stop more of light at f/1.0 than the far more common f/1.4 lenses do. In that sense it is the ultimate low light performer, allowing you to stop action in a way that slower lenses can only dream of (and f/2.8 is REALLY slow by comparison here! This lens is 3 full stops faster!!) To bring this into more familiar perspective, that is like the difference between f/2.8 and f/8!
The build of the lens is incredibly familiar (and current!) for a lens that is 27 years old. The reason that it looks so familiar is that the current 85mm f/1.2L II inherited the same physical body. The copy I’m reviewing has held up extremely well and doesn’t show its age in the least. This was (is) a well-engineered instrument. The squat frame has a distance window (with hyperfocal makings for f/4, 8, 11, and f/16 – minimum aperture for this lens).
In a somewhat unusual step for this kind of the lens there is a focus limiter. You can set the lens to focus from .6m to infinity or from 1m to infinity. Doesn’t seem like much of a difference, does it? But then you enable manual focus (select MF and the camera must be powered on) and realize that there is more focus throw between .6m and 1m on this lens than there is for the whole focus range on the Sigma 50mm f/1.4 ART! That incredibly tiny depth of field means that there are incredible amount of potential focus points between minimum focus and 5 or 6 feet out. The focus limiter is also the MF switch at its final setting.
The lens can only focus down to a very poor .6 meters (roughly two feet), and the resulting maximum magnification figure (.11x) is poorer than I’ve seen for any other 50mm lens (my older Zeiss Planar T* 1.7/50mm is a close second). The current class leader (in a non-macro form) is the Tamron 45mm f/1.8 VC and its .29x maximum magnification. The difference between the magnification of these two lenses is staggering. The Tamron shot is the bottom one – both of these are shot at the respective minimum focus distances for the lens.
What is unquestionable is that this is a great lens to look at! Here are few more shots of this beauty:
Autofocus Findings
First of all, it is actually somewhat incredible that a lens like this has autofocus. This is a huge engineering accomplishment. The strain put on an autofocus system by such a large aperture is incredible, as is the amount of force required to move such heavy elements. Canon managed this in a unique way, combining a focus by wire system that isn’t dissimilar in that sense to modern STM lenses, though the actual focus motor here is a ring USM (Ultrasonic Motor). Considering the challenges presented by the extreme nature of this lens, the autofocus is really quite a success. It actually probably works better today than it did at the time that it was manufactured because of better autofocus systems along with the ability to perform microadjustment to calibrate the lens to the camera body.
Overall resolution isn’t fantastic, but this f/1.0 shot is certainly nailed as far as focus.
It is interesting to calibrate such a massive aperture lens. The amount of glass in it is incredible, and knowing how shallow that depth of field is makes me leery that the lens would be able to accurately autofocus. Although the lens needed a -12 (a fairly large adjustment), it focused quite consistently at that setting in my tests.
Autofocus performance is actually fairly good, particularly at close to medium distances. The relatively low sharpness (combination of low contrast, relatively low resolution, and high chromatic aberrations) on the subject in comparison to many high resolution lenses might tempt you to think the image isn’t focused well, but I found that in the majority of my shots good focus had been achieved. You also have to focus very carefully, as depth of field is very, very thin at f/1.0 at most focus distances. Using the focus and recompose technique may not work in some instances. In one case, I took a photo of a barn and thought the AF literally couldn’t hit the side of a barn, but then I noticed that some very thin reeds sticking out of the snow about 10 feet in front of the barn were in focus. That point of contrast had obviously caught the AF’s attention, and the very thin DOF meant that the barn was not in focus at all despite my being at least thirty feet from it and over twenty from the reeds.
A lens like this doesn’t only put pressure on the AF system; it puts a lot of pressure on the photographer. Still, my feeling is that the aging AF system in the 50mm f/1.0L is still doing a pretty impressive job considering the challenge it faces – at 5 feet the depth of field is a tiny 2 inches; an f/1.8 has twice as much DOF to play with. I will admit that my expectations were lower with this lens than modern ones, but while not perfect, the AF system in the 50mm f/1.0L really does quite a decent job of accurately focusing.
Autofocus speed is not nearly as impressive. The 85mm f/1.2L II inherited the “shell” of this lens (they are physically almost identical), but it seems like they share leisurely autofocus speed as well. Minor focus changes are relatively quick, but major changes (particularly towards minimum focus) are very slow. You definitely get a sliding noise as the elements move into place, though the actual AF motor is relatively quiet.
There is full time manual override, but only if the shutter button is held down halfway while turning the focus ring. On that point, even if the lens is switched into MF the focus ring will only do something if the camera is powered on and active. The actual action of the focus ring is quite smooth, in part because the connection to the moving of the elements is electronic, not mechanical. Even in manual focus mode it is actually the USM motor that moves the elements, much like modern STM lenses. The copy that I’m reviewing is sometimes sluggish to “wake up” and accept manual input, so occasionally it can be a little exasperating.
Still, this lens is definitely unique in its ability to accurately autofocus at such a massive aperture value and in many ways behaves like any other lens.
Image Quality
This is a demanding lens…period. It is capable of producing very unique results, but it challenges you to use it the right way. If you plan to shoot outdoors, for example, know that at wide apertures you are likely to be butting up against the limits of your camera’s shutter speed all the time. My 6D’s limit is a weak 1/4000th, but even the 1/8000th limit of my 70D is regularly exceeded. My solution was to use a three stop ND filter (ND8), but even with that on a bright sunny day I was regularly hitting max shutter speed. The inverse of this, of course, is that you can shoot in very low lighting conditions and maintain a slow shutter speed. Just to give you an example: I was calibrating a Tamron SP 45mm f/1.8 VC lens, and with the lighting on the test chart it was metering at 1/400th second (ISO 100, f/1.8). Just for the fun of it, I aimed the 50L at the chart at f/1.0 – the camera metered at 1/2500th of a second!!! That shows the difference between f/1.0 and f/1.8 and demonstrates just how much light this baby can suck in.
There is no other lens that I know of that can gather more light than this lens. There is a Mitakon 50mm f/.95 lens, but it is for a mirrorless and manual focus only. The difference in aperture between these lenses becomes little more than technicality. That aside, you will be unlikely to be in many situations where you can’t shoot at a relatively low ISO setting.
Clearly an area where this lens shines in its very shallow depth of field and subject isolation. A great application of this lens is not only throw backgrounds out of focus but also foregrounds. If you isolate your subject between a diffused foreground and background you maximize that huge aperture. Shoot with corners in the frame, or foreground bushes, trees, or other objects. They disappear into a defused blur and allow you to creatively frame subjects in a very unique way. I shot the shot above through a chair. The wooden slats are only a vague frame here.
I ran an Aperture Sharpness Profile on the lens. At no aperture is it as sharp as most of the modern lenses that I review, with peak sharpness coming at f/4, with consistently high results coming between f/3.2 and f/5. The lens doesn’t really reach a high level of sharpness until f/2.2. Diffraction sets in at f/10, but the lens stays as sharp through f/16 as it is at f/2.
Apparent resolution takes a hit because of some other optical defects, namely low contrast at wide apertures and strong amounts of chromatic aberrations. This tends to make the details a little hazy and mushy when viewed at a pixel level. The whole picture has a different look than what I’m familiar with; almost like a slight filter has been applied. You will either love or hate the look. I shot a few video segments with it and I was personally less than thrilled with the final product. The shot below shows this “look” at f/1.0:
This “haze” makes details indistinct due to the chromatic aberrations, lack of contrast, and low resolution. I dinged the new Tamron 45mm f/1.8 VC for its chromatic aberrations, but this shot shows how stunningly different its contrast and CA control is compared to the f/1.0L:
Chromatic aberration correction is a challenge with this lens because of the width of the aberrations. Fine lines often don’t resolve with hard edges but are blurred, meaning that the chromatic aberrations can cover a wide area and don’t clean up particularly well. This shows a particularly bad example and what it looks like after extensive processing to remove the CA:
Another area where the lens fails modern standards is in its flare control. It flares strongly and uniquely when the sun is in the frame. Curved ghosting lines head out towards the edges of the frame, and a general loss of contrast (veiling) occurs.
The lens also heavily vignettes at wide apertures, but not necessarily much more than many other wide aperture lenses. There isn’t a standard profile for the lens, so you will need to find your preferred look manually if you want to correct for it. Vignette is mostly gone by f/4 (except extreme edges).
All of this aside, in real life testing sharpness is actually very adequate…with a major caveat. The lens is clearly optimized for portrait distances, and resolution isn’t very impressive at wide aperture beyond about 15 feet to infinity. This is one area where I feel modern primes have made great strides, and recent lenses like the 35L II, Zeiss Otus lenses, Sigma ART primes along with the new Tamron primes have demonstrated the ability to resolve highly at all focus distances, not just a certain “optimized” zone. In this case, however, one is hardly well served using this lens as a wide aperture landscape lens – that isn’t at all what it is about.
But for some photographers all of these flaws are welcome; they enjoy shooting with this lens because of them and the distinct look that it gives their photos. Different strokes for different folks!
I encourage you to check out this video segment where I interactively break down the bokeh and image quality from the lens:
When you hear f/, you immediately think of utterly brilliant bokeh. The lens is definitely capable of an incredible amount of blur both before and after the narrow plane of focus, but the bi-aspheric design of the lens results in some unique (positive spin) or downright funky (honest) looking bokeh.
I actually prefer the look of the bokeh on this lens on an APS-C sensor where the mirror box doesn’t cause the clipping effect on the bokeh circles. Here is a look at the bokeh at various apertures on APS-C (crop).
Here is the bokeh at various apertures on full frame:
Contrary to expectations you may not want to put out of focus highlights in the frame with this lens. The bokeh is actually better without specular highlights (bokeh circles). You can develop a lot of “cream” with this lens when you shoot at relatively close distances. Look at how diffused the ping pong net is just a little bit beyond the paddles and ball here:
Subject isolation is a strength, but bokeh highlights…not so much. Some people will love the uniqueness of the bokeh, but it definitely doesn’t suit conventional tastes. I prefer bokeh shots without highlights in them. I see some of these shots are being more artistic:
Conclusion
Without being contradictory, it is easy to see why the Canon EF 50mm f/1.0L never sold much but also easy to see why people are desperate to acquire the rare copy that shows up on the used market. The lens is far too inaccessible for the typical photographer and too optically flawed for most working professionals. The Canon 50mm f/1.2L has its own share of detractors, but in every way it is far more accessible than its venerable (and more extreme) ancestor. But it is the extreme nature of 50mm f/1.0L that also makes it so desirable as a collector’s item. People are intrigued by extremes, and even the optical flaws of the lens will be desirable to some; a challenge to overcome.
Supercars are not very practical, but they are highly desirable. Think of the Canon 50mm f/1.0L the same way. Putting a man on the moon had little practical value, but it made a Cold War statement for the United States that screamed, “Look what we can do.” The technology developed in the Apollo missions served many other more practical purposes later.
Canon didn’t make this lens (in quantity) for long, but it was a shot across the bows of Nikon, Pentax, and others that said, “Look what we can do!” The technologies (and lens body) pioneered in this lens were implemented into the far more practical (yet still extreme) EF 85mm f/1.2L, and seven years later evolved into the EF 85mm f/1.2L II lens; one of the most prized portrait lenses in the world. The burst of creativity and advanced engineering that resulted in this lens enabled Canon to create more accessible and successful autofocusing f/1.2 lenses (50mm and 85mm), a feat that no one else is replicating even in 2016. It is worth noting that still today Canon is the only one producing autofocusing lenses with an f/1.2 maximum aperture.
Was the Canon EF 50mm f/1.0L USM a success? That depends on what metric you use. Canon was clearly successful in make something so extreme work, and my review copy is still working well some 25+ years later. It is far from being the most practical optical instrument I’ve ever used, but yet I can clearly so why so many collectors long for this lens and why the price for one is likely to only continue to climb in the future.
Thanks to Craig from Canon Rumors for loaning me his personal copy of this lens for Q1 2016 so that I could thoroughly review it. I appreciate it!
Pros:
Bragging rights of having the biggest aperture in the room
f/1.0
Your neighbor won’t have one
Taking pictures of it is as fun as taking pictures with it
Fairly accurate autofocus even at f/1.0
f/1.0
Incredible subject isolation
f/1.0
Value likely to only grow
Cons:
You don’t need f/1.0, and the optics are compromised to get there
Purchasing your gear through B&H and these links helps fund this website and keeps the articles coming. Thank you for your support.
Great News! I can now offer a 5% discount on all purchases at Amplis Foto, Canada’s Leading Photographic Supplier. Please enter discount code: AMPLIS52016DA in your cart. It is good for everything in your cart, and is stackable with other coupons, too! It will take 5% off your entire order! Proceeds go towards keeping this site going and providing you with new reviews!
DISCLAIMER: This article and description contains affiliate links, which means that if you click on one of the product links, I’ll receive a small commission. As an Amazon Associate I earn from qualifying purchases.
The 50mm king! I want to give a big shout out to Craig (owner) over at Canon Rumors for loaning me his rare and expensive copy of the legendary Canon EF 50mm f/1.0L lens. This massive 50mm lenses is a study in extremes, and that massive aperture results in some very unique images. I look forward to playing with it and reviewing it over the next couple of months. In the meantime, here is a gallery of sample images that I have taken during the time of the review. Most of these will be at [very] wide apertures, but I will also shoot some landscape shots at more normal apertures as well. There is also a gallery of images OF this rare and unique lens. Enjoy! I’ve updated this page to include my video review as well as a few other video segments. You can view the full review of the lens here: https://dustinabbott.net/2016/04/canon-ef-50mm-f1-0l-usm-review/
Purchasing your gear through B&H and these links helps fund this website and keeps the articles coming. Thank you for your support.
Great News! I can now offer a 5% discount on all purchases at Amplis Foto, Canada’s Leading Photographic Supplier. Please enter discount code: AMPLIS52016DA in your cart. It is good for everything in your cart, and is stackable with other coupons, too! It will take 5% off your entire order! Proceeds go towards keeping this site going and providing you with new reviews!
DISCLAIMER: This article and description contains affiliate links, which means that if you click on one of the product links, I’ll receive a small commission. As an Amazon Associate I earn from qualifying purchases.


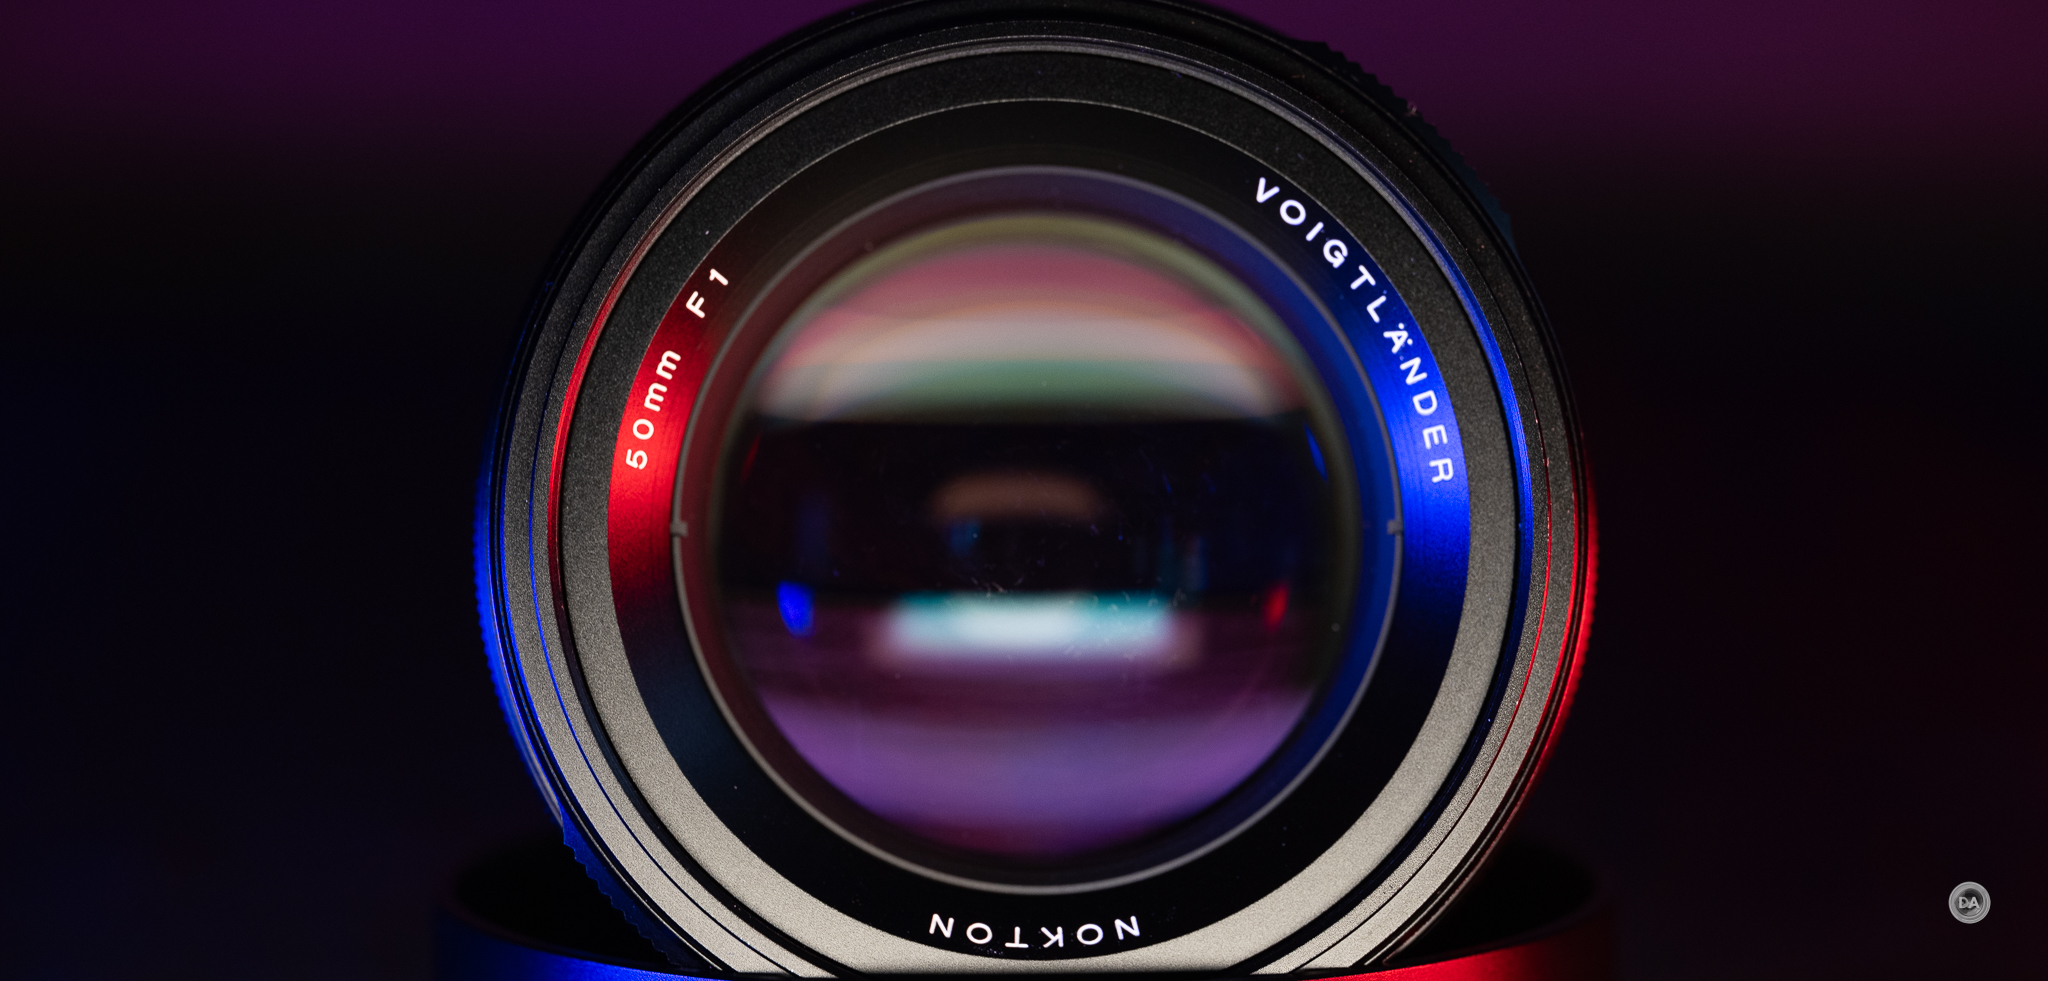

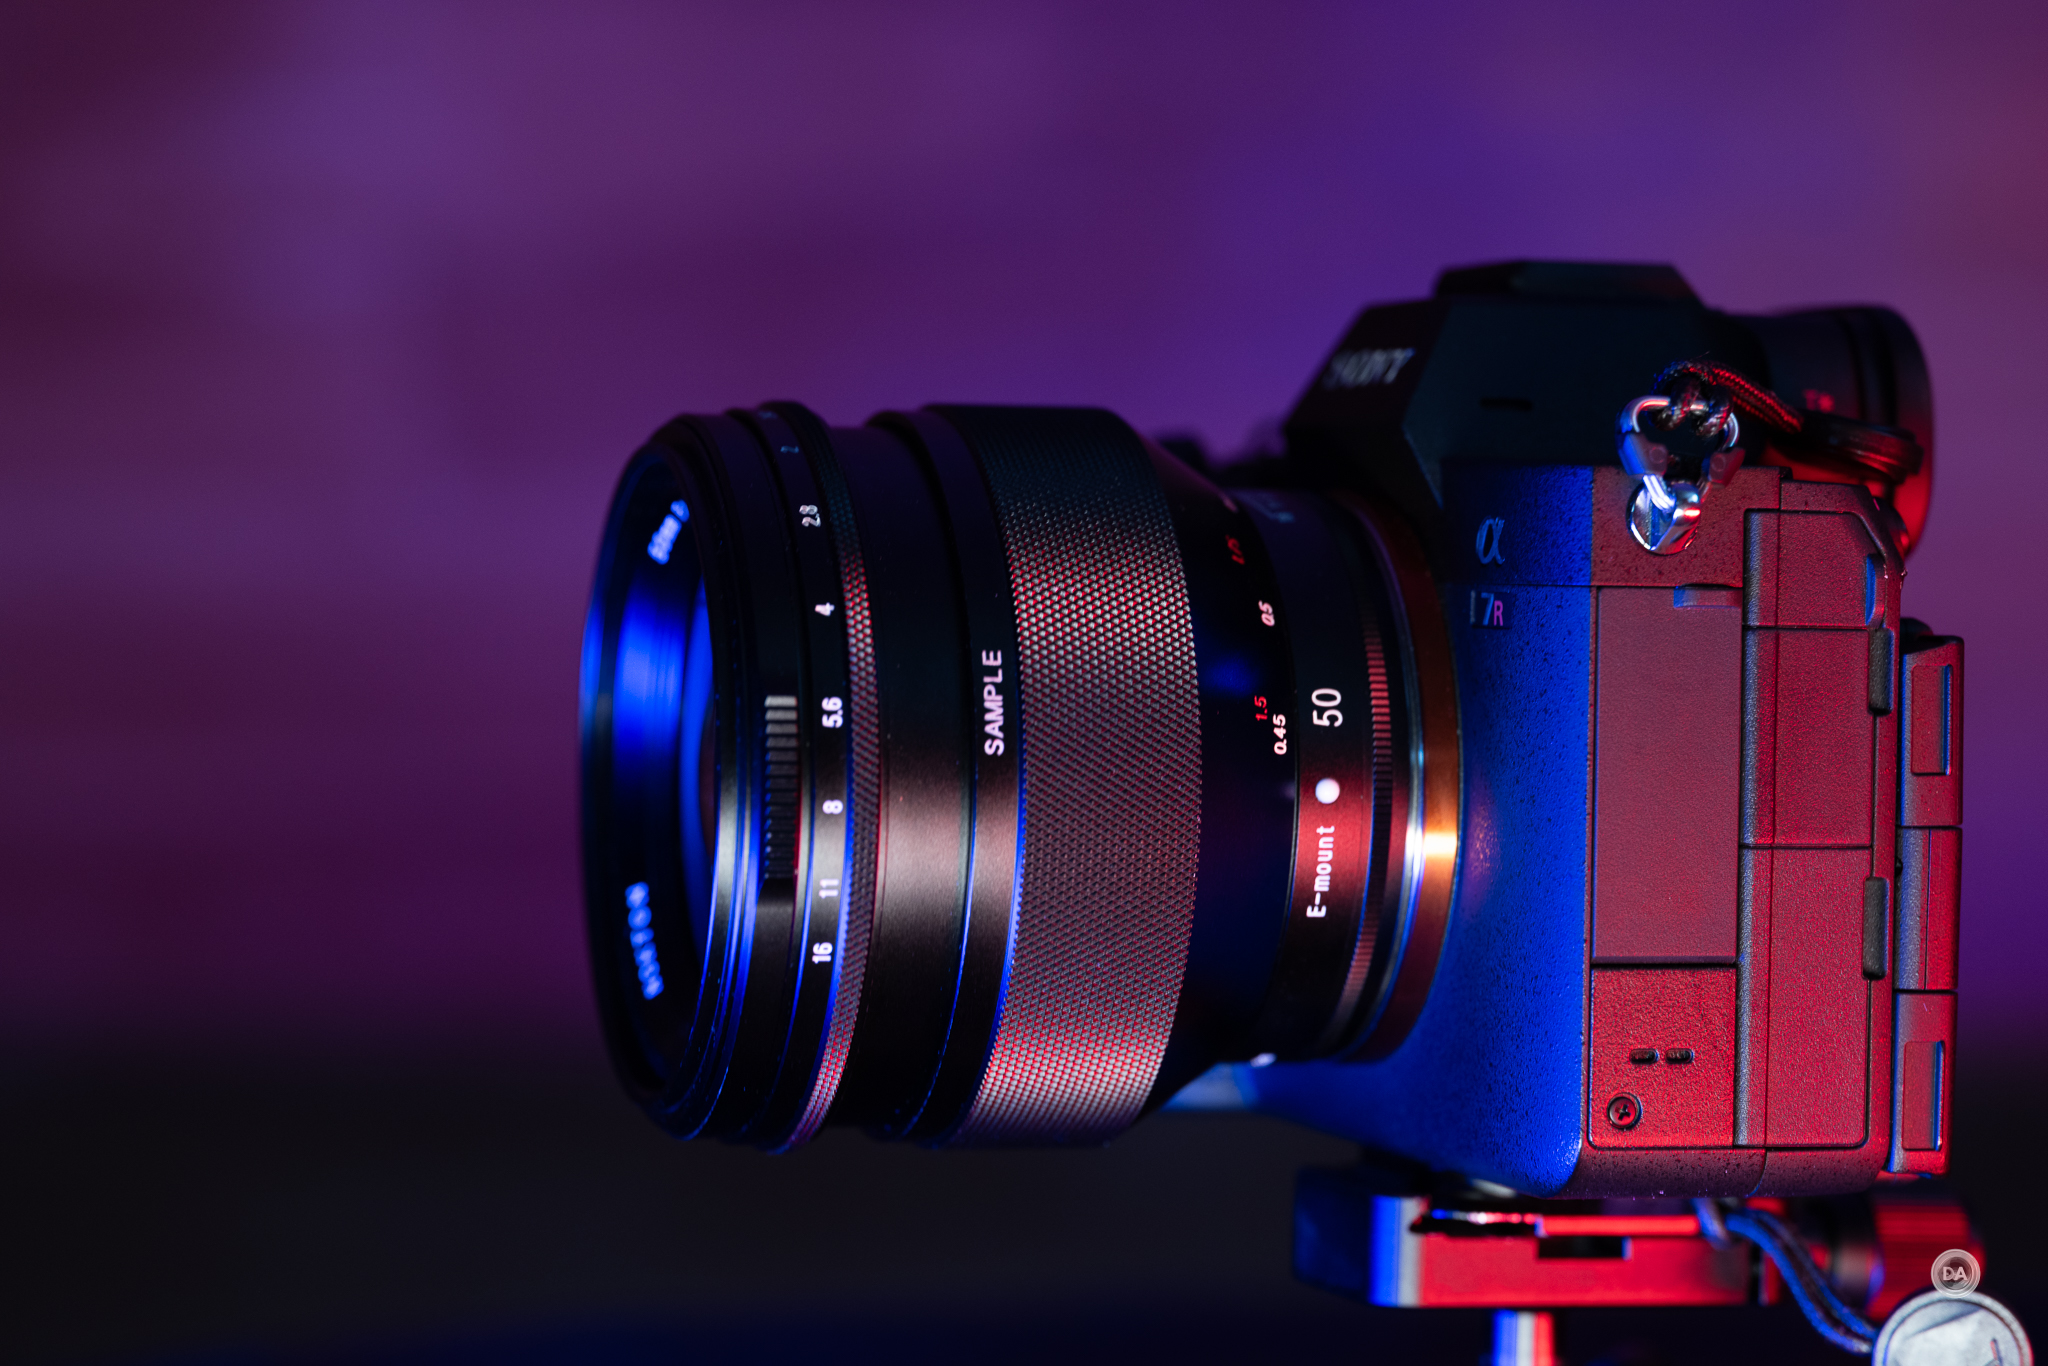
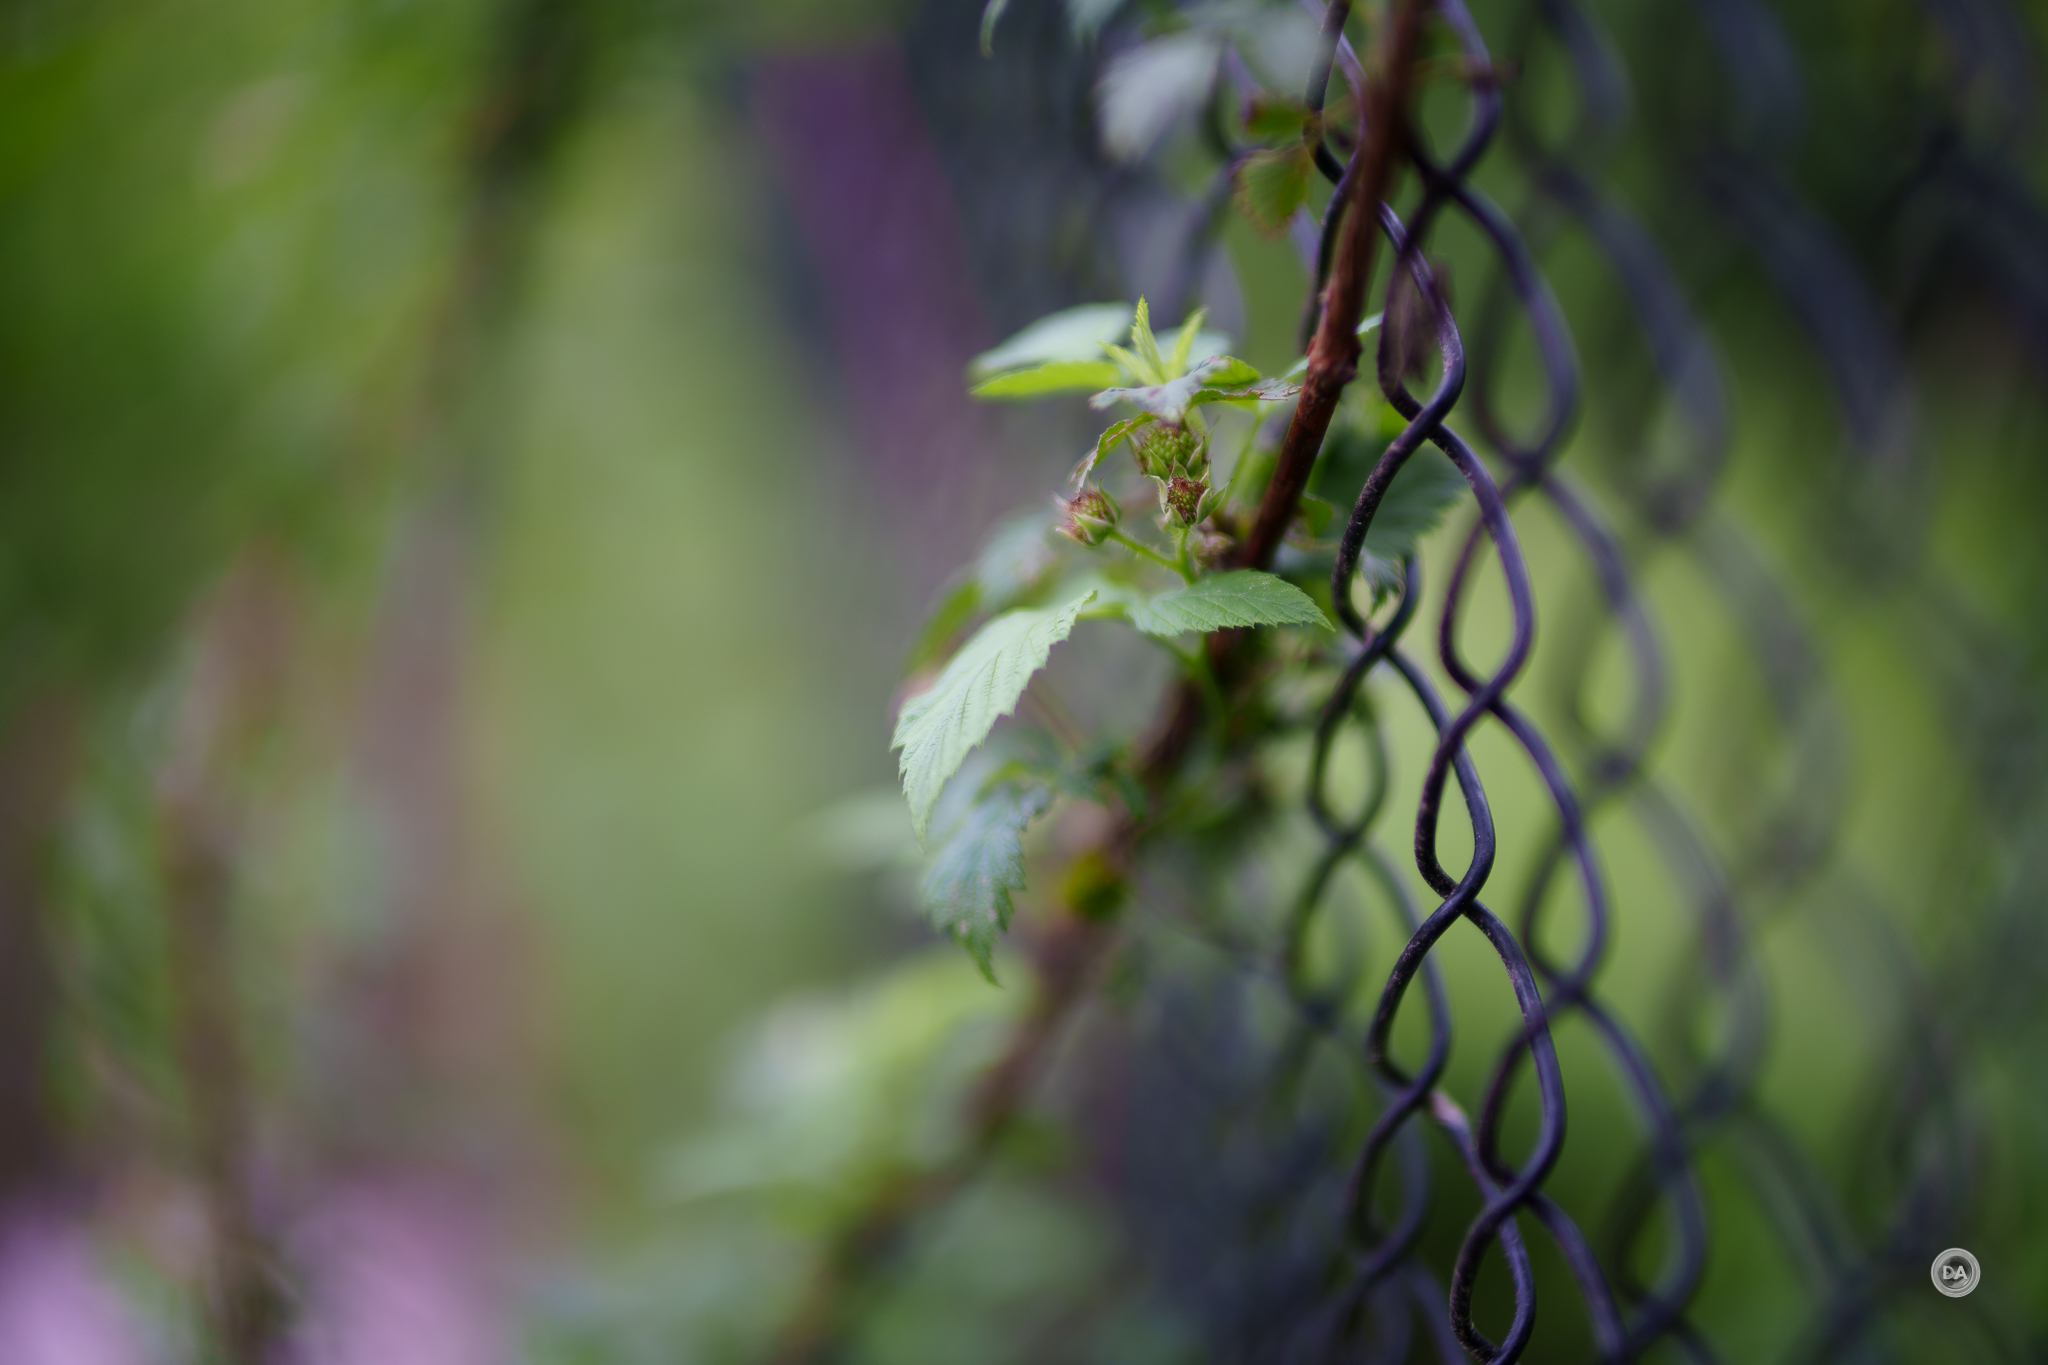
 Sigma 17-40mm F1.8 DC | ART Gallery
  Sigma 17-40mm F1.8 DC | ART Review
  Viltrox Pro AF 85mm F1.4 FE Gallery
  Viltrox AF 85mm F1.4 PRO FE Review
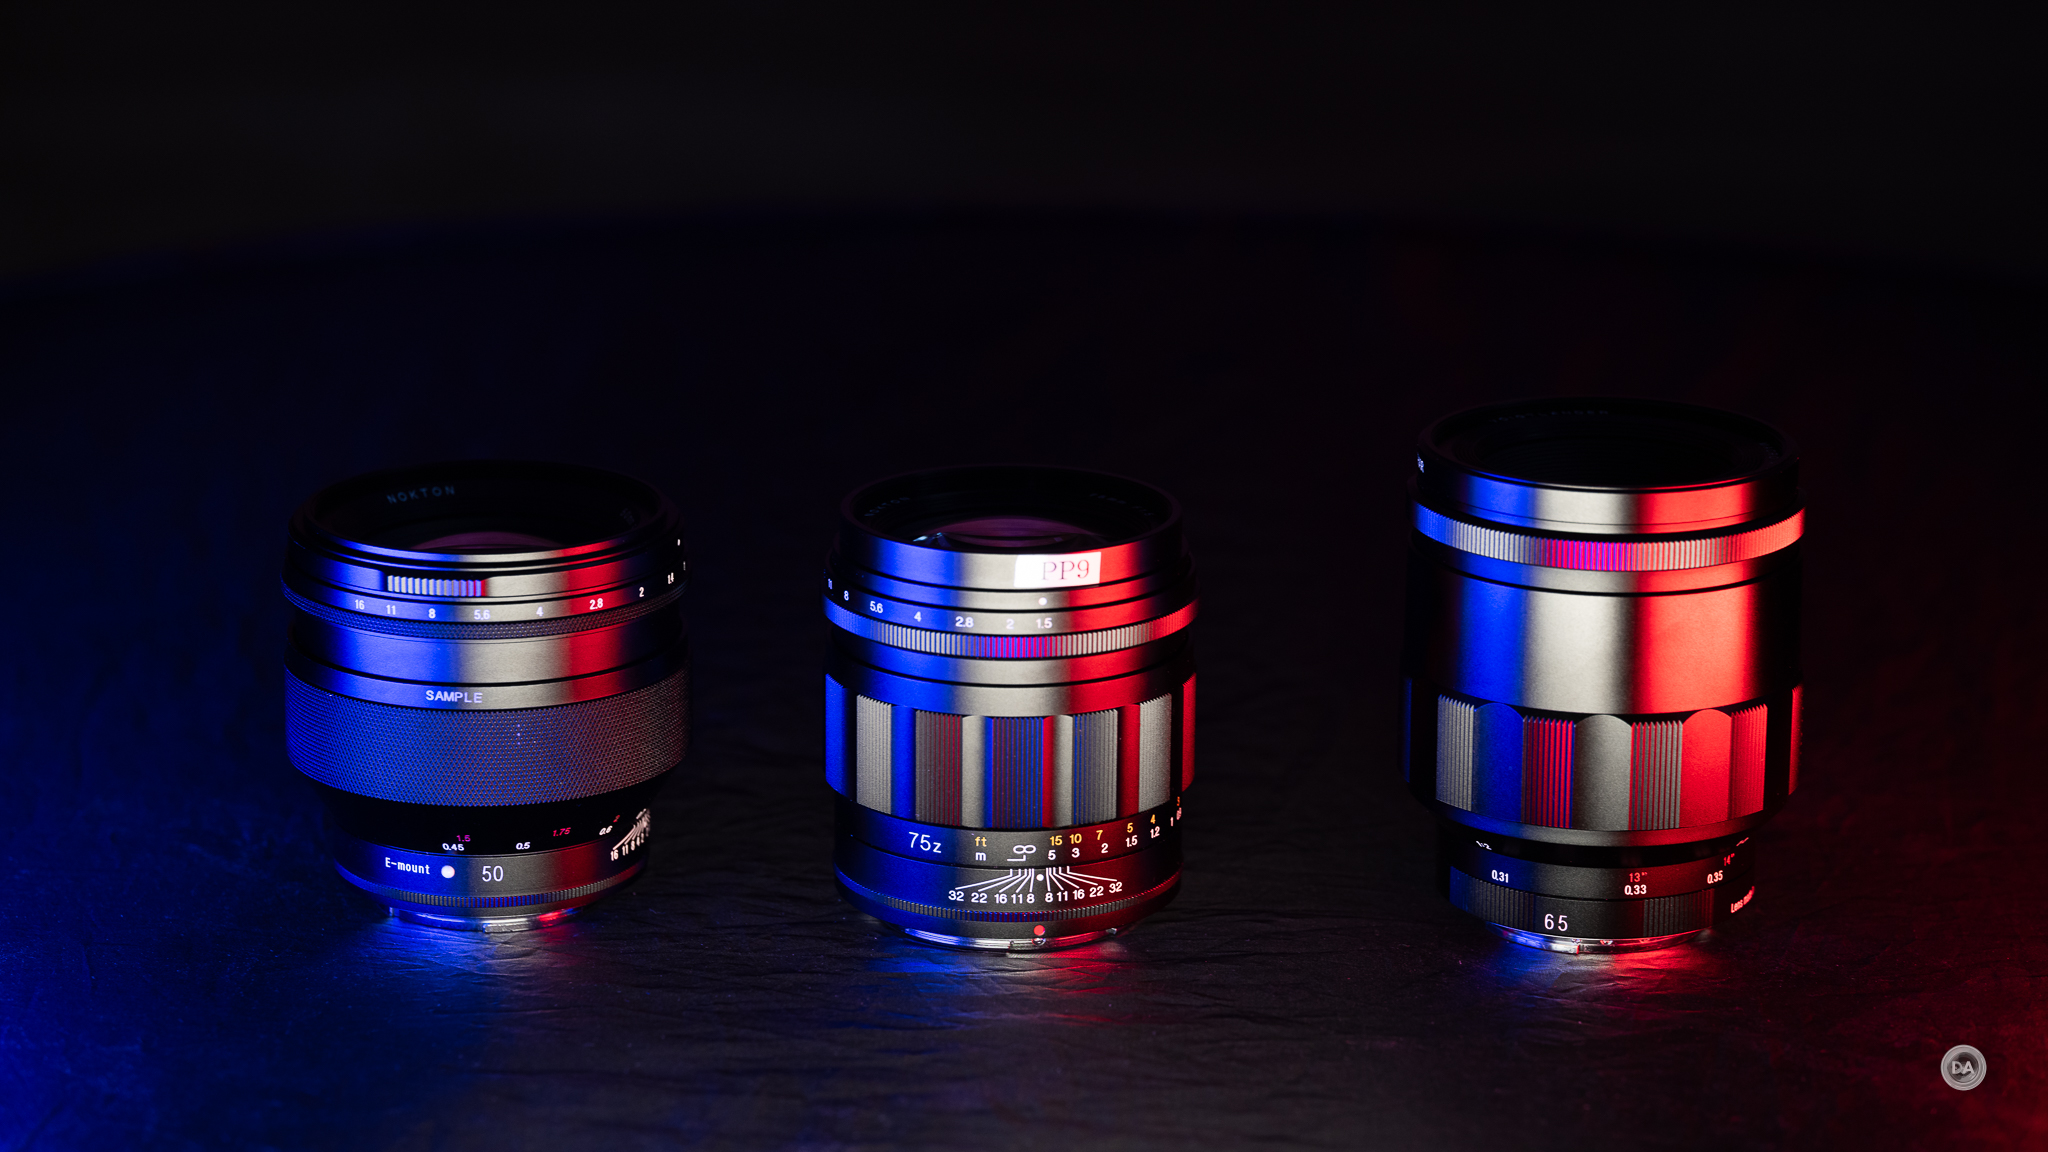

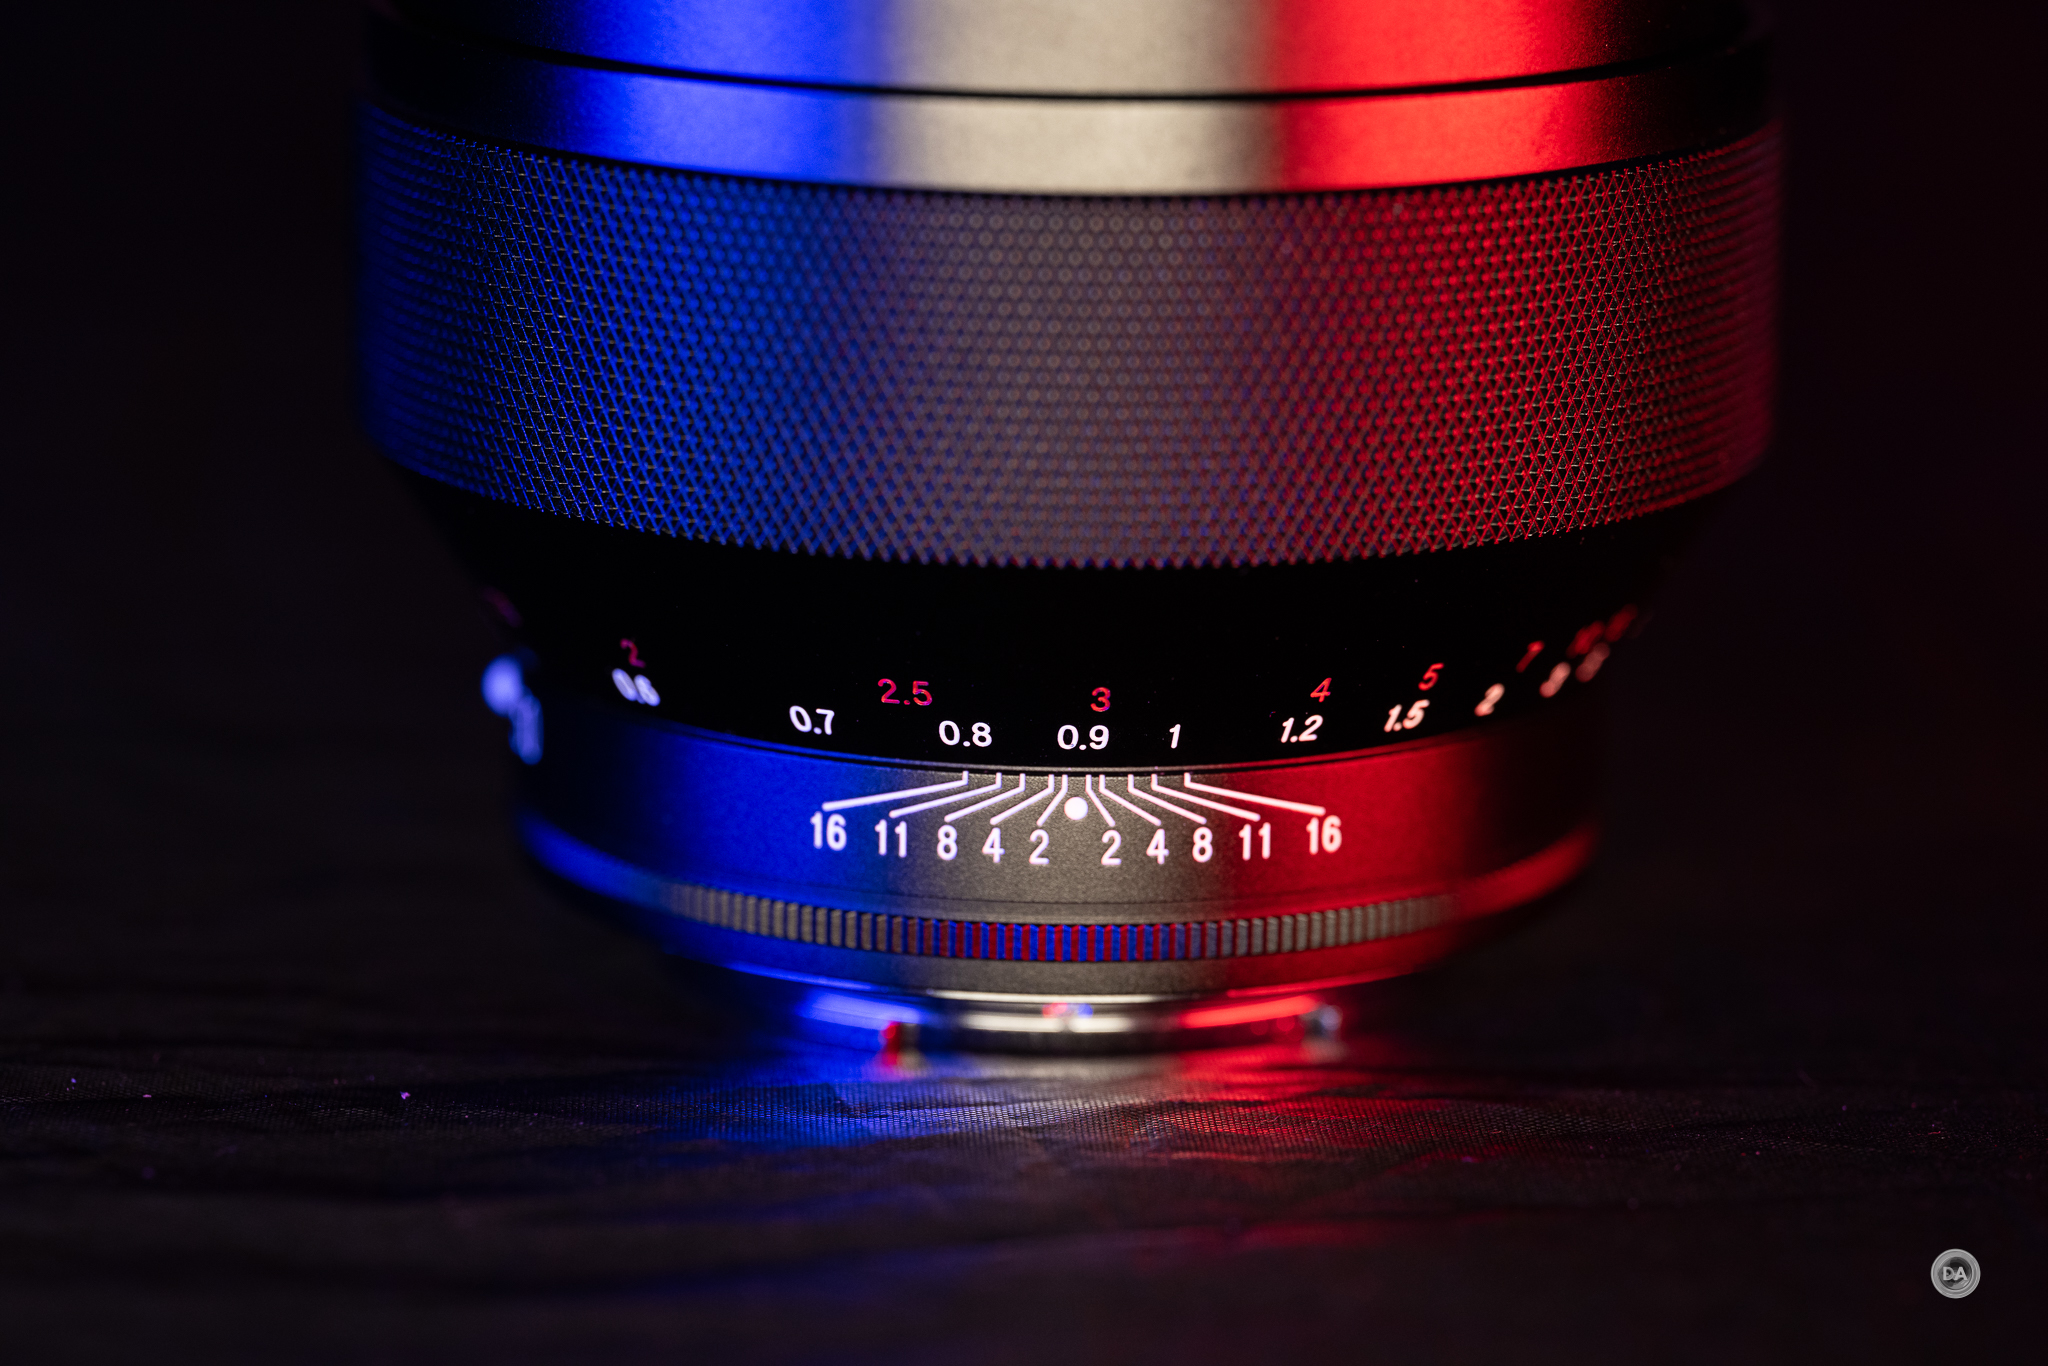

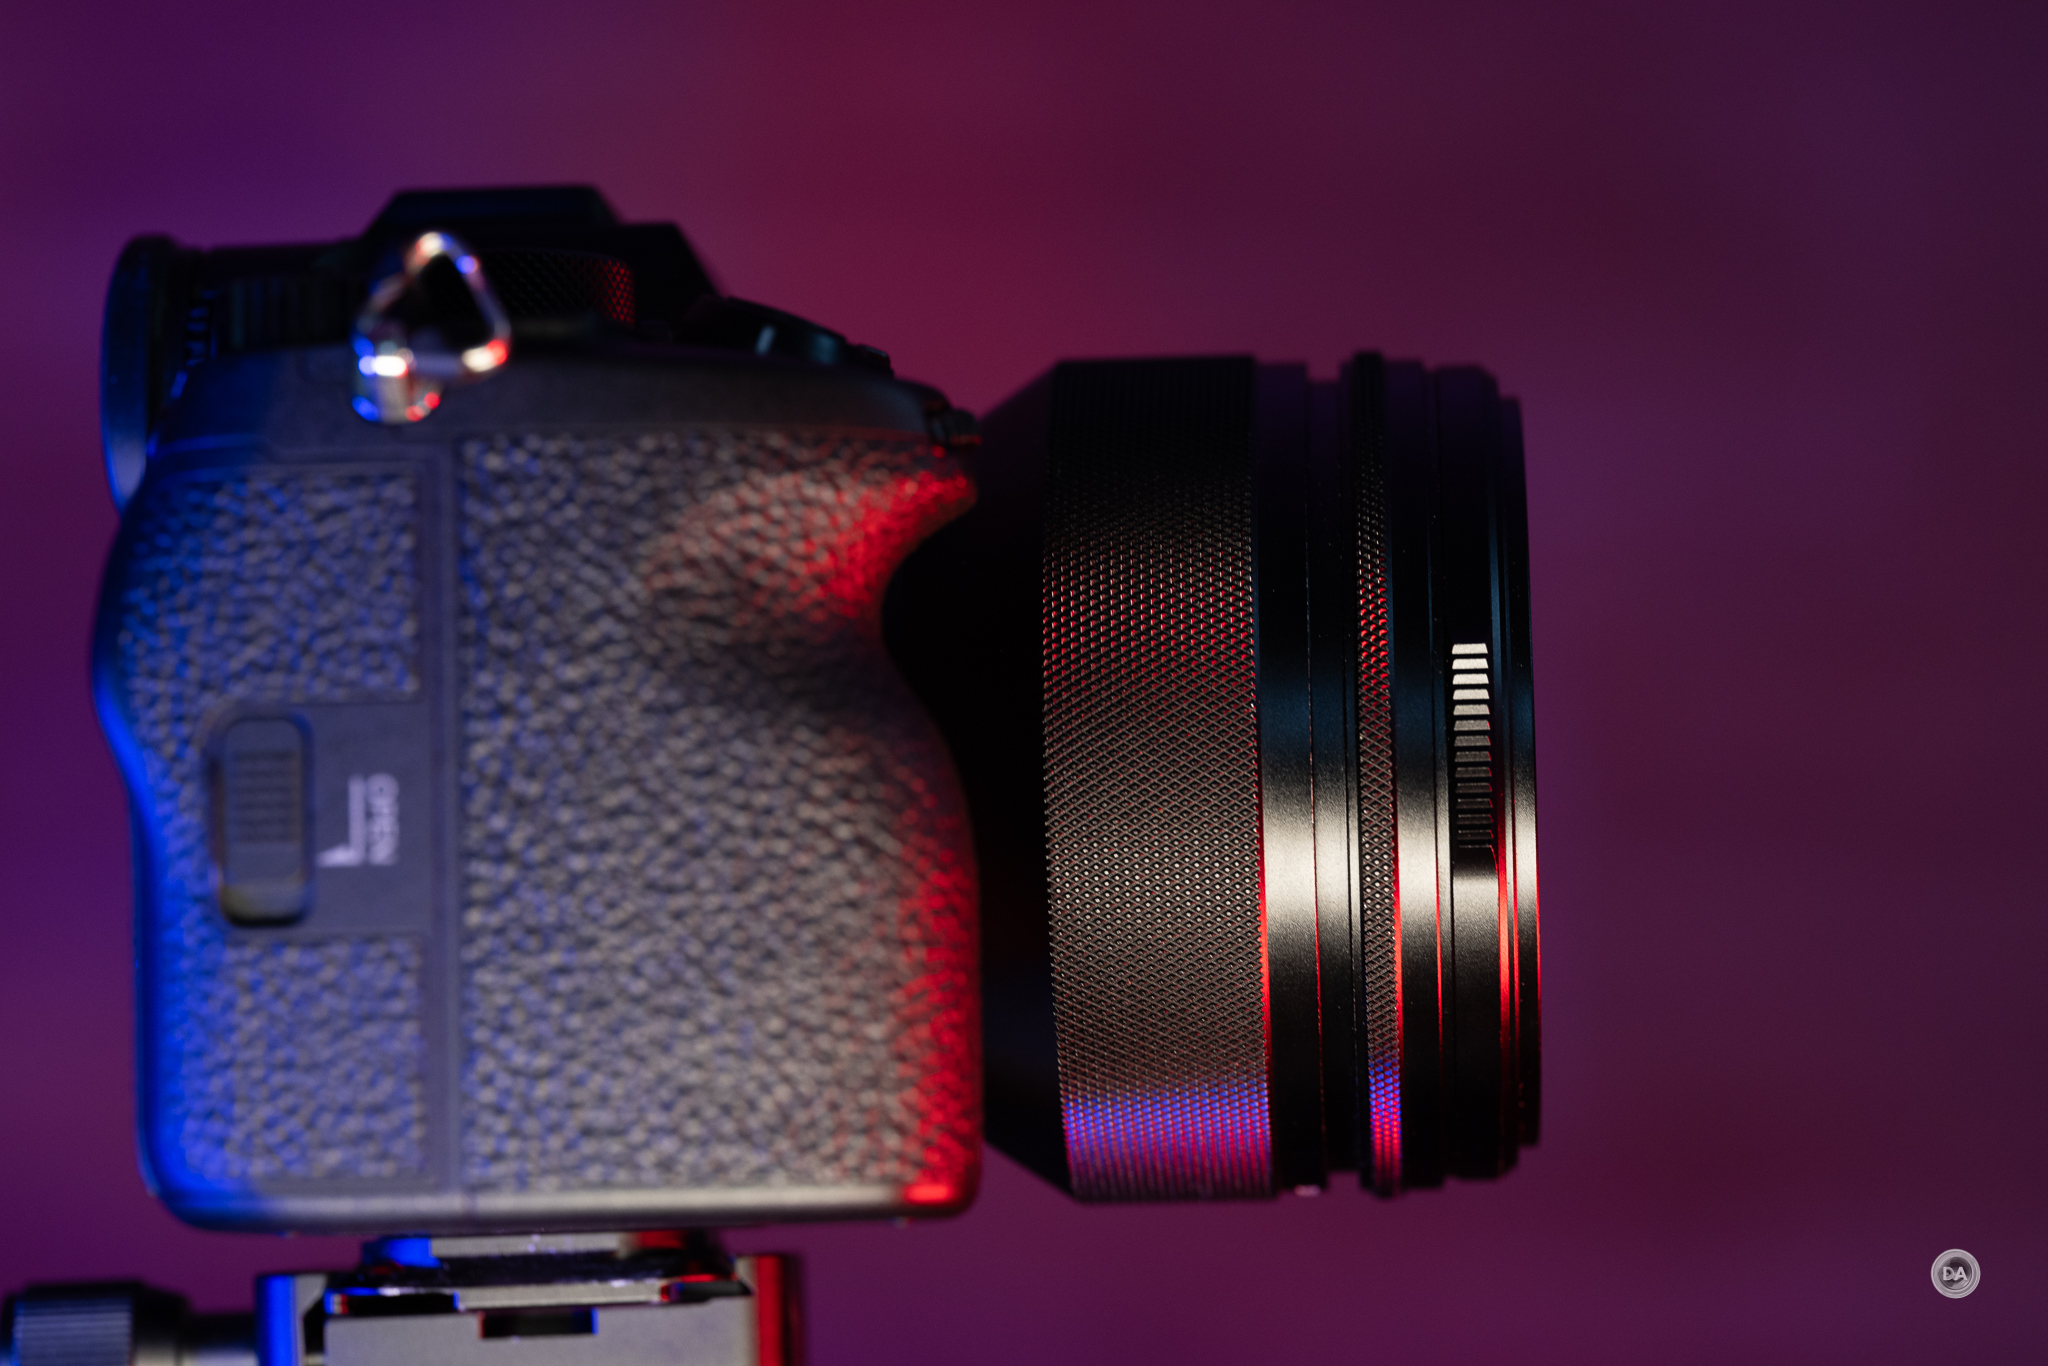
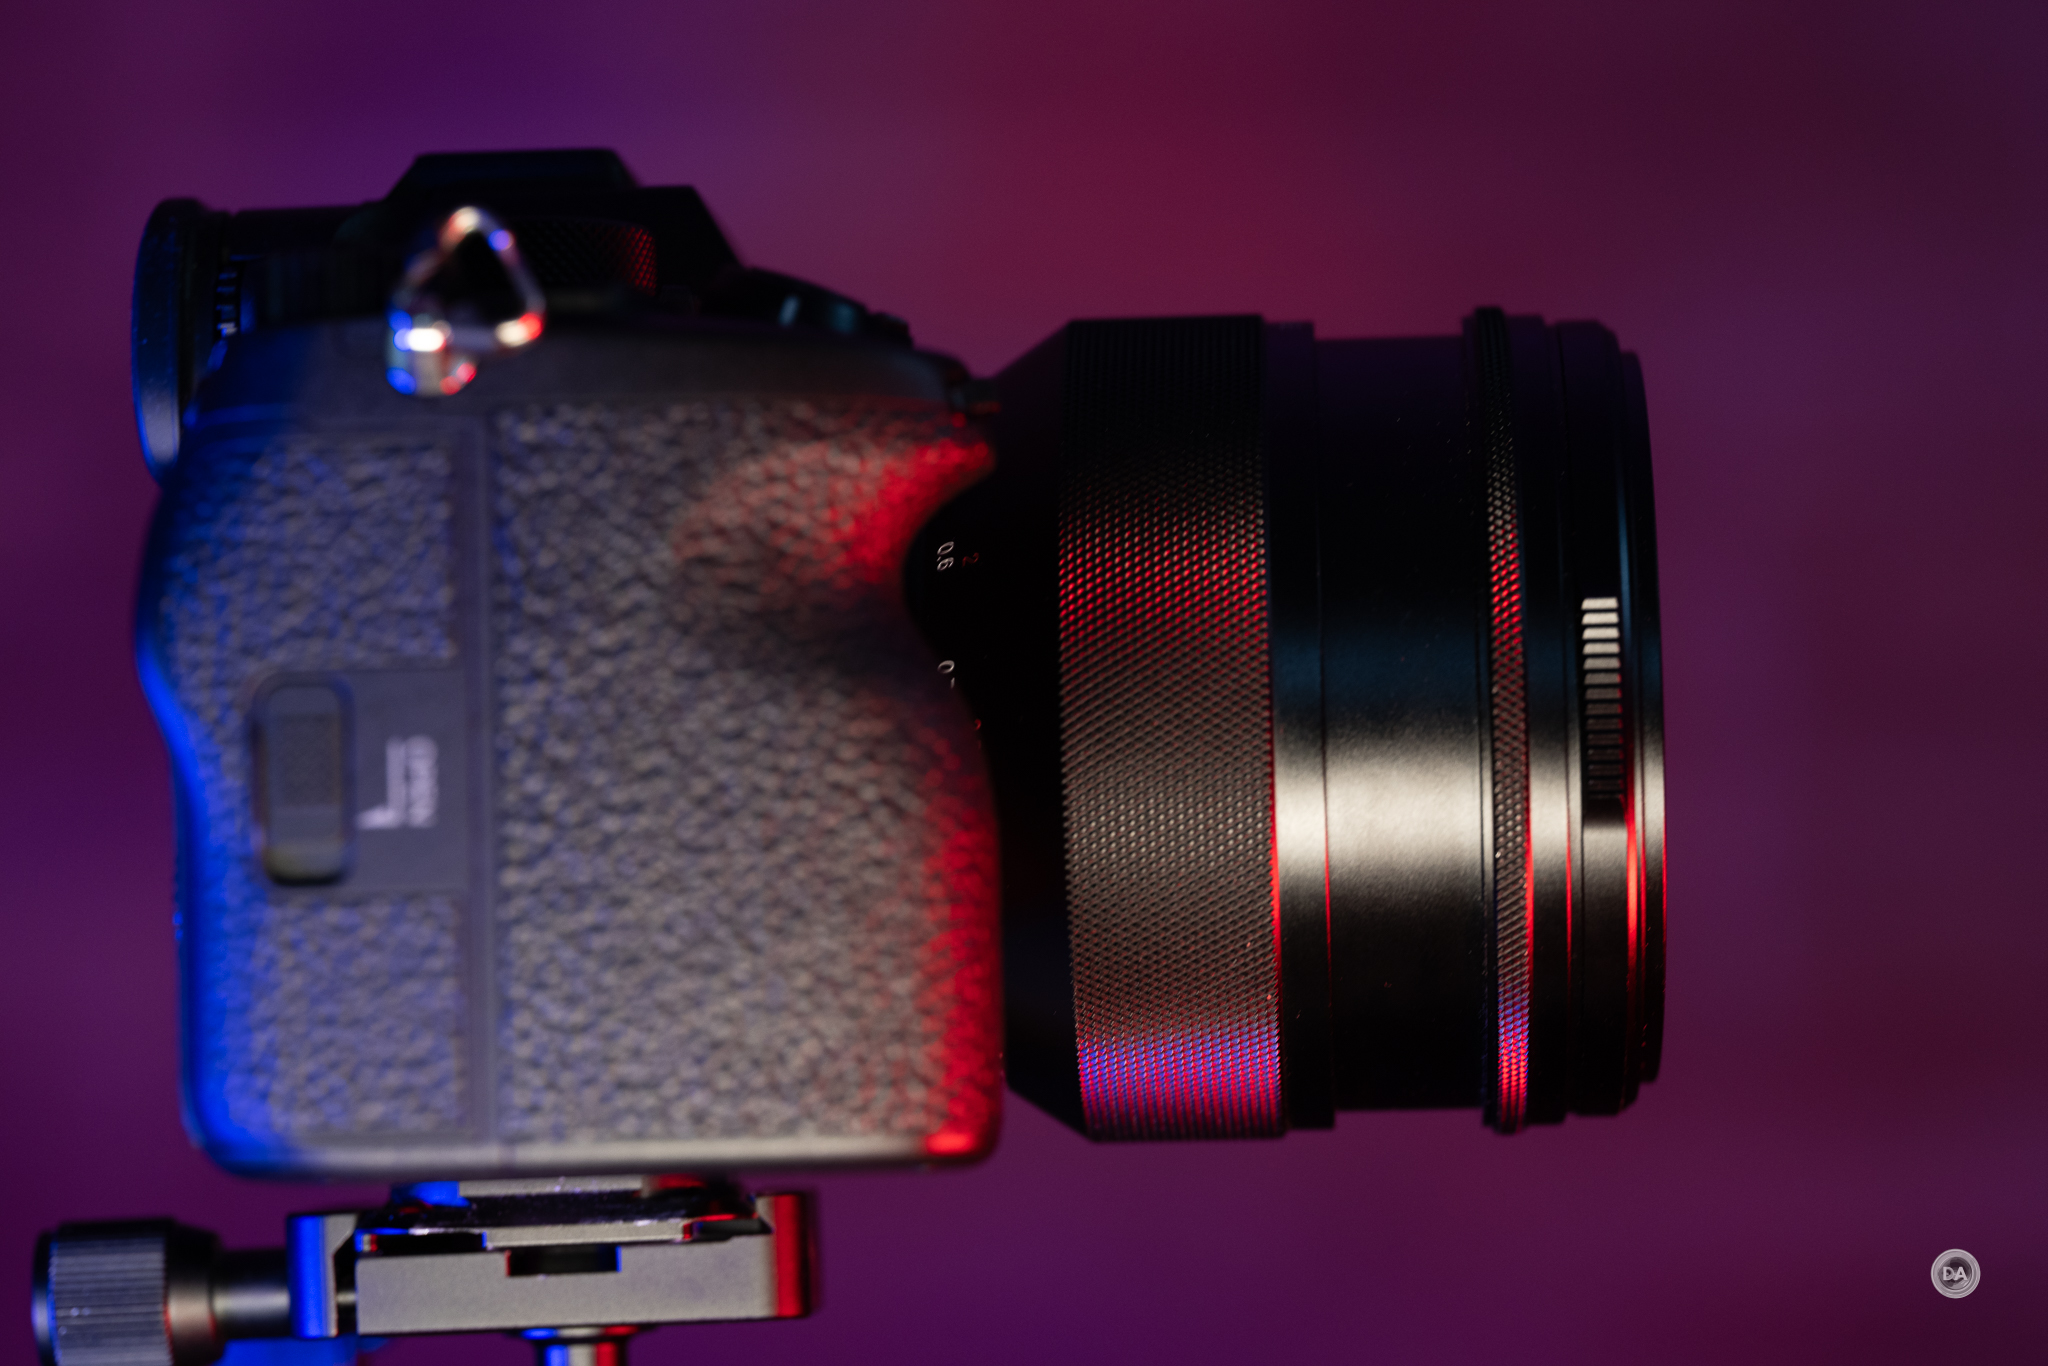
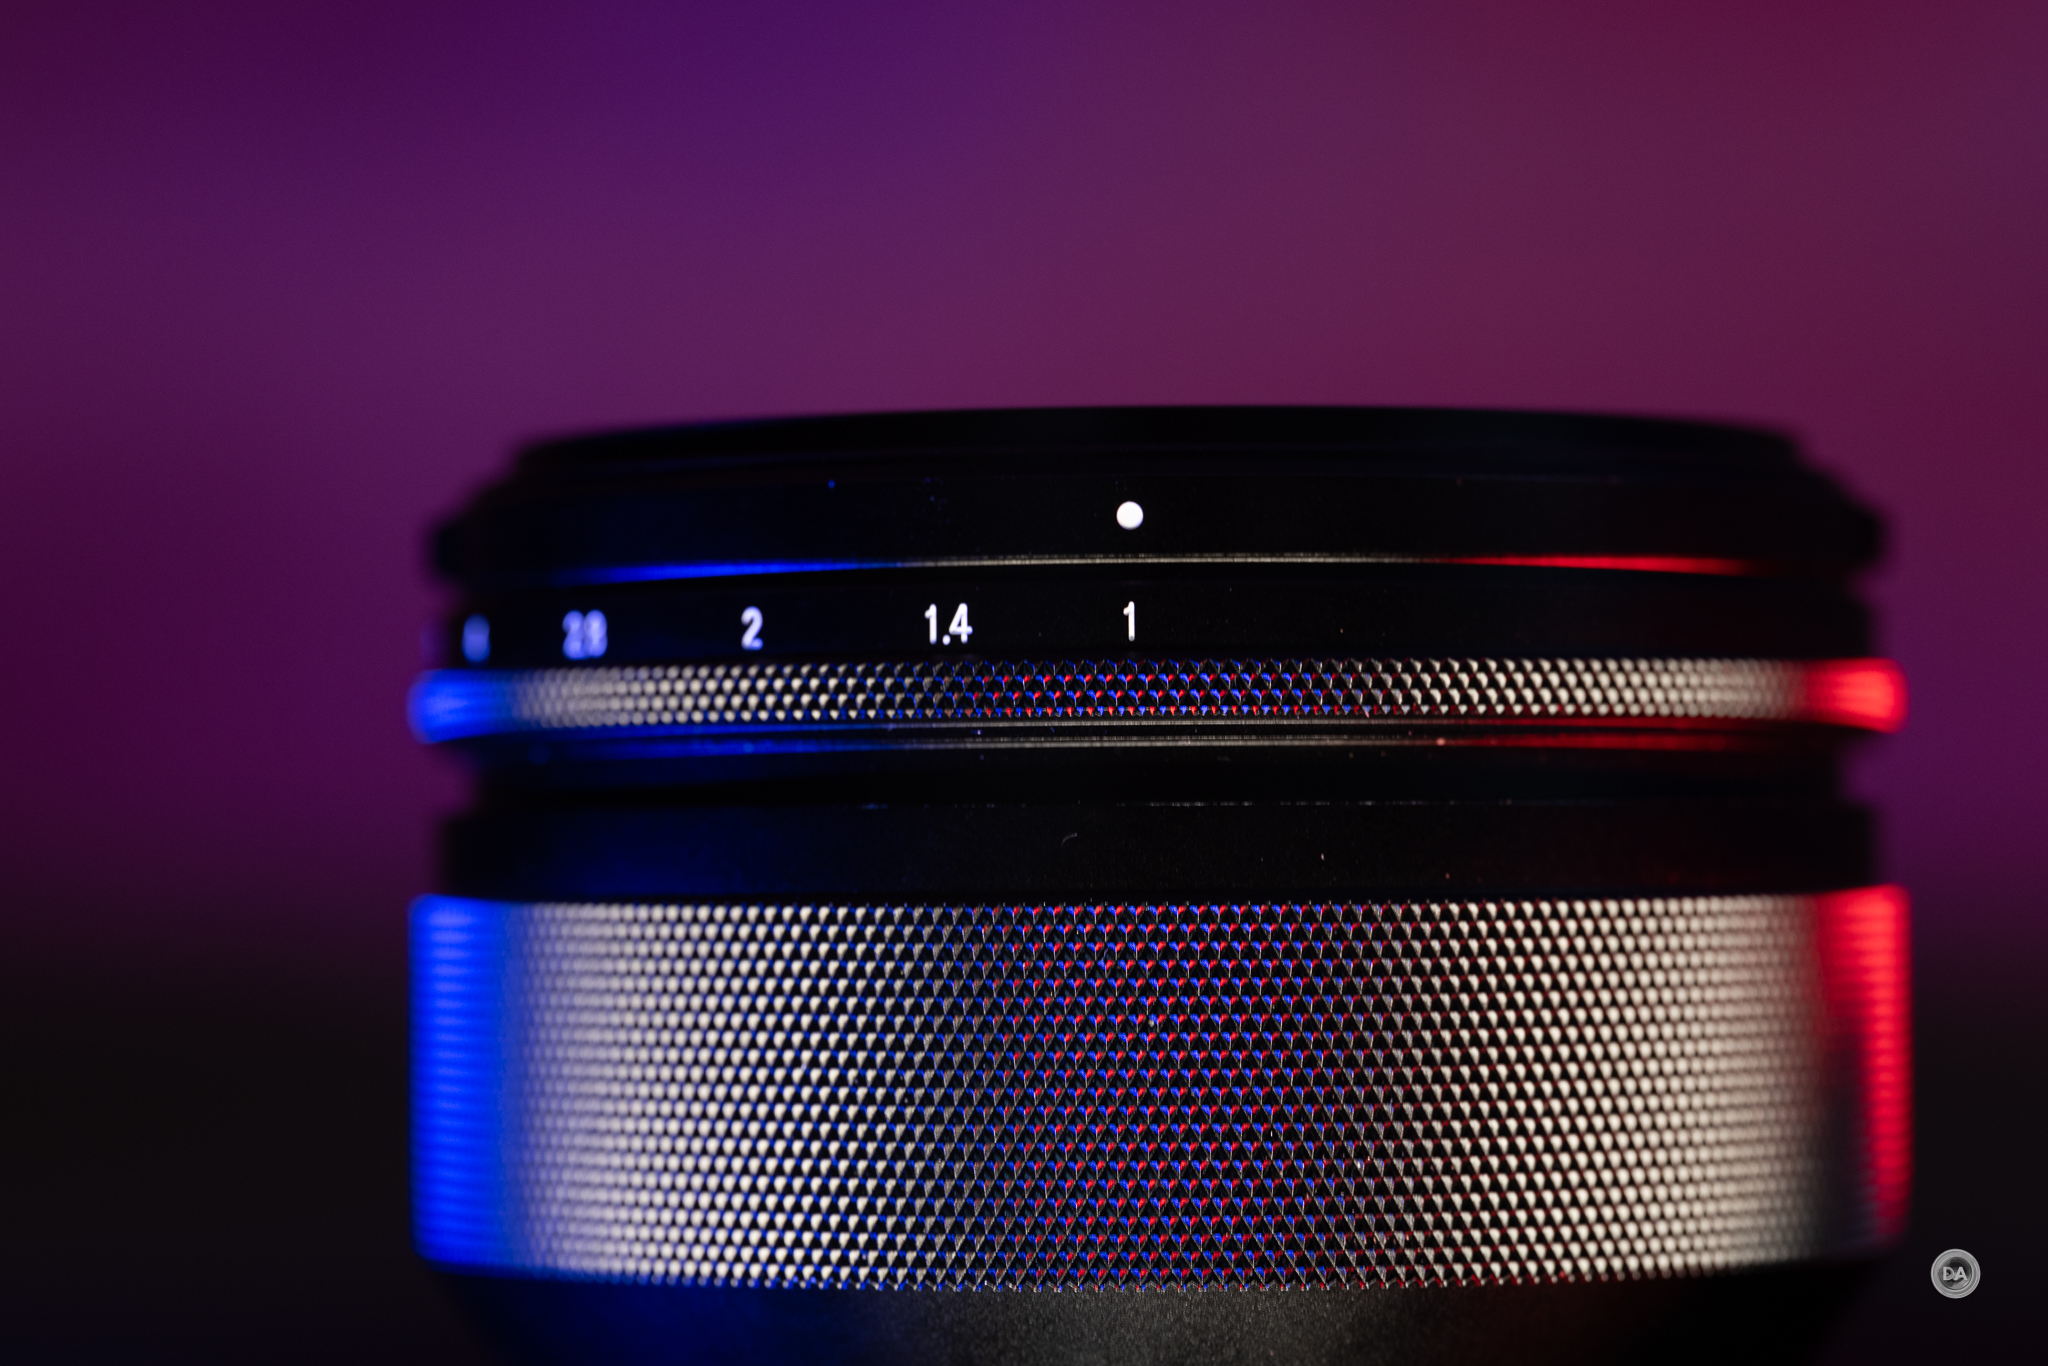

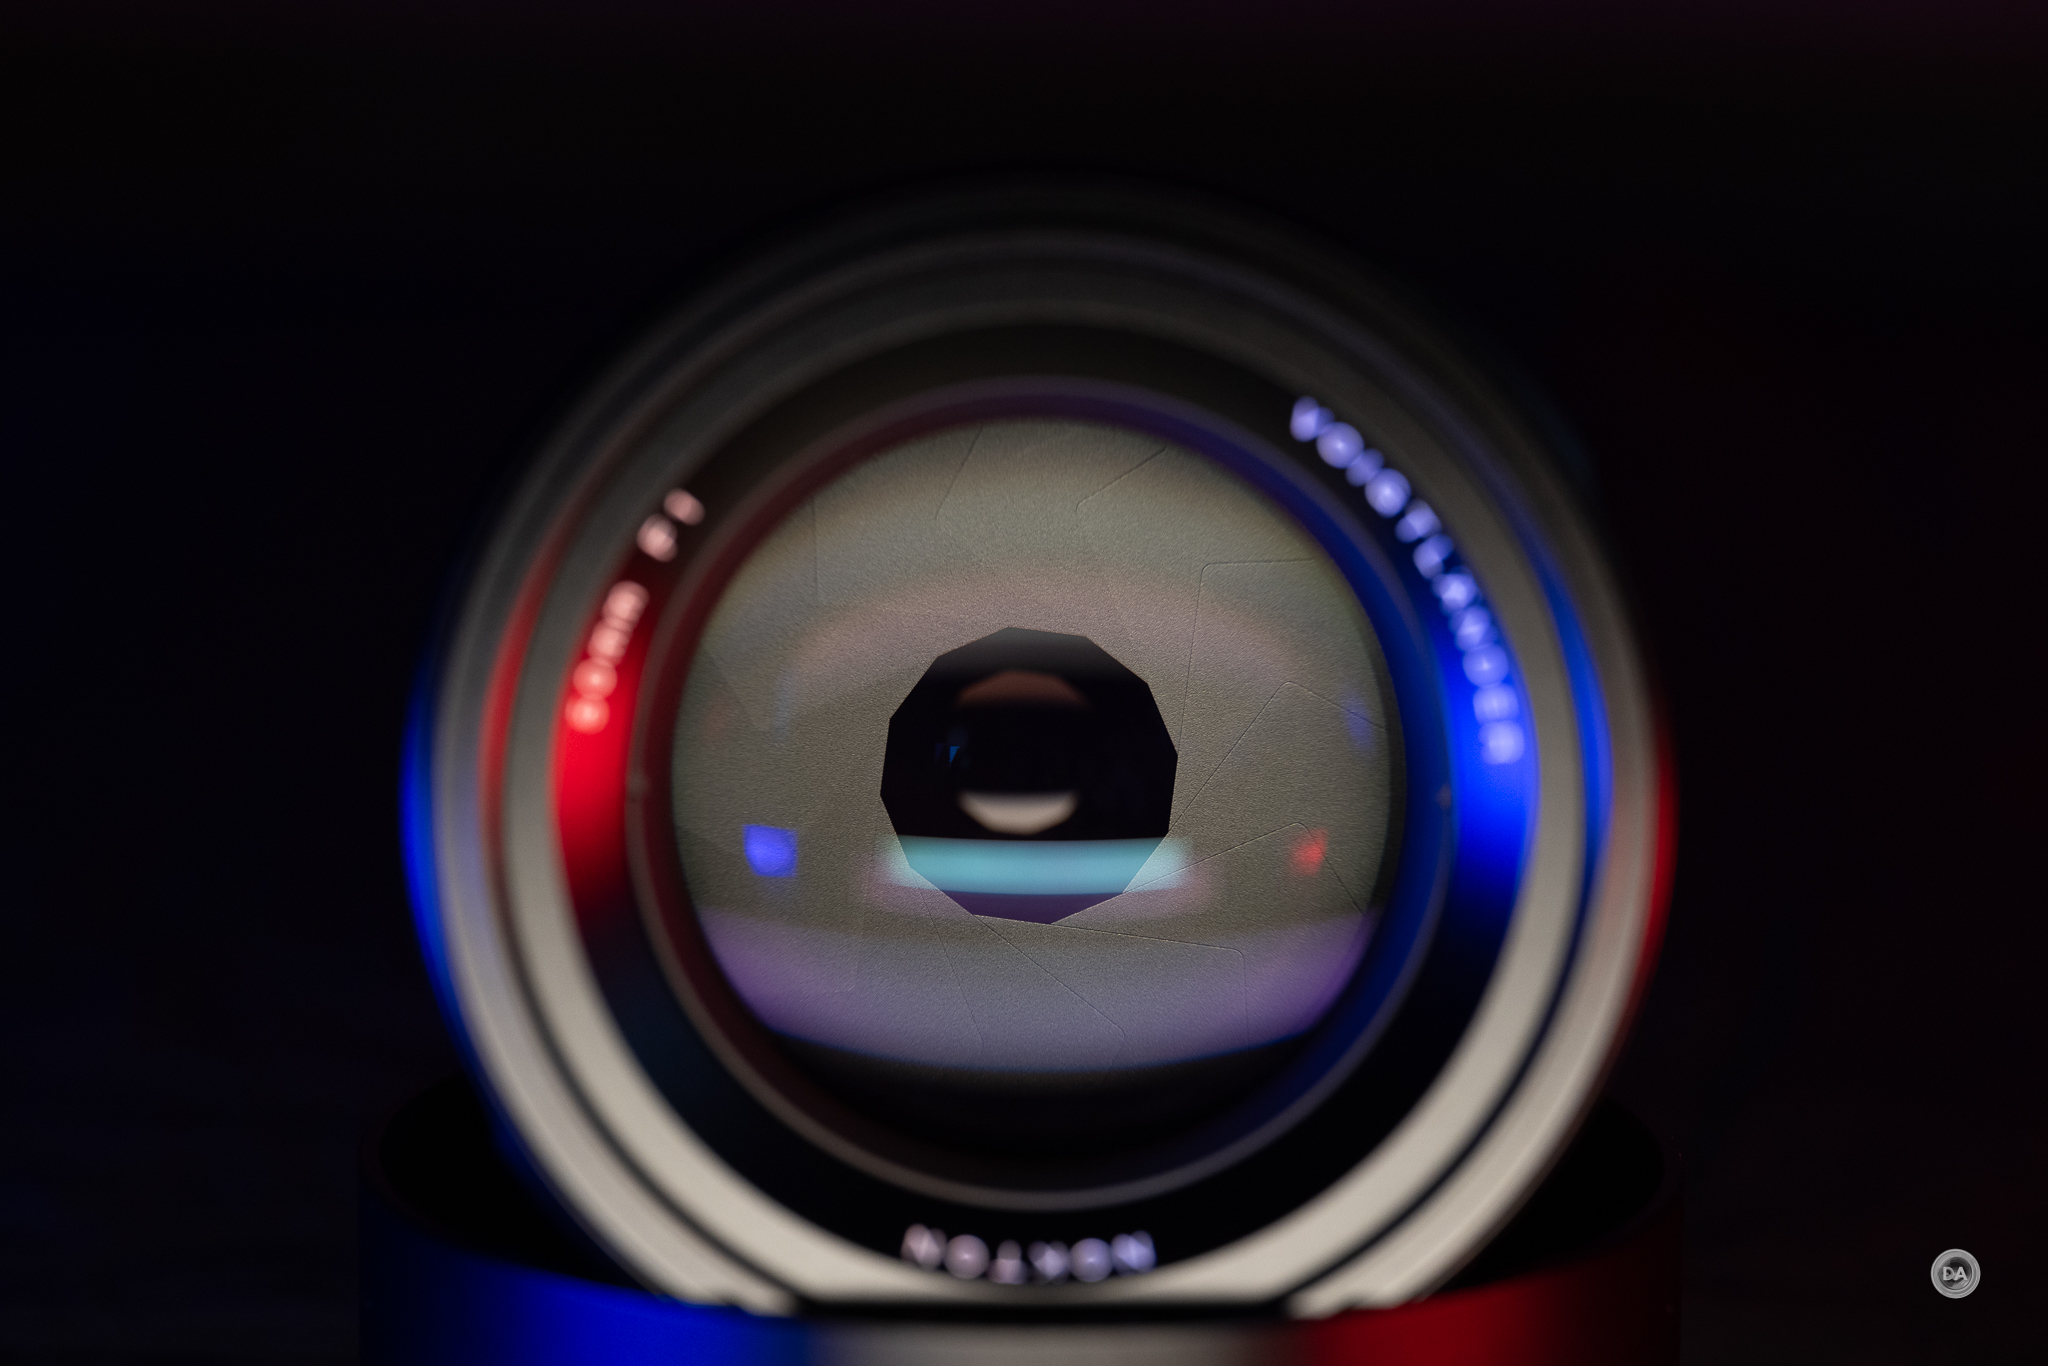
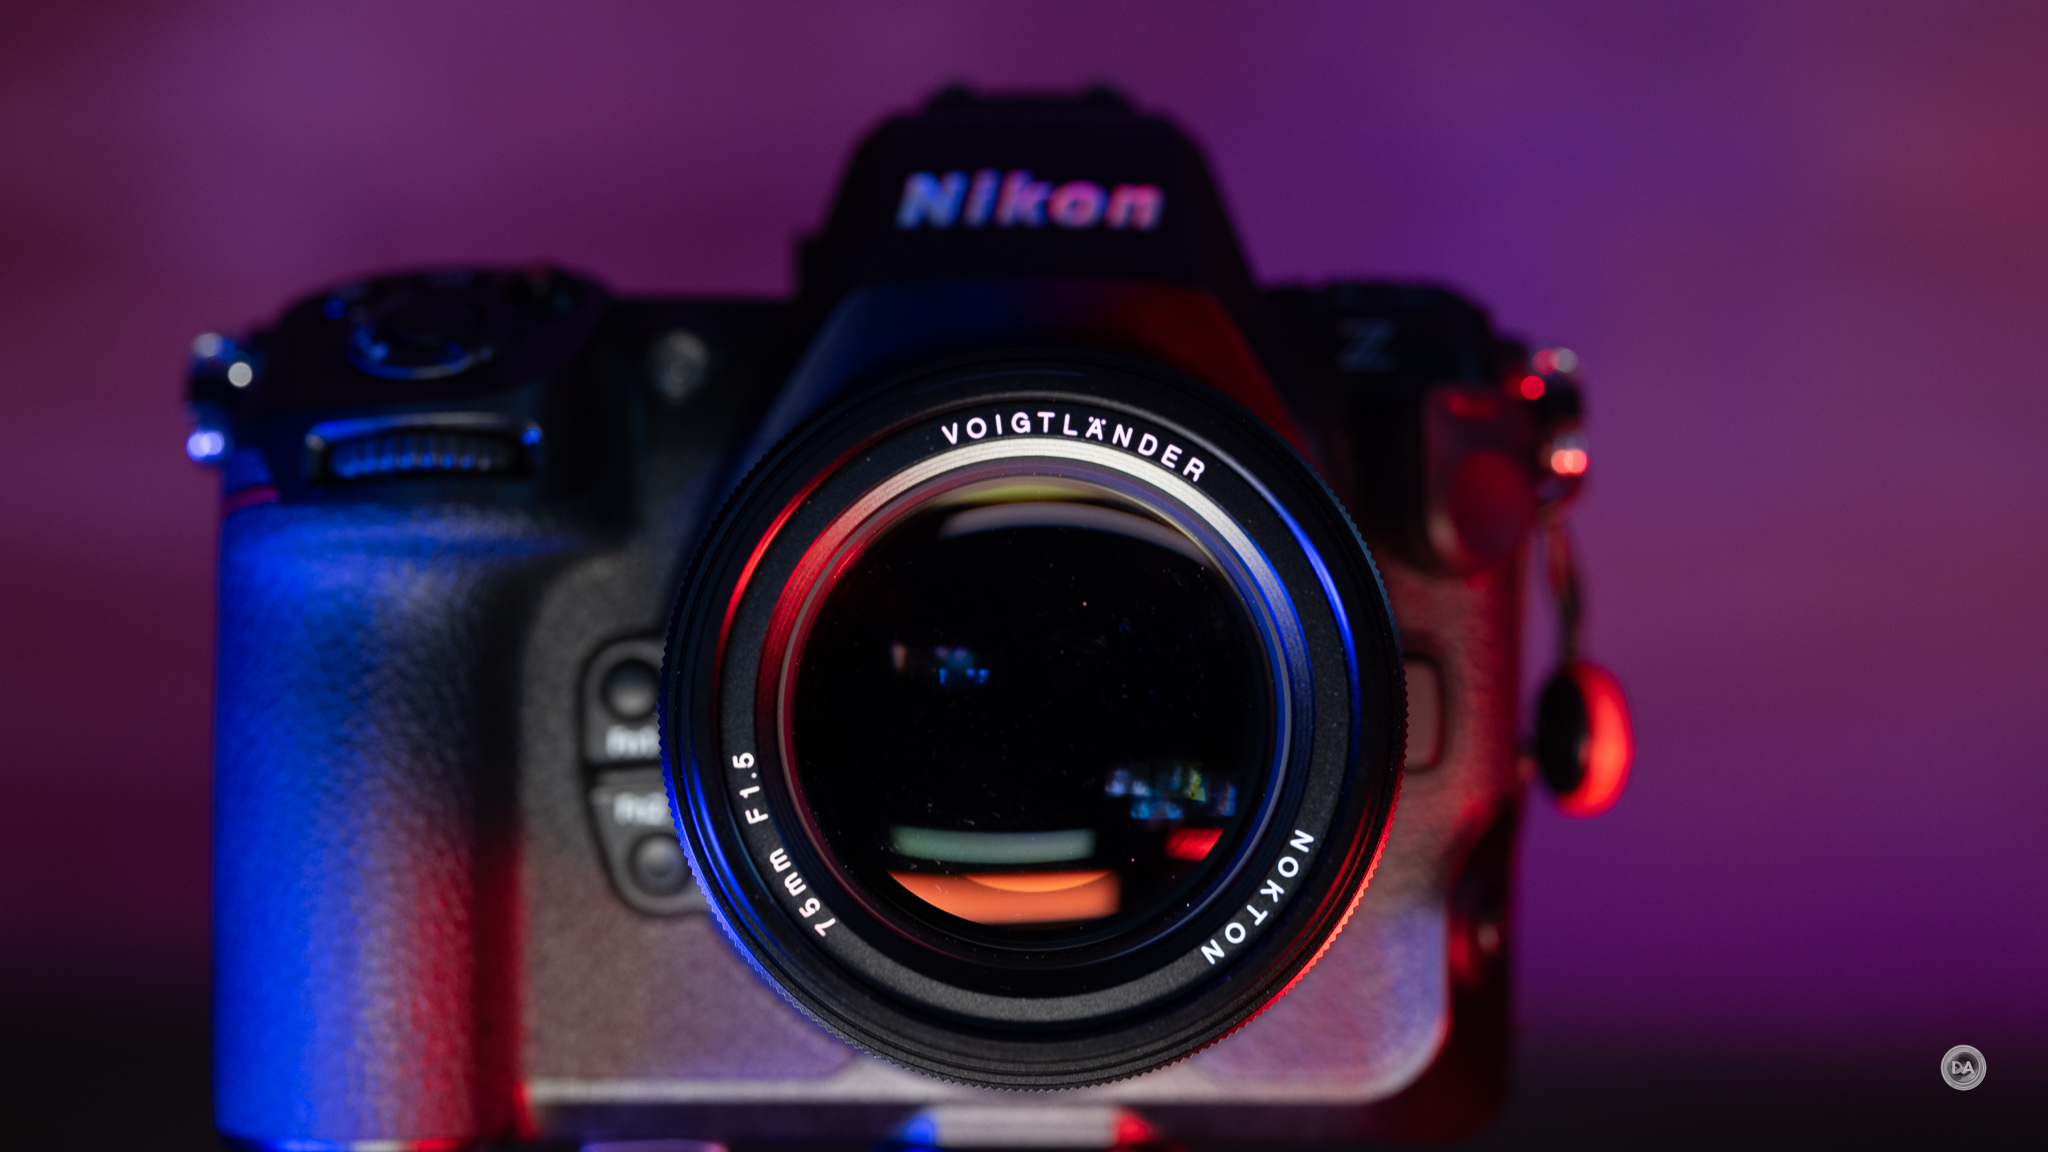
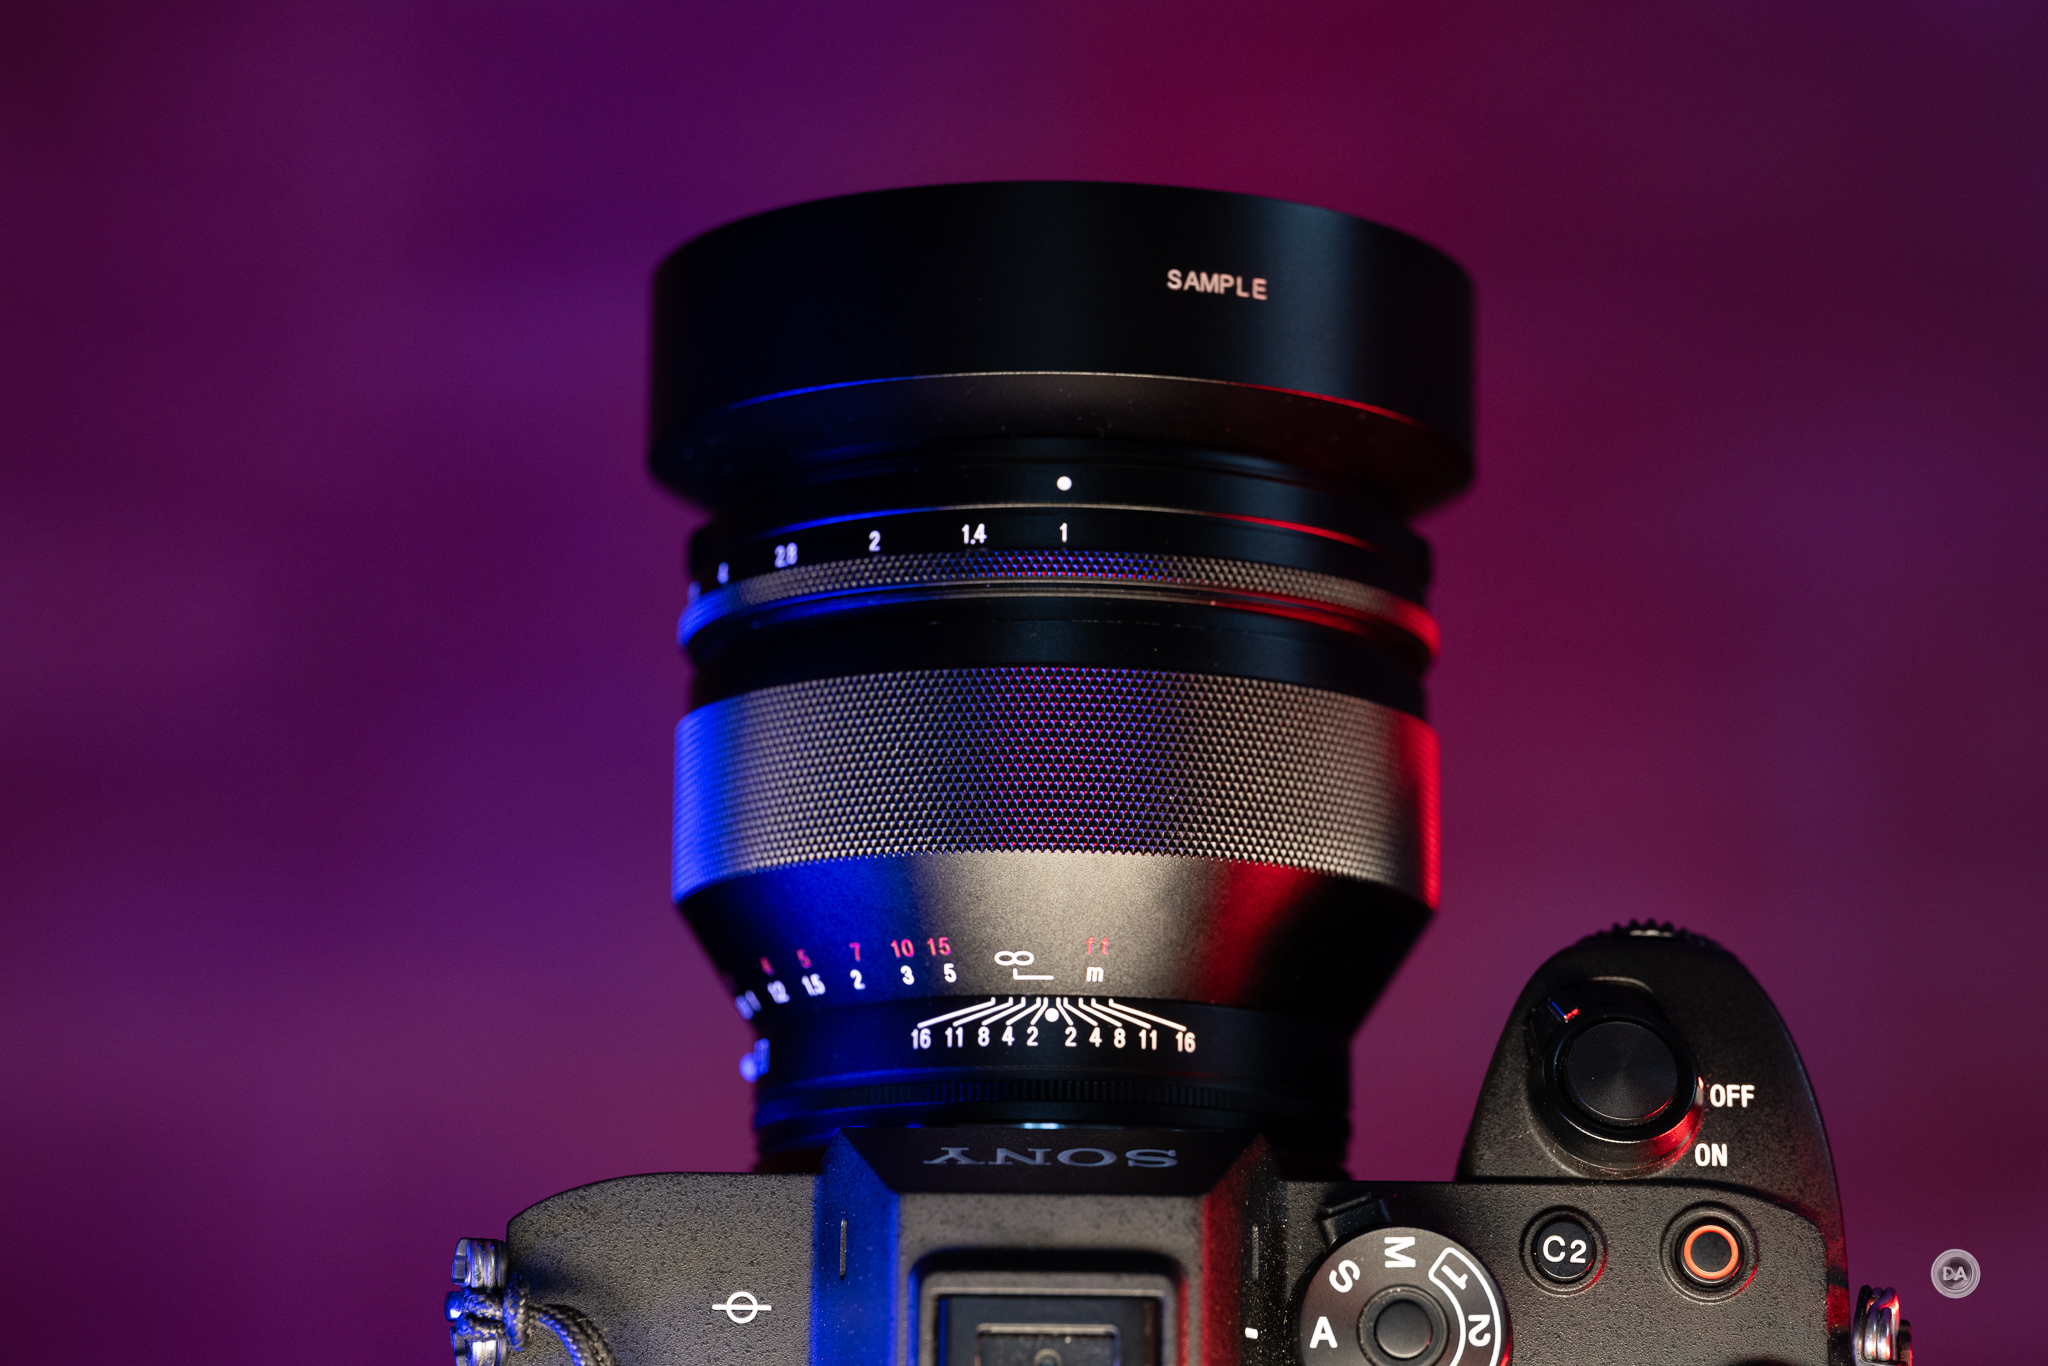

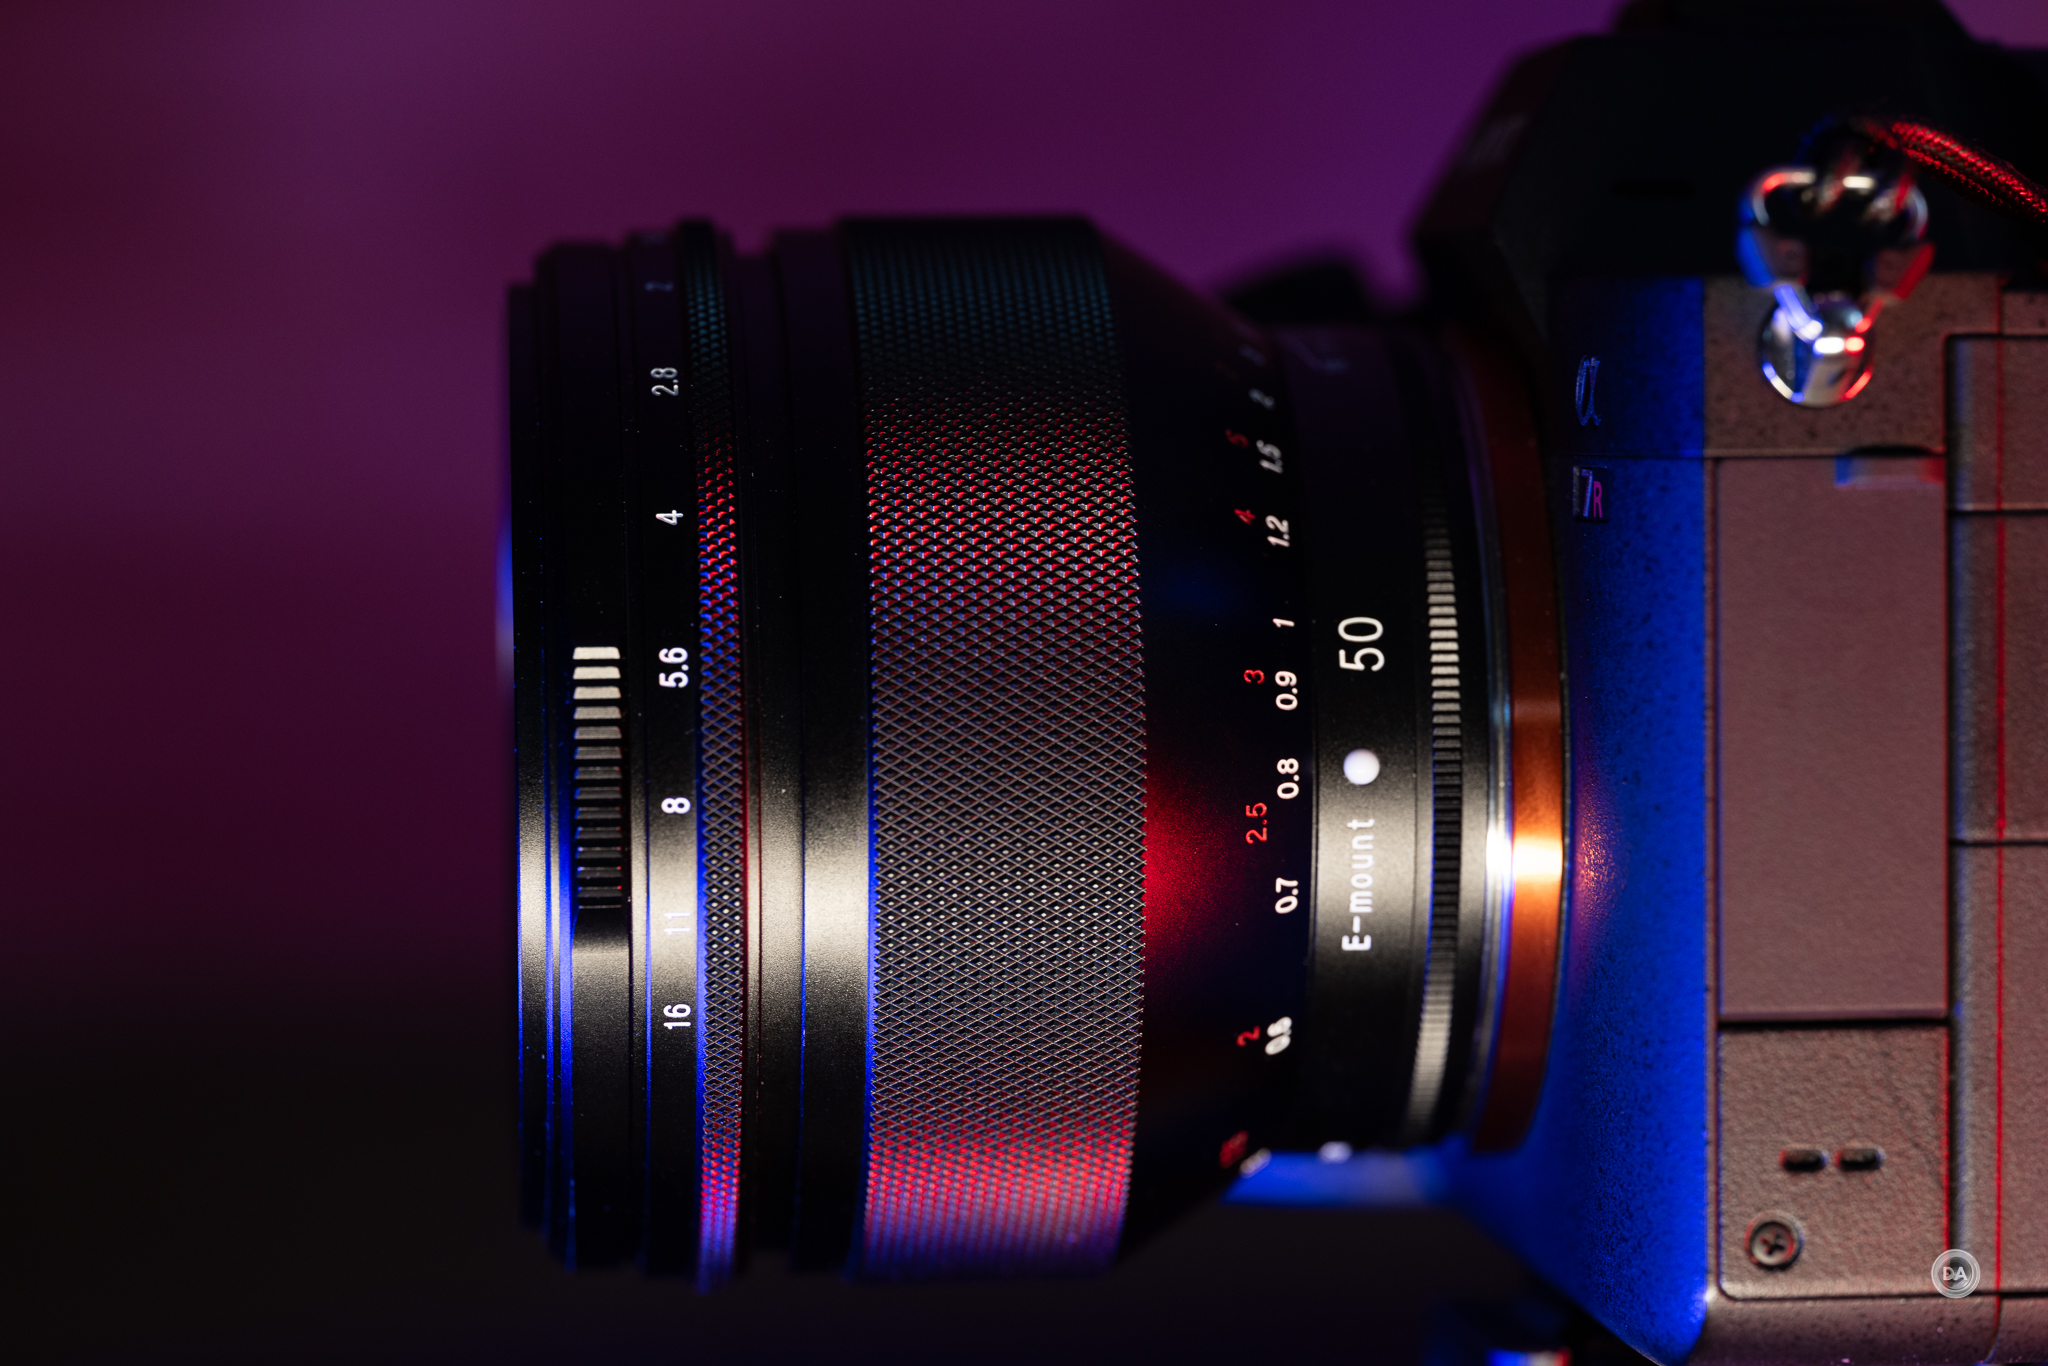


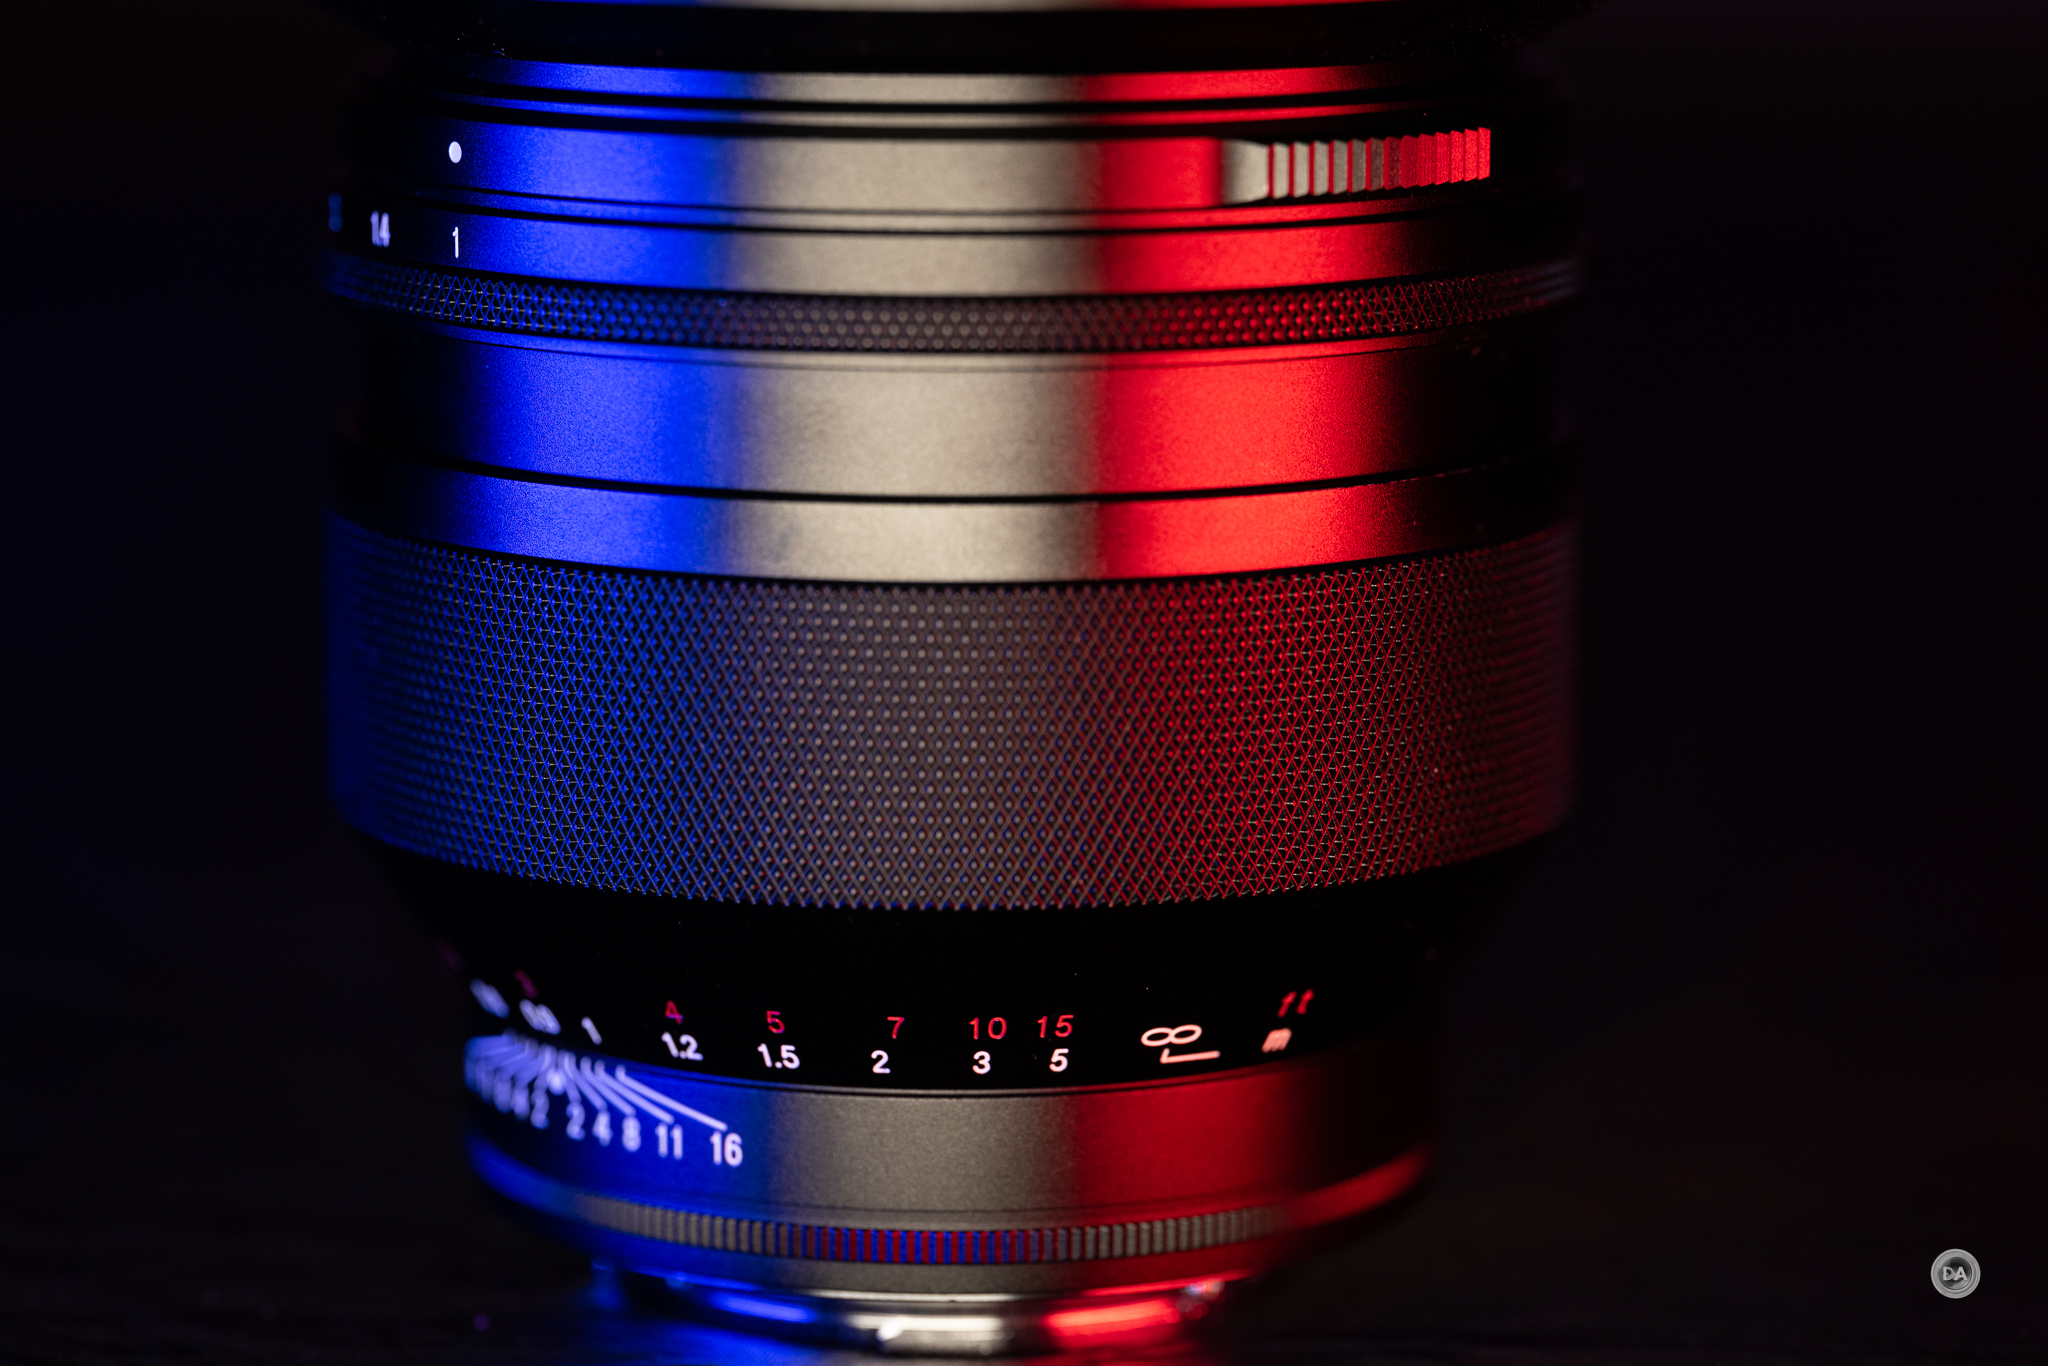
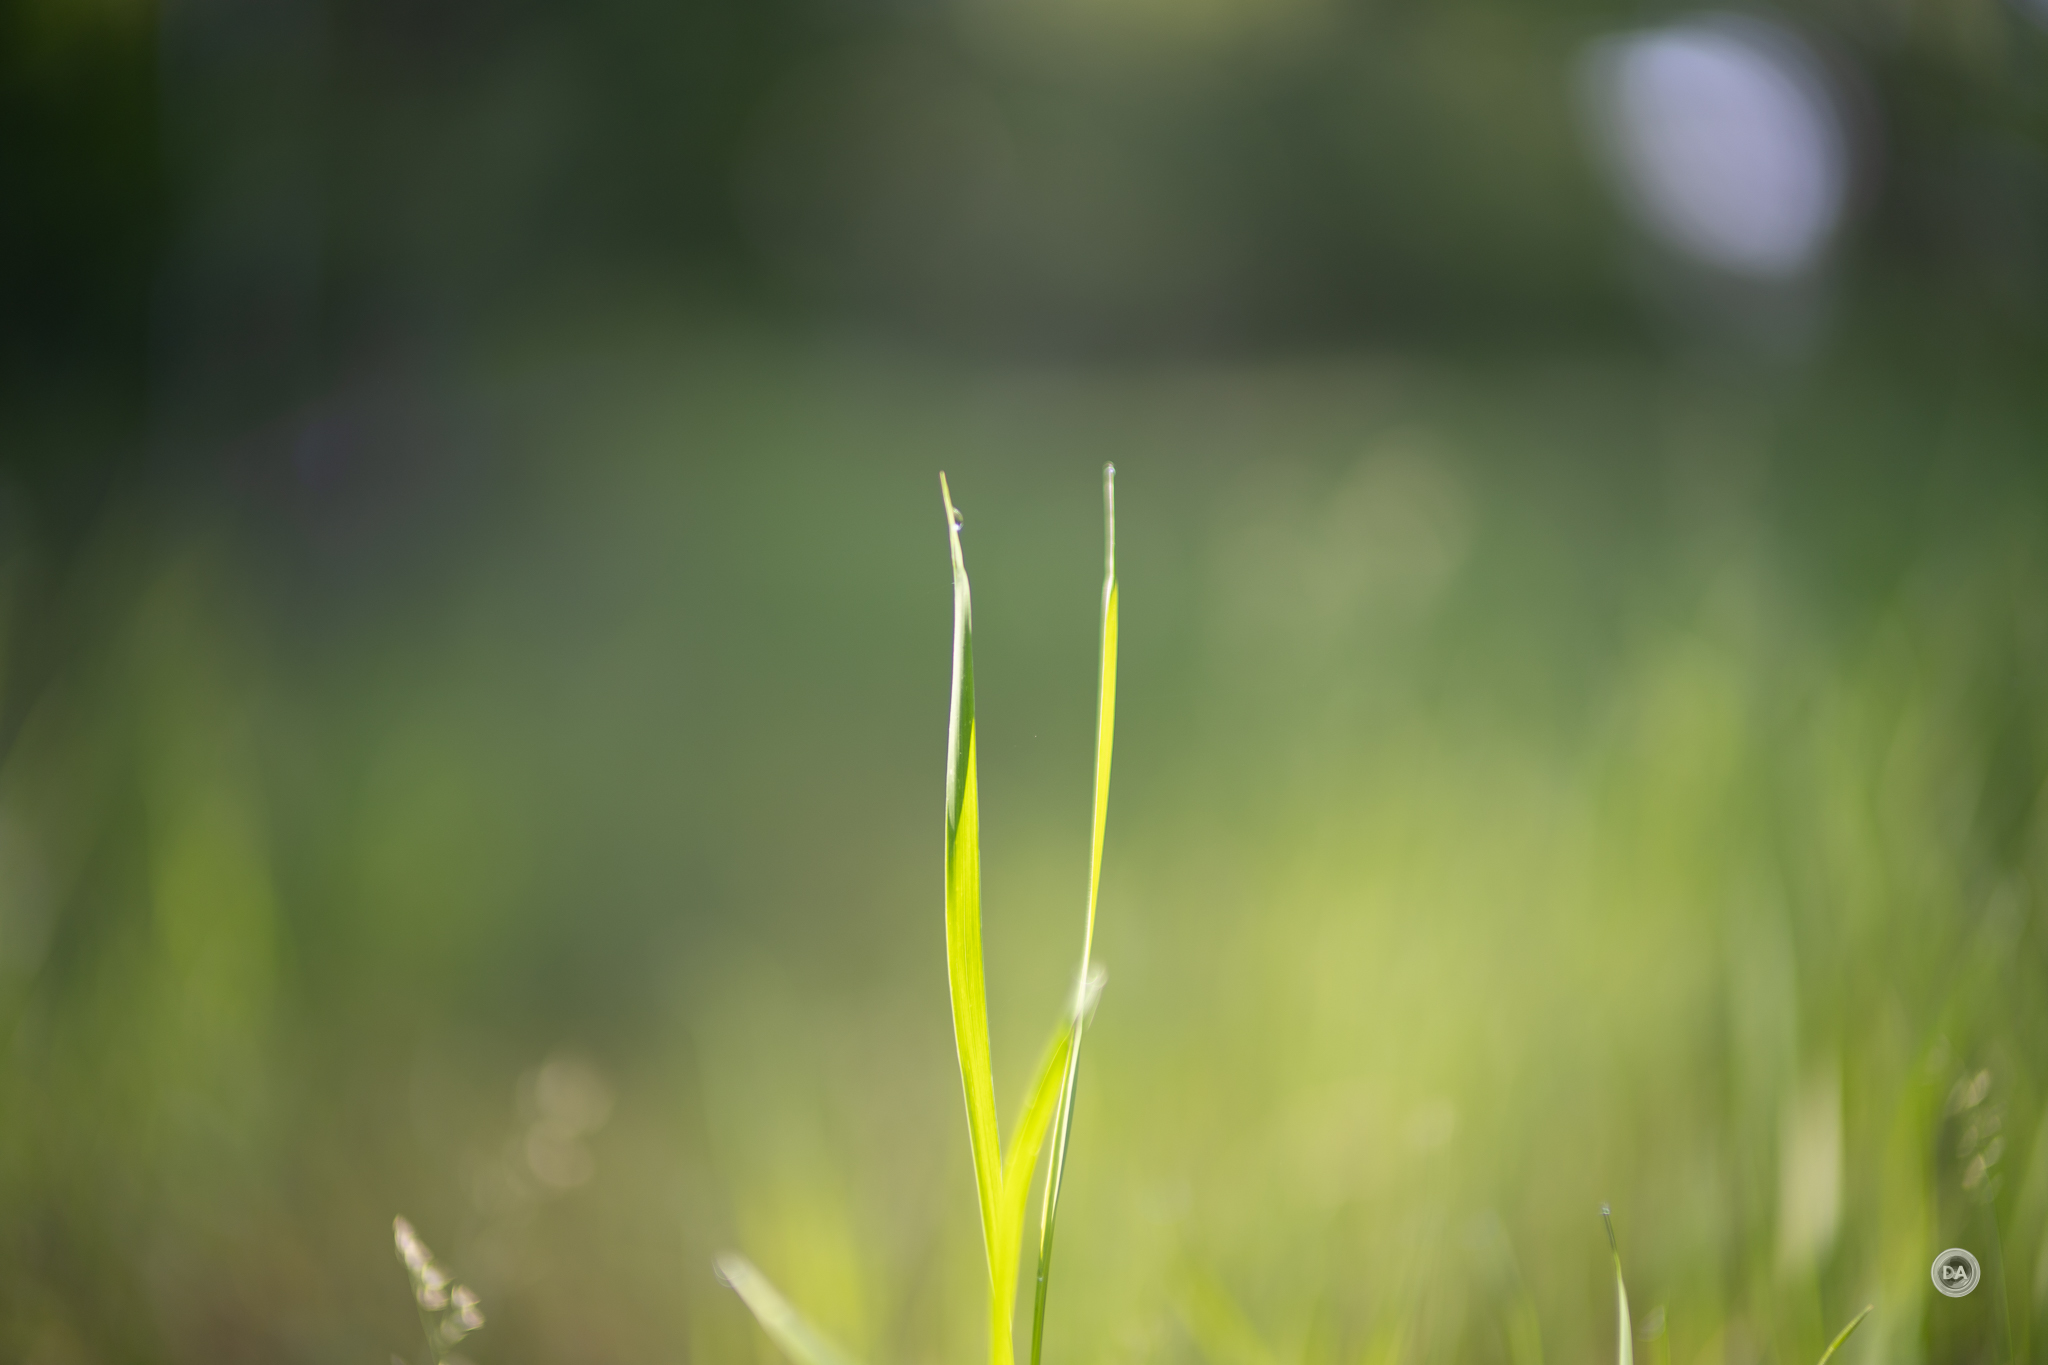
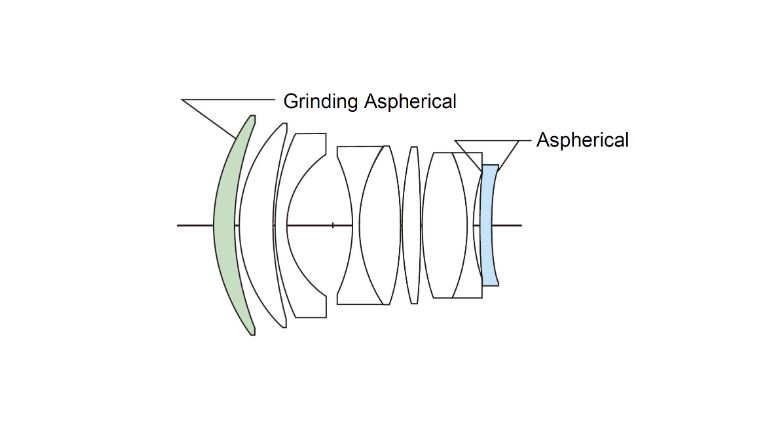
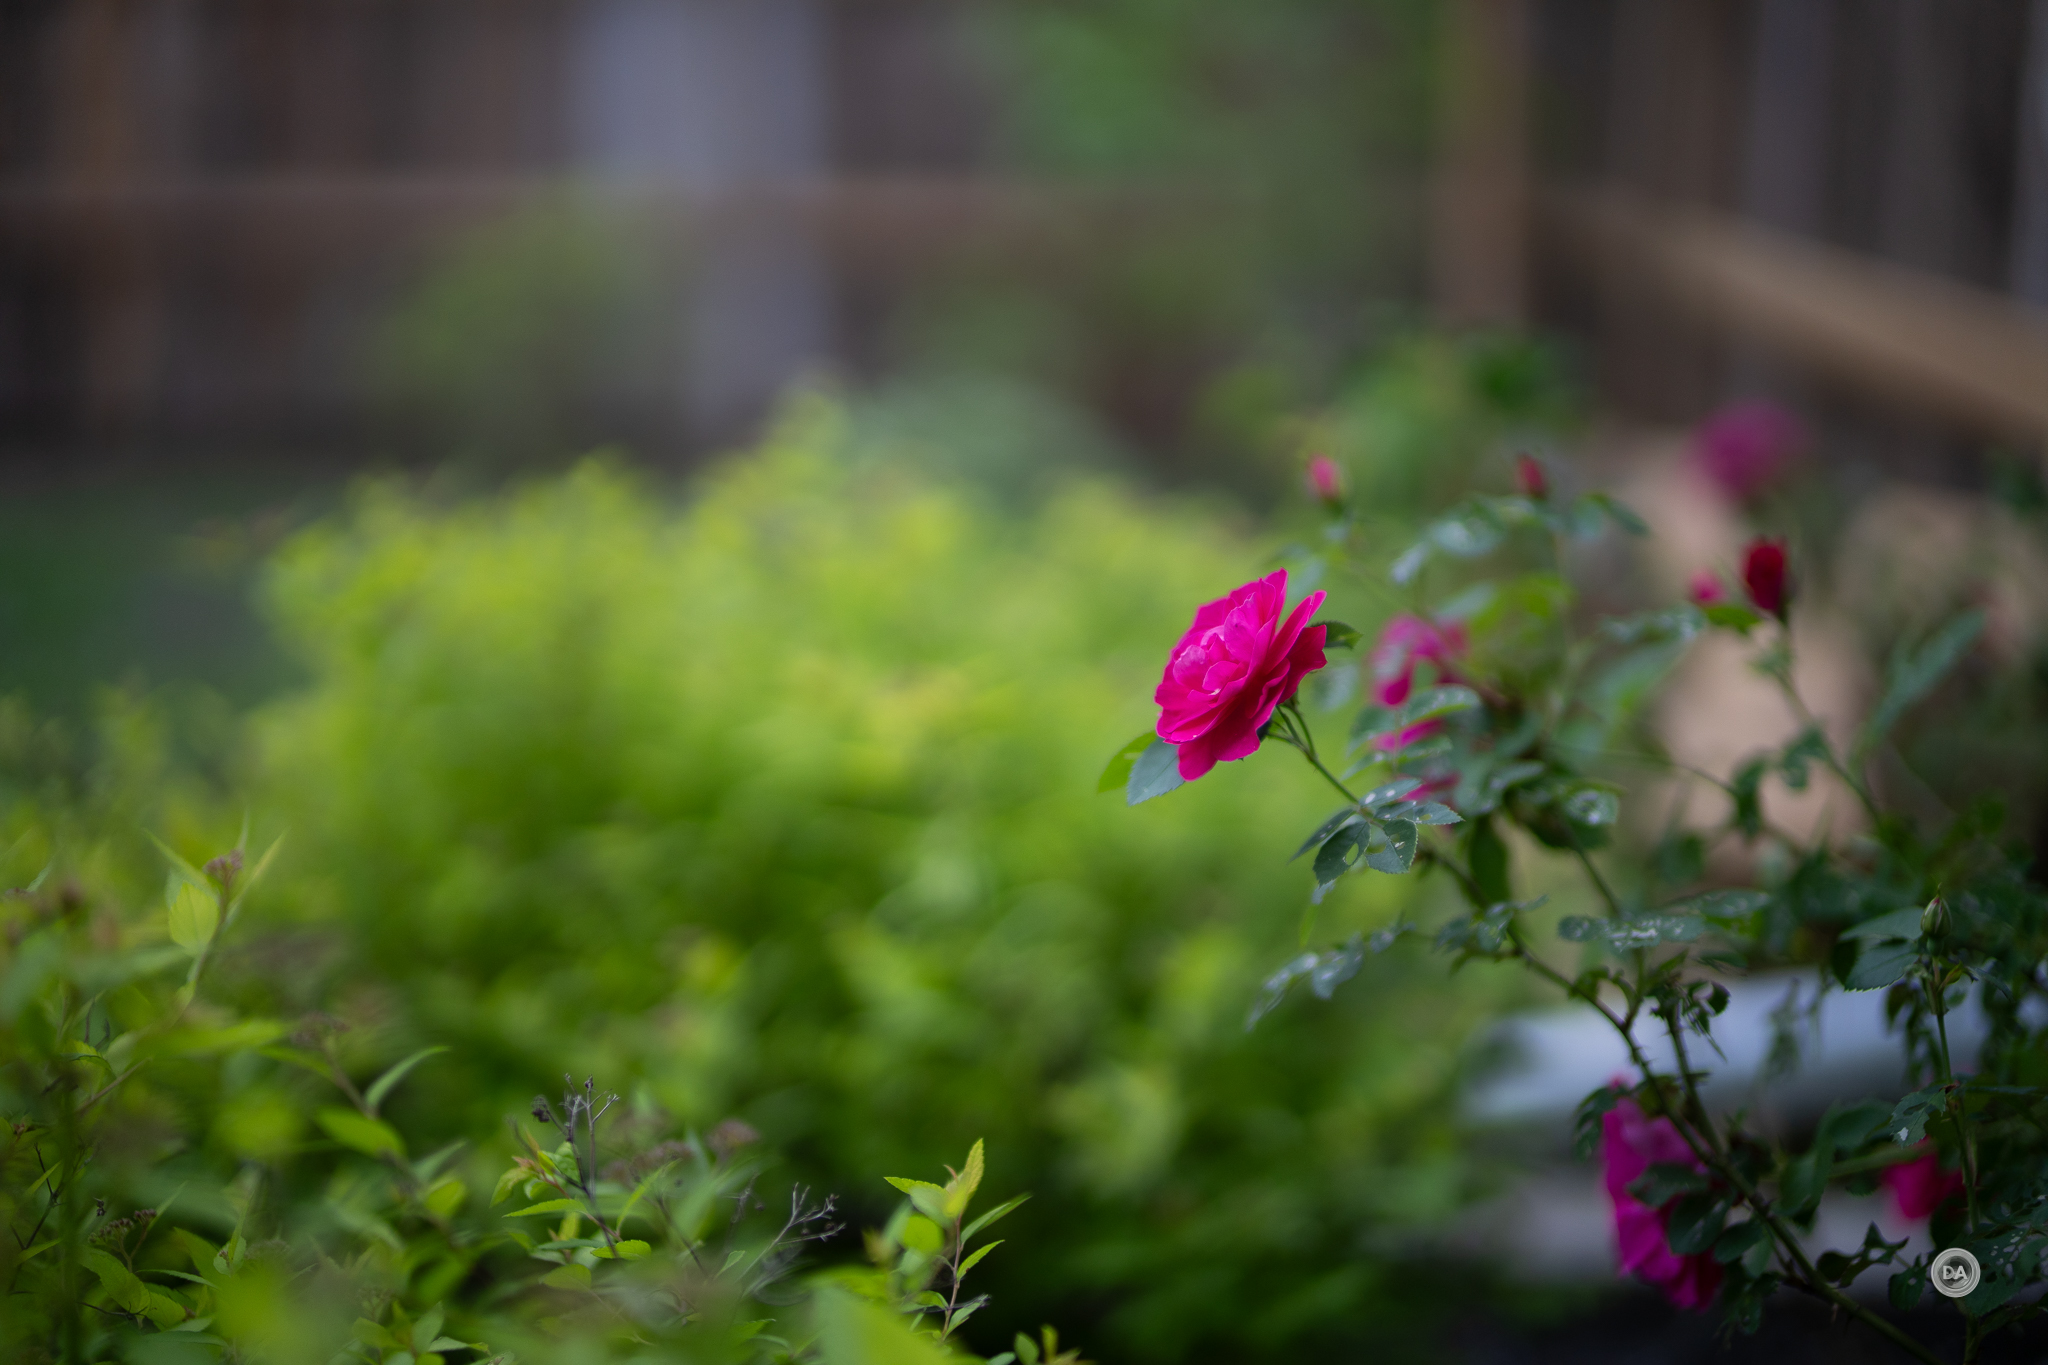

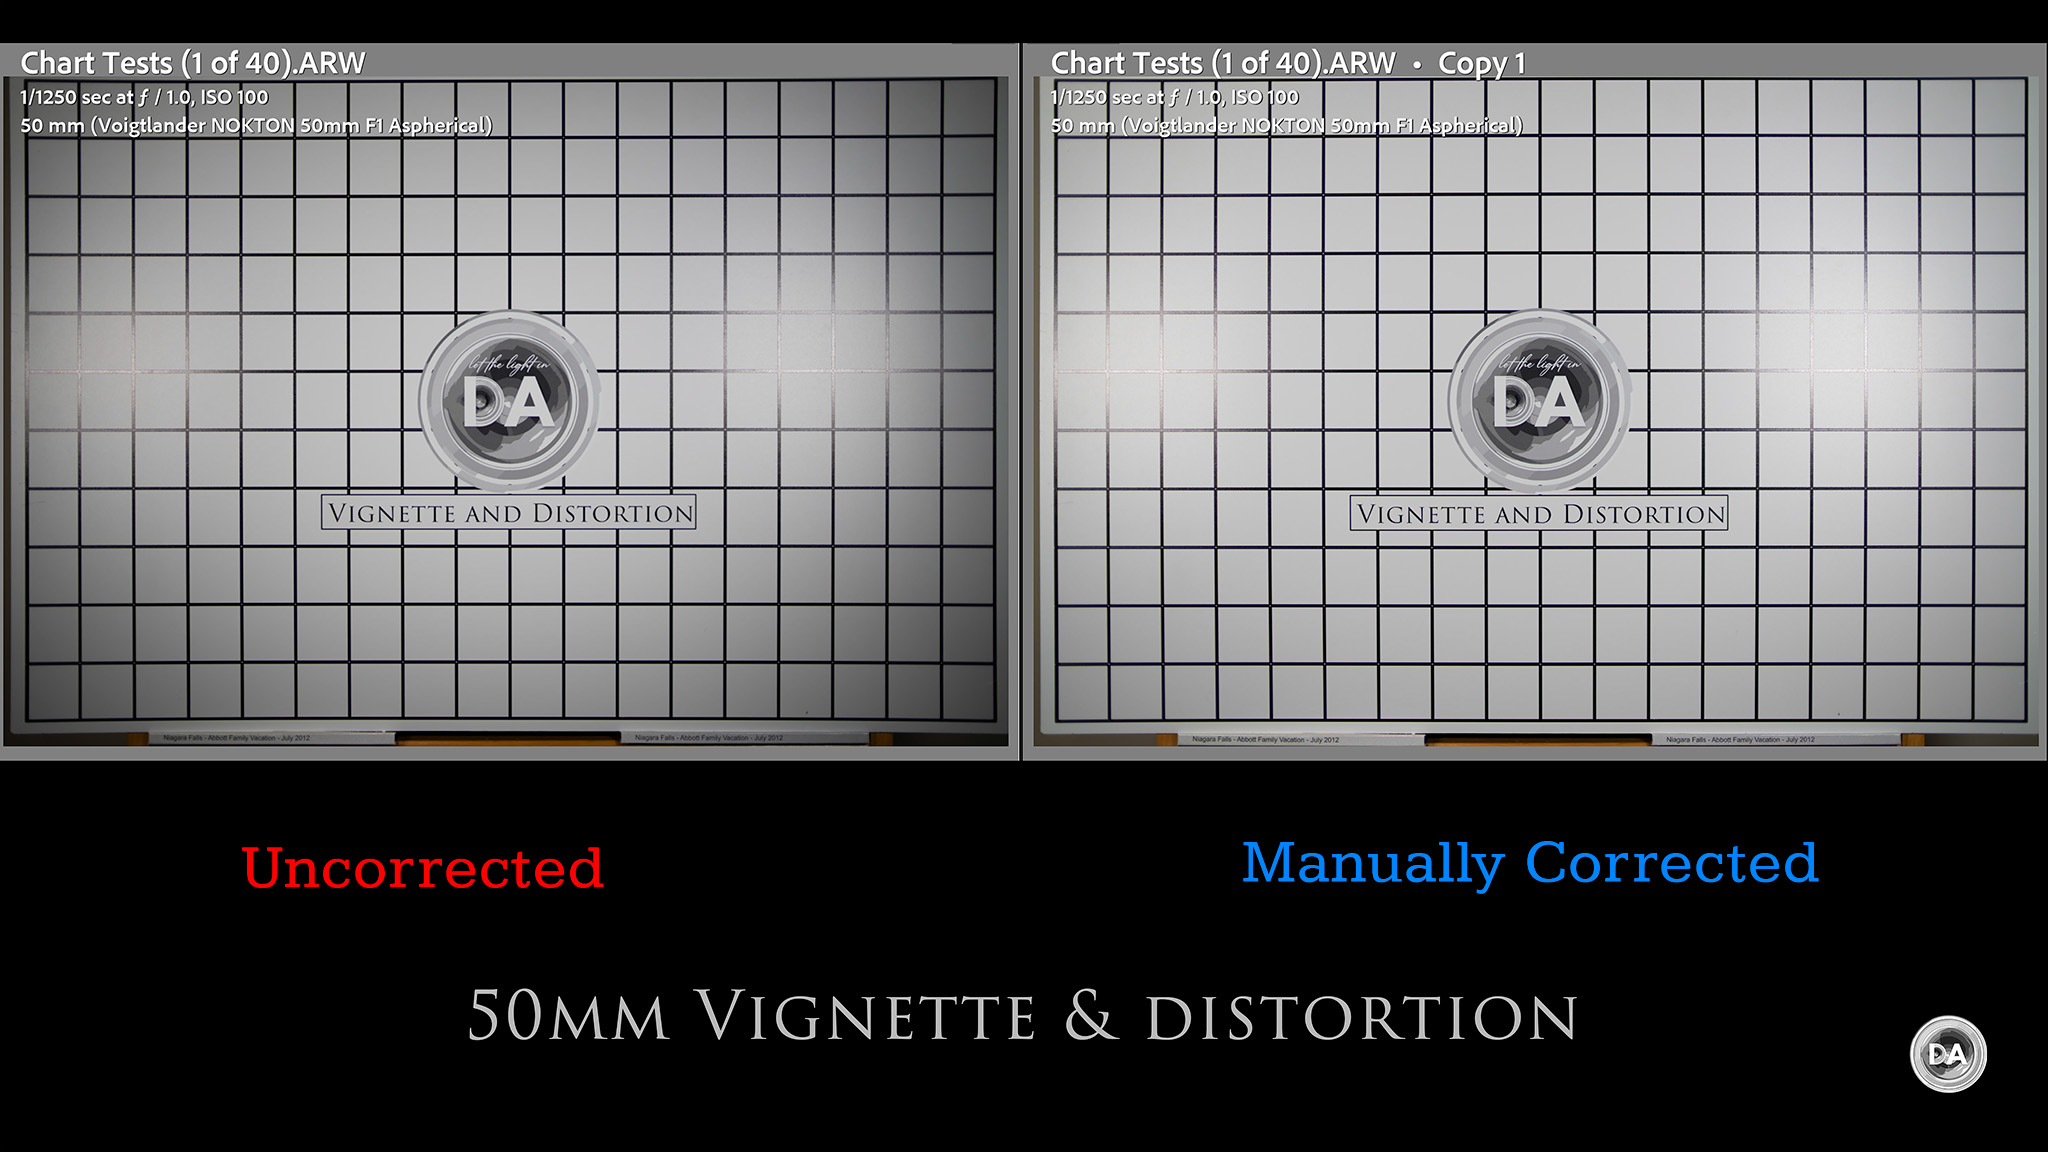

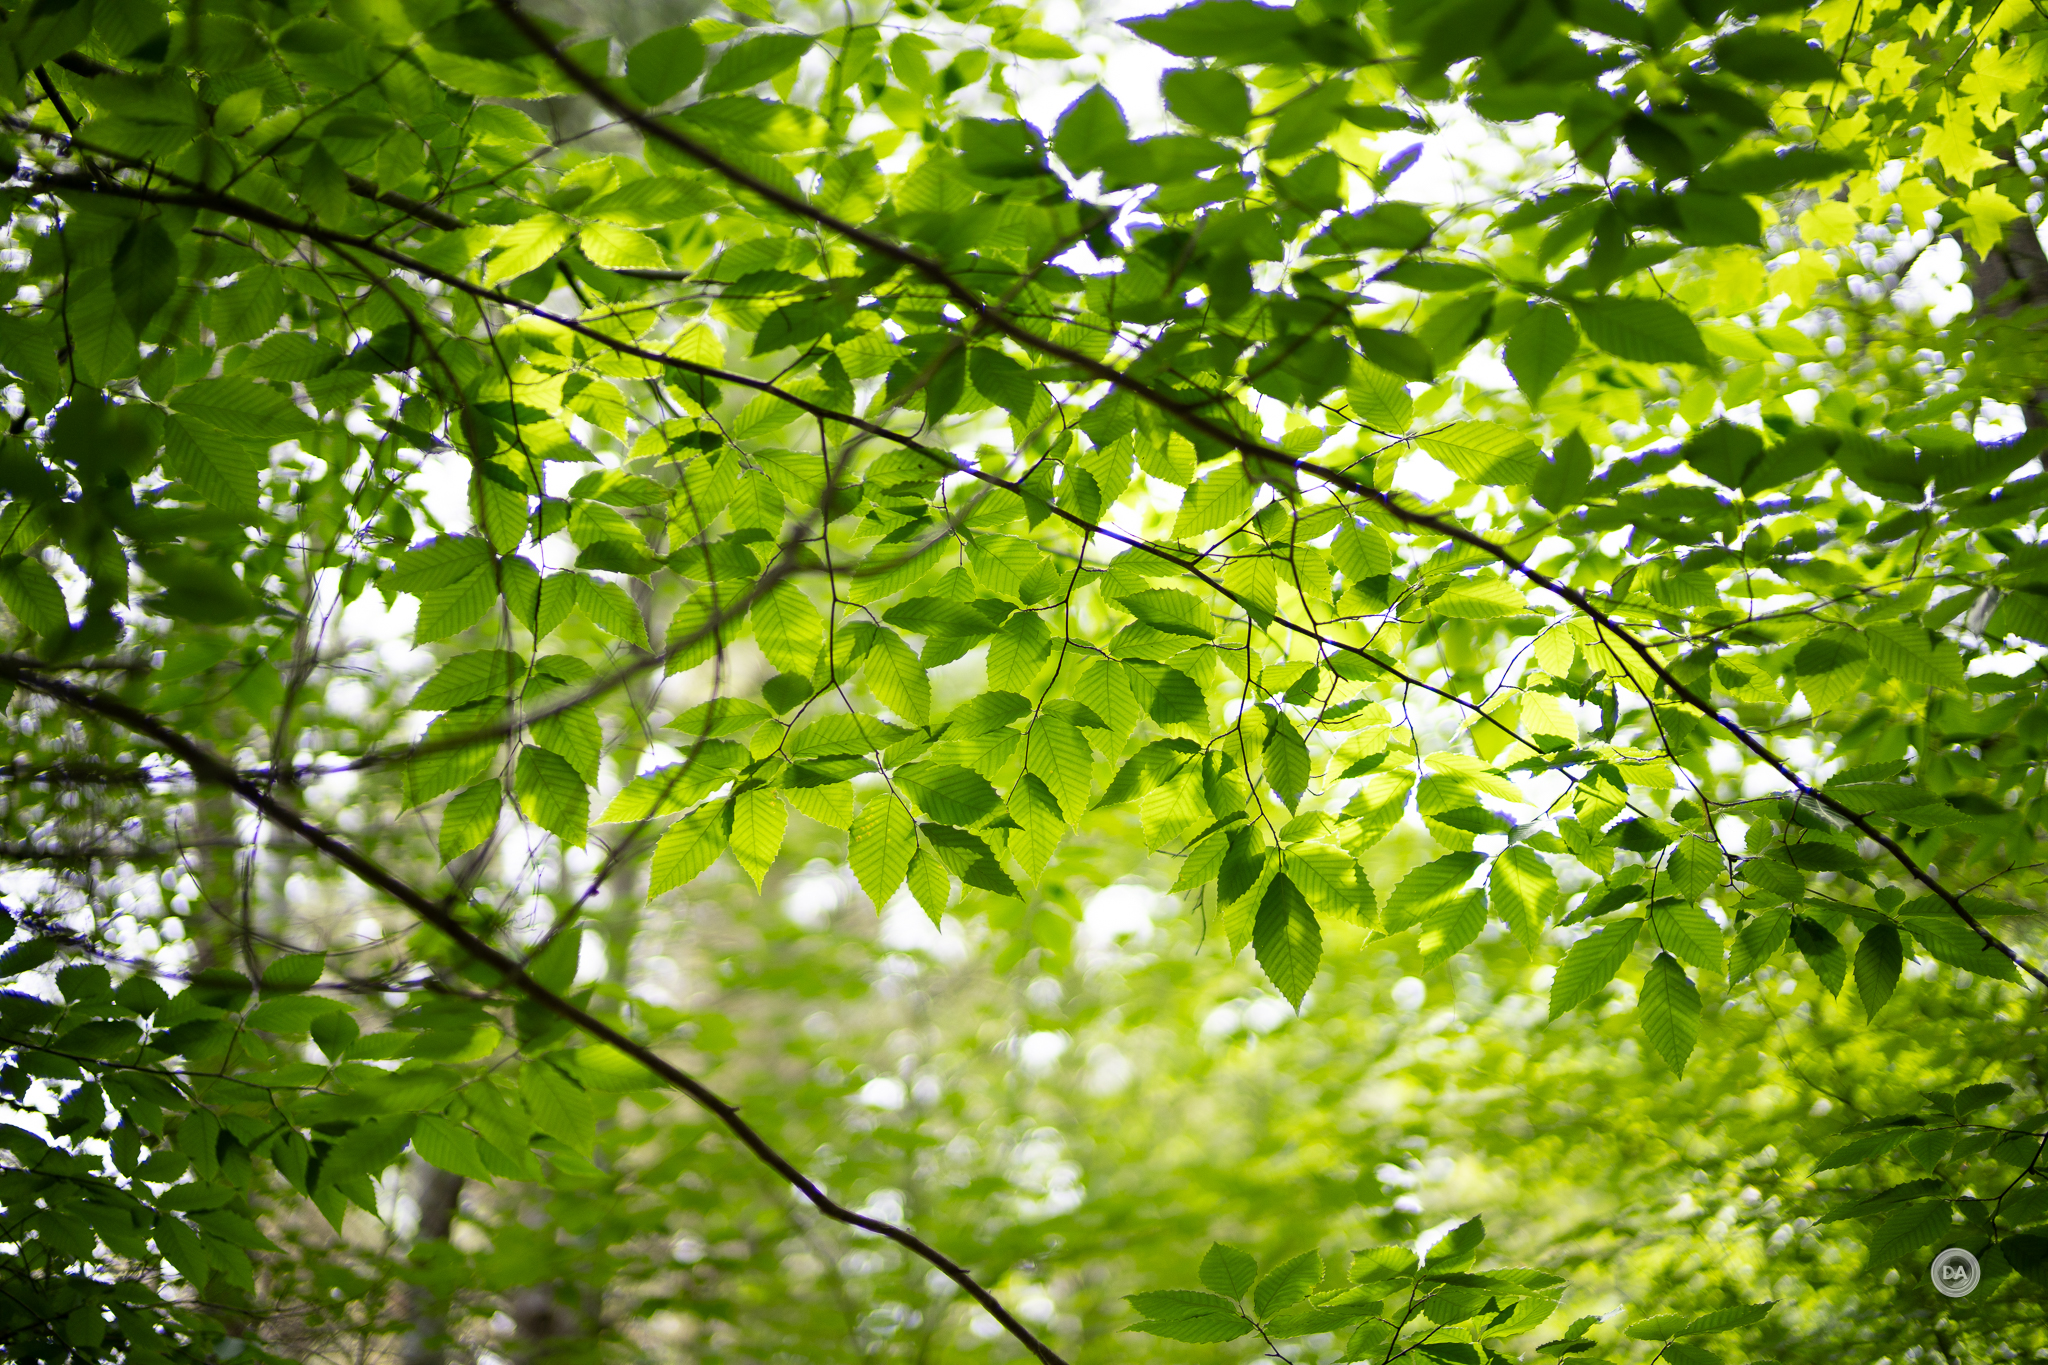


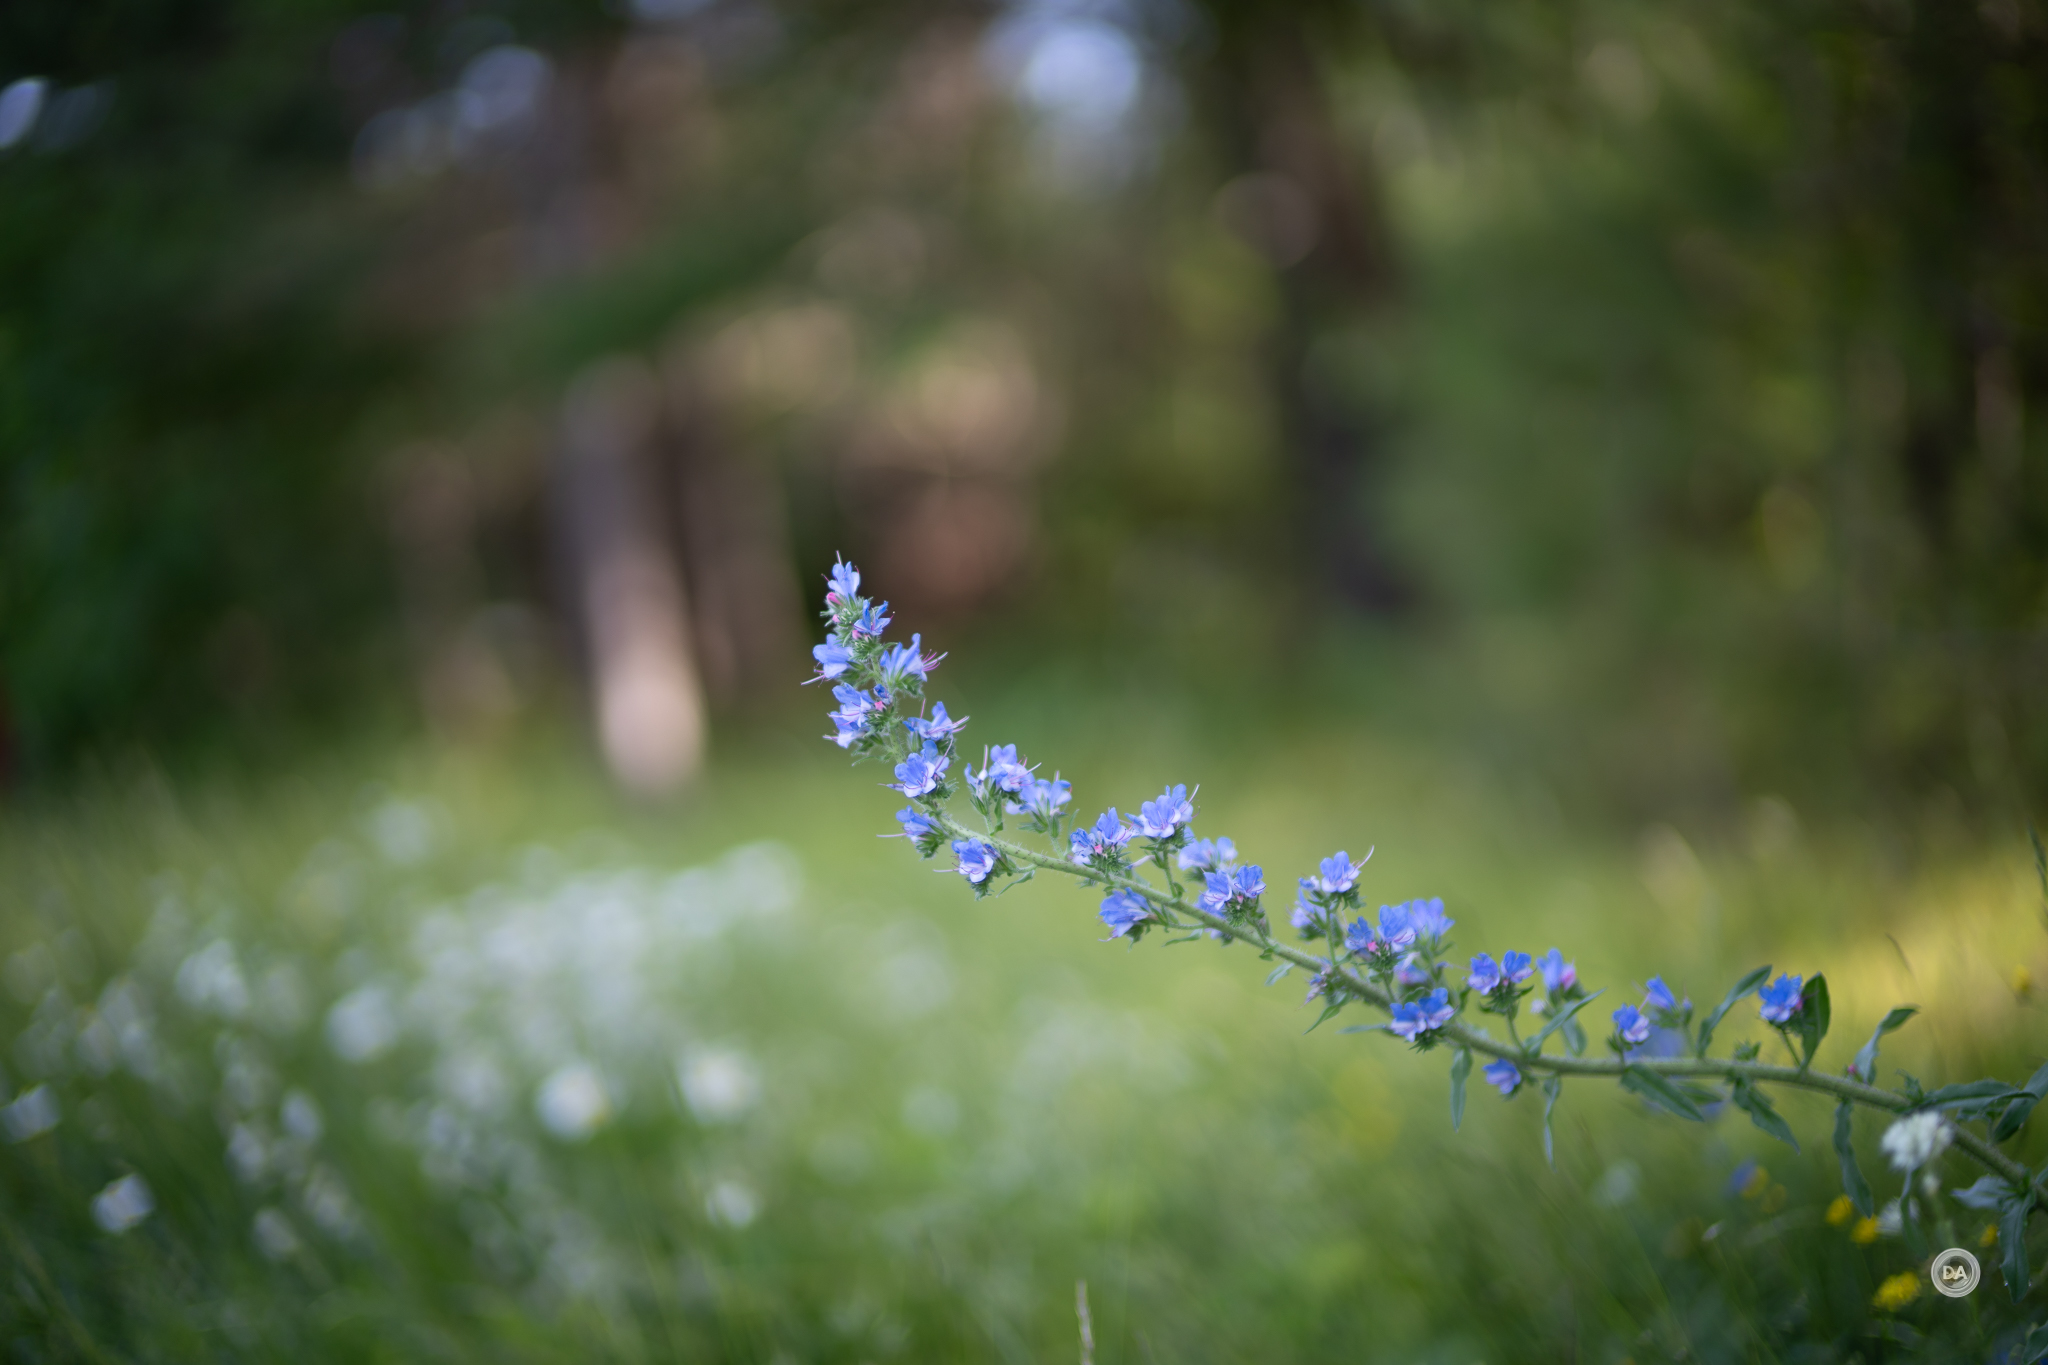


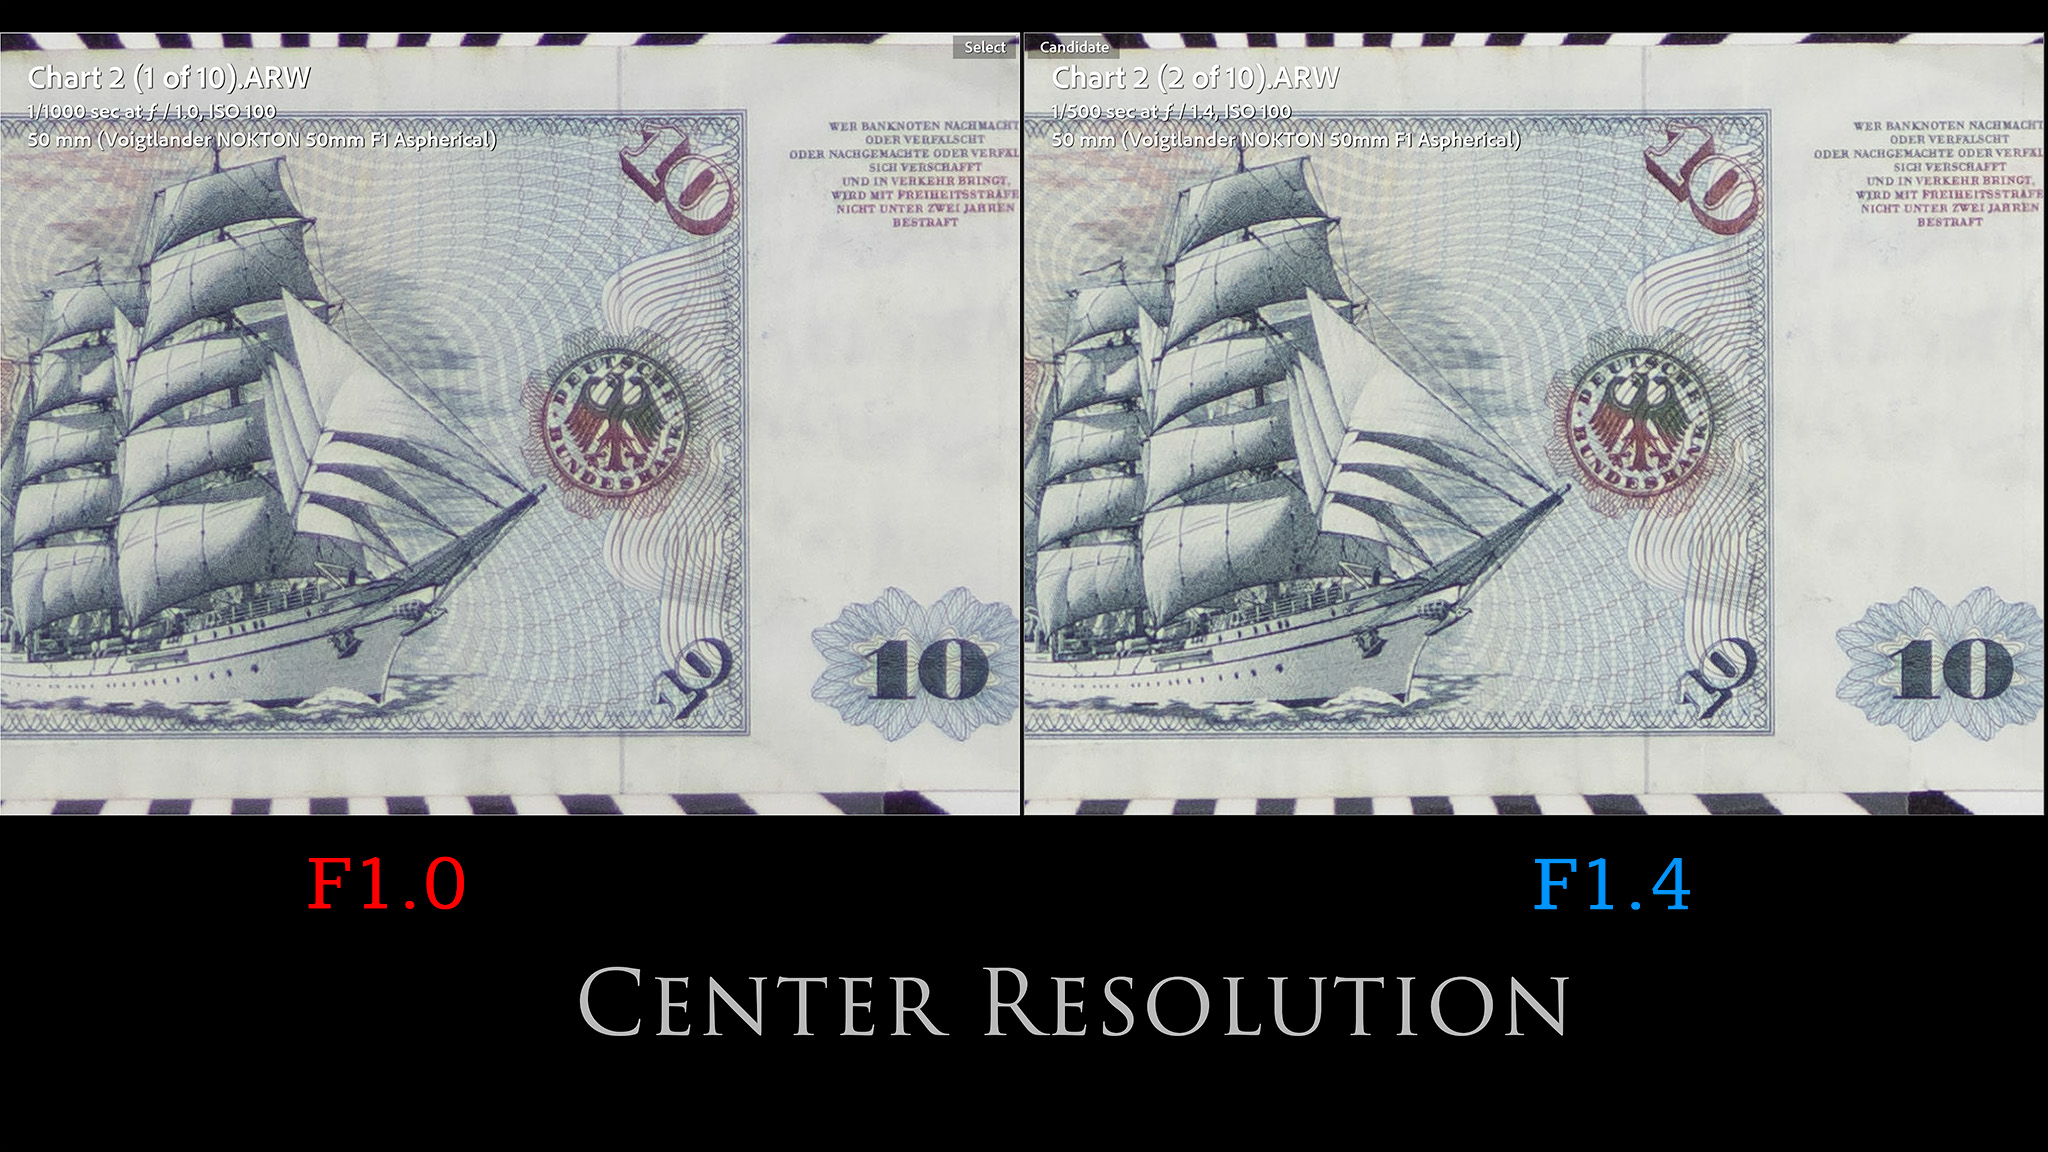
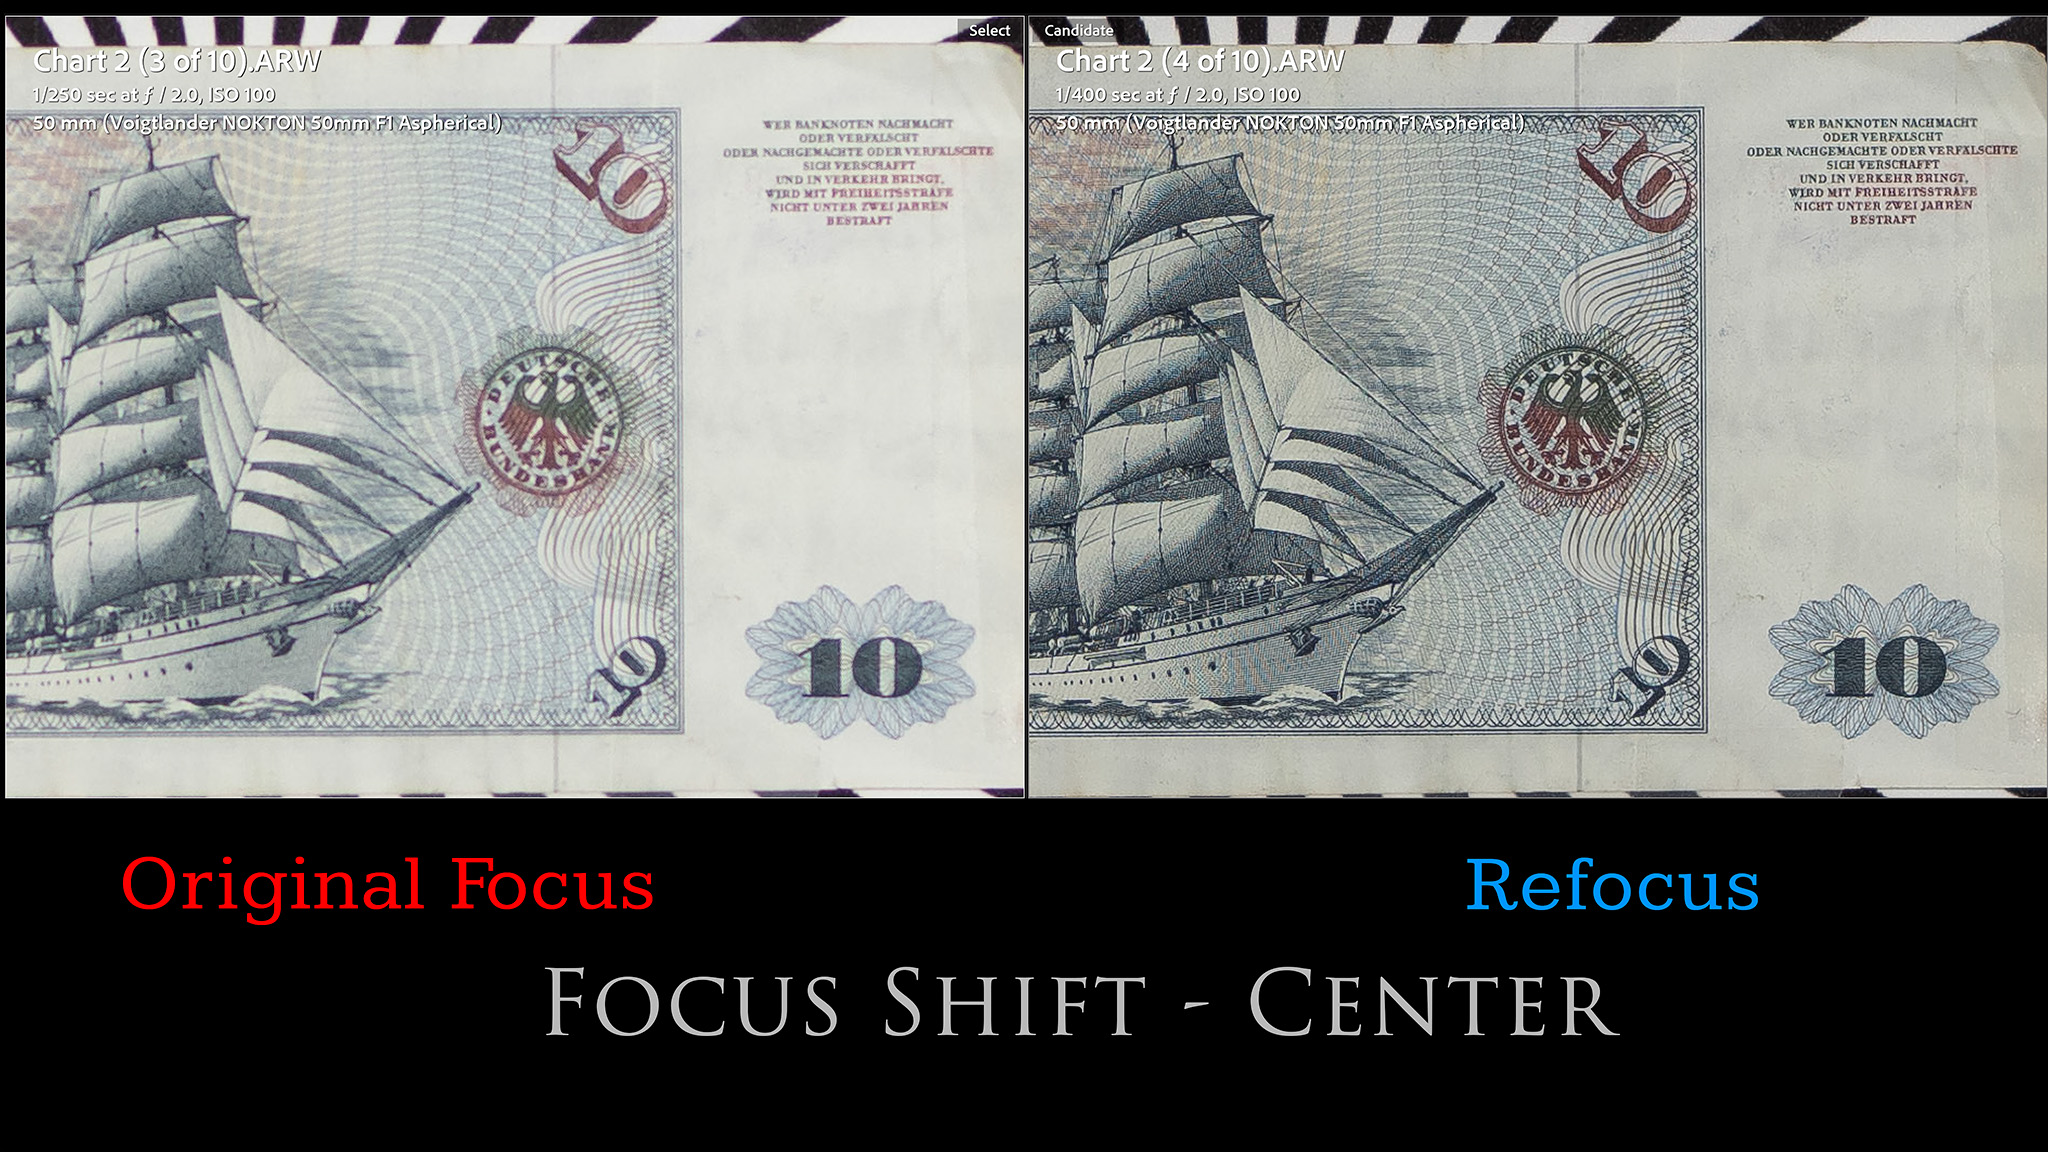
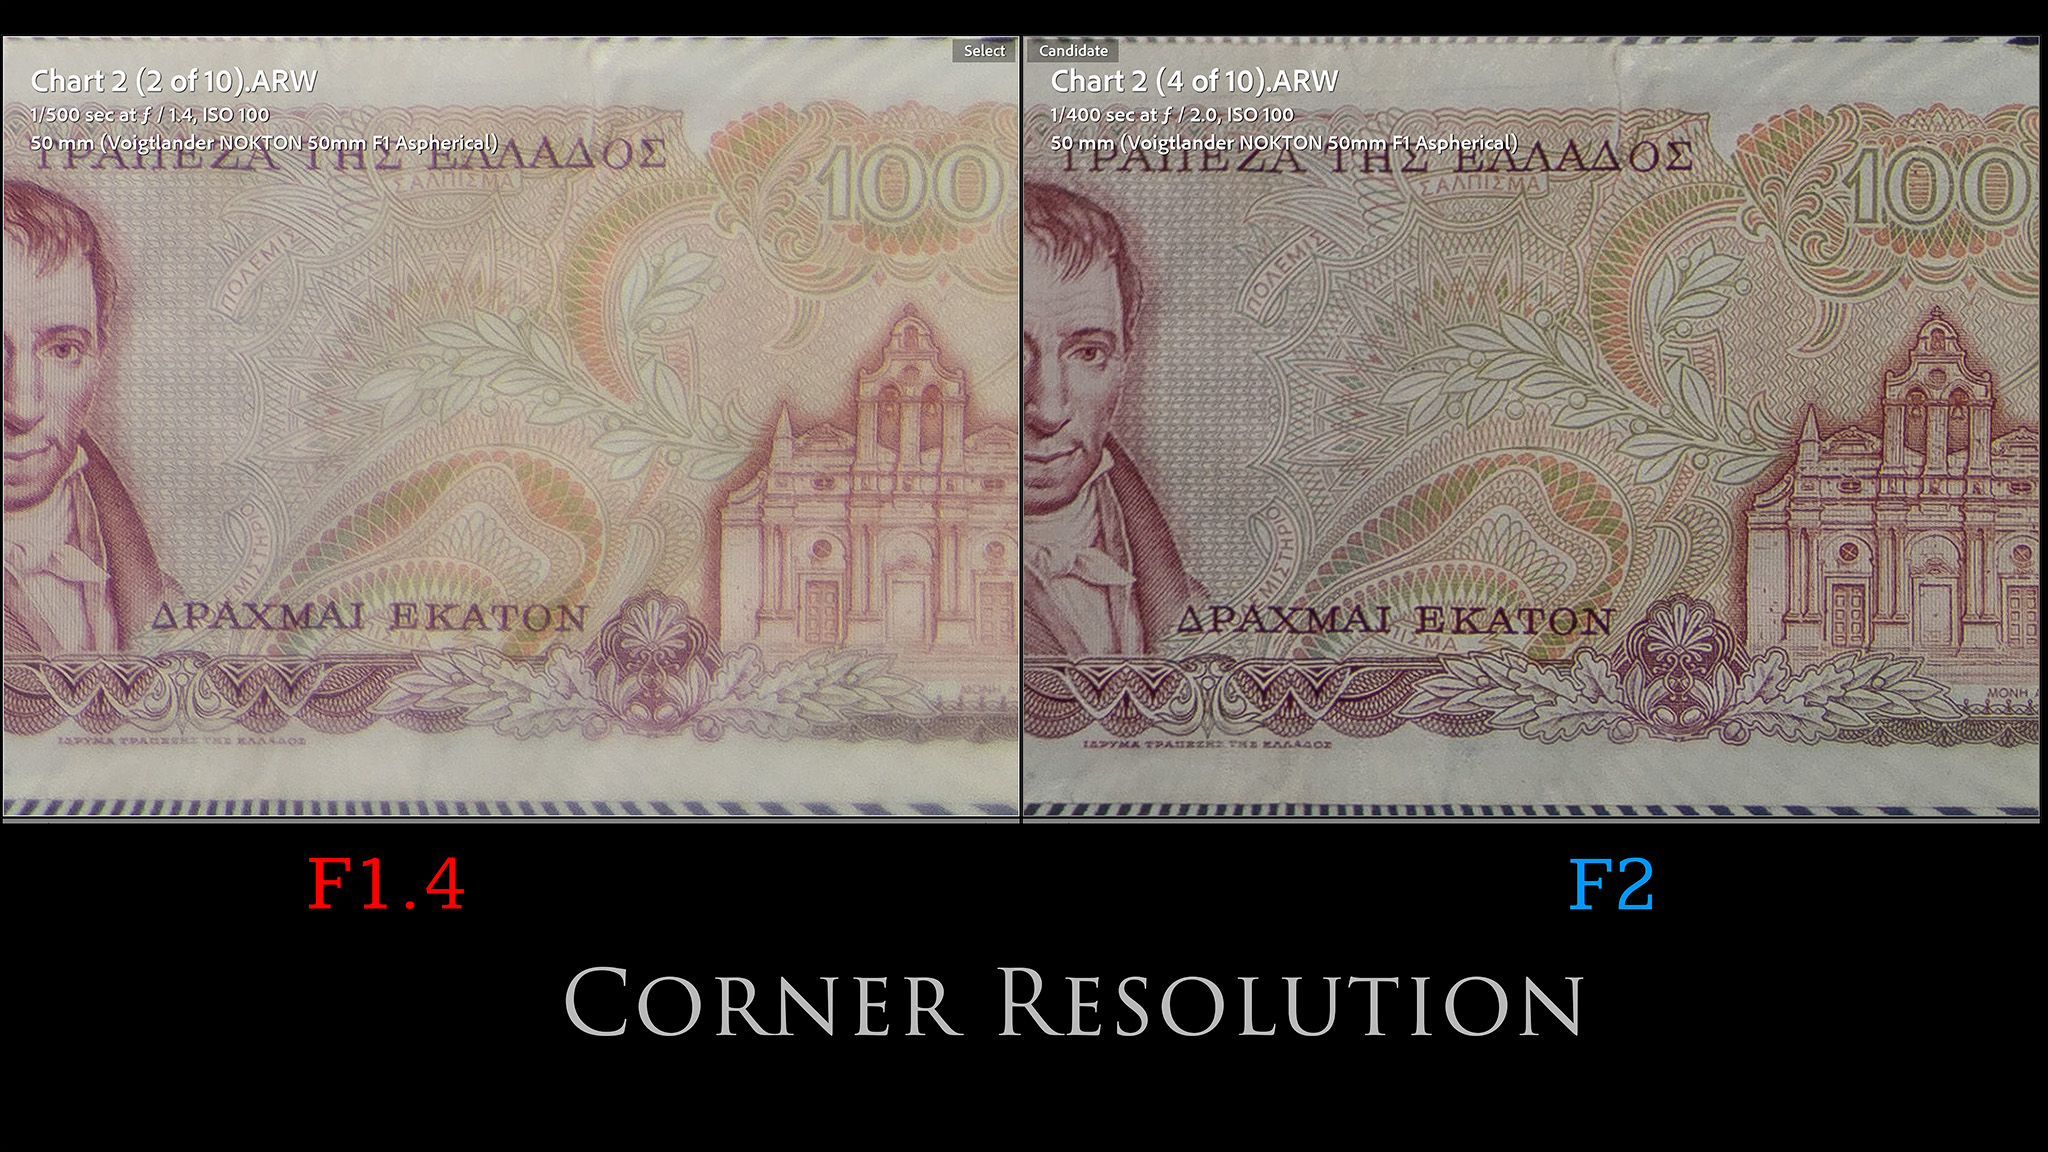
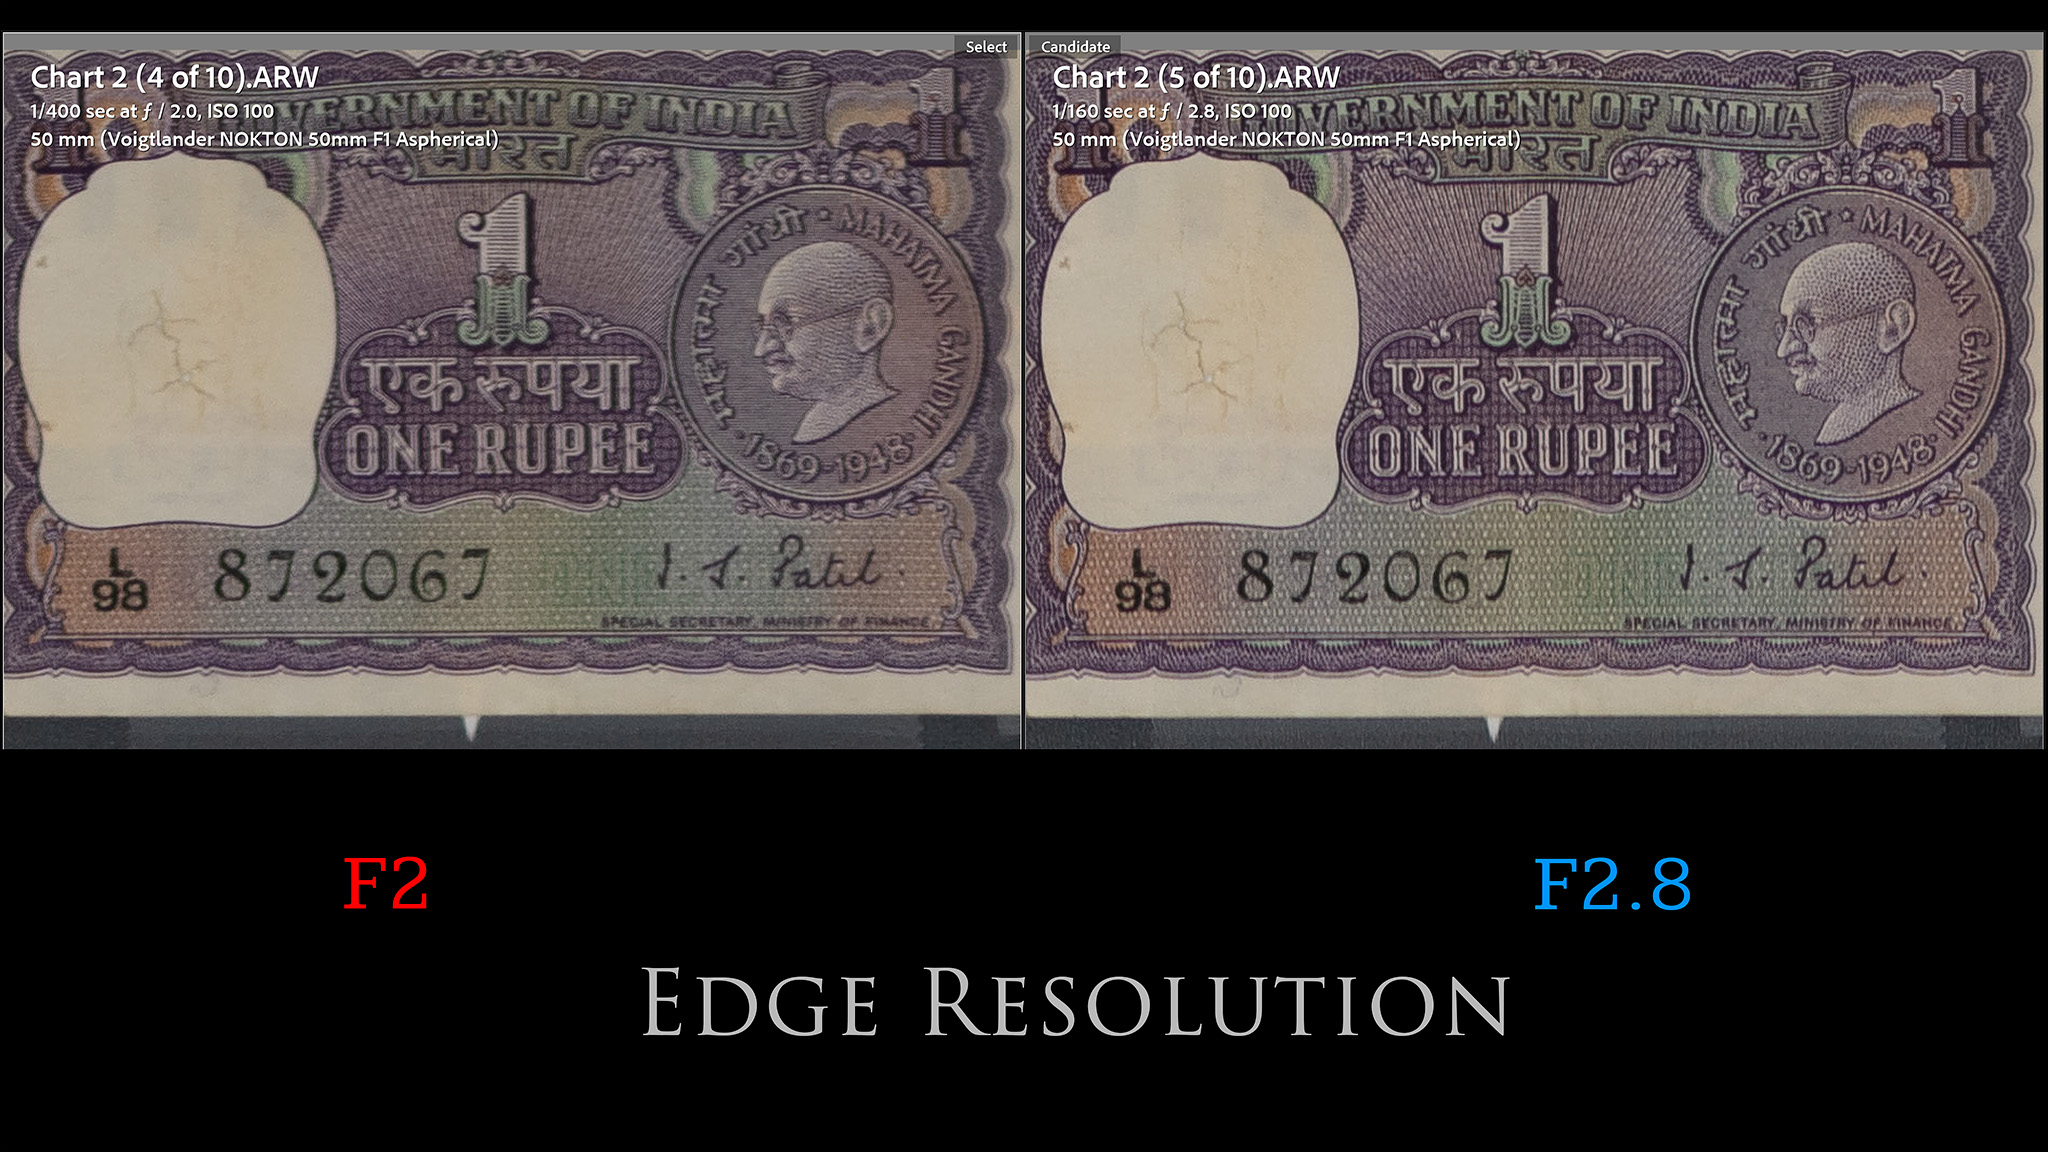
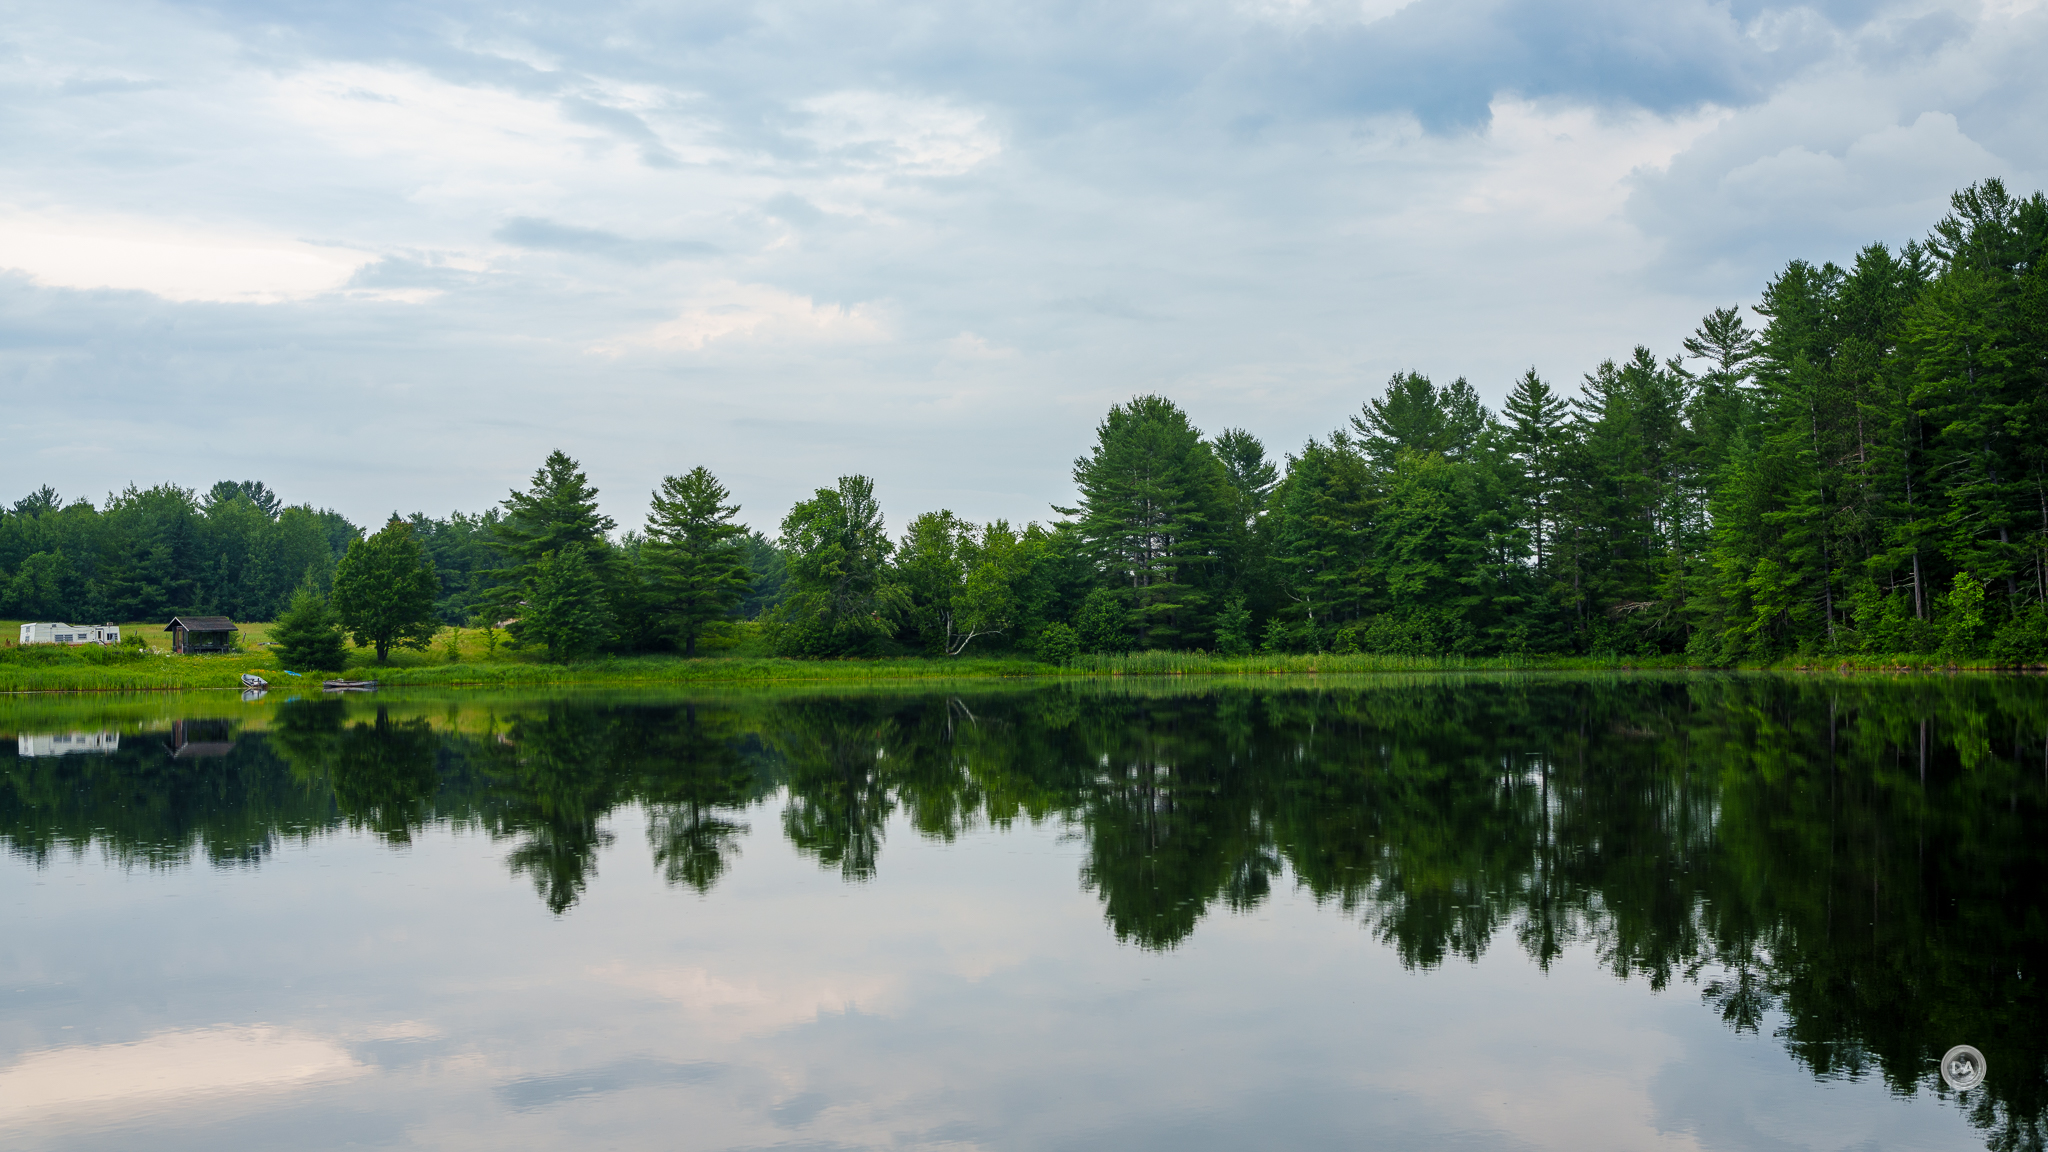

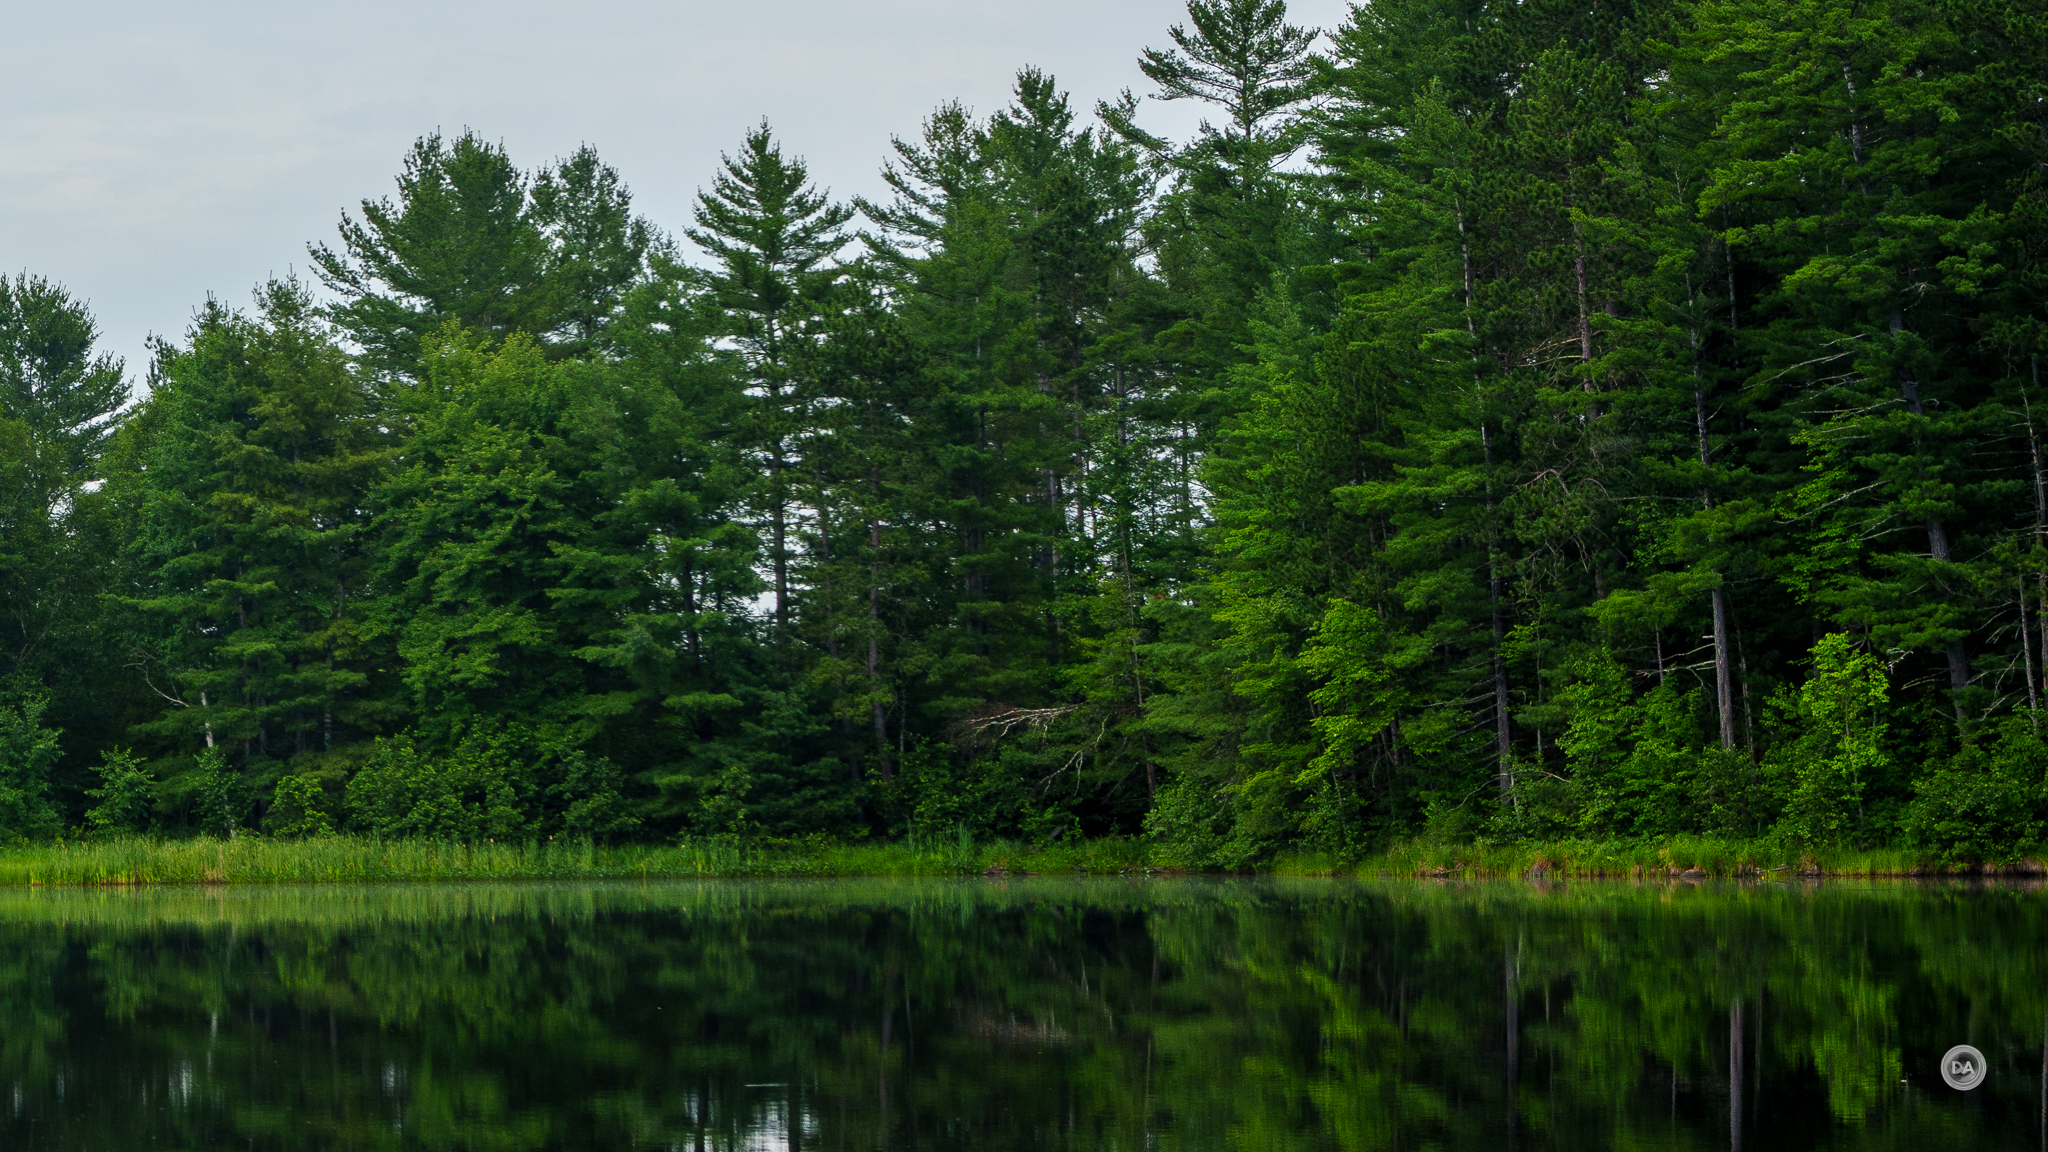
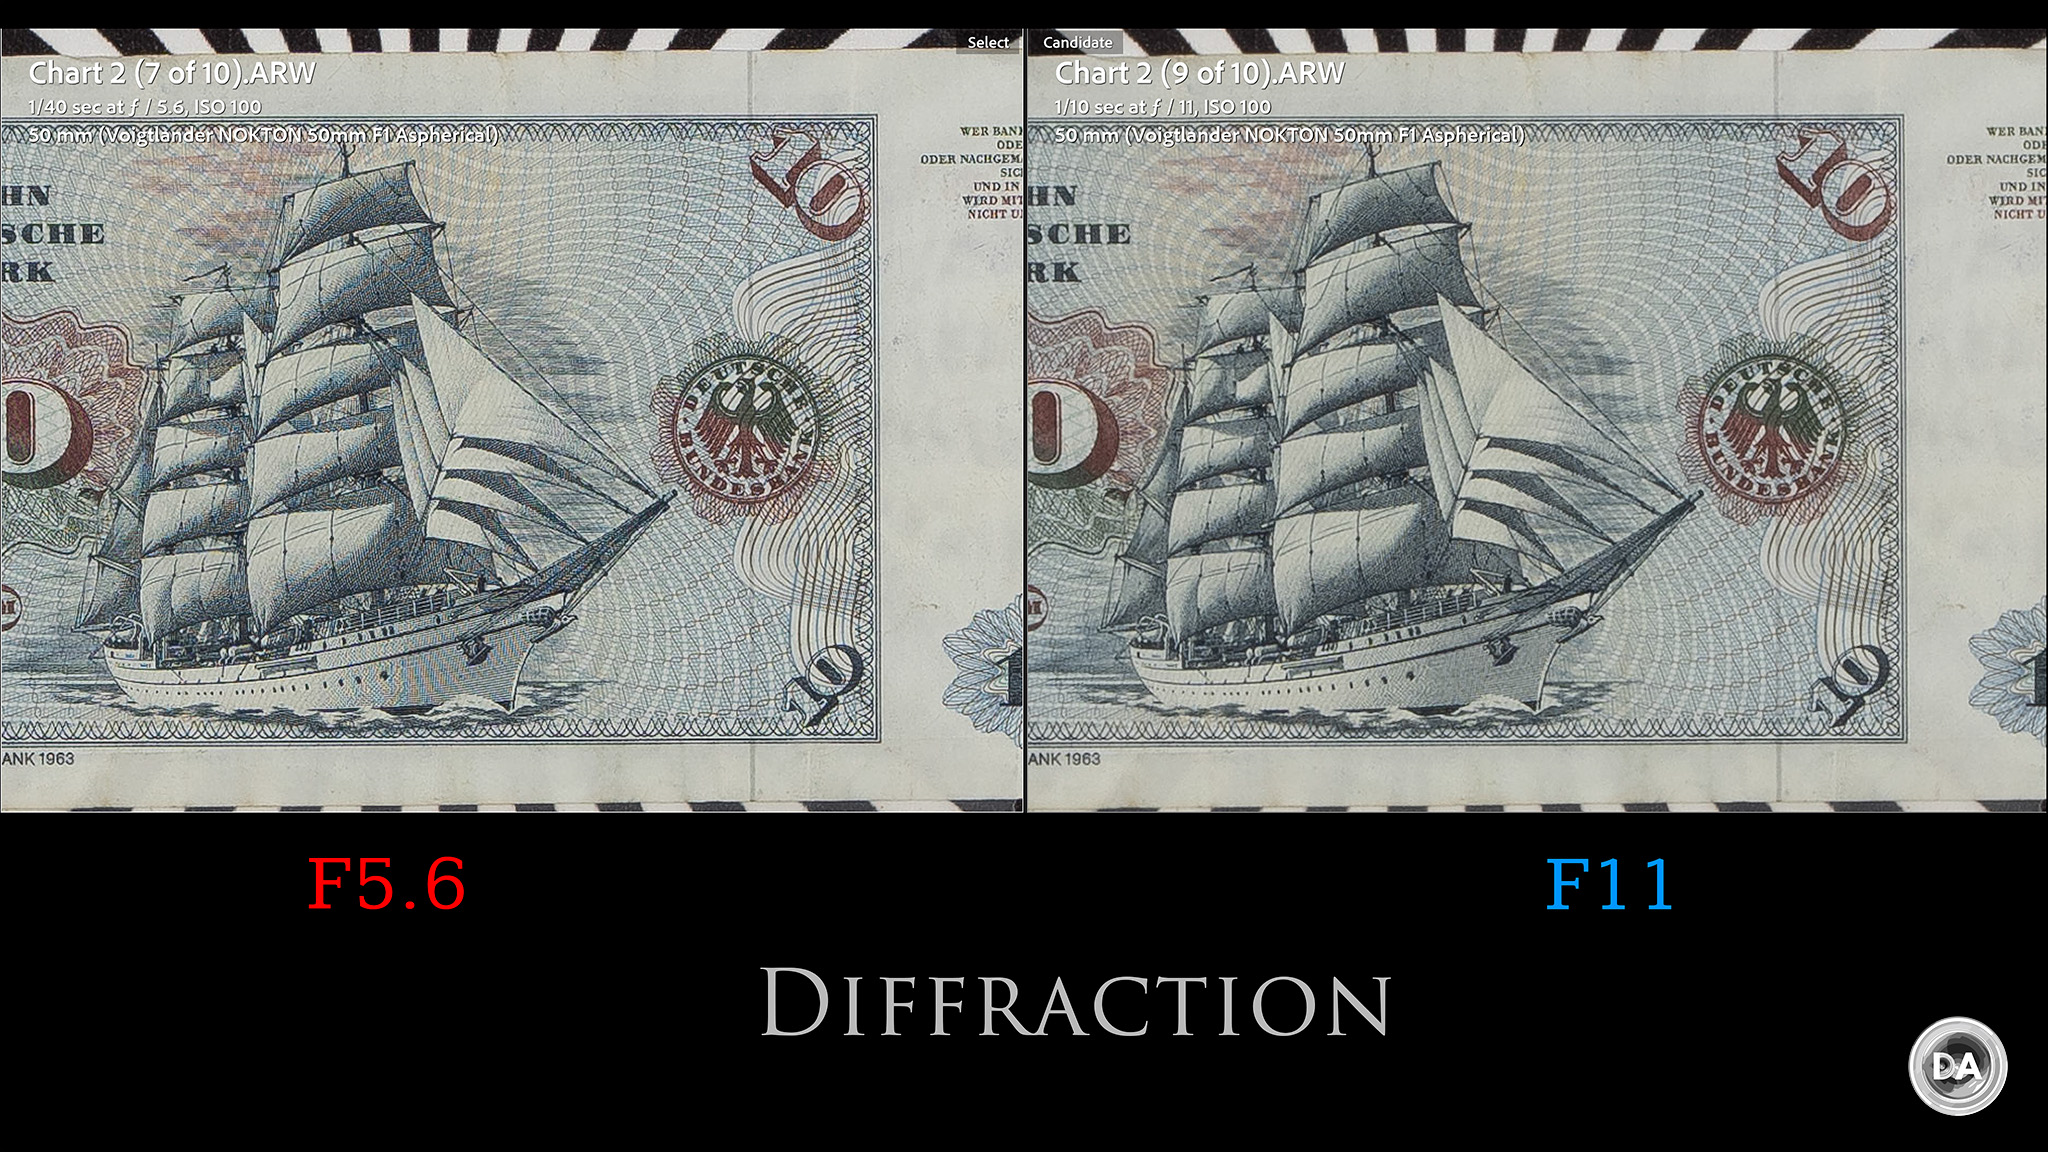

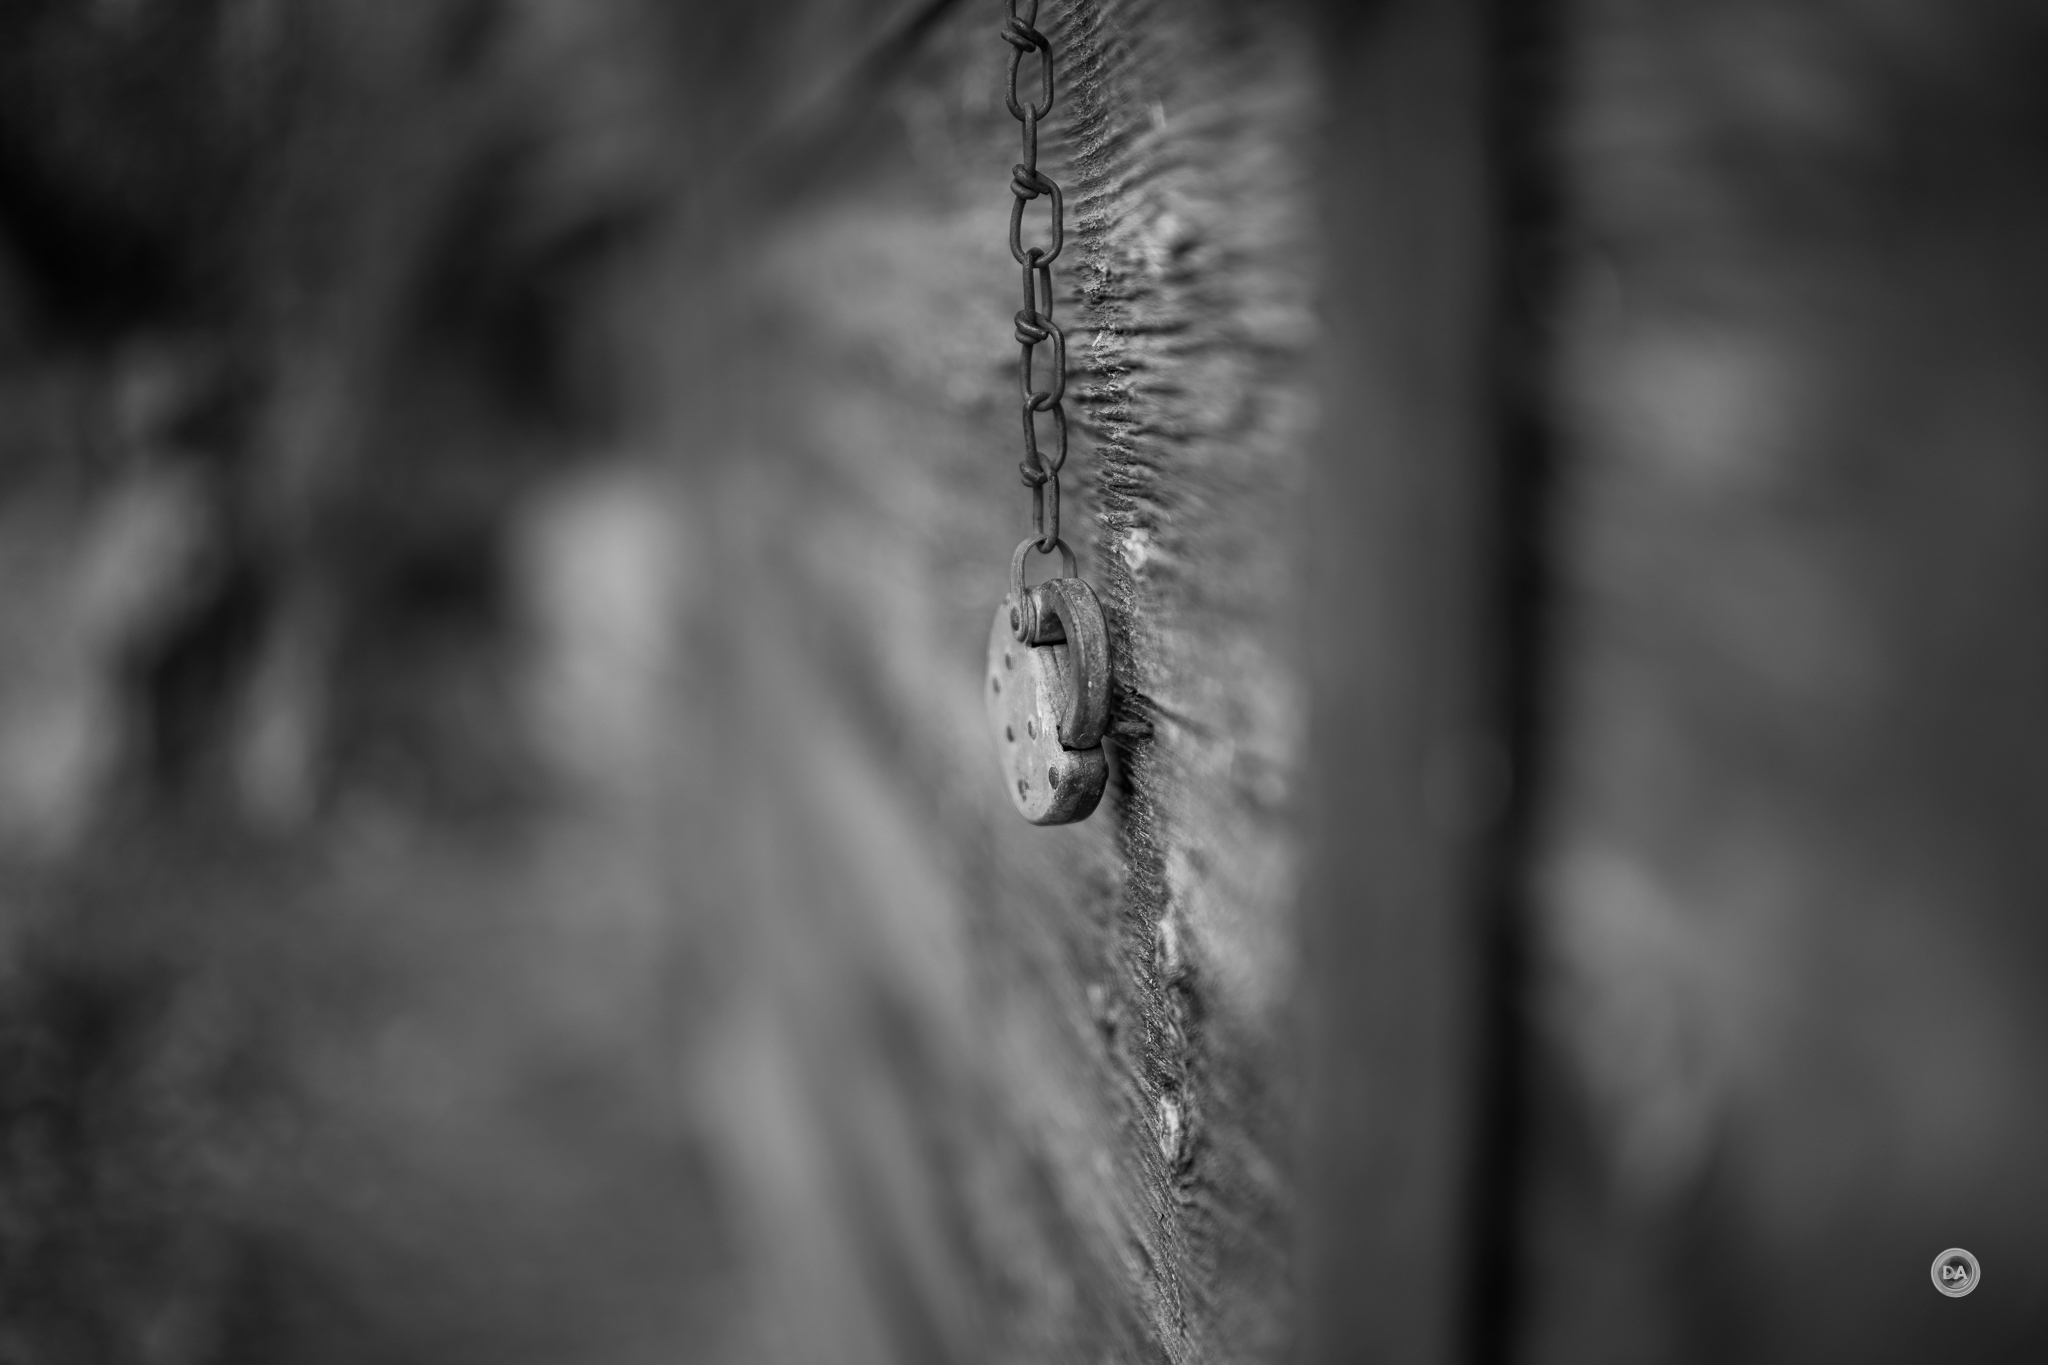
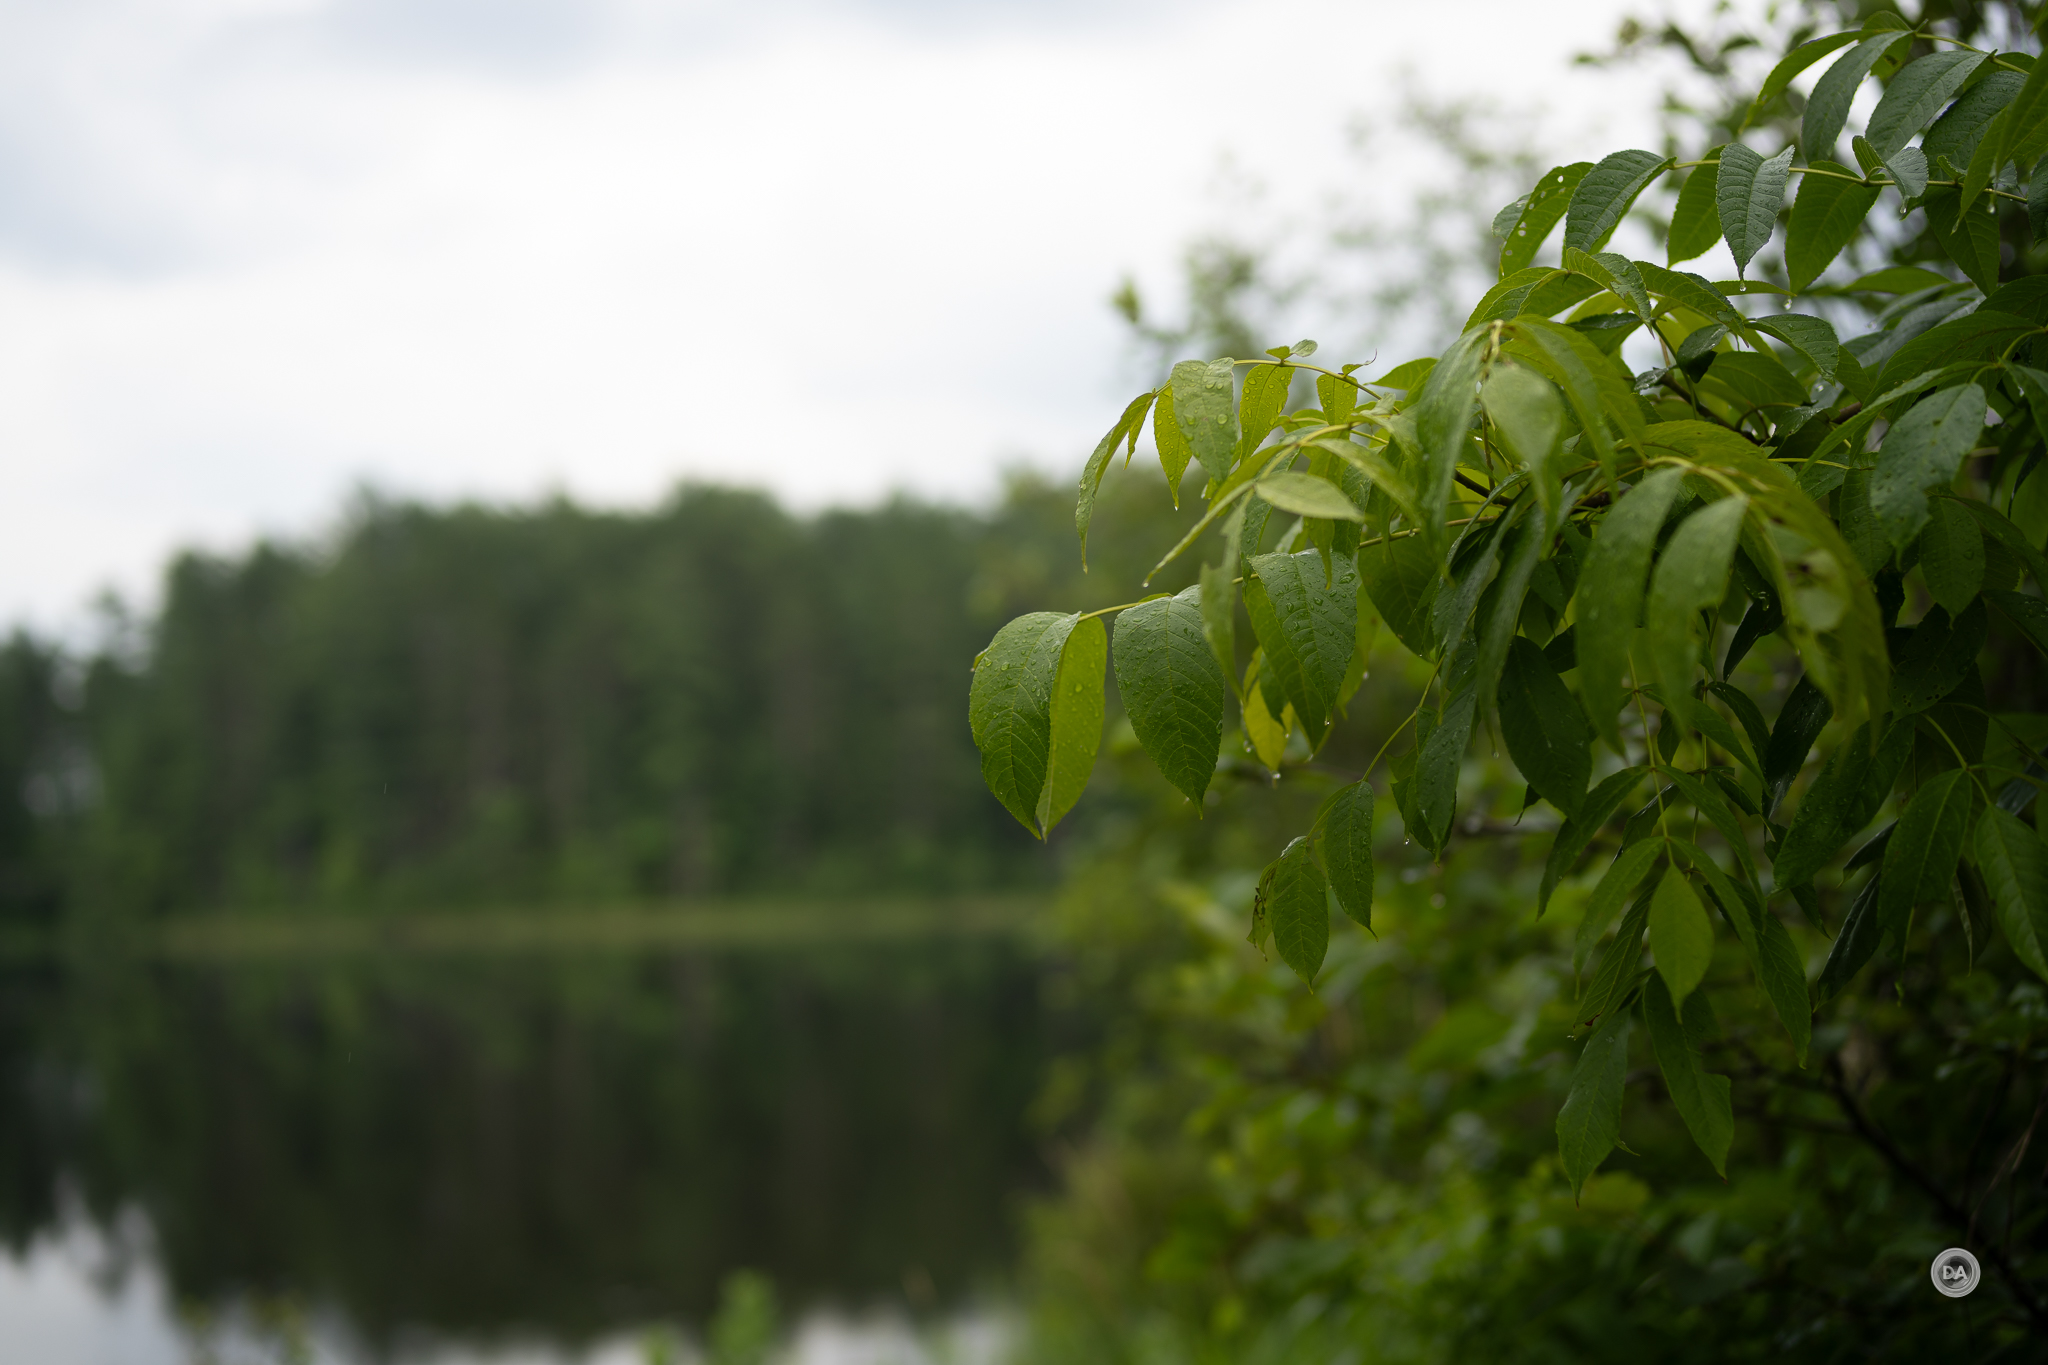
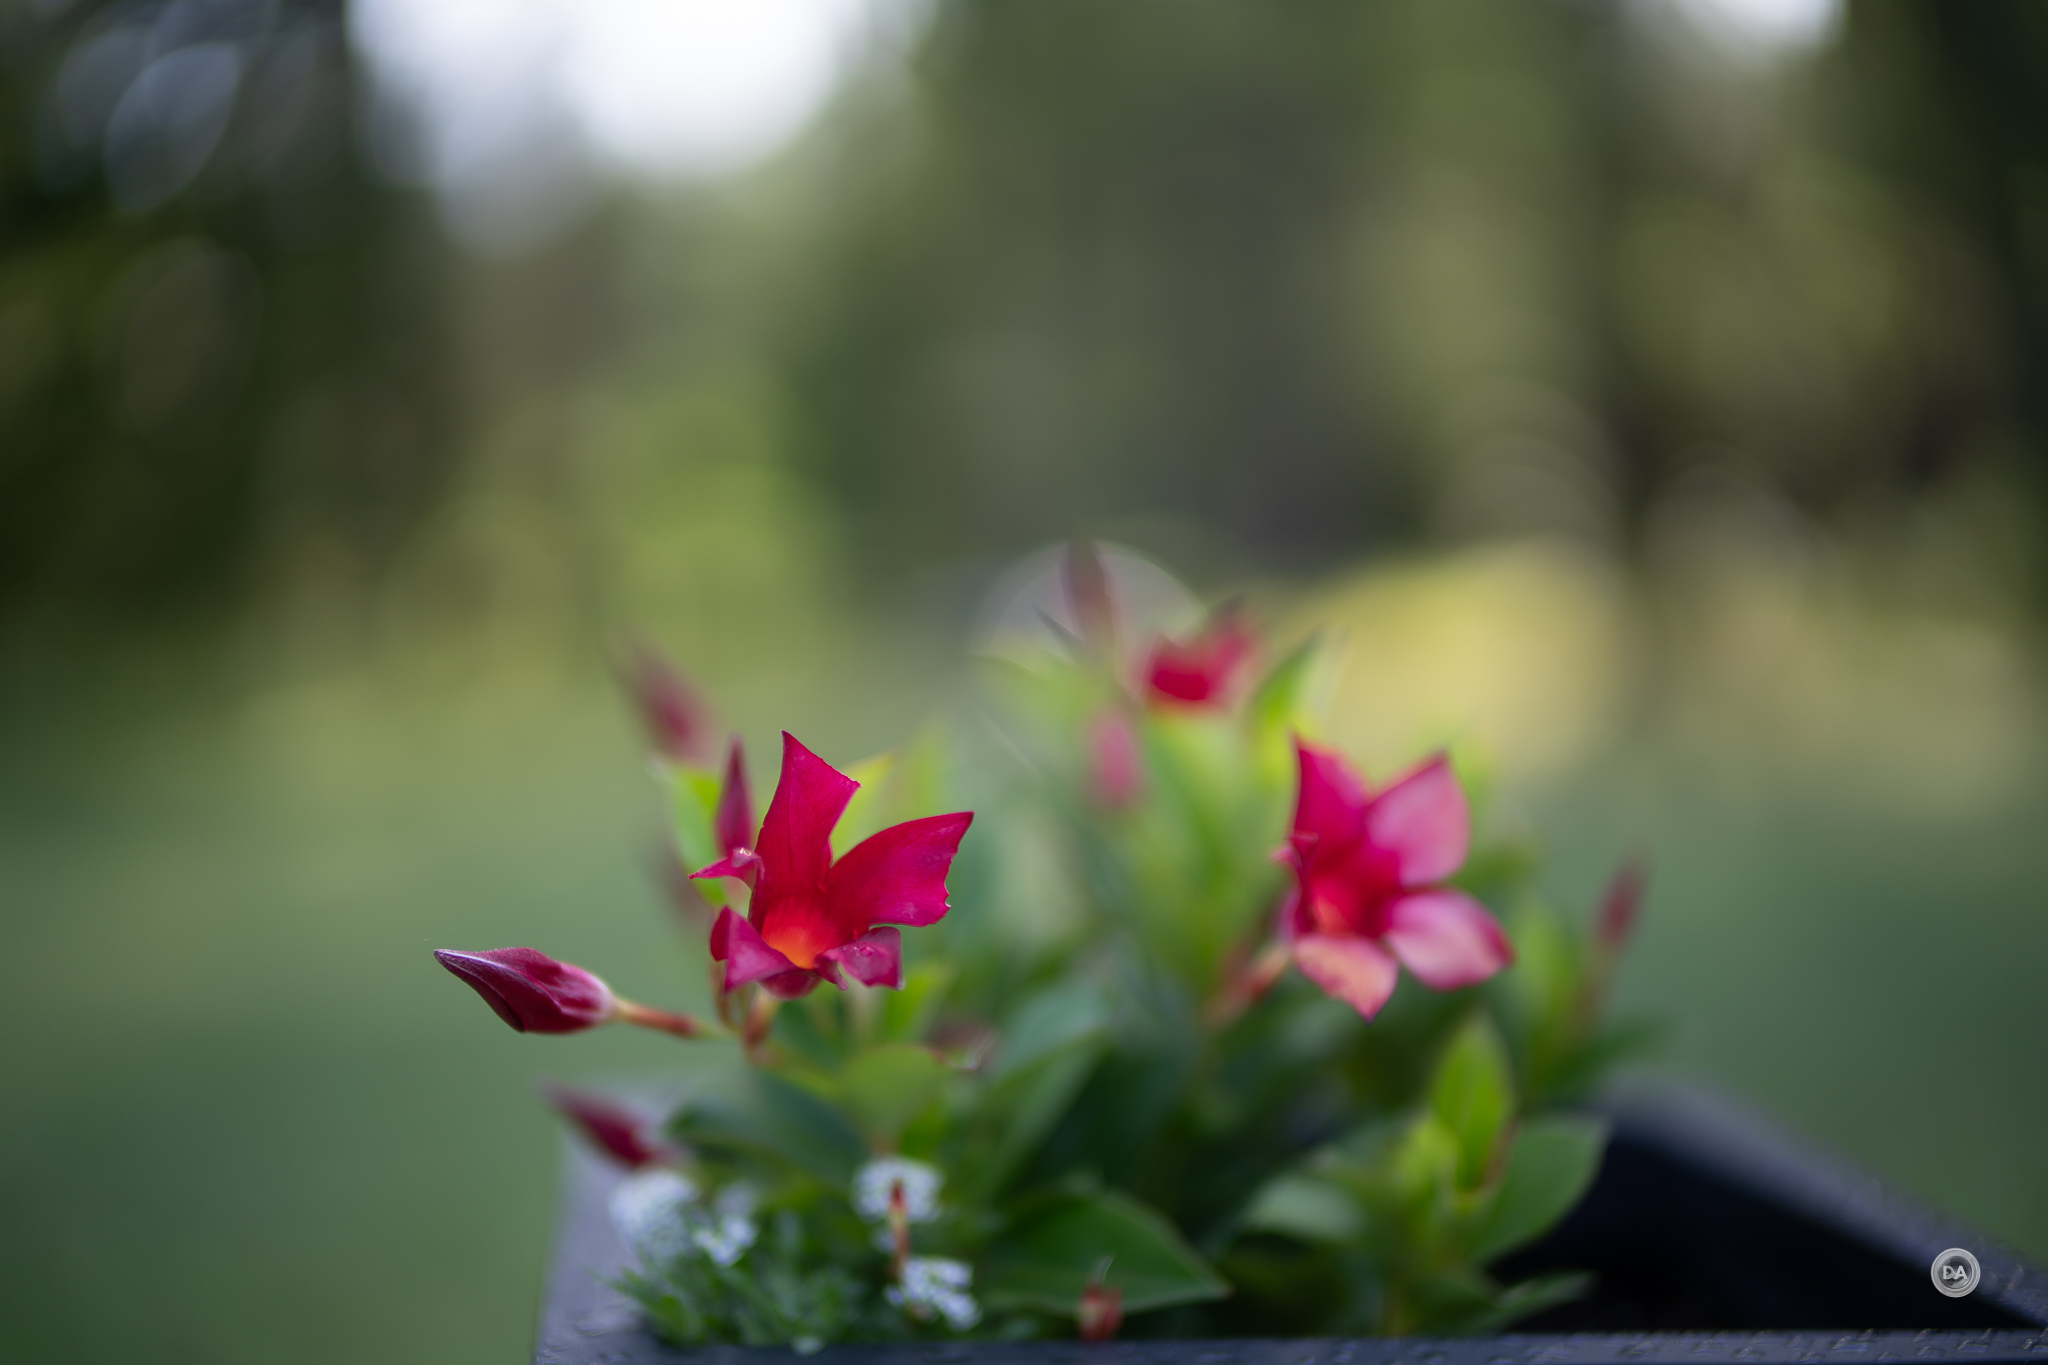


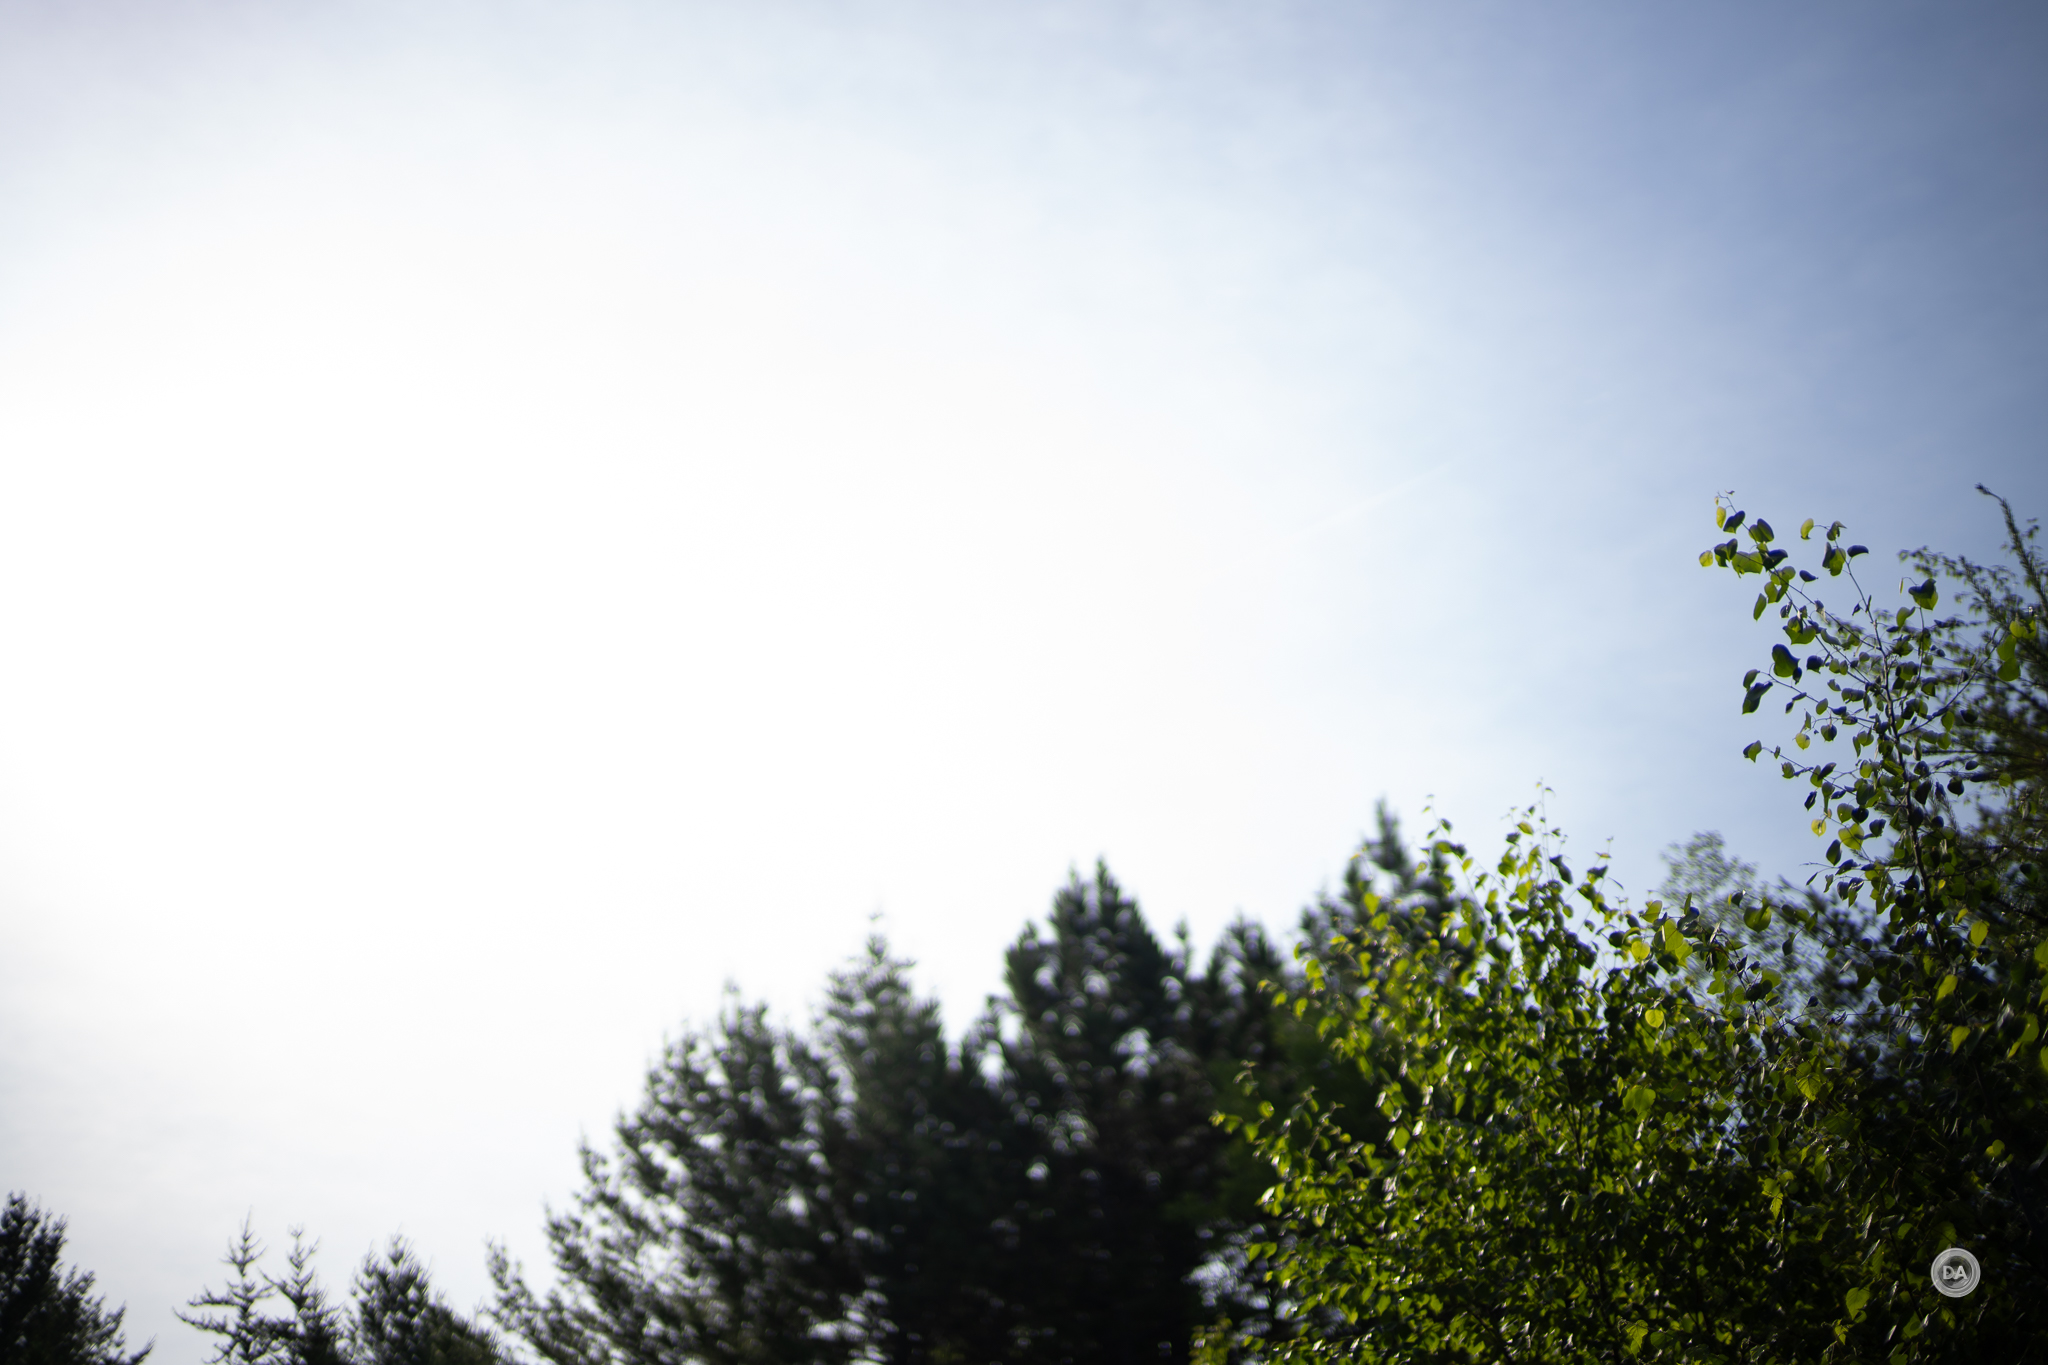
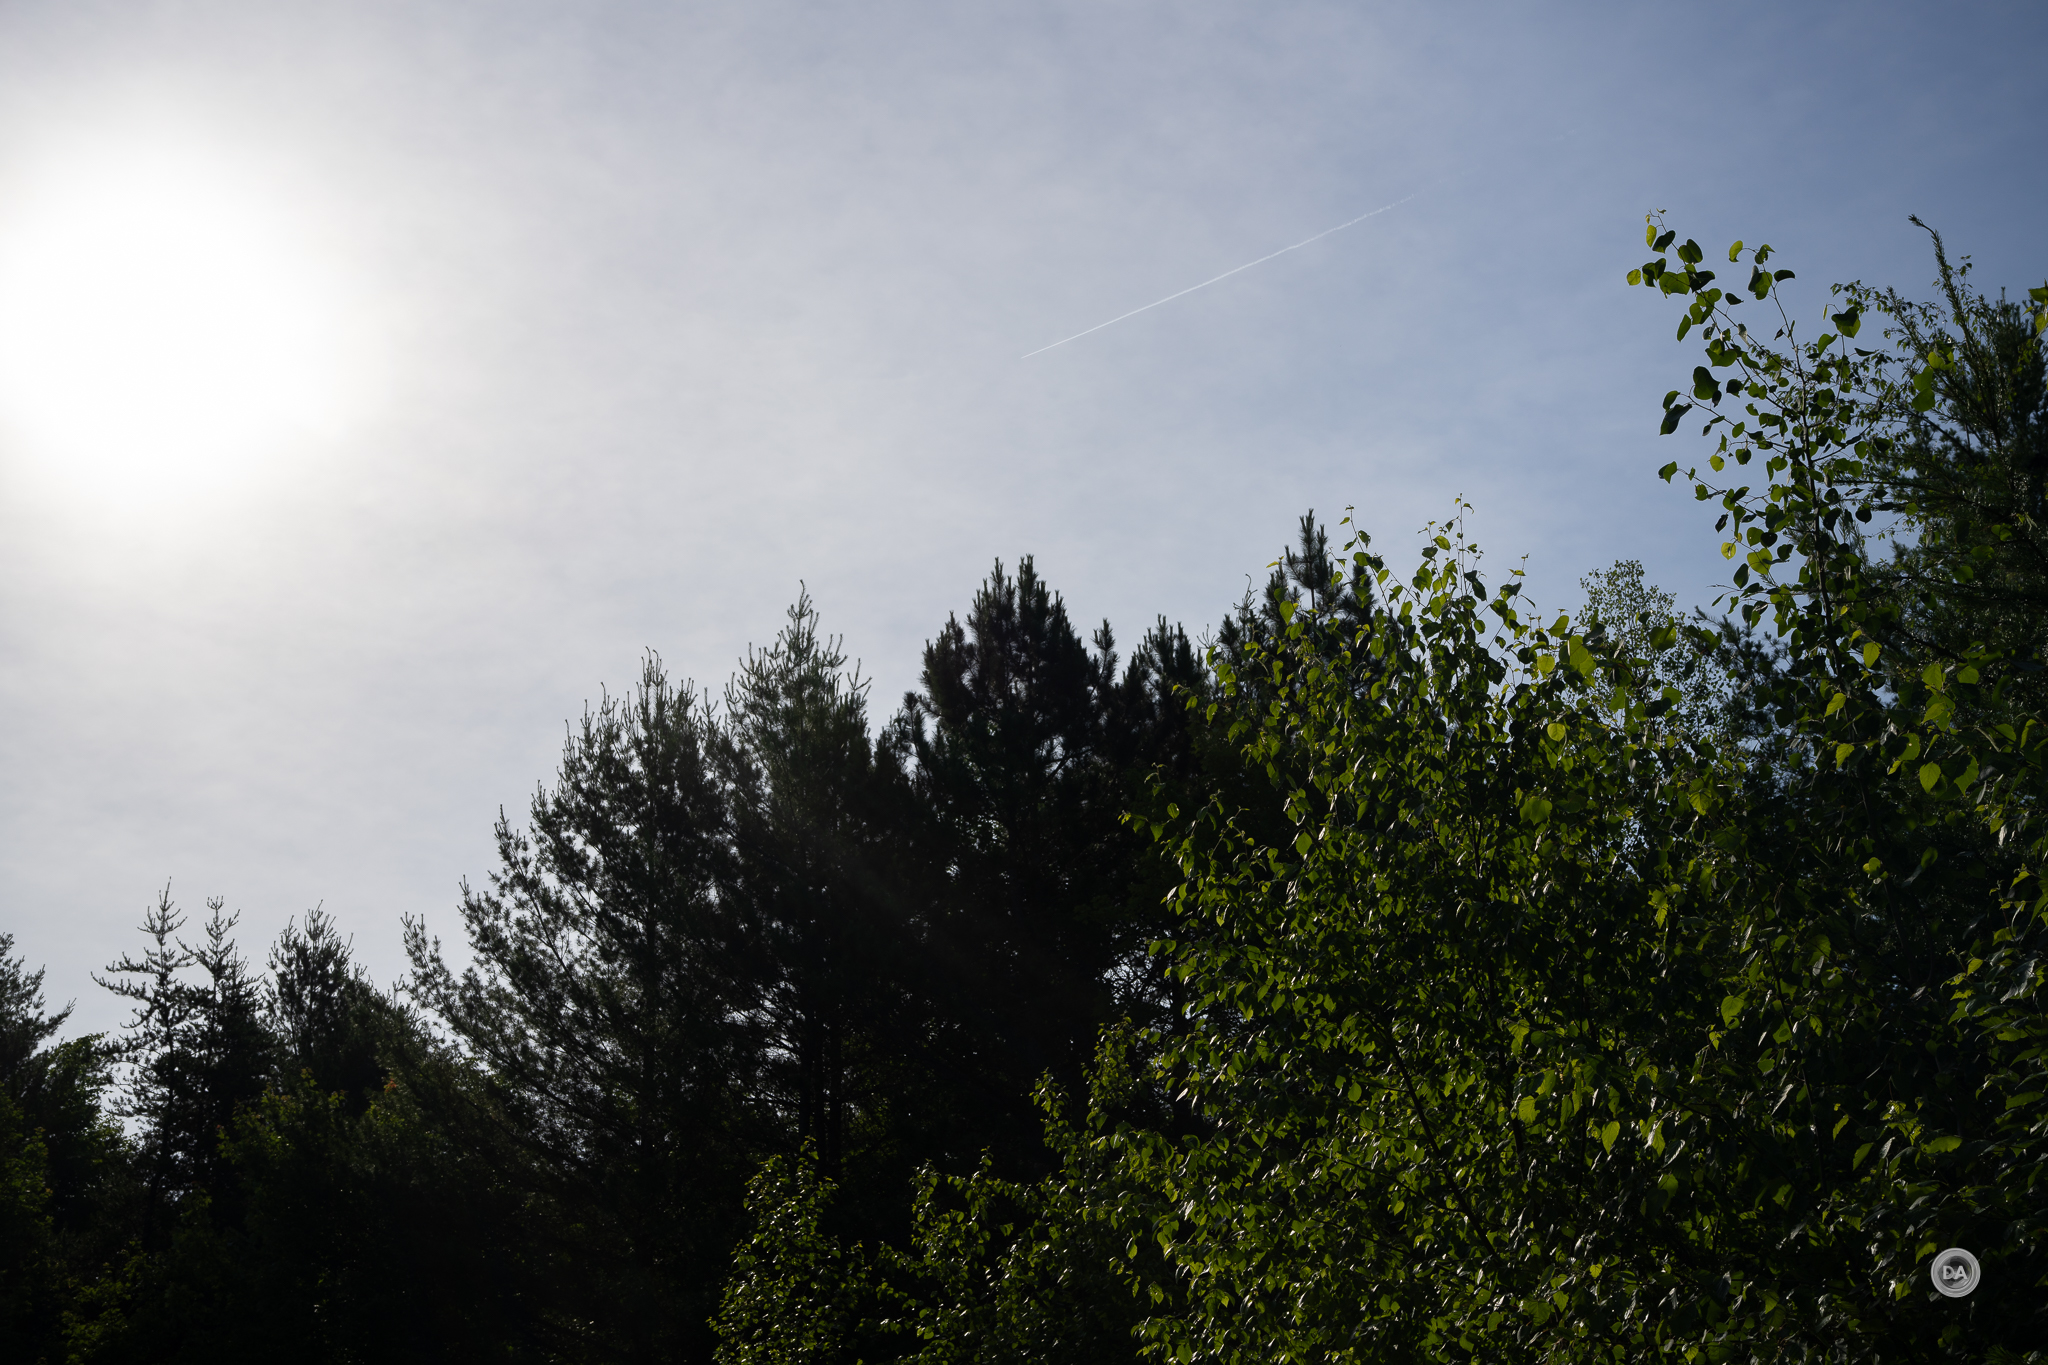

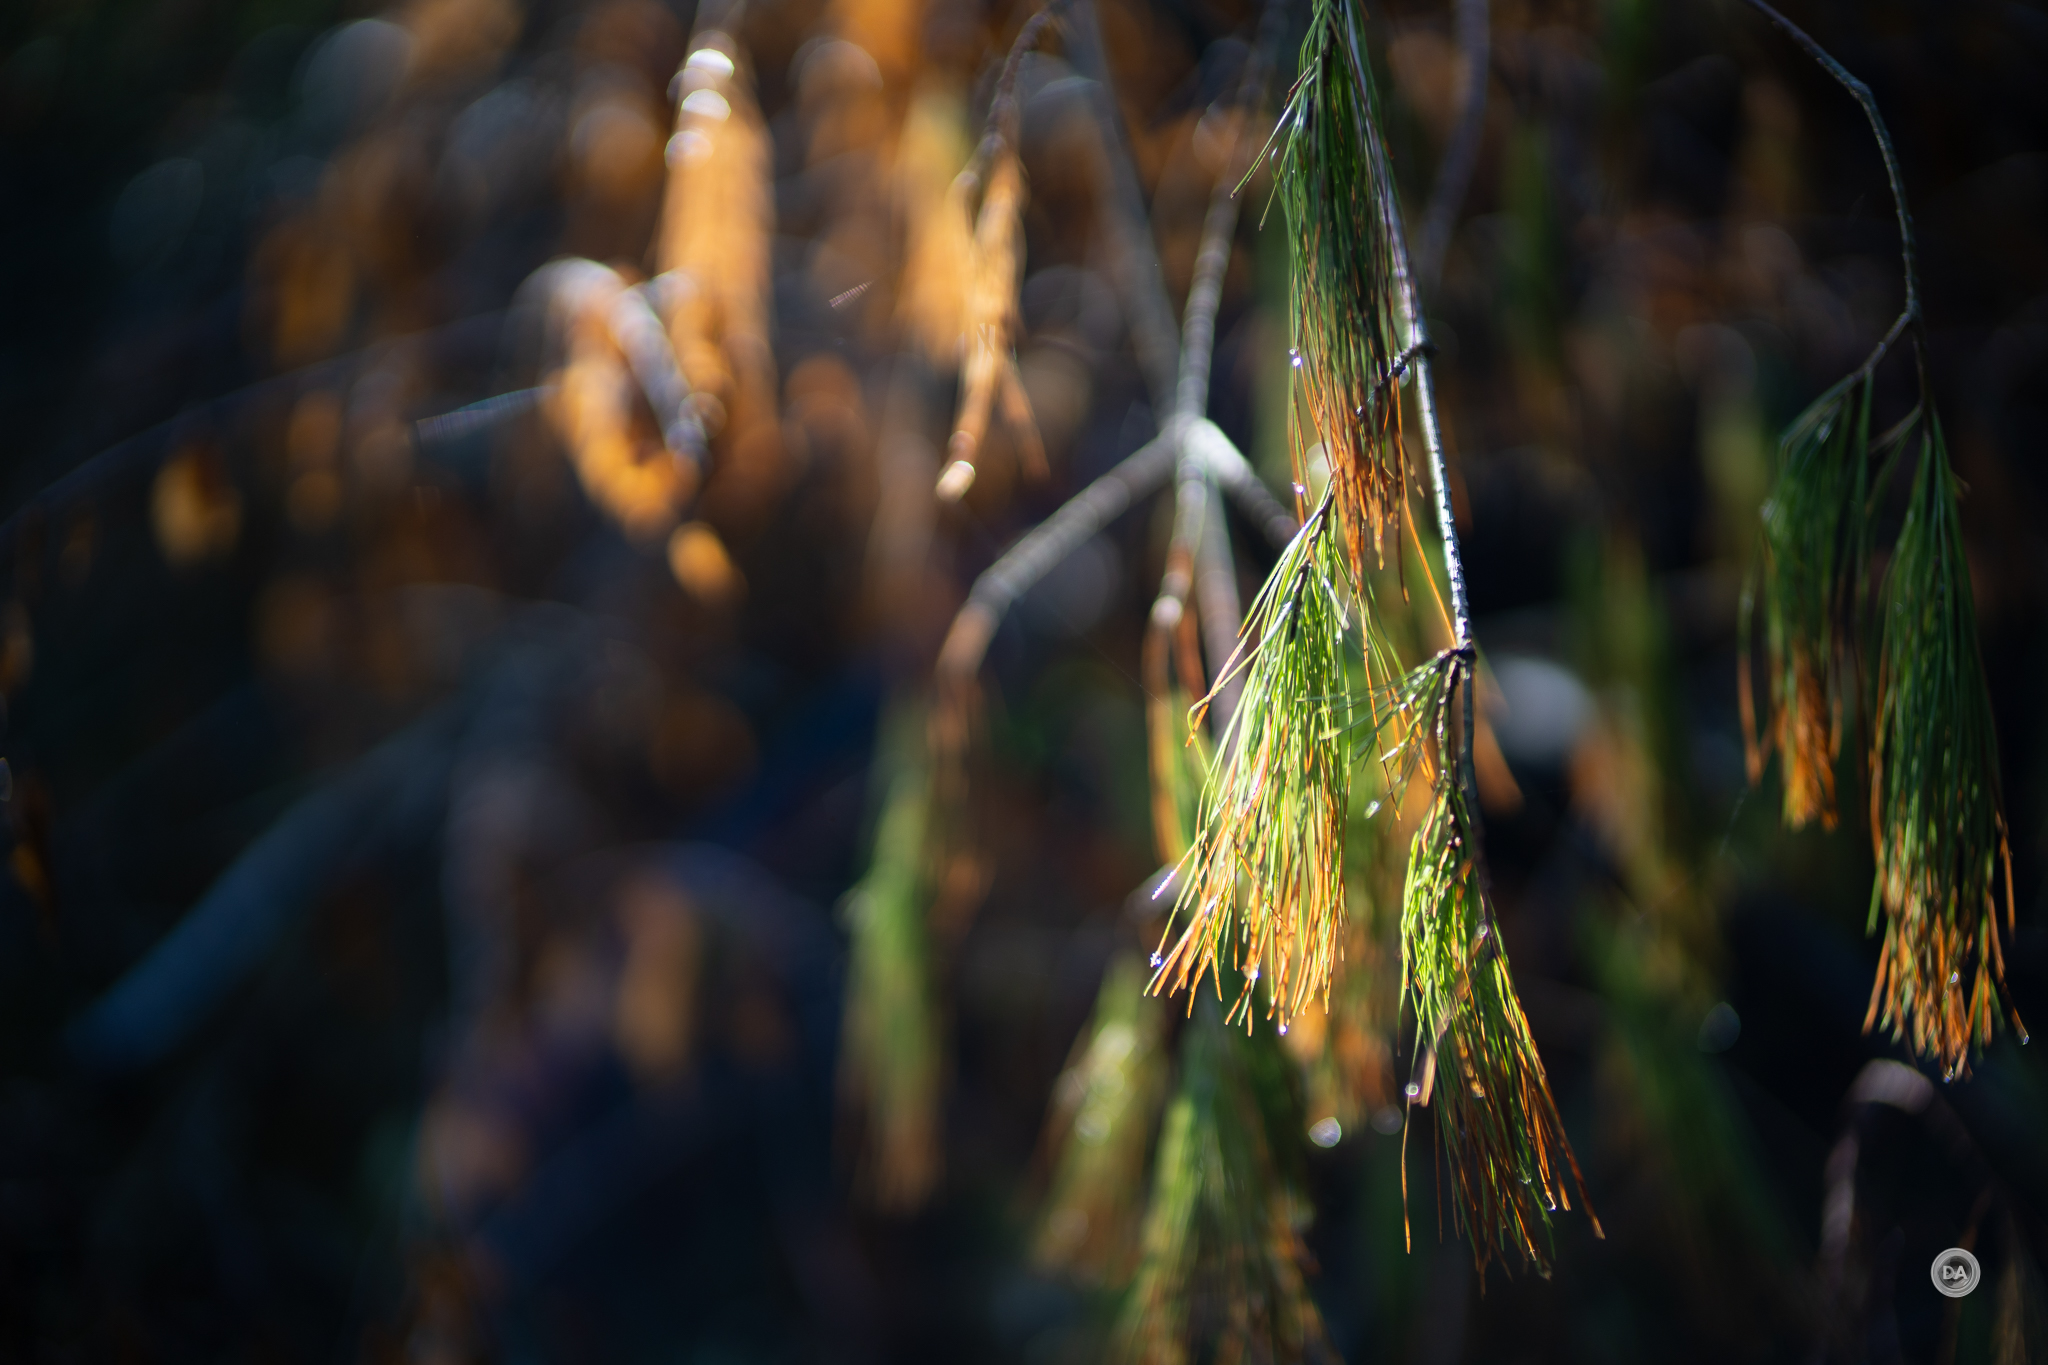

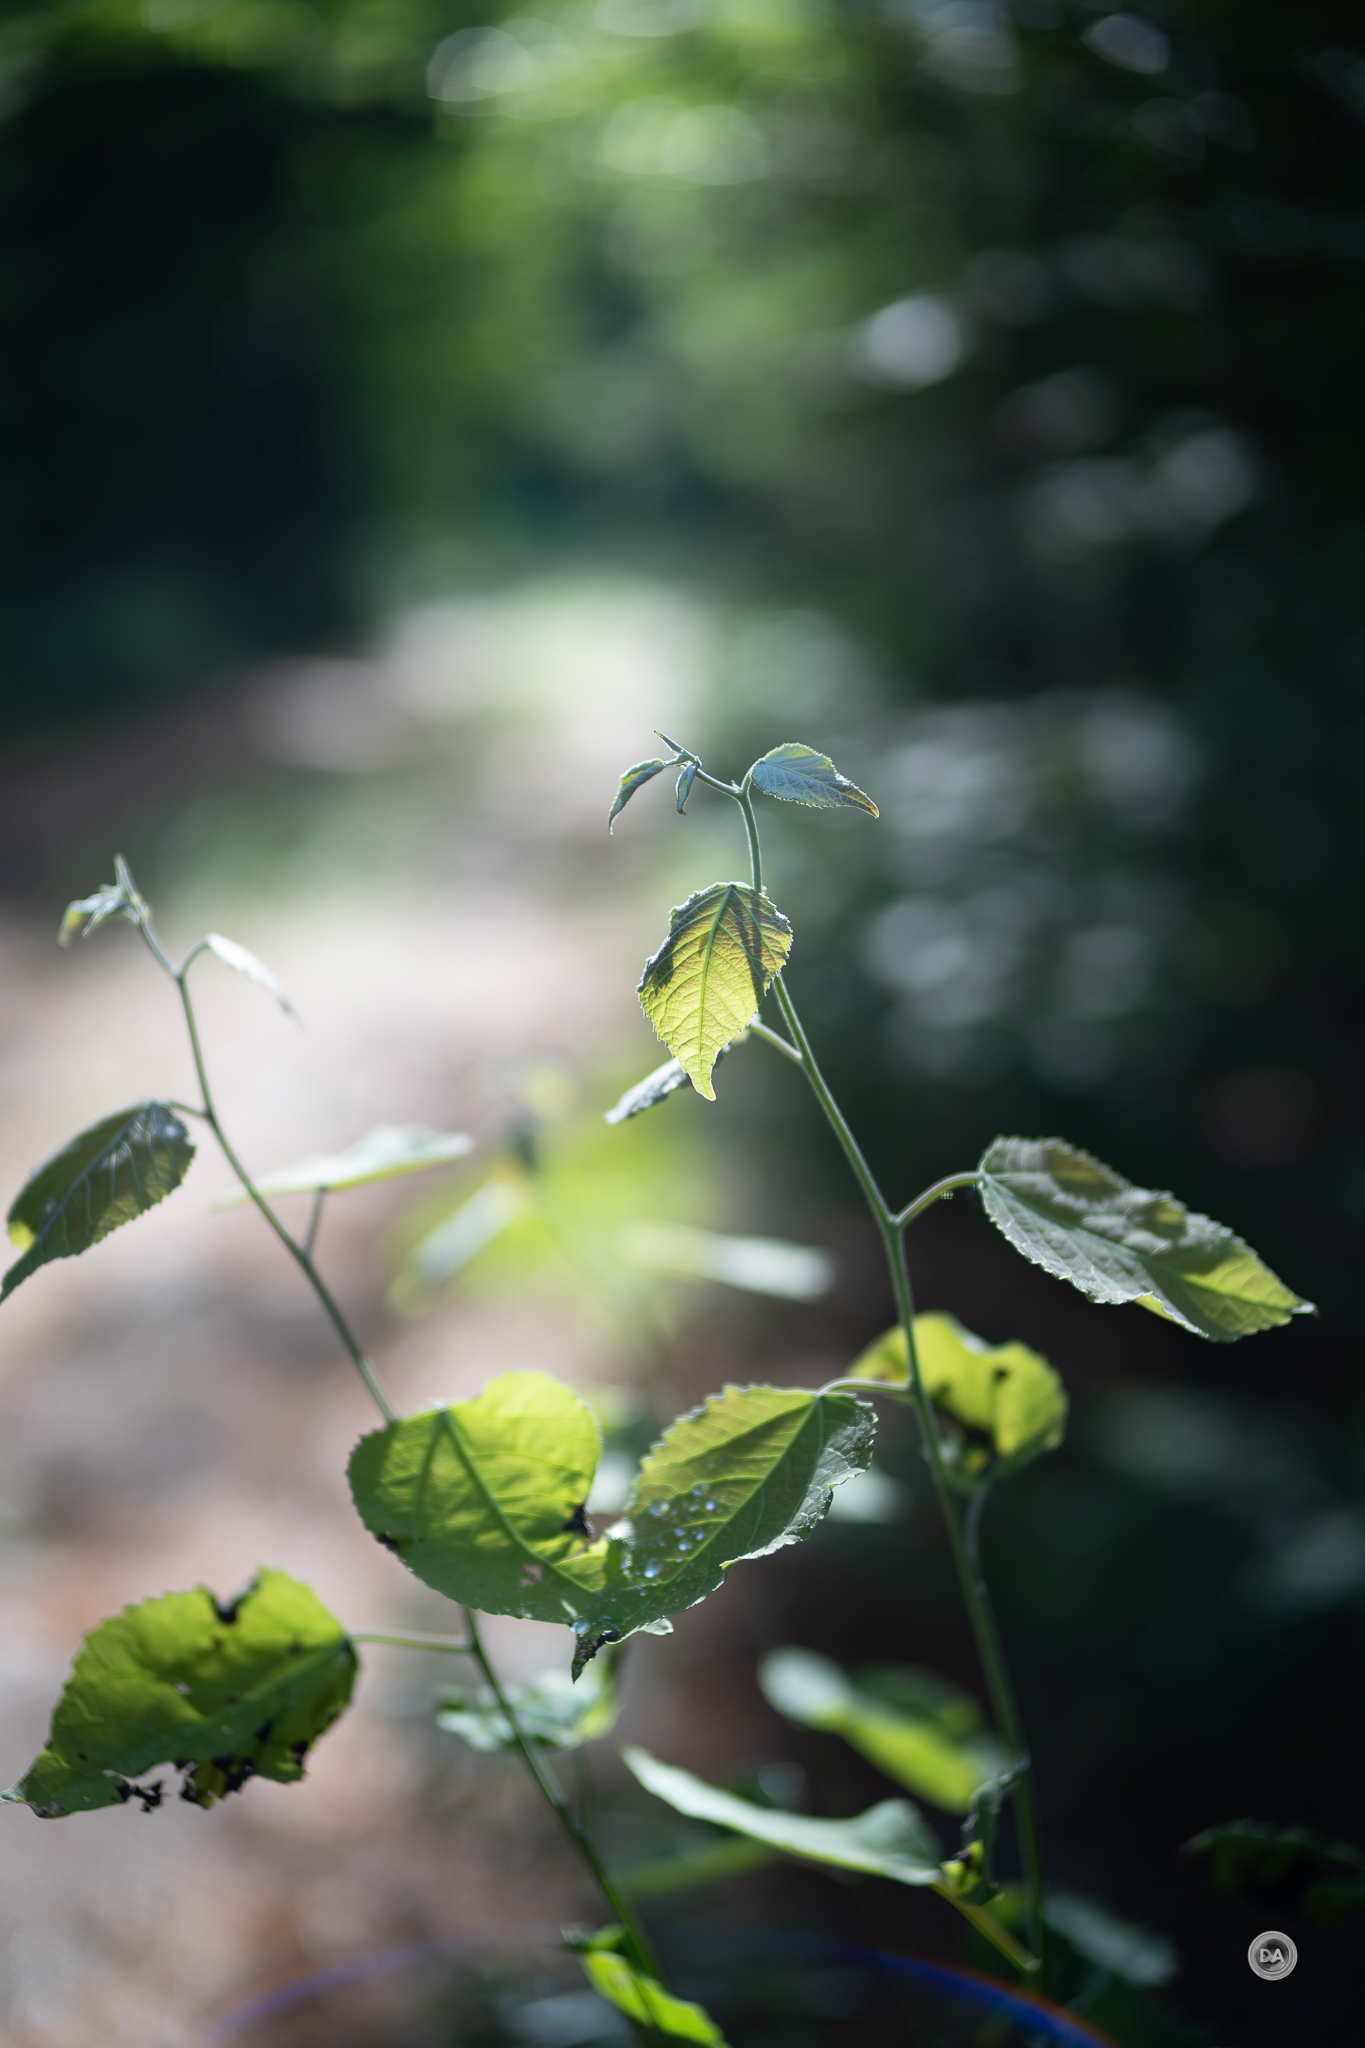

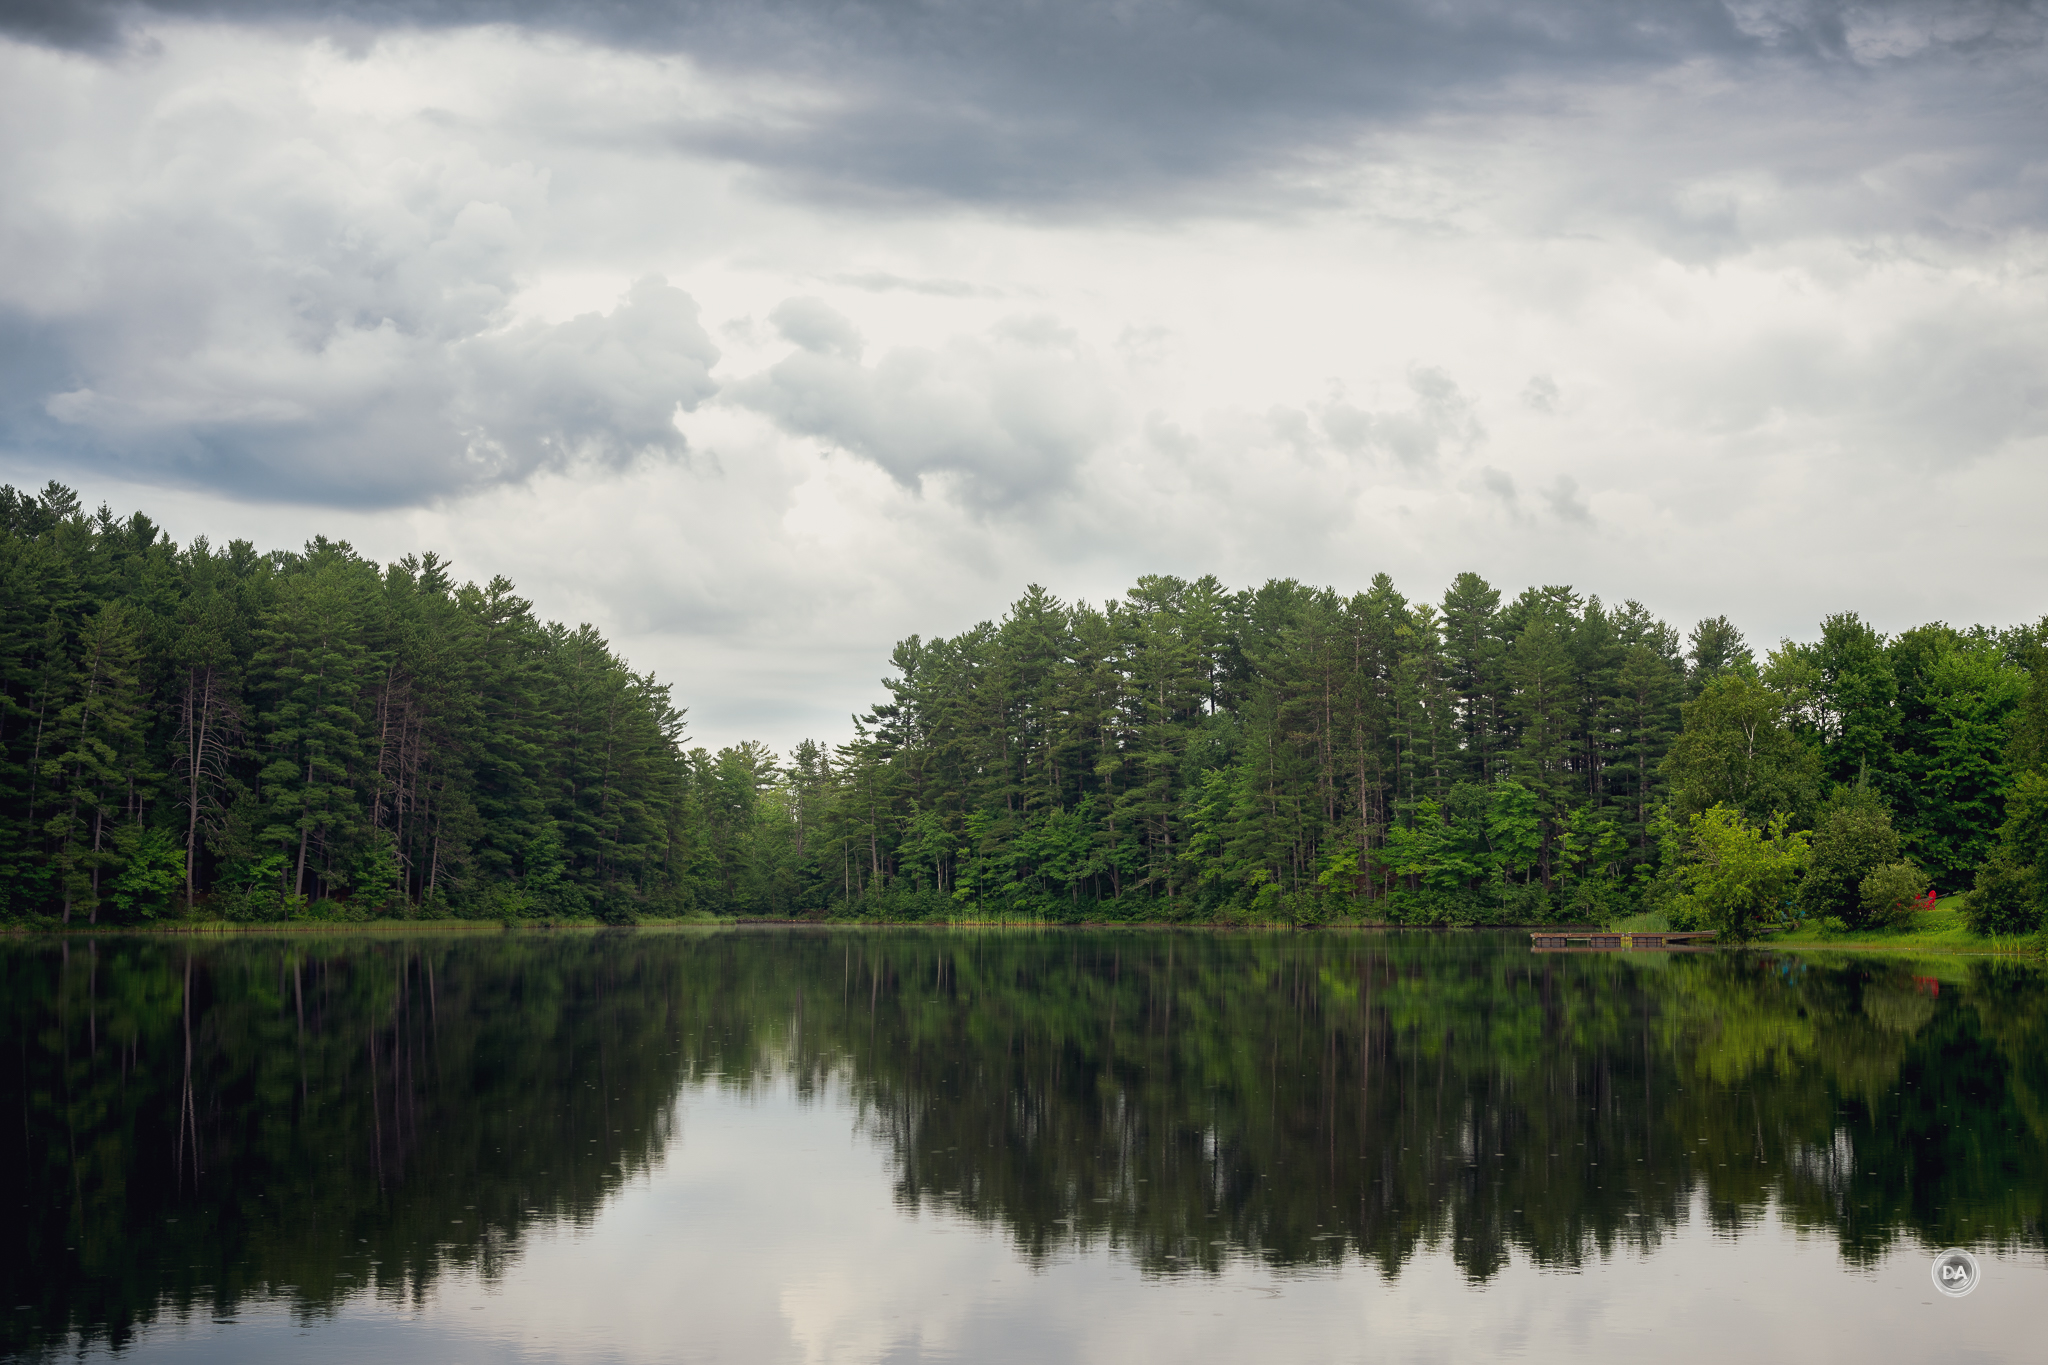


")


")


