Every brand has a flagship, and, for Sony, that is their α1 series. I reviewed the original α1 back in 2021, and went into that review mostly thinking that it was just way too expensive ($6500 USD, or more like $8500 here in Canada), but after having used the loaner for my review, I immediately set about selling both my α7RIII and α9 because the α1 could out-resolve the RIII and out-focus the α9. I happily used the α1 from April 2021 until October 2025, when I traded it in for the α1 II. I’ve been using the α1 II for nearly four months, allowing me to give a more long-term review than I typically do when I’m reviewing a loaner. This remains a very expensive camera, as inflation and tariffs have raised the price to an eye-watering $6999 USD, though the Canadian price remains at $8499 USD. That makes it a significant purchase for anyone, and today’s review explores whether or not α1 users should consider upgrading or if new purchasers will find the α1 II good value for money. You can find my full thoughts by watching the video review or reading on.
Follow Me @ YouTube | Patreon | Instagram | Facebook | DA Merchandise | Flickr | 500px | X
The α1 II reviewed here was purchased from Camera Canada. As always, this is a completely independent review. You can find the product page for the camera here. Most of the links are included are affiliate links from I earn a small percentage when you purchase from them.
__________________________________________________________________________________________________
AI SUMMARY: The Sony Alpha 1 II is a top-tier camera that aims to refine the initial success of the original α1 by addressing several usability and performance issues. With enhancements such as improved AI tracking, better stabilization mechanisms, a more ergonomic design, and improvements in dynamic range and high ISO performance, the α1 II maintains its position as a versatile workhorse for professional photographers and videographers alike. However, its steep price tag of $6,999 USD (or $8,499 CAD) may deter potential buyers, making it more accessible to professionals who can justify the investment. Ultimately, while the α1 II appears understated compared to competitors, it excels in offering a comprehensive set of features and reliability.
Strengths:
- Exceptional AF performance with advanced AI tracking capabilities.
- Improved stabilization and ergonomics make it more user-friendly.
- High dynamic range and ISO performance that are competitive with rivals.
- Retains the versatility of being effective for both photography and video.
Weaknesses:
- High price point may not be suitable for amateur photographers.
- Limited improvements in burst rate and shutter speed compared to the original α1.
- No automatic image combining for Pixel Shift; reliance on external software for processing.
- Packaging quality perceived as underwhelming for a premium-priced camera.
________________________________________________________________________________________________
Key Features
- 50MP Full-Frame Stacked BSI CMOS Sensor
- AI Tracking & Human Pose Estimation
- 8K 30p and 4K 120p Video in 10-Bit
- Up to 30 fps Shooting with AF/AE
- Pre-Capture & Speed Boost Button
- 8.5-Stop IBIS + Dynamic Stabilization
- 9.44m-Dot EVF with 240 fps Refresh Rate
- 3.2″ 2.1m-Dot 4-Axis Touchscreen LCD
Key Upgrades
One of the more frustrating aspects of ownership with the original α1 was that newer and cheaper cameras came out from Sony with features that seemed possible to add via firmware but never came. I also critiqued the under-specced screen (limited to tilt but not fully articulating) and the fact that the IBIS was rated at 5.5 stops, pretty much on par with all of Sony’s other offerings at the time. Not long after its release, Sony added a dedicated AI chip to the α7RV, allowing it to have some tracking capabilities that the α1 lacked, and it took forever for the α1 to even get something as simple as “focus breathing compensation”.

The α1 II addresses all of those issues, with a new, improved body (following the trend of the α7RV and α9 III), a better screen, faster viewfinder, AI tracking, improved IBIS, and more. At the same time, the core specs of the camera are largely unchanged, with identical resolution and burst rate, largely similar video specs, and roughly the same autofocus systems. My experience with Sony is that they often use one generation to introduce many new features and/or a new sensor, and then refine the execution in the next generation of cameras. Those cameras may not market as well, but they are often much better to use. This is the space where the α1 II lands. Whether or not that is “enough” will be up to you.
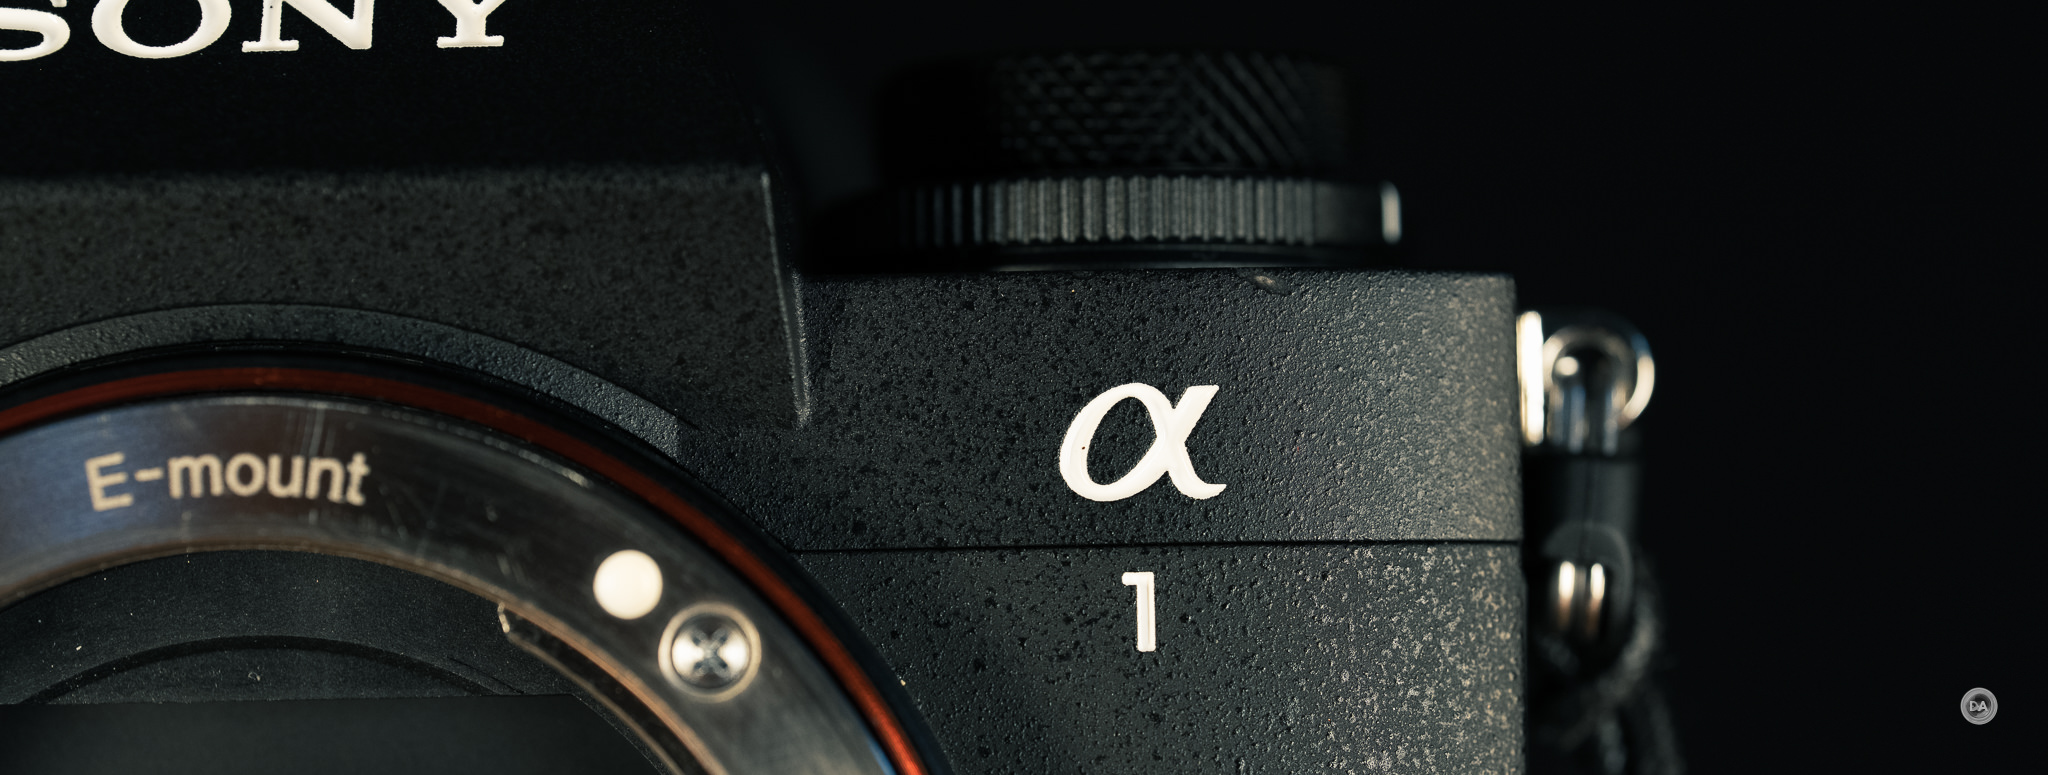
Build and Features
Sony’s approach to flagship cameras has always been different than everyone else. You can typically tell a flagship camera because it is, well, bigger than all of the other cameras from the brand. Not so with Sony. In fact, Camera Decision put together this graphic with the original α1 that showed just how tiny Sony’s flagship was compared with those from other brands.
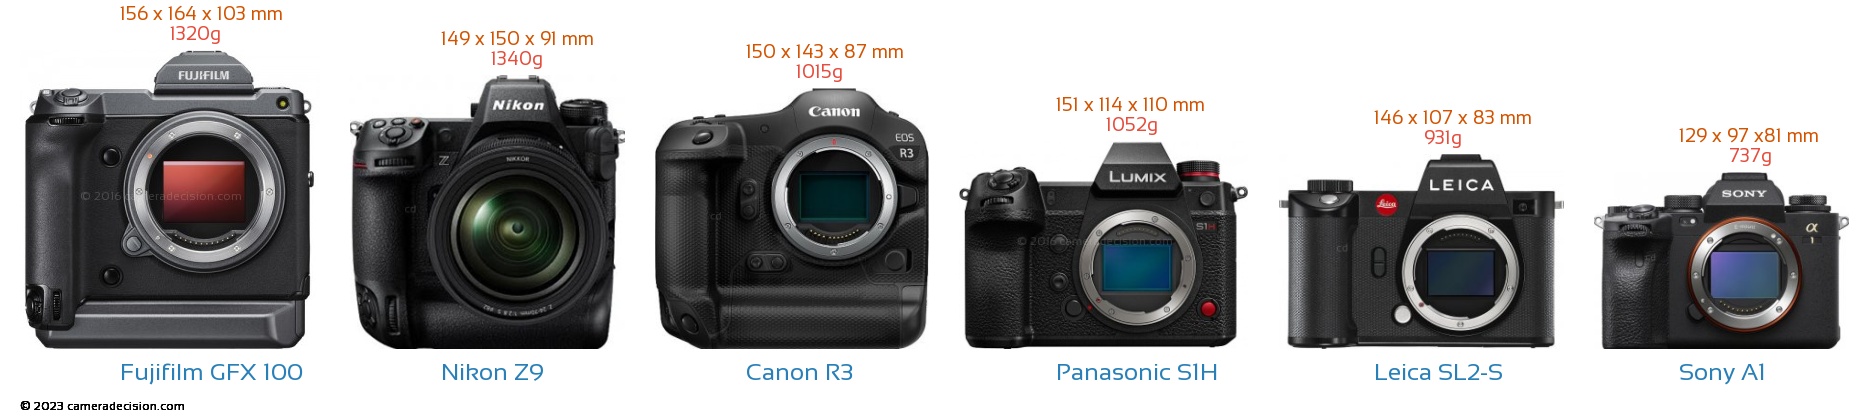
The α1 looks tiny by comparison, and the α1 II isn’t much different. It measures at 136.1 (w) x 96.9 (h) x 82.9 mm (d), or 5.4 x 3.8 x 3.3″. That isn’t much different than, say, the recently released α7V (my review here). It is considerably wider and a bit deeper than the original α1, however, and that makes a significant difference. That difference can be primarily seen from the top view, which shows a wider camera camera with a much more robust grip on it. *Image courtesy of Camera Decision.
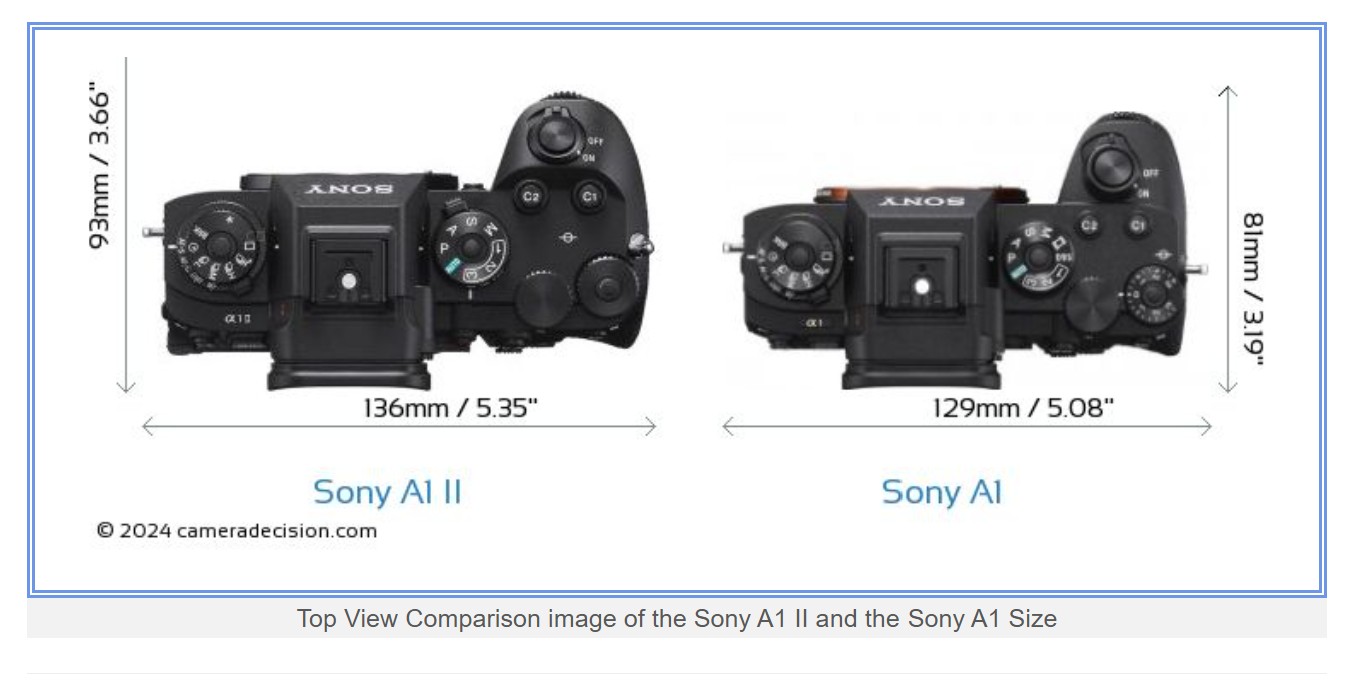
The measurements aren’t quite right in the graphic (the depth of the camera is 82.9mm, not 93mm), but you can see that the wider body allows for a more robust grip and a little more space on the top of the camera. I’d personally still like a slightly bigger body, but there’s no question that the α1 II fits better in my hand than the last generation and has a more pleasing feel to the grip. Because the grip is larger, however, one of the basic issues with Sony cameras remains unsolved – the space between the grip and larger lenses. I still find that my knuckles are sometimes right up against certain lenses.
The weight remains very moderate as well at just 743g or 26.28oz, and that includes the battery and memory cards. The weight is up only 6g relative to the α1.
One of the biggest physical changes (and improvements) is the inclusion of the tilt/flip LCD touchscreen from the α7RV. This screen is larger (3.2″ vs 3.0″), higher resolution (2.095 million dots vs 1.440 million dots), and has both tilt and flip functionality, allowing it to be fully rotated for front monitoring. Some people scoff at the importance of this, but it was probably the single biggest reason that I upgraded. I have used the α1 II nearly exclusively for my YouTube channel since purchasing it, and the ability to monitor the framing while on camera saves me a lot of having to reshoot segments because of poor framing. And on that note – I absolutely love using the Sony RMT-VP2 Bluetooth remote along with the α1 II’s video self-timer to cut unnecessary scraps off each end of my clips.
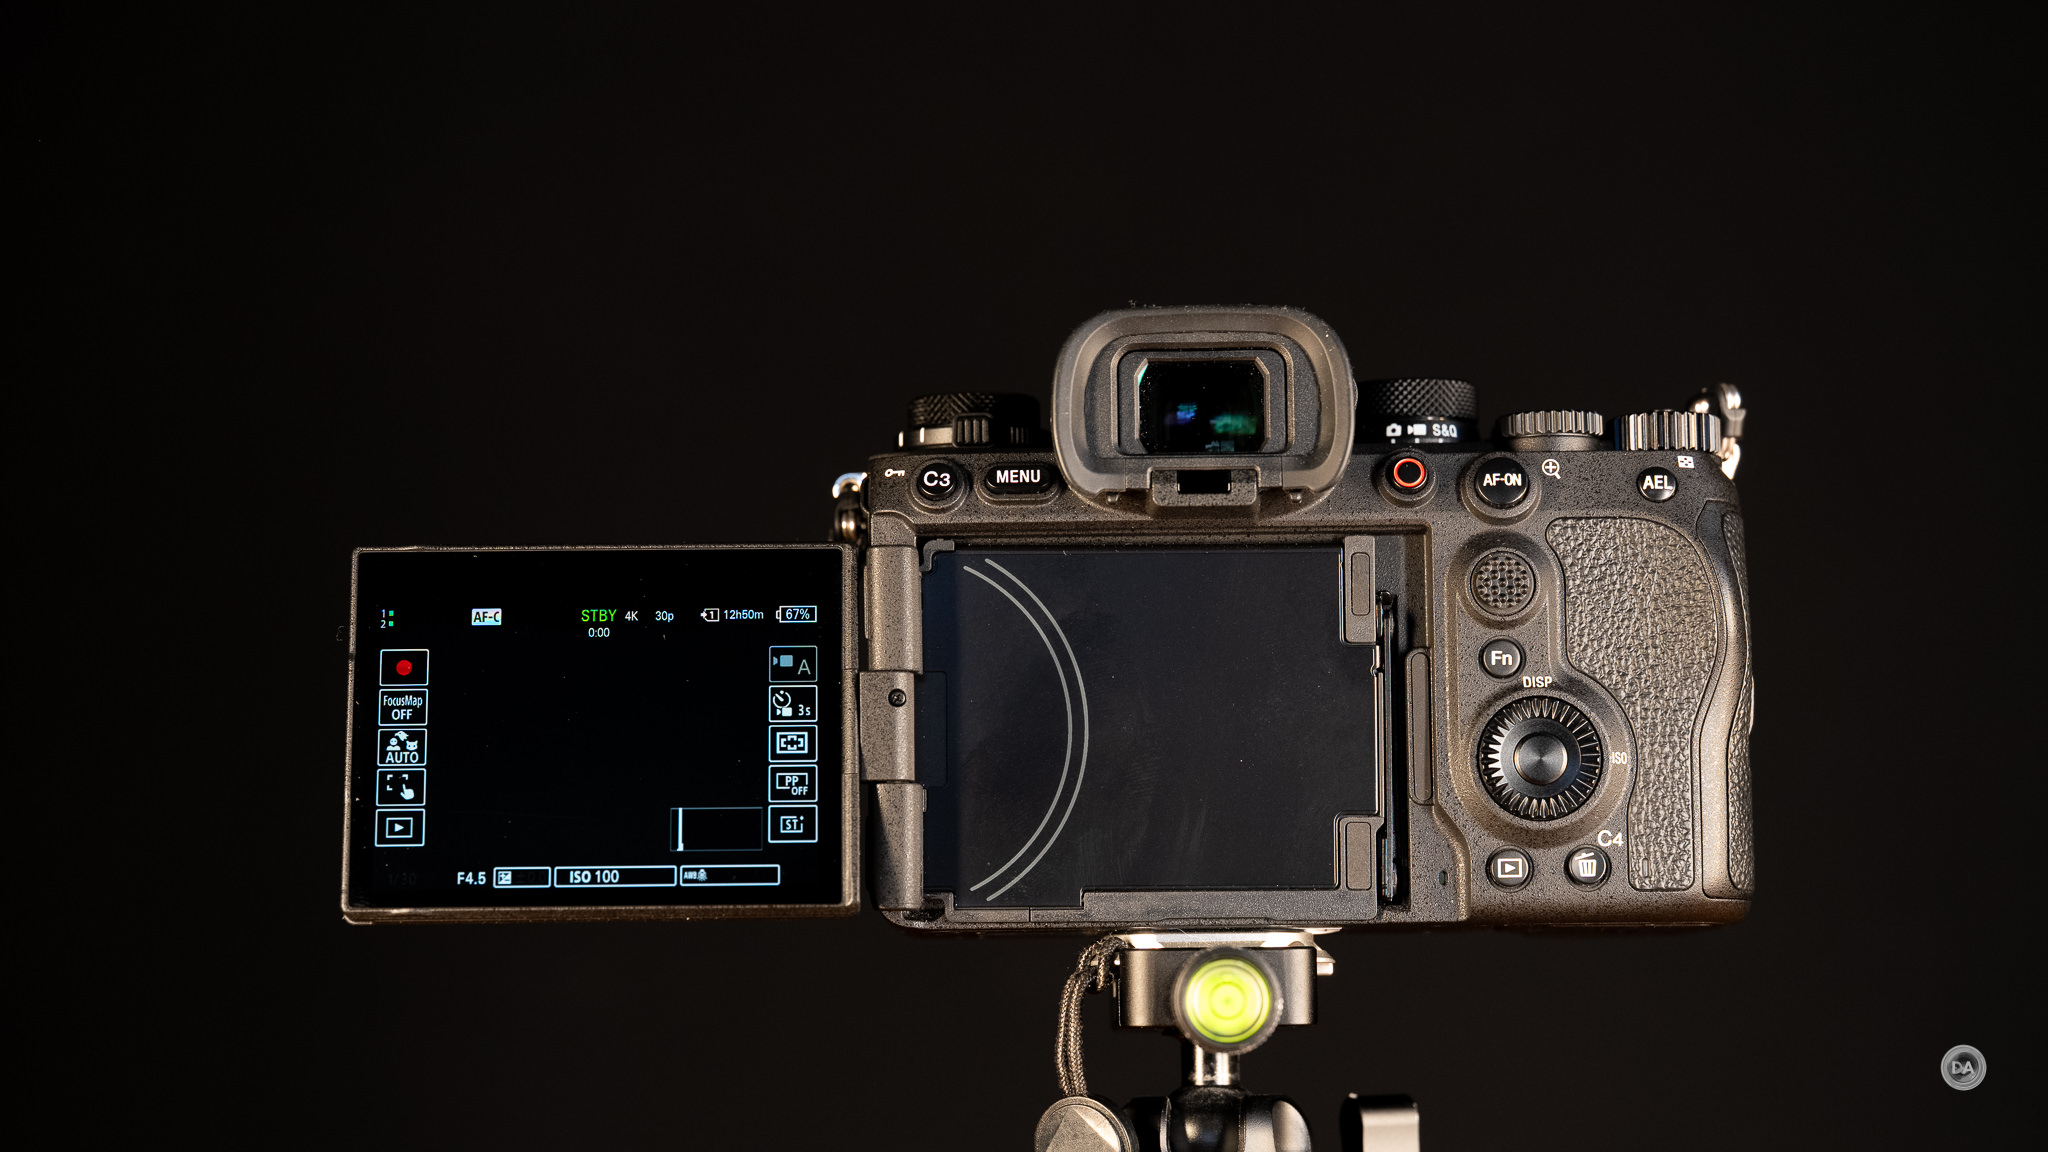
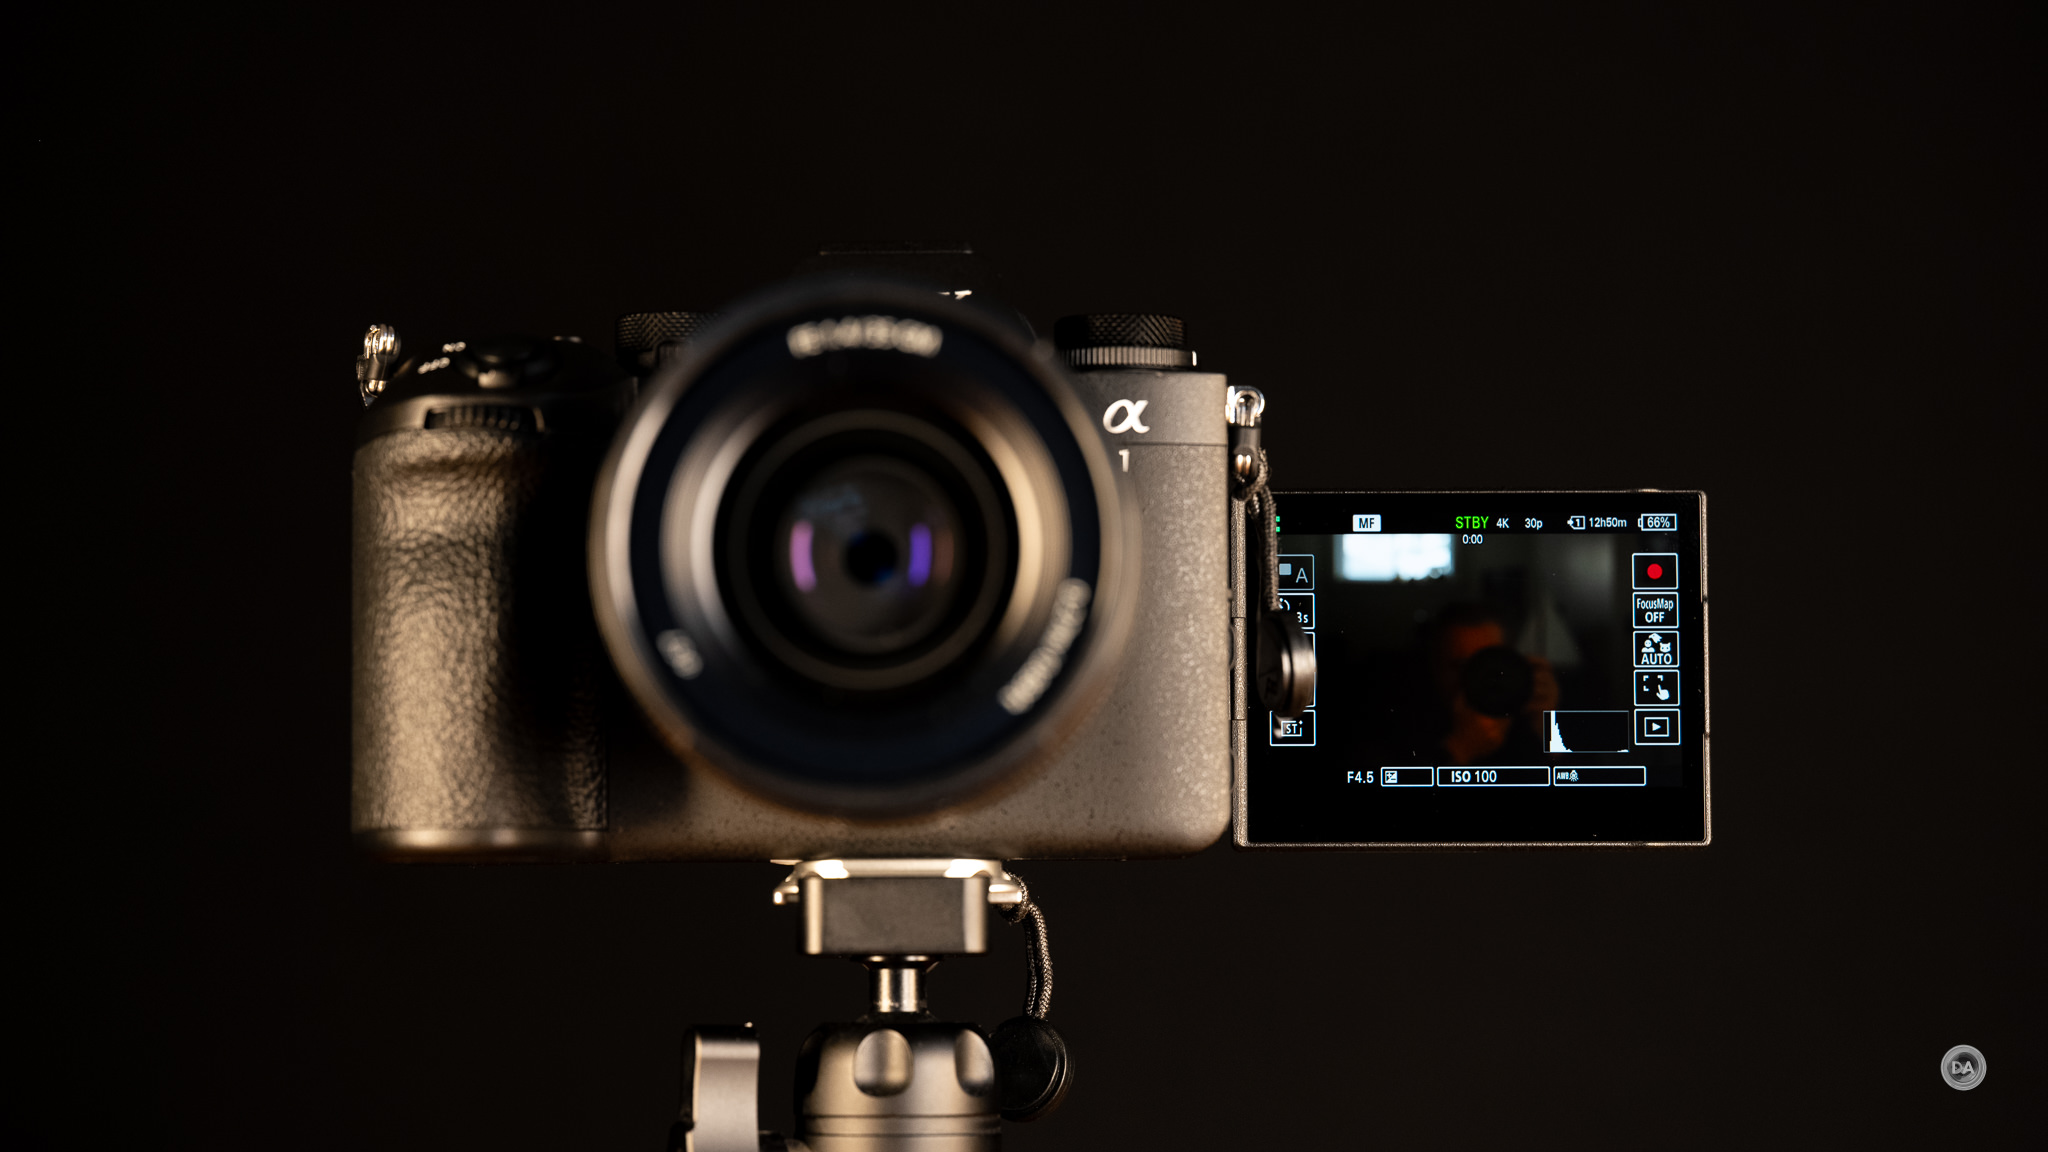
The touchscreen shows good responsiveness and all menus can be navigated by touch (hello, Fuji!).
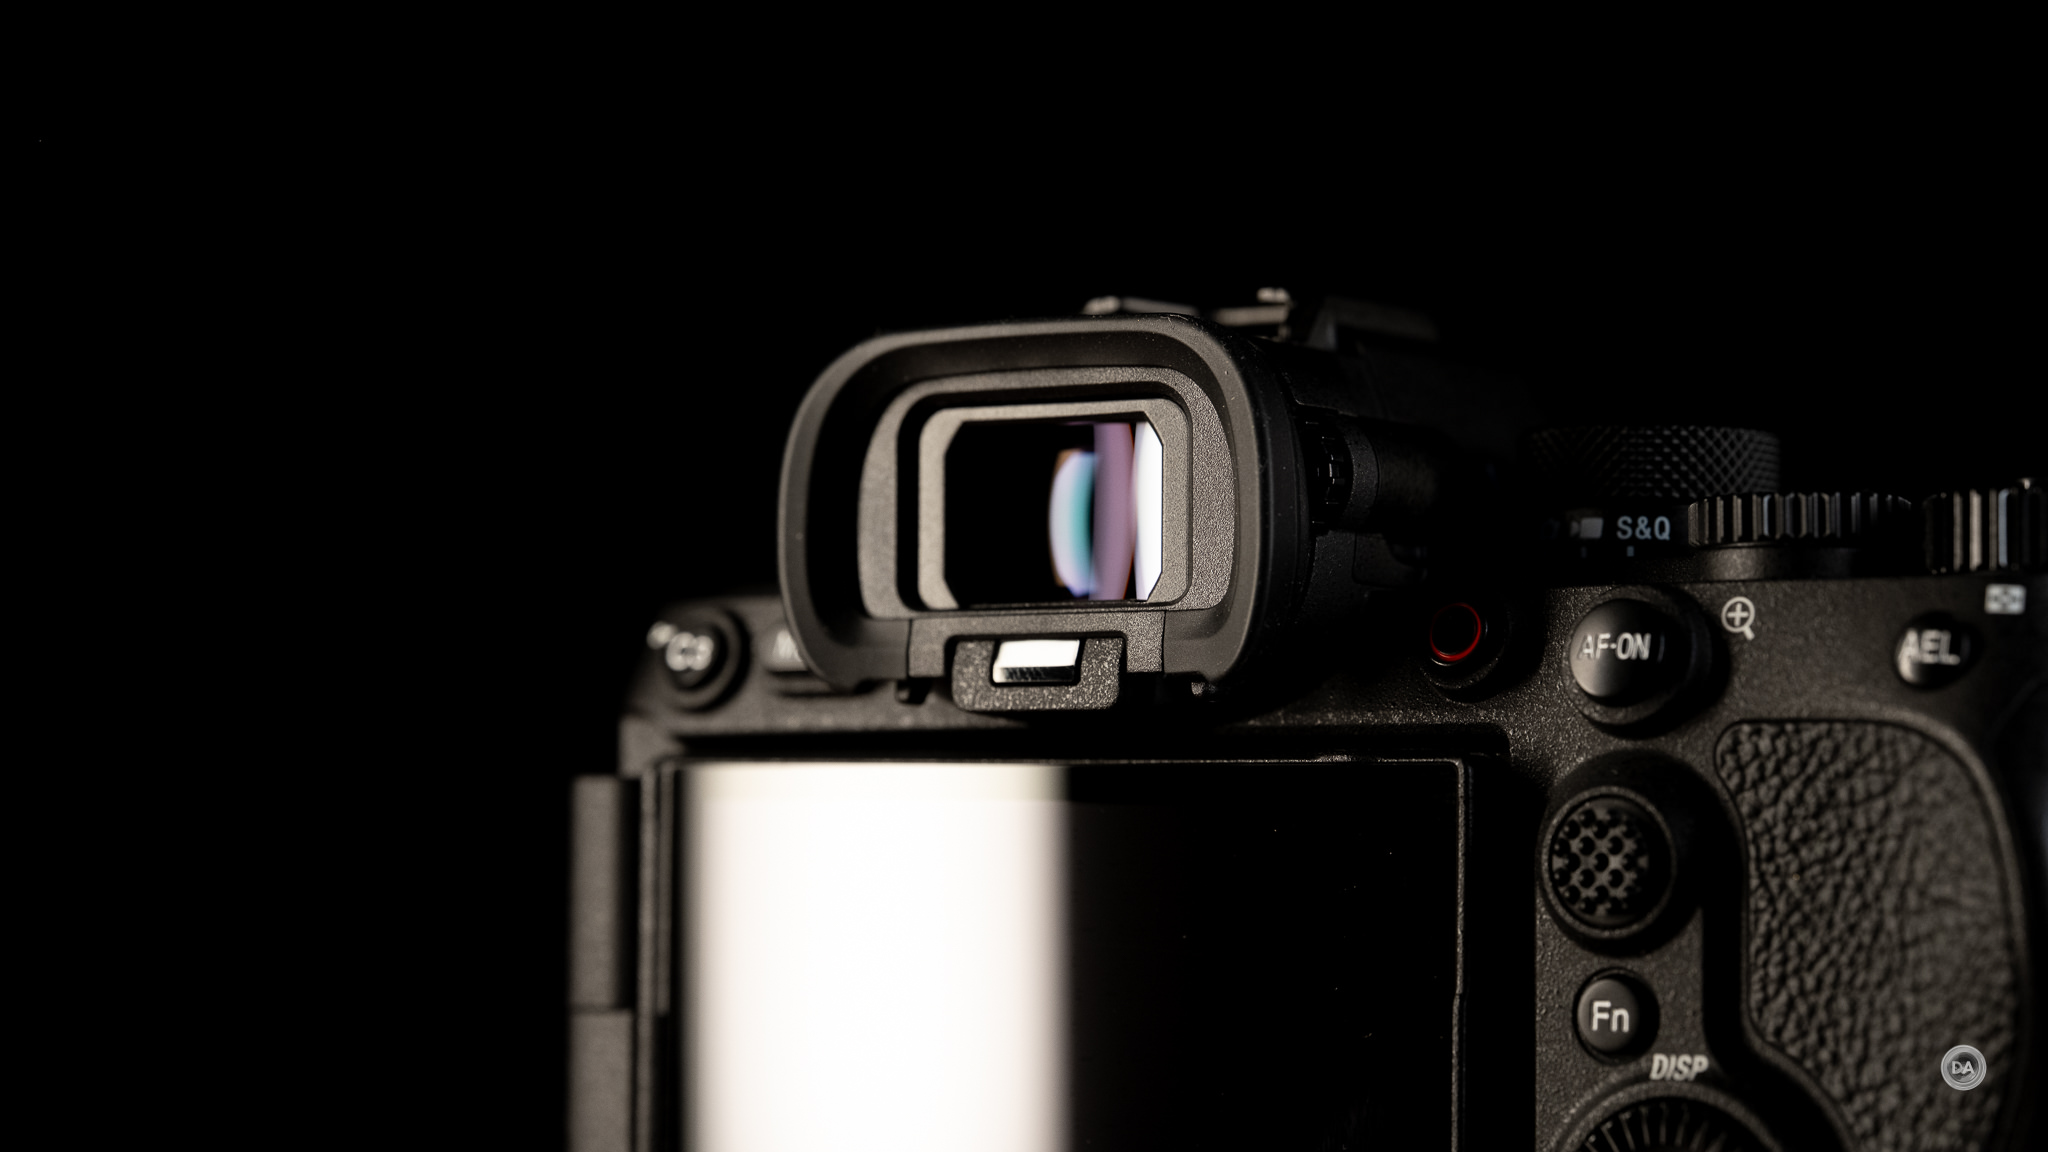
The raw specifications of the viewfinder aren’t different, but the performance has changed. This is a 0.64″ Quad-XGA OLED with a magnification of 0.90x and a resolution of 9.4 million dots. There are three refresh rates available: Standard (60FPS), Hi (120FPS), and Higher (240FPS). The performance difference is that the resolution doesn’t drop at the 120FPS setting, allowing for a much better experience. This a blackout-free EVF, which means that there will be no blackout between frames when shooting at fast burst speeds. This allows for a more better tracking experience as you don’t lose the framing of a fast-moving subject in between shots. Sony’s viewfinders are sometimes a bit disappointing, but this is definitely their best.
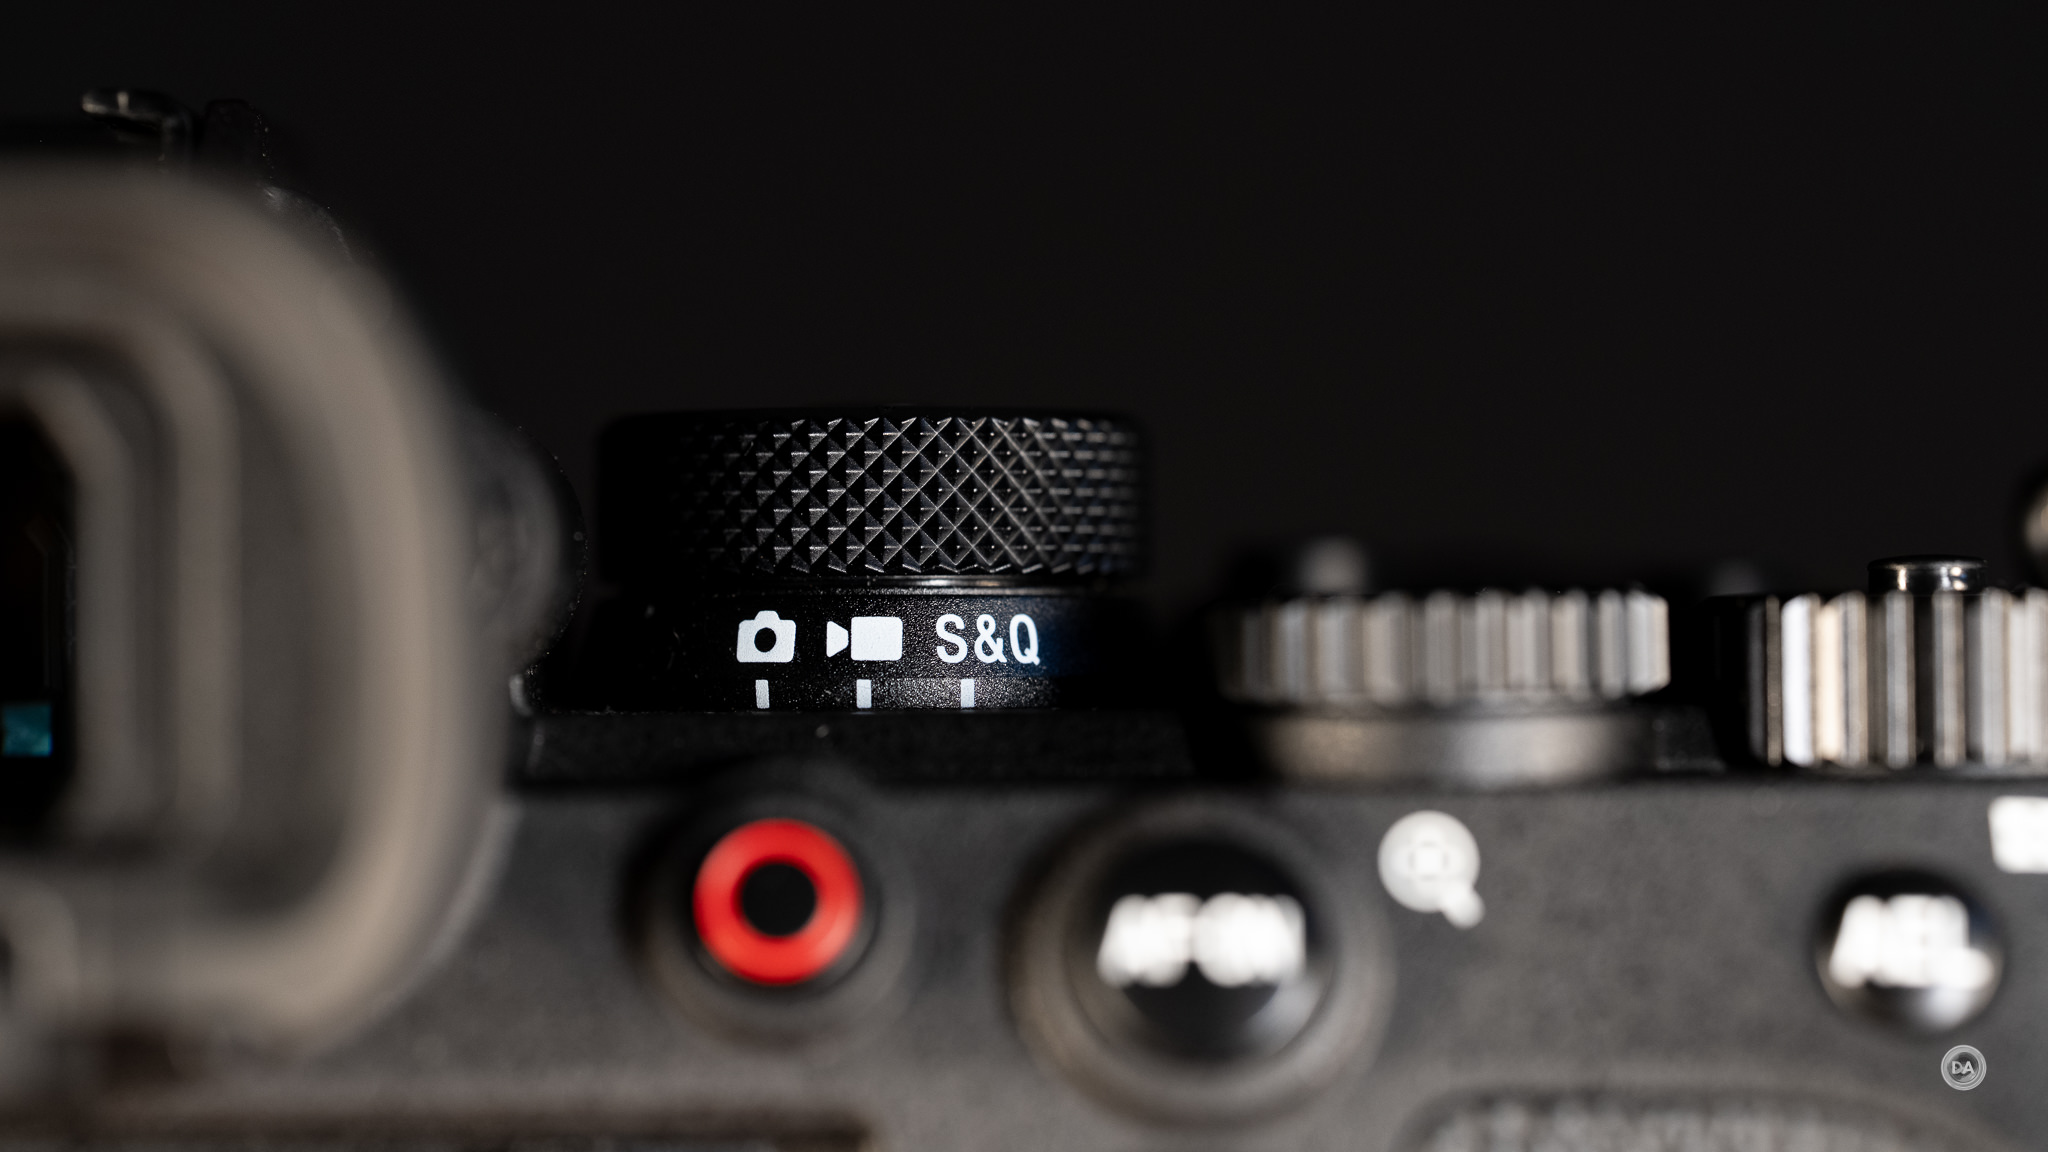
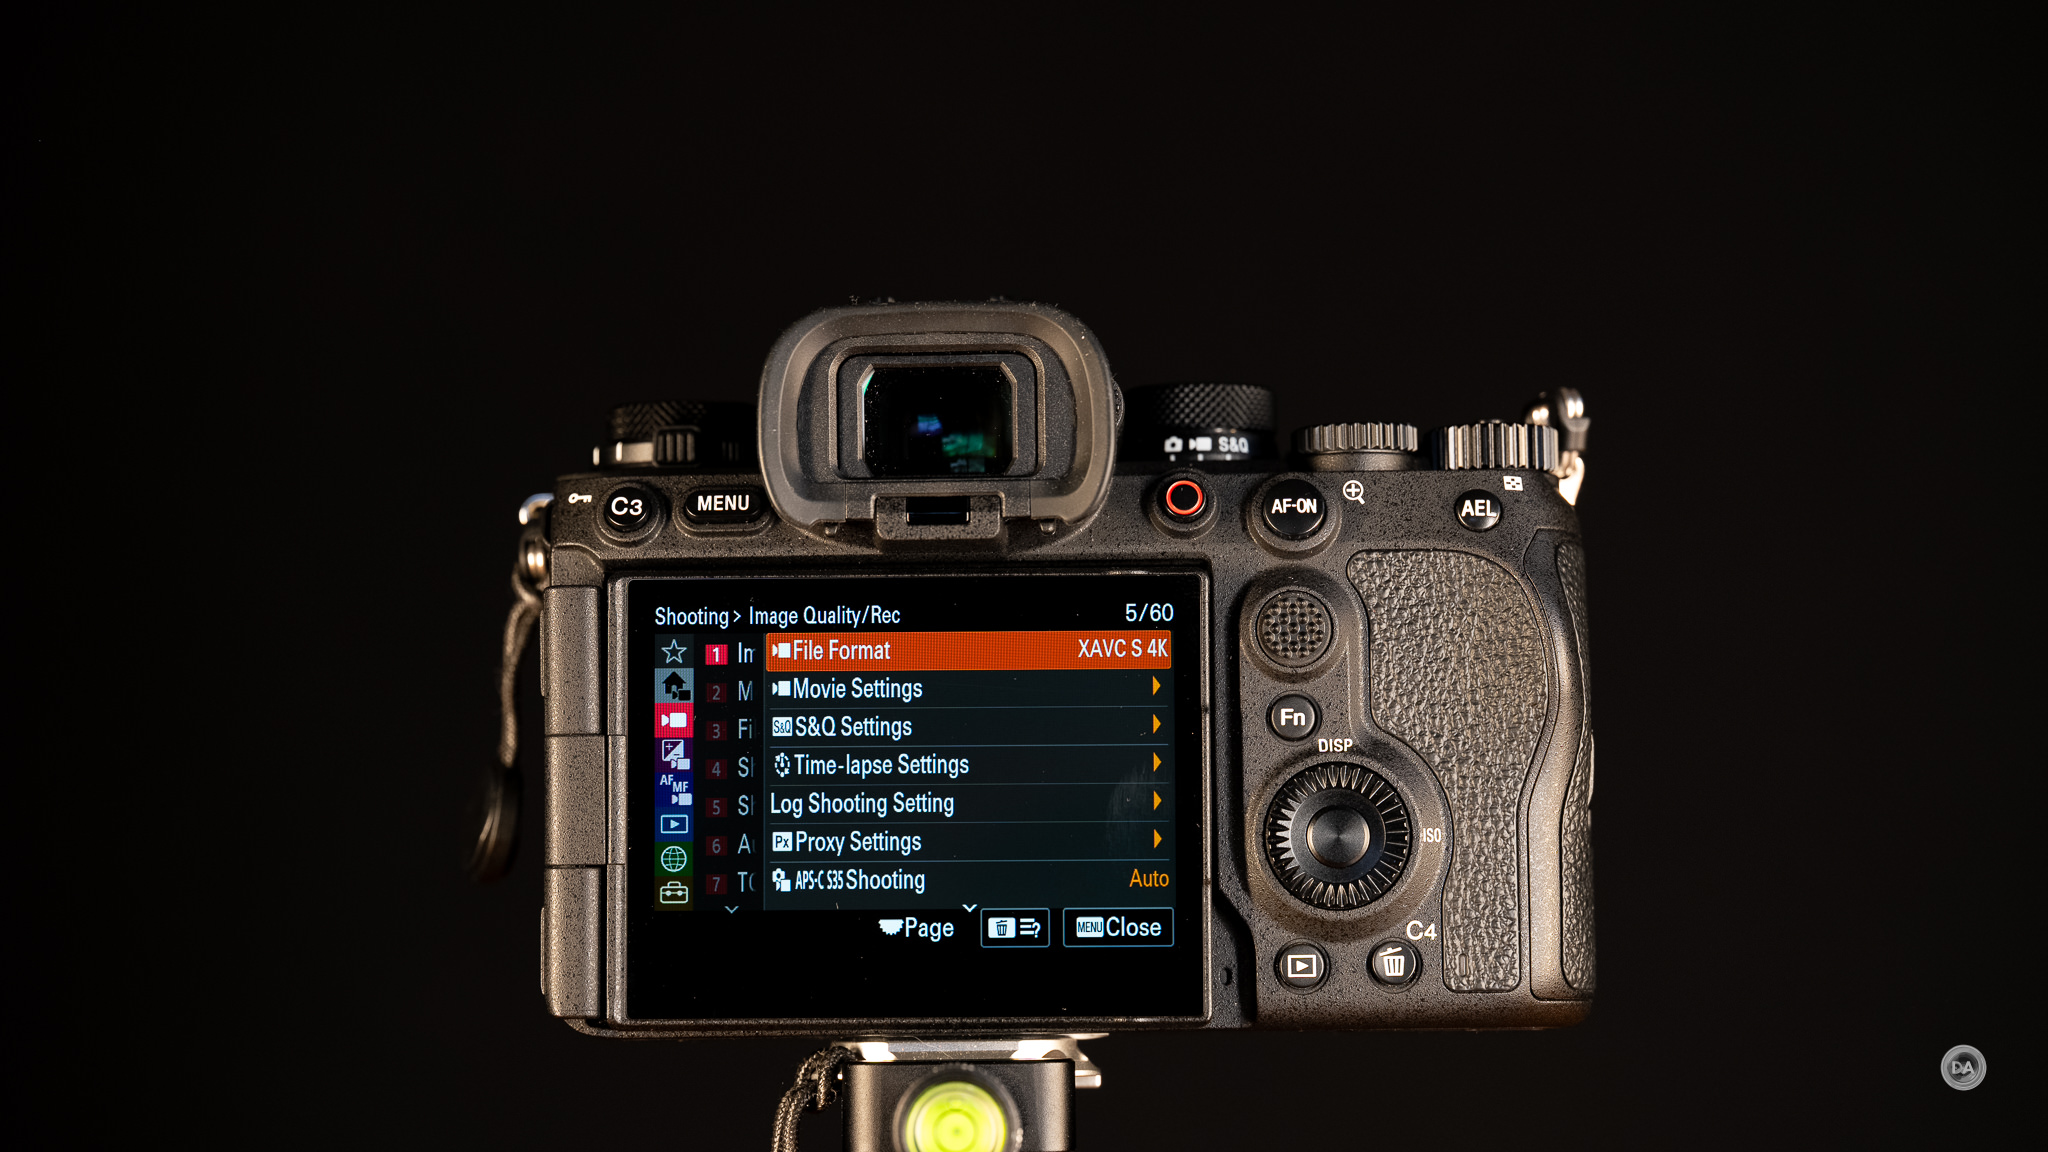
Another key physical change is a simple one that aligns the α1 II with other more recent Sony cameras. There is a lever underneath the PASM mode dial that allows one to switch between completely different setups for Stills, Video, and S&Q (Slow and Quick). This includes custom settings for buttons and menus. It is a very important improvement for those who spend time customizing their control setups (which is far more likely in this class of camera).
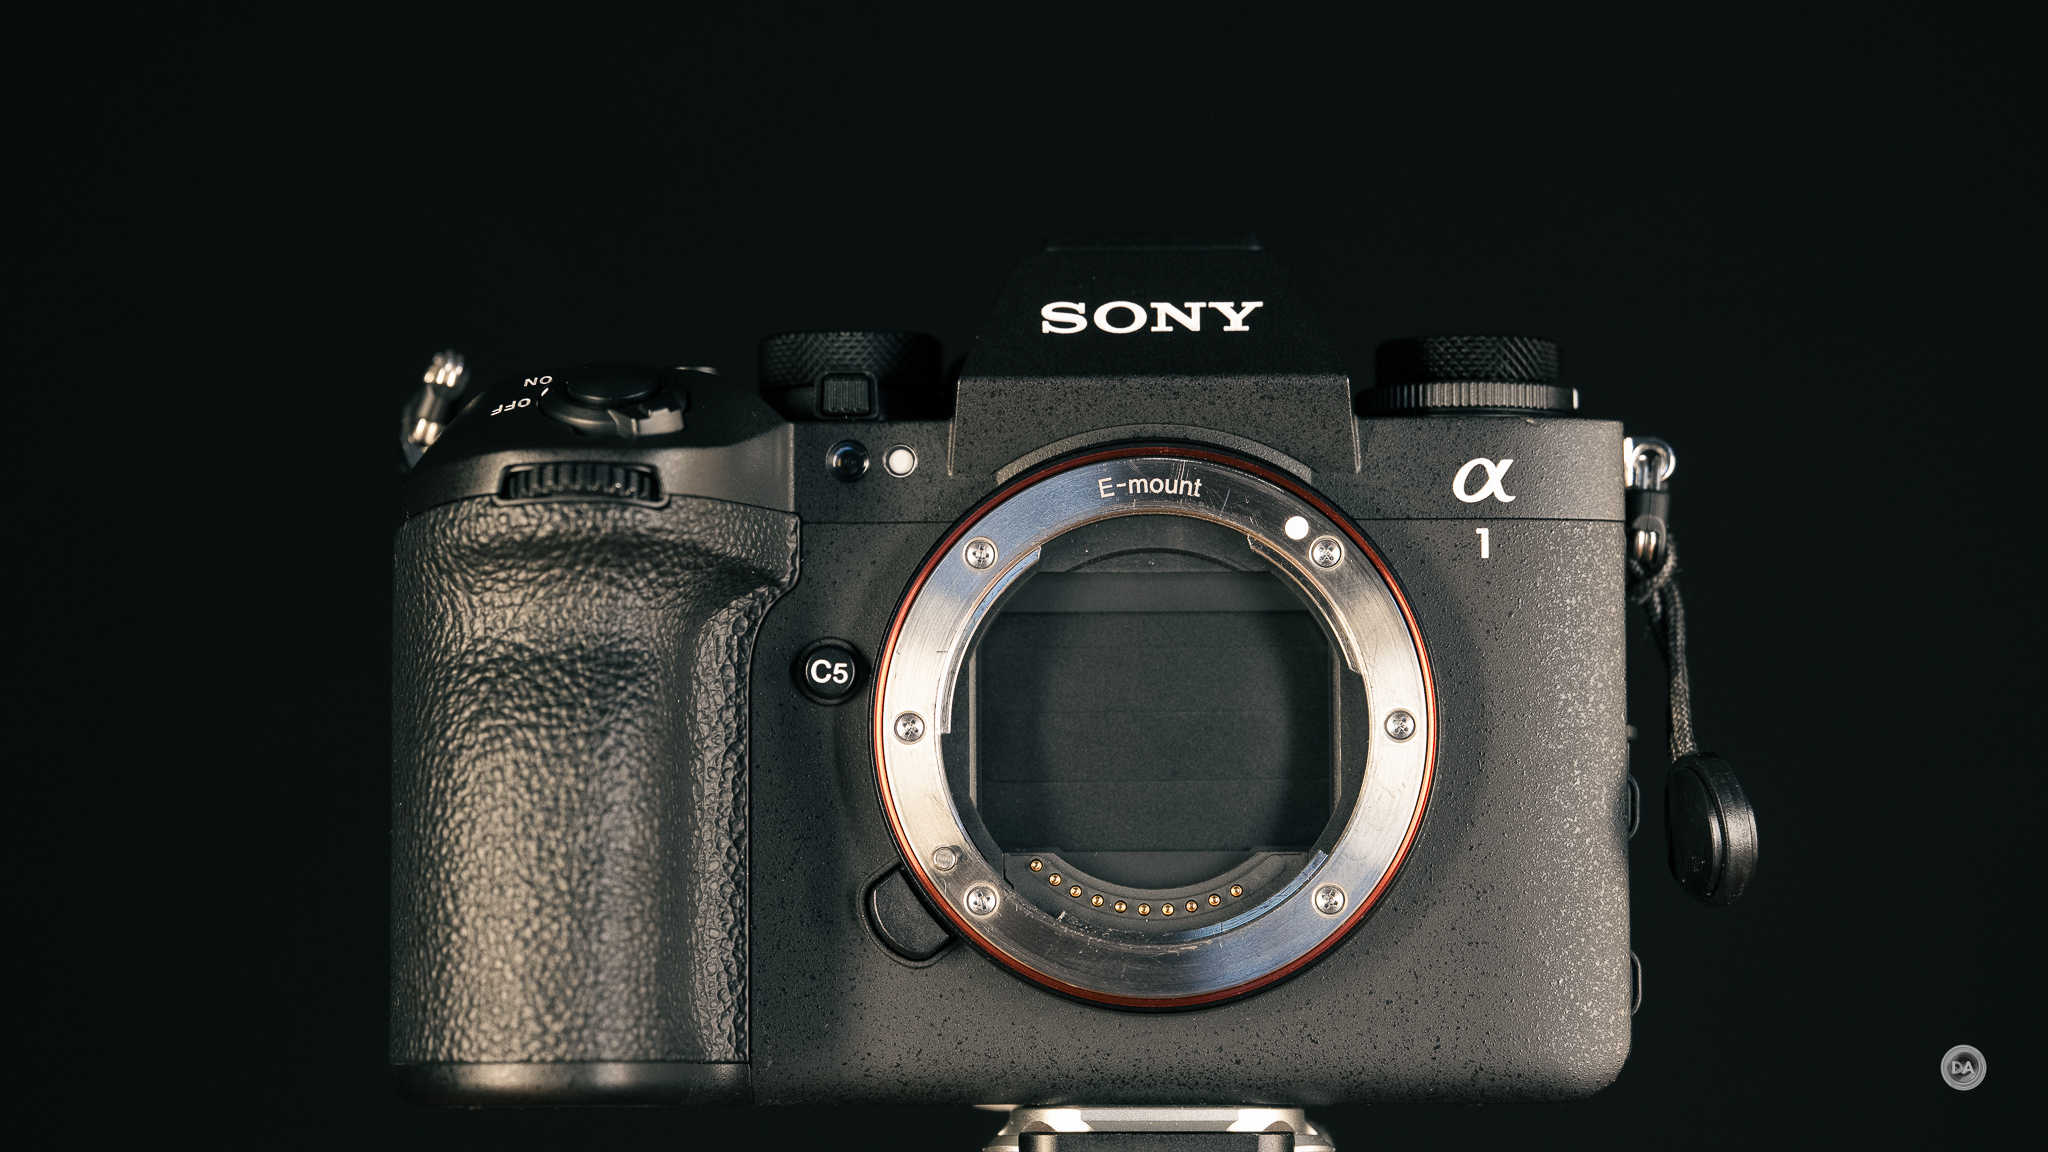
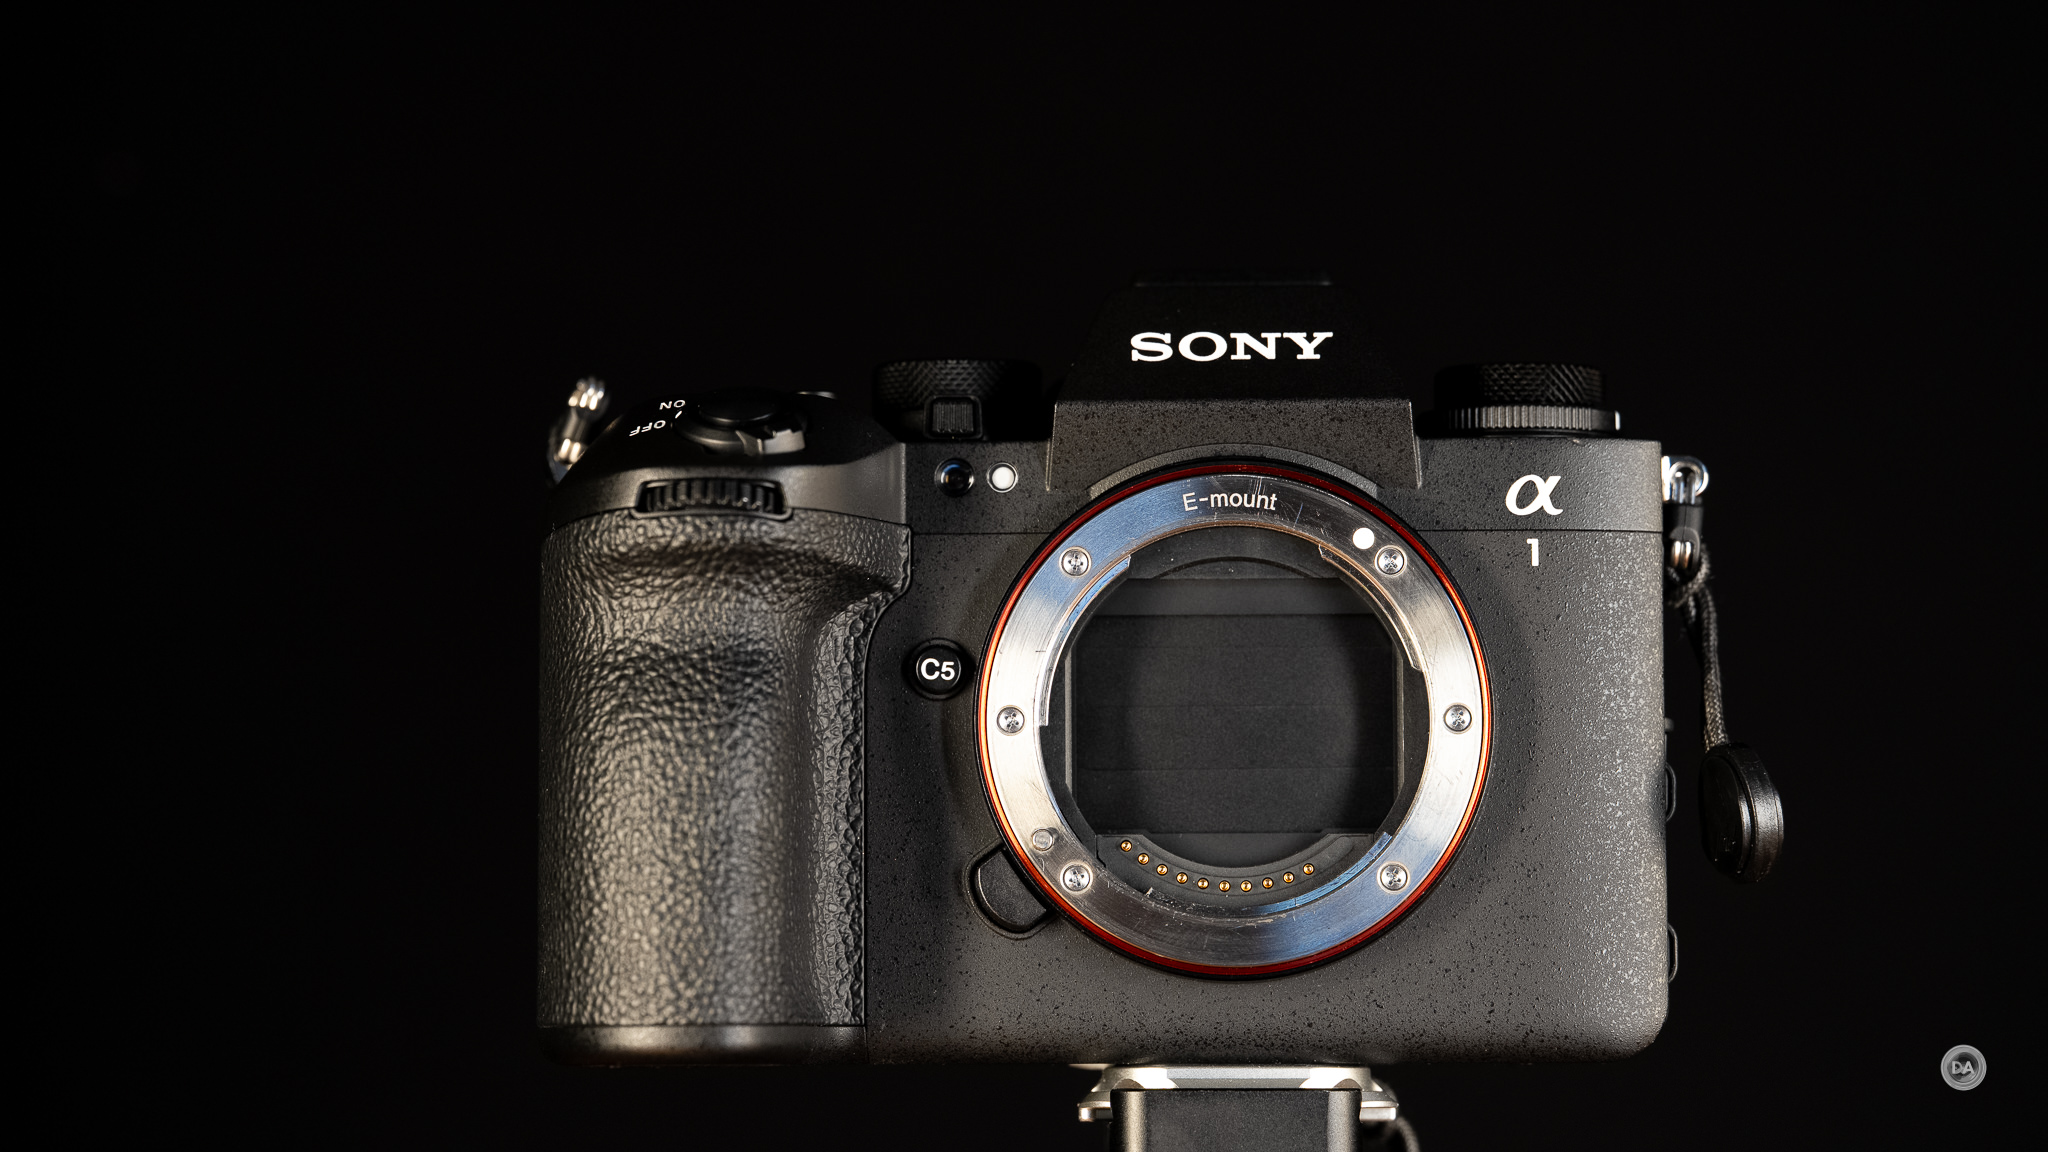
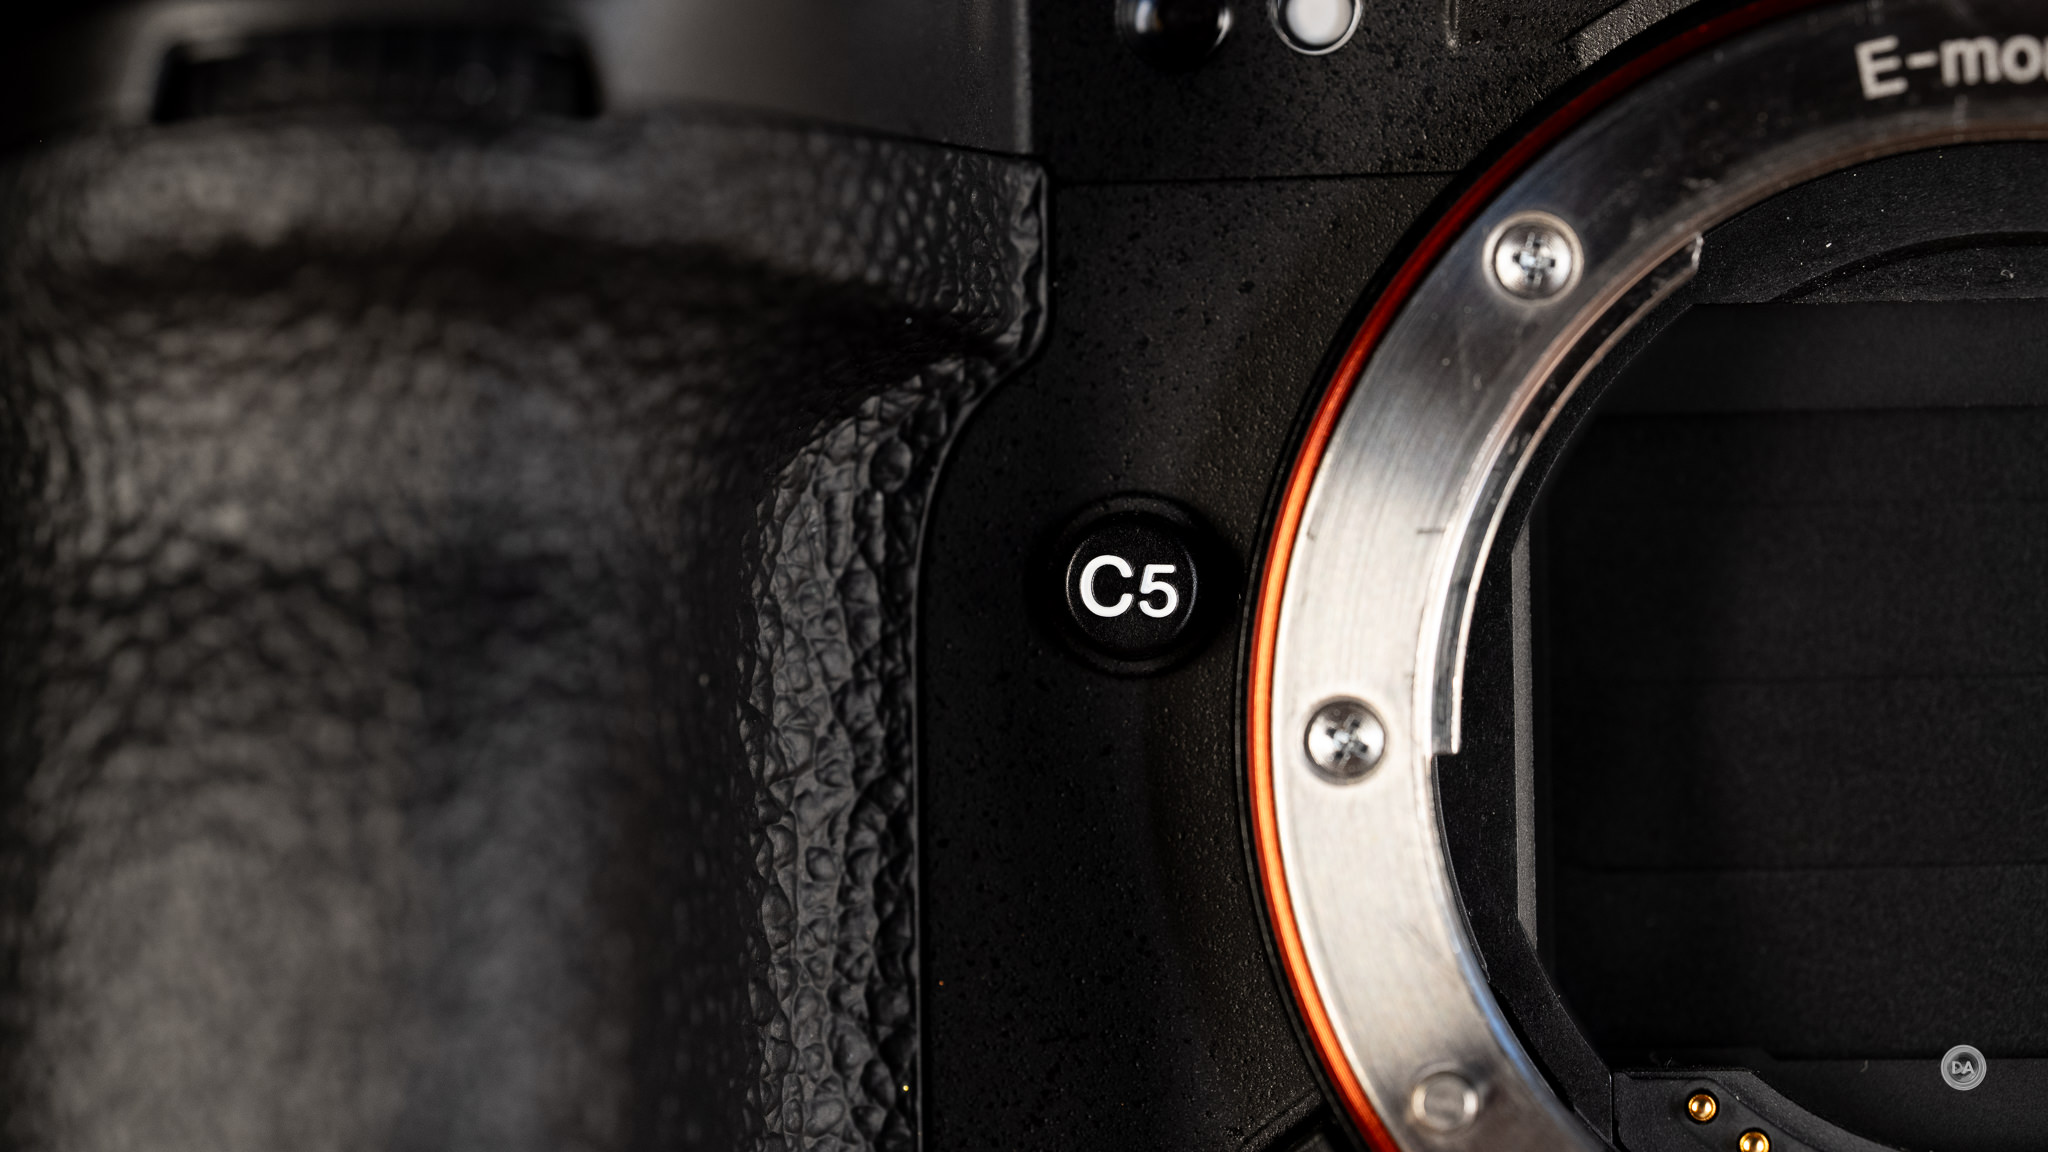
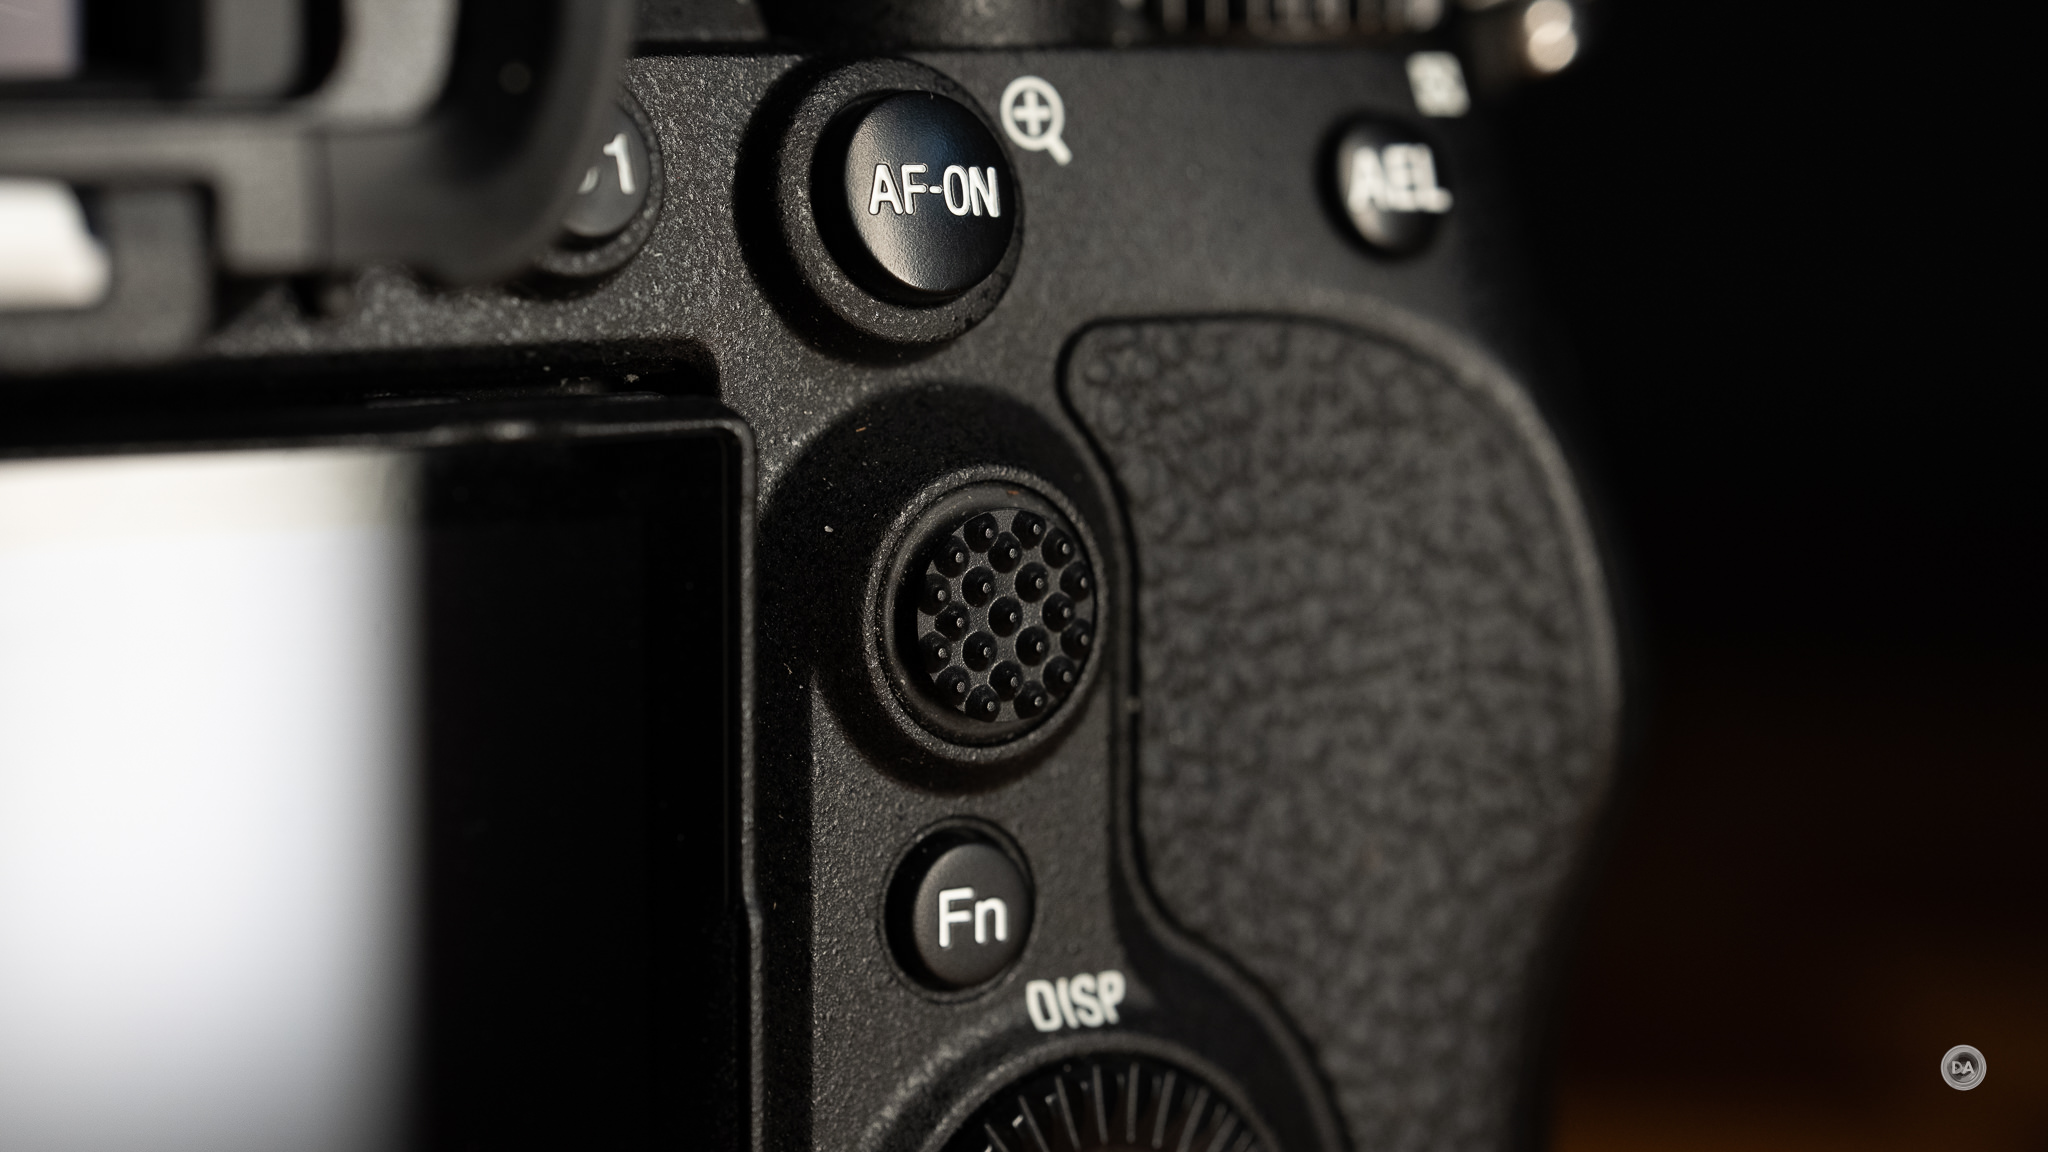
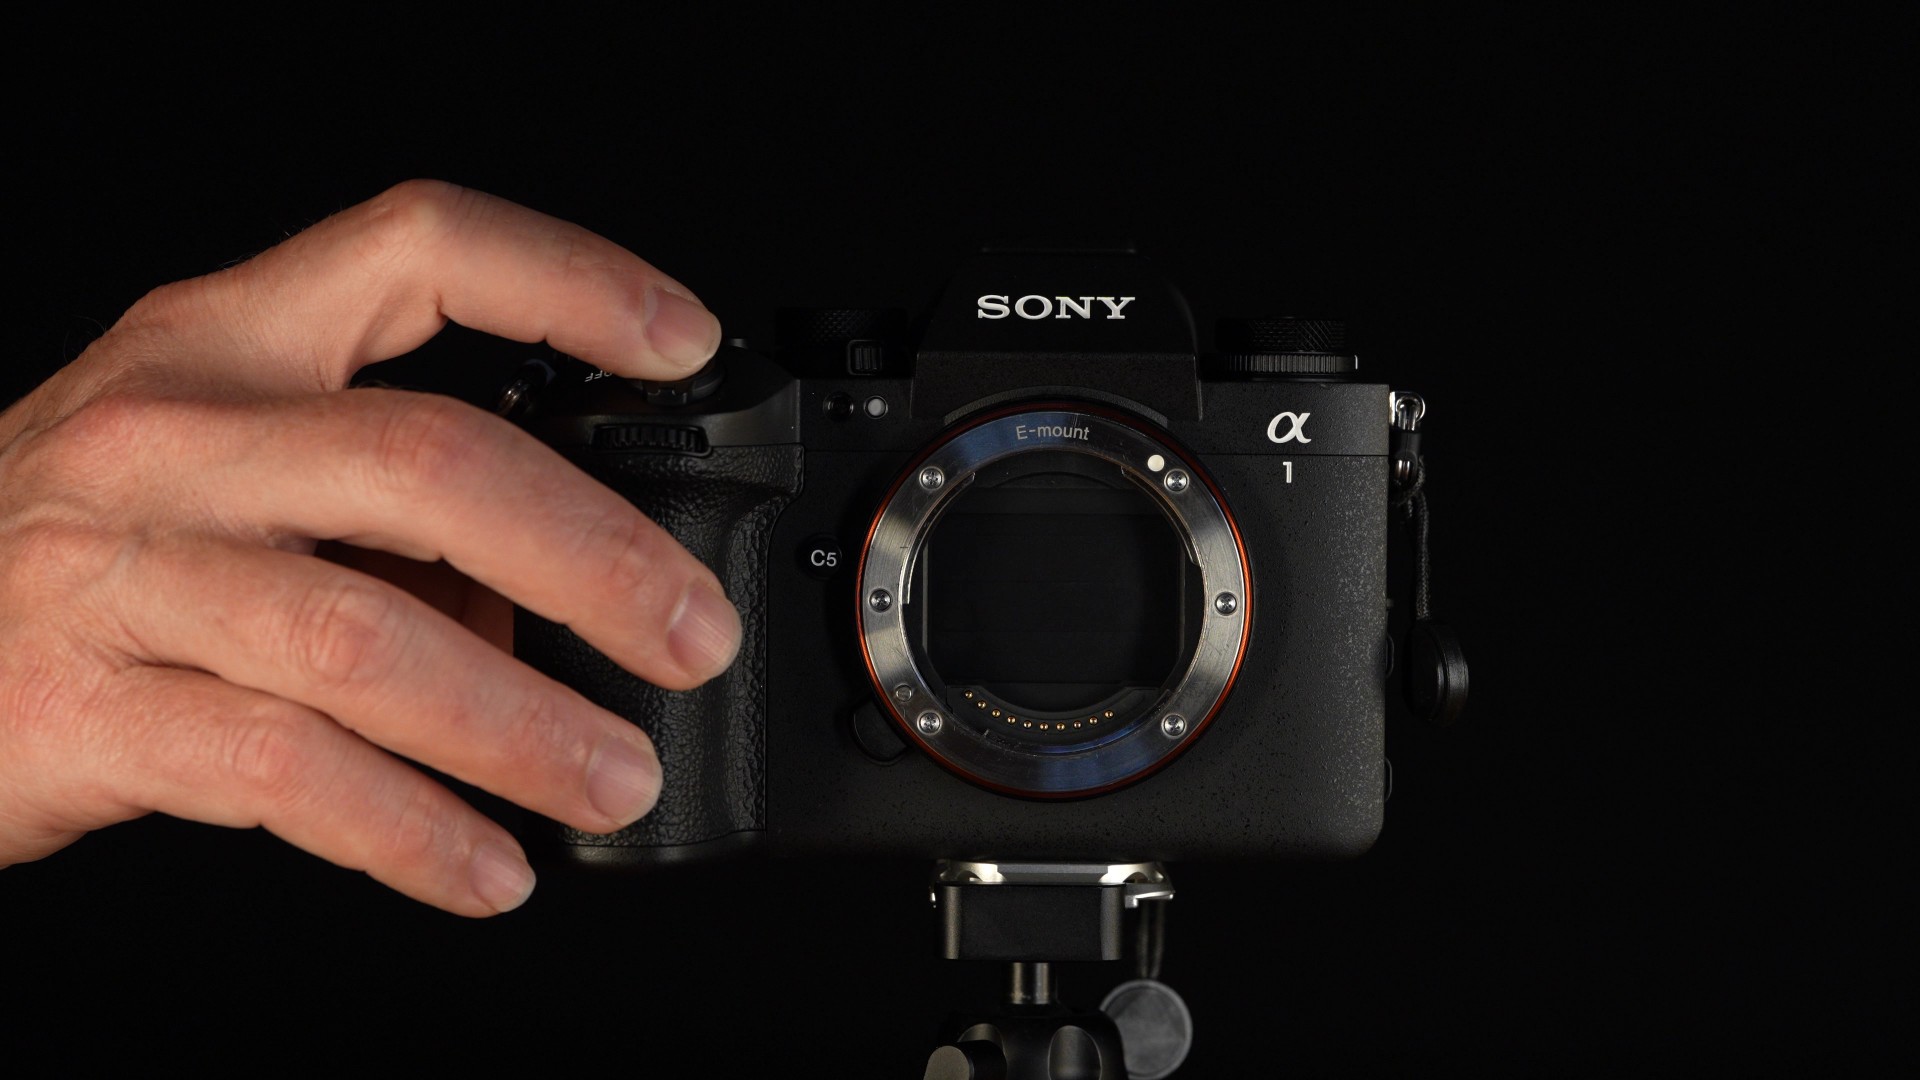
We have one additional custom control over the α1 (and most other Sony bodies) in the form of an additional custom button located on the front of the camera. The C5 button can be programmed to whatever function you desire in the menus.
Other controls are entirely similar to the α1, with the C1 and C2 buttons on the top of the camera, which continues to exist without a top-mounted LCD screen. This may be the most expensive 35mm camera to not have a top-mounted LCD.

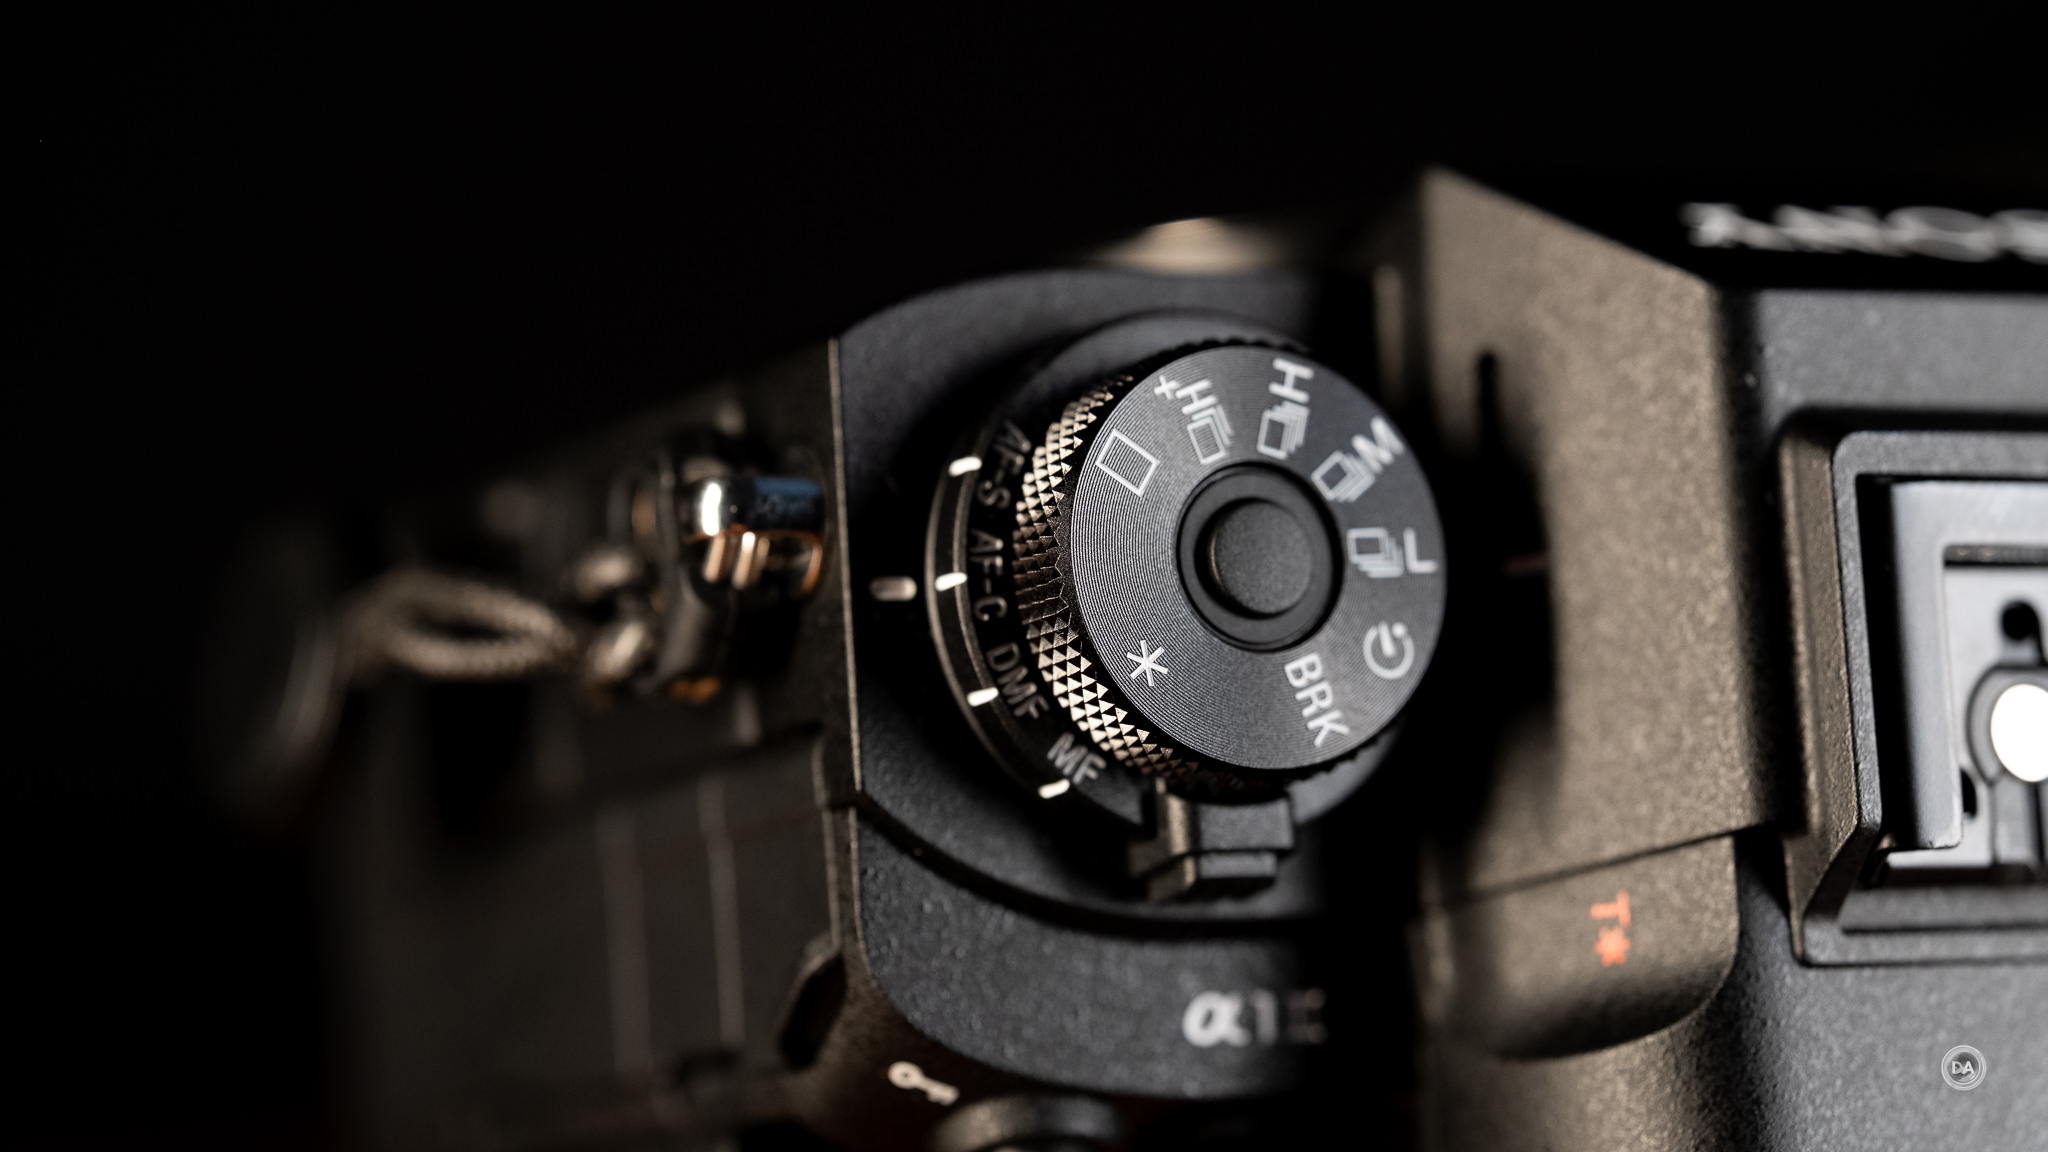
What we do have is the two-level control dial to the left of the viewfinder stack that is reserved for α1 and α9 cameras. This gives you control over the Drive Mode on the top and then control over Focus Mode on the bottom.
Other controls are familiar across most of Sony’s recent cameras. There are a total of four control dials, including two on the rear top plate. The furthest right of these is, by default Exposure Compensation, but the dial can now easily be assigned a different function if you don’t want to use it for exposure compensation. The dial doesn’t have a predetermined limit in either direction, either, so it can be easily used for a completely different function. Menu options include exposure, white balance, or Color/Tone. This dial does have a locking mechanism that is either locked or unlocked, not one that you hold down during rotation.
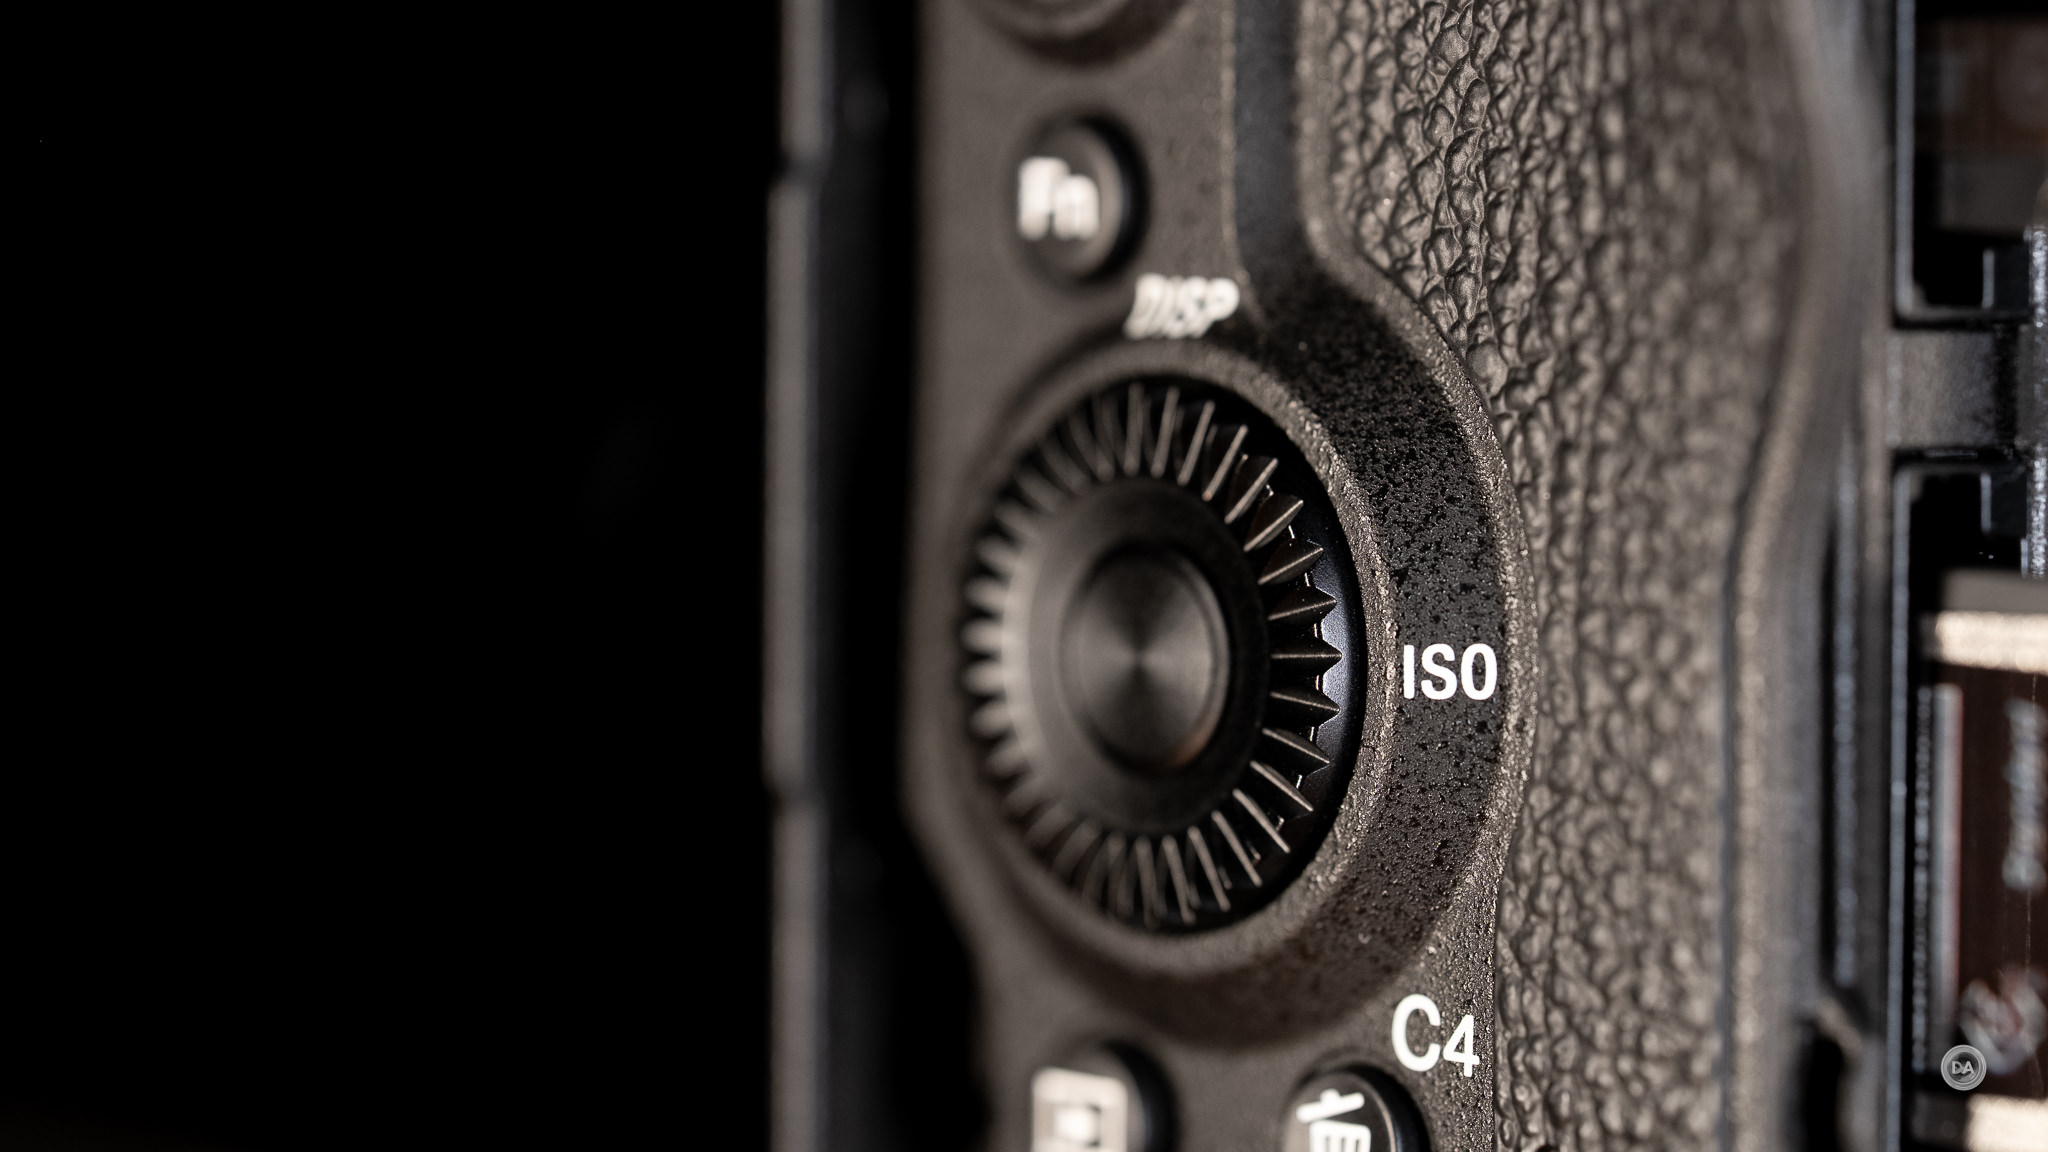
I really like the fact that Sony gives us a fourth wheel around the SET button. This can be clicked like a D-Pad but rotated to control another function where a wheel works well. I like to assign ISO to this wheel on all my Sony cameras to give a direct control for this function.
The rear joystick has good texture and can be clicked for an additional control. The rear wheel sits at a higher position on top of the camera body where it is easier to get one’s thumb on it. I don’t love some of the physical ergonomics of Sony cameras, but I love the number of control dials and custom buttons.

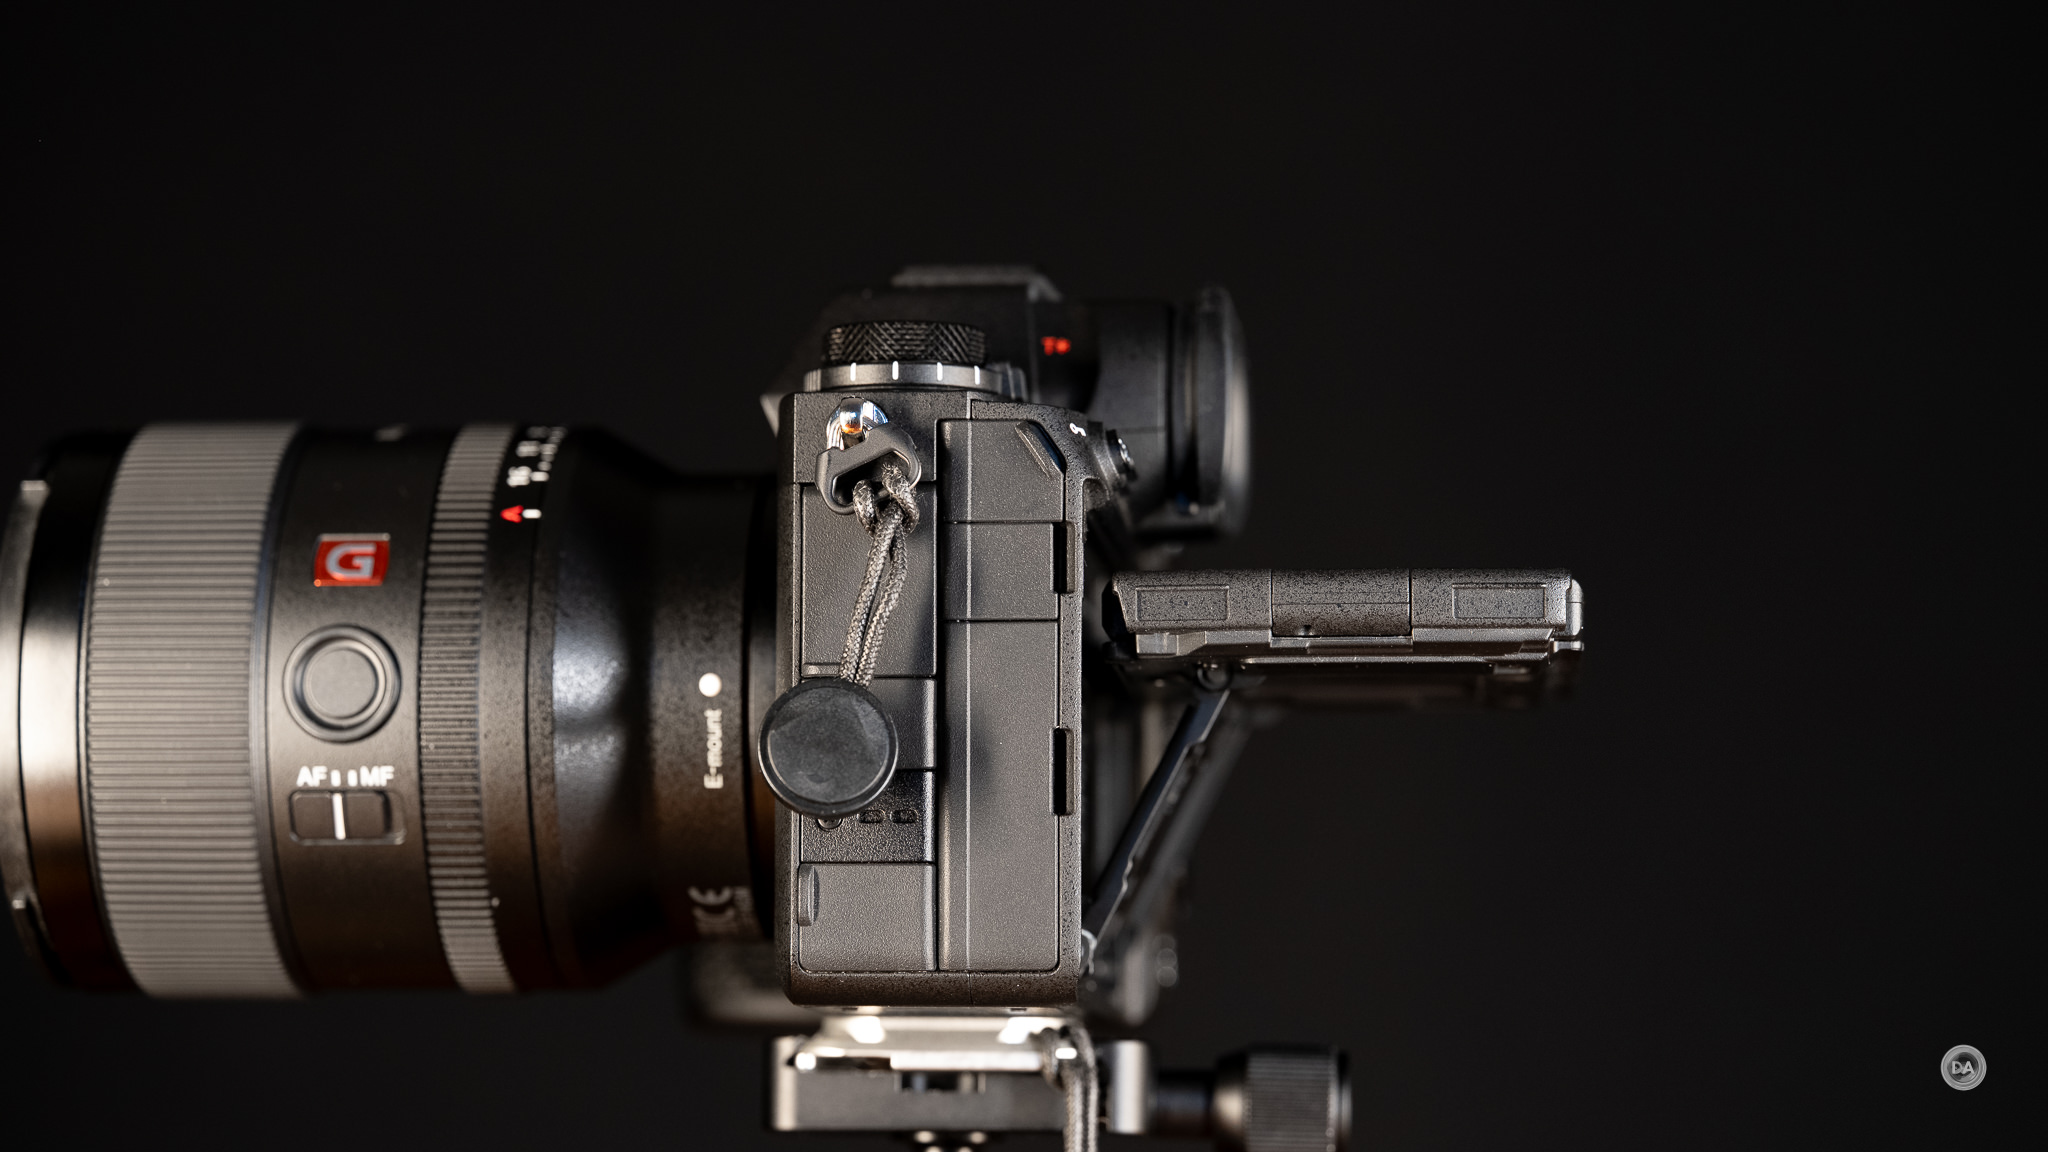
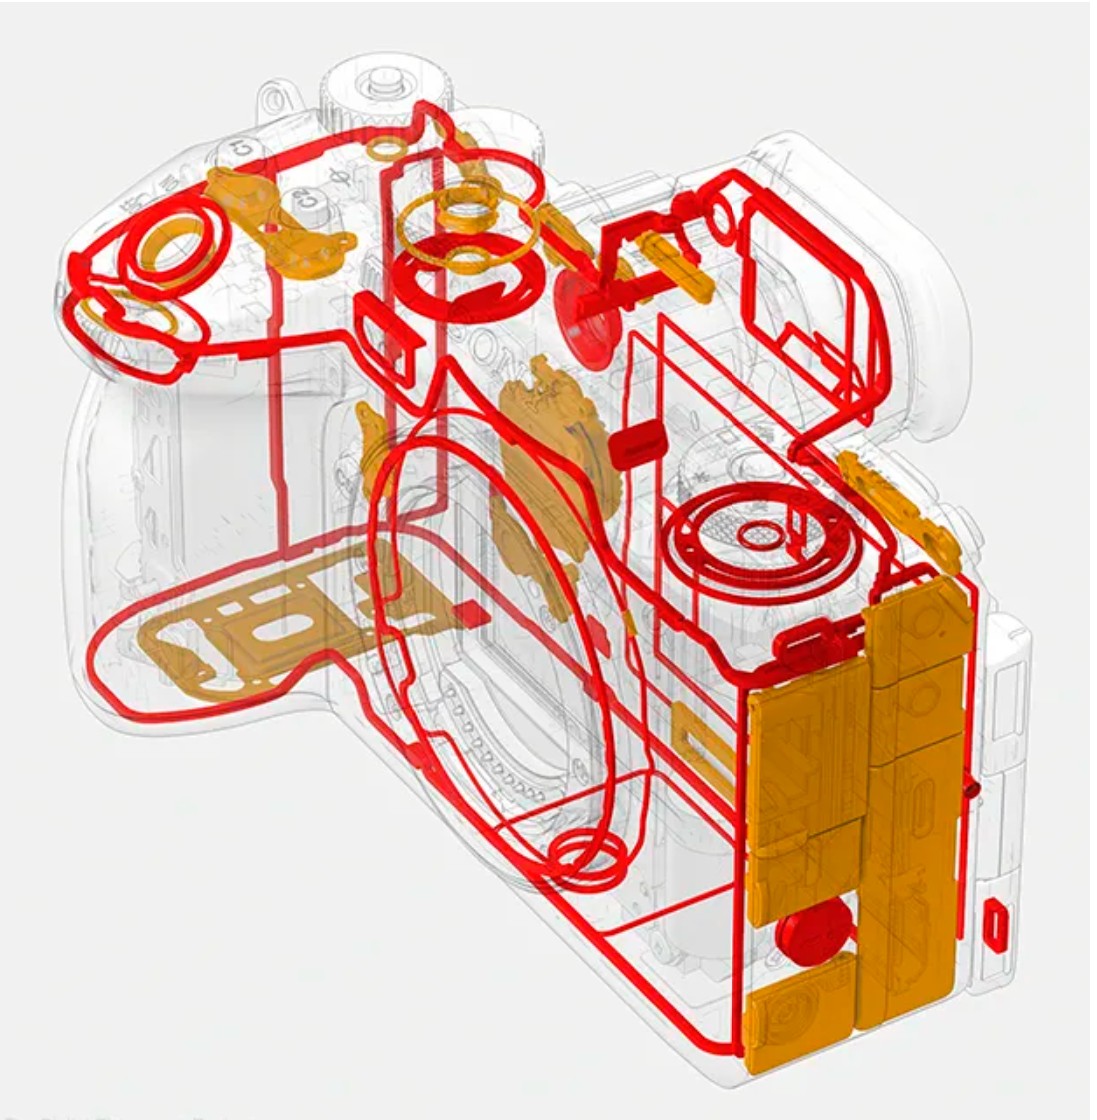
As a flagship camera, the α1 II is loaded with connection ports. Sony’s doors over those ports have better gaskets and seals and open more cleanly than the flaps I find on some Canon and Nikon competitors.
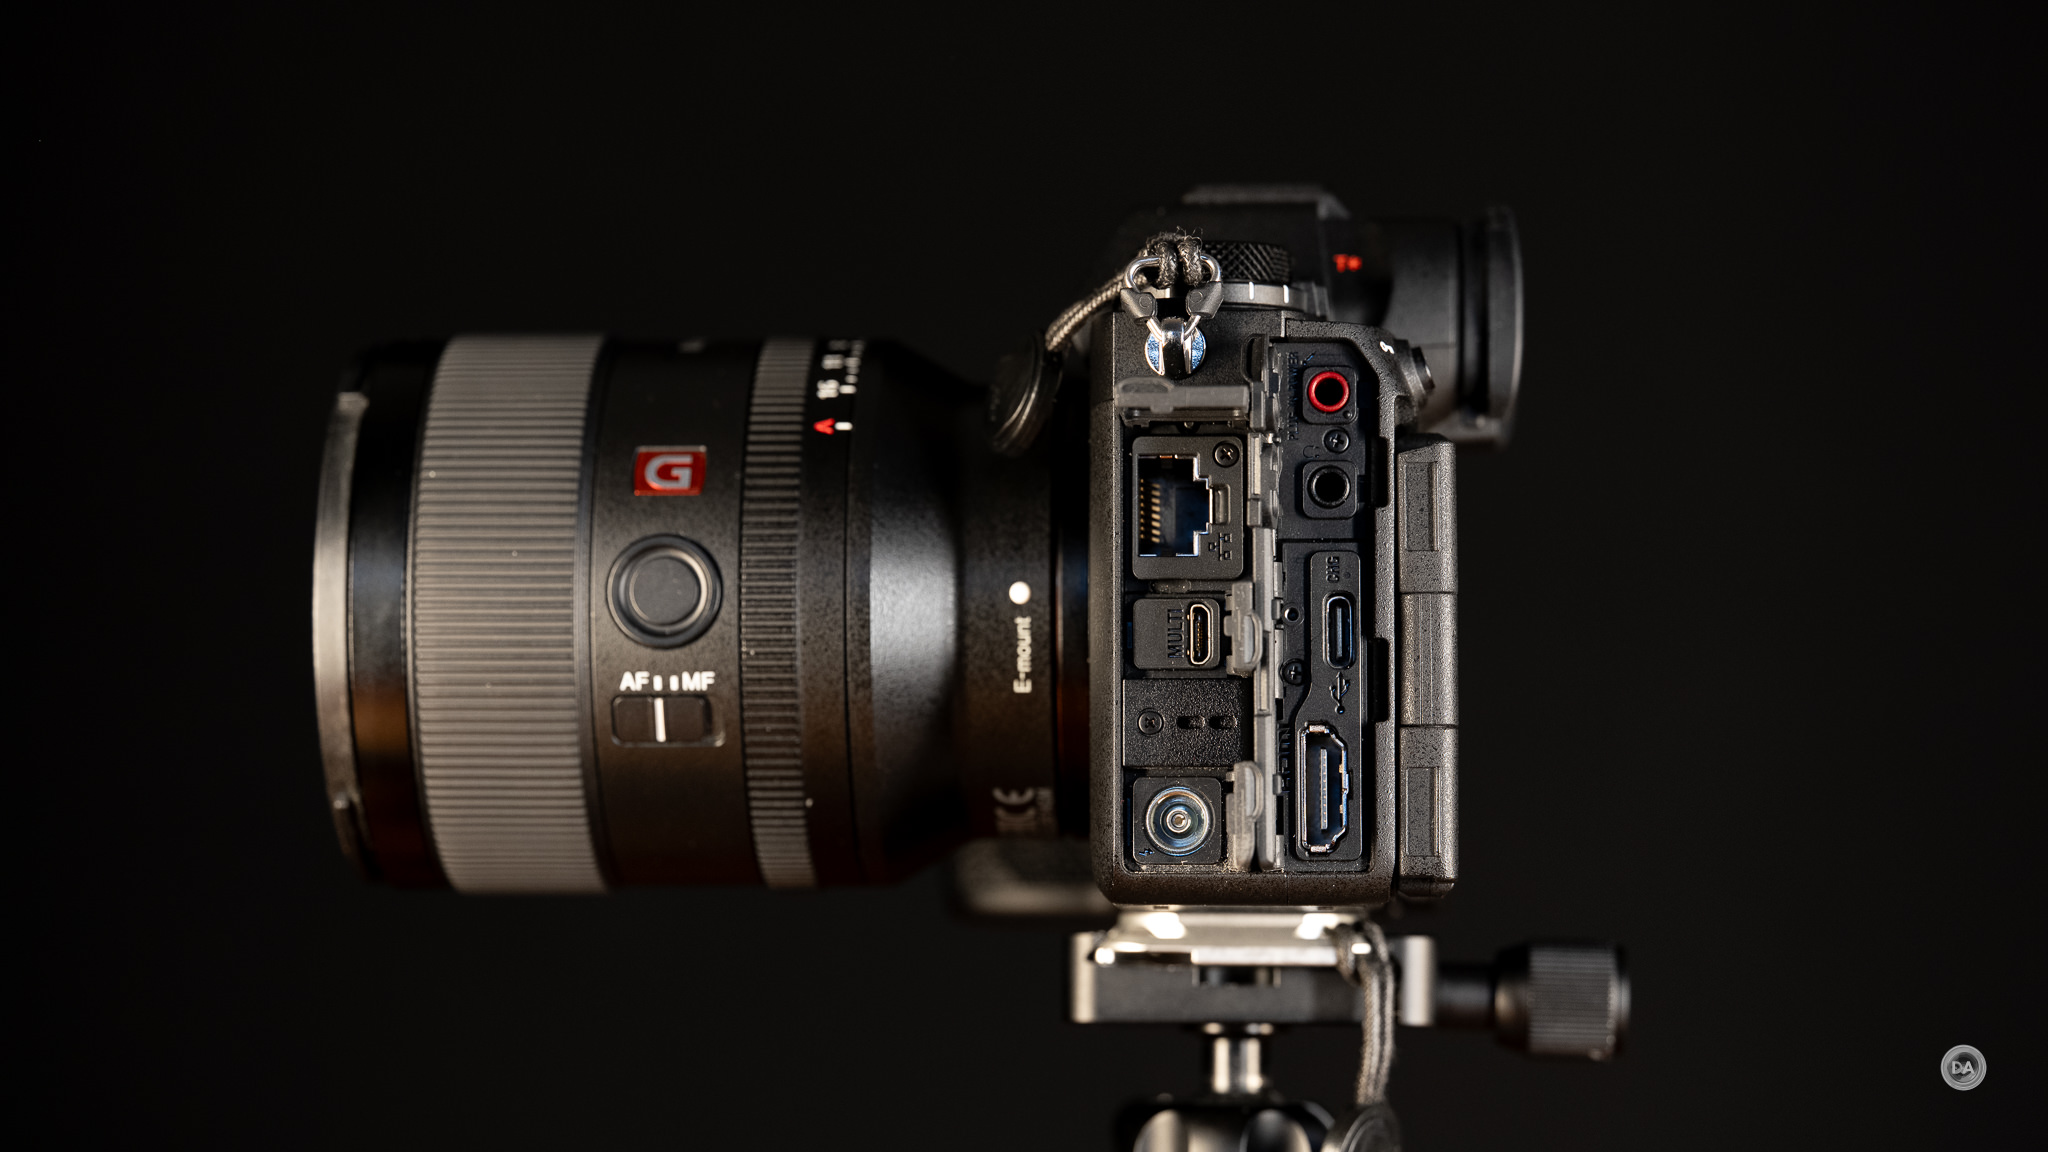
One of the Sony design cues that I like is the small separate compartment for the 3.5mm microphone input port. This is very useful as it allows you to have the screen facing forward for monitoring while having a microphone plugged in.
The 3.5mm headphone monitoring jack occupies its own port below that, while below that we have a USB-C port. Charging the camera via the USB-C port requires a PD (Power Delivery) standard at at least 18W and a 3A cable. The USB-C port is the SuperSpeed USB 10 Gbps (USB 3.2) standard for rapid data transfer (you can use this to use the camera as a webcam, do direct live streaming, or connect a smartphone. The α7V smartly moved to two USB-C ports so that you could charge the camera with one and do data transfer with the other, but unfortunately the α1 II was released before this epiphany. We have a Micro-USB multi port instead.
Also in this port is a full size HDMI port. Open the top port towards the front of the camera and you’ll find an upgraded LAN port which now has the faster 2.5GBASE-T, 1000BASE-T, 100BASE-TX standards. Below that (in a separate compartment) is the aforementioned micro-USB port, and below that is a flash sync terminal. Plenty of physical connectivity, and on top of that we have wireless connections in the form of Bluetooth 5.0 along with WiFi at the IEEE 802.11a/b/g/n/ac (2.4 GHz band/5 GHz band) standards.
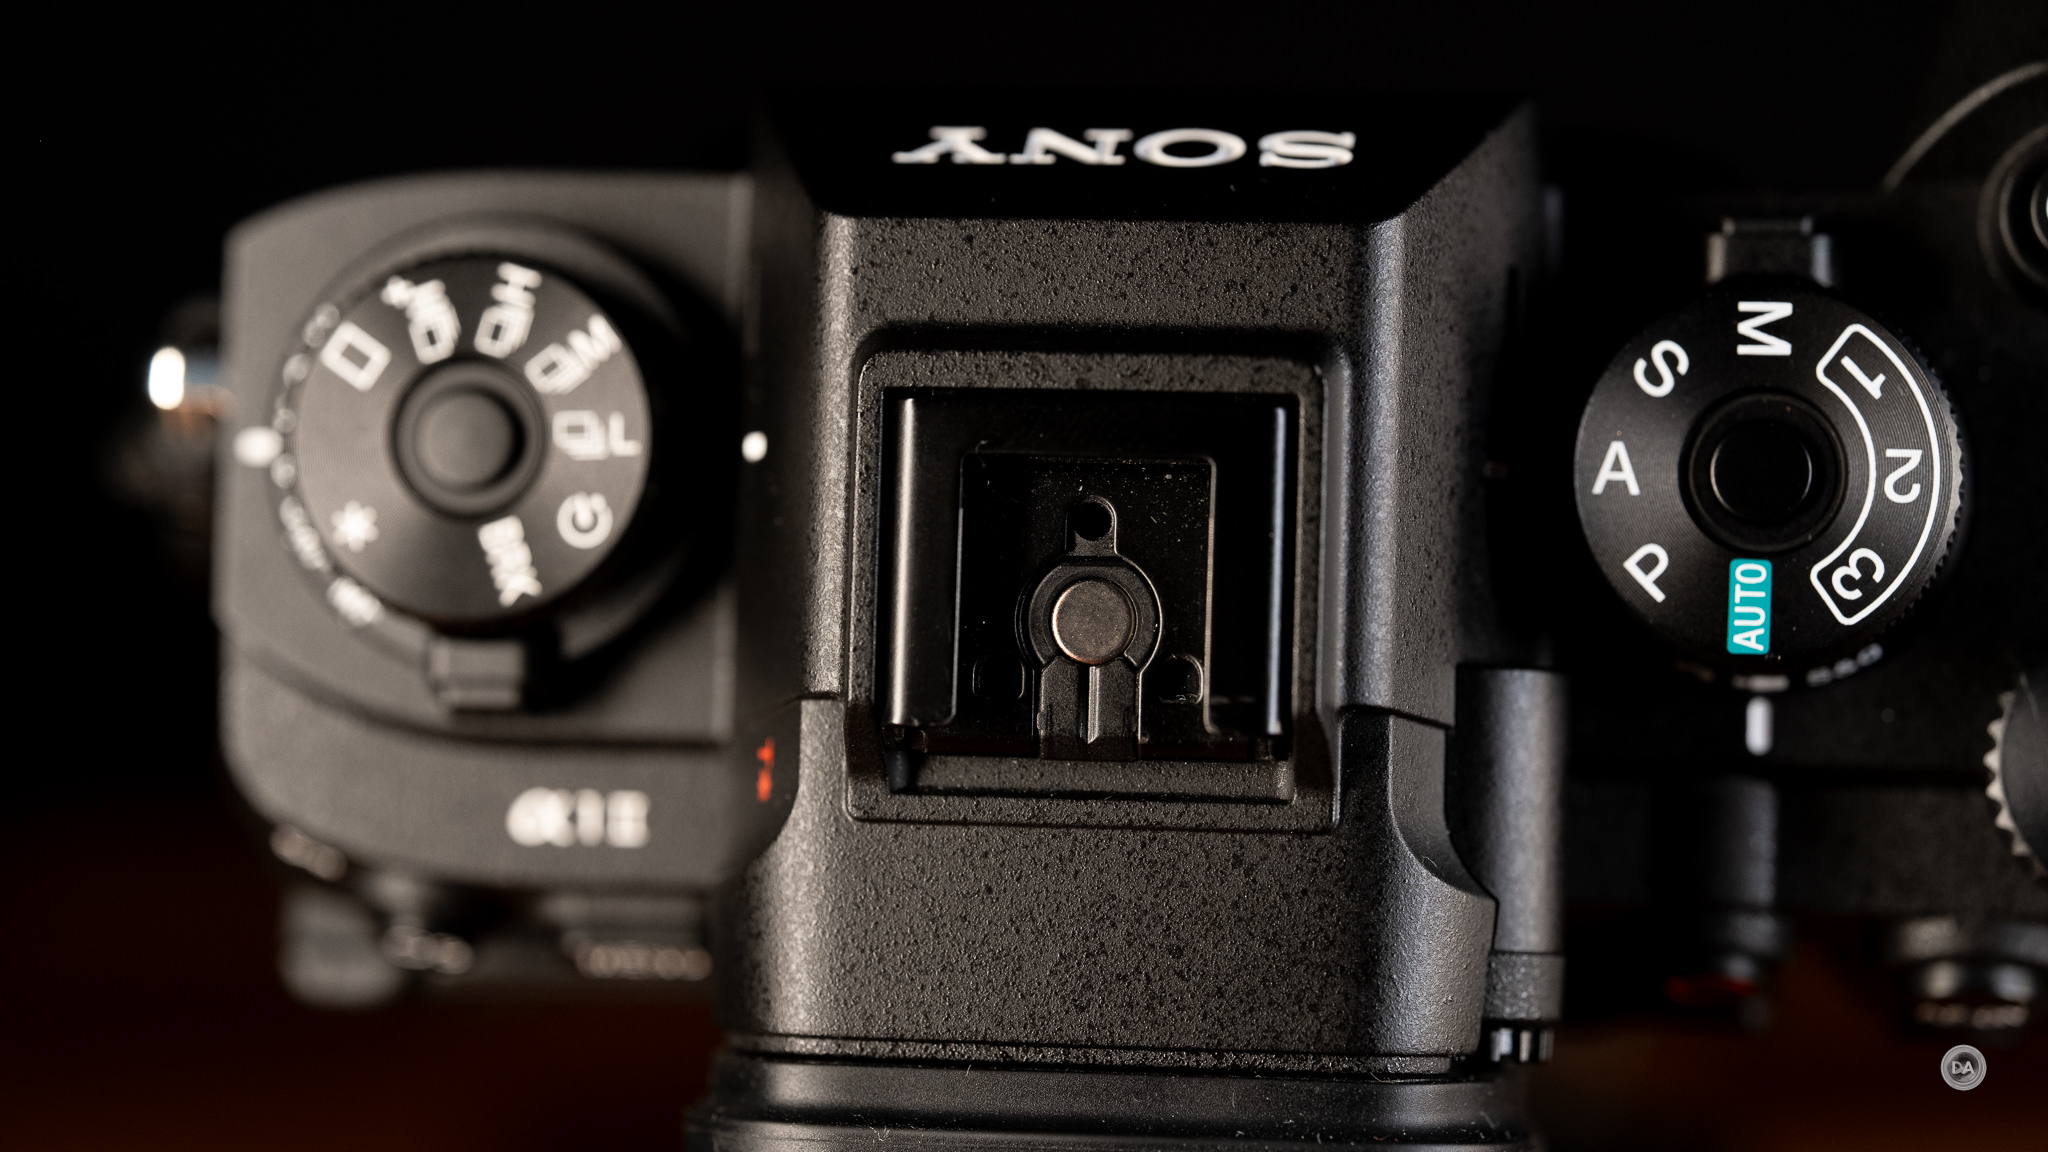
The “hot-shoe” is Sony’s MI (Multi-Interface) shoe that allows for not only flash communication but digital audio recording through compatible microphones.
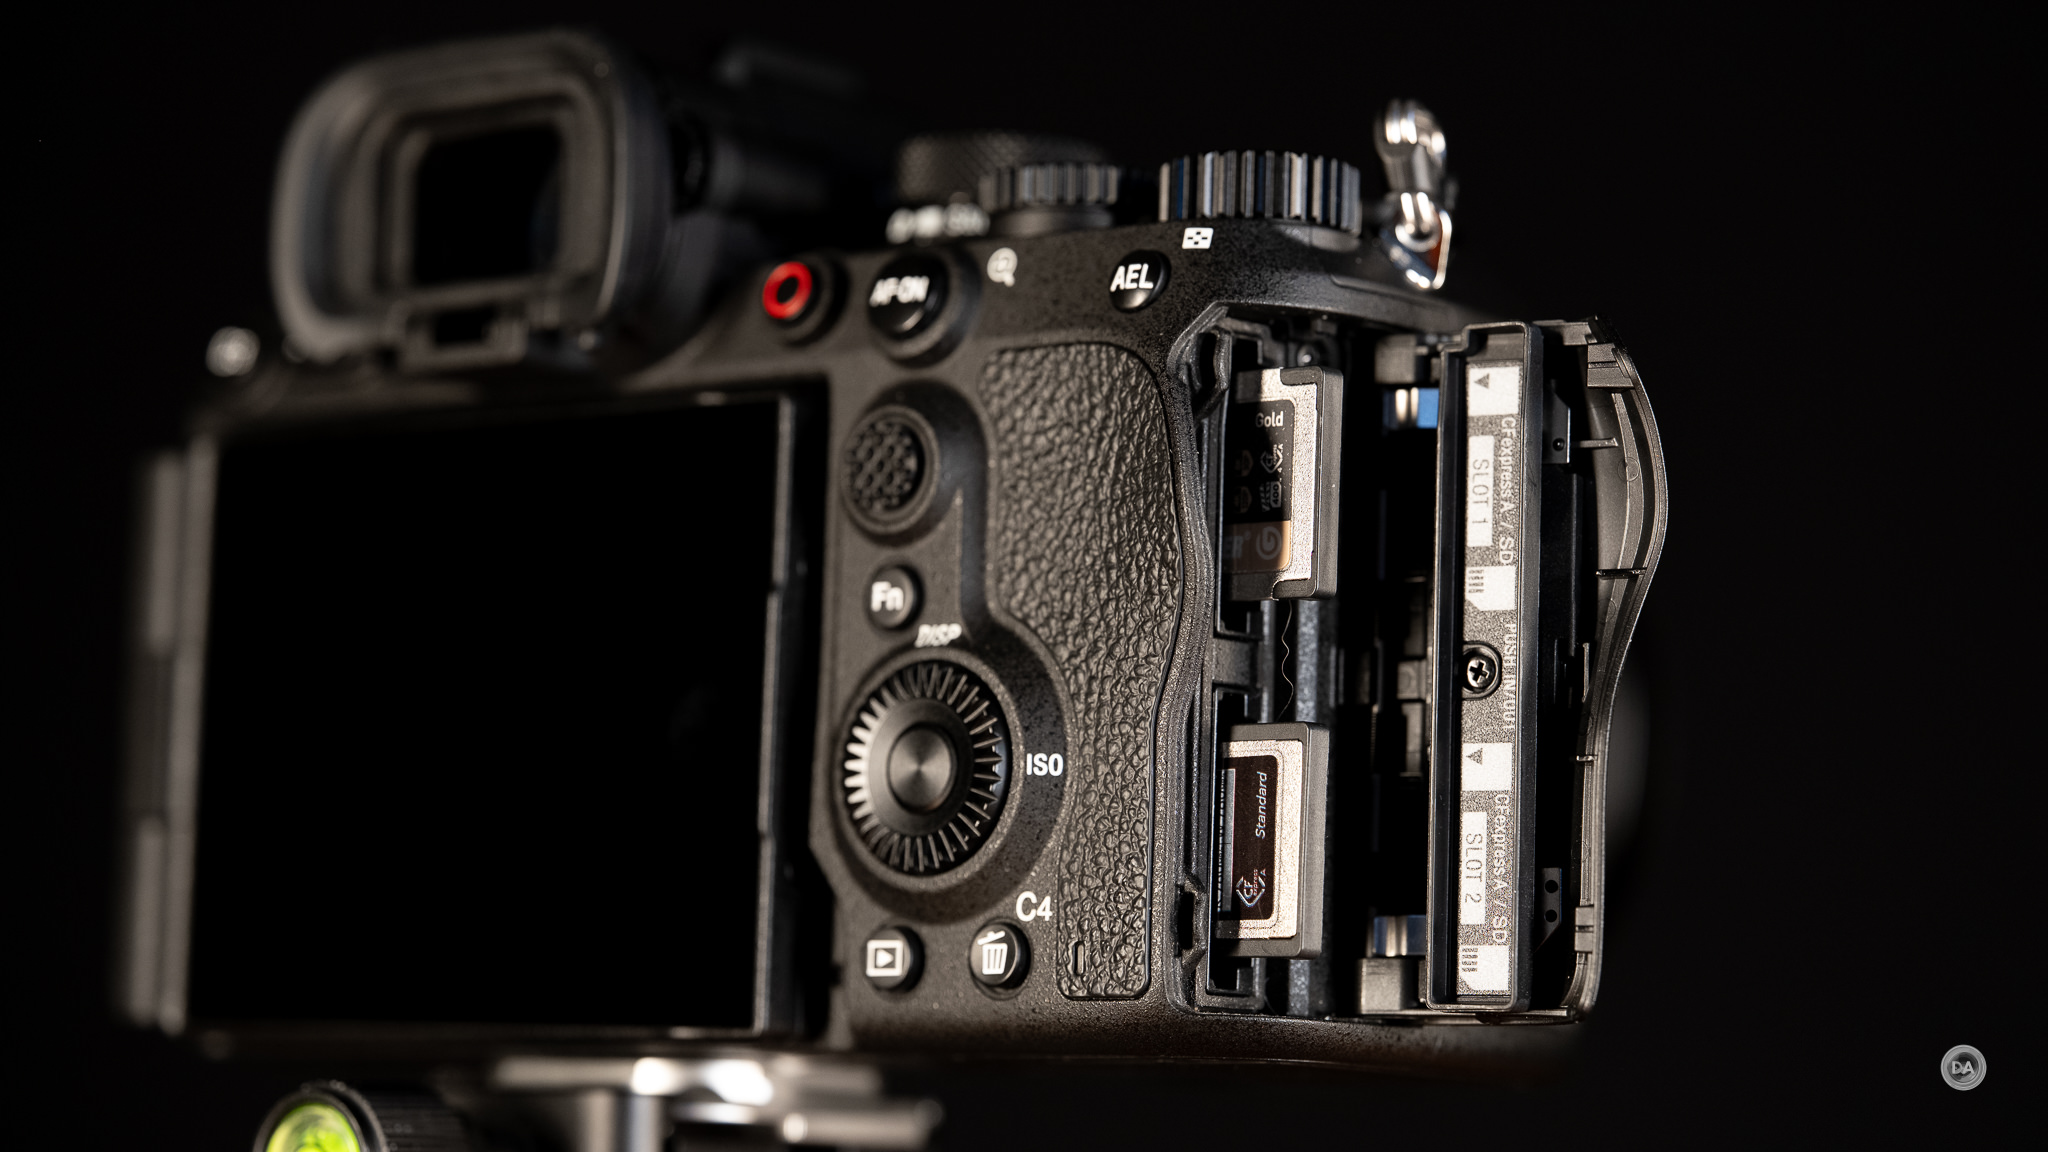
On the right side of the camera we have dual card slots. Both are a combo CFExpress Type A/UHS-II SD slots which allow you to use either/or card style. This gives you a number of recording options. I tend to use the “Sort” option that writes RAW images to one card and JPEGs to the other. The price of CFExpress Type A cards has really dropped in recent years due to more and more companies producing them.
Power comes courtesy of the familiar NP-FZ100 battery that has been powering Sony’s cameras for some time. The new α7V showed increased efficiencies in battery life, but unfortunately that isn’t the case with the α1 II, which is rated at just 420 frames through the viewfinder or 520 via the LCD screen according to CIPA. Video recording time is roughly 90 minutes per battery.
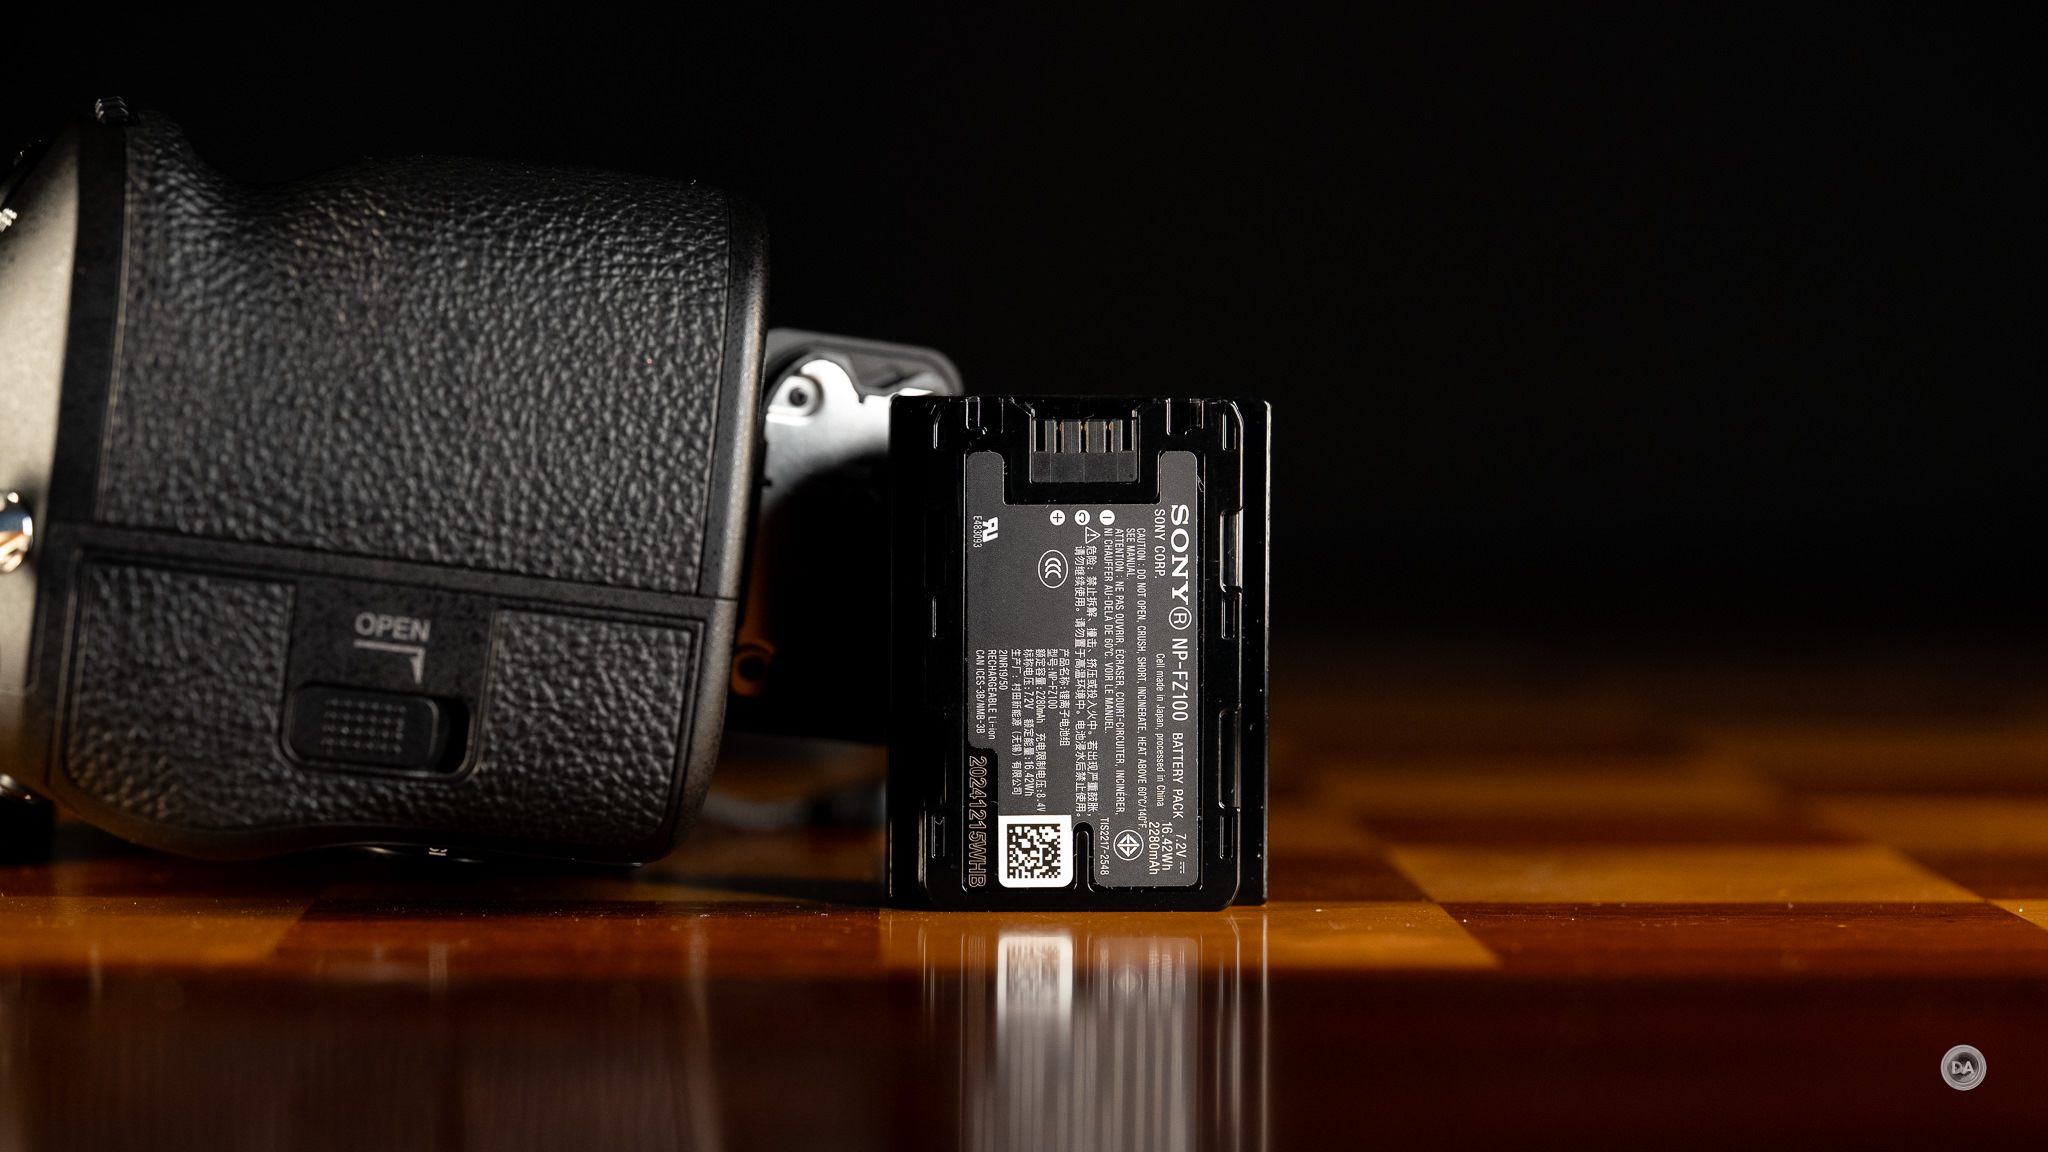
The α1 II is compatible with the VG-C5 vertical battery grip, (also used on the α9 III) for those wanting a bigger body and/or more battery life. The grip will allow you to utilize two of the NP-FZ100 batteries and extends your shooting life. You may be able to exceed the ratings for shots if you are shooting a lot of bursts and doing less reviewing/menu surfing.
Sony’s 5-Axis in-body-image-stabilization (Steady Shot) has gotten a huge upgrade here, moving from a CIPA rated 5.5 stops to up to 8.5 stops in the center and 7 stops in the periphery. That rating is reported using the 50mm F1.2 GM, so there will be some minor variation based on what lens is attached. I’ve found that Sony’s IBIS works better with shorter focal lengths in the past, which is still true to some degree, though I do see some improvement with longer lenses. Sony’s camera-based stabilization will work in conjunction with lens-based stabilization, though unlike Canon, for example, Sony doesn’t give any numbers on what level of stops are available in a hybrid situation where both lens and camera stabilization is working in concert.
I definitely feel like handholding with non-stabilized lenses is getting easier. I used the Viltrox LAB 135mm with their new 2.0x teleconverter and got this 270mm shot with a shutter speed of just 1/13th of a second (and at very close distance), and it is perfectly stable (about five stops, and I wasn’t even trying…)
One nice feature of Sony’s IBIS is that if you are using a lens with electronics (even an adapted lens), it will automatically adjust for the focal length. If you are using a lens without electronics you can manually set the focal length in the Steady Shot settings. It’s worth noting that sometimes third party lenses don’t report quite as well, so if you see less than desired stabilization results, switching to manually inputting the focal length can make a positive improvement. The a7V sports Sony’s Active Mode for video capture which adds digital stabilization into the mix to help with those handheld video shots. The combination works very well for getting run and gun video.
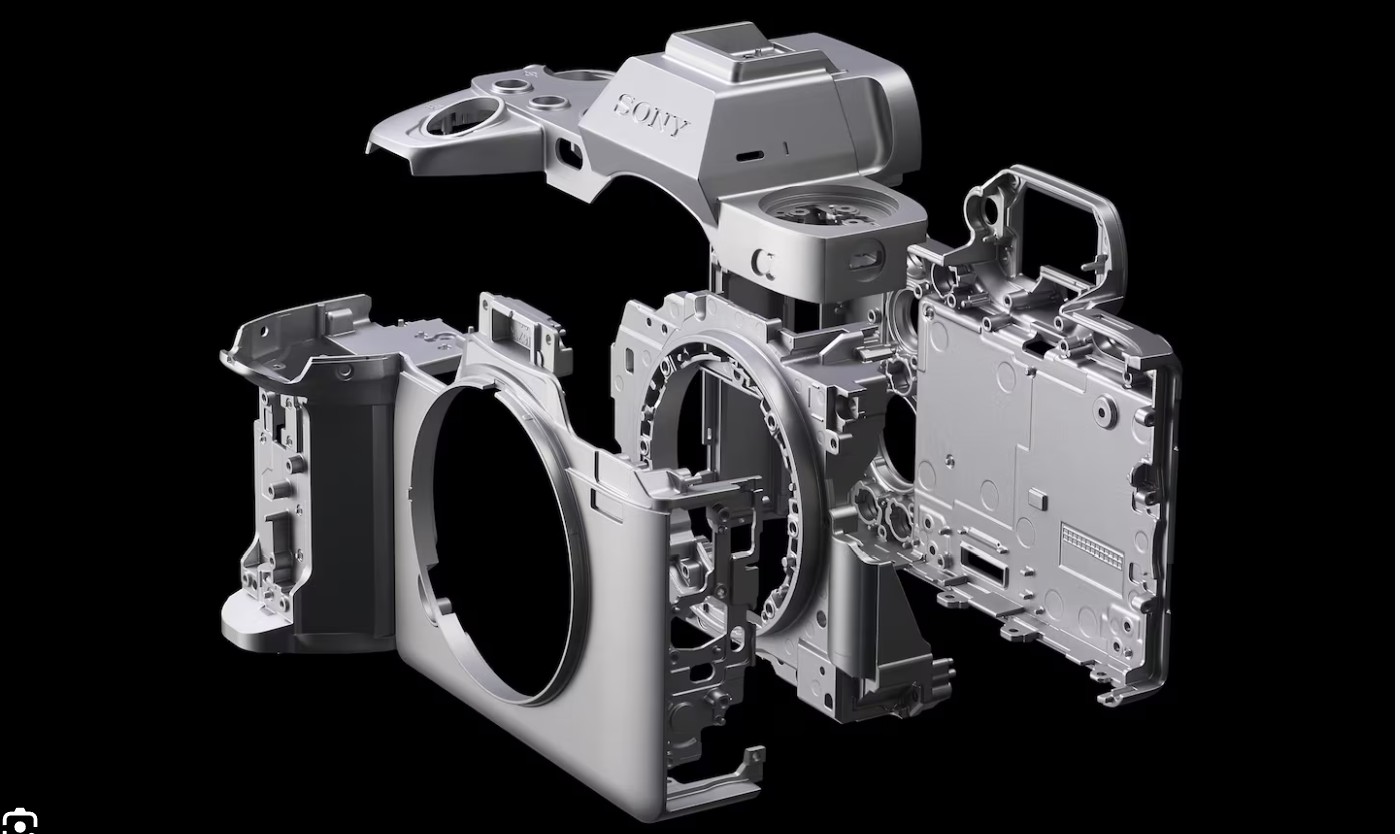
The α1 II has a robust body made of magnesium alloy complete with thorough weather sealing. The mechanical shutter is rated for an impressive 500,000 actuations.
The α1 II sports an intervalometer that is well-implemented for shooting time lapses, though I continue to wish there was an option for creating the timelapse movie in-camera, as downloading potentially hundreds of images and then creating the time lapse in software feels like unnecessary extra work. I would prefer to have a both/and option rather than either/or for this.
Ditto for the Pixel Shift feature. What is Pixel Shift? Pixel Shift functions by taking up to 16 photos (options are 4 or 16) while shifting the sensor one-half pixel in between, which results in getting massive amounts of information at a pixel level. Those (up to) 16 images are blended together (in software) to produce a single file with as much as 199MB, plus it eliminates things like moire and even increases color accuracy. This is particularly noticeable at a pixel level, where the file has much more resolution. Pixel Shift works best with a subject in which there will be no movement in between frames (architecture, for example), as there will be some minor delay between shots. Landscape images might be marred if there is any breeze present.
After shooting you will have either four or sixteen uncompressed RAW files in camera (there is no automatic combining of files in camera, unfortunately). You have to combine these files in post afterwards, and, at least for now, this is unsupported by Adobe or other third party software makers even after several years of the technology being on the market. You are required to use Sony’s own Imaging Edge Software to combine the images. The end results are impressive, but the resulting file sizes will be huge (particularly with the 16 shot option), and might be hard for your workstation to work with if it is underpowered.
There are five RAW options. We have the full size Uncompressed RAW option (highest quality but biggest file size), three Lossless Compressed RAW options (Small (12MP) | Medium (21MP) | Large (50MP), and a lower quality Compressed option. I prefer the Lossless Compressed option, as it gives you high quality along with more efficient file sizes. The average size of my RAW images seems to be right under 60MB. We also have the option of shooting in an HEIF format for better image quality than JPEGs.

GPS logging and geotagging is handled via a Bluetooth connection to your smartphone and having the Sony Creator’s app active (and the Location Linkage set up). This is standard practice these days across brands, but it doesn’t always work consistently, in my experience, leaving some images tagged and others untagged. You essentially need to be sure that the Bluetooth link is active before you start shooting (at the very least at the beginning of your shoot).
The improvements are subtle, perhaps, but add up to a more complete camera that I’m personally enjoying using much more than the α1 that I replaced.
As a final note: Sony is touting the “environmentally friendly” packaging of the α1 II, but frankly I found it very insulting after spending $8500 CDN on a camera. The box is plain white cardboard with little adornment, and the packaging for something like the extra eyecup was literally a little paper pouch that felt like someone had folded a sheet of copy paper around it. It honestly felt like buying a black market product. Apple has mastered the art of delivering packaging that makes you feel like you’ve bought a premium product. Sony has done the opposite here. On a positive note, however, the α1 II does come with the BC-ZD1 dual-bay battery charger which charges via USB-C. Too bad they didn’t include even a USB-C cable, much less an AC Adapter.
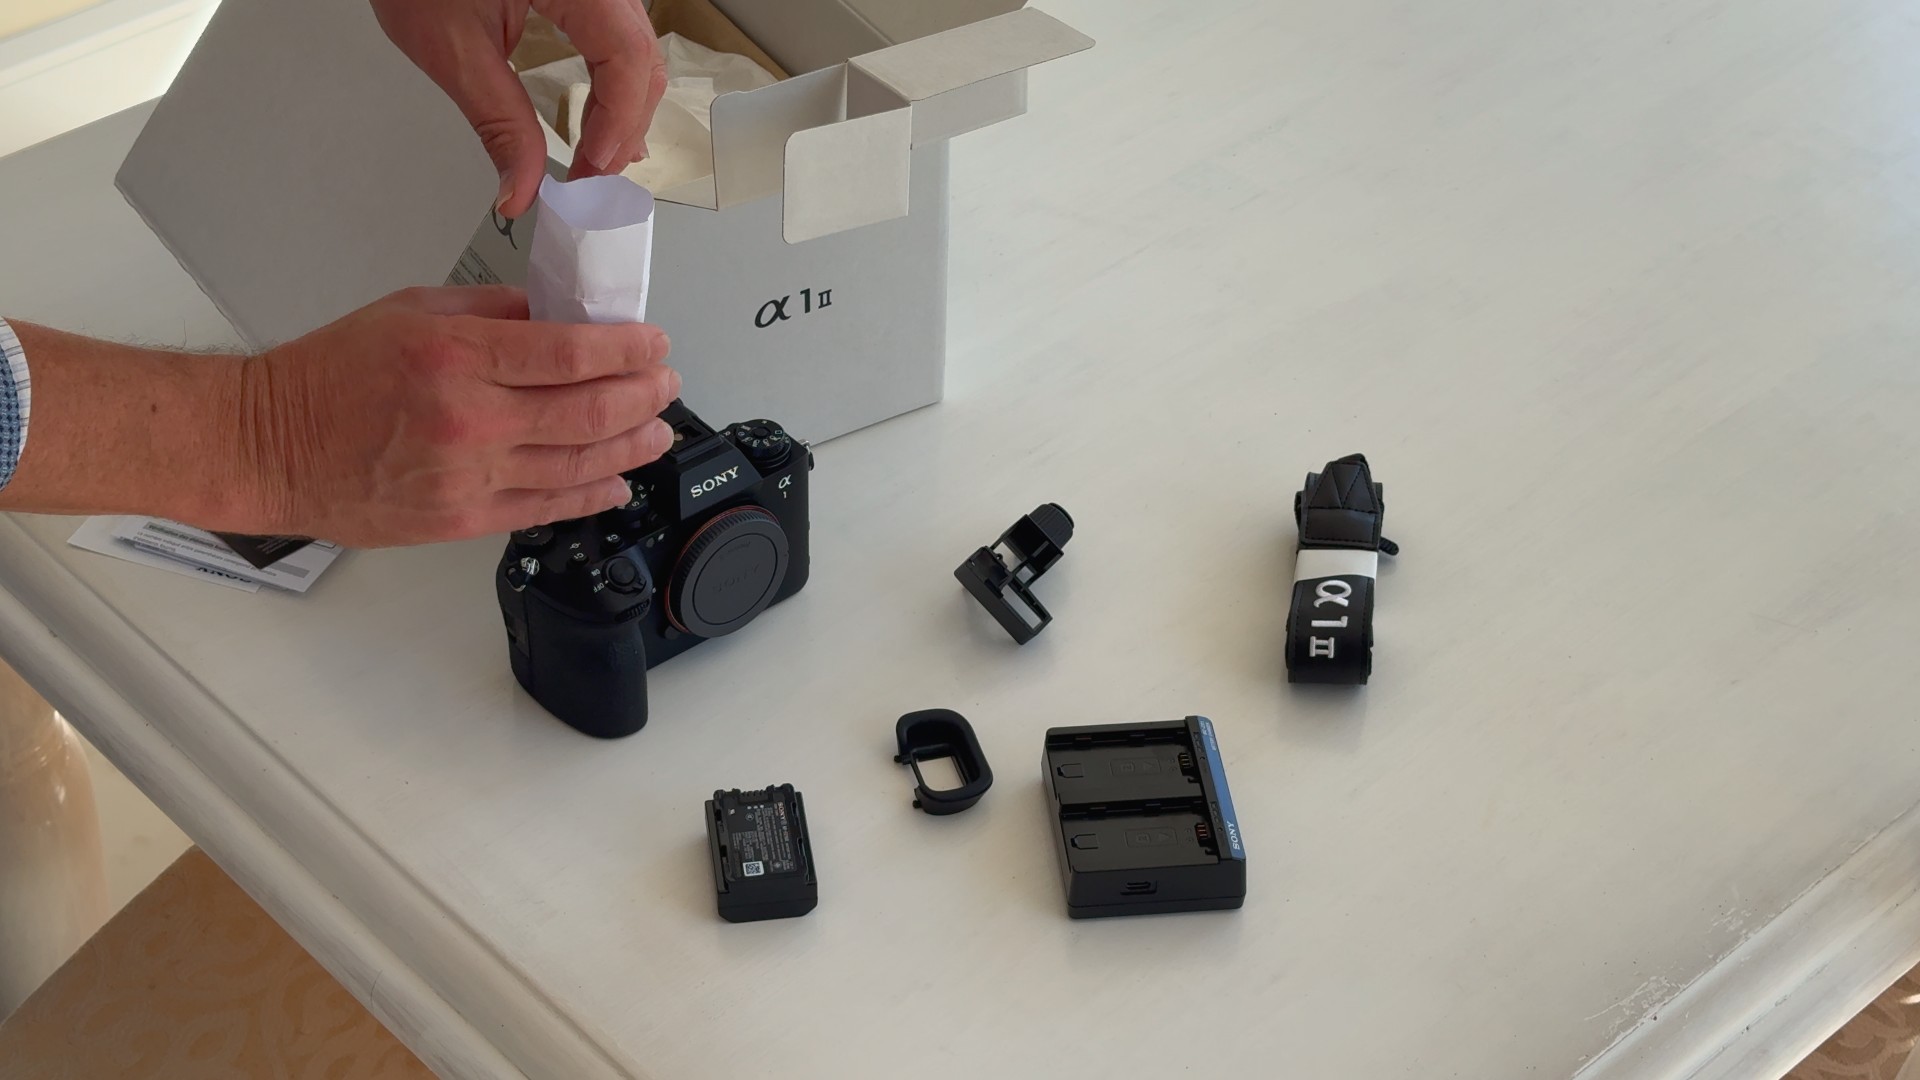
I’m not impressed, Sony, not impressed. Virtue signal at your own expense, not with my premium camera.
Shutter, Burst Rate, and Buffers
Until the launch of the α9 III, the α1 series was Sony’s fastest camera in terms of burst rate. The α9 III blew it out of the water, however, with its incredible up to 120FPS burst speed, which makes the 30FPS of the α1 series feel rather slow.
It’s not.
I’ve never encountered any issues with “not enough speed” with the α1, and I’m unlikely to feel the same about the α1 II. The bad news is that there really isn’t any particular improvement to the shutter speed, burst rate, or buffers here, but that was largely because the original was already pretty excellent. The ability to shoot up to 30FPS at such a high resolution (50MP) remains fairly unique, and the α1 II does it while maintaining a 14-bit RAW image. A camera like the Nikon Z8 is 45MP and can shoot up to 30FPS, but that is only while shooting JPEGs. The maximum burst rate while shooting RAW files drops to 20FPS. The fact that the α1 II can deliver 50MP 14-Bit RAW images at 30FPS remains unique, and the α1 II delivers those fast burst speeds without any viewfinder blackout, so your view through the viewfinder stays constant and without disruption.

There are a few caveats attached to getting that 30FPS, however. The first and most obvious is that you have to be using a native Sony lens, as Sony has restricted the burst rate of third party lenses to 15FPS (with AF) on all of its cameras. You can achieve the full 30FPS with certain third party lenses, but not in AF-C mode. So, if you want actually useful burst rates (with tracking and using AF-C), you’ll need a Sony lens. You’ll also need to be shooting with the electronic shutter, as the mechanical shutter is limited to just 10FPS. The third limitation is that the full 30FPS is only accessible using the “Lossy” RAW compression (if shooting RAWs). Shooting other RAW compressions (like my preferred Lossless Compressed) will drop the burst speed to 20FPS. Finally, you need to be shooting with a fast enough shutter speed to achieve those fast burst rates, as shooting at slower shutter speeds take more time.
I have rarely used the mechanical shutter on either generation of α1, as the camera is really designed around the electronic shutter. The Stacked BSI CMOS Sensor has an incredibly fast 3.8ms readout speed, meaning that it has extremely low rolling shutter and can mitigate almost all of the typical deficiencies associated with an electronic shutter. It can even do 1/200th second flash sync speeds with the electronic shutter, and up to a whopping 1/400th of a second flash sync speeds with the mechanical shutter (which might be the only reason to use the mechanical shutter!) Those numbers rise to 1/250th and 1/500th when shooting in APS-C mode.
As per usual, the mechanical shutter has a maximum shutter speed of 1/8000th of a second, but the electronic shutter will deliver up to 1/32,000th of a second, which can be very useful when shooting with bright lenses.
One of the areas that the premium α1 II separates itself from a mid-level camera like the α7V is in the buffer depth. You get much more flexibility in how many frames you can shoot before the buffer fills, making it more likely that you’ll catch your moment.

Here are the official buffer specs from Sony: “JPEG Extra fine L: 190 frames JPEG Fine L: 400 frames JPEG Extra fine L: 400 frames RAW: 240 frames RAW & JPEG: 200 frames RAW (Uncompressed): 84 frames RAW (Uncompressed) & JPEG: 80 frames RAW (Lossless Compressed): 100 frames RAW (Lossless Compressed) & JPEG: 86 frames” Your buffer depth and the rate at which it empties will depend on the speed of your card, so get a fast one. I’ve had no problems exceeding these buffer depths. When testing for this review, I got about 5 1/2 seconds at 30FPS, which would be over 150 RAW images, and shooting continued after that at only a slightly lower frame rate. I’m using the Chipfancier 512GB CFExpress Type A found here.
Need more buffer depth? Drop to 20FPS and you’ll have few practical issues with buffer.
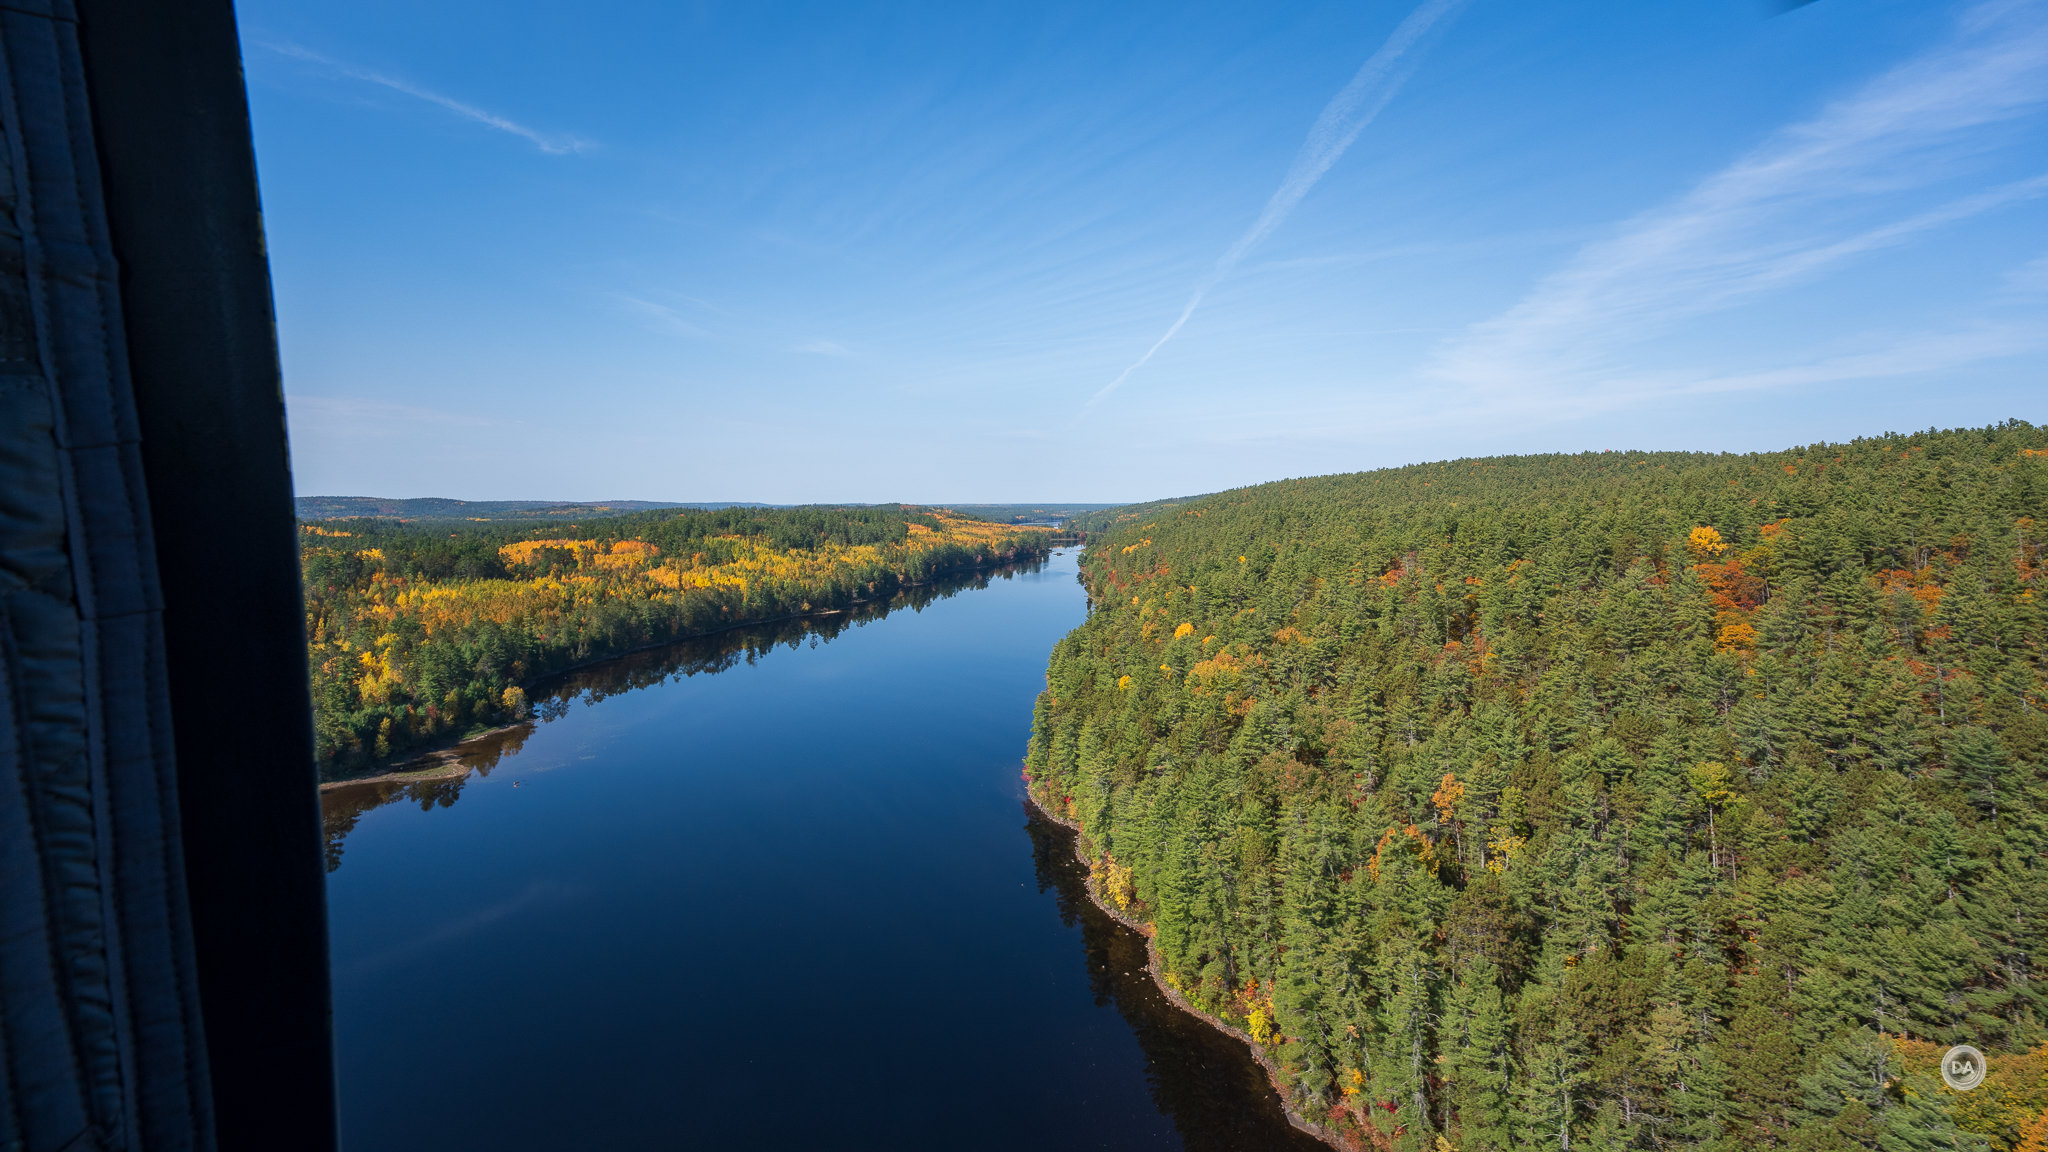
Sony has also added “Pre-Capture” to the α1 II. With Pre-Capture enabled, holding the shutter release halfway down will starting tracking the subject and shooting up to 30 frames even before you fully depress the shutter, and capture continues after you have fully depressed the shutter. This ensures you won’t miss your shot in the initial split-second. That can certainly come in handy. I grabbed this shot while zooming over this river in a Chinook helicopter.
I love cameras designed around electronic shutters, as they tend to have relatively few compromises attached to using the electronic shutter…and many advantages!
Autofocus Performance
On paper, the autofocus system looks largely the same as the one found on the α1, though with a key addition. We still have 759 Phase Detect autofocus points spread across most all of the frame (for both stills and video).

What’s different, however, is that the α1 II has a dedicated AI processor that alongside the BIONZ XR image processing engine that allows for advanced subject detection and tracking. We first saw this on the α7RV. Very importantly we know have an automatic subject detection mode, which means that you don’t have to manually select the subject to be tracked (I’ve had issues with this in the past). You can still also choose to manually track humans, birds, animals, humans, cars, planes, or trains.
The AI chip detects human poses even if a face is not visible, allowing you to pick up a human subject (and continue to effectively track them) where eye detection is no longer possible. I have found autofocus to be utterly reliable where people are involved, regardless of lighting.

What’s more, even when shooting at F1.4 with a third-party lens (the Viltrox Pro 50mm F1.4 in this case), I could stop fast moving action and get great precision.
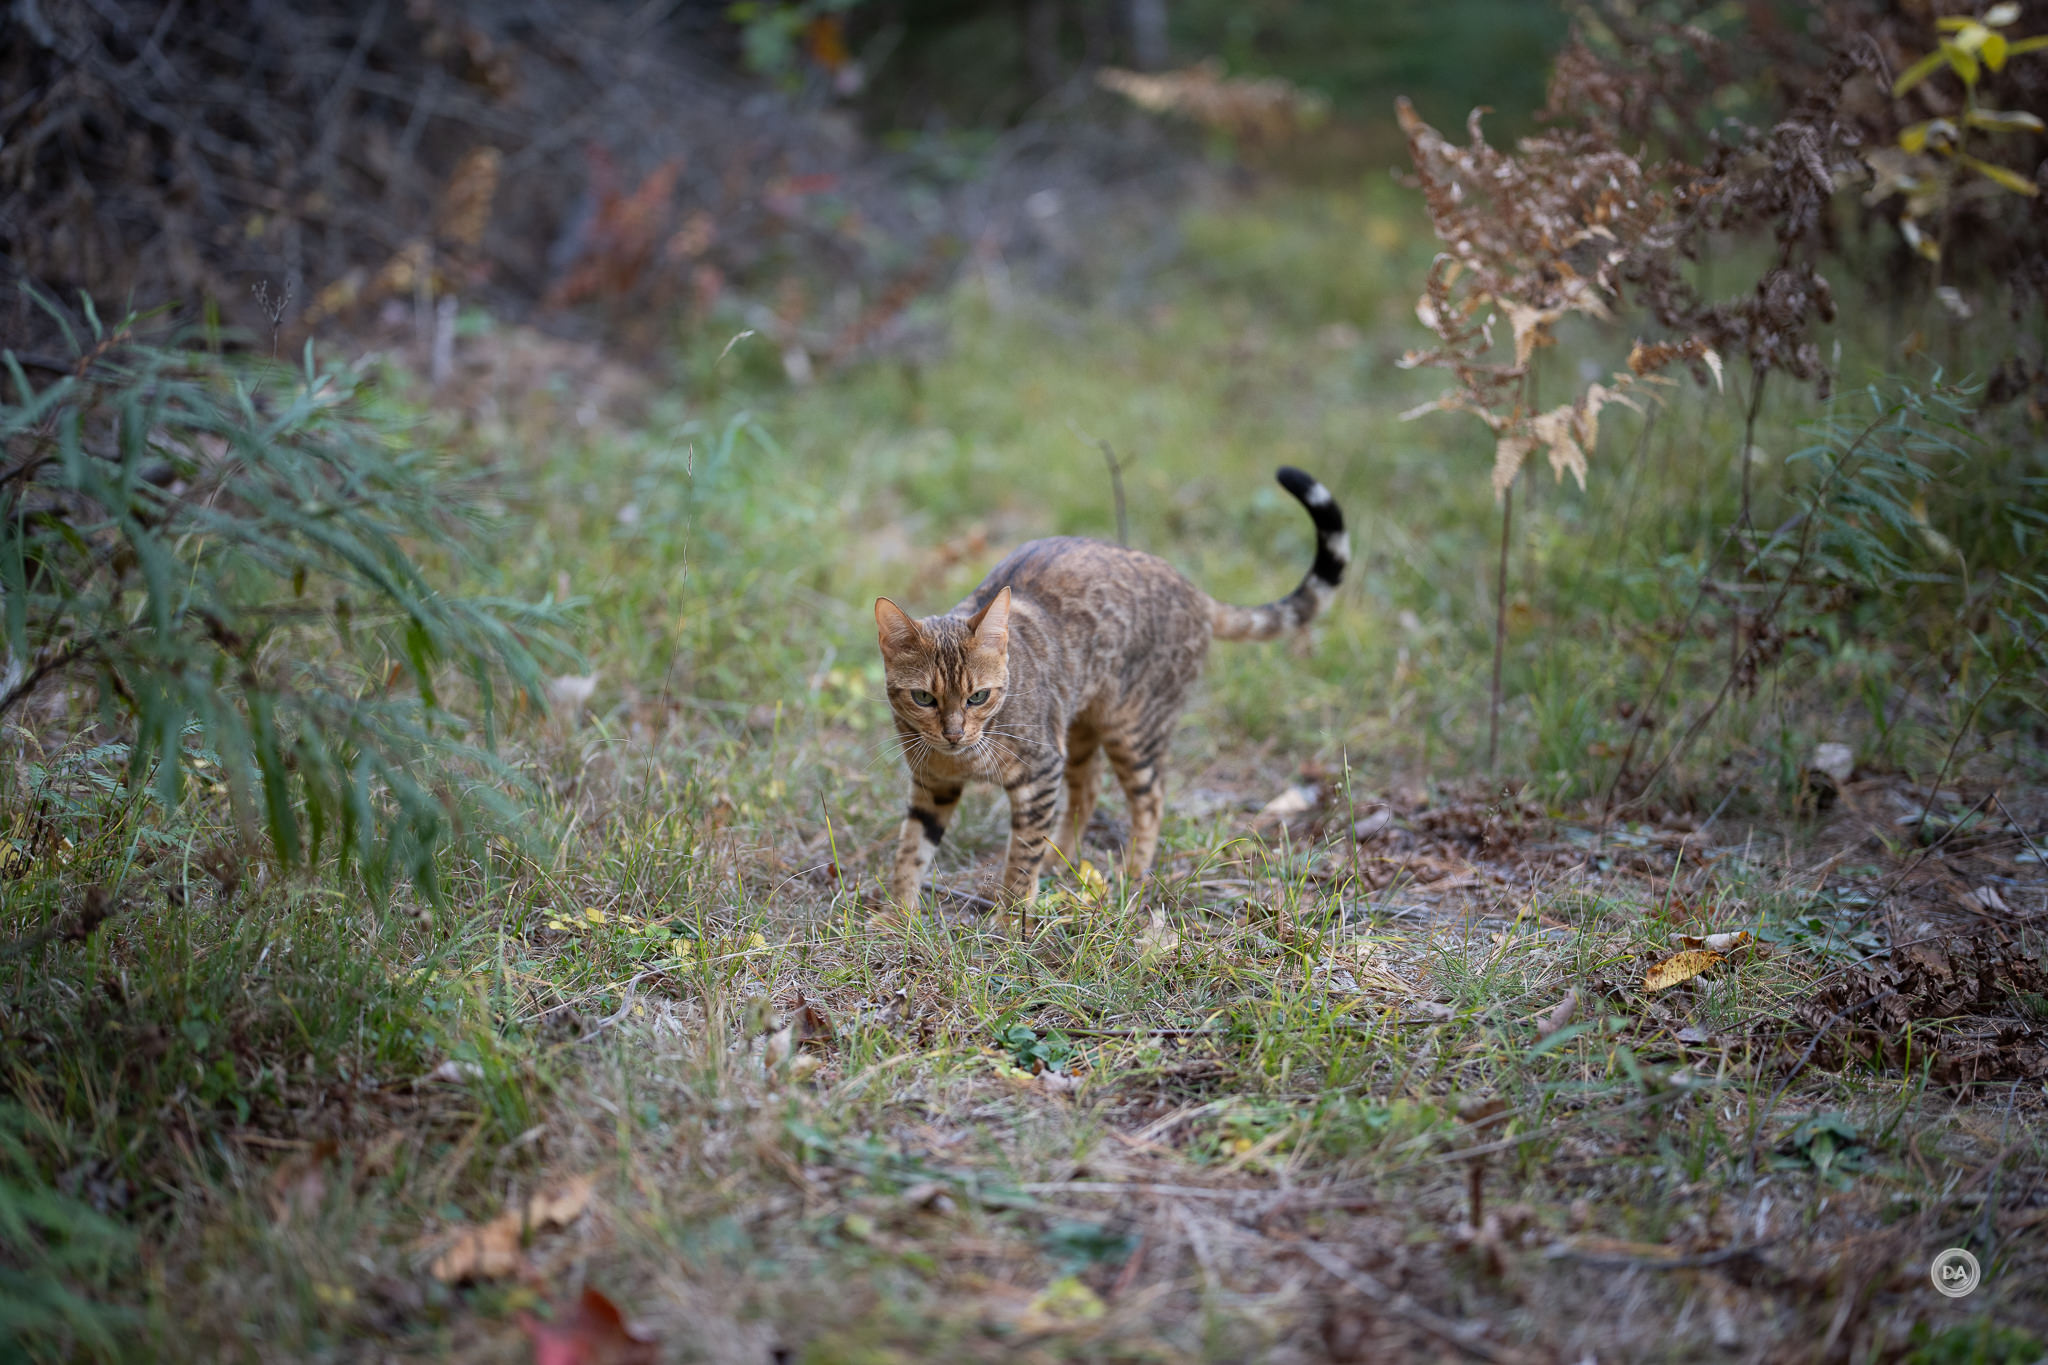
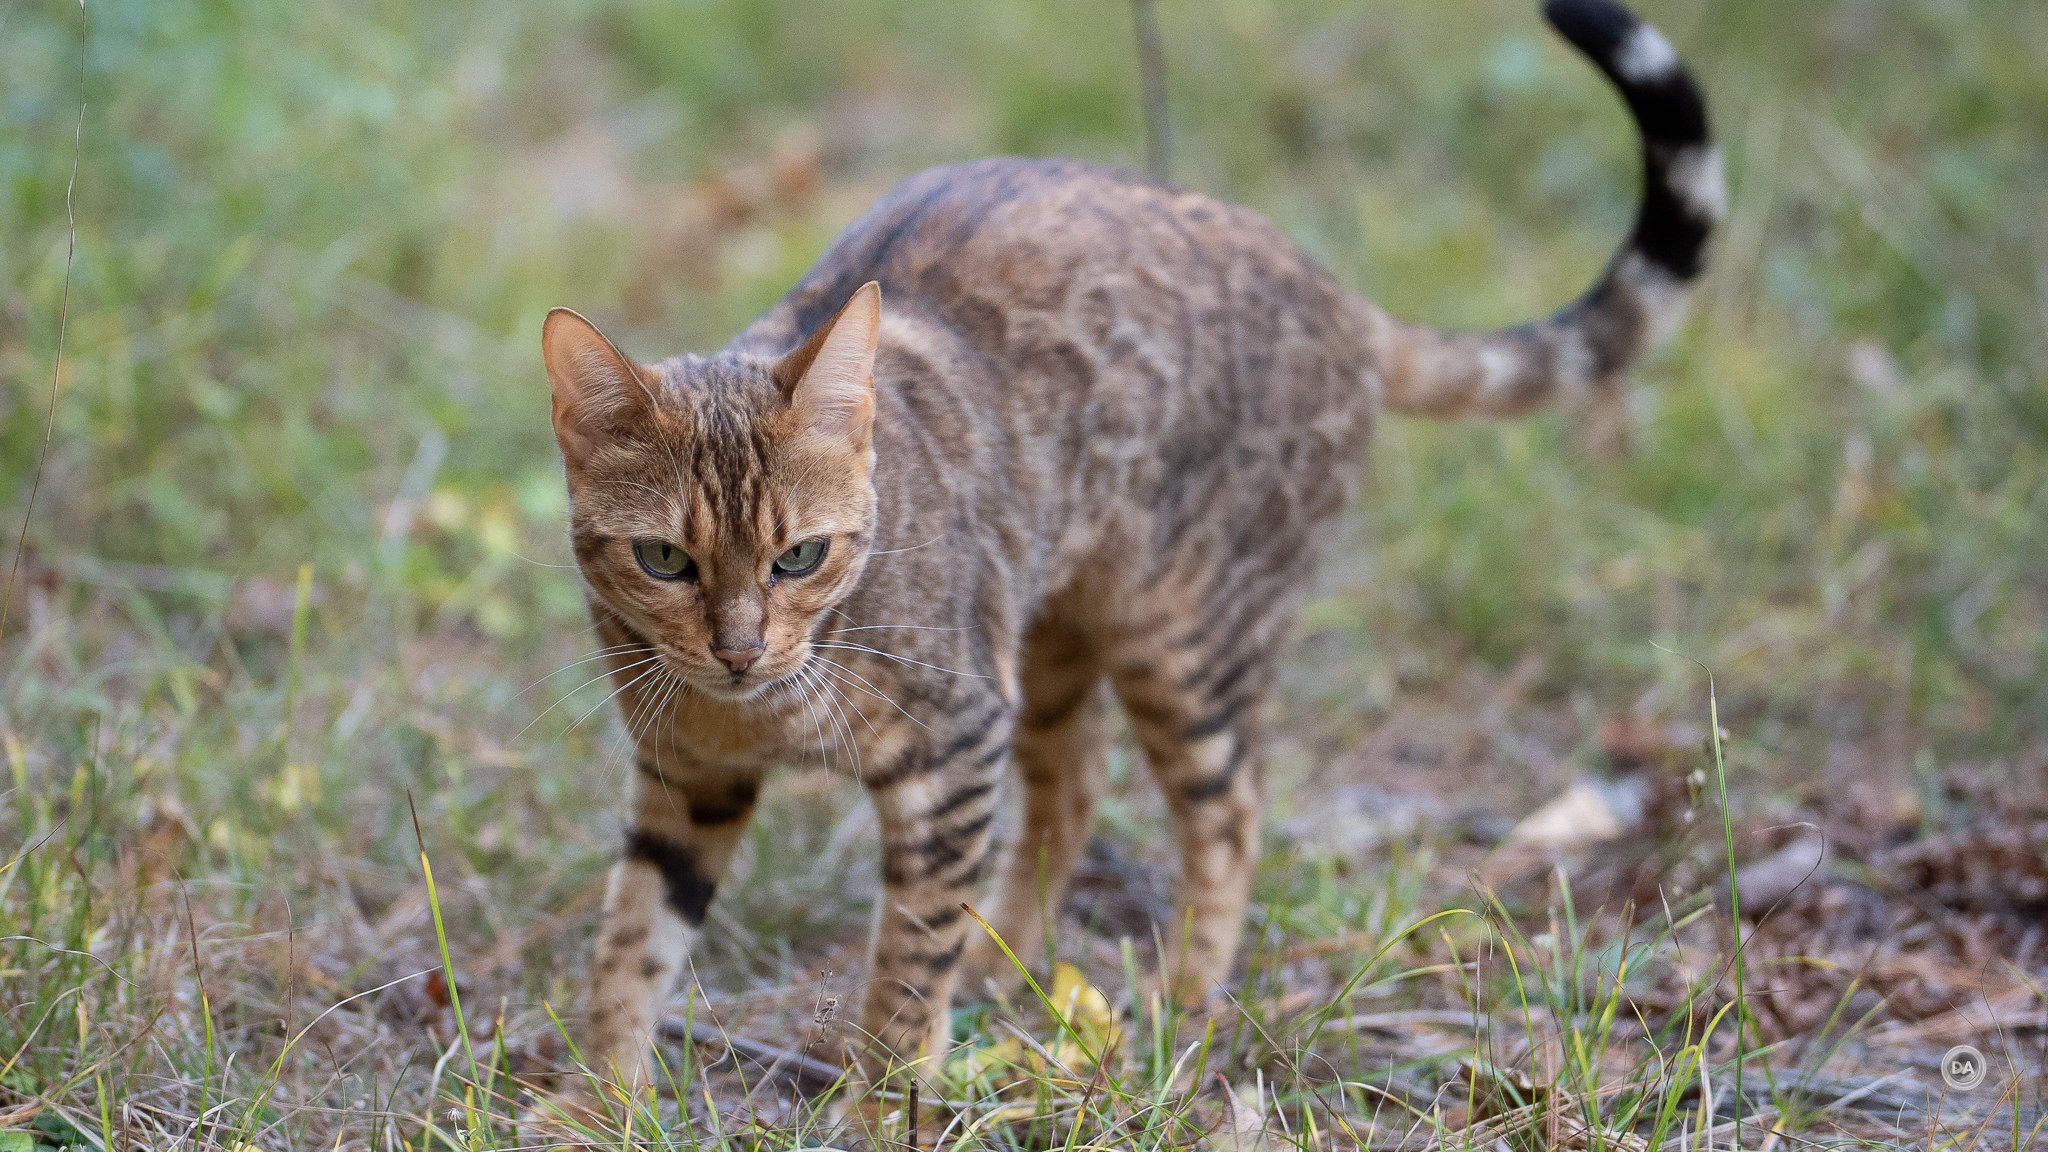
Birds in flight? No problem. Tracking is well-night perfect all throughout the bursts with a variety of lenses.

Forget birds in flight…what about bees in flight? No problem, even shooting with the new Sony 100mm F2.8 GM Macro and a 1.4x teleconverter.

I’ve used the α1 II for weddings, portrait sessions, and a ton of reviews already, and autofocus is always amazing.

The autofocus capabilities of this camera are impressive.
Video Performance
In 2021 the video specs of the α1 were nothing shot of exceptional. It was the first Sony Alpha camera to offer 8K 10 bit recording. Likewise the idea of have 120FPS at 4K resolution was still very novel. But there isn’t much change in the basic specs to this second generation, even if there are some key refinements. We don’t see 8K60 recording options, for example, or Open-gate recording, nor do we see any internal RAW recording options.
So what improvements do we have?
- Improved AI tracking while shooting video. The core autofocus improvements we’ve discussed also apply to video recording. The α1 II will be less distracted by foreground objects, can detect “poses” even if a face is not present, and will generally be more stable during focus. Sony touts 30% better human subject tracking and 50% better animal/bird tracking.
- Enhanced stabilization modes for video. The α1 II has Sony’s “Dynamic Active Mode” for stabilization that improves stabilization by up to 20% over the original when the camera is moving and also has a “Framing Stabilizer” modes that locks onto a subject to minimize shifting while walking.
- Custom LUT (Look Up Table) support. The α1 II allows you to upload of up 16 custom LUTs and then preview LOG footage with the LUT attached in real-time. The process is quite simple, though note you’ll need to use an SD card instead of a CFExpress Type A for transferring the LUTs to camera along with a specific folder structure on the cards.
- 180-degree shutter angle support. The a1 II adds 1/48 and 1/96 second shutter speeds to enable a perfect 180-degree shutter angle. This is very useful for those wanting to shoot in the more cinematic 24FPS format.
- AI Auto Framing. This mode will automatically crop and track a subject across the frame, giving the impression of a camera operator.
- Fully articulating LCD screen. This enables much easier front monitoring.
You’ll notice that what isn’t in the list are any new resolutions or bitrates. That all essentially remains the same.
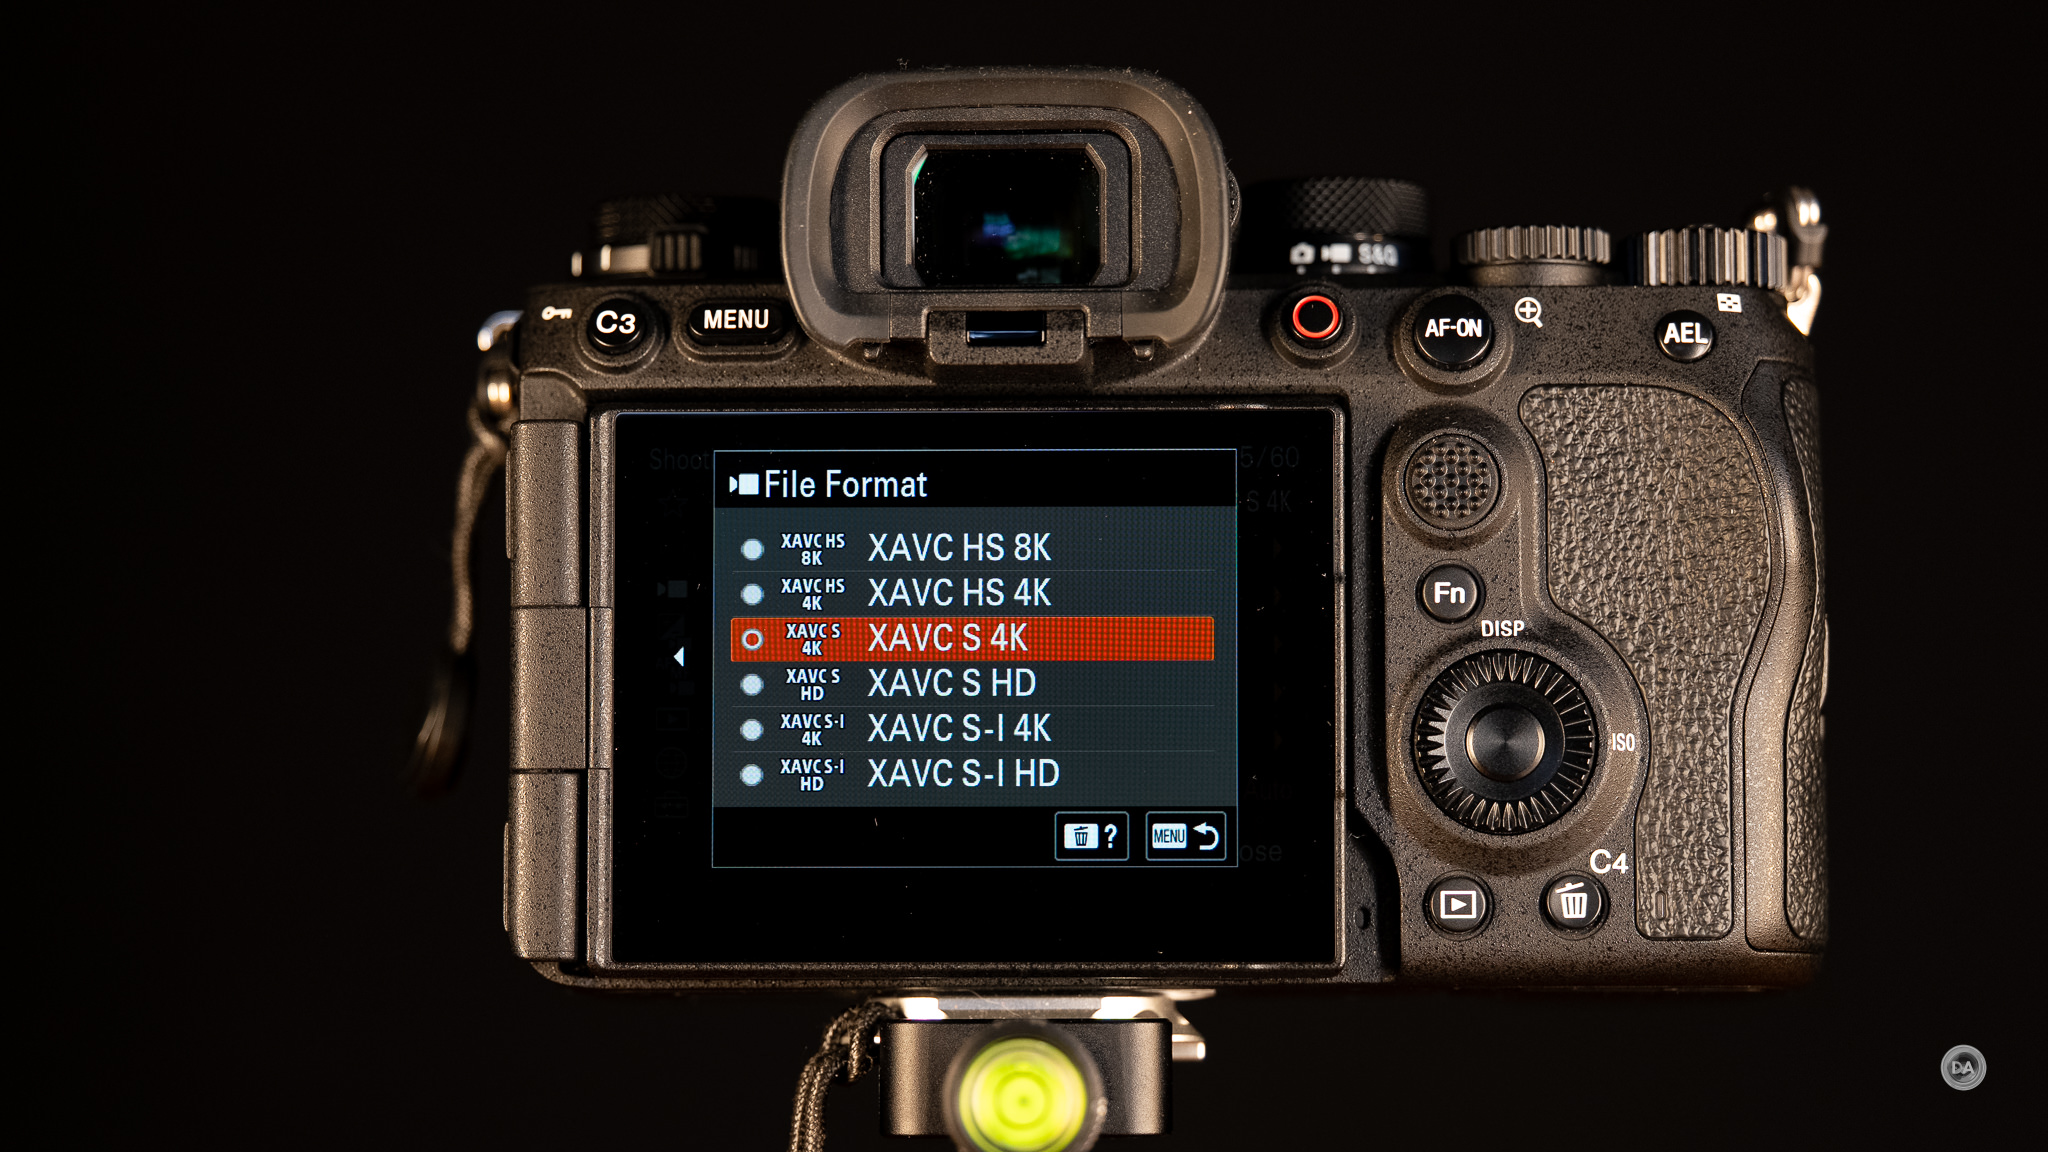
Internal Recording Formats
- 8K (7680 x 4320): Up to 30p in XAVC HS 4:2:2 10-bit.
- 4K (3840 x 2160): Up to 120p (with 10% crop) in XAVC HS/S 4:2:2 10-bit.
- 4K (3840 x 2160): Up to 60p (full-frame or Super 35) in XAVC S-I (up to 600 Mbps).
- FHD (1920 x 1080): Up to 240p (via S&Q mode).
External Recording
RAW Video: Up to 8K 16-bit RAW output via HDMI to compatible external recorders.
Codecs & Color
- Codecs: XAVC HS (H.265), XAVC S (H.264), XAVC S-I (Intra).
- Color Profiles: S-Log3, S-Log2, HLG, and S-Cinetone.
- Capabilities: 10-bit 4:2:2 internal recording, user LUT support.
All of this is obviously still very competitive (and very useful), and there’s a reason why I use the α1 II almost exclusively for filming on my channel. I find Sony’s footage easy to work with, and the option to film in 8K gives one the ability to deeply crop (zoom up to 200%) while still retaining 4K resolution. Sony’s 8K footage is oversampled from an 8.6K source for additional detail, and taking a screen grab from the 8K footage is like getting a high resolution image.

You can also get very high detailed Super35 4K footage, as it is oversampled from a 5.8K source.
I have always found Sony’s footage easy to work with, and, if I don’t want to grade (I rarely do for my channel), I find that footage straight out of camera looks great. I’ve been doing a bit more grading recently, however, largely because shooting LOG in camera with the ability to use a custom LUT simplifies the workflow. I’m a fan of Gerald Undone’s custom LUTs that he’s developed for specific cameras, which is what I primarily use. Here’s a screen grab of an S-LOG 3 scene shot in 8K and then graded using Gerald’s LUT.

A variety of LOG options are available, along with Sony’s S-Cinetone color matrix. I’ve never run into overheating issues with either the α1 or α1 II, though that is a possibility if you are shooting in extremely hot conditions. Sony estimates that you can record in 8K straight for about 30 minutes before encountering any overheating issues. Extending the screen from the body helps. I’ve done plenty of long format 4K30 recording with zero overheating issues, though I have felt the camera get warm.
If you are purely into video, perhaps consider an a7S series camera instead, but if you like the idea of having a massively capable video camera that can also do high resolution imagery and sports photography, the α1 II has few rivals.
Sensor Performance
You may detect a theme at this point, as the sensor in the α1 II is the same full-frame stacked 50.1-MP Exmor RS™ CMOS found in the Alpha 1, though with a few tweaks to improve performance. This is largely due to an updated processing unit that squeezes a bit of additional efficiency out of the sensor. My trusted source for raw sensor data is Photons to Photos, which we’ll reference a few times alongside my own tests. According to them, the α1 II achieves a bit more dynamic range along with a bit cleaner high ISO performance. That’s all good news, as this is one of Sony’s best sensors. It is very effective at combining very high resolution (8640 x 5760 pixels) with speed and clean results. The Sony a7RV is higher still at 9504 x 6336 pixels, though most photographers will find the α1 II’s resolution plenty for them. Pair the Alpha 1 with quality lenses and it will reward you with incredible detail across the frame:

High resolution bodies like this allow you to deeply crop images while still having plenty of resolution, which gives you all kinds of framing options:

The α1 was the first to give us both the speed of a sports camera and this kind of resolution, and while my mind isn’t quite as blown by it these days, I remain impressed with the incredible images I can get from the α1 II in a wide variety of situations.

There’s enough resolution here to have a very useful Medium Lossless Compressed RAW size (5616 x 3744 , or 21MP) that has no crop (just a reduced size for when you don’t need full resolution), which is also the size of the APS-C crop mode, which is enough that throwing APS-C lenses on there does still make sense. It’s not quite as useful as the 26MP APS-C resolution that the a7RIV or a7RV provide, but I shot for a decade with the 20MP Canon 6D…so that’s something!
Here’s a look at a shot from an APS-C lens on the α1 II (Viltrox Pro AF 56mm F1.2), and you can see that the image delivers plenty of fine detail in the crop of it.


Let’s dig deeper into some of the technical issues.
Dynamic Range
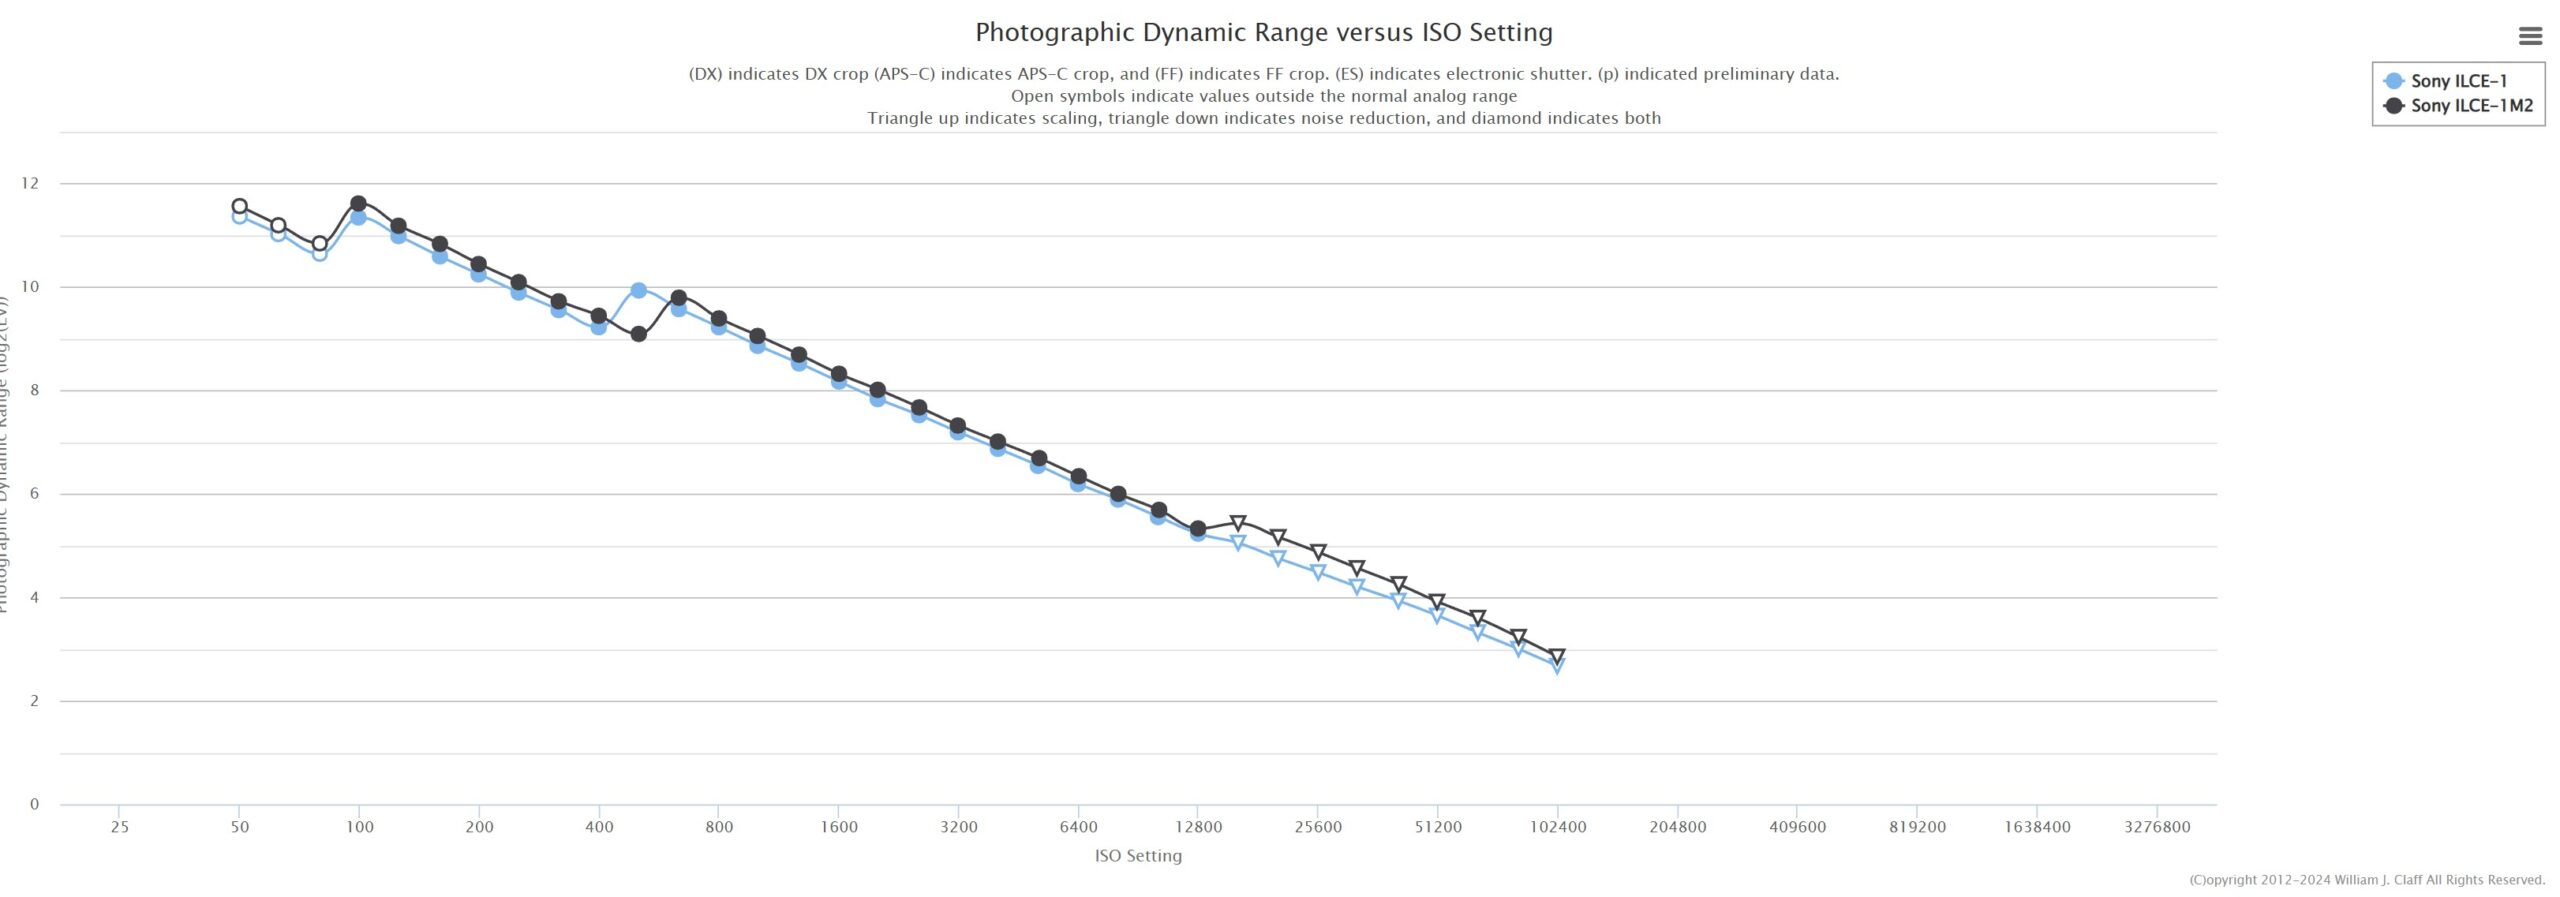
While the basic sensor is the same in the α1 II as it was in the previous generation α1, Sony always manages to get a bit more out of the second generation use of a sensor. It’s been true in multiple generations of the a7R series and even a7 series as well. Photons to Photos shows a slight but consistent improvement in the dynamic range according to their tests. (Black represents the α1 II).
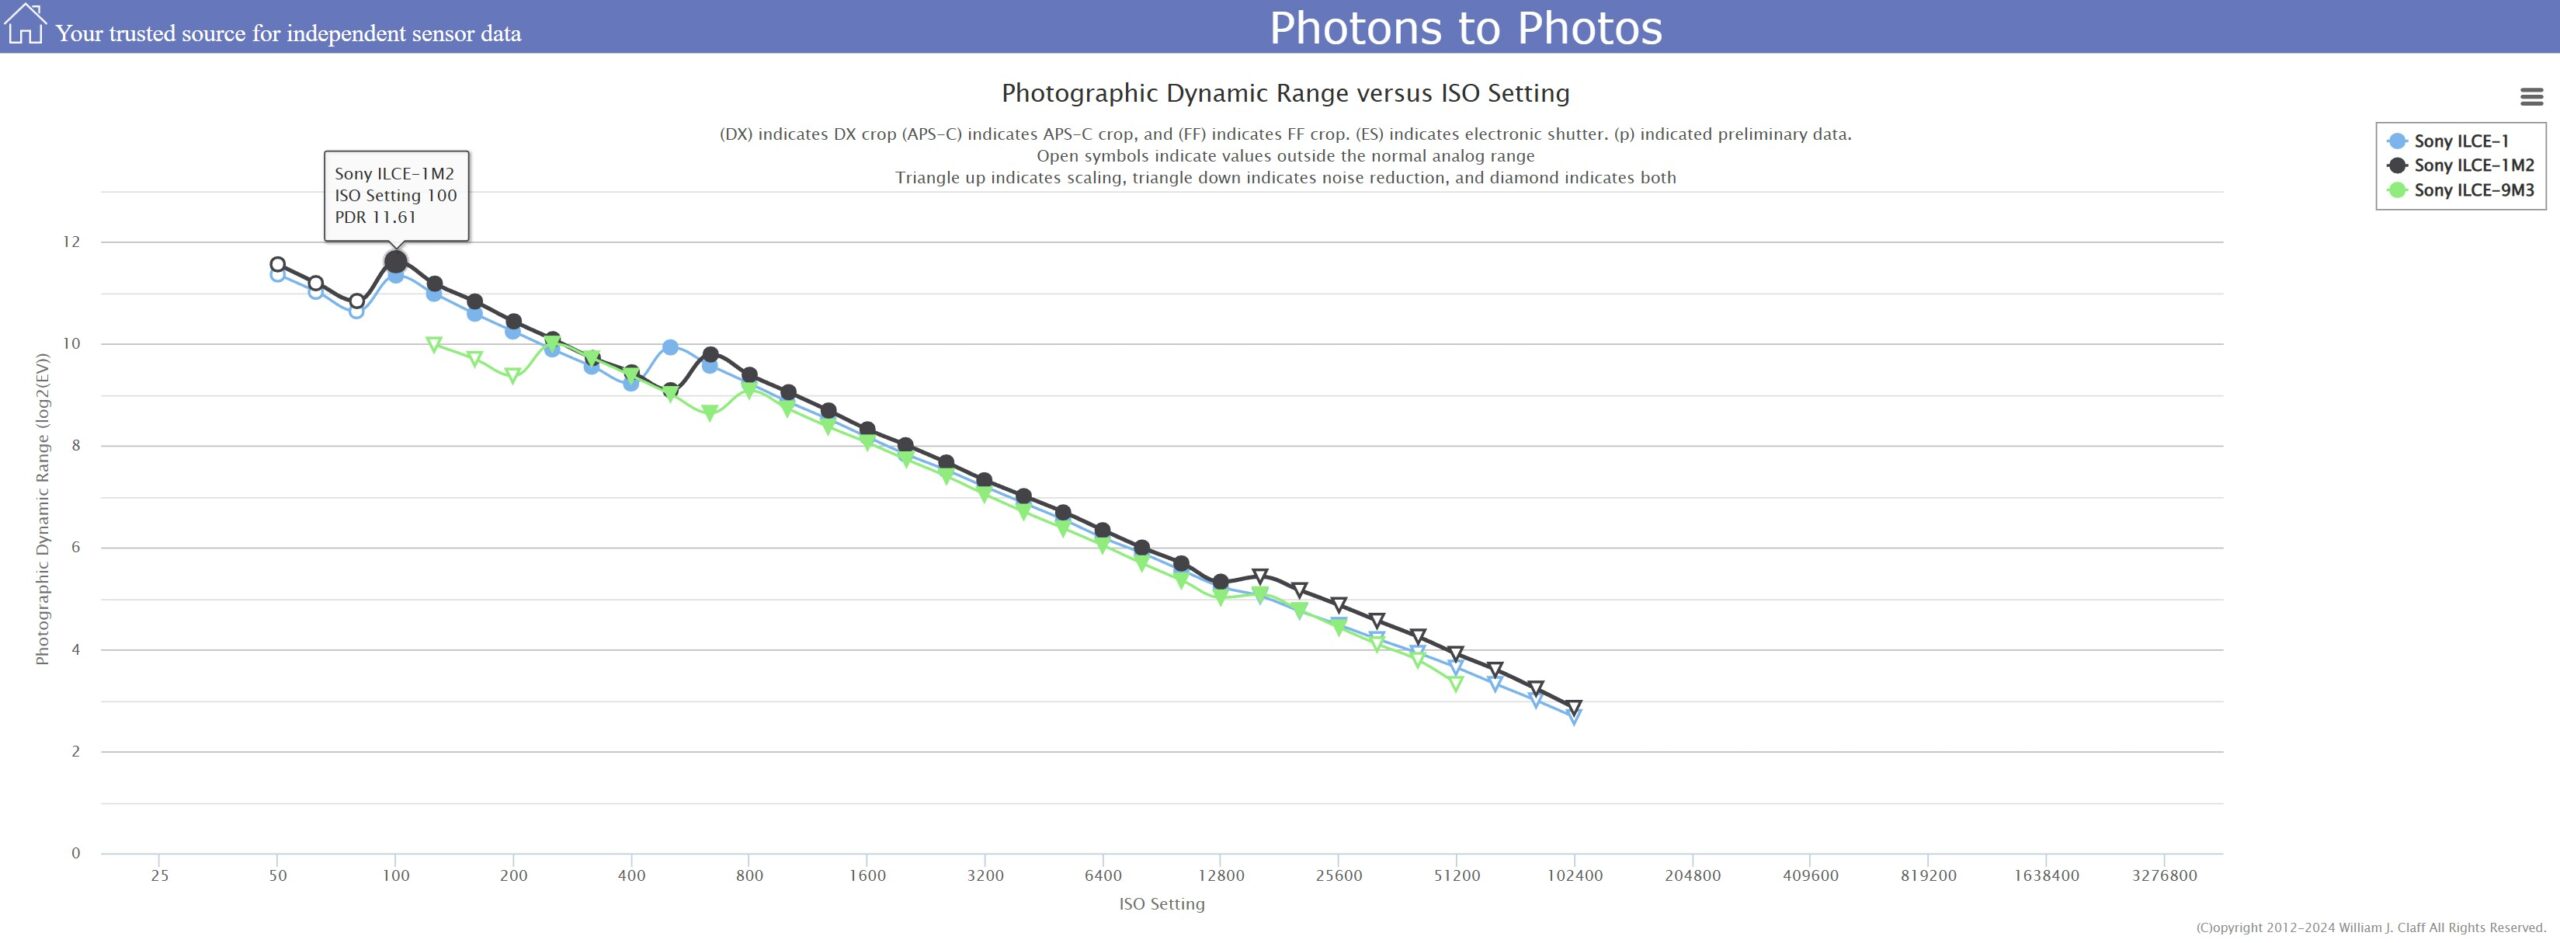
And, while the α9 III is unquestionably Sony’s leader in terms of pure speed, it’s 24MP sensor isn’t anywhere near as effective at either resolution or dynamic range. You can see from the green line that it falls significantly behind either α1 camera.
Photons to Photos has their own process for measuring dynamic range, so their findings never match what companies market, but because they have a consistent criteria, it does give a consistent metric for comparing one camera to another. They rate the dynamic range (for photos) at 11.61 stops, which bests the α1’s 11.36 stops by a meaningful margin. The Canon R5 MKII is rated at 11.45 stops, while the Nikon Z8 measures at 11.32, positioning Sony in a really solid position over the competition. Sony’s own α7RV takes a very slight win for the high resolution DR crown at 11.70 stops, but that’s probably too little a difference to be observable. The bottom line is that this is a very, very good sensor for dynamic range performance.
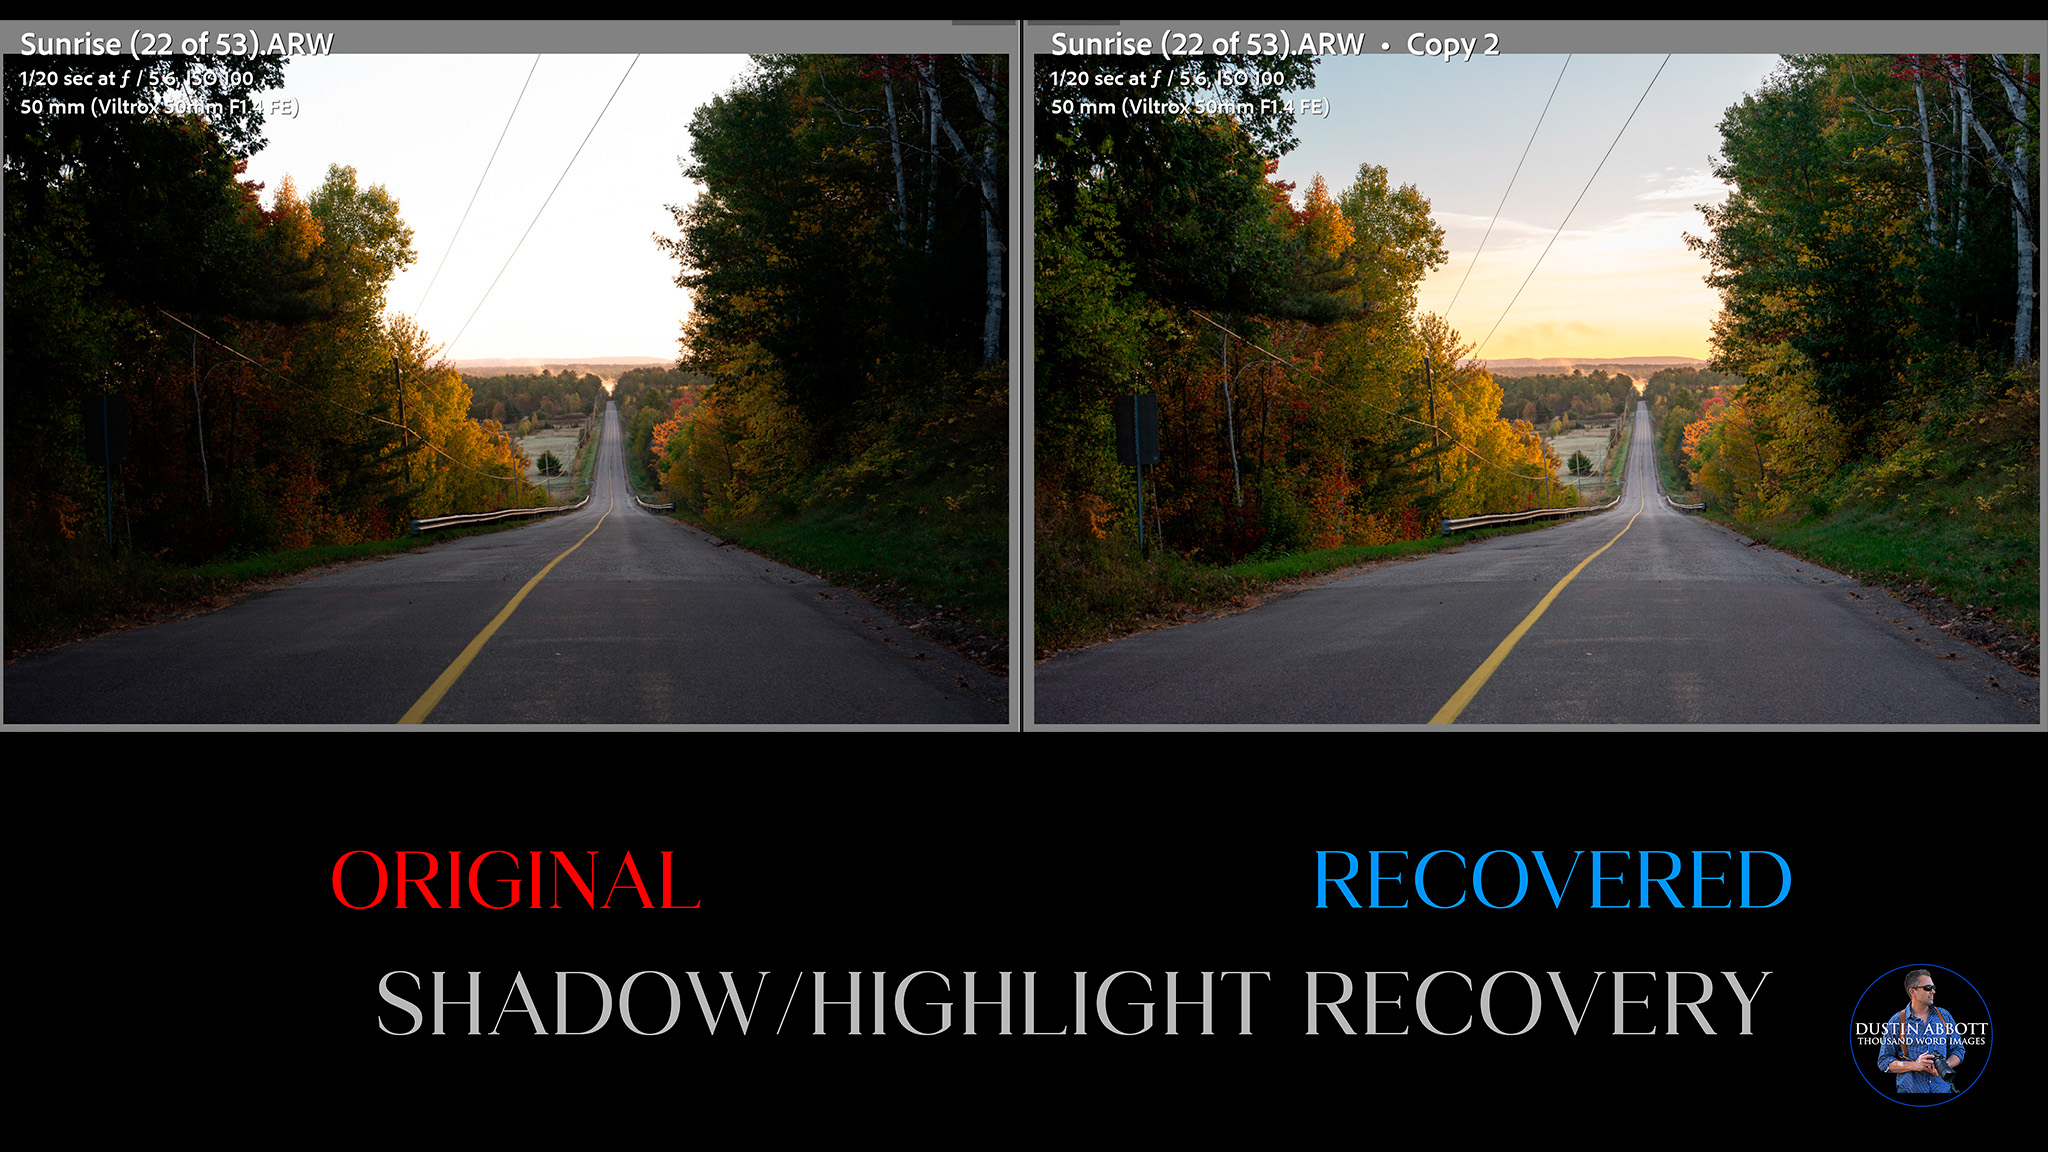
Dynamic range has become one those topics debated ad nauseum on photography forums and harped on by certain reviewers to the place where some perspective has been lost on the topic. It has become one of the key “stats” where brand fanboys either push their brand or bash another, causing many people to become disgusted with the term in general. That being said, there is no question that there are a number of situations where improved dynamic range gives the photographer (and particularly the post-processor) more latitude to fulfill their vision. This could be in the ability to recover a blown-out sky or shadowed area as a landscape photographer or the ability to balance a foreground subject with a background or sky for portrait photographers. I’ve also been able to save images where I captured something special but a flash didn’t fire. In the image below, I was able to restore color in the sky along with details (and color) in the shadows, making for a more vibrant and engaging image. The only difference was using the highlight and shadow recovery sliders in Lightroom.
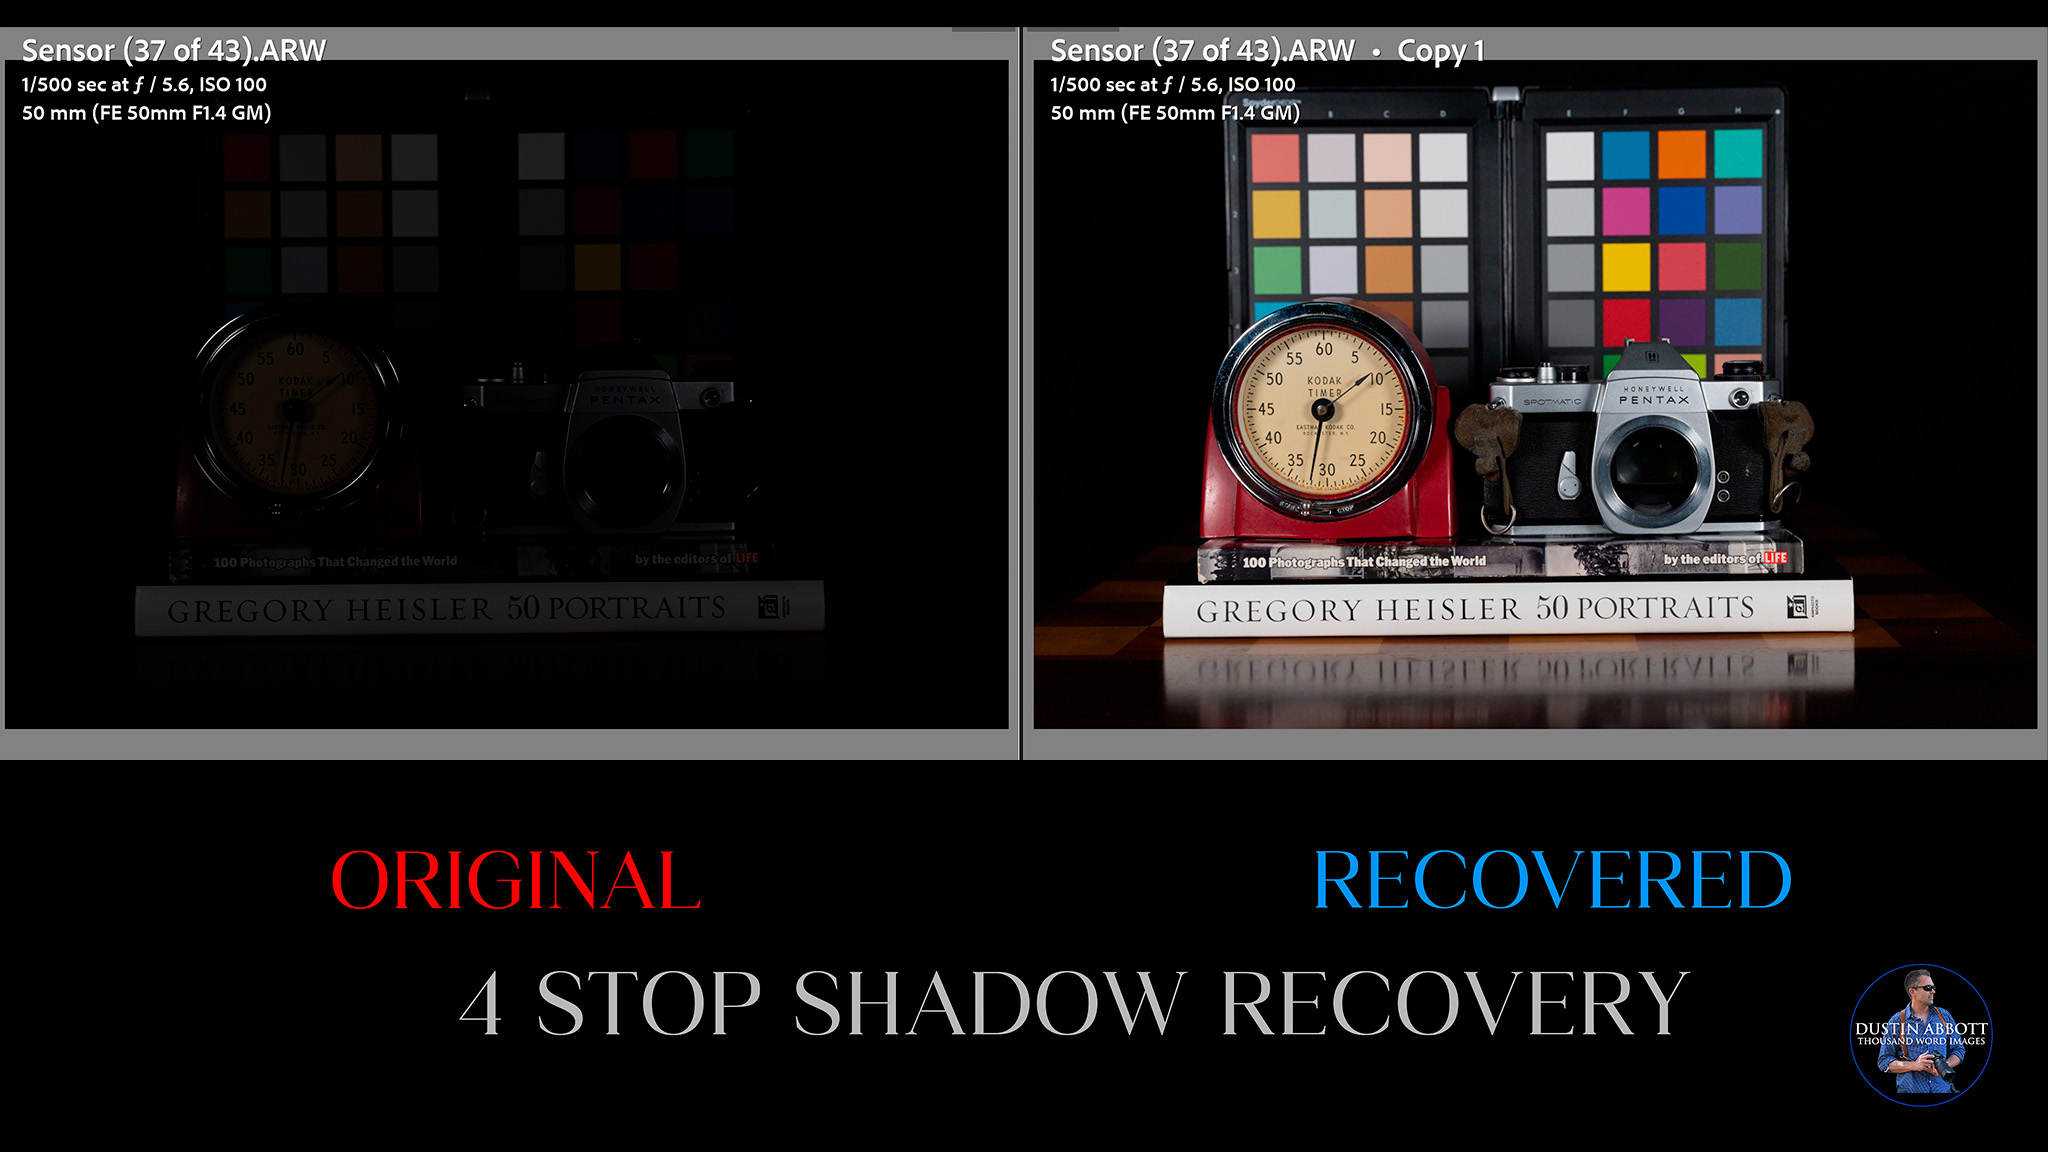
I found that the α1 II actually did a really excellent job in my own tests. I use a still life scene that I apply a base exposure to and then intentionally overexposure in steps up to 4 stops, then underexpose in steps up to 5 stops. We’ll examine the results both before and then at those extremes.
First of all, shadow recovery. The α1 II is simply fantastic at recovering shadows. At a global level you simply can’t tell a difference between a perfectly exposed image and an image underexposed by 5 stops and then recovered. We’ll step back a stop and look at the four stop recovery.
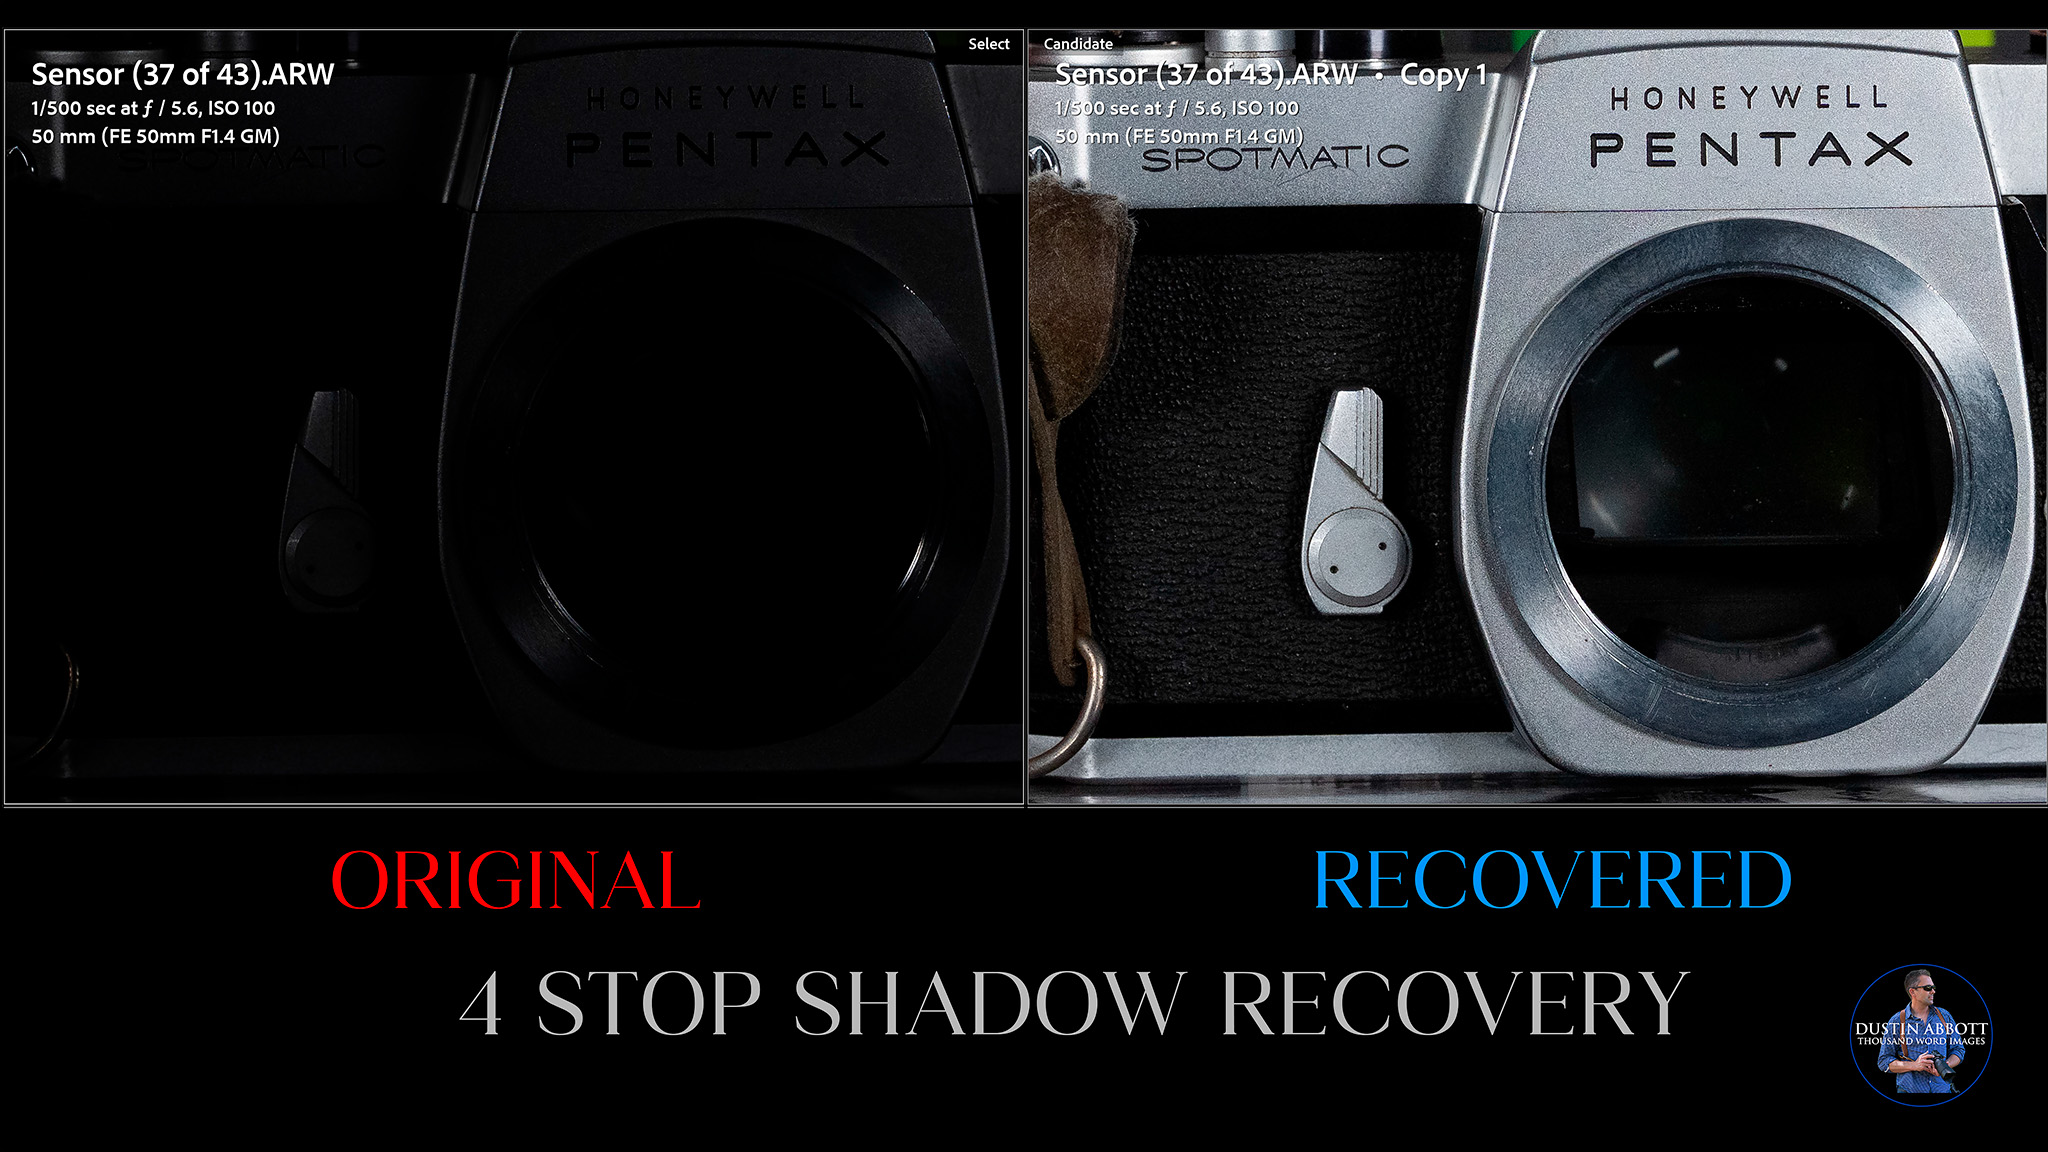
If we compare our original and then recovered result at a pixel level, it will show you how completely and how cleanly those shadows have been recovered.
Even if I move on to 5 stops, details “magically” emerge out of the complete black when I add exposure back in.
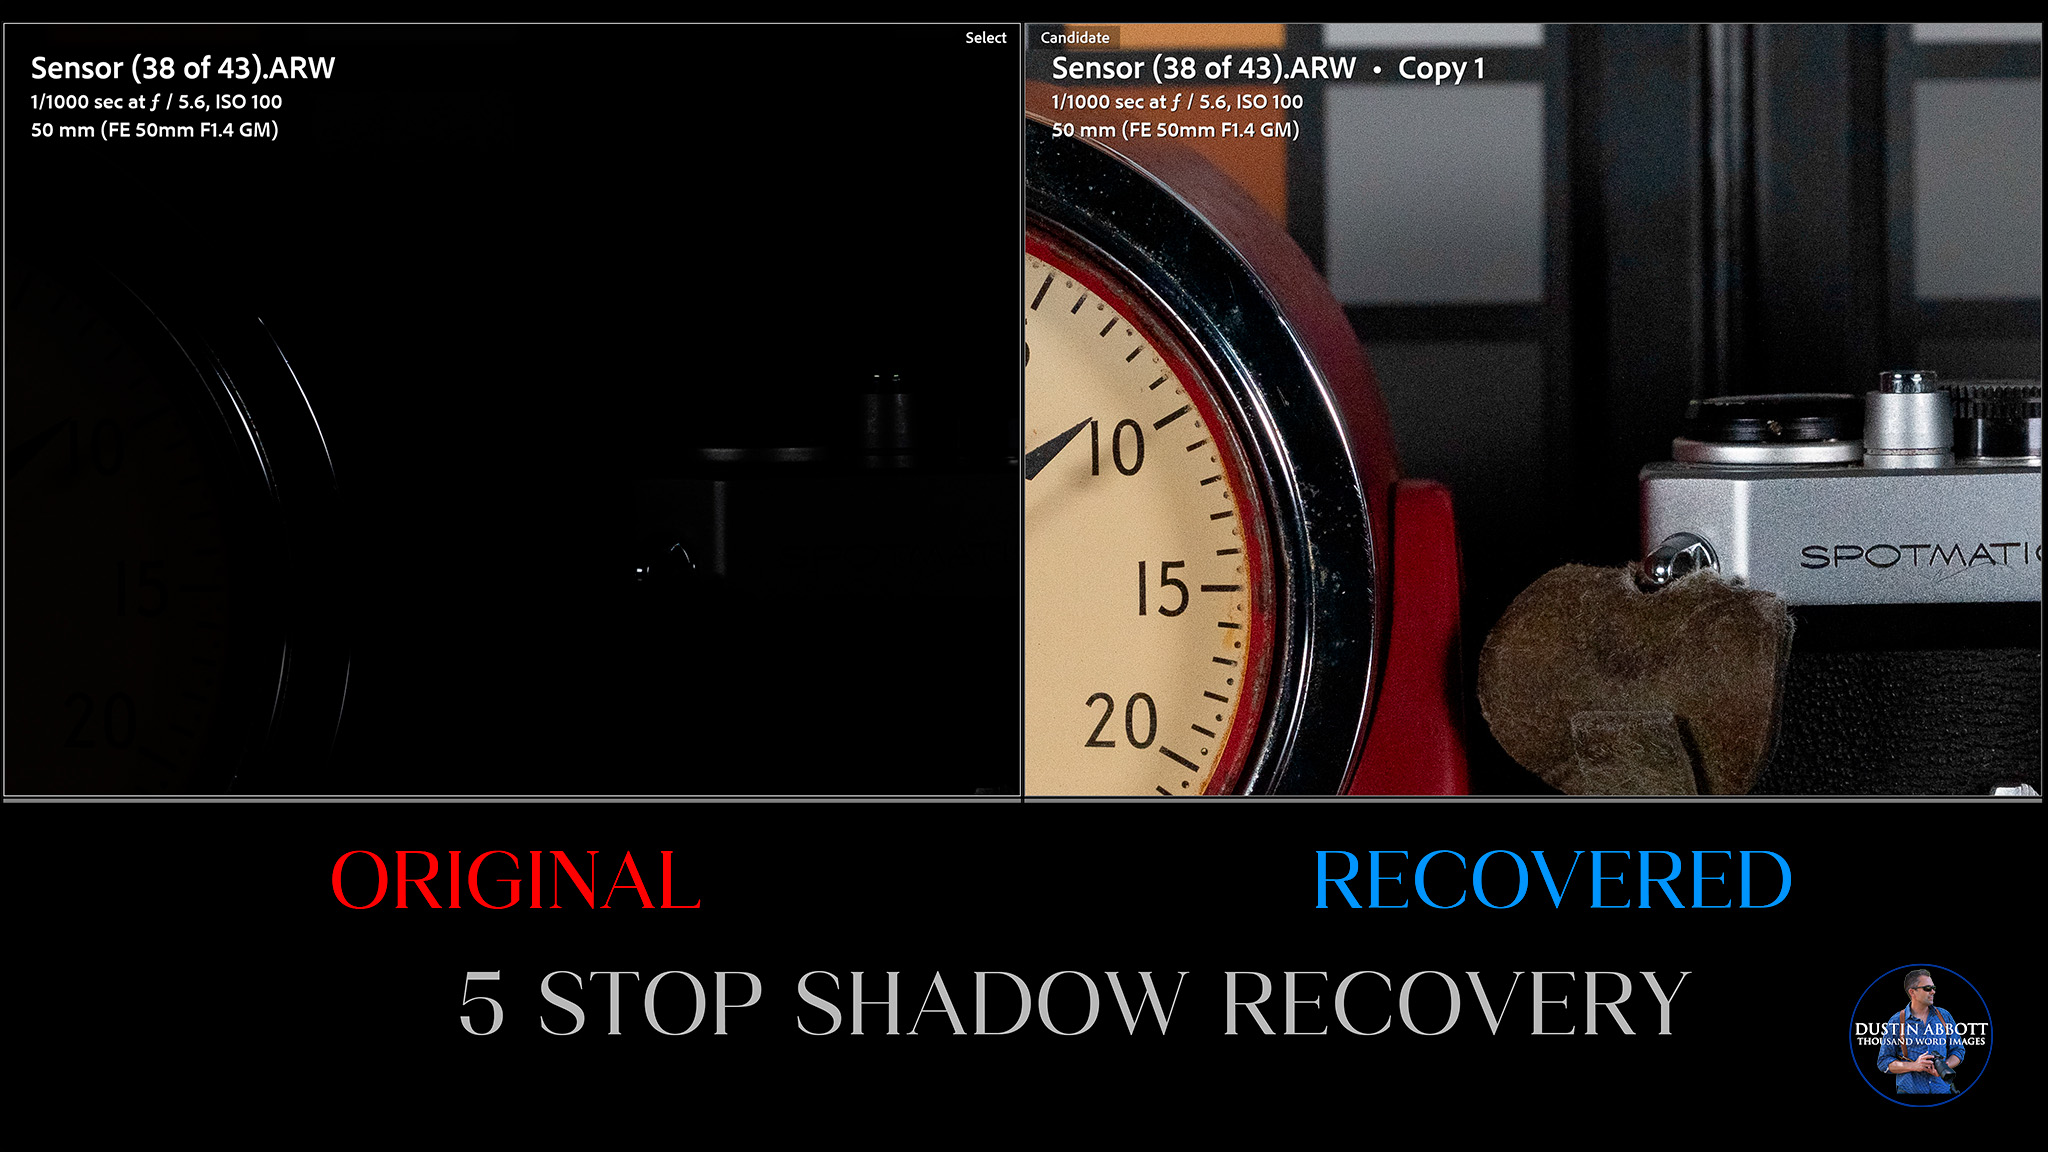
If I compare the 4 and 5 stop results, I see slightly more noise in the five stop recovery, but no color shift or hot pixels.
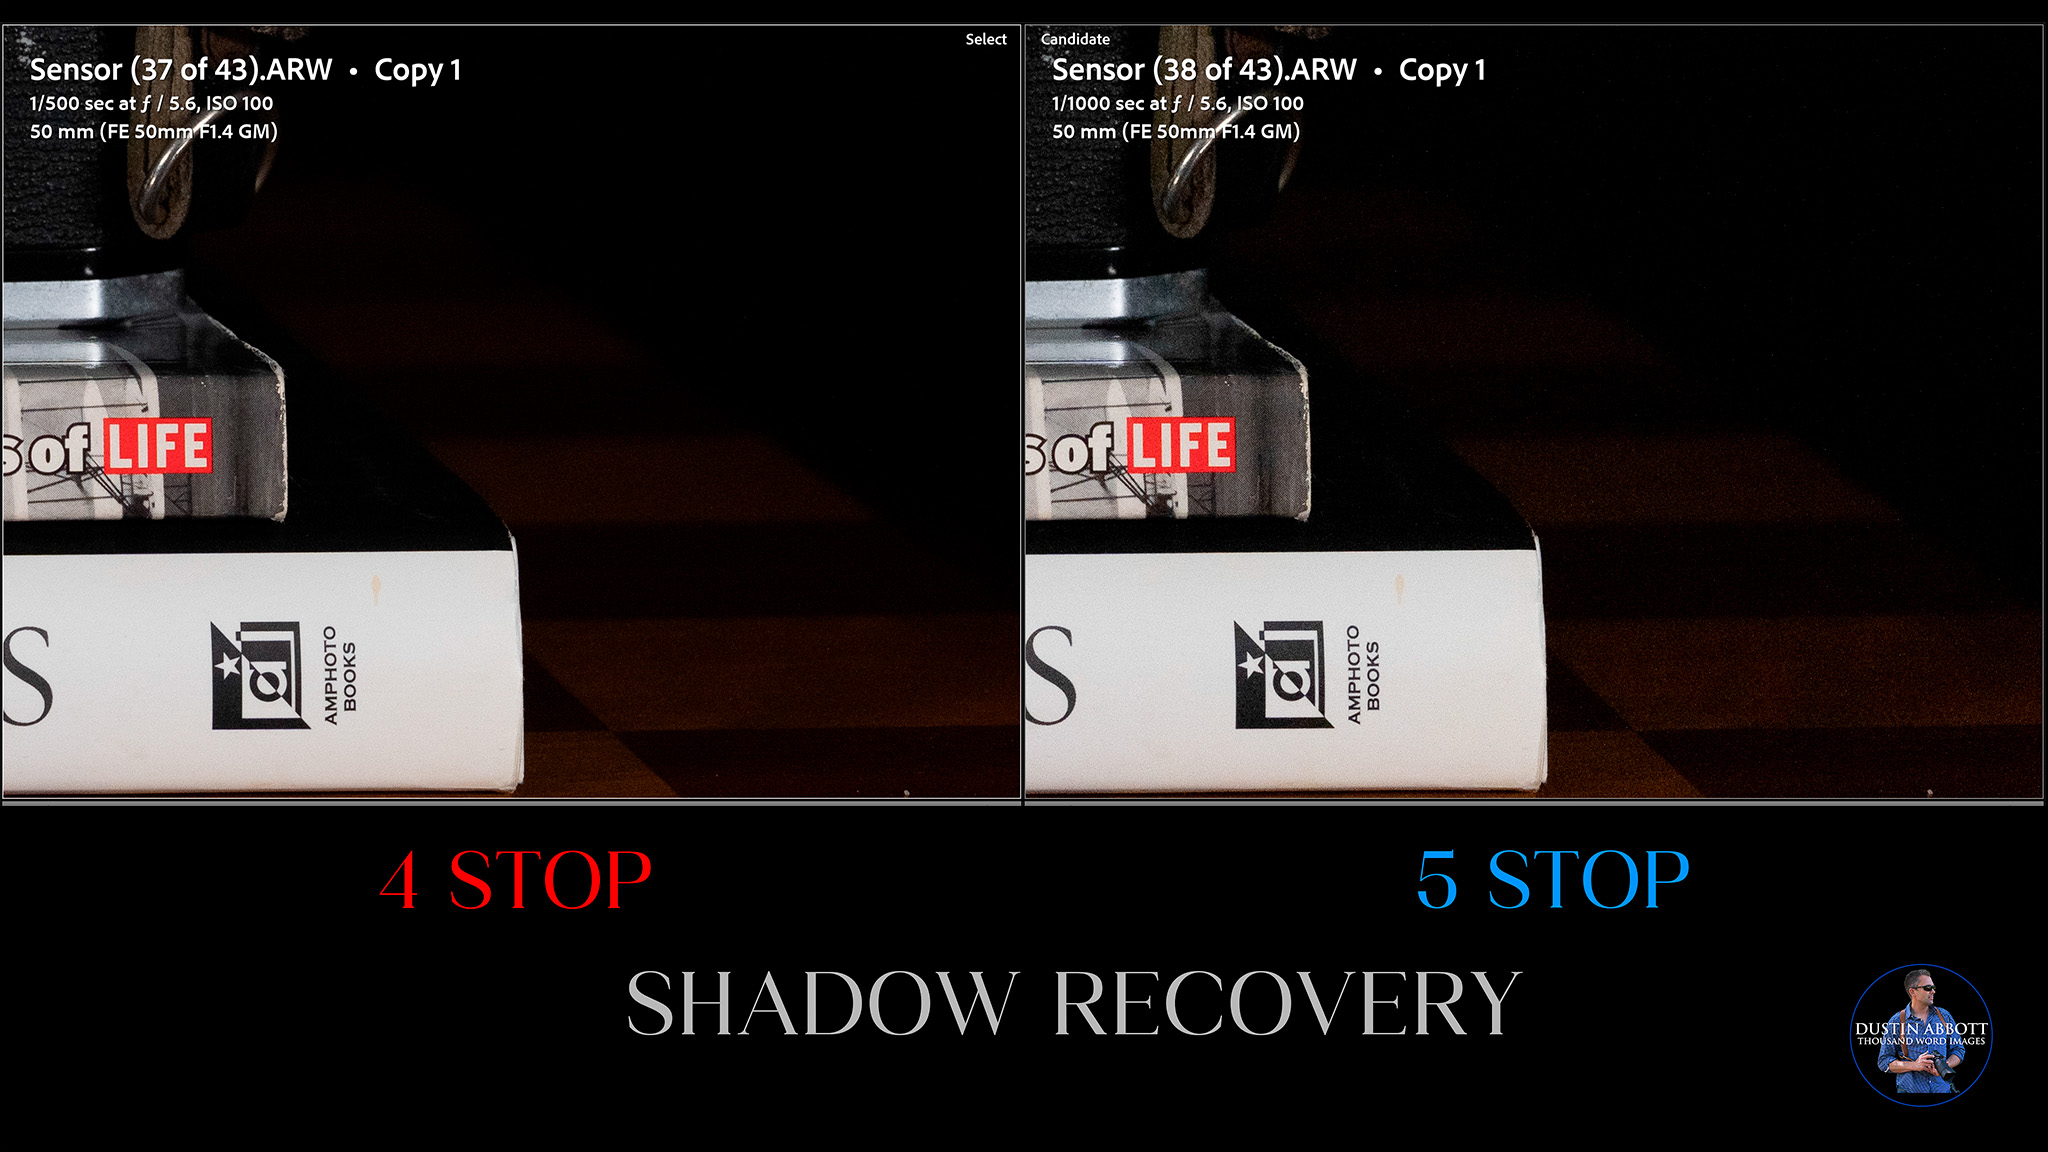
Impressive!
Recovering highlights is something that cameras struggle more with, as when highlights are “blown out” there is often unrecoverable information loss. The α1 II does well here, though, proving able to successfully recover 3 stops of overexposure with minimal loss of information and good color saturation levels.
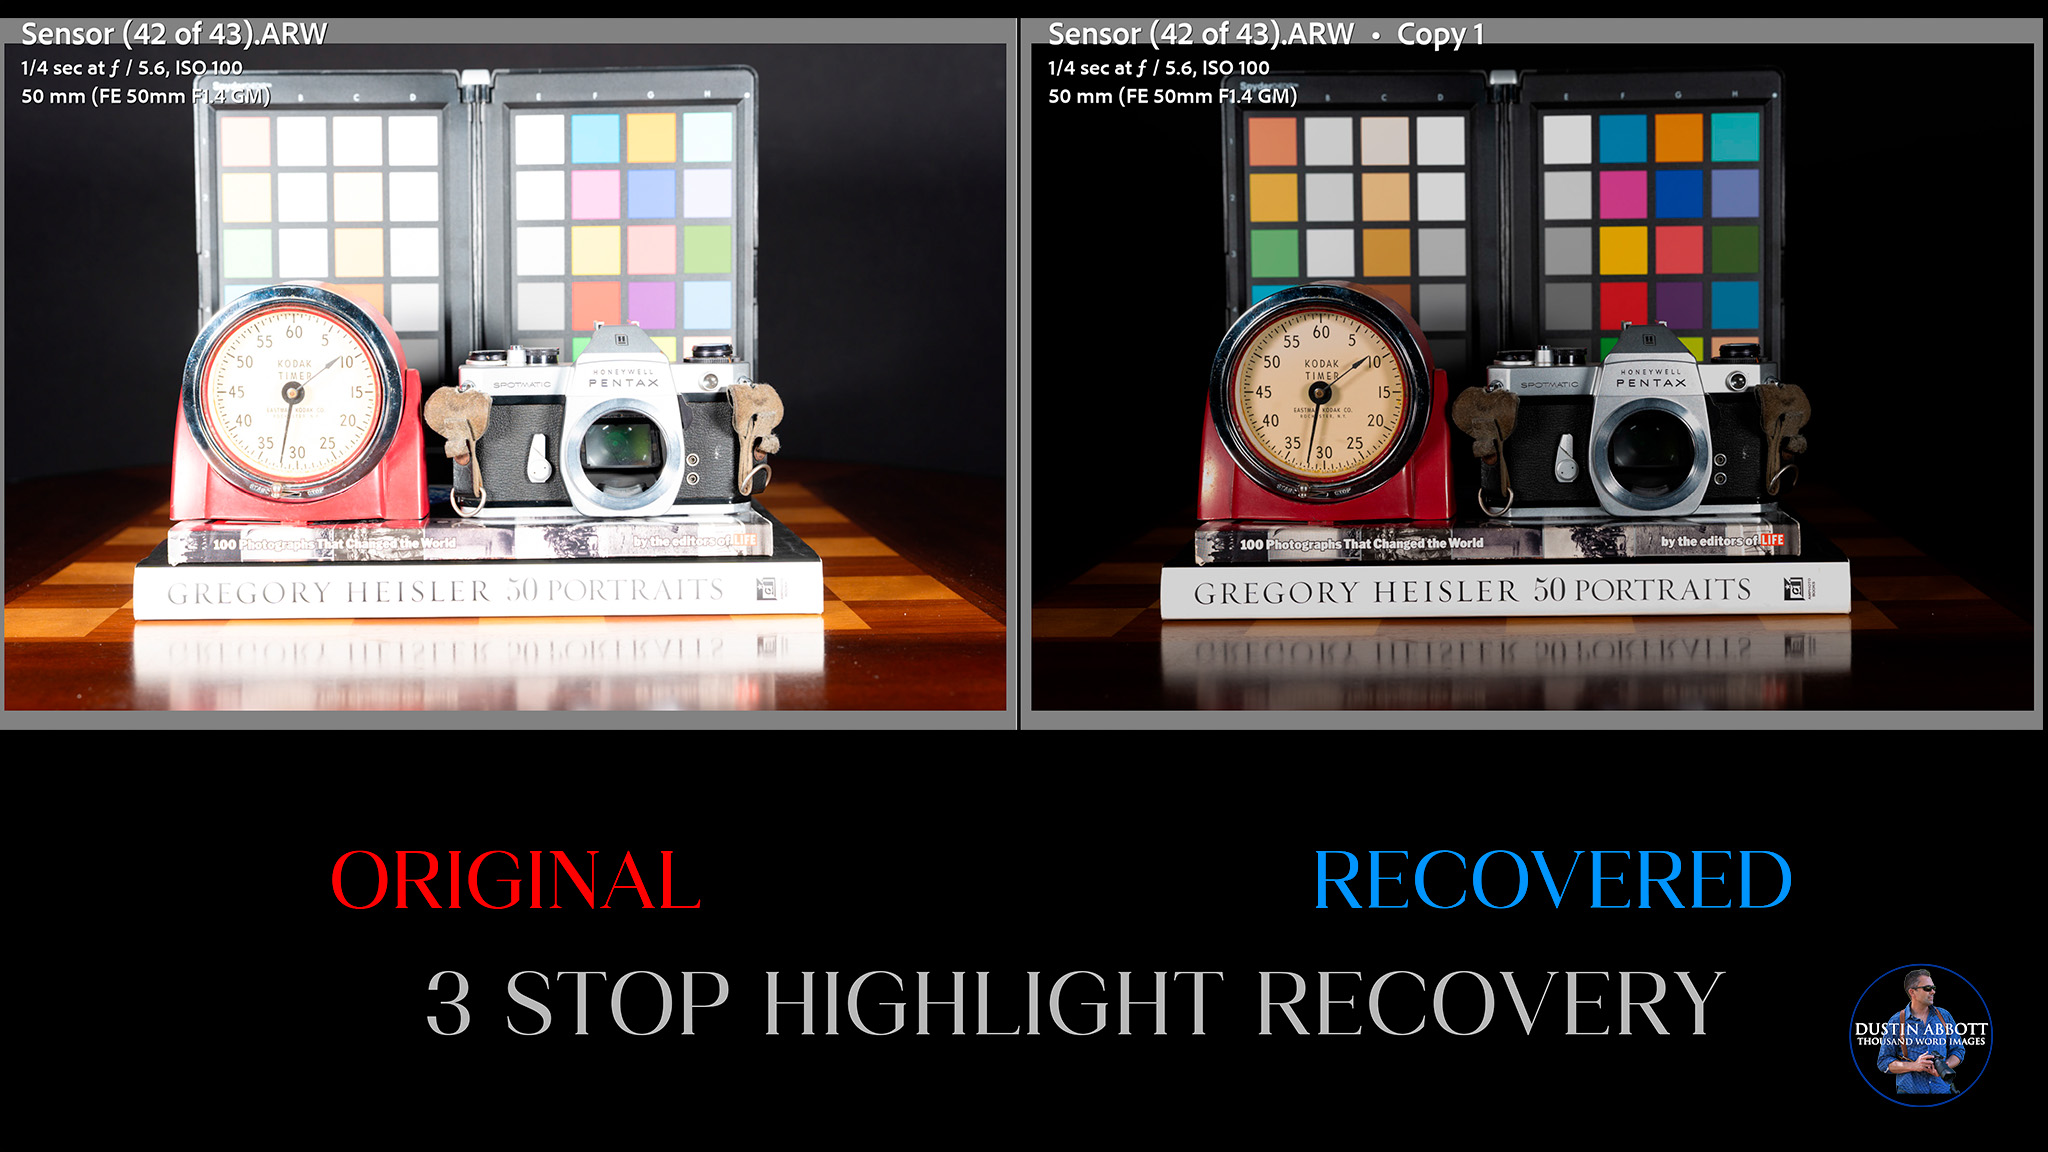
You’ll note that textures have recovered, colors look natural, and lost colors in the color swatches have been restored to deep saturation levels. That’s all excellent. It looks good even under close examination.
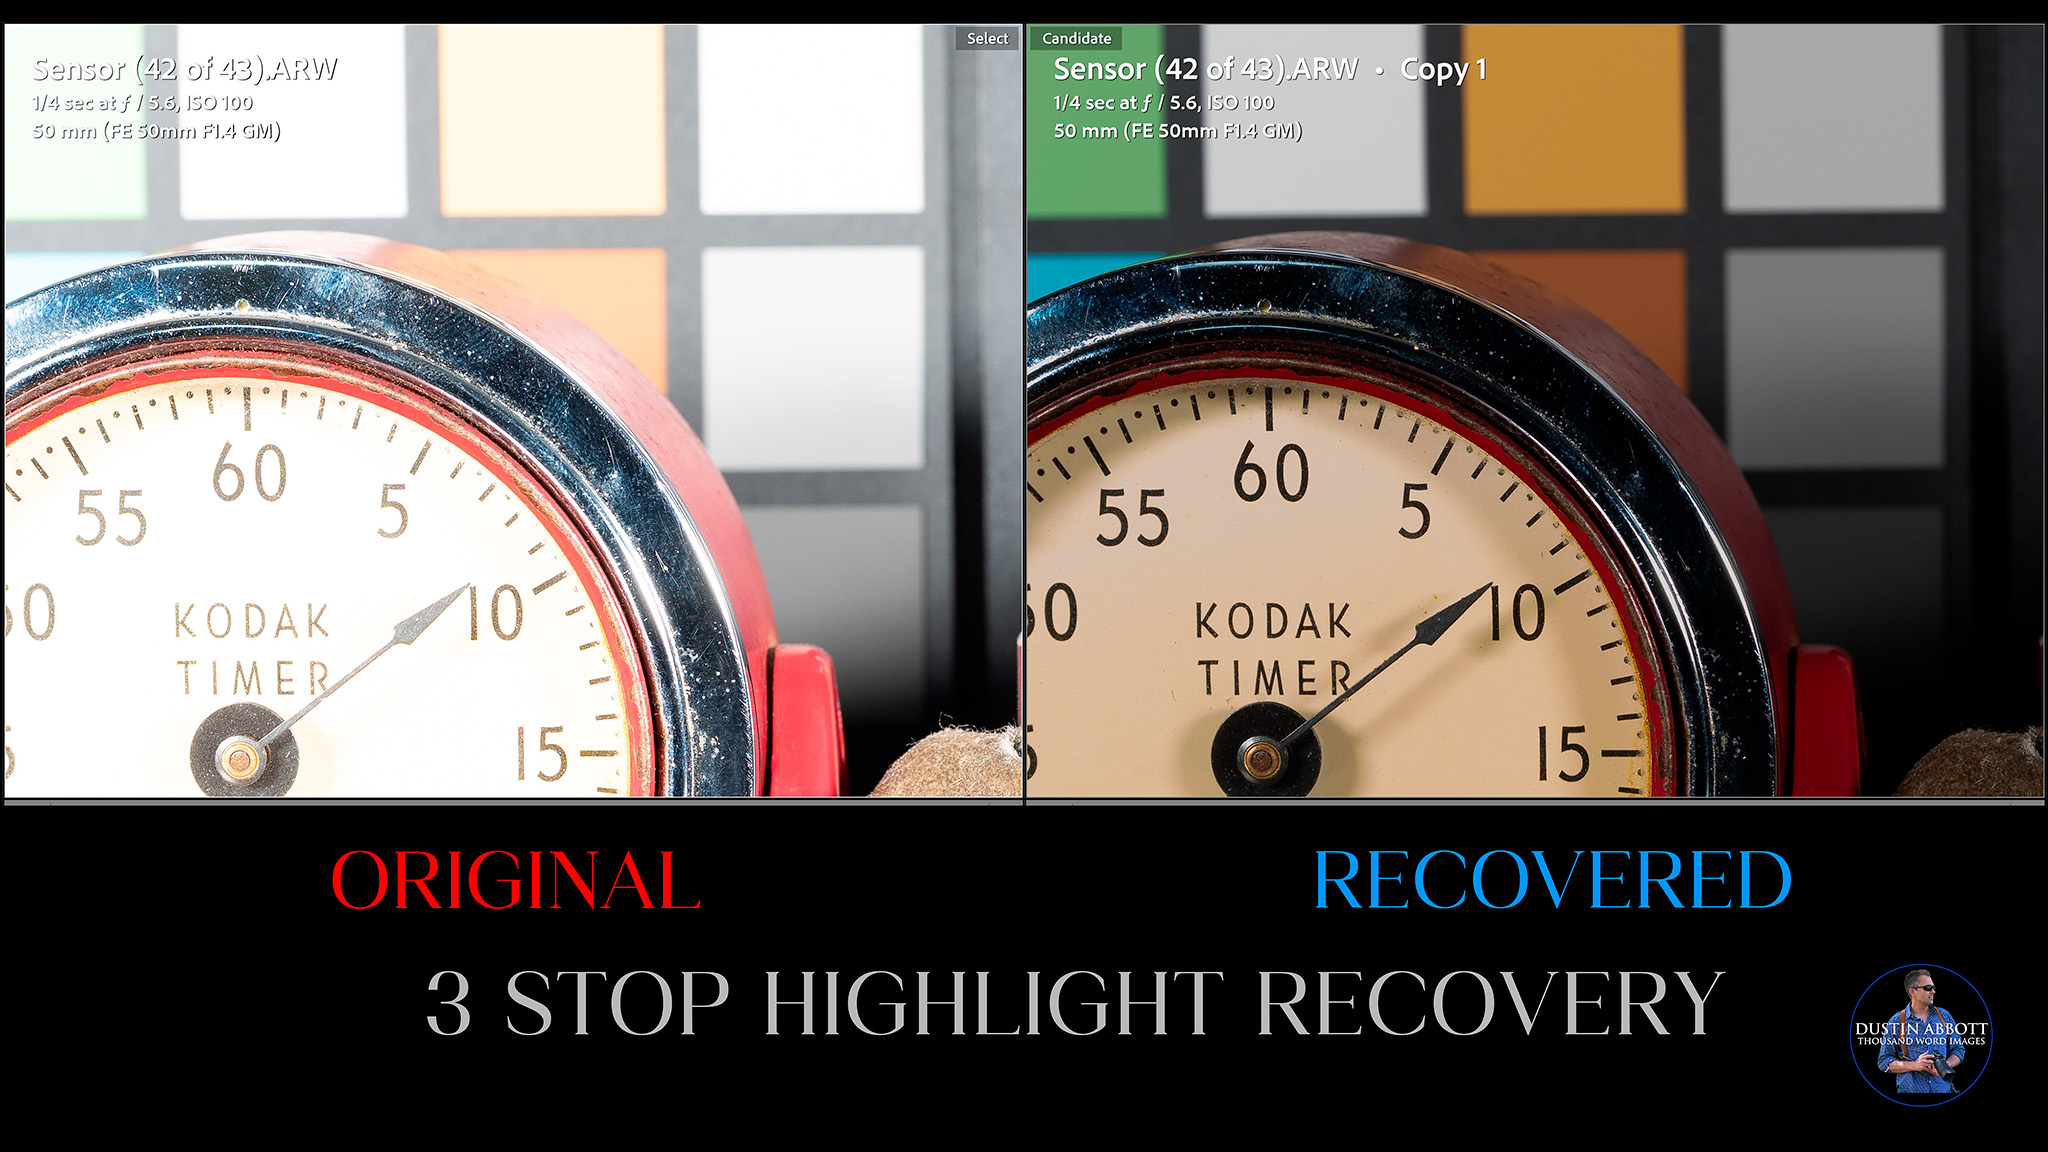
Things fall apart between the 3 and 4 stop mark, however, with some texture and color information being lost, and the image generally takes on an unnatural cast.
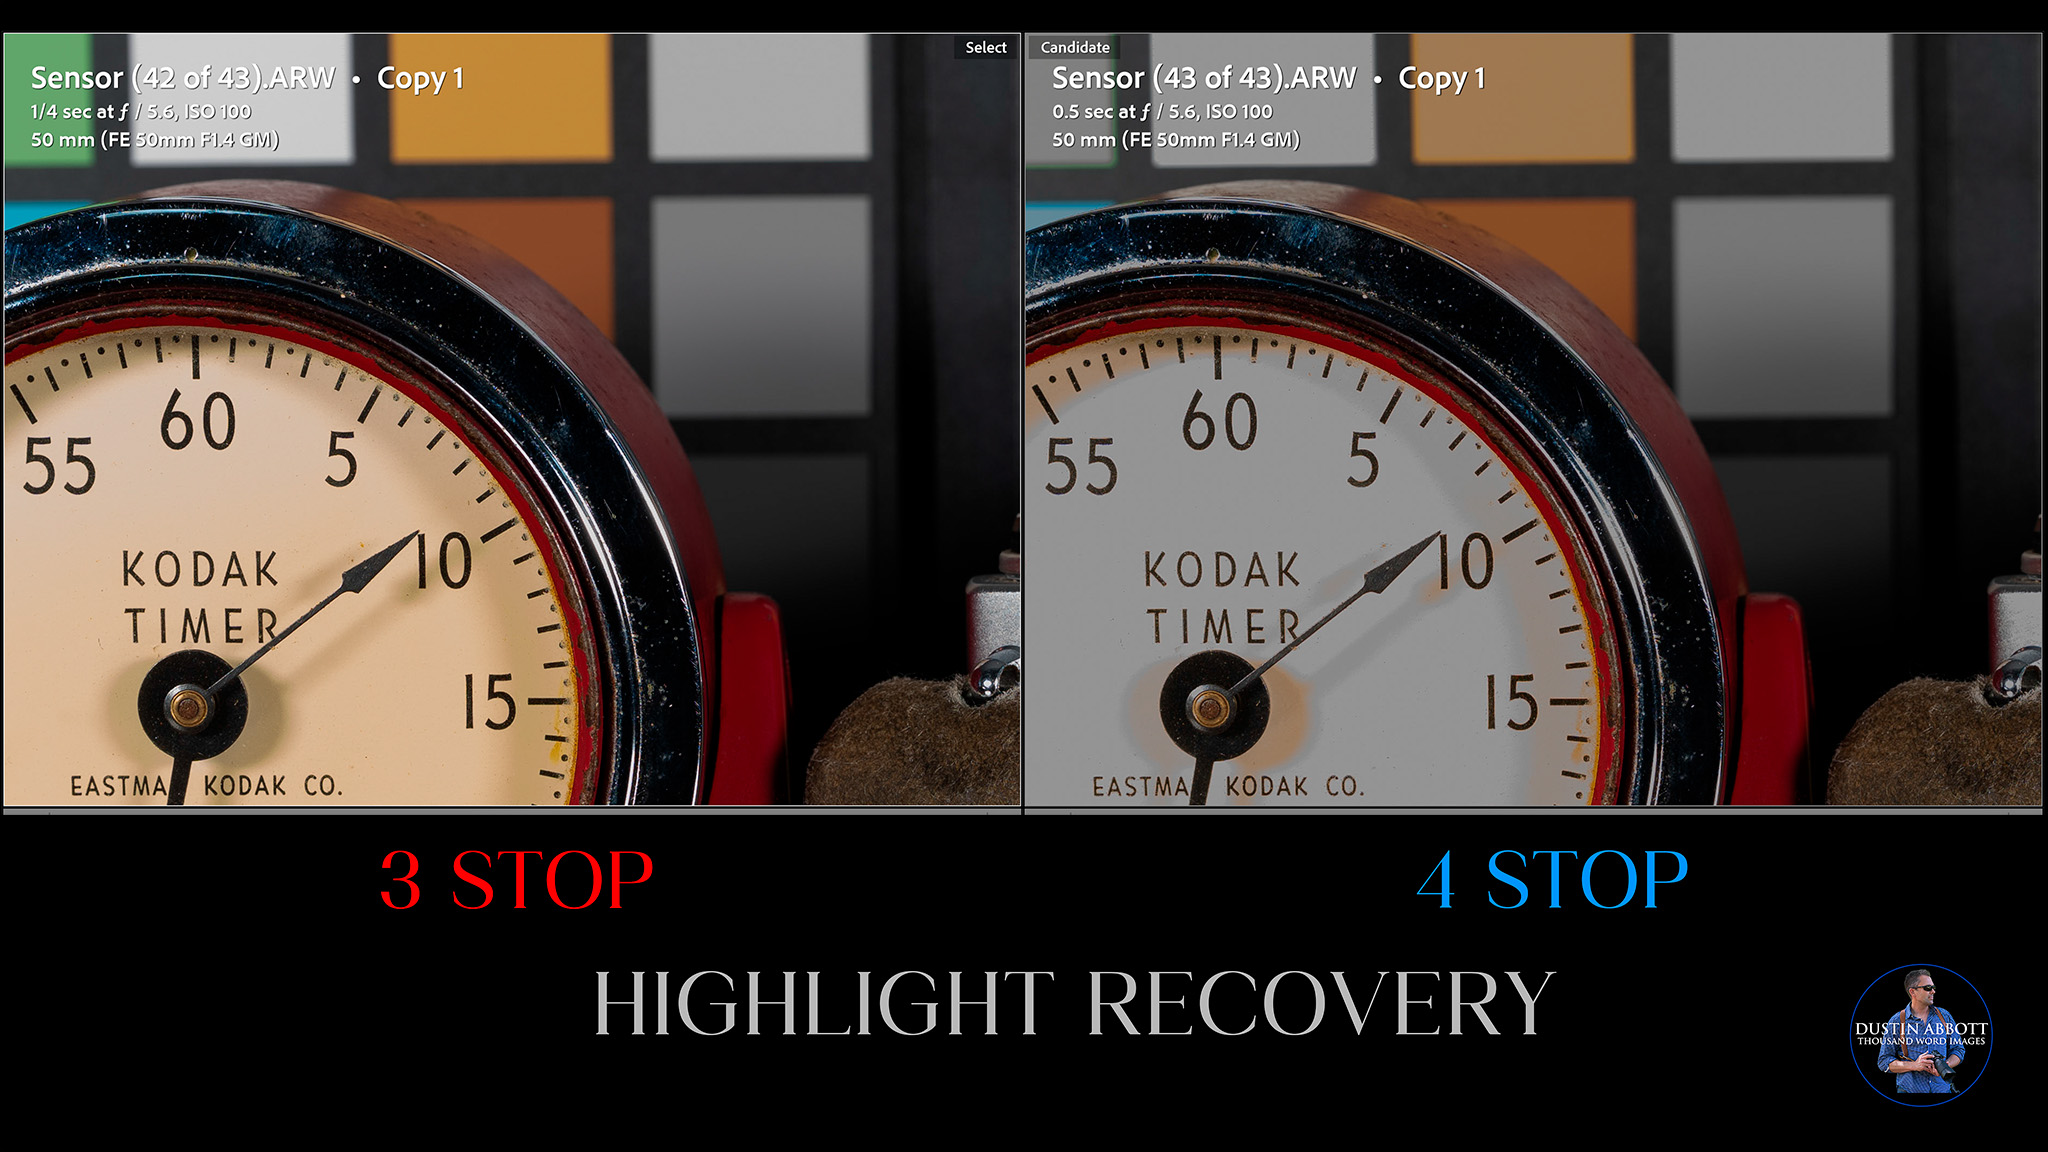
I have yet to find any sensor (including medium format sensors) successfully recover a four stop overexposure, so I won’t hold this one against the α1 II. This is as good of a result in these tests as I’ve seen from a full frame camera, so I’m pretty delighted.
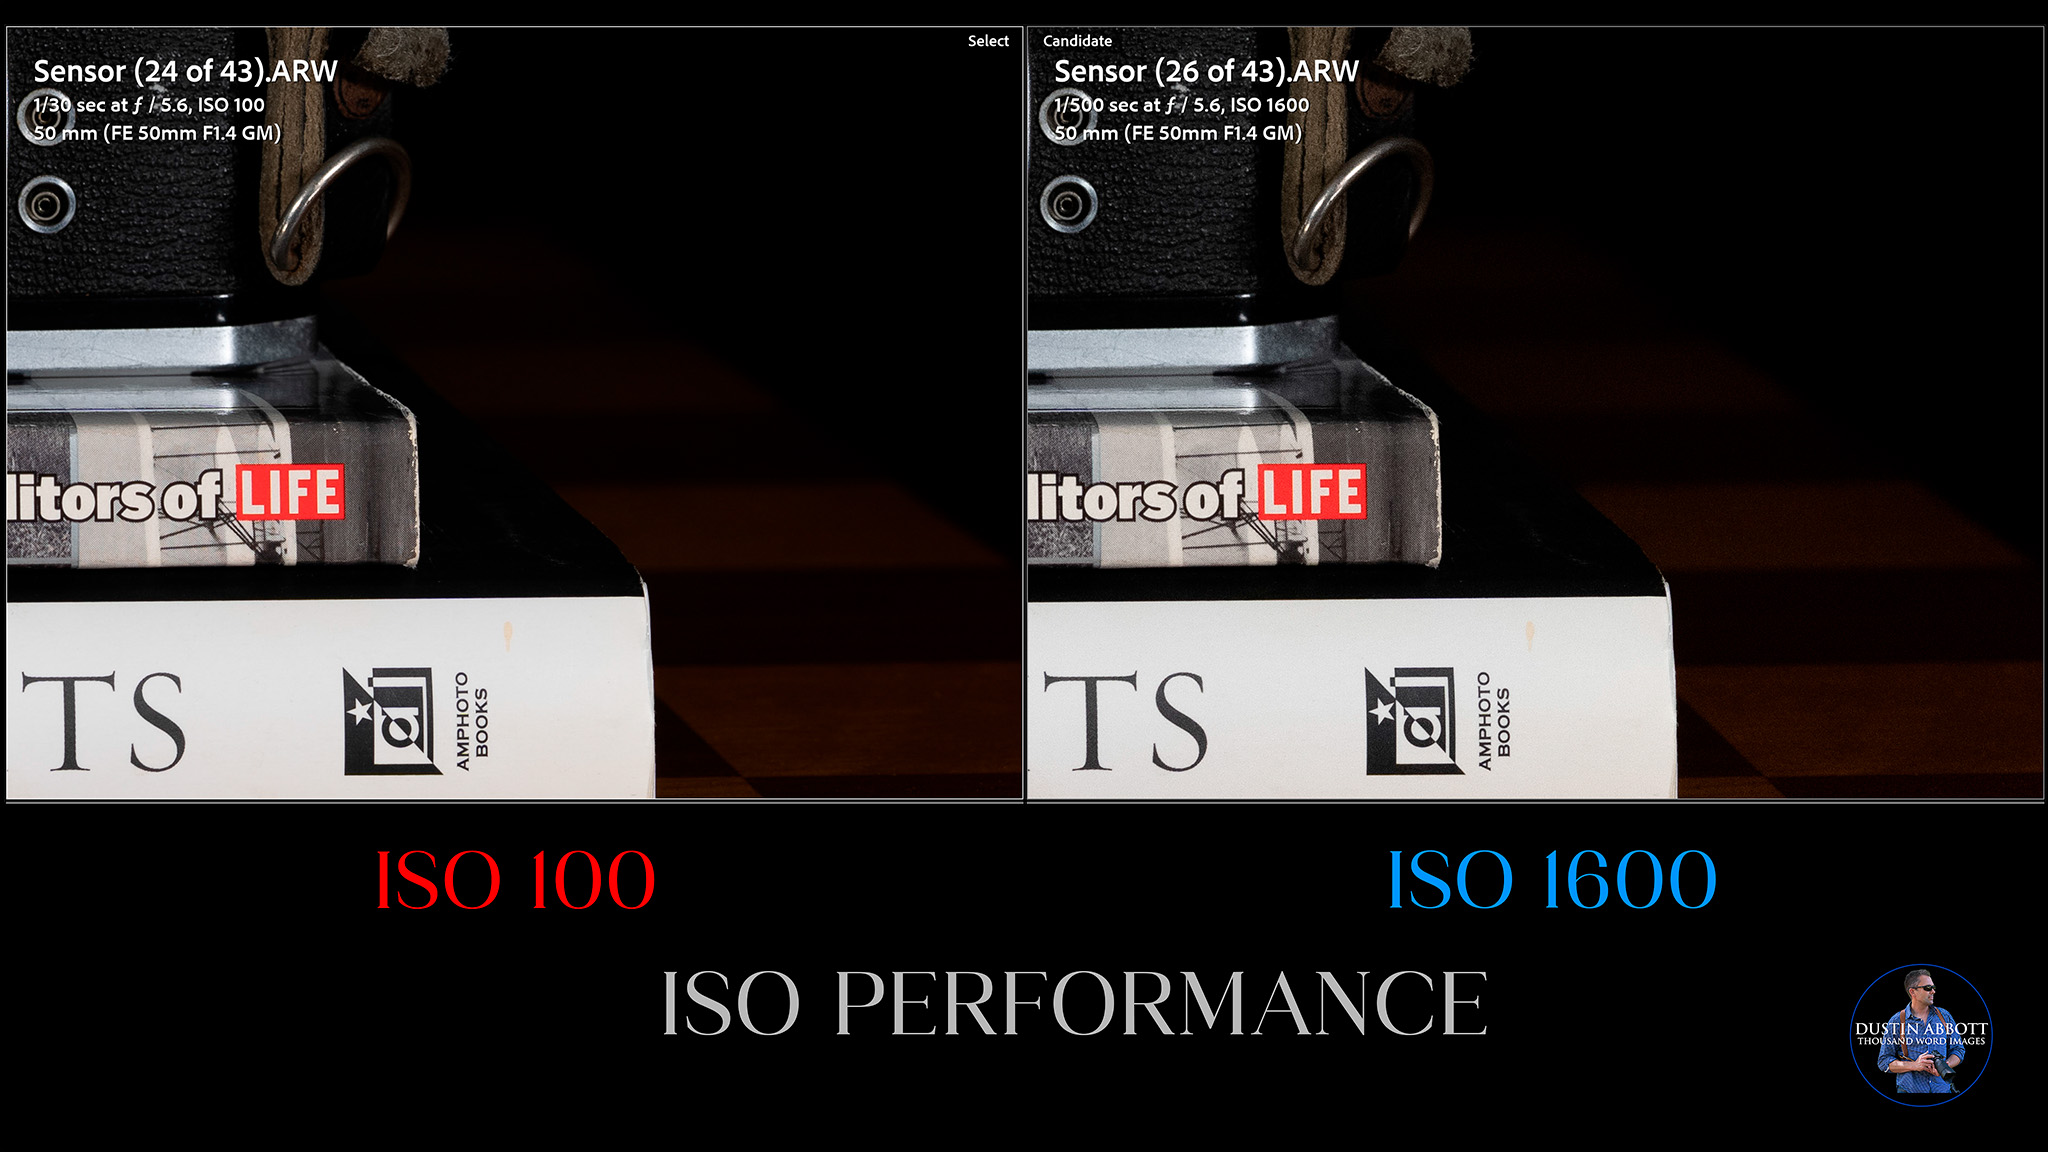
ISO Performance
High resolution cameras face an uphill battle in ISO performance for the simple reason that more pixels packed onto the surface area of a sensor results in higher apparent amounts of noise as the ISO rises. I found the first high resolution camera (the Canon 5DsR, also 50MP) nearly unusable by 6400 (its upper native ISO limit), but more recent high resolution cameras have done much better in this metric. The α1 II manages to best the original α1 by a meaningful margin.

Photons to Photos rates it at 5768 for its low light ISO performance, which is roughly 500 points higher than the original α1. This is significantly better than the Nikon Z8 (4224) or the Canon R5 MK II (4846). It would be hard to find a better high ISO performer at this kind of resolution level. It has a native ISO range from 100-32,000, with an expanded range of ISO 50-102,400 available.
At ISO 1600 the result is scarcely distinguishable from base ISO (100) even at a pixel level:
At ISO 3200 and 6400, there is some fine noise creeping in, but no color shift.

At at global level you will find images at these ISO values perfectly usable.
Things are mostly similar at ISO 12,800, with black levels still quite inky. By ISO 25,600, you can start to see some uneven pixels in the black area along with a bit of green color shift. I would avoid the values beyond this point.

Often I see cameras fall apart in the last stop (say, from 25,600 to 51,200), and that’s somewhat true here, but the difference between 25,600 and 32,000 isn’t really significant. ISO 51,200 is only accessible via the expanded range, and I noticed a drop-off in contrast there, with the image lacking the deep blacks and overall punch that the image even at 25,600 has.
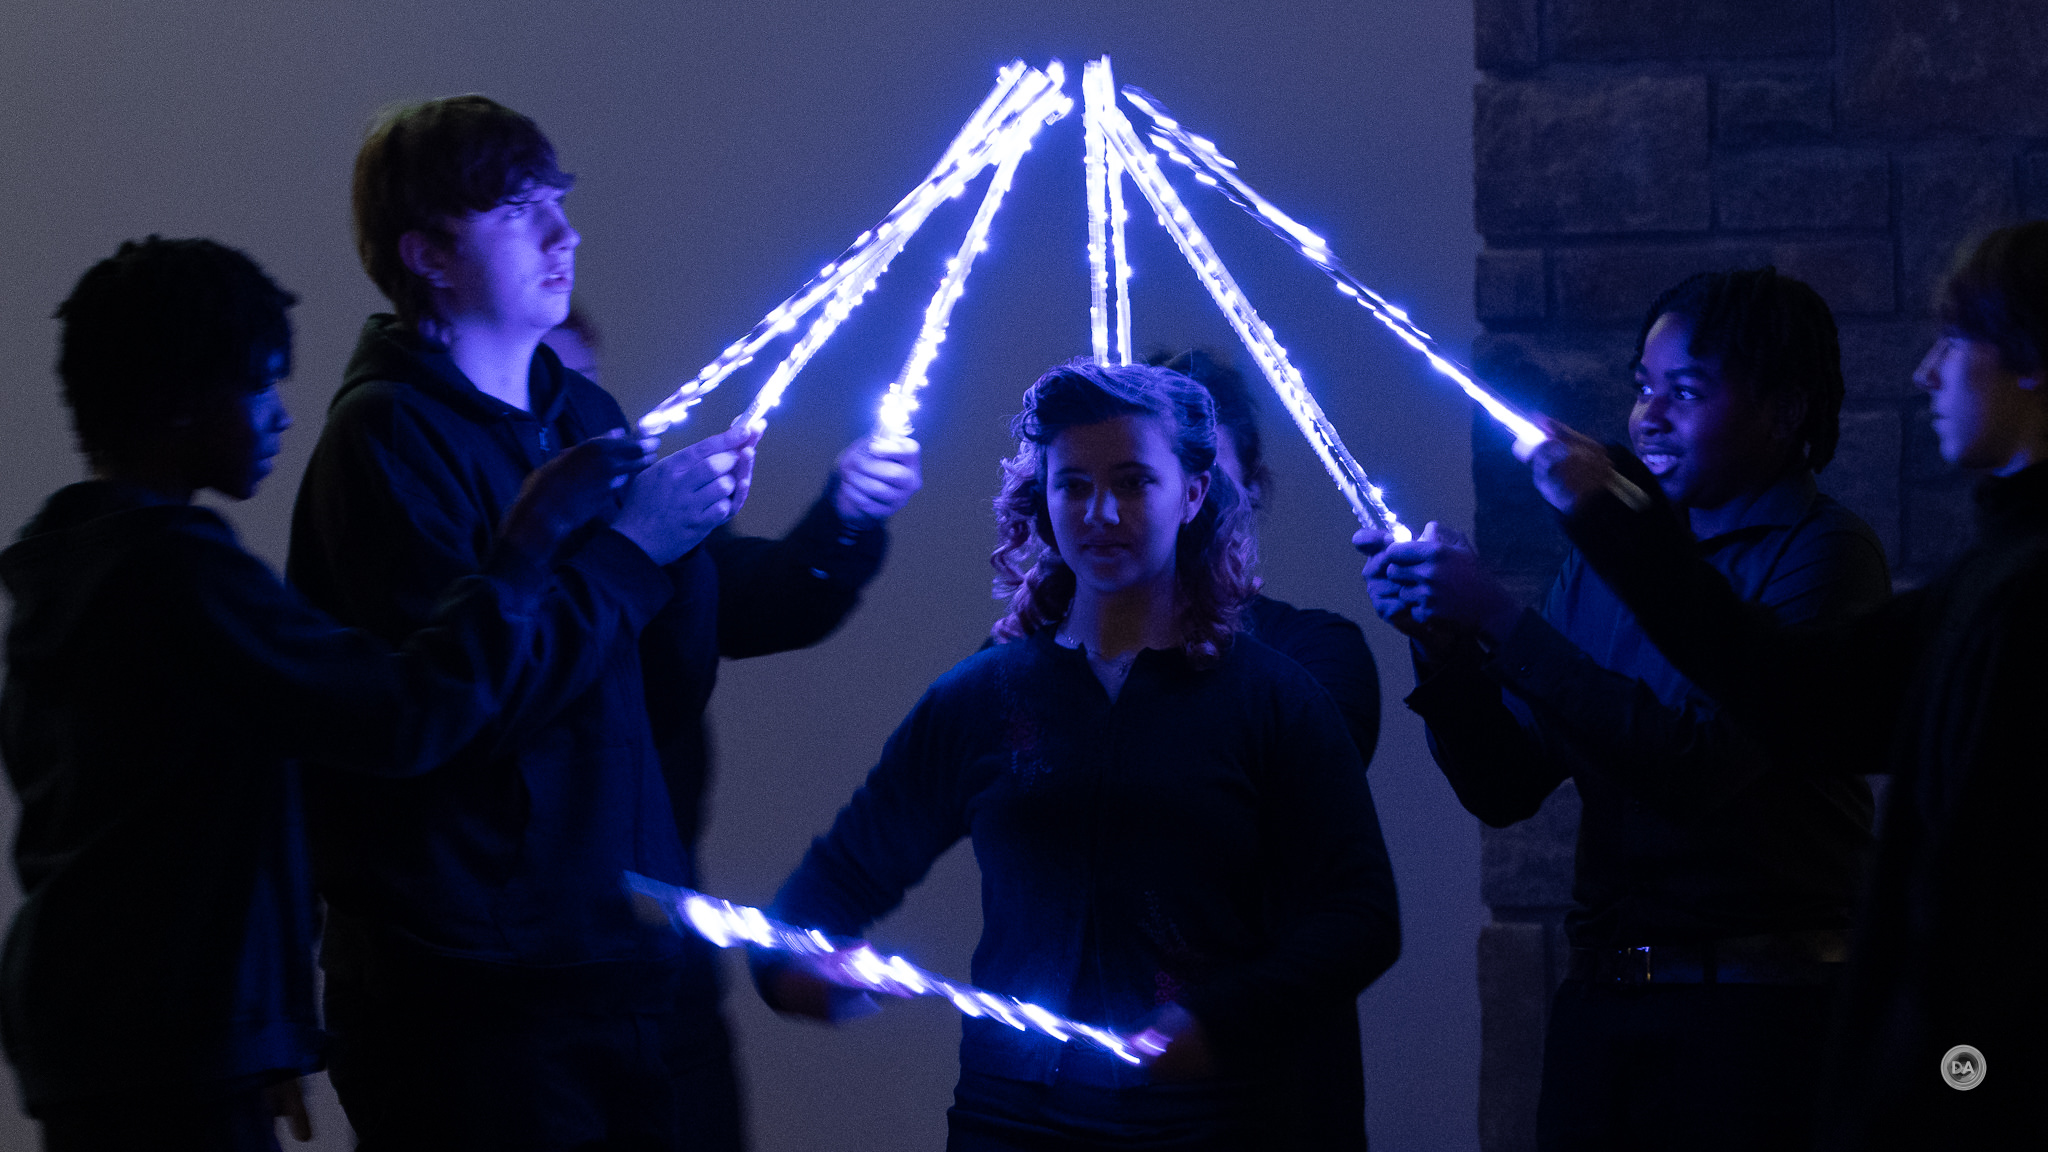
In my my moderate real world shooting (where I never exceed ISO 12,800), I’ve been happy with results. This shot from some of our church youth in a dark room shows a mostly clean image at ISO 3200 with good detail in the crop.

While I always try to keep ISO speeds down, the α1 II is nicely accommodating in the times when I need to boost the ISO to properly stop the action.
Color
Earlier generations of Sony cameras didn’t have a stellar reputation for color, but that is, to me, a thing of the past. I’m perfectly happy with Sony color at this point, whether it be for portrait work, landscapes, or general purpose shooting. What’s more, when shooting my chart tests for my many lens reviews, I note that Sony is basically the only brand that I don’t have to correct the white balance on my chart tests, meaning that Sony images are often delivered with more accuracy than I’m getting from other brands. Here’s a gallery of images from a variety of lenses that show off the nice colors achievable from the α1 II.


Sensor Conclusion
Sony is excellent at sensor design, and the α1 II’s sensor is no exception. It really amazes me that we can get such high quality images from a camera that can capture them at such a high rate. The numbers show that no one is doing it quite as well as Sony. While I’m always happy for further sensor improvements, I’m not sure that I really want any higher resolution for the α1 series (at least for now). I would rather see Sony continue to improve what’s possible at this resolution level rather than increase it further.

Conclusion
The Sony Alpha 1 II is an incredible camera, that, like the α9 II, will appear somewhat underwhelming to some because the first generation of cameras in the series was so very good. On paper it feels like relatively little has changed or improved from the α1, but as someone who own the α1 for nearly four years, I can attest to the fact that the α1 II is just a better camera to use, period. It essentially realizes many of the promises made by the original α1, giving us a camera that just works better. The α1 II is more ergonomic, has better stabilization, focuses more effectively, and makes better use of its sensor. It has essentially all of Sony’s more recent tweaks and features.

It is also hugely expensive. This is a camera that, after tax, will probably cost buyers north of $7000. I’m a professional photographer who earns my living through photography, so I could justify the expense (and even write some of it off), but clearly not everyone falls into that category. The α1 II looks rather unimposing when sat next to other flagship cameras, but don’t be deceived. This is still the camera that is capable of doing more things (and typically doing them better) than most of the competition. It is the jack-of-all-trades that defies the odds and masters them all. It is a very sweet camera to own…though it is best to forget how much it costs as soon as possible after ownership.

Pros:
- Exceptional Autofocus Performance: The dedicated AI processor significantly enhances subject detection and tracking, making it particularly effective for moving subjects.
- Improved IBIS (In-Body Image Stabilization): Enhanced stabilization offers up to 8.5 stops of compensation, allowing for smoother hand-held shooting even with longer lenses.
- High-Resolution Sensor: The 50MP stacked BSI CMOS sensor delivers remarkable detail and dynamic range, making it suitable for various types of photography, including landscape and portrait work.
- Fast Burst Shooting: Capable of shooting up to 30 frames per second with full autofocus and exposure tracking, catering to high-speed action photography.
- Enhanced Video Capabilities: Supports 8K recording at 30p and 4K at 120p, providing filmmakers with versatile options and high-quality footage.
- Advanced Connectivity Options: Features multiple connectivity ports, including dual card slots for CFExpress Type A/UHS-II SD, USB-C, HDMI, and 3.5mm ports, accommodating various shooting needs.
- Full Articulating Touchscreen: The updated fully articulated touchscreen LCD greatly enhances usability, especially for vlogging and creative angled shots.
- Robust and Weather-Sealed Build: Constructed with a magnesium alloy body, the α1 II offers significant durability and protection against the elements.
- Customizable Controls: Numerous customizable buttons and dials allow users to tailor the camera’s functionality to their shooting style.
- Highly Competitive ISO Performance: The α1 II shows significant improvement in low-light performance, making it viable to shoot at higher ISO settings without excessive noise.
- Long Battery Life: While not improved from the original, the NP-FZ100 battery provides decent longevity, especially when paired with efficient power management.
Cons:
- High Price Point: The camera’s starting price of $6,999 USD makes it a significant investment that may limit its accessibility to amateur photographers.
- Limited Improvements in Core Specs: Minimal upgrades in burst rate and shutter speeds compared to the original α1, which might disappoint users expecting substantial advancements.
- No Internal RAW Video Recording: Lack of internal RAW recording capabilities, which is a disadvantage for professional video work compared to some competitors.
- No Open Gate or 8K60 options: Some competing camera systems offer these features.
- Uninspired Packaging: The quality of the packaging feels cheap, which does not align with the premium nature of the product.
_________________________________________________________________________
GEAR USED:
Purchase the α1 II @ Camera Canada | Sony USA | B&H Photo | Adorama | Amazon | Amazon Canada | Amazon UK | Amazon Germany
___________________________________________________________________
Purchase the Sony a7RV @ B&H Photo | Adorama | Amazon | Camera Canada | Sony Canada | Amazon Canada | Amazon UK | Amazon Germany
__________________________________________________________________
Purchase the Sony a7IV @ B&H Photo | Adorama | Amazon | Camera Canada | Sony Canada | Amazon Canada | Amazon UK | Amazon Germany
_________________________________________________________________
Purchase the Sony Alpha 1 @ Camera Canada | B&H Photo | Adorama | Amazon | Sony Canada | Amazon Canada | Amazon UK | Amazon Germany | Ebay
_________________________________________________________________
Want to support this channel? Use these affiliate links to shop at: B&H Photo | Amazon | Adorama | Camera Canada | Amazon Canada | Amazon UK | Ebay | Make a donation via Paypal
Buy DA Merchandise https://bit.ly/TWIMerch
Keywords: α1 II, a1II, ILCE-1M2, Sony, a1, Alpha 1, Alpha 1 II, Full Frame, Review, Sensor, Resolution, Dynamic Range, ISO, Autofocus, Video, Burst Rate, FPS, Review, Hands On, Dustin Abbott, Real World, Comparison, Sharpness, Autofocus, Dynamic Range, Sensor, ISO, 30FPS, AI, Image Quality, Sample Images, Video, Photography, let the light in, weathersealing, #letthelightin, DA, #α1II, #ILCE-1M2, #sony
Related posts:
 Sony a7V Review
 Sony Alpha 1 (ILCE-1) Review
 Sony ZV-E10 II Vlogging Camera Review
 Sony FE 100mm F2.8 Macro GM OSS Review
 Sony a7C2 (ILCE-A7CM2) Review
 Sony a7CR Review
 2023 DA Awards – Best Lenses and Cameras
 TTArtisan AF 75mm F2 Review
 TTArtisan AF 75mm F2 Gallery
 TTArtisan AF 40mm F2 E-Mount Review