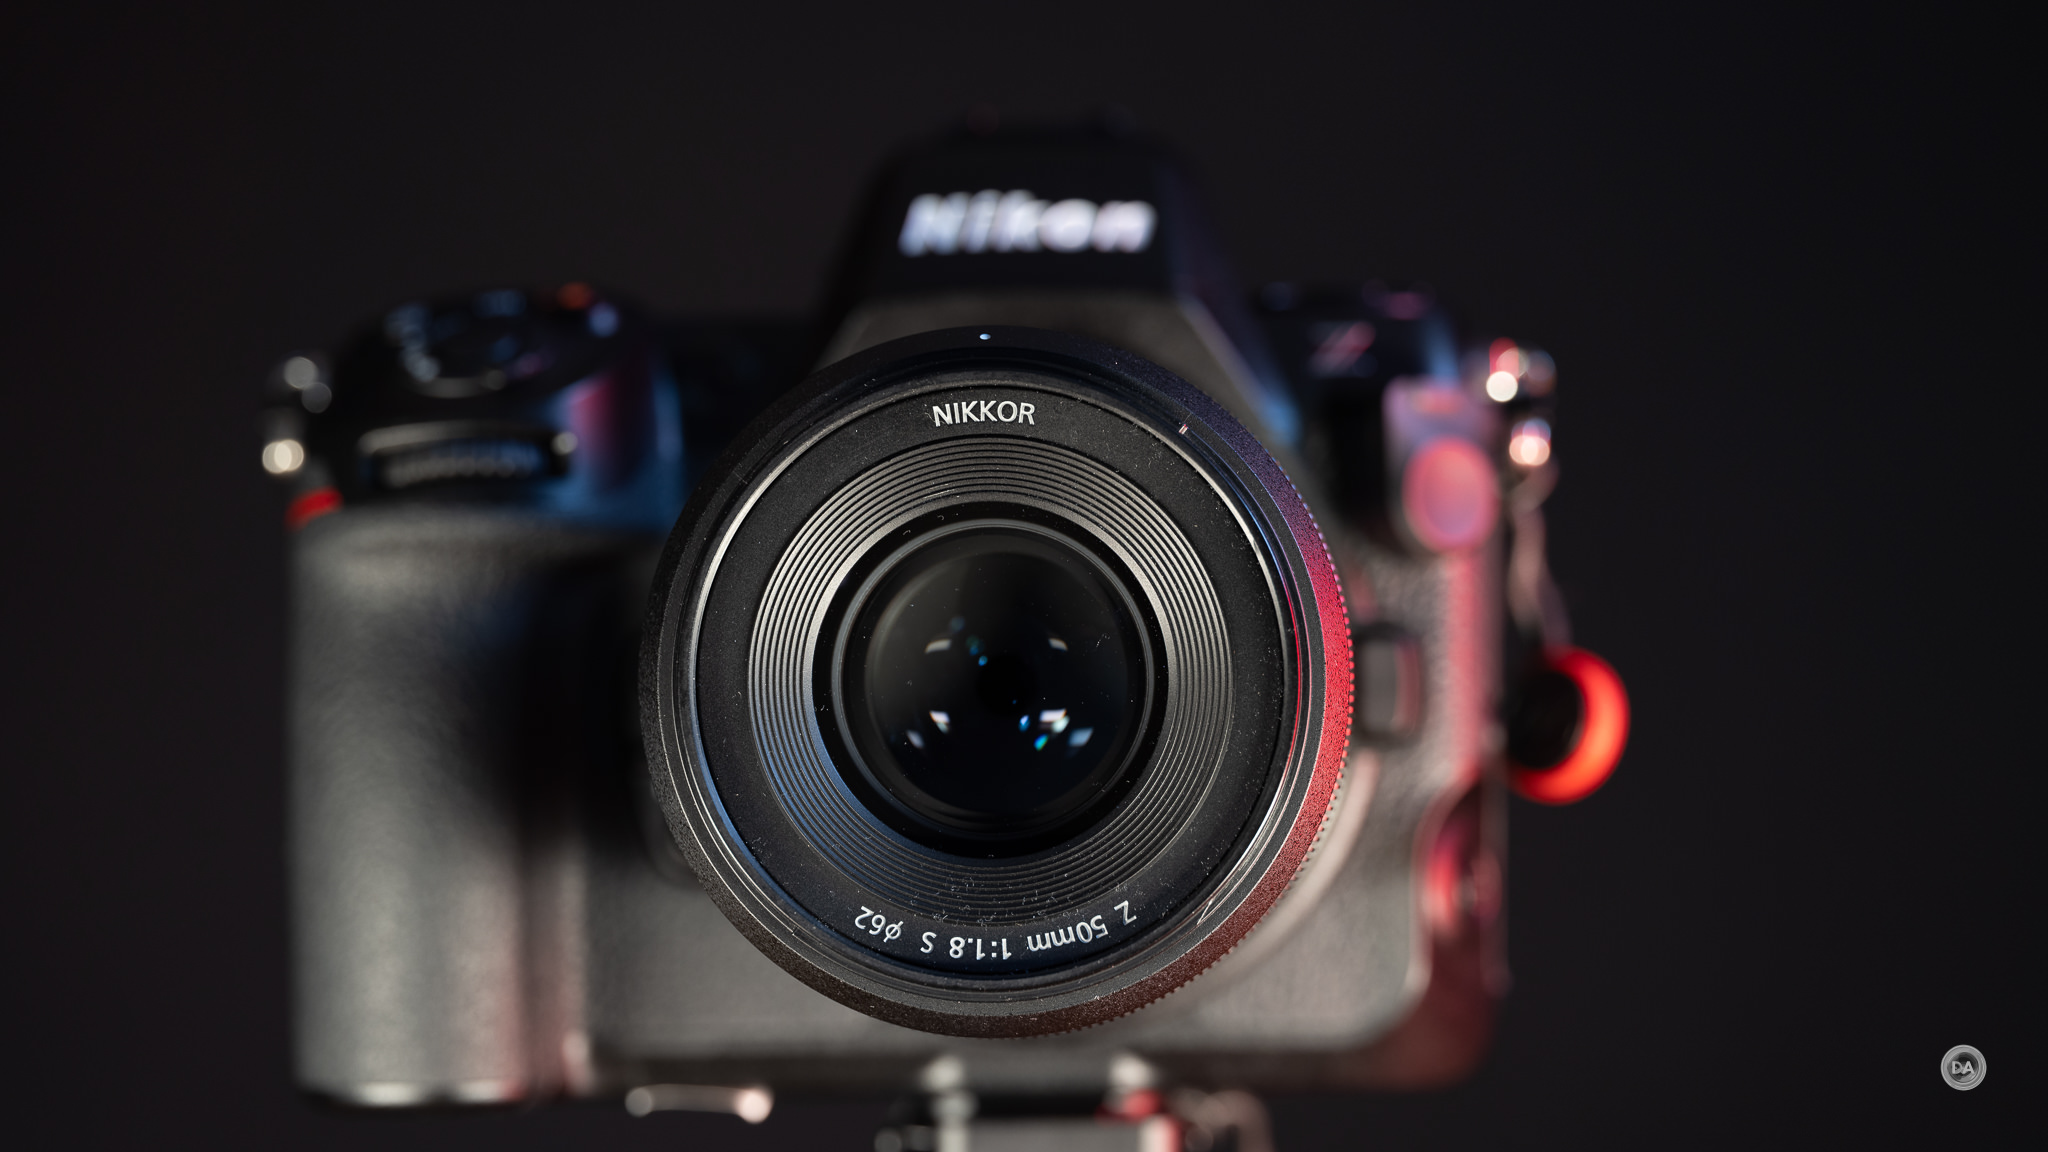
Nikon’s marketing strategy with the common prime focal lengths is a little odd. They started with a series of premium S-Line primes…but with the uncommon maximum aperture of F1.8. They then followed those with the extreme F1.2 options. Everything made sense until they’ve much later decided to release a series of 35mm, 50mm, and 85mm F1.4 primes…except for these are more like the entry level primes. The 50mm F1.4 is nearly the same size as the 50mm F1.8 S, costs about $130 less, and, confusingly, has at least one key feature that the premium lacks. So is the slower 50mm F1.8 S still the niftiest fifty from Nikon…let’s find out.
The Z 50mm F1.8 S was loaned to me by Nikon Canada for this test, and the 50mm F1.4 I purchased from Camera Canada in 2024. As always, this is a completely independent review. All opinions and conclusions are my own. *The tests and most of the photos that I share as a part of my review cycle have been done with the 45MP Nikon Z8, which I reviewed here.You can visit the product page for the Nikkor Z 50mm F1.8 S here.
Extremely similar size (Same diameter, F1.8 is 2.5mm shorter and -7G)
62mm front filters
Both have similar amount of seals (7)
Both have nine rounded aperture blades
Can do similar aperture racks
Similar levels of focus breathing
Both have STM focus motors with similar speed
Was able to track sports action with both lenses
Both delivered similar results in my hand test
Both have almost no distortion
Reasons to Choose the Nikkor Z 50mm F1.4:
Brighter maximum aperture (2/3rds stop – 1.66x brighter)
Has a separate customizable control ring
Can focus 3cm closer and has higher 0.17x (0.15x)
Can produce a more blurred background for 2 reasons
Rounder bokeh balls
Reasons to Choose the Nikkor Z 50mm F1.8 S:
MUCH sharper (MTF and reality)
Much higher contrast
Much lower fringing
Slightly more confident video focus
Less vignette (still high +71 vs +88)
Better rendering near edges
Better up close performance (flatter plane of focus, better contrast and detail)
Has AF | MF switch
No fringing in bokeh balls
Conclusion
I actually really like the 50mm F1.4 in a lot of ways, but when you compare them head to head, there isn’t a lot of reasons to choose the F1.4 lens unless A) you really need F1.4 or B) the price difference is a deal breaker. The S-Line lens is definitely the premium (and preferred) lens despite the confusing aperture values.
DISCLAIMER: This article and description contains affiliate links, which means that if you click on one of the product links, I’ll receive a small commission. As an Amazon Associate I earn from qualifying purchases.
I noted in last year’s review of the Nikkor Z 50mm F1.4 that Nikon’s marketing strategy at the typical prime focal lengths (35mm, 50mm, and 85mm) is a bit unconventional. In the past the usual strategy was entry level (F1.8), mid-tier (F1.4), and premium (F1.2) options. But Nikon actually released F1.8 lenses at these focal lengths first, but rather than the typical entry level “plastic fantastics” they actually created more premium mid-tier options included in their premium S-line lineup. They then followed those up with F1.2 options (large, expensive, and excellent), and only then created F1.4 options. The F1.4 lenses are actually the least expensive options, and, ironically, tend to be about the same size as the F1.8 S lenses. But thanks to a newfound connection at Nikon Canada (thanks, Chris!), I’ve got an opportunity to work through some of the catalog lenses in Z mount. I’ve been very interested in seeing how the F1.8 S lenses compare to the newer F1.4 lenses, so I’m starting that journey by reviewing the Nikkor Z 50mm F1.8 S, and I’ll follow that up with a review and article directly comparing it to the 50mm F1.4. Sound interesting? Find out my thoughts by watching the video review, reading the text review, or just enjoying the photos in the gallery below.
Thanks to Nikon Canada for sending me a review copy of this lens. As always, this is a completely independent review. All opinions and conclusions are my own. *The tests and most of the photos that I share as a part of my review cycle have been done with the 45MP Nikon Z8, which I reviewed here.You can visit the product page for the Nikkor Z 50mm F1.8 S here.
I actually really liked the Nikkor Z 50mm F1.4 and ended up purchasing one myself from Camera Canada. I’ll be using my own copy of that lens for some of the comparisons in these reviews. What’s interesting is just how similar in size these two lenses are. The F1.8 lens is about 2.5mm shorter and weighs 7g less, but let’s just say that it wouldn’t be difficult to confuse the two lenses.
The 50mm F1.8 S has been a great seller for Nikon, and that’s in part because this approach allowed photographers to have an S-Line lens that they could afford…and that wouldn’t mind carrying. The 50mm F1.8 S weighs 416g; the premium F1.2 S weighs a whopping 1090g! Many “ordinary” photographers aren’t interested in paying for or carrying around a lens like the F1.2 S, so that has made the F1.8 S lens the sweet spot for many buyers. I’m curious how the F1.4 lens released in 2024 has impacted sales of the F1.8 S. Has Nikon done a good enough job of marketing the S-Line advantages to the casual buyer, or will they see the F1.4 aperture and lower price of the newer lens and pull that level instead? We tackle that question and others in the reviews if you want more info. For now, just enjoy the photos in the galleries.
DISCLAIMER: This article and description contains affiliate links, which means that if you click on one of the product links, I’ll receive a small commission. As an Amazon Associate I earn from qualifying purchases.
I noted in last year’s review of the Nikkor Z 50mm F1.4 that Nikon’s marketing strategy at the typical prime focal lengths (35mm, 50mm, and 85mm) is a bit unconventional. In the past the usual strategy was entry level (F1.8), mid-tier (F1.4), and premium (F1.2) options. But Nikon actually released F1.8 lenses at these focal lengths first, but rather than the typical entry level “plastic fantastics” they actually created more premium mid-tier options included in their premium S-line lineup. They then followed those up with F1.2 options (large, expensive, and excellent), and only then created F1.4 options. The F1.4 lenses are actually the least expensive options, and, ironically, tend to be about the same size as the F1.8 S lenses. But thanks to a newfound connection at Nikon Canada (thanks, Chris!), I’ve got an opportunity to work through some of the catalog lenses in Z mount. I’ve been very interested in seeing how the F1.8 S lenses compare to the newer F1.4 lenses, so I’m starting that journey by reviewing the Nikkor Z 50mm F1.8 S, and I’ll follow that up with a review and article directly comparing it to the 50mm F1.4. Sound interesting? Find out my thoughts by watching the video review or by reading on in the text review.
Thanks to Nikon Canada for sending me a review copy of this lens. As always, this is a completely independent review. All opinions and conclusions are my own. *The tests and most of the photos that I share as a part of my review cycle have been done with the 45MP Nikon Z8, which I reviewed here.You can visit the product page for the Nikkor Z 50mm F1.8 S here.
I actually really liked the Nikkor Z 50mm F1.4 and ended up purchasing one myself from Camera Canada. I’ll be using my own copy of that lens for some of the comparisons in these reviews. What’s interesting is just how similar in size these two lenses are. The F1.8 lens is about 2.5mm shorter and weighs 7g less, but let’s just say that it wouldn’t be difficult to confuse the two lenses.
The 50mm F1.8 S has been a great seller for Nikon, and that’s in part because this approach allowed photographers to have an S-Line lens that they could afford…and that wouldn’t mind carrying. The 50mm F1.8 S weighs 416g; the premium F1.2 S weighs a whopping 1090g! Many “ordinary” photographers aren’t interested in paying for or carrying around a lens like the F1.2 S, so that has made the F1.8 S lens the sweet spot for many buyers. I’m curious how the F1.4 lens released in 2024 has impacted sales of the F1.8 S. Has Nikon done a good enough job of marketing the S-Line advantages to the casual buyer, or will they see the F1.4 aperture and lower price of the newer lens and pull that level instead?
This is not a new lens. It was one of the first released by Nikon when Z mount launched in late 2018, so is it sill holding up to scrutiny over six years later?
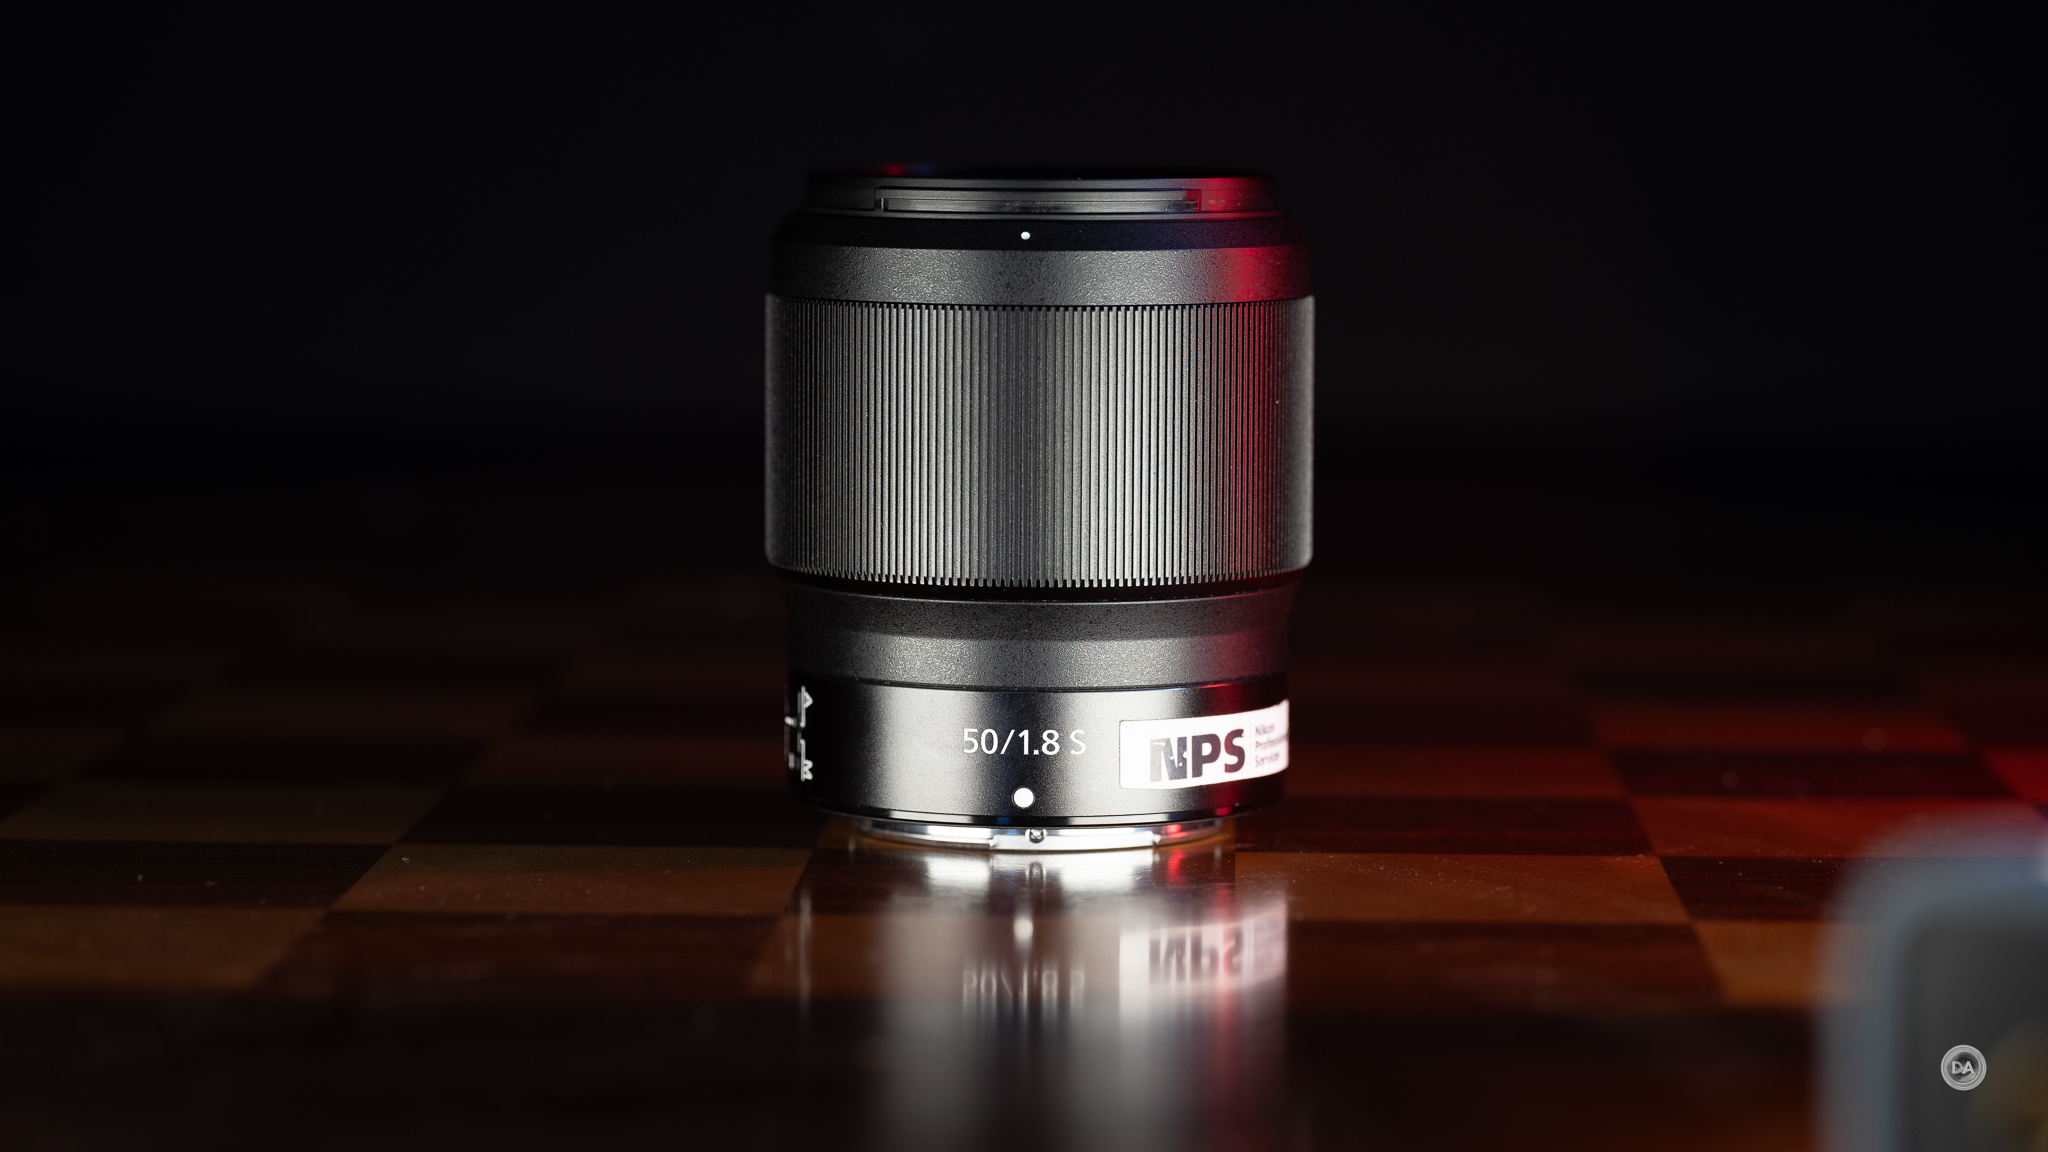
Nikkor 50mm F1.8 S Build and Handling
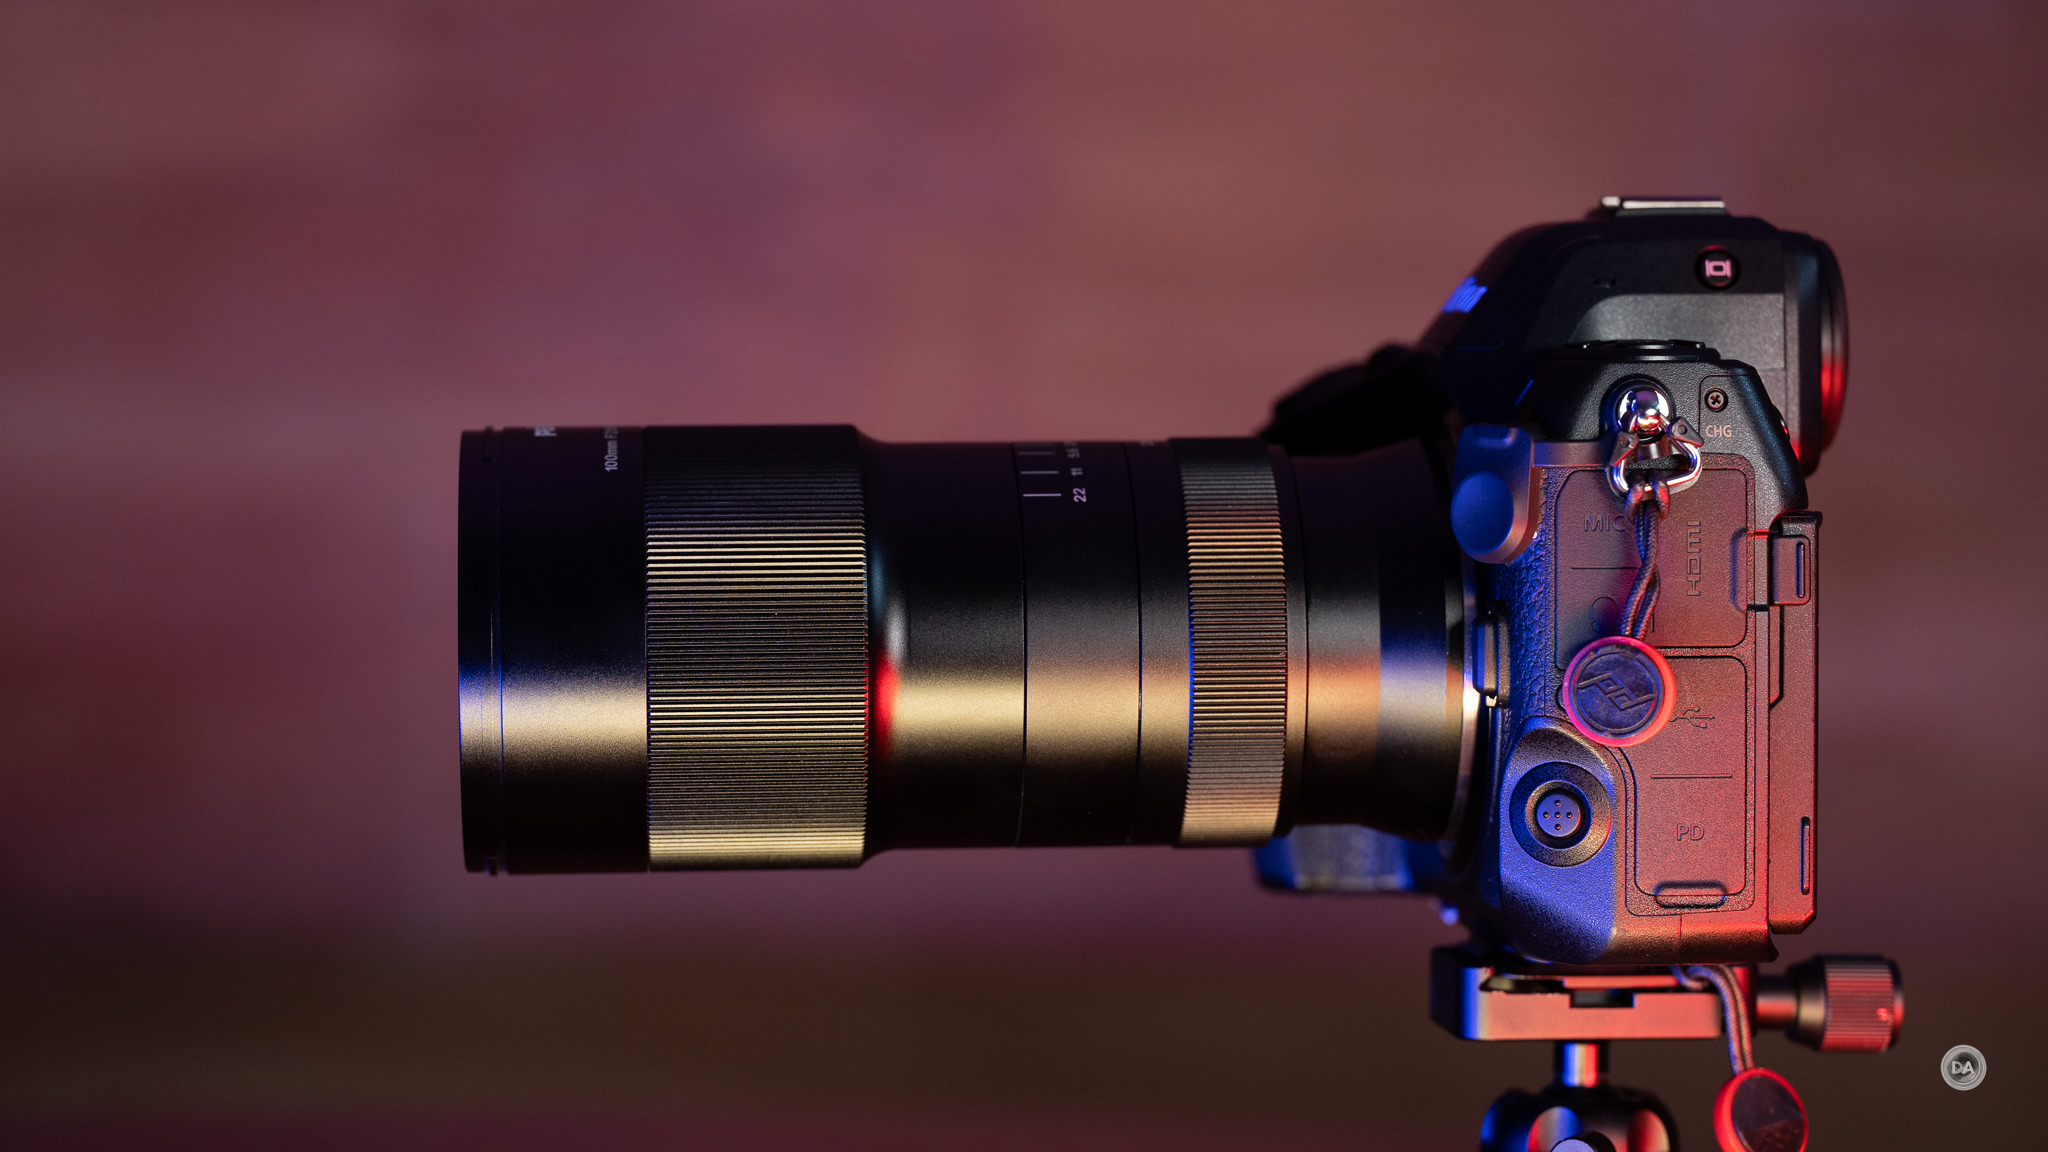
Though this is the smallest of the three traditional 50mm options available from Nikon on Z-mount (excluding a macro option), it isn’t actually small…particularly for an F1.8 lens. Nikon’s Z-mount is the largest diameter of the three major full frame players at 55mm, with Canon’s RF mount right behind at 54mm, but Sony’s E-mount is a much smaller 46.1mm. There are definite advantages for Nikon with their larger mount diameter, but the downside is that lenses tend to be a little bigger because the diameter of the lens even at the mount starts a bit larger. Sony has proven to be the most efficient of the three in creating smaller, more compact premium lenses, but that is aided by having that smaller diameter to start with. The 50mm F1.8 S is 76mm (2.99″) x 86.5 mm (3.41″) in length.
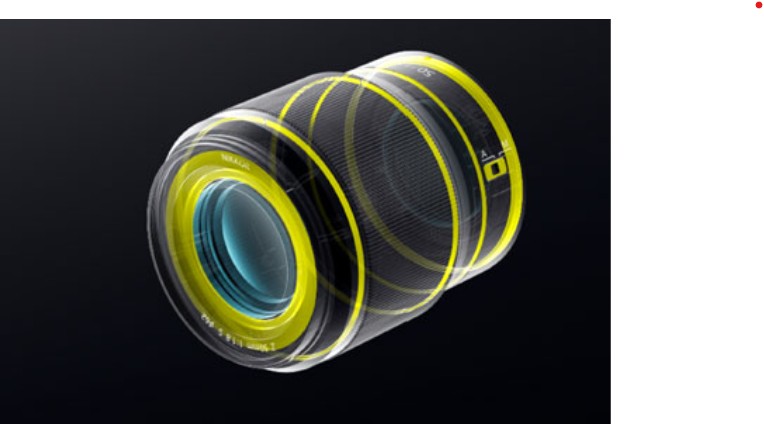
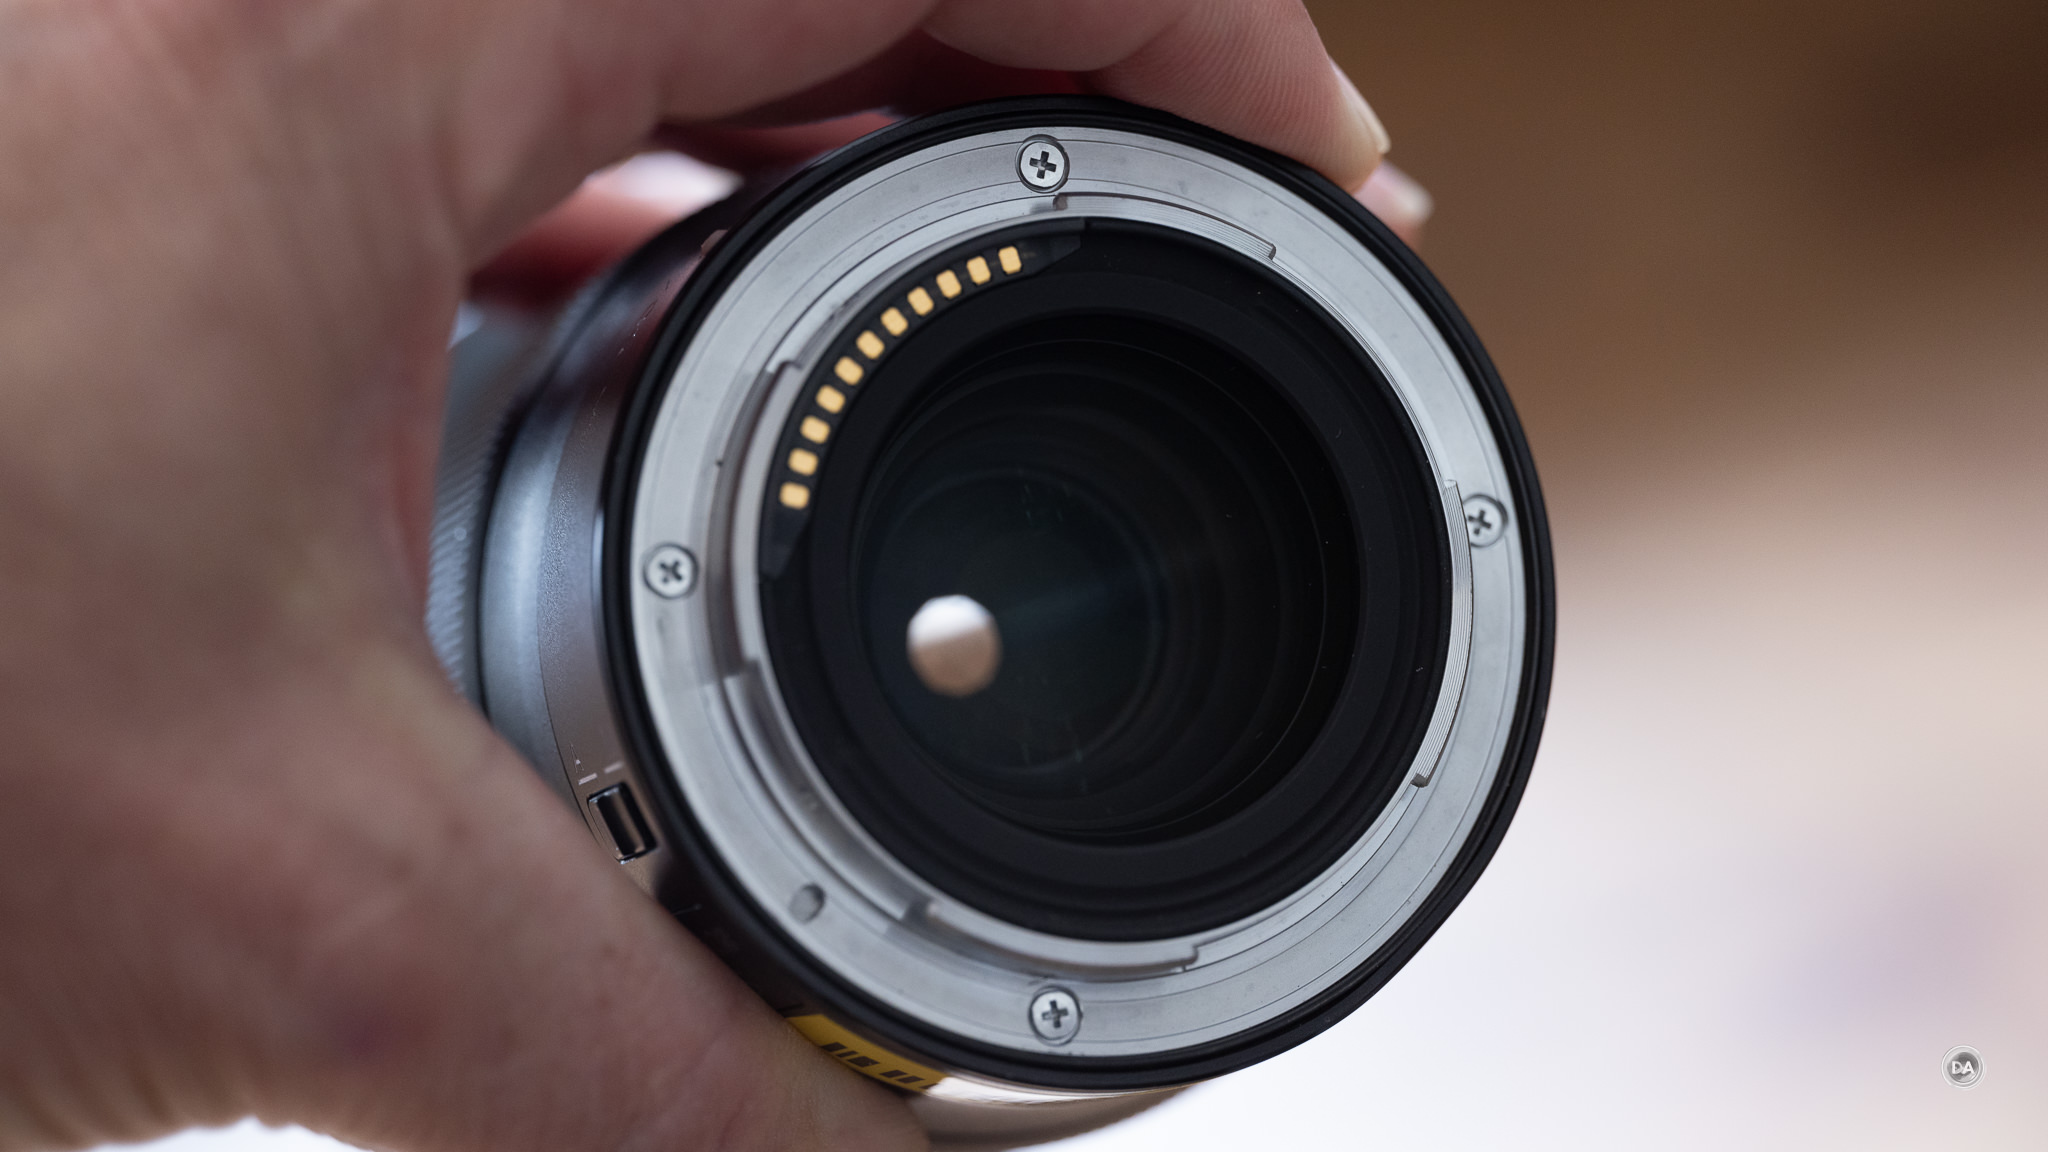
It weighs in at a moderate 415g or 14.64oz. The outer barrel is made of a robust polycarbonate material with some metal components, including the mount. There is a weather sealing gasket at the mount along with internal seals throughout the lens.
I count either 6 or 7 seal points overall in this diagram. Nikon’s language around the weather sealing is a little more confident for the S-Line lens than it was for the Z 50mm F1.4. They say, “Extensively sealed against dust and moisture, especially around all moving parts of the barrel.” (Emphasis mine). On paper the 50mm F1.4 and the 50mm F1.8 S have similar weather sealing, but Nikon seems to be indicating that the sealing is more robust in the S-line lens. As with the 50mm F1.4, however, the gasket is pretty thin at the lens mount.
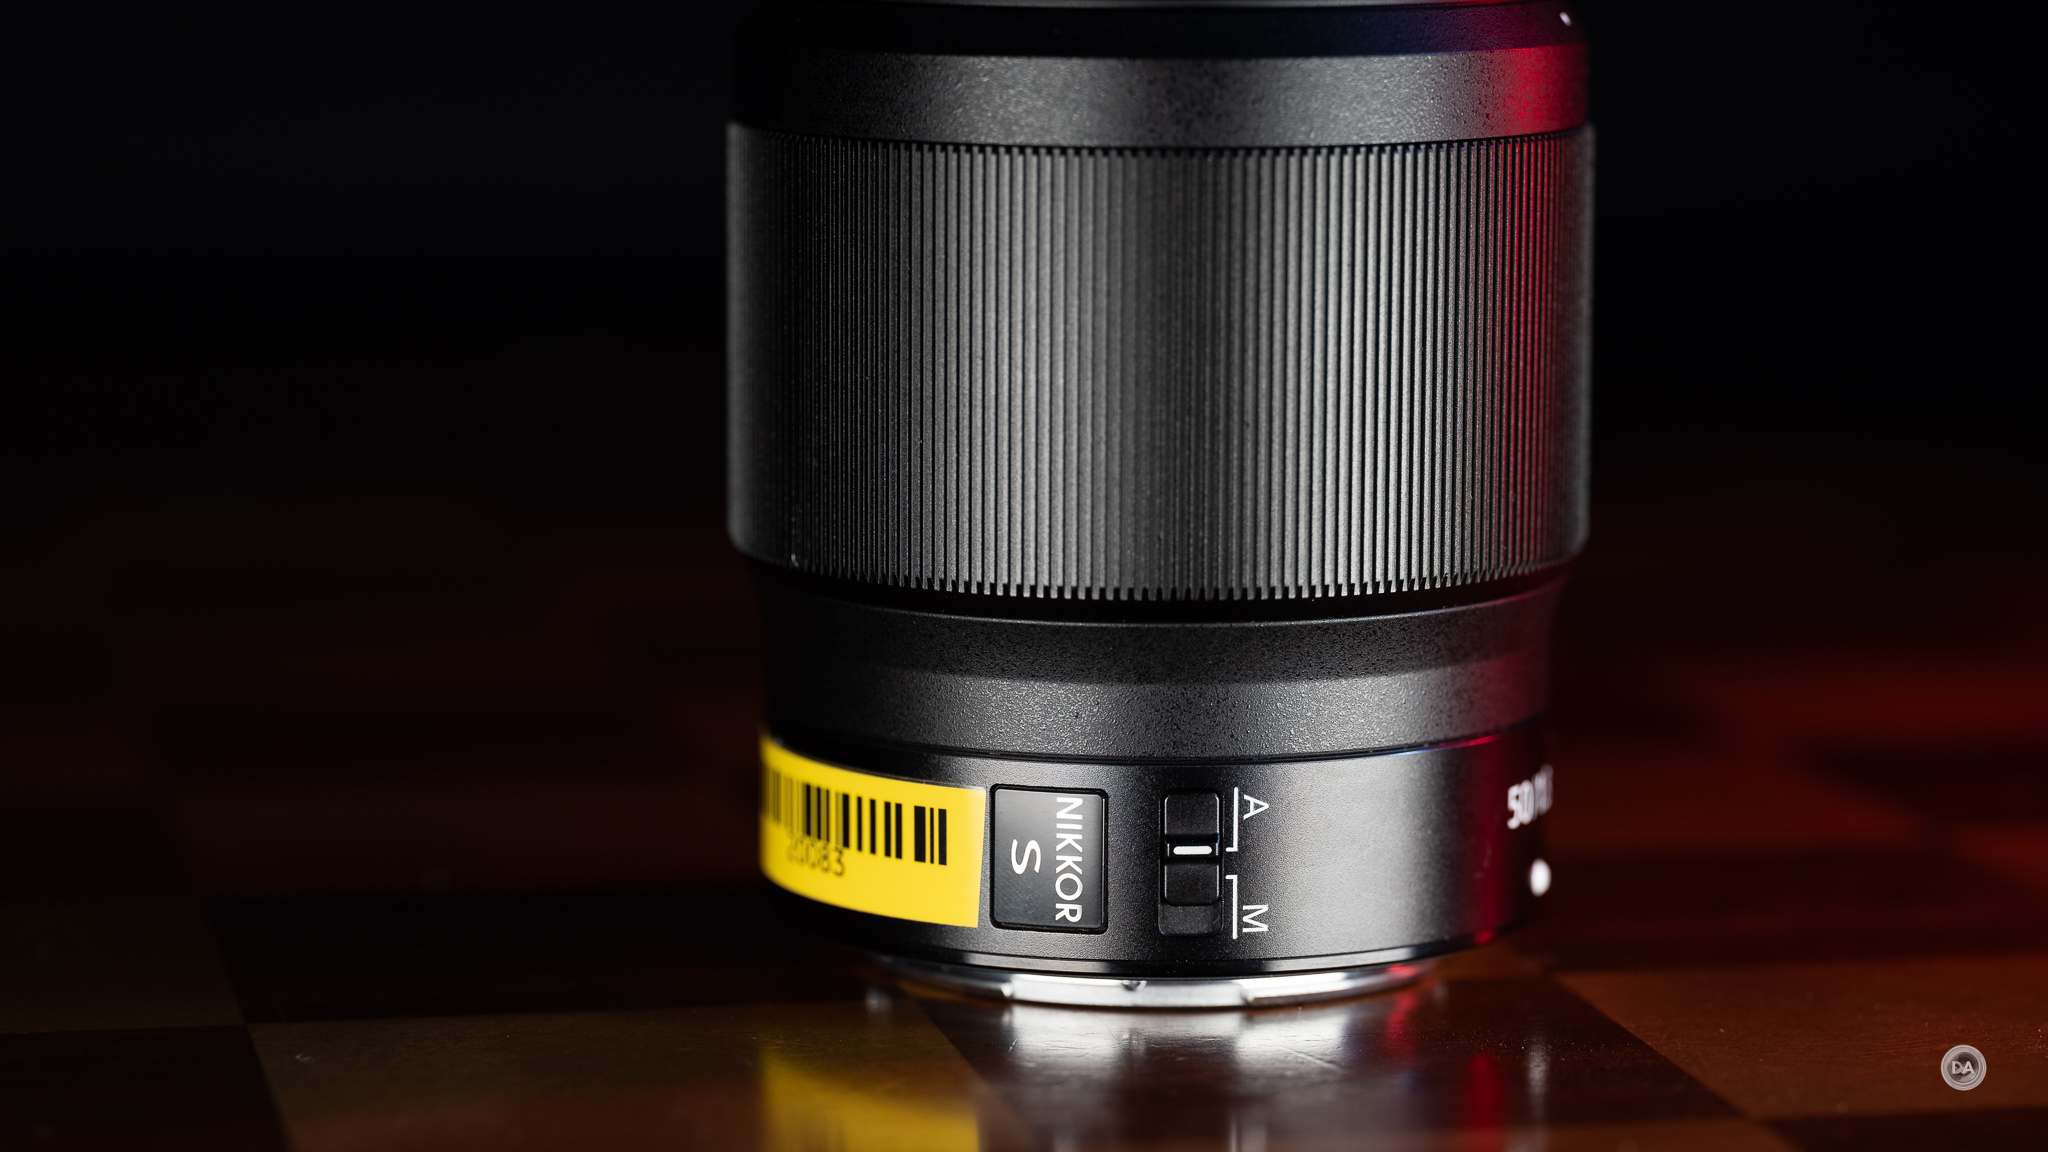
The feature set of the 50mm F1.8 S is fairly brief. There is an AF | MF switch along with the S-Line badging near the lens mount (*my Nikon Professional Services loaner has stickers all over the place, so these won’t be the prettiest product shots I’ve ever produced!)
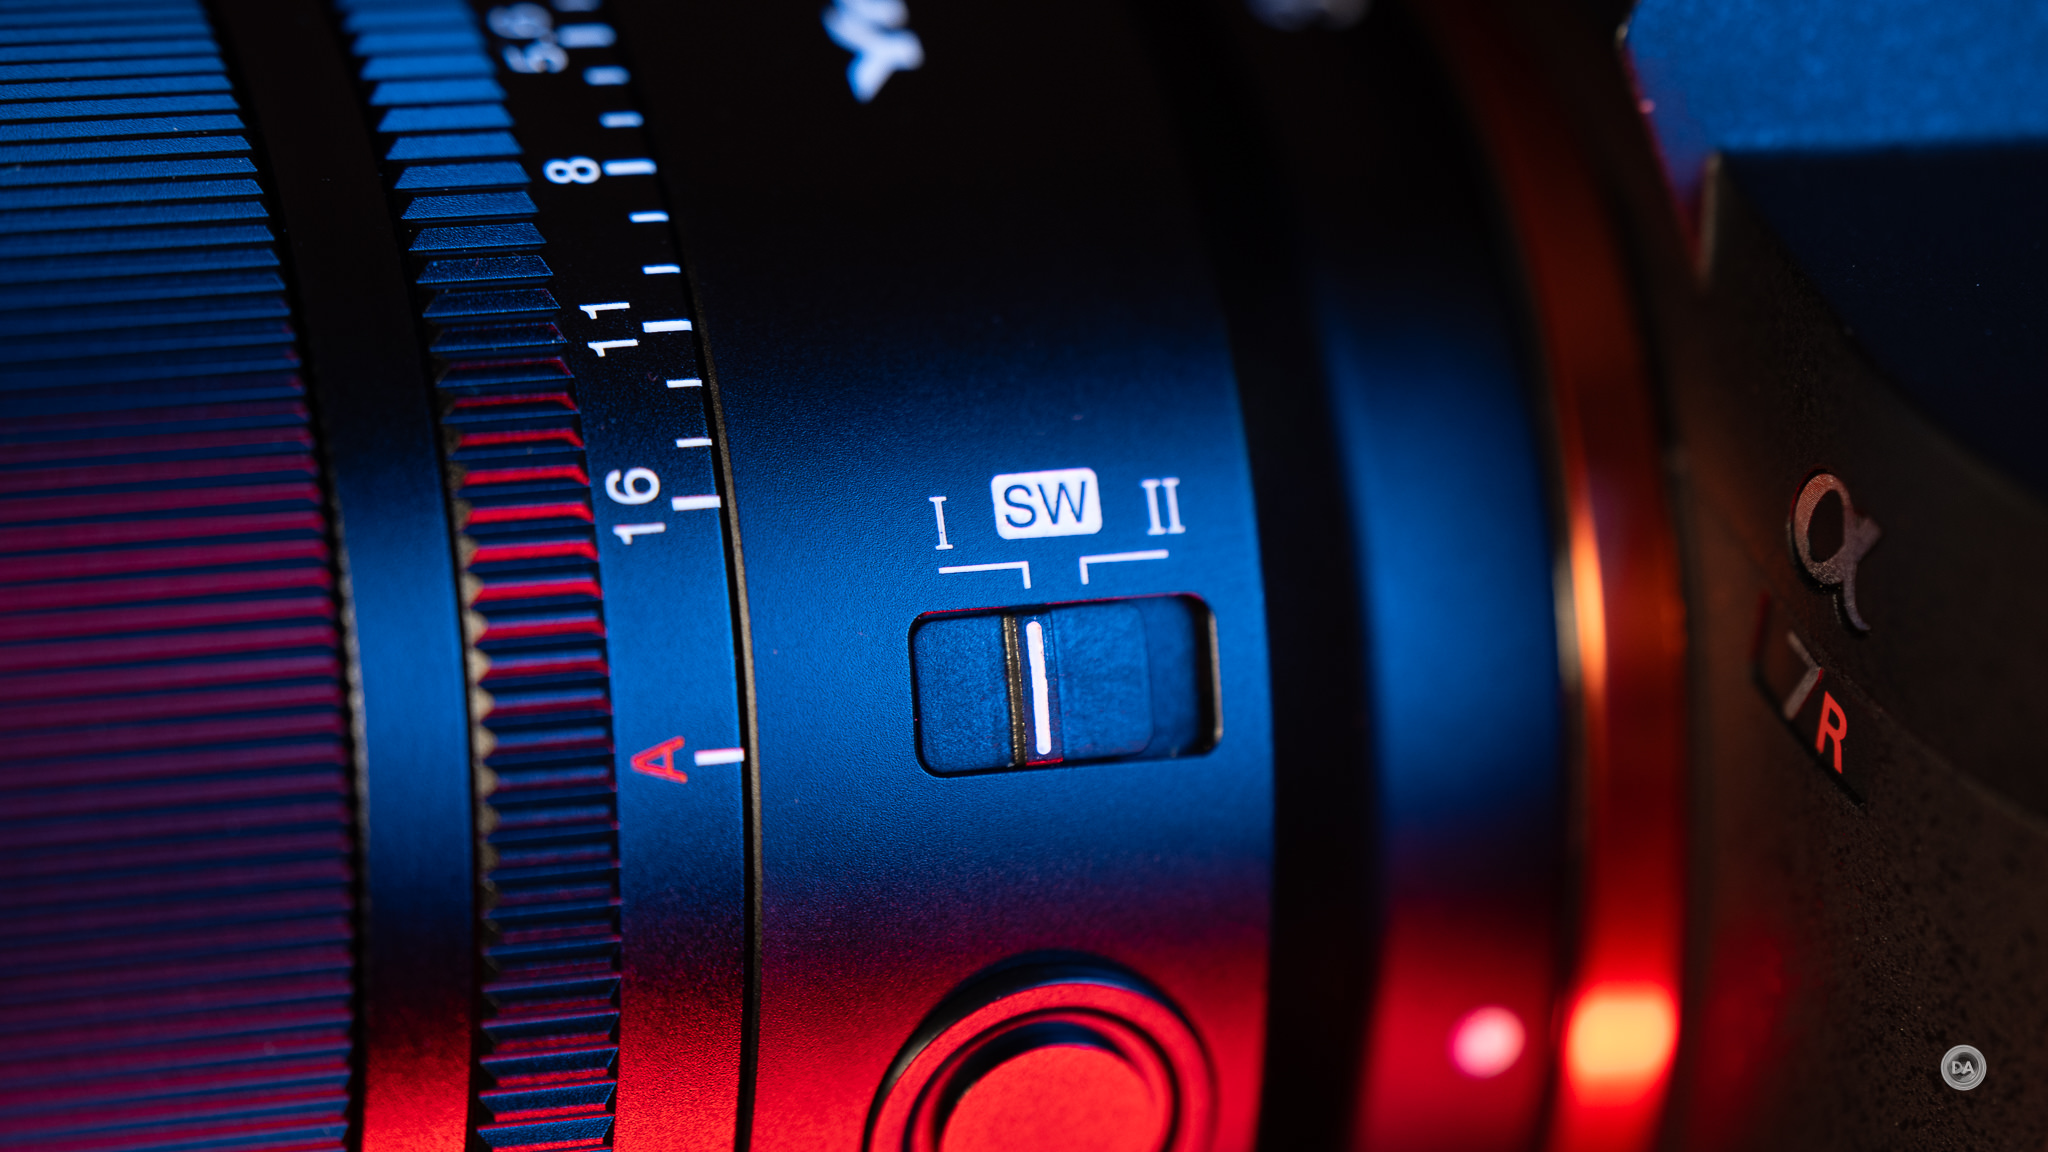
There is just a single ring on the lens barrel. This is an area of differentiation from the newer 50mm F1.4, as that lens has two rings. It has a dedicated manual focus ring along with Nikon’s customizable control ring that can be assigned to adjust aperture, exposure compensation, or ISO. In this case, however, the single ring is the customizable control ring, meaning that manual focus is the default function but is also just one of the potential uses for the ring.
This leaves me with a bit of quandary, as I do like having an aperture ring, but I also really like Nikon’s full time manual override and do find it often necessary when autofocus doesn’t want to grab a close object. The shot below found autofocus stuck on the background and I had to use manual override to pull focus to the right zone where autofocus can take over. I would give the win to the newer F1.4 lens for having a separate control ring, as I decided that I would just have to skip the manual aperture control in order to retain manual focus override.
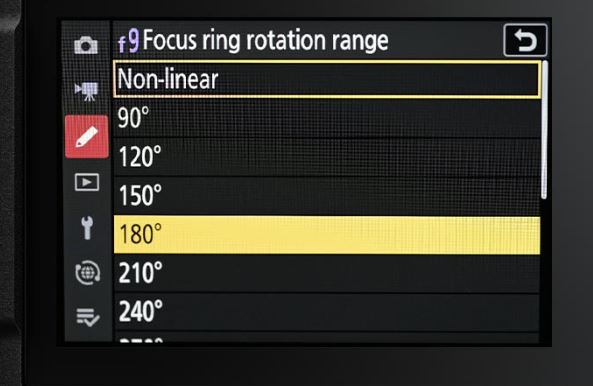
The feel of the ring is fairly good, with good damping and precision. I like Nikon’s options for controlling the behavior of the manual focus ring, allowing you to choose a linear response and your desired focus throw distance.
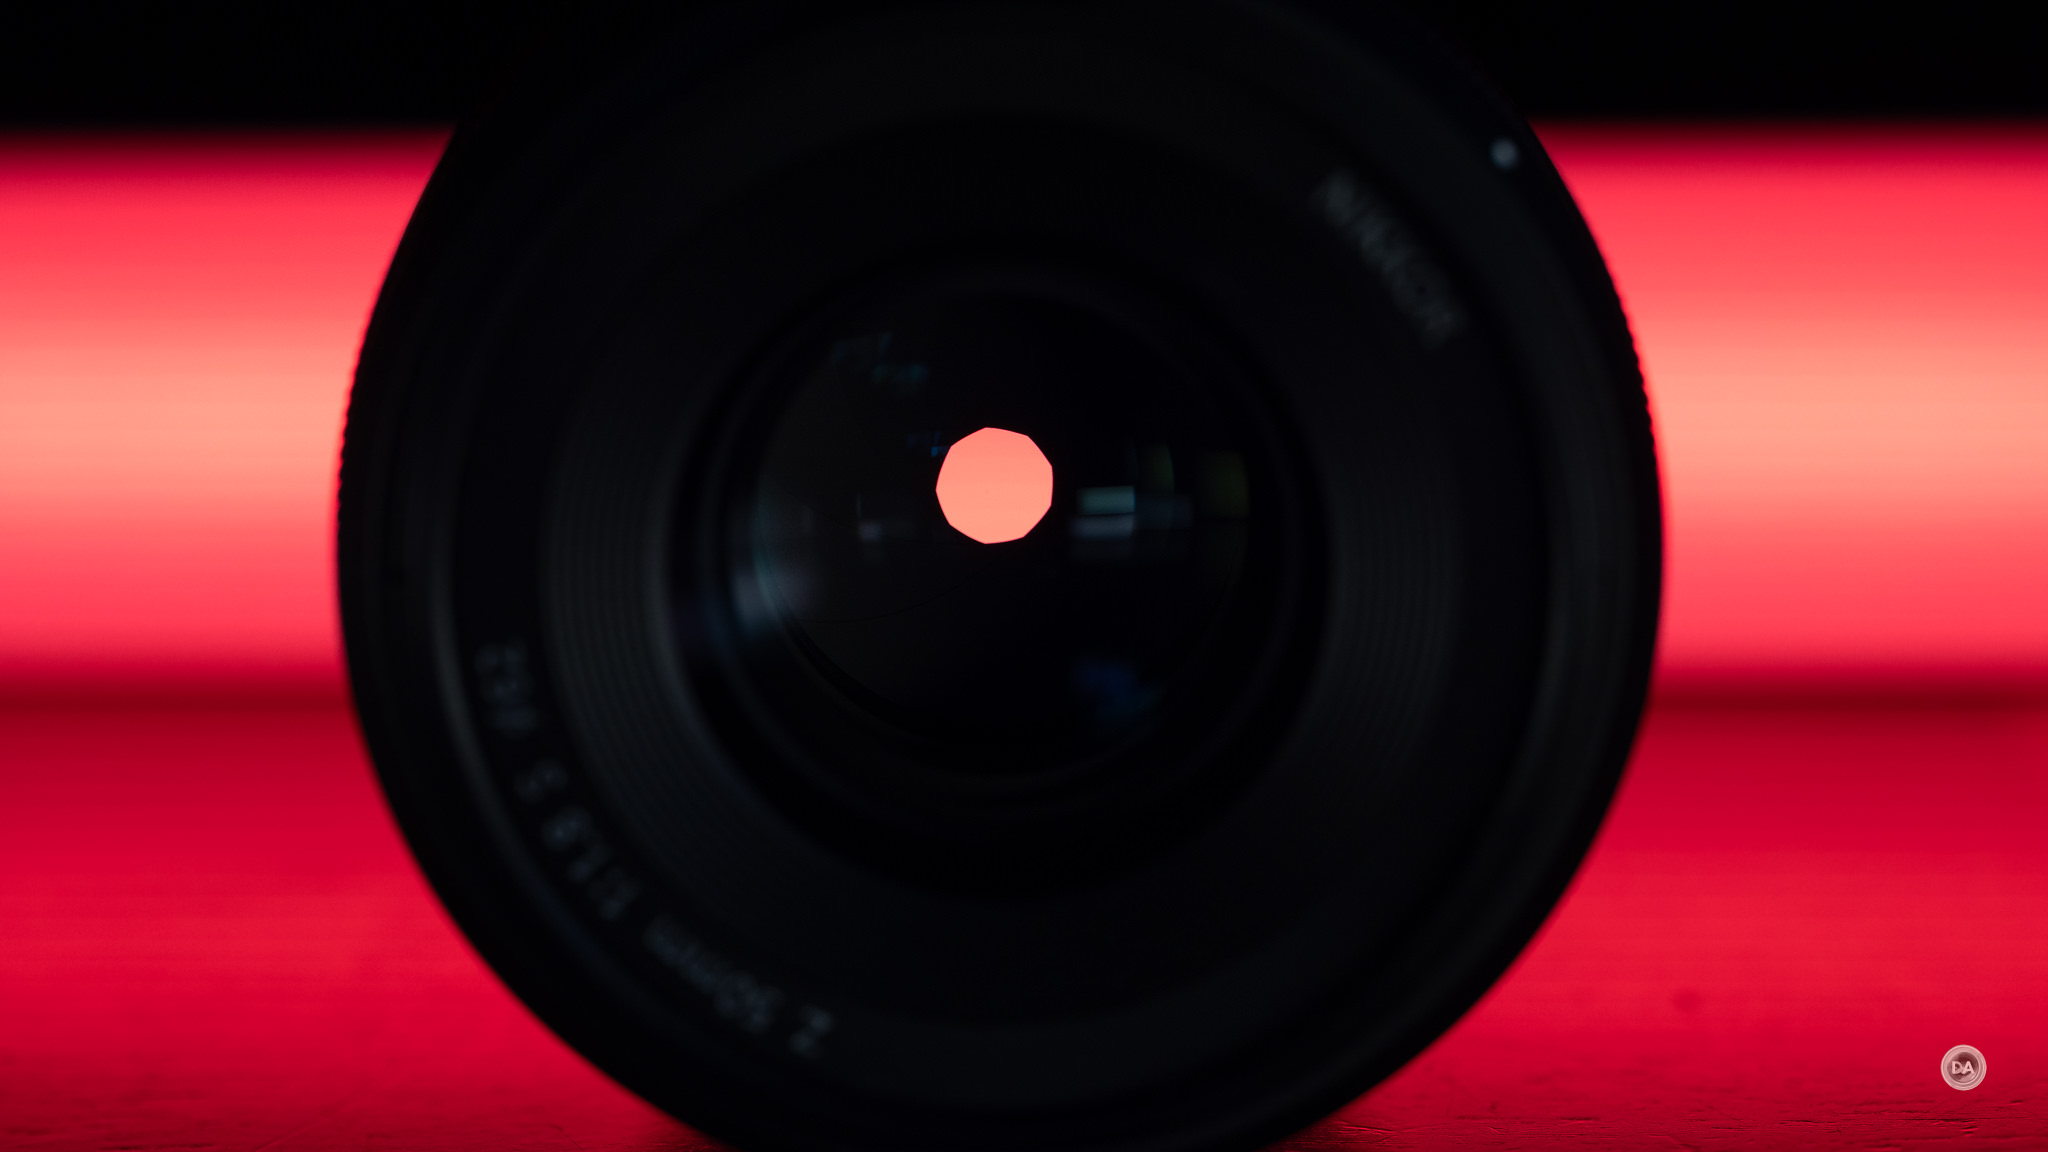
The aperture iris is made up of nine rounded blades, allowing for a circular aperture shape when the lens is stopped down.
As you stop the aperture down, the overall shape is “roundish” but you can slightly see the shape of the aperture blades (F1.8, F2.8, and F4 shown below).
The front filter size is a relatively uncommon 62mm, though Nikon is making it more common by equipping the 50mm F1.4 along with both the 35mm F1.8 and F1.4 options with a 62mm filter thread. The 85mm F1.8 S moves up to a 67mm filter size.
There is a fairly deep lens hood included. There are ribs inside and a ridged grip section to make it easier to mount/unmount the lens. My loaner copy didn’t include the hood, though I found that the one on my 50mm F1.4 looked very similar to the one shown in the photos and mounted fine.
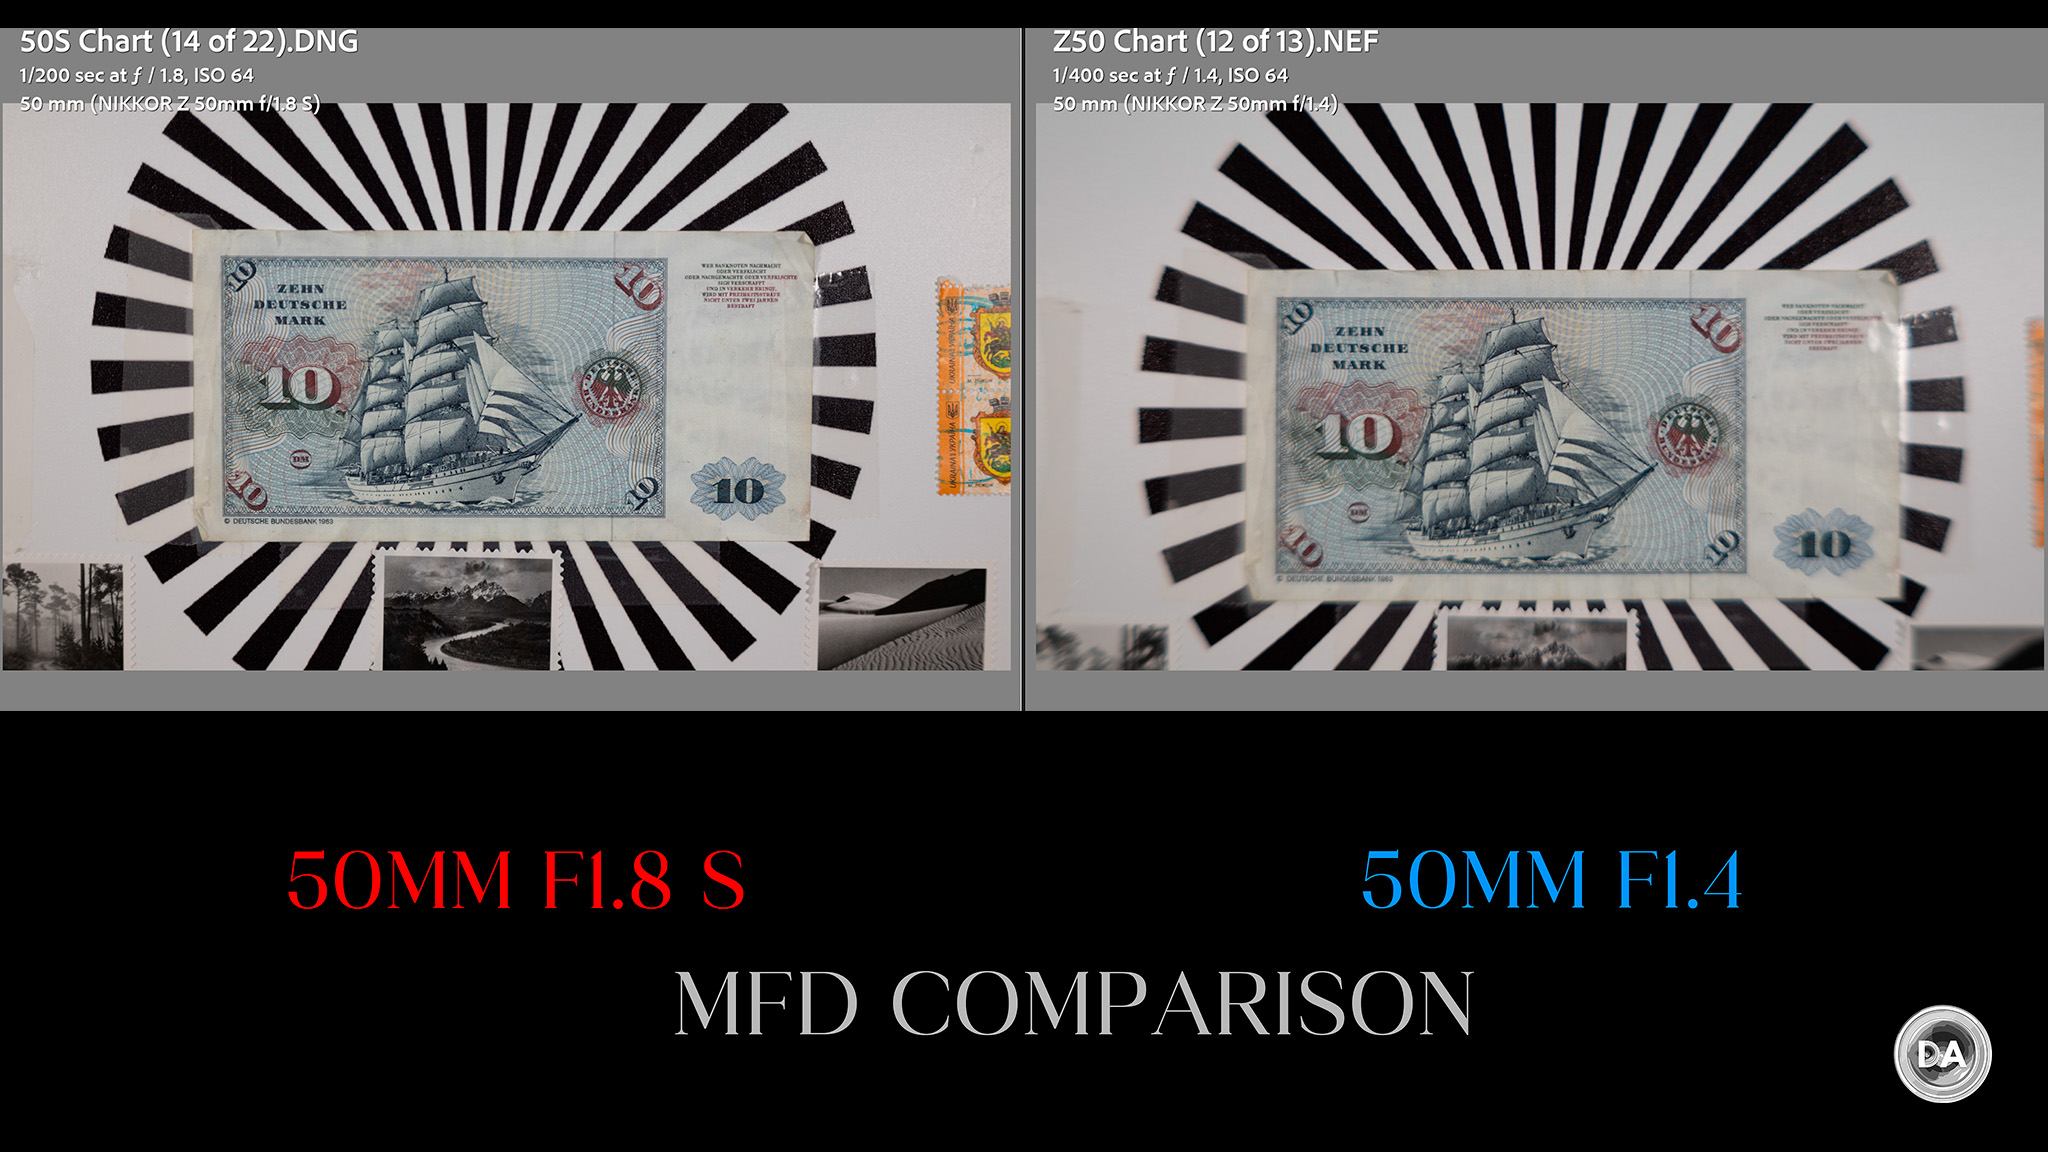
The 50mm F1.8 S lags behind the F1.4 lenses a bit in minimum focus distance. It can only focus as closely as 40cm while the 50mm F1.4 can focus down to 37.19cm. This means the maximum magnification is reduced from 0.17x (on the F1.4 lens) to 0.15x here. That’s about average for a 50mm lens, and the 50mm F1.2 S shares that specification. Here’s what MFD looks like:
While the F1.4 does have a higher degree of magnification, it produces a much poorer end result, with less contrast and a plane of focus that isn’t particularly flat. The 50mm F1.8 S does a much better job.
I’m not sure that you’d be able to tell that the 50mm F1.8 S is the premium lens when just visually comparing the 50mm F1.8 and 50mm F1.4 lenses. It adds the AF | MF switch but loses the separate control ring, and while there are a few more metal bits on the S Line lens (it does have slightly better build), the build materials don’t feel radically different. Add in that both lenses are roughly the same size and weight, and you end up needing to use other criteria to differentiate the two lenses in your buying decision. The current price of the 50mm F1.8 S is about $630, while the 50mm F1.4 will cost about $500. You’ll have to decide if the S-Line approach is worth more to you than the newer, brighter lens.
Autofocus for Stills
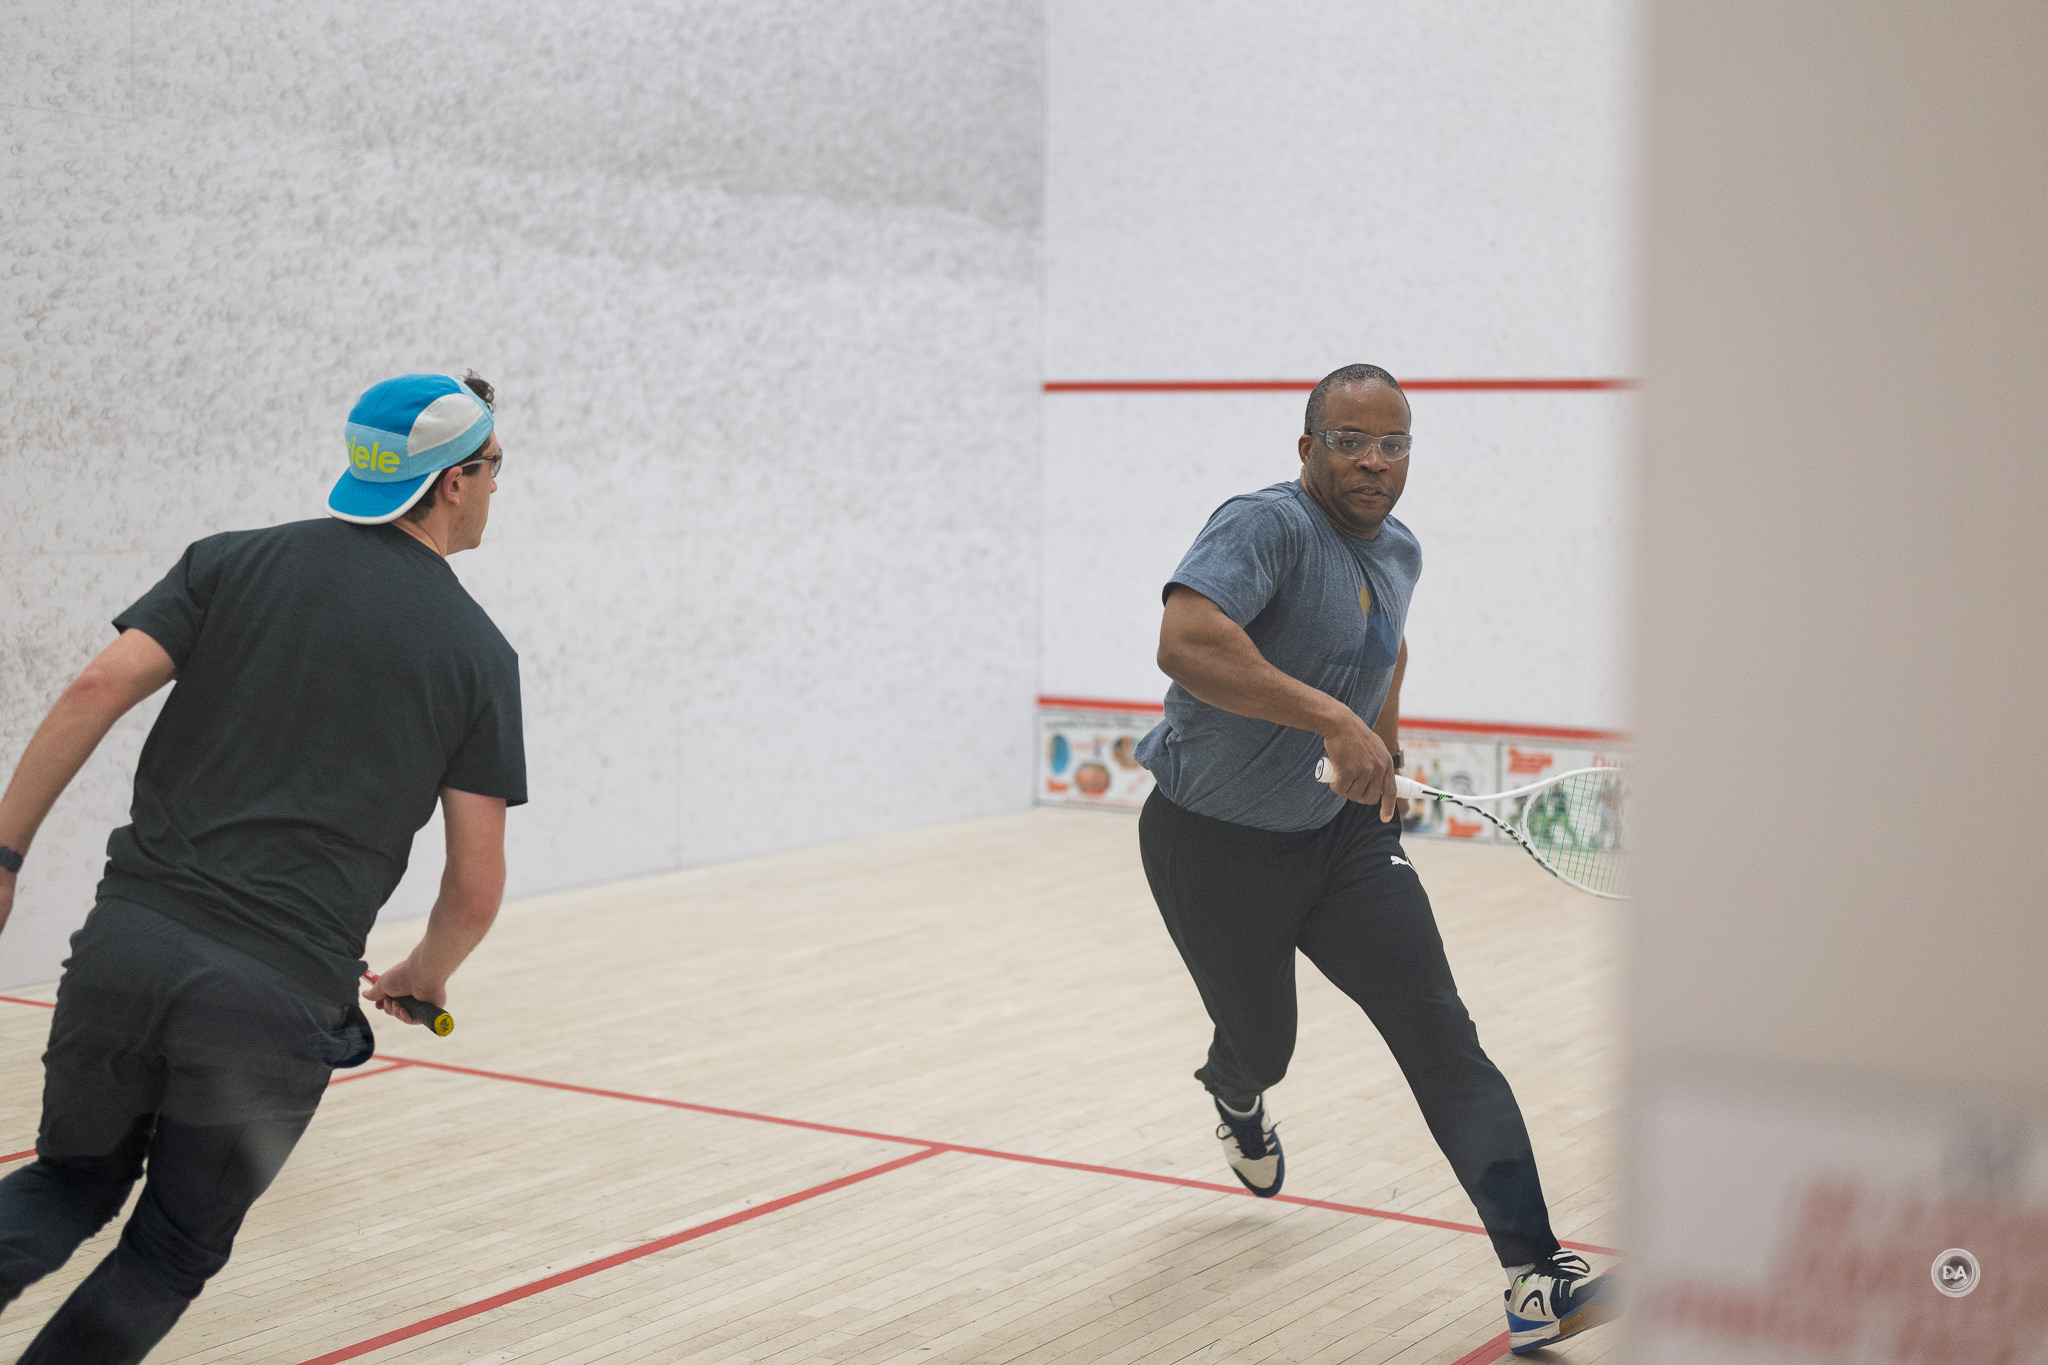
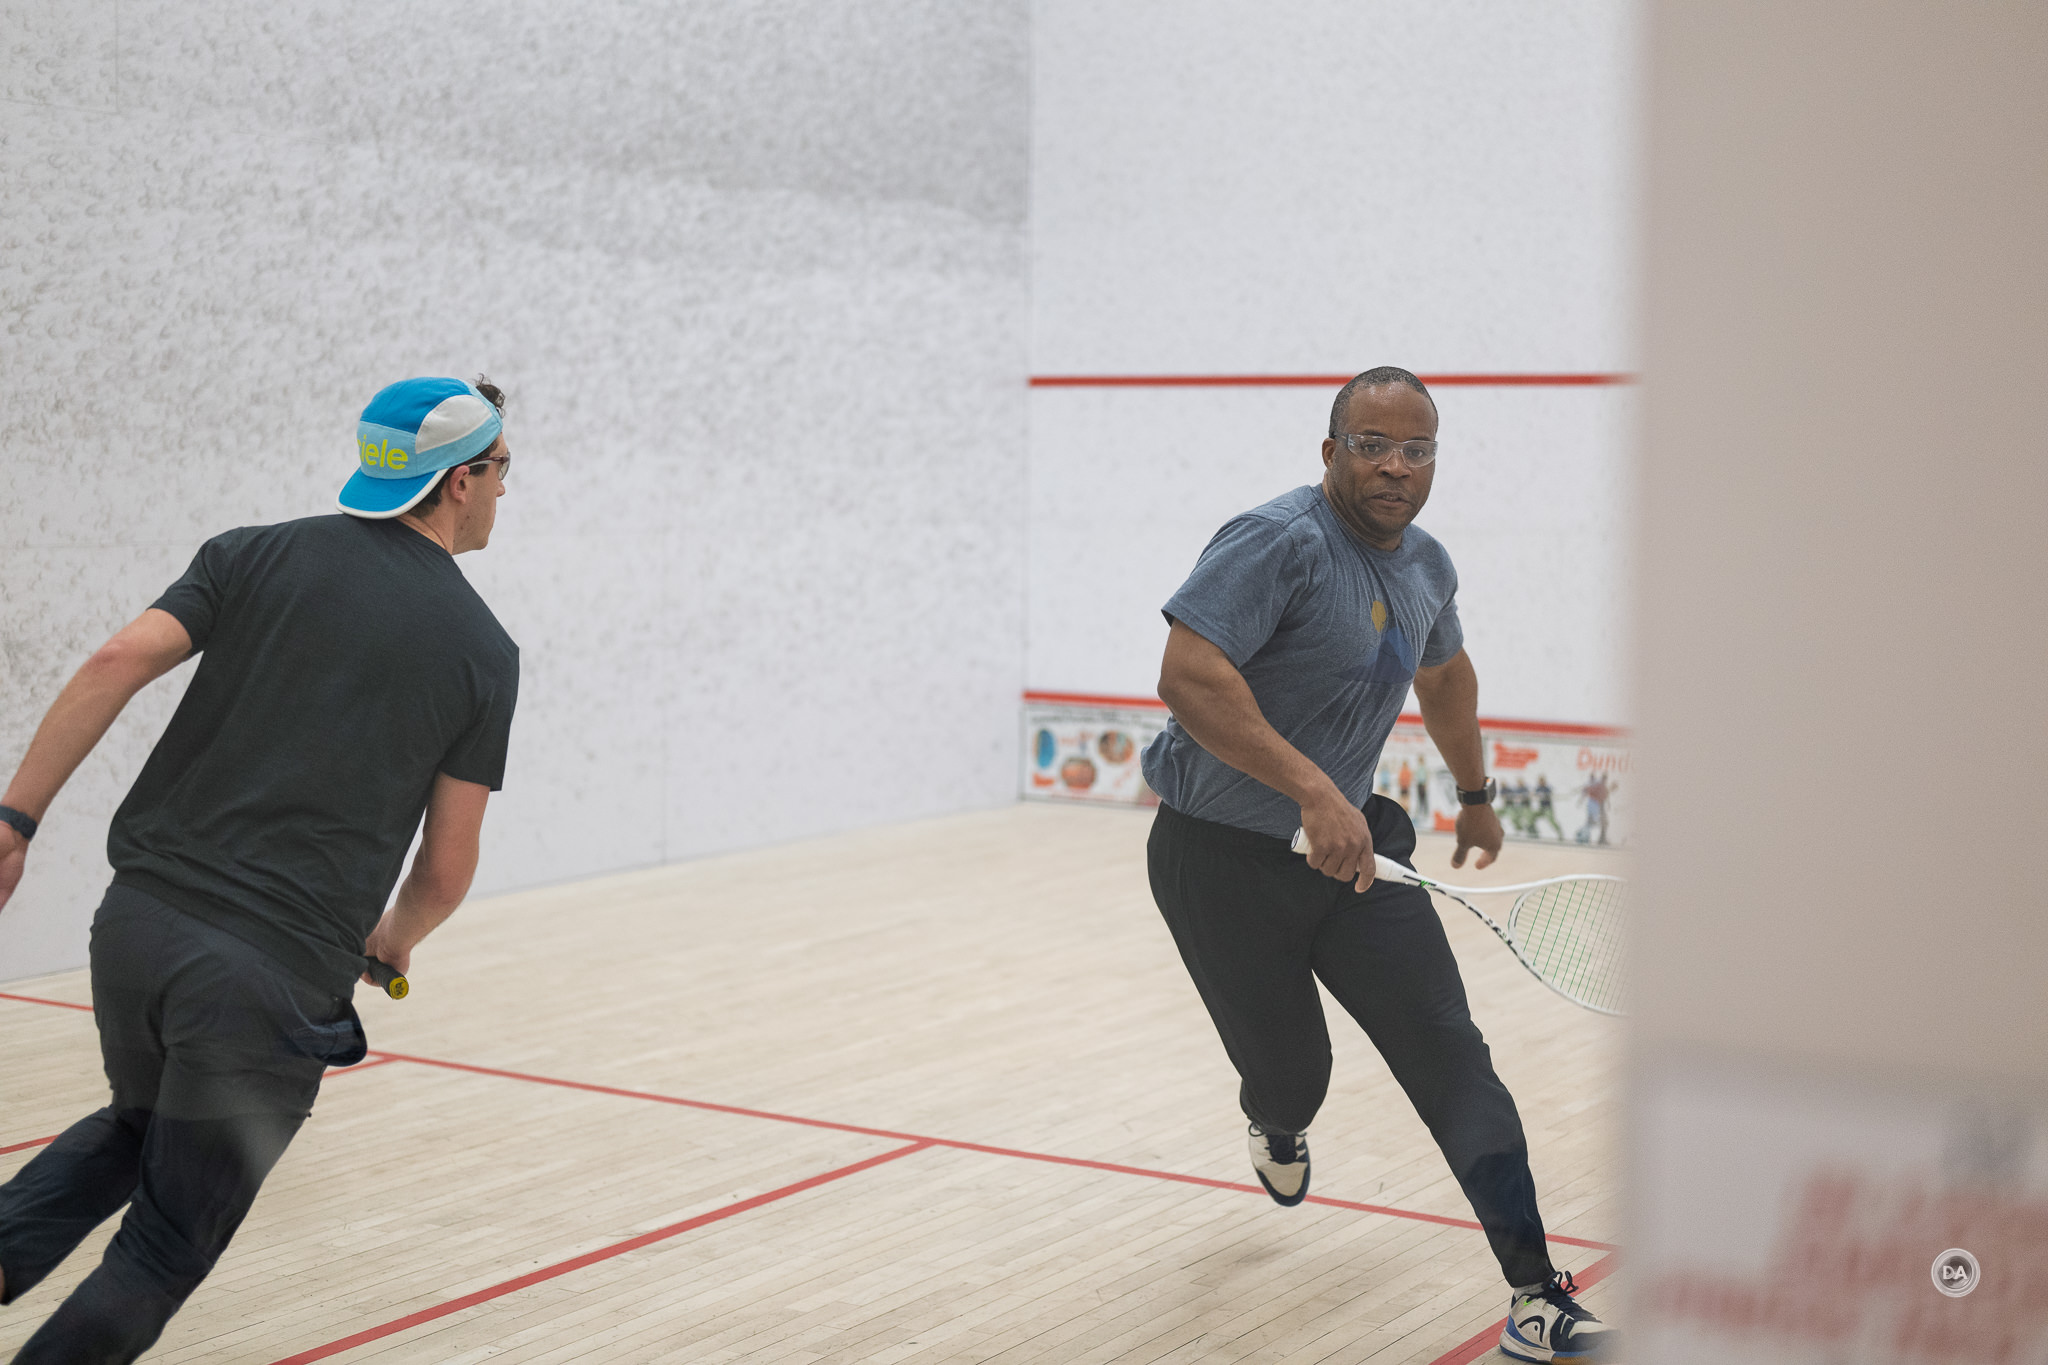
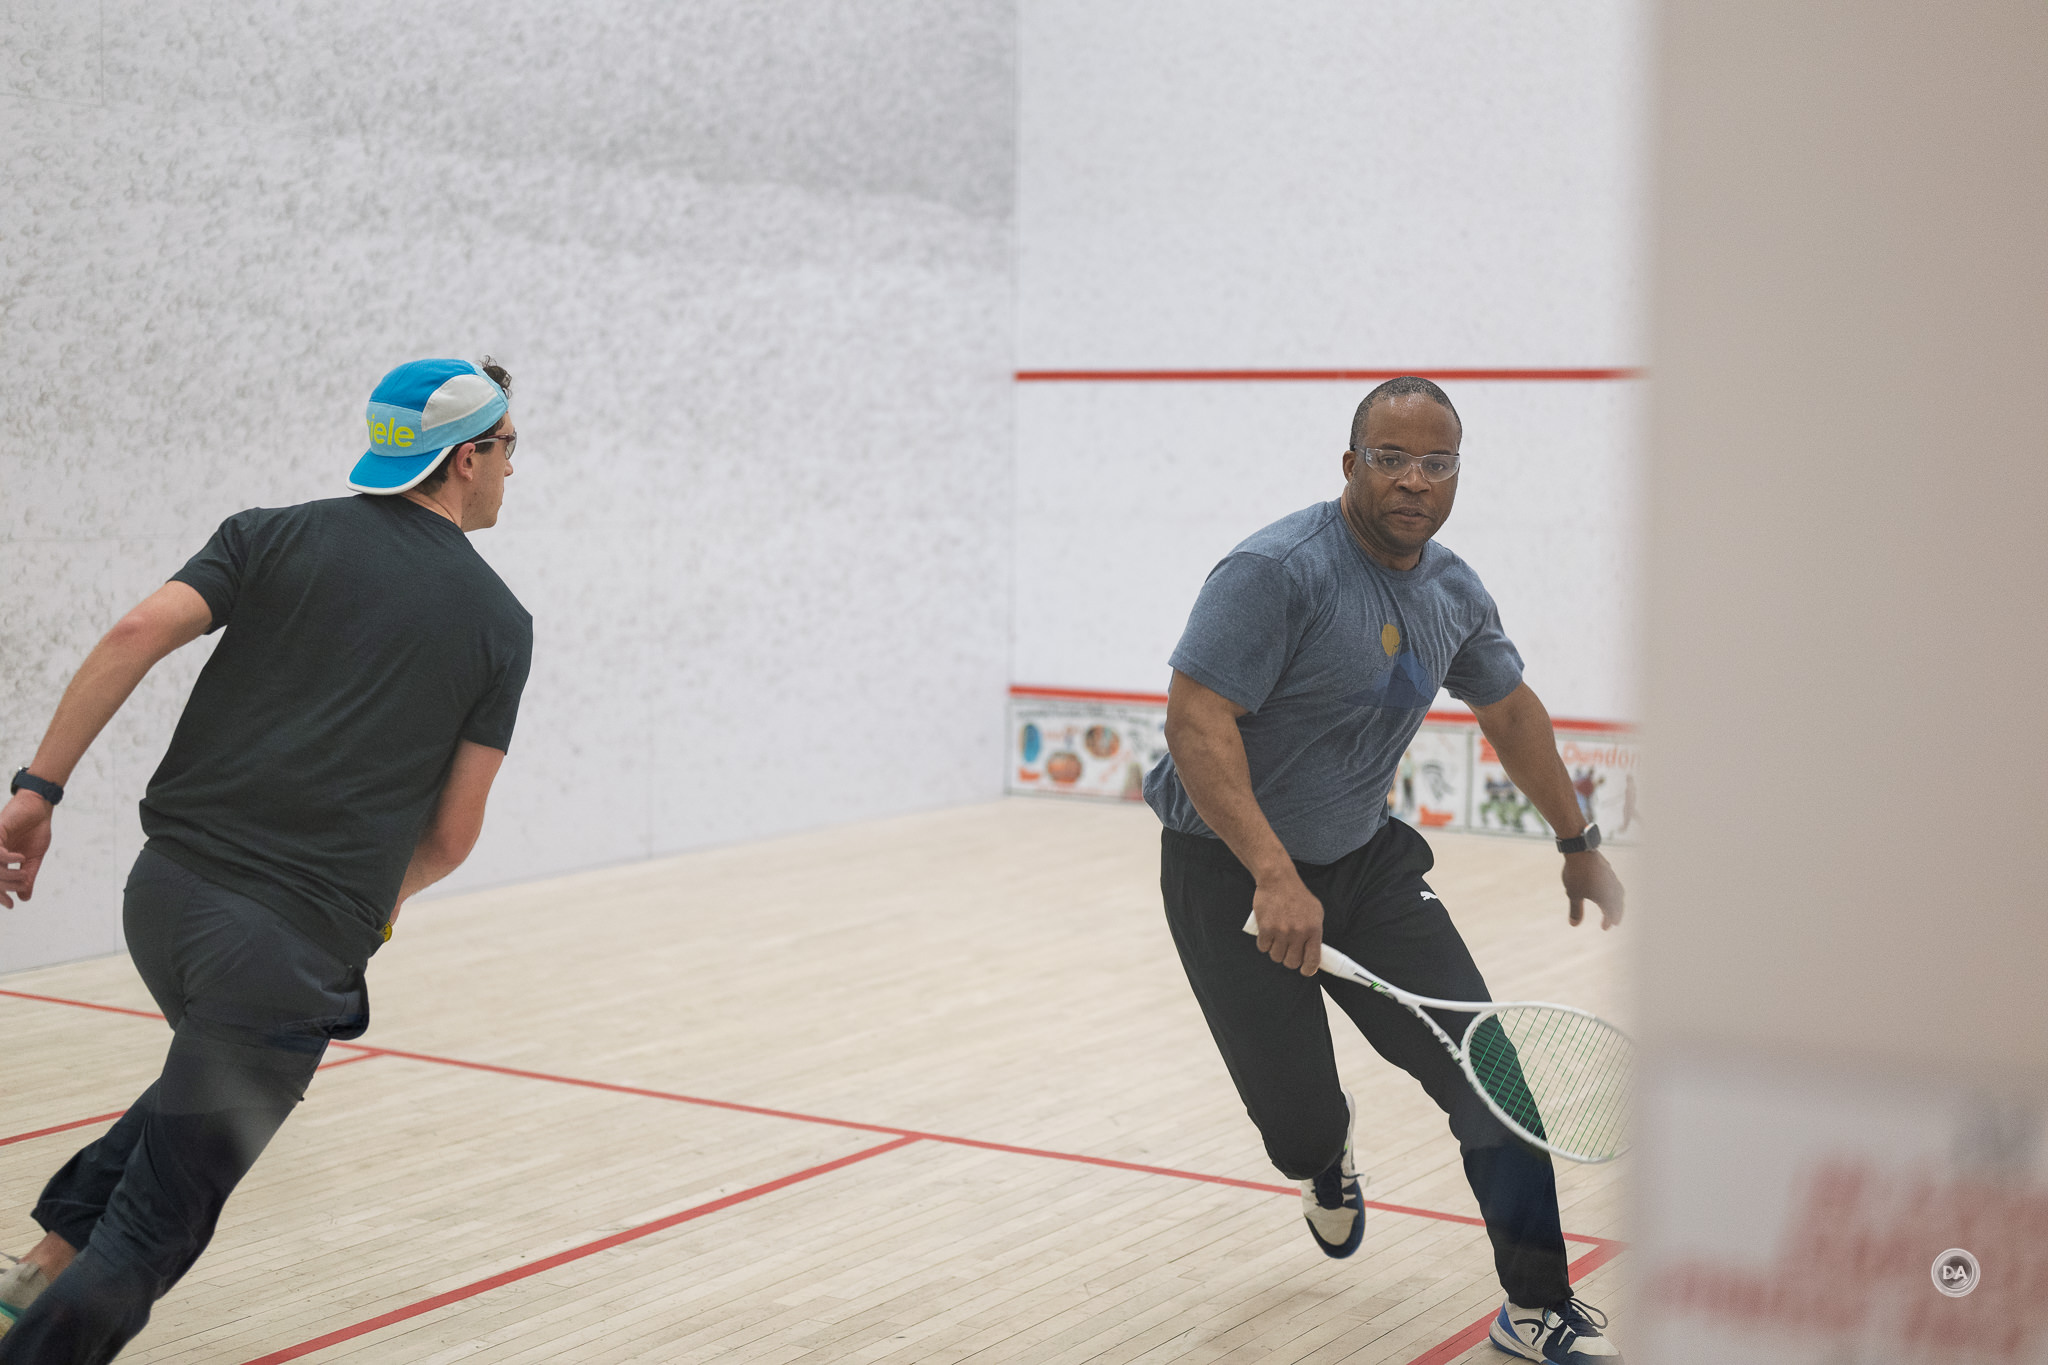
Like the 50mm F1.4, the 50mm F1.8 S utilizes a stepping focus motor (STM) that is, for the most part, surprisingly fast. Focus changes happen very quickly whether indoors or outdoors, and most of the time you won’t think about autofocus at all because the job just gets done quickly and efficiently. I was able to track action sequences with good accuracy on a squash court shooting at F1.8 (despite shooting through glass). I shot bursts at 20FPS on my Z8 and got nearly perfectly focused long bursts.
I had very good results when shooting “people pictures”, with beautiful focus on the eyes.
My one complaint with walkaround focus is a fairly typical one with lenses on my Z8; 3D Focus (my typical focus mode) doesn’t love picking up close objects when the background is fairly complex…even if I put the default box/point right on the out of focus contrast edge of the subject. This is something that Sony and Canon seem to do a bit better with. What helps, however, is that Nikon’s full time manual override works in all modes…including AF-C, so it is easy to pull focus back where I want it and then let the AF do its thing.
There is a faint “schnick” sound if you put your ear right next to the lens barrel, but if I held the camera at chest level and racked focus here and there, I couldn’t hear anything. Focus speed in my formal tests was not instant but was nice and fast racking back and forth.
I’ve got no concerns for autofocus for stills.
Video Autofocus
Though some training with my new Nikon insider I’ve learned that tweaking the focus settings in G6 and G7 of my Z8’s menu will affect the speed and sensitivity of focus with on screen subjects but not the touch to focus process that I use for my video focus pulls. This helps explain the variance I’ve sometimes seen between this test and my “hand test” detailed below.
My first test was video focus pulls, and I saw quick and reasonably confident pulls from one subject to another in my standard test. I didn’t see any visible steps from the STM motor. What I did see was a bit of micropulsing where it felt like focus had perhaps slightly overshot the target and pulsed back. You will see a periodic quick rack in the wrong direction, which is another thing that I’ve seen in all of my Nikon tests thus far. That means that this is more of a camera/focus system issue than a lens specific issue.
Focus breathing felt fairly well controlled, but Nikon does have a focus breathing compensation setting that does help with that.
My “hand test” where I alternately block the camera’s view of my face with my hand and then remove it has improved through tweaking the settings I’ve mentioned before. I will now keep these new settings as the standard settings so that I have a baseline for all future Nikon reviews. I’ve found that I needed to nearly maximize speed and sensitivity settings to get the kind of result I was looking for, but I was pleased with the result I got in my test here.
I had very good results when walking towards the camera, with consistent tracking of my face, and when I ducked out of frame and then back in, the lens was relatively quick in picking me back up.
I’ve shot a number of short clips with the 50mm F1.8 S and had solid, reliable focus results.
All told there is a lot to like here in the autofocus performance. I never get too excited when I see “STM” under the focus motor description, but this is a solid implementation of STM.
Image Quality Breakdown
The Nikkor Z 50mm F1.8S is an FX (full frame lens), though it can also be used on DX cameras where it will give a full frame equivalent of 75mm due to the 1.5x crop factor on DX. This is a more complex optical design than the F1.4 lens, with 12 elements in 9 groups, including one aspherical element. This is clearly not the same optical design as their older DSLR era AF-S 50mm F1.4, which had 8 elements in 7 groups. The MTF chart shows a very even performance across the frame with only a slight drop in the extreme corners.
The difference in the design philosophy for the two lenses can be easily seen if we compare the MTF charts. I like to line up MTF charts and put a line through the 80% threshold. Anything above that at 30lp/mm will look extremely sharp.
You can see that the S-Line lens has a lot of its performance either above or just slightly below that threshold, while the 50mm F1.4 lens is considerably softer. If pure sharpness is your priority, the S-Line lens definitely wins on paper.
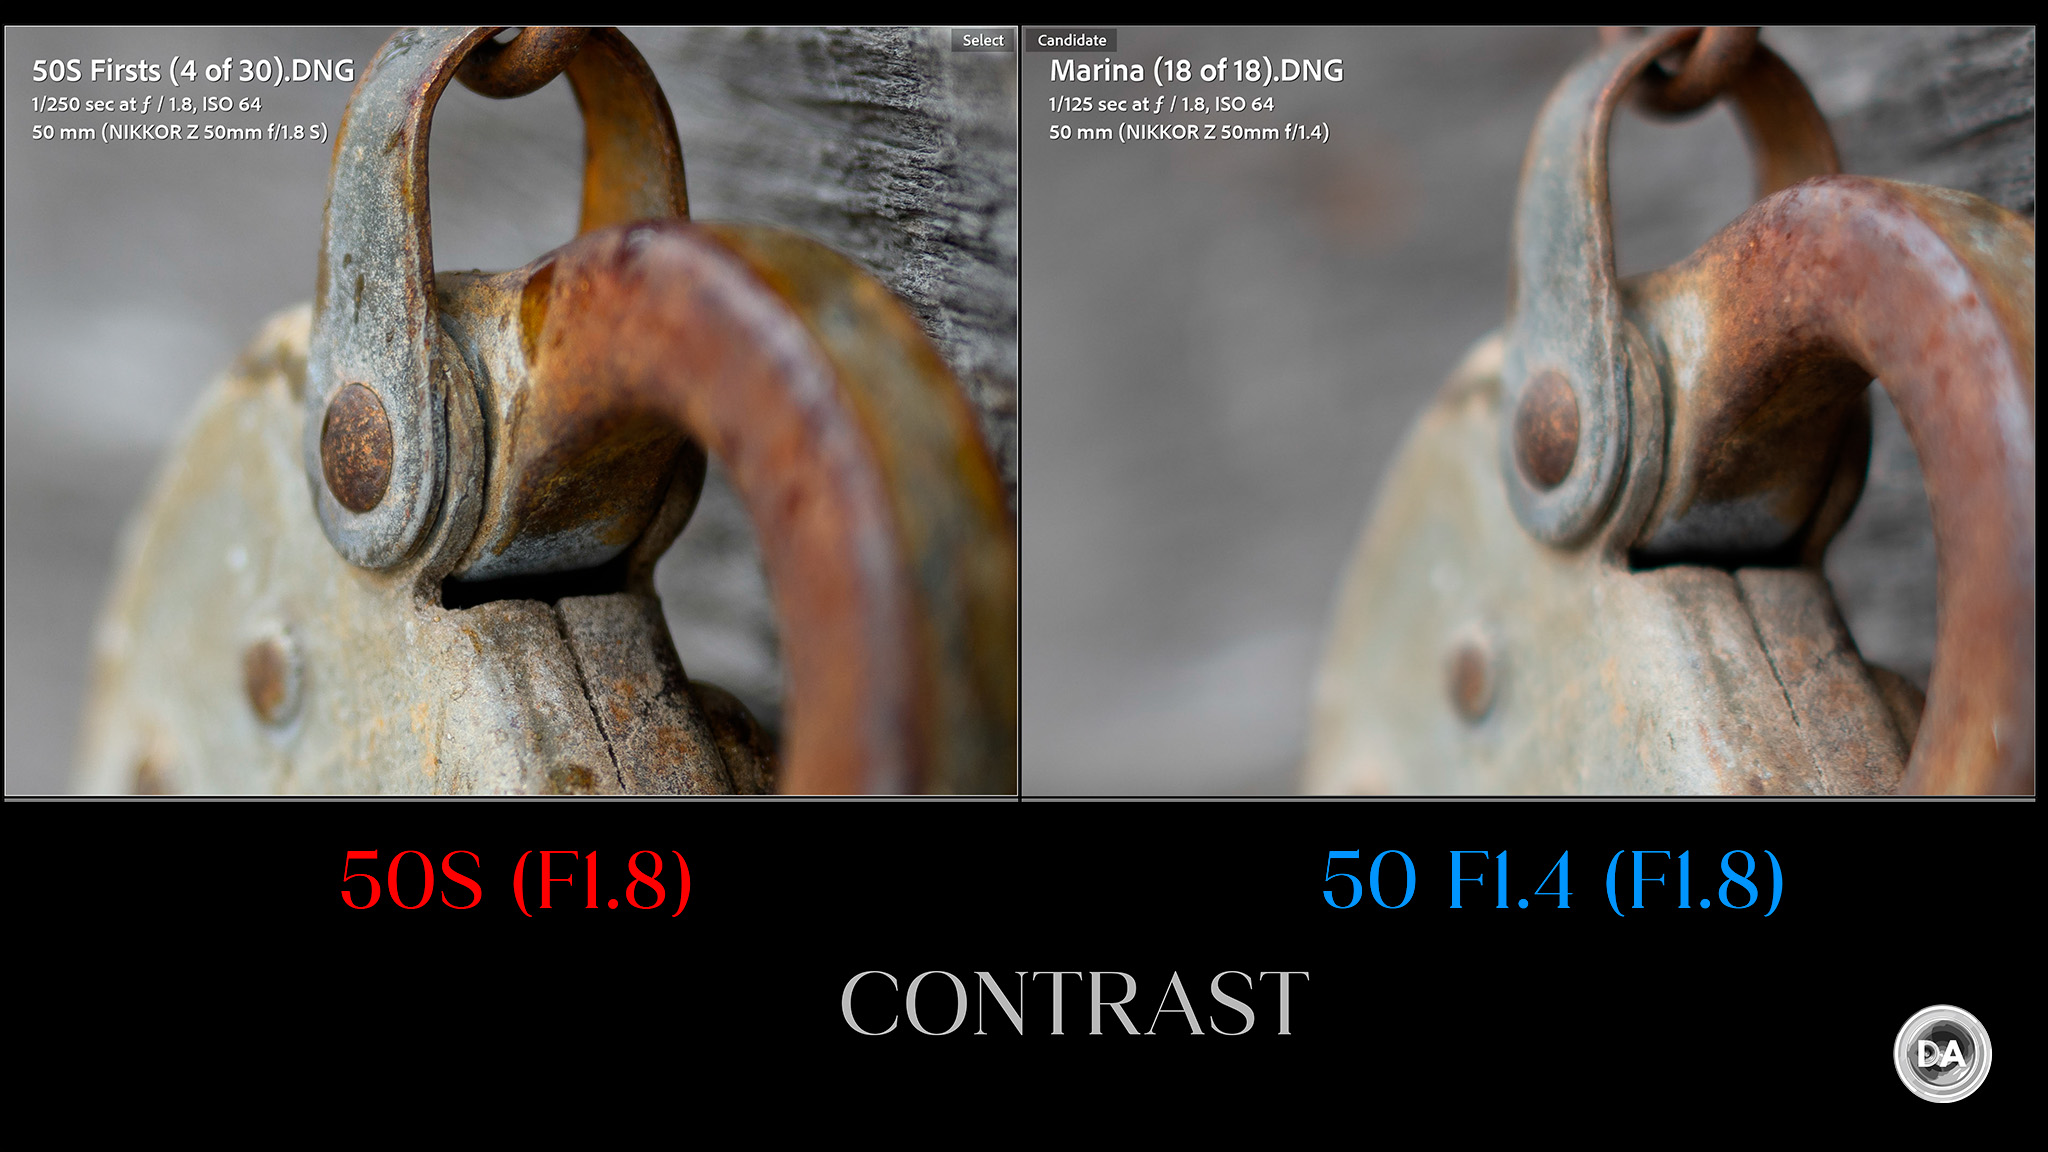
Out in the real world, I found a very, very different philosophy between the design of these two lenses. The newer 50mm F1.4 follows more of a classic design philosophy. It’s less corrected, lower contrast, but I continue to think it has a nice rendering. The S Line lens has much higher contrast and is a much sharper at similar apertures. Take a look at my classic lock that I use as a subject for many of my reviews.
That’s a radically different result. Here’s a look at result from the 50mm F1.8 S.
That’s an intense amount of contrast and detail, and that, to me, really defines the character of this lens.
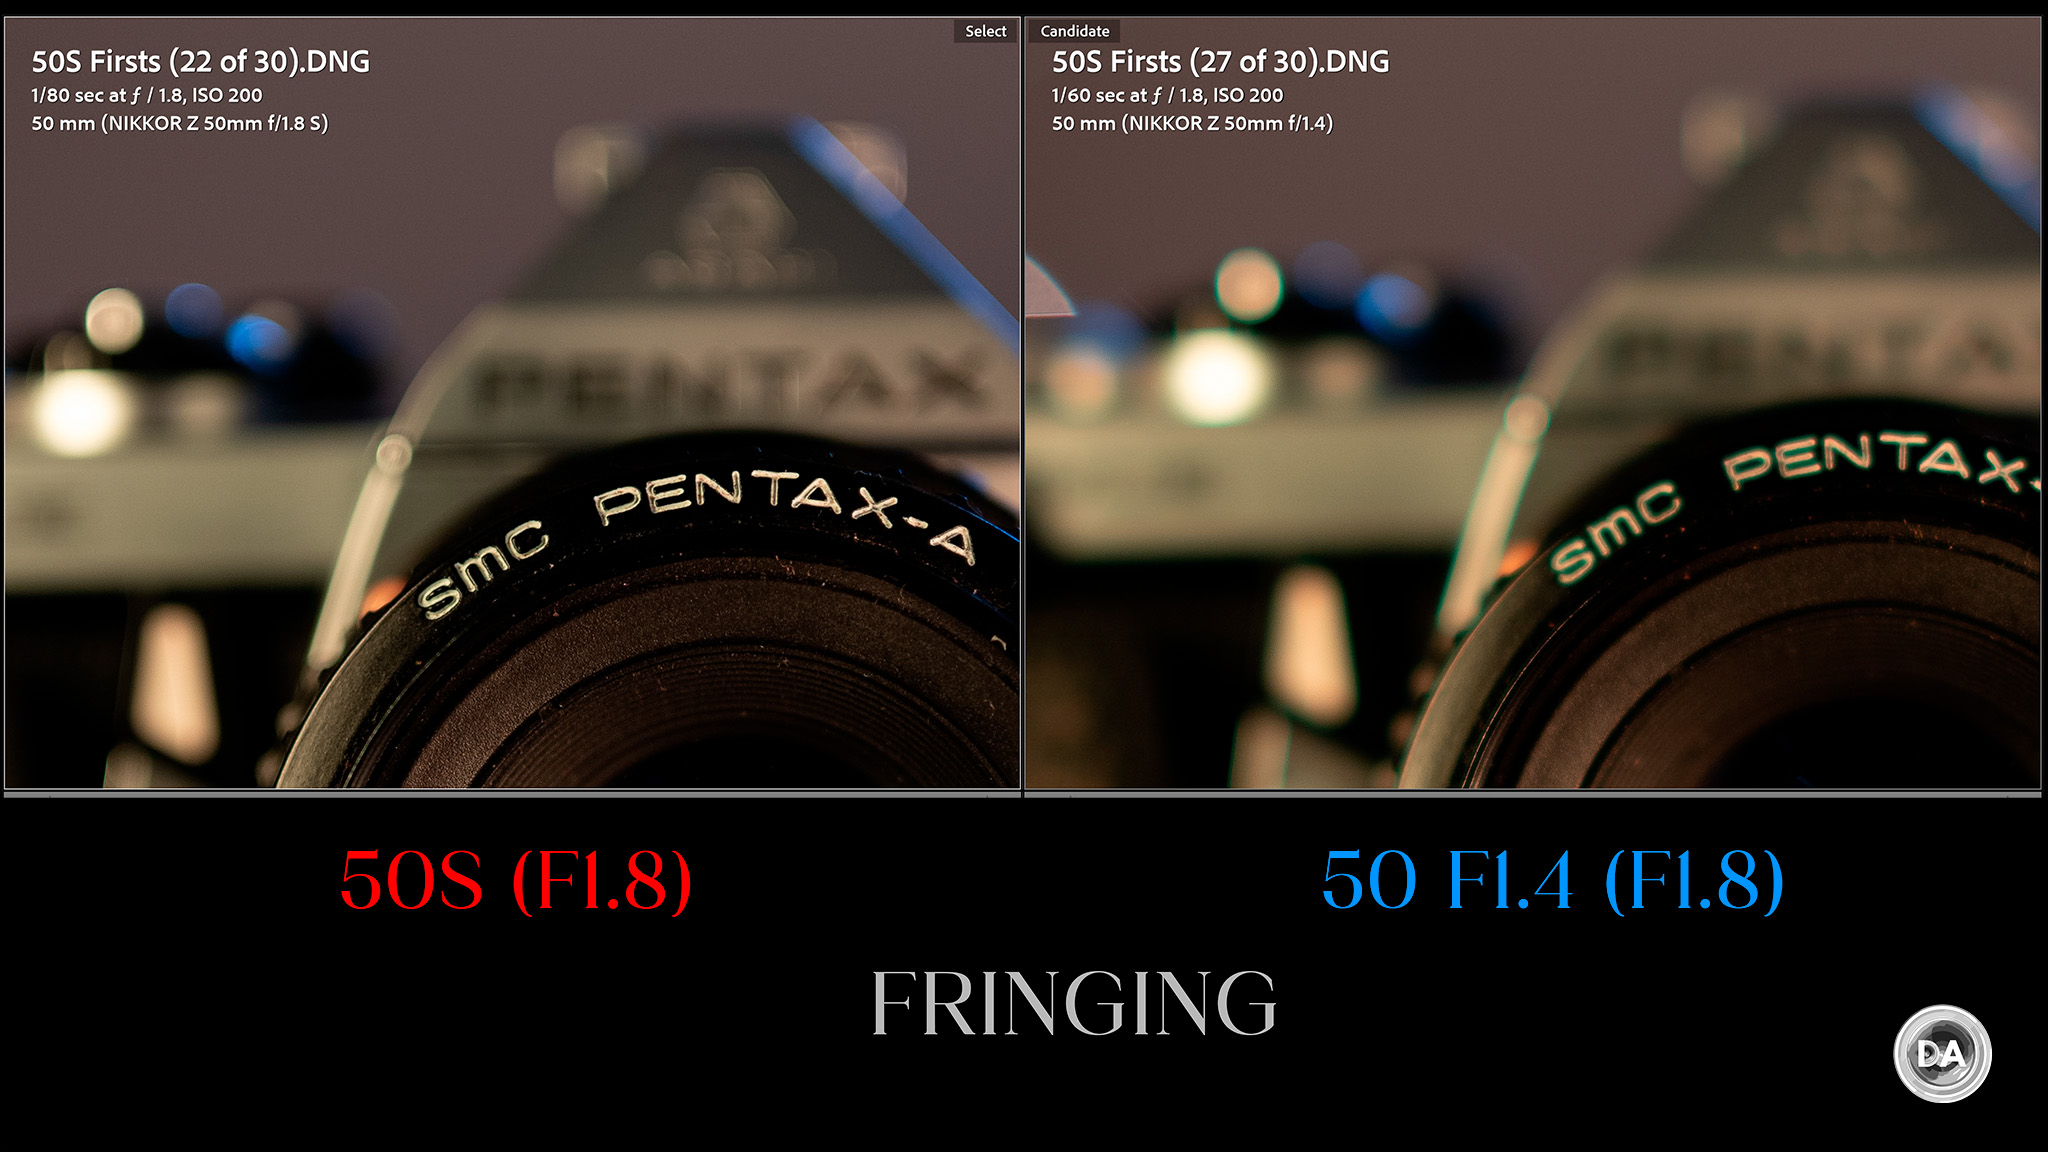
You’ll also see it in the approach to correcting LoCA (longitudinal chromatic aberrations), which show up as fringing before or after the plane of focus. The 50mm F1.4 shows not only the fringing but also the loss of contrast that comes as a byproduct.
You can see how well corrected the S Line lens is by comparison. So, as expected, when we go to the test charts we won’t really see any fringing.
Lateral chromatic aberrations near the edge of the frame are essentially non-existent, so that won’t be a problem.
Sometimes highly corrected lenses like this will suffer in terms of their bokeh and overall rendering, so we’ll revisit that in a while to see if there are negative consequences that come from the corrections.
If we move on to vignette and distortion we find a tiny amount of barrel distortion which required just a +2 to correct for. It is both minimal and linear, so it corrects fine but would also be fine uncorrected in almost every application.
Vignette is another story. I had to add a +71 to correct for the vignette. That’s not as bad as the 50mm F1.4, but it isn’t great! The correction profile is able to make a clean correction of the vignette, though I will note any lens with high levels of vignette will result in some less clean corners when shooting at higher ISO values.
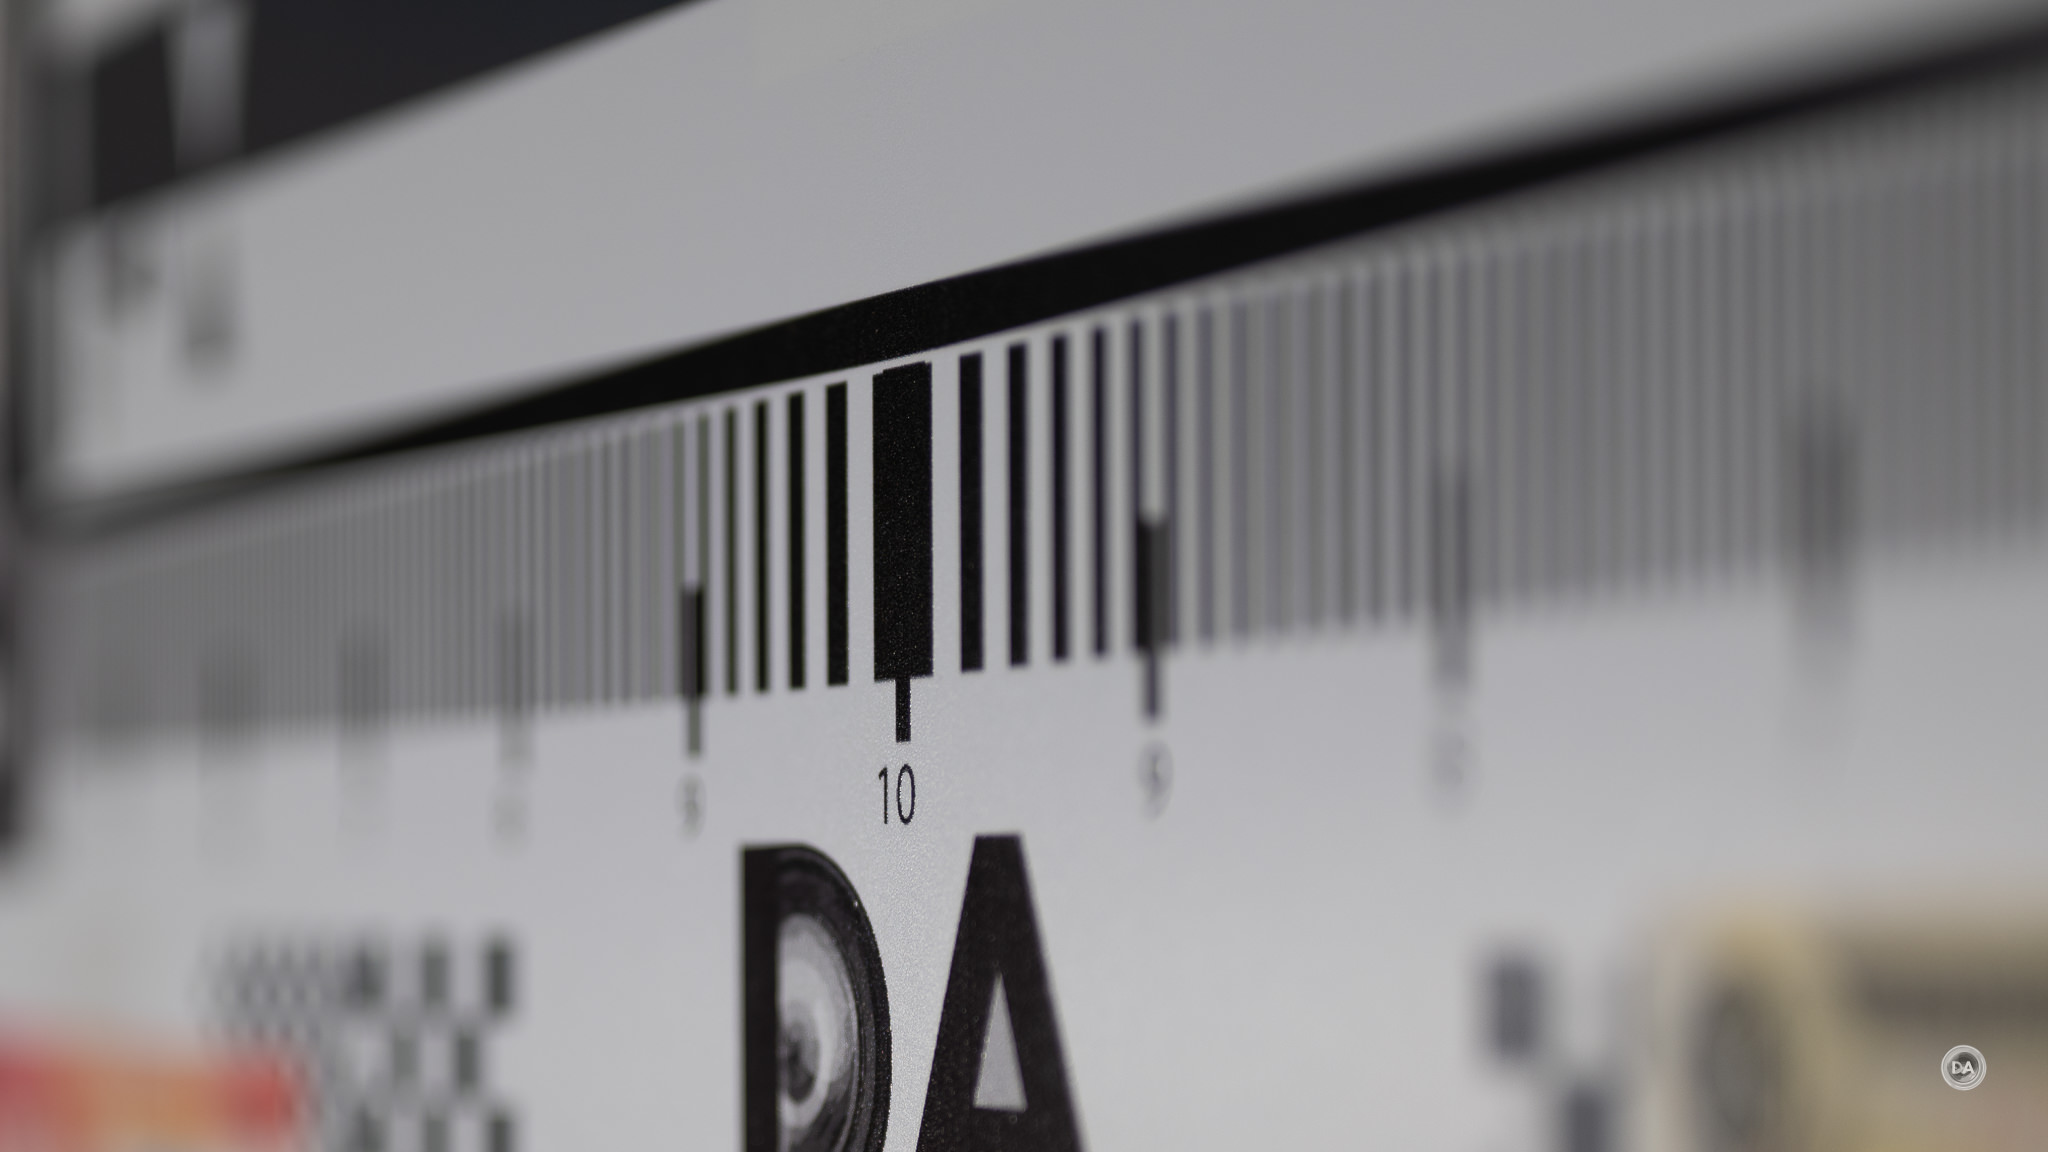
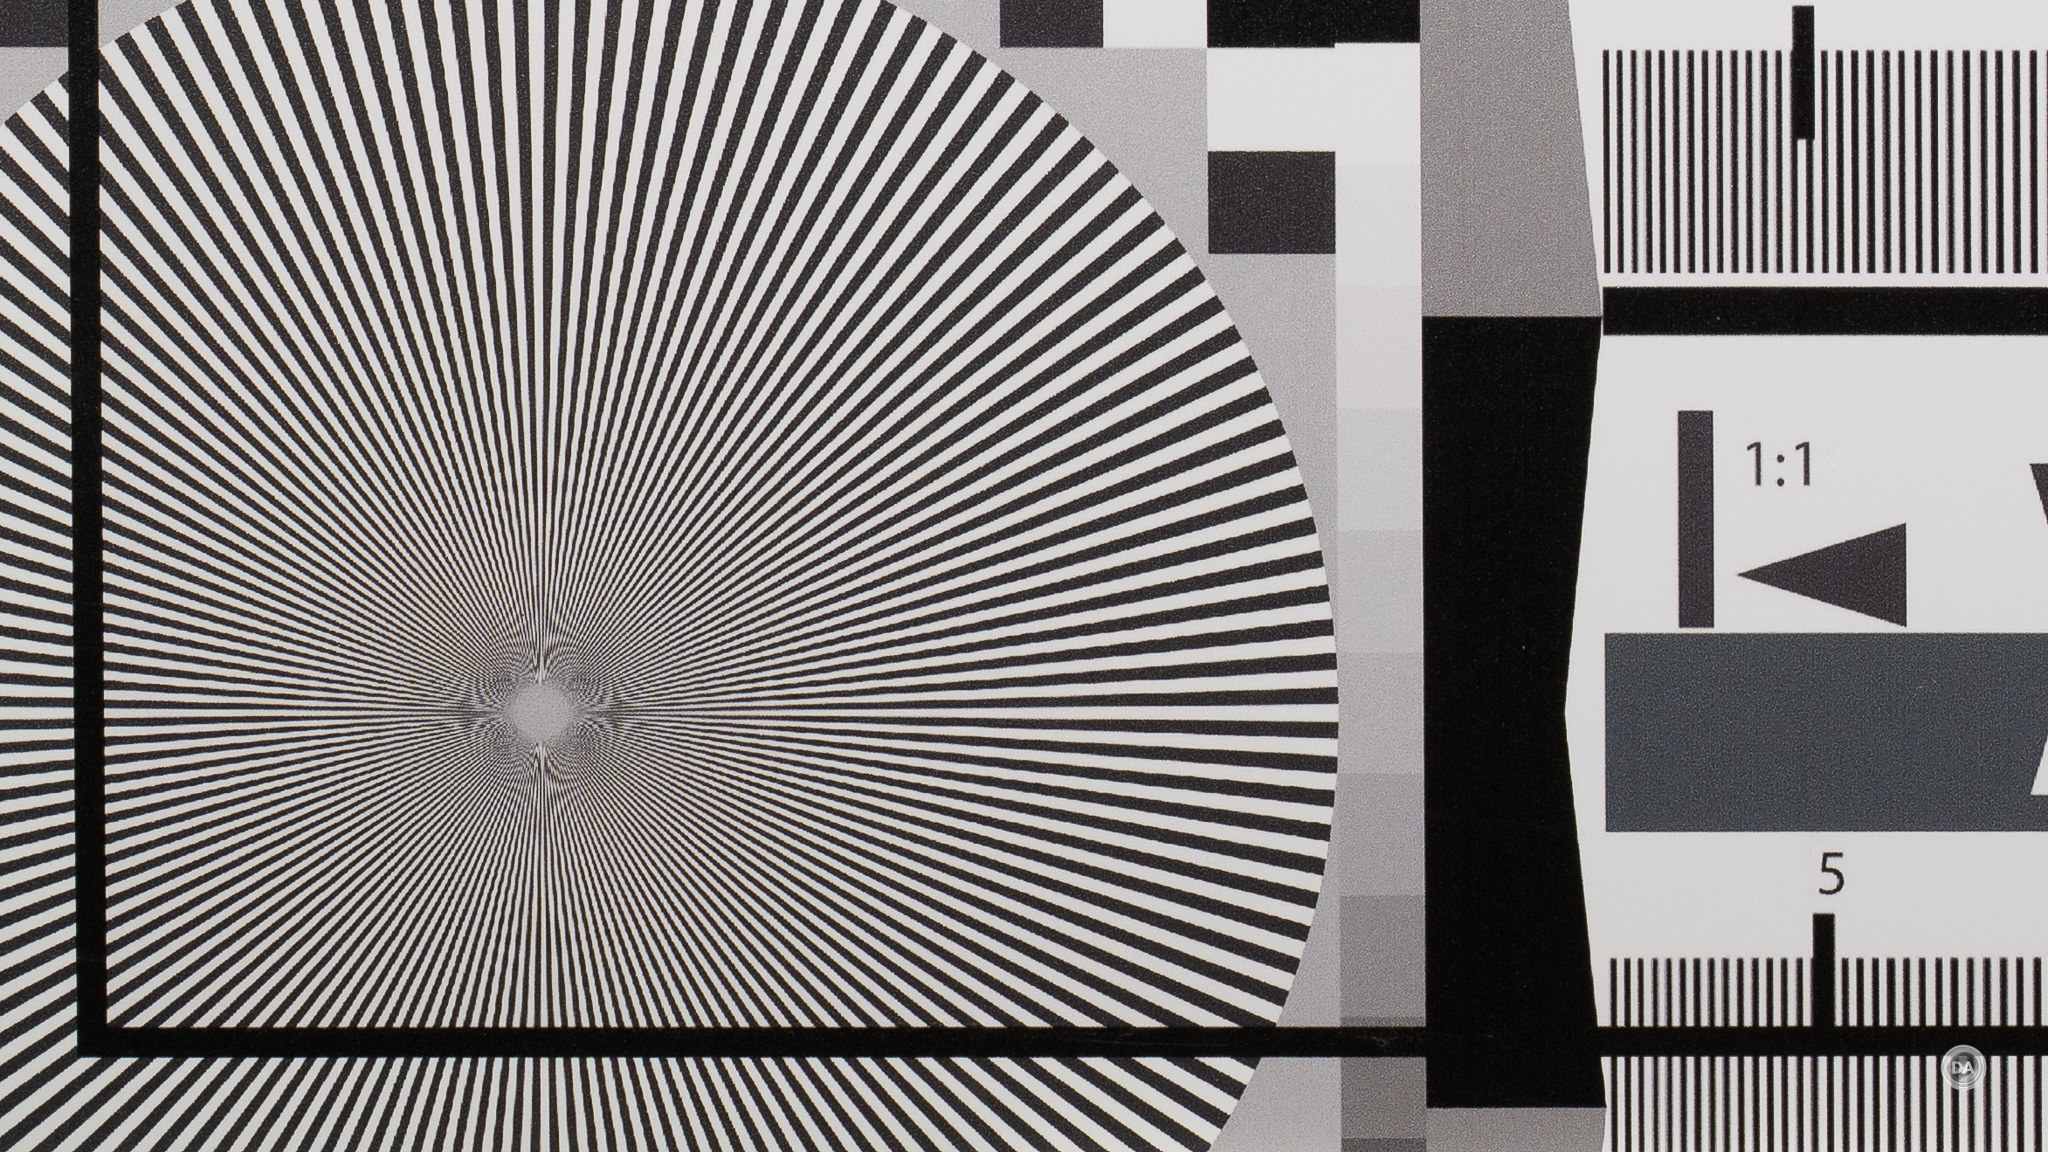
We’ll move on to inspecting our test chart. This test has been done on a 45MP Nikon Z8 sensor. I use a high end tripod and two second camera delay to ensure vibration doesn’t affect images. Here’s a look at the test chart that we will examine at high magnification:
If we take a look at crops (at roughly 200%) at F1.8 from the center, mid-frame, and lower right corner, we see a very strong center and mid-frame (contrast is a standout), with a bit of fade very close to the edge of the frame.
What stood out to me above all was the really impressive contrast. It also has an Apochromatic look. I often shoot on this fallen jack pine because the lichen covered cones really challenge a lens’ ability to produce good contrast. Often you’ll see fringing and blooming on the textures because of high contrast transitions along with the complication of subject matter with a lot of depth. The 50mm F1.8 S kills it on this shot, with amazing microcontrast, no fringing, and extremely crisp delineation of details even at a pixel level.
If we zoom in to the pixel level, we see that the subject looks nice and crisp.
This gives you a lot of versatility to challenge challenging, high contrast scenes and trust that you are still going to get images that hold up under careful examination.
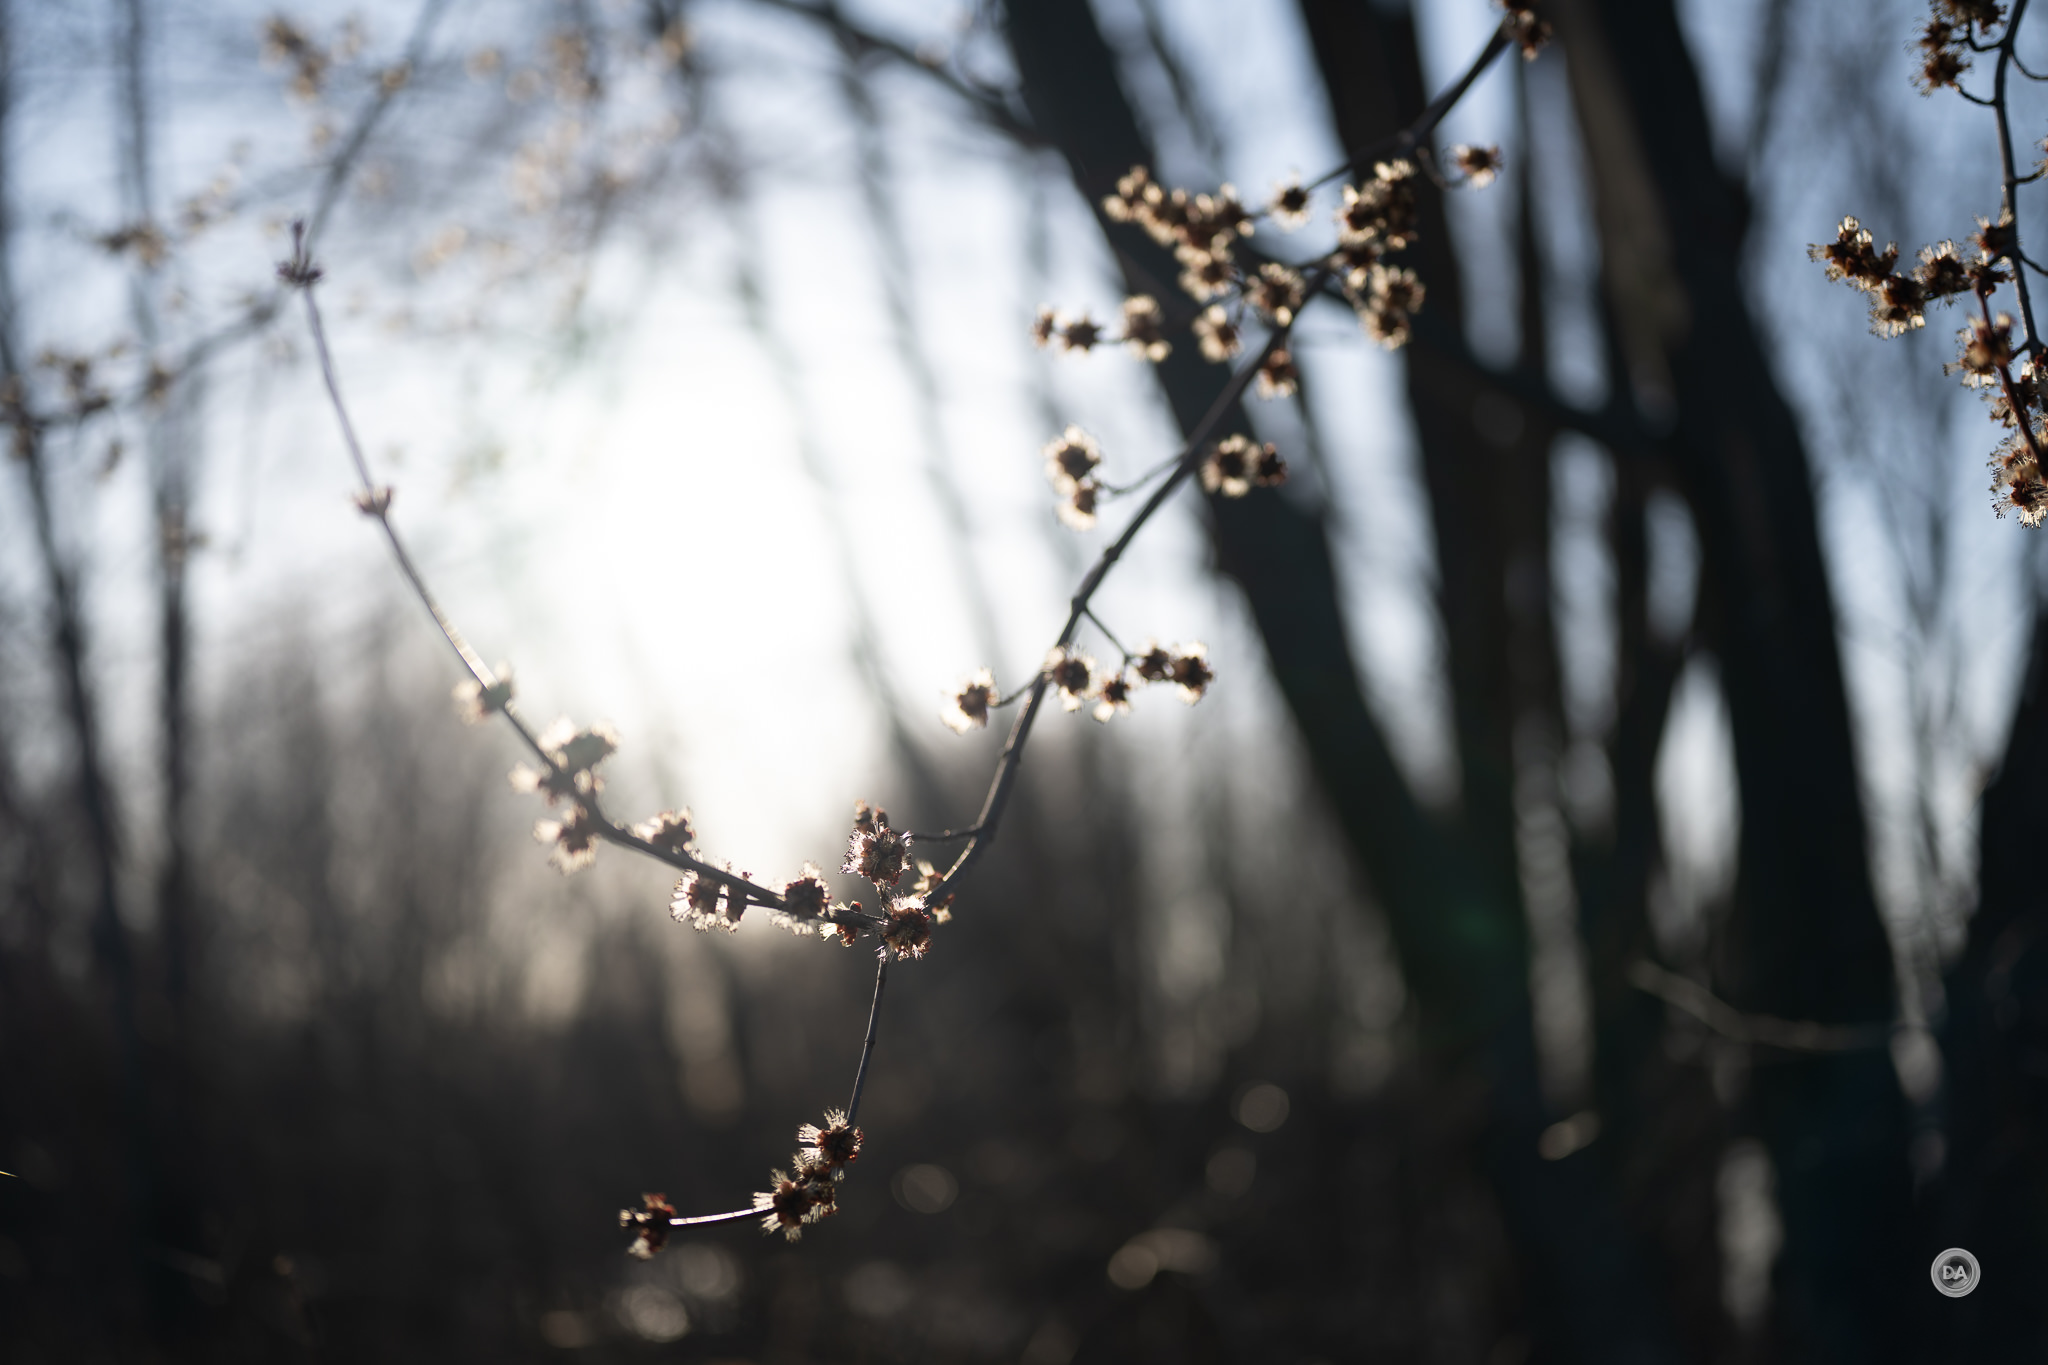
Let me give you an excellent case in point. I took this shot of a new emerging buds on a tree with intense evening backlighting. This is a scene loaded with potential image destroying elements. Intense backlight brings the risk of flare or ghosting, bright light coming through fine, filament like subjects gives the perfect recipe for fringing and a loss of contrast. The image looks fine when viewed globally…
…but it looks great when viewed at high percentage levels, as you basically need to view it at 100% to appreciate just how well the S Line lens is handling the very difficult subject in the narrow depth of field.
If you’re a fan of monochrome images with intense contrast, that’s very easy to achieve here.
Surprisingly, a mild stopdown to F2 creates a noticeable improvement to contrast.
Whereas I classified the sharpness at wide apertures “enough” in my review of the 50mm F1.4 Z, I would call the sharpness of the 50mm F1.8 S intensely good.
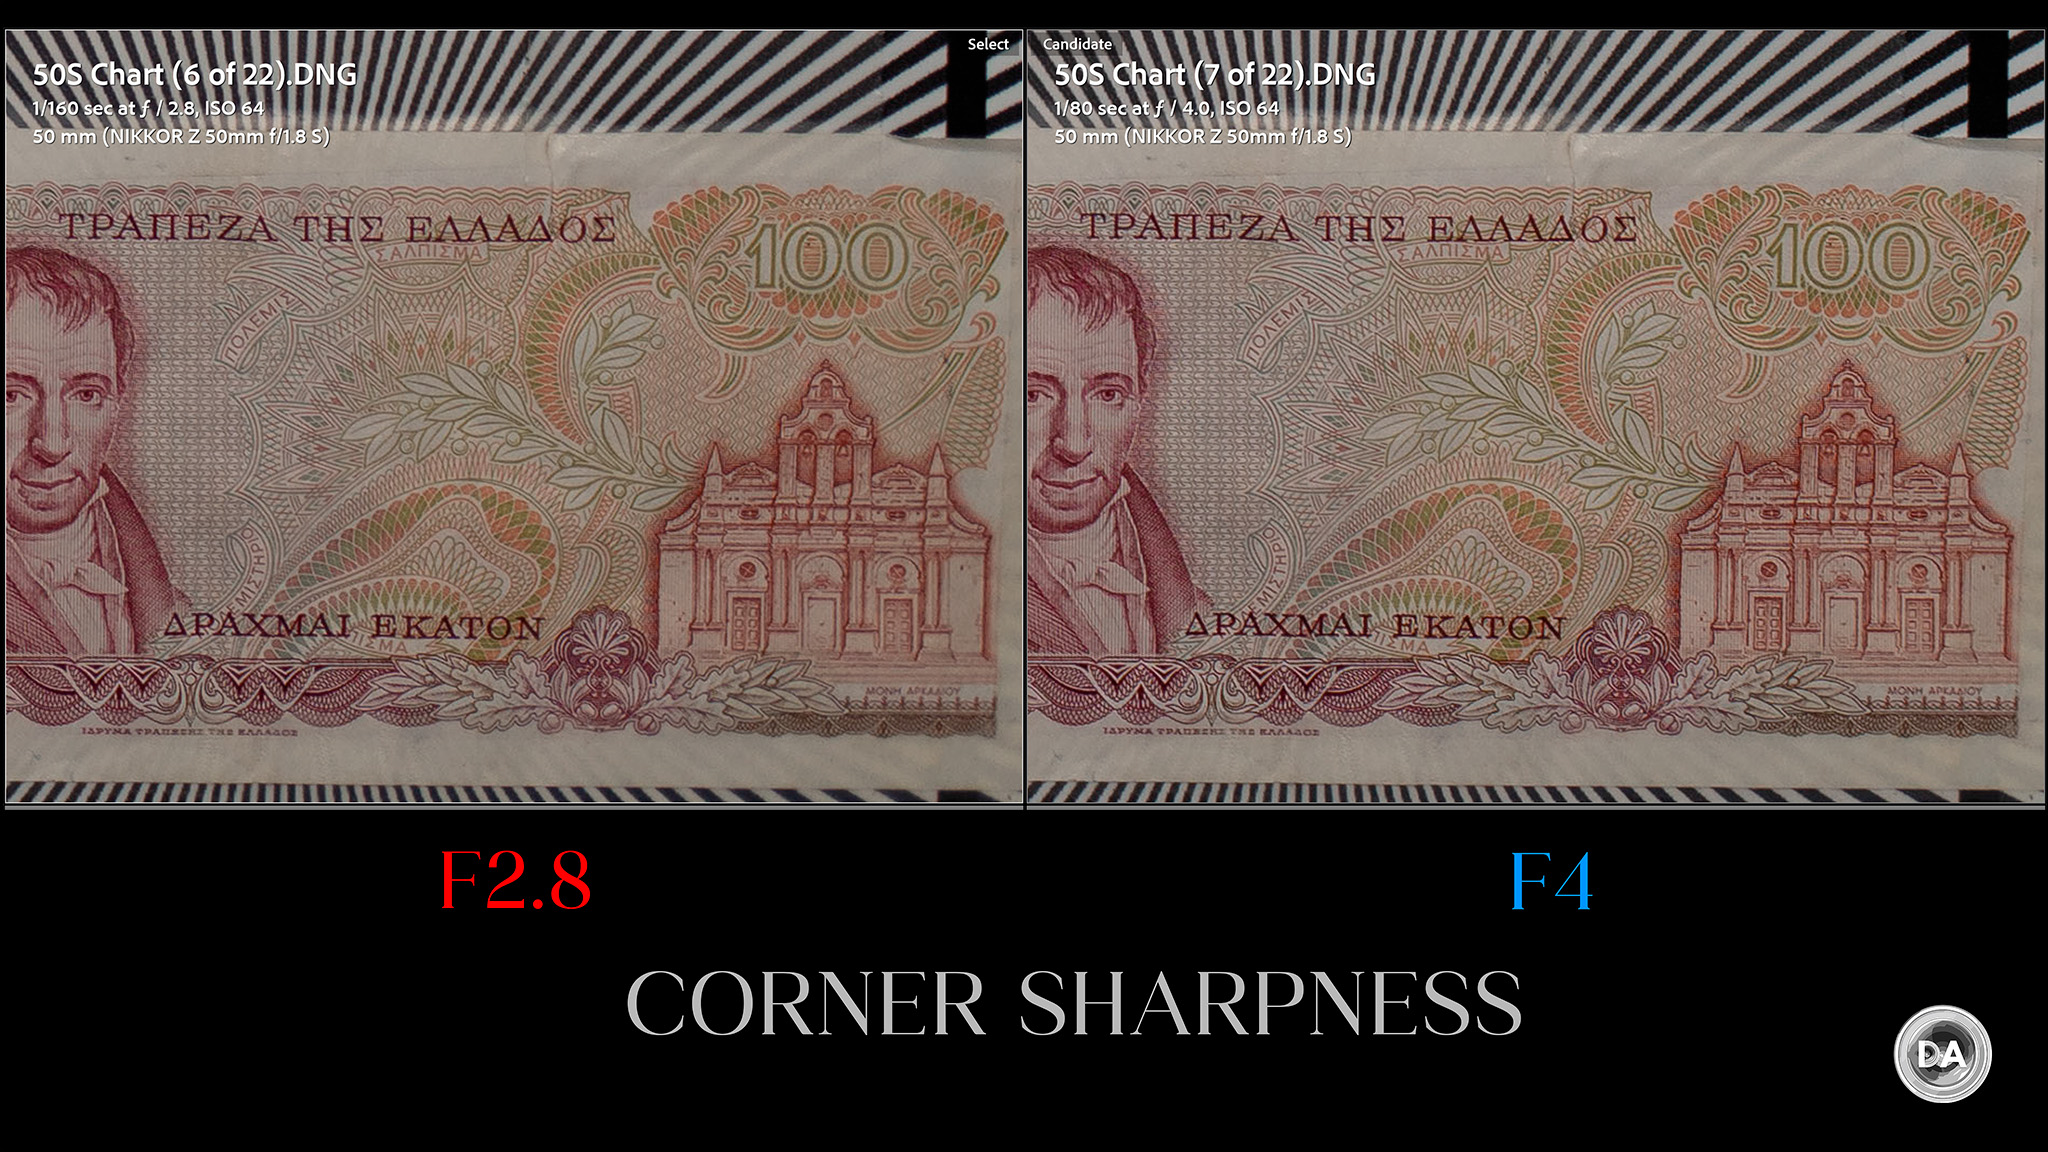
Stopping down further can essentially be reserved for two scenarios: 1) to increase depth of field or 2) to achieve maximal corner sharpness. It’s at F4 where corner sharpness becomes impressively good.
High contrast lenses like this are really fantastic for landscape images because they produce really inky black levels and well saturated colors. Here’s a case in point.
That image just wouldn’t look as good from a less corrected lens. There are just certain situations where a only a high contrast lens produces the kinds of images you want.
Expect the typical diffraction pattern on high resolution cameras where the image is a little softer by F11 and softer still at the minimum aperture of F16, though frankly I’ve seen much worse when it comes to diffraction.
Sharpness and contrast are nothing short of fantastic on the Nikkor Z 50mm F1.8 S – even six years after release!
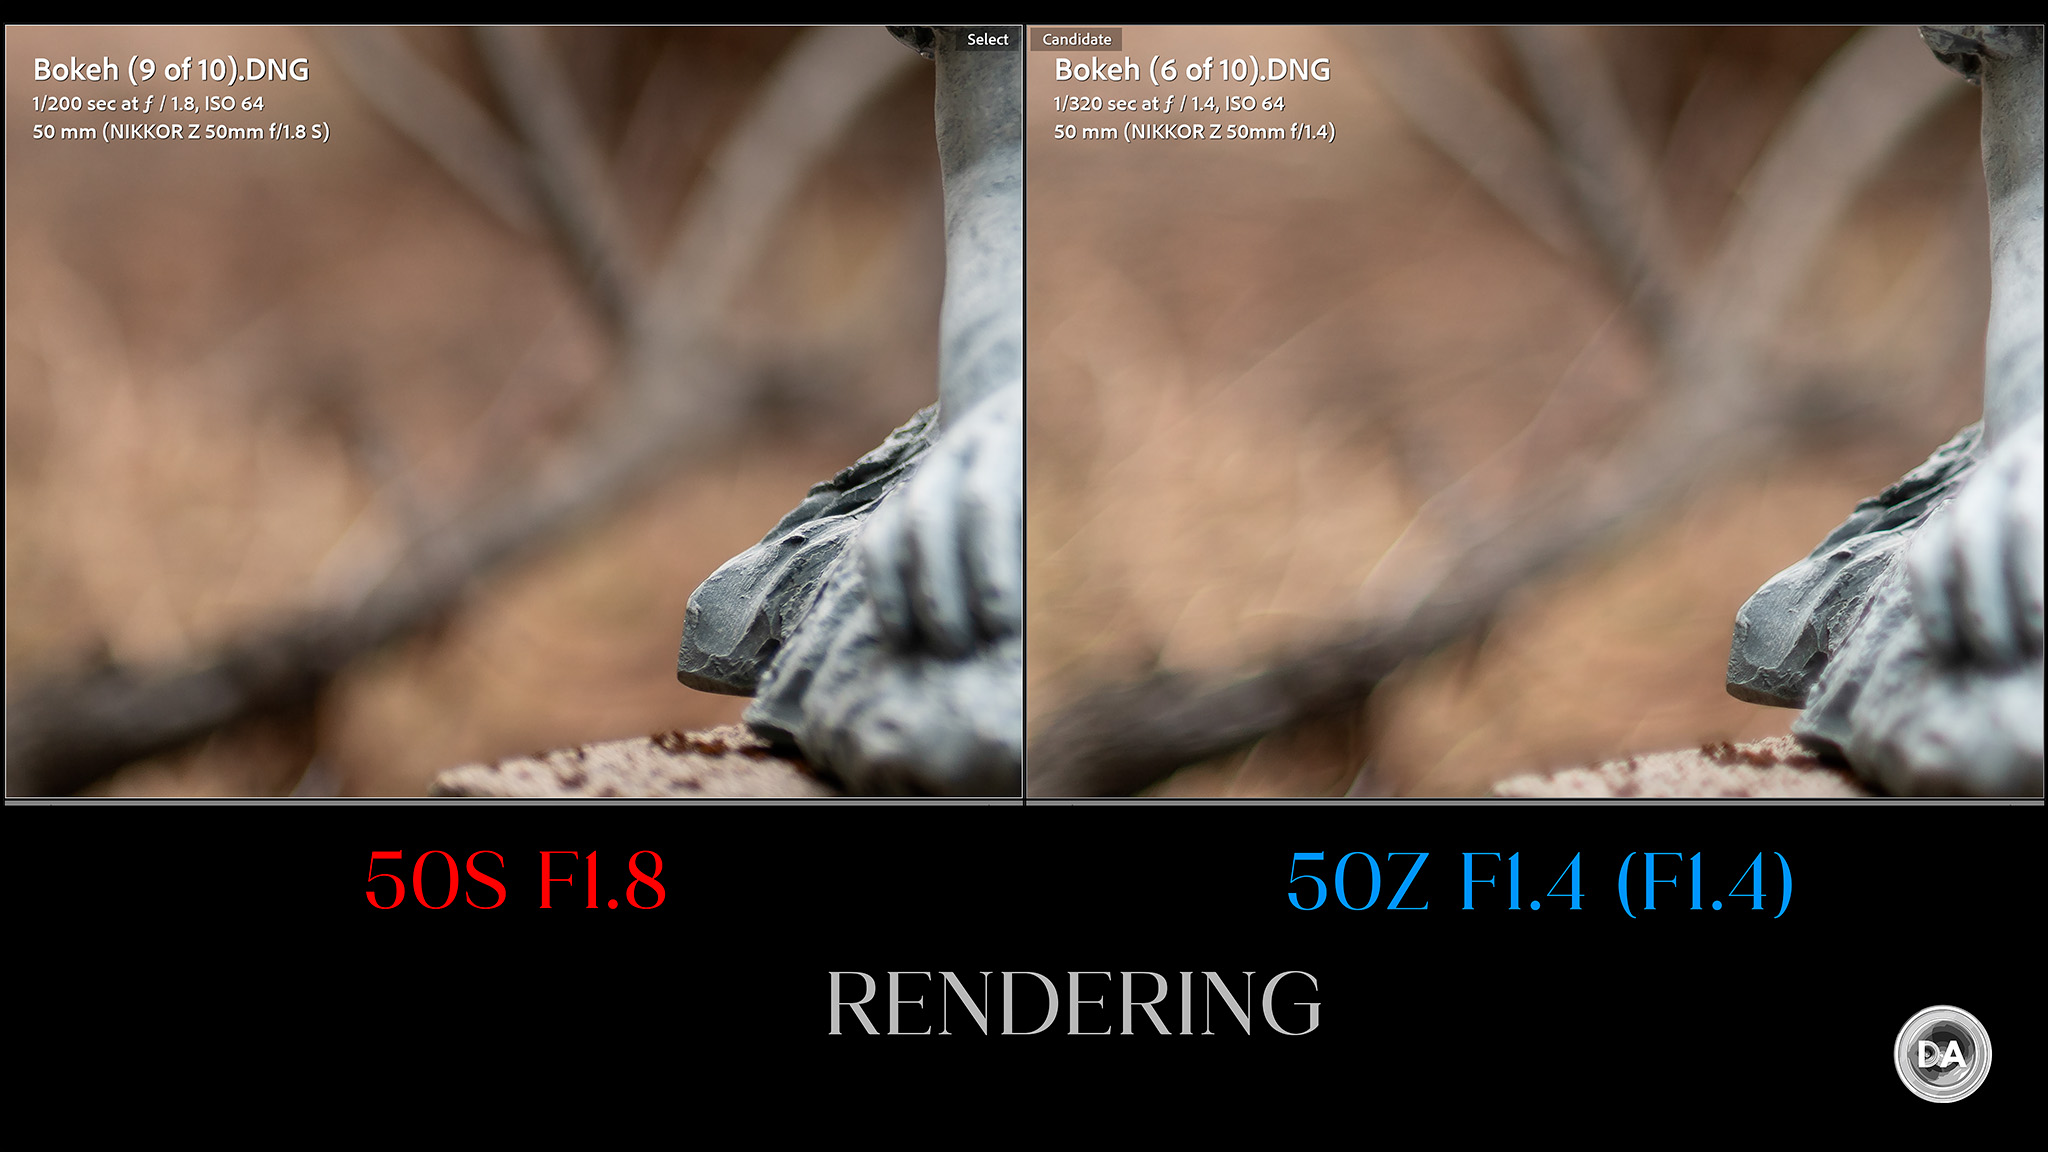
I noted in my review of the Z 50mm F1.4 that one tradeoff for some uncorrected fringing can be a softer background. Often lenses with a little less contrast and a little more fringing are able to produce softer, more pleasing backgrounds. We’ve determined that the S Line lens is certainly more corrected…so does that come at the cost of softly blurred backgrounds and pleasing bokeh?
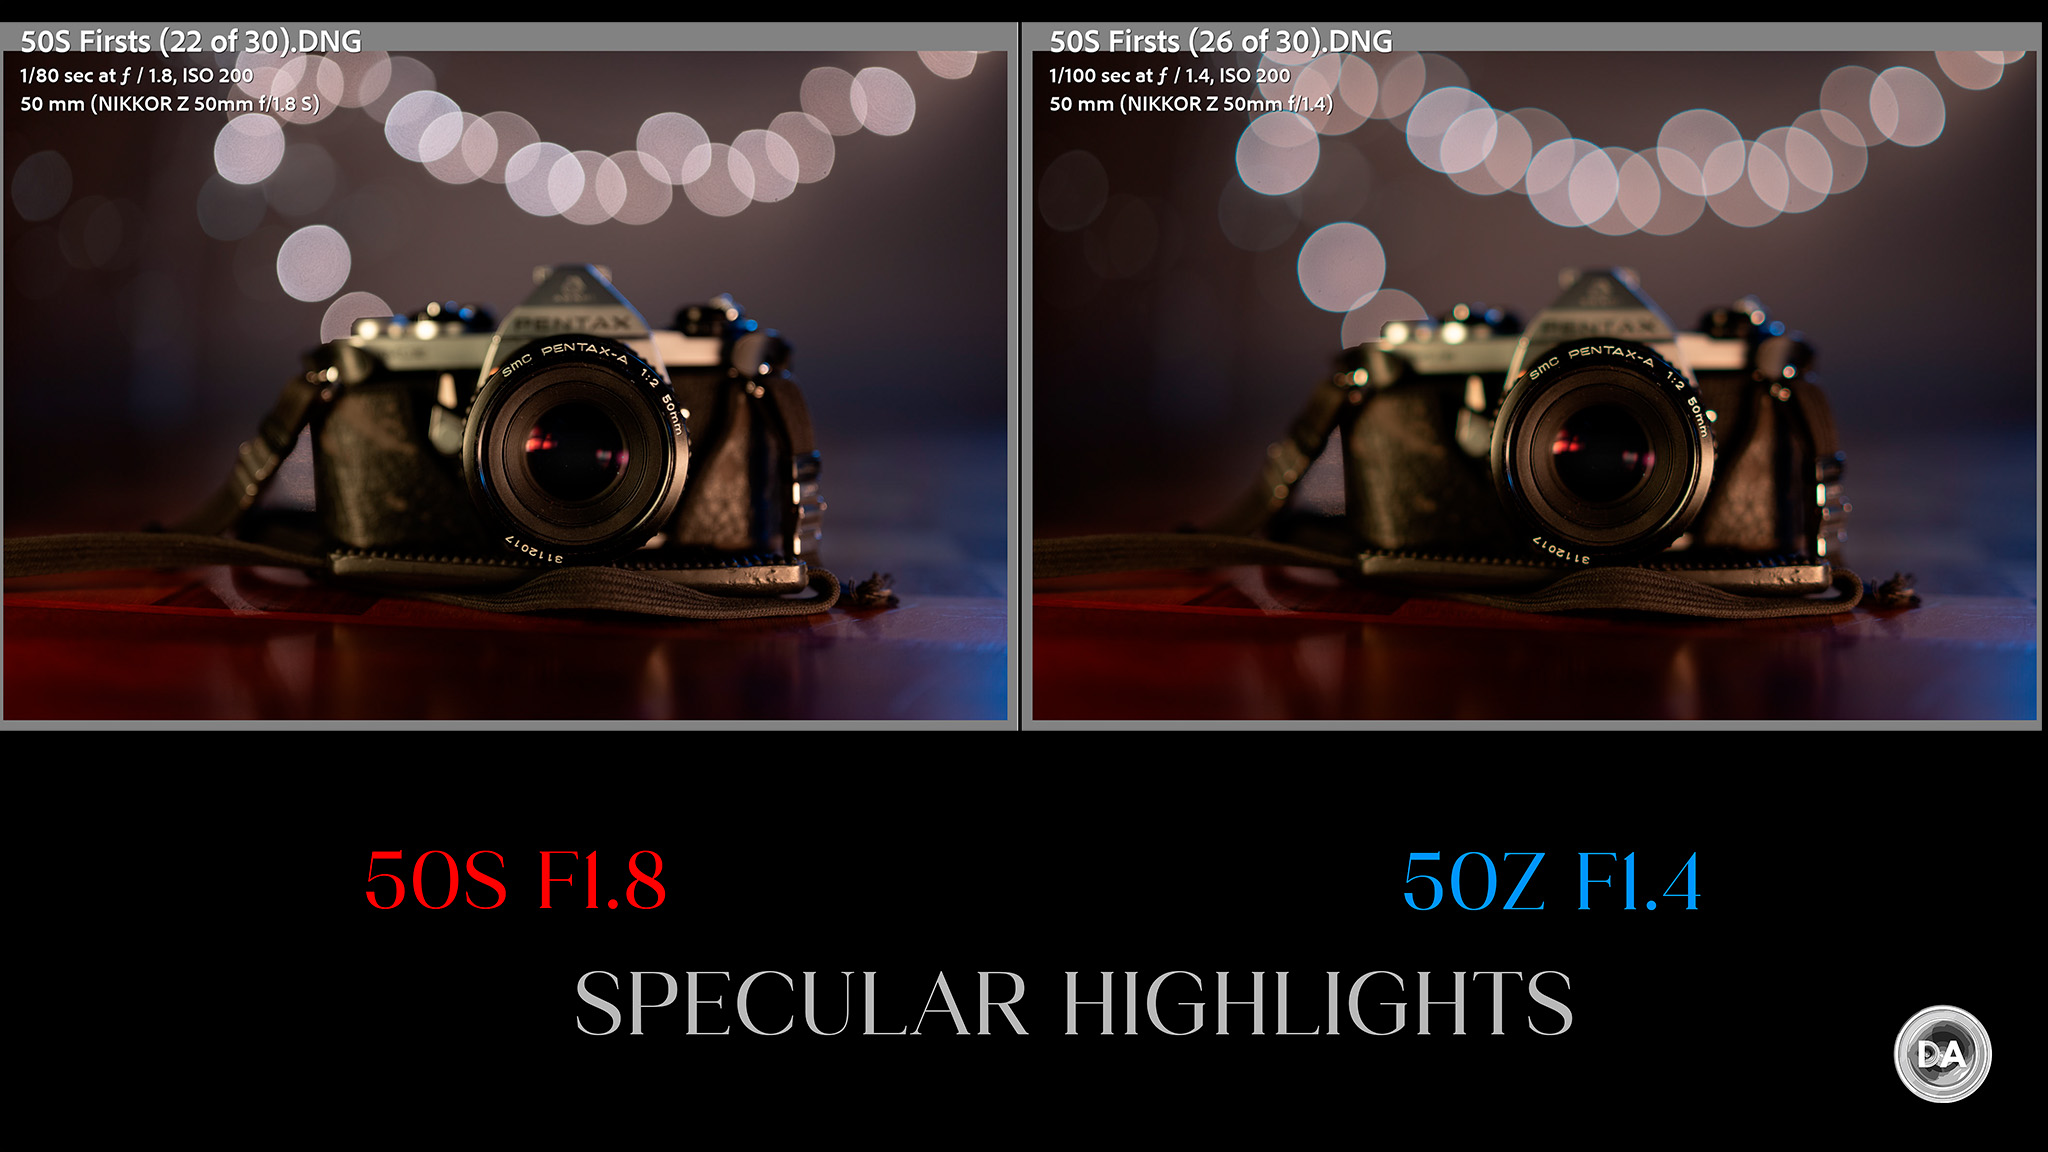
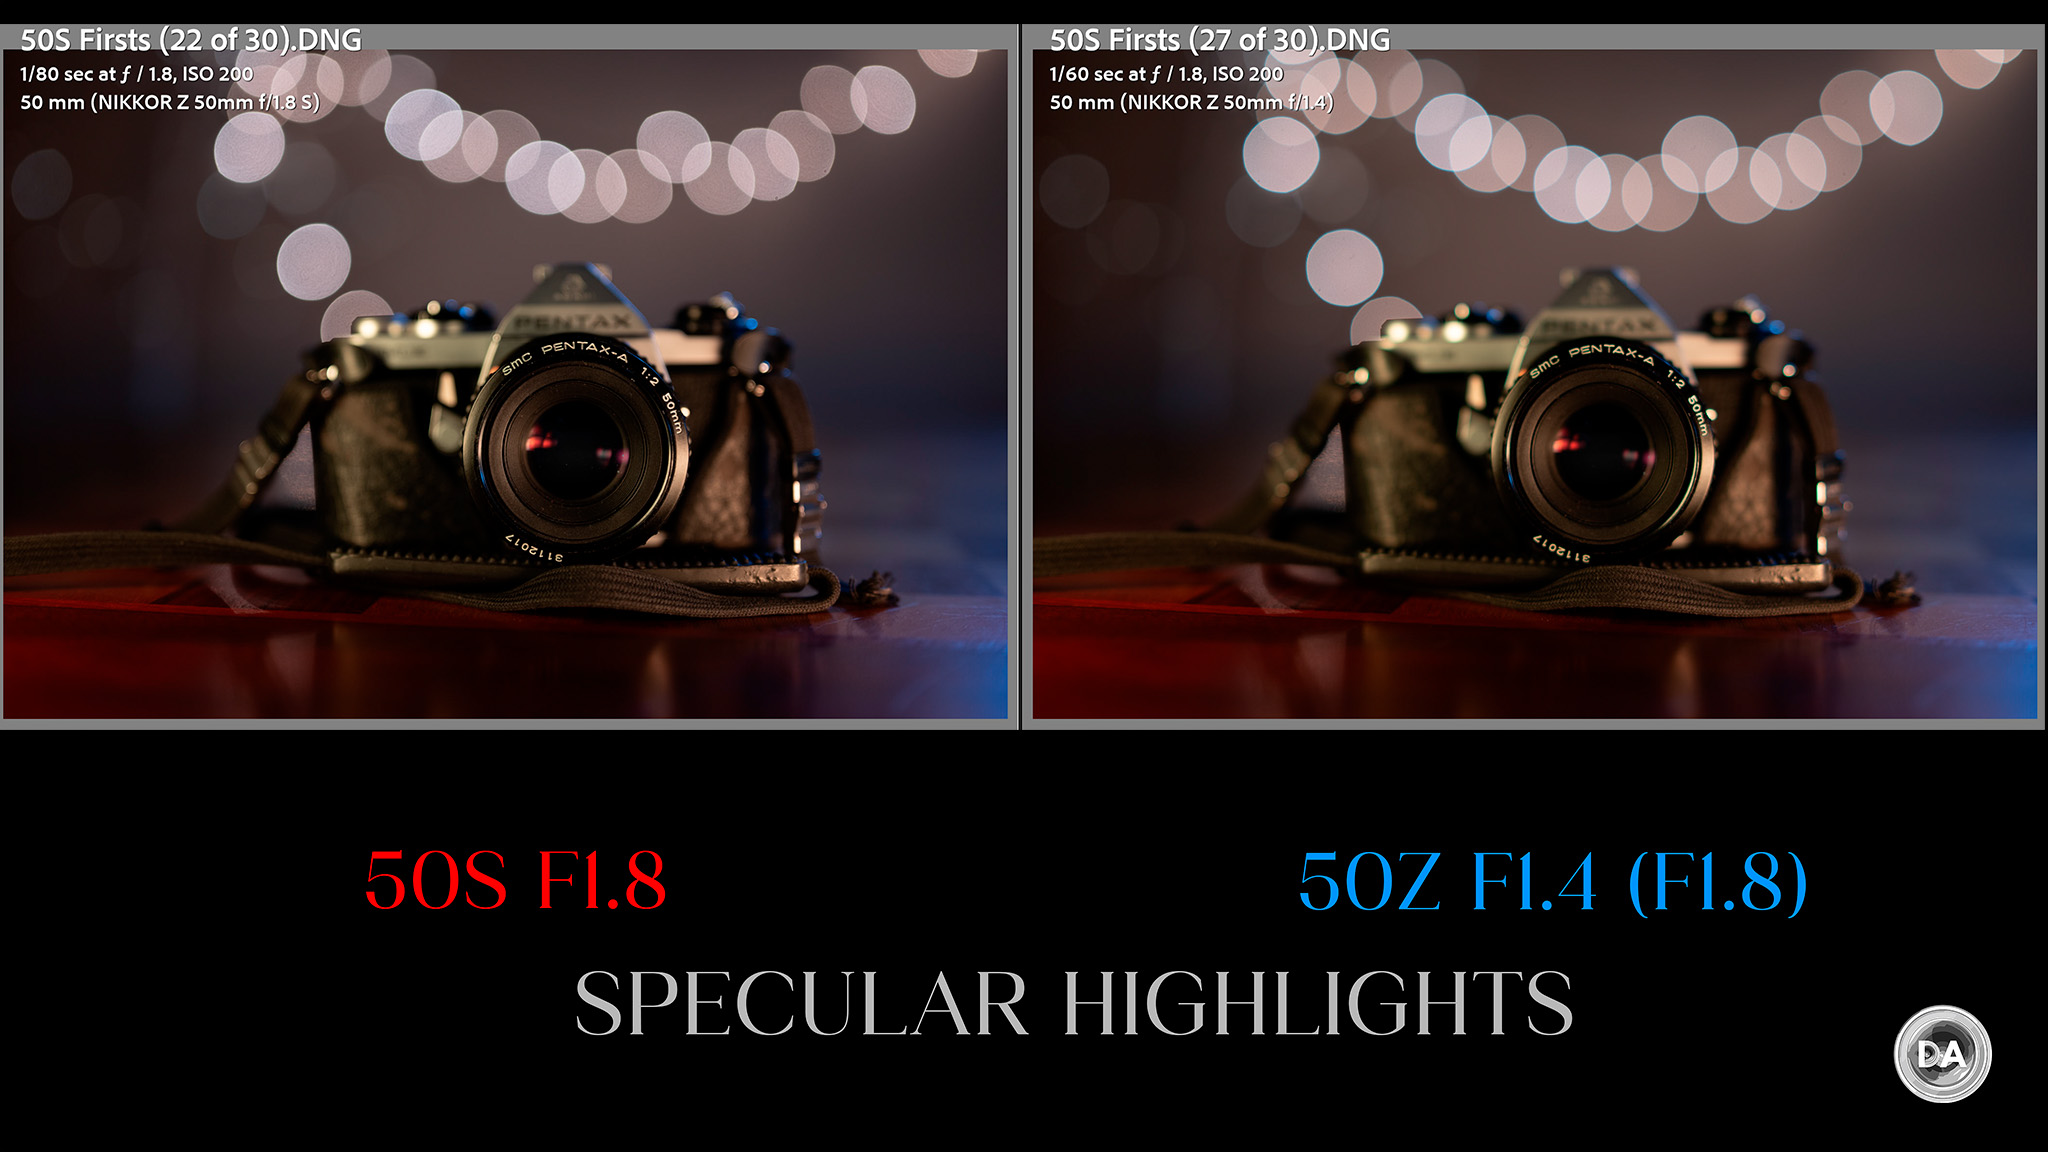
First we’ll look at specular highlights (bokeh balls).
We see an immediate advantage for the F1.4 lens – a lens with a larger maximum aperture is always going to produce larger, softer specular highlights than a lens with a smaller aperture because those specular highlights will be more out of focus. This is a byproduct of the shallower depth of field.
Lets zoom in a bit and take a closer look:
There’s some give and take here. The 50mm F1.8 S loses points for not only having smaller bokeh balls but also having more busyness inside them. There’s also an inner line or membrane that is lacking on the 50mm F1.4 Z. But the cheaper lens also has fairly pronounced fringing on the specular highlights that the better corrected 50mm F1.8 S doesn’t have. The winner is going to the lens whose flaws you find less objectionable.
What’s interesting (and that many photographers don’t know) is that the larger aperture lens will maintain some advantage even when the two lenses are stopped down to equal settings. If I stop the F1.4 lens down to F1.8, it still has larger specular highlights.
In this case, however, that advantage fades by about F2, where the two lenses equal out.
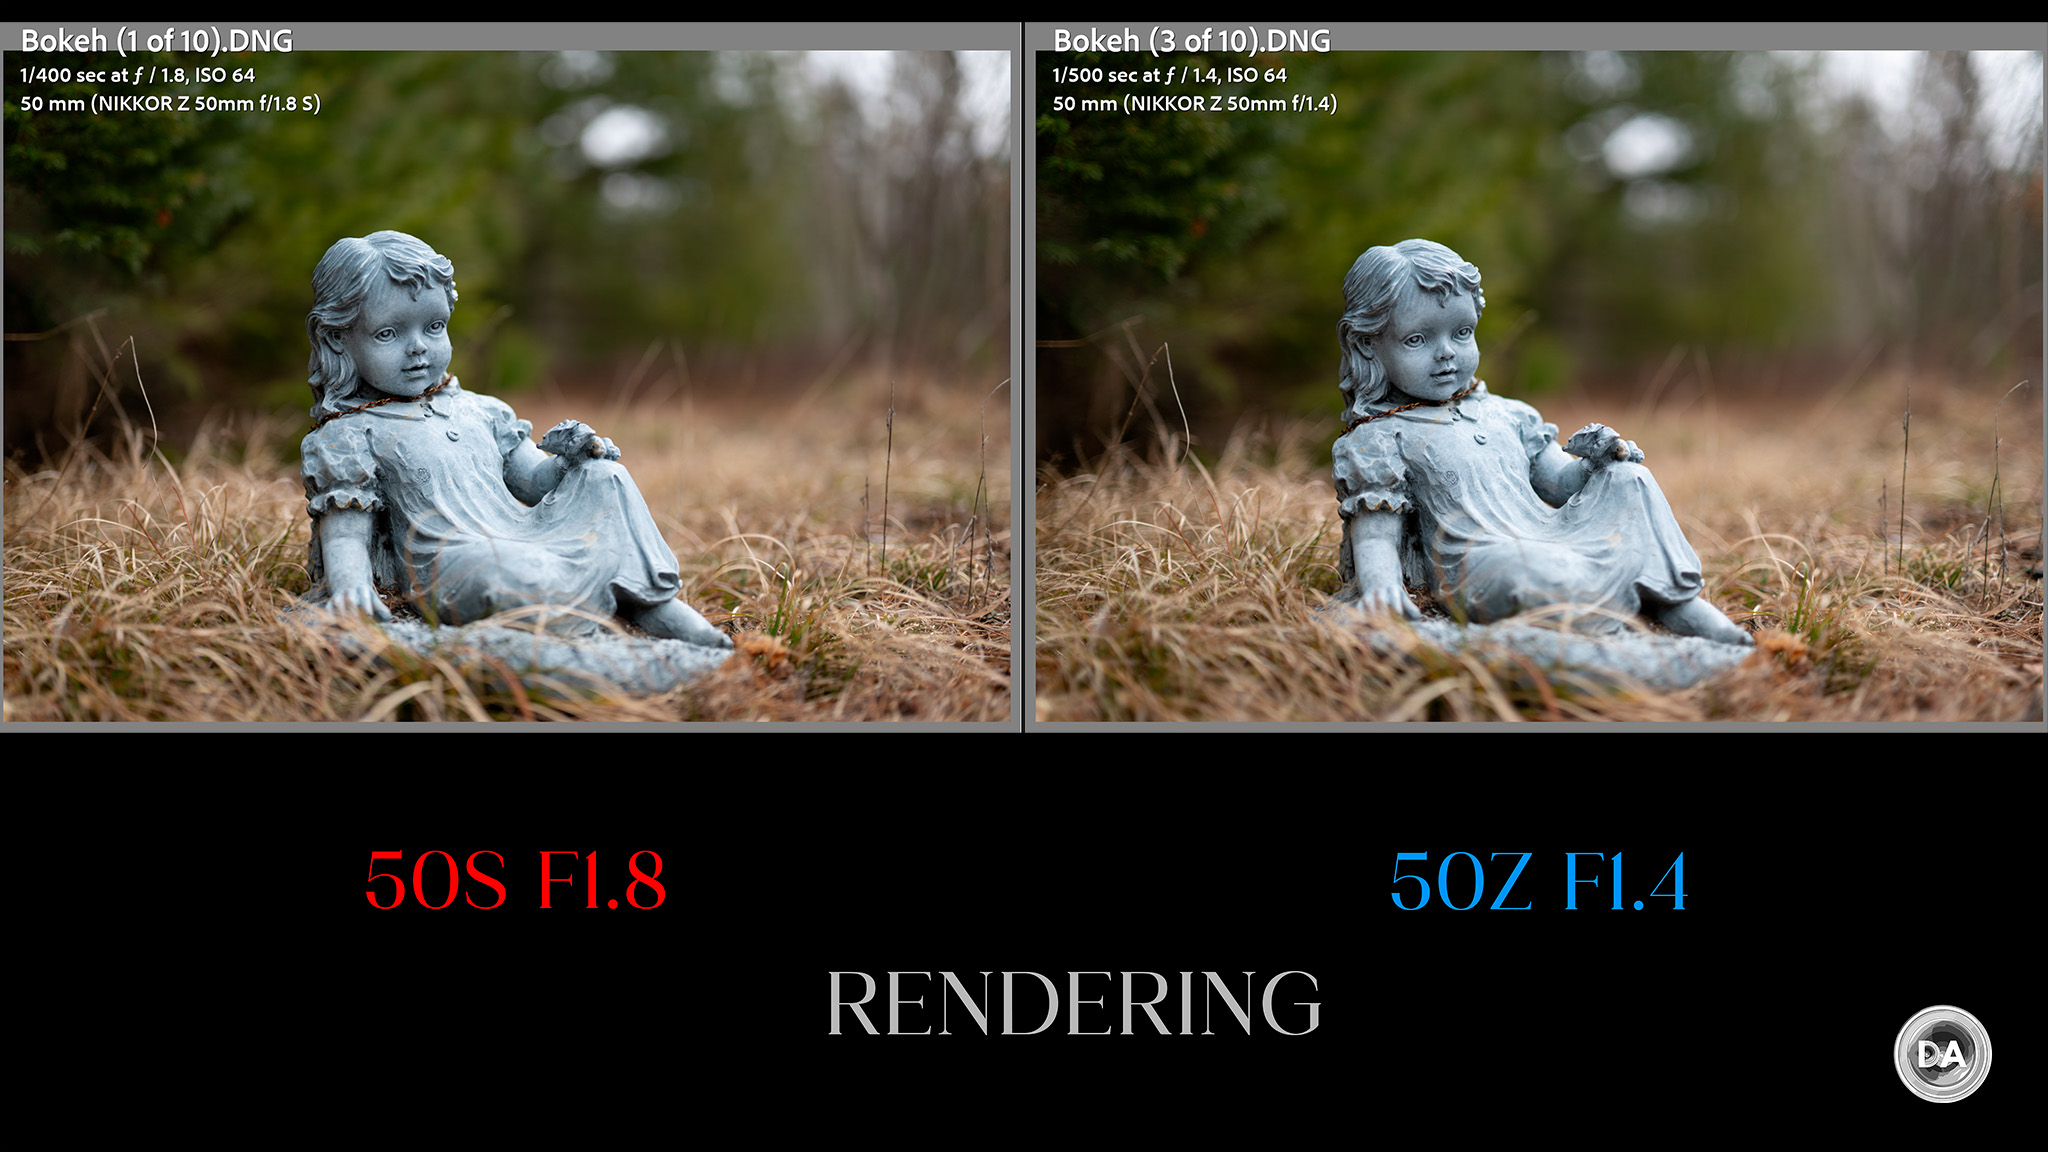
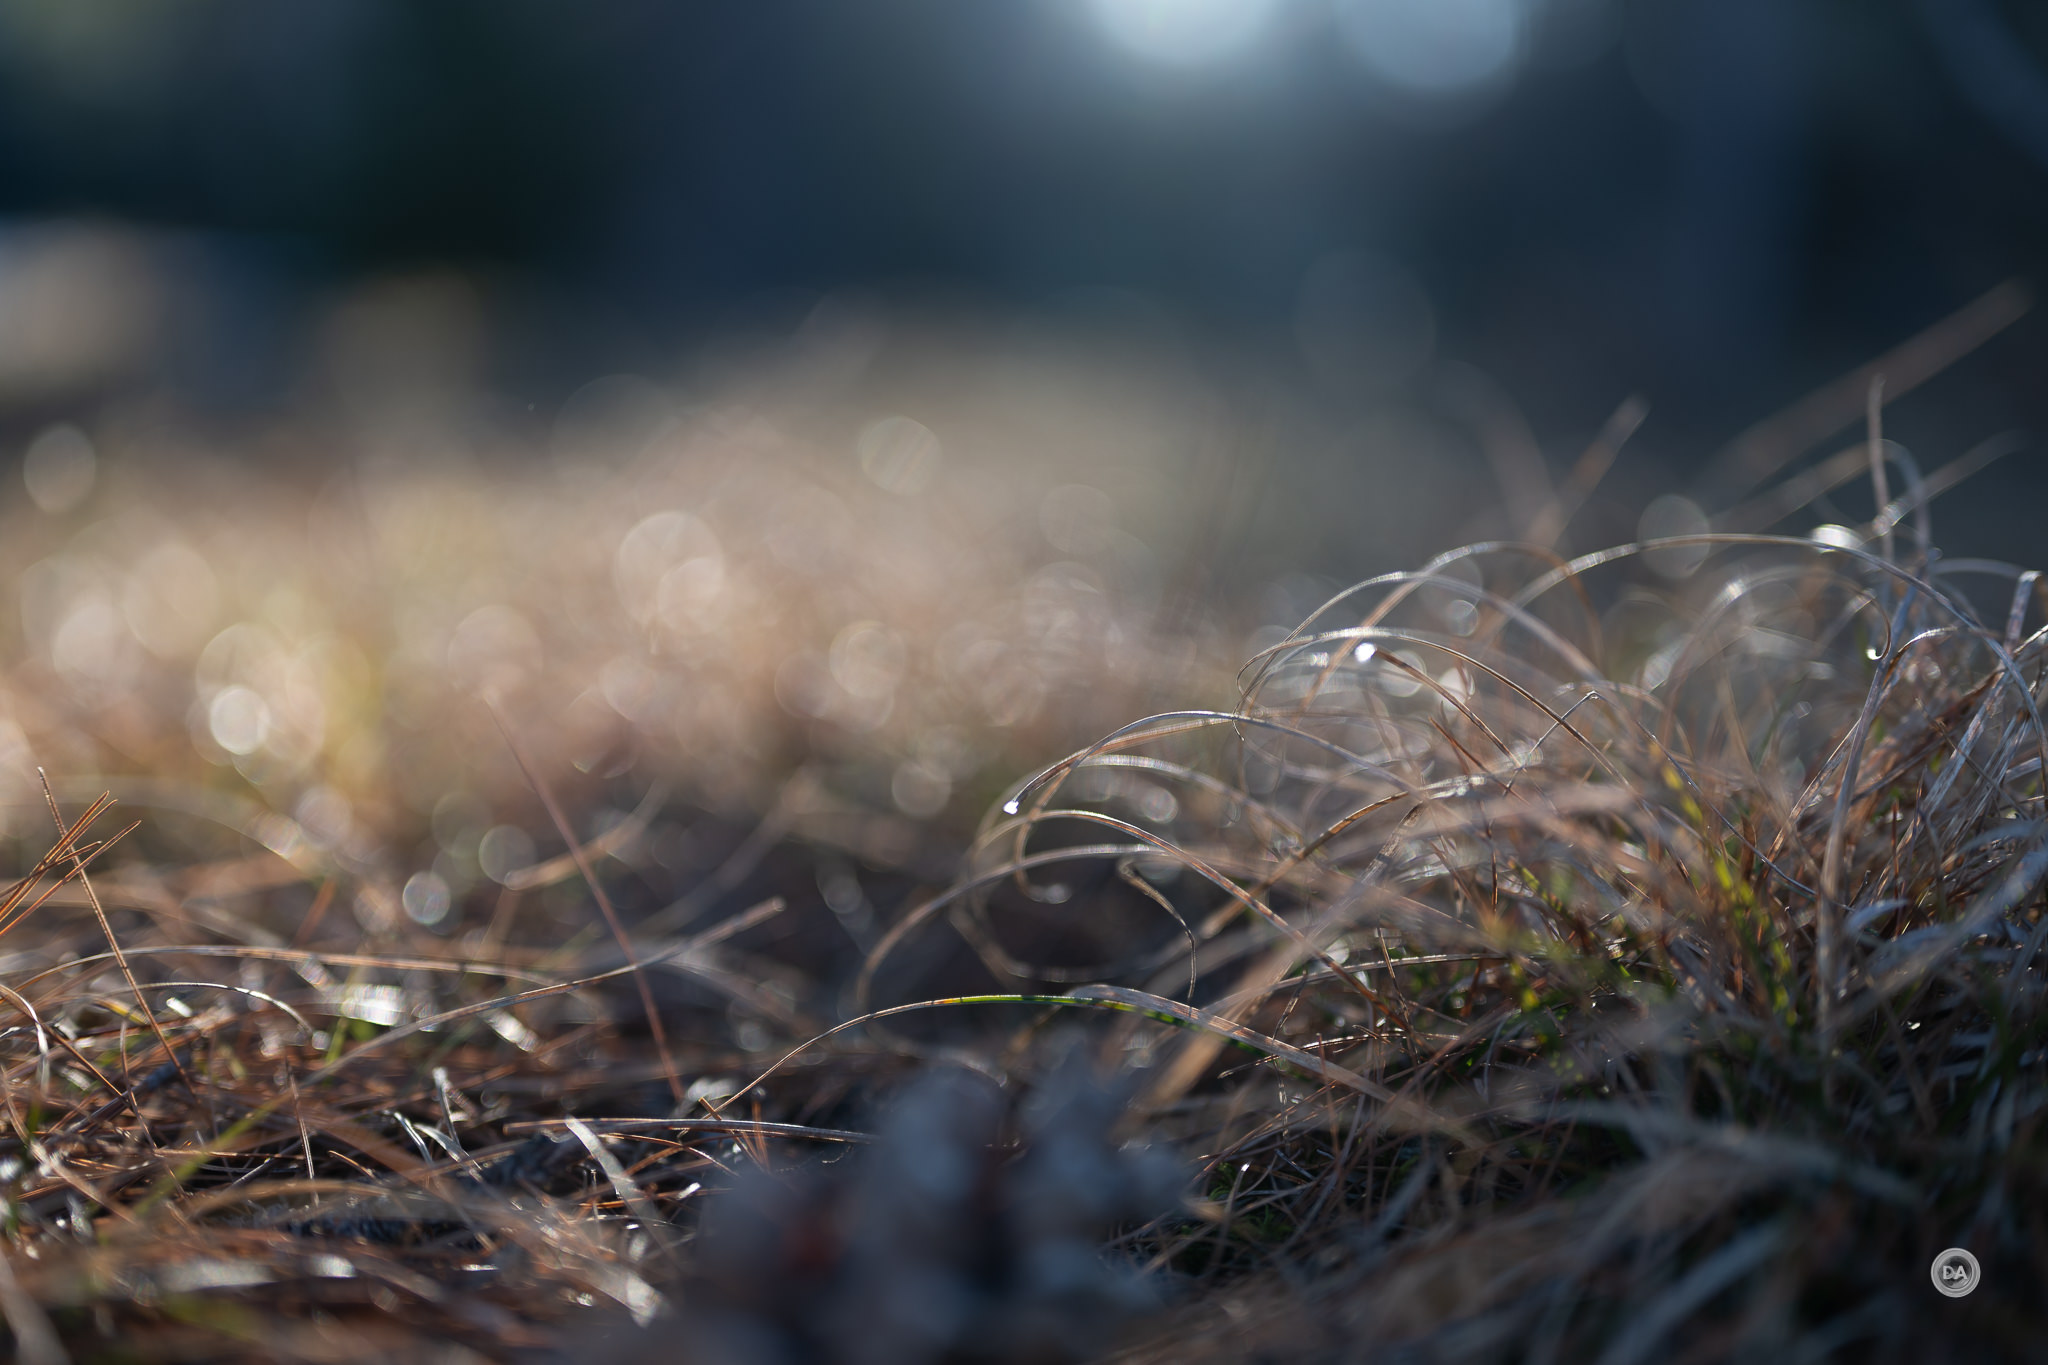
How about the rendering without specular highlights? That’s just one aspect of bokeh. We’ll start with a scene that I know will render well (a lot of depth, not too many hard edges, etc…)
The results are somewhat surprising. Yes, where there are specular highlights, they are larger and softer on the F1.4 lens (at F1.4), but frankly I don’t see a lot of difference overall in the two images.
What’s more, while we all know by this point that the microcontrast on the F1.8 S is far and away better at a pixel level, when viewing at this global level the F1.4 lens doesn’t look like it has lower contrast levels.
In another unexpected twist, I found that when I stopped the F1.4 lens down to F1.8, that I actually felt like the F1.8 S did a better job of managing the defocused areas nearer the edge of the frame. The F1.4 lens looks a little jittery.
That was unexpected.
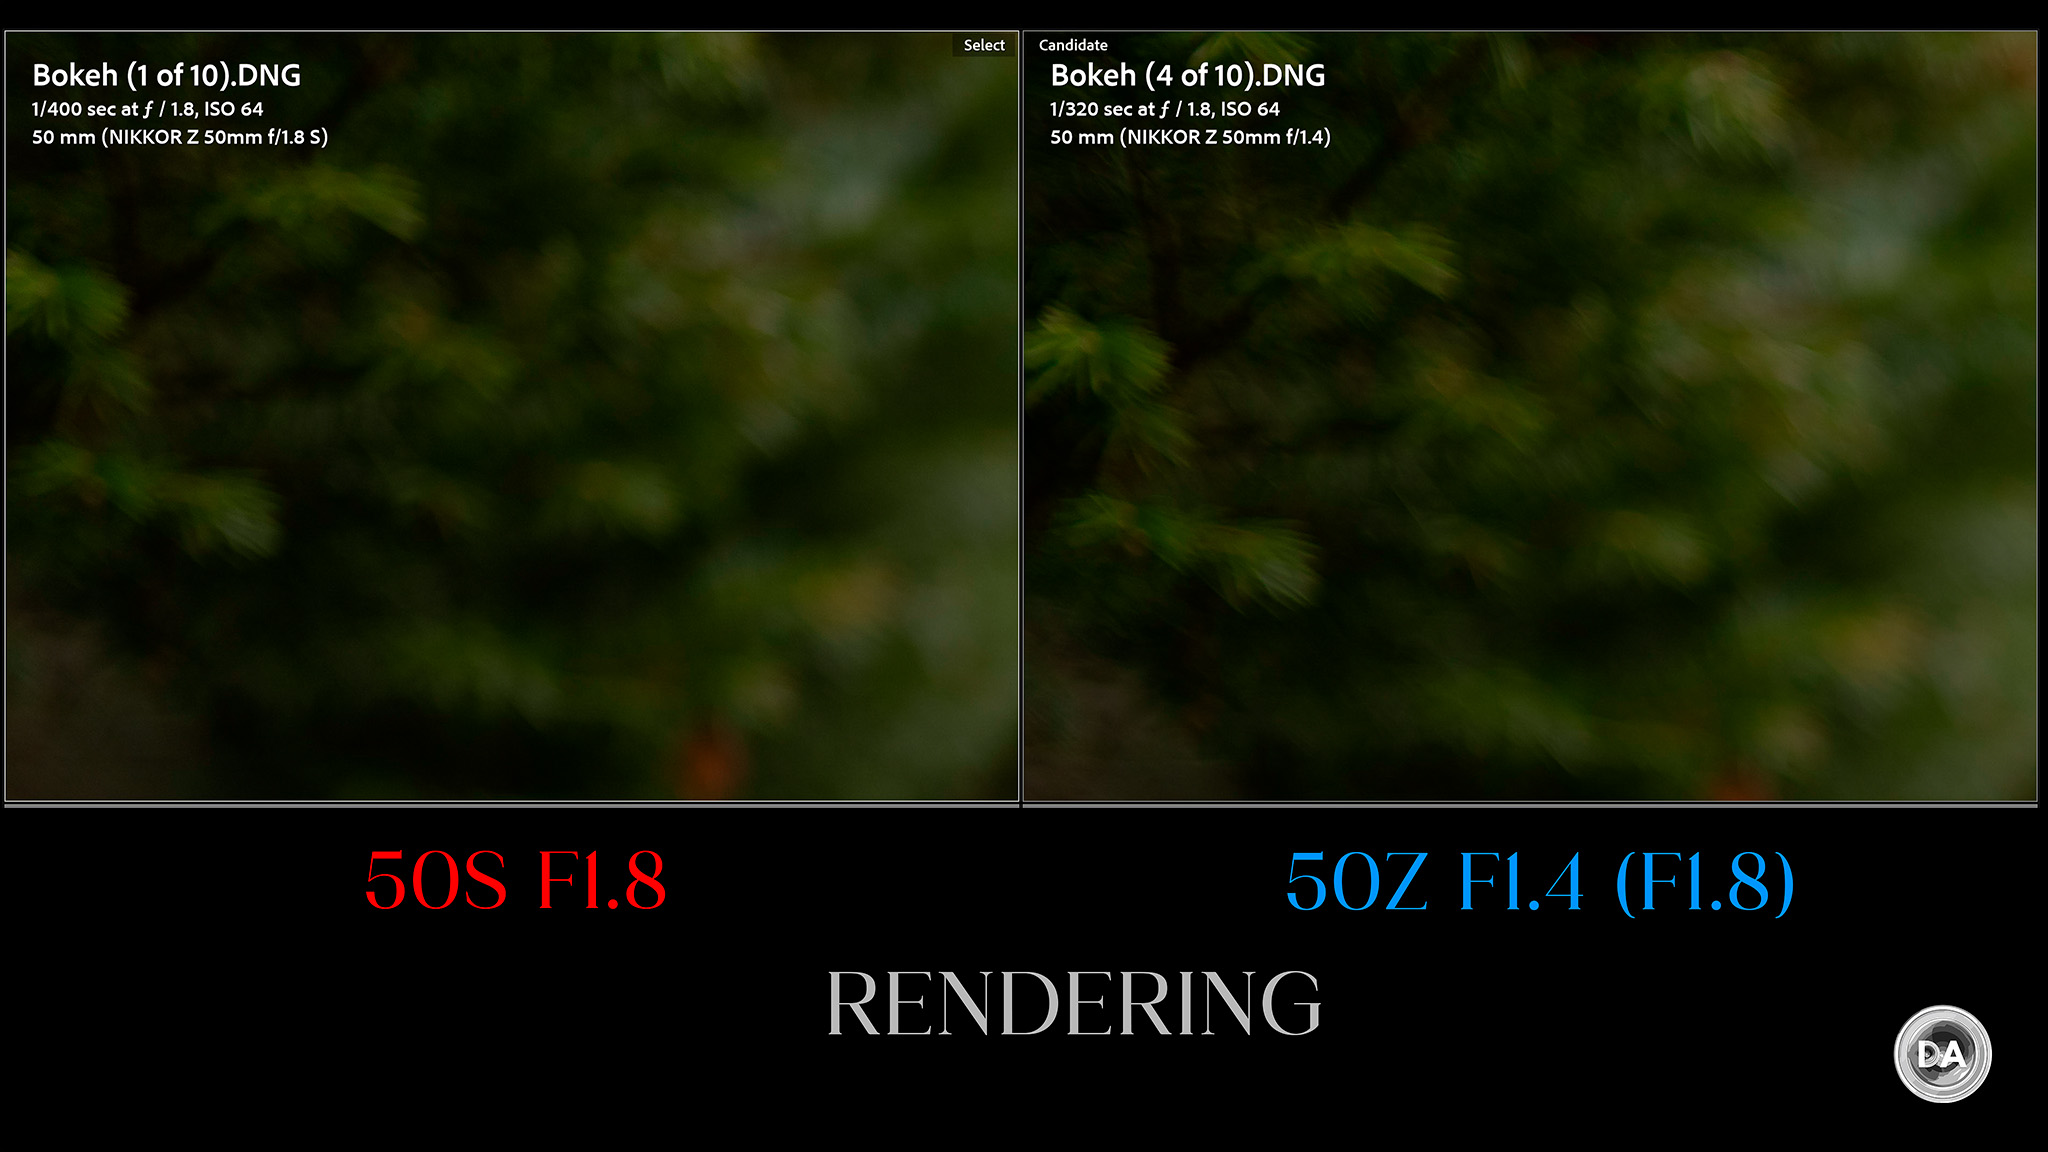
In this second series I chose a more complex background with a lot of hard edges and a less preferential ratio of distance to the subject and then to the background.
This was another example that gave both an expected and unexpected result. On a global level the lower contrast of the F1.4 lens actually works here, making the background appear a little less dominant in the shot. When I zoom into the defocused area in most of the frame, the two lenses are very similar. But it was on the edge that I found the S Line advantage once again.
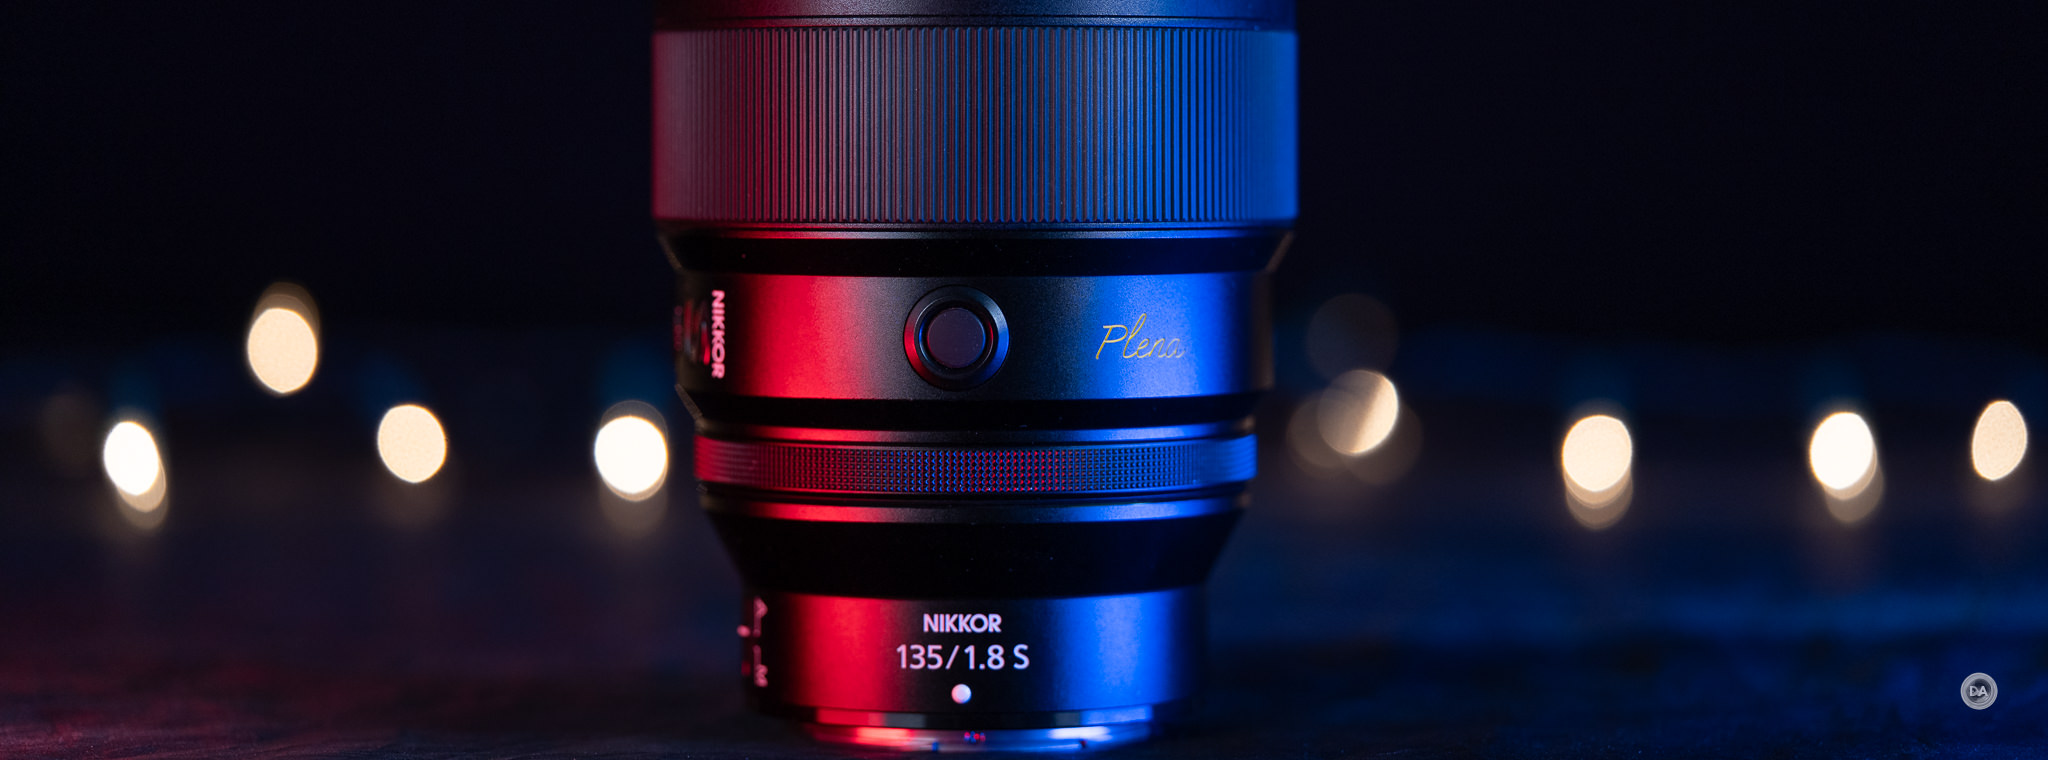
It reminds me of the design philosophy around the Nikkor Z 135mm F1.8 S Plena (my review here); a point of emphasis for Nikon’s engineers was to really work on the outer portion of the image. They took advantage of the bigger mount (and building a bigger lens) to allow them to have more consistent shading and performance in the corners. The 50mm F1.8 S doesn’t go quite to that limit (it also costs a third as much), but its clear that Nikon’s engineers did work along the edges of the frame to improve the rendering.
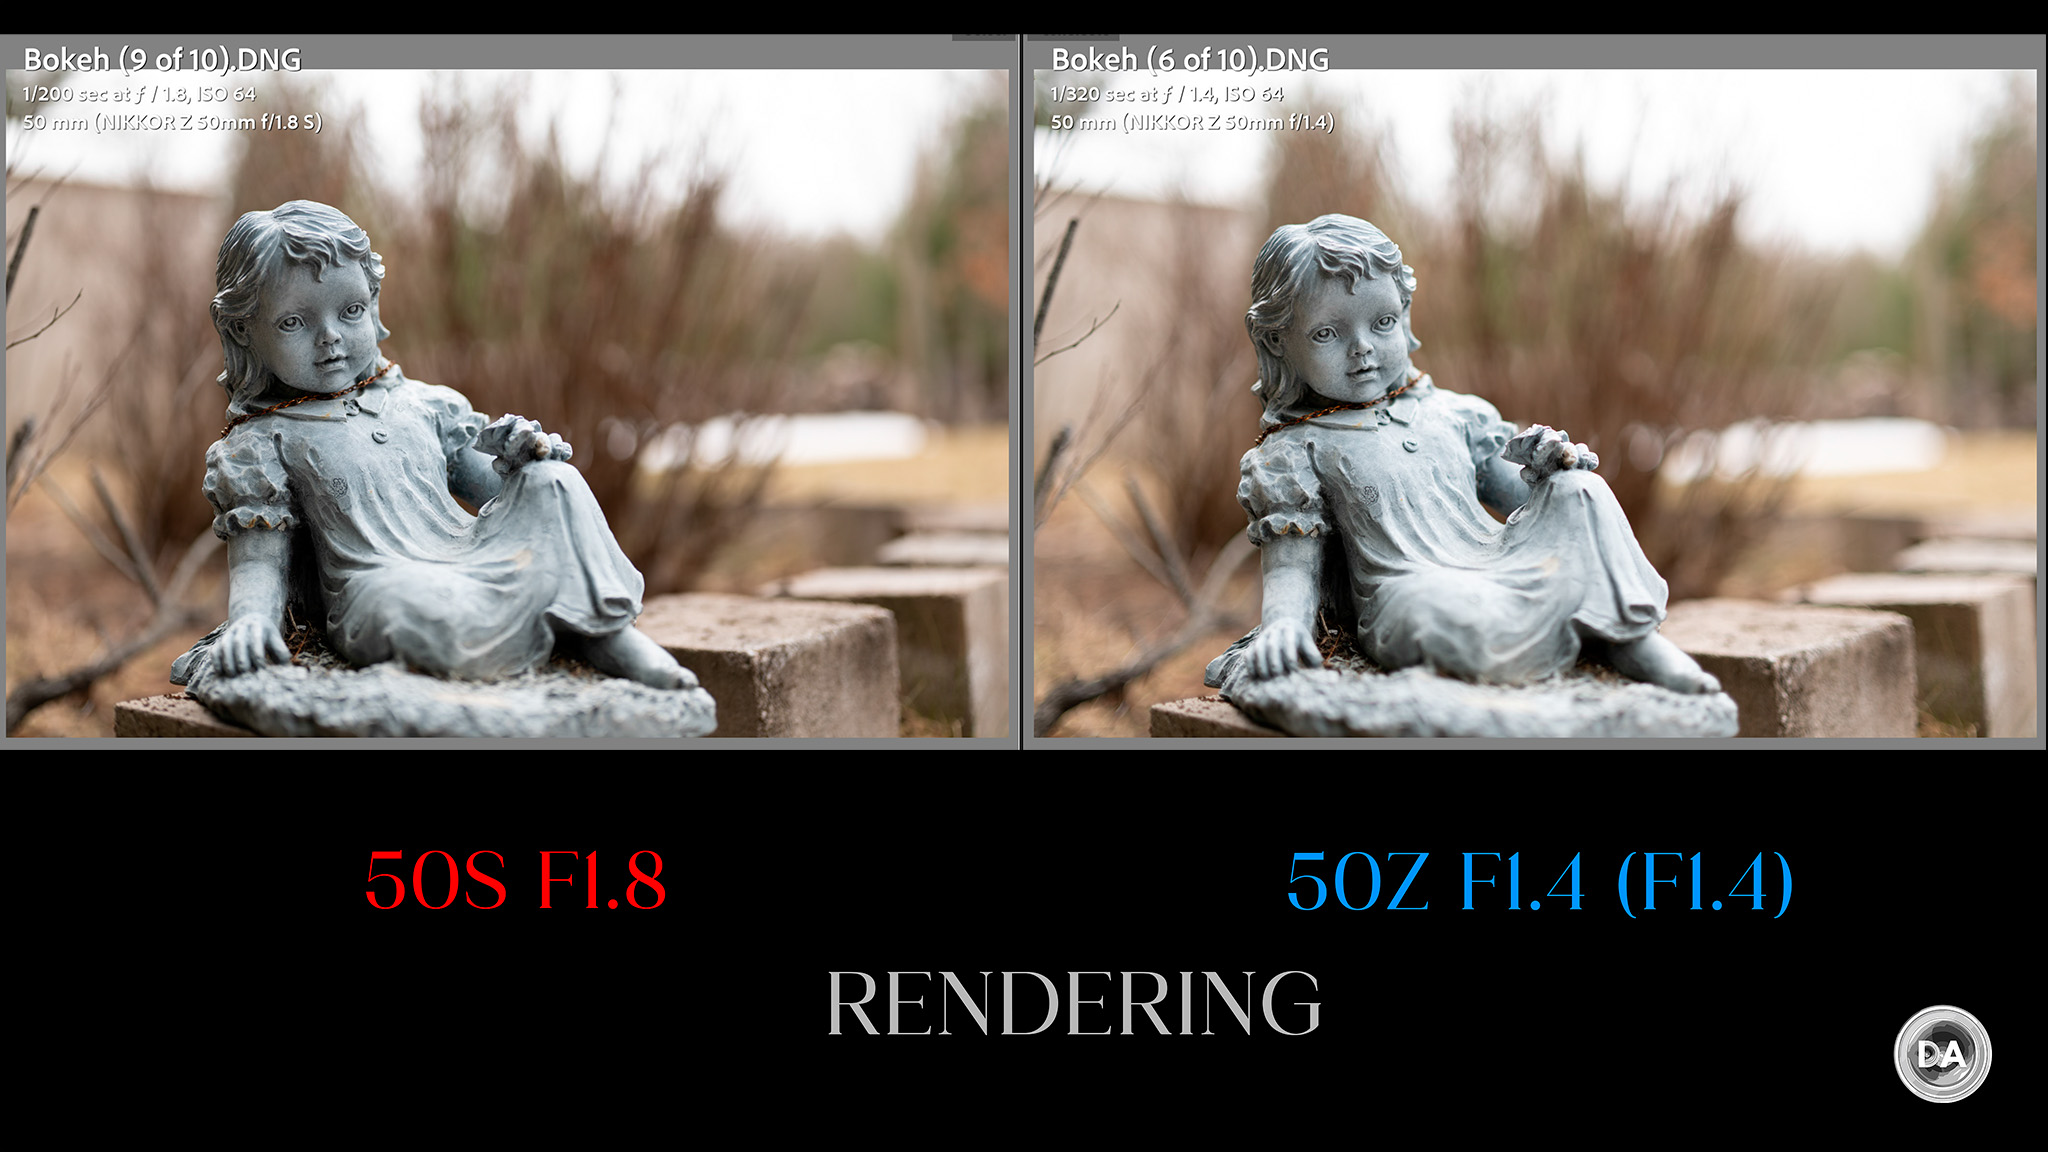
My chief concerns going into this review was that 1) the S Line lens wouldn’t have held up well being older, and thus wouldn’t look extra sharp compared to the newer F1.4 lens and 2) the rendering wouldn’t be as nice as an F1.4 lens. Neither of those things proved to be true. I think the rendering from the F1.8 S is just as nice as the newer lens.
There are going to be times that an F1.8 lens won’t look as defocused as what I would like, but in many situations the bokeh is just generally very nice.
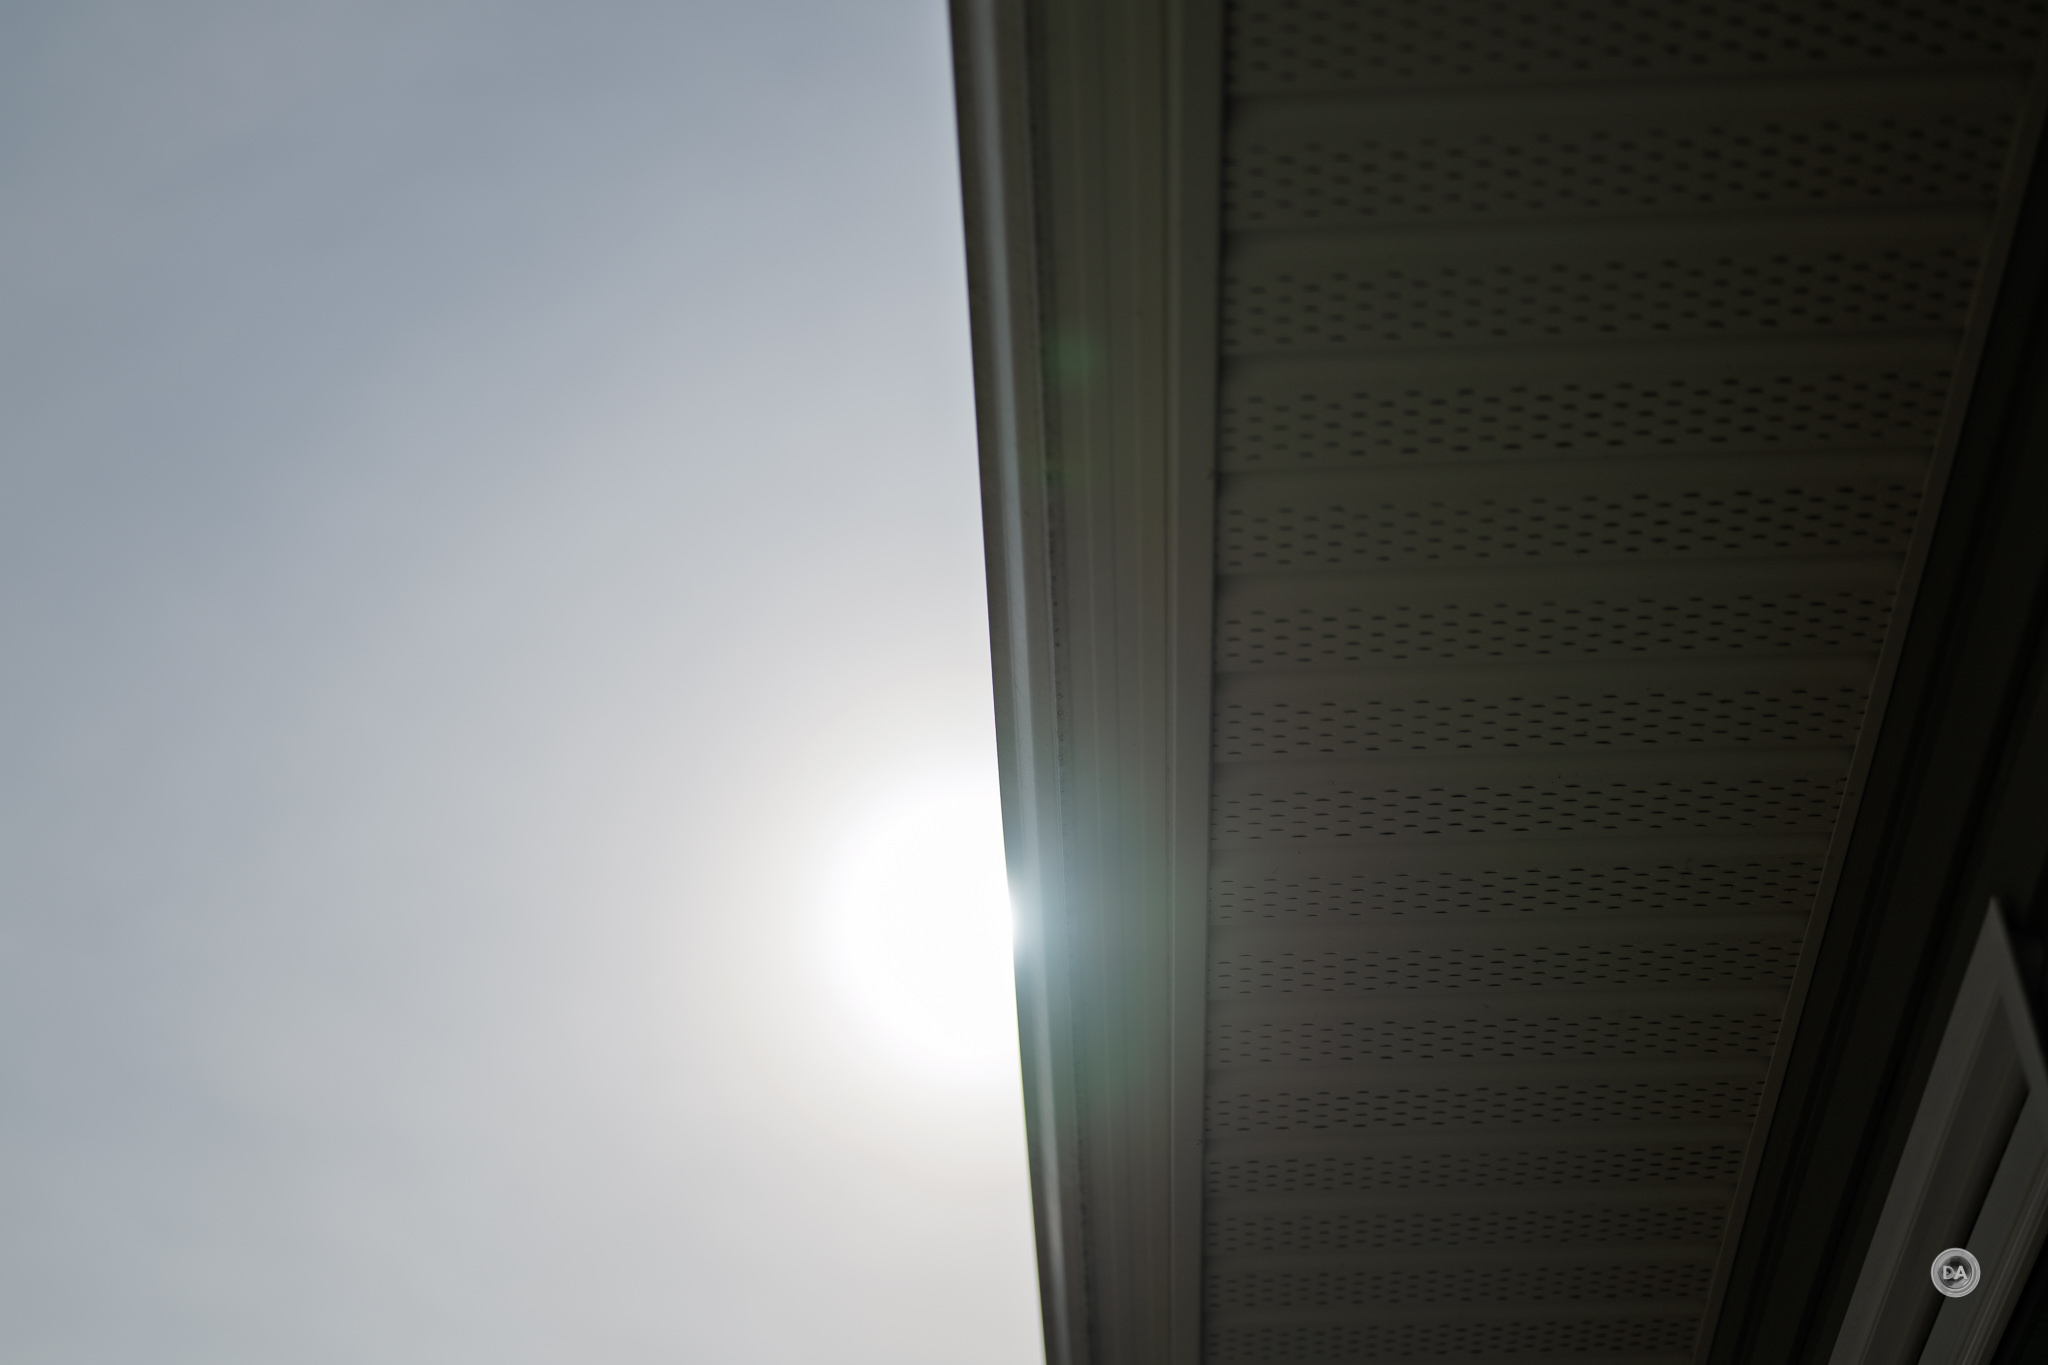
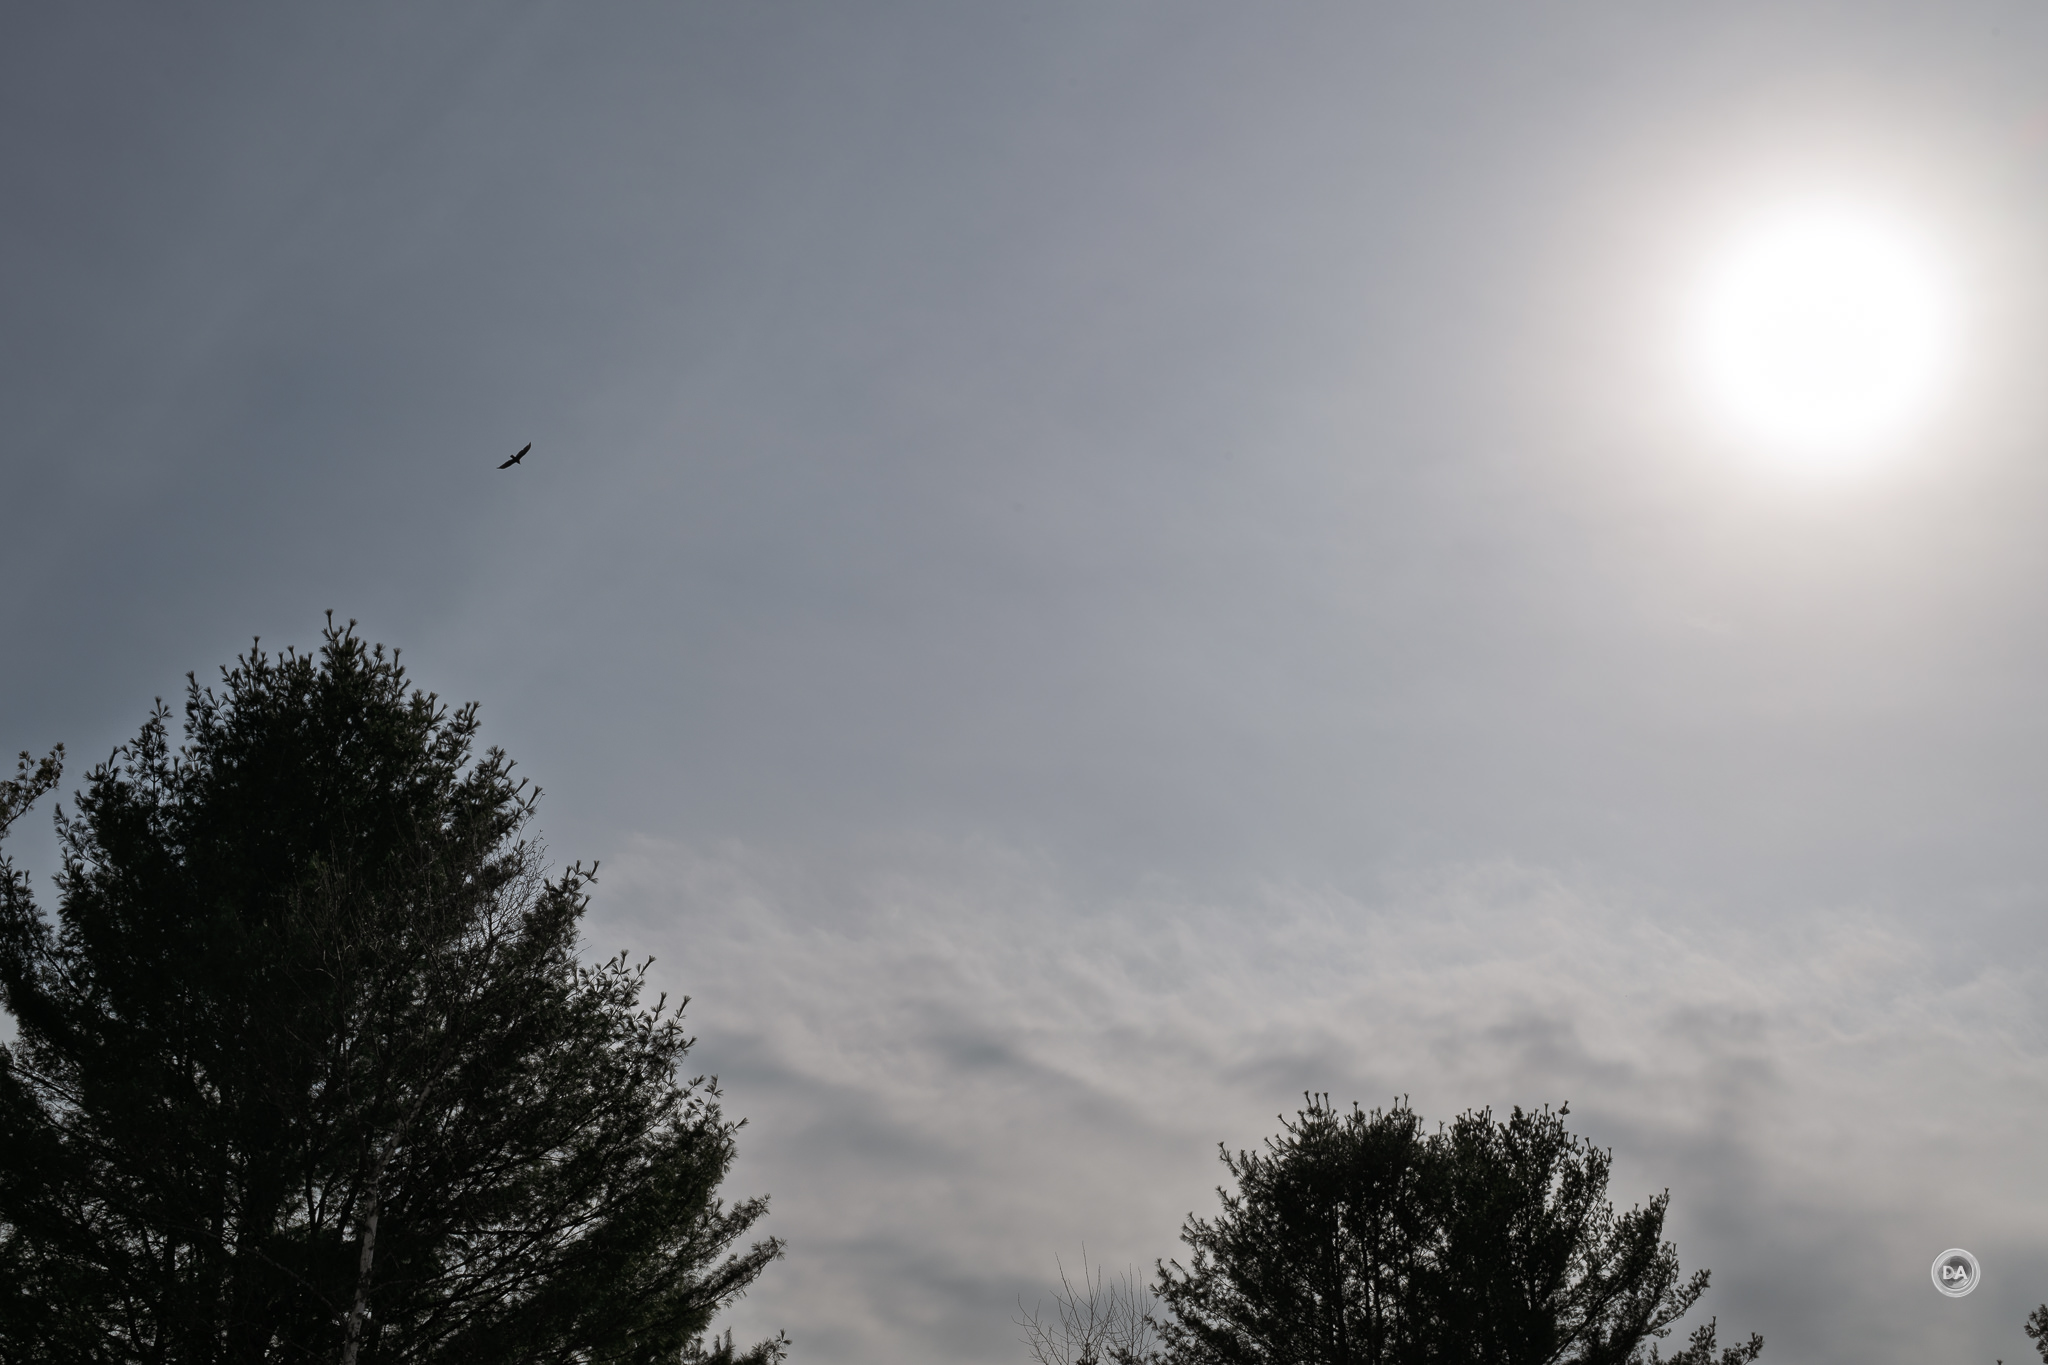
Flare resistance was generally pretty good, though I could pick up a little flashing if the sun or light source was right out of frame (it’s a little easier to demonstrate in video).
Ordinary flare resistance was pretty good, however, with minimal amounts of ghosting blobs or loss of contrast.
Color more impressed. This lens is better than I expected, particularly considering how long its been around. I was impressed with the images I was able to produce with the lens. It feels like an easy lens to reach for those family moments you want to capture, for walking around when you feel like shooting 50mm, and for portrait work in this range.
I still can’t say that Nikon’s overall marketing strategy with their primes at key focal lengths makes sense, at least in a conventional way, but I can at least understand why they did the original S Line F1.8 primes. F1.8 is not a typical maximum aperture for any premium lens save perhaps an ultra wide angle or a longer telephoto like a 135mm, but Nikon chose to make some lenses that could be both premium in performance and reasonable in price. If they’d made F1.4 lenses, they almost certainly would have priced more like Canon or Sony’s F1.4 primes. This way a lot of people could afford a higher end lens, even if the maximum aperture wasn’t particularly sexy.
And, at least as far as the Nikkor Z 50mm F1.8 S goes, the performance is pretty sexy. It is incredibly sharp and contrasty and retains a very nice rendering even if the depth of field isn’t as shallow as a faster lens. If you want to go crazy, there’s the Nikkor Z 50mm F1.2 S…but you’ll be spending a whopping $2100 to get it and have to tote around a nearly 1100g 50mm lens.
The 50mm F1.4 Z is actually less of a threat than I expected it to be. Nikon did a good job of leaving a lot of daylight between the two lenses in terms of performance, so I think the three main advantages of the 50mm F1.4 Z are the lower price, brighter maximum aperture, and having a separate control ring. But the 50mm F1.8 S does win basically every other metric. It’s much sharper and better corrected, has slightly better autofocus, and manages to even render slightly better. It’s probably the best 50mm F1.8 lens that I’ve ever tested. I suspect the main challenge will come from a company like Viltrox, who will have a 50mm F2 from their AIR series, a 50mm F1.4 from their PRO series, and a 50mm F1.2 from their LAB series on Z mount probably by this time next year, and surely one of those lenses will be fairly competitive. I’ve wondered at times why people seem to love this lens so much, as on paper it isn’t particularly impressive. But now that I’ve used it, I get it. This is a great lens, and still well worth considering in 2025 (particularly when it goes on sale!)
DISCLAIMER: This article and description contains affiliate links, which means that if you click on one of the product links, I’ll receive a small commission. As an Amazon Associate I earn from qualifying purchases.
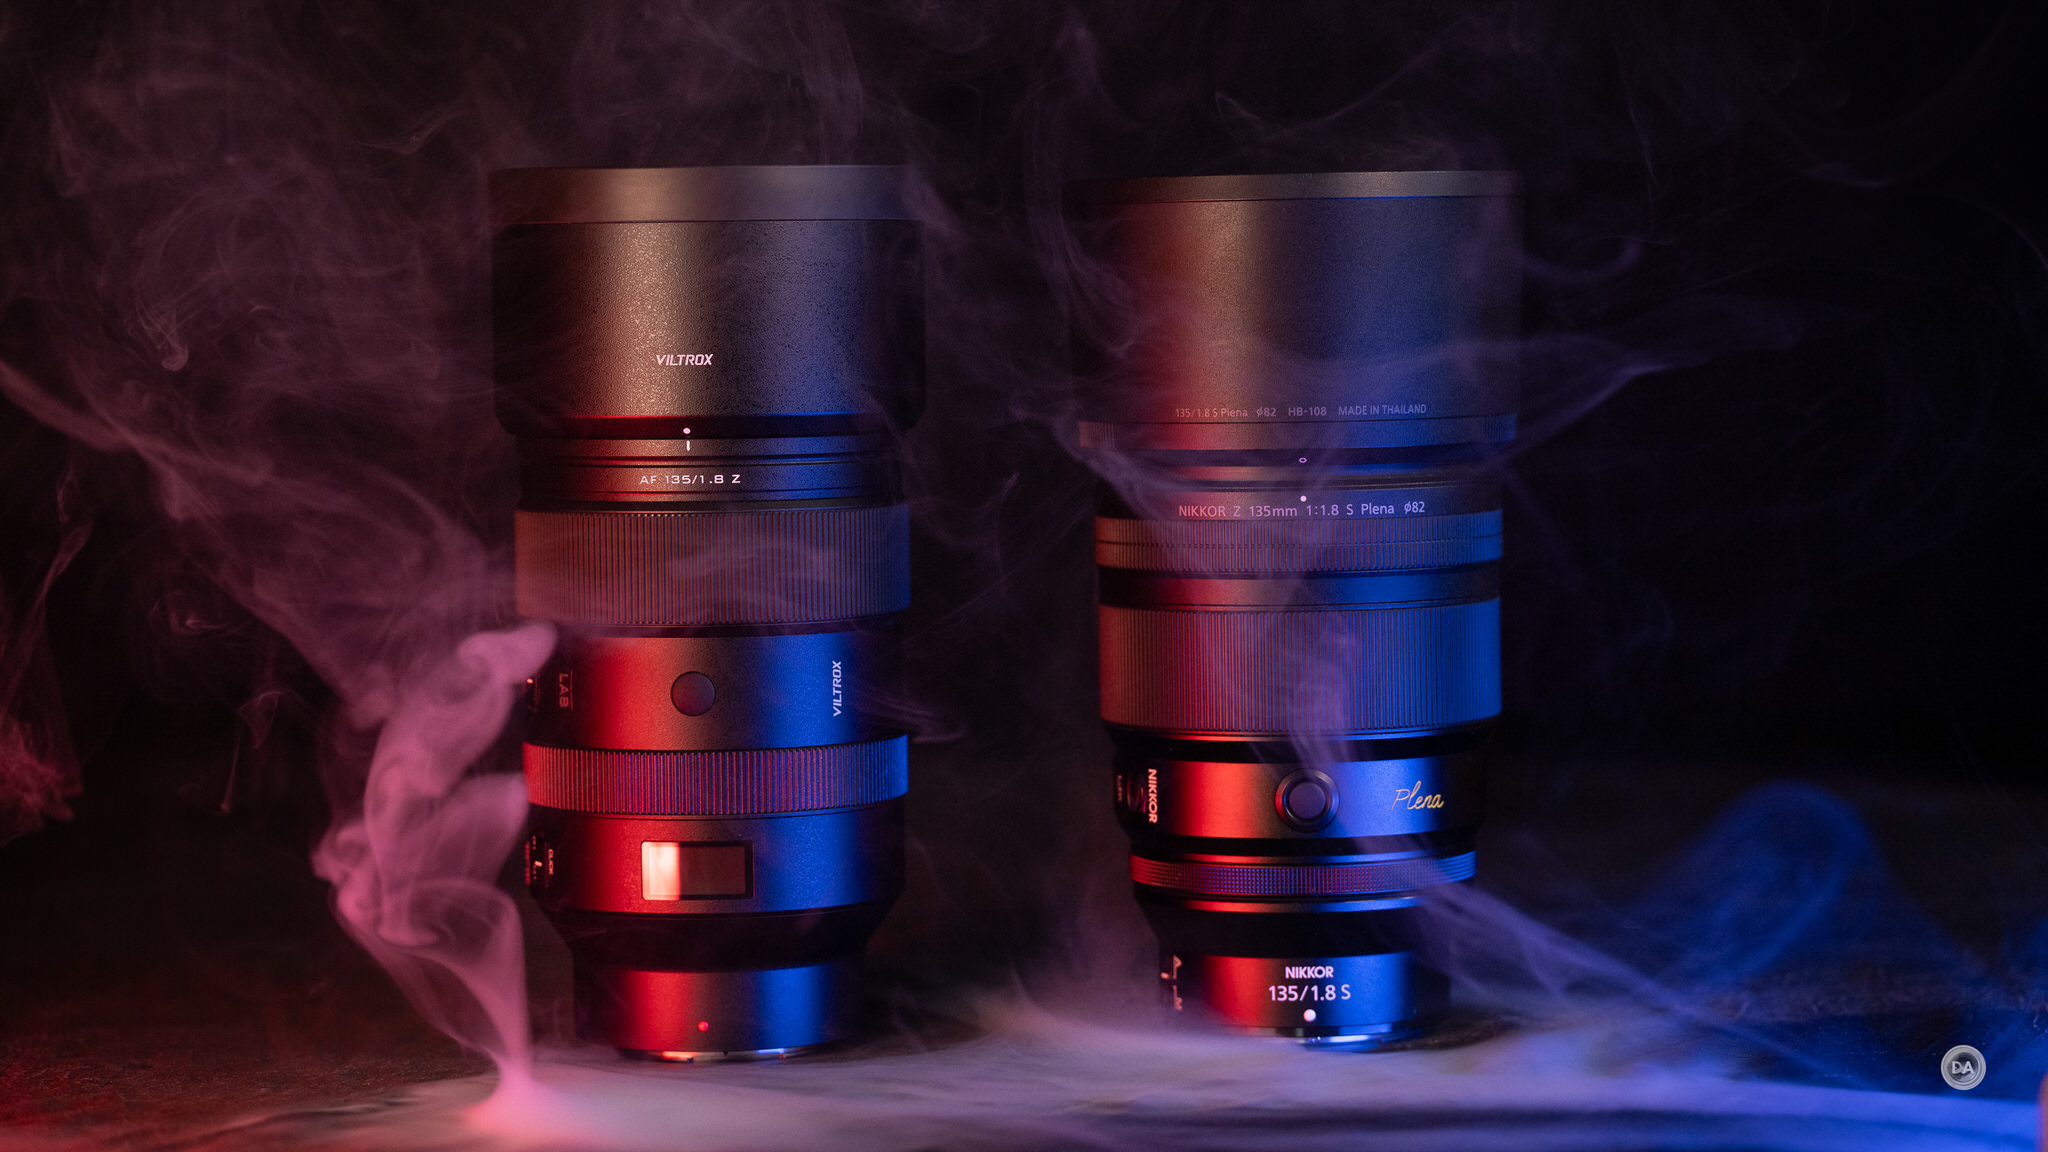
In the past six weeks I have reviewed two amazing 135mm lenses – both in Nikon Z mount. That’s great, as 18 months ago we had zero 135mm lenses. Both of them have tremendous strengths and a lot of similarities…but they are priced radically different, with the LAB coming in at $900 USD and the Plena closer to $2500 USD. Is the Plena worth it? Does the LAB make the Plena irrelevant? It’s complicated…so let’s dive in. You can get my full thoughts in the video review below or by checking out a summary of my findings in the article below.
Thanks to Chris at Nikon Canada for sending me a review loaner of the Plena and to Chloe from Viltrox for supplying me a review copy of the LAB. As always, this is a completely independent review. All opinions and conclusions are my own.*The tests and most of the photos that I share as a part of my review cycle have been done with the 45MP Nikon Z8, which I reviewed here.
Mostly similar feature set (Aperture/Control ring, AF | MF, Function)
Both weather sealed
Autofocus speed and feel pretty similar*
Optically very similar (portrait comparisons)
Neutral Differences
One is wider (Plena); one is longer (LAB) – within 1% of volume
Reasons to Choose LAB:
Price (currently $899 (less with discount), so -$1600
More customizable – LCD screen allows you to set A – B focus
Has focus limiter and click/declick aperture
Slightly less distortion
Nicer build? (definitely nicer hood)
Sharper in mid-frame and corners
Higher magnification
Reasons to Choose PLENA:
Much lighter at 995 weights 273g less than LAB (1268g)
Can do smooth aperture racks
Manually focuses smoother
Rounder specular highlights
About half the vignette
More focus consistency
More reactive focus
A few less video focus quirks*
Sharper center
Conclusion
I think it is safe to say that differences in performance between the two lenses are subtle. They are both incredible optically, but I did encounter more quirks with the Viltrox (needs a firmware update – 16mm). There were moments using them side by side where I was reminded that one was a first party lens and the other a third party lens. I would still call the Plena the better lens, all things considered. BUT – $1600 is a lot of money, and I think the case can be easily made that the LAB is giving you at least 90-95% of the performance on the Plena – and you could buy 2.7 LABs for the price of one Plena.
Keywords: Nikkor, Nikkor Z 135mm, Plena, F1.8, F1.8 S, Nikkor Z, Nikkor Z 135mm F1.8 S Plena review, Nikon 135mm, Nikon Z 135mm, Viltrox, LAB, Viltrox AF 135mm F1.8 LAB Z, Nikon, Nikon Z8, Z, Z-mount, Z8, Review, mirrorless, Full Frame, Sports, Tracking, Dustin Abbott, Real World, Comparison, Handling, Focus, Portraits, Resolution, High ISO, Image Quality, Sample Images, Photography, 45MP, #letthelightin, #DA, #NIKON, #Z8, #nikonz8
DISCLAIMER: This article and description contains affiliate links, which means that if you click on one of the product links, I’ll receive a small commission. As an Amazon Associate I earn from qualifying purchases.
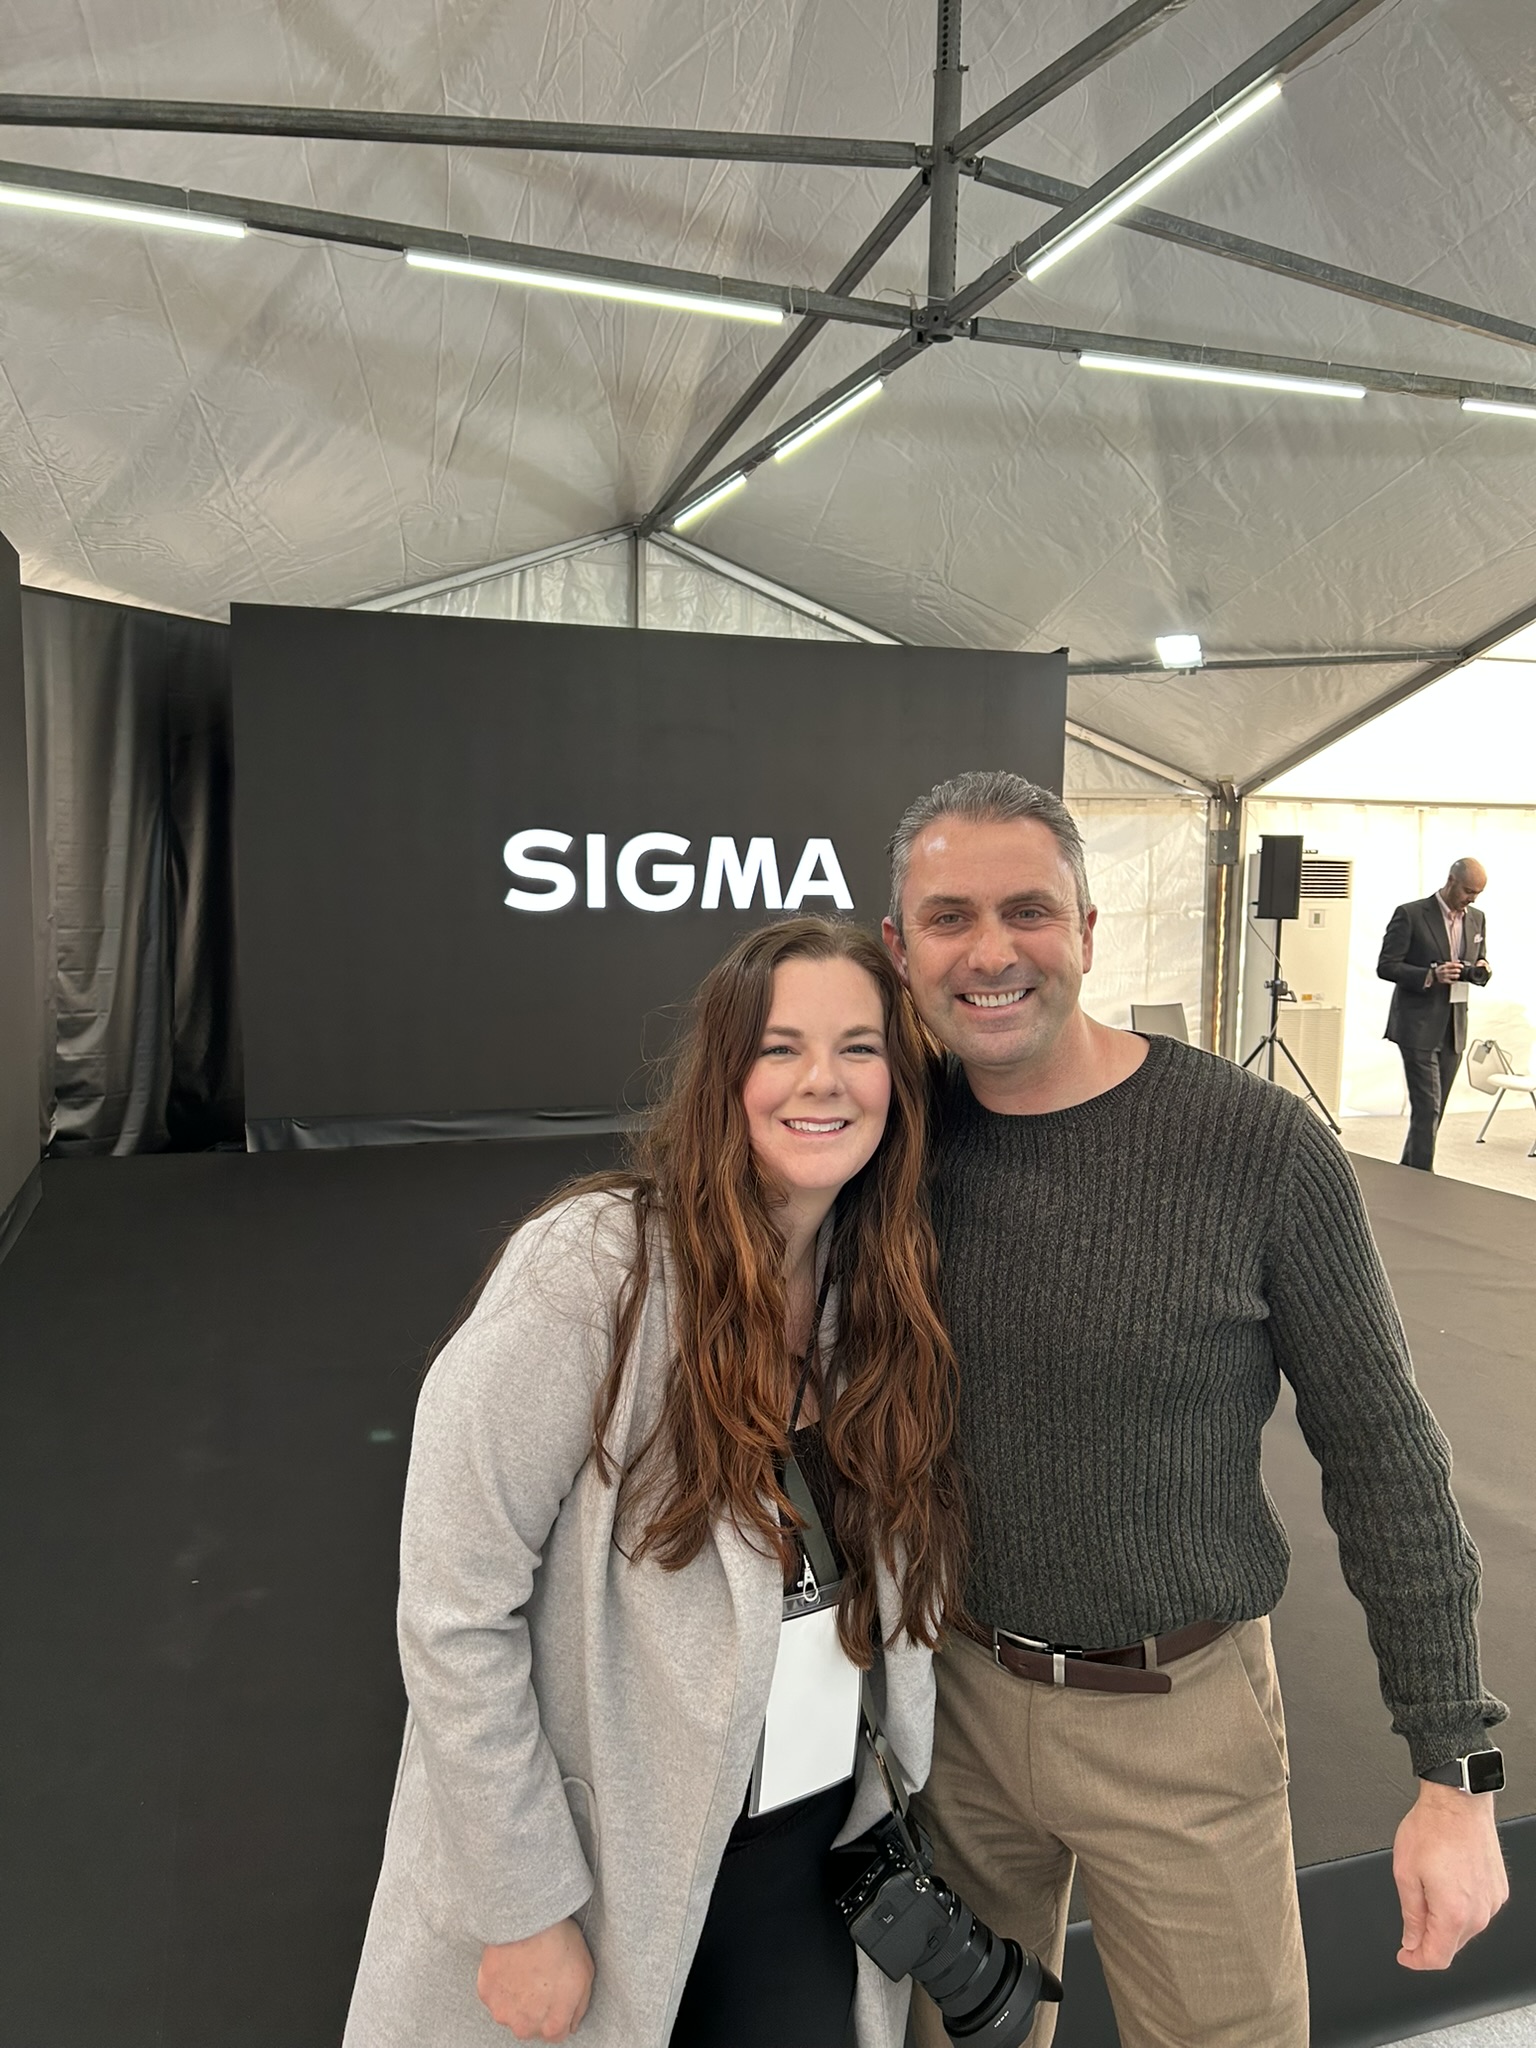
This is a very important review for me. Not because the Nikkor Z 135mm F1.8 S Plena is a new and hot review (it was actually released in October of 2023, several months before I started to do Nikon reviews and 18 months before this review), but because it represents a very important new connection for me. Since adding my Z8 in spring of 2024 I have been seeking partnerships to get a supply of Nikon loaners here in Canada, but I was largely unsuccessful in my first year. That meant that I have largely reviewed third party Z mount lenses (Tamron, Viltrox, etc…) but only a few first party Nikkor lenses. But on a trip to Japan I developed a friendship with Evelyn Drake of The Camera Store TV on YouTube (a truly lovely person!), and she connected me with Chris at Nikon Canada.
Chris was kind enough to get me a loaner of the Plena, and its my hope that my connection to him will enable me to do a more thorough job of covering Nikon products moving ahead. So far he has been great, so thank you to both Chris and Evelyn!
The Plena 135mm is one of Nikon’s top tier premium prime lenses, engineered to produce as beautiful of bokeh as possible. It’s a lens that I’ve been wanting to test for a while, as I’ve had an opportunity to review (and own) a lot of other premium 135mm lenses over the years and have been very interested in Nikon’s offering. There’s also the factor that Viltrox has now released their 135mm F1.8 LAB lens in Nikon Z mount, (my review here), so for the first time the Plena 135mm has some real competition. There’s no question the LAB is a great lens, but having spent time with the two lenses side by side, there are definitely some areas where the extra polish and sophistication of the Plena shine through. The big question, however, is whether or not that difference is worth a $1600 USD premium, as the Plena costs a whopping $2500. The answer, as usual, is complicated, and really depends on your set of priorities. We’ll explore all those details in either the video review, in the text review, or just enjoy the photos in the galleries below.
Thanks to Chris at Nikon Canada for sending me a review copy of this lens. As always, this is a completely independent review. All opinions and conclusions are my own.*The tests and most of the photos that I share as a part of my review cycle have been done with the 45MP Nikon Z8, which I reviewed here.You can find the product listing page for the Nikkor Z 135mm F1.8 S Plena here.
There are sharp lenses and there are lenses with beautifully soft rendering…that creamy bokeh that we all love. Lenses that have both qualities are very rare, as it takes masterful engineering to accomplish this. Nikon’s engineers prioritized the rendering in the Plena, working to engineer right out to the edges of the frame. They wanted round specular highlights across the frame, low vignette so that it wouldn’t interfere with that rendering, and as generally pleasing bokeh as possible. One of the first banners on the listing page says, “Beauty that reaches every corner.” It’s that attention to detail that sets the Plena 135mm apart…as I dive into in either the text or video reviews.
Keywords: Nikkor, Nikkor Z 135mm, Plena, F1.8, F1.8 S, Nikkor Z, Nikkor Z 135mm F1.8 S Plena review, Nikon 135mm, Nikon Z 135mm, Viltrox, LAB, Viltrox AF 135mm F1.8 LAB Z, Nikon, Nikon Z8, Z, Z-mount, Z8, Review, mirrorless, Full Frame, Sports, Tracking, Dustin Abbott, Real World, Comparison, Handling, Focus, Portraits, Resolution, High ISO, Image Quality, Sample Images, Photography, 45MP, #letthelightin, #DA, #NIKON, #Z8, #NIKONZ8
DISCLAIMER: This article and description contains affiliate links, which means that if you click on one of the product links, I’ll receive a small commission. As an Amazon Associate I earn from qualifying purchases.
This is a very important review for me. Not because the Nikkor Z 135mm F1.8 S Plena is a new and hot review (it was actually released in October of 2023, several months before I started to do Nikon reviews and 18 months before this review), but because it represents a very important new connection for me. Since adding my Z8 in spring of 2024 I have been seeking partnerships to get a supply of Nikon loaners here in Canada, but I was largely unsuccessful in my first year. That meant that I have largely reviewed third party Z mount lenses (Tamron, Viltrox, etc…) but only a few first party Nikkor lenses. But on a trip to Japan I developed a friendship with Evelyn Drake of The Camera Store TV on YouTube (a truly lovely person!), and she connected me with Chris at Nikon Canada.
Chris was kind enough to get me a loaner of the Plena, and its my hope that my connection to him will enable me to do a more thorough job of covering Nikon products moving ahead. So far he has been great, so thank you to both Chris and Evelyn!
The Plena 135mm is one of Nikon’s top tier premium prime lenses, engineered to produce as beautiful of bokeh as possible. It’s a lens that I’ve been wanting to test for a while, as I’ve had an opportunity to review (and own) a lot of other premium 135mm lenses over the years and have been very interested in Nikon’s offering. There’s also the factor that Viltrox has now released their 135mm F1.8 LAB lens in Nikon Z mount, (my review here), so for the first time the Plena 135mm has some real competition. There’s no question the LAB is a great lens, but having spent time with the two lenses side by side, there are definitely some areas where the extra polish and sophistication of the Plena shine through. The big question, however, is whether or not that difference is worth a $1600 USD premium, as the Plena costs a whopping $2500. The answer, as usual, is complicated, and really depends on your set of priorities. We’ll explore all those details in either the video review below or in this text review.
Thanks to Chris at Nikon Canada for sending me a review copy of this lens. As always, this is a completely independent review. All opinions and conclusions are my own.*The tests and most of the photos that I share as a part of my review cycle have been done with the 45MP Nikon Z8, which I reviewed here.You can find the product listing page for the Nikkor Z 135mm F1.8 S Plena here.
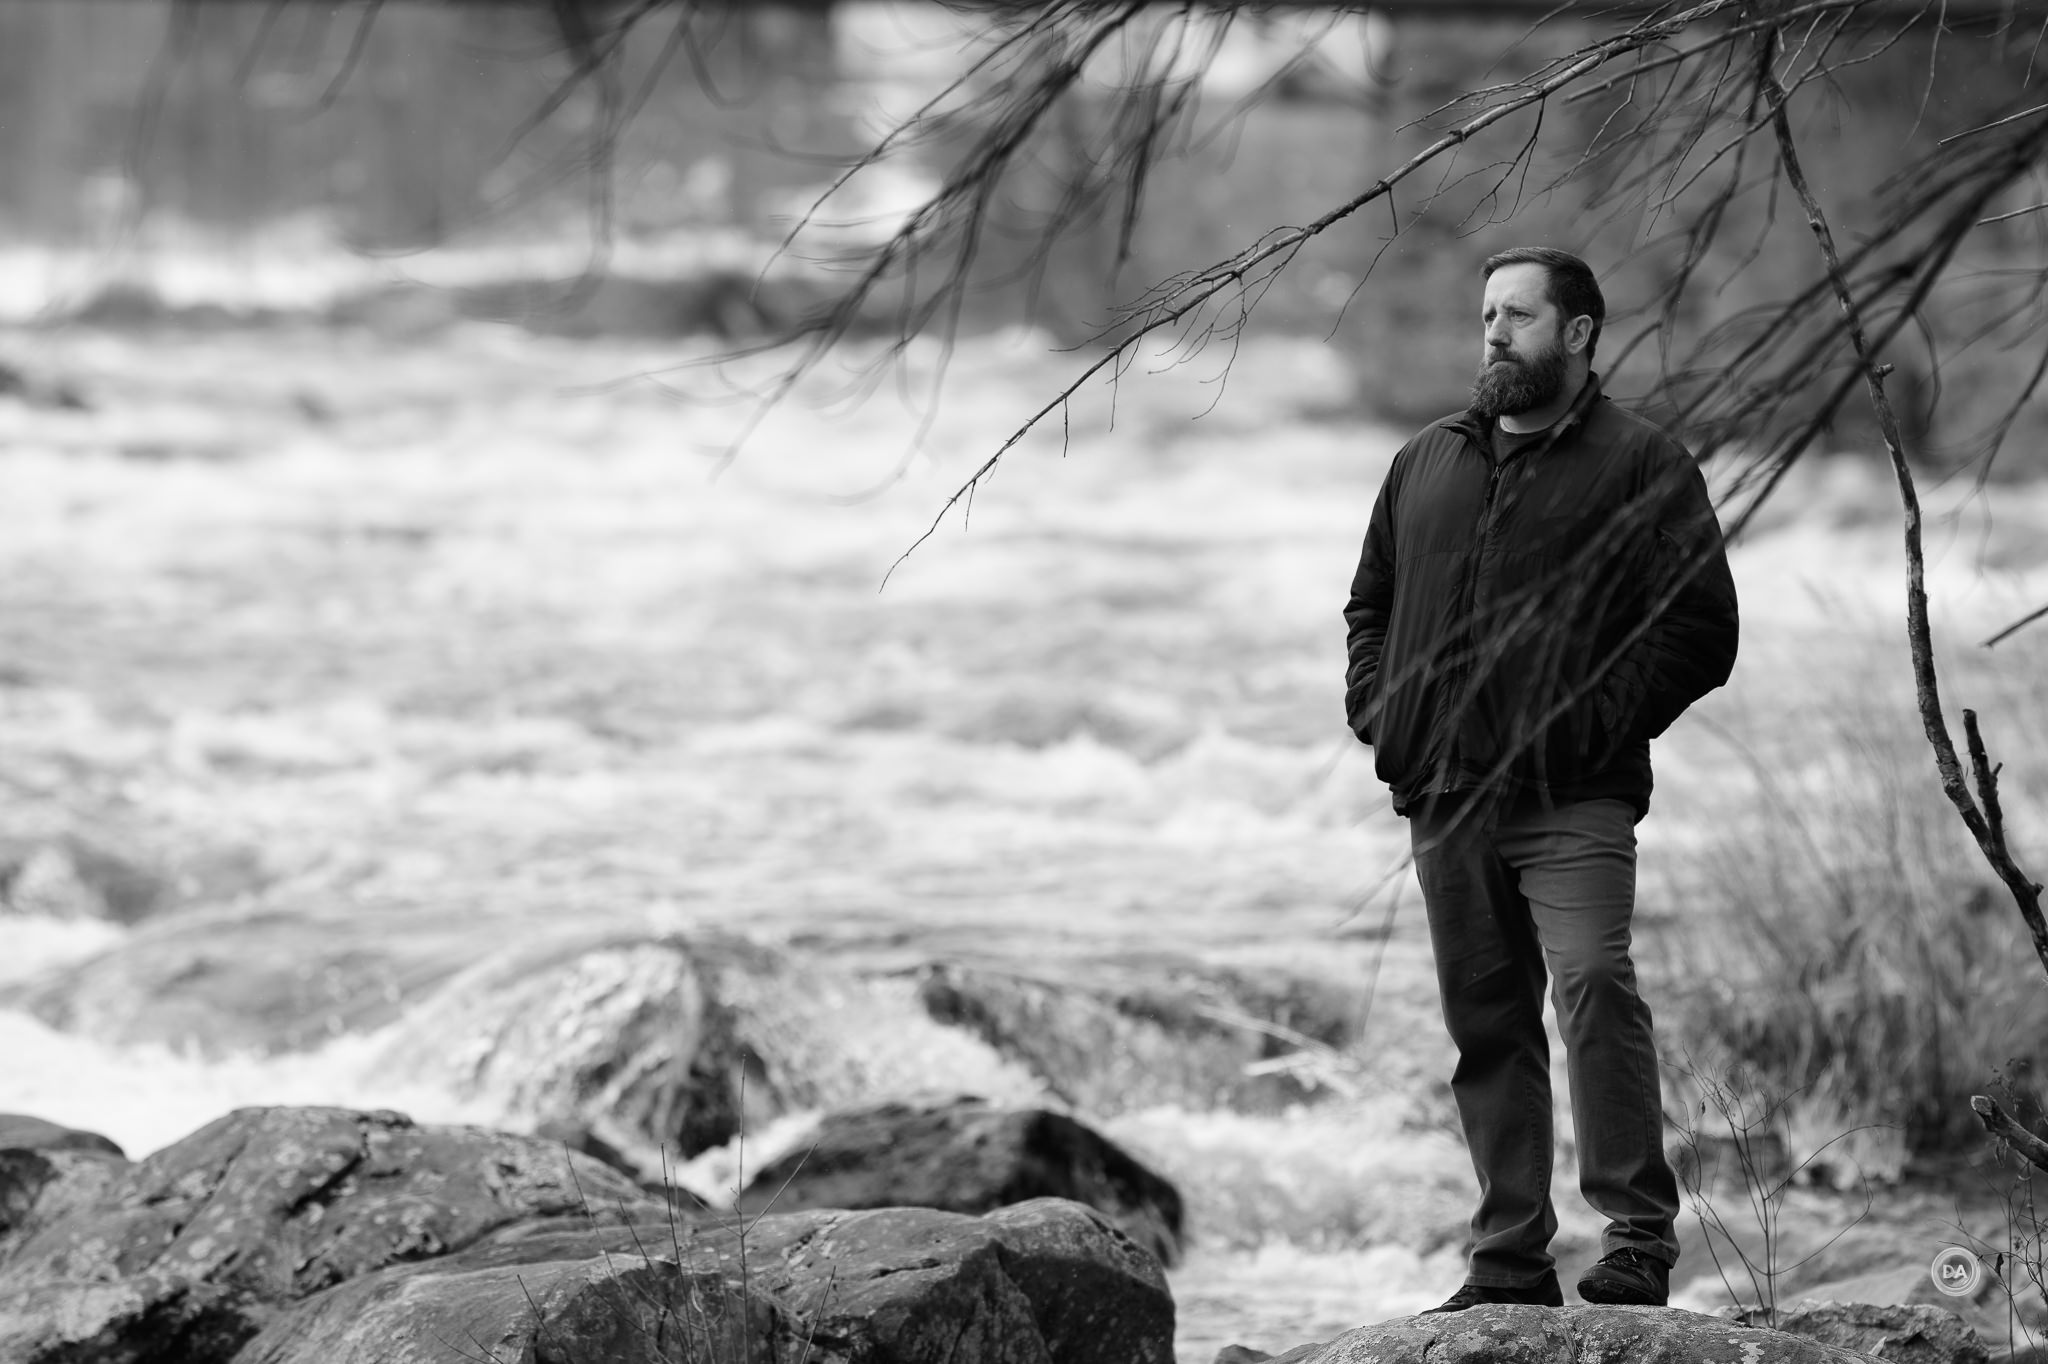
First, a word on 135mm lenses. There are few lenses that I like the look of images more from. To me images shot with a fast 135mm lens are a cut above those shot with an 85mm F1.4 (or even F1.2), but the challenge is that the additional 50mm in focal length makes for a less flexible tool. You need more room to operate, which means that a 135mm lens isn’t going to work in every room. I shot my first wedding using a Canon EF 135mm F2L lens rather than a 70-200mm type zoom, and I regretted it afterwards. There were several shots where the framing was unnatural because I didn’t have enough room to fit everything I wanted in the frame. But there’s no lens that I like more for environmental portraiture. The ability to have a full length portrait while still having beautiful separation of the subject from the background makes for incredibly special images.
There are sharp lenses and there are lenses with beautifully soft rendering…that creamy bokeh that we all love. Lenses that have both qualities are very rare, as it takes masterful engineering to accomplish this. Nikon’s engineers prioritized the rendering in the Plena, working to engineer right out to the edges of the frame. They wanted round specular highlights across the frame, low vignette so that it wouldn’t interfere with that rendering, and as generally pleasing bokeh as possible. One of the first banners on the listing page says, “Beauty that reaches every corner.” It’s that attention to detail that sets the Plena 135mm apart. This comparison hows that extra little something special when compared to the LAB, with rounder specular highlights right into the edges.
We’ll explore more of those little details in the review.
Nikkor Plena 135mm Build and Handling
Nikon’s lineup of Z-mount premium lenses – the S-Line lenses – is known for many things, but being small is not one of them. Nikon has taken the old Zeiss Otus philosophy where performance is by the greatest object and size and weight are not really significant considerations. I think they can get away with it, too, when they often have a Small | Medium | Large option at that given focal length. It’s true now of a 35mm, 50mm, and 85mm, where F1.8, F1.4, and F1.2 options all exist (though ironically the F1.4 options are often the smallest!). Obviously that’s not true of the 135mm focal length, where the Plena is the lone entry, but the Plena is definitely a part of the F1.2 crowd in design philosophy.
That being said, it’s not as if 135mm F1.8 lenses tend to be small and light in general, and while the Plena is a little wider in diameter than the Viltrox LAB option, it’s actually shorter and lighter.
The Plena is 98mm (3.9″) in diameter and 139.5mm (5.5″) in length. It weighs 995g (35oz). But the LAB 135Z manages to top that. It is 93mm in diameter (3.66″), a little narrower, but is a bit longer at 147.6mm (5.74″) in length. That’s not bigger (the Plena has an internal volume about 1% higher), but the Plena is actually lighter than the LAB. The Plena weighs 995g (35oz), which is heavy enough, but the LAB weighs a whopping 1268g (44.72oz), or about 270g more than the Plena. For that matter, the Plena is shorter and lighter than any of the S-Line F1.2 options. That’s right – the Plena is the lightweight option! It’s all about perspective.
What makes this a big, heavy lens is that there is a massive amount of glass inside right past those 82mm front filter threads.
The Plena is a premium lens with an excellent build. It has a tough outer shell of mostly metal alloys, and, internally, it has thorough weather sealing throughout.
There is a protective coating on the front and rear elements and then roughly 11 (by my count) internal seals at the rings, buttons, and switches. That allows you to have confidence when shooting in the elements.
I do have one gripe with modern 135mm lenses, and this criticism applies to all of them…not just the Plena. One of the things I appreciated about the old school Canon EF 135mm F2L (my first quality 135mm) was that it was fully compatible with teleconverters, allowing one to get a nice quality 190mm (ish) F2.8 lens with an F1.4x TC or even a 270mm F4 lens with a 2.0x. That just added to the versatility of the lens, but that seems to have be a forgotten element of modern 135mm design. Nikon instead touts that the rear element (located nearly flush with the mount, meaning that there is no physical room ever for a TC) is actually curved to allow for lower vignette.
At least this design has a specific purpose (more on that in the image quality section).
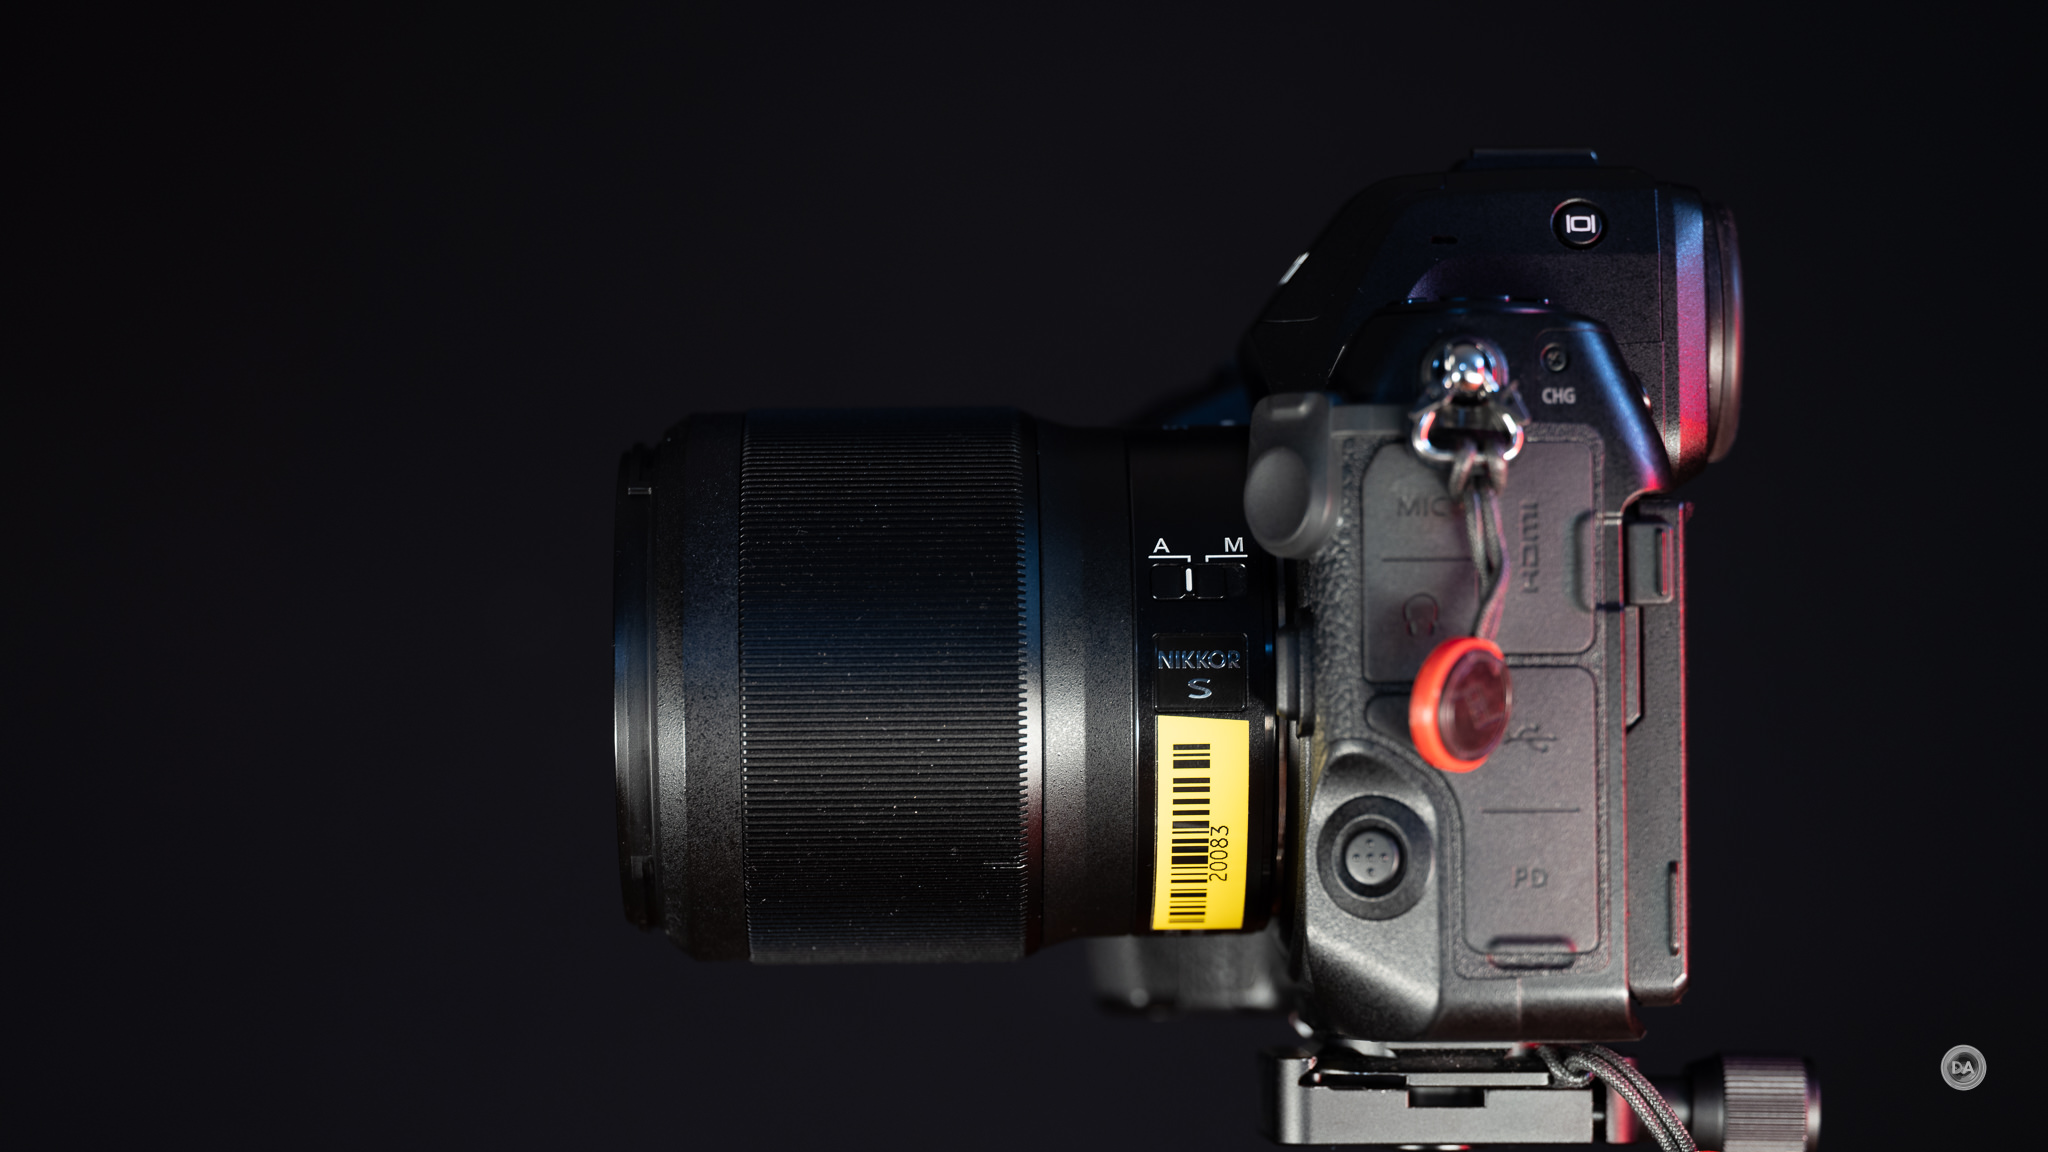
Nikon has a specific design ethos of the feature set of these upscale S-Line lenses, which includes a few more control points than the average lens. That starts very early on the lens with an AF | MF switch that is located very close to the lens mount.
Maybe too close to the lens mount, at least on certain cameras. On my Z8, there are two controls located way too close to this area. There is a flash sync port behind a rubber cover along with the camera release button. That means if I’m reaching around with my left thumb to operate the switch, I’m having to thread the needle through a couple of obstacles. Perhaps placing it on the same tier with the Fn buttons would have made more sense.
Next comes Nikon’s “clickless control ring”, which could serve as a manual aperture ring but could also function to control ISO, exposure compensation, or a few other functions – whatever you’ve set up the ring to do in the menus. Those controls can be found in the Custom Settings menu, then by selecting group F (Controls), and finally choosing custom setting F2 (Custom Controls Shooting) to change the function of the ring.
As an aside, I will note that I was able to do smooth aperture racks through the control ring without any visible steps. That wasn’t true of the LAB lens, where I could see visible steps even when I had the aperture ring in the declicked mode (at least on Z-mount).
The aperture iris has eleven rounded blades, and the aperture iris definitely does a nice job of keeping the specular highlights round. The screenshot above is somewhere around F5.6 or F6.3, and shows a very circular shape with very minimal evidence of the individual aperture blades.
Here’s what that aperture iris looks like from the inside.
I’m personally more a fan of a traditional manual aperture ring (with marked positions) as I think the function works better than using the control ring for aperture, where there is no natural visual representation of the current aperture. Unlike Sony (at least at the present), some of Nikon’s cameras have a top mounted LCD screen (including my Z8), which at least gives you some visual feedback on the current aperture. I can also appreciate that not everyone is a fan of manual aperture rings, and Nikkor’s approach allows that ring to be used for other purposes if so desired. Viltrox seems to have been taking a similar tack with their LAB lenses (and I’ve been complaining about it there, too!)
Many 135mm lenses employ a focus limiter switch, but Nikkor has skipped that on the Plena. The positive spin is that they clearly have confidence in the autofocus speed and don’t feel it is necessary.
In the middle of the lens there are two Fn buttons, one on the top and the other on the left side. These are redundant (both have the same function – whatever has been assigned to it in camera) but are in duplicate so that you have one easy to hand whether shooting in horizontal or vertical modes.
The manual focus ring is slightly raised and has a rubberized, ribbed texture. It moves very smoothly and has a nice amount of weight to it. I was able to pull off really smooth manual focus pulls and focus with very nice precision. I also love the fact that I can do full time manual overrides even when in AF-C mode.
You’ll note that there is a third rubberized section near the front of the lens, but that appears to just be a grip section and not a movable part. It’s a rather odd design choice, actually.
There is no lens based stabilization, so you will need to rely upon the in-camera stabilization if your camera is so equipped.
The lens hood is relatively deep and does have a small lock on the right side. The hood is made of plastics and feels fairly ordinary. Unlike the Viltrox, it doesn’t have a rubberized front edge. I would argue that a premium lens like the Plena deserves a nicer hood.
Minimum focus distance is 82cm, giving a maximum magnification figure of 1:5, or 0.20x. That falls a little behind the LAB lens, which can focus 10cm closer and gives a 0.25x magnification. The performance of the Plena up close is fantastic even at F1.8, with excellent sharpness and contrast and a nicely flat plane of focus.
That excellent detail and contrast holds up well with a three-dimensional subject as well at minimum focus distances.
This is one other area where being able to throw on a teleconverter would be nice, as you could significantly boost that magnification into more macro territory.
There is no VR (vibration reduction, or optical stabilization) built into the lens. That’s not a problem on a body like my Z8, which has good camera based stabilization, but could be a problem for those of you shooting on a camera without VR.
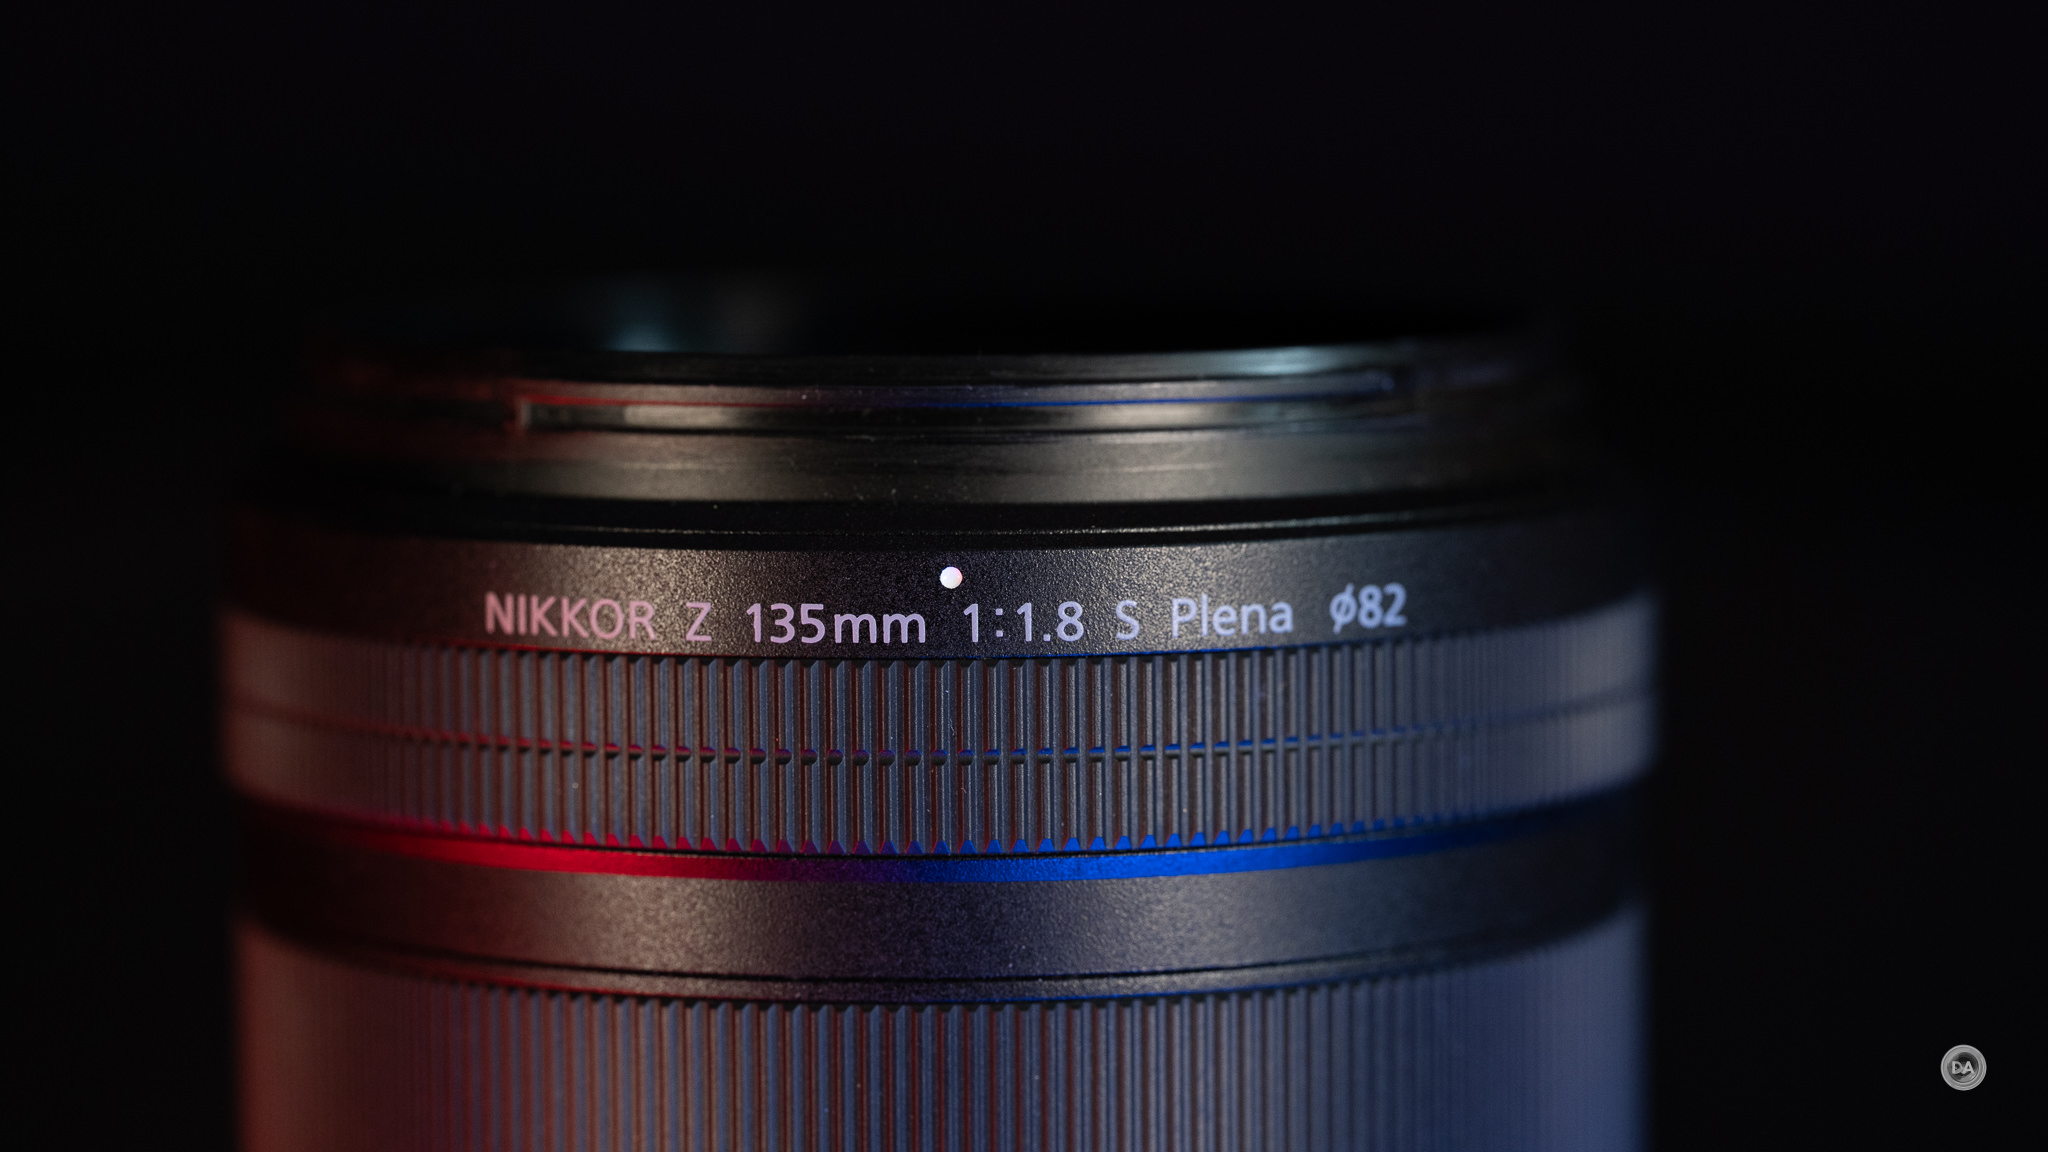
I have loved using the word “Plena” as my keyword in this review. I wish that all lensmakers would apply a designated name to their premium lenses, as it becomes an easy way to distinguish it from alternatives and gives the lens a touch of elegance. The word “Plena” comes from a Latin word that means “full” or “complete”, and the latter meaning seems most appropriate. The words in nicely etched into the barrel of the lens and becomes a visual focalpoint for the lens design.
This is a big, heavy, expensive lens, but it is also beautifully made and is a nice match for a beefier camera like my Z8. It does carry a premium price at roughly $2500 USD, but it is also a premium product.
Autofocus (Stills)
I was a little surprised to see that the Plena employed dual STM focus motors, as I tend to associate Linear or VCM style motors with the more premium options. But having used the lens for a variety of applications, I’ve got no real reservations about the AF performance. Focus is very nicely reactive, able to keep up with more difficult subjects that I regularly photograph, including a fastly scampering little Nala.
I’m not sure if you’re aware, but cats are not very cooperative subjects. Most often when they are sitting nicely you can guarantee that they will start moving the moment you go to pick up a camera. Nala was perched on a planter in the sunshine, so I went to grab my Z8 with the Plena mounted on it, delighted to get a shot with her in a nice position. She immediately ran to the end of the planter and jumped off. I snapped a picture in frustration anyway, knowing that it would be out of focus.
But it wasn’t.
Not only was it not out of focus, but it was perfectly focused, despite her A) being backlight B) being on the move and C) my having no opportunity to start tracking and reacting properly to her movement. Here’s what a 100% crop looks like.
Now we’re talking!
So, autofocus speed belied my expectations of an STM-equipped lens. Maybe the solution is having two of them!
In my formal tests I saw mostly good speed, but I also a pretty consistent quick rack in the wrong direction before a then quick journey to the right focus destination. The Plena doesn’t seem to love those forced racks between a close and distant subject. In real world shots, however, focus changes tend to be smaller and I didn’t really notice the same things.
Focus accuracy was generally excellent in my tests. You can shoot with precision even in situations with a tiny depth of field, like this:
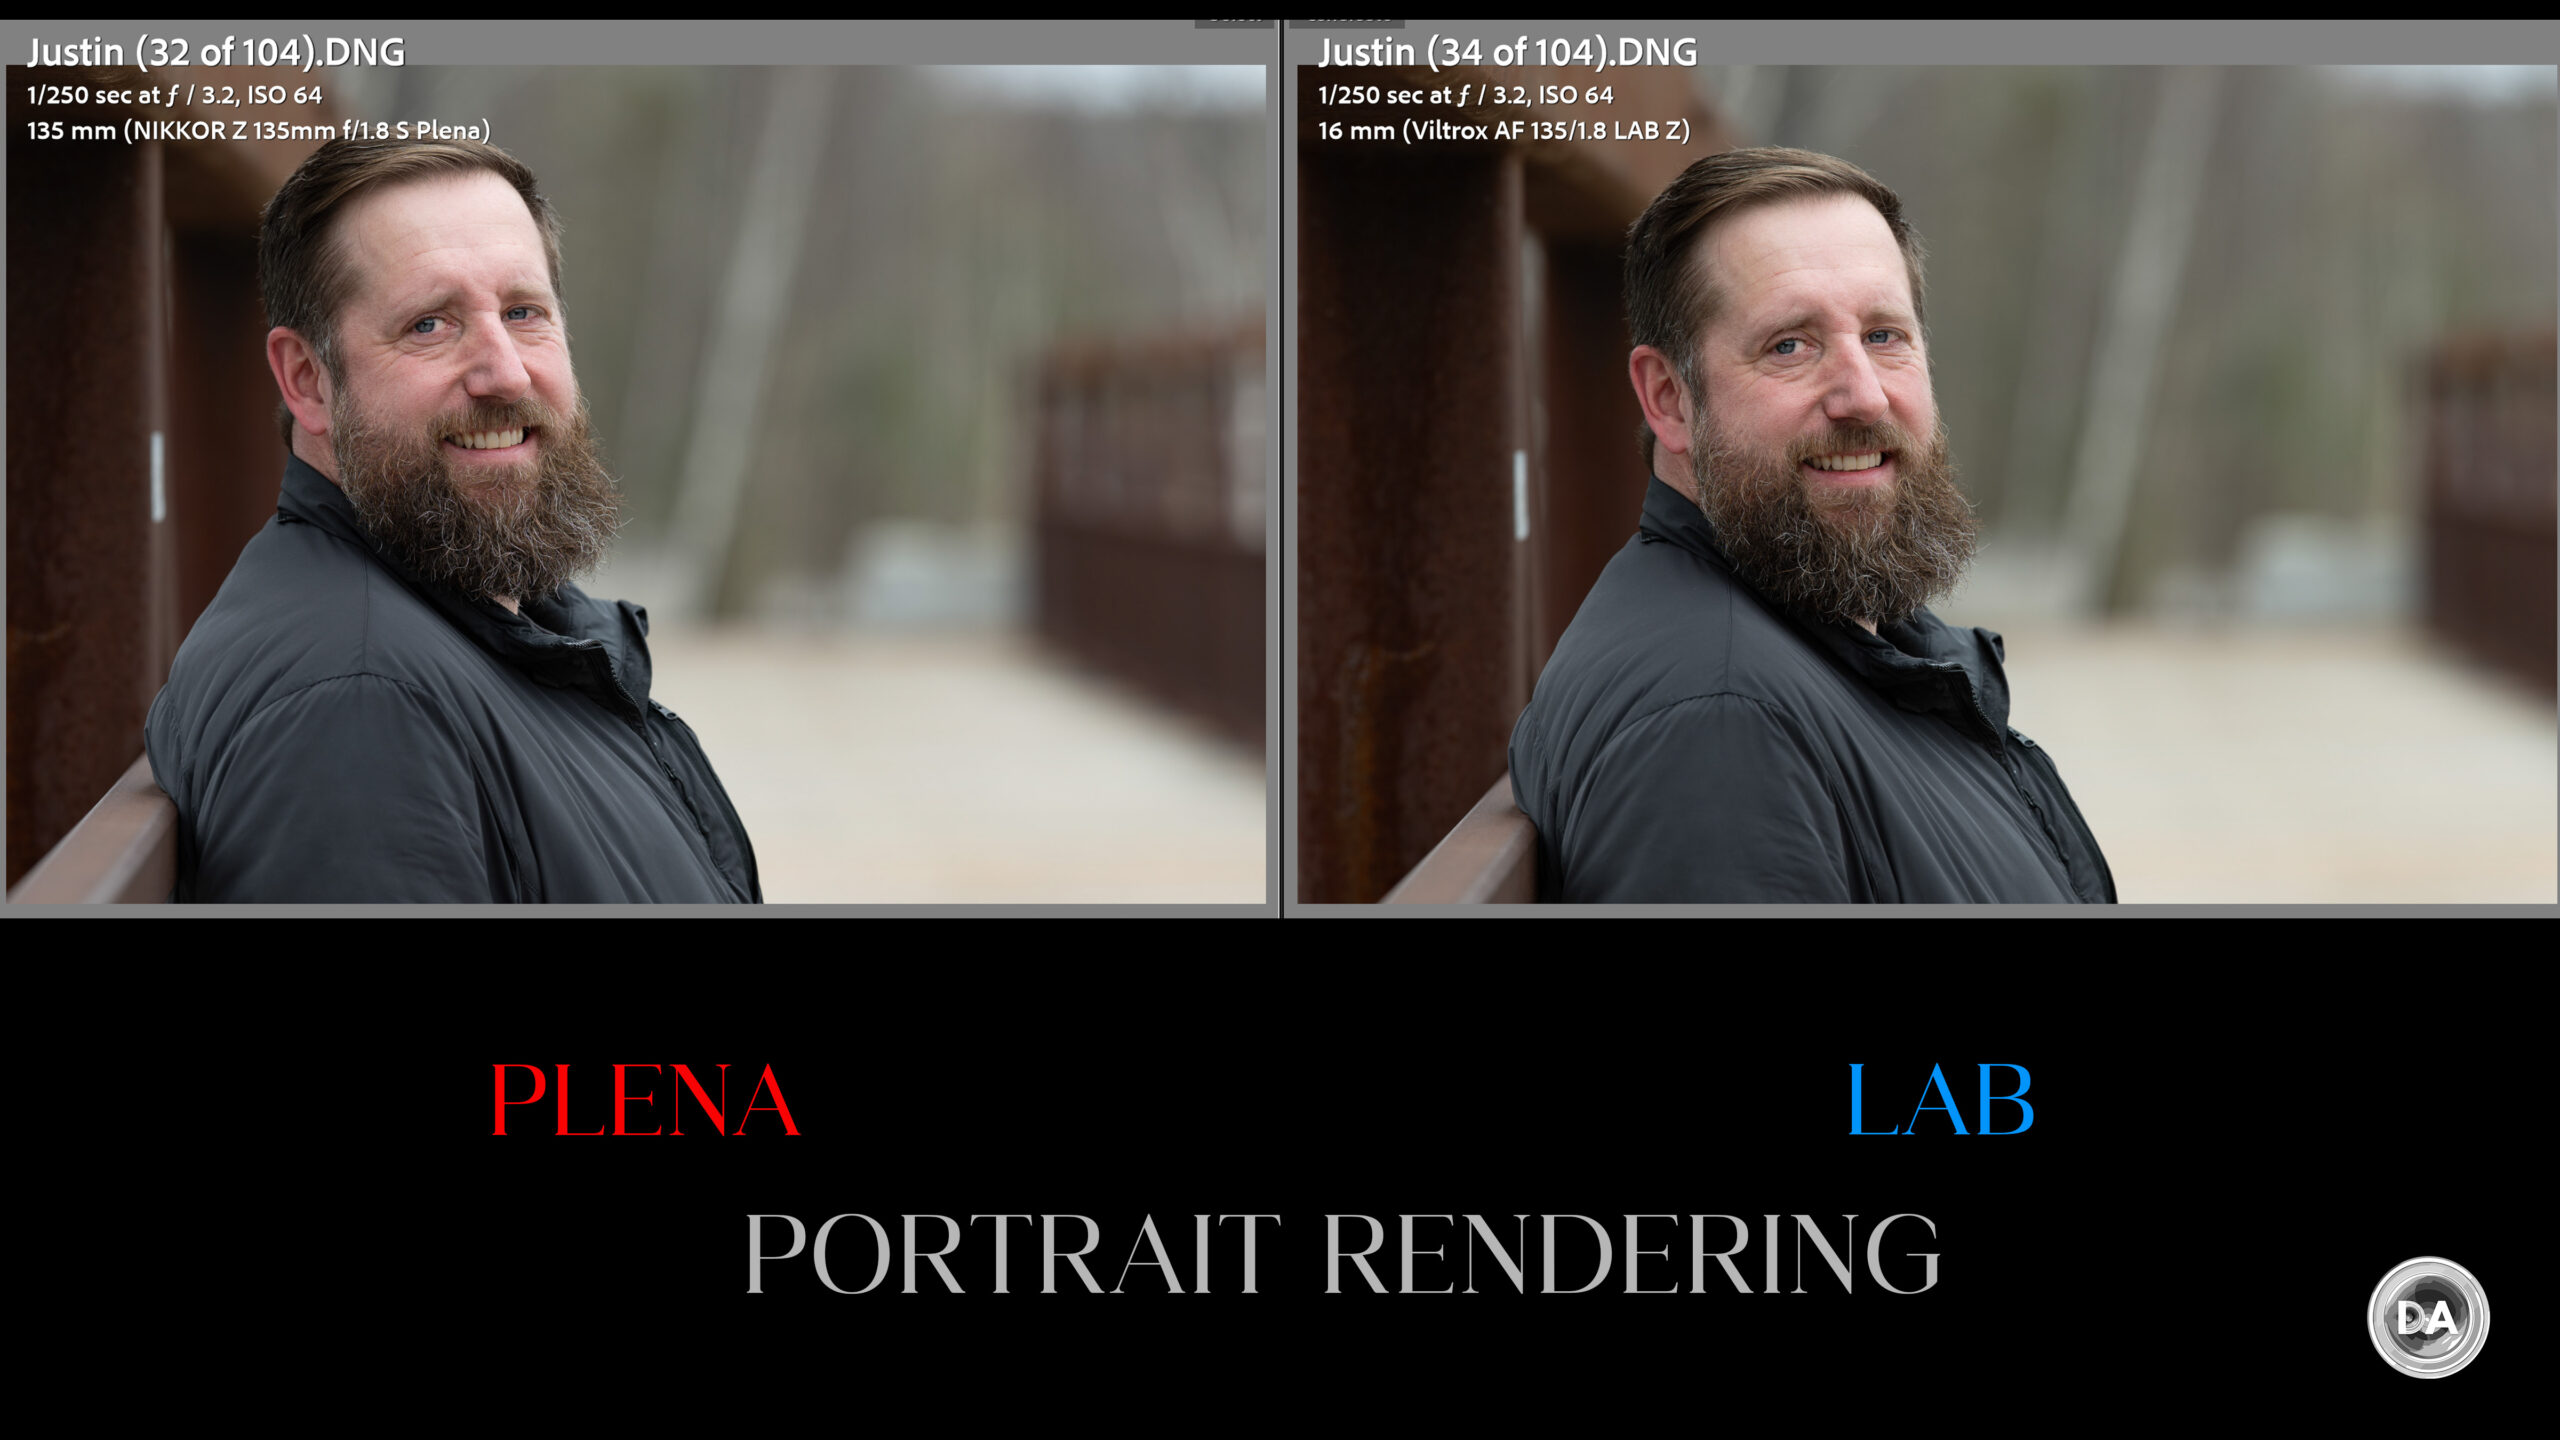
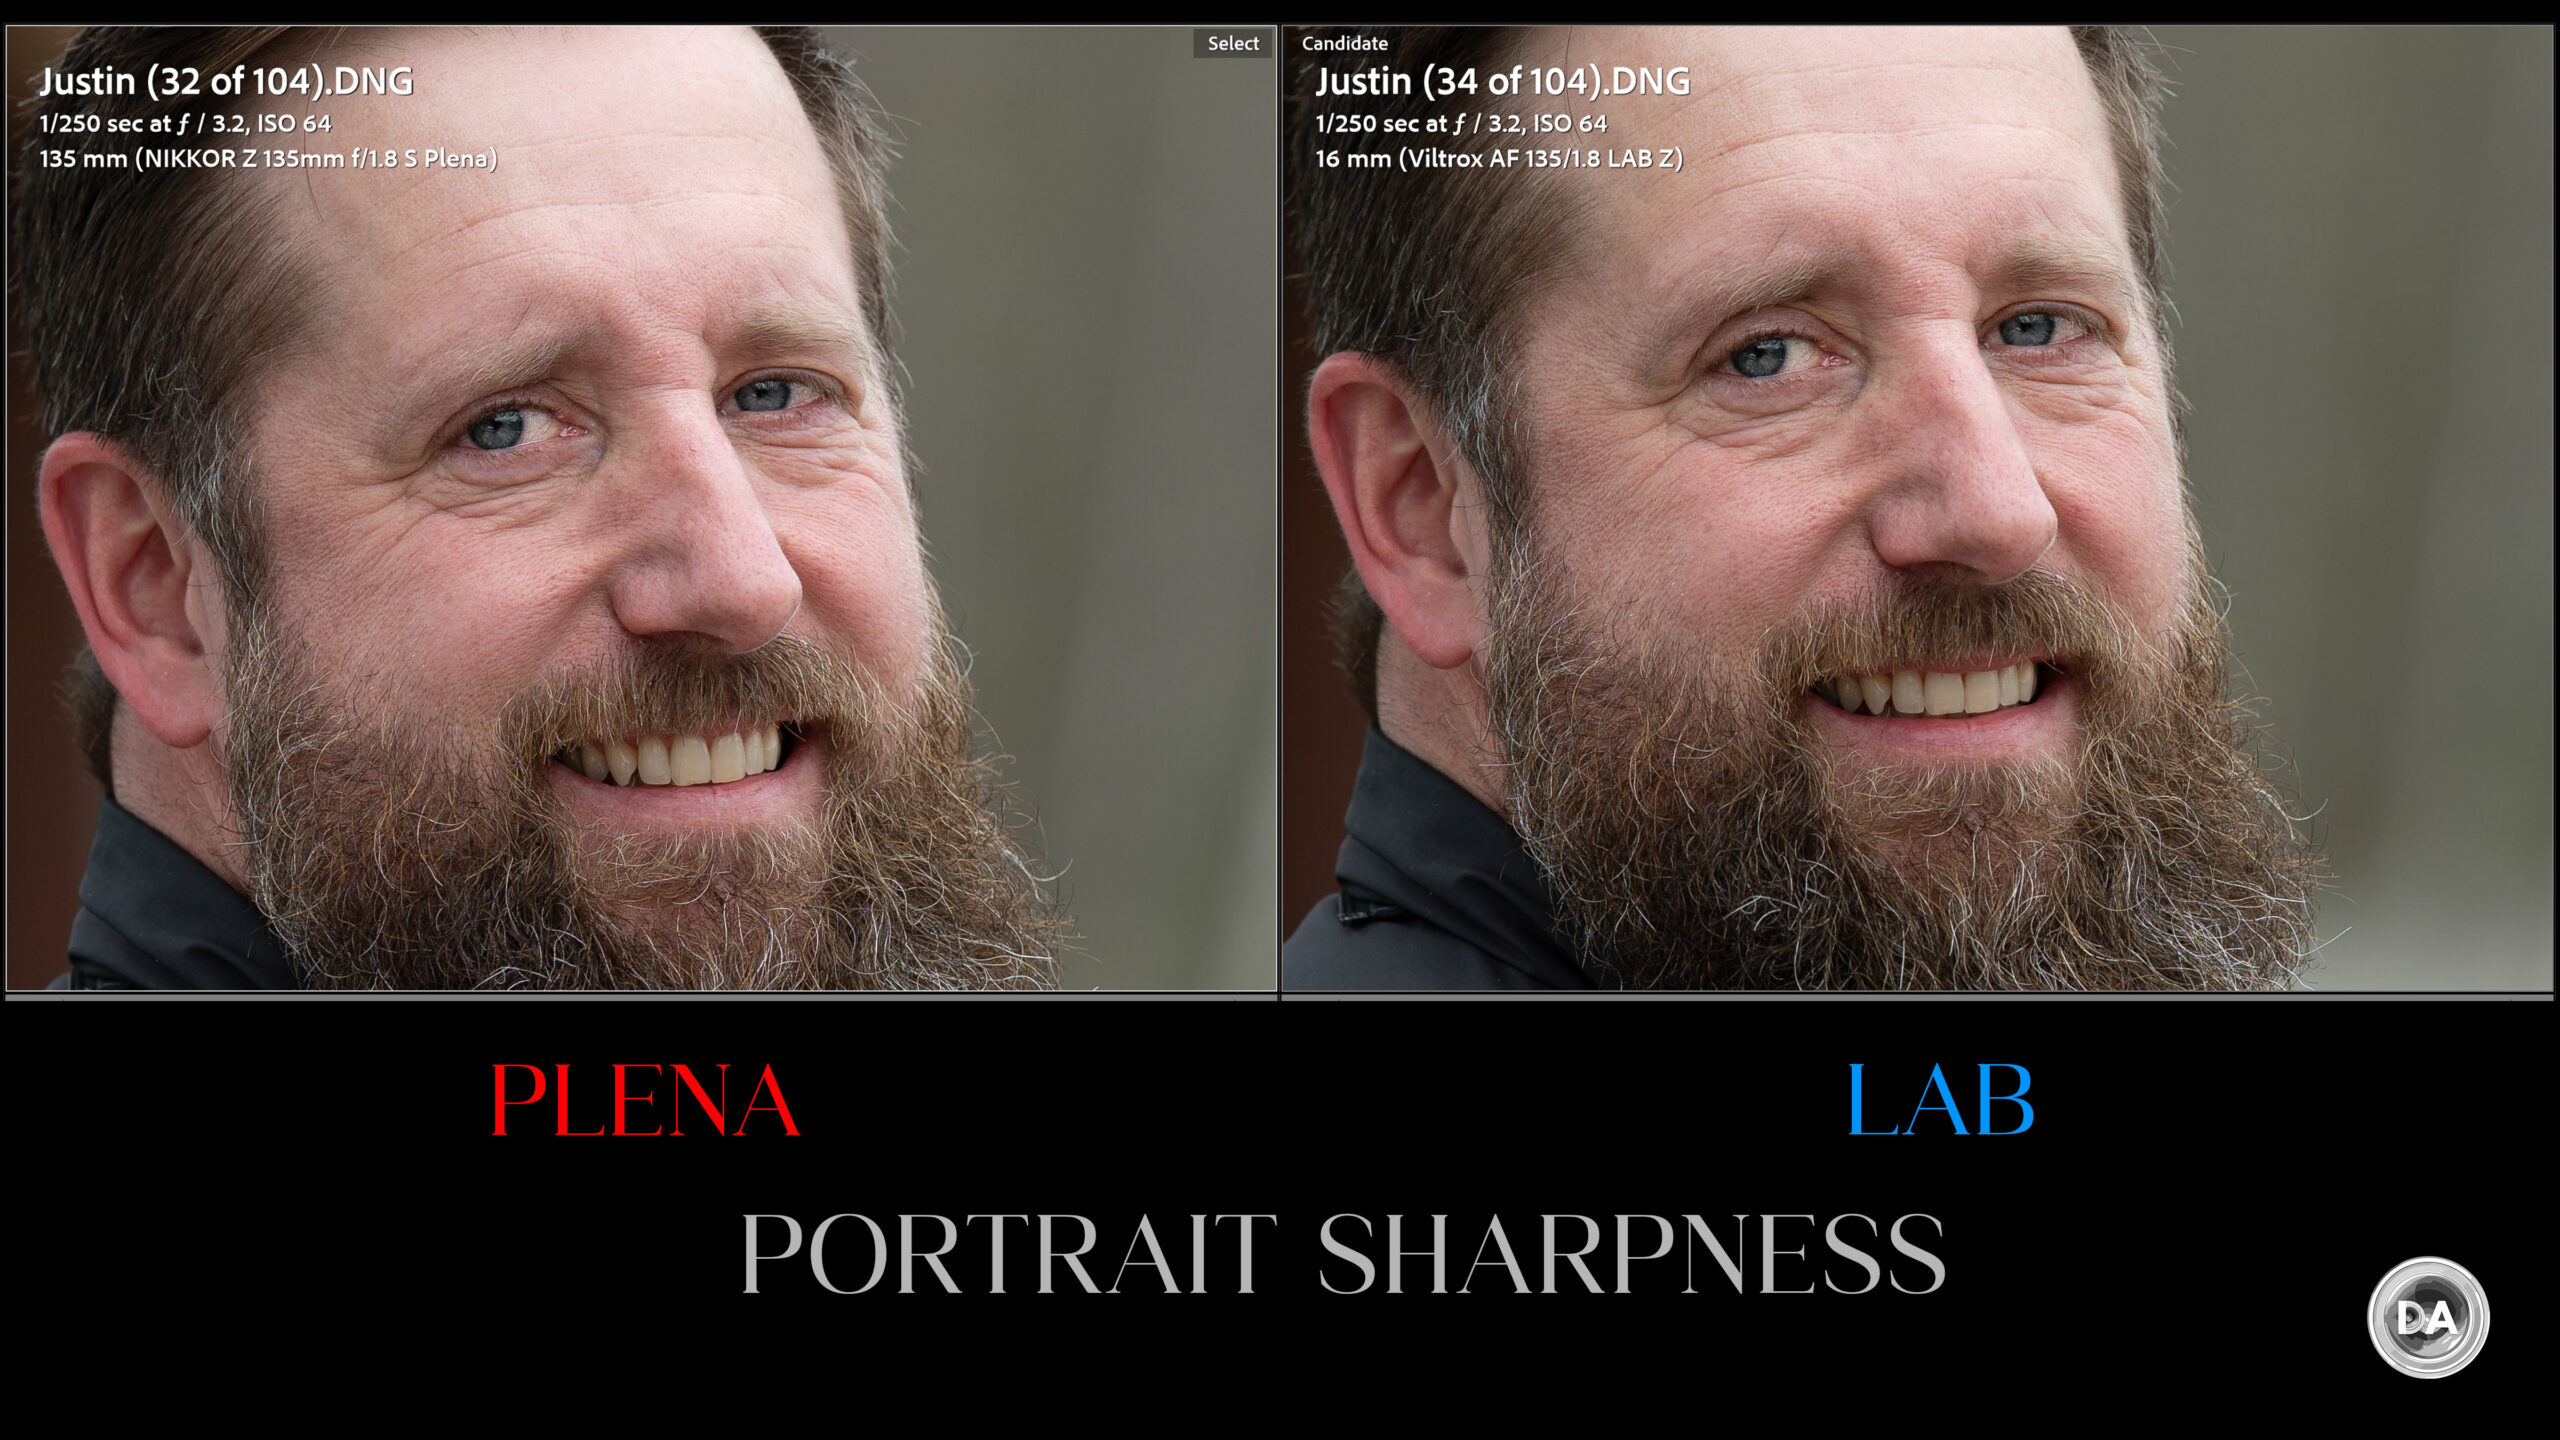
I did a portrait session with a friend (thanks, Justin!), and worked at a big range of focus distances – from a little over a meter to nearly 20 meters (4-55 feet). I switched between the Plena and the Viltrox LAB lens and had Justin hold poses so that I could get as scientific of results as possible. What I found as a general rule is that I had more consistent accuracy with the Plena than the Viltrox. That’s pretty much what you would expect, obviously, though I’m still waiting for the Viltrox to receive a firmware update that will hopefully improve the performance closer to what I saw on Sony FE.
I had very good focus results with the Plena whether working at close distances:
Medium distances:
…or further distances.
The only sequence that I saw some issues was in this one where some prominent branches sometimes confused the AF system.
Those of you who watched or read my initial review of the Viltrox LAB lens on Z-mount know that I had a similar problem there with snowflakes, so I think that Nikon’s Eye AF is just not quite as good at looking past obstacles as either Sony or Canon.
With a little persistence I got the result that I wanted here.
So autofocus for stills was generally very good. I wouldn’t put the Plena in the same class as a lens like the Sony FE 135mm F1.8 G Master, however, which utilizes dual XD Linear motors and has essentially flawless autofocus for both stills and video, but that’s not necessarily relevant on the Nikon platform.
Autofocus (Video)
Video autofocus was less impressive to me. Focus pulls felt a little rough, with plenty of little pulses, racks, and an end result that felt anything but cinematic. There’s a fairly strong amount of focus breathing as well (not unusual for a 135mm lens).
The focus breathing further detracts from the cinematic quality of video focus pulls. When I compared the LAB and Plena closely, however, it doesn’t seem like one is any better than the other.
Both also equally failed my hand test where I alternately block the view of the camera to my face with my hand and then remove it to test reactiveness. Neither lens decided to move from my face to my hand in any of the sequences.
Things were better when I approached the camera and stepped in and out of frame. They both did a pretty good job of moving focus on me when I approached in a linear fashion. With both lenses there was a pretty pronounced lag before focus snapped back into place on me if I stepped out of frame, however. I’d say the Plena was a couple of percentage points better, but neither was great.
The Plena did fine with static video shots where I just needed it to hold focus without pulsing or hunting. Overall video AF was probably the area where I was least impressed during my review, however.
Image Quality Breakdown
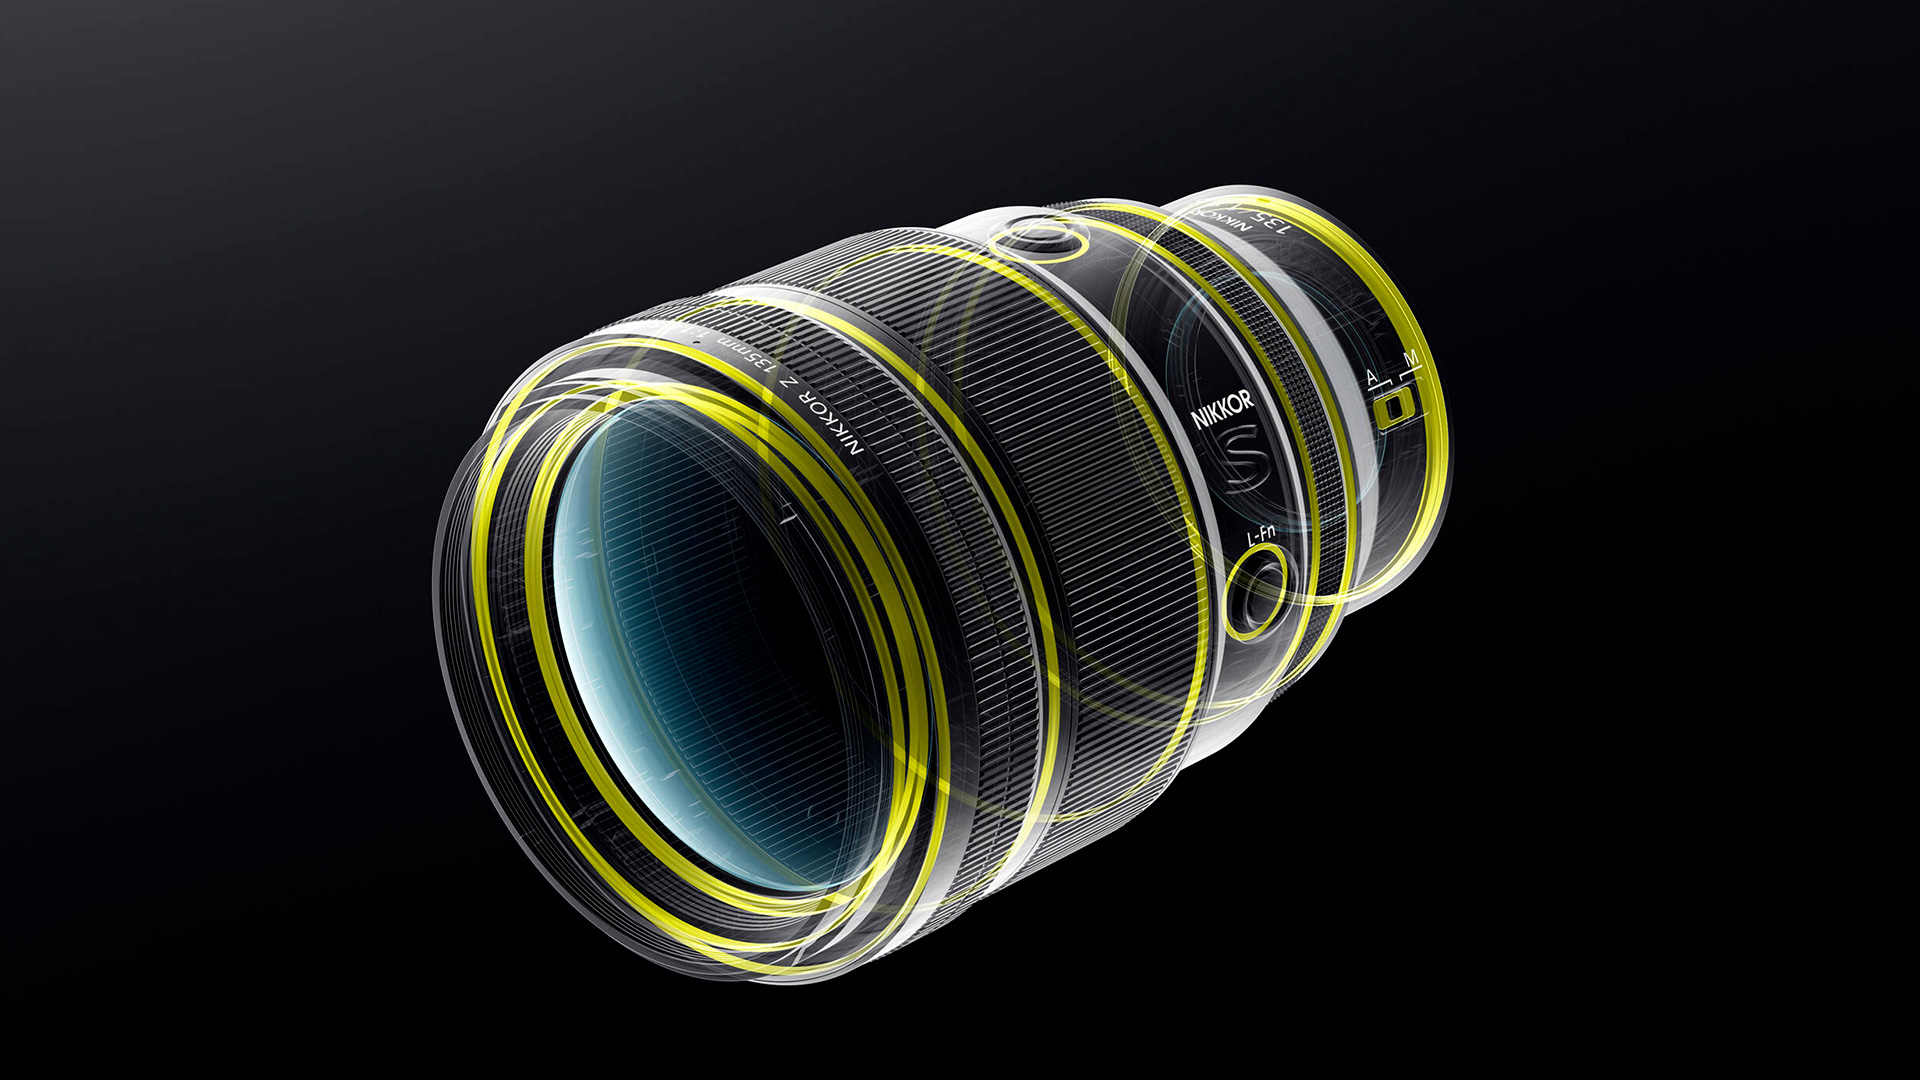
There’s rarely anything sharper than a good 135mm lens, and the Nikkor Z 135mm F1.8 S Plena is a sharp one. The optical design is 16 elements in 14 groups, and as you can see from the cutout below, six of those are exotic elements including Aspherical, ED (extra-low dispersion), and SR (short wave refractive) elements. The MTF shows a 90% mark across about half the frame and then a slow slide to the corners at F1.8.
On paper, the Viltrox LAB is the sharper lens.
But we’ll verify (or dispute) that for ourselves.
One of the big marketing points by Nikon is that the Plena has been designed with a unique rear element that is both larger and curved, allowed light to more evenly illuminate the whole image circle. And, when examining the my chart results, I found that the Plena showed very low vignette.
I used about a stop of correction here (+30), and even that is gone by F2.8. There’s a tiny bit of pincushion distortion that corrected easily with a -3.
That means that real world results at F1.8 even without correction are going to have an essentially invisible amount of vignette, like this (uncorrected result – no profiles or manual correction).
This was also the way that I found the LAB on Sony, but that’s just not the case on Z-mount. The Viltrox lens shows a lot of vignette on the larger diameter Z-mount.
For perspective, I needed +50 to correct the vignette on the Z-mount version of the LAB, or nearly twice as much. There is no distortion on the LAB lens.
I also saw very minimal amounts of LoCA (longitudinal chromatic aberrations), and that is the case here. I see mostly neutral results on either side of the plane of focus with only a tiny amount of fringing after the lane of focus.
This real world result shows no visible fringing before or after the plane of focus.
Brilliant.
LaCA (lateral chromatic aberrations) typically show up along the edges of the frame with high contrast transition points. I saw nothing but clean transitions on either side of the black and white transitions.
So far those are all really excellent results.
We’ll move on to inspecting our test chart. This test has been done on a 45MP Nikon Z8 sensor. I use a high end tripod and two second camera delay to ensure vibration doesn’t affect images. Here’s a look at the test chart that we will examine at high magnification:
If we take a look at crops (at 200%) at F1.8 from the center, mid-frame, and lower right corner, we find that center and mid-frame performance is exceptionally good, and that sharpness extends right to the corners.
If I compare my chart results with those I’ve done with the LAB, I find that I prefer the Plena in the center, the LAB in the mid-frame, and it is mostly a wash in the corners.
If I compared the two lenses for portraits, I had a hard time picking a winner. They both gave essentially equal amount of contrast and detail, and even skin tones look pretty similar. The LAB lens may give very slightly deeper levels of saturation, but they are very, very close.
If we step back and look at the image as a whole, there is again very little to distinguish between the two lenses.
One more interesting comparison is a full length F1.8 shot with a lot going on in the scene. I’ll let you spend the time trying to find the differences; they aren’t easy to spot.
Now, before you get too bent out of shape, know that Sony shooters have already dealt with the same angst, as, if anything, the Plena actually outperforms the Sony GM. The LAB lens is just shockingly sharp for the price.
Stopping the Plena down to F2 produces a slight contrast boost across the frame, but probably not enough that you would notice without them side by side and at high levels of magnification. That’s not true at F2.8, however, where the improvement is far more noticeable…particularly in the corners, which are now razer sharp.
If we jump back to a real world result, we will find that sharpness and contrast are just gorgeous…as is the general rendering from the lens. As mentioned in the intro, this is one of those rare lenses that has both gorgeous defocused rendering and razer sharp detail/contrast.
Look at the amount of detail in Justin’s beard and mustache.
After F2.8, it is hard to tell much of a difference through F8. It’s just amazingly good all throughout. Landscape images are going to be pretty flawless.
Physics will affect even the mightiest of lenses, however, so expect diffraction to start to soften the image by F11 and more obviously by F16, which is minimum aperture (though this lens is still sharper than many lenses at its weakest!)
But the Plena isn’t all about sharpness. Bokeh is at the heart of its design. It is very easy to get extremely pleasing backgrounds with very creamy defocus and great colors.
You also get great subject separation, with an excellent level of 3D subject isolation.
I brought along a vintage hatchet to the photo shoot with Justin, not really knowing how I’d use it but grabbed it on a whim. It turned out that the area we went to had just had some clearing along the path, and the heavy machinery had just chewed everything into splinters. I knew exactly how the hatchet would work, and got Justin in the midst of the carnage as if he’d done it all with the hatchet. See the amazing cutout effect effect that you can achieve even at a distance?
I was using natural light for these shots, but if I had used strobes, it would have seemed essentially like I had “Photoshopped” him into the scene as strobes will often just intensify the cutout effect.
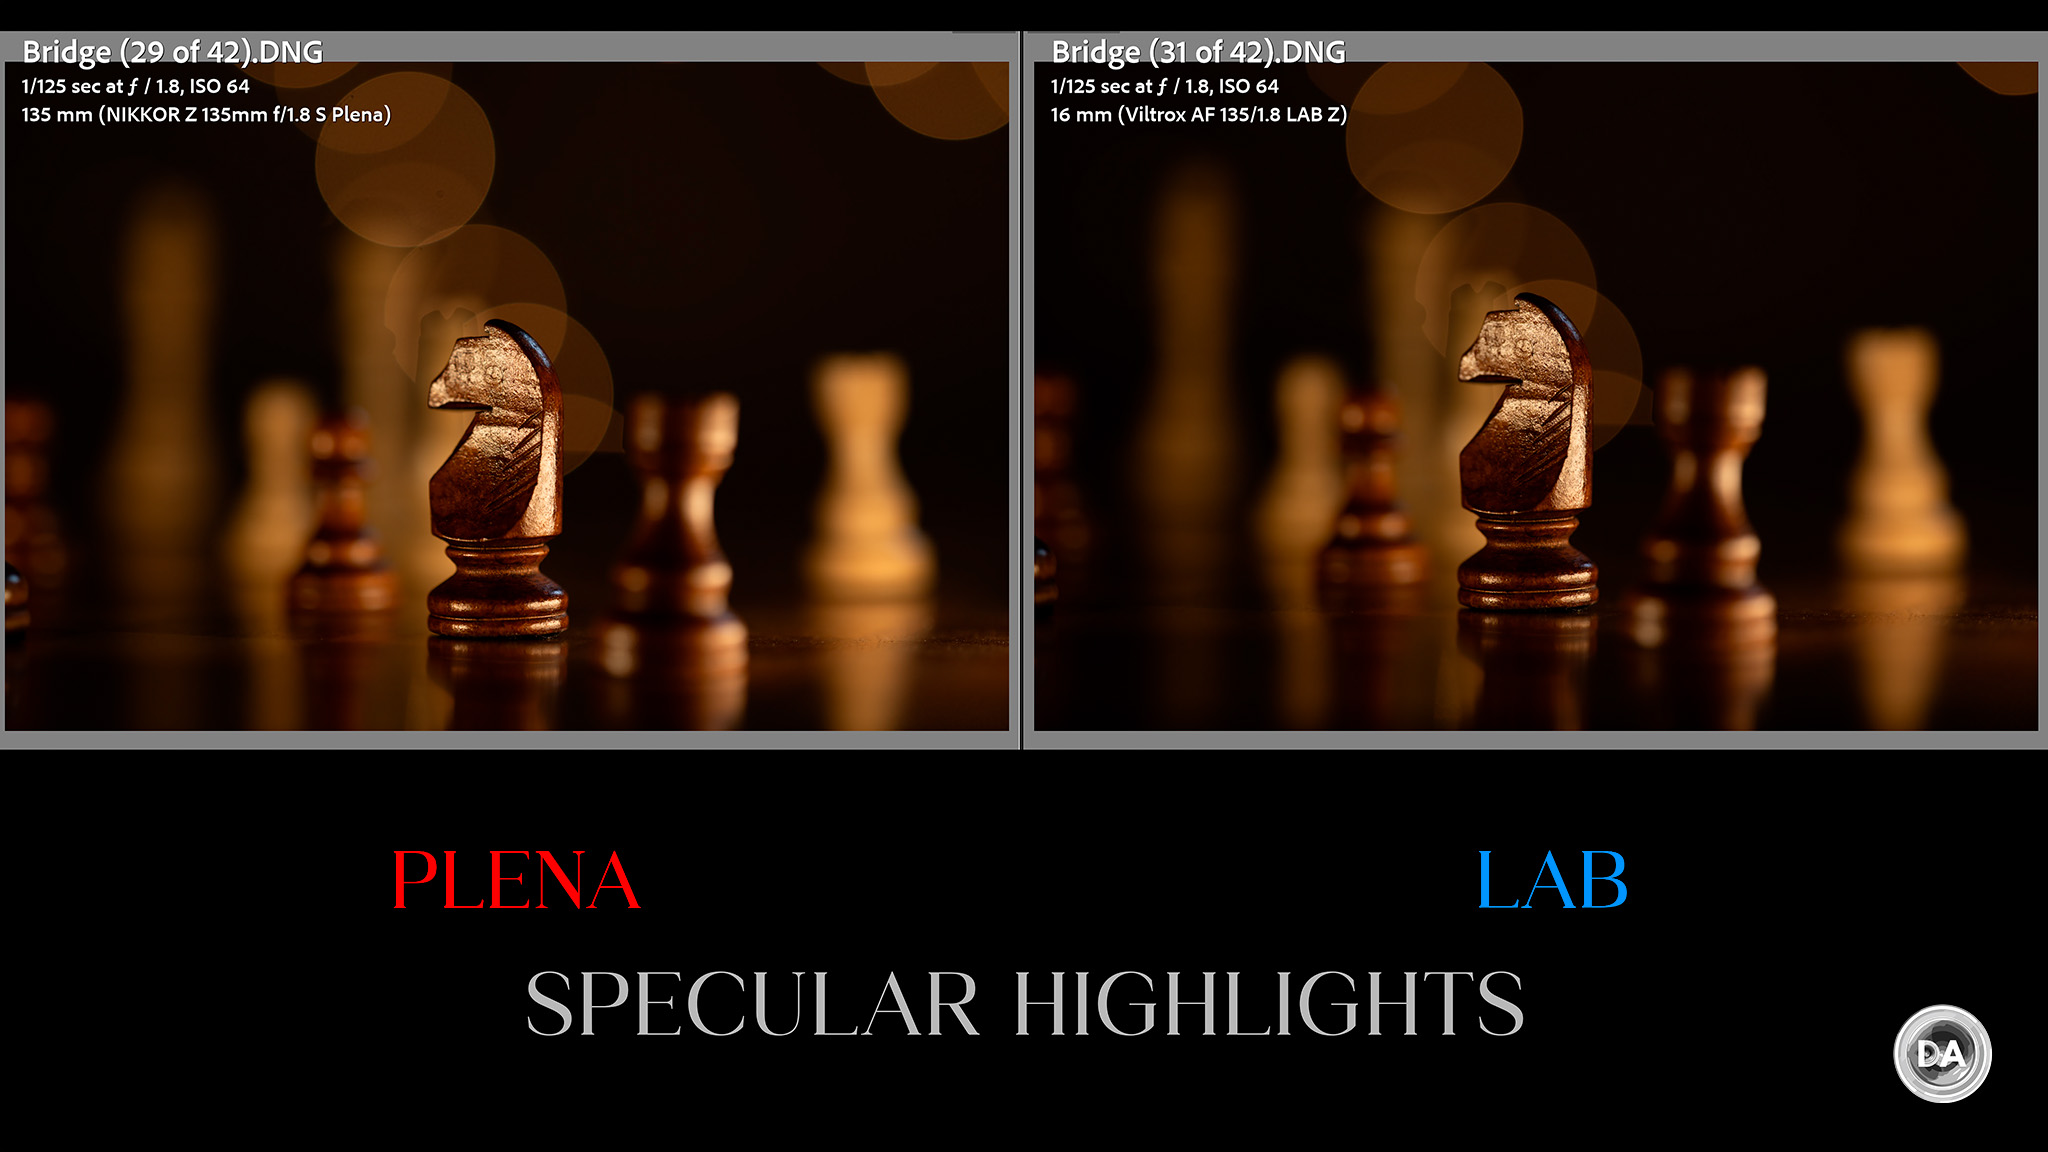
Part of that rear element design was not just about vignette, but also about being able to evenly distribute light for the sake of specular highlights. And there is no question that the Plena is the best 135mm lens that I’ve used for keeping circular specular shapes (bokeh balls) right into the corners even at F1.8.
The bokeh rendering is fantastic from the 135mm Plena.
I only have one optical complaint, and it is more of a general Nikon complaint. I find magentas a little too strong, so I find that in Caucasian skin tones that I often feel that I need to take some of the red/magenta out of people’s faces.
Darker skin tones look more natural to me.
Cat fur tones are also excellent, and I just love the amount of sharpness and contrast I get from the Plena.
Flare resistance was also very strong on the Plena. I didn’t see any lost of contrast in real world shots, and here you can see with the sun in the variety of positions and with a variety of apertures (from F1.8 to F11) that there is never really any veiling, either. The various coatings by Nikkor (Meso Amorphous Coat and ARNEO Coat) are doing a fantastic job.
The Plena thrives in all tested metrics. This is one the good ones.
The bottom line is that this is one the most complete lenses that I’ve tested optically, with strong performances in basically every optical category. If you’d like to see more images in my extensive image gallery, just click here.
Conclusion
Nikon’s premium S-Line lenses represent the pinnacle of their Z-mount engineering, and the Nikkor Z 135mm F1.8 S Plena is one of the best. It has it all going optically – great sharpness, great bokeh, and no real aberrations or flaws.
The only fly in the ointment is the new Viltrox AF 135mm F1.8 LAB Z, as it shares a lot of those optical strengths and comes at a much lower price tag. But as I used the two lenses side by side, I could see the many little ways where the Plena proved its superiority. It just works better, whether it was doing aperture racks, getting better consistency when doing portraits, or even manually focusing.
The Plena is still the premium option, however, with an amazing performance all around. It produces the kinds of images that you can only associate with professional photography, and you won’t ever have to worry about someone’s phone producing images that look like your 2 kilo combination of Z8/Z9 and the Plena. If you are a portrait photographer (particularly if you do environmental portraits) and you want a lens that can reliably produce images that you’ll love, then check out the Plena. It’s a treat.
Keywords: Nikkor, Nikkor Z 135mm, Plena, F1.8, F1.8 S, Nikkor Z, Nikkor Z 135mm F1.8 S Plena review, Nikon 135mm, Nikon Z 135mm, Viltrox, LAB, Viltrox AF 135mm F1.8 LAB Z, Nikon, Nikon Z8, Z, Z-mount, Z8, Review, mirrorless, Full Frame, Sports, Tracking, Dustin Abbott, Real World, Comparison, Handling, Focus, Portraits, Resolution, High ISO, Image Quality, Sample Images, Photography, 45MP, #letthelightin, #DA, #NIKON, #Z8, #NIKONZ8
DISCLAIMER: This article and description contains affiliate links, which means that if you click on one of the product links, I’ll receive a small commission. As an Amazon Associate I earn from qualifying purchases.
Fujifilm scored a huge hit with their X-100VI and its retro-cool design and fixed lens. But there are plenty of people who like the vibe but want the ability to use more than one lens. Enter the new Fujifilm X-M5, which has a similar cool vibe but uses Fuji’s ubiquitous X-mount that can host probably more than a hundred different lenses from a variety of brands at this point. It utilizes Fuji’s 26MP X-Trans sensors, has their most recent focus algorithms, and also boasts a deeper video component than many competitors. So is this new Fujifilm X-M5 worth considering over the competition? Find out by watching my video review below…or keep reading.
Thanks to Fujifilm Canada for sending me a review loaner of this camera. As always, this is a completely independent review, and the thoughts and opinions expressed here are my own.
So what are the major competitors to this camera? The closest competitor that springs to mind is the similarly vlog-focused Sony ZV-E10II that I reviewed in 2024. That camera costs more (+ $200), has slightly lower video specs, but also has a more robust autofocus system.
There’s also the Canon EOS R10, Nikon Z50II, and even the long in the tooth Sony a6400 might be worth considering, as while it is five years old now, its AF system still beats what Fuji can deliver. Autofocus is improved on the X-M5 over previous models, but unfortunately this does remain the Achilles heel for Fuji products. But Fuji brings its own strengths, including more stylish design, its famous film simulations, and up to 6K30 video recording specs.
If you are looking for a stylish vlogging camera, want to travel light, or generally want to keep things as compact as possible without compromising on imaging, the X-M5 might just be the camera for you. And, at $799 USD for the camera alone or just $899 for a kit including the XC 15-45mm f/3.5-5.6 Lens, the Fujifilm X-M5 offers a very compelling value.
I’ve got a few complaints that I’ll detail as well, but there’s a lot to praise here…so let’s dive in.
Spec List
26.1MP APS-C X-Trans 4 CMOS Sensor
Latest AI-Assisted Processing Algorithms
6.2K/29.97 fps Video, 10-Bit Internal
425-Point AF, AI-Based Subject Detection
Up to 30 fps JPEG Shooting w/ 1.25x Crop
Compatible with X-Series Lenses
3.0″ 1.04m-Dot Tilting Touchscreen LCD
SD/SDHC/SDXC Card Slot
Wi-Fi and Bluetooth Wireless Connections
*XC 15-45mm f/3.5-5.6 OIS PZ Lens (if purchased in kit)
Some of the biggest omissions to the feature list include a viewfinder of any kind along with having no camera-based stabilization.
Build and Features
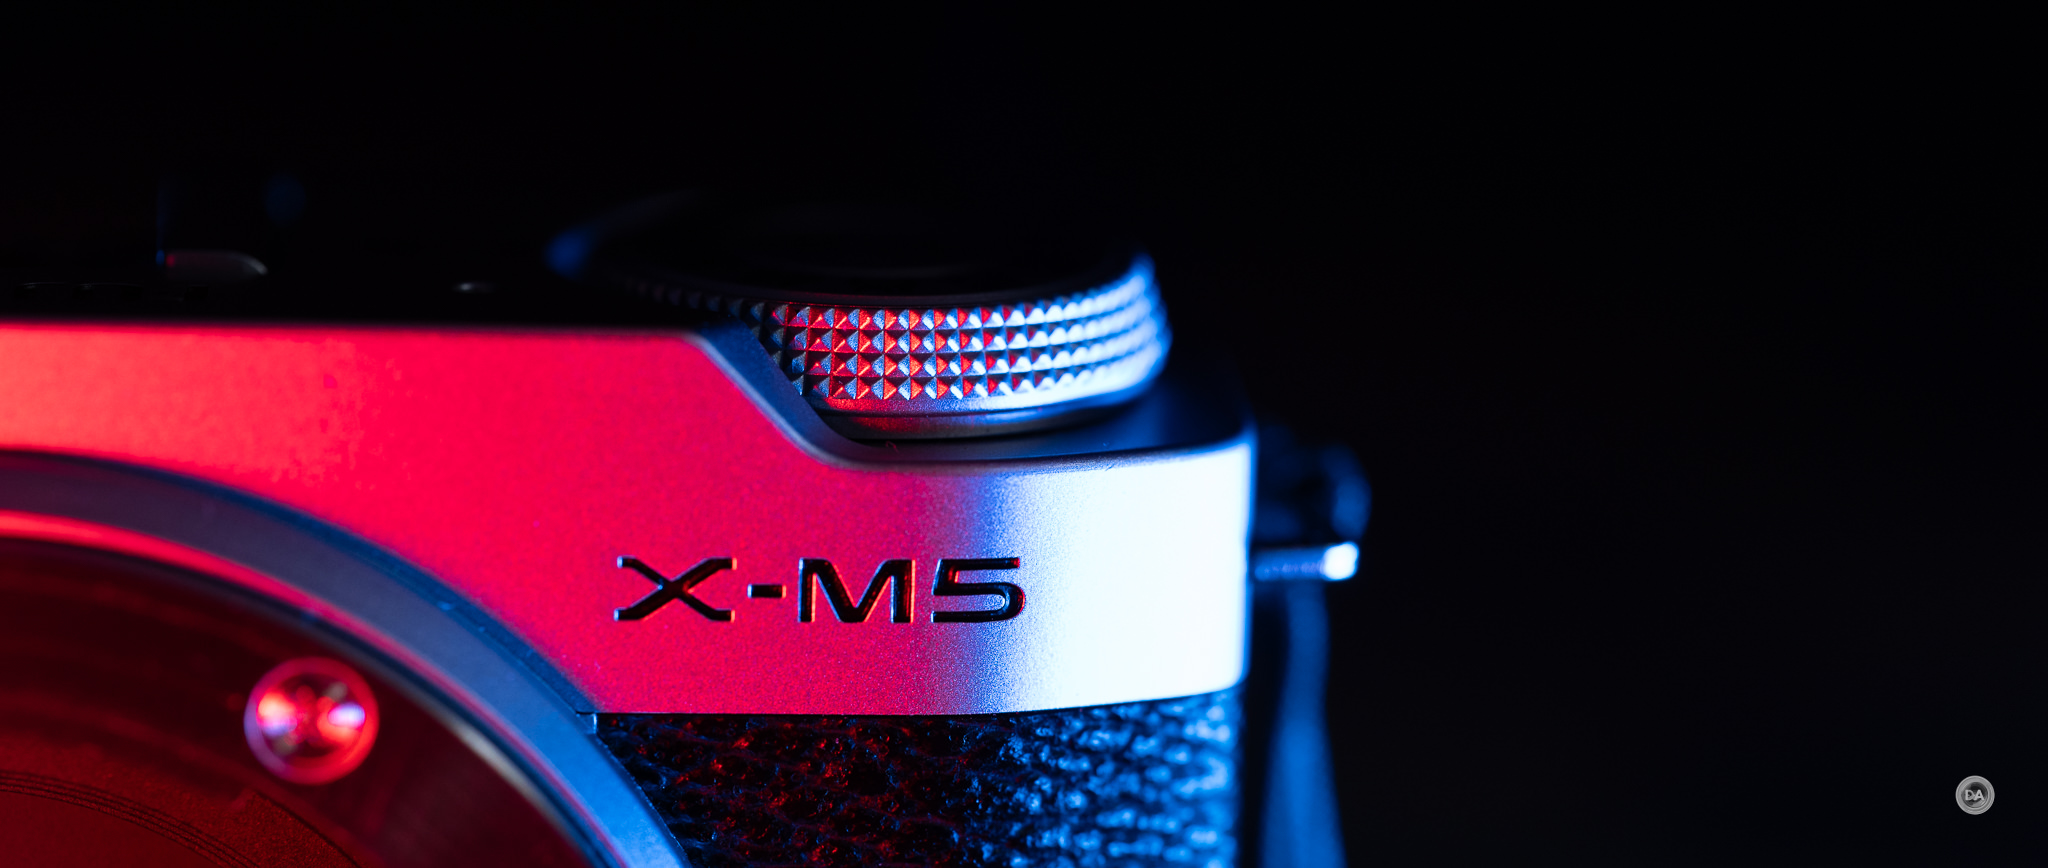
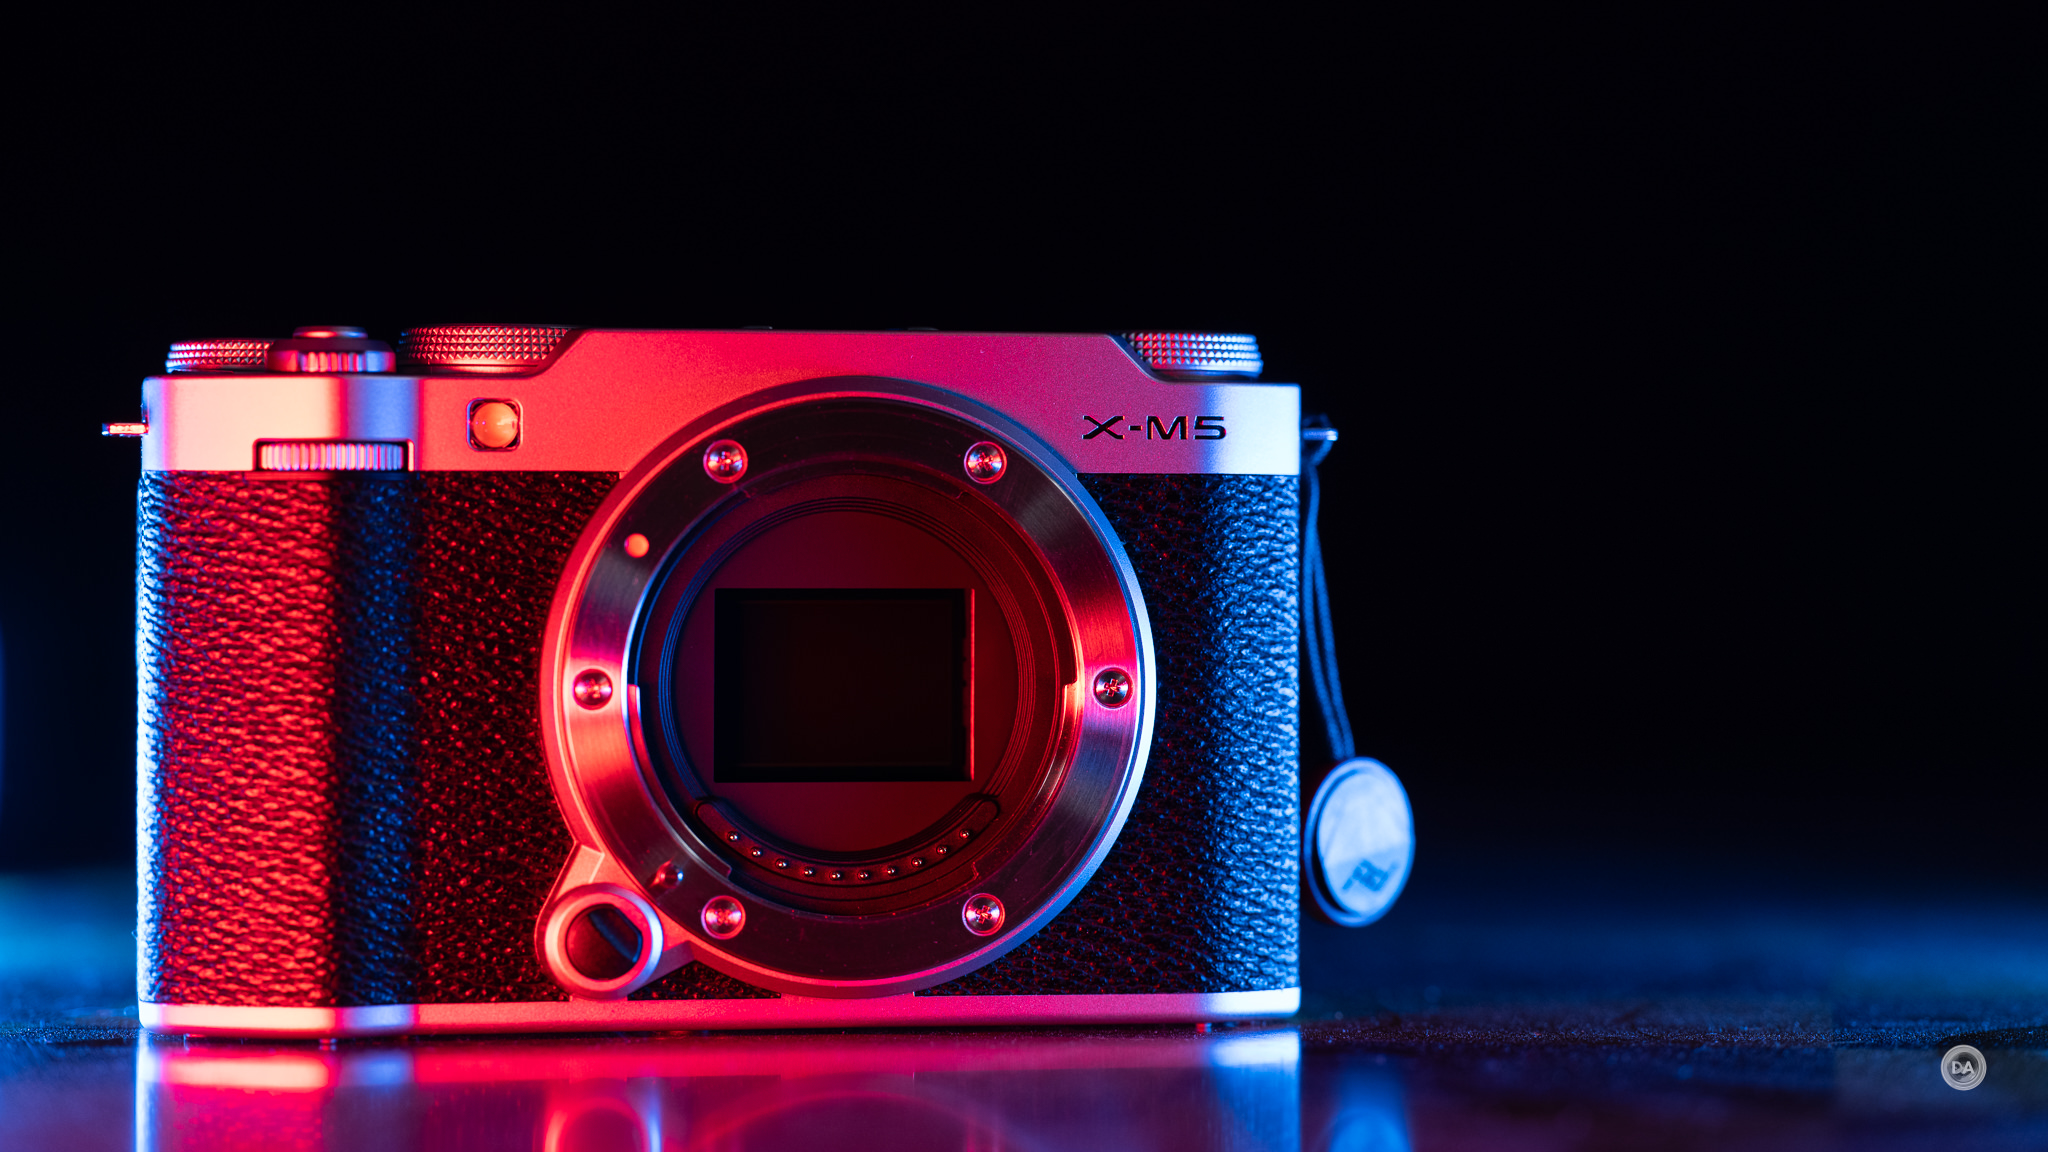
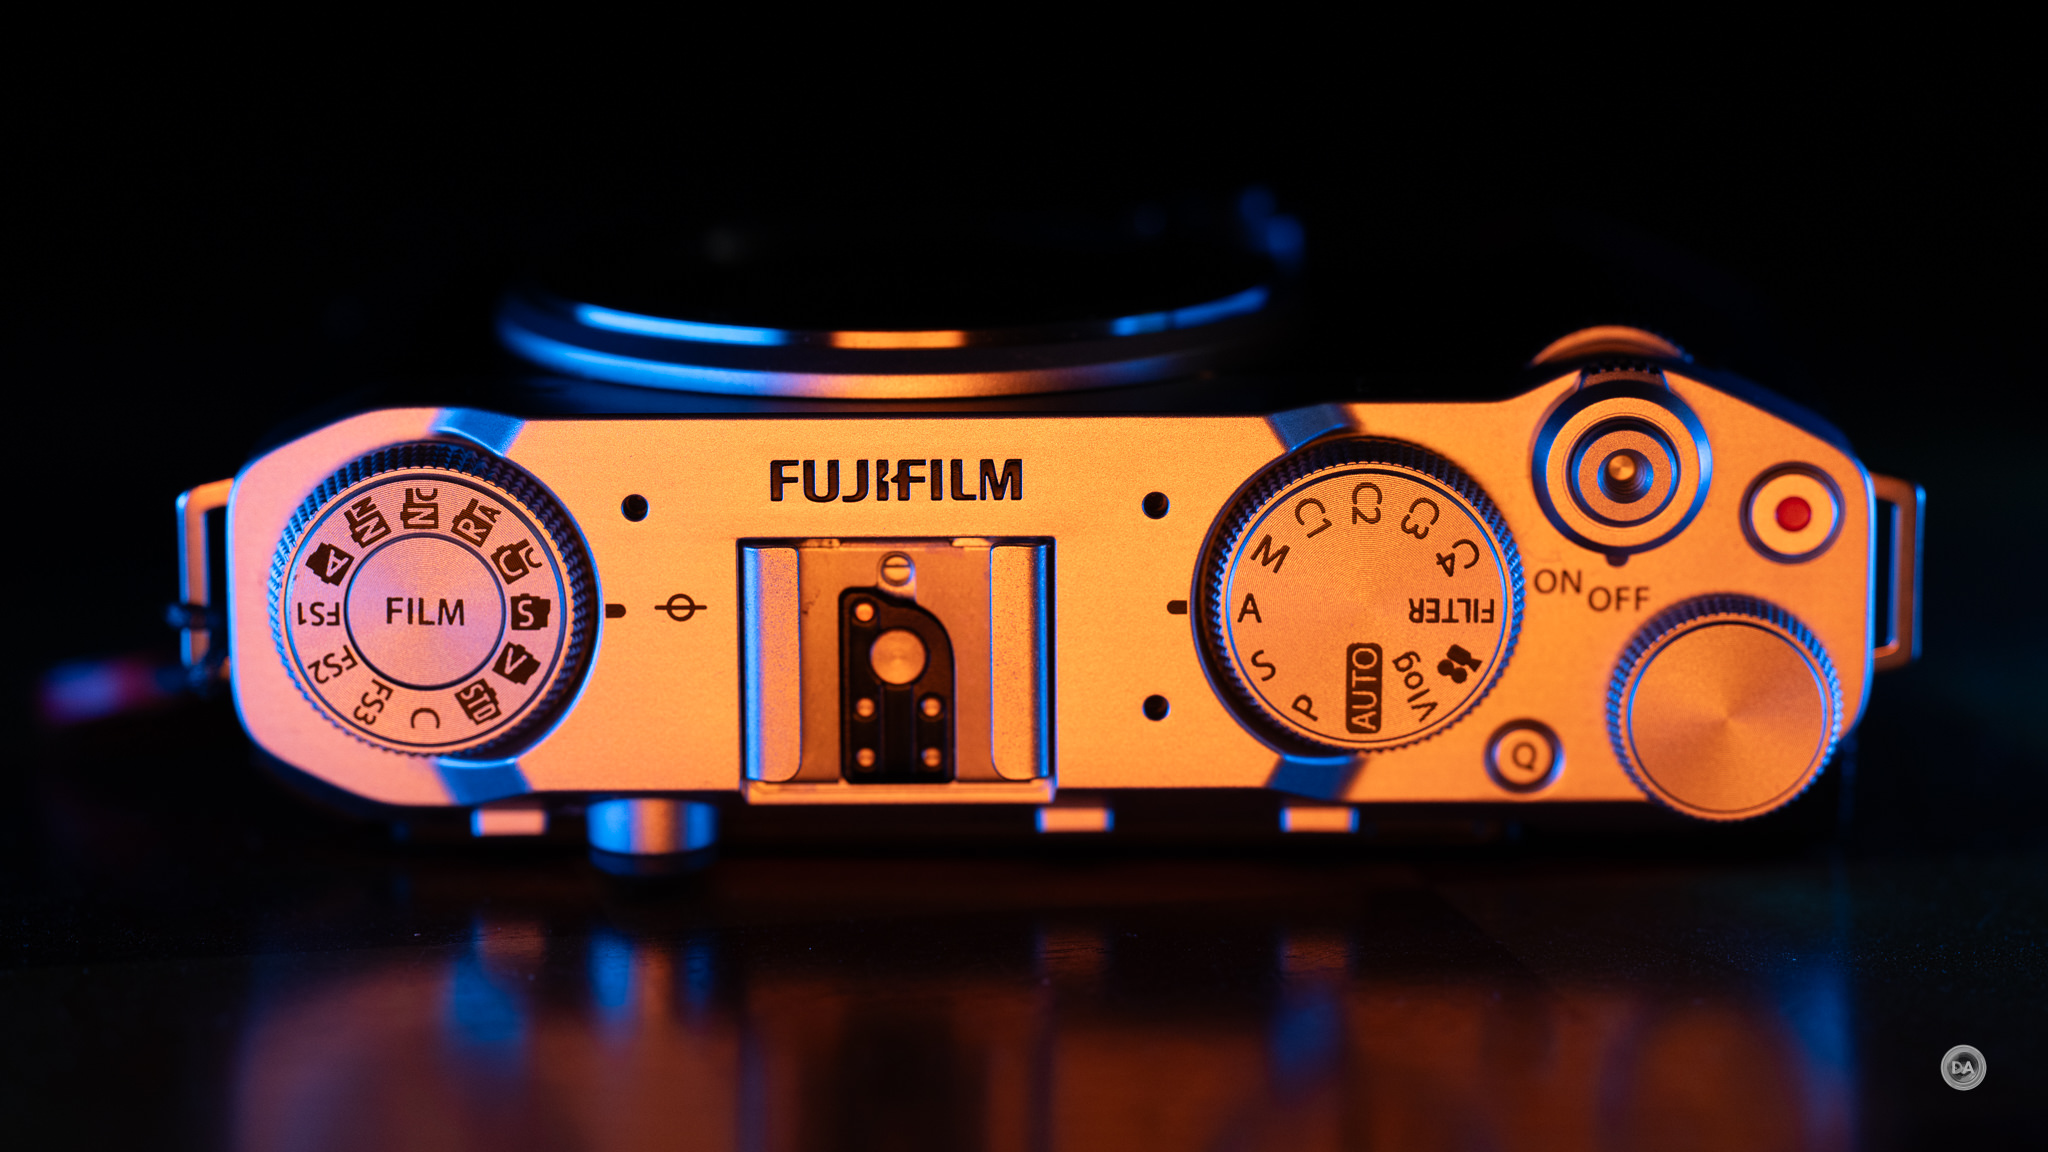
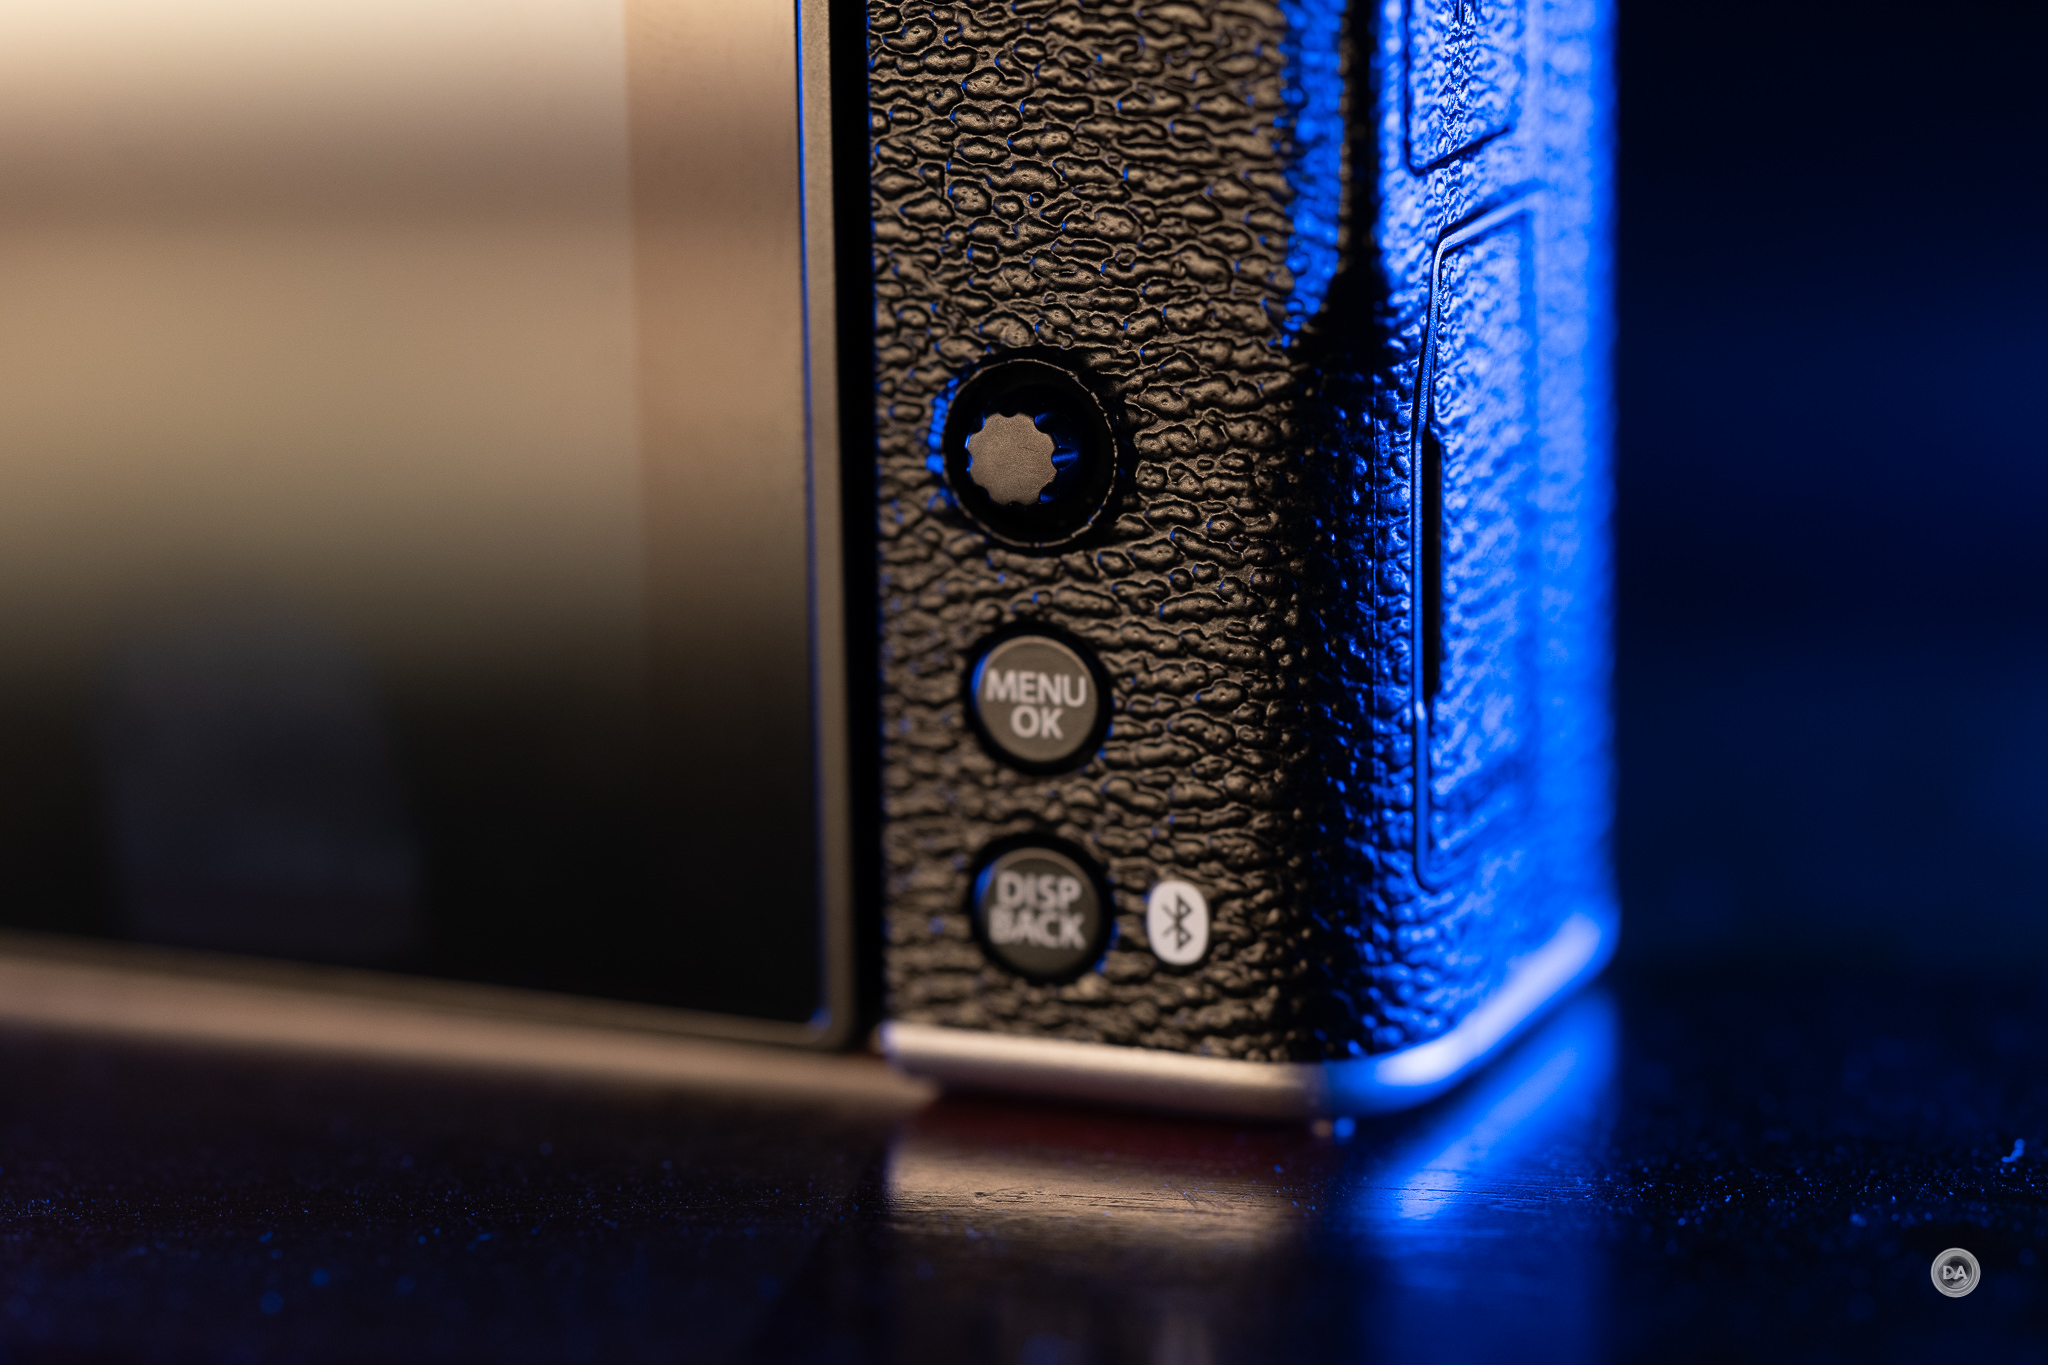
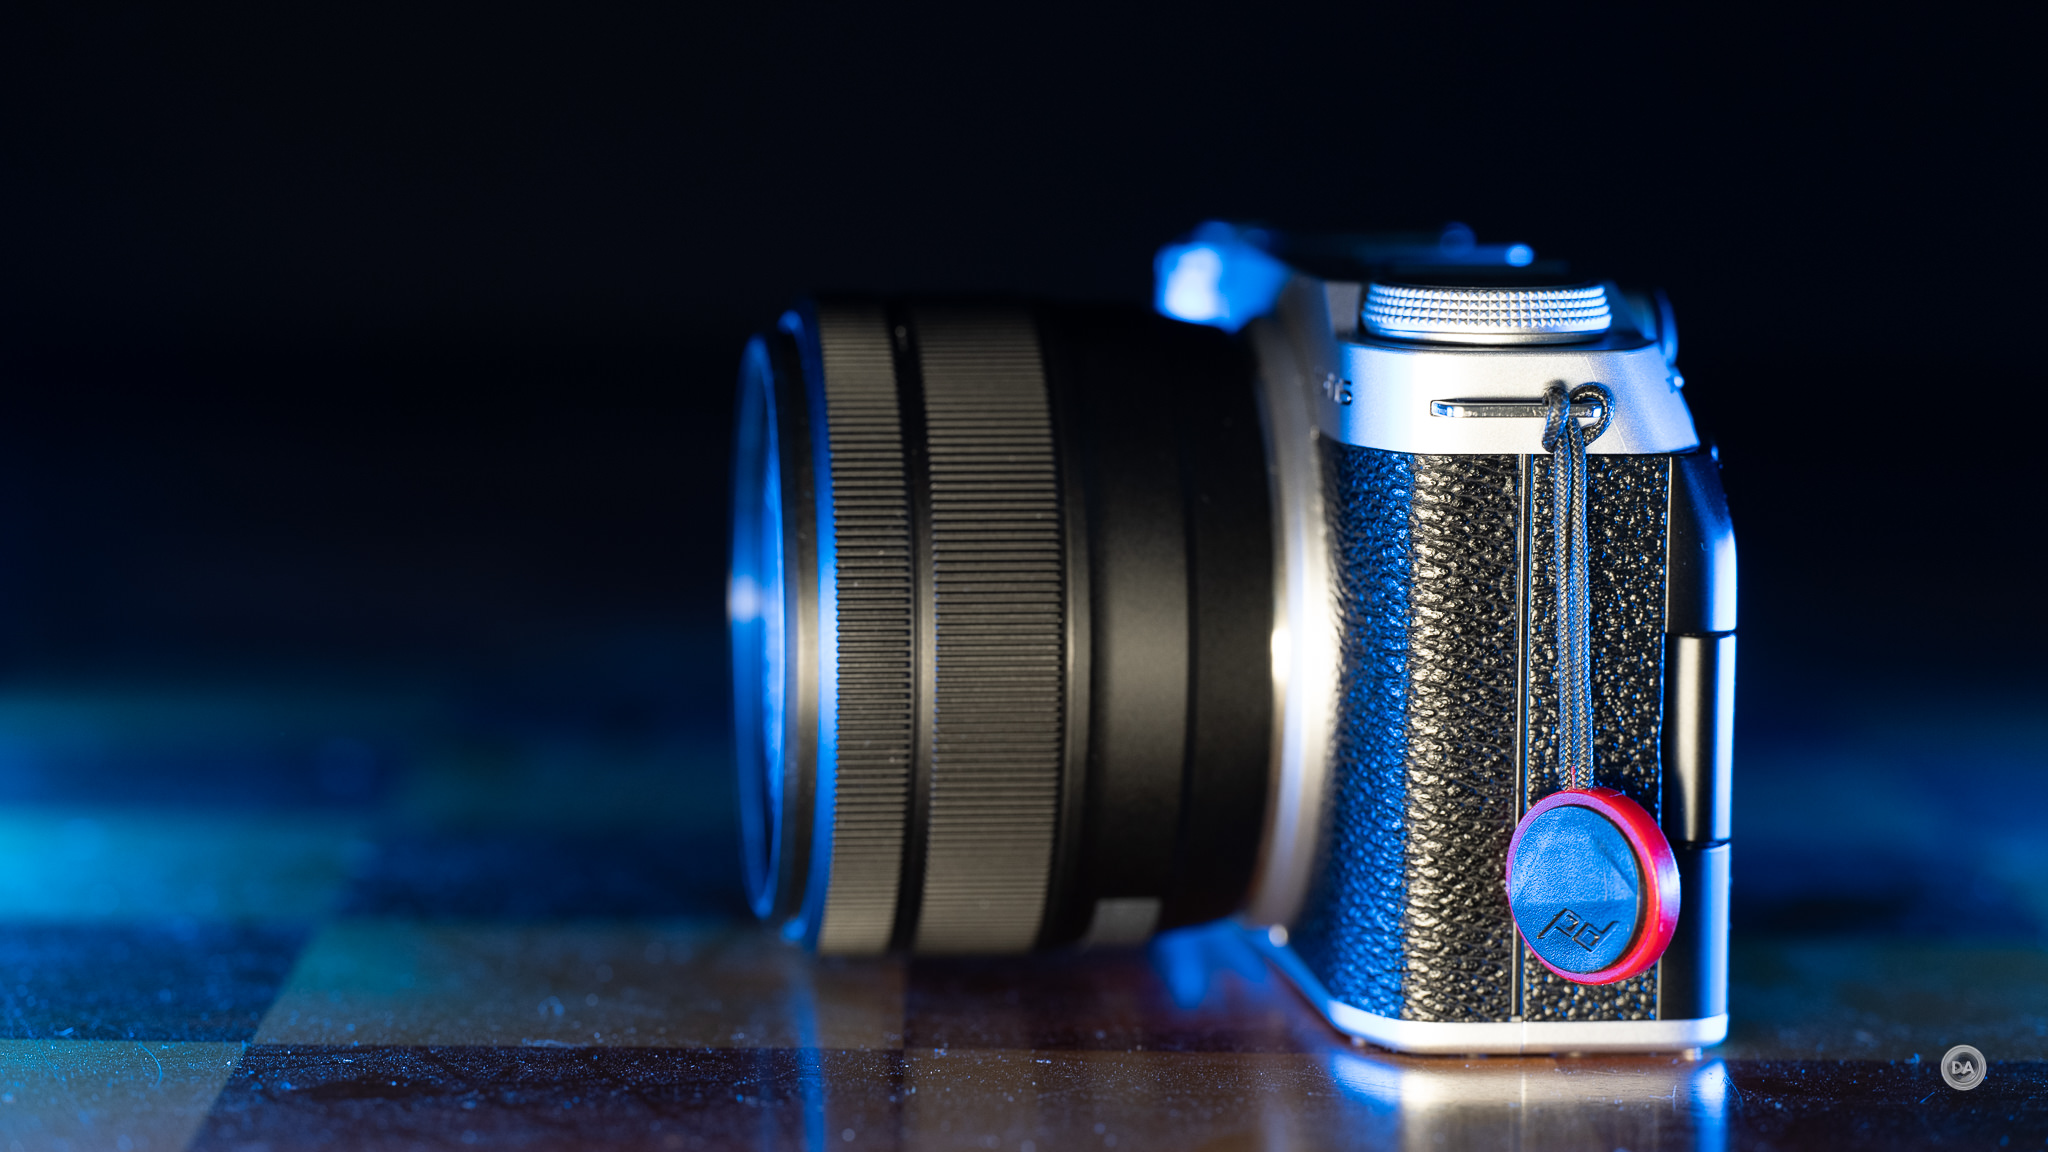
The X-M5 does have some visual connections to the X100VI, particularly in the silver edition that I’ve reviewed here (a standard black finish is also available). It shares a similar topline, the tiny bulge of the grip, and a somewhat similar top control scheme.
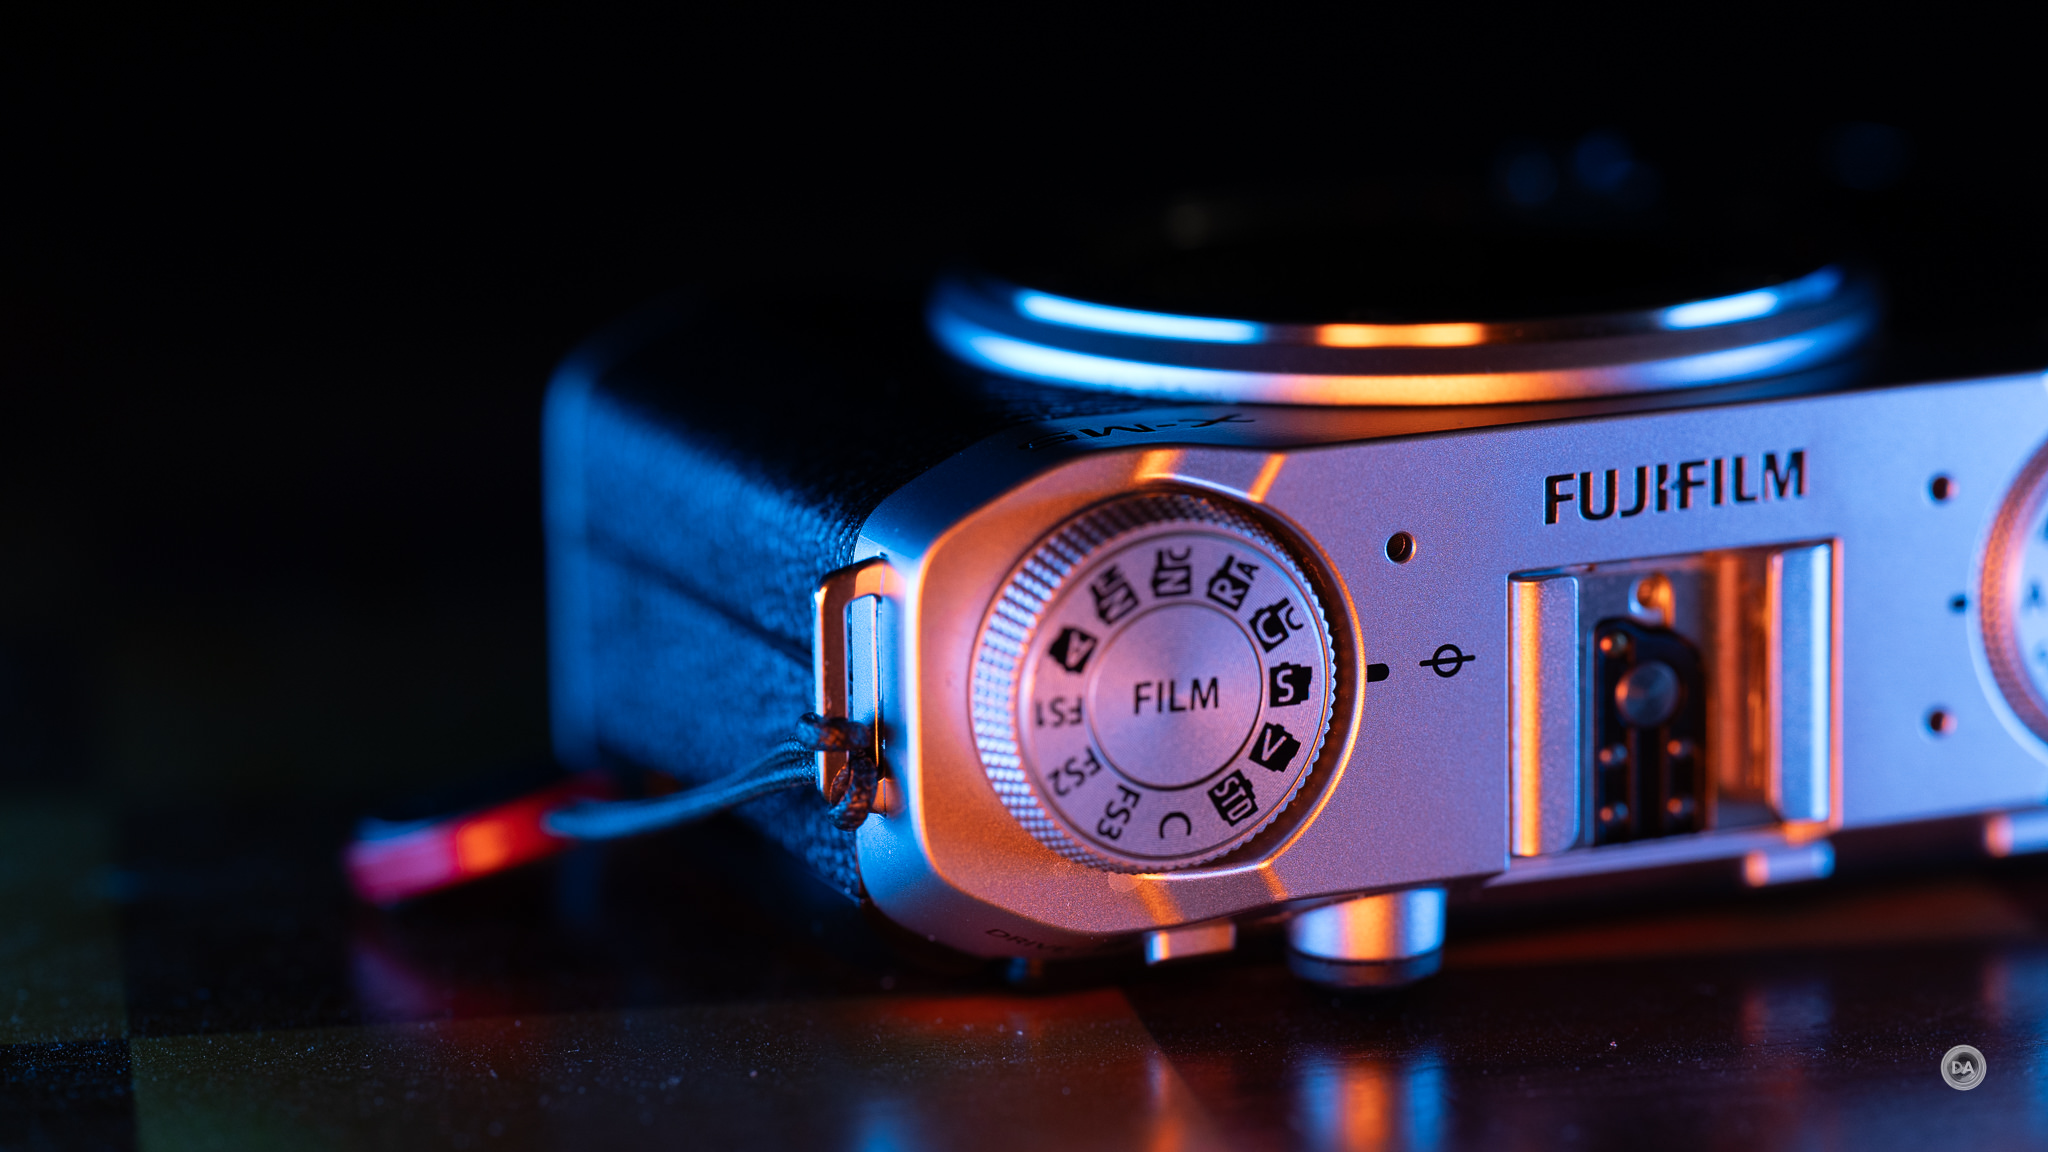
Fuji has forged a reputation for retaining a more analog control scheme that relies more on dials that touchscreens (a good thing, as Fuji’s touchscreens remain unimproved in the more than six years I’ve been reviewing their products). That’s less true here, however, and the main concession to that aesthetic is the film simulation dial on the left side of the topline of the camera.
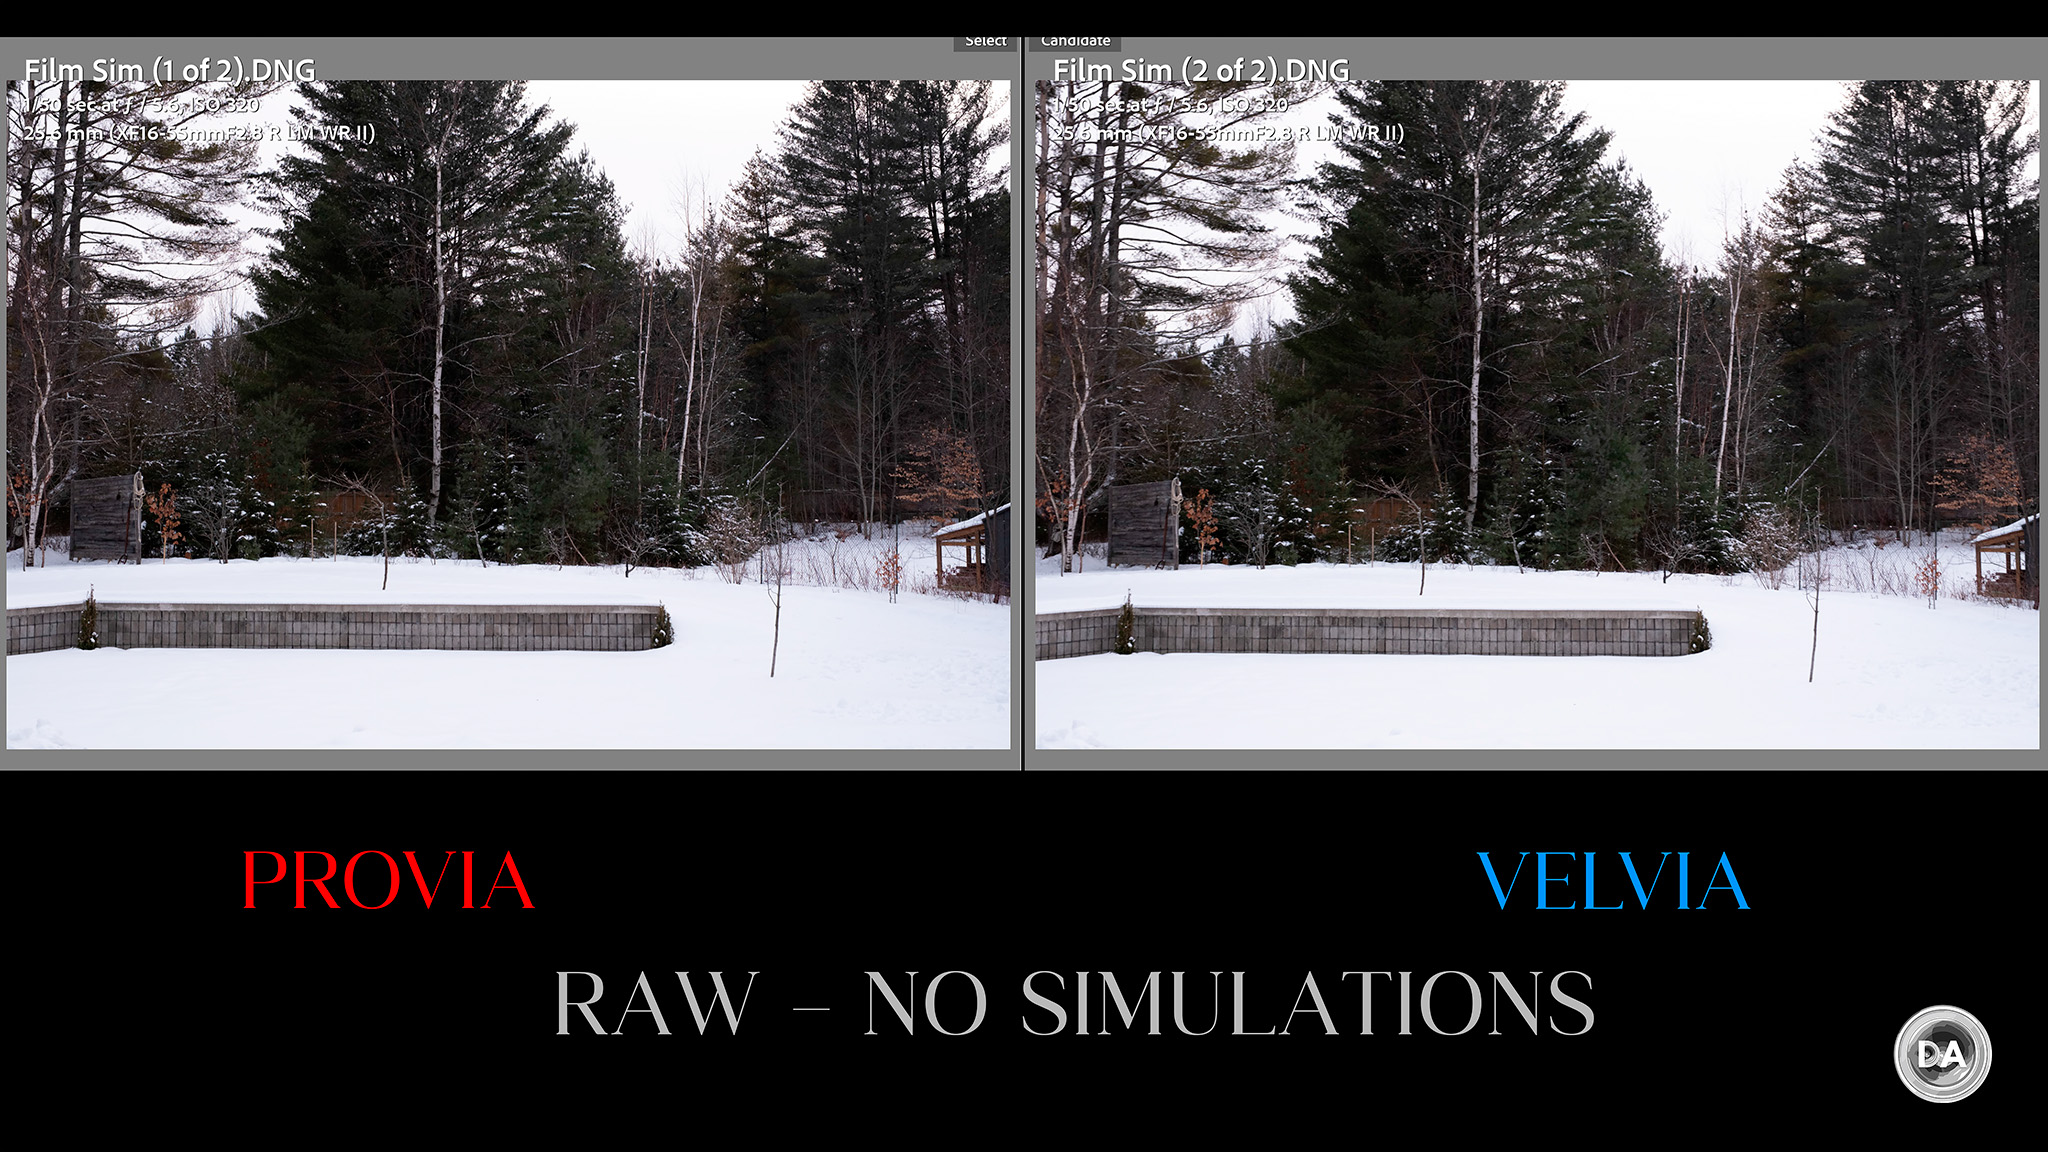
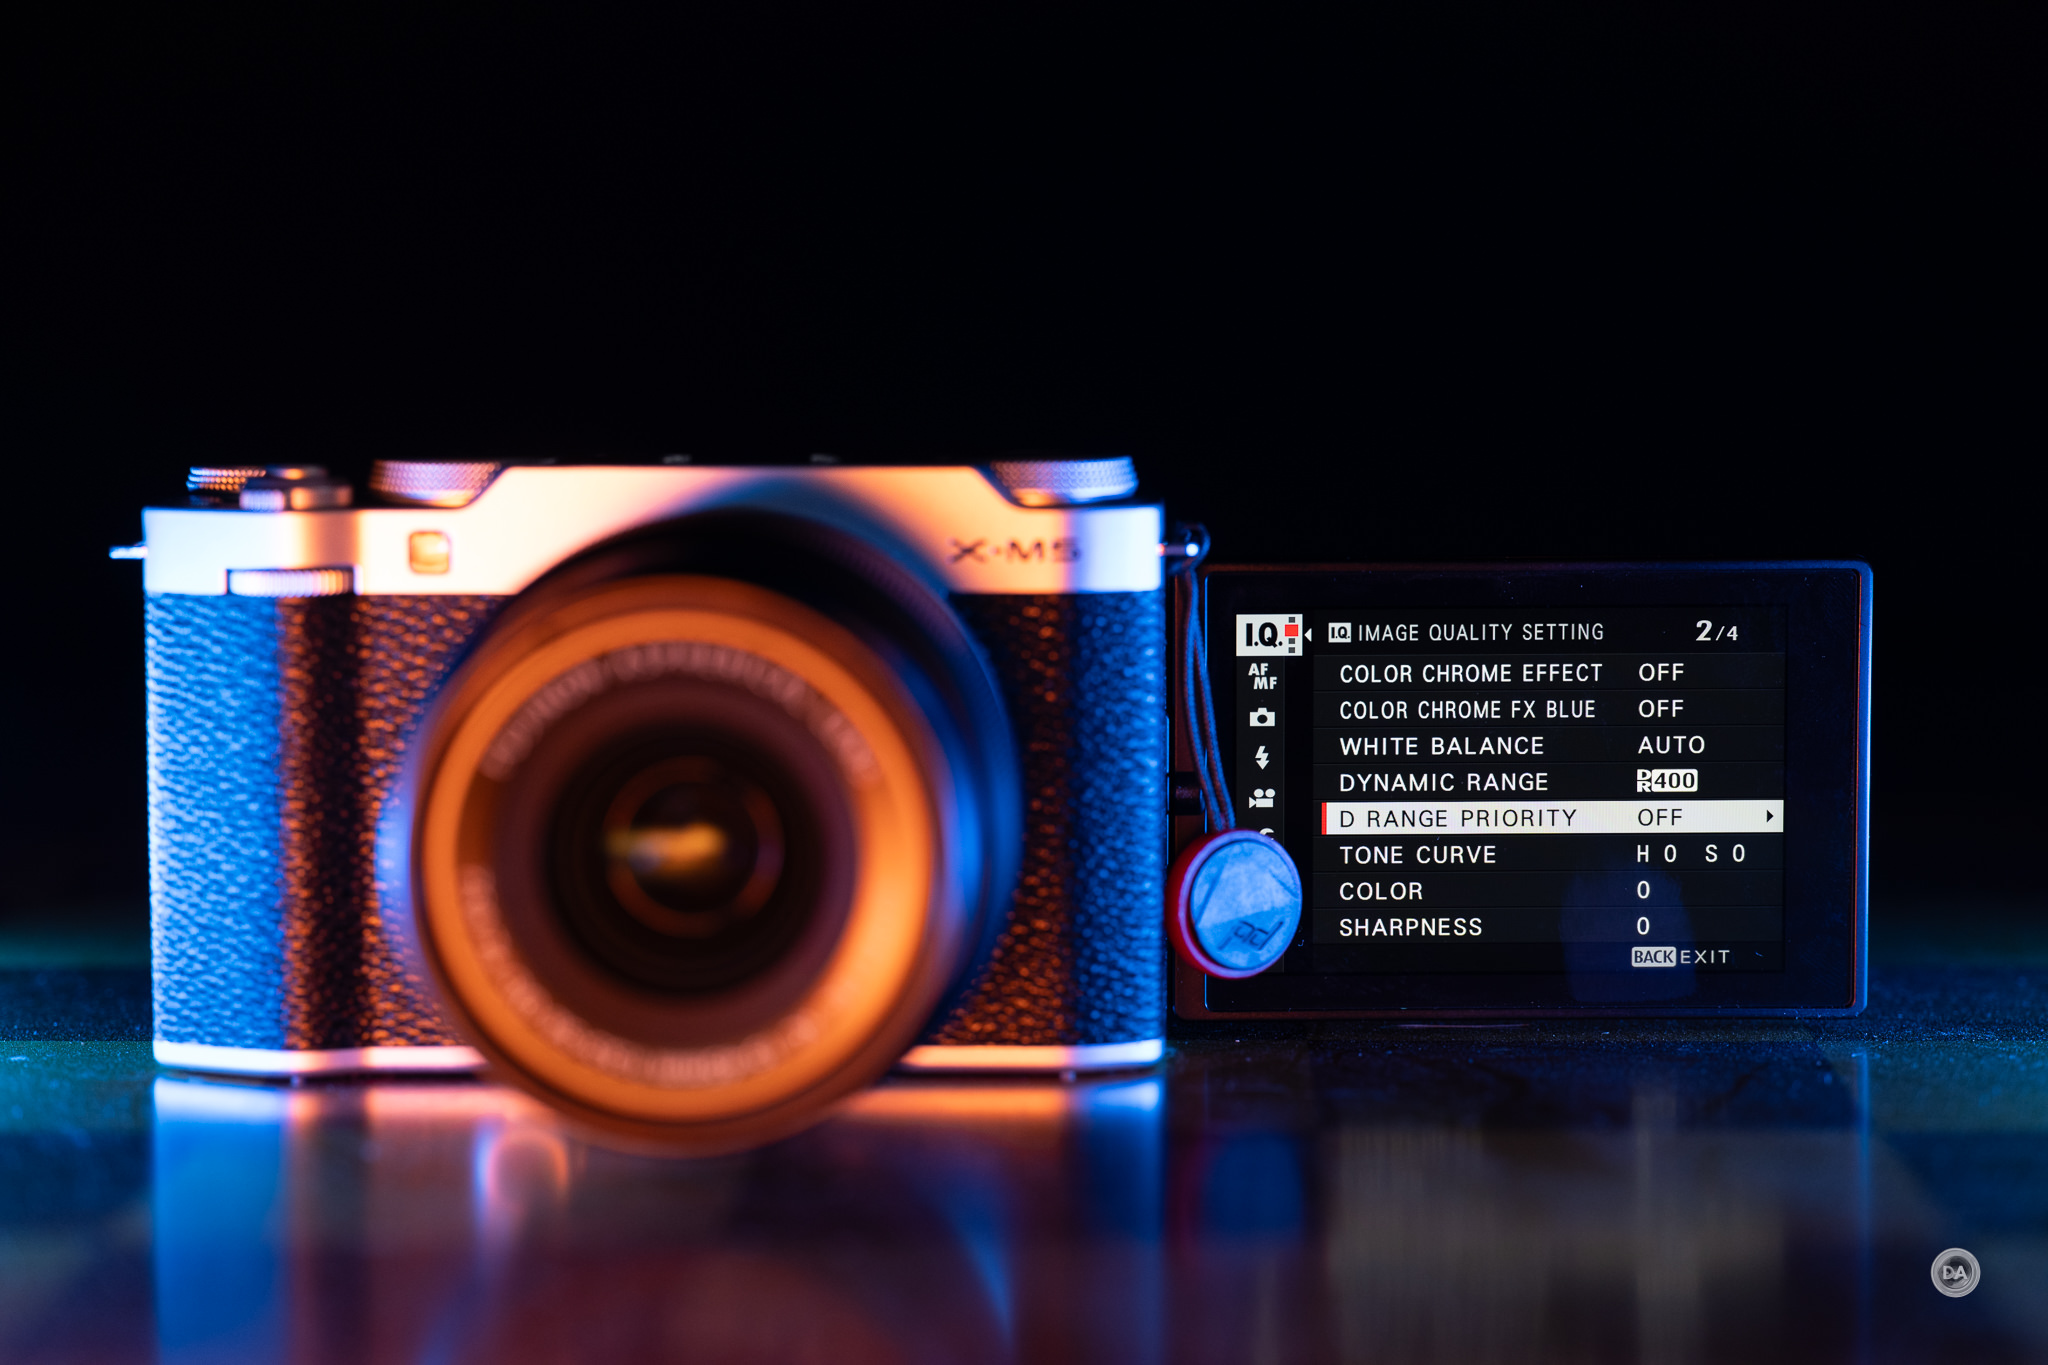
This allows you quick access to Fuji’s film simulations, though, frankly, this is going to appeal more to people who shoot JPEGs than those who shoot RAWs, as shooting with a preselected film simulation doesn’t affect a RAW image on import. Case in point is that I turned the dial to PROVIA for the shot on the left and then VELVIA for the shot on the right. The JPEGs will look different, with much more saturation on the VELVIA image, but the two RAW files arrived in Lightroom looking identical:
If you are a JPEG shooter and love Fuji’s film simulation, this quick access dial is going to be great. For me (a RAW shooter), it is a waste, as I would strongly prefer an extra control dial, and thus far I haven’t found a way to assign a different function to that Film simulation dial. Also somewhat odd is the fact that the front command dial has to serve multiple functions, which are accessed by clicking the dial in (each click will cycle through the default 3 options in sequence unless customized otherwise). One of those default functions is film simulations, but this feels very redundant when there is a large dedicated dial for this function already on the top of the camera.
The X-M5 is a very slim and stylish camera, but that stylish exterior does come at the cost of ergonomic practicality. You’ll note from the comparison above that out of the competing cameras the X-M5 is by far the slimmest. It’s just 38mm (1.5″) deep, which means that the grip is nearly nonexistent. There is a very slight bulge on the right side of the camera that serves as the grip, but there’s nowhere near enough depth there to actually wrap your fingers around. This is more a camera that you pinch rather than one that settles into your grip. The minimal height of the camera also means that my pinky has no place to go and has to float underneath the camera. This is a camera that is better suited to smaller, lighter lenses, and you probably won’t want to often use the larger, heavier telephoto lenses with the camera. Even the new XF 16-55mm F2.8 II, which is considerably smaller than the first generation lens, feels a little awkward in balance.
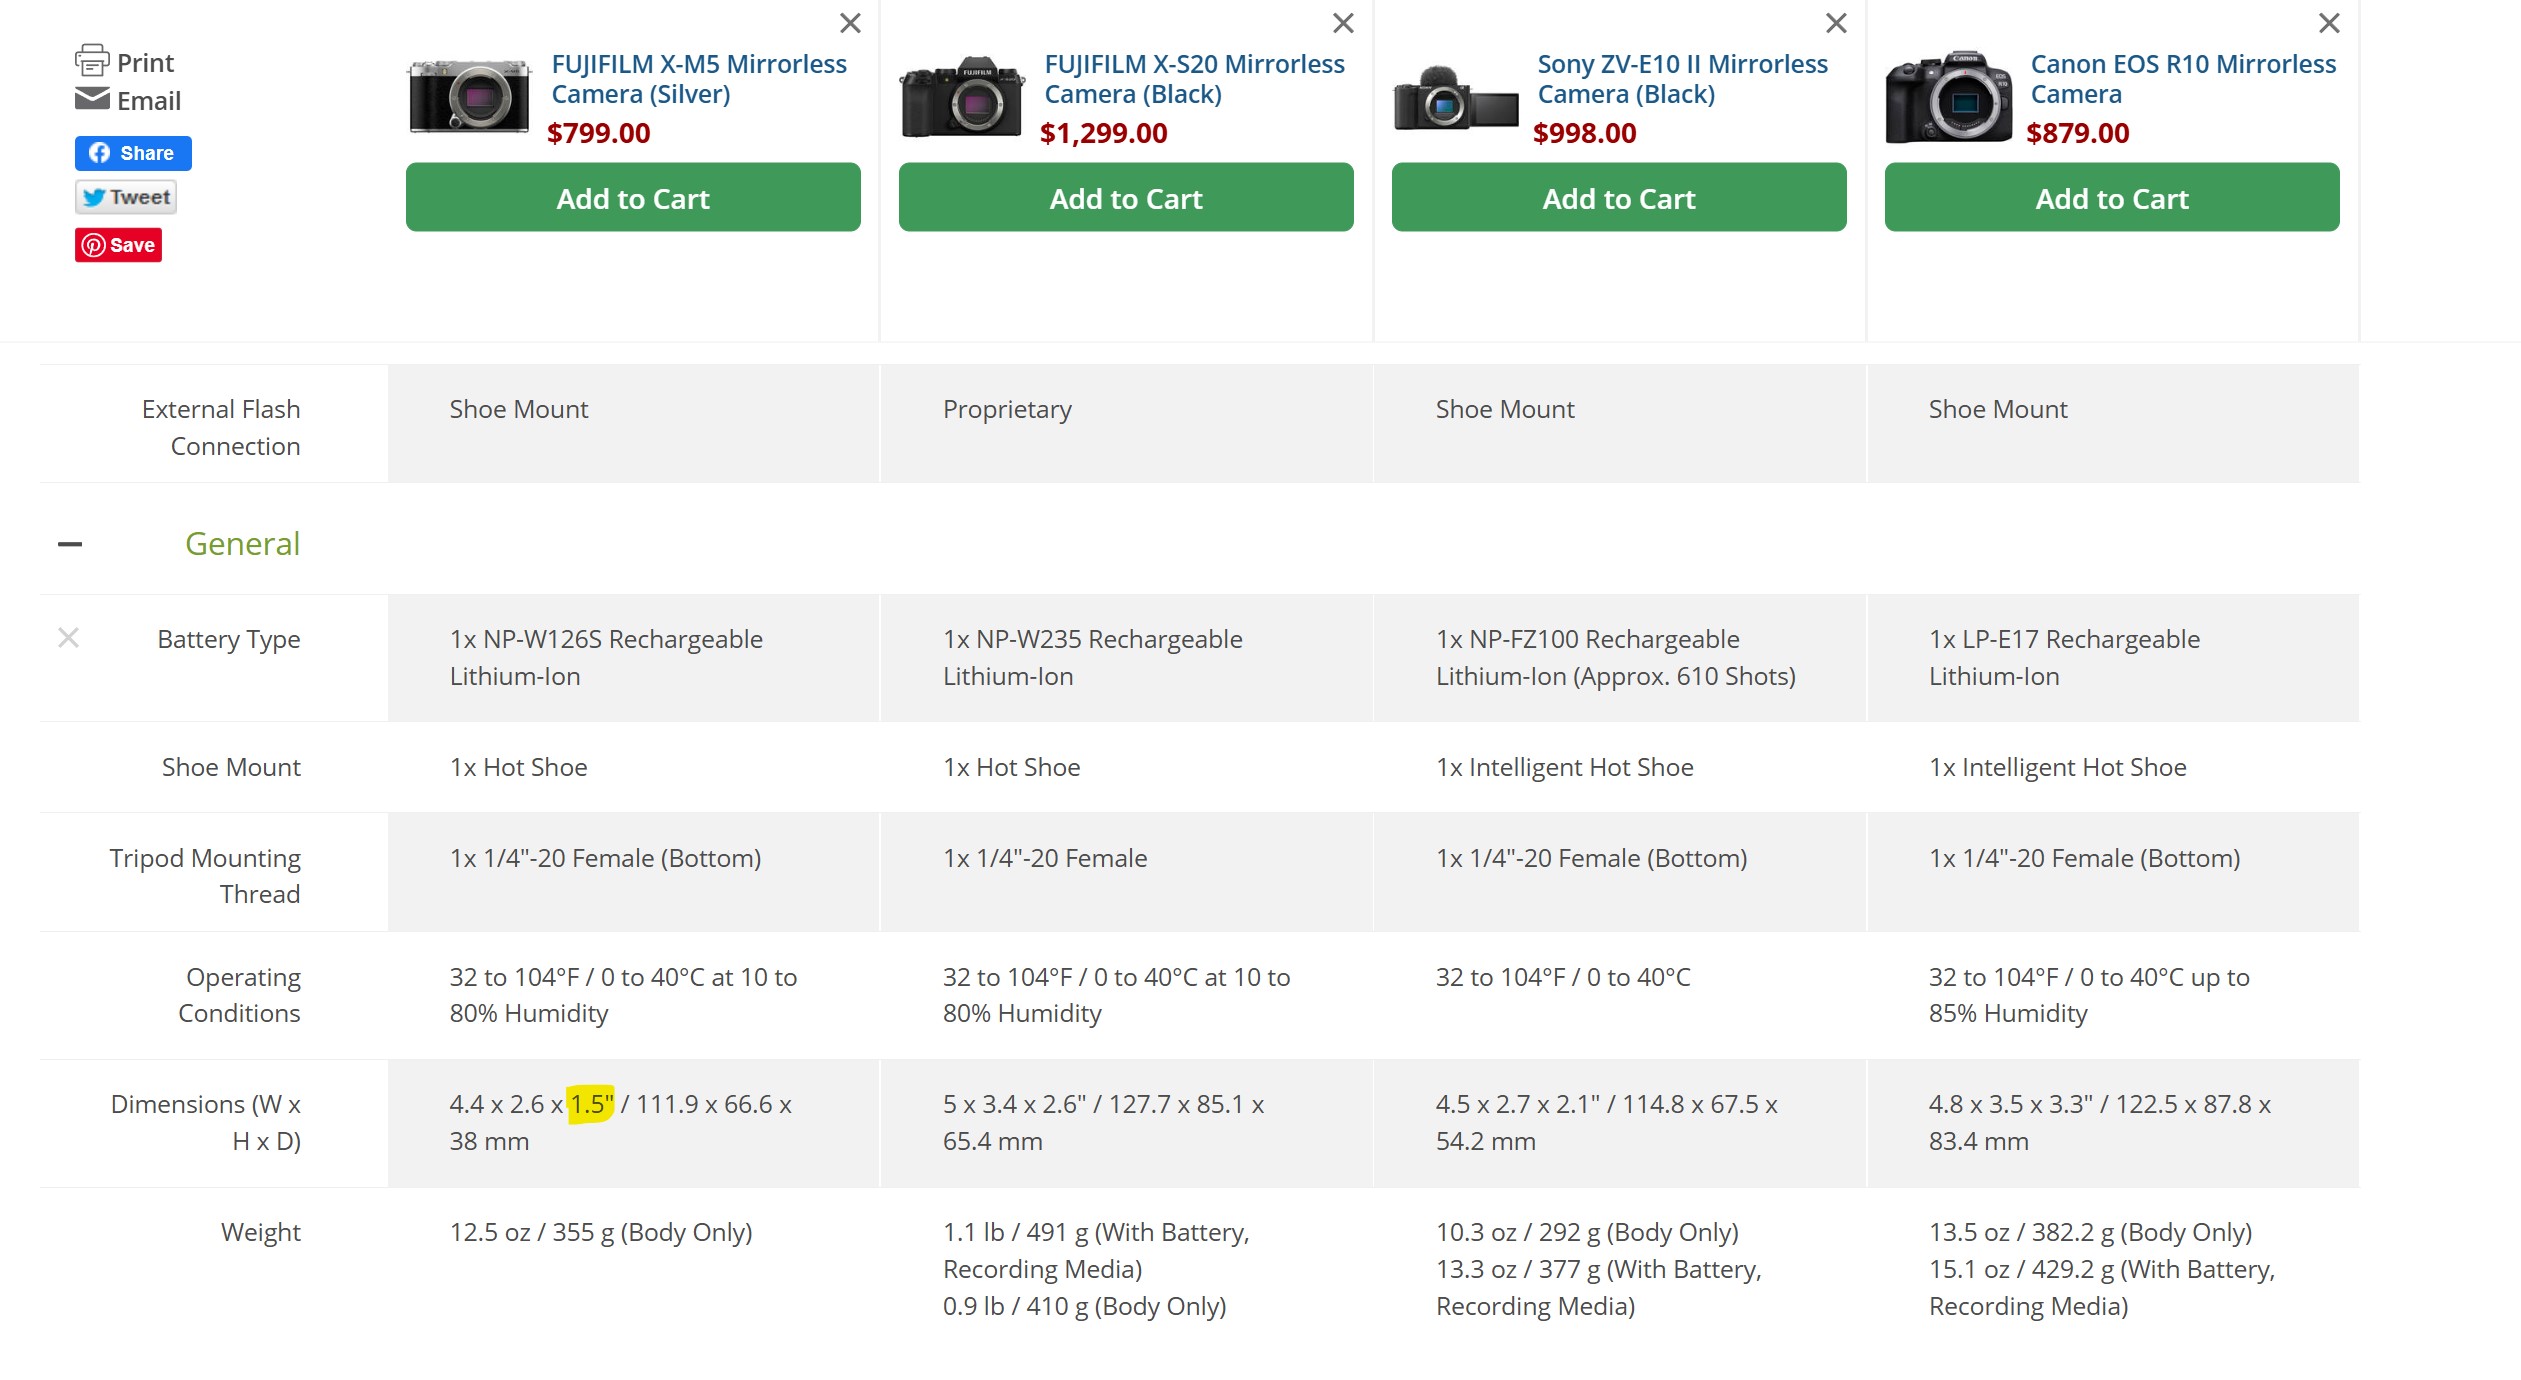
You can see from this shot of the battery compartment that the grip above is a just a little bump. There’s very little to hang onto. I personally don’t find this camera very easy to hang onto, though your mileage may vary. The flipside of this design is that it takes the portability way up. Pair this with a pancake style lens (an X-mount version of Viltrox’s 28mm F4.5 VCM would be perfect!) and you would truly have a pocketable camera. The camera is 111.9 (W) x 66.6 (H) x 38mm (D) or 4.4 x 2.6 x 1.5″. The weight is just 355g (12.5oz) without a battery or memory card. That’s a little heavier than the Sony ZV-E10 II, and a little lighter than the Canon EOS R10.
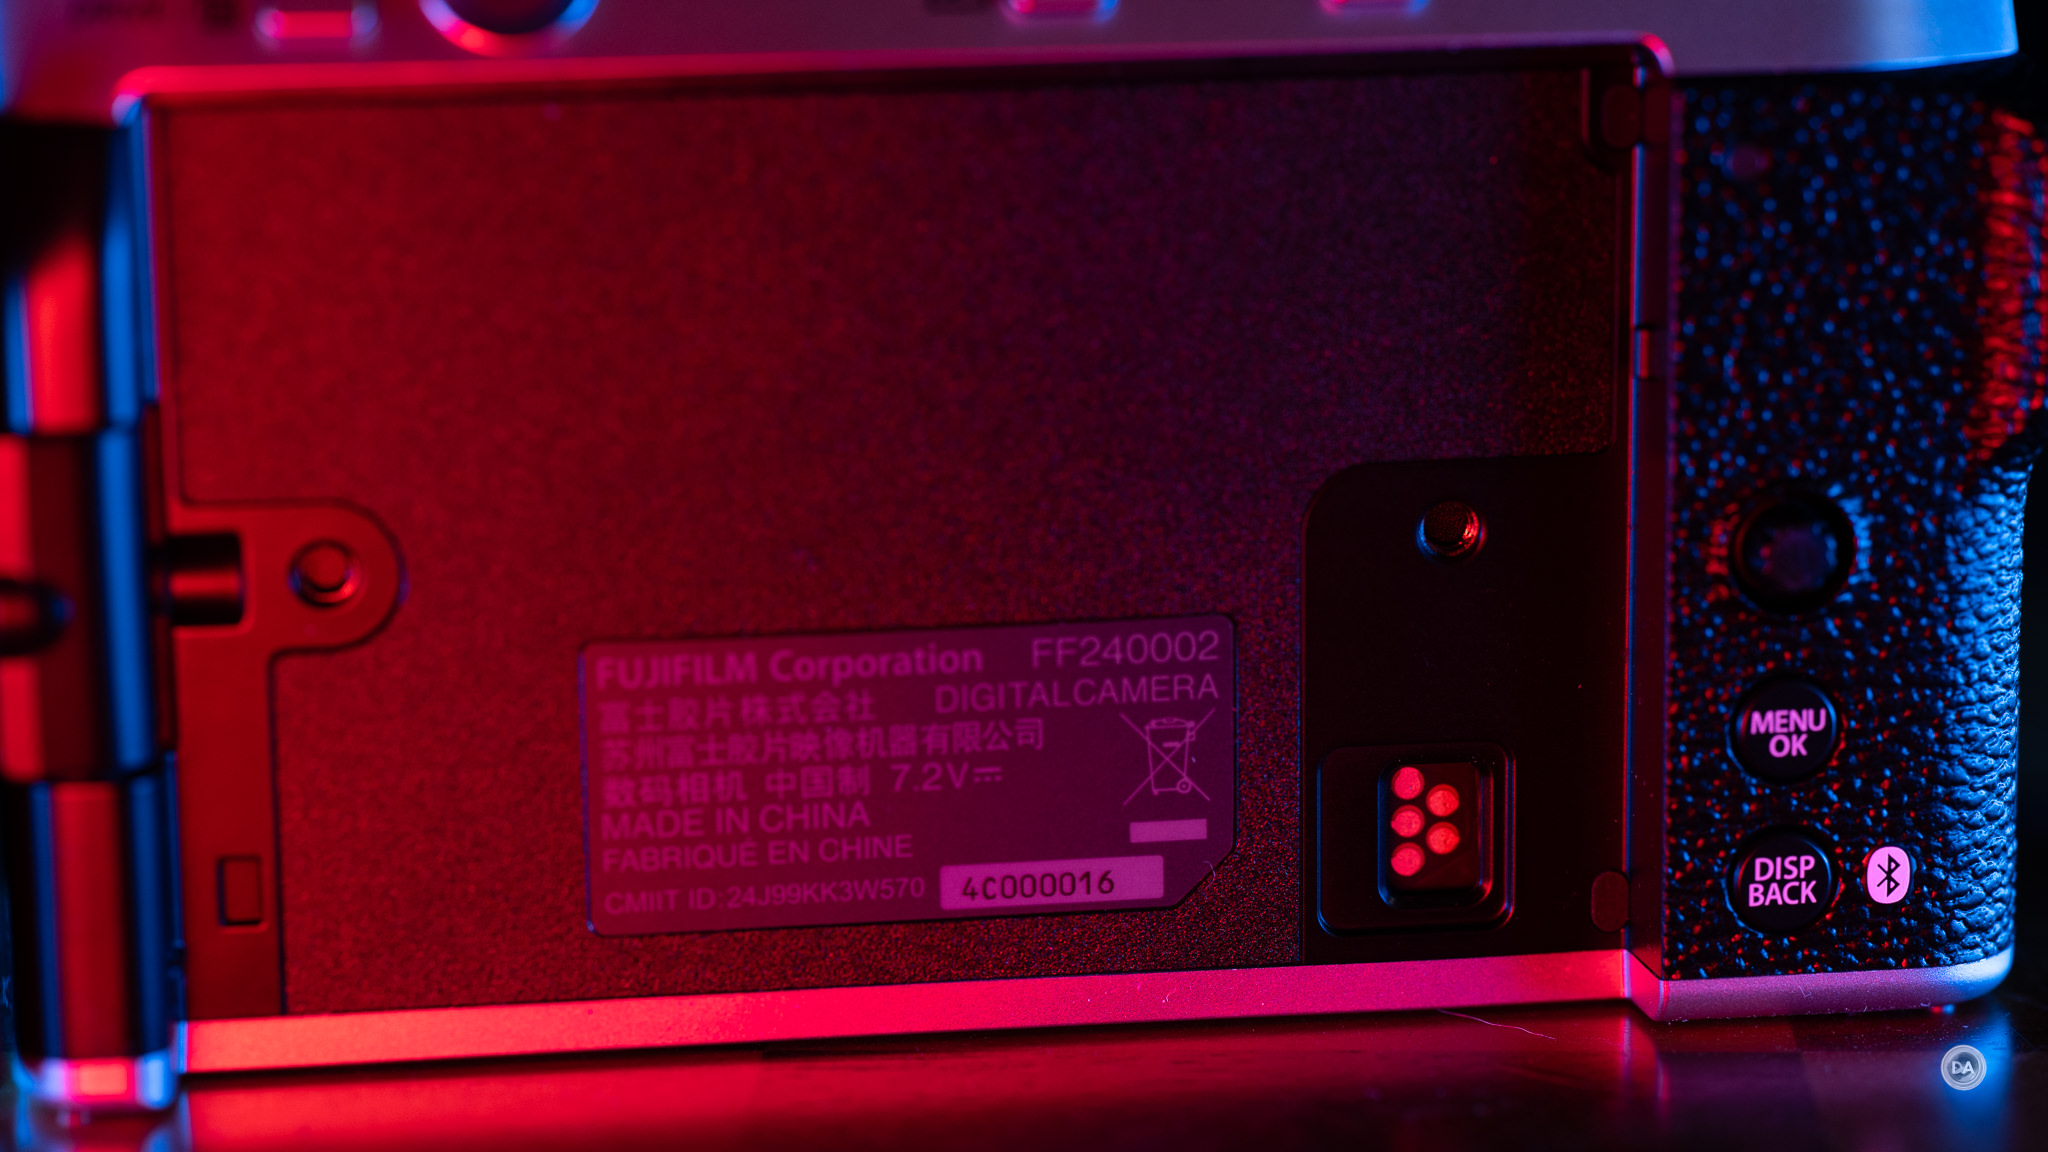
You might also note from above that there is no room in that grip for a battery, so the battery sits laterally in the camera. The NP-W126S is a relatively small 1260mAh unit that is rated for as much as 440 frames in “Economy mode” but drops to 330 frames in normal mode. Economy mode reduces performance of both the LCD screen and the autofocus system, so that probably isn’t going to work for most people most of the time, particularly considering the LCD is the only way to compose with the X-M5. That battery charge is also only good for about 45 minutes of 6.2K or 4K60 recording. You probably want to pick up a spare battery or two.
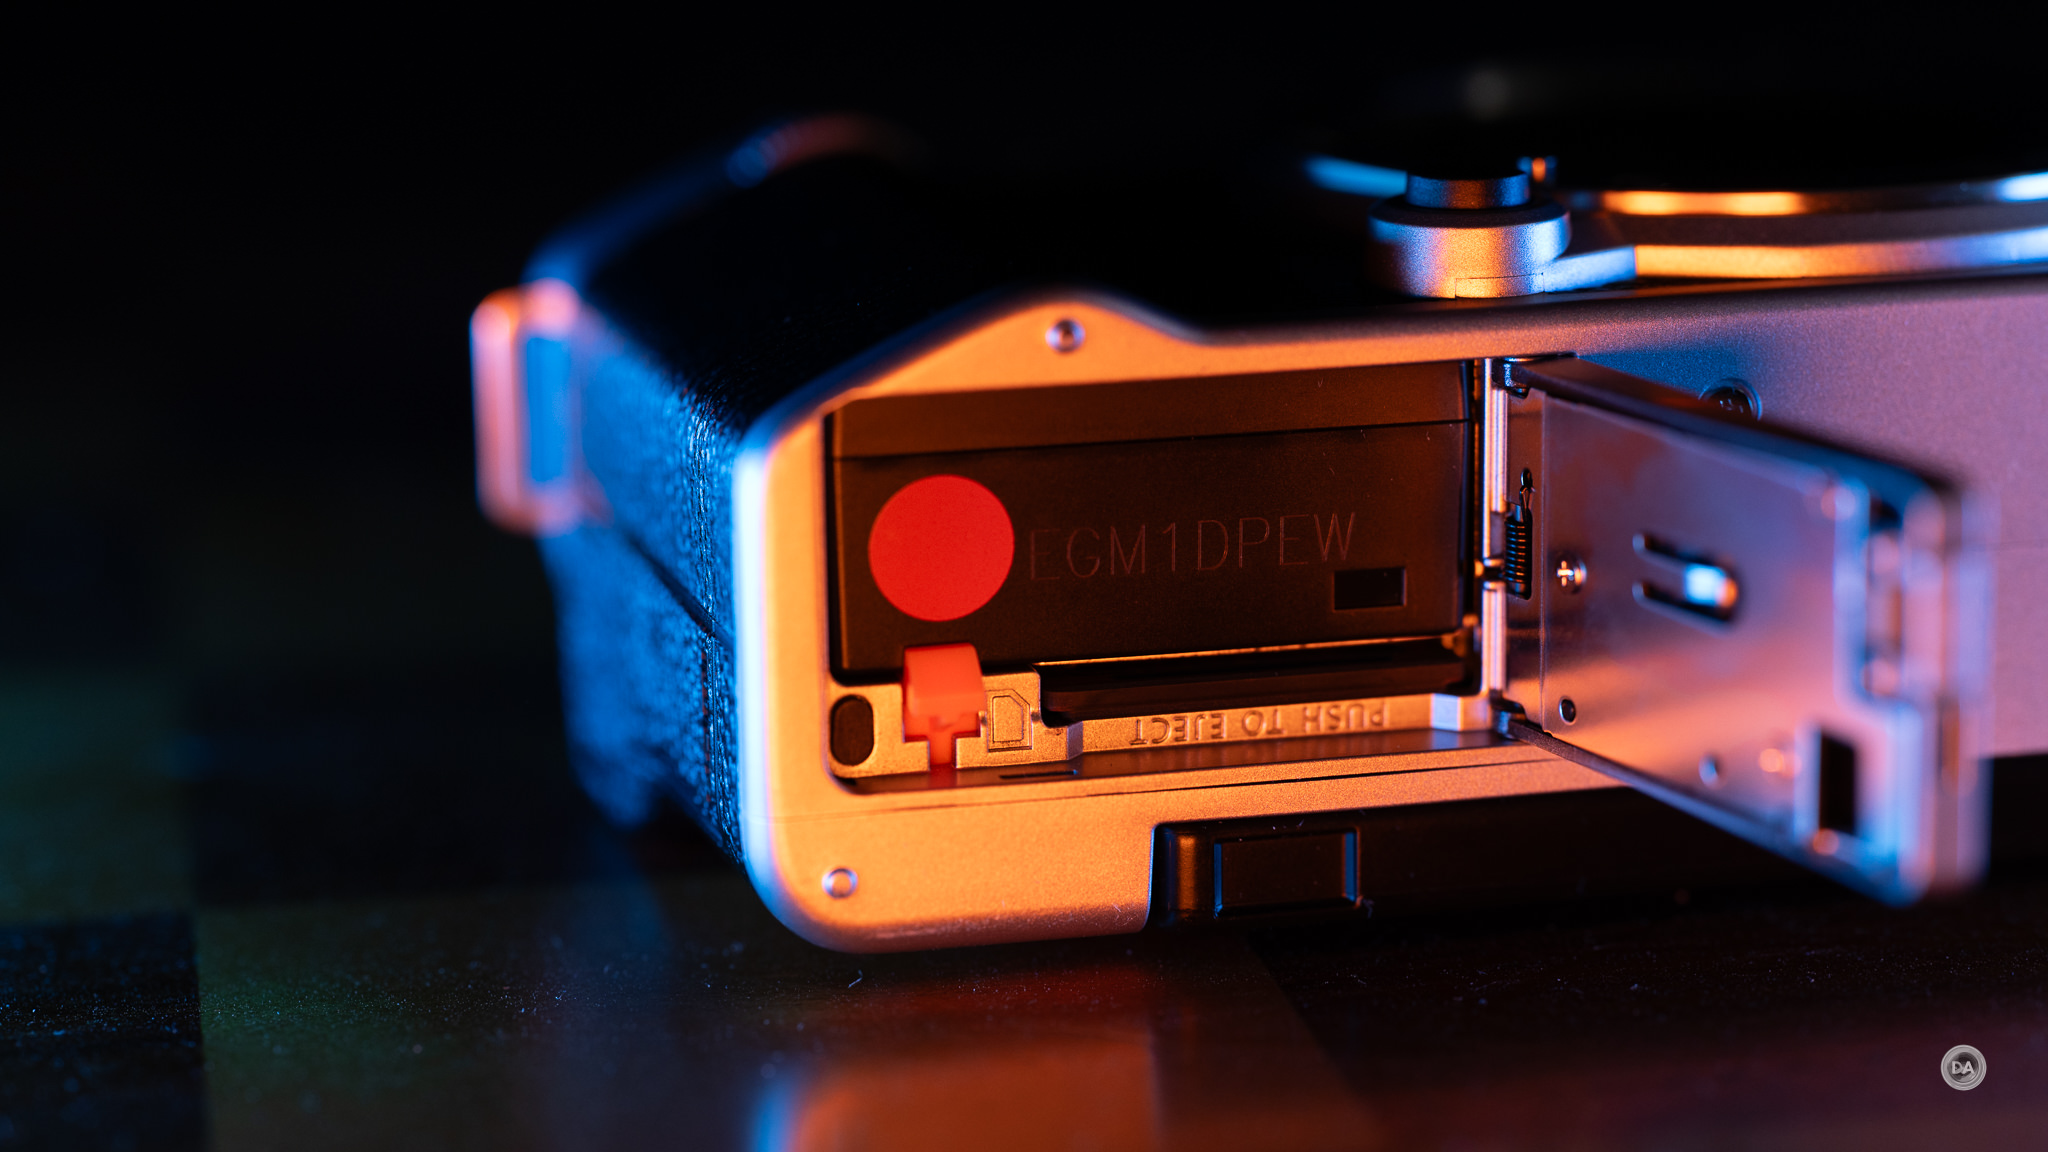
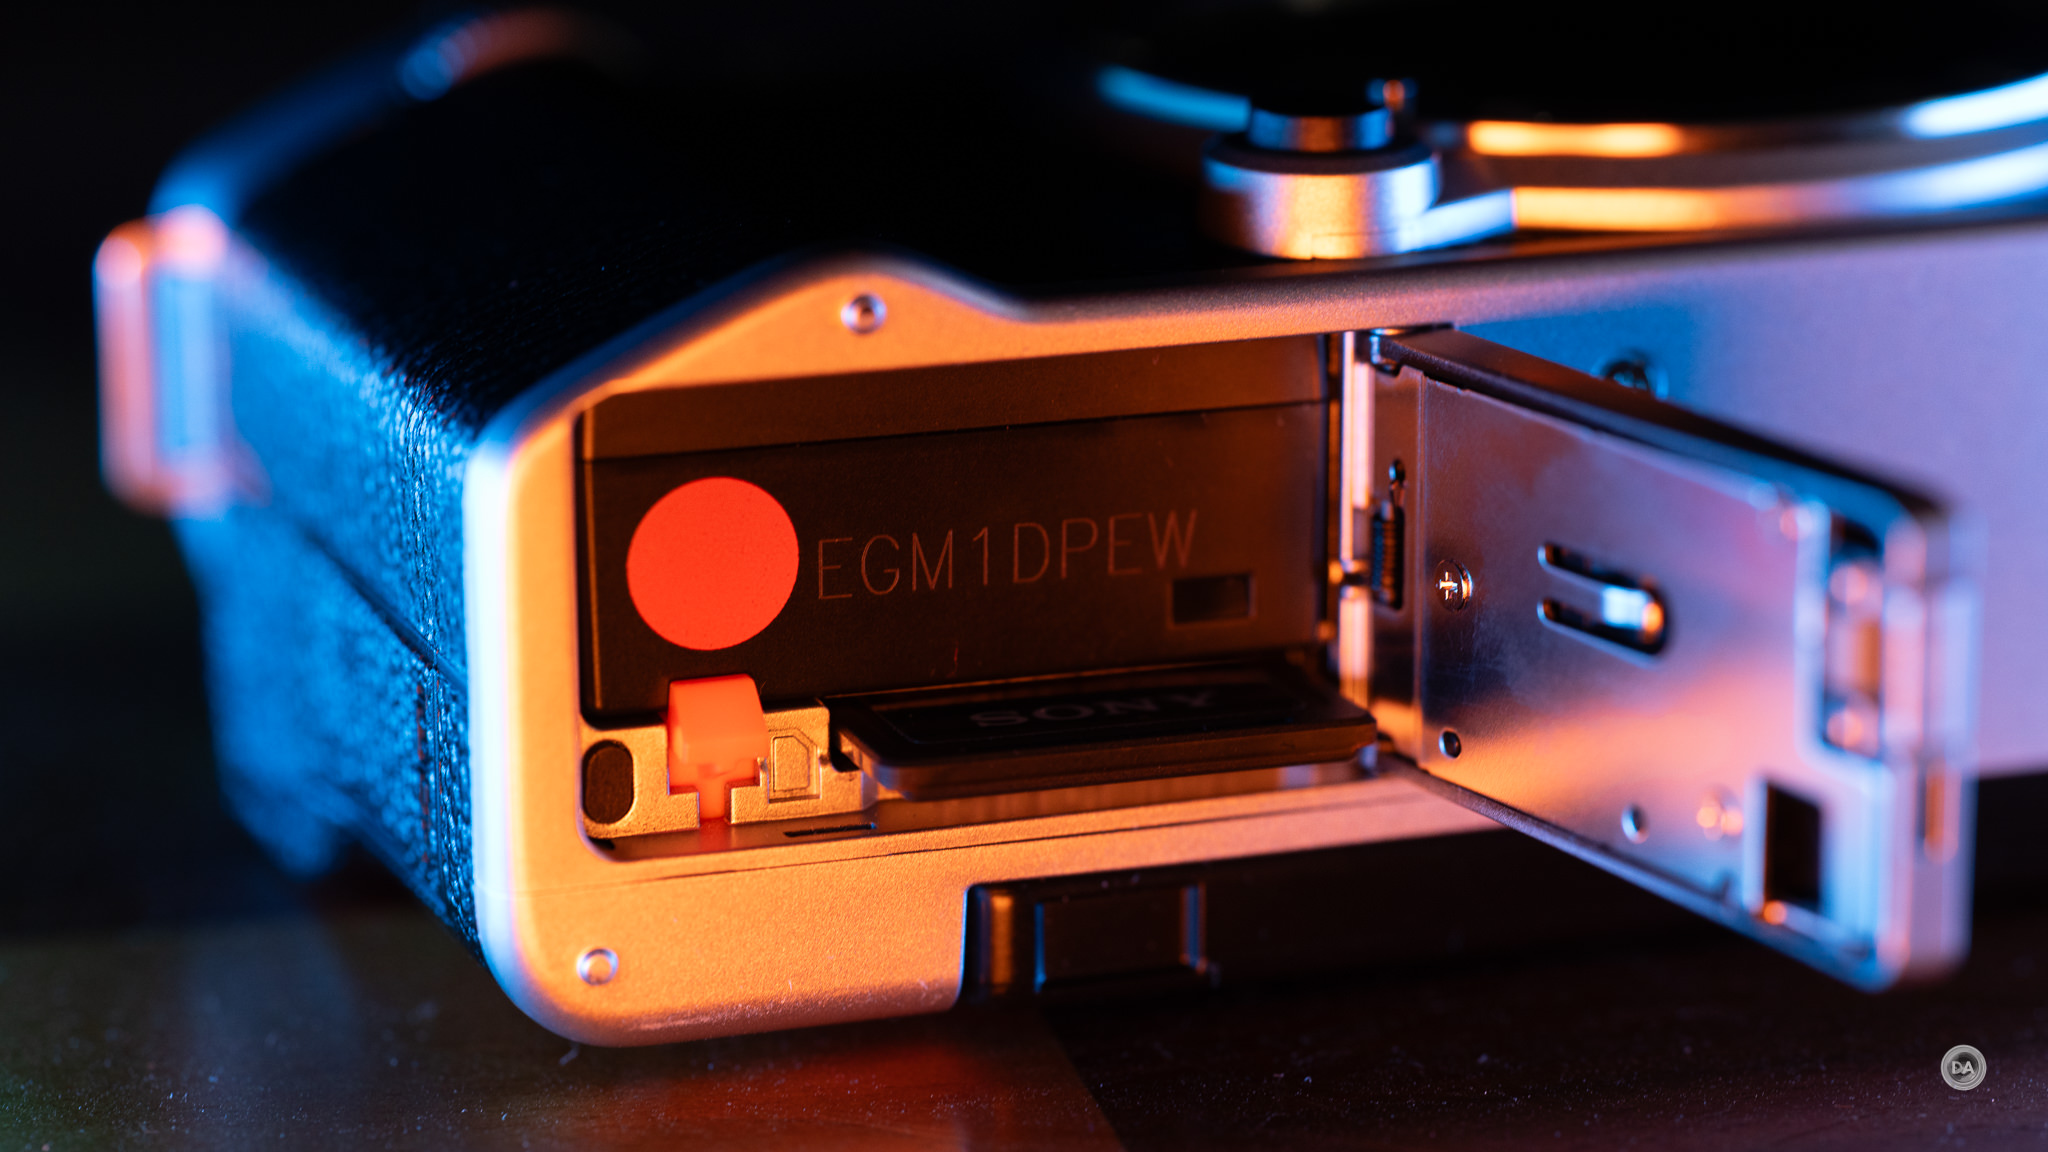
The second disappointment is that the memory card is housed there. I hate this position as it makes it far more likely that you’ll walk away without a memory card inserted because you have to close the battery door to set the camera down (happened to me!) If you have a tripod QR plate attached you also won’t be able to open the door to get at the card without removing it first. I also couldn’t figure out a way to just attach a USB-C cable and directly transfer images to my computer. That meant that I either had to do without my Peak Design capture plate that I put on all my cameras to make them easy to attach to either straps or tripods, or I had to use a hex key to remove the plate every time I needed to access the memory card. I really, really dislike this card position, and it is made worse here because the card is located on the far right of the bay, closer to the center of the camera and the 1/4″ tripod socket.
The card slot is only UHS-1 compatible, but that seems to be enough for steady data flow for the 6K30 footage. Buffer depth (as we’ll explore later) is pretty decent as well thanks to the more reasonable 26MP (rather than 40MP) resolution of the sensor.
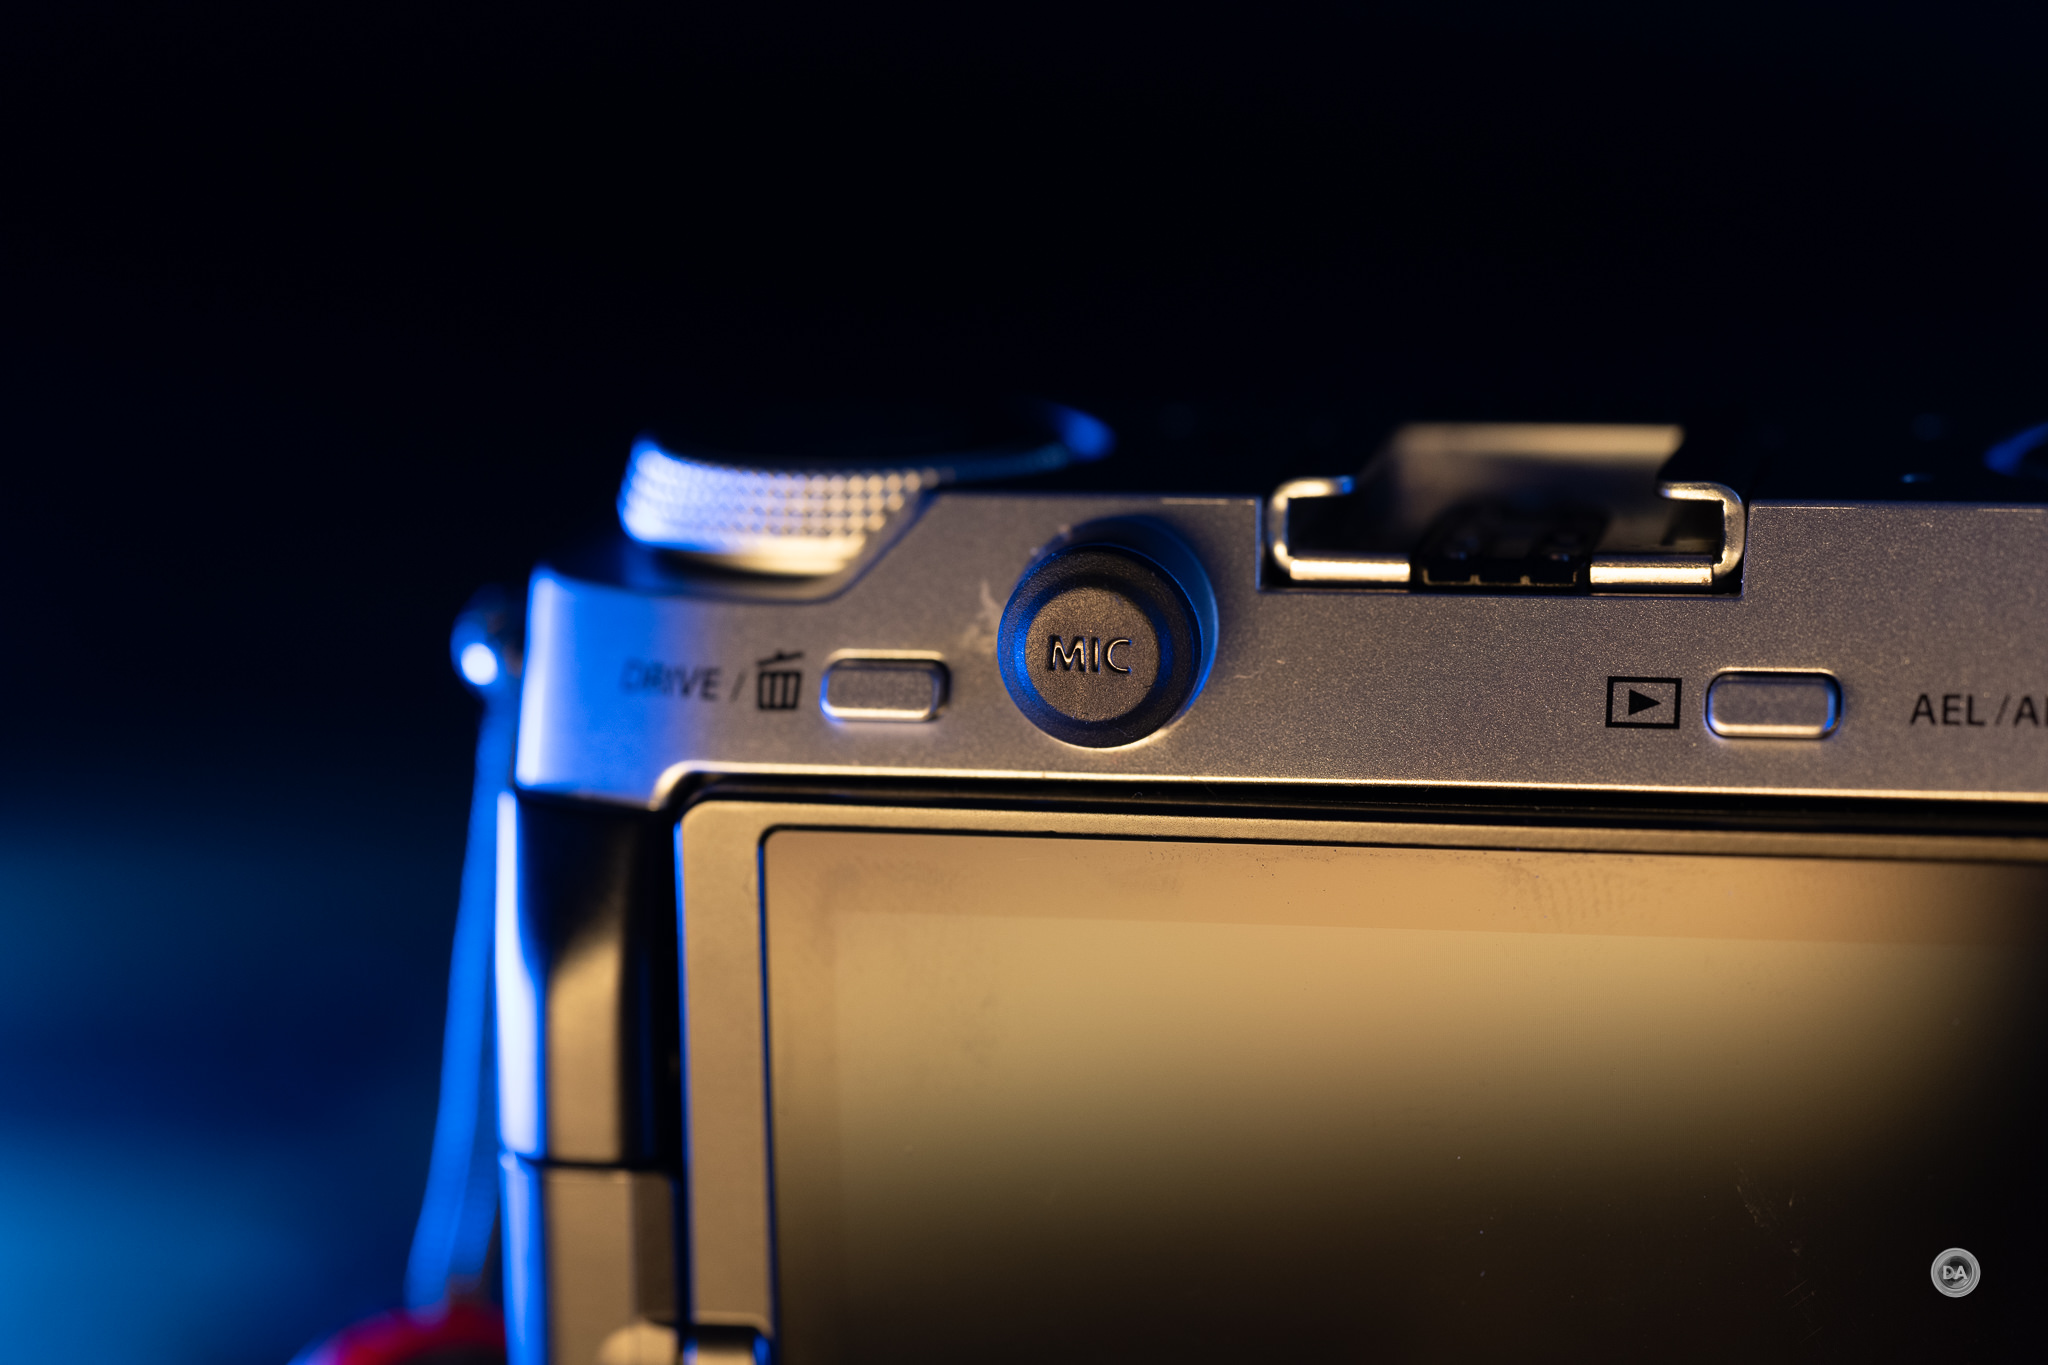
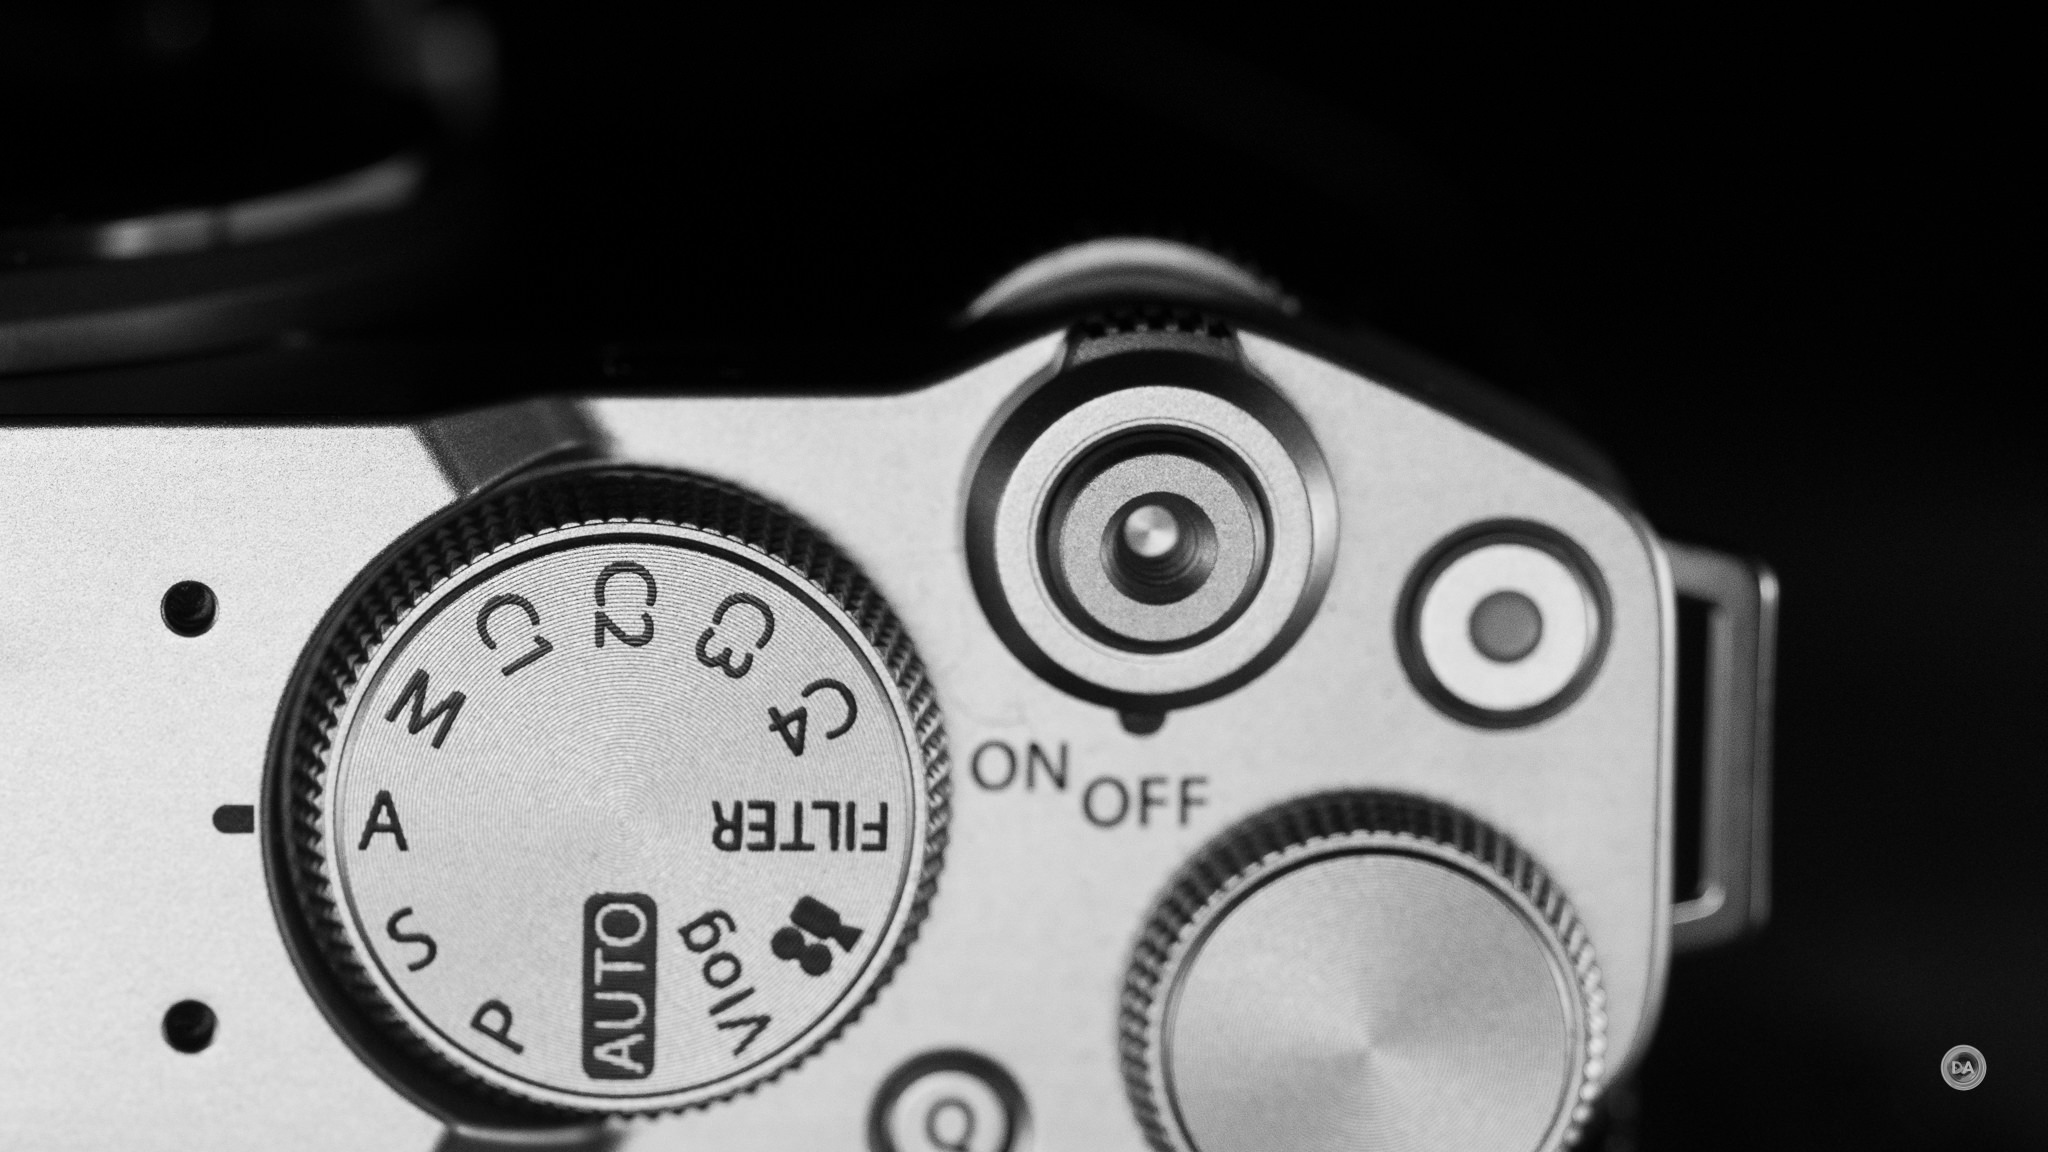
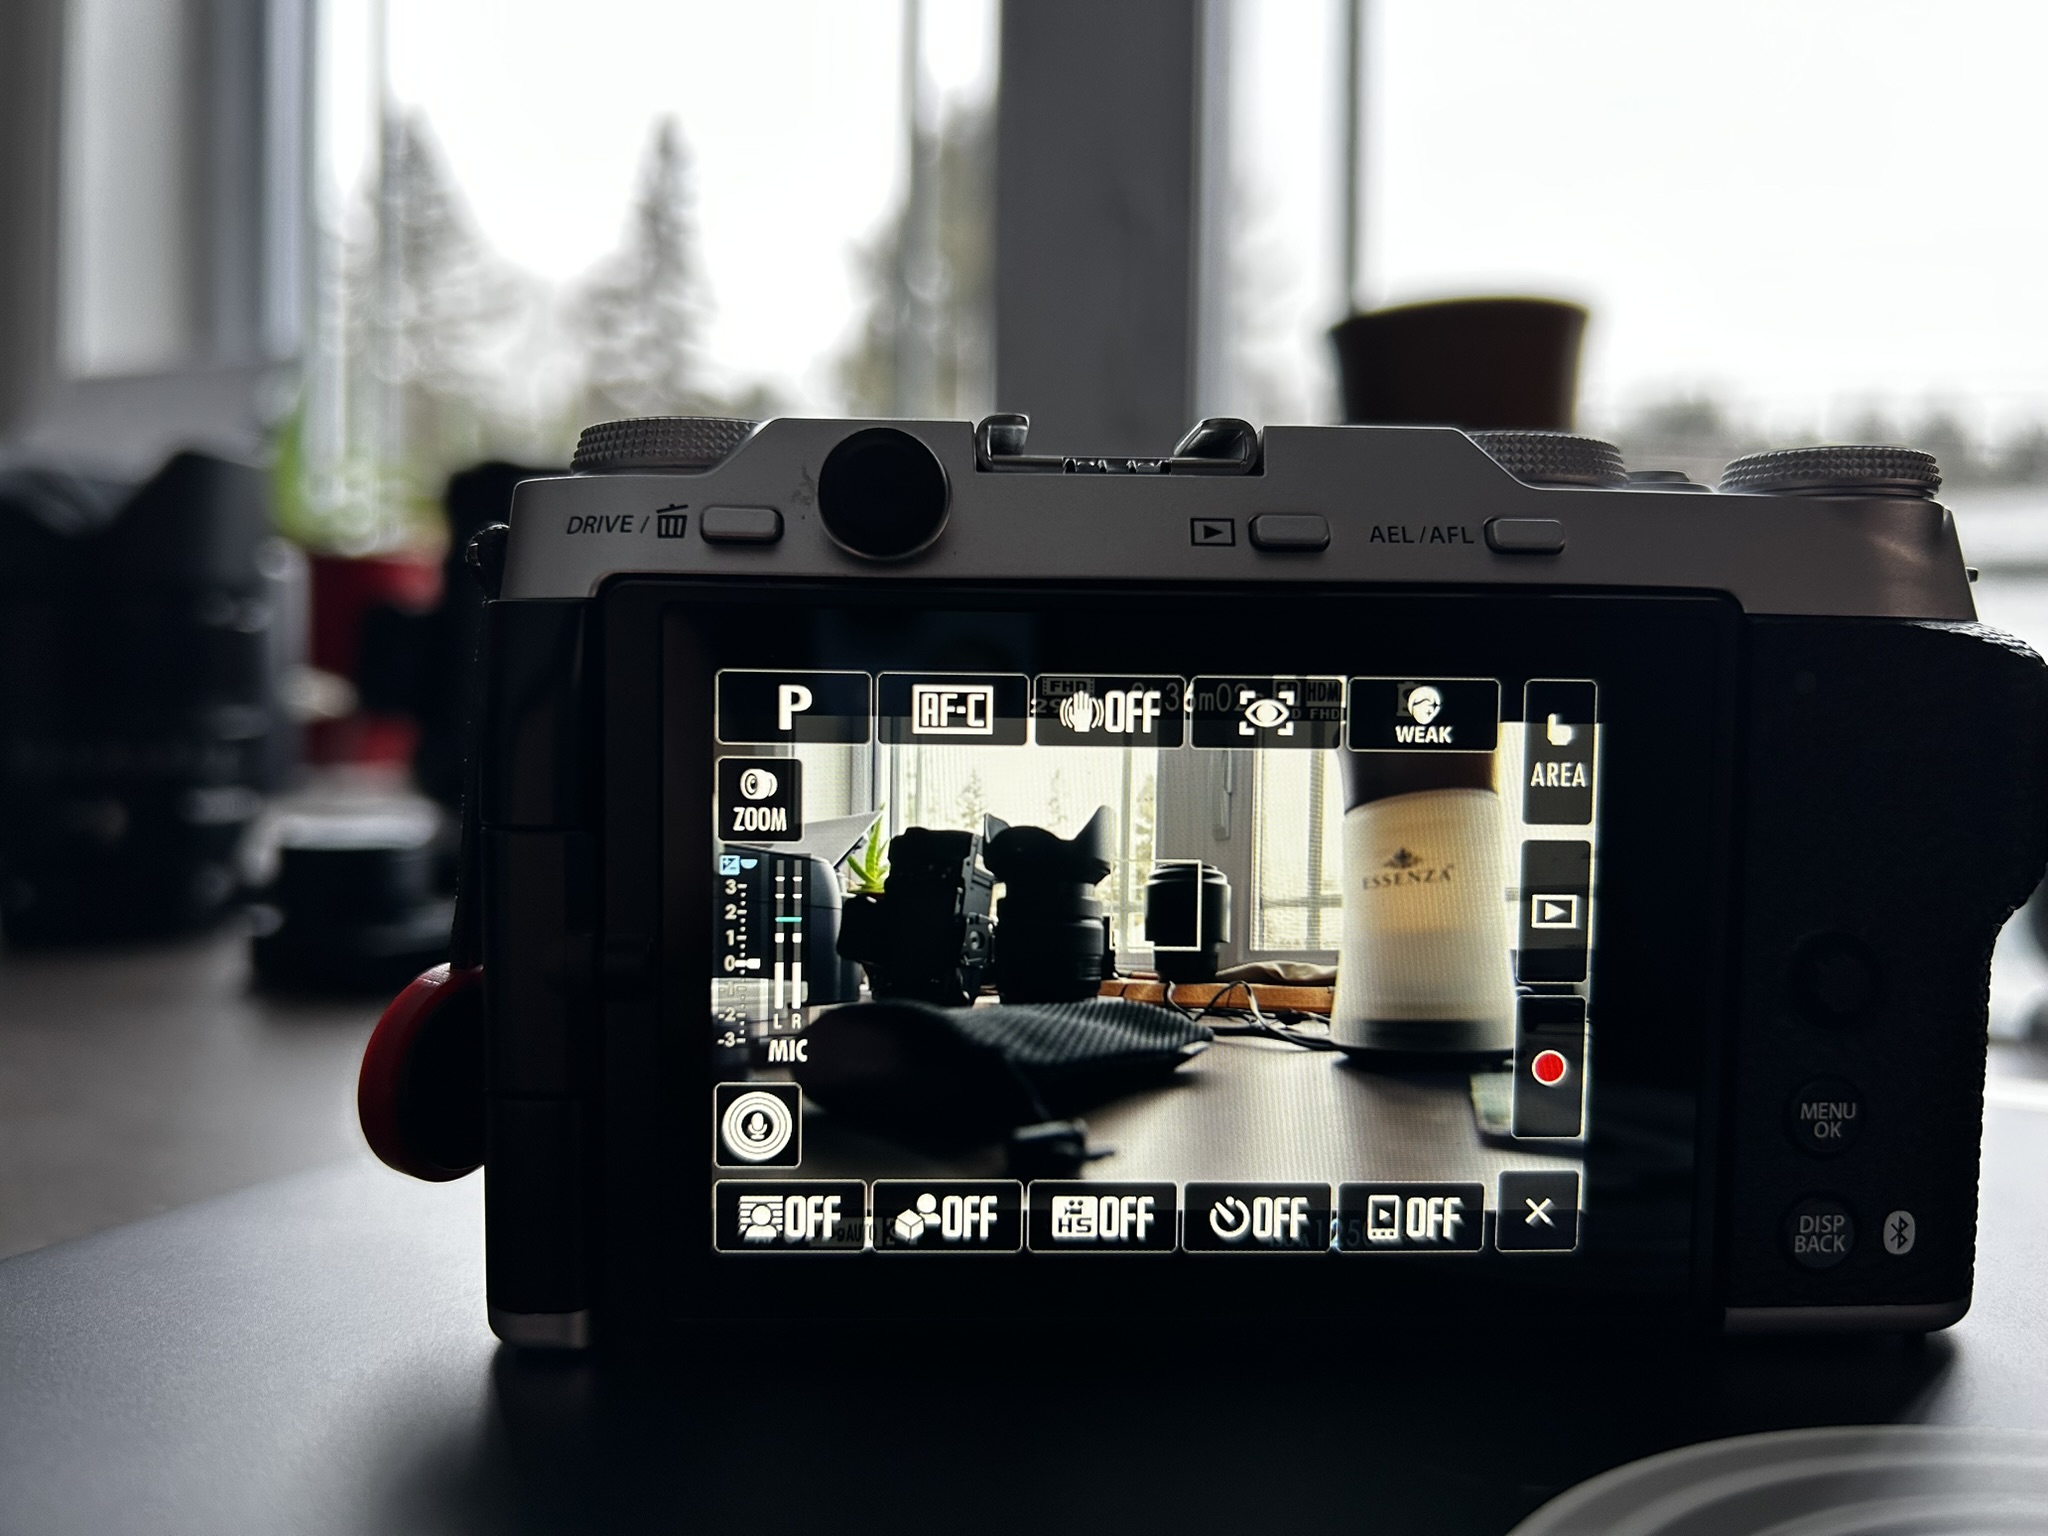
While the X-M5 has some of the retro aesthetic that Fuji does so well, the control scheme (outside of the film simulation dial) is pretty routine. As a personal preference, I actually like even my compact cameras to be big enough to have decent ergonomics. Controls are not bad here, but there’s a few questionable decisions in with the good. You can see from the top plate (where most of the controls are) that there is a mode dial and a rear control dial in addition to the film simulation dial. The rear control dial is a little stiff, but works well enough. What I really don’t like is the tiny, tiny Q menu button between those two dials. It is hard to access with a bare fingertip, and impossible when wearing gloves (I’m doing a winter review).
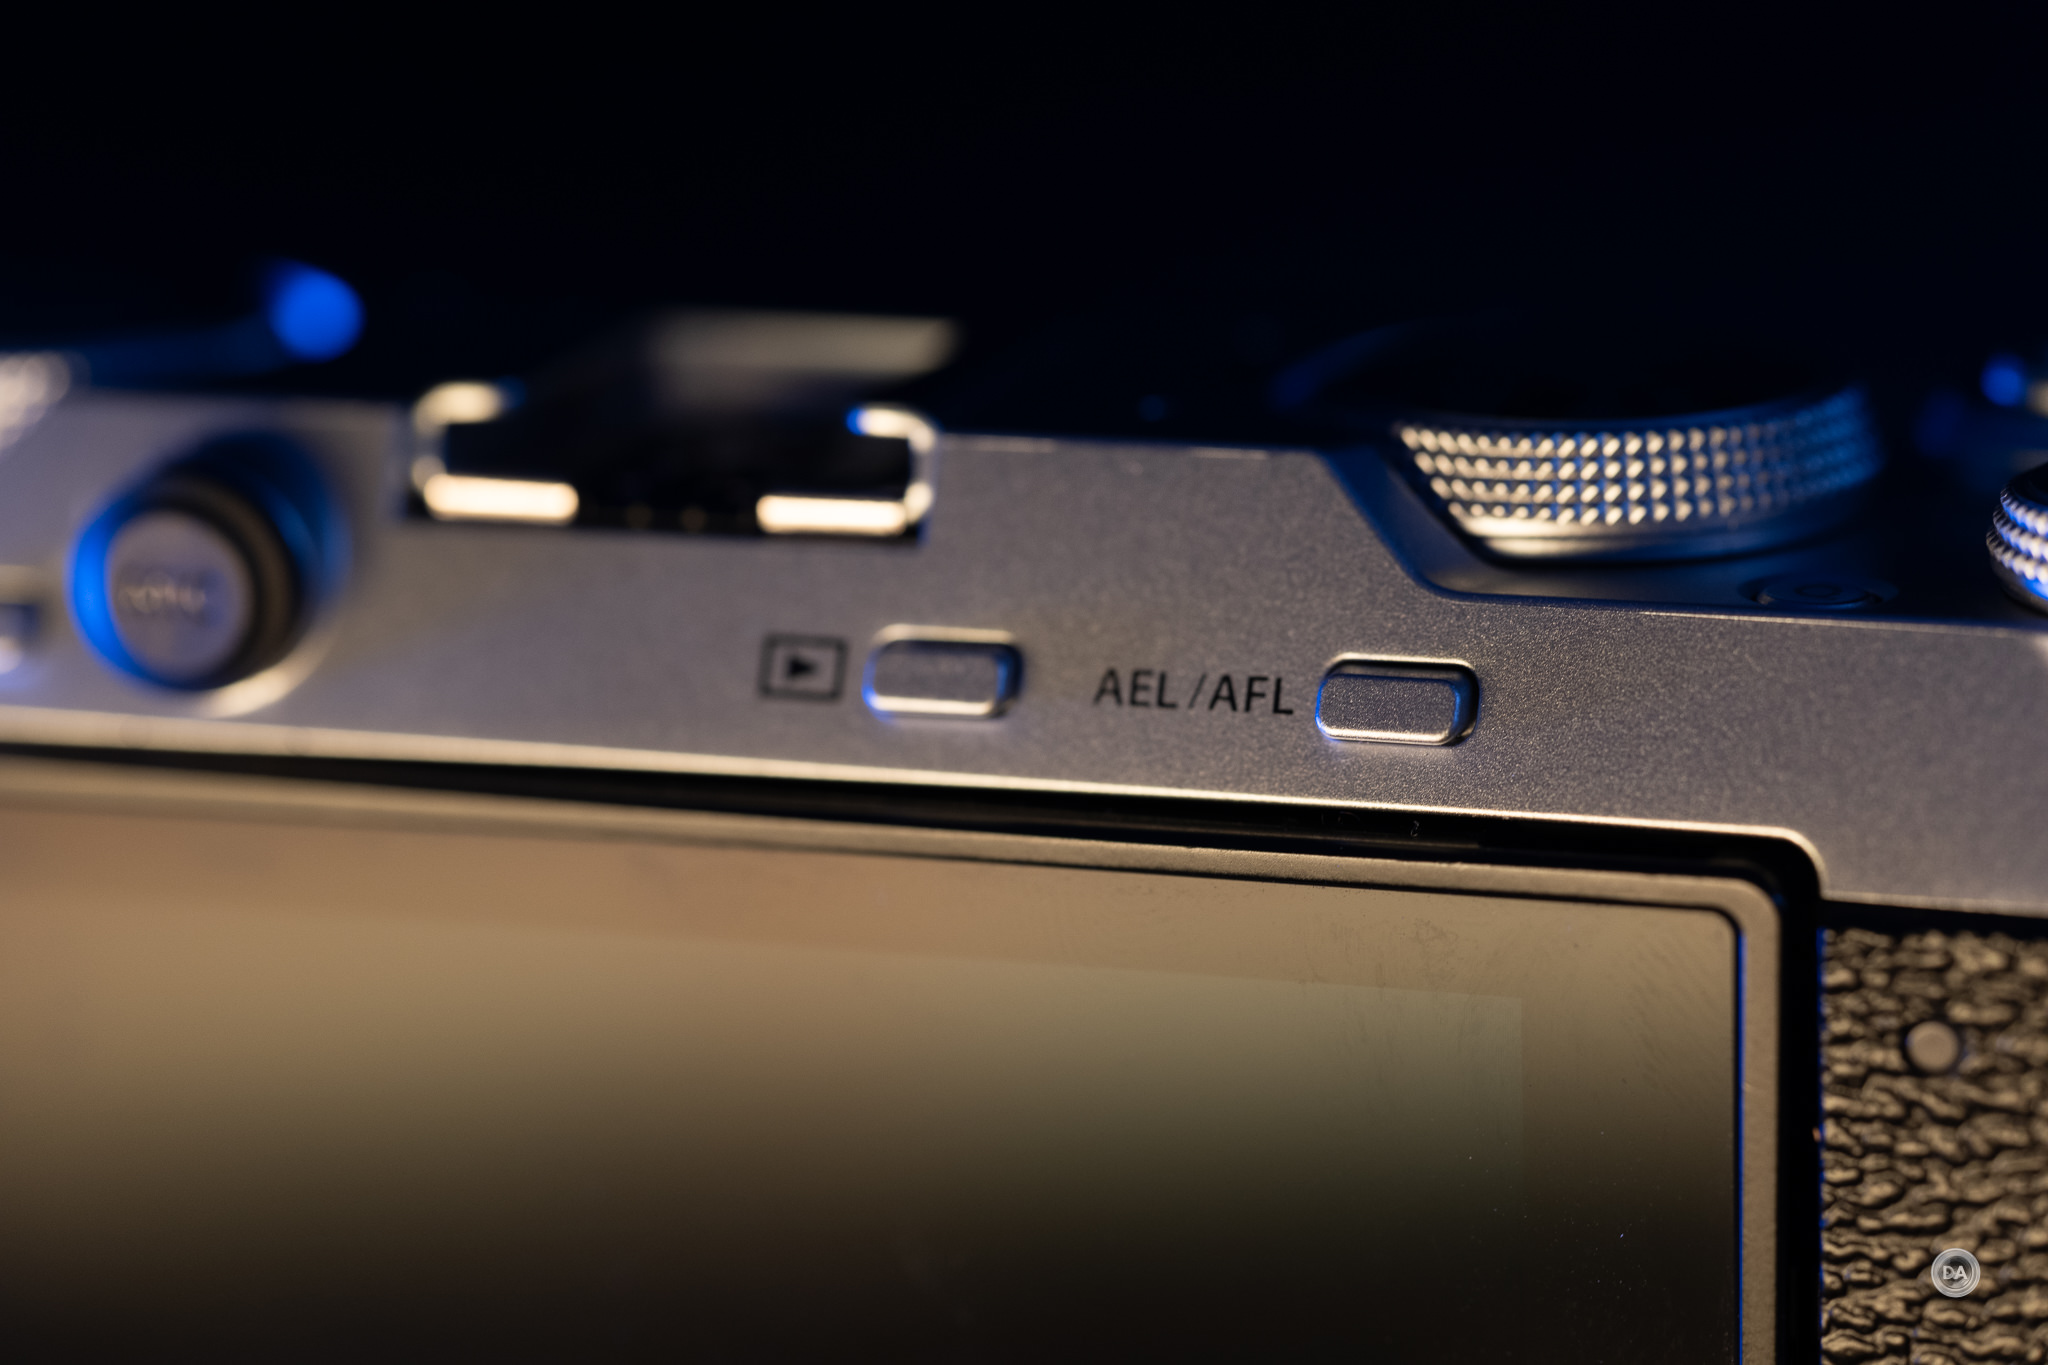
The rear buttons above the LCD screen are also very small, and those wearing gloves will also find them a little difficult.
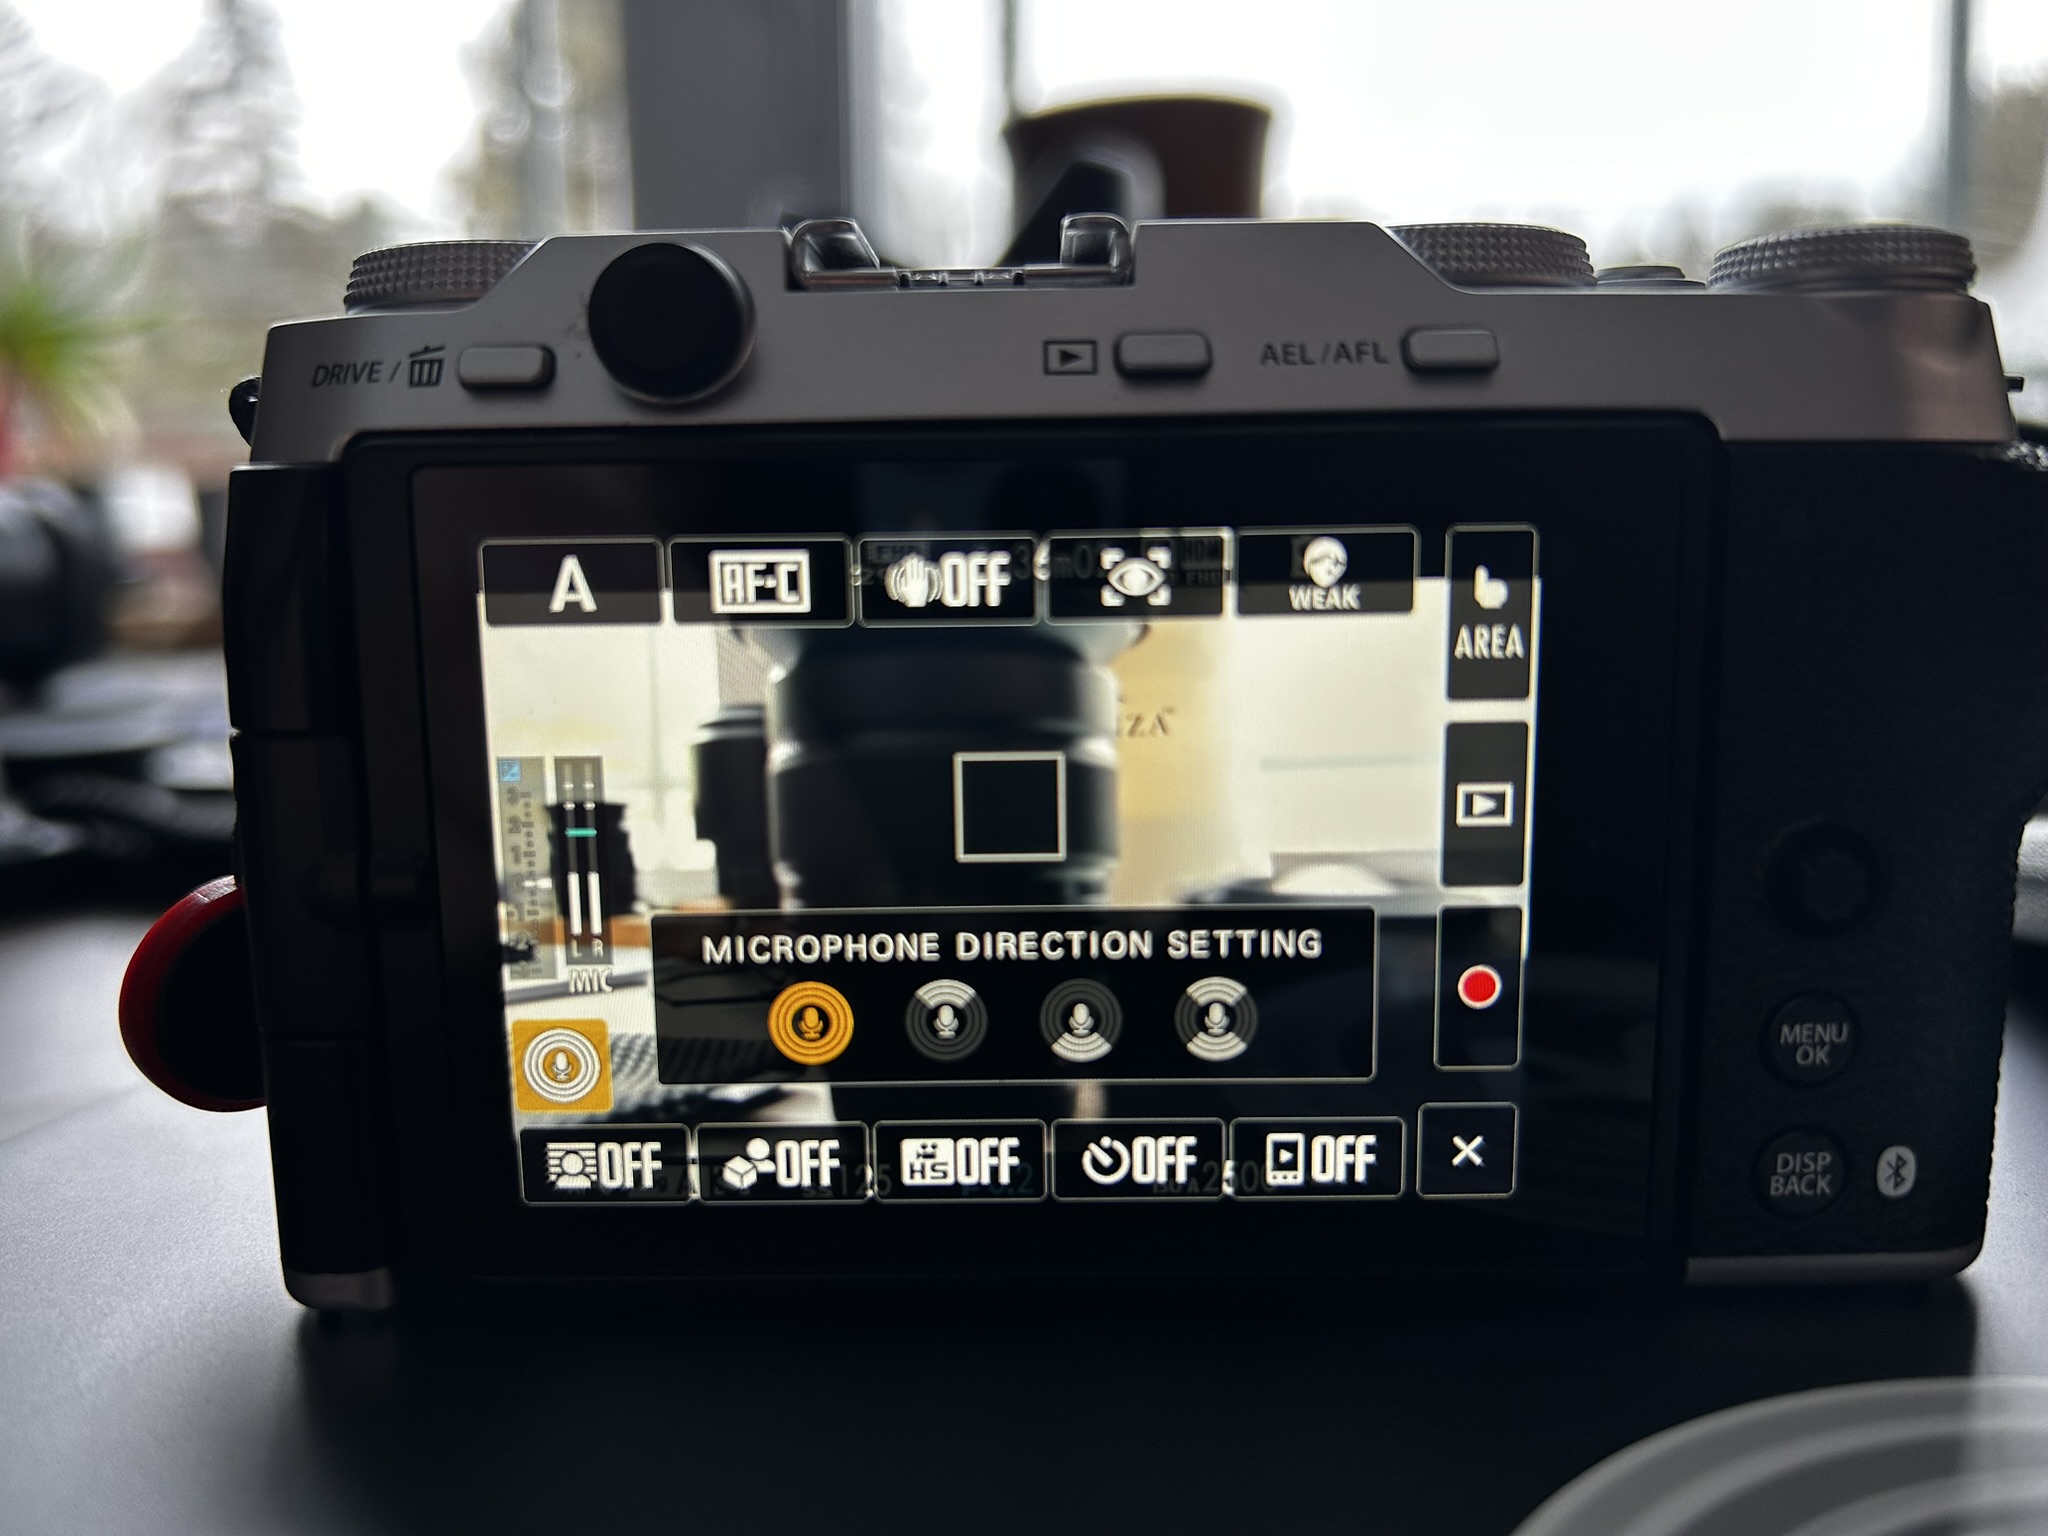
The drive/garbage button is harder still to access due to the prominent port for the mic input. Mic ports are usually on the side. I don’t mind this position in a small camera, as it has good proximity to the hot shoe where the mic will likely be mounted, but it does make the adjacent button a little difficult to access.
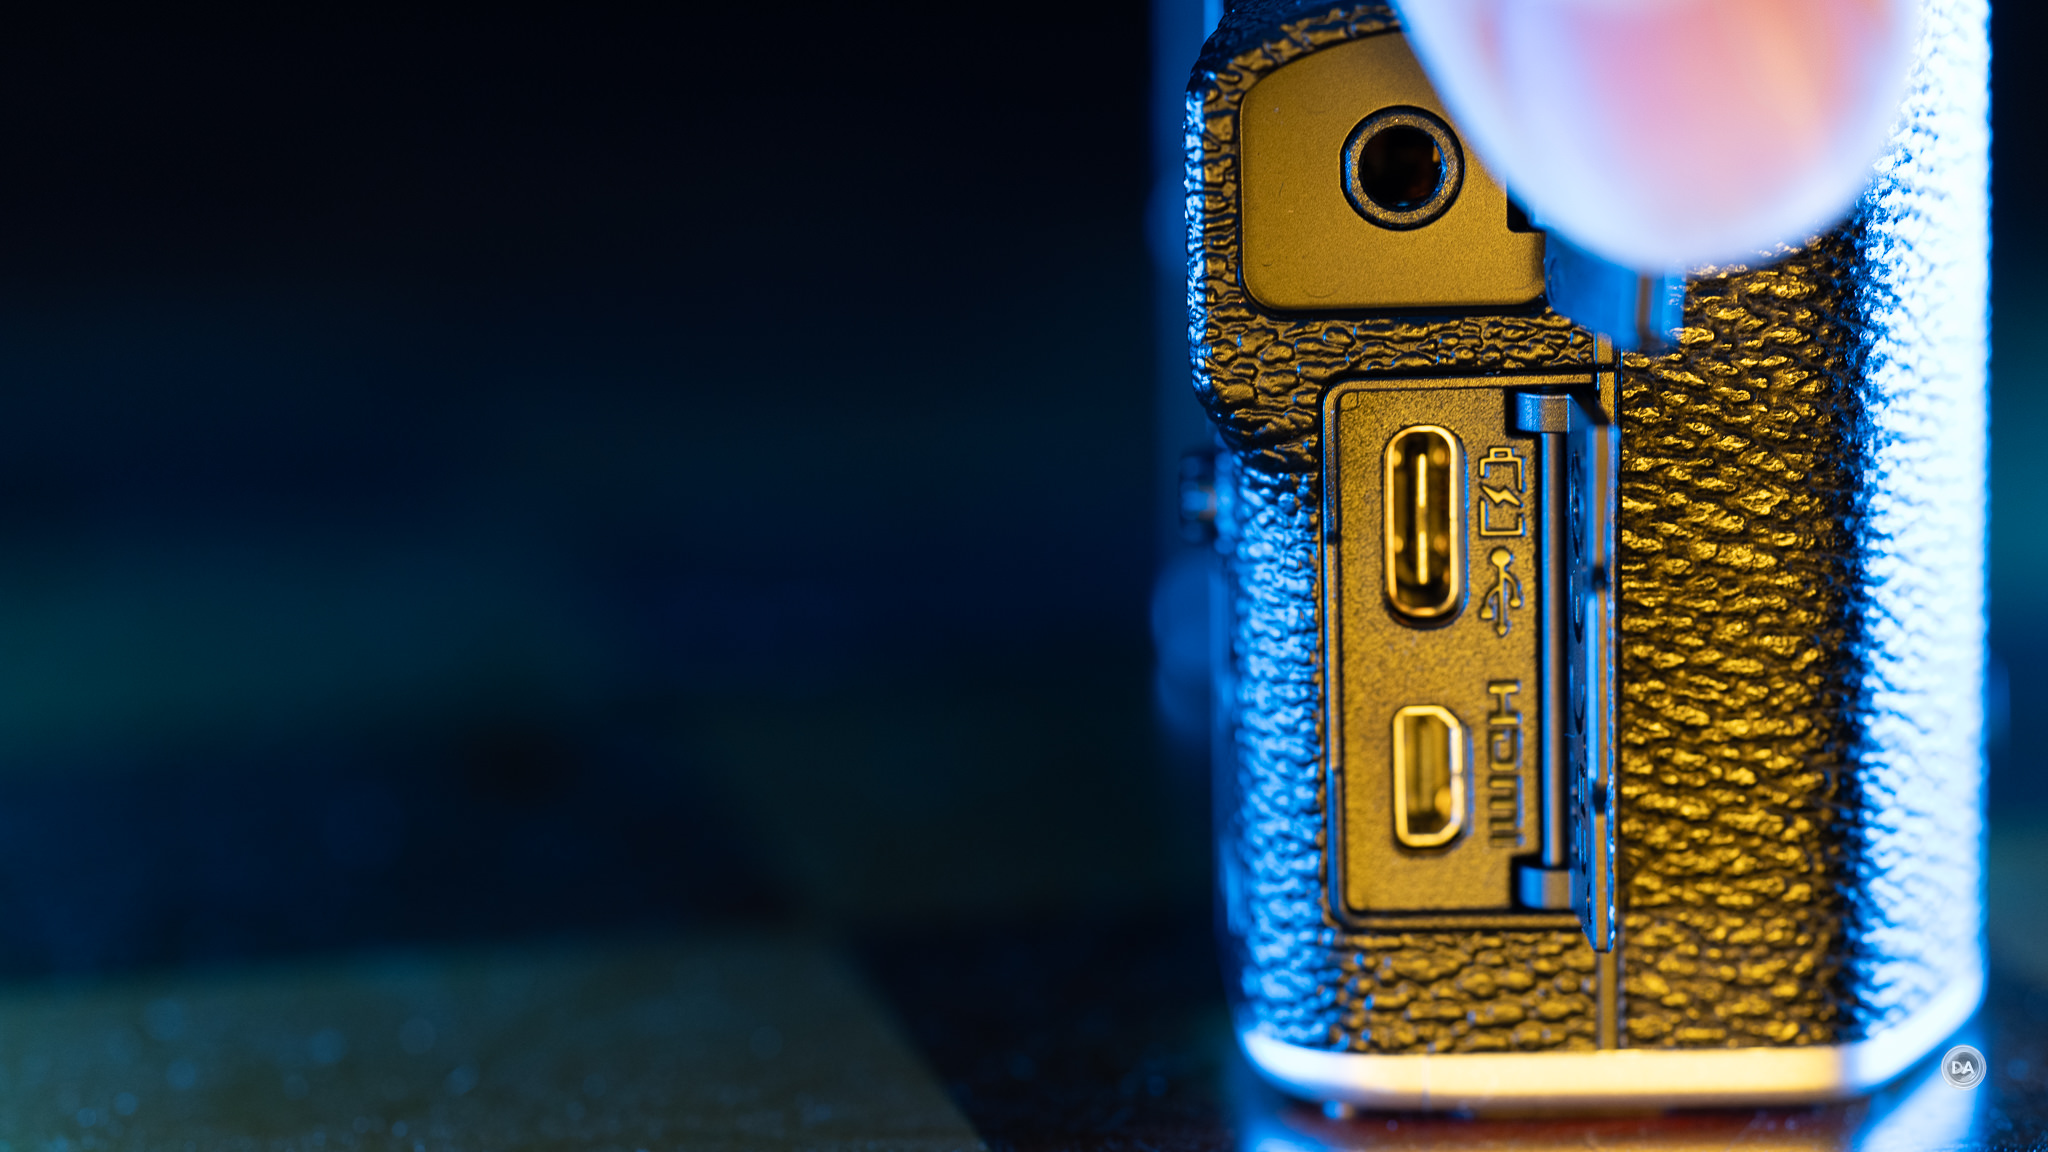
This includes a headphone monitoring jack, which is important on a video-centric camera like this. A second port has a USB-C port that can be used for either data or charging the battery in camera, and a micro-HDMI port. I don’t love micro-HDMI (it feels more fragile), but obviously there isn’t room in a camera this size for a full size HDMI port.
On the positive note, there is a little navigational joystick that helps with menu navigation. On the negative side, however, there is no full menu navigation by touch, which isn’t true of most of the competing (non-Fuji) cameras. There are two other buttons below this for further control.
The limited touch capacity makes navigating Fuji’s menus a little clunkier than other cameras where you can use whatever combination of touch and/or physical control that you like. I’m mostly frustrated here because I haven’t seen any progress on this front in all the time I’ve been using Fuji. The reactiveness of what touch is there (touch to focus, navigating the Q-menu, etc…) feels imprecise and with a lower reactiveness than competing cameras.
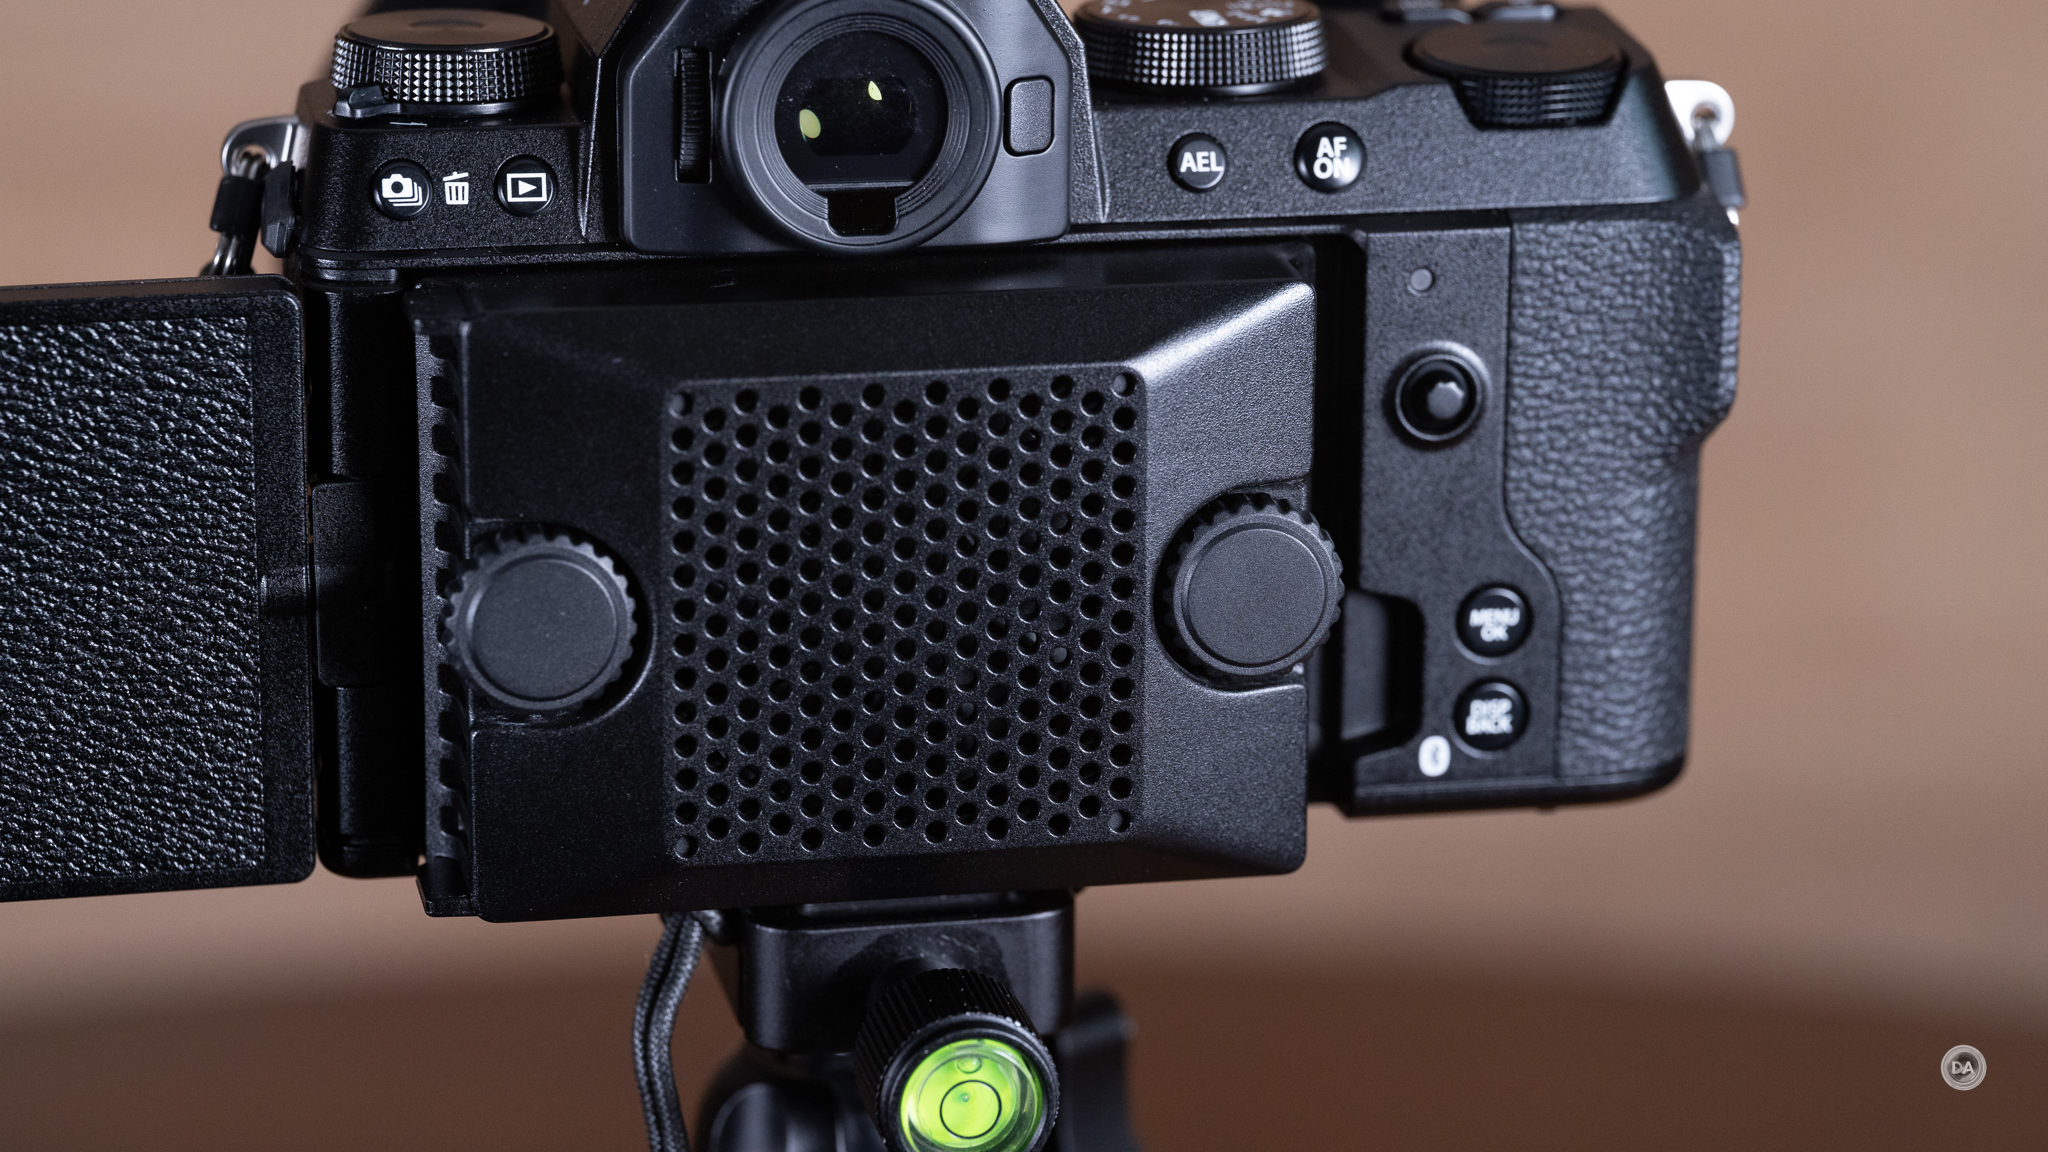
Another disappoint regarding the screen is a fairly low resolution. This is a 3″ fully articulating screen (which I personally like!), but the resolution is just 1.04 million dots. That’s not great when the screen is your only compositional tool. There is no viewfinder. While the screen has reasonable brightness, it is definitely very hard to see in bright, sunny conditions. There were many times in those situations where I instinctively began to bring the camera up to my eye only to remember that there was no viewfinder.
Also missing is one of Fuji’s useful control points – an easy to use switch that controls the focus mode (Manual, Continuous, and Single Shot). This is more missed on Fuji than other cameras because most Fuji lenses do not have an AF | MF switch because this is usually handled by a camera-based switch.
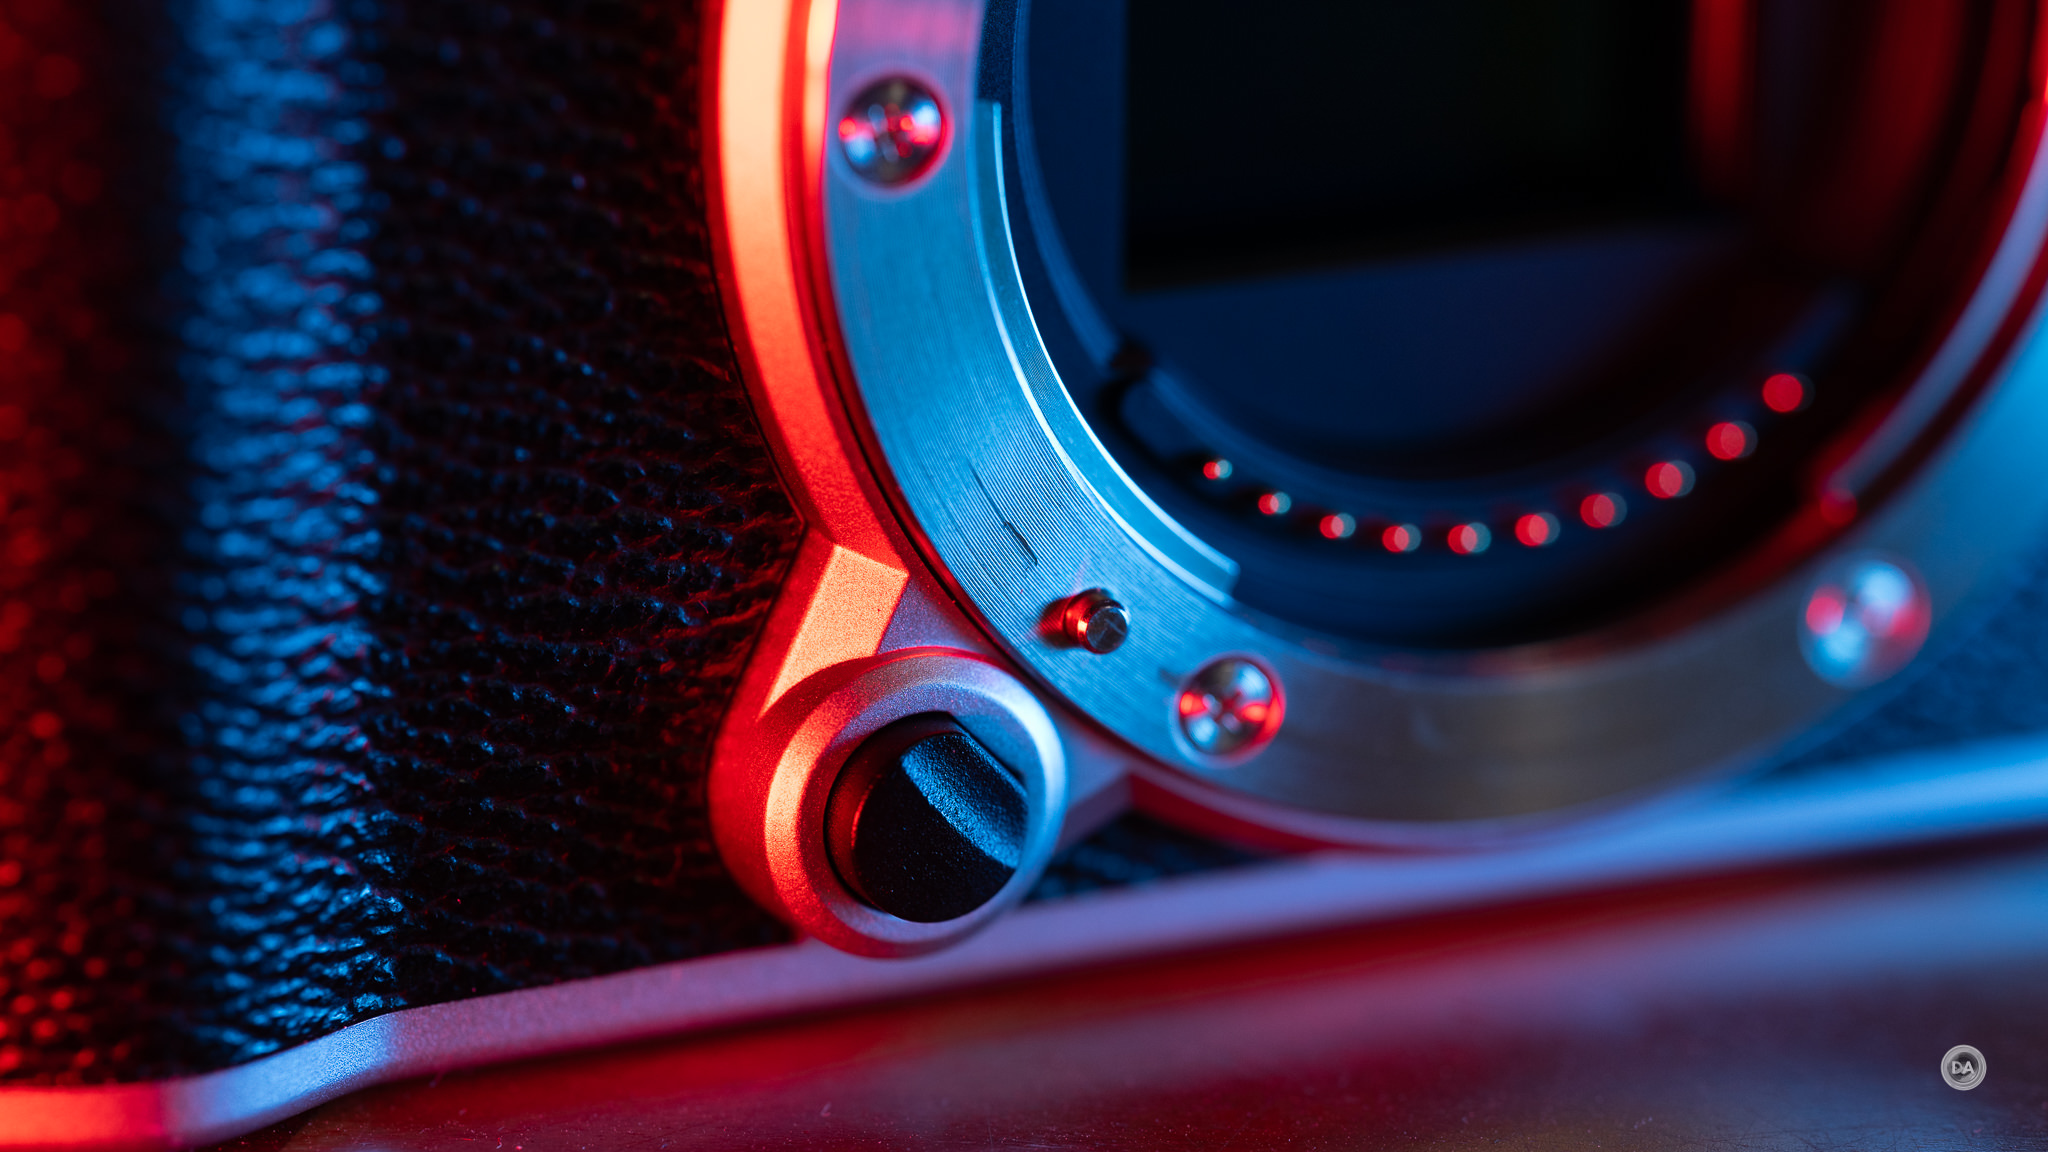
All we have on front is the aforementioned control dial and a lens release button located on the right side of the lens mount.
The shutter is threaded in a typical Fuji fashion, and surrounding it is the ON/OFF toggle. You can choose either a mechanical style shutter with a 1/4000th shutter speed limit, or an electronic shutter that can reach a much higher 1/32,000th shutter speed. Fuji has a nice hybrid option where you can choose to use the mechanical shutter for slower shutter speeds (with all of the advantages that come with a mechanical shutter) and then automatically switch to the electronic shutter when faster shutter speeds are needed.
The X-M5 is compatible with Fuji’s FAN-001 cooling fan accessory. It seems like most of their recent cameras with a fully articulating screen can use this. It’s an interesting (if somewhat clunky) interesting concept, as it plugs into the body in the port pictured above with the screen rotated out and actively cools the camera chassis to extend video recording time. You aren’t going to be able to close the screen with the FAN-001 attached (for obvious reasons), but it seems like a fairly intelligent solution to a common problem for those focused on long format video capture at higher bitrates and resolution levels. I didn’t have the FAN-001 on hand, but here’s what it looked like attached to the X-S20.
The X-M5 is a very cool looking compact camera that definitely wins style points, though, as per usual, the compact nature of the camera comes with some serious ergonomic challenges.
To me, going back to my X-H2 was a treat, but I’m more of a fan of more conventional controls and chunkier camera bodies. If you want small, and compact, the X-M5 may be perfect for you.
Kit Lens
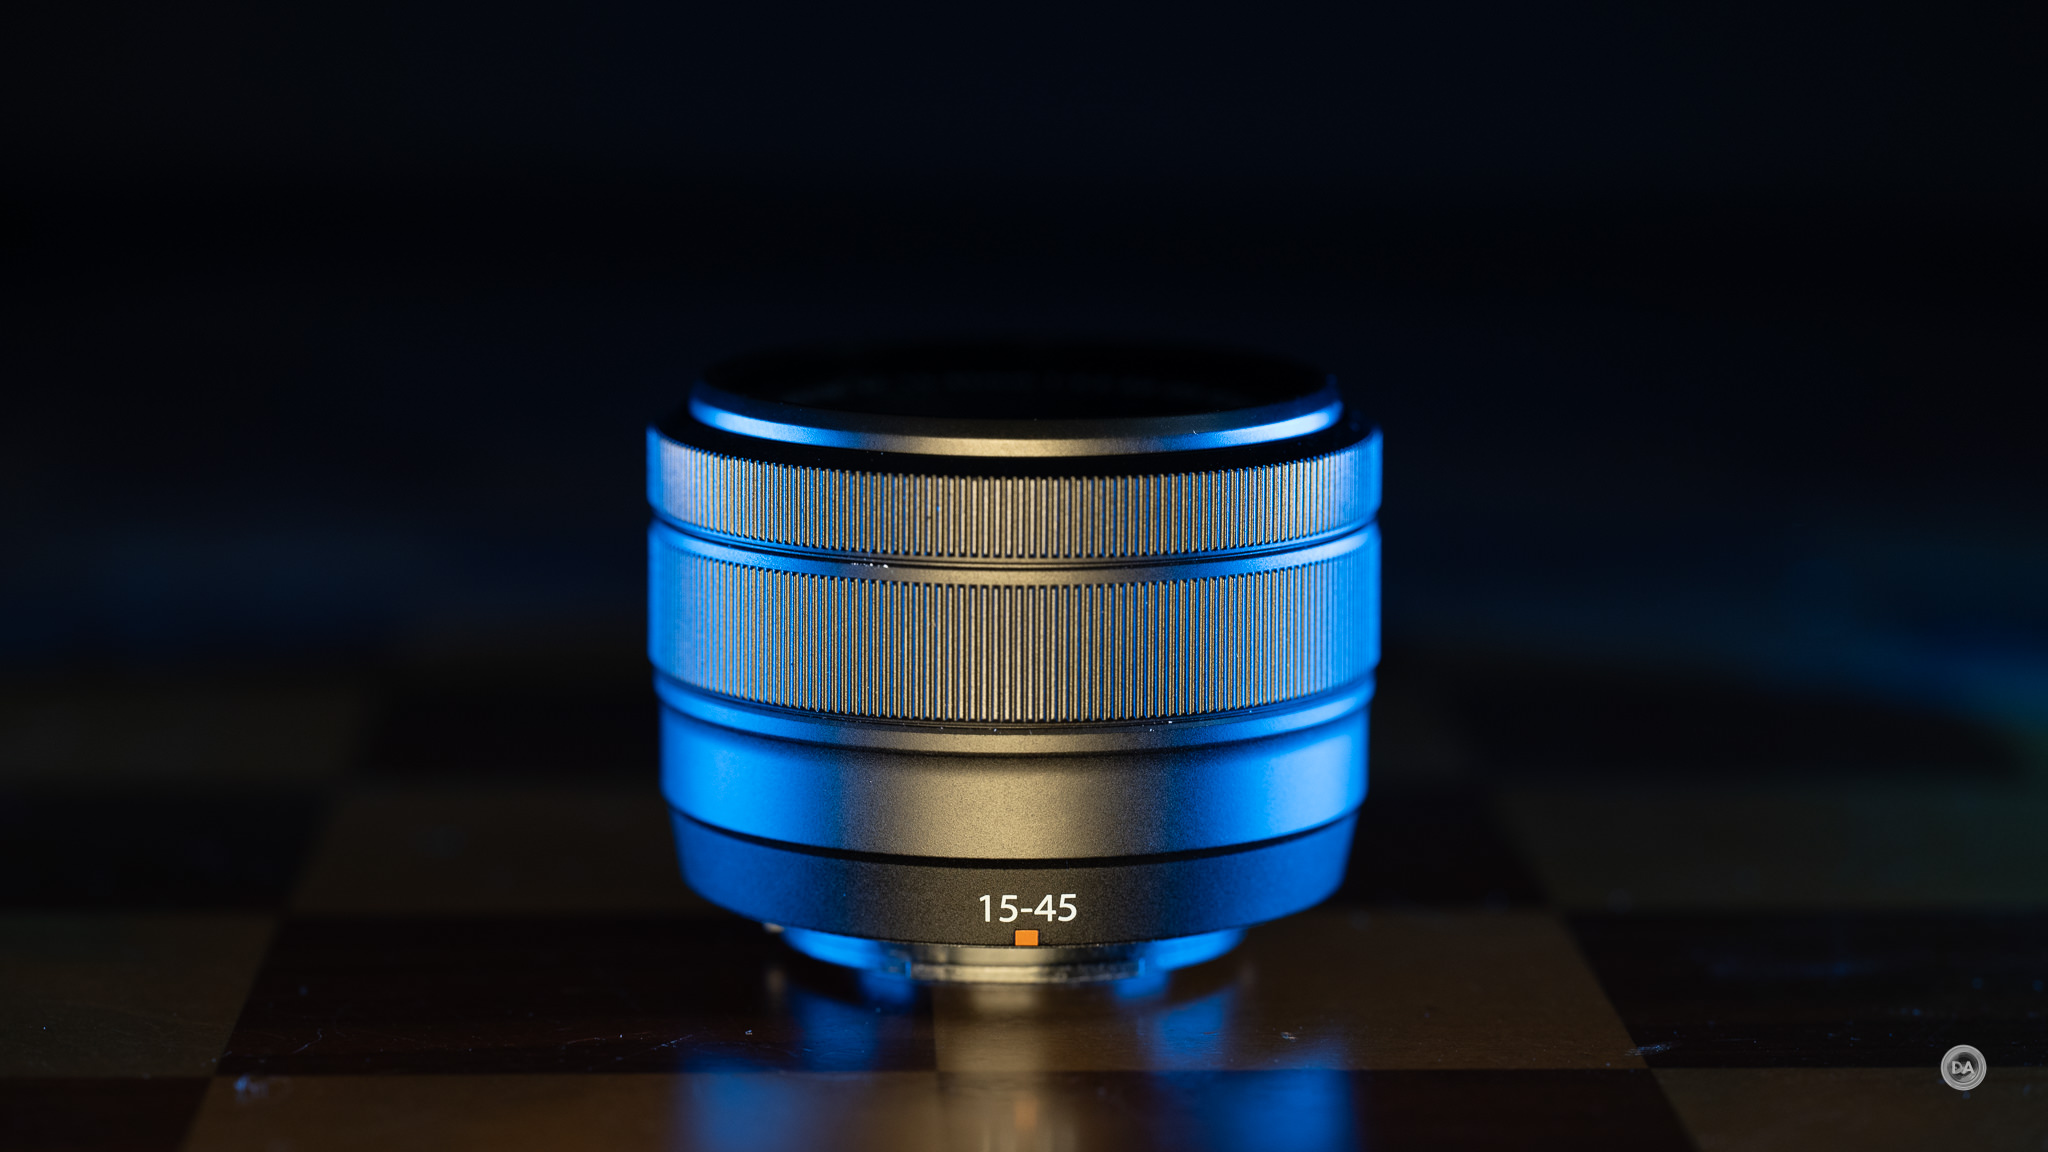
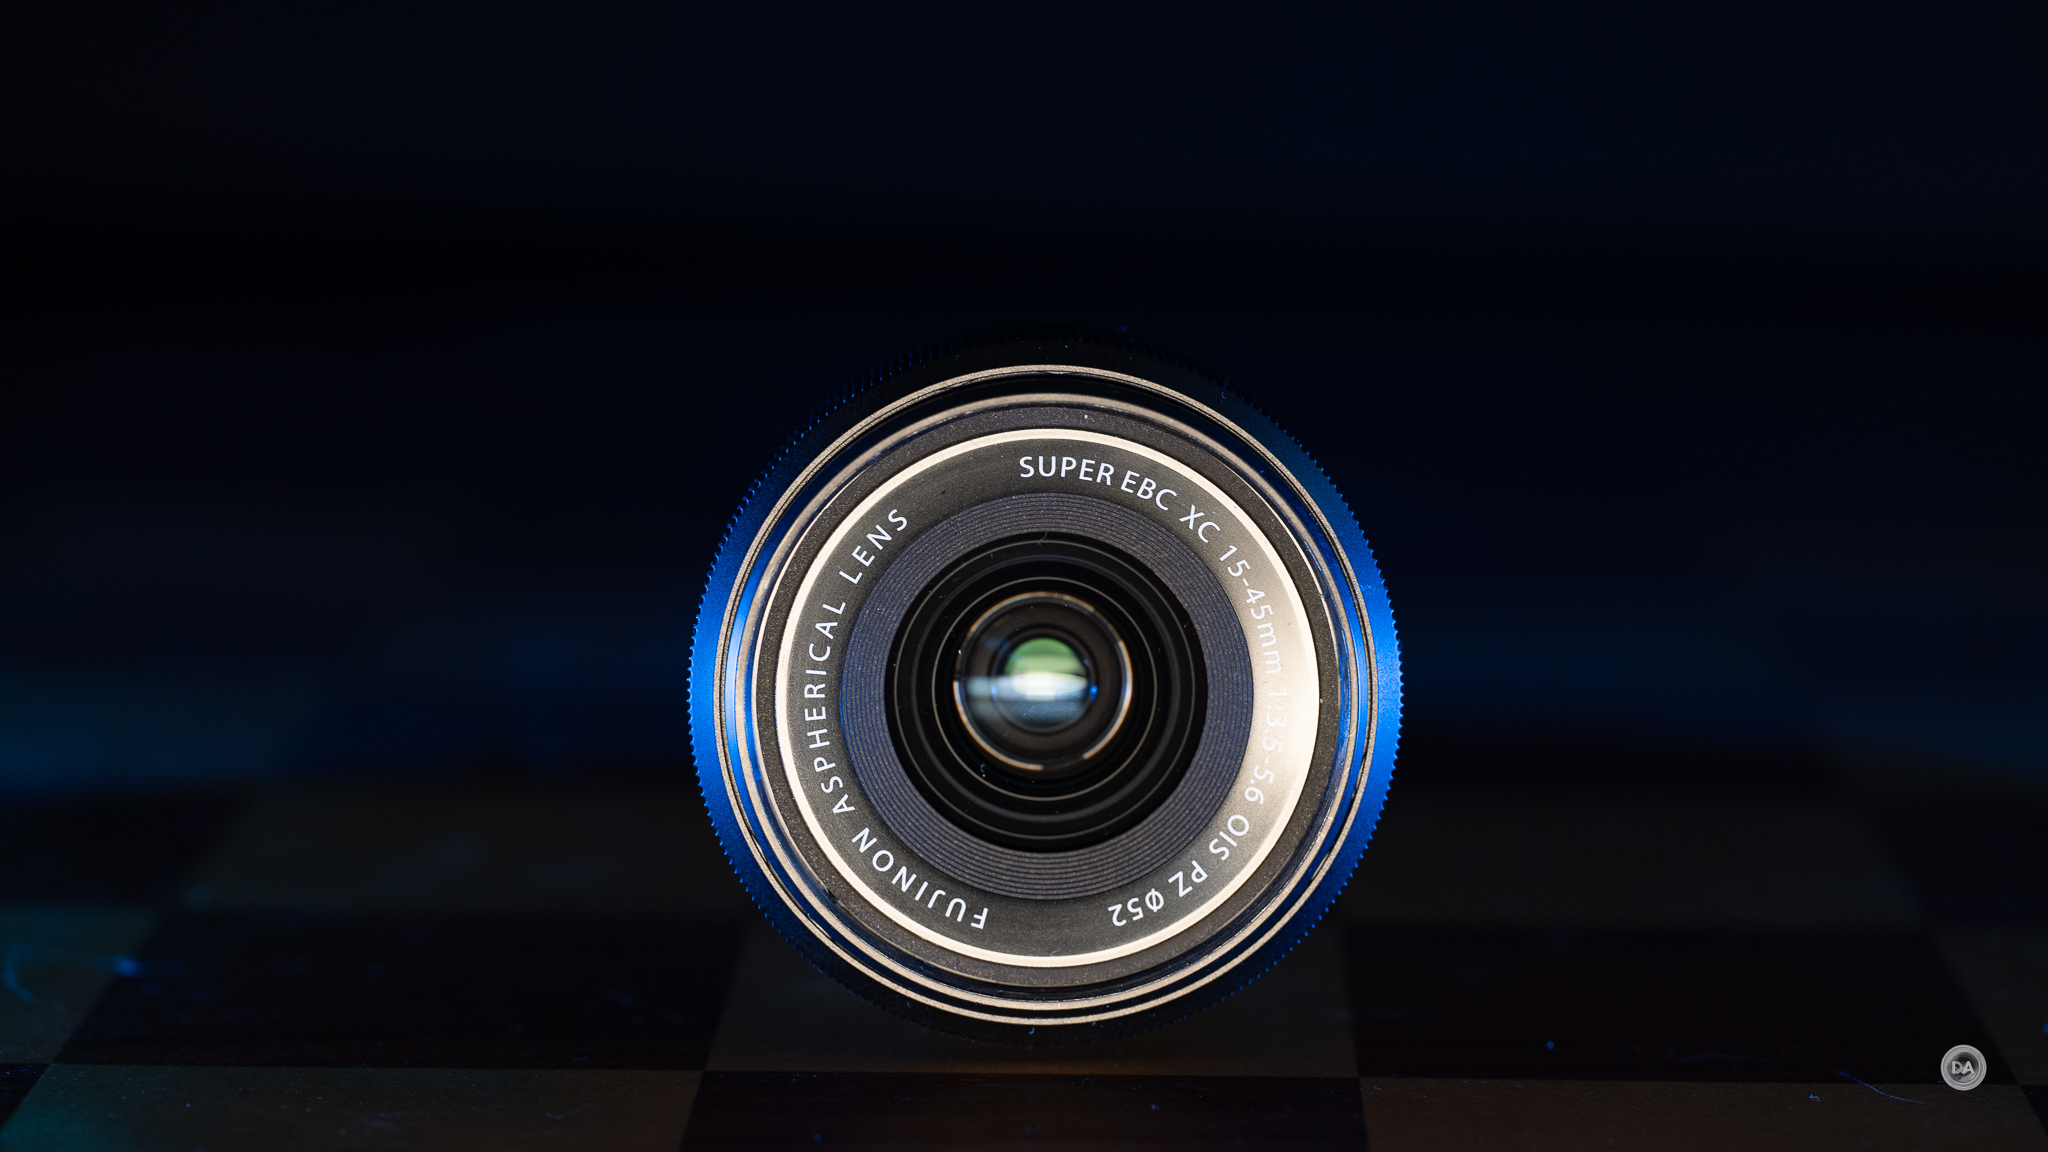
I’ll take a moment to give you a look at the potential kit lens, which is the XC 15-45mm F3.5-5.6 OIS PZ. Bought in kit, it will only set you back an additional $100, but bought separately it will cost three times as much! You’ll obviously want to make that decision before purchasing the camera!
This is a useful focal length, and I will give some credit for having a slightly brighter aperture than some competing lenses (F6.3 is pretty common on the telephoto end). The lens also provides OIS (Optical Image Stabilization), which could be important since the camera body itself has no stabilization.
I also appreciate the fact that while the lens is a retractable zoom design (the inner barrel emerges when the lens is powered on), it doesn’t require a manual twist to make the lens usable like Canon’s RF kit lenses do (a feature I hate!!)
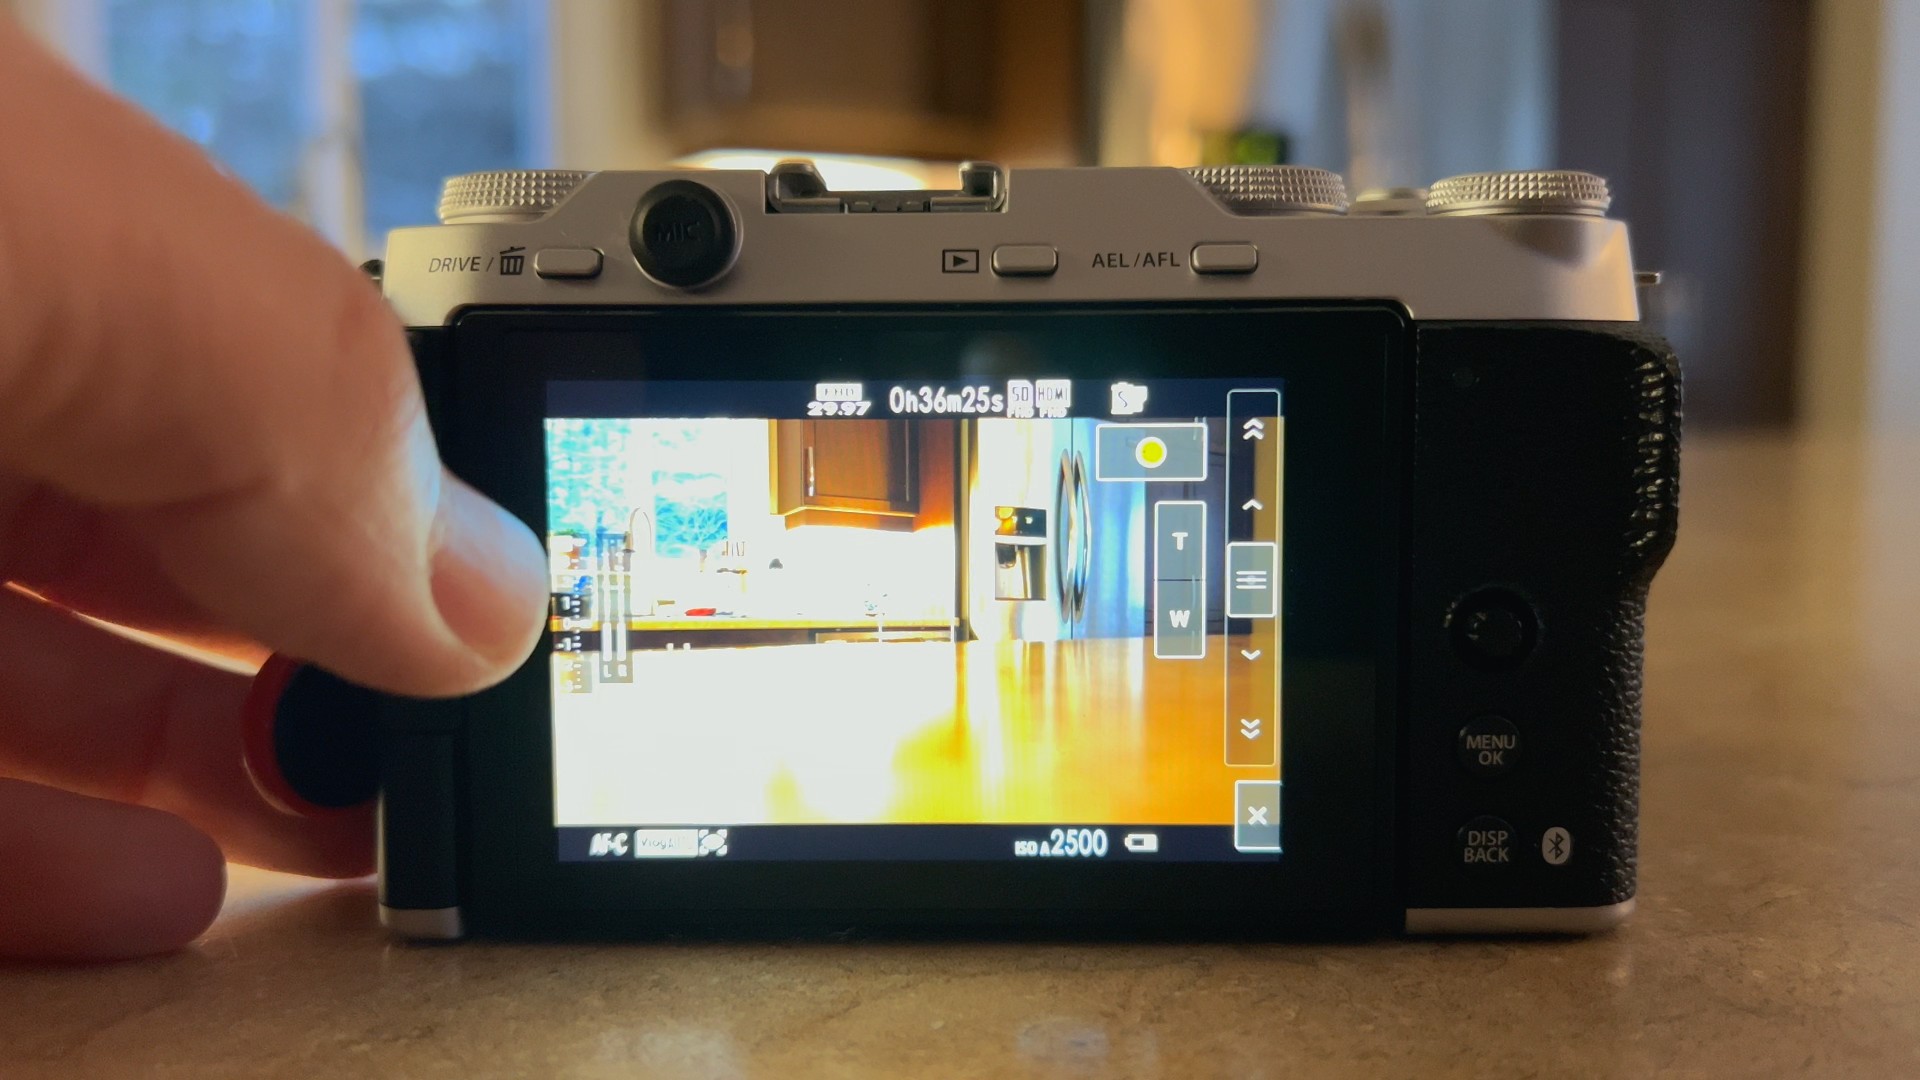
The lens is a PZ, or Powerzoom lens, which means that the zooming mechanism is motorized. When you twist the larger of the two rings the lens will zoom either in or out depending on the direction. This allows for smoother zooming than you can accomplish with a typical twisting zoom, making it useful if you want zooming shots. In the VLOG mode you will also get on-screen zoom controls that will allow you another option for zooming.
A kit lens can be useful in a few scenarios: 1) if you are new to photography or to Fuji and don’t have any lenses. Buying a kit lens means that you can immediately start taking pictures, and at $100, the XC 15-45mm offers a low cost point of entry. 2) If you want a general purpose video zoom. The lens is lightweight, has a useful focal range, and gives you some stabilization.
But there’s a good chance you’ll quickly want an optical upgrade, particularly for stills. Kit lenses tend to be cheap for a reason, and that’s true here right down to the plastic lens mount. Sometimes video is a little less demanding for optical performance, but for stills I sometimes find the image quality rather soft.
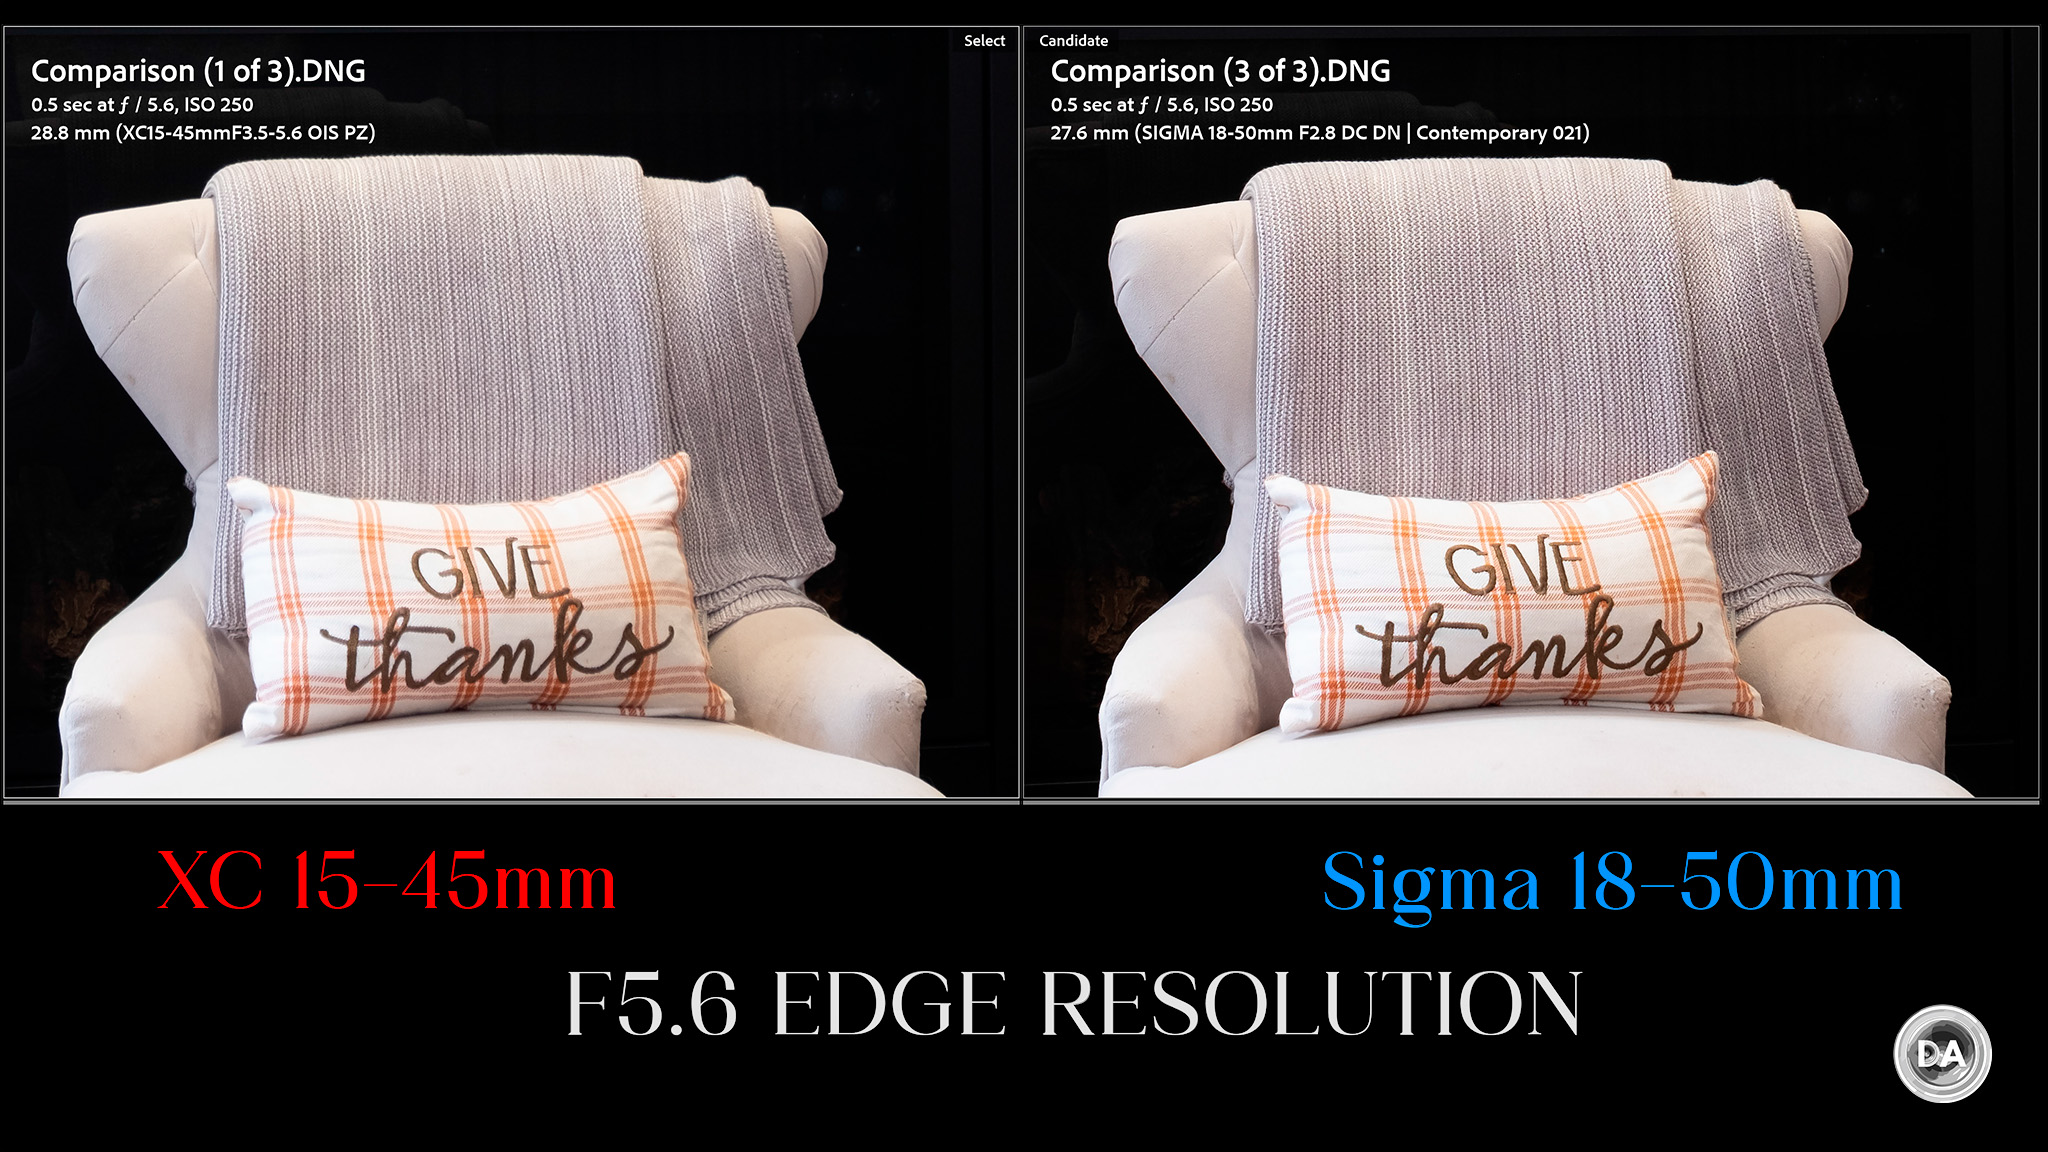
Fortunately there are a lot of great, inexpensive options for sharper image quality (particularly if you are willing to use prime lenses, or those with a single focal length). Zoom lenses are fewer and more expensive, but I’m very fond of the Sigma 18-50mm F2.8 DN, which I reviewed here. You can see the Sigma’s sharpness advantage in the center:
…and along the edges of the frame, where it has noticeably stronger contrast.
It’s also considerably more expensive, however, so if you’re on a tight budget, the kit lens at least gives you a functional lens, and I’ve definitely seen worse kit lenses.
Vlogging Mode
One of the key features of the X-M5 that positions it to directly compete with a camera like the Sony ZV-E10 II is the dedicated vlogging mode and associated features. We’ve already noted that when you turn the mode dial to “VLOG”, completely different screen controls appear. New options include zoom control (if a powerzoom is present). When I attached the non-PZ XF 16-50mm F2.8-4.8, that option disappeared. Other new controls include record (to begin or end video record), playback, and then a menu button.
If you touch the menu option, a number of other options will arrive displayed around the edges of the screen.
It’s a little frustrating in one sense, as while the touchscreen still isn’t amazingly responsive, it does show that Fuji is capable of doing more with their touch capabilities. There are a decent amount of menu options here, and that gives you more direct access to some of these controls. It’s also worth noting that these controls can be easily accessed if you have the touchscreen facing you in “selfie mode”, which could save a bit of frustration of going back and forth.
But it isn’t just software, as the X-M5 also has hardware upgrades to the audio recording. According to Fuji, “(the) FUJIFILM X-M5 is the first X Series model to feature three built-in microphones for the highest-quality audio. Four different audio modes are available: Surround, Front Priority, Back Priority, or Front & Back Priority, giving the flexibility to get crystal-clear sound from any direction.”
If you touch the Mic option on the touchscreen, you’ll get a nicely illustrative menu that gives you the four different options for sound recording.
Because there are actually multiple mics, these options will in fact really change the way that sound is recorded by the camera. There’s a bit less of an obvious difference between the “surround sound” and “front/rear” (1st and 4th options) if there isn’t a lot of sound to the sides, but there is a very obvious difference in the sound if you are selecting either front or back modes. I tested in vlogging mode, with the camera faced towards me, and when I had the rear only mode engaged my voice was recorded at a much lower level and a different sound quality than when the front microphones were activated.
The best sound in many cases will come from using separate mics, but you definitely have more creative options here than are typical with most cameras using the built in mics.
There are a few other design elements that reflect modern content creation. There is a “Shorts” mode that allows you to record short clips (up to 60 seconds) in vertical mode…but without having to rotate the camera.
Also, in addition to being able to record high bitrates and high quality footage, you can also record at very low bitrates (as low as 8Mbps) to allow for quick sharing or transfer.
You’ll have a few other options regarding focus and the look of videos. Background defocus mode will simply choose the largest maximum aperture available on the lens you have attached so the background is blurred more, but that’s going to be limited to by your lens selection (don’t expect a strong background blur with the kit lens, for example). Portrait Enhancer will do some skin smoothing, with three levels of intensity that is user selectable. Product priority mode will set the autofocus to focus on anything that is moved towards the camera rather than staying locked on the presenter. It allows you to highlight a product or item you want the camera to focus on.
In many ways I was reminded of the ZV-E10 II, as a lot of these same features are making priority lists for these type of cameras.
Autofocus Performance
Ahhh, my least favorite section when reviewing Fuji cameras. Over the years that I’ve been reviewing Fuji I’ve seen a variety of improvements, but somehow the end result is always just falling further and further behind the competition. When I first reviewed the X-T3, I though the autofocus was fairly good (at least for stills) relative to, say, the Sony a6500 I owned at the time. But since that point Sony, Canon, and Nikon have all made great strides and have nearly perfected autofocus for stills and video, but Fuji’s AF has only made very incremental improvements. I’ve become convinced that what is needed is not the continual focus algorithm updates, or even the AI chip and tracking, but rather a more fundamental hardware improvement.
Fuji says, “FUJIFILM X-M5 features the same built-in AI-driven subject detection autofocus as FUJIFILM X100VI and X-T50 mirrorless digital cameras. Along with Fujifilm’s latest-generation image processor, this delivers incredible focus accuracy in nearly all lighting conditions, even if your subject is moving. X-Processor 5 features subject detection autofocus that is built withdeep-learning AI technology. In addition to providing incredible AF tracking and detection for human faces and eyes, FUJIFILM X-M5 can also automatically detect and track a broad range of subjects, including animals, birds, cars, motorcycles, bicycles, airplanes, trains, insects, and drones.
FUJIFILM X-M5 is equipped with Fujifilm’slatest predictive algorithm, recording subjects with highly accurate AF even in scenes requiring tracking of moving objects or in low-contrast environments. It tracks a wide range of subjects, including sports and animals, and subjects in motion.“
So yes, the X-M5 receives all of Fuji’s most recent autofocus improvements, but they are almost all software rather than hardware based. The underlying hybrid Contrast/Phase Detect autofocus system that has undergirded Fuji’s cameras for the past few generations is still in place (and in need of an upgrade!), but it has been augmented in the most recent generation of cameras with Fuji’s X-Processor 5.
This adds AI based deep learning for subject detection AF to accurately track a range of subjects. The system detects animals, birds, cars, motorcycles, bicycles, airplanes, trains, insects, and drones (though you choose “bird” to track insects and “airplane” to track drones). My experience with Fuji’s most recent autofocus in a variety of cameras is that the AF system definitely works best when there is a trackable subject in frame.
The most recent firmware updates to cameras like my X-H2 and what’s present in the X-M5 do feel like a more significant improvement in terms of stills autofocus. I found that things don’t feel too far behind my other cameras for shooting stills.
Obviously focus is going to depend somewhat on the lens you have attached, but using the most recent generation of Fuji lenses produces good results (the new 16-55mm F2.8 II was used for the shot above). I did notice in my “around the house” shots that I’ve gotten very accustomed to having IBIS in my cameras, and I wasn’t quite as attentive to shutter speed as I should be, resulting in some unexpected motion blur in some of my shots captured with the X-M5.
I’m not sure I would treat this as an action camera. Fuji’s tracking capabilities vary quite bit according to what lens is attached, but even at its best it doesn’t quite match what other brands can do. More relevant here, however, is that tracking action (particularly in varying lighting conditions) without a viewfinder is TOUGH.
The burst speeds here vary according to what shutter is being used. The mechanical shutter has an upper limit of 8FPS, which does place it behind some of the competing cameras. You have the option to switch into electronic shutter mode, however, and get up to 20FPS with the full sensor and then up to 30FPS with a sports crop of 1.25x. These electronic shutter burst rates are faster than what competing cameras offer. As per usual, however, there will be some limitations with the electronic shutter in a camera that doesn’t have a particularly fast readout speed. Here’s a breakdown of some of the primary burst rates along with the buffer depth per file size and compression.
The lower resolution point of 26MP (relative to their 40MP sensor) helps considerably with buffer depth, as the JPEG buffer rates aren’t too bad, with as much as 173 frames (mechanical at 8FPS) or as little as 127 frames (electronic at 20FPS). If you try to get it all (Uncompressed RAW + JPEG), that buffer will fill really fast (in about a second)! The lossless compressed RAW (my preferred format) buffers are relatively shallow, but compressed RAW isn’t too bad. If this is your only camera, then by all means use it to capture action, but don’t buy this camera particularly for that purpose. Cameras without viewfinders are rarely top choices for capturing high speed action.
Fuji’s eye detection has definitely improved, with better recognition of the eye and better stickiness once the eye is acquired. One questionable ergonomic decision persists, however, in that Fuji separates human eye detection from AI detection of any other subject. This means that you have to separately access these two features, so if you want to assign eye detection to a button, for example, you can’t put both types of eye or subject detection on one button. I have to have two separate shortcuts set up on my X-H2, for example, which just means that you have one less thing you could map to your camera.
Some brands have started to add a smart auto subject detection mode, a move I applaud as it allows photographers to be more reactive to changing subjects and conditions. Fuji is improving in overall detection performance, but it does still lag somewhat behind competitors.
Video Autofocus
Video focus has been the area where I feel like Fuji has fallen the most behind. I have been able to rely on face detection to provide stable footage for my review videos when I’m in front of the camera for years on my Sony and Canon cameras. I don’t hesitate to set up a tripod with a wide variety of lenses and get in front of it, knowing that focus will be rock solid during the video clip. I used to shoot at least a portion of my review videos with the lens or camera that I was testing, but I stopped doing that early on with Fuji reviews because often there would be so much hunting and focus slippage that my audience would complain about how distracting it was.
This area, at least with good lenses, has improved on the X-M5. I shot some test segments using the XF 16-55mm F2.8 II and got reliable focus results when I was sitting in front of the camera. I didn’t notice any focus pulsing or slippage, and focus remained solid during the clip of roughly one minute in length. That’s progress, and it shows that the AI detection is certainly helping.
I also had good results while moving along in selfie mode while walking through the forest and talking to the camera. Focus changes are minimal in that scenario (the subject is mostly a constant distance from the camera), but I did have to periodically duck under branches and focus stayed consistent. I could see in the articulated screen that the tracking box was staying locked on an eye, though it it would occasionally swap eyes.
Where things really fell apart is during persistent movement, however. I ran multiple tests where I stepped into frame, pause for a moment to give the camera a chance to detect me, and then walked towards the camera. While the camera initially picked me up, focus was quickly lost as I started to move, as you can see above. This is a relatively simple test that most cameras from other brands handle just fine, so that’s an area for concern if your video capture includes action.
Video Performance
Outside of the video autofocus performance, video performance is actually a relative strength relative to the competition. Most competing cameras will top out at 4K60 recording (some even at 4K30 like the Canon alternatives), but the X-M5 will allow for open gate 6K recording. What is open gate? It is essentially allow for the whole sensor to be recorded…in its native ratio. We are accustomed to seeing video in 16:9 ratio, which would look like this:
There are plenty of 16:9 crops (and even 17:9) crops available here, but the open gate 6K is using all of the pixels of the sensor for recording video just as it would for recording stills. That results in a 3:2 aspect ratio, which looks like this:
There’s obviously a whole lot more on frame that would have been cropped out in a 16:9 crop. It gives more flexibility to the videographer in post, as with those extra pixels they could more easily produce a vertical crop for a reel:
This is what enables the camera to do the short clips in 9:16 (vertical) while in vlogging mode. It is taking the crop from the open gate image rather than requiring the photographer to rotate the camera vertically.
So, just know that you won’t get 6K 16:9 footage. If you want to do the typical widescreen look, you will have to do a 16:9 crop in post. The good news is that you’ll have more flexibility on how you choose to frame those shots, as you can crop closer to the top or bottom than would normally be allowed.
4K60 recording is also available, though that does come with a mild 1.18x crop (though that is more than the ZV-E10 II and its 1.10x crop). 4K30 or 4K24 is shot without any crop.
Bitrates range from 8Mbps to 200Mbps, and footage will come in either the MOV or MP4 wrapper depending on your choices. Here’s a list of some of the bitrates and framerates available.
There are high speed full HD modes available in either 17:9 or 16:9 aspect ratios with framerates as high as 240FPS. These will be shot in the higher 200Mbps bitrates.
Both FLog 2 and HLG recording are available, and of course all of Fuji’s film simulations and your custom tweaks can be made. There is a digital stabilization available when shooting movies, though that does come with a pretty significant crop attached to it (as much as 1.44x, depending on shooting mode).
Footage generally looks good. It has nice detail and color. My computer doesn’t recognize the codecs on the open gate footage, however, so that might be something to watch for.
Image Quality
The X-M5 used Fuji’s familiar 26.1Mpx X-Trans sensor. I’ve reviewed at least half a dozen cameras with this same sensor. The sensor was originally developed for the X-T3, where Fuji said of the X-T3’s sensor, “[with] a newly developed sensor, the X-T3 features an APS-C-format 26.1MP X-Trans CMOS 4 sensor, which has a back-illuminated design to afford smooth tonal rendering, improved low-light performance, and a low native ISO 160 setting. As an X-Trans sensor, it still utilizes the randomized pixel array, too, which provides a high degree of image quality and sharpness due to the omission of an optical low-pass filter. Versus conventional pixel patterns, the X-Trans design more closely mimics the organic nature of film in order to produce nuanced colors and tonal transitions, while also reducing moiré and aliasing.”
It used to be that this was the higher resolution point of the Fuji X lineup, with a more standard Bayer 24MP sensor used on some lower models, but now a number of cameras utilize the higher resolution 40MP sensor. This 26MP sensor is a good but not exceptional one. I’ve spent time with and reviewed most all of the competition, so, my quick conclusion is that this sensor is a competitive but not a clear winner in any category. Sony’s 26MP sensor sports a little more dynamic range (about a half stop) but slightly inferior high ISO performance.
After reviewing at least ten cameras with Fuji’s X-Trans sensors, I can safely say I personally think that the disadvantages of the X-Trans sensors outweigh the advantages over traditional Bayer sensers being used by competitors. Fuji says that the X-Trans sensor produces a more film-grain-like noise pattern, I don’t really see it, and it is rare that I run into the real world moiré issues that X-Trans supposedly reduces.
Here’s a look at the various file sizes and framing options:
If you don’t want the technicalities, here’s a brief summation of the sensor performance. This sensor has a smaller native ISO range than cameras with the 40MP sensor, with an ISO range of 160-12,800 (those cameras have a base ISO of 125). Most competing camera from Sony or Canon have a larger ISO range that starts even lower at ISO 100. I like to charitably call this Fuji being conservative and avoiding the marketing extremes. I have found that Fuji competes well with, say, Sony, across most of its ISO range (things even out around ISO 12,800).
Likewise, Fuji’s sensors don’t quite have the same amount of dynamic range as competing Sony sensors (close to a stop less DR at base ISO), though the Fuji sensors are more competitive at higher ISO values. I found that shadow recovery is clean, but I start to see highlight clipping earlier on. Fuji does have a feature called DR200/DR400 that open up at higher ISO values (320/640) that will sample the highlight information from the base ISO while taking the midtone and shadow information from the selected ISO value. This does help the dynamic range to be more competitive.
I also find Fuji images a little more complex to sharpen, as the X-Trans sensors have a unique way of handling information.
But what the sensor does have is Fuji’s excellent color science. Many people love Fuji colors (myself included), and they include a number of their film simulations that can give a unique “feel” to images and/or video footage. I’m currently loving the REALA ACE profile for a great look that works well on a wide variety of images. Fuji also has a fantastic JPEG engine, so if you just want to take photos and not spend a lot of time editing them to get the look you want, you may really enjoy the Fuji approach. Fuji also does a great job with in camera correction profiles, and so often the JPEG output looks even better than what the RAW images might suggest is possible. Note: as there are no changes to the sensor itself, the following are results given from earlier reviews of this sensor (in this case from X-S20).
ISO Performance
The native ISO range of Fuji’s 26Mpx X-Trans sensor is more limited than alternatives from Sony or Canon, running from ISO 160 to 12,800, with an expanded range going down to ISO 80 and moving up to 51,200 on the high end. I personally don’t ever use expanded ISO ranges and consider them more marketing than actually useful.. The native range is usable throughout, and even images ISO 12,800 are perfectly usable in many situations. Here’s a look at an image and crop of a guitar taken at ISO 12,800:
There’s some obvious noise at a pixel level, but the basic image is perfectly useful. Here’s another image at ISO 12,800 where I’ve used the Fuji ACROS + G monochrome simulation, and I would argue that the noise in this image is quite film-like and pleasing.
So how about at lower extremes? At ISO 800 there is a tiny addition of noise only detectable in the shadows. There isn’t a lot of difference from base ISO, however, and moving on to ISO 1600 shows little difference. At ISO 3200 there is slightly less contrast and slightly more noise, but still at a very acceptable level:
That pattern continues at ISO 6400 and 12,800, where the noise becomes rougher and more visible in shadow areas, with 6400 being cleaner than ISO 12,800.
You can go up into an “extended” range that gives you the 25,600 and 51,200 options. The first might be usable in non-critical situations, but few people will be happy with what ISO 51,200 is going to give you for any kind of application.
I will say that ISO 25,600 in particular does do a good job of “color fastness”. If we step back and look at the images on a global level, we can see that the sensor has done a good job of keeping a consistent color balance without color shift or color banding.
This is a solid ISO performance, and this is at least one area where the older 26MP sensor found in the X-S20 is going to deliver better results than the larger resolution 40MP sensor of the X-H2 or X-T5.
Dynamic Range Performance
I value dynamic range within a camera in two specific areas: the ability to cleanly lift shadows without introducing noise or color banding and the ability to recover highlights without introducing “hot spots” where information has been permanently lost. The value of good dynamic range is in the margins of photography, as eliminating shadows or recovering blown out highlights doesn’t always produce the better image. Having good dynamic range (particularly if you shoot RAW), allows you a lot more creative vision over how the final image will turn out (particularly with Adobe’s new AI tech for getting more information out of the sky). This shot, for example, has all of the rich detail in the shadows and colors of the trunk of the fallen tree and the moss on it, but also allowed me to recover the sky rather than just a blown out mess. This shot was taken with the new Fujinon XF 8mm F3.5, which is a very sweet little lens, by the way.
Fuji has an extra trick up its sleeve to help you maximize dynamic range performance in such scenes, which we’ll get to in just a moment.
In my tests, I found that the X-S20 (or X-M5) did an excellent job of recovering shadows very cleanly. Here we have an image that I purposefully underexposed by four stops. As you can see in the original RAW image, there is very little information left there. In post I added those four stops back into the recovered image. What we find is an image that has been recovered with very little penalty. Contrast looks good and the image is nice and bright.
Here’s a look at that same image at a pixel level. We see little additional noise, no banding or discoloration, and a nice restoration of contrast to the image.
As is often the case, however, highlight recovery lags behind shadow recovery. While a 2 stop highlight recovery is nice and clean, by 3 stops the recovered image is not natural looking at all:
Moving beyond that is obviously a fools errand. But Fuji does have a nice workaround if you want more dynamic range. If you move beyond the base ISO to either ISO 320 or 640 (and beyond), two new options open up in the menu. These are DR200 and DR400. What these do is essentially split the sensor readout so that the shadow information is gathered from the current ISO setting while the highlight information comes from base ISO. At ISO 320 that gives you one additional stop in the highlights, while at ISO 640 you gain two. This allows you to overexpose the image slightly so that you have plenty of information in the shadows, but since there is one or two stops less exposure in the highlights, you have plenty of ability to recover blown out areas in post. A three stop highlight recovery using DR200 looks just fine:
I can go even further using DR400. Here’s a four stop overexposure (look how blown out the image is on the left), and how cleanly it recovers using DR400:
I certainly will often utilize this for landscape images when I’m shooting Fuji. My priority was exposing for the interesting textures of the little barn in this shot, but rather than a white, blown out sky, I was able to recover something interesting in the sky to add to the image.
I personally enable DR400 in camera, and then it is ready if I have to raise the ISO level (either intentionally or not). Dynamic range naturally diminishes as the ISO raises anyway, so it can be a way of getting better results when the ISO is up. That’s not to say that you should shoot this way all the time, as often retaining contrast and either crushed shadows or blown out highlights makes for a better photograph, but having this technique available to improve dynamic range certainly has its uses…just don’t go too crazy on those sliders!!
X-M5 Color
Color science is the one area where there is a fair amount of consensus on Fuji. It’s definitely something that Fuji does well, and I think it’s true both on the camera sensor side and in their optical glass. Fuji color tends to be really nice, with good saturation levels and a pleasing transition of color tones. I shot this image of a still lake with the 8mm F3.5 and the X-S20, and I think the colors look lovely.
Likewise a standard shot of the woods, where the greens look really rich but without feeling garish:
Fuji has long been famous for their excellent film simulations. Fuji is pretty much a JPEG shooter’s dream, as you can tweak your recipes to get images you love right out of camera. RAW images with film simulations will arrive (as usual) flat in Lightroom, as you can easily apply any of 20 film simulations in post.
Here’s an example from the X-T4 shown first with Adobe’s Landscape profile.
Now Astia (Soft)
Now Classic Chrome
Provia
Velvia
Eterna (Cinema)
Classic Chrome is little less saturated but often has a tasteful look to it. I find Velvia (which is Vivid) is often too intense for me, but can be great for landscapes. Provia is the Standard, and it is fairly neutral. Astia is “Soft”, and it’s another one I like. A more recent addition to Fuji’s portfolio (REALA ACE) is one of my favorites for general purpose use.
I also enjoy the monochrome film simulations and also the ability to go into the menus and tweak the look in several ways. For example, if I select Acros, I’ve got the added ability to select whether to apply a Yellow Filter (more contrast, darker skies), Red (slightly more extreme of yellow), or Green (for better skin tones). There is also an option to warm or cool the monochrome image in camera. You can move to near-sepia on the warm side and near-selenium on the cool side. This shot of a coiled rope looks great in Acros + R (red filter):
You can also control grain (if that’s your thing) in camera as well. Bottom line is that color science and the ability to manipulate color in camera remains a great strength for Fuji cameras…and you can utilize that same color science in video as well.
Conclusion
The Fujifilm X-M5 is a camera designed to appeal to a certain segment of the camera landscape. It will be Fuji’s lowest price current model at $799 USD (undercutting the X-T30 II by $100), but Fuji’s pivot to marketing it as a Vlog/creator’s camera is a potentially wise one. It does have a bit of the desirability factor of the X100VI, though as an interchangeable lens model.
It’s easy to define this camera by its shortcomings, but the truth of the matter is that the true competitors for this camera don’t have IBIS or even a viewfinder. Critiquing this model in particular for these lacks doesn’t seem just. I am more apt to critique the autofocus system which still lags noticeably behind competing cameras.
But Fuji also offers up a few more video features than competing cameras along with a great looking physical design. I don’t personally love the ergonomics here, but I could learn to live with them. Fuji’s rapidly growing library of first party and third party lenses is also a calling card, as no other brand is devoting as much attention to the APS-C space. If you can live with the shortcomings I’ve detailed here, the X-M5 is a solid option at its reasonable price tag of $800 USD.
Pros:
Cool retro style (particularly in silver!)
Interesting vlogging specific features
Microphones give options
More video features than competitors
AI Tracking upgrade
Huge video spec upgrade
Cheaper than competitors
More robust library of APS-C specific lenses on Fuji
Cons:
Limited grip means that I’m “pinching” the camera
Autofocus experience only so-so
Lack of viewfinder makes composing in bright light tough
Keywords: Fujifilm, X-M5, Fuji X-M5, Fujifilm X-M5, Fuji X-M5 Review, Fujinon, Dustin Abbott, Review, Sensor, Tracking, IBIS, Stabilization, Eye AF, XF, 40MP, 40 MP, Review, Hands On, Video Test, Sharpness, High ISO, Autofocus, Dynamic Range, 26MP, 26 MP, Lens, Comparison, Test, Dustinabbott.net, APS-C, X-Trans, letthelightin, DA #letthelightin, #DA, #Fujifilm
DISCLAIMER: This article and description contains affiliate links, which means that if you click on one of the product links, I’ll receive a small commission. As an Amazon Associate I earn from qualifying purchases.
A good macro lens opens up a whole new world of photographic possibilities, but it also represents a very niche area of photography. Some people are born macro photographers; it’s their favorite type of photography. Others don’t mind dabbling in it, but aren’t so invested that they are interested in spending a thousand dollars on a lens that they will mostly use for one specific kind of photography. That’s what makes lenses like the Pergear 100mm F2.8 2x Macro interesting. They promise the ability to create those amazing macro images while not breaking the bank to do so. The Pergear 100M costs about $270, making it far more tempting to add to the casual macro photographer’s kit. But does cheap in price also mean cheap in quality? That’s what we are here to explore, which you can do in either my video review, linked below, reading the text review, or by just by enjoying the photos in the gallery below to get the “flavor” of the lens.
Thanks to Pergear for sending me a review loaner of this lens. As always, this is a completely independent review. All opinions and conclusions are my own.*The tests and most of the photos that I share as a part of my review cycle have been done with the 45MP Nikon Z8, which I reviewed here.
I like reviewing macro lenses in the winter, as macro photography is one of the easiest kinds of photography to do indoors. You can take ordinary household items and create extraordinary images by getting in close.
Several years ago I reviewed the Laowa APO 100mm F2.8 2X Macro, and in many ways the Pergear 100M seems like it was inspired by the lens. They both have a long slender profile (Laowa on left, Pergear on right), a similar focal length, and even a similar functional design where the focusing groups move obviously forward and backwards inside but without the external length changing.
The Laowa is more expensive but also much better optically, as we will see, but there’s a lot of physical similarities.
I like to utilize macro lenses for doing my product photography, as often there will be fine details that I want to capture than ordinary lenses won’t magnify enough. I’ve used the Pergear 100M for a number of the product photography sessions for lens reviews.
There’s some debate about which focal length is best for a macro lens, but suffice it to say that the 90-105mm range is probably the most popular, landing the Pergear 100M right in the sweet spot for macro photography.
DISCLAIMER: This article and description contains affiliate links, which means that if you click on one of the product links, I’ll receive a small commission. As an Amazon Associate I earn from qualifying purchases.


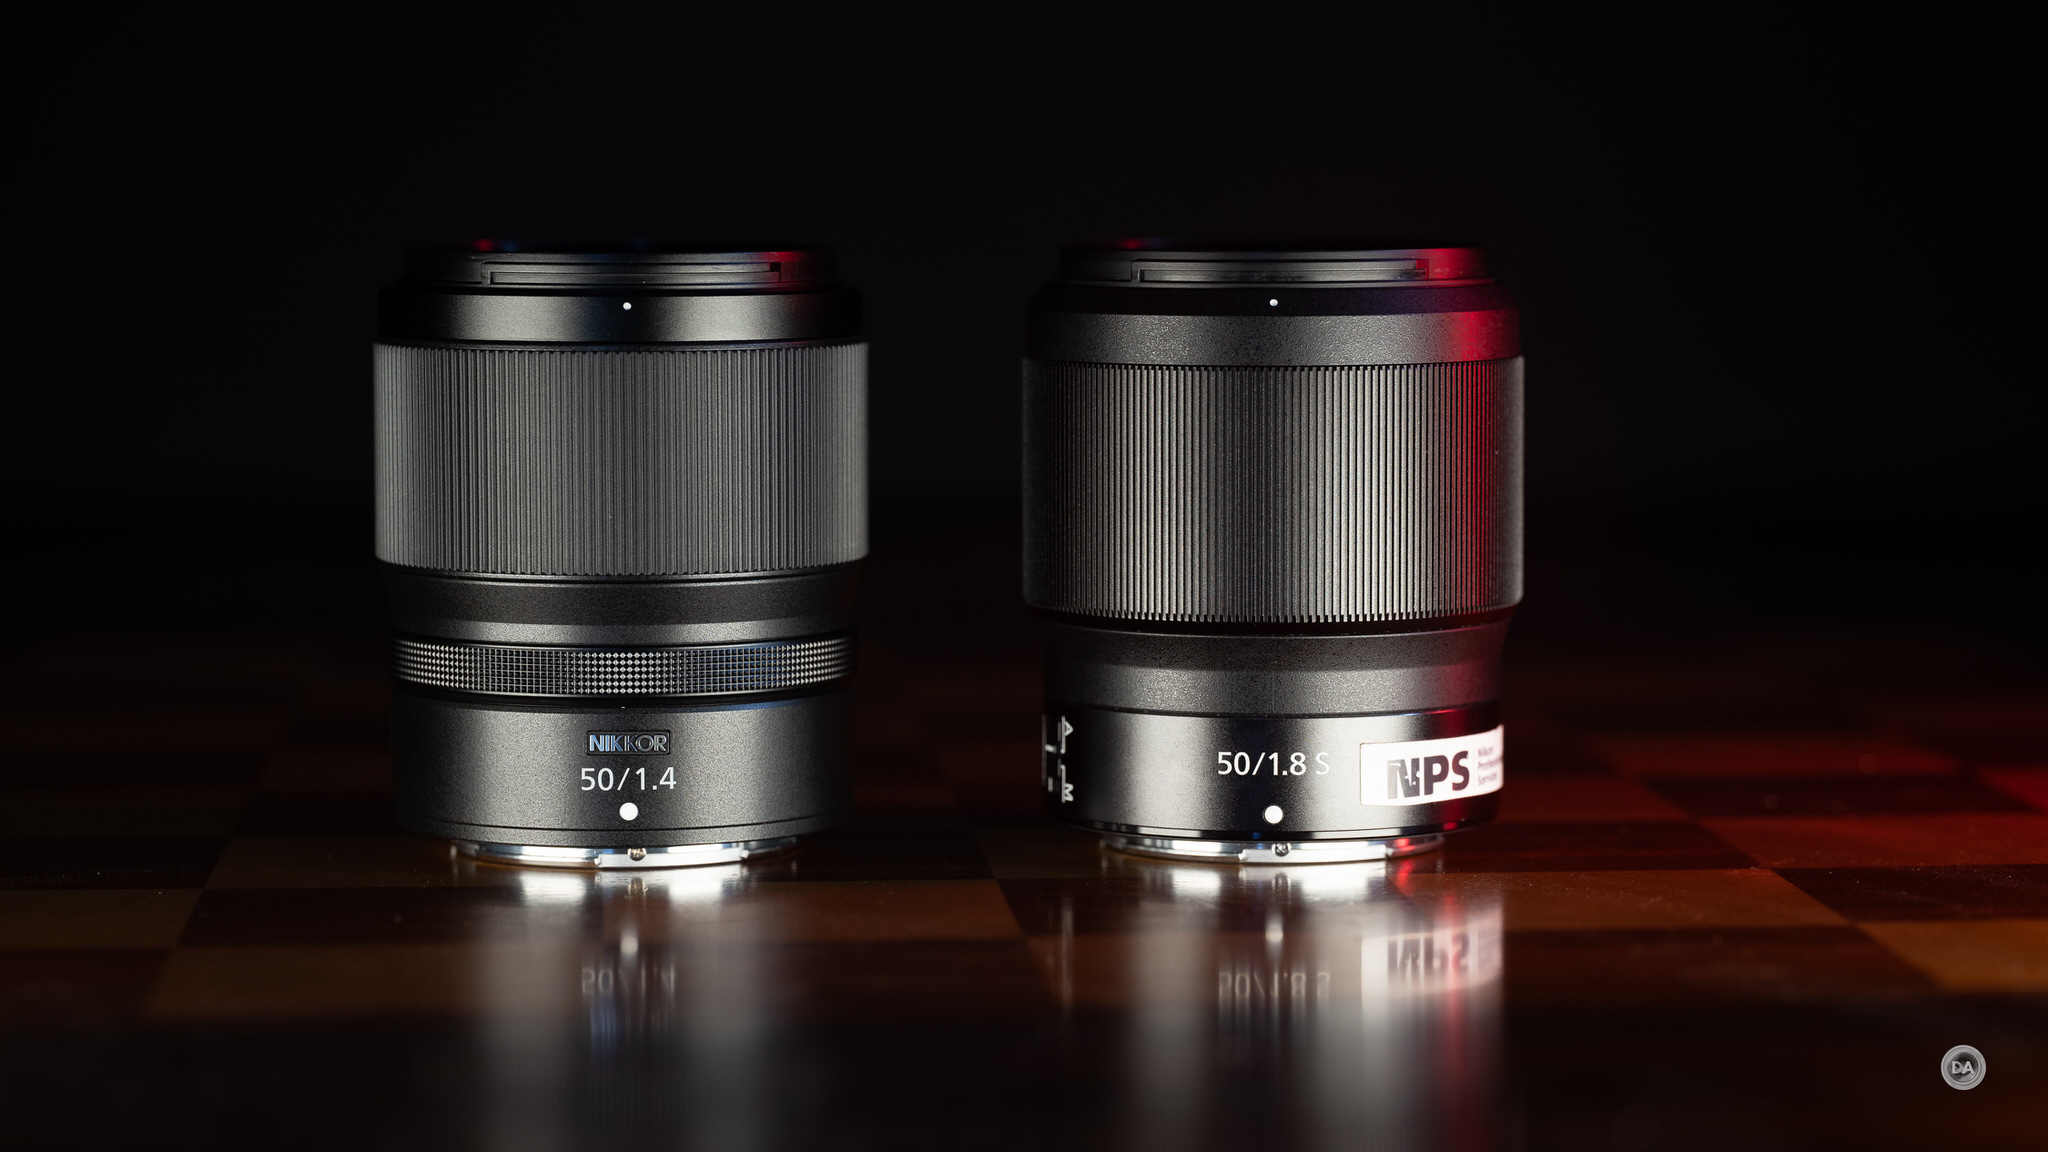
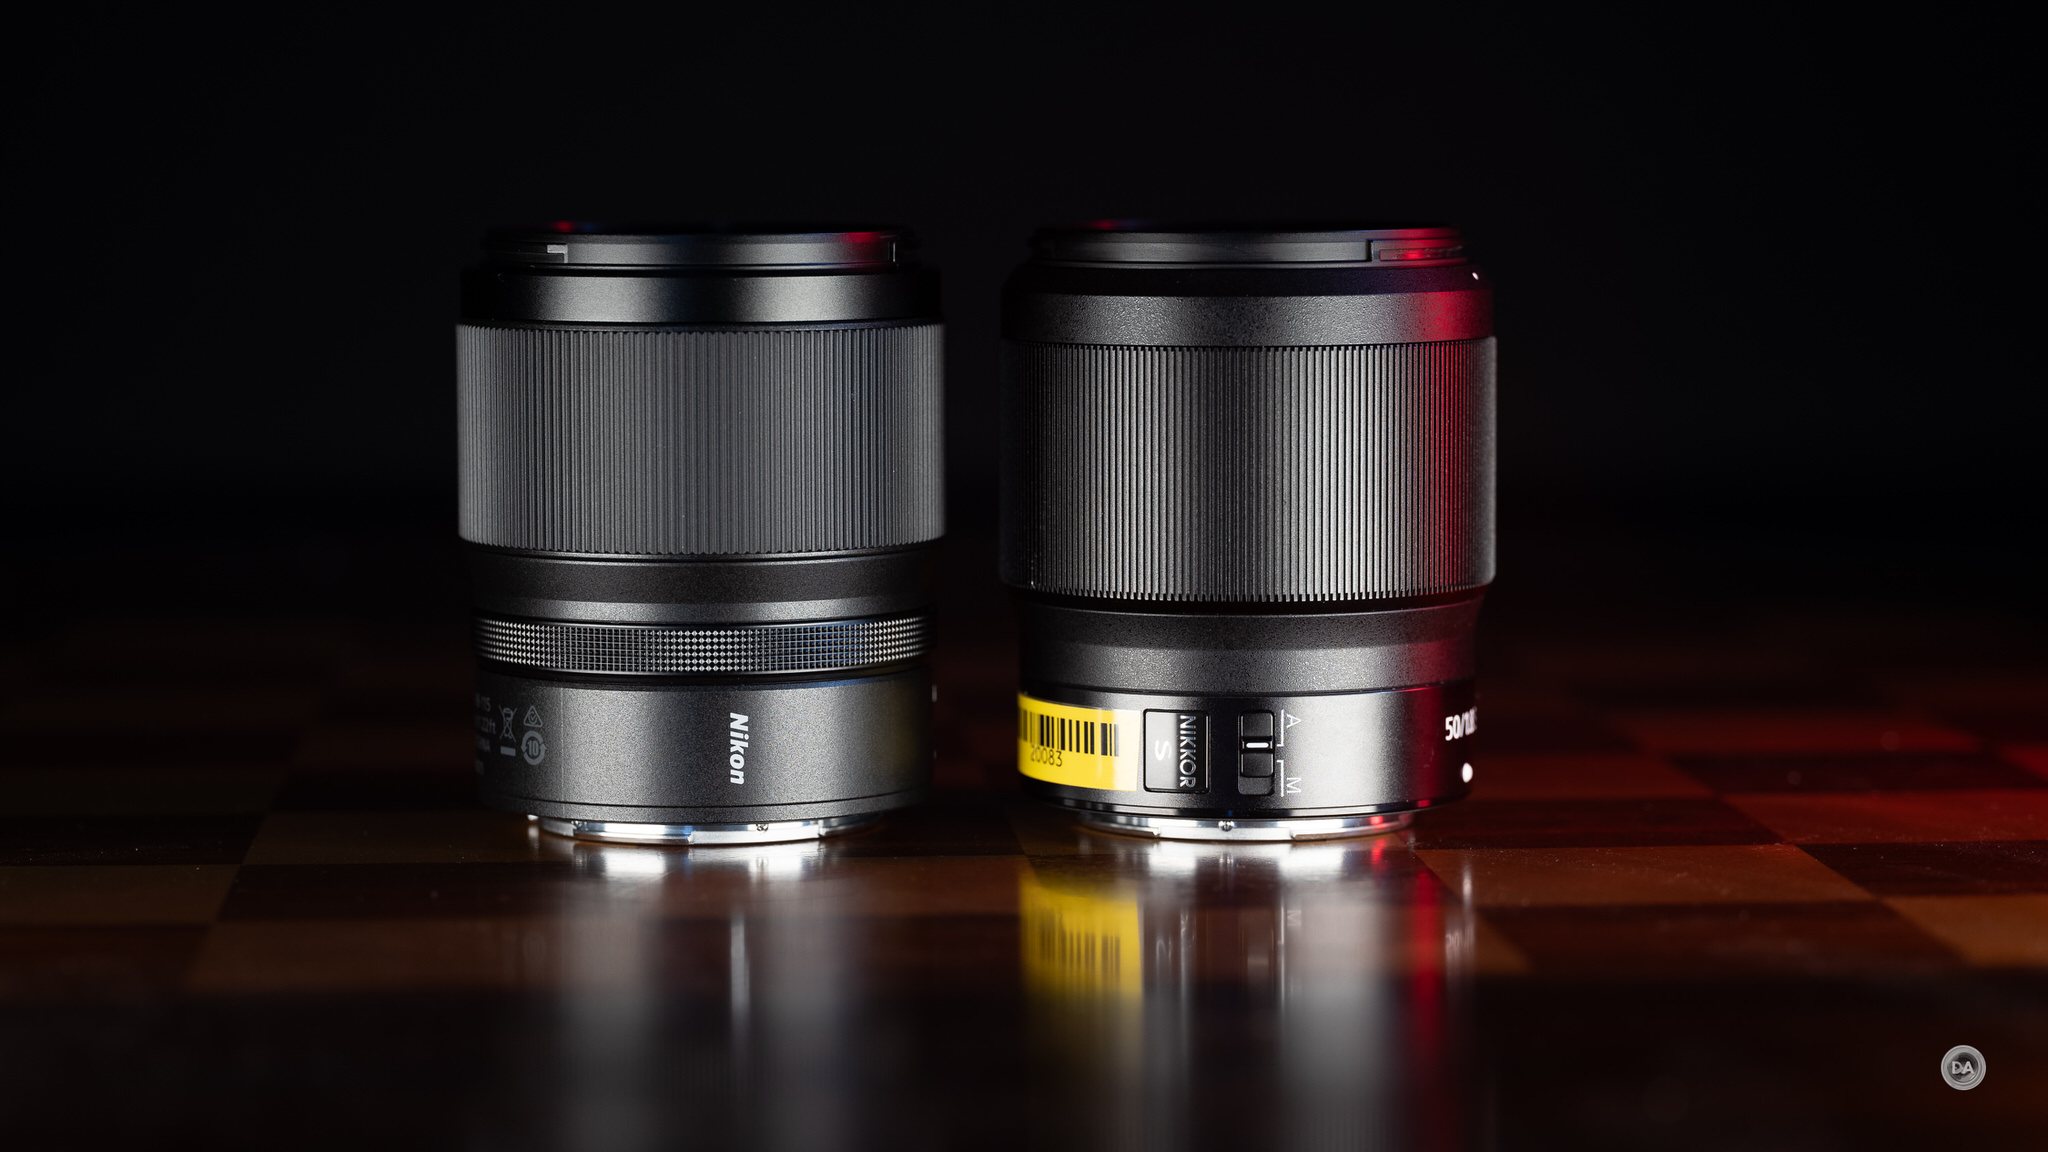
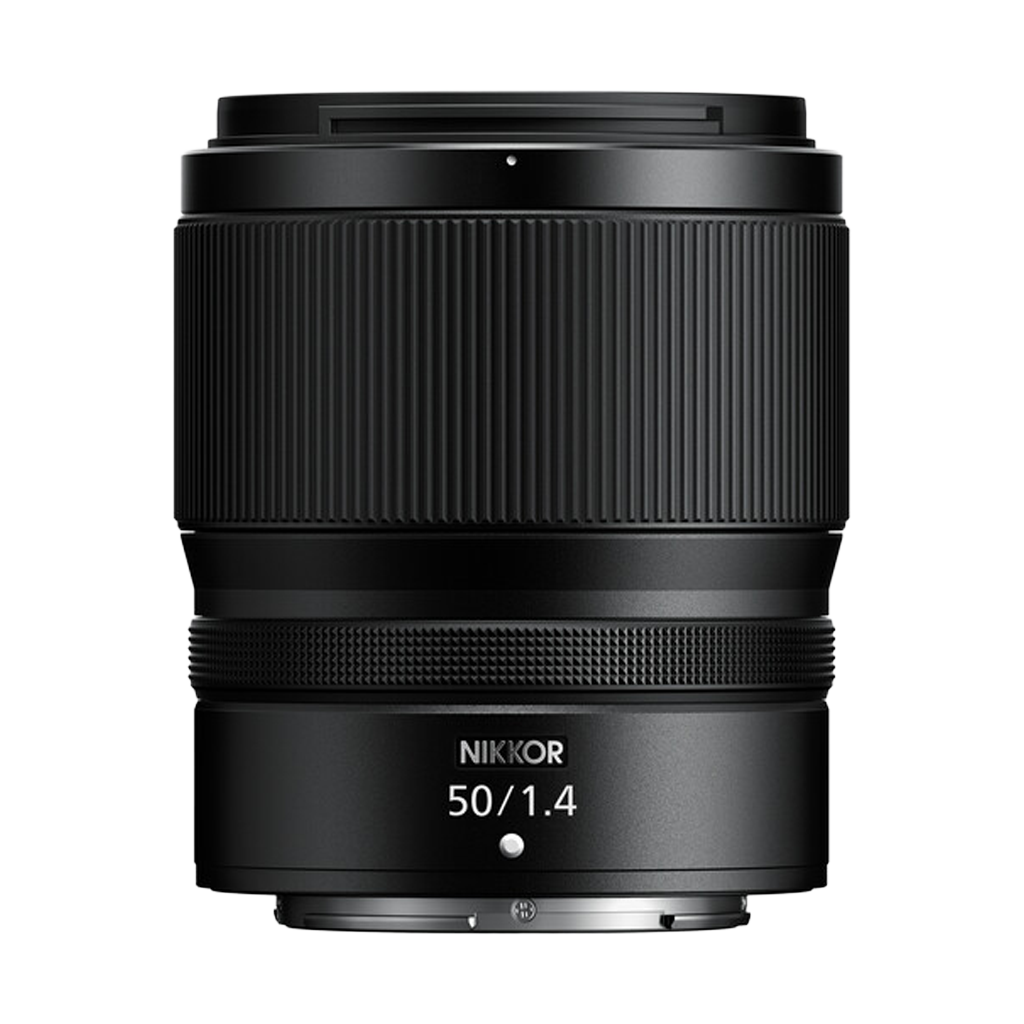
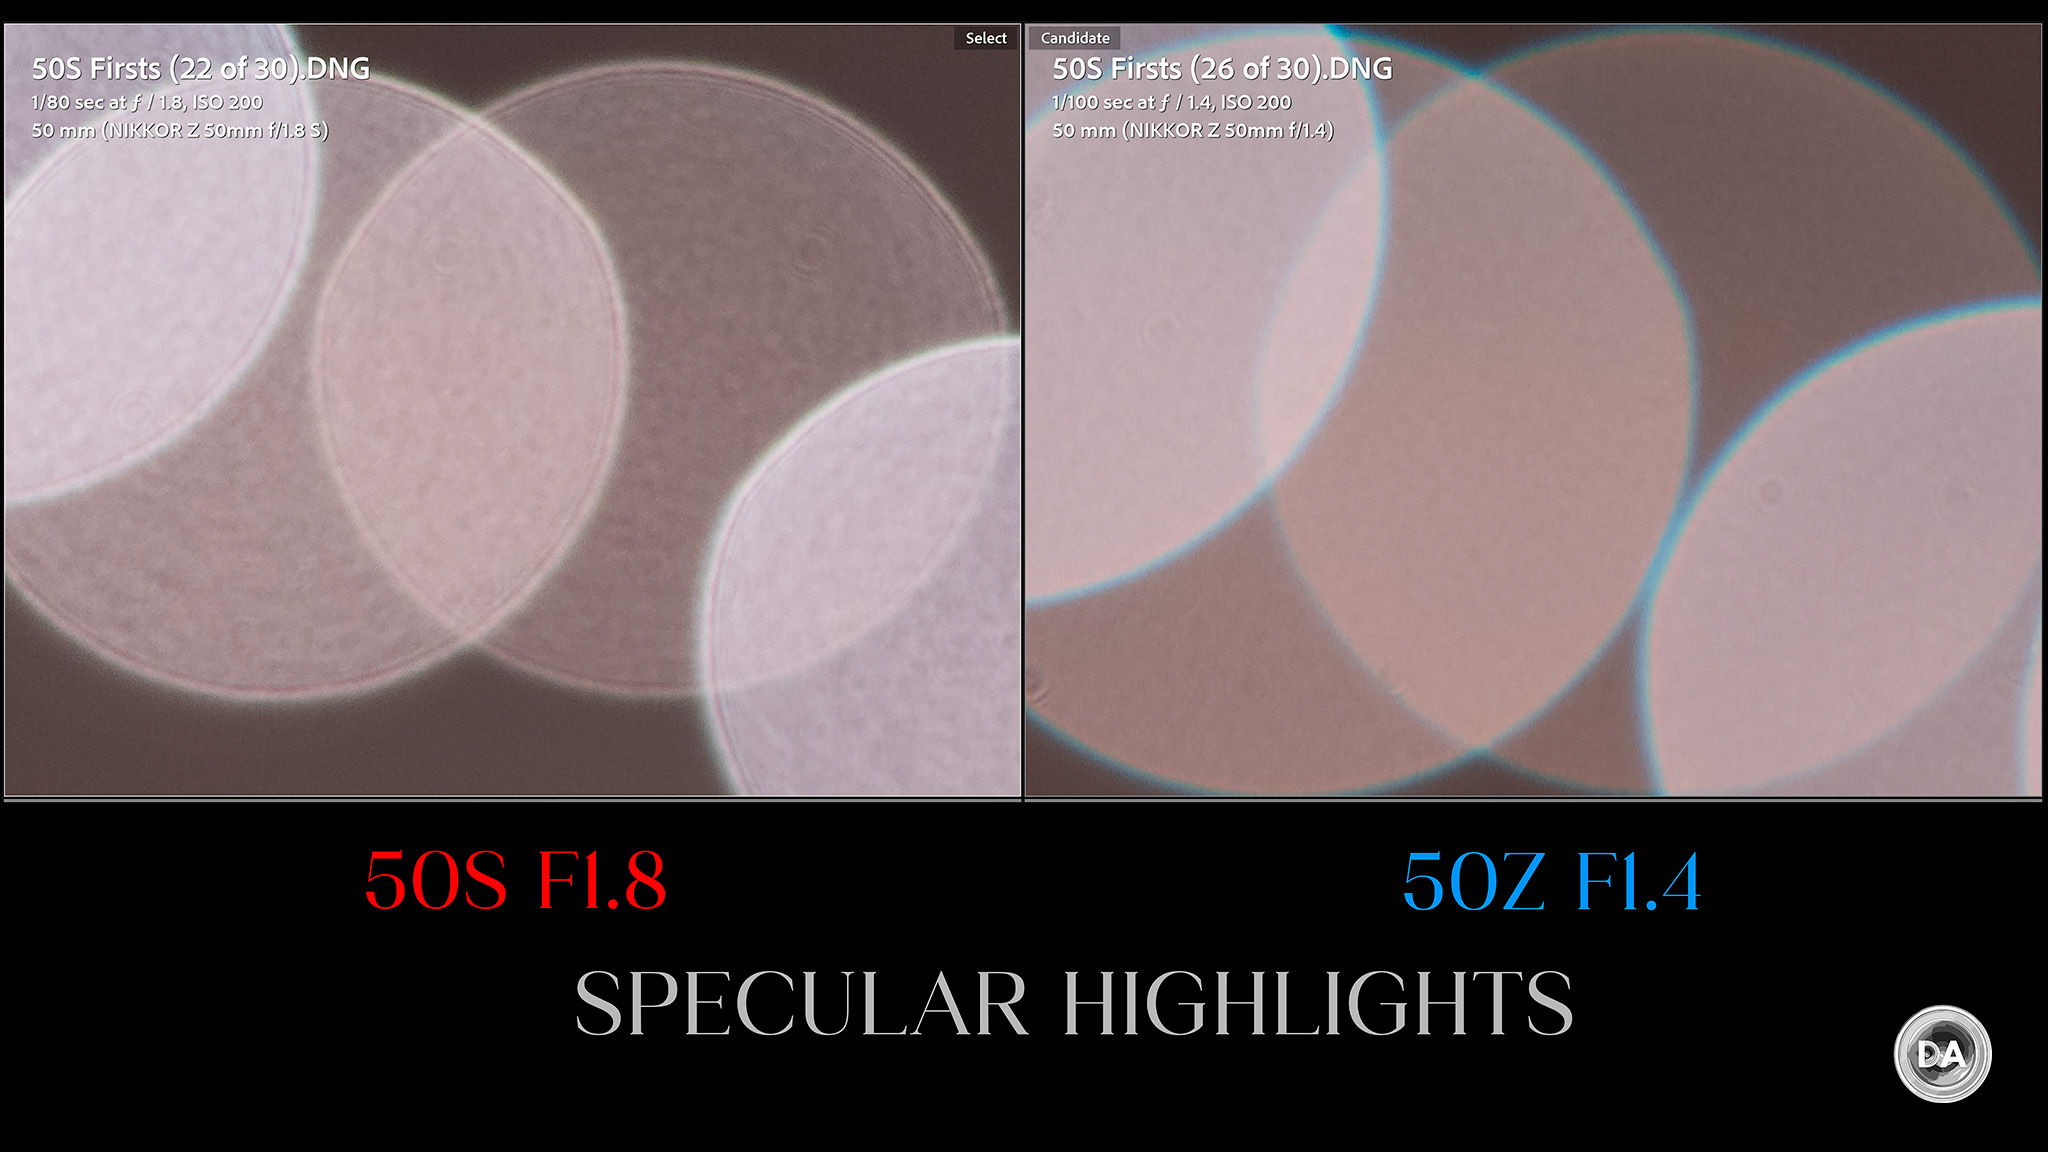
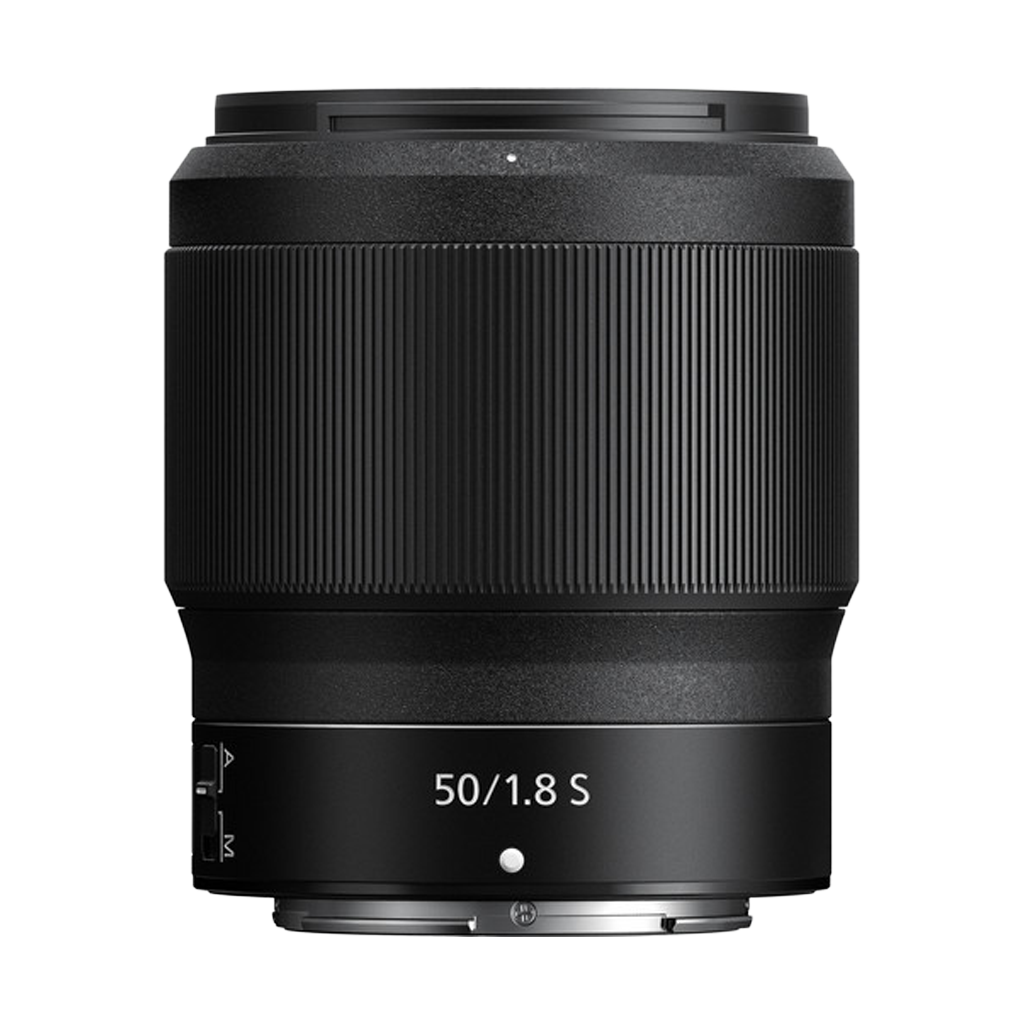
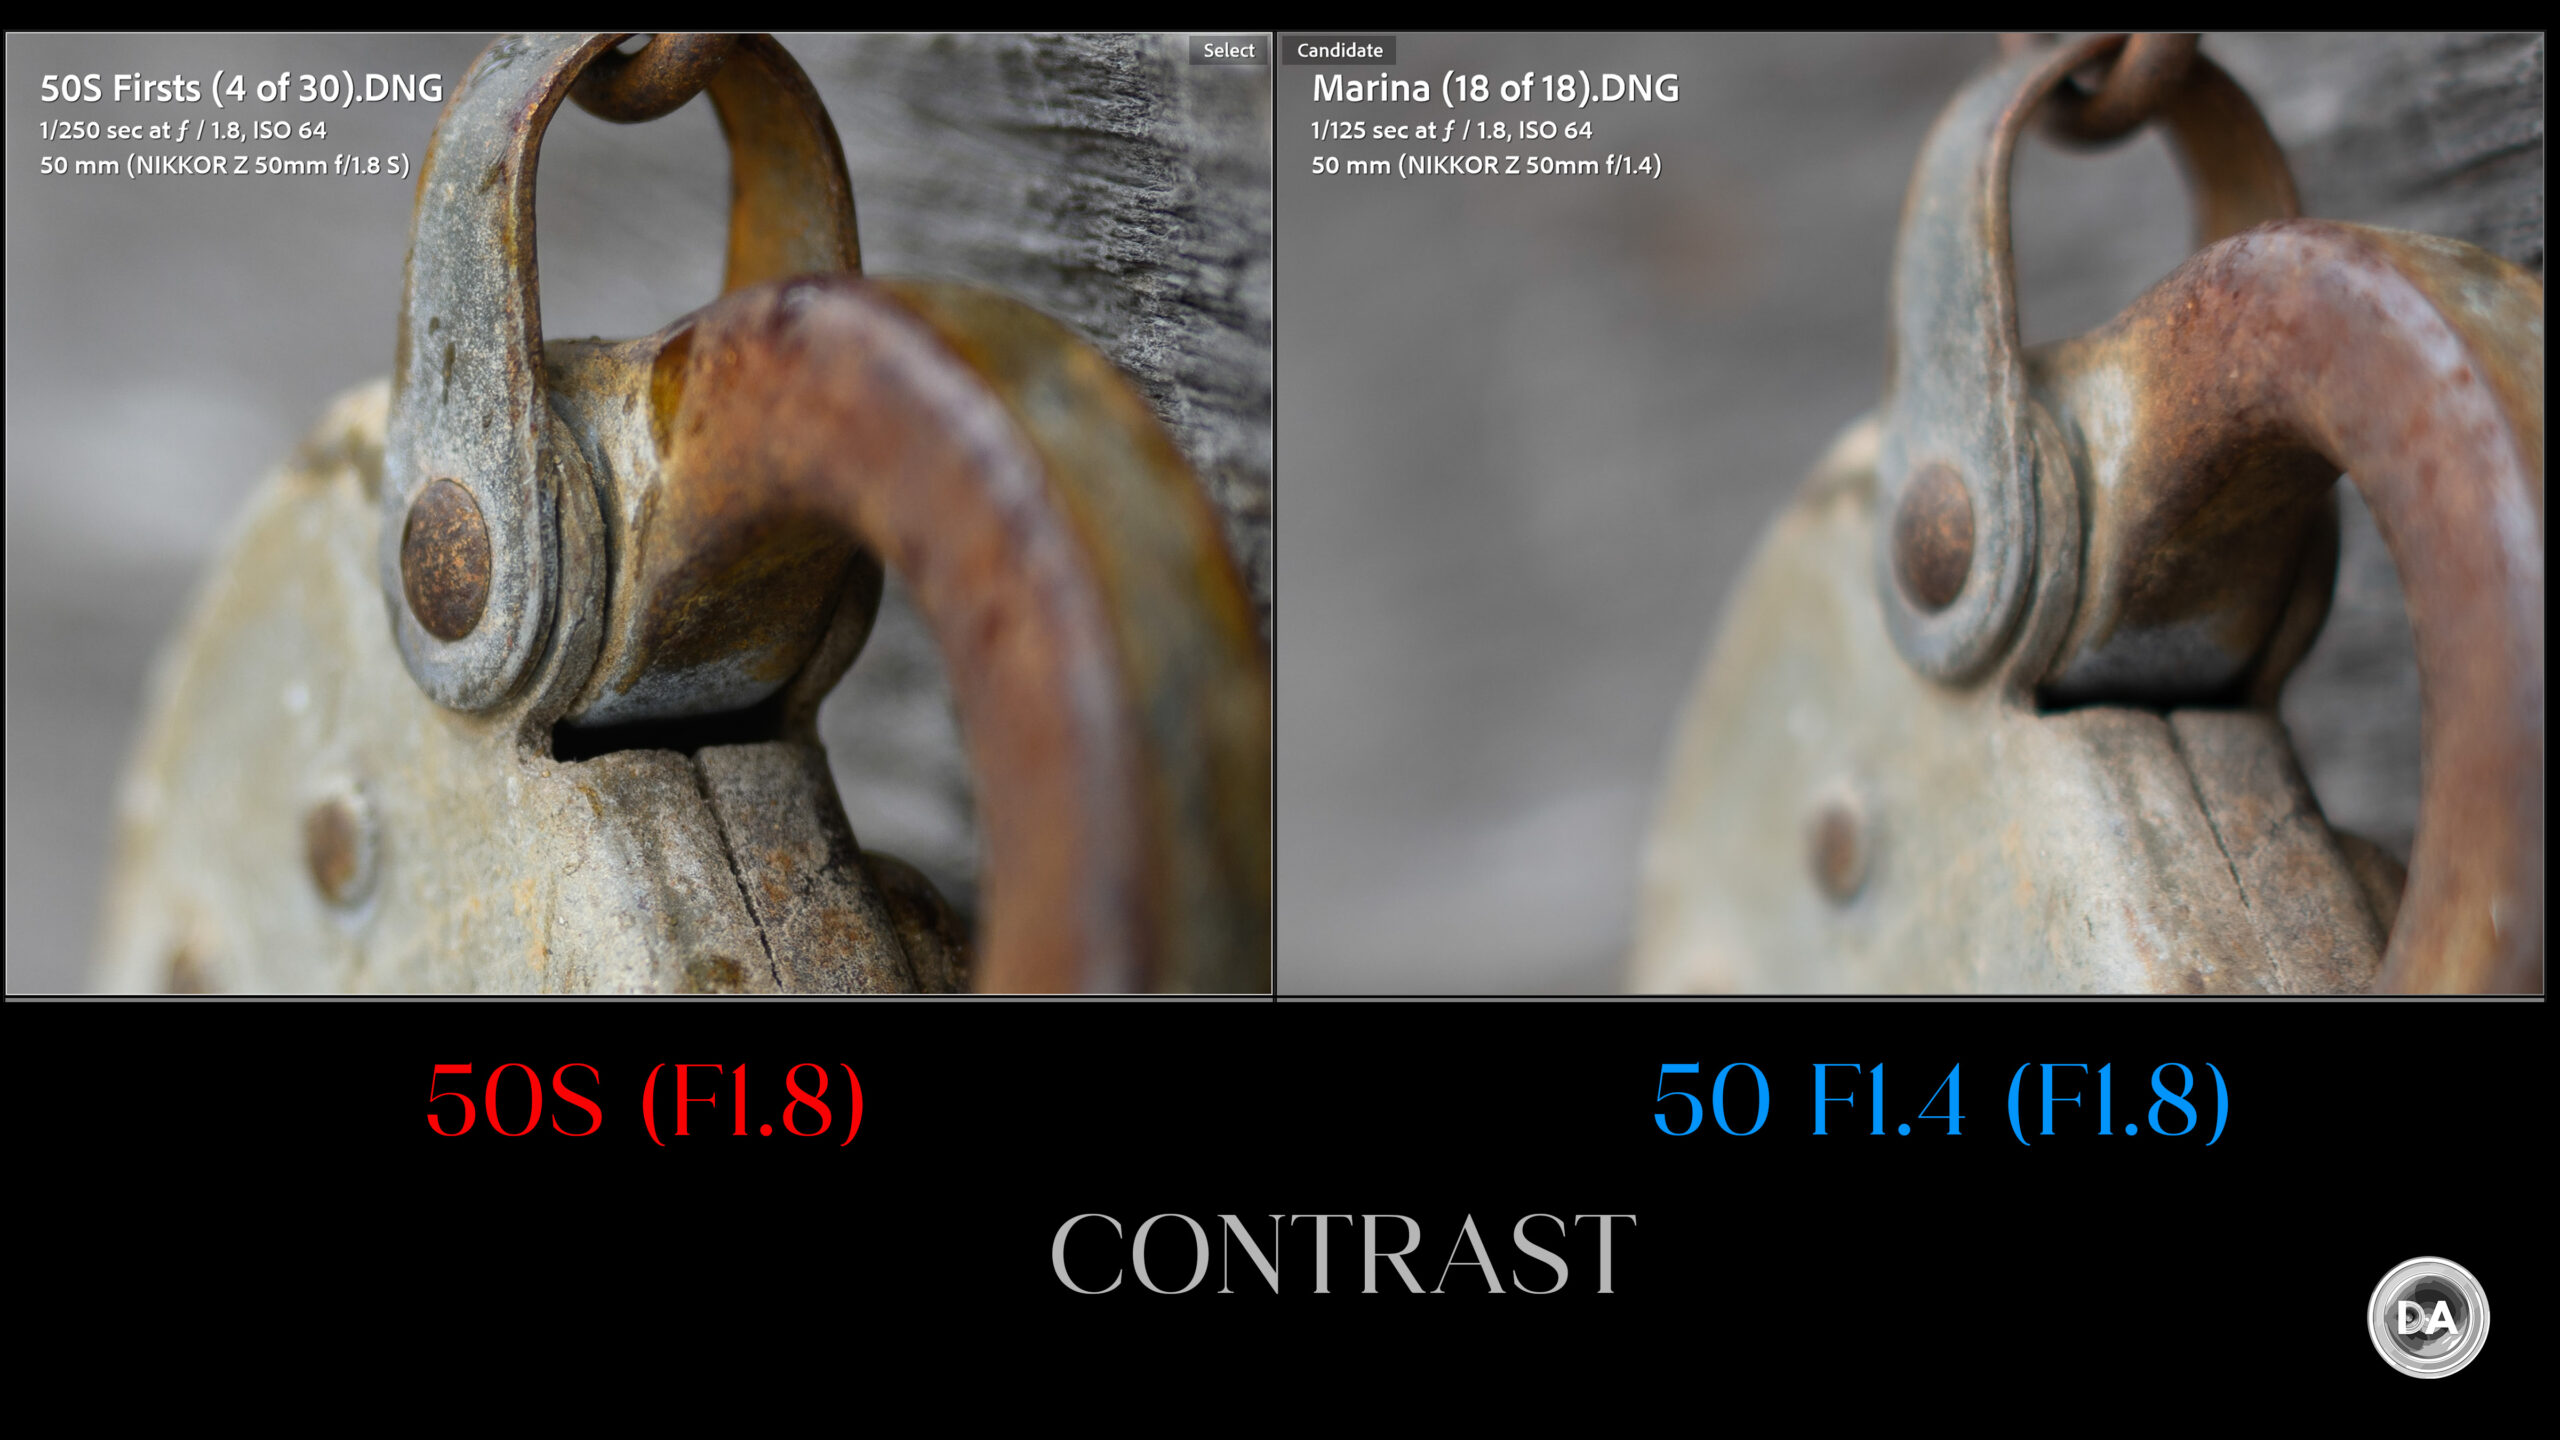
 Sony GP-VPT3 3-in-1 Bluetooth Grip Review
  Sony 50-150mm F2 GM vs Tamron 35-150mm F2-2.8
  Nikkor Z 50mm F1.8 S Gallery
  Nikkor Z 50mm F1.8 S Review
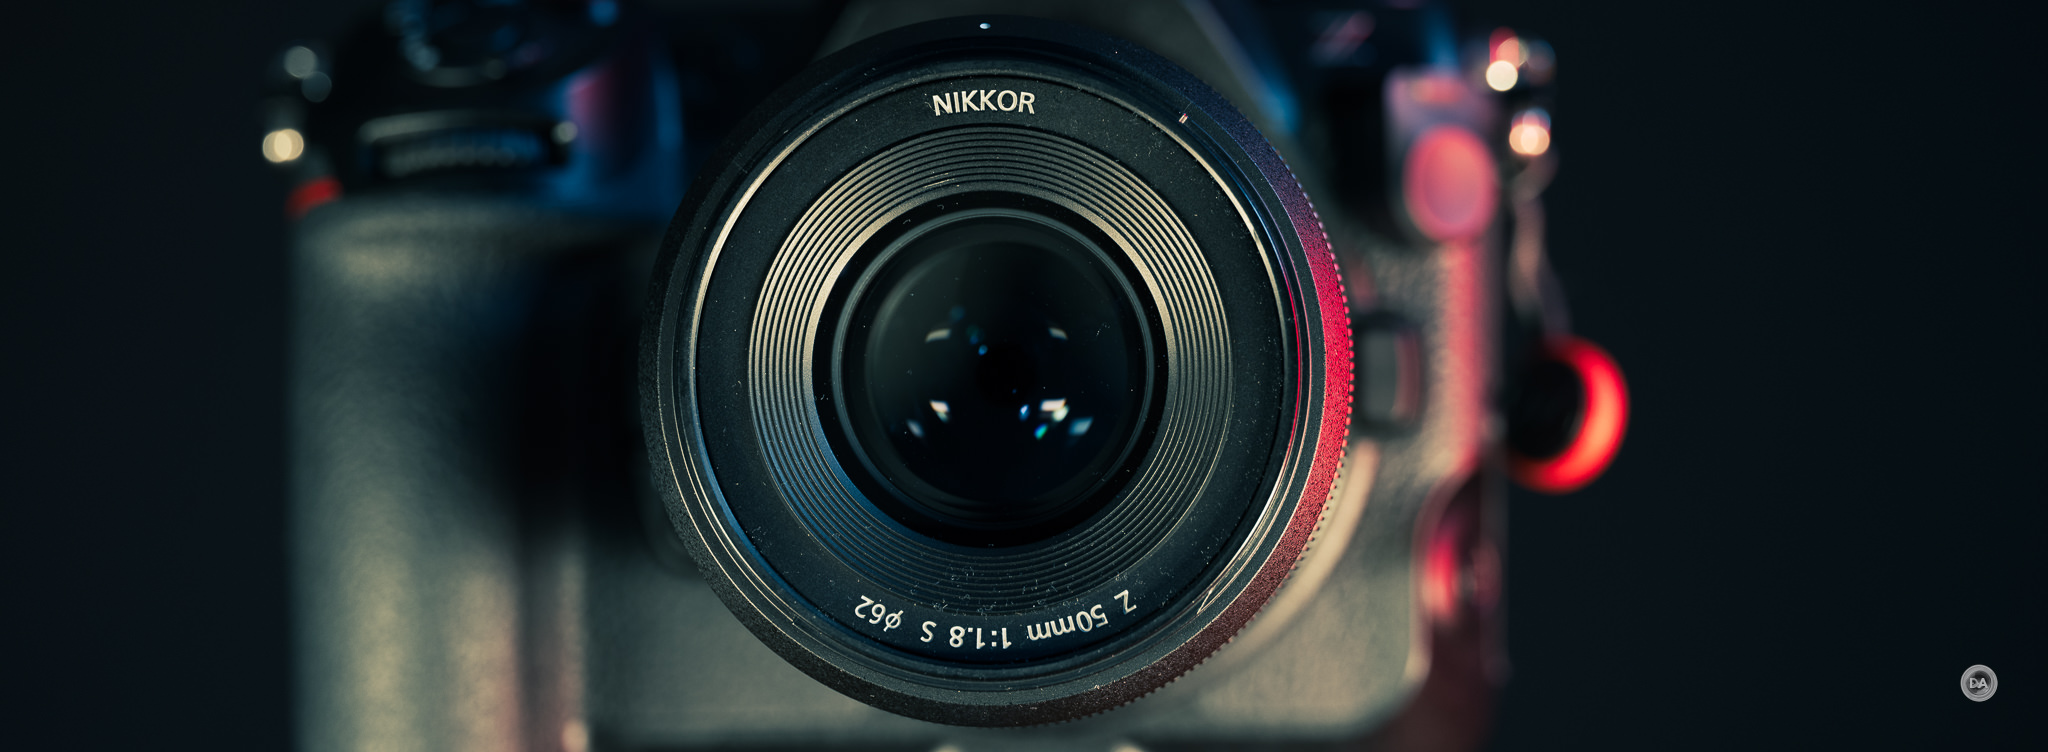


 Nikon Z 50mm Showdown – F1.4 vs F1.8 S