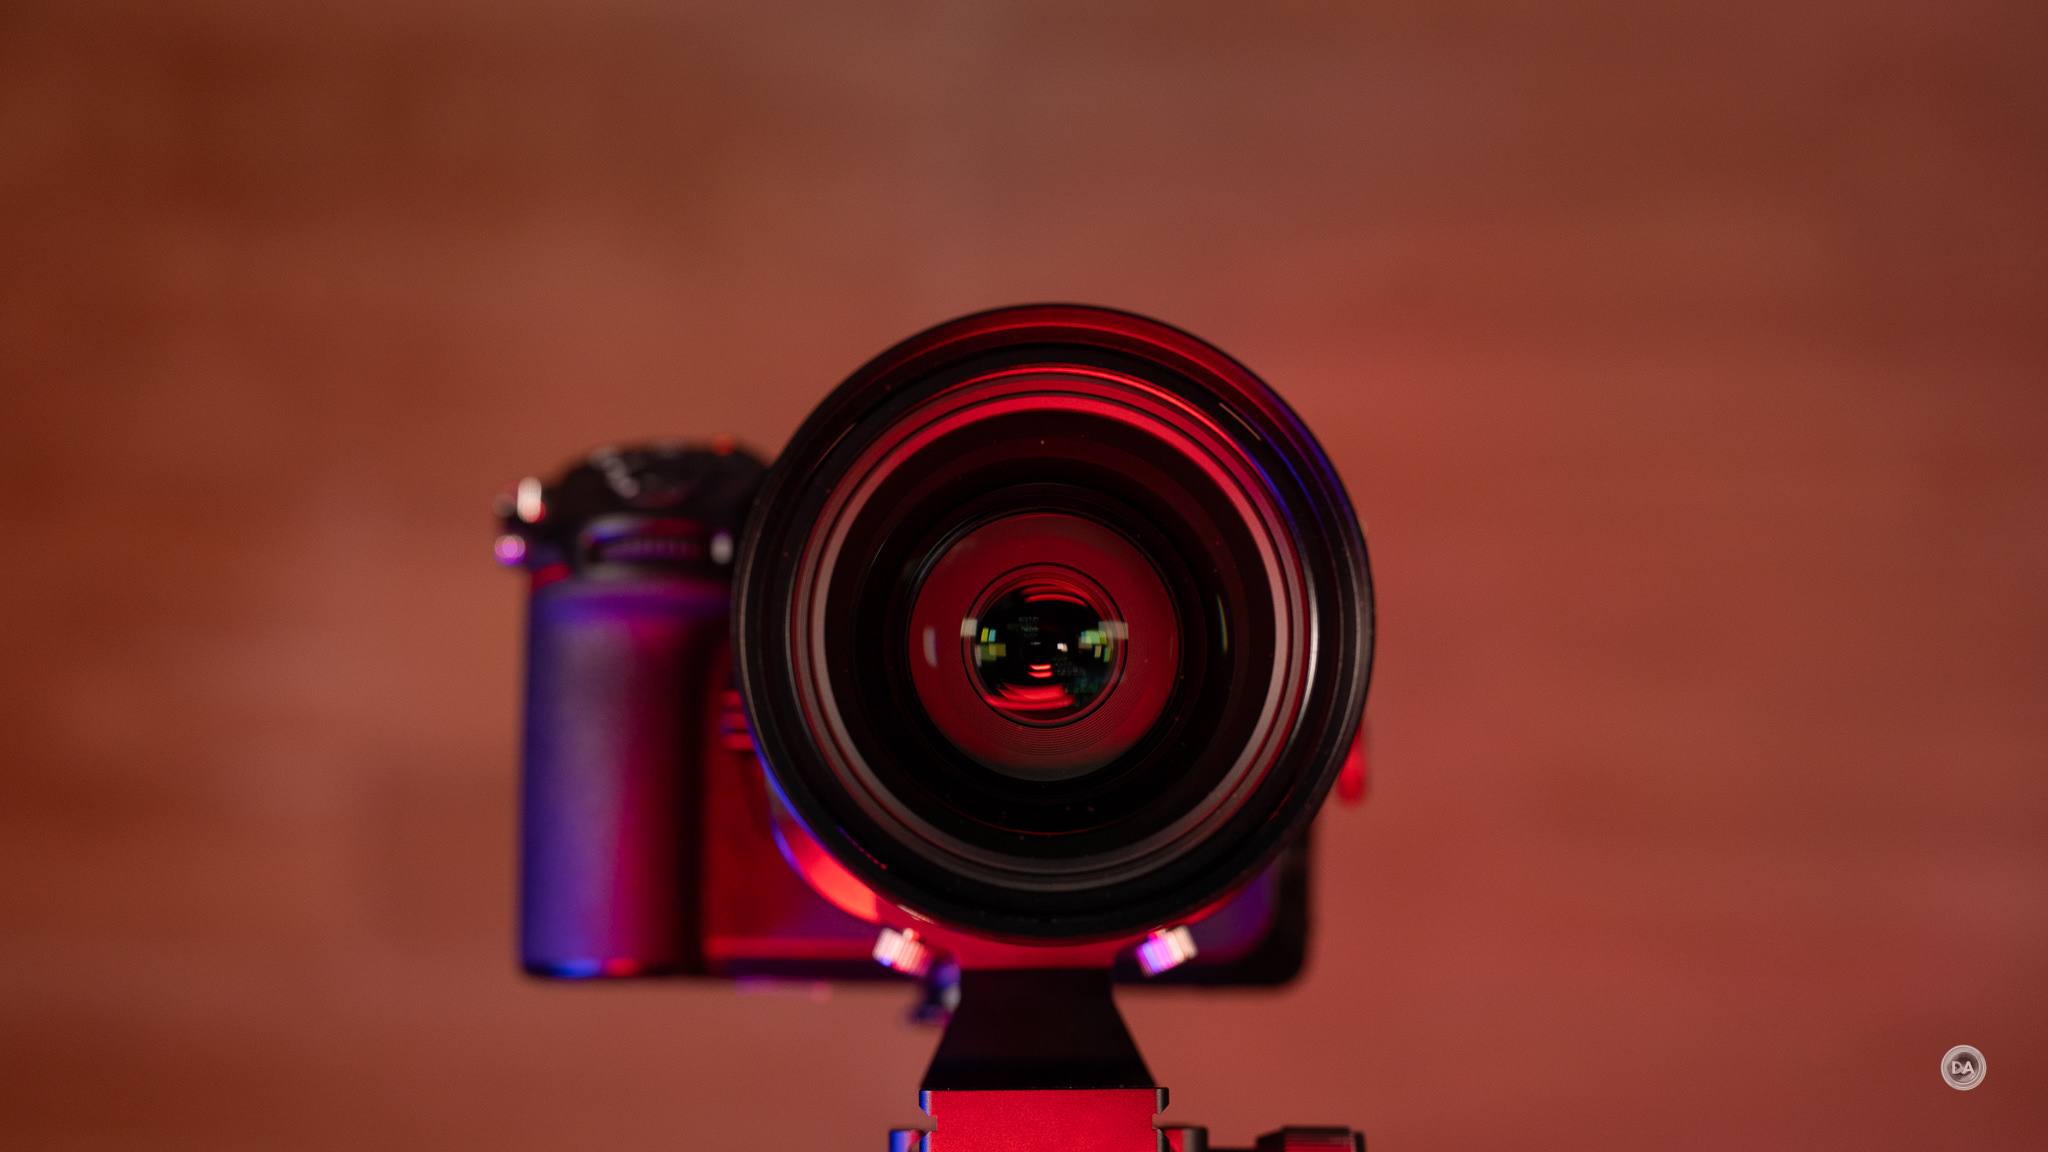
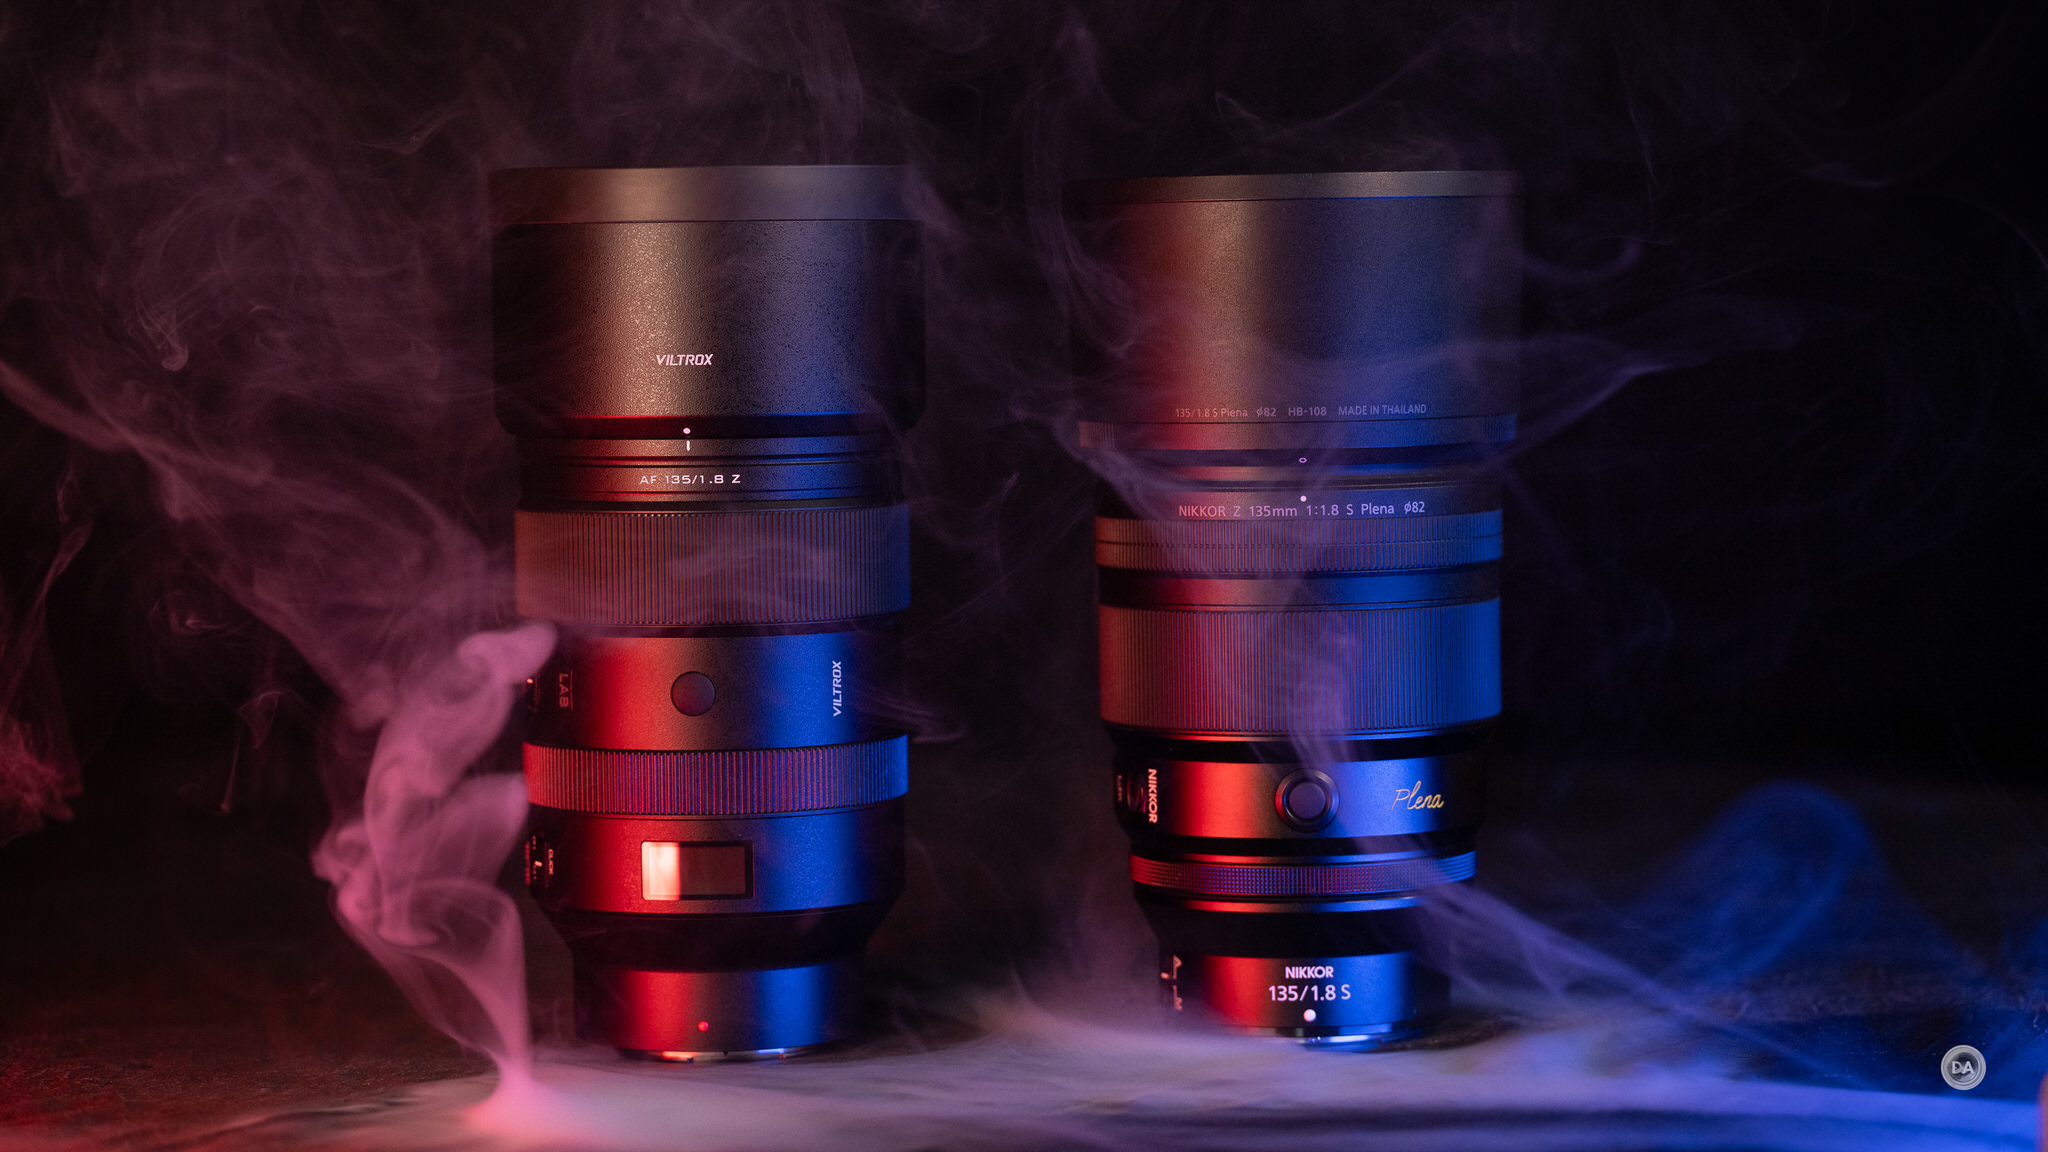
In the past six weeks I have reviewed two amazing 135mm lenses – both in Nikon Z mount. That’s great, as 18 months ago we had zero 135mm lenses. Both of them have tremendous strengths and a lot of similarities…but they are priced radically different, with the LAB coming in at $900 USD and the Plena closer to $2500 USD. Is the Plena worth it? Does the LAB make the Plena irrelevant? It’s complicated…so let’s dive in. You can get my full thoughts in the video review below or by checking out a summary of my findings in the article below.
Thanks to Chris at Nikon Canada for sending me a review loaner of the Plena and to Chloe from Viltrox for supplying me a review copy of the LAB. As always, this is a completely independent review. All opinions and conclusions are my own.*The tests and most of the photos that I share as a part of my review cycle have been done with the 45MP Nikon Z8, which I reviewed here.
Mostly similar feature set (Aperture/Control ring, AF | MF, Function)
Both weather sealed
Autofocus speed and feel pretty similar*
Optically very similar (portrait comparisons)
Neutral Differences
One is wider (Plena); one is longer (LAB) – within 1% of volume
Reasons to Choose LAB:
Price (currently $899 (less with discount), so -$1600
More customizable – LCD screen allows you to set A – B focus
Has focus limiter and click/declick aperture
Slightly less distortion
Nicer build? (definitely nicer hood)
Sharper in mid-frame and corners
Higher magnification
Reasons to Choose PLENA:
Much lighter at 995 weights 273g less than LAB (1268g)
Can do smooth aperture racks
Manually focuses smoother
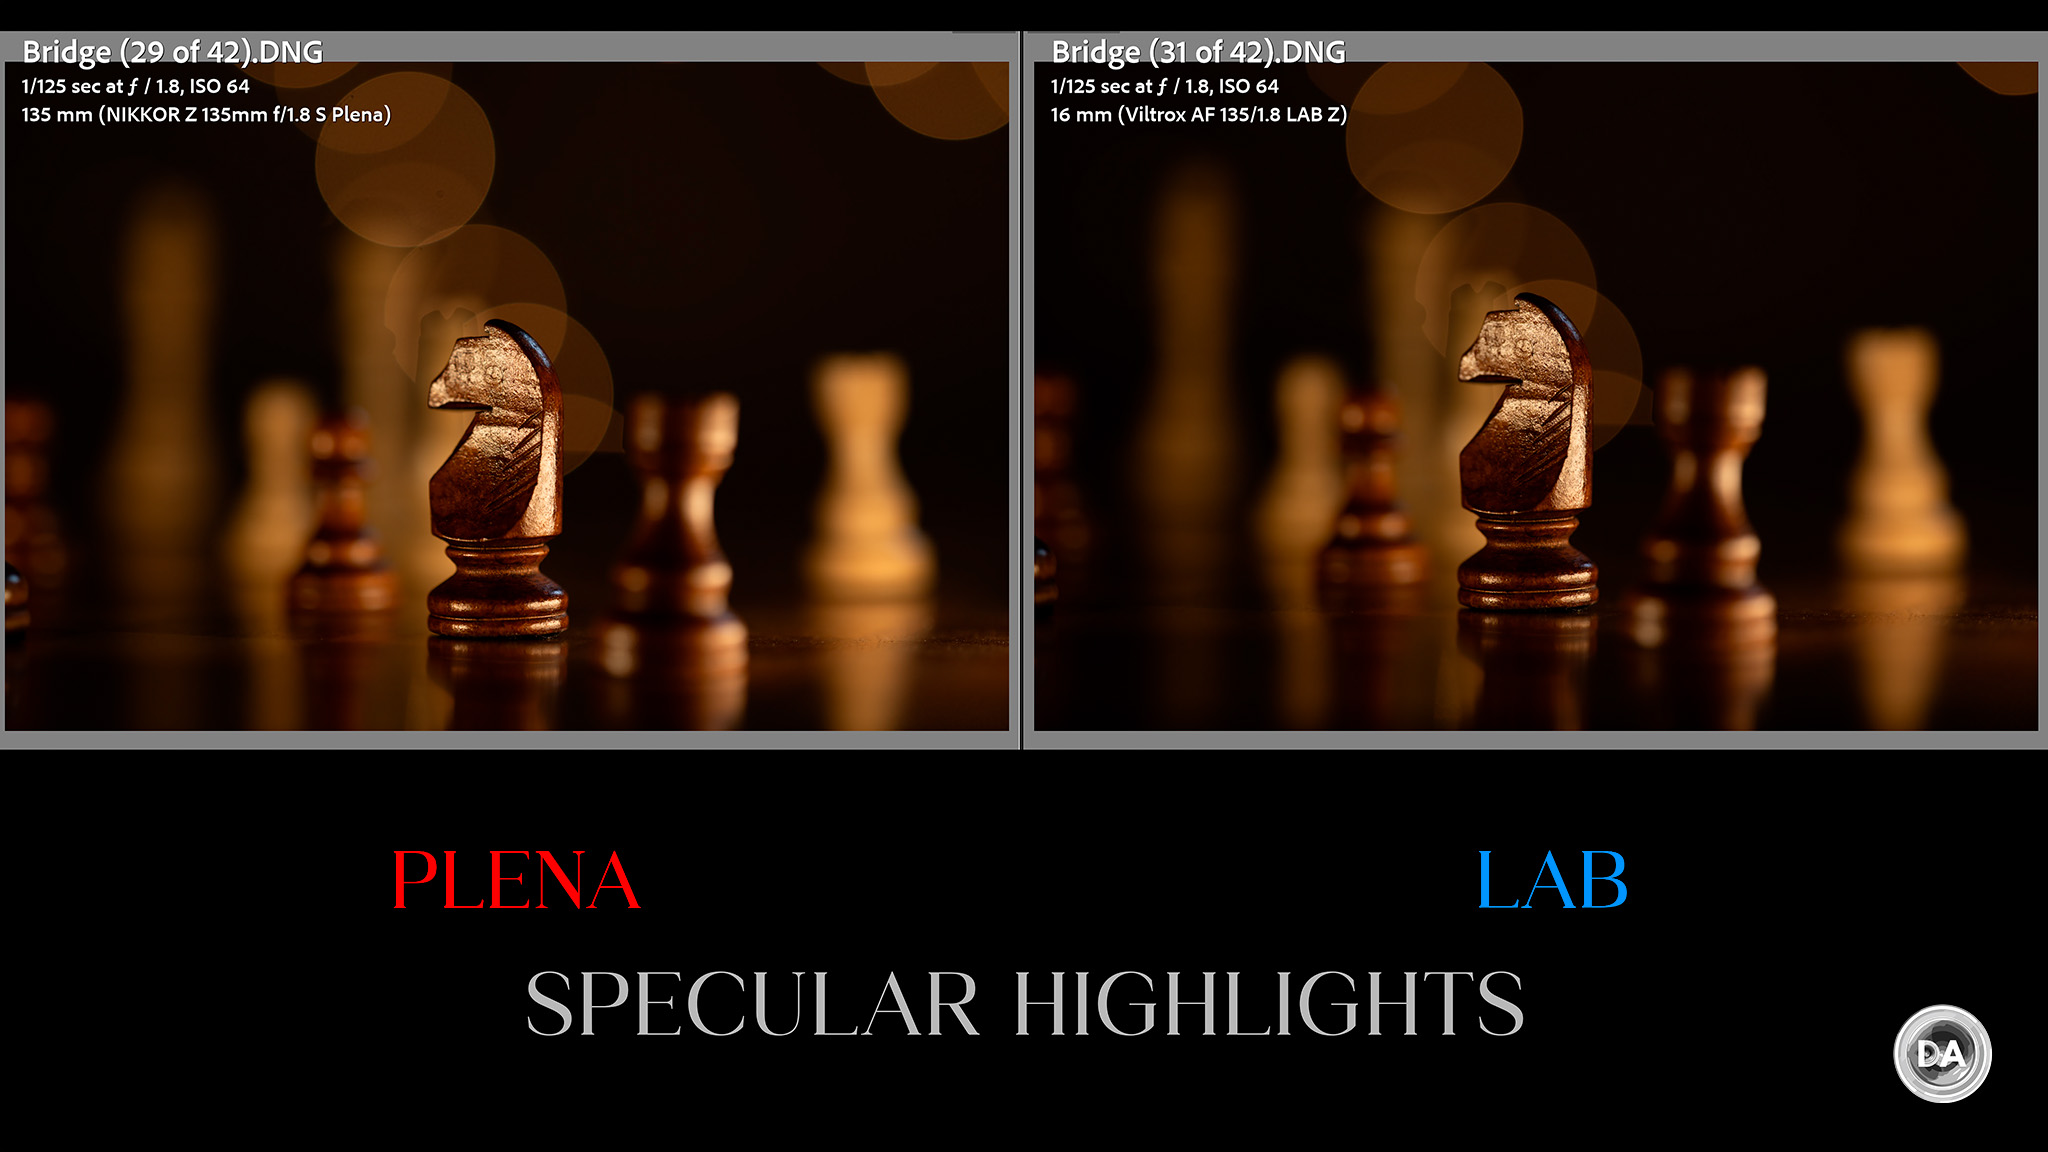
Rounder specular highlights
About half the vignette
More focus consistency
More reactive focus
A few less video focus quirks*
Sharper center
Conclusion
I think it is safe to say that differences in performance between the two lenses are subtle. They are both incredible optically, but I did encounter more quirks with the Viltrox (needs a firmware update – 16mm). There were moments using them side by side where I was reminded that one was a first party lens and the other a third party lens. I would still call the Plena the better lens, all things considered. BUT – $1600 is a lot of money, and I think the case can be easily made that the LAB is giving you at least 90-95% of the performance on the Plena – and you could buy 2.7 LABs for the price of one Plena.
Keywords: Nikkor, Nikkor Z 135mm, Plena, F1.8, F1.8 S, Nikkor Z, Nikkor Z 135mm F1.8 S Plena review, Nikon 135mm, Nikon Z 135mm, Viltrox, LAB, Viltrox AF 135mm F1.8 LAB Z, Nikon, Nikon Z8, Z, Z-mount, Z8, Review, mirrorless, Full Frame, Sports, Tracking, Dustin Abbott, Real World, Comparison, Handling, Focus, Portraits, Resolution, High ISO, Image Quality, Sample Images, Photography, 45MP, #letthelightin, #DA, #NIKON, #Z8, #nikonz8
DISCLAIMER: This article and description contains affiliate links, which means that if you click on one of the product links, I’ll receive a small commission. As an Amazon Associate I earn from qualifying purchases.
This is a very important review for me. Not because the Nikkor Z 135mm F1.8 S Plena is a new and hot review (it was actually released in October of 2023, several months before I started to do Nikon reviews and 18 months before this review), but because it represents a very important new connection for me. Since adding my Z8 in spring of 2024 I have been seeking partnerships to get a supply of Nikon loaners here in Canada, but I was largely unsuccessful in my first year. That meant that I have largely reviewed third party Z mount lenses (Tamron, Viltrox, etc…) but only a few first party Nikkor lenses. But on a trip to Japan I developed a friendship with Evelyn Drake of The Camera Store TV on YouTube (a truly lovely person!), and she connected me with Chris at Nikon Canada.
Chris was kind enough to get me a loaner of the Plena, and its my hope that my connection to him will enable me to do a more thorough job of covering Nikon products moving ahead. So far he has been great, so thank you to both Chris and Evelyn!
The Plena 135mm is one of Nikon’s top tier premium prime lenses, engineered to produce as beautiful of bokeh as possible. It’s a lens that I’ve been wanting to test for a while, as I’ve had an opportunity to review (and own) a lot of other premium 135mm lenses over the years and have been very interested in Nikon’s offering. There’s also the factor that Viltrox has now released their 135mm F1.8 LAB lens in Nikon Z mount, (my review here), so for the first time the Plena 135mm has some real competition. There’s no question the LAB is a great lens, but having spent time with the two lenses side by side, there are definitely some areas where the extra polish and sophistication of the Plena shine through. The big question, however, is whether or not that difference is worth a $1600 USD premium, as the Plena costs a whopping $2500. The answer, as usual, is complicated, and really depends on your set of priorities. We’ll explore all those details in either the video review, in the text review, or just enjoy the photos in the galleries below.
Thanks to Chris at Nikon Canada for sending me a review copy of this lens. As always, this is a completely independent review. All opinions and conclusions are my own.*The tests and most of the photos that I share as a part of my review cycle have been done with the 45MP Nikon Z8, which I reviewed here.You can find the product listing page for the Nikkor Z 135mm F1.8 S Plena here.
There are sharp lenses and there are lenses with beautifully soft rendering…that creamy bokeh that we all love. Lenses that have both qualities are very rare, as it takes masterful engineering to accomplish this. Nikon’s engineers prioritized the rendering in the Plena, working to engineer right out to the edges of the frame. They wanted round specular highlights across the frame, low vignette so that it wouldn’t interfere with that rendering, and as generally pleasing bokeh as possible. One of the first banners on the listing page says, “Beauty that reaches every corner.” It’s that attention to detail that sets the Plena 135mm apart…as I dive into in either the text or video reviews.
Keywords: Nikkor, Nikkor Z 135mm, Plena, F1.8, F1.8 S, Nikkor Z, Nikkor Z 135mm F1.8 S Plena review, Nikon 135mm, Nikon Z 135mm, Viltrox, LAB, Viltrox AF 135mm F1.8 LAB Z, Nikon, Nikon Z8, Z, Z-mount, Z8, Review, mirrorless, Full Frame, Sports, Tracking, Dustin Abbott, Real World, Comparison, Handling, Focus, Portraits, Resolution, High ISO, Image Quality, Sample Images, Photography, 45MP, #letthelightin, #DA, #NIKON, #Z8, #NIKONZ8
DISCLAIMER: This article and description contains affiliate links, which means that if you click on one of the product links, I’ll receive a small commission. As an Amazon Associate I earn from qualifying purchases.
This is a very important review for me. Not because the Nikkor Z 135mm F1.8 S Plena is a new and hot review (it was actually released in October of 2023, several months before I started to do Nikon reviews and 18 months before this review), but because it represents a very important new connection for me. Since adding my Z8 in spring of 2024 I have been seeking partnerships to get a supply of Nikon loaners here in Canada, but I was largely unsuccessful in my first year. That meant that I have largely reviewed third party Z mount lenses (Tamron, Viltrox, etc…) but only a few first party Nikkor lenses. But on a trip to Japan I developed a friendship with Evelyn Drake of The Camera Store TV on YouTube (a truly lovely person!), and she connected me with Chris at Nikon Canada.
Chris was kind enough to get me a loaner of the Plena, and its my hope that my connection to him will enable me to do a more thorough job of covering Nikon products moving ahead. So far he has been great, so thank you to both Chris and Evelyn!
The Plena 135mm is one of Nikon’s top tier premium prime lenses, engineered to produce as beautiful of bokeh as possible. It’s a lens that I’ve been wanting to test for a while, as I’ve had an opportunity to review (and own) a lot of other premium 135mm lenses over the years and have been very interested in Nikon’s offering. There’s also the factor that Viltrox has now released their 135mm F1.8 LAB lens in Nikon Z mount, (my review here), so for the first time the Plena 135mm has some real competition. There’s no question the LAB is a great lens, but having spent time with the two lenses side by side, there are definitely some areas where the extra polish and sophistication of the Plena shine through. The big question, however, is whether or not that difference is worth a $1600 USD premium, as the Plena costs a whopping $2500. The answer, as usual, is complicated, and really depends on your set of priorities. We’ll explore all those details in either the video review below or in this text review.
Thanks to Chris at Nikon Canada for sending me a review copy of this lens. As always, this is a completely independent review. All opinions and conclusions are my own.*The tests and most of the photos that I share as a part of my review cycle have been done with the 45MP Nikon Z8, which I reviewed here.You can find the product listing page for the Nikkor Z 135mm F1.8 S Plena here.
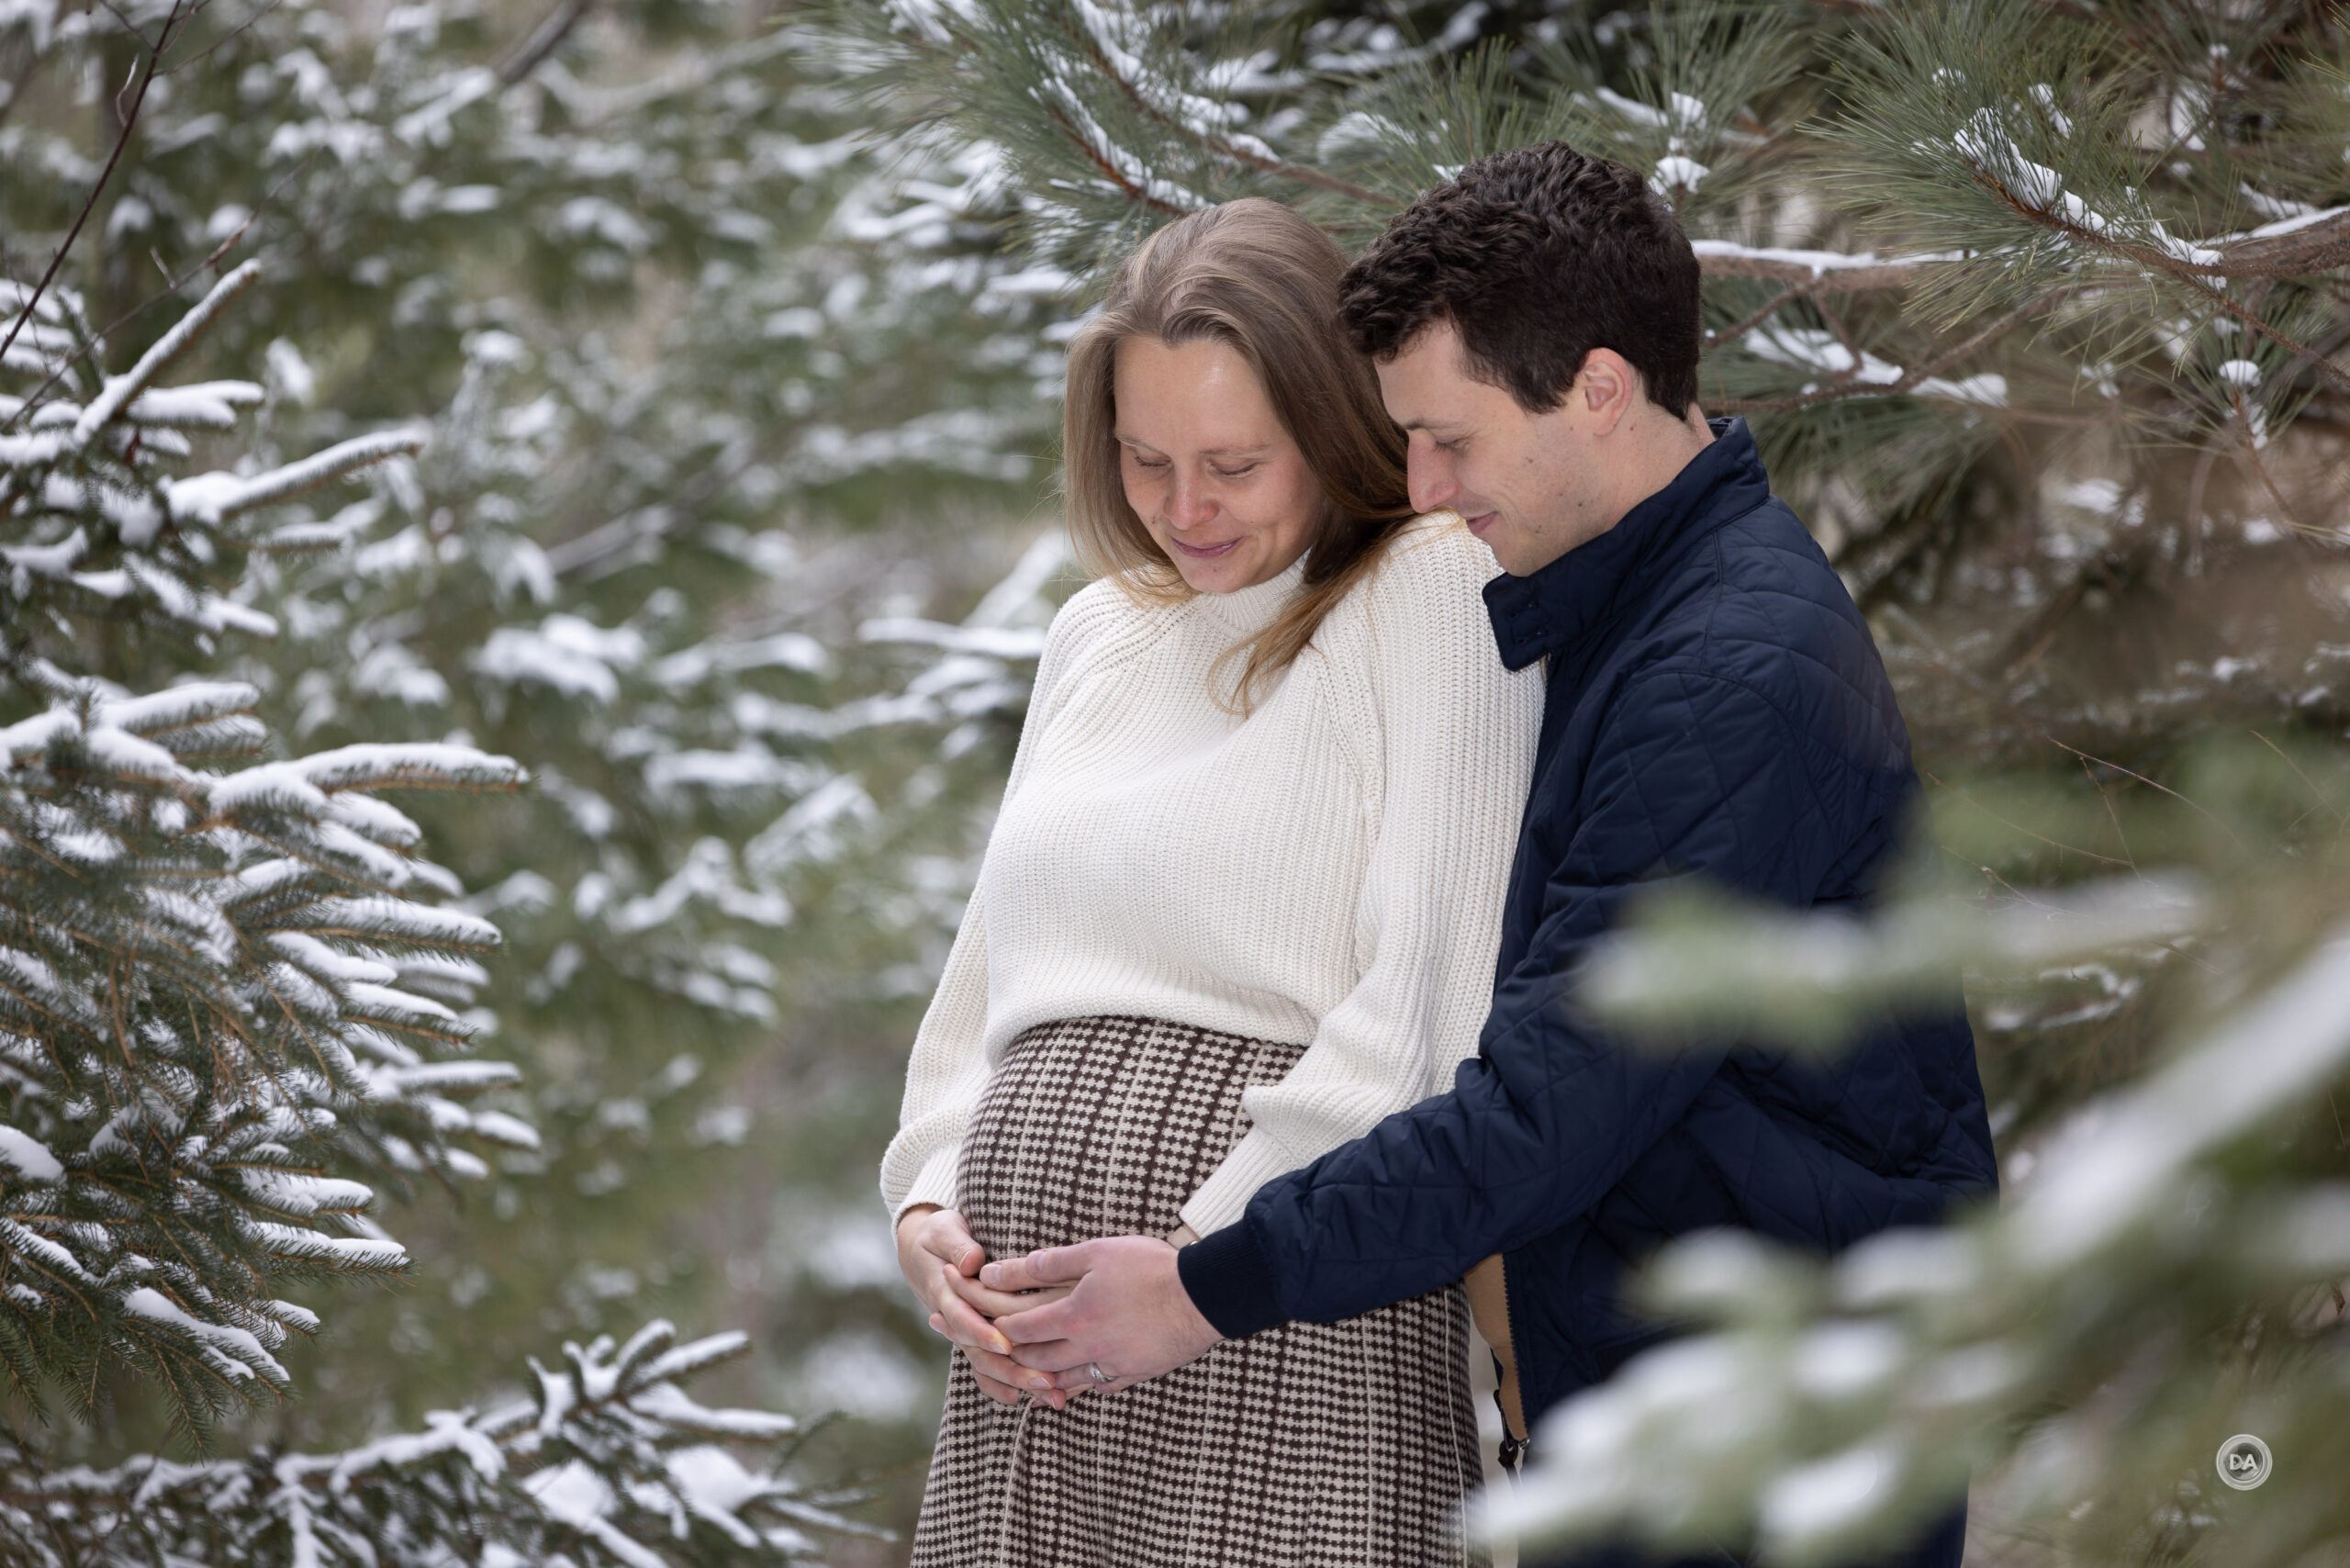
First, a word on 135mm lenses. There are few lenses that I like the look of images more from. To me images shot with a fast 135mm lens are a cut above those shot with an 85mm F1.4 (or even F1.2), but the challenge is that the additional 50mm in focal length makes for a less flexible tool. You need more room to operate, which means that a 135mm lens isn’t going to work in every room. I shot my first wedding using a Canon EF 135mm F2L lens rather than a 70-200mm type zoom, and I regretted it afterwards. There were several shots where the framing was unnatural because I didn’t have enough room to fit everything I wanted in the frame. But there’s no lens that I like more for environmental portraiture. The ability to have a full length portrait while still having beautiful separation of the subject from the background makes for incredibly special images.
There are sharp lenses and there are lenses with beautifully soft rendering…that creamy bokeh that we all love. Lenses that have both qualities are very rare, as it takes masterful engineering to accomplish this. Nikon’s engineers prioritized the rendering in the Plena, working to engineer right out to the edges of the frame. They wanted round specular highlights across the frame, low vignette so that it wouldn’t interfere with that rendering, and as generally pleasing bokeh as possible. One of the first banners on the listing page says, “Beauty that reaches every corner.” It’s that attention to detail that sets the Plena 135mm apart. This comparison hows that extra little something special when compared to the LAB, with rounder specular highlights right into the edges.
We’ll explore more of those little details in the review.
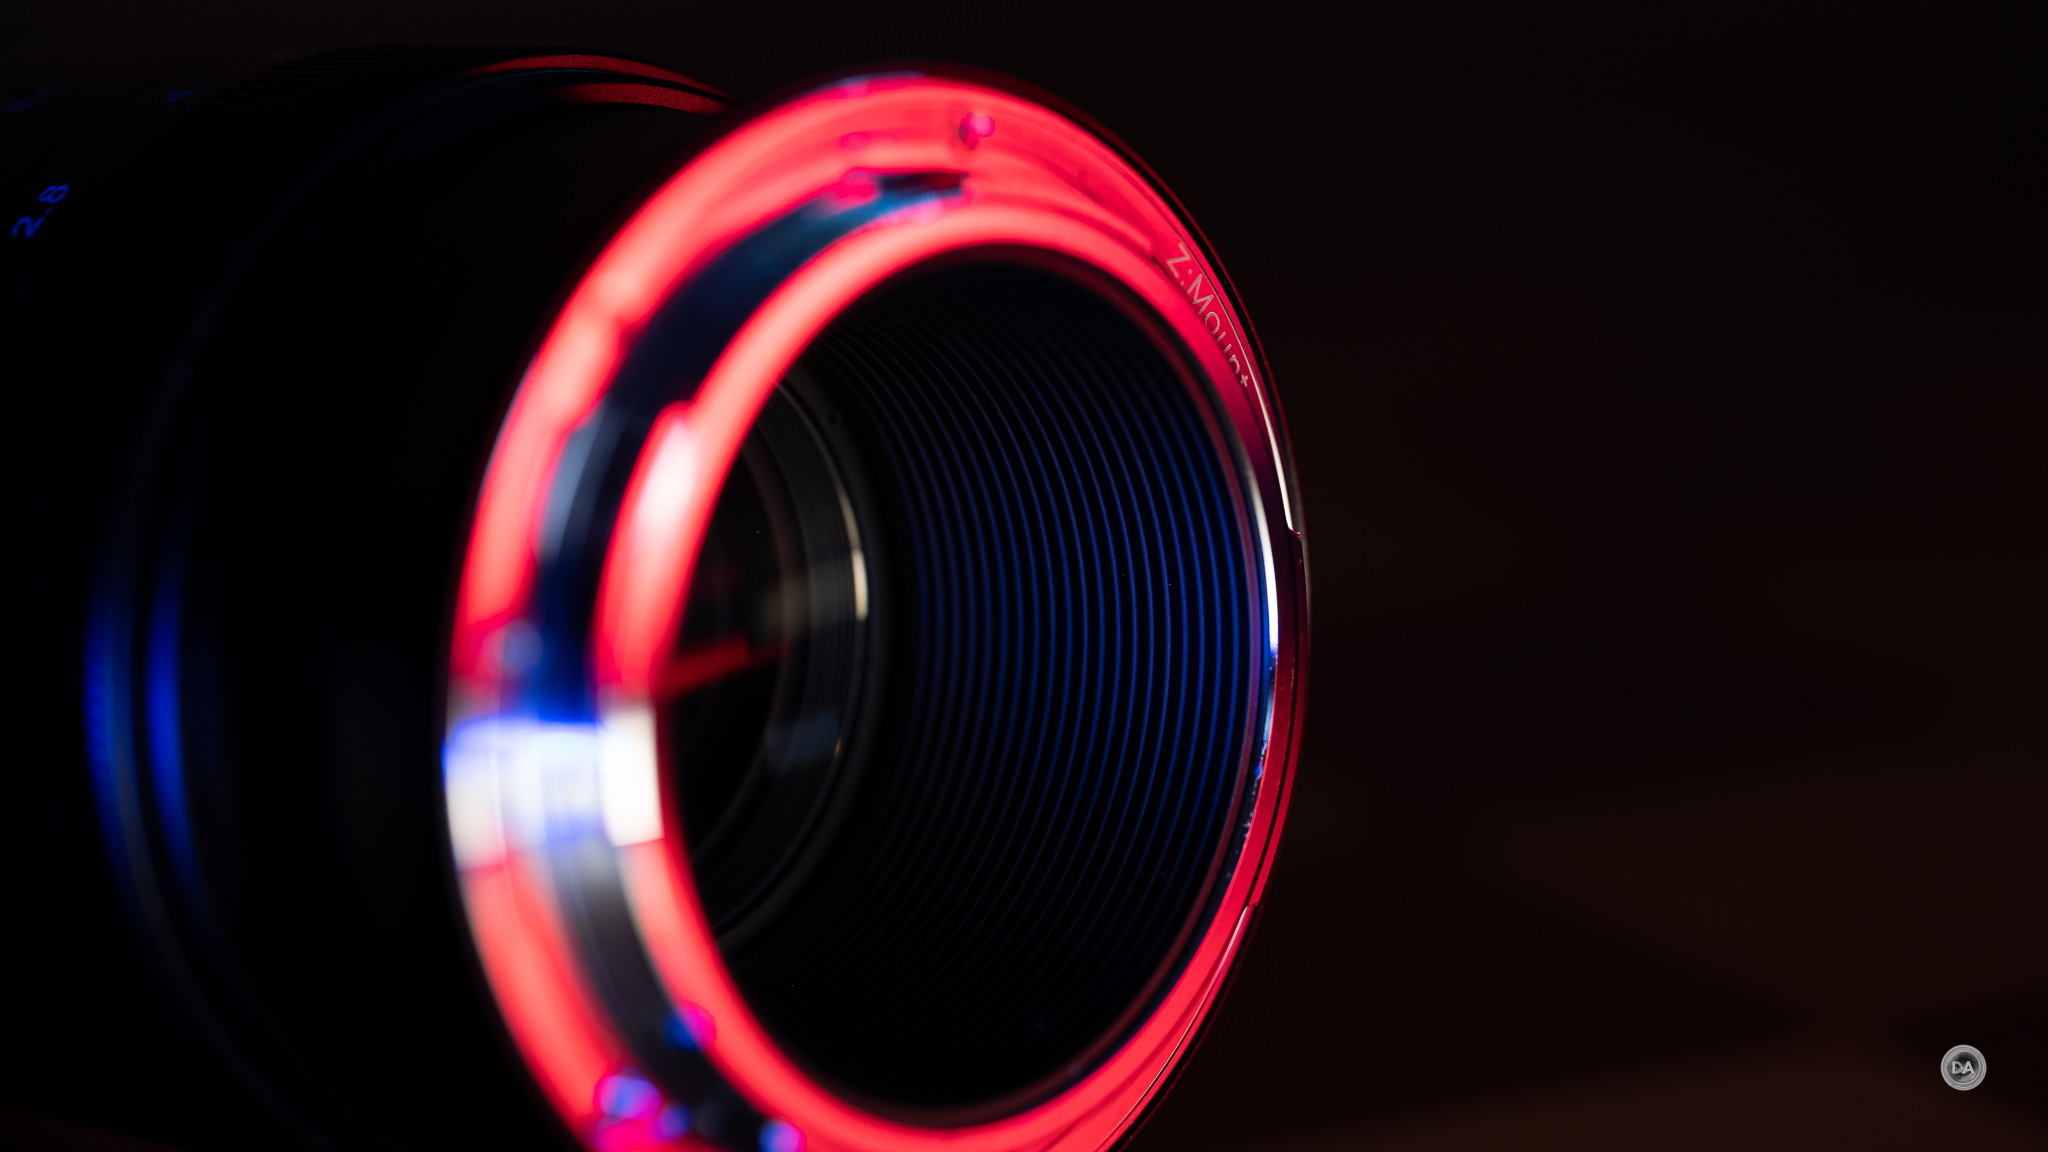
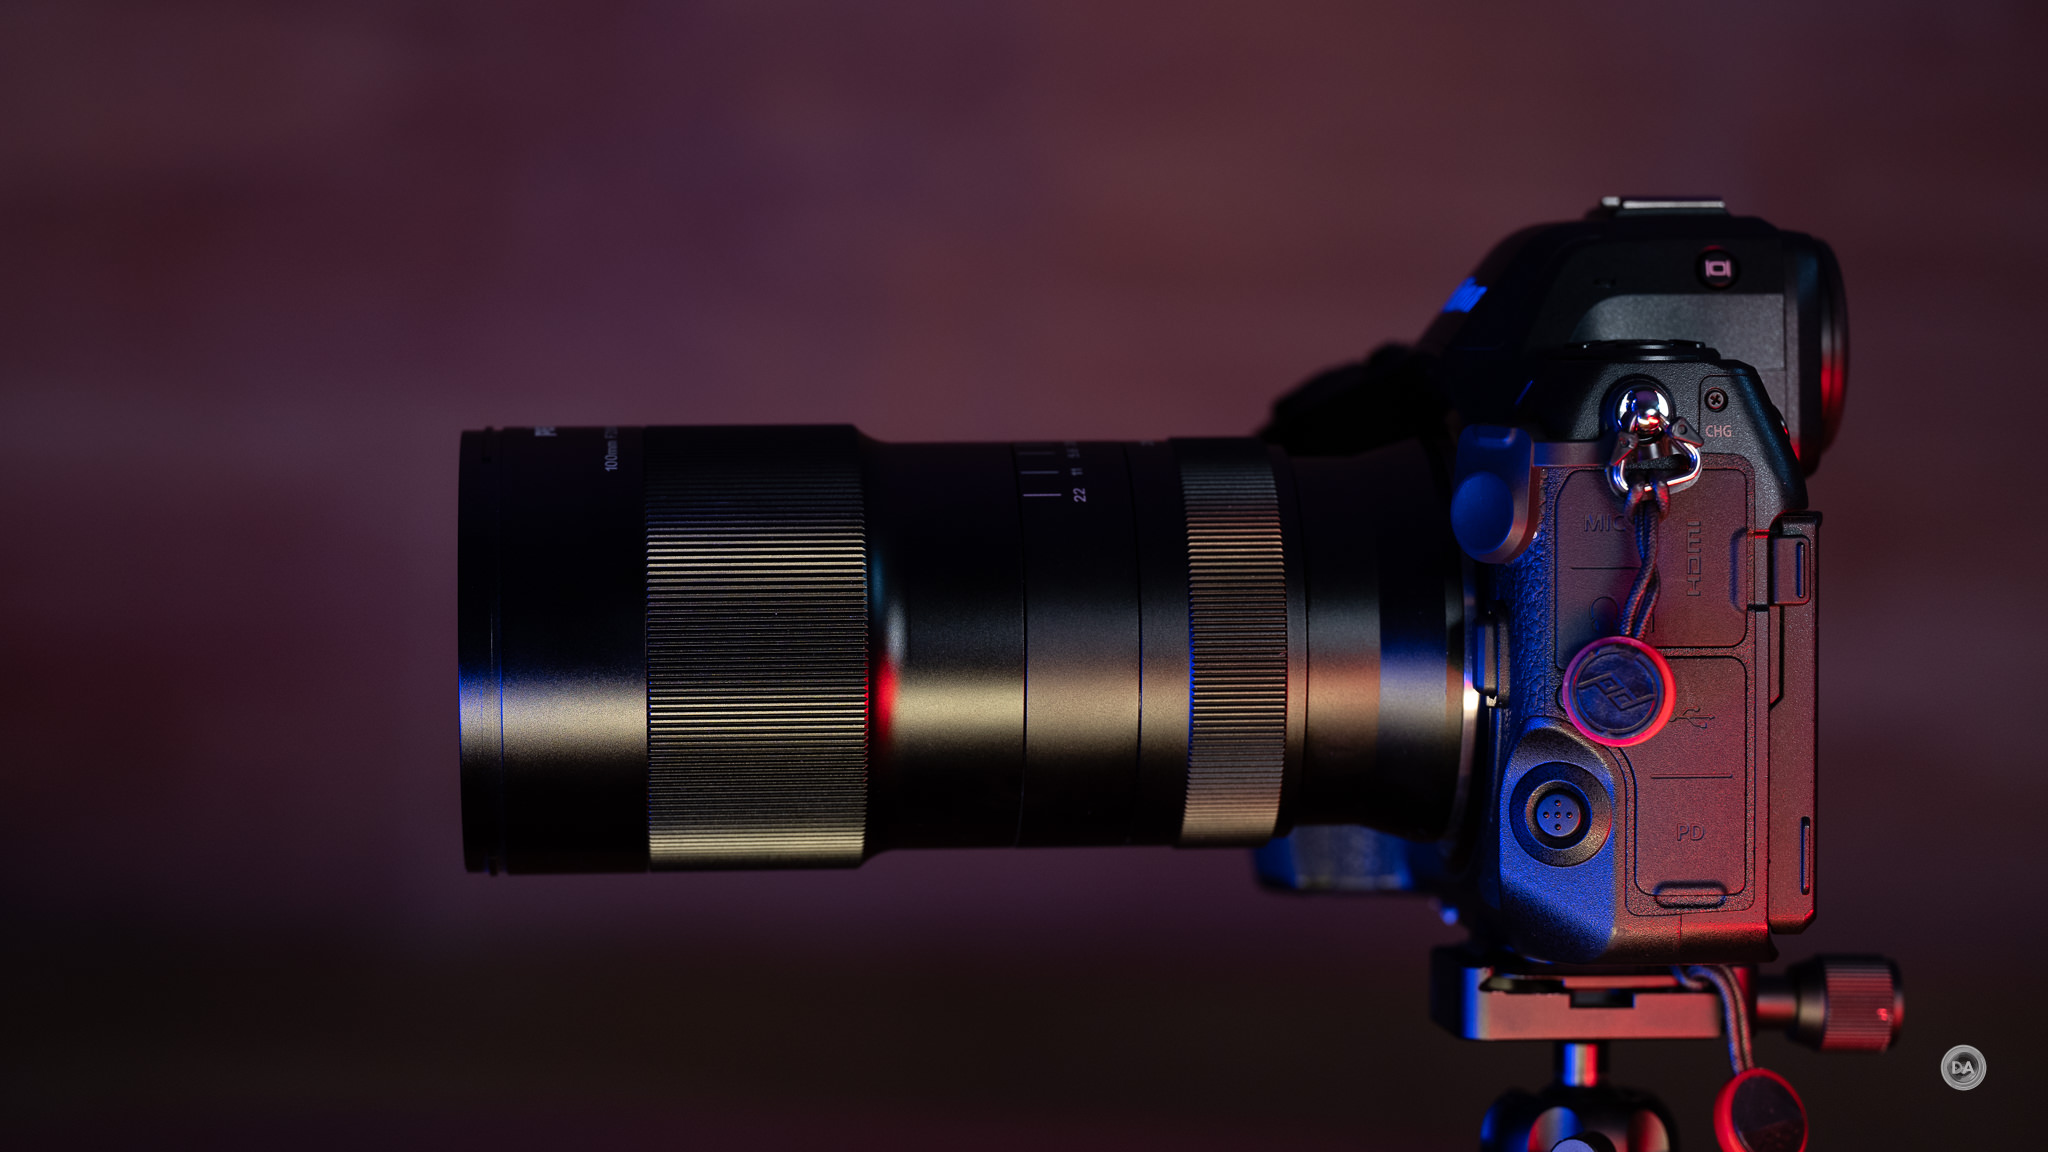
Nikkor Plena 135mm Build and Handling
Nikon’s lineup of Z-mount premium lenses – the S-Line lenses – is known for many things, but being small is not one of them. Nikon has taken the old Zeiss Otus philosophy where performance is by the greatest object and size and weight are not really significant considerations. I think they can get away with it, too, when they often have a Small | Medium | Large option at that given focal length. It’s true now of a 35mm, 50mm, and 85mm, where F1.8, F1.4, and F1.2 options all exist (though ironically the F1.4 options are often the smallest!). Obviously that’s not true of the 135mm focal length, where the Plena is the lone entry, but the Plena is definitely a part of the F1.2 crowd in design philosophy.
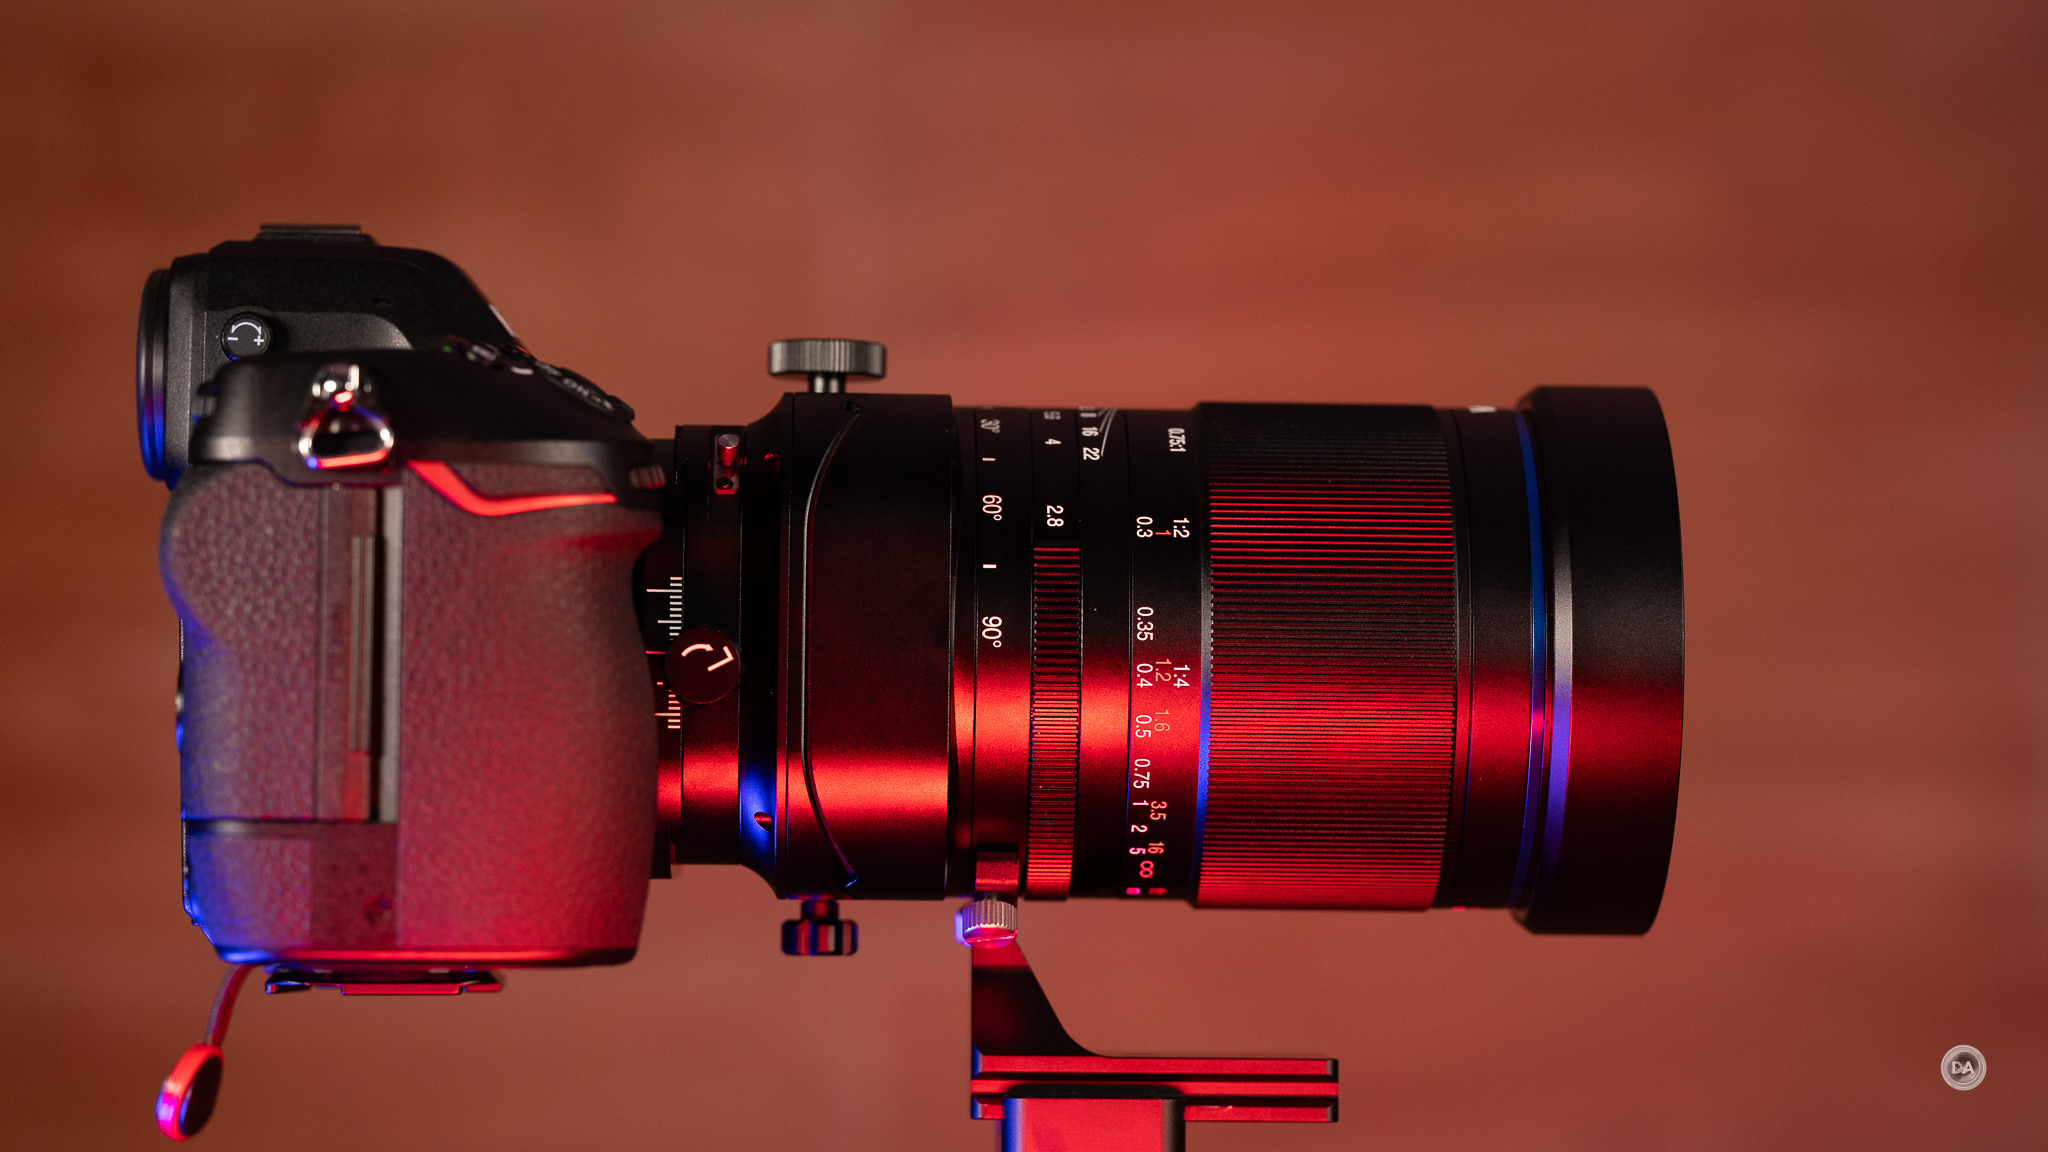
That being said, it’s not as if 135mm F1.8 lenses tend to be small and light in general, and while the Plena is a little wider in diameter than the Viltrox LAB option, it’s actually shorter and lighter.
The Plena is 98mm (3.9″) in diameter and 139.5mm (5.5″) in length. It weighs 995g (35oz). But the LAB 135Z manages to top that. It is 93mm in diameter (3.66″), a little narrower, but is a bit longer at 147.6mm (5.74″) in length. That’s not bigger (the Plena has an internal volume about 1% higher), but the Plena is actually lighter than the LAB. The Plena weighs 995g (35oz), which is heavy enough, but the LAB weighs a whopping 1268g (44.72oz), or about 270g more than the Plena. For that matter, the Plena is shorter and lighter than any of the S-Line F1.2 options. That’s right – the Plena is the lightweight option! It’s all about perspective.
What makes this a big, heavy lens is that there is a massive amount of glass inside right past those 82mm front filter threads.
The Plena is a premium lens with an excellent build. It has a tough outer shell of mostly metal alloys, and, internally, it has thorough weather sealing throughout.
There is a protective coating on the front and rear elements and then roughly 11 (by my count) internal seals at the rings, buttons, and switches. That allows you to have confidence when shooting in the elements.
I do have one gripe with modern 135mm lenses, and this criticism applies to all of them…not just the Plena. One of the things I appreciated about the old school Canon EF 135mm F2L (my first quality 135mm) was that it was fully compatible with teleconverters, allowing one to get a nice quality 190mm (ish) F2.8 lens with an F1.4x TC or even a 270mm F4 lens with a 2.0x. That just added to the versatility of the lens, but that seems to have be a forgotten element of modern 135mm design. Nikon instead touts that the rear element (located nearly flush with the mount, meaning that there is no physical room ever for a TC) is actually curved to allow for lower vignette.
At least this design has a specific purpose (more on that in the image quality section).
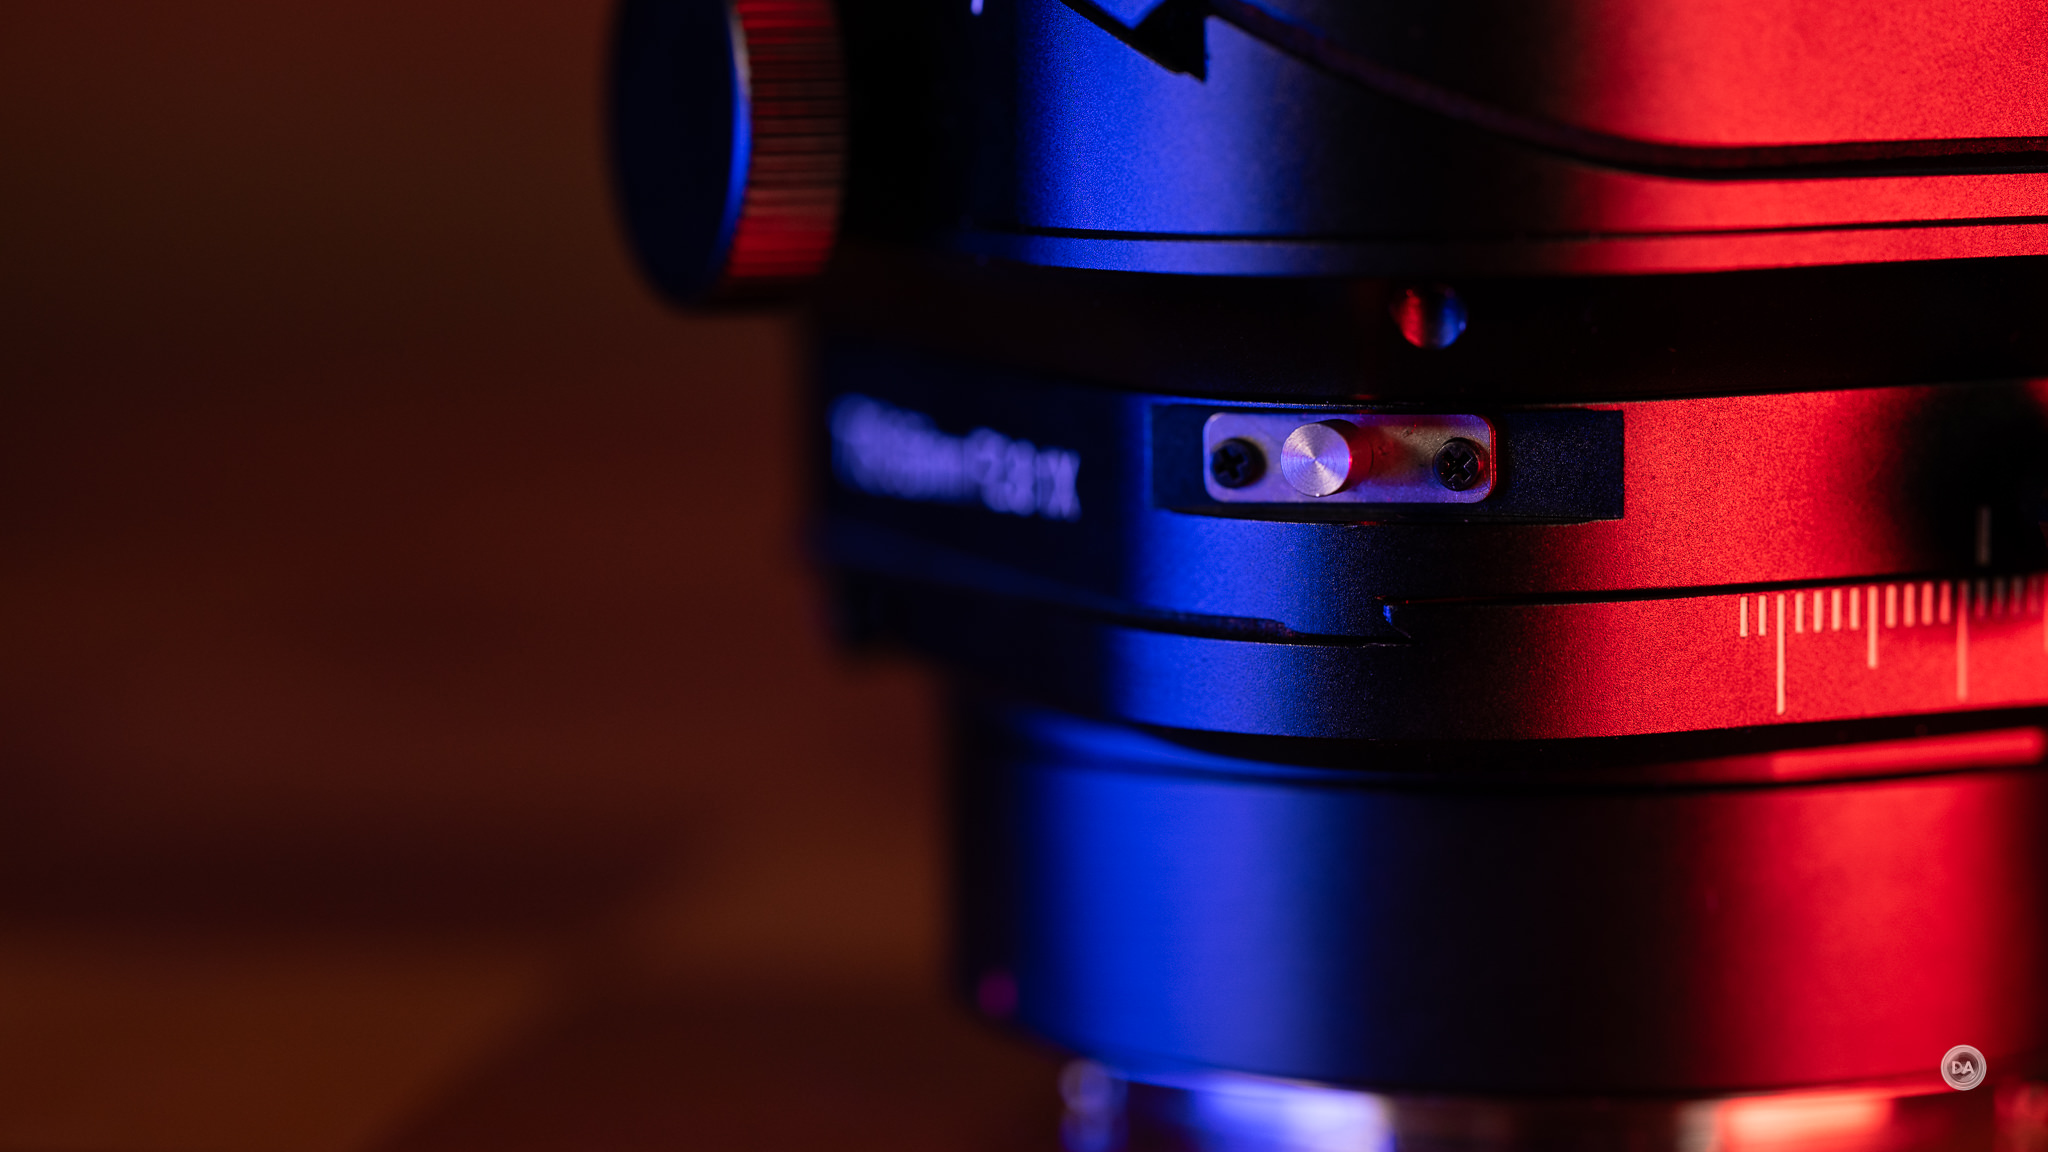
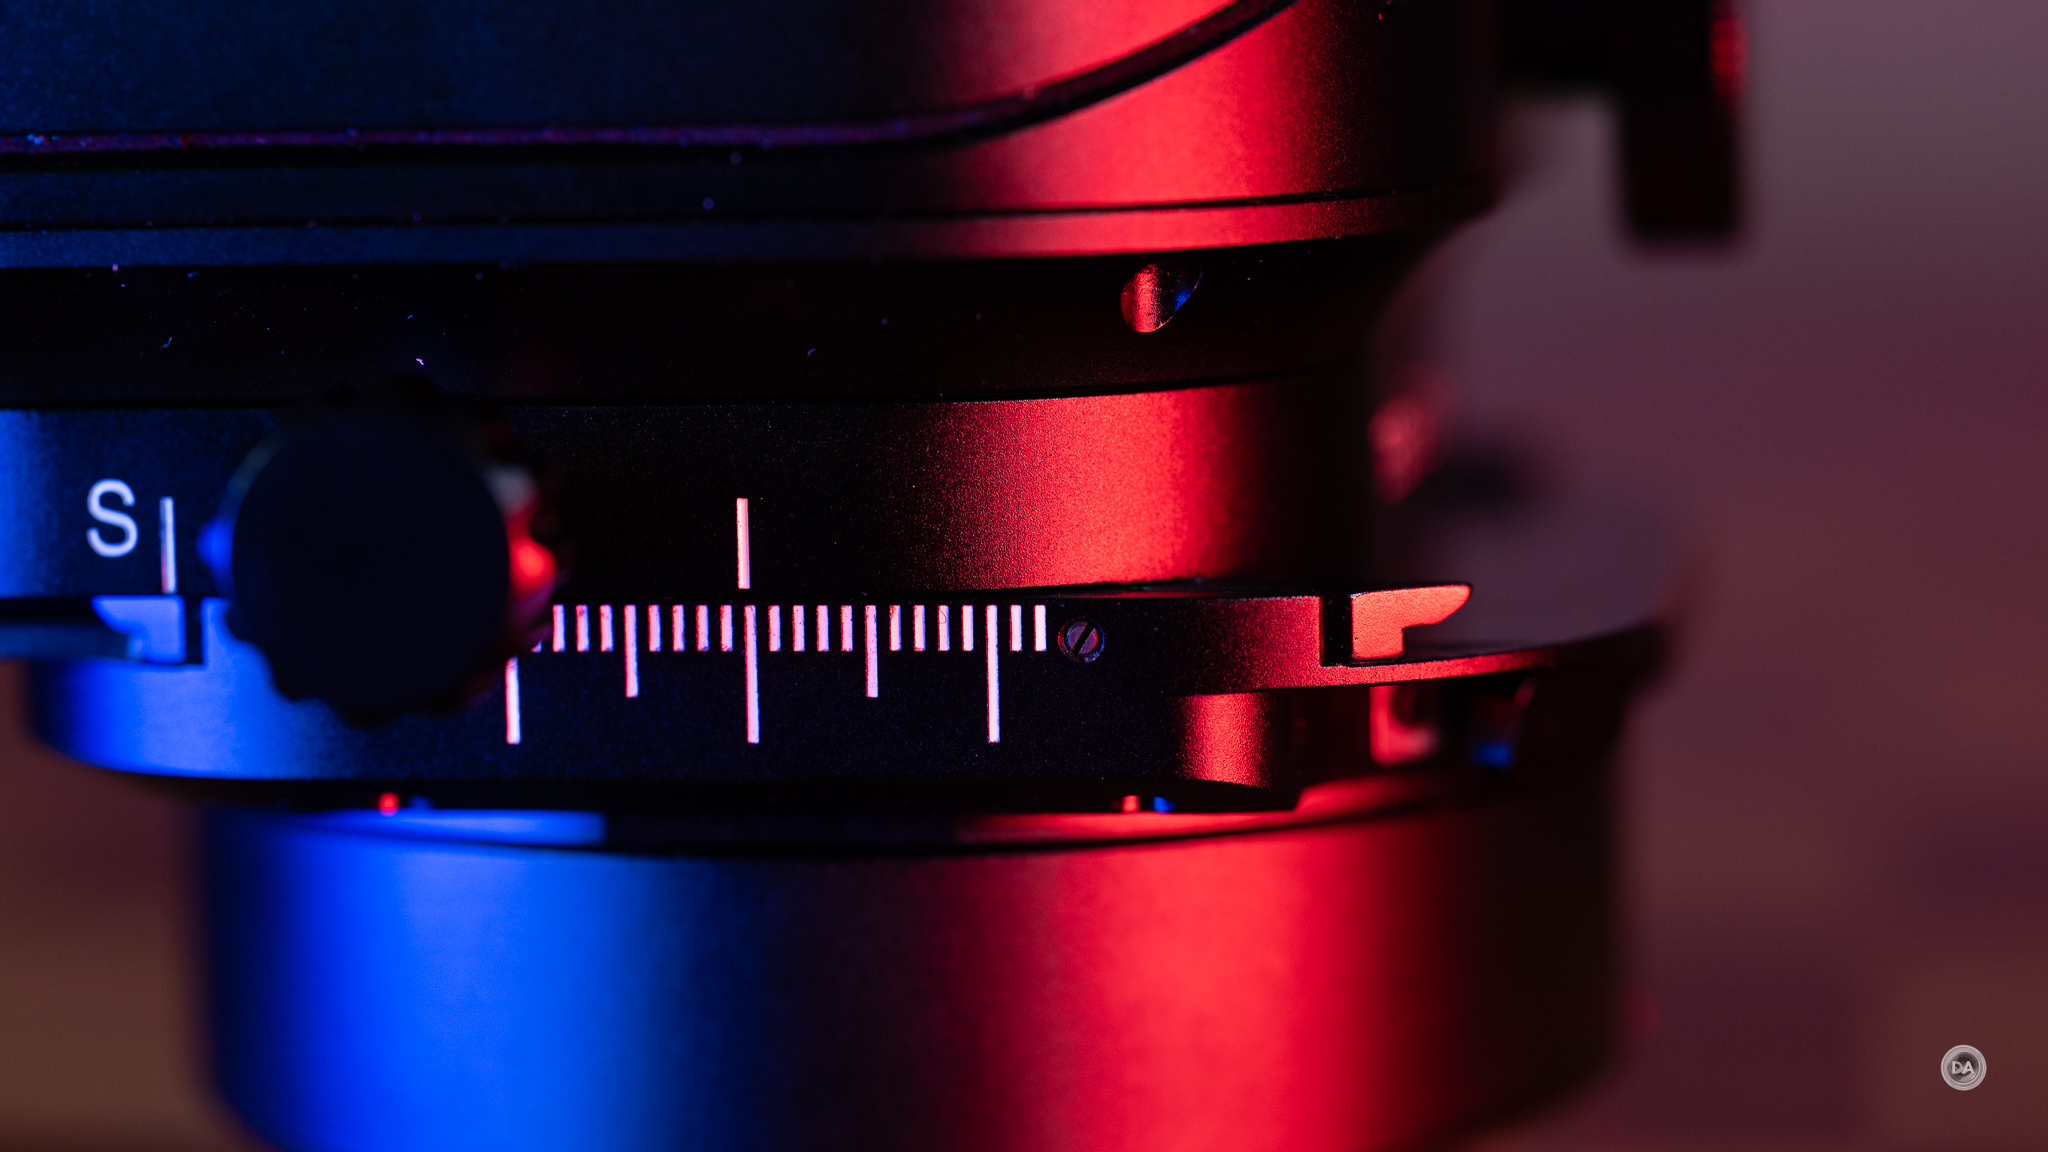
Nikon has a specific design ethos of the feature set of these upscale S-Line lenses, which includes a few more control points than the average lens. That starts very early on the lens with an AF | MF switch that is located very close to the lens mount.
Maybe too close to the lens mount, at least on certain cameras. On my Z8, there are two controls located way too close to this area. There is a flash sync port behind a rubber cover along with the camera release button. That means if I’m reaching around with my left thumb to operate the switch, I’m having to thread the needle through a couple of obstacles. Perhaps placing it on the same tier with the Fn buttons would have made more sense.
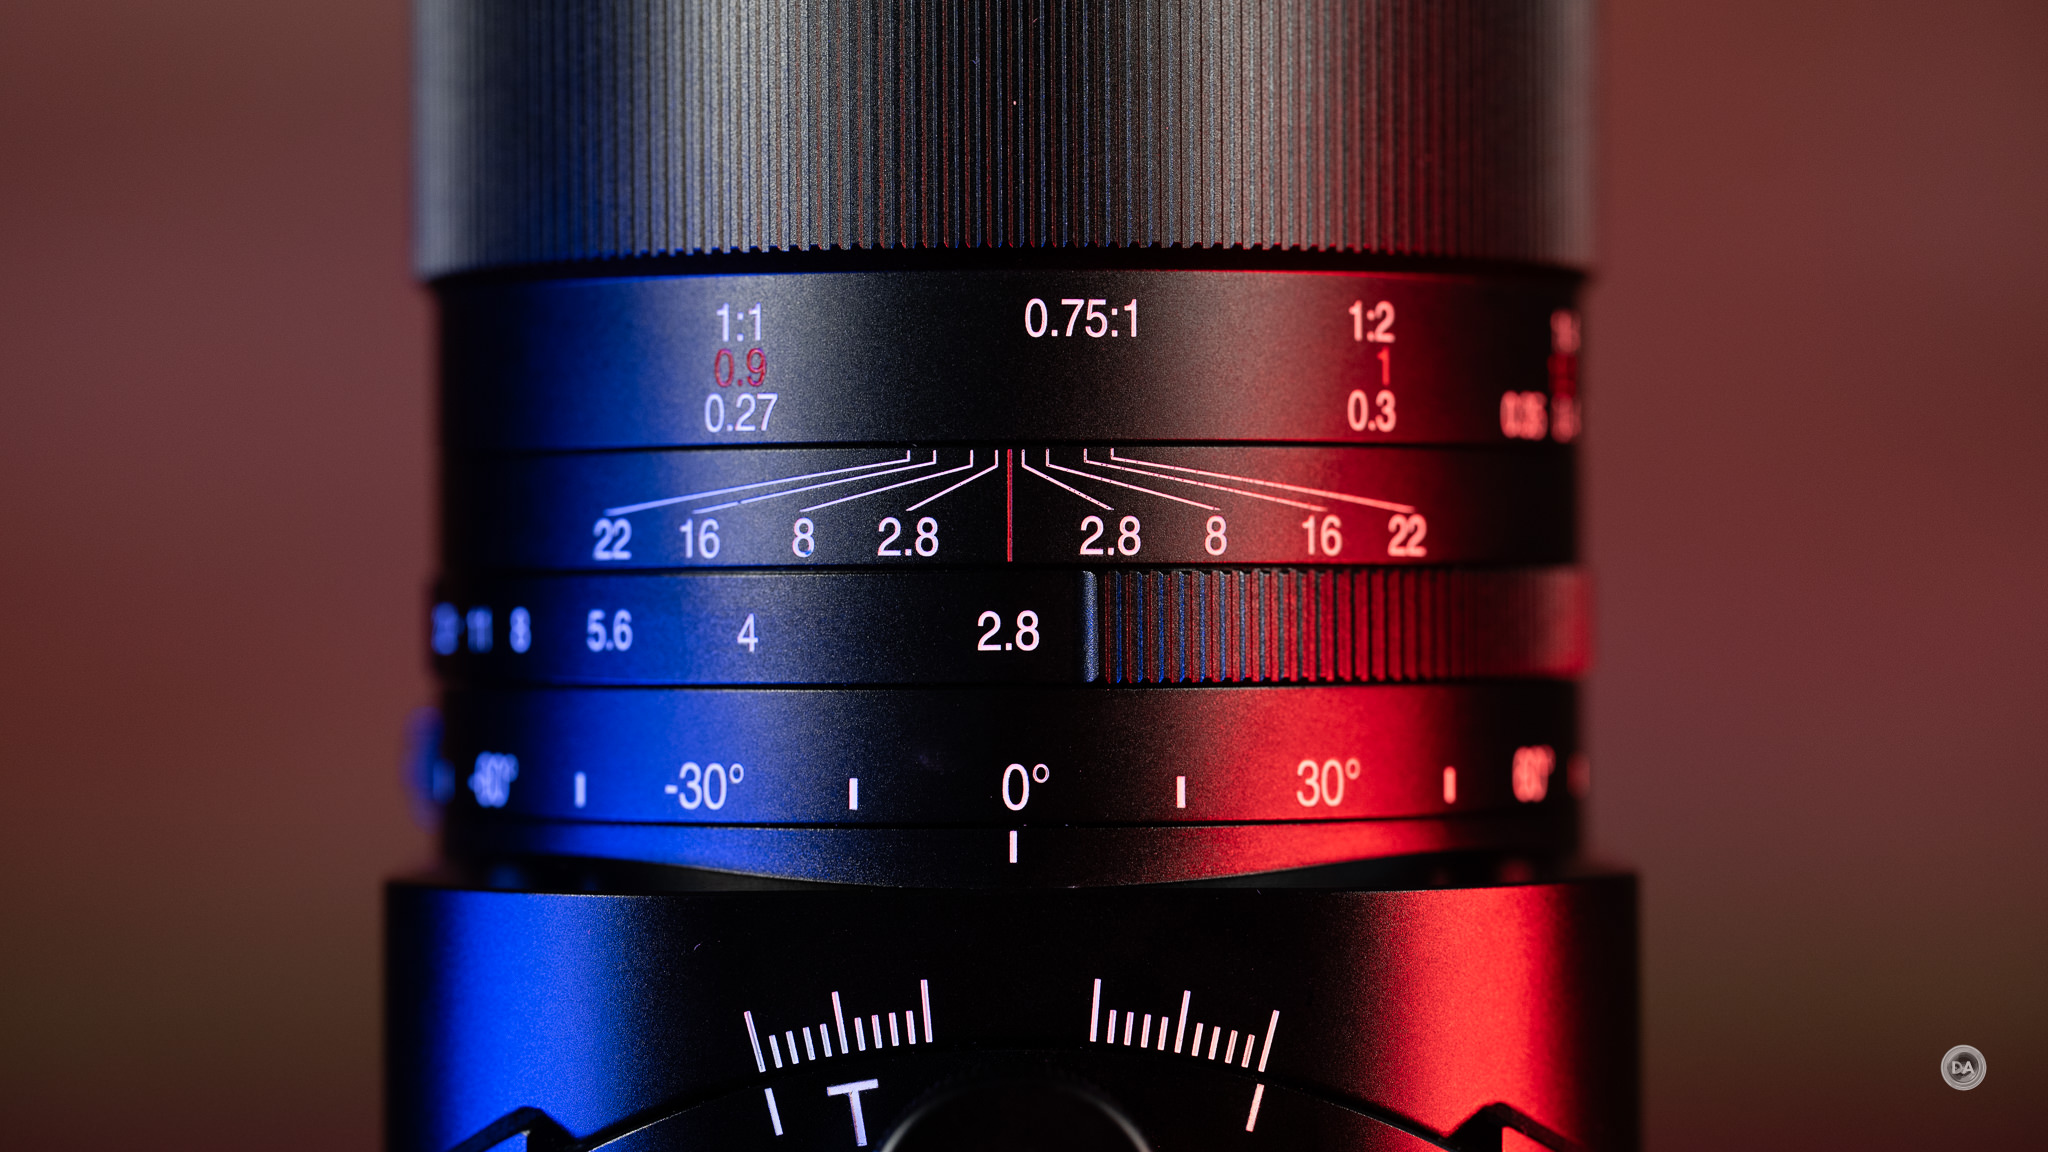
Next comes Nikon’s “clickless control ring”, which could serve as a manual aperture ring but could also function to control ISO, exposure compensation, or a few other functions – whatever you’ve set up the ring to do in the menus. Those controls can be found in the Custom Settings menu, then by selecting group F (Controls), and finally choosing custom setting F2 (Custom Controls Shooting) to change the function of the ring.
As an aside, I will note that I was able to do smooth aperture racks through the control ring without any visible steps. That wasn’t true of the LAB lens, where I could see visible steps even when I had the aperture ring in the declicked mode (at least on Z-mount).
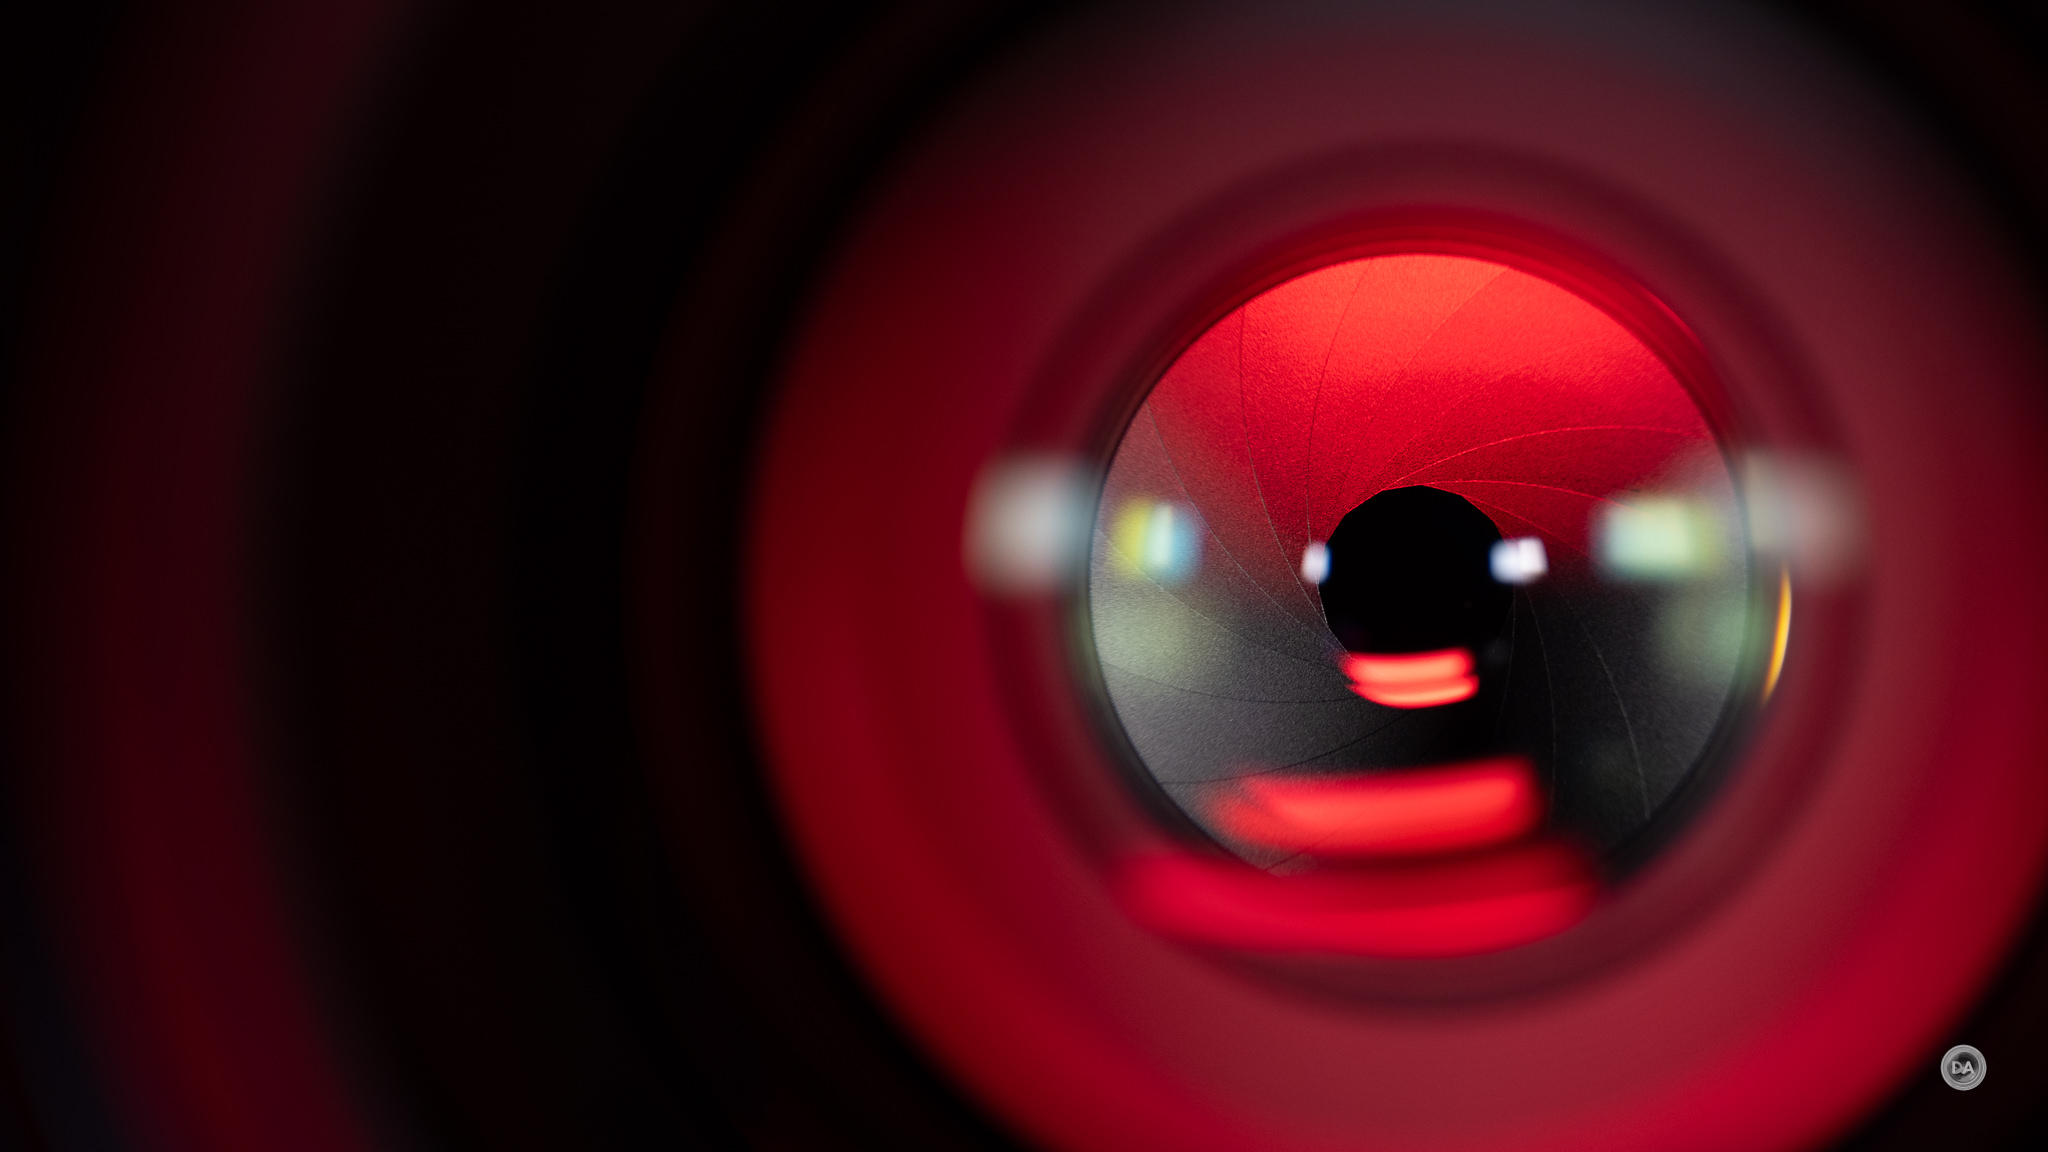
The aperture iris has eleven rounded blades, and the aperture iris definitely does a nice job of keeping the specular highlights round. The screenshot above is somewhere around F5.6 or F6.3, and shows a very circular shape with very minimal evidence of the individual aperture blades.
Here’s what that aperture iris looks like from the inside.
I’m personally more a fan of a traditional manual aperture ring (with marked positions) as I think the function works better than using the control ring for aperture, where there is no natural visual representation of the current aperture. Unlike Sony (at least at the present), some of Nikon’s cameras have a top mounted LCD screen (including my Z8), which at least gives you some visual feedback on the current aperture. I can also appreciate that not everyone is a fan of manual aperture rings, and Nikkor’s approach allows that ring to be used for other purposes if so desired. Viltrox seems to have been taking a similar tack with their LAB lenses (and I’ve been complaining about it there, too!)
Many 135mm lenses employ a focus limiter switch, but Nikkor has skipped that on the Plena. The positive spin is that they clearly have confidence in the autofocus speed and don’t feel it is necessary.
In the middle of the lens there are two Fn buttons, one on the top and the other on the left side. These are redundant (both have the same function – whatever has been assigned to it in camera) but are in duplicate so that you have one easy to hand whether shooting in horizontal or vertical modes.
The manual focus ring is slightly raised and has a rubberized, ribbed texture. It moves very smoothly and has a nice amount of weight to it. I was able to pull off really smooth manual focus pulls and focus with very nice precision. I also love the fact that I can do full time manual overrides even when in AF-C mode.
You’ll note that there is a third rubberized section near the front of the lens, but that appears to just be a grip section and not a movable part. It’s a rather odd design choice, actually.
There is no lens based stabilization, so you will need to rely upon the in-camera stabilization if your camera is so equipped.
The lens hood is relatively deep and does have a small lock on the right side. The hood is made of plastics and feels fairly ordinary. Unlike the Viltrox, it doesn’t have a rubberized front edge. I would argue that a premium lens like the Plena deserves a nicer hood.
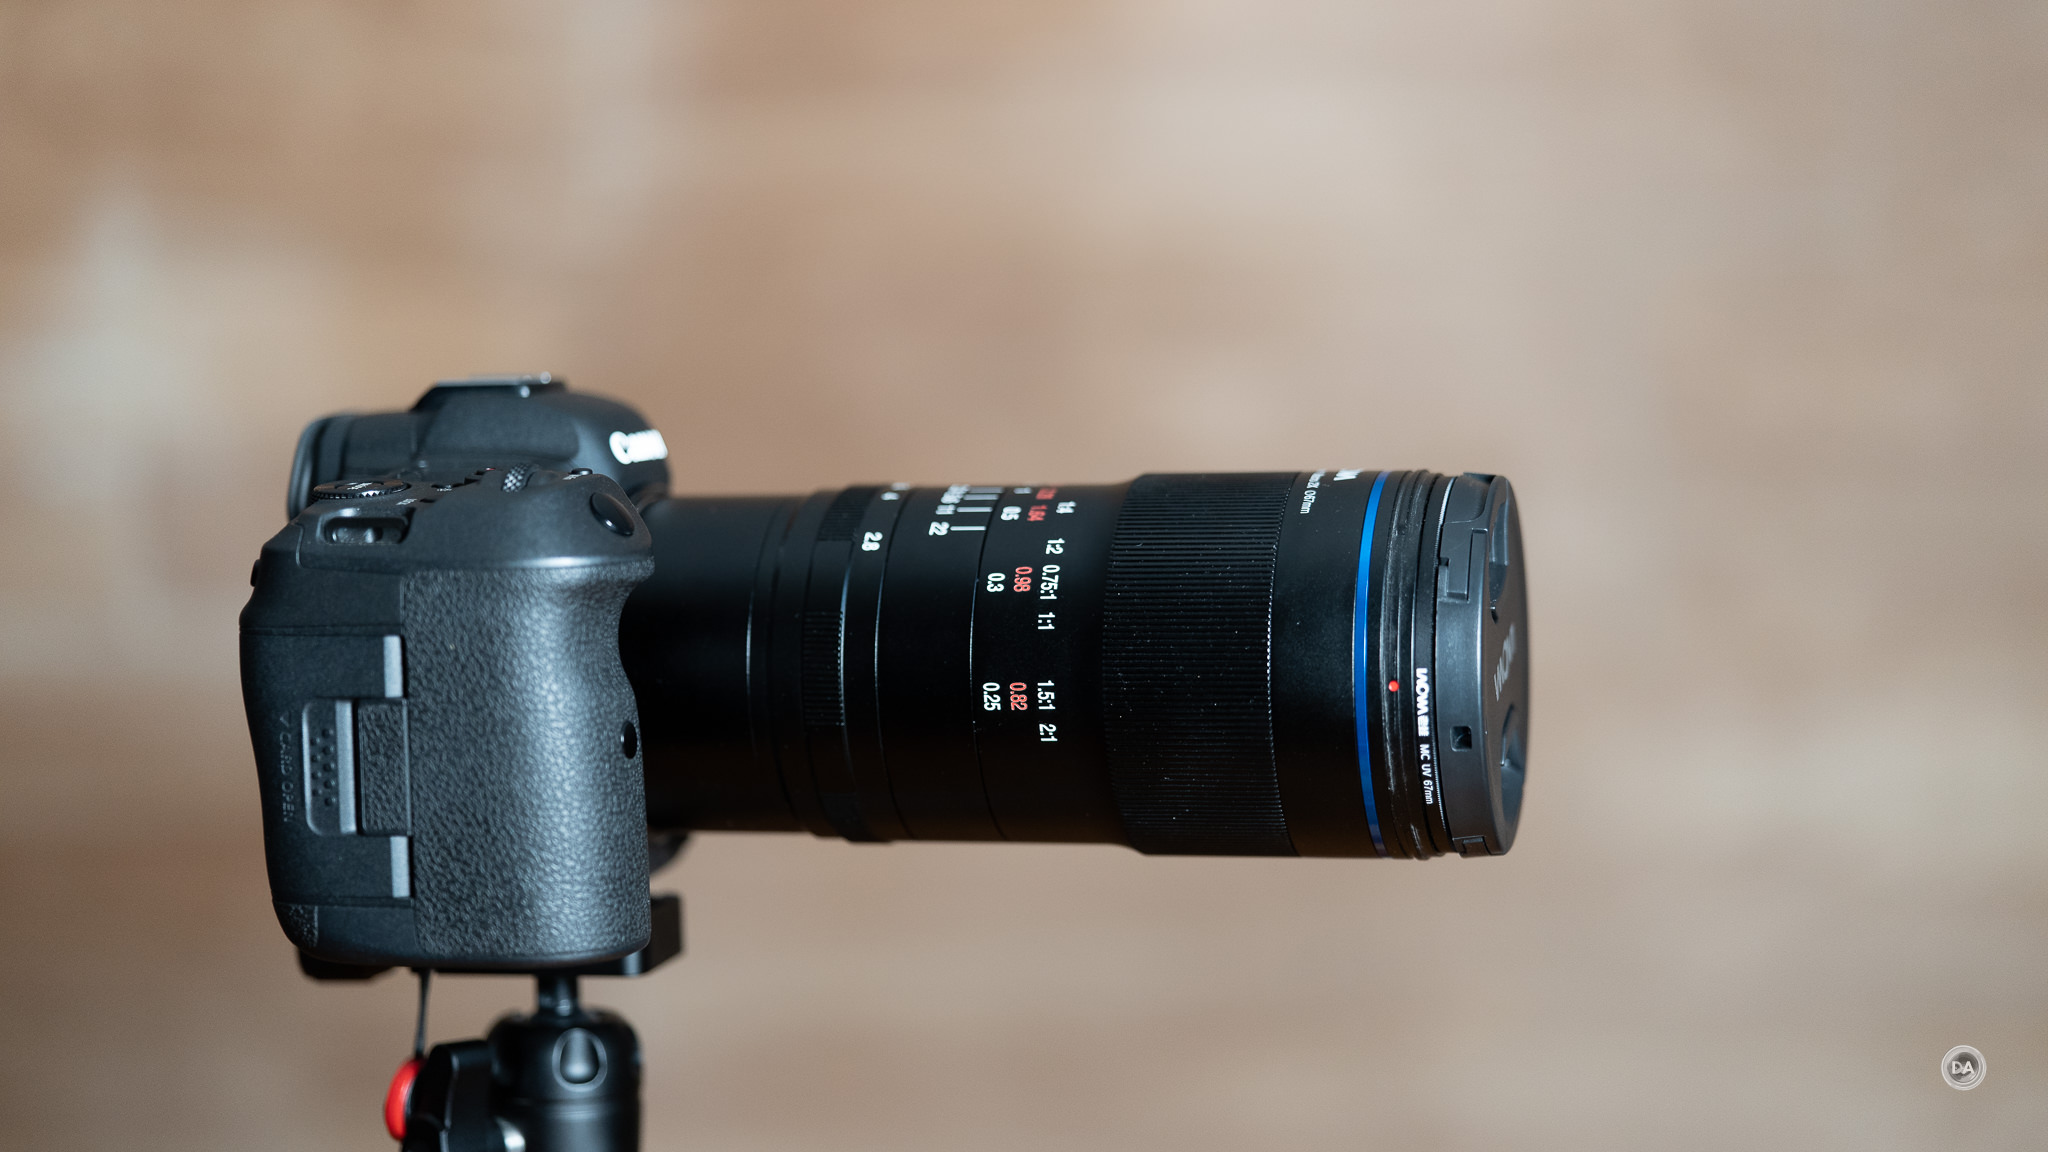
Minimum focus distance is 82cm, giving a maximum magnification figure of 1:5, or 0.20x. That falls a little behind the LAB lens, which can focus 10cm closer and gives a 0.25x magnification. The performance of the Plena up close is fantastic even at F1.8, with excellent sharpness and contrast and a nicely flat plane of focus.
That excellent detail and contrast holds up well with a three-dimensional subject as well at minimum focus distances.
This is one other area where being able to throw on a teleconverter would be nice, as you could significantly boost that magnification into more macro territory.
There is no VR (vibration reduction, or optical stabilization) built into the lens. That’s not a problem on a body like my Z8, which has good camera based stabilization, but could be a problem for those of you shooting on a camera without VR.
I have loved using the word “Plena” as my keyword in this review. I wish that all lensmakers would apply a designated name to their premium lenses, as it becomes an easy way to distinguish it from alternatives and gives the lens a touch of elegance. The word “Plena” comes from a Latin word that means “full” or “complete”, and the latter meaning seems most appropriate. The words in nicely etched into the barrel of the lens and becomes a visual focalpoint for the lens design.
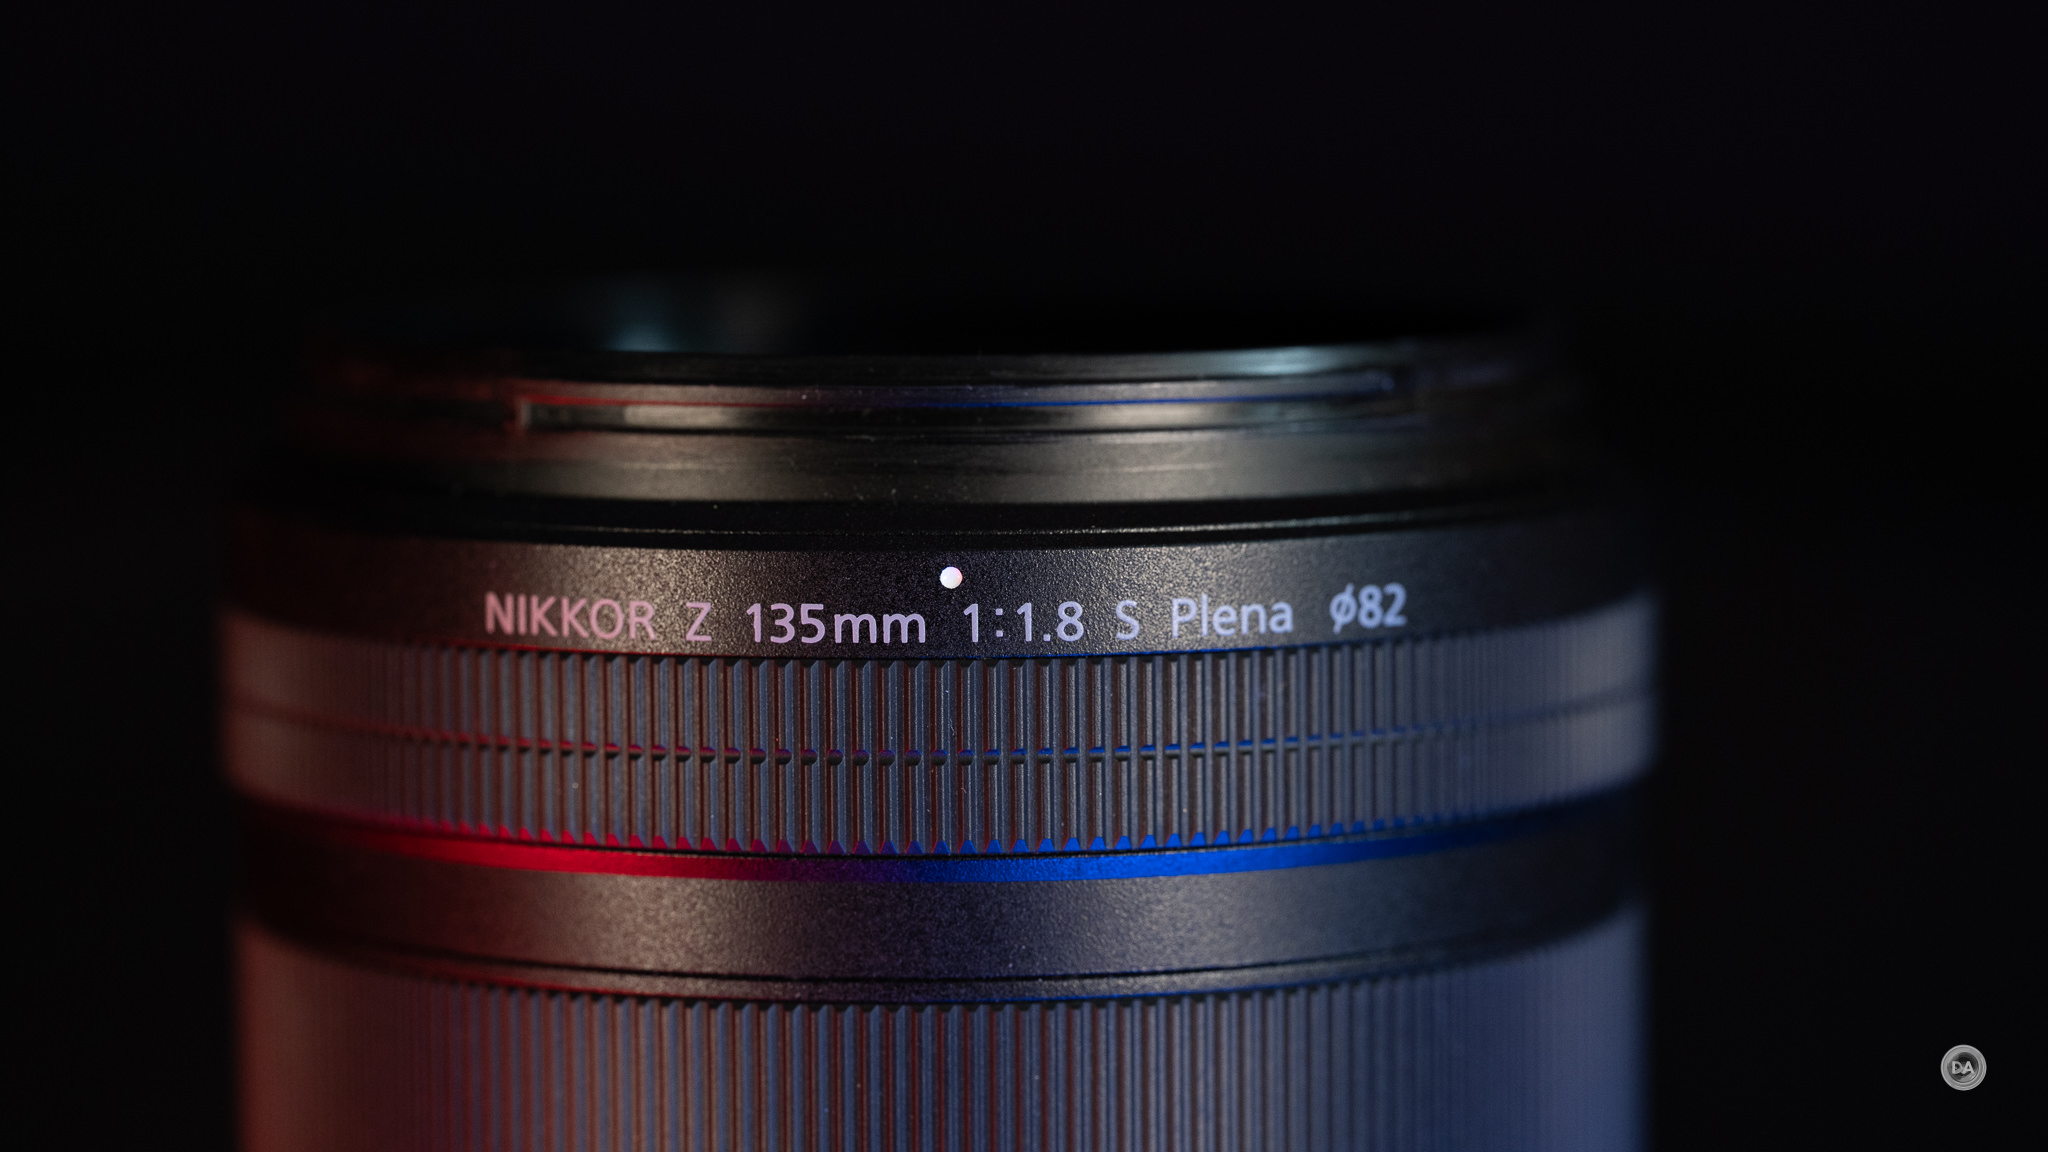
This is a big, heavy, expensive lens, but it is also beautifully made and is a nice match for a beefier camera like my Z8. It does carry a premium price at roughly $2500 USD, but it is also a premium product.
Autofocus (Stills)
I was a little surprised to see that the Plena employed dual STM focus motors, as I tend to associate Linear or VCM style motors with the more premium options. But having used the lens for a variety of applications, I’ve got no real reservations about the AF performance. Focus is very nicely reactive, able to keep up with more difficult subjects that I regularly photograph, including a fastly scampering little Nala.
I’m not sure if you’re aware, but cats are not very cooperative subjects. Most often when they are sitting nicely you can guarantee that they will start moving the moment you go to pick up a camera. Nala was perched on a planter in the sunshine, so I went to grab my Z8 with the Plena mounted on it, delighted to get a shot with her in a nice position. She immediately ran to the end of the planter and jumped off. I snapped a picture in frustration anyway, knowing that it would be out of focus.
But it wasn’t.
Not only was it not out of focus, but it was perfectly focused, despite her A) being backlight B) being on the move and C) my having no opportunity to start tracking and reacting properly to her movement. Here’s what a 100% crop looks like.
Now we’re talking!
So, autofocus speed belied my expectations of an STM-equipped lens. Maybe the solution is having two of them!
In my formal tests I saw mostly good speed, but I also a pretty consistent quick rack in the wrong direction before a then quick journey to the right focus destination. The Plena doesn’t seem to love those forced racks between a close and distant subject. In real world shots, however, focus changes tend to be smaller and I didn’t really notice the same things.
Focus accuracy was generally excellent in my tests. You can shoot with precision even in situations with a tiny depth of field, like this:
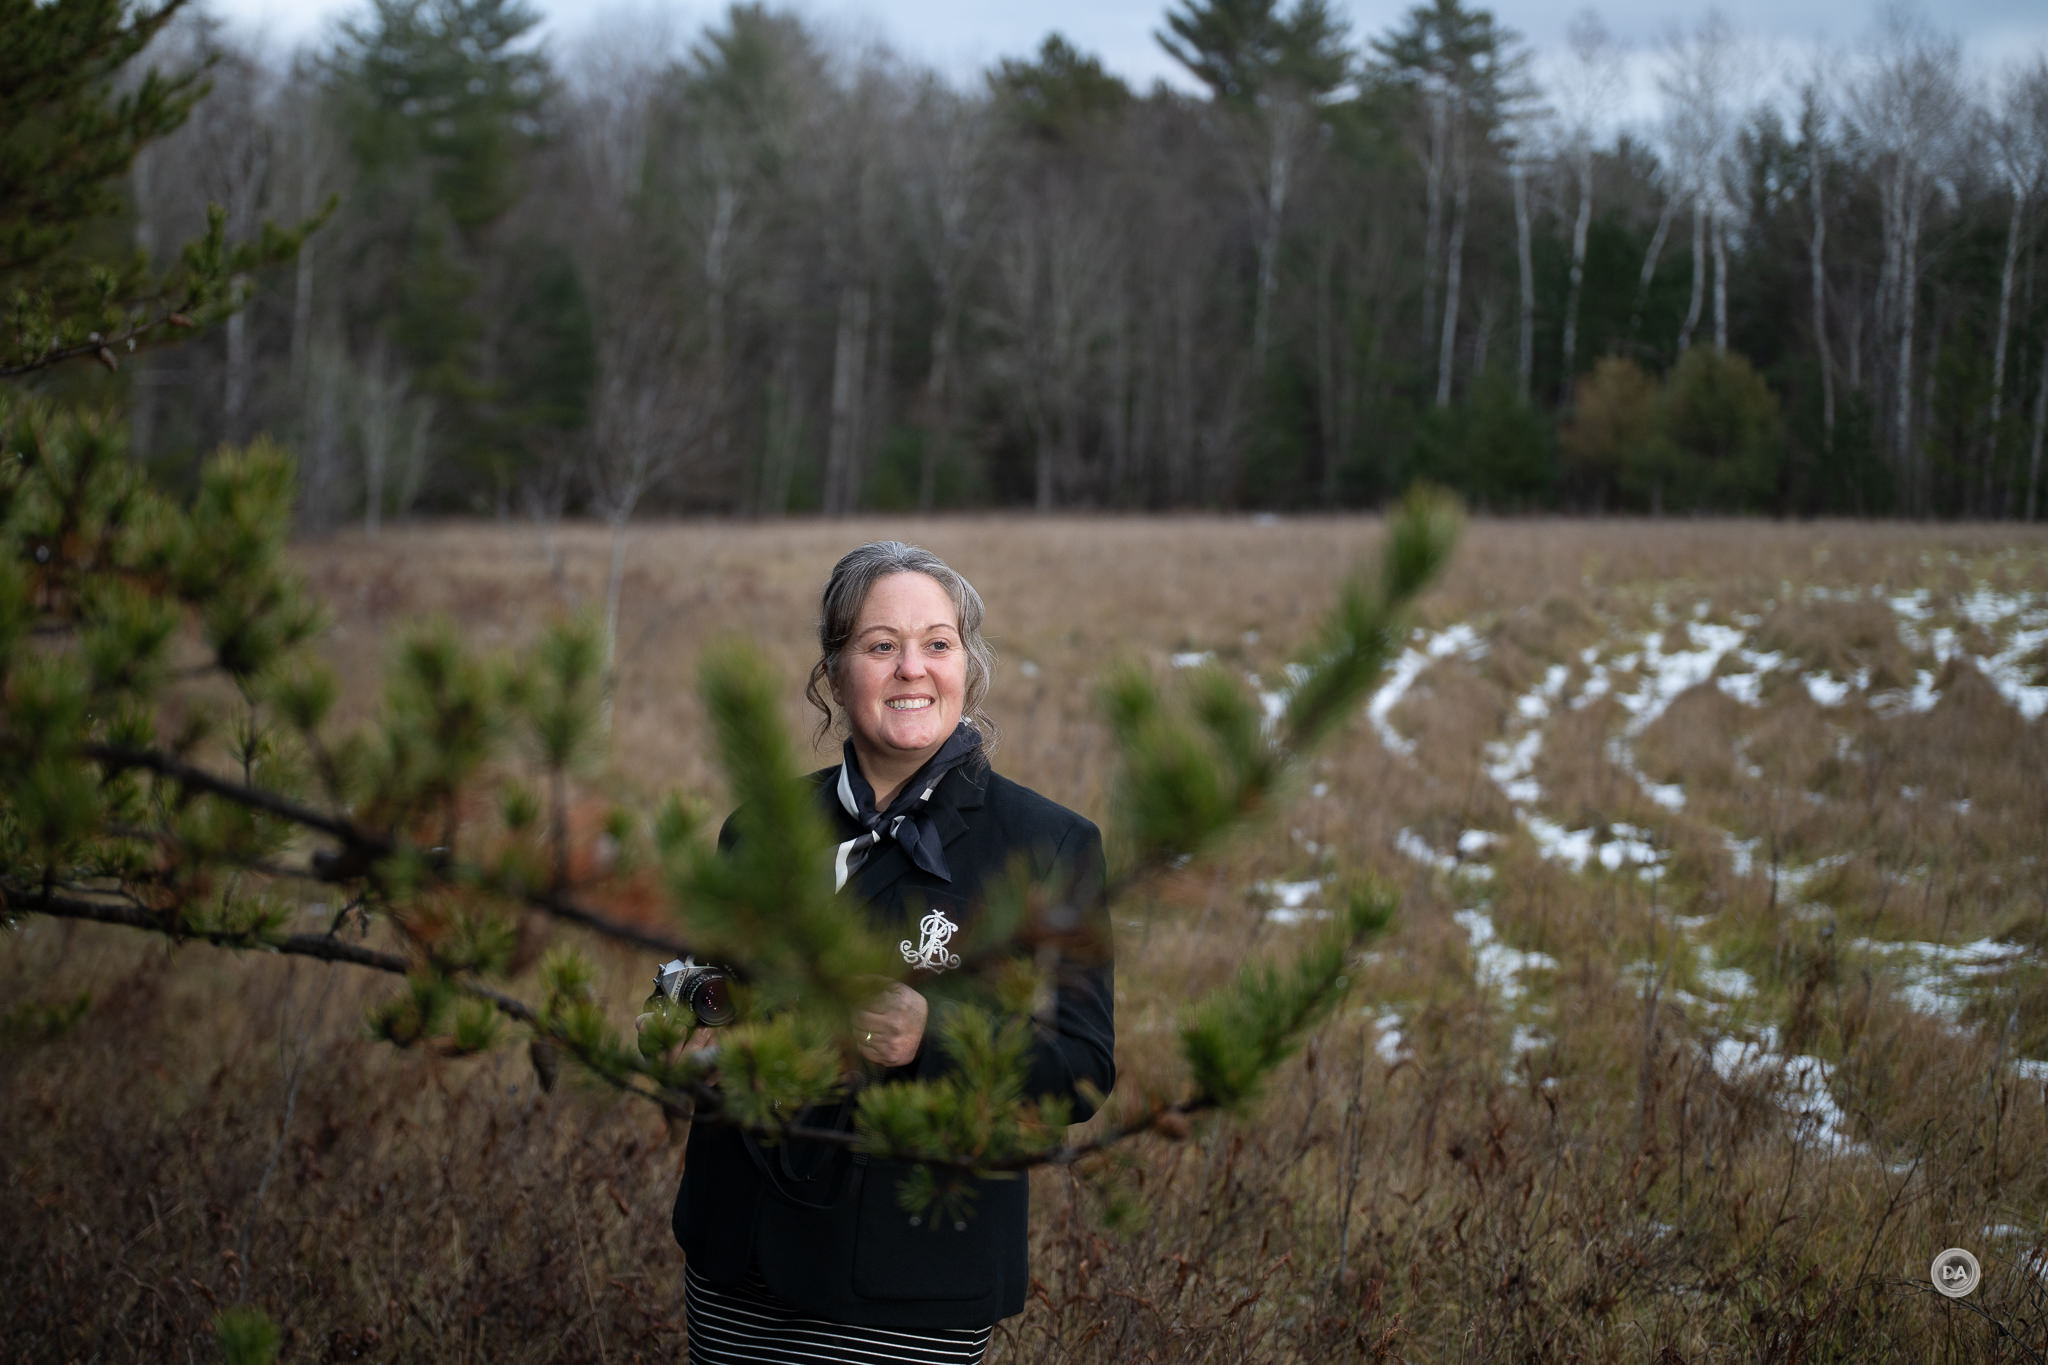
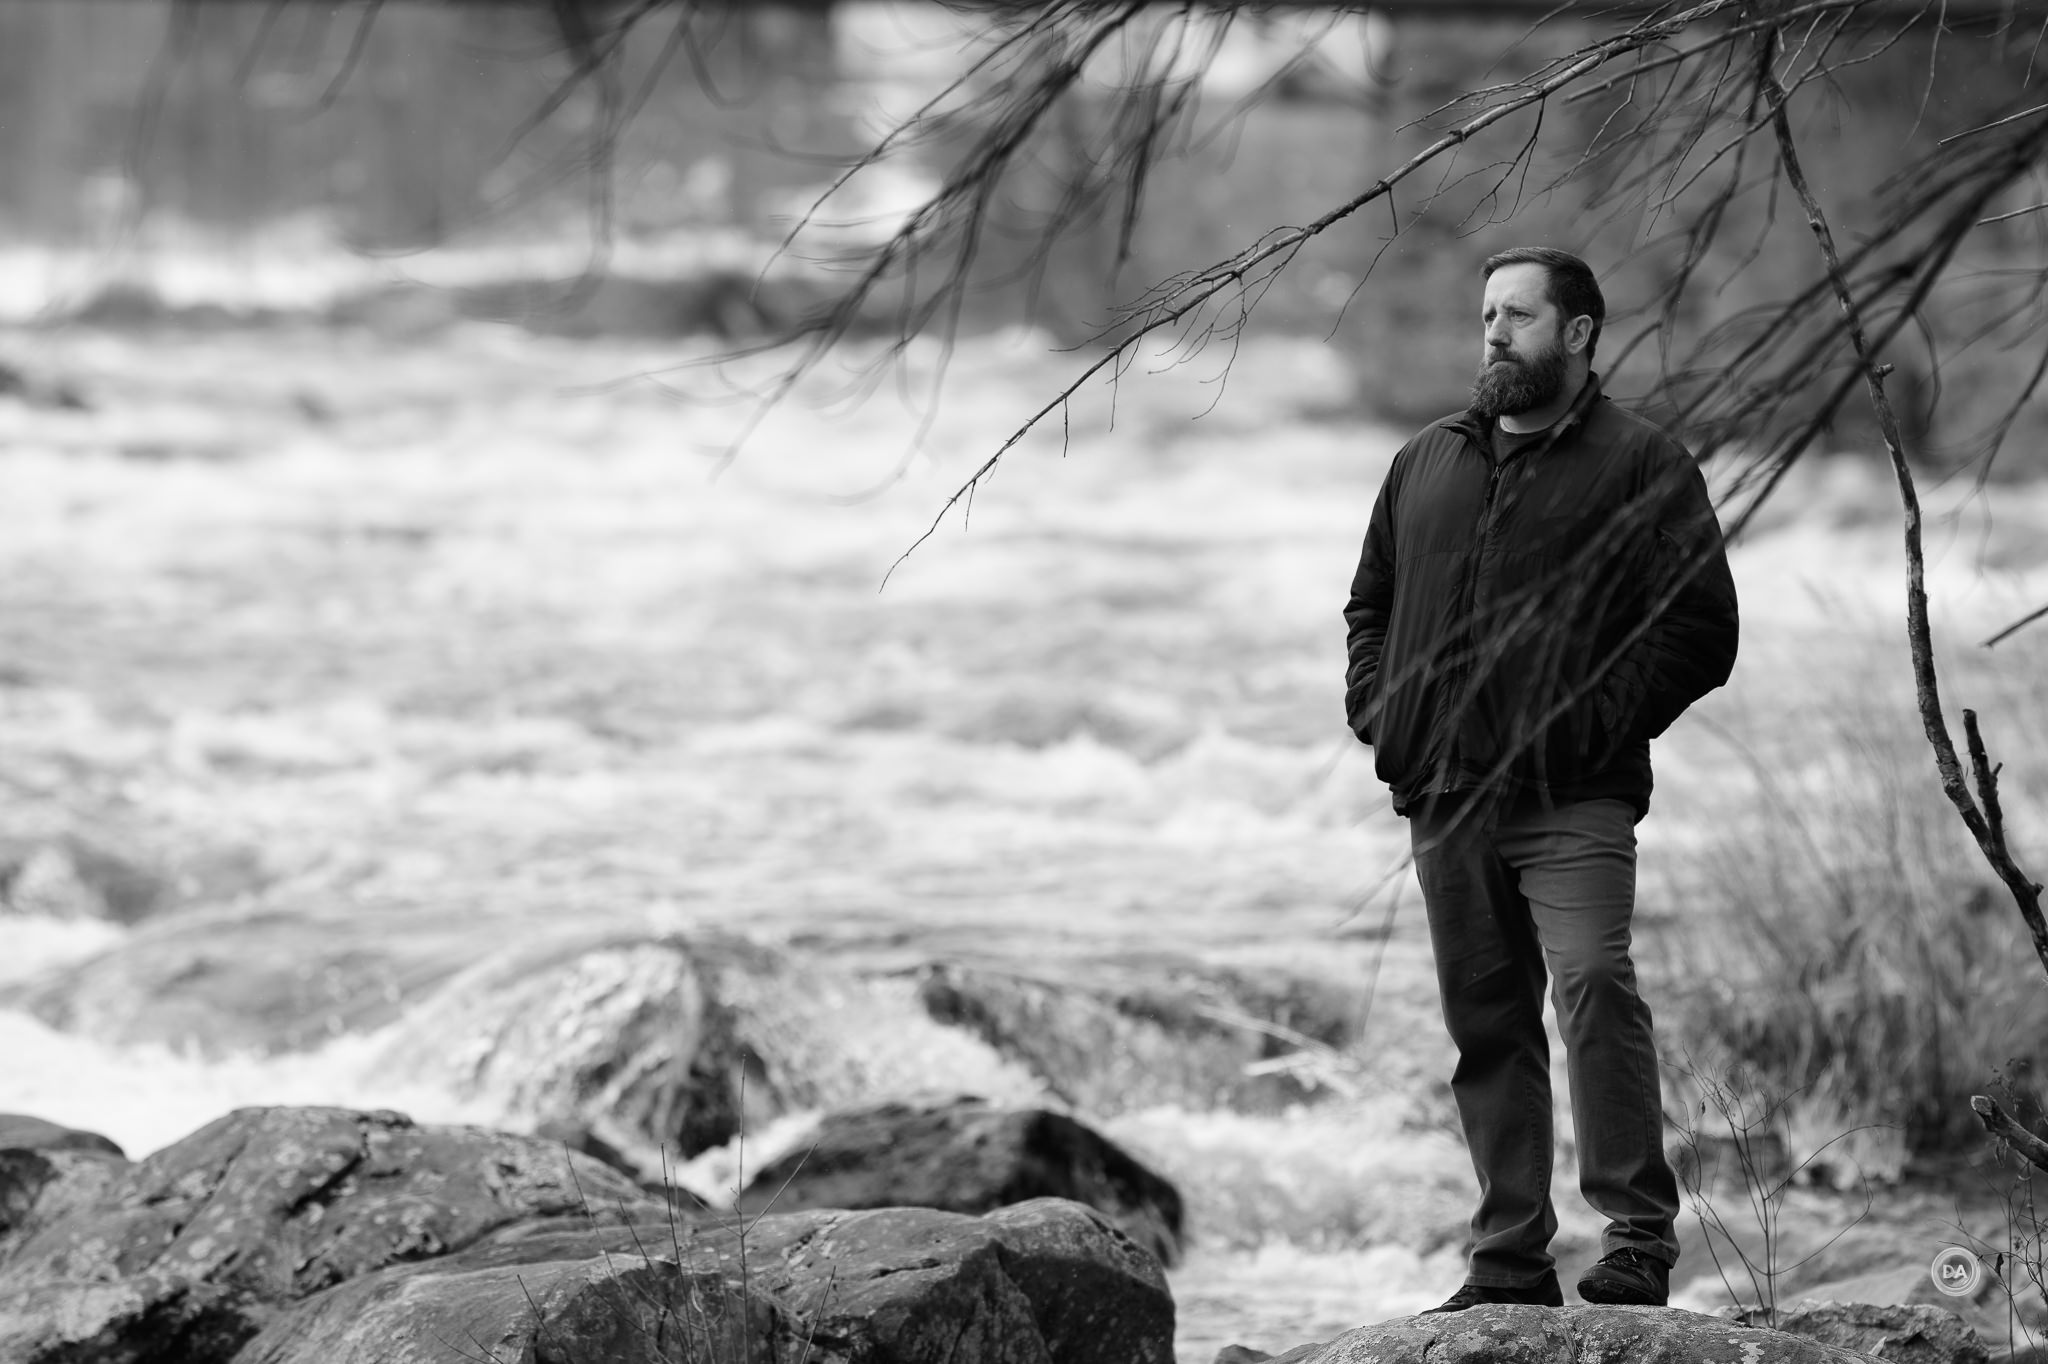
I did a portrait session with a friend (thanks, Justin!), and worked at a big range of focus distances – from a little over a meter to nearly 20 meters (4-55 feet). I switched between the Plena and the Viltrox LAB lens and had Justin hold poses so that I could get as scientific of results as possible. What I found as a general rule is that I had more consistent accuracy with the Plena than the Viltrox. That’s pretty much what you would expect, obviously, though I’m still waiting for the Viltrox to receive a firmware update that will hopefully improve the performance closer to what I saw on Sony FE.
I had very good focus results with the Plena whether working at close distances:
Medium distances:
…or further distances.
The only sequence that I saw some issues was in this one where some prominent branches sometimes confused the AF system.
Those of you who watched or read my initial review of the Viltrox LAB lens on Z-mount know that I had a similar problem there with snowflakes, so I think that Nikon’s Eye AF is just not quite as good at looking past obstacles as either Sony or Canon.
With a little persistence I got the result that I wanted here.
So autofocus for stills was generally very good. I wouldn’t put the Plena in the same class as a lens like the Sony FE 135mm F1.8 G Master, however, which utilizes dual XD Linear motors and has essentially flawless autofocus for both stills and video, but that’s not necessarily relevant on the Nikon platform.
Autofocus (Video)
Video autofocus was less impressive to me. Focus pulls felt a little rough, with plenty of little pulses, racks, and an end result that felt anything but cinematic. There’s a fairly strong amount of focus breathing as well (not unusual for a 135mm lens).
The focus breathing further detracts from the cinematic quality of video focus pulls. When I compared the LAB and Plena closely, however, it doesn’t seem like one is any better than the other.
Both also equally failed my hand test where I alternately block the view of the camera to my face with my hand and then remove it to test reactiveness. Neither lens decided to move from my face to my hand in any of the sequences.
Things were better when I approached the camera and stepped in and out of frame. They both did a pretty good job of moving focus on me when I approached in a linear fashion. With both lenses there was a pretty pronounced lag before focus snapped back into place on me if I stepped out of frame, however. I’d say the Plena was a couple of percentage points better, but neither was great.
The Plena did fine with static video shots where I just needed it to hold focus without pulsing or hunting. Overall video AF was probably the area where I was least impressed during my review, however.
Image Quality Breakdown
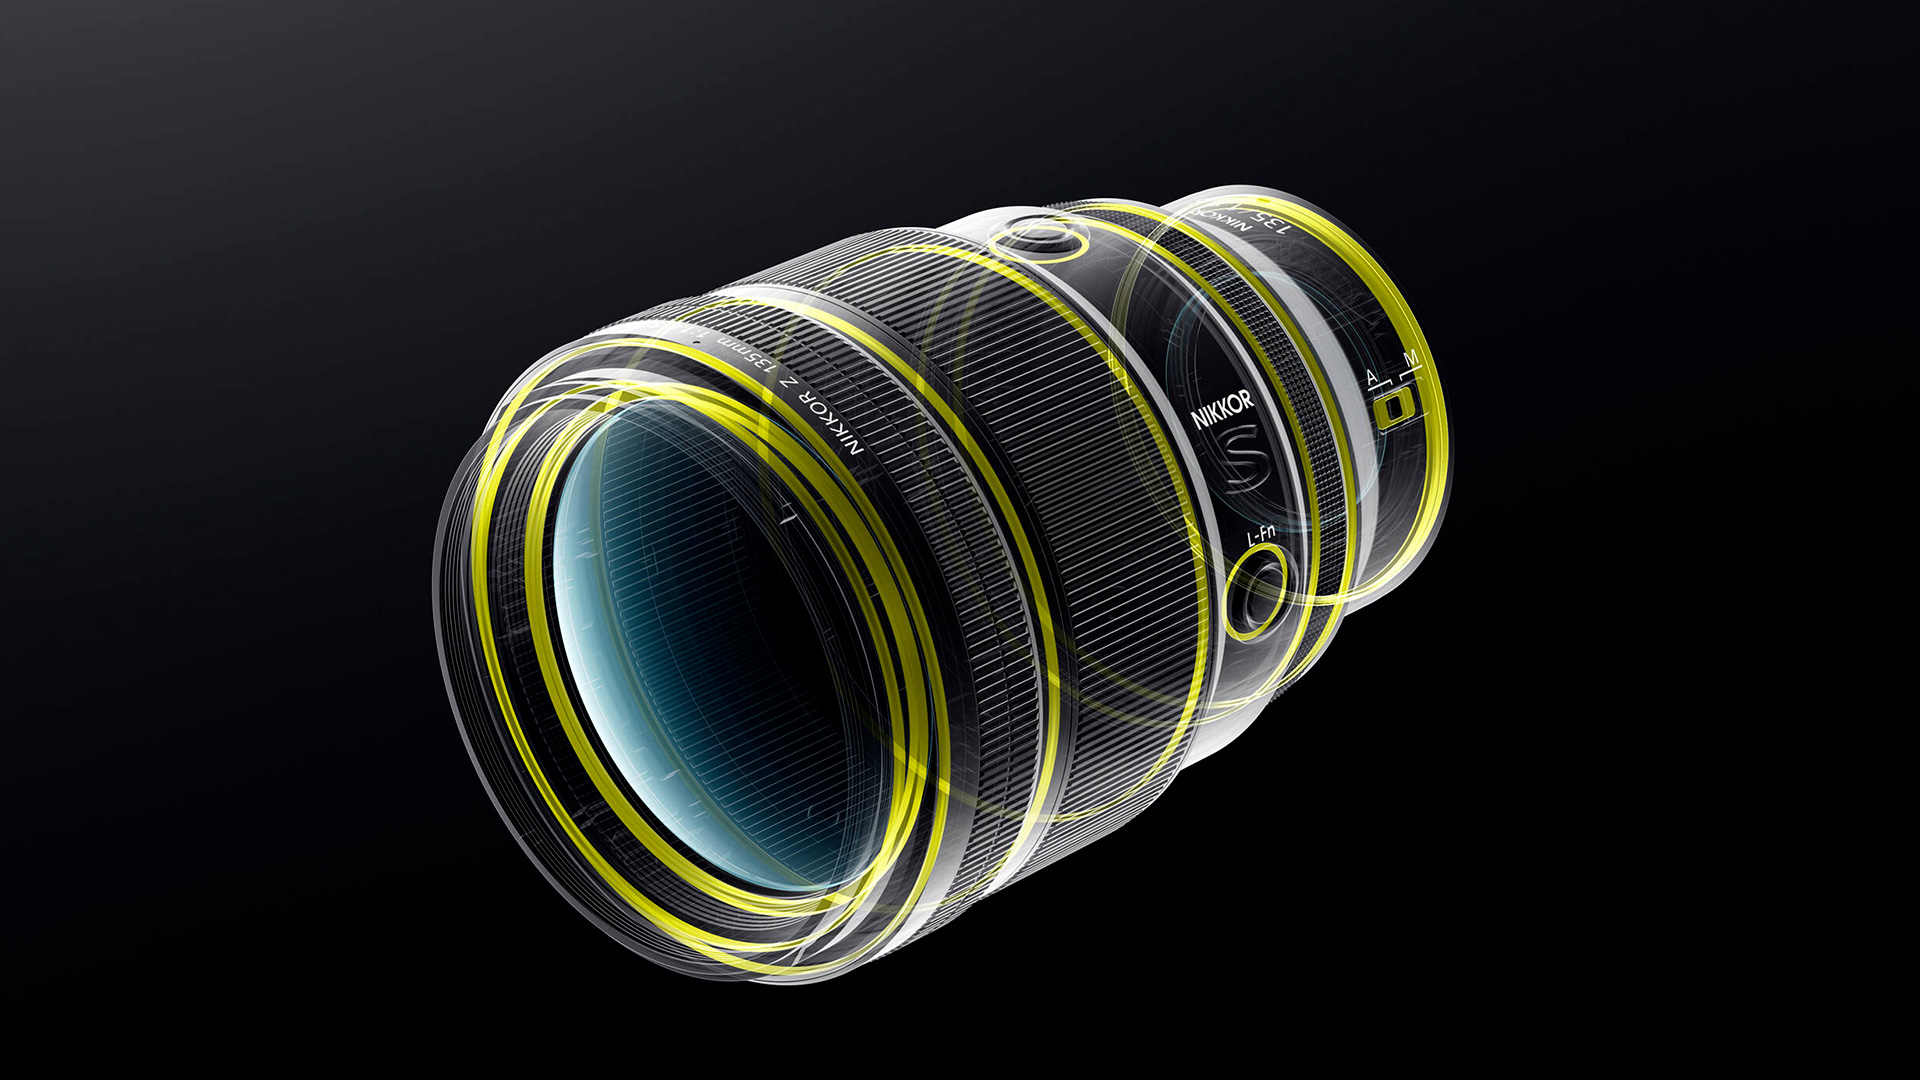
There’s rarely anything sharper than a good 135mm lens, and the Nikkor Z 135mm F1.8 S Plena is a sharp one. The optical design is 16 elements in 14 groups, and as you can see from the cutout below, six of those are exotic elements including Aspherical, ED (extra-low dispersion), and SR (short wave refractive) elements. The MTF shows a 90% mark across about half the frame and then a slow slide to the corners at F1.8.
On paper, the Viltrox LAB is the sharper lens.
But we’ll verify (or dispute) that for ourselves.
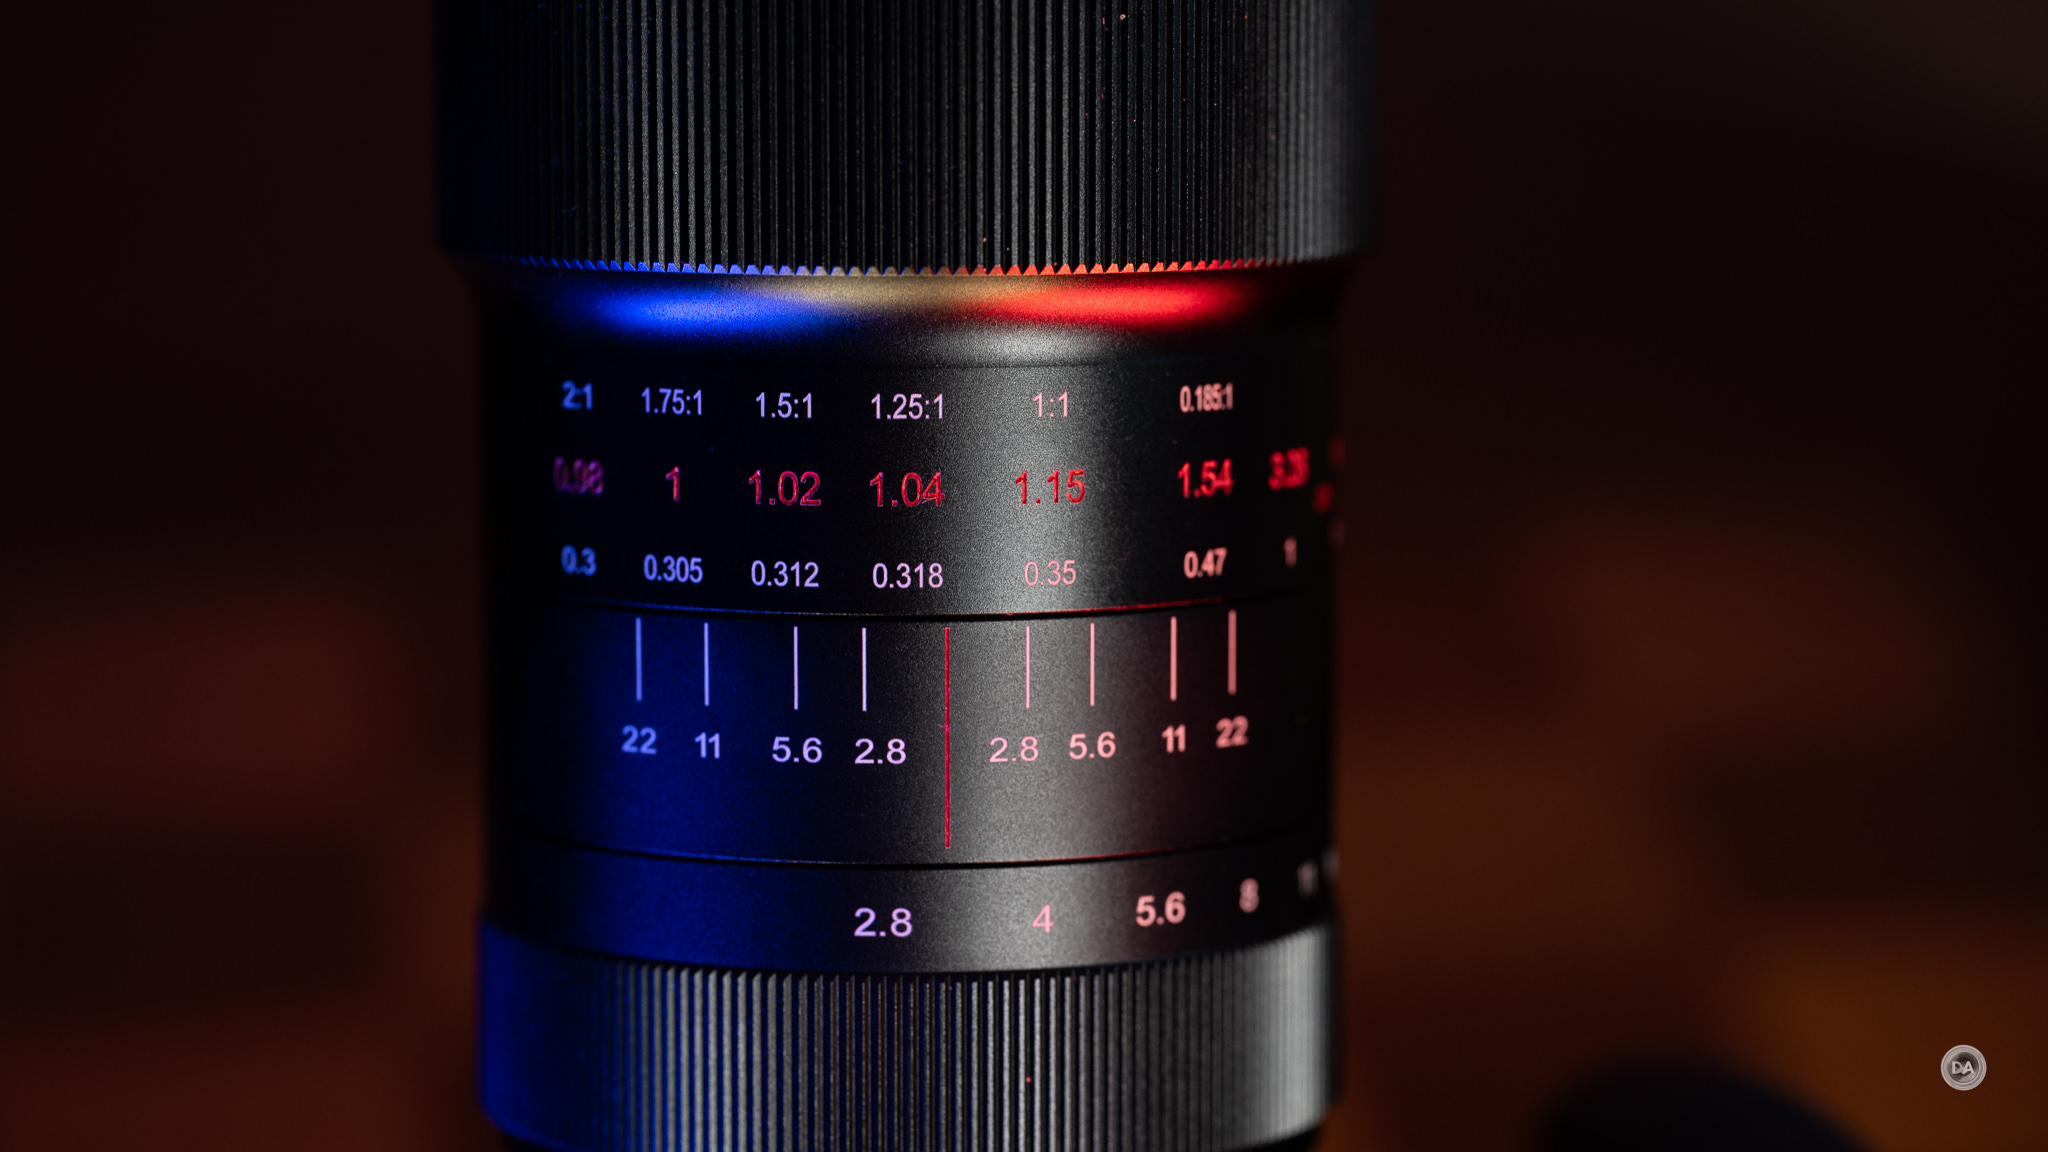
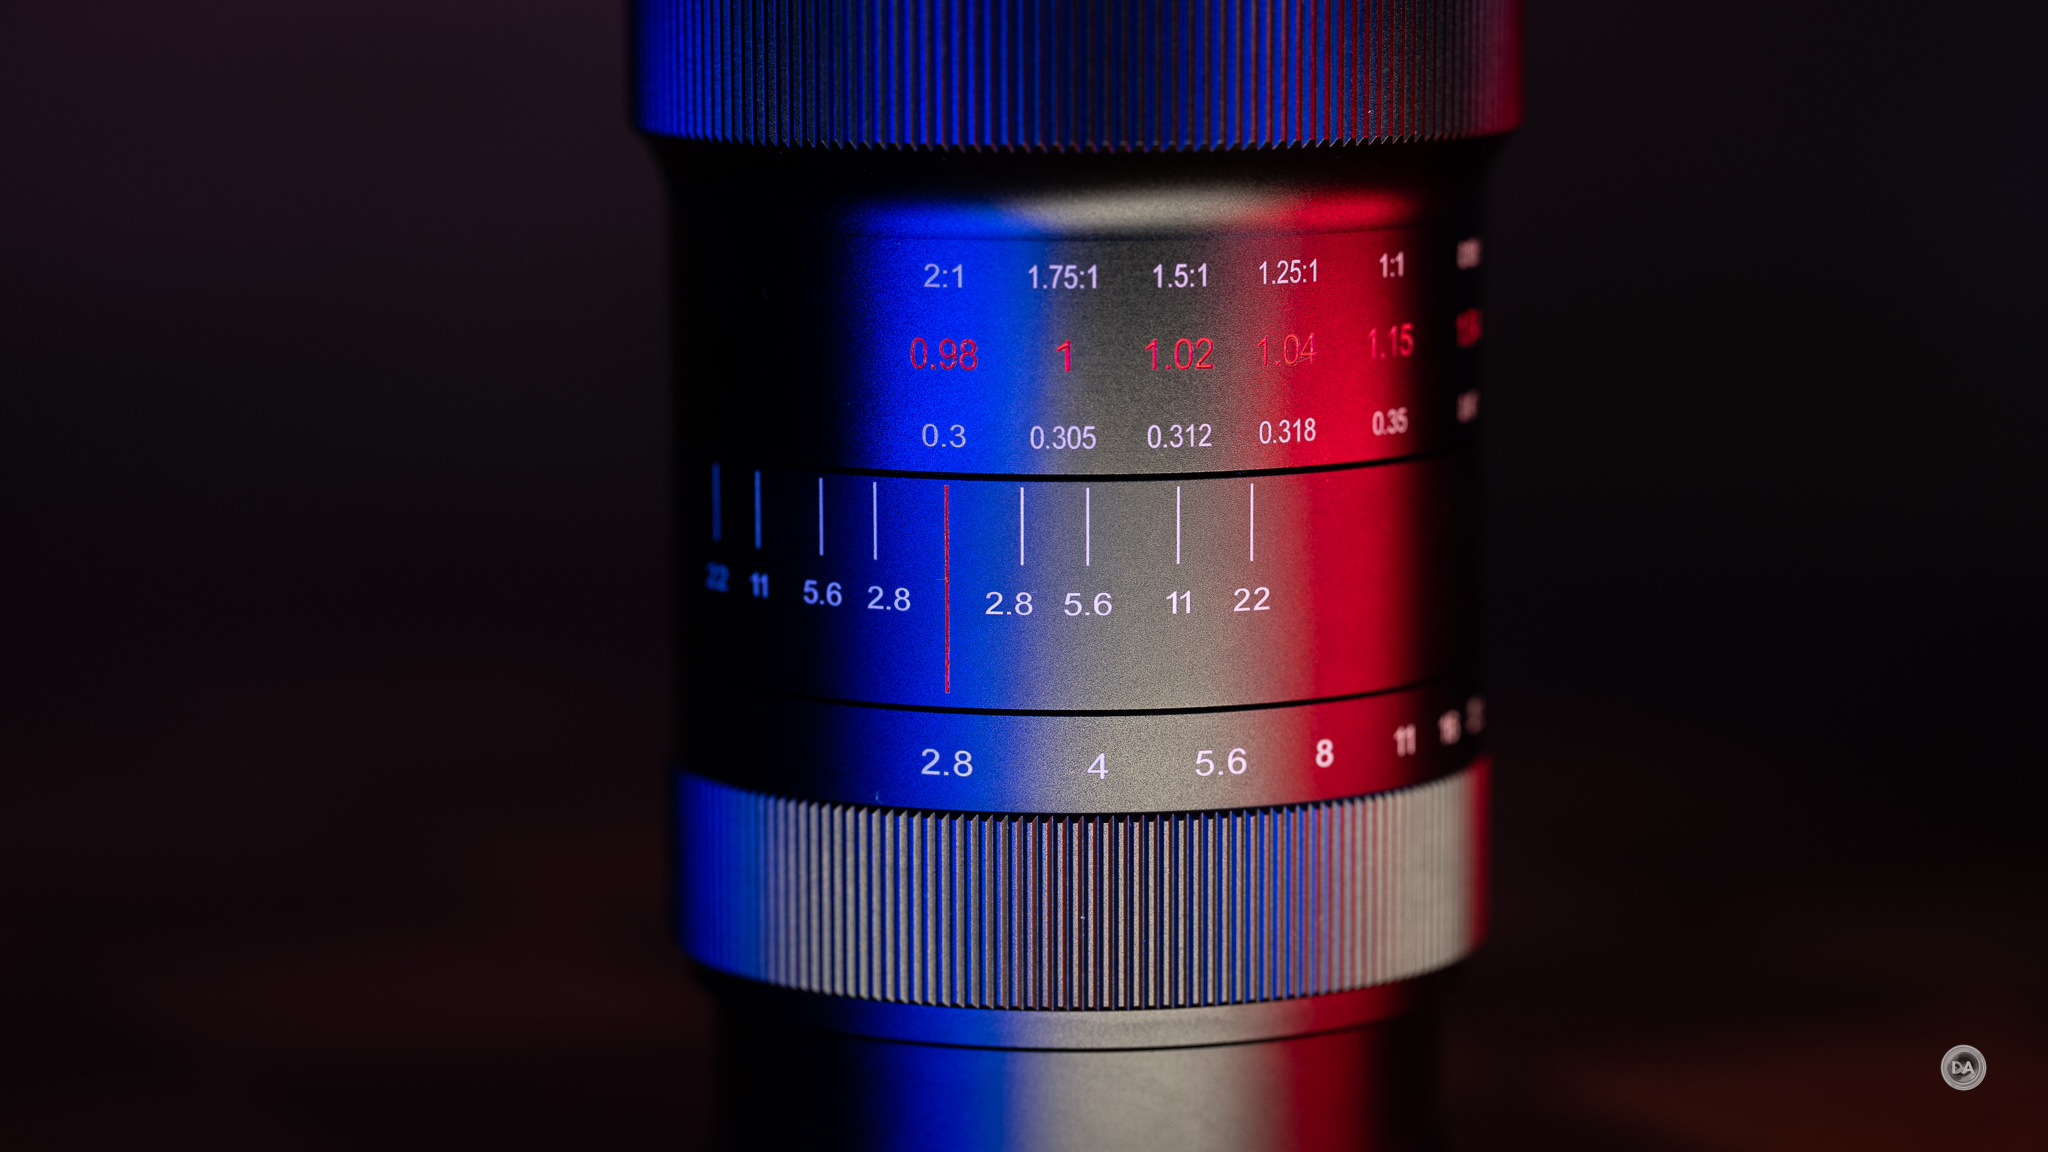
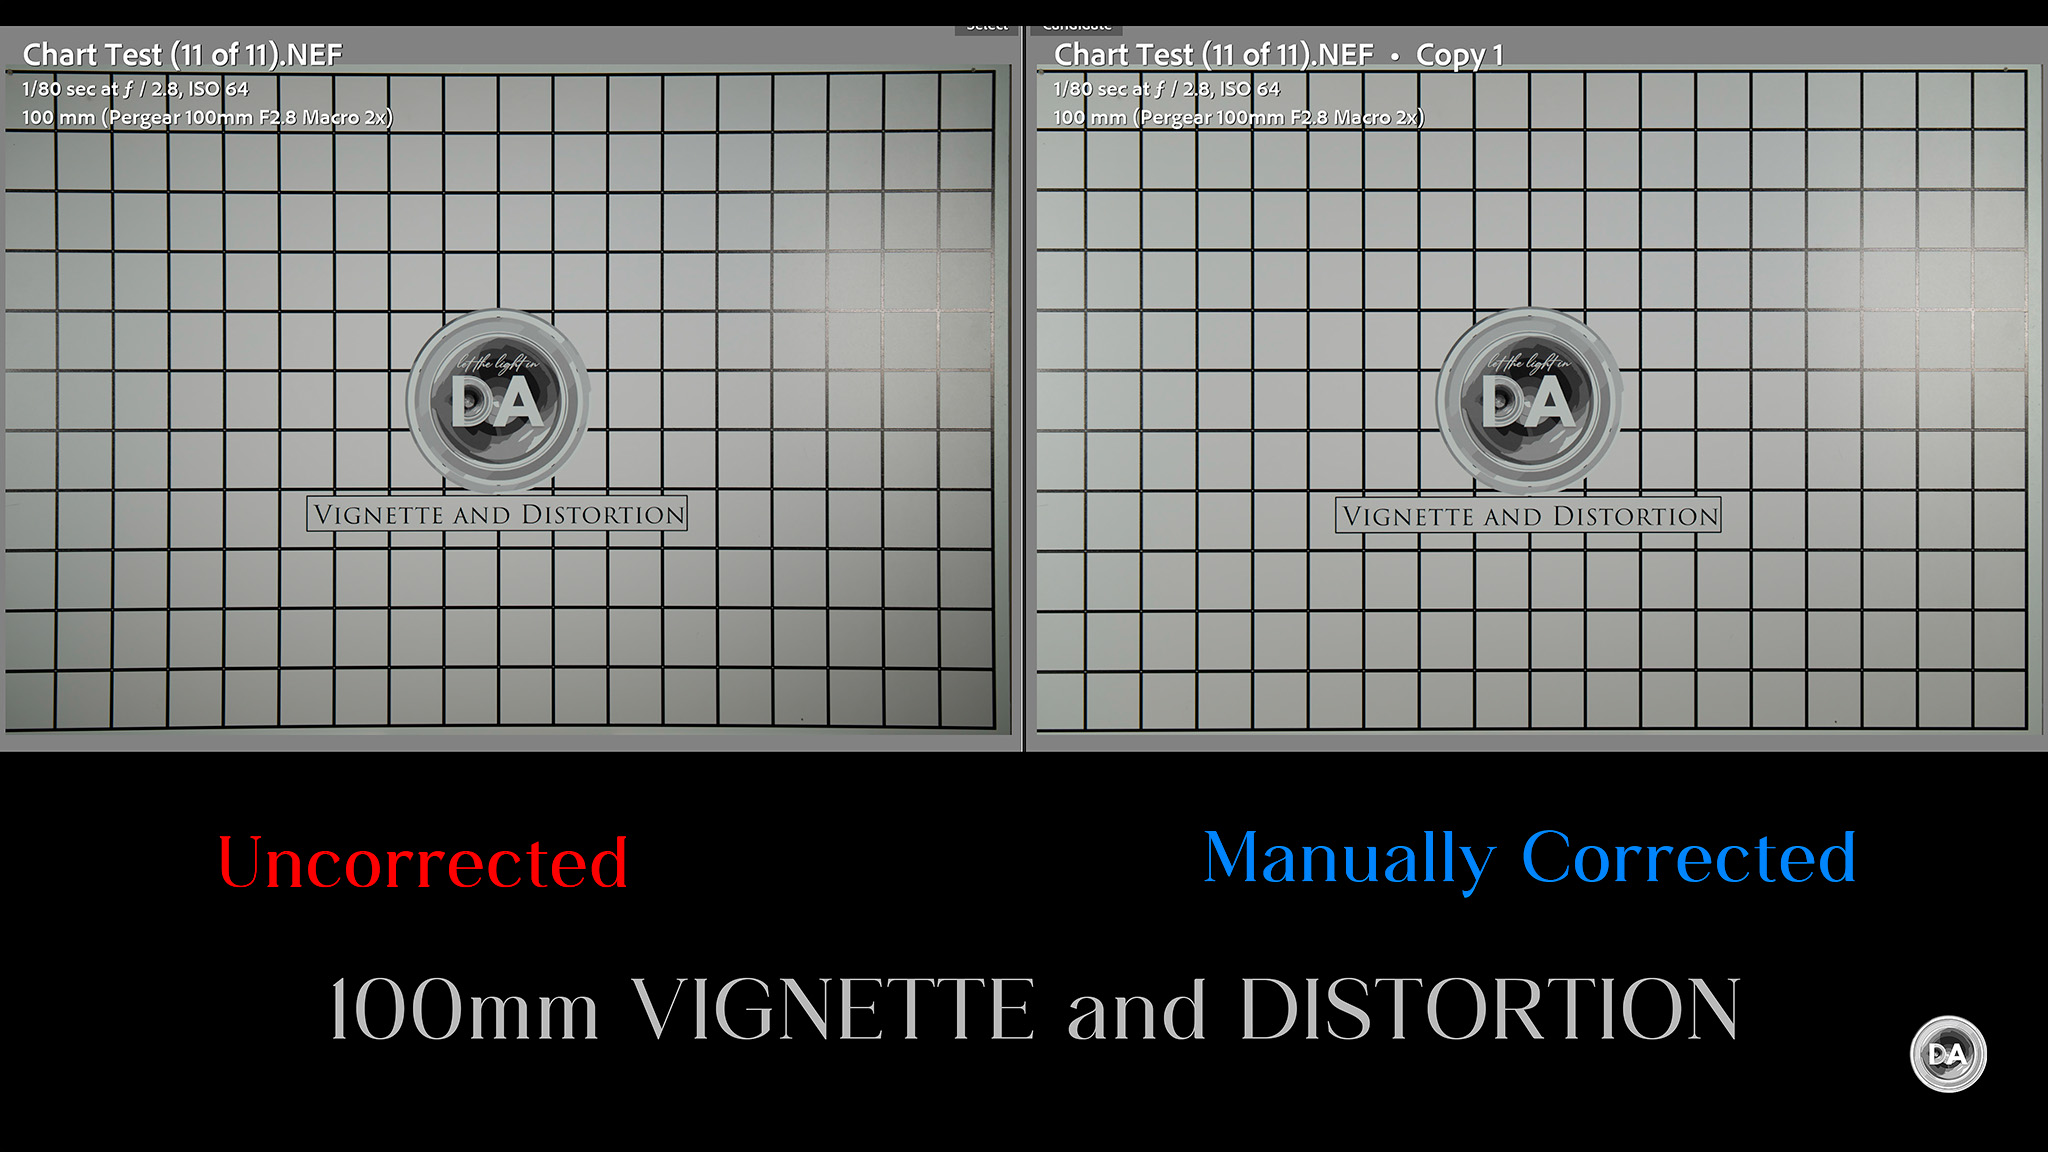
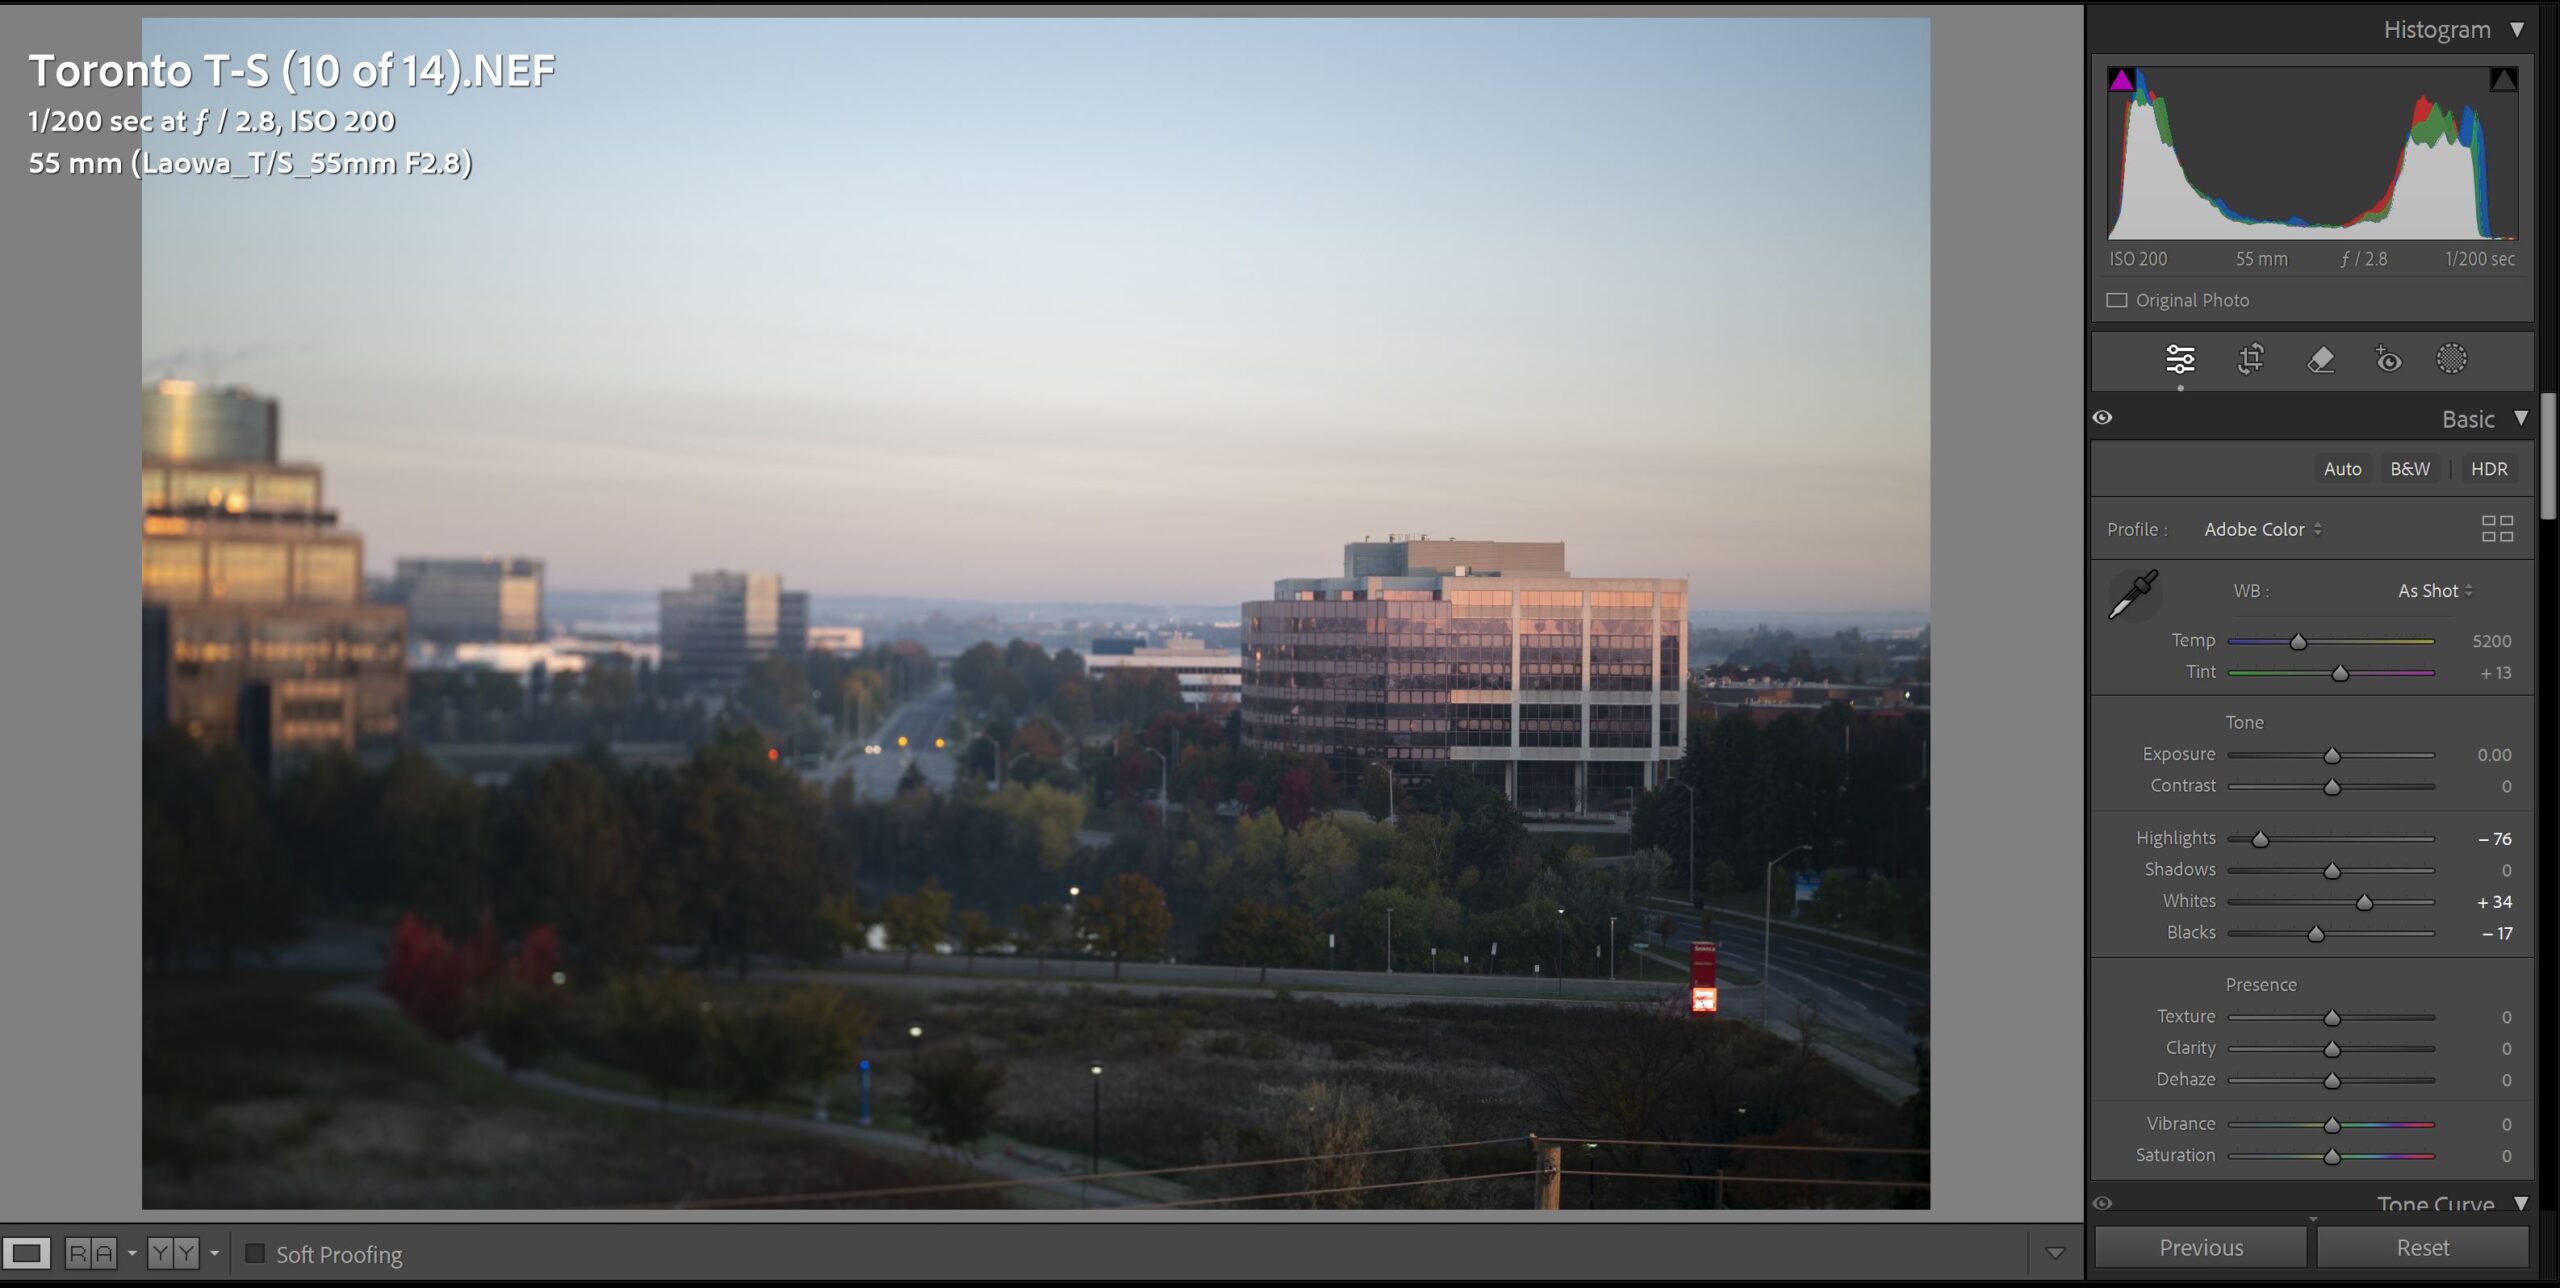
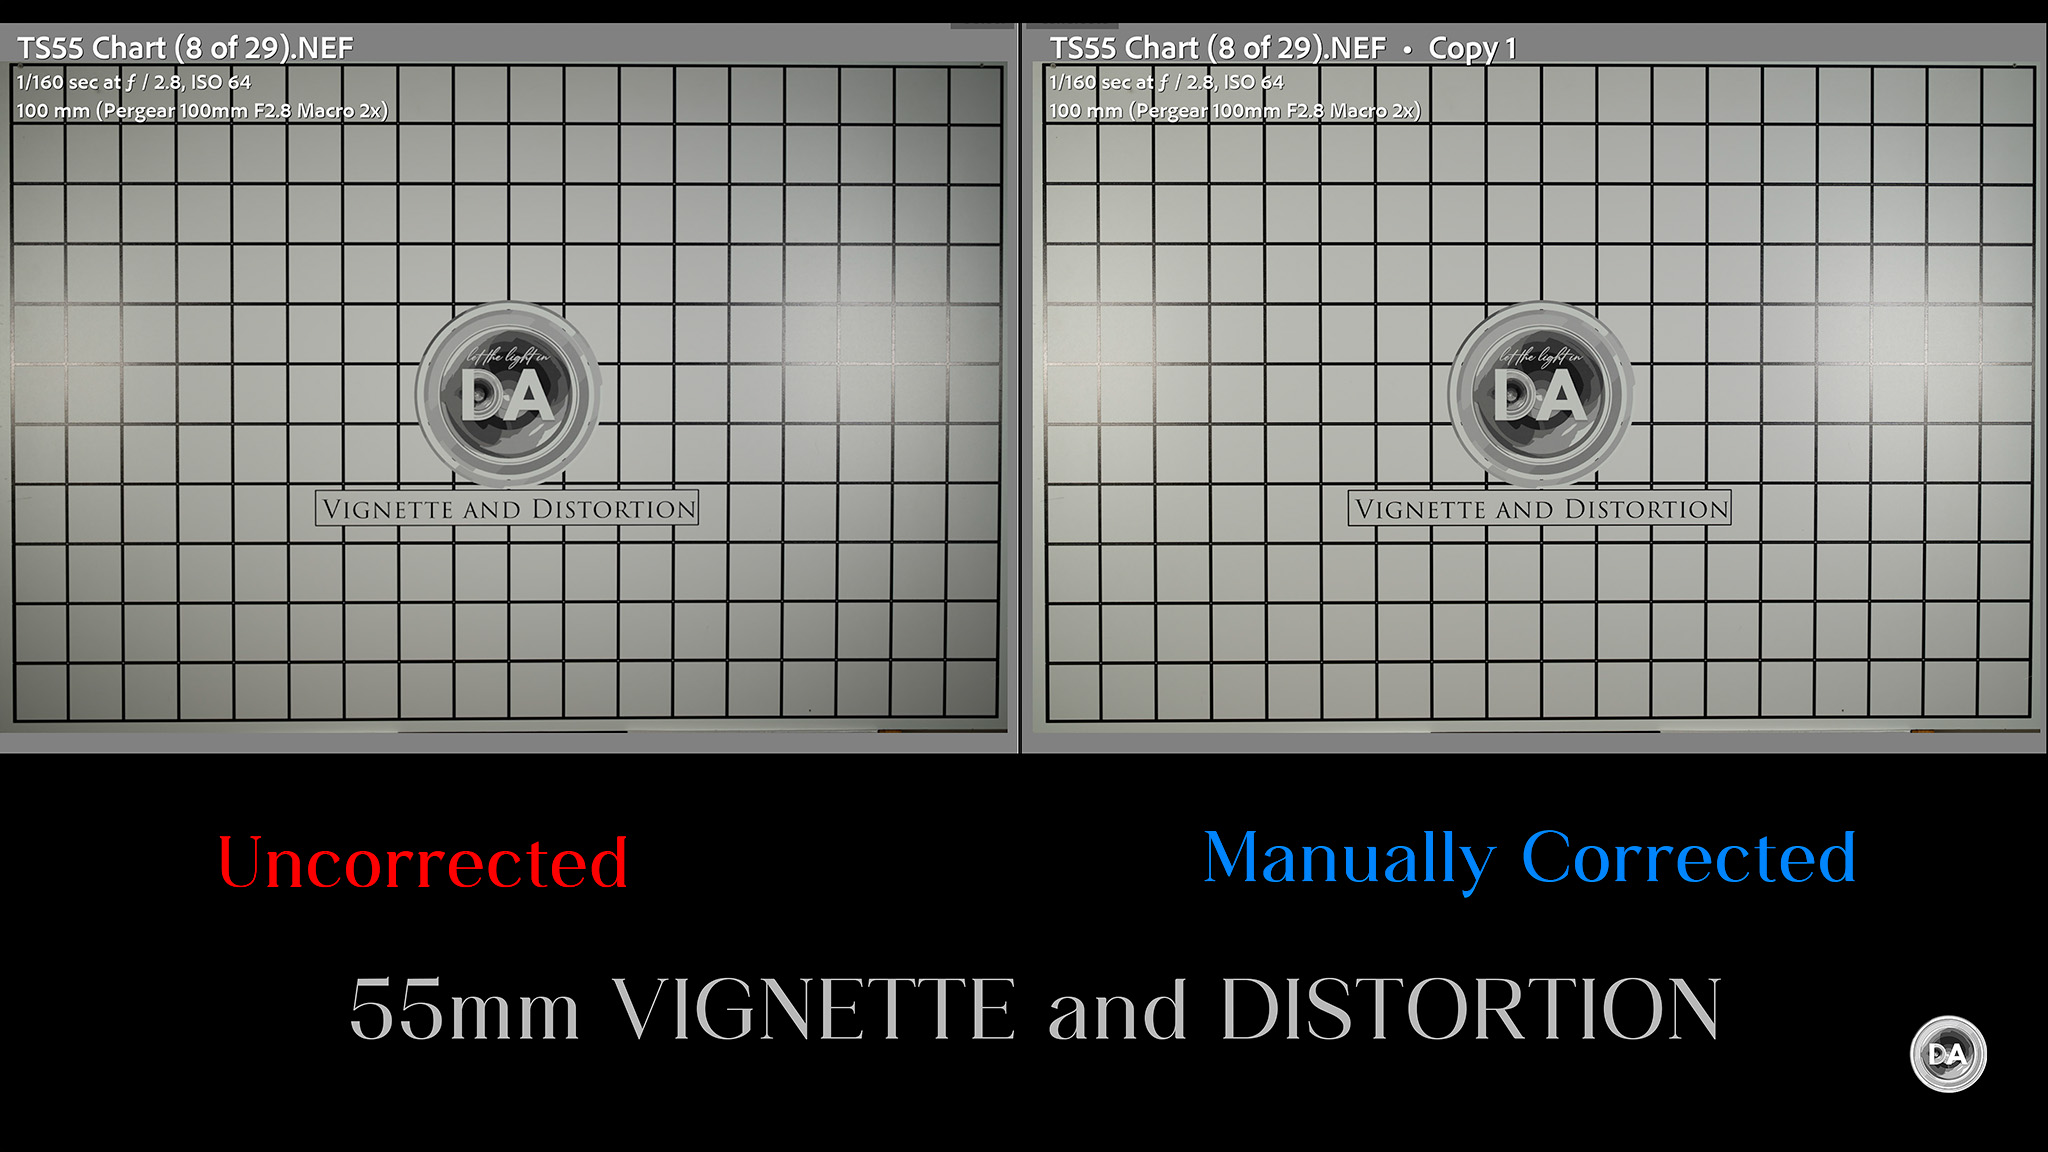
One of the big marketing points by Nikon is that the Plena has been designed with a unique rear element that is both larger and curved, allowed light to more evenly illuminate the whole image circle. And, when examining the my chart results, I found that the Plena showed very low vignette.
I used about a stop of correction here (+30), and even that is gone by F2.8. There’s a tiny bit of pincushion distortion that corrected easily with a -3.
That means that real world results at F1.8 even without correction are going to have an essentially invisible amount of vignette, like this (uncorrected result – no profiles or manual correction).
This was also the way that I found the LAB on Sony, but that’s just not the case on Z-mount. The Viltrox lens shows a lot of vignette on the larger diameter Z-mount.
For perspective, I needed +50 to correct the vignette on the Z-mount version of the LAB, or nearly twice as much. There is no distortion on the LAB lens.
I also saw very minimal amounts of LoCA (longitudinal chromatic aberrations), and that is the case here. I see mostly neutral results on either side of the plane of focus with only a tiny amount of fringing after the lane of focus.
This real world result shows no visible fringing before or after the plane of focus.
Brilliant.
LaCA (lateral chromatic aberrations) typically show up along the edges of the frame with high contrast transition points. I saw nothing but clean transitions on either side of the black and white transitions.
So far those are all really excellent results.
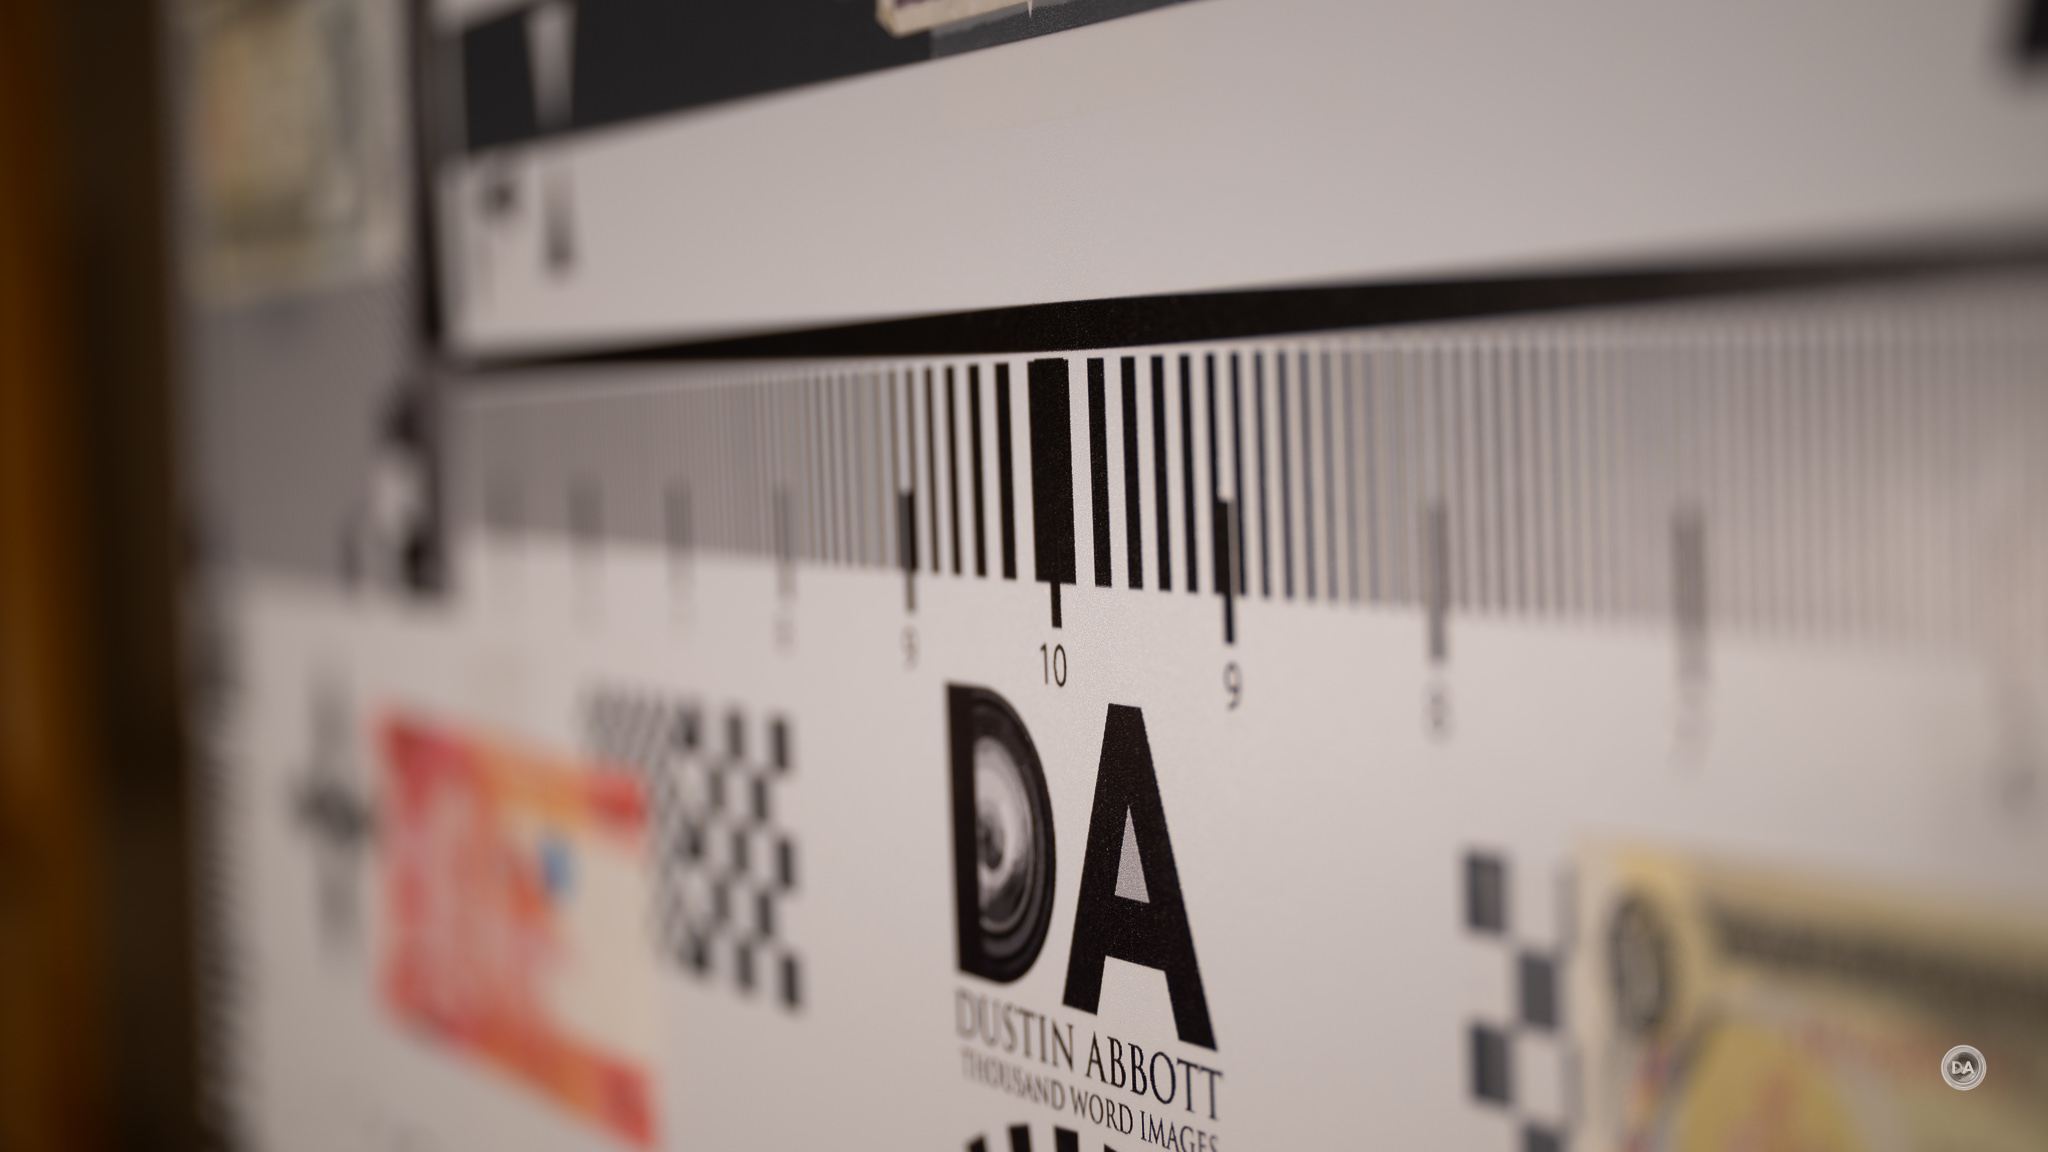
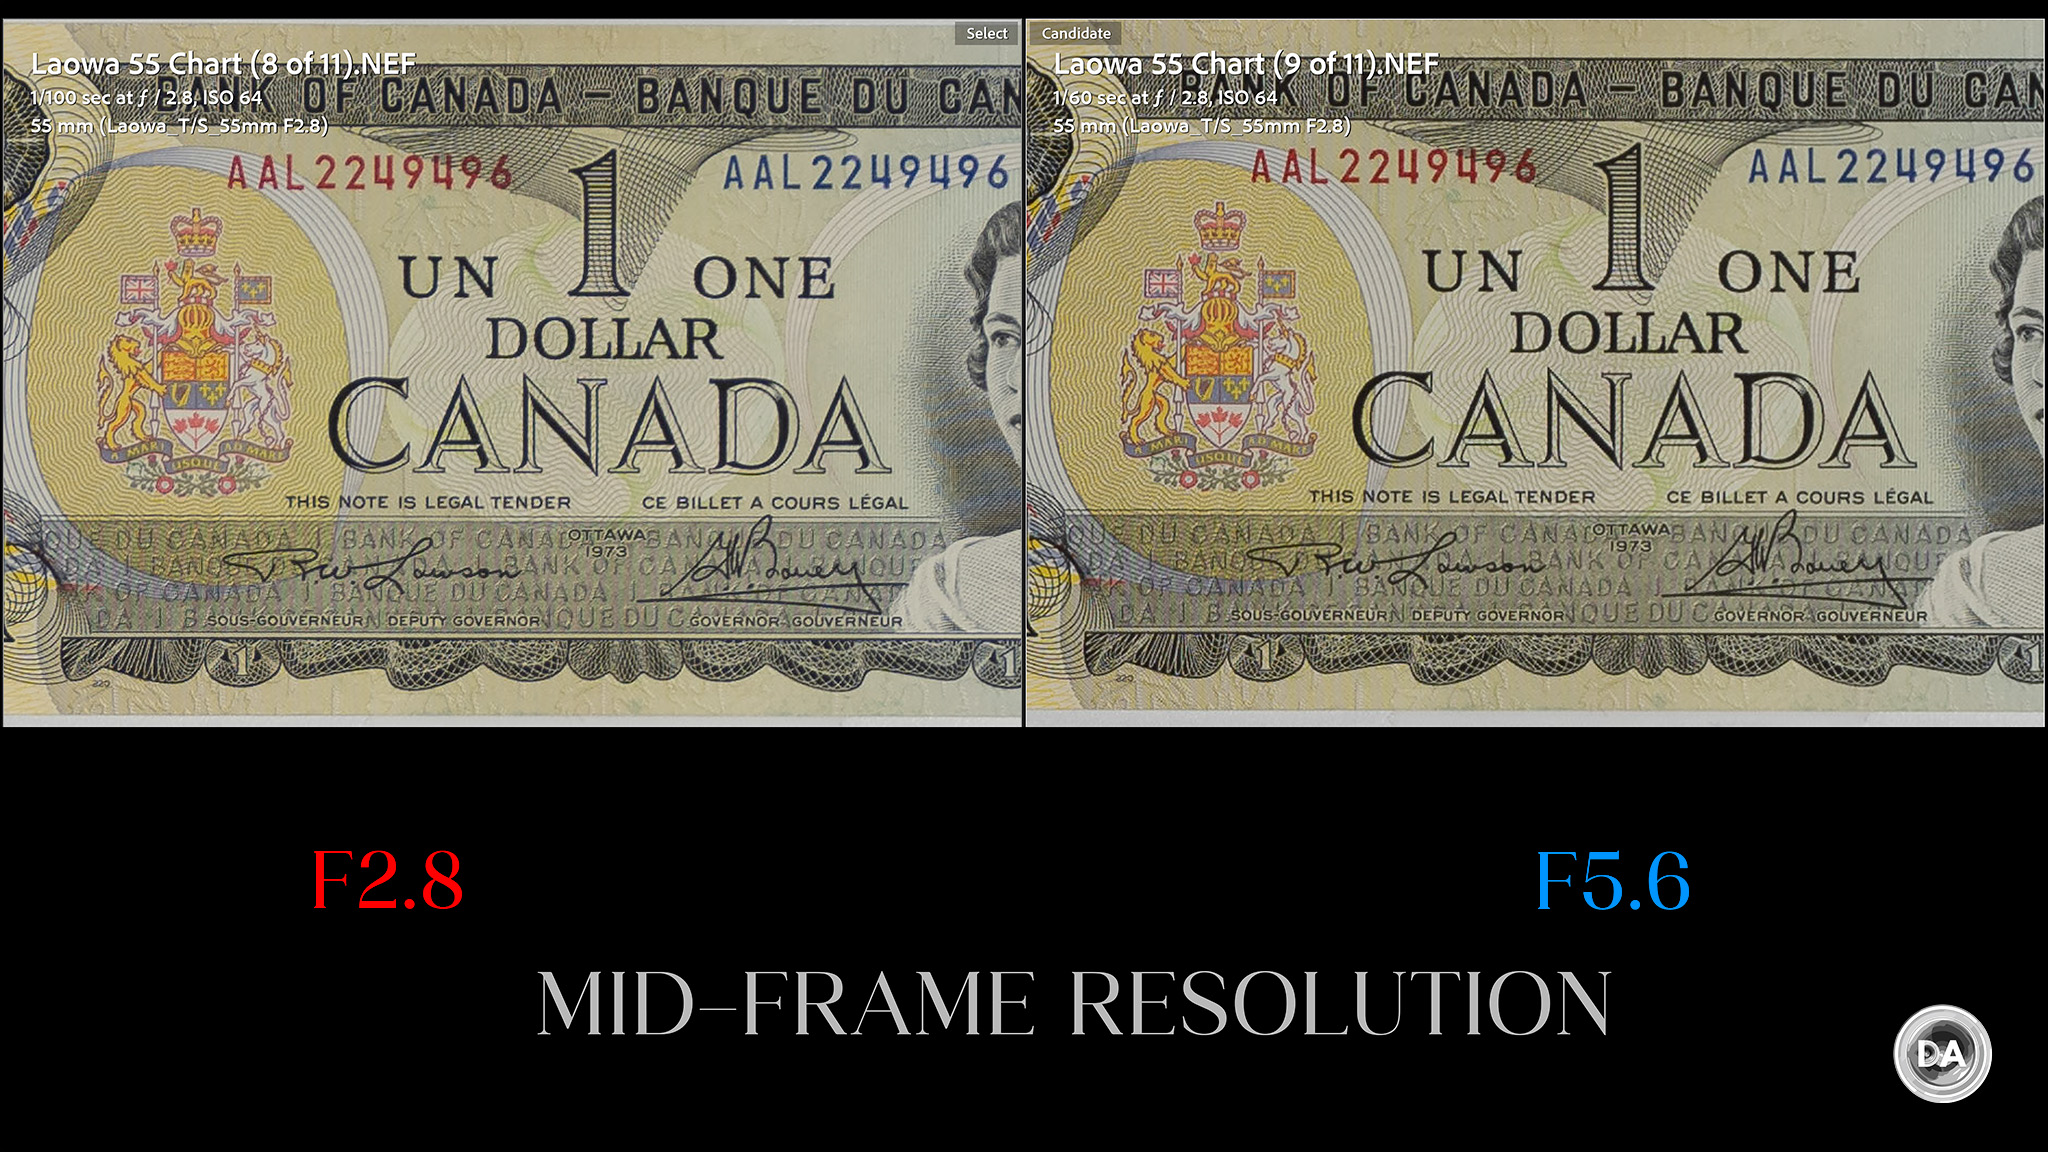
We’ll move on to inspecting our test chart. This test has been done on a 45MP Nikon Z8 sensor. I use a high end tripod and two second camera delay to ensure vibration doesn’t affect images. Here’s a look at the test chart that we will examine at high magnification:
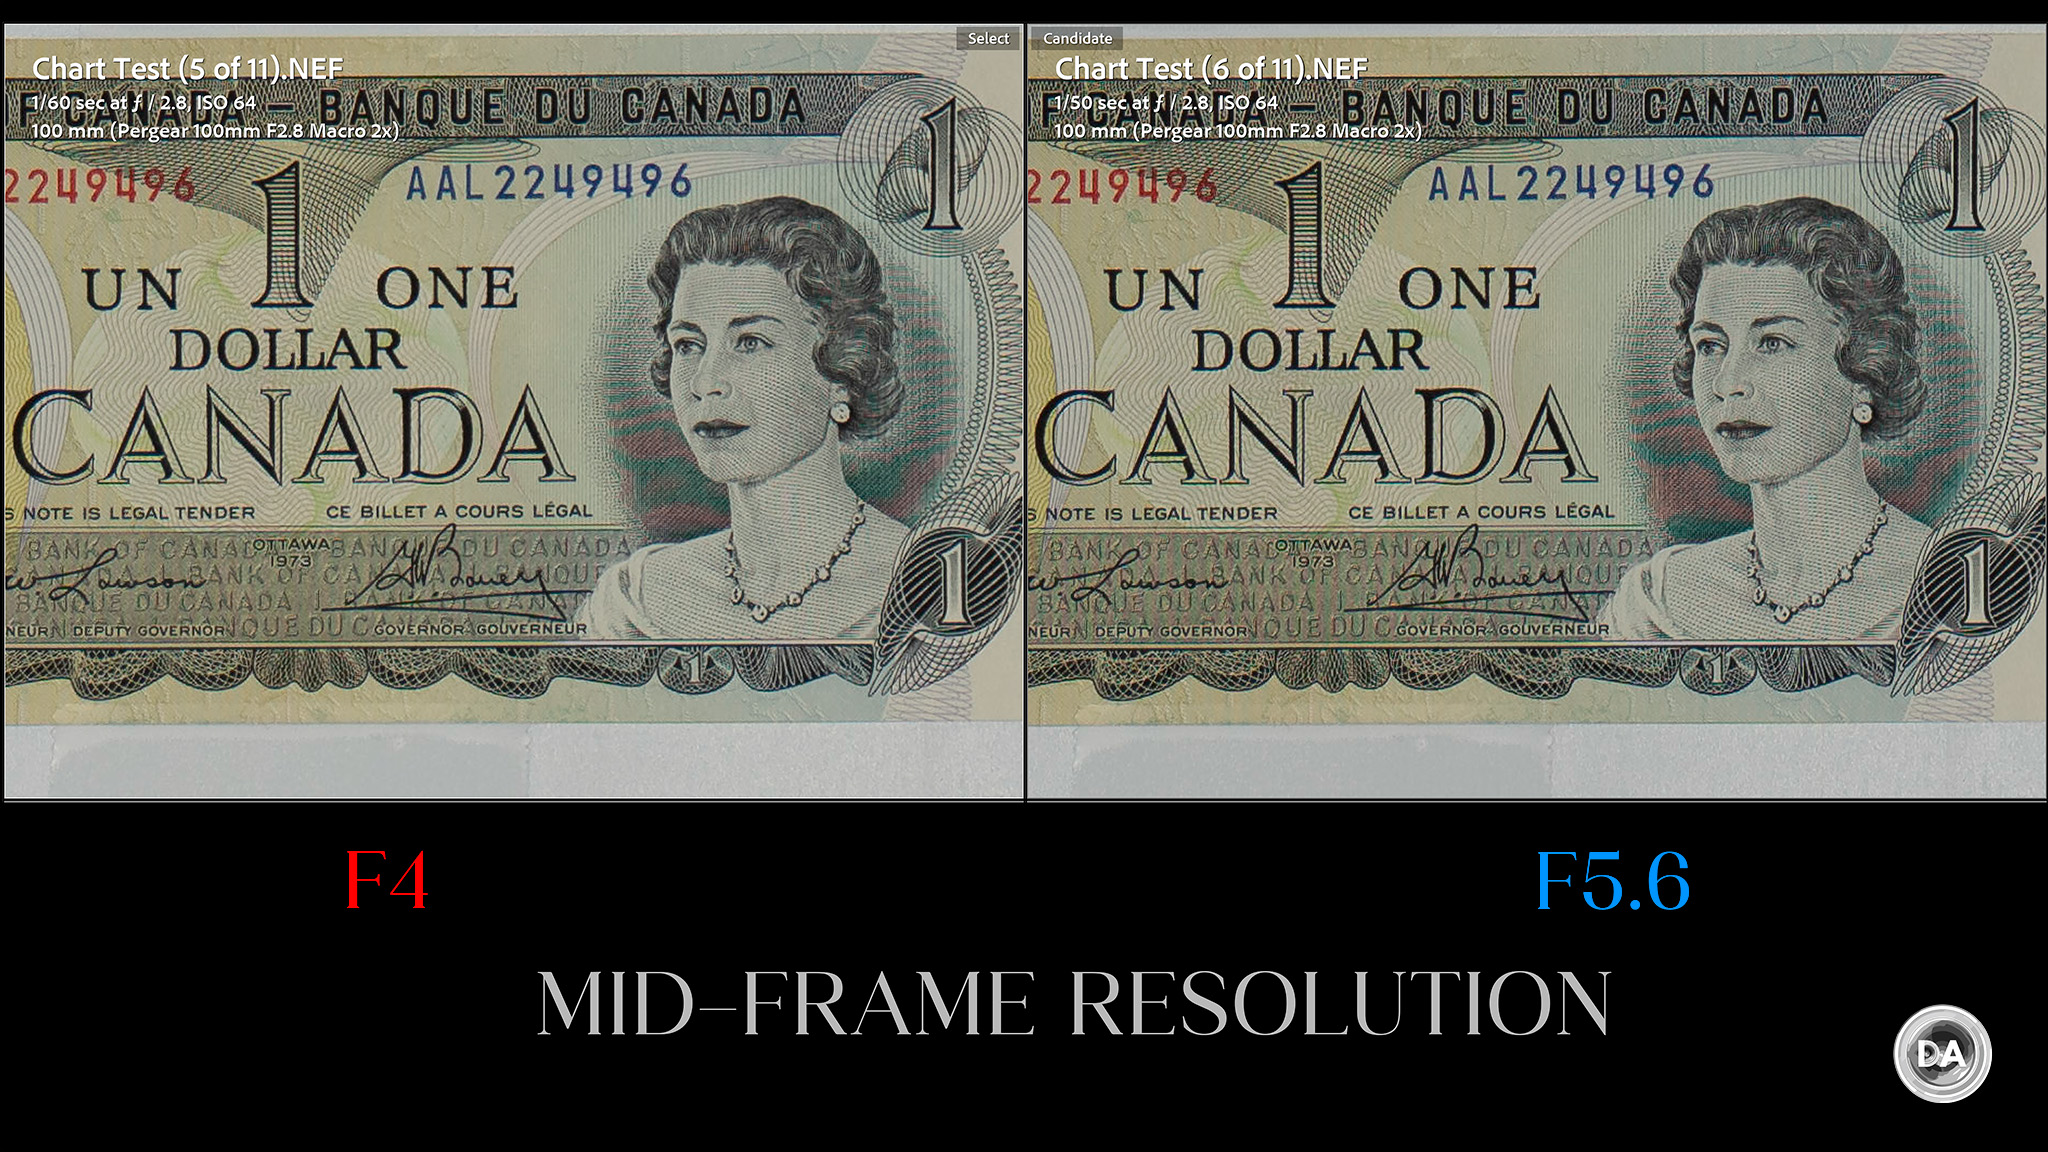
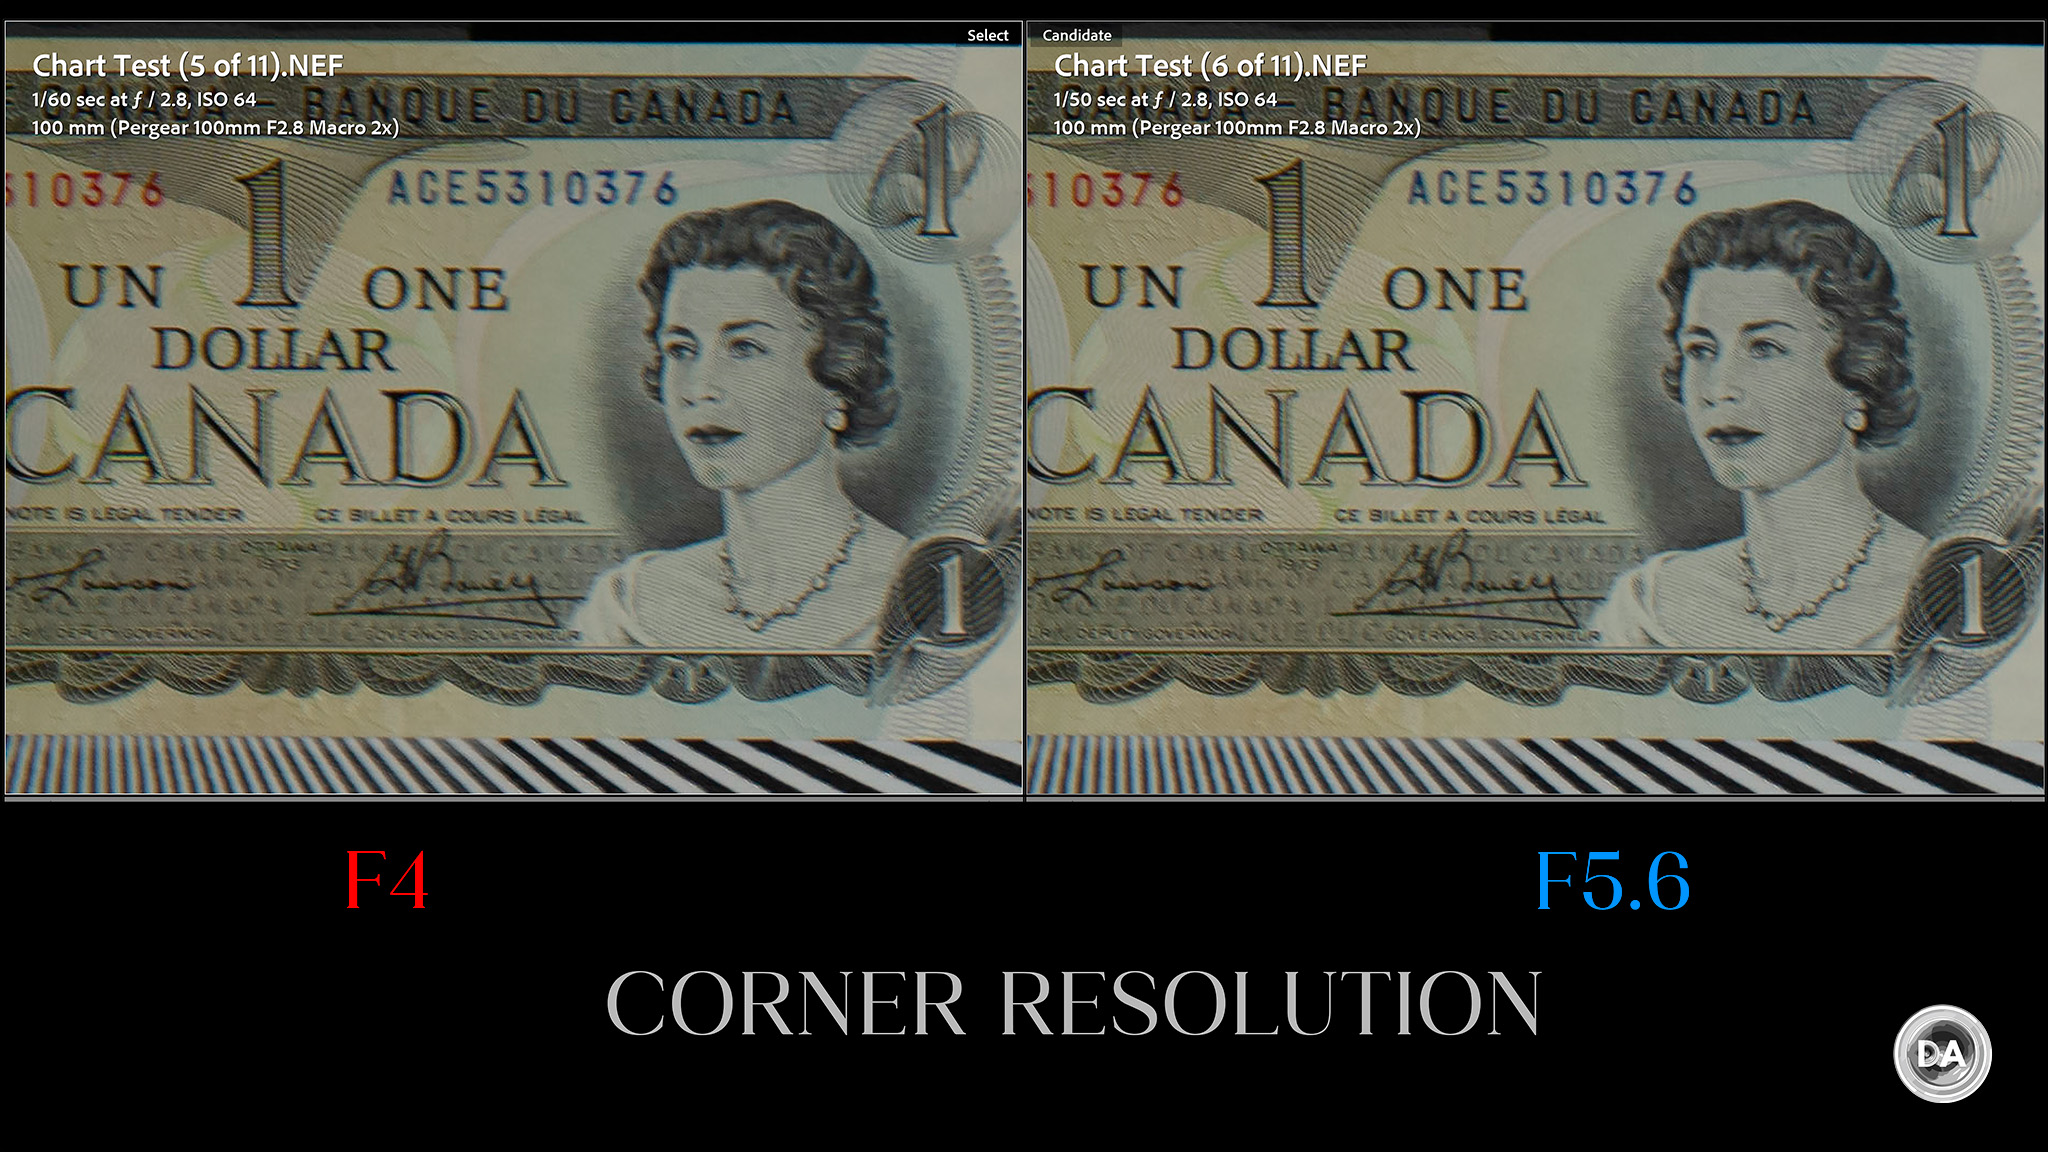
If we take a look at crops (at 200%) at F1.8 from the center, mid-frame, and lower right corner, we find that center and mid-frame performance is exceptionally good, and that sharpness extends right to the corners.
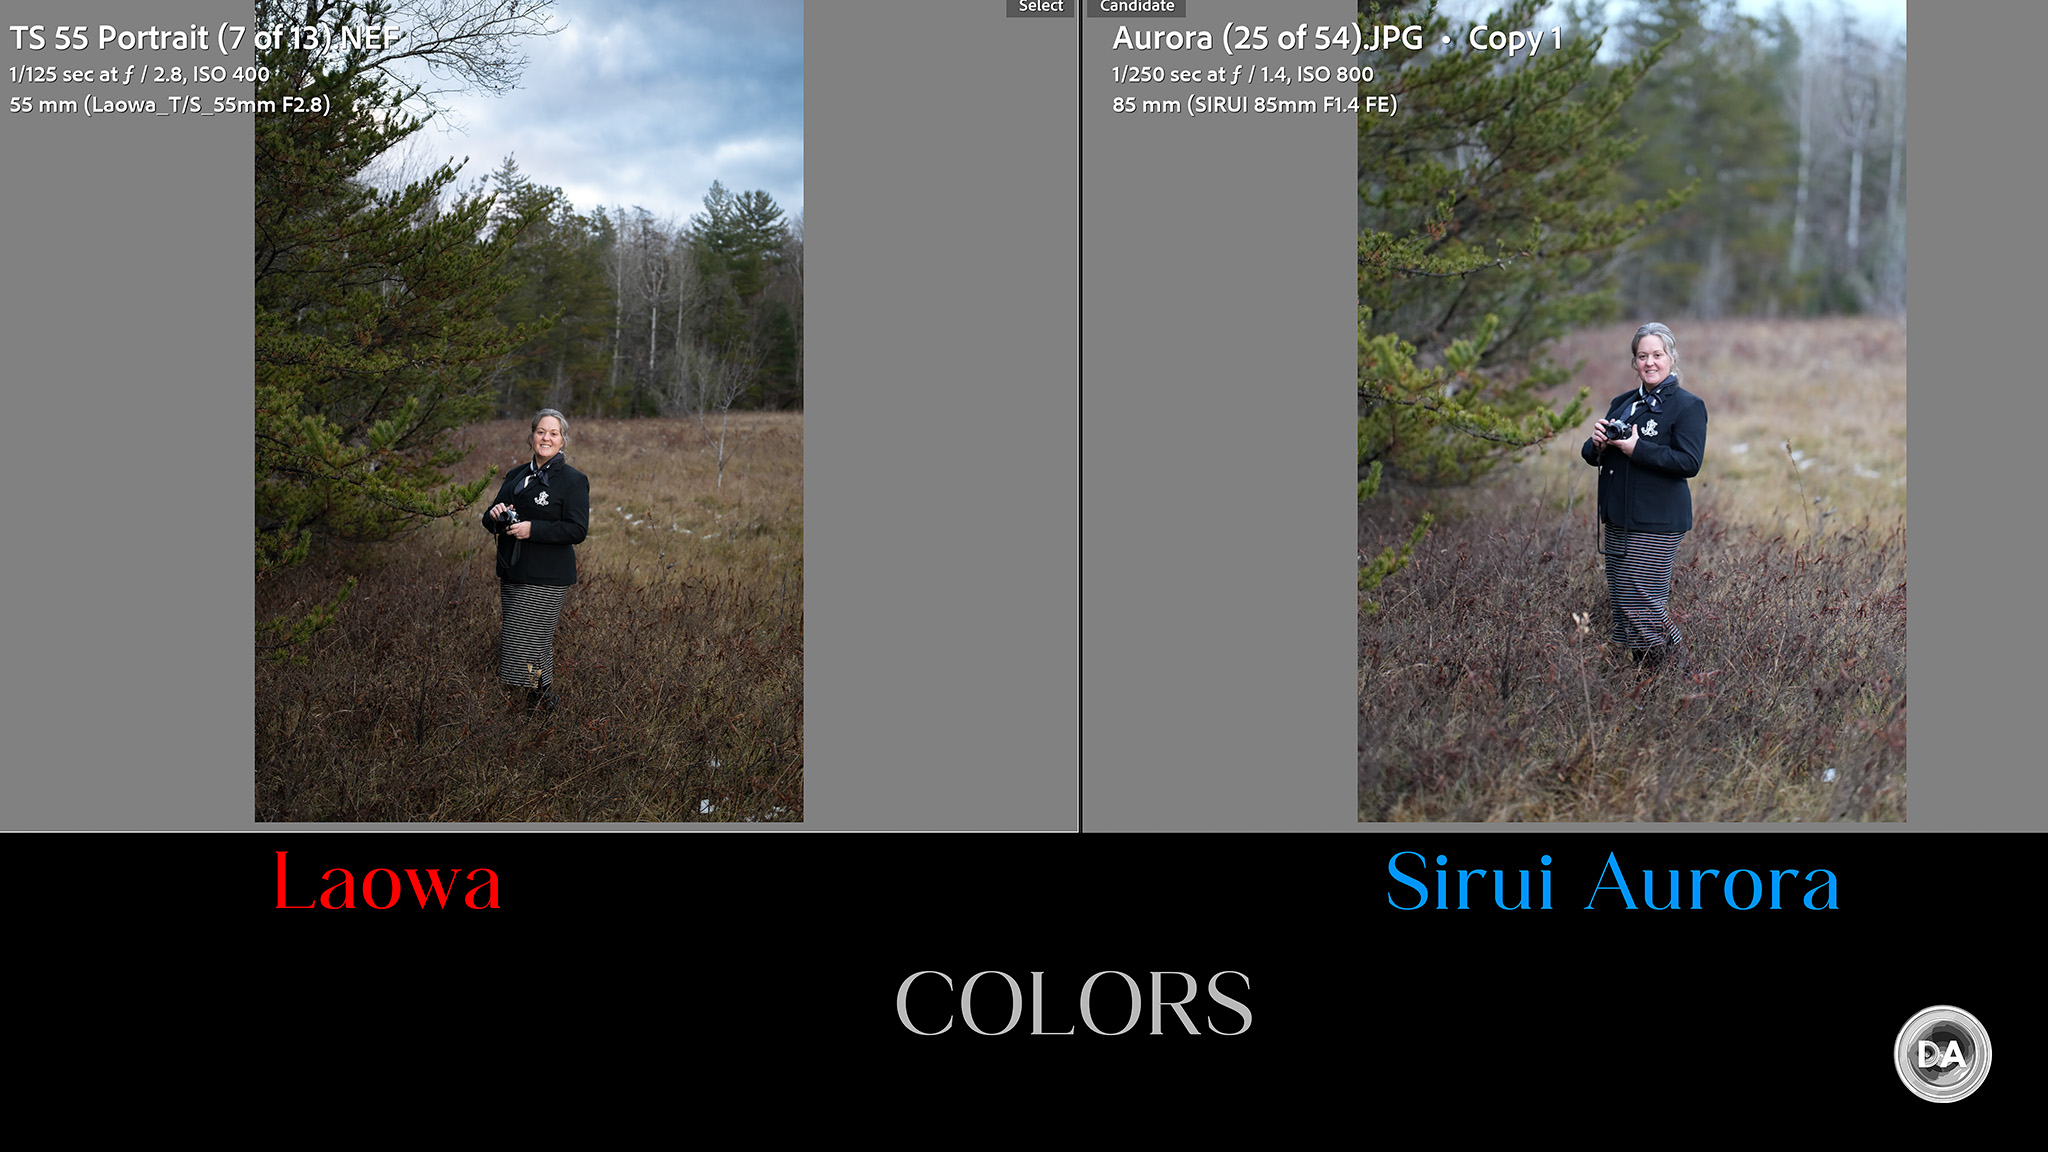
If I compare my chart results with those I’ve done with the LAB, I find that I prefer the Plena in the center, the LAB in the mid-frame, and it is mostly a wash in the corners.
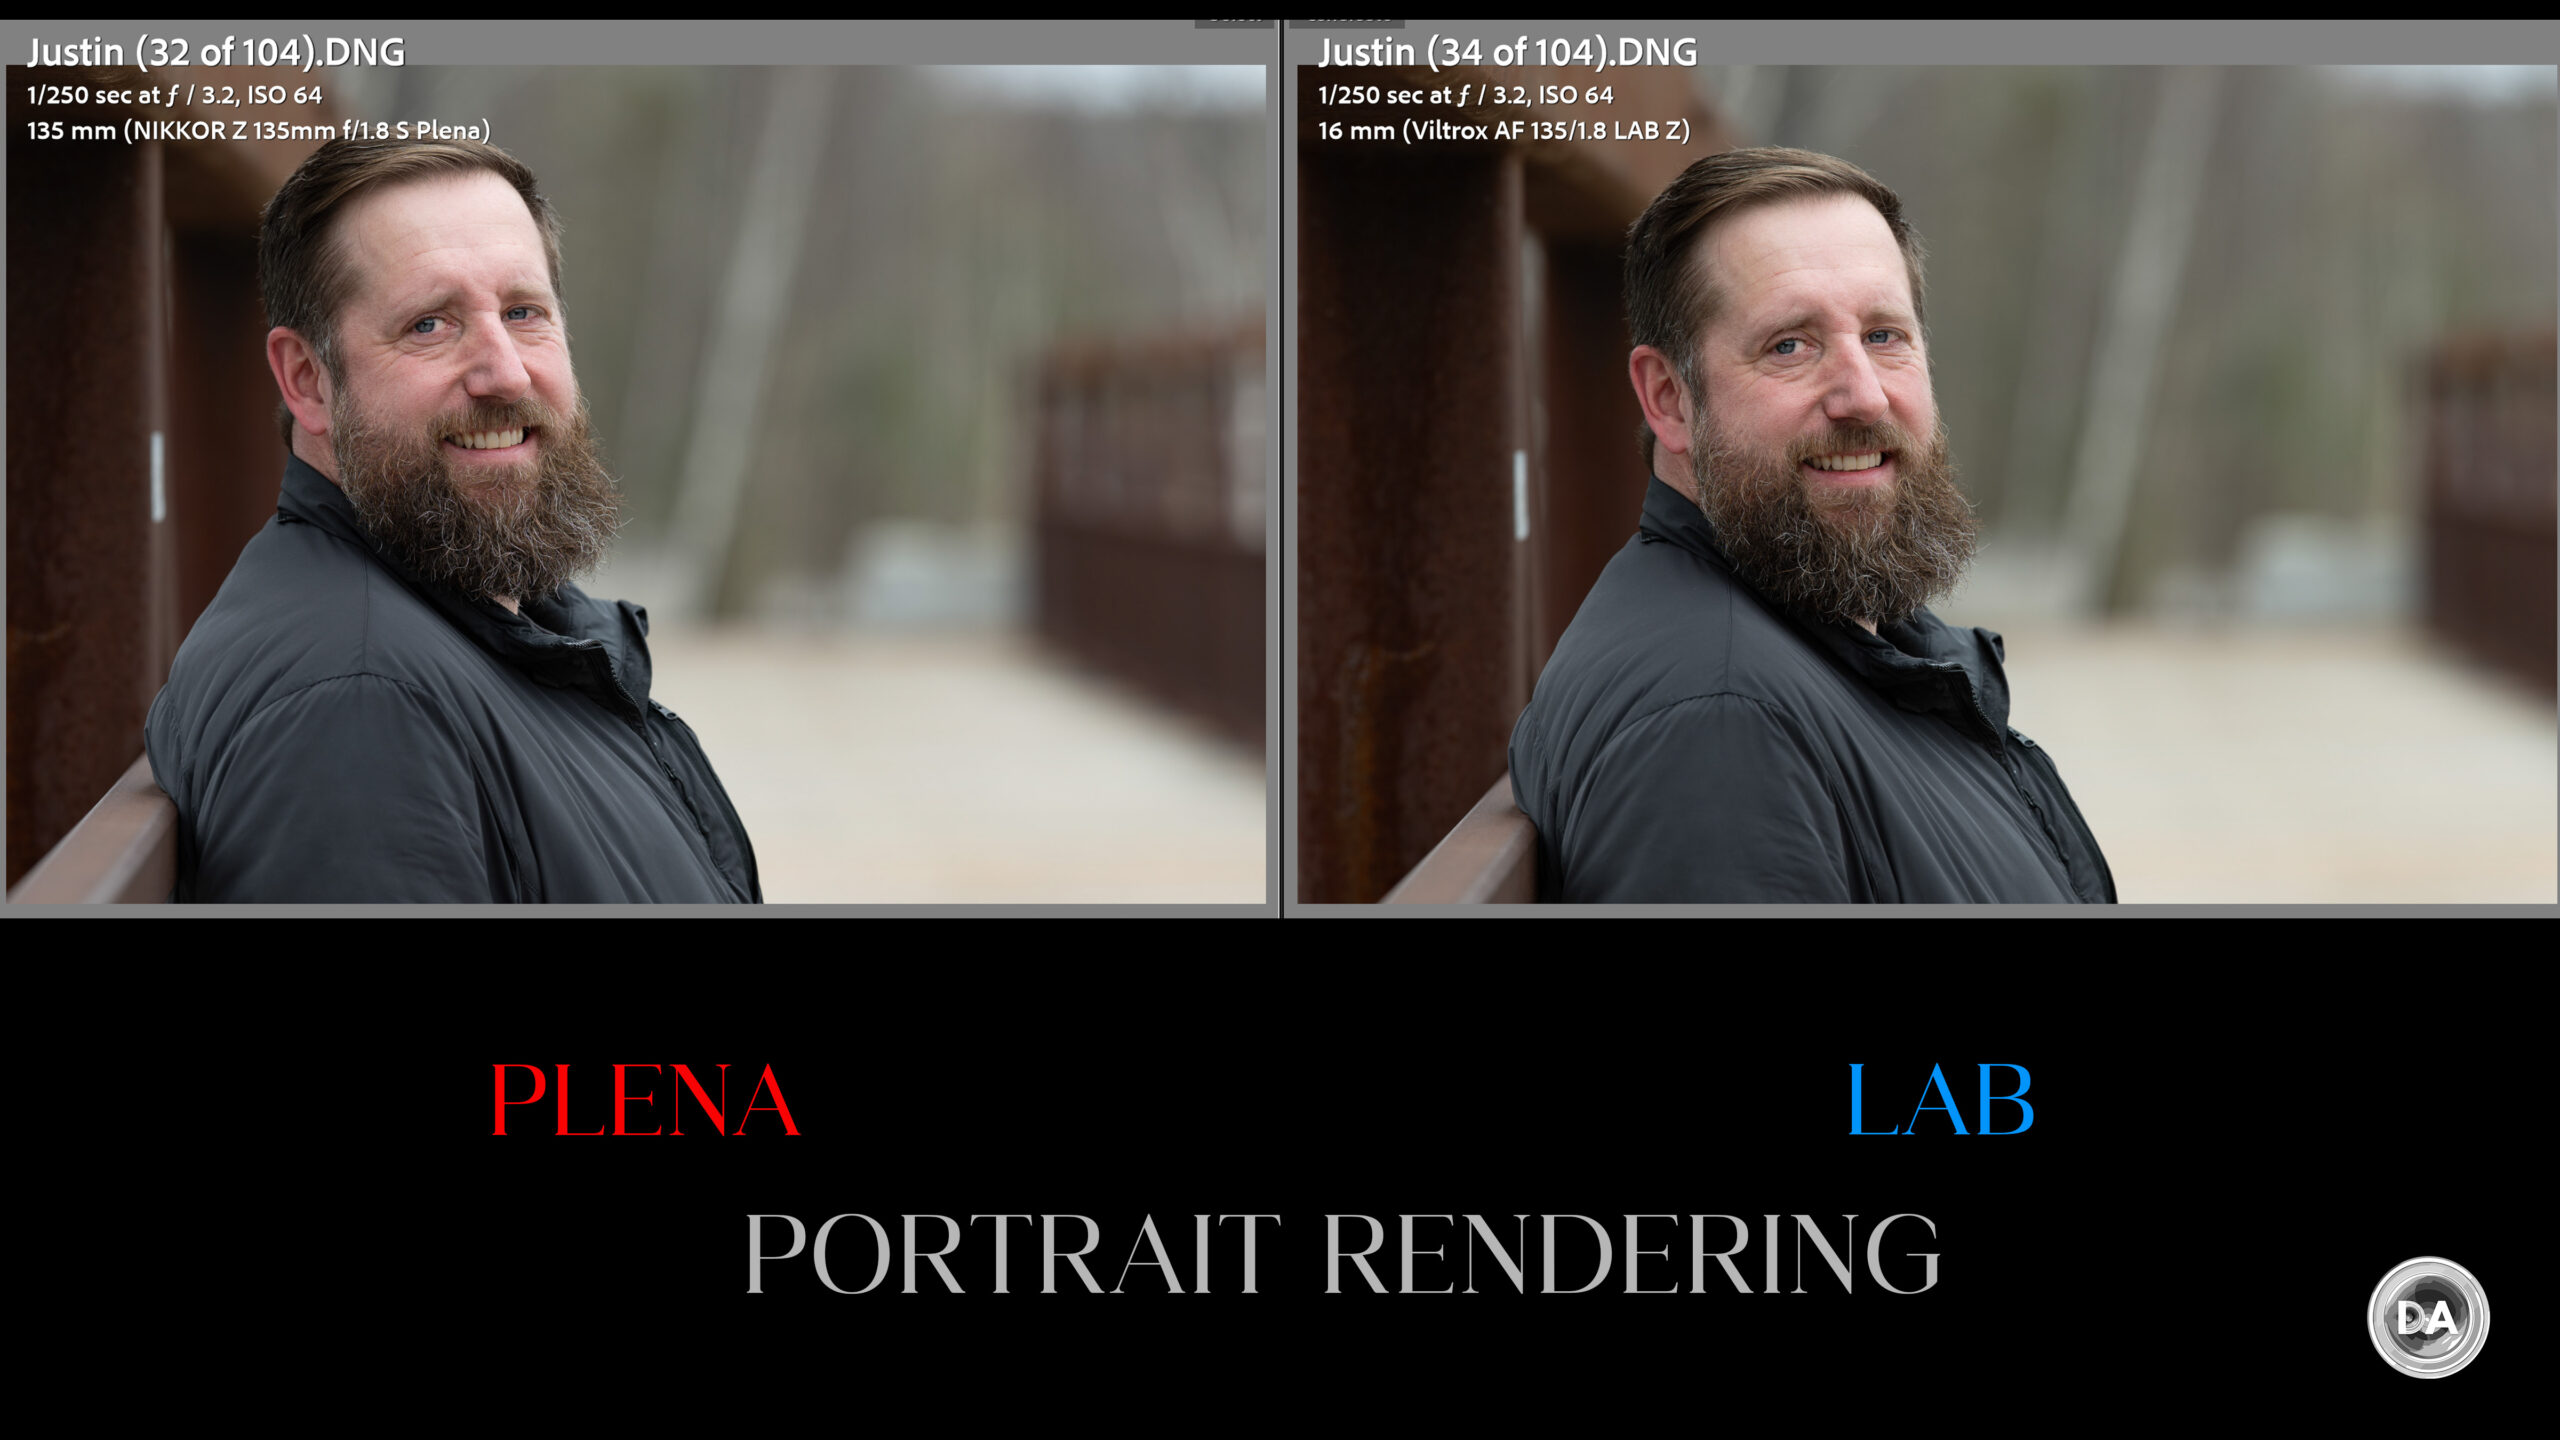
If I compared the two lenses for portraits, I had a hard time picking a winner. They both gave essentially equal amount of contrast and detail, and even skin tones look pretty similar. The LAB lens may give very slightly deeper levels of saturation, but they are very, very close.
If we step back and look at the image as a whole, there is again very little to distinguish between the two lenses.
One more interesting comparison is a full length F1.8 shot with a lot going on in the scene. I’ll let you spend the time trying to find the differences; they aren’t easy to spot.
Now, before you get too bent out of shape, know that Sony shooters have already dealt with the same angst, as, if anything, the Plena actually outperforms the Sony GM. The LAB lens is just shockingly sharp for the price.
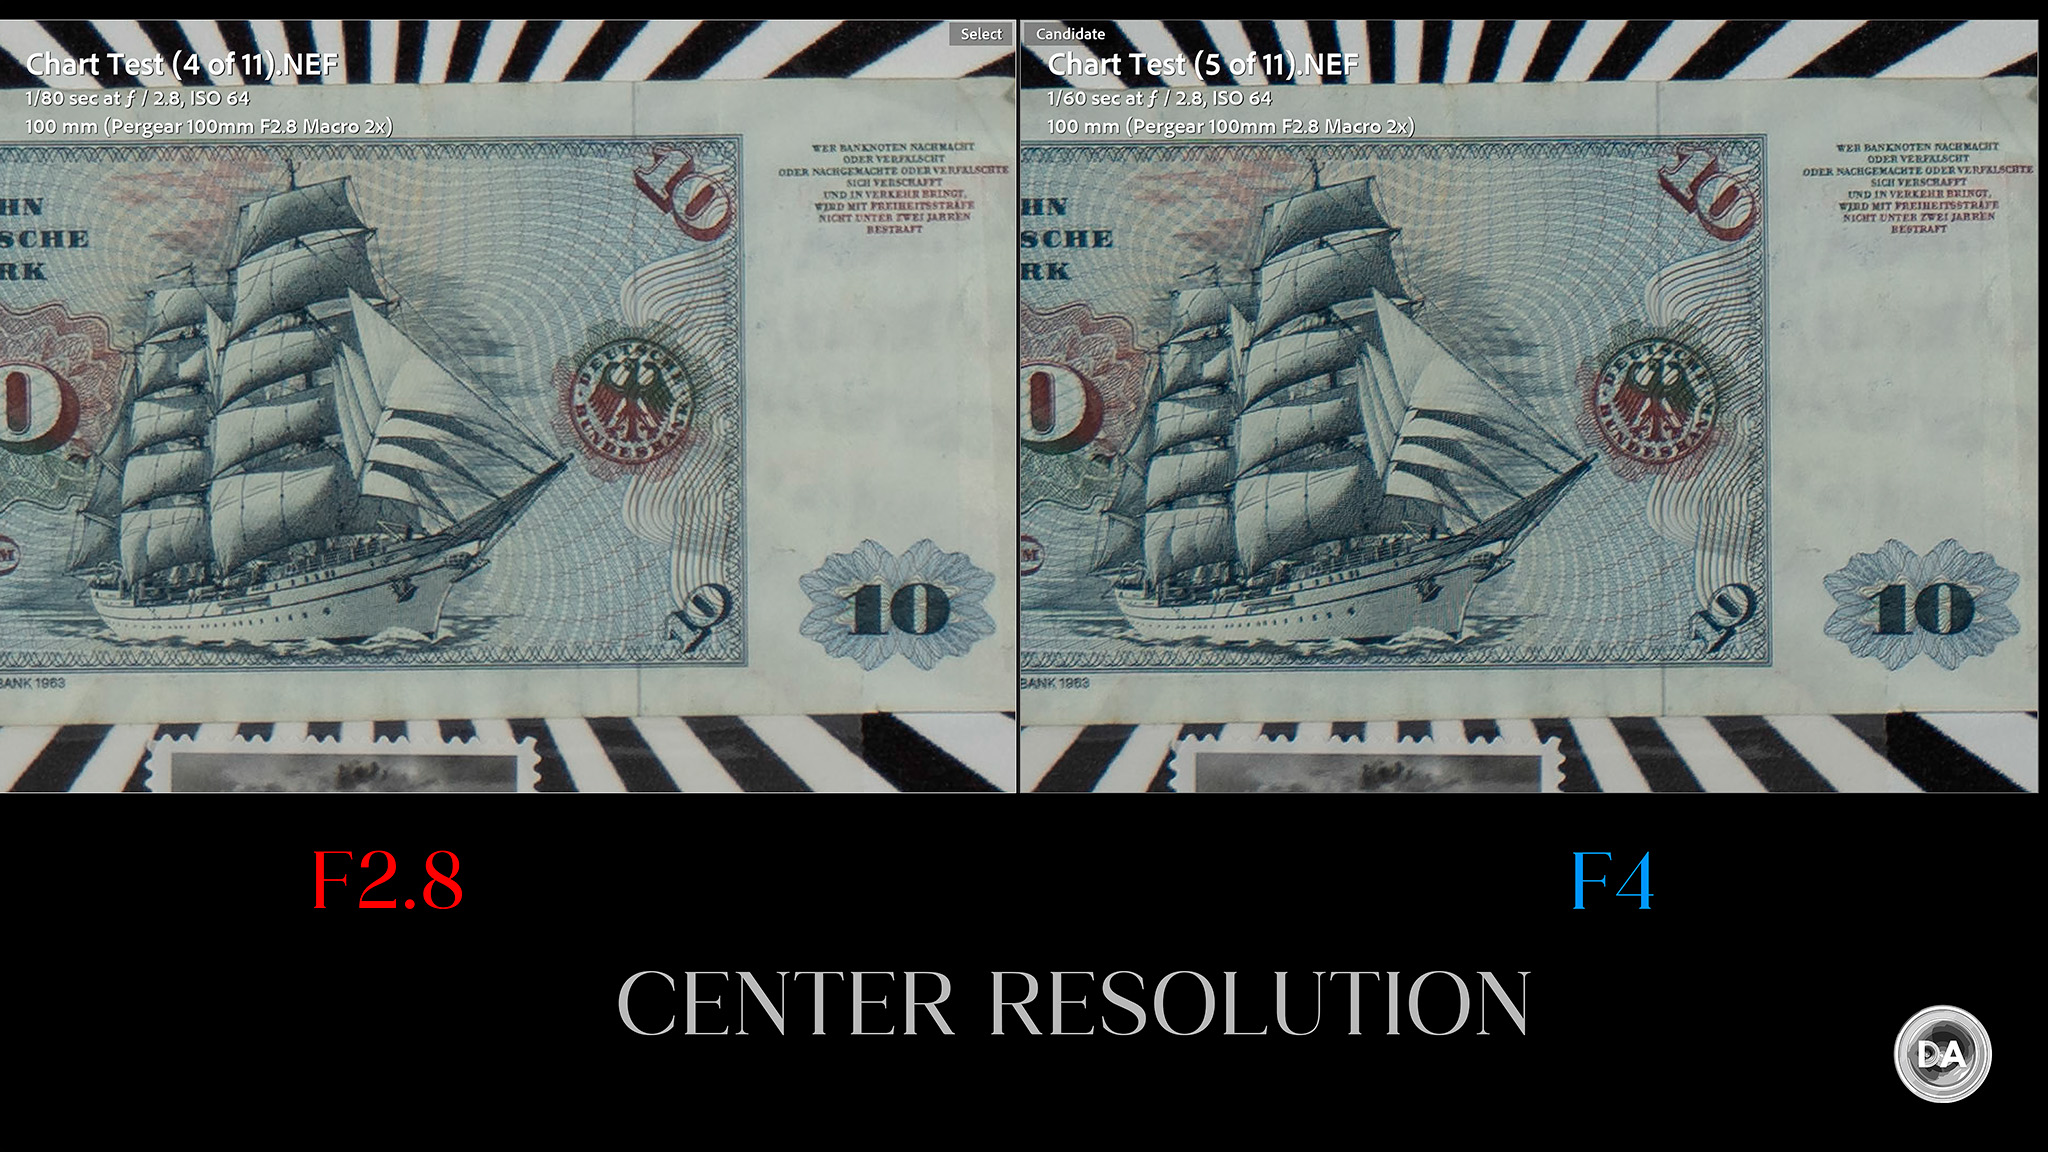
Stopping the Plena down to F2 produces a slight contrast boost across the frame, but probably not enough that you would notice without them side by side and at high levels of magnification. That’s not true at F2.8, however, where the improvement is far more noticeable…particularly in the corners, which are now razer sharp.
If we jump back to a real world result, we will find that sharpness and contrast are just gorgeous…as is the general rendering from the lens. As mentioned in the intro, this is one of those rare lenses that has both gorgeous defocused rendering and razer sharp detail/contrast.
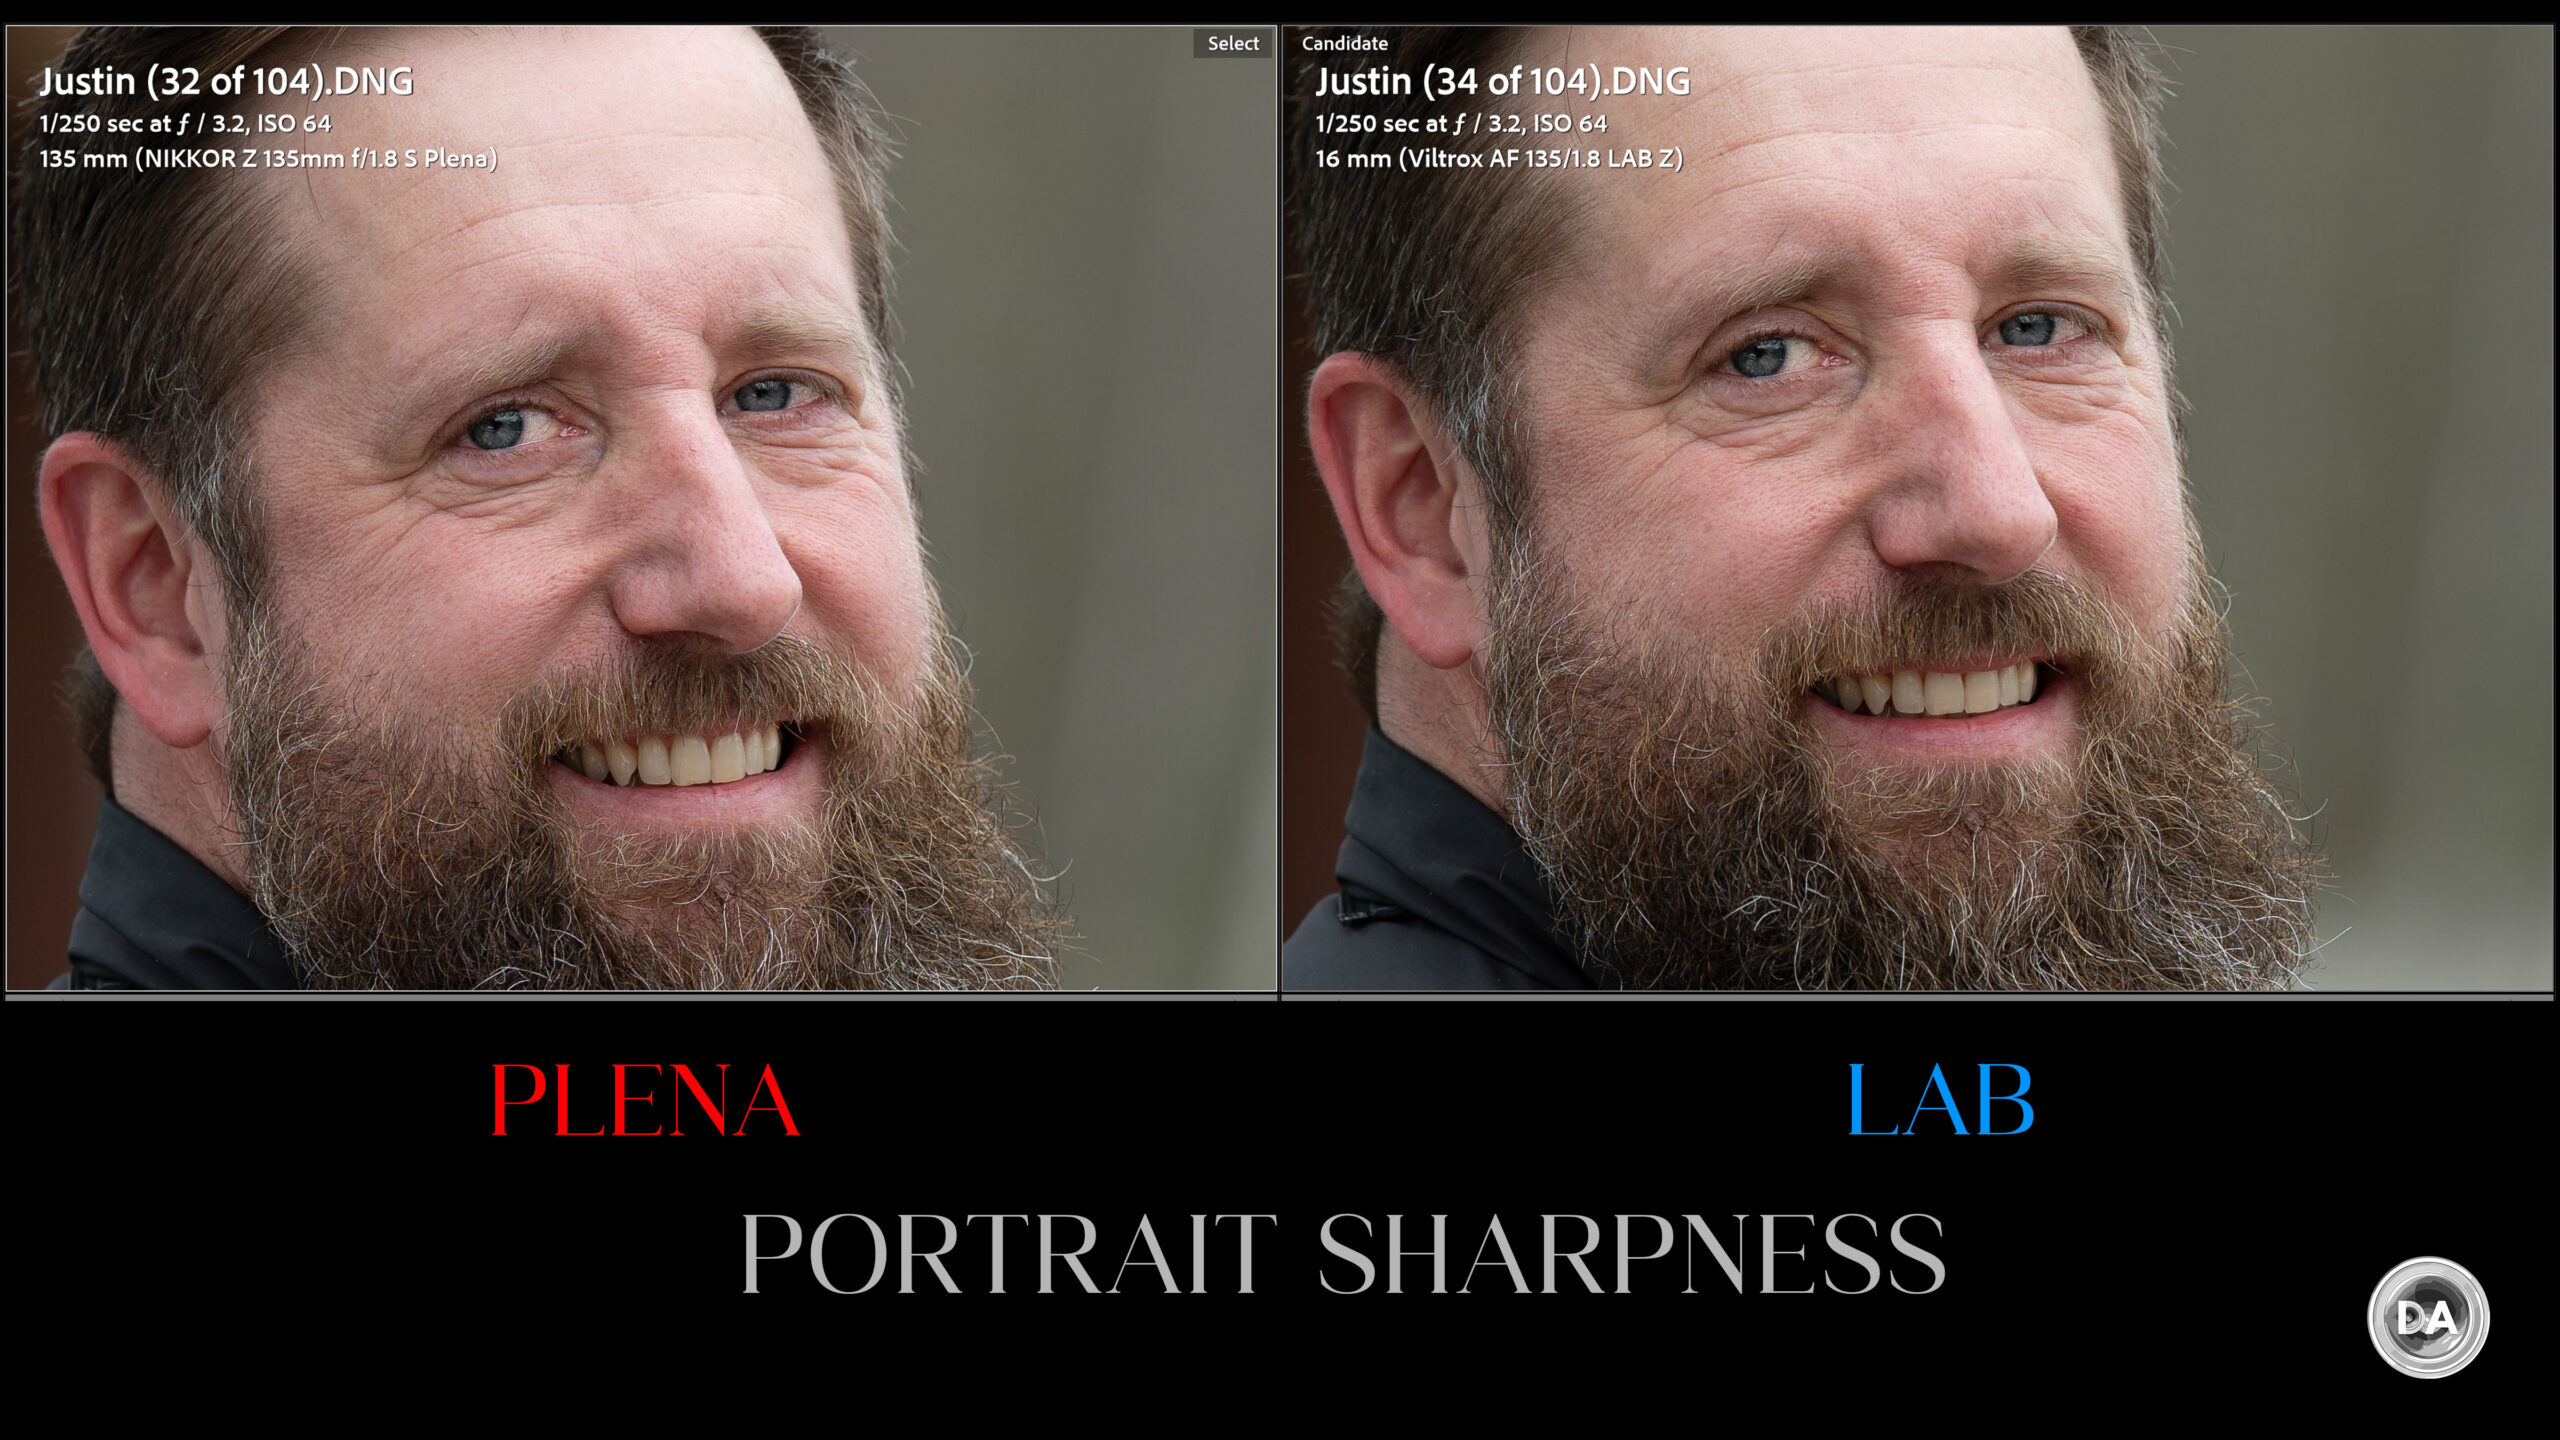
Look at the amount of detail in Justin’s beard and mustache.
After F2.8, it is hard to tell much of a difference through F8. It’s just amazingly good all throughout. Landscape images are going to be pretty flawless.
Physics will affect even the mightiest of lenses, however, so expect diffraction to start to soften the image by F11 and more obviously by F16, which is minimum aperture (though this lens is still sharper than many lenses at its weakest!)
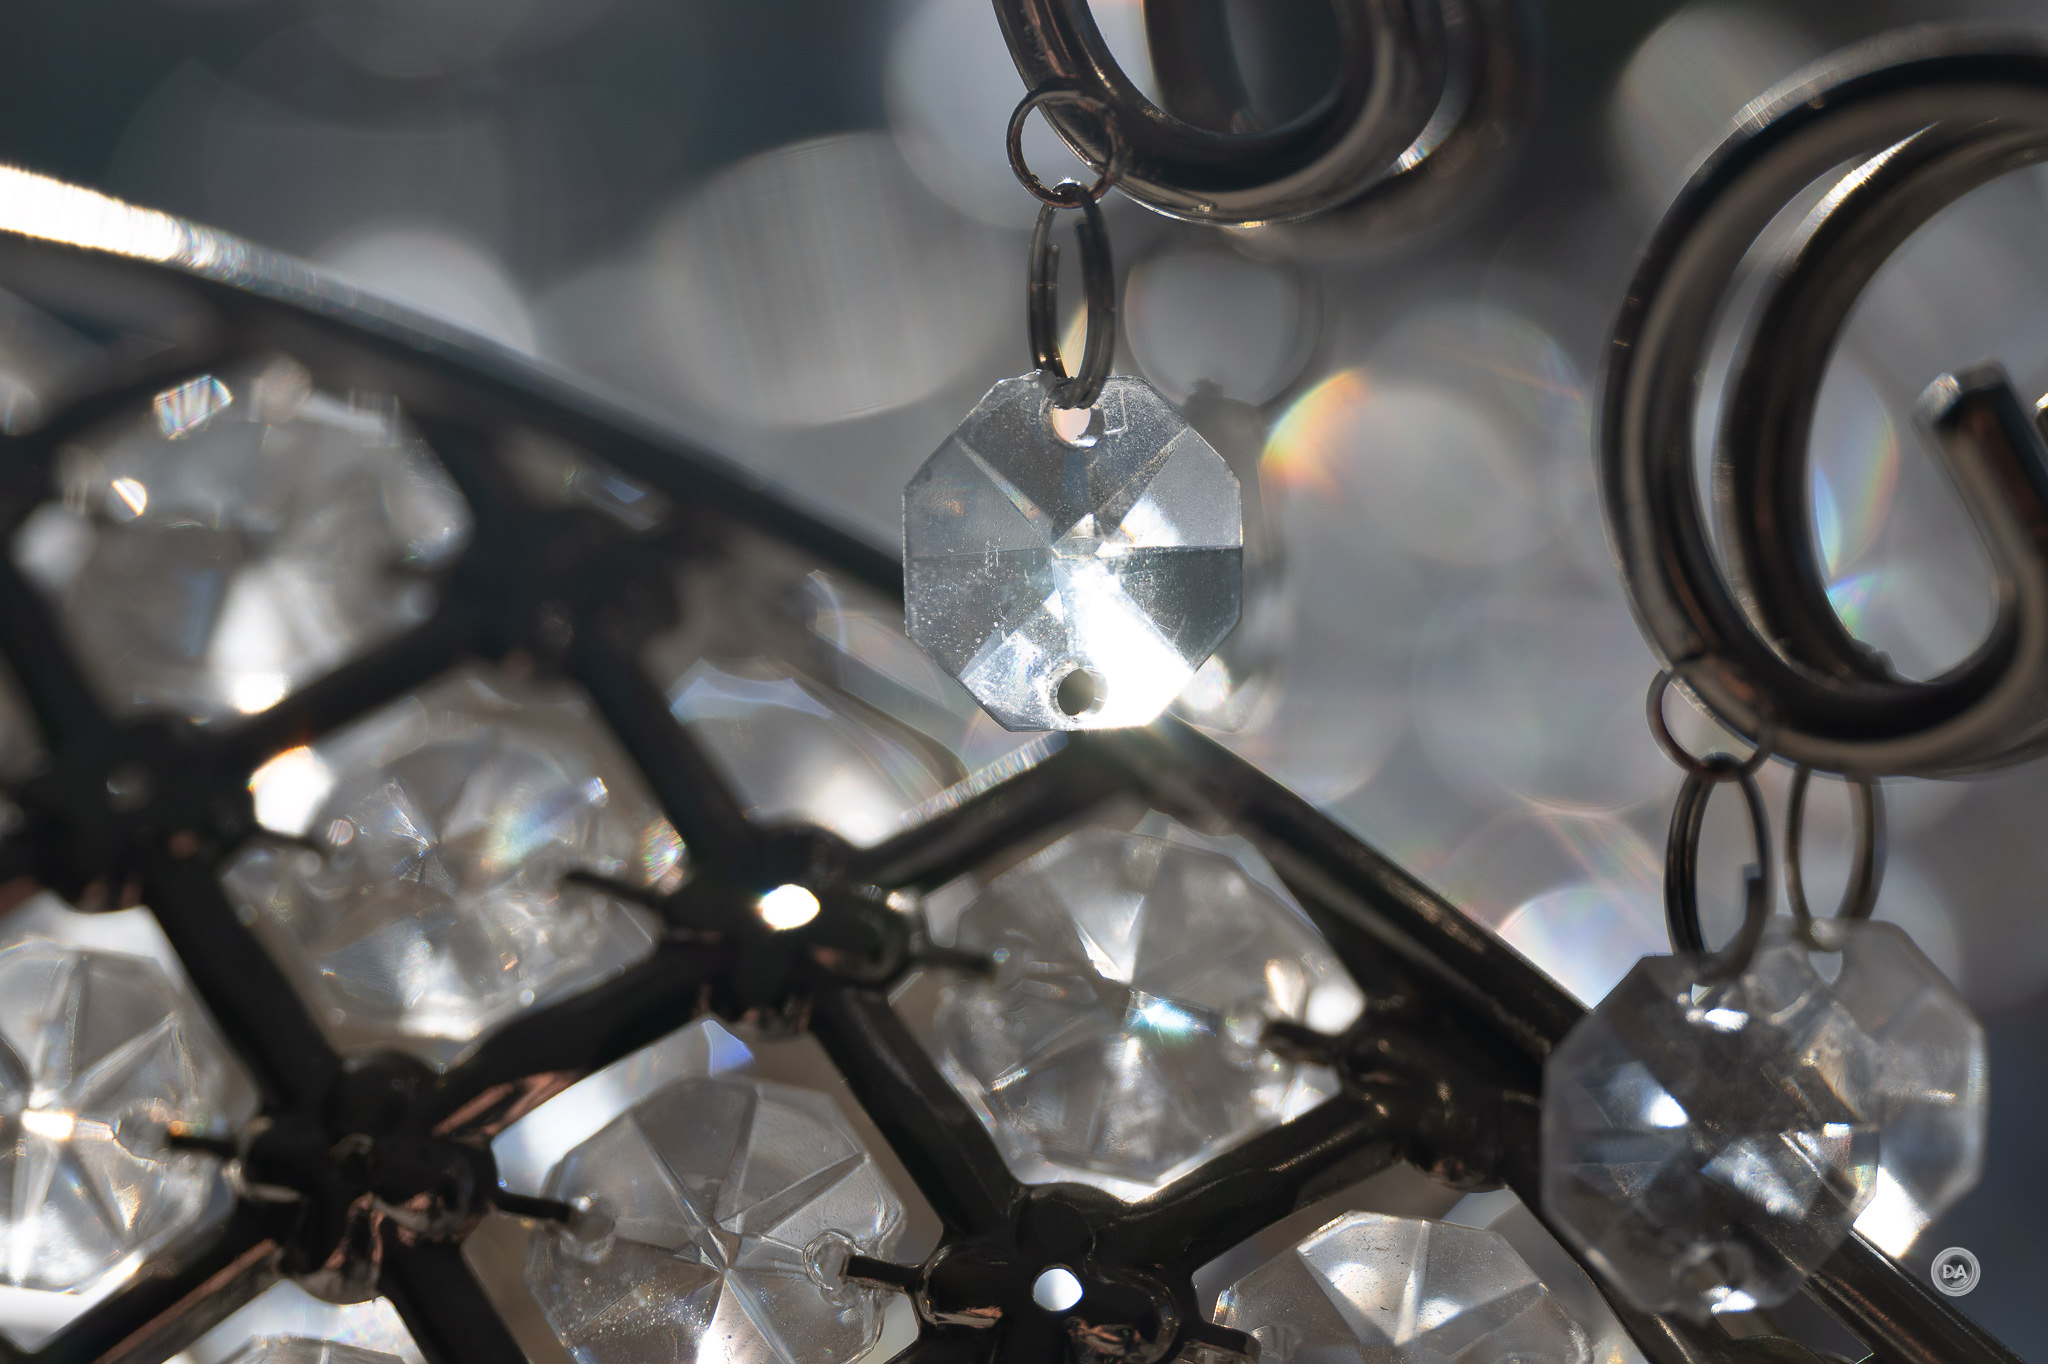
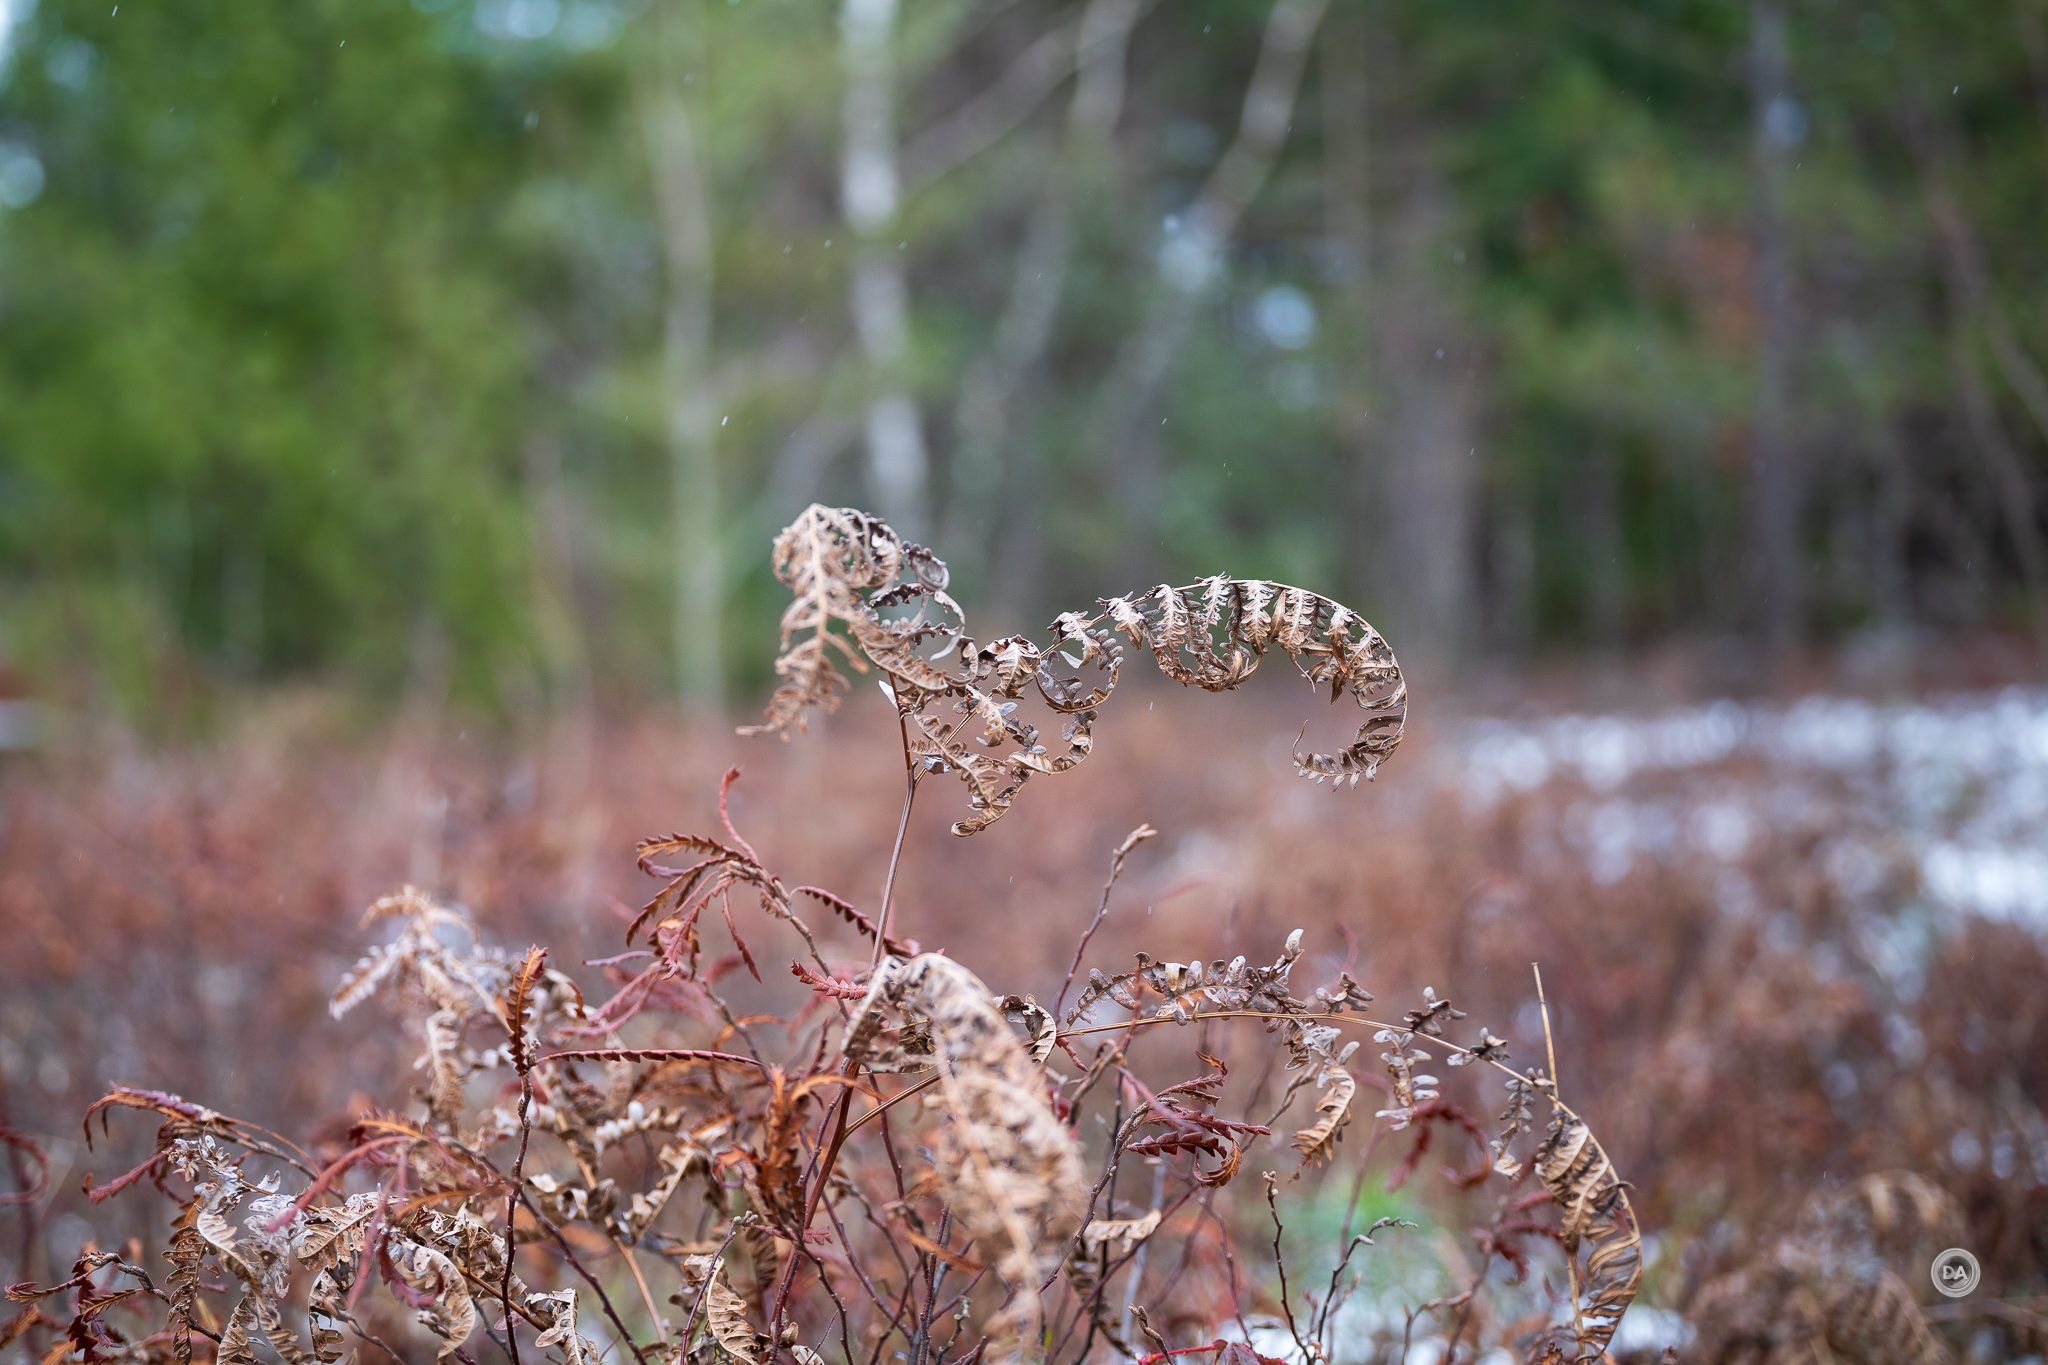
But the Plena isn’t all about sharpness. Bokeh is at the heart of its design. It is very easy to get extremely pleasing backgrounds with very creamy defocus and great colors.
You also get great subject separation, with an excellent level of 3D subject isolation.
I brought along a vintage hatchet to the photo shoot with Justin, not really knowing how I’d use it but grabbed it on a whim. It turned out that the area we went to had just had some clearing along the path, and the heavy machinery had just chewed everything into splinters. I knew exactly how the hatchet would work, and got Justin in the midst of the carnage as if he’d done it all with the hatchet. See the amazing cutout effect effect that you can achieve even at a distance?
I was using natural light for these shots, but if I had used strobes, it would have seemed essentially like I had “Photoshopped” him into the scene as strobes will often just intensify the cutout effect.
Part of that rear element design was not just about vignette, but also about being able to evenly distribute light for the sake of specular highlights. And there is no question that the Plena is the best 135mm lens that I’ve used for keeping circular specular shapes (bokeh balls) right into the corners even at F1.8.
The bokeh rendering is fantastic from the 135mm Plena.
I only have one optical complaint, and it is more of a general Nikon complaint. I find magentas a little too strong, so I find that in Caucasian skin tones that I often feel that I need to take some of the red/magenta out of people’s faces.
Darker skin tones look more natural to me.
Cat fur tones are also excellent, and I just love the amount of sharpness and contrast I get from the Plena.
Flare resistance was also very strong on the Plena. I didn’t see any lost of contrast in real world shots, and here you can see with the sun in the variety of positions and with a variety of apertures (from F1.8 to F11) that there is never really any veiling, either. The various coatings by Nikkor (Meso Amorphous Coat and ARNEO Coat) are doing a fantastic job.
The Plena thrives in all tested metrics. This is one the good ones.
The bottom line is that this is one the most complete lenses that I’ve tested optically, with strong performances in basically every optical category. If you’d like to see more images in my extensive image gallery, just click here.
Conclusion
Nikon’s premium S-Line lenses represent the pinnacle of their Z-mount engineering, and the Nikkor Z 135mm F1.8 S Plena is one of the best. It has it all going optically – great sharpness, great bokeh, and no real aberrations or flaws.
The only fly in the ointment is the new Viltrox AF 135mm F1.8 LAB Z, as it shares a lot of those optical strengths and comes at a much lower price tag. But as I used the two lenses side by side, I could see the many little ways where the Plena proved its superiority. It just works better, whether it was doing aperture racks, getting better consistency when doing portraits, or even manually focusing.
The Plena is still the premium option, however, with an amazing performance all around. It produces the kinds of images that you can only associate with professional photography, and you won’t ever have to worry about someone’s phone producing images that look like your 2 kilo combination of Z8/Z9 and the Plena. If you are a portrait photographer (particularly if you do environmental portraits) and you want a lens that can reliably produce images that you’ll love, then check out the Plena. It’s a treat.
Keywords: Nikkor, Nikkor Z 135mm, Plena, F1.8, F1.8 S, Nikkor Z, Nikkor Z 135mm F1.8 S Plena review, Nikon 135mm, Nikon Z 135mm, Viltrox, LAB, Viltrox AF 135mm F1.8 LAB Z, Nikon, Nikon Z8, Z, Z-mount, Z8, Review, mirrorless, Full Frame, Sports, Tracking, Dustin Abbott, Real World, Comparison, Handling, Focus, Portraits, Resolution, High ISO, Image Quality, Sample Images, Photography, 45MP, #letthelightin, #DA, #NIKON, #Z8, #NIKONZ8
DISCLAIMER: This article and description contains affiliate links, which means that if you click on one of the product links, I’ll receive a small commission. As an Amazon Associate I earn from qualifying purchases.
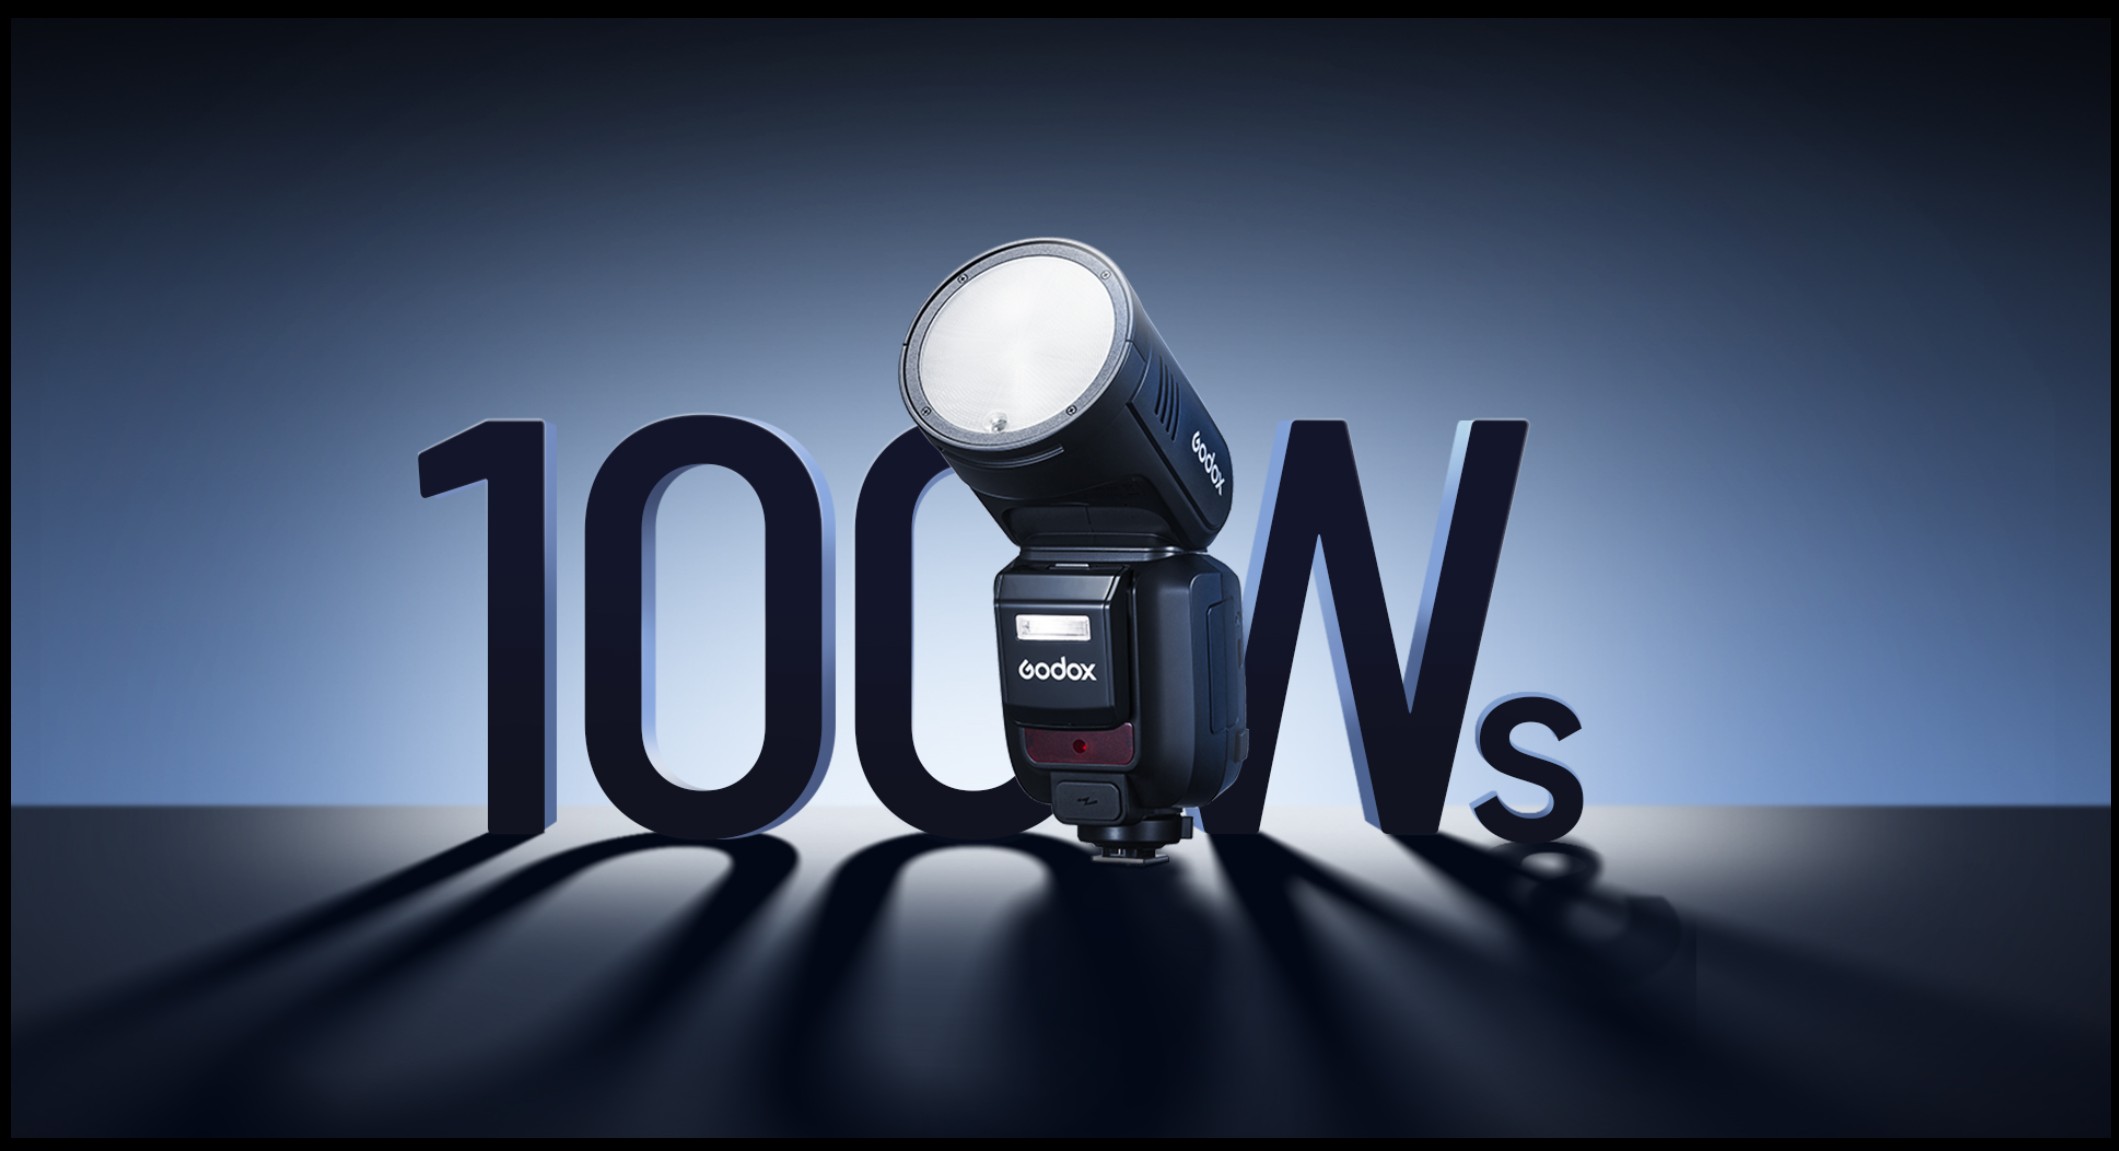
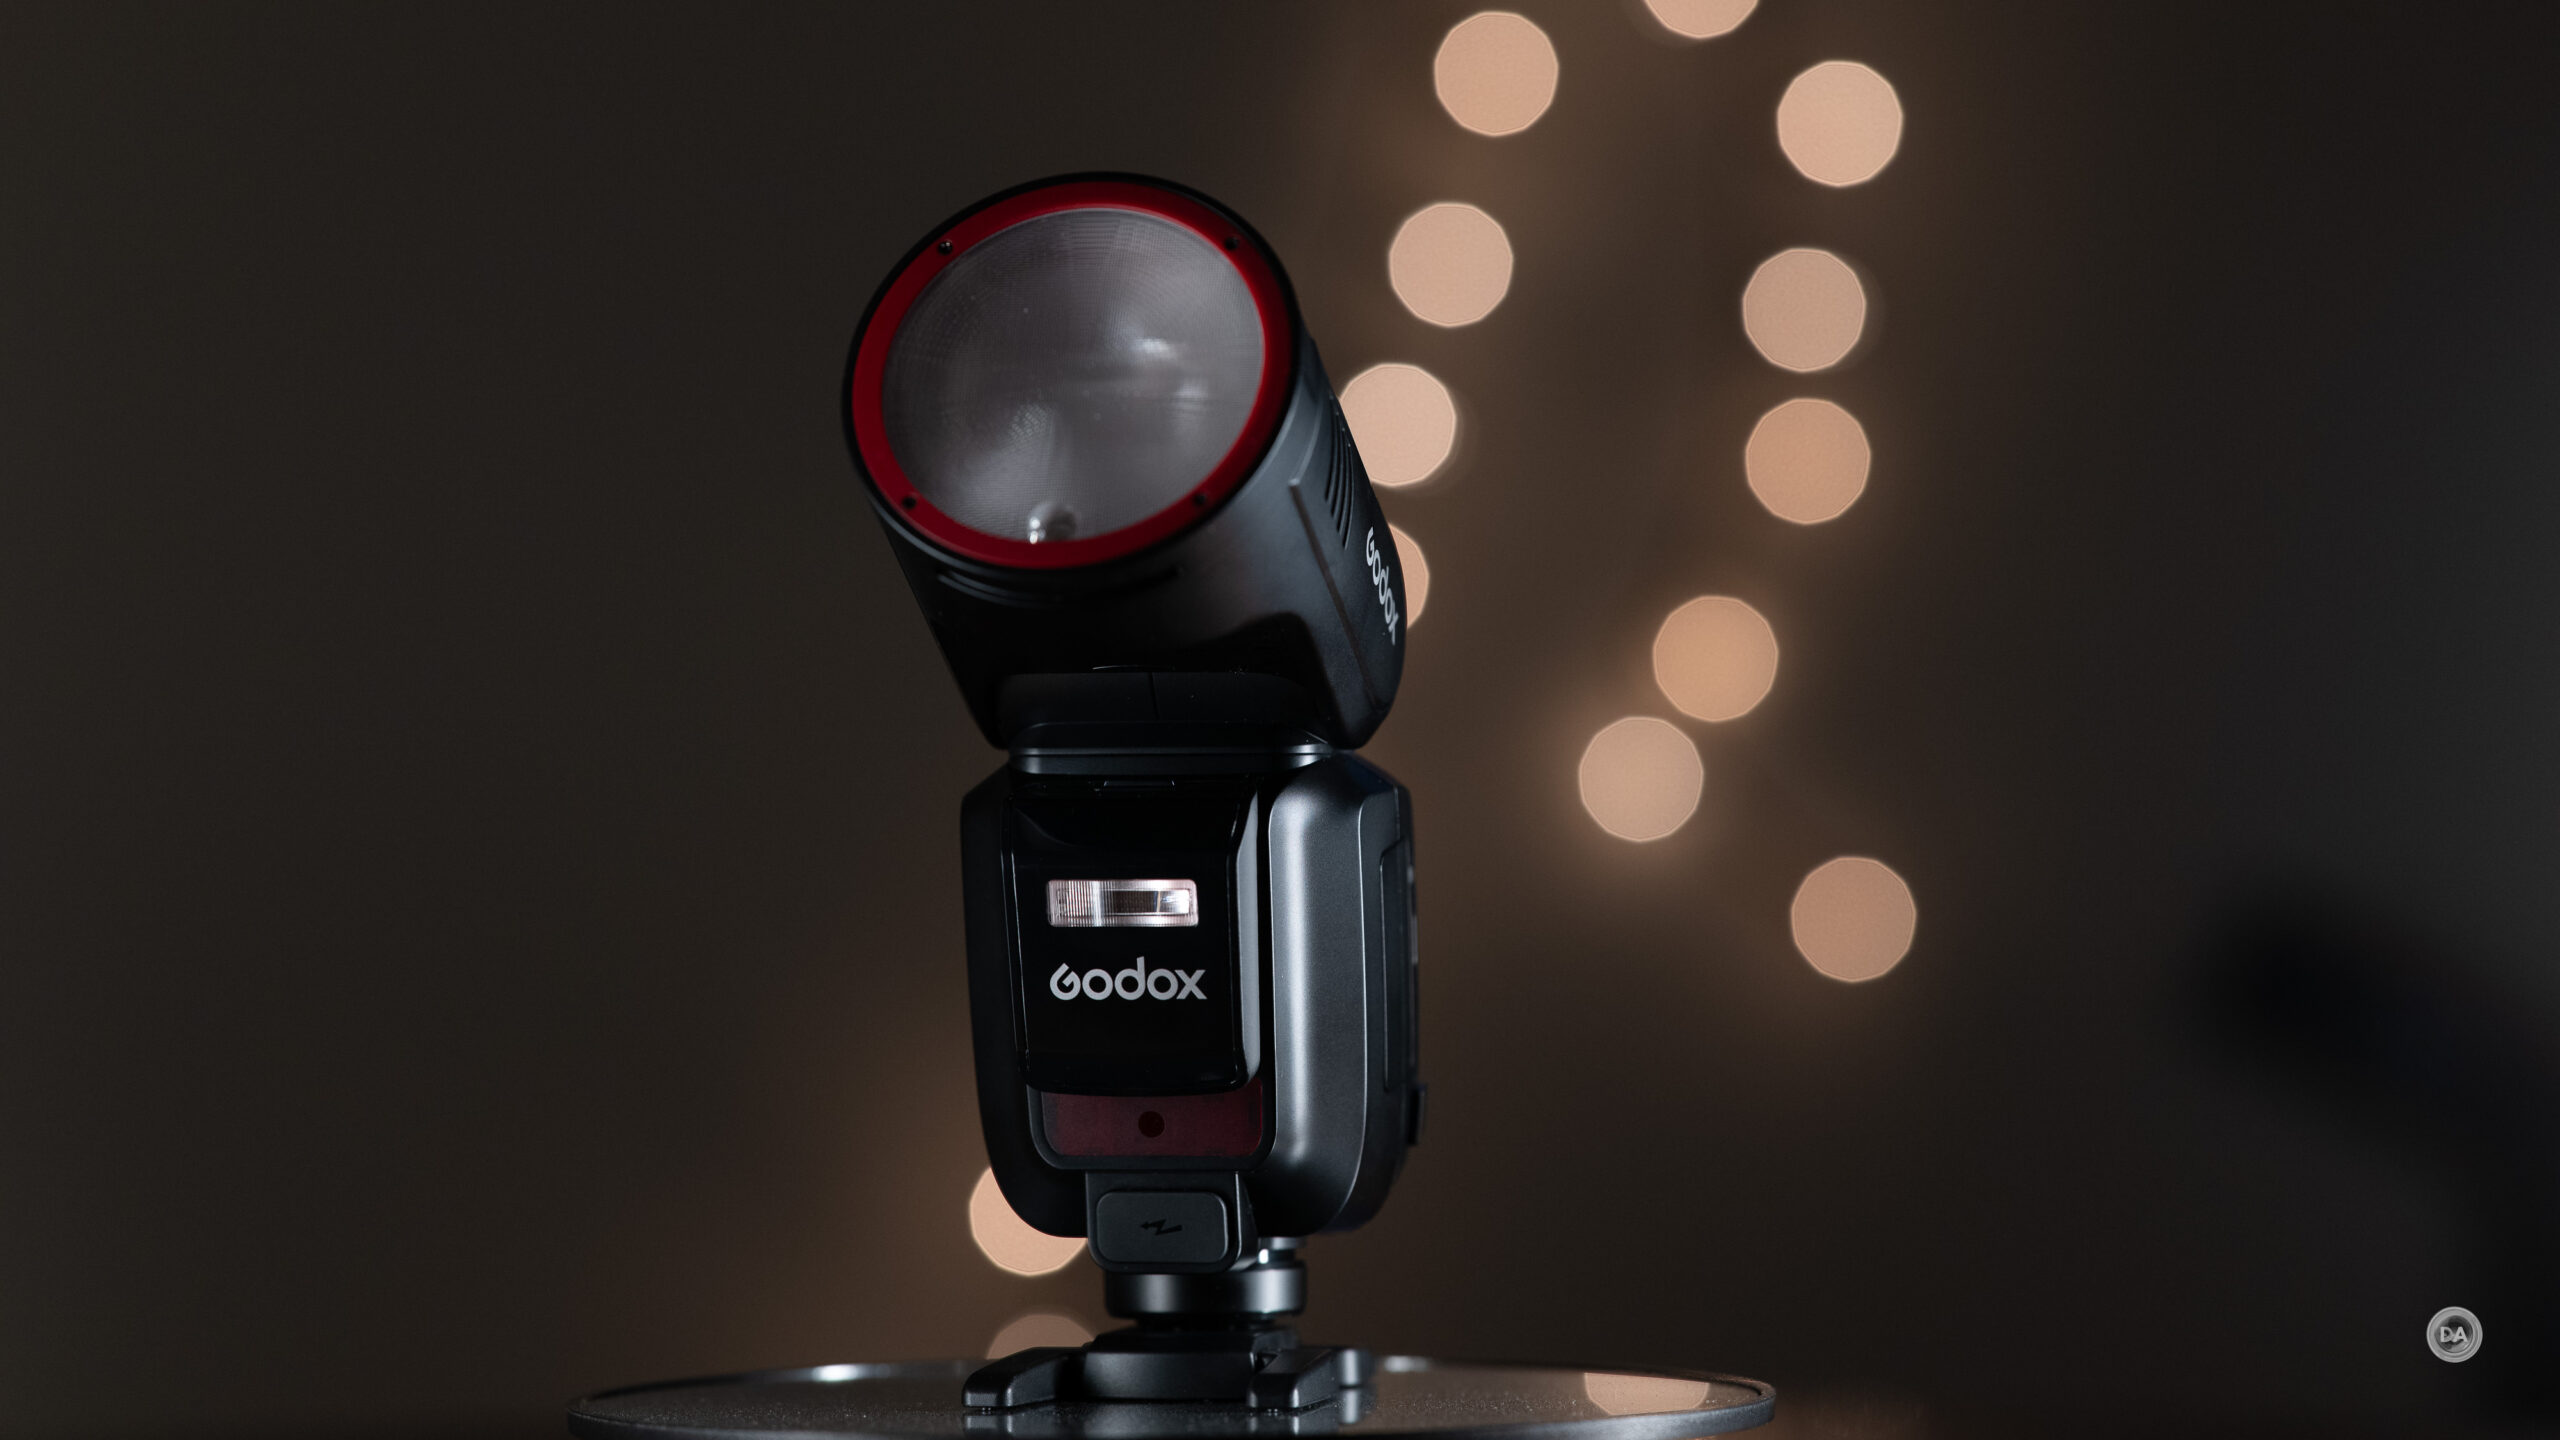
The Godox V100 is in many ways an update to their first round head flash (the V1) that they released in 2019. This is a modernized and vastly improved flash unit that thoroughly impressed me. This is one the best value premium flashes I’ve ever seen at roughly $350, and well worth your consideration. You can get my full thoughts and demonstrations in my video review, or look at a summary of my findings in this article.
Thanks to Godox for sending me a review sample. As always, this is a completely independent review. All thoughts and opinions expressed here are my own.
This is the first on camera flash unit with a power output of 100Ws, which is truly impressive. We are now getting into the territory of Godox’s off camera AD series (the AD100), and to have all of the additional controls and options here (TTL, command unit, etc…) in addition to having the receiver capabilities of the AD series makes this an amazing value.
Lets start by looking at the long list of upgrades from the V1:
Upgrades from the V1
Improved airflow for cooling (motorized)
Improved modeling light – brighter and now have kelvin control
New bare bulb head (with modeling light)
Group color indicator – better visual indications (red light)
I’ve gotten a lot of use from the V1 flashes over the years, and the V100 is a really solid upgrade. Great power output, good battery life, and ever improving TTL performance. Godox flashes work great, and the V100 seems to work better than ever, with more thoughtful features, better usability, and more power. A LOT of flash for $349, and a better option than something like the AD100 series if you need on camera flash at times or TTL for a command unit.
DISCLAIMER: This article and description contains affiliate links, which means that if you click on one of the product links, I’ll receive a small commission. As an Amazon Associate I earn from qualifying purchases.
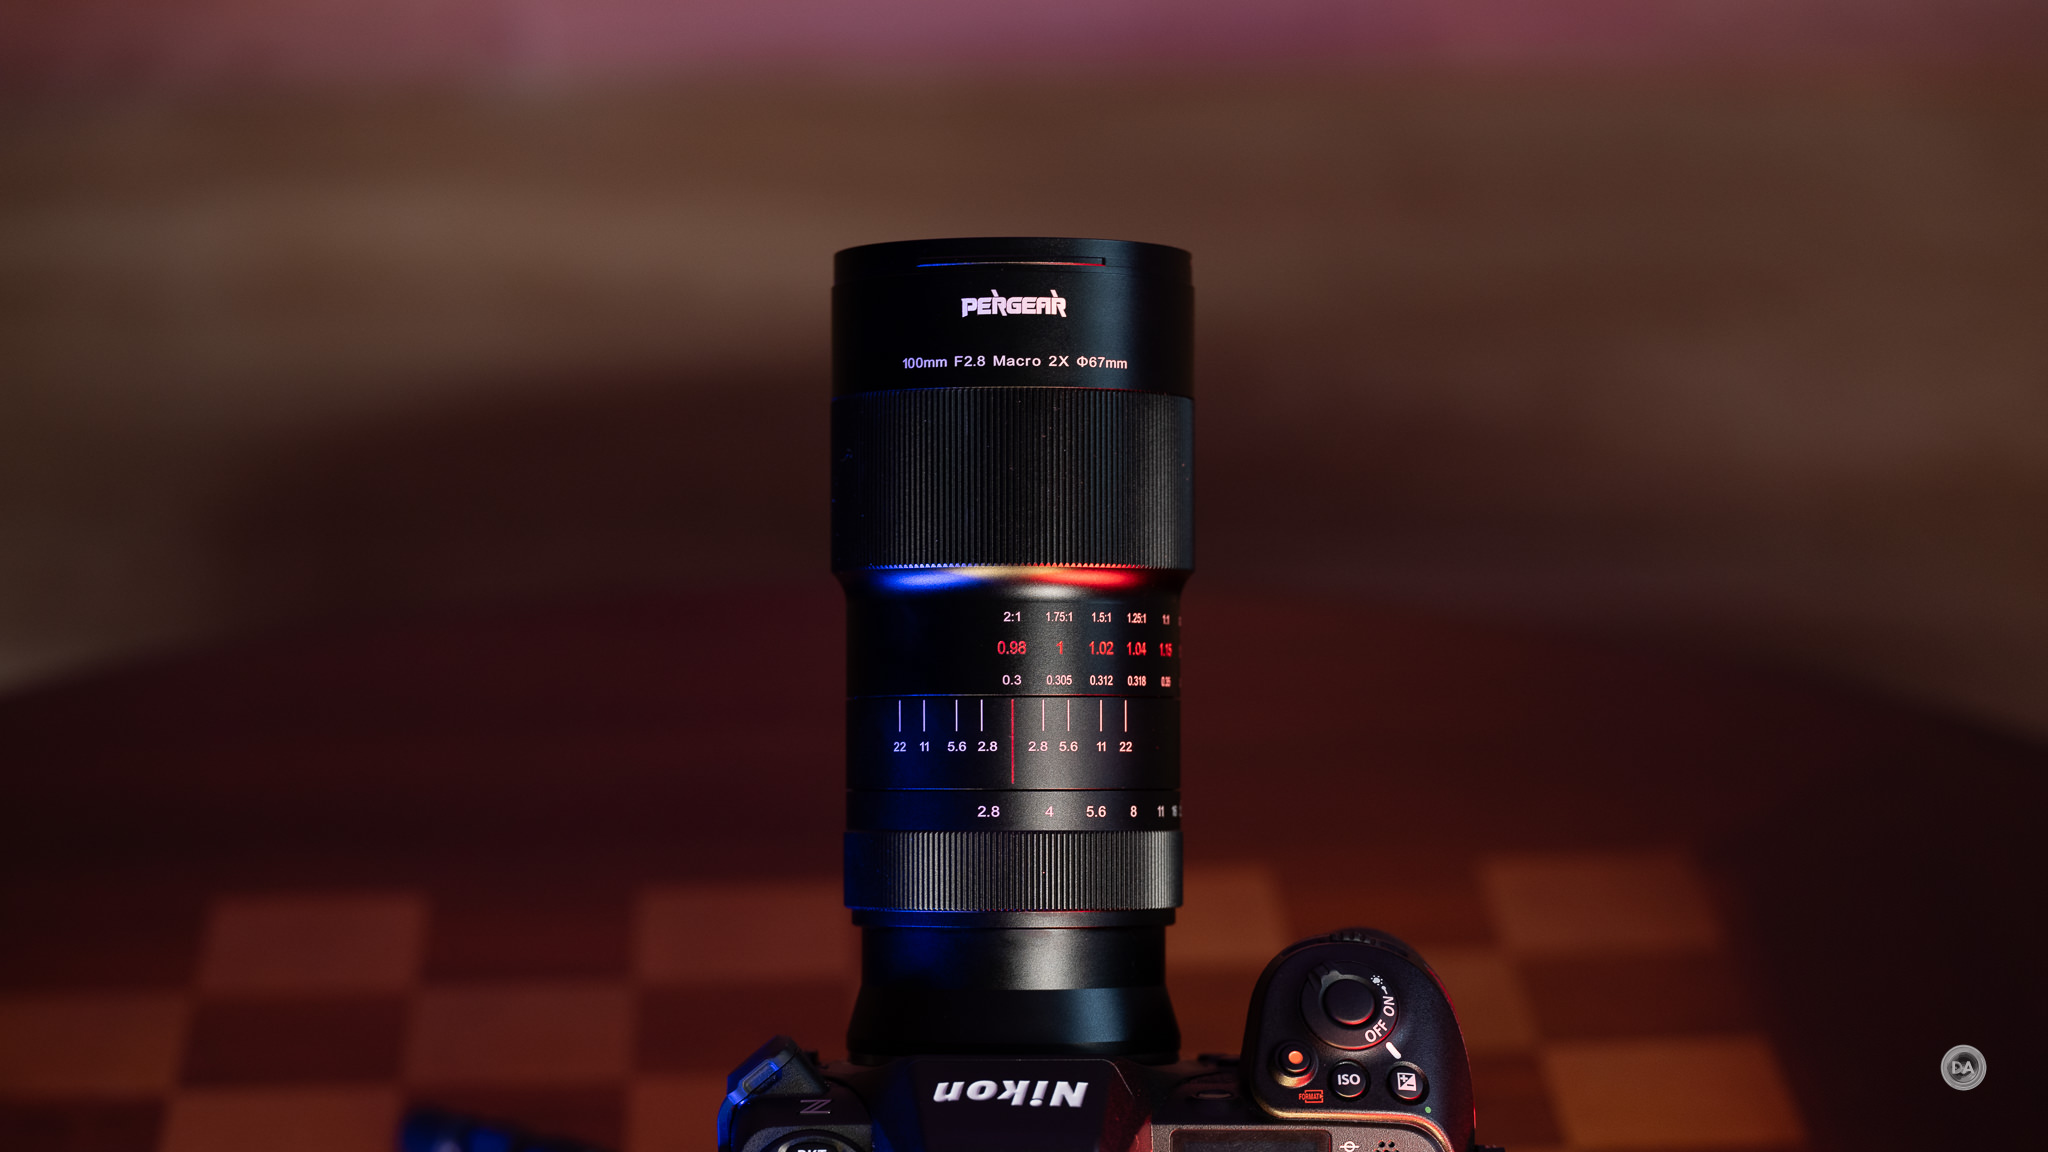
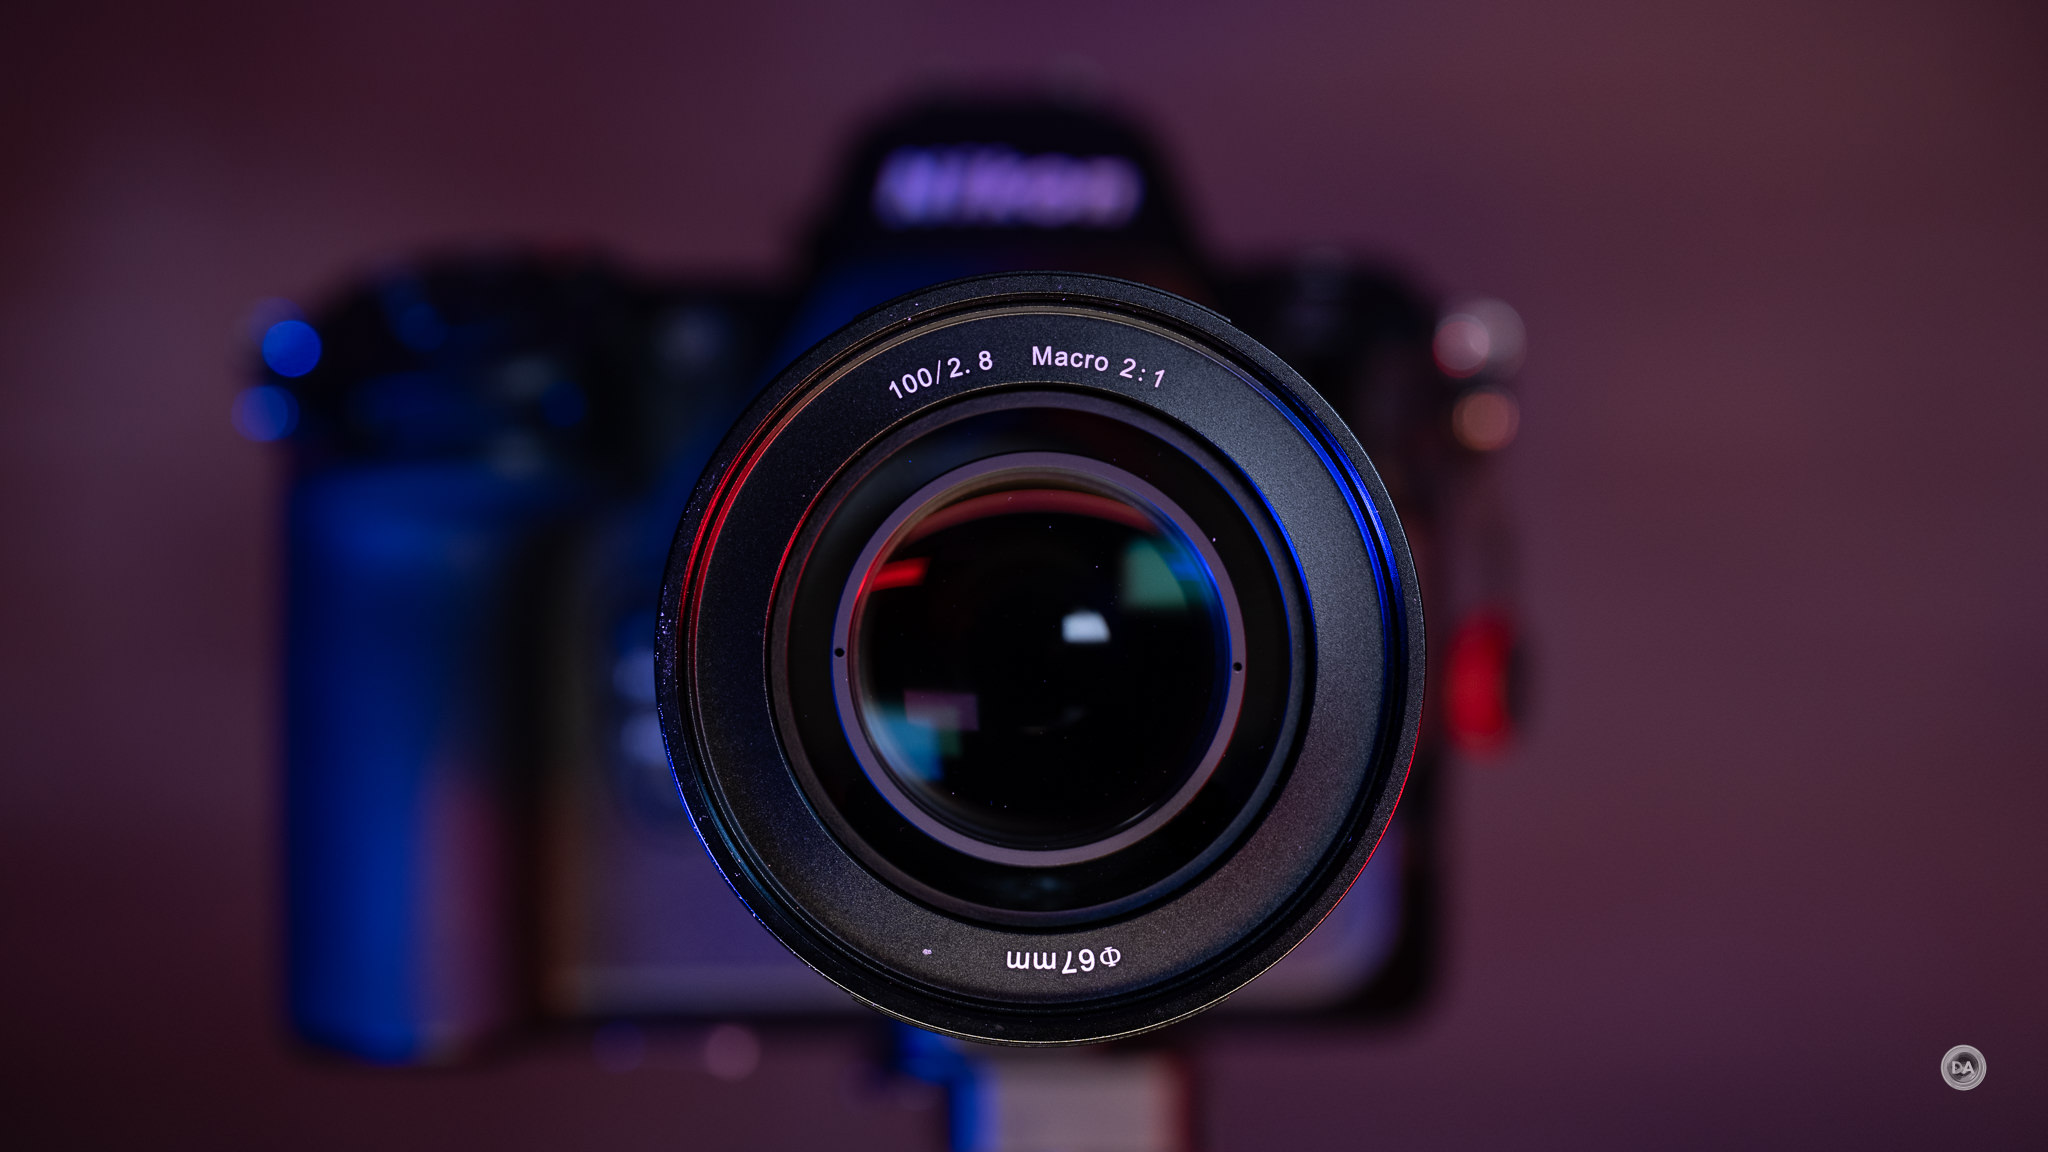
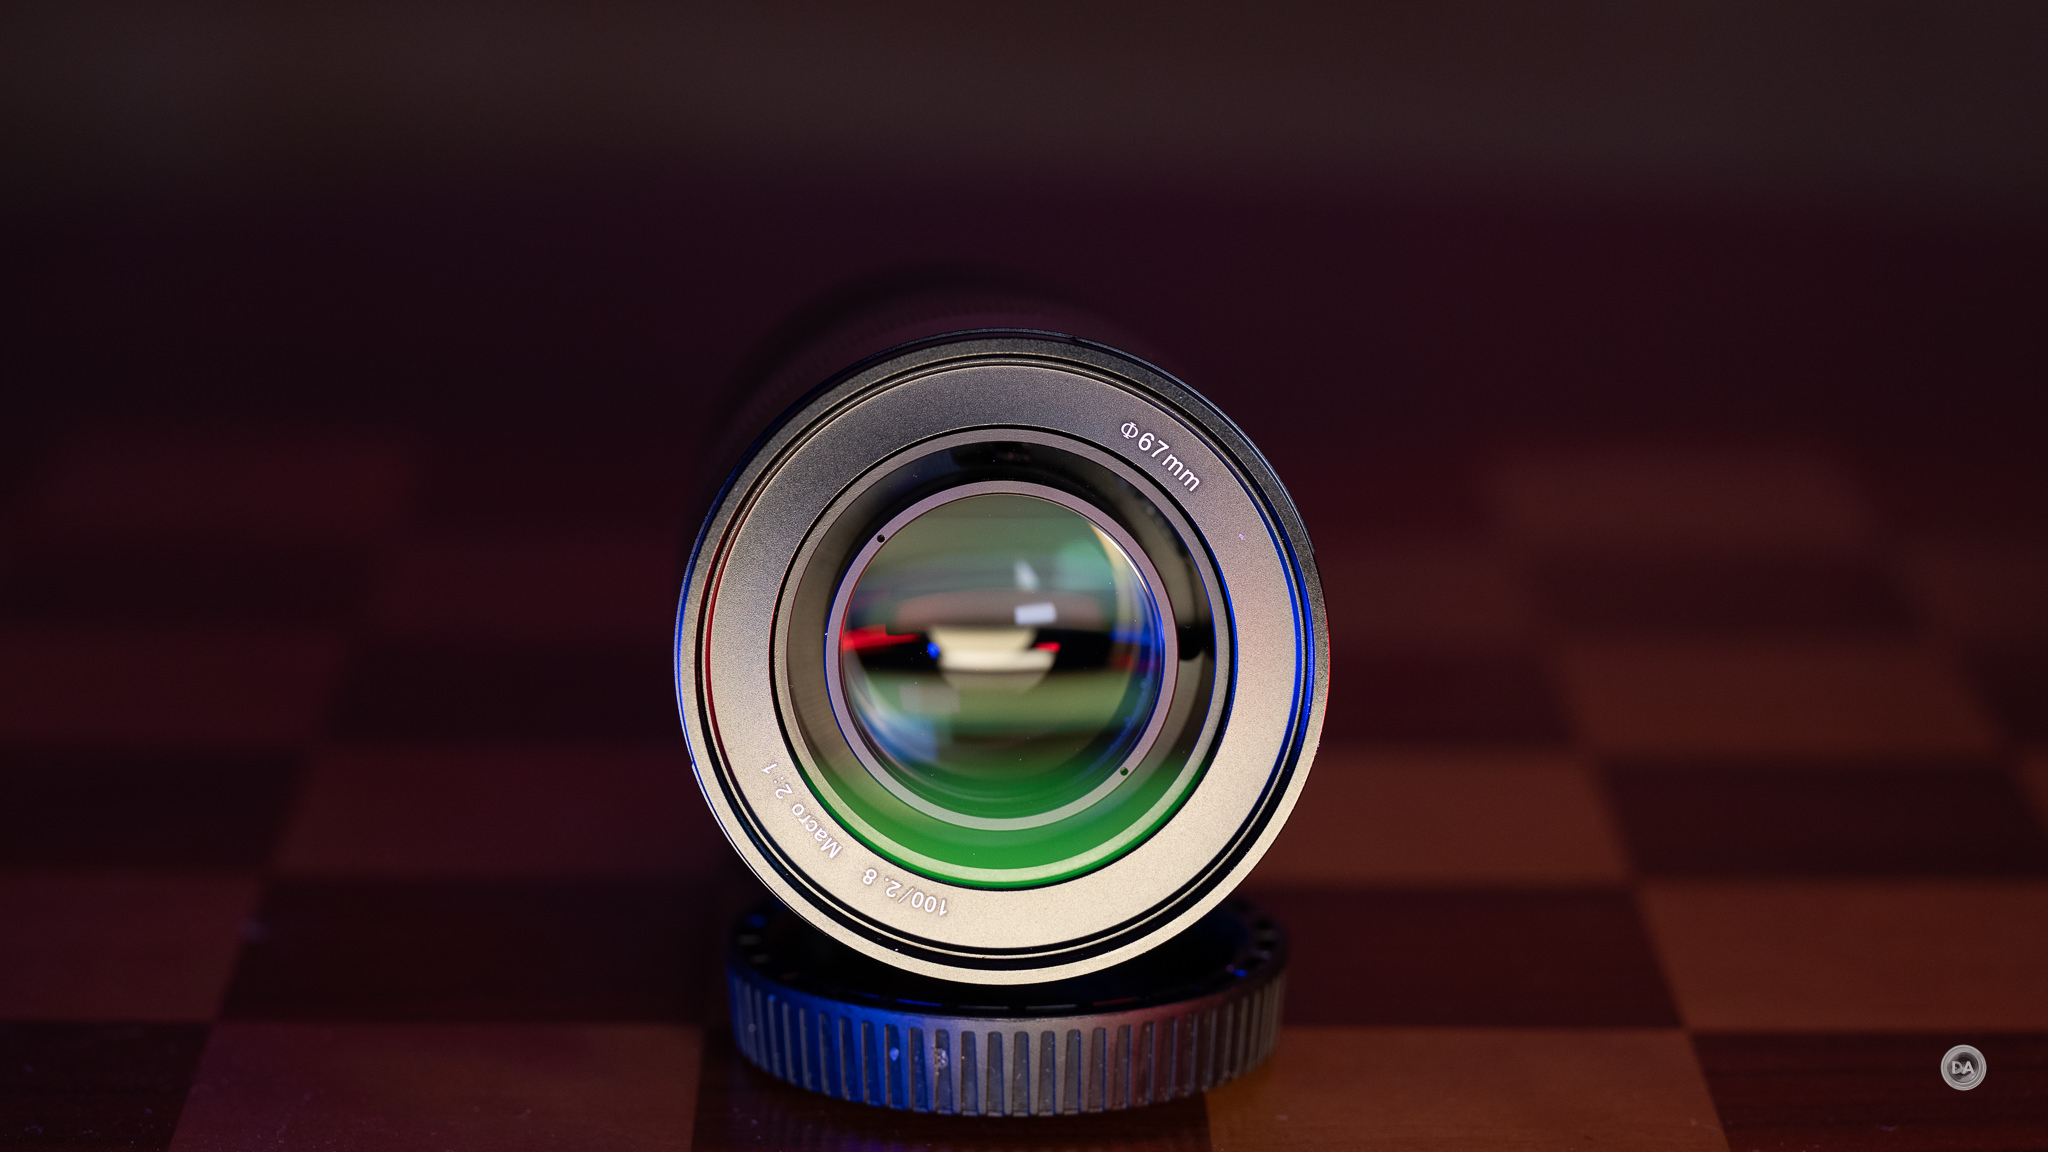
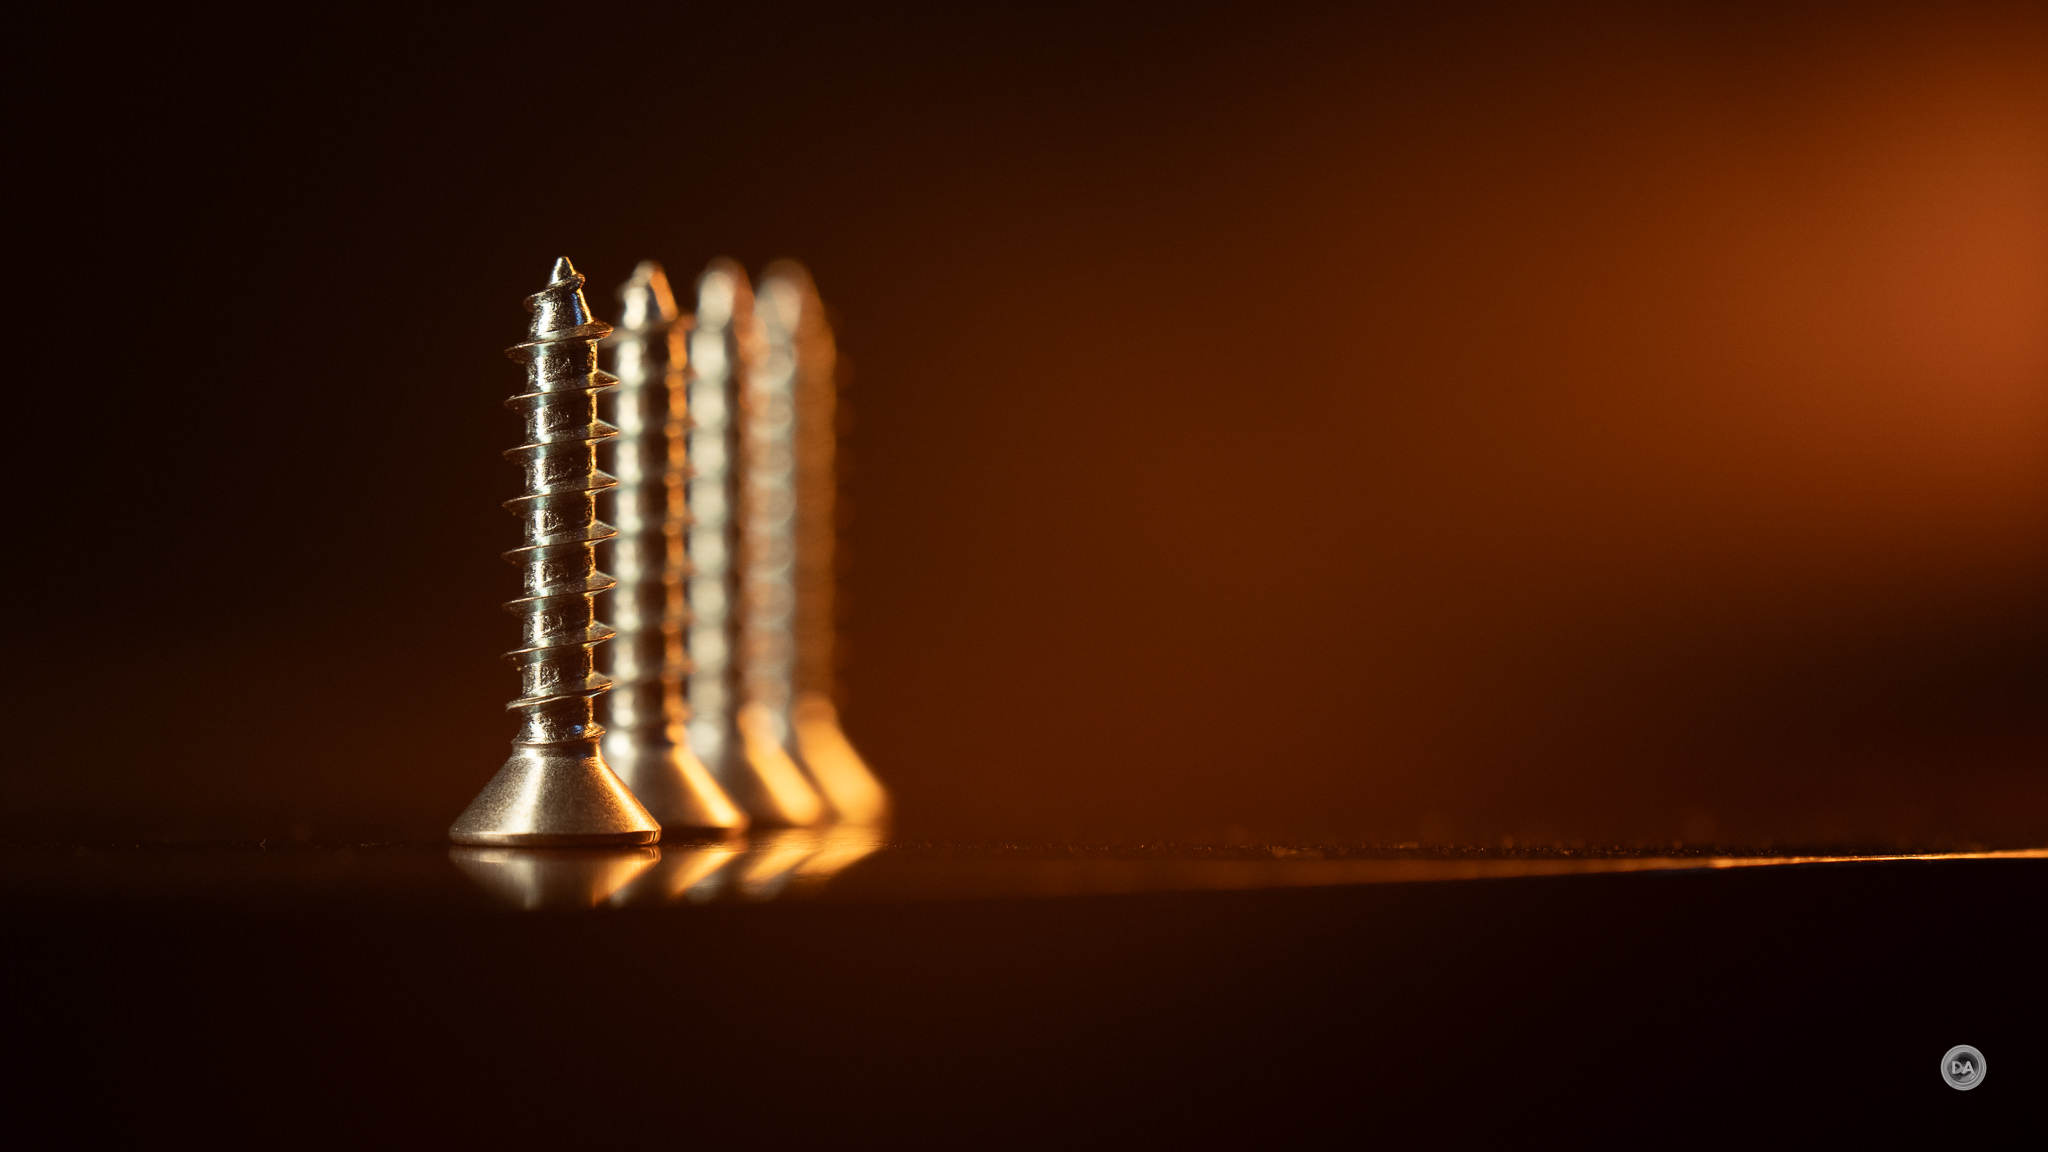
A good macro lens opens up a whole new world of photographic possibilities, but it also represents a very niche area of photography. Some people are born macro photographers; it’s their favorite type of photography. Others don’t mind dabbling in it, but aren’t so invested that they are interested in spending a thousand dollars on a lens that they will mostly use for one specific kind of photography. That’s what makes lenses like the Pergear 100mm F2.8 2x Macro interesting. They promise the ability to create those amazing macro images while not breaking the bank to do so. The Pergear 100M costs about $270, making it far more tempting to add to the casual macro photographer’s kit. But does cheap in price also mean cheap in quality? That’s what we are here to explore, which you can do in either my video review, linked below, reading the text review, or by just by enjoying the photos in the gallery below to get the “flavor” of the lens.
Thanks to Pergear for sending me a review loaner of this lens. As always, this is a completely independent review. All opinions and conclusions are my own.*The tests and most of the photos that I share as a part of my review cycle have been done with the 45MP Nikon Z8, which I reviewed here.
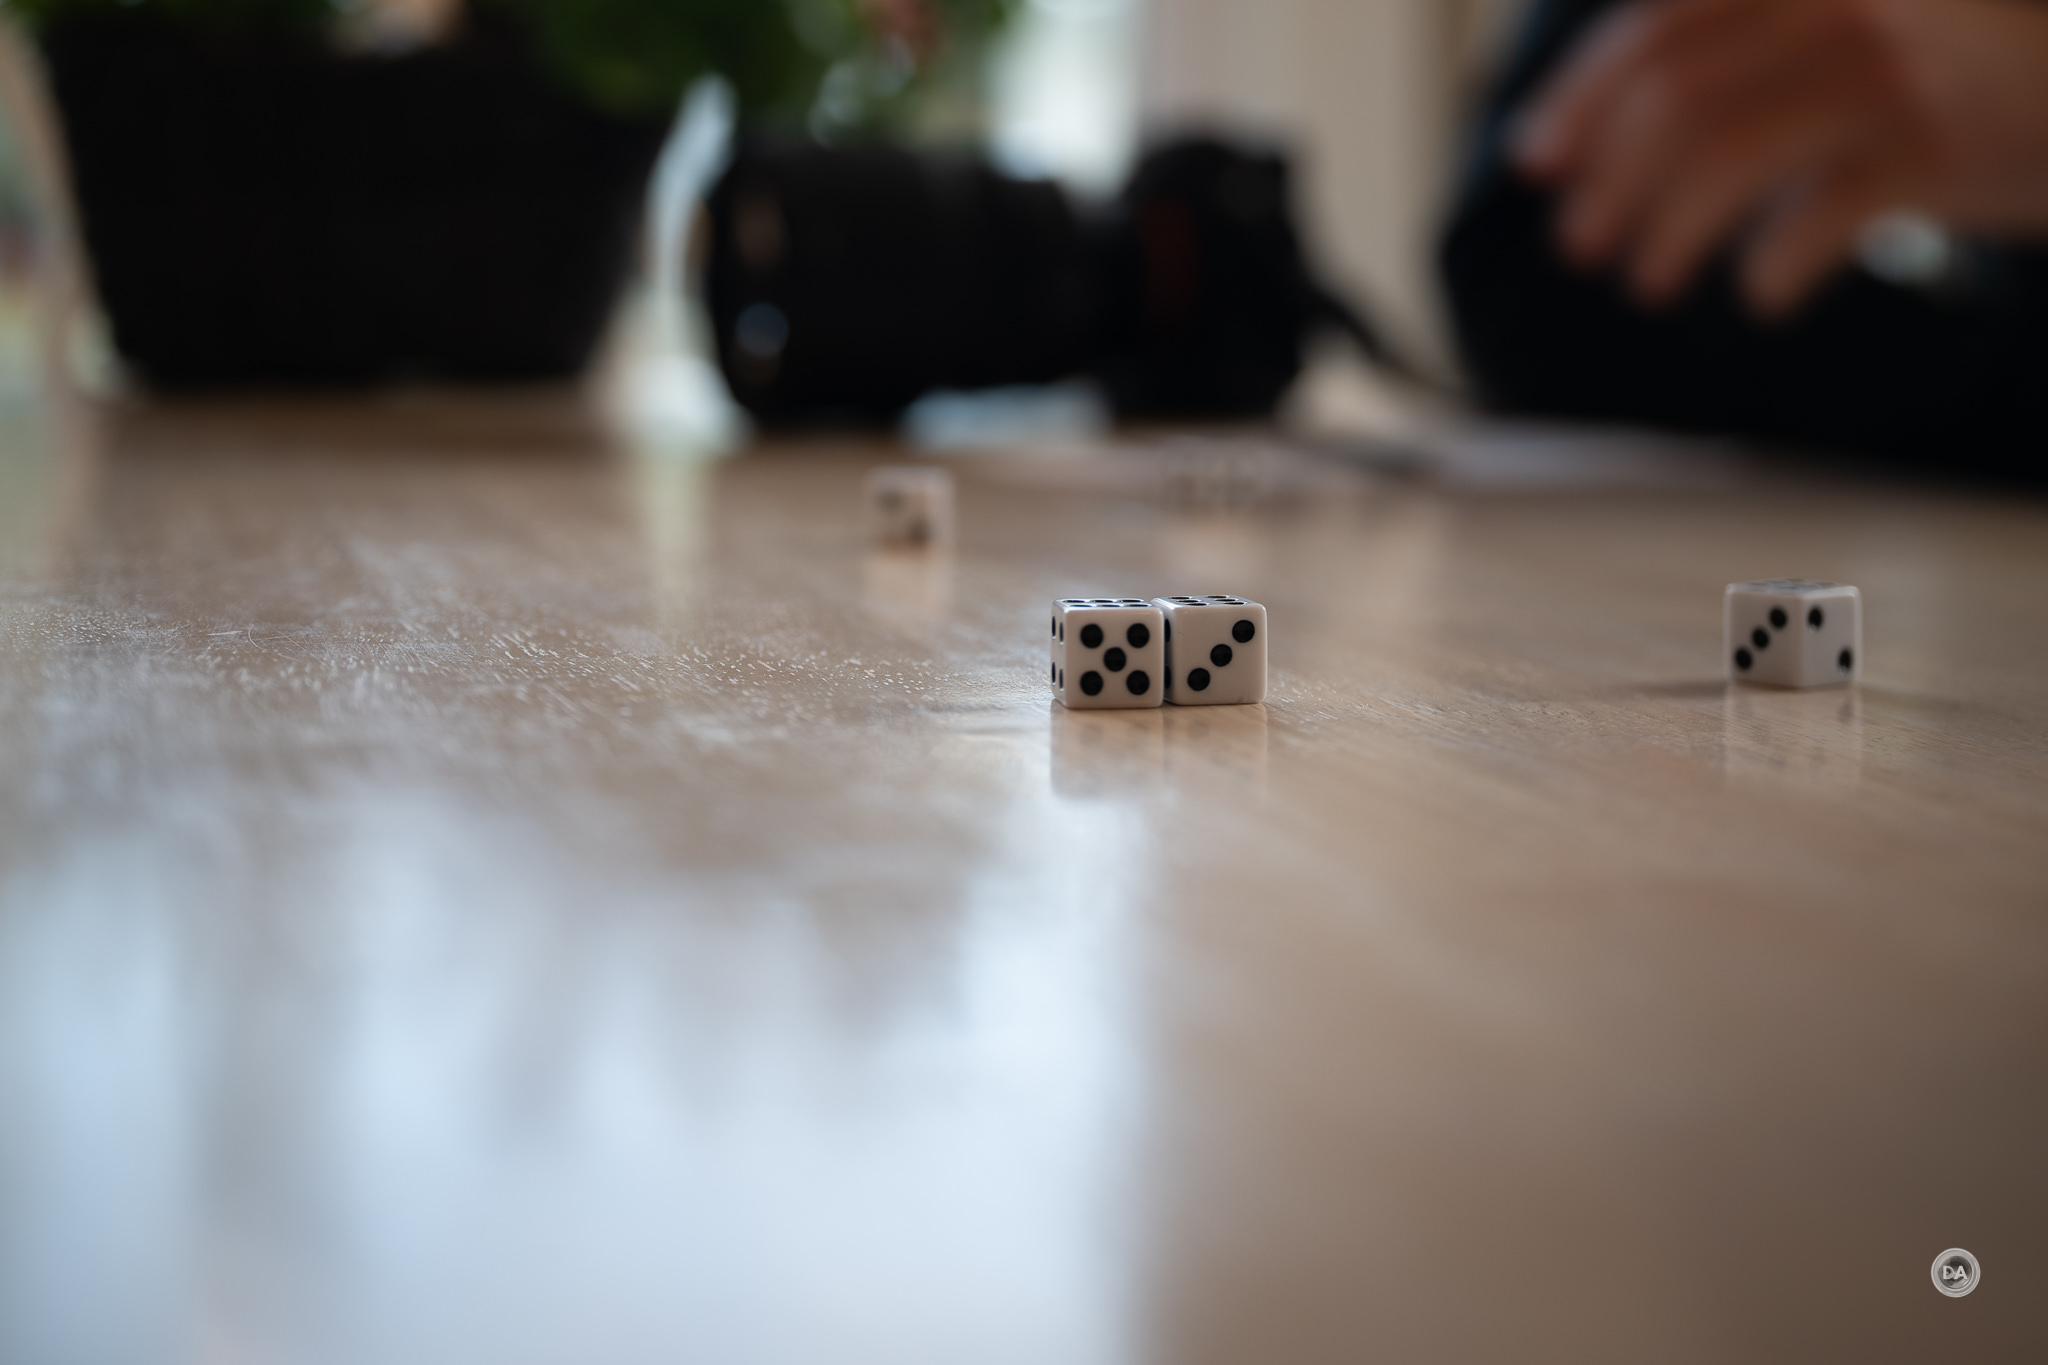
I like reviewing macro lenses in the winter, as macro photography is one of the easiest kinds of photography to do indoors. You can take ordinary household items and create extraordinary images by getting in close.
Several years ago I reviewed the Laowa APO 100mm F2.8 2X Macro, and in many ways the Pergear 100M seems like it was inspired by the lens. They both have a long slender profile (Laowa on left, Pergear on right), a similar focal length, and even a similar functional design where the focusing groups move obviously forward and backwards inside but without the external length changing.
The Laowa is more expensive but also much better optically, as we will see, but there’s a lot of physical similarities.
I like to utilize macro lenses for doing my product photography, as often there will be fine details that I want to capture than ordinary lenses won’t magnify enough. I’ve used the Pergear 100M for a number of the product photography sessions for lens reviews.
There’s some debate about which focal length is best for a macro lens, but suffice it to say that the 90-105mm range is probably the most popular, landing the Pergear 100M right in the sweet spot for macro photography.
DISCLAIMER: This article and description contains affiliate links, which means that if you click on one of the product links, I’ll receive a small commission. As an Amazon Associate I earn from qualifying purchases.
A good macro lens opens up a whole new world of photographic possibilities, but it also represents a very niche area of photography. Some people are born macro photographers; it’s their favorite type of photography. Others don’t mind dabbling in it, but aren’t so invested that they are interested in spending a thousand dollars on a lens that they will mostly use for one specific kind of photography. That’s what makes lenses like the Pergear 100mm F2.8 2x Macro interesting. They promise the ability to create those amazing macro images while not breaking the bank to do so. The Pergear 100M costs about $270, making it far more tempting to add to the casual macro photographer’s kit. But does cheap in price also mean cheap in quality? That’s what we are here to explore (which you can do in either my video review, linked below, or by reading on in this text review.)
Thanks to Pergear for sending me a review loaner of this lens. As always, this is a completely independent review. All opinions and conclusions are my own.*The tests and most of the photos that I share as a part of my review cycle have been done with the 45MP Nikon Z8, which I reviewed here.
I like reviewing macro lenses in the winter, as macro photography is one of the easiest kinds of photography to do indoors. You can take ordinary household items and create extraordinary images by getting in close.
Several years ago I reviewed the Laowa APO 100mm F2.8 2X Macro, and in many ways the Pergear 100M seems like it was inspired by the lens. They both have a long slender profile (Laowa on left, Pergear on right), a similar focal length, and even a similar functional design where the focusing groups move obviously forward and backwards inside but without the external length changing.
The Laowa is more expensive but also much better optically, as we will see, but there’s a lot of physical similarities.
I like to utilize macro lenses for doing my product photography, as often there will be fine details that I want to capture than ordinary lenses won’t magnify enough. I’ve used the Pergear 100M for a number of the product photography sessions for lens reviews.
There’s some debate about which focal length is best for a macro lens, but suffice it to say that the 90-105mm range is probably the most popular, landing the Pergear 100M right in the sweet spot for macro photography. Let’s dive deeper.
Build and Handling
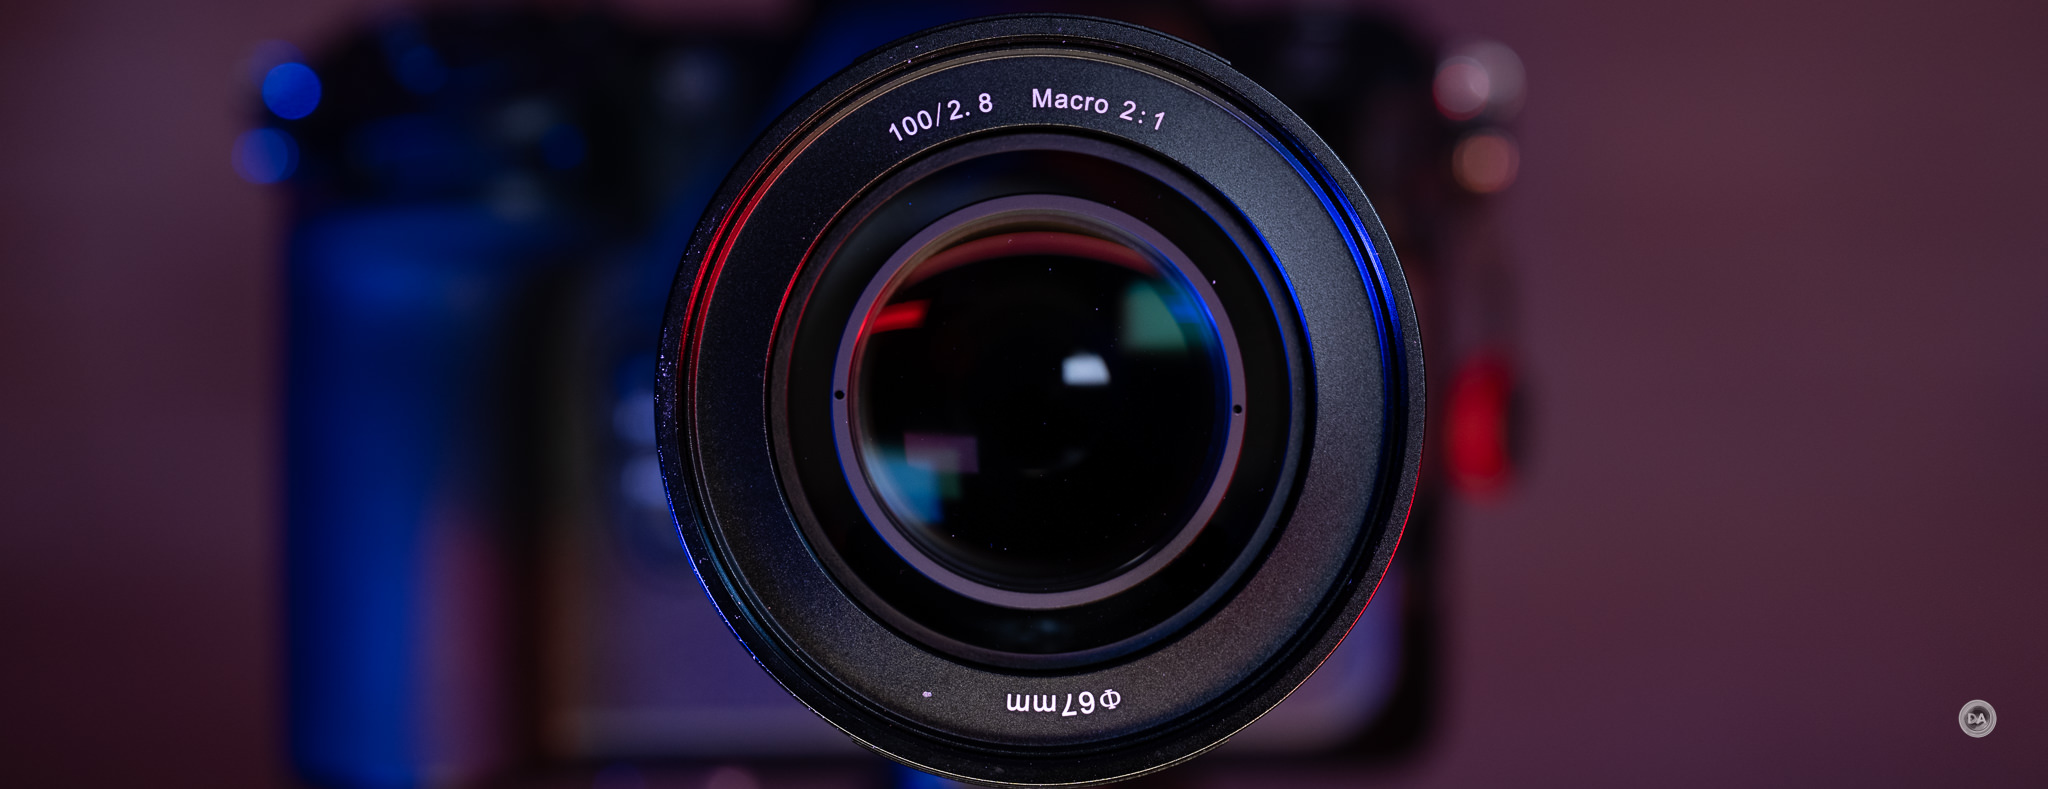
The Pergear 100M is a manual only lens. There is no autofocus, no electronic contacts, and both focus and aperture will need to be manually controlled. The upside for a macro lens is that many macro photographers prefer manual focus for macro anyway, and it also means that it is pretty simple for Pergear to offer the lens in a variety of lens mounts. I’m reviewing on Nikon Z mount, but it is also available for Sony E, Canon RF, Leica L, Canon EF(don’t often see that anymore!), and Fuji X (an APS-C only system, so the lens will have an effective focal length of 150mm there). The lens can also be used on the APS-C/DX versions of these mounts, where the effective focal length will be magnified by the crop factor of that camera.
As noted, this is a very long and slender lens. It is just 71mm (2.79″) in diameter, but a whopping 157.8mm (6.2″) in length. It weighs in at a fairly hefty 814g (28.7oz) on my scale.
The front filter threads are a common 67mm.
One design element I do prefer about the Pergear over the Laowa is that the Laowa experimented with having an included filter become the front element. I didn’t like this design, and they went away from it with the subject 90mm APO F2.8 2x Macro that came out the next year. The Pergear uses a traditional glass element there instead, and the focusing group of elements moves back and forth behind that front element. When at macro distances the focusing elements come right up to that front element, as seen here:
When you focus to infinity, that focusing group will retract quite deeply into the lens barrel, as you can see here.
There is no lens hood included, and while adding one would obviously expand the length of the lens, the lens is a bit flare prone, and a hood could prove useful.
The build quality actually feels quite nice. It’s a hefty lens, but that’s in large part because everything is made of metal and glass, with a nice anodized satin finish to the barrel and with markings nicely etched into it.
This is a fully manual lens, so no electronics. Both focus and aperture control will be manual via the rings. The aperture ring comes first, and while it is marked at the traditional full stops, the mechanism is clickless, allowing you to move smoothly through the whole aperture range. This can be useful for focus racks during video capture, though I find the weight of both rings definitely on the heavy side, which would make racking a little more difficult.
Between the aperture and focus rings are hyperfocal scales.
The aperture iris itself has a high blade count of 13 blades, which allows it to remain circular even when the lens is stopped down.
The manual focus ring is nicely wide and ribbed in metal, but I have a few complaints here. First of all is the weight of the focus action, which is unnecessarily heavy. I had a similar observation about the first Zeiss 100mm Makro-Planar that I reviewed, but unlike that lens, this is an internally focusing lens and so that extra weight just feels unnecessary.
My second complaint is about the focus throw, or available rotation. There is about 130° of focus travel, which isn’t bad, but only about 15° of rotation is available to cover the whole distance from 1 meter (3 feet) to infinity. This makes focus in that range extremely difficult, as even the slightest movement causes focus to be completely off. It’s unfortunate, as you really need that precision when using a manual focus lens.
There are no switches or dials on the barrel of the lens; the only features are the two rings.
Minimum focus distance is 30cm, and you can achieve an extremely high 2:1 (2.0x) magnification at that distance. You’ll have about 12cm of distance between the front of the lens and the subject at that level of magnification.
I wish the manual focus ring were a little better executed, but overall this feels like a nicely made lens for the money.
Manual Focus on Nikon
Manual focus is an overall positive experience on my Nikon Z8. Here’s a few reasons why:
Clear, useful EVF. On paper, the EVF of the Z8 is nothing special, but, in practice, it works very well. I’ve got much higher resolution viewfinders on Sony cameras, but Sony viewfinders do some weird things when the shutter is half depressed. And I typically want the shutter half depressed when manually focusing, as this helps stabilize the viewfinder while I focus. Nikon’s viewfinder is clear and makes it easy to see focus moving as I turn the manual focus ring.
Effective IBIS (VR). I’ve been impressed with the real world stability of Nikon’s in camera VR. It works effectively and allows for both a stable viewfinder experience as a I focus and also stable results when I take the shot. To my knowledge, no manual focus lens to this point has included lens-based image stabilization, so having effective in-camera stabilization is very important.
Useful manual focus aids. There are three primary manual focus aids that I’ve utilized when manually focusing, including the onscreen focus confirmation box (put it where you want focus to be, and it will turn green when proper focus has been achieved), magnification of the image to visually confirm focus, and focus overlays (peaking). With some lenses Nikon includes a directional arrow that points you the direction you need to turn the focus ring to focus in the right direction, but that isn’t always the case. I’ve found that the focus box is quite accurate, though, and it makes manual focus fairly easy.
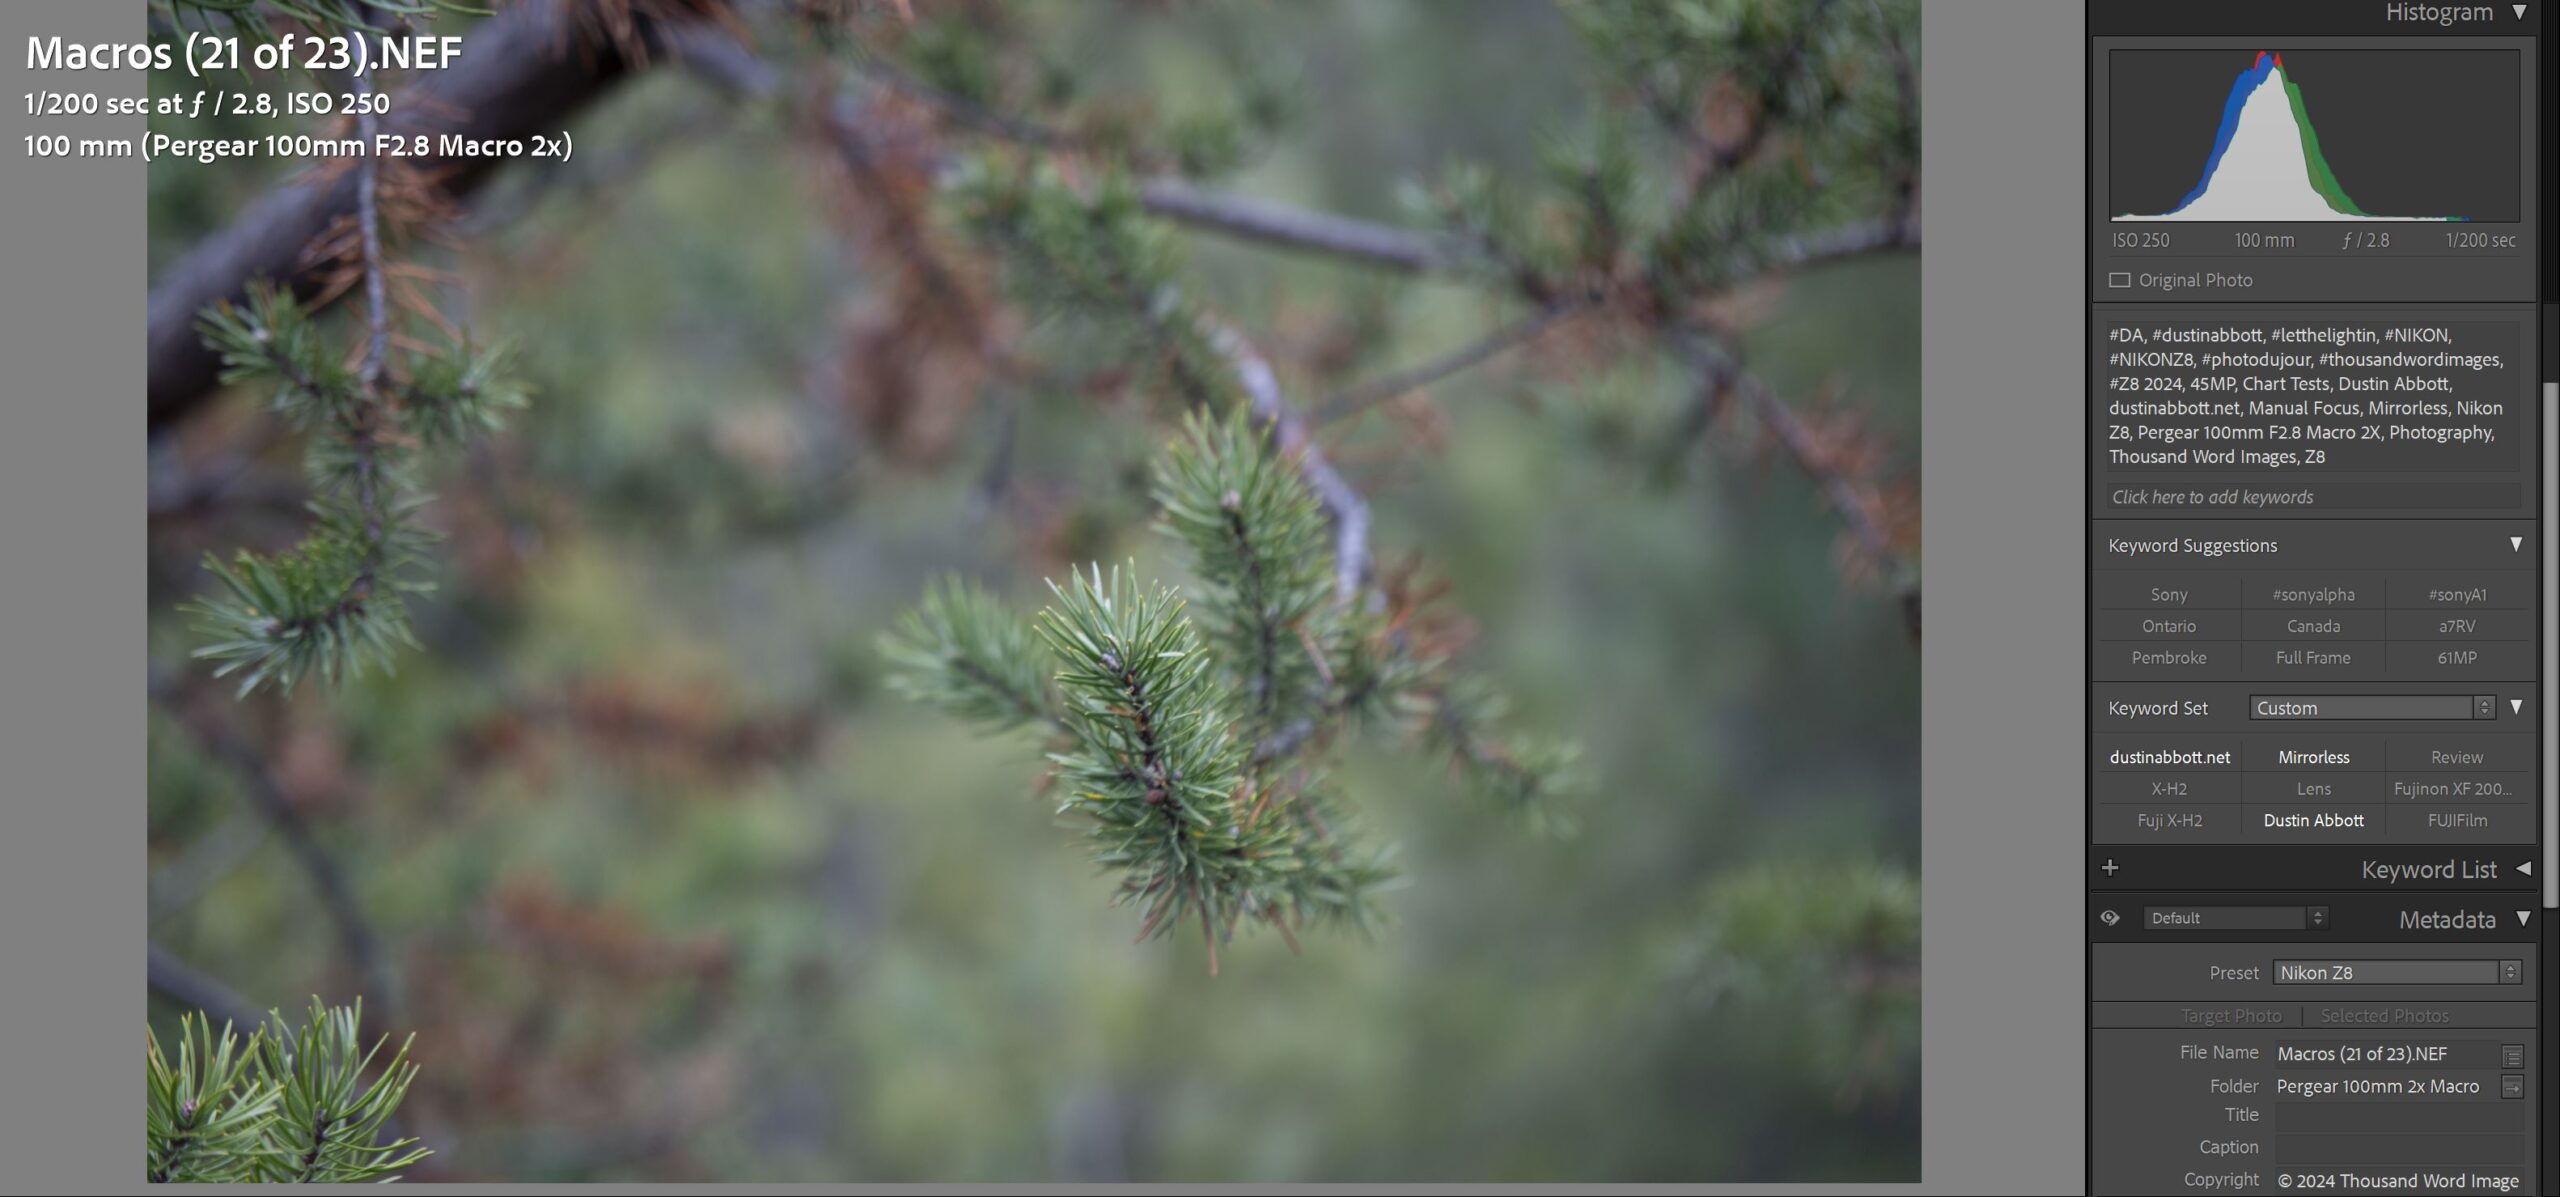
The Pergear 100M is a purely manual lens, with no electronics, and that subtly changes the calculus, however. On the positive side, Nikon is unique among the brands I test in allowing one to manually create some proper metadata for a lens. You can manually input the lens name, focal length, and maximum aperture. This not only helps with VR (the camera knows the proper focal length), but also helps images to be sorted properly in your editing software because that name transfers in the EXIF data. Note the information given to my image in Lightroom:
The good news there is that I can search for images with that name designation rather than them all falling under the “unknown” category. I can even sort them by the proper focal length. What won’t always be properly reported, however, is the aperture. It will always be F2.8, which means that sometimes that will be right and in other cases very wrong.
On the negative side of the equation, the lack of electronic means that A) you will get no automatic magnification of the focus area when you start to manually focus and B) Nikon’s innovative focus guide won’t work. I don’t love Nikon’s manual zoom function, so I don’t love the manual focus process quite as much here. That isn’t helped by a not having enough rotation for easy focus beyond the macro range.
Image Quality Breakdown
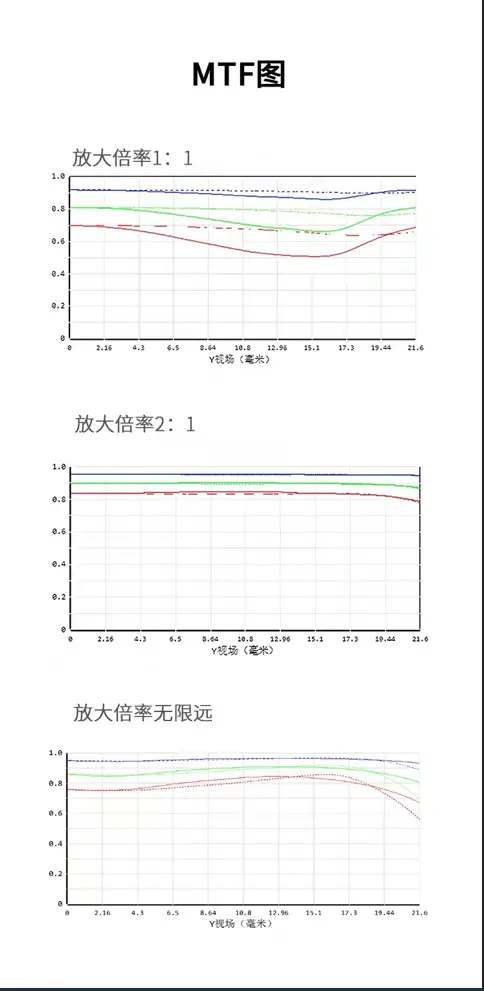
The Pergear 100mm F2.8 2x Macro has an optical design of 14 elements in 9 groups, though I was unable to source whether or not any of those elements are of the exotic variety. The MTF chart shows a performance that varies somewhat according to the focus distance. Peak performance seems to come at the 2:1 level.
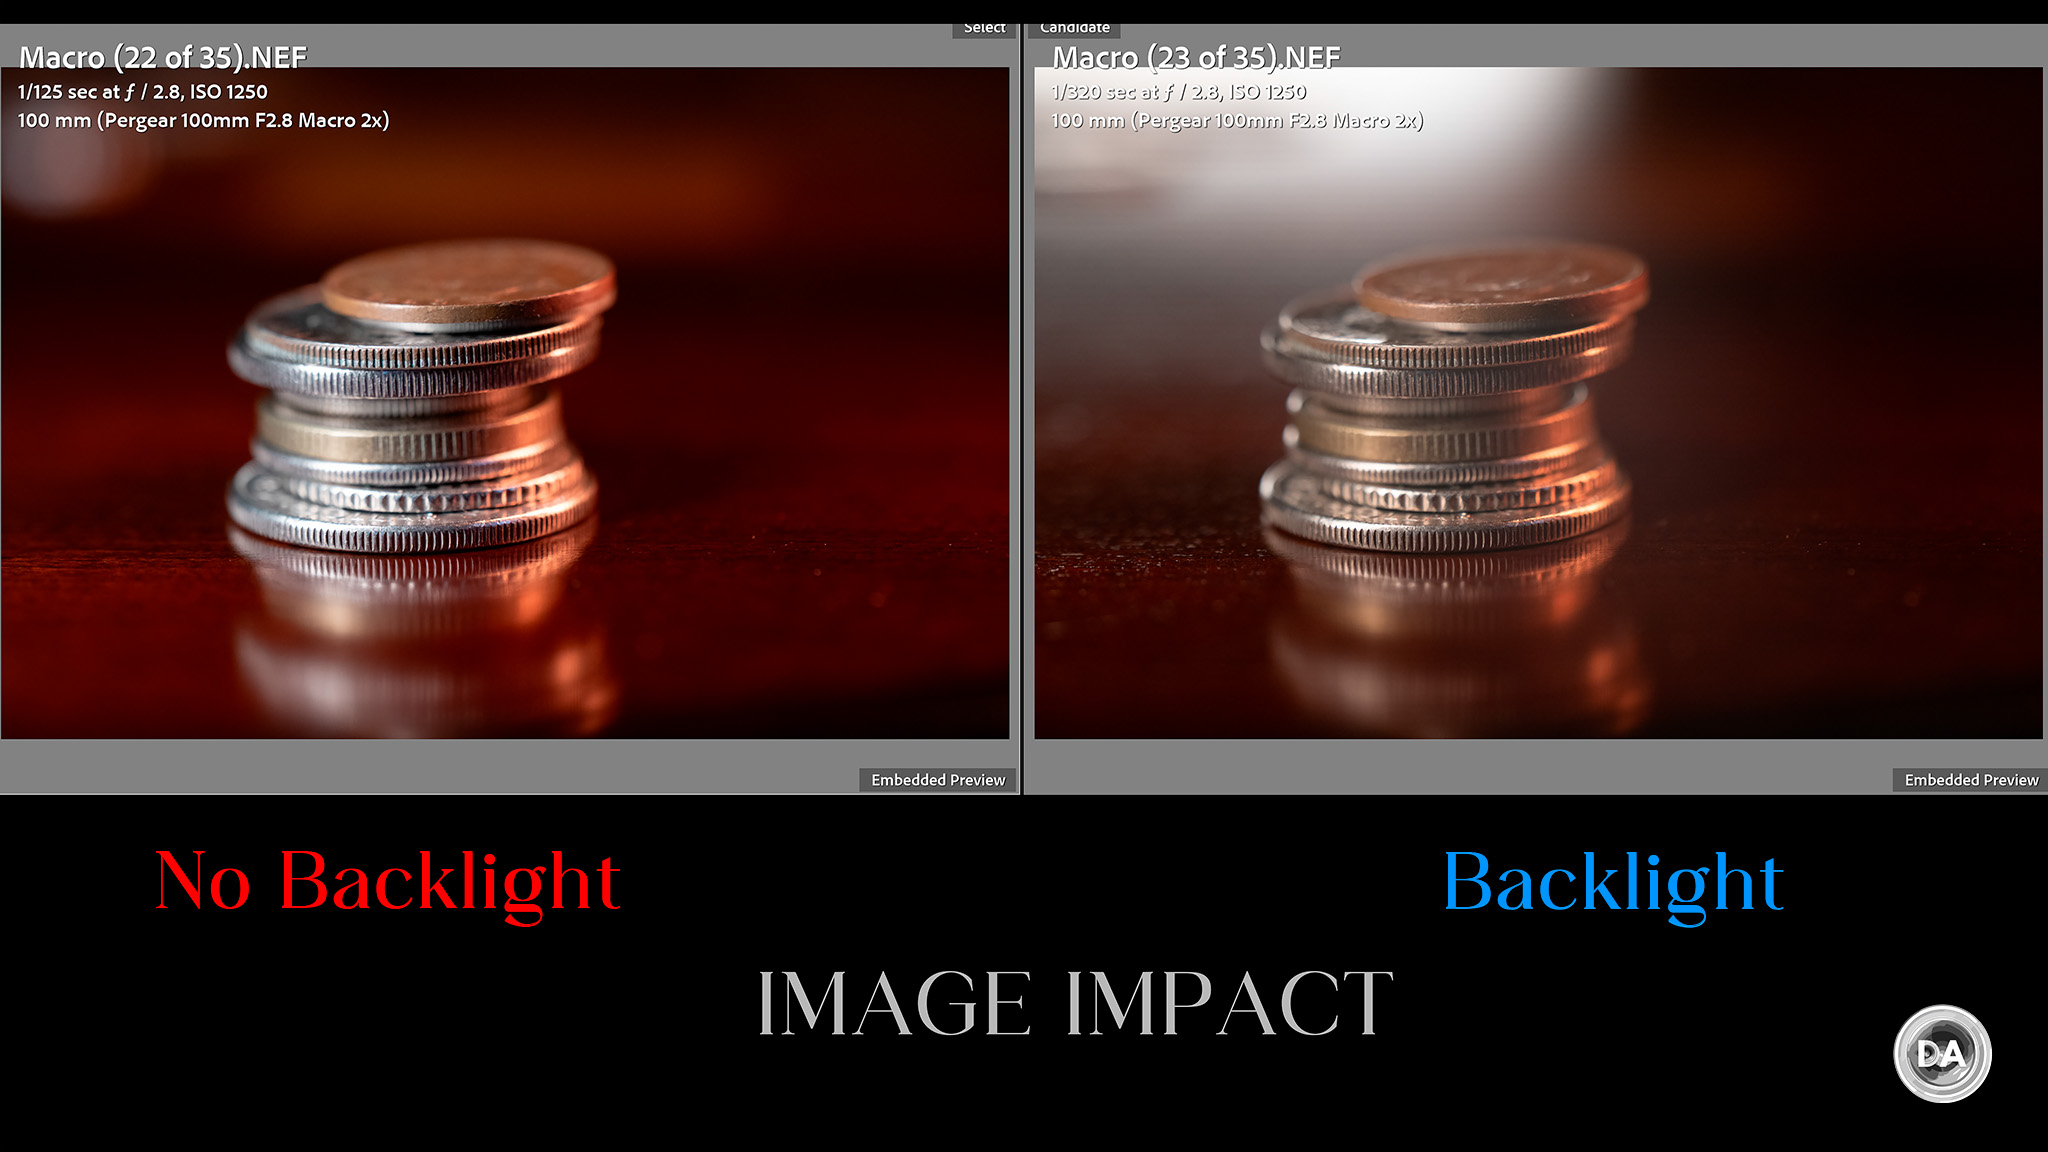
It is possible to get great looking macro shots with the Pergear 100M, but there are a few negative factors that can influence those results. The most obvious of those is flare related issues. The contrast of the Pergear 100M is easily impacted by backlighting. In the comparison below, I show a scene that is light from both sides, but in the first example there is no backlighting source, while in the second shot I add a backlight. You can see just how much the contrast is reduced in the second example.
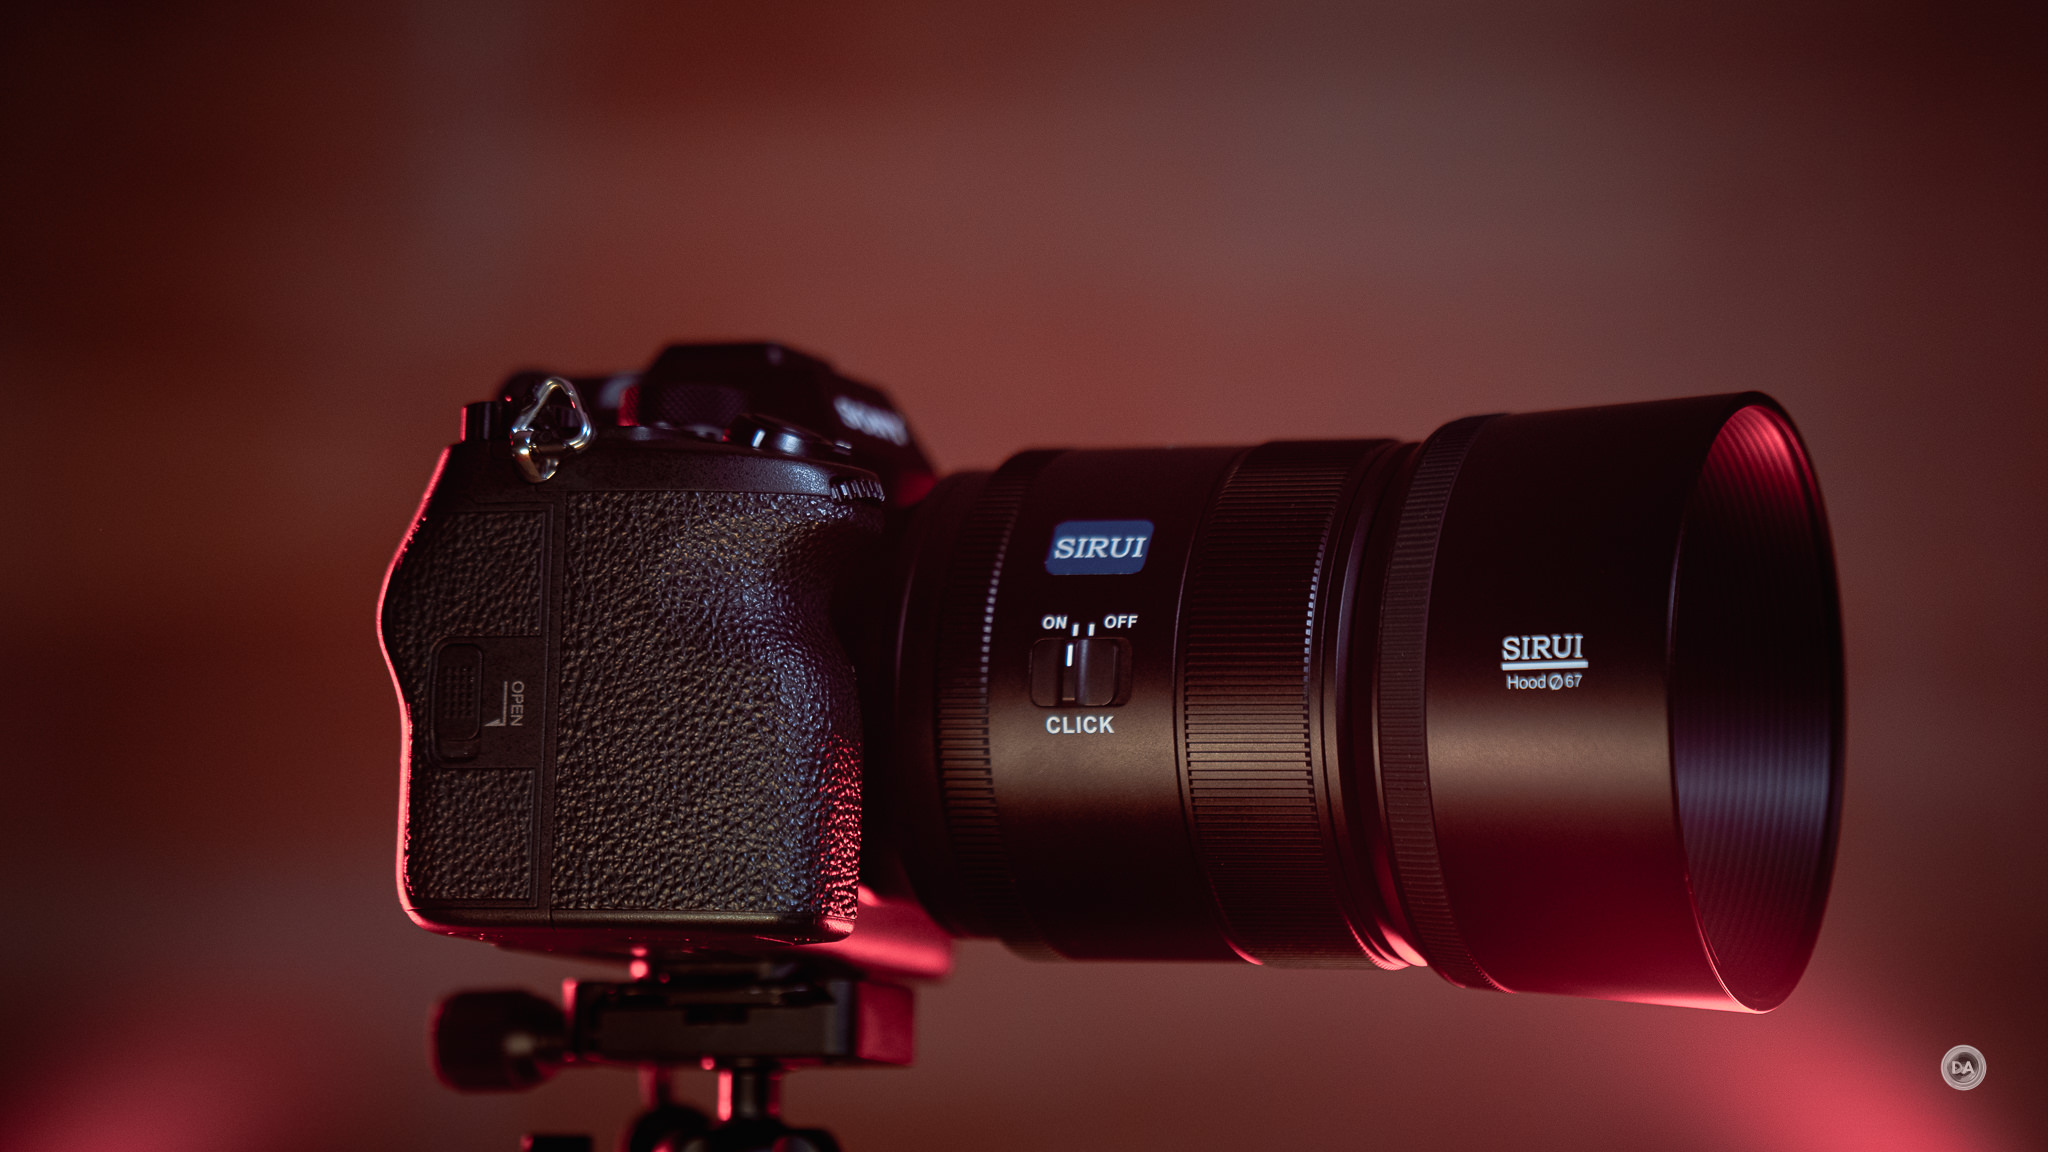
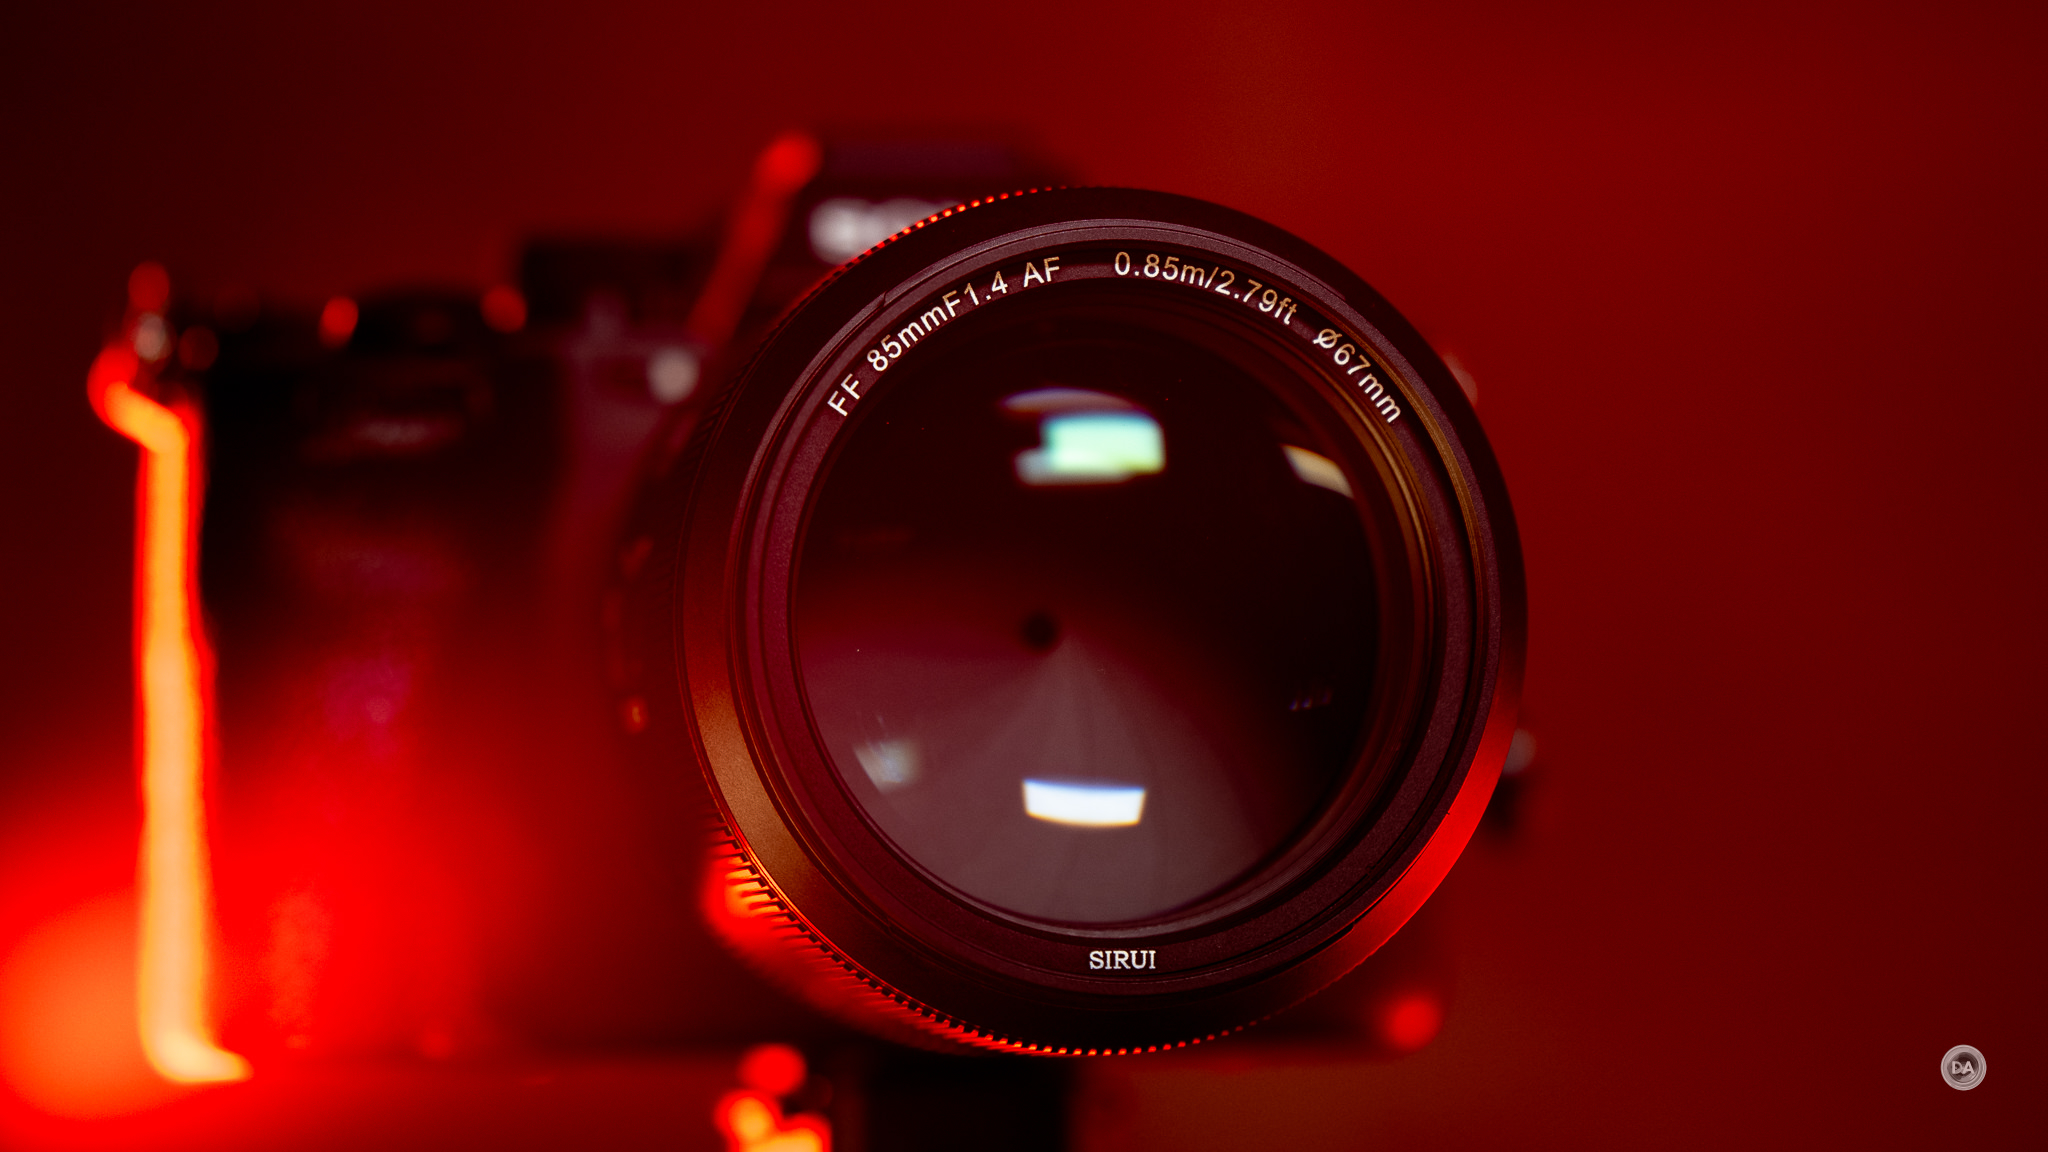
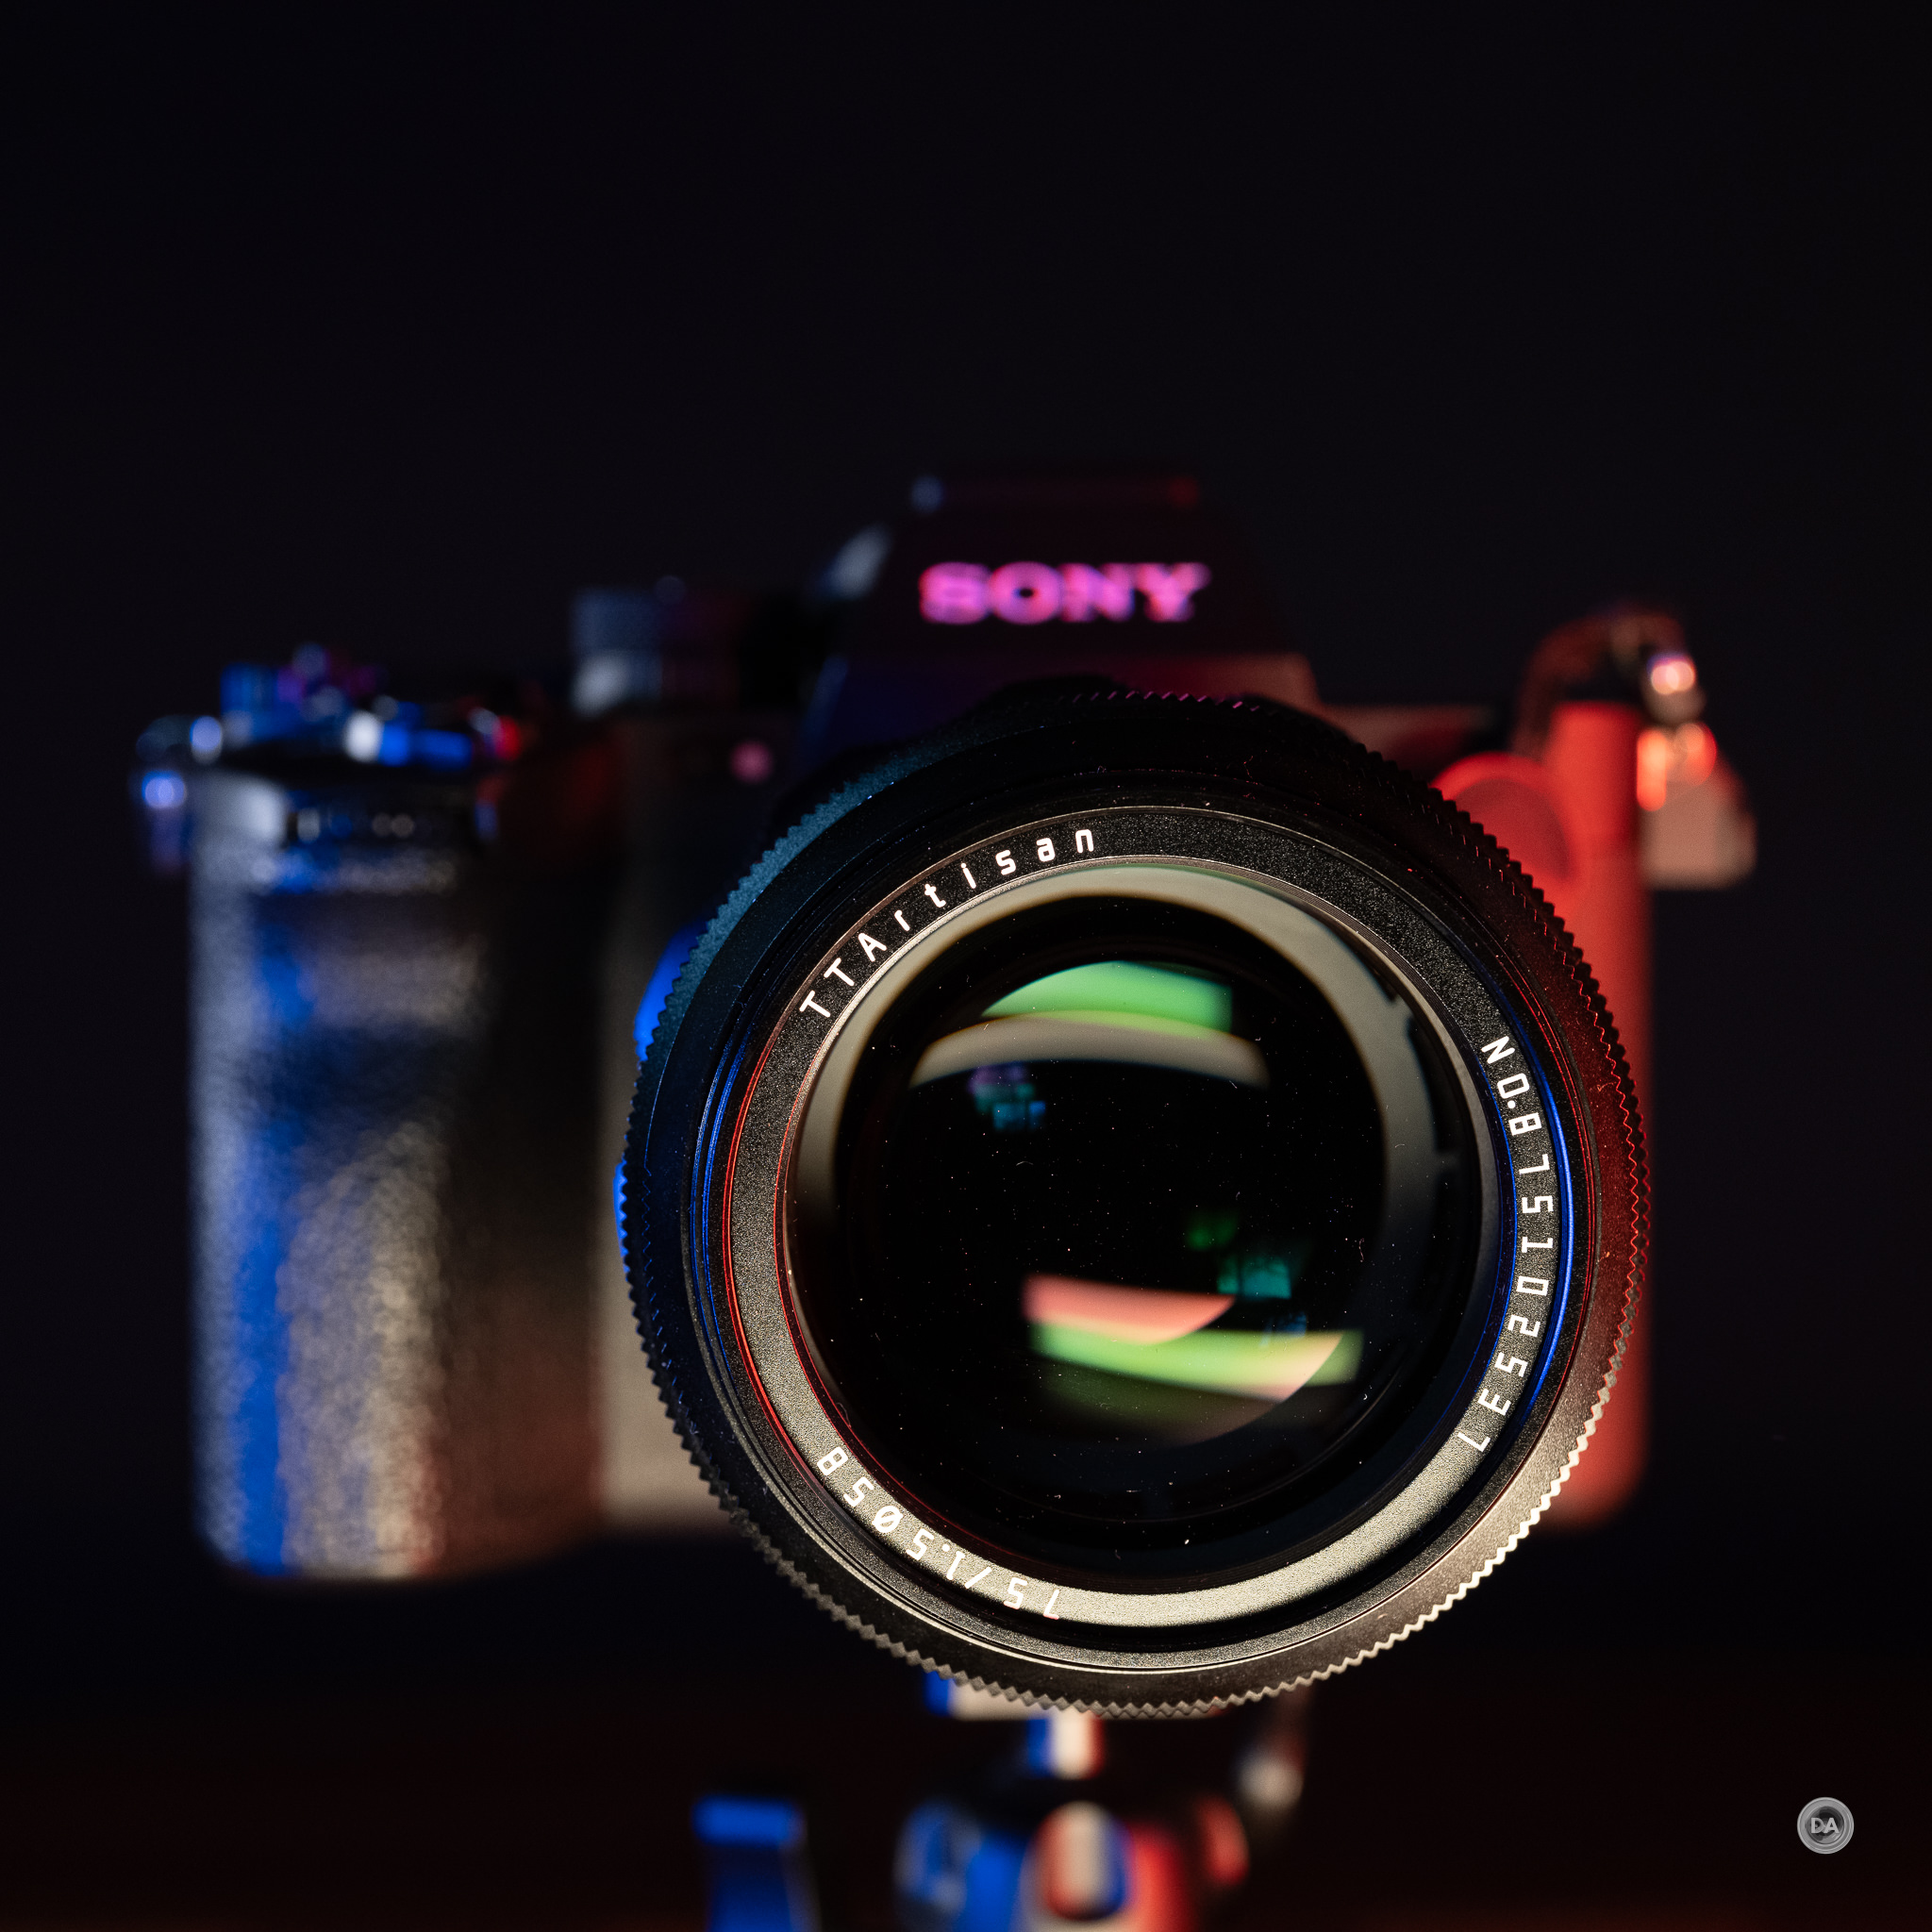
And it isn’t just backlighting. It’s pretty easy for glowing effects or light leaks to end up in your images even if the light source isn’t actually in frame. You can see from these product shots of the Sirui Aurora 85mm that various light leaks can be pretty common.
Now perhaps you say, “I like that look!”, and that’s a valid perspective. But it is definitely true that you’ll have to be very careful and intentional about how you use light, because this lens is very flare prone.
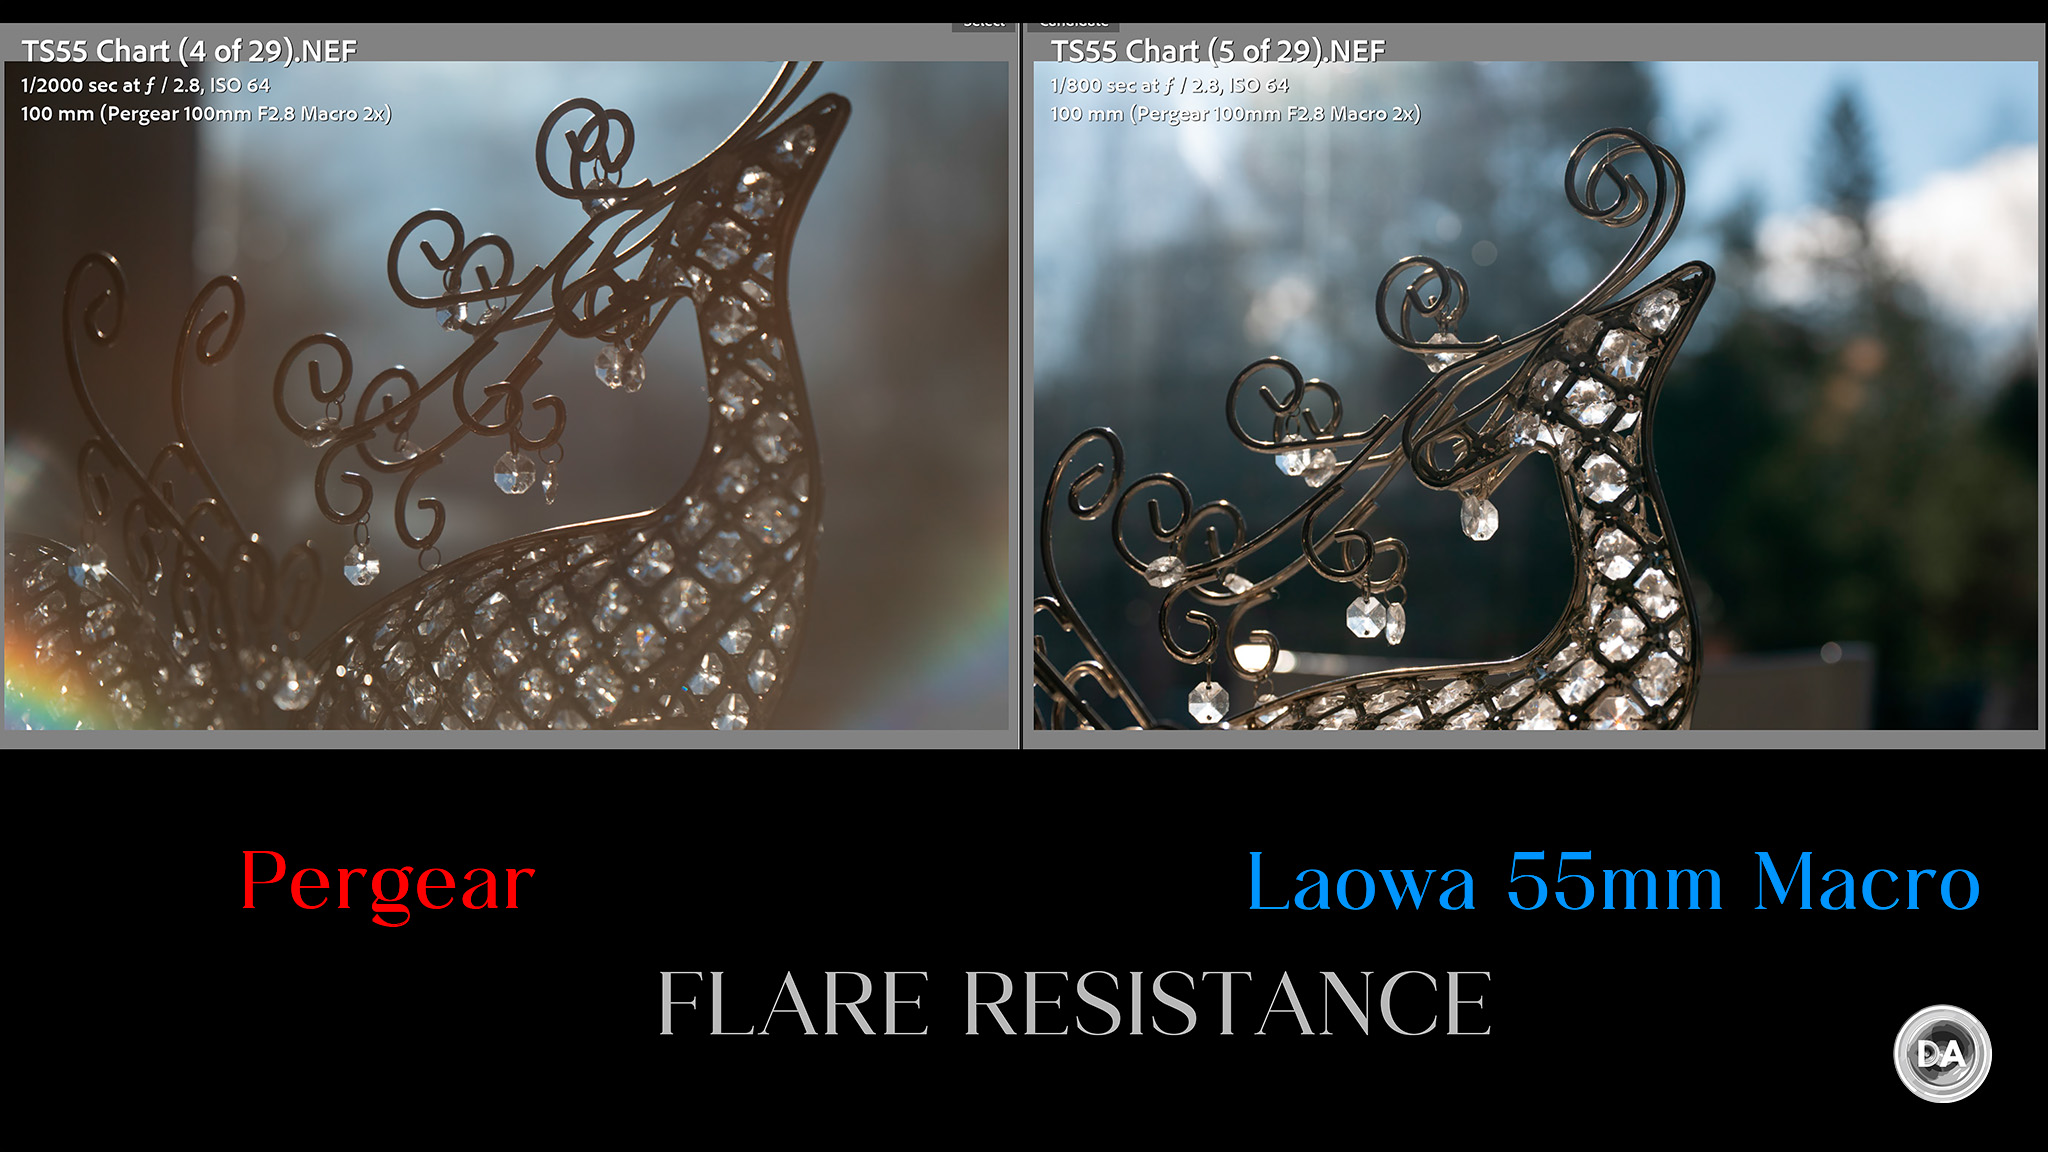
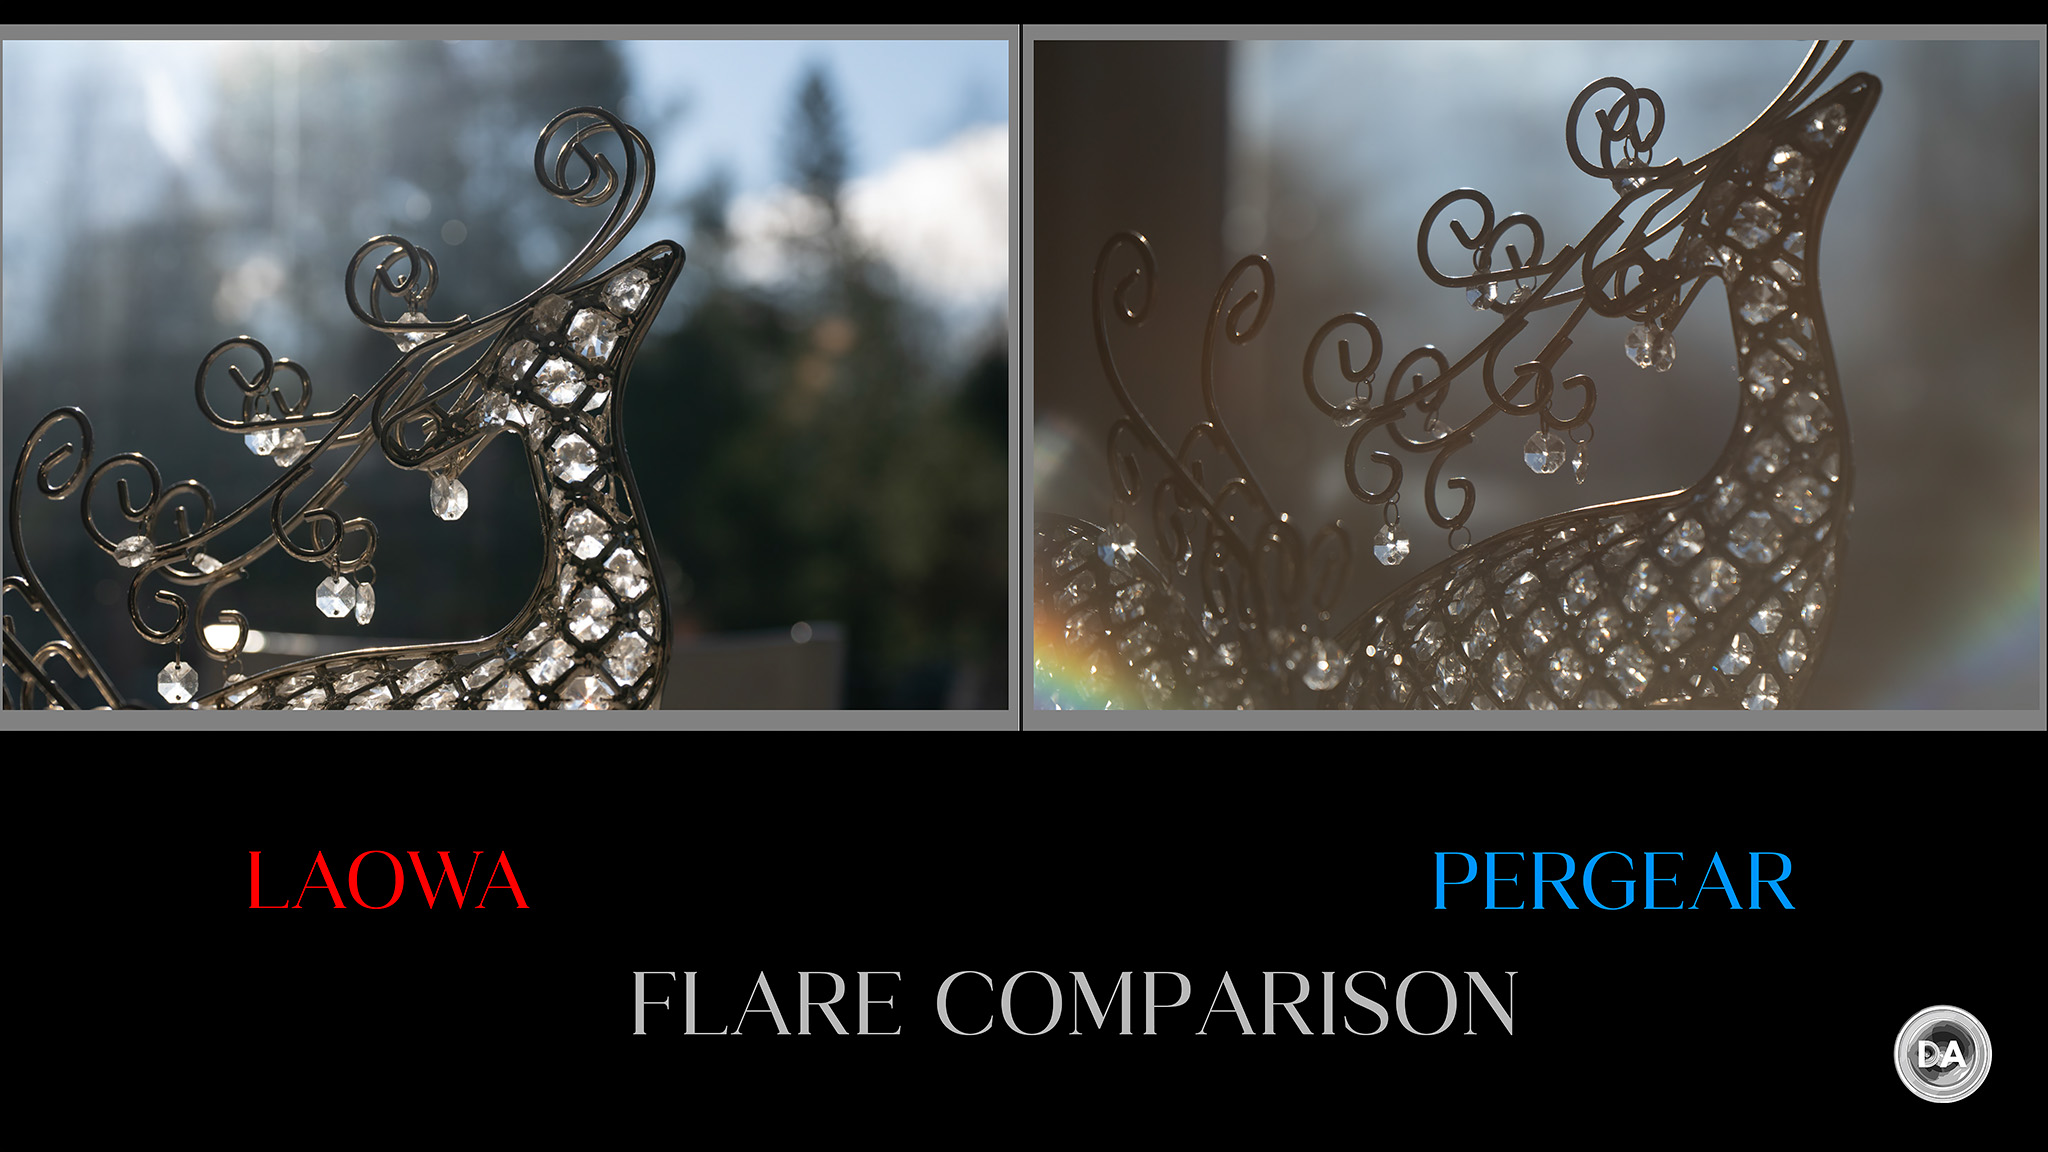
I was also testing the Laowa Tilt/Shift 55mm F2.8 Macro at the same time, and I did a comparison shot between the two with a Christmas decoration that was flooded with directional light from a window behind it. You can see that the Pergear image is flooded with veiling and prismatic haze, while the Laowa and its superior coatings is essentially unaffected by the light.
Bottom line is that you have to learn to use the Pergear 100M to its strengths, and, if you do so wisely, you can use those light leaks to devastating effect.
We’ll start our detailed examination with a look at vignette and distortion.
There’s no major concerns here. There is a small amount of pincushion distortion (I used a -3 to correct) and a moderate amount of vignette (+44 to correct).
The Pergear 100M is not entirely immune to color fringing, though it isn’t bad. You can see a bit of blue-green fringing after the plane of focus here.
It did fairly well with text, too.
That’s important, as a lot of macro work includes shooting shiny, well lit surfaces that are likely to produce color fringing. Less color fringing means more versatility in what you can capture and in what conditions.
The lens is not free from lateral chromatic aberrations (this tends to be a weakness of cheaper optical glass), but it’s fairly well contained.
So, not a flawless performance, but not bad for an inexpensive full frame macro lens, either.
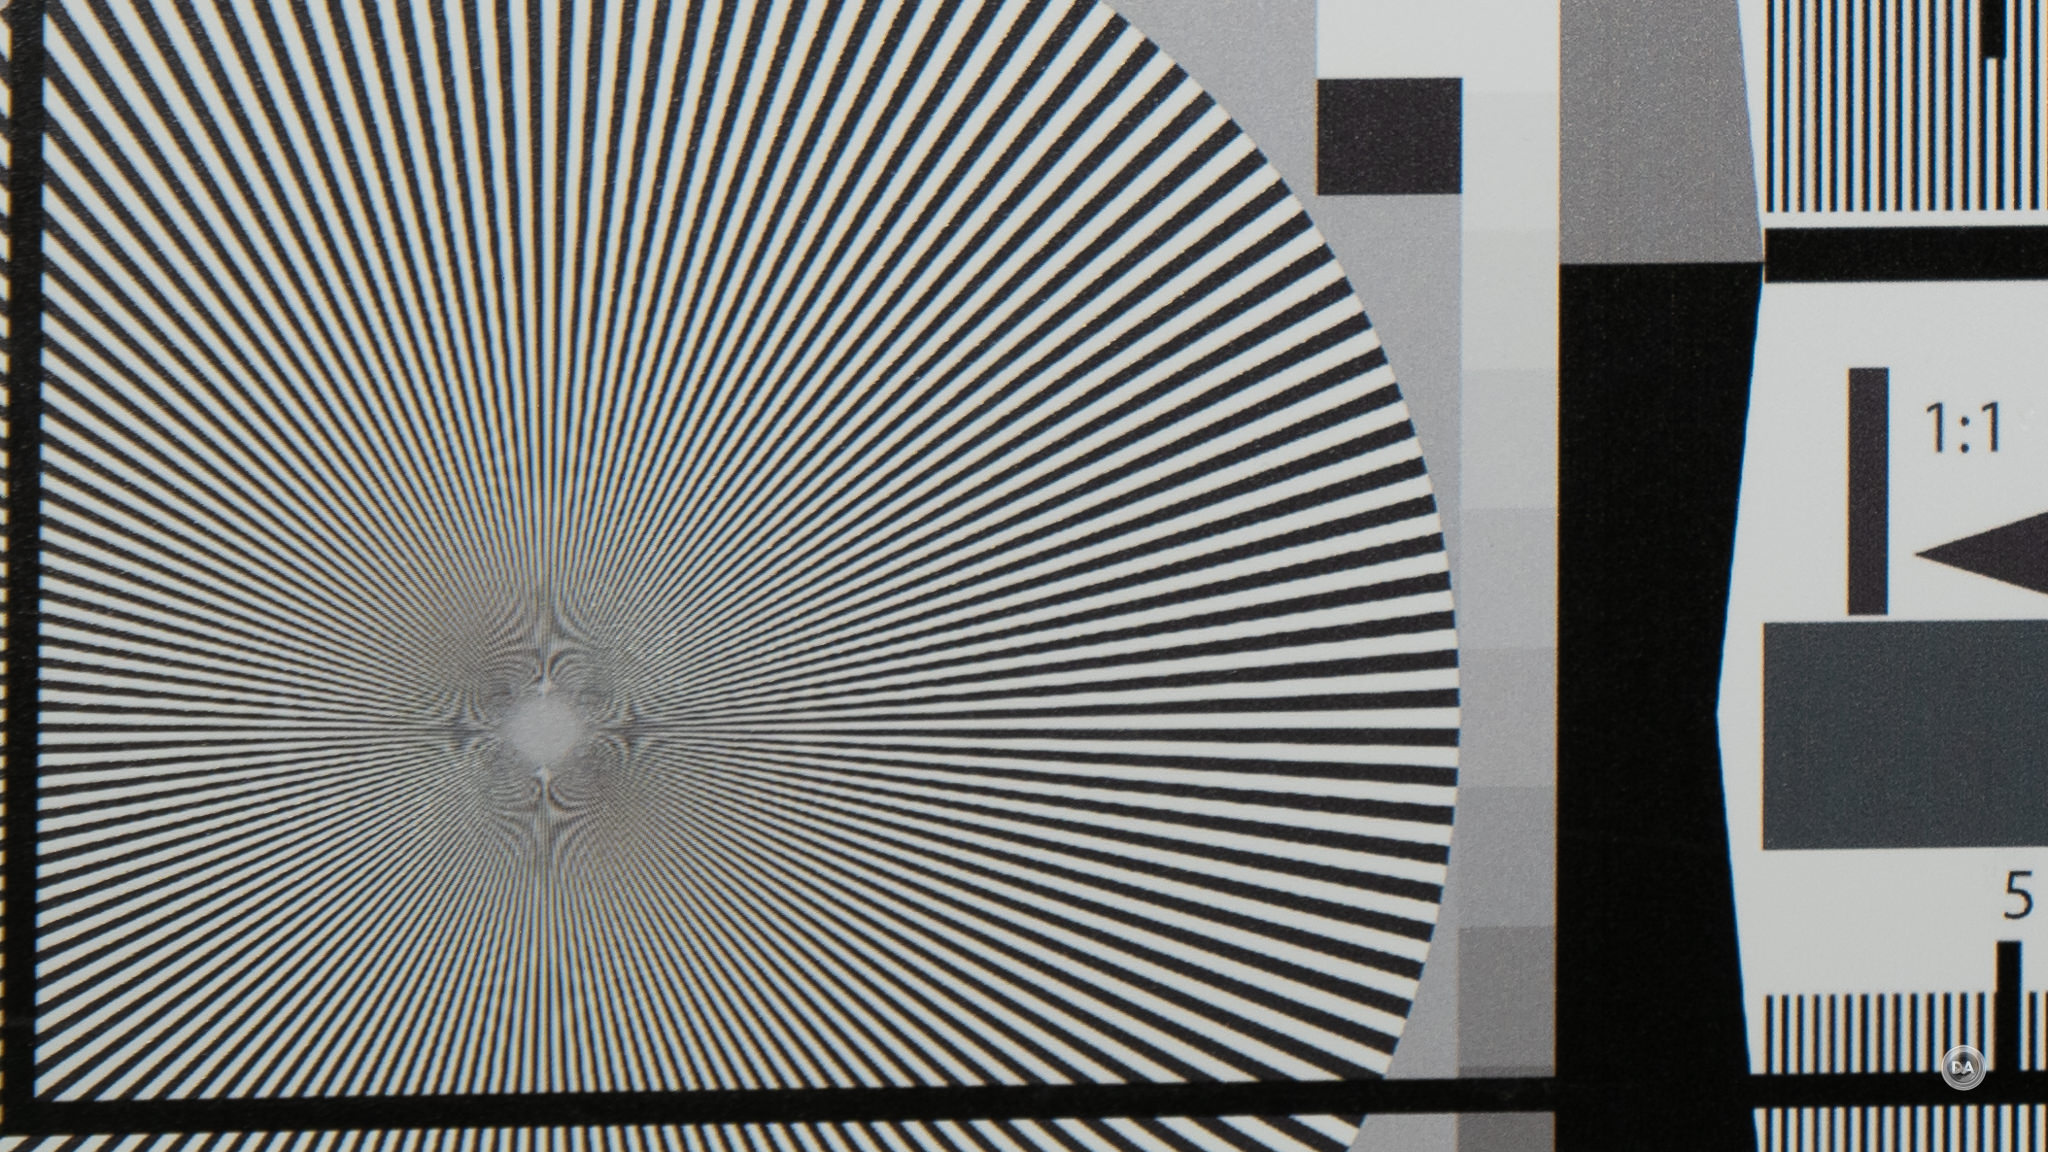
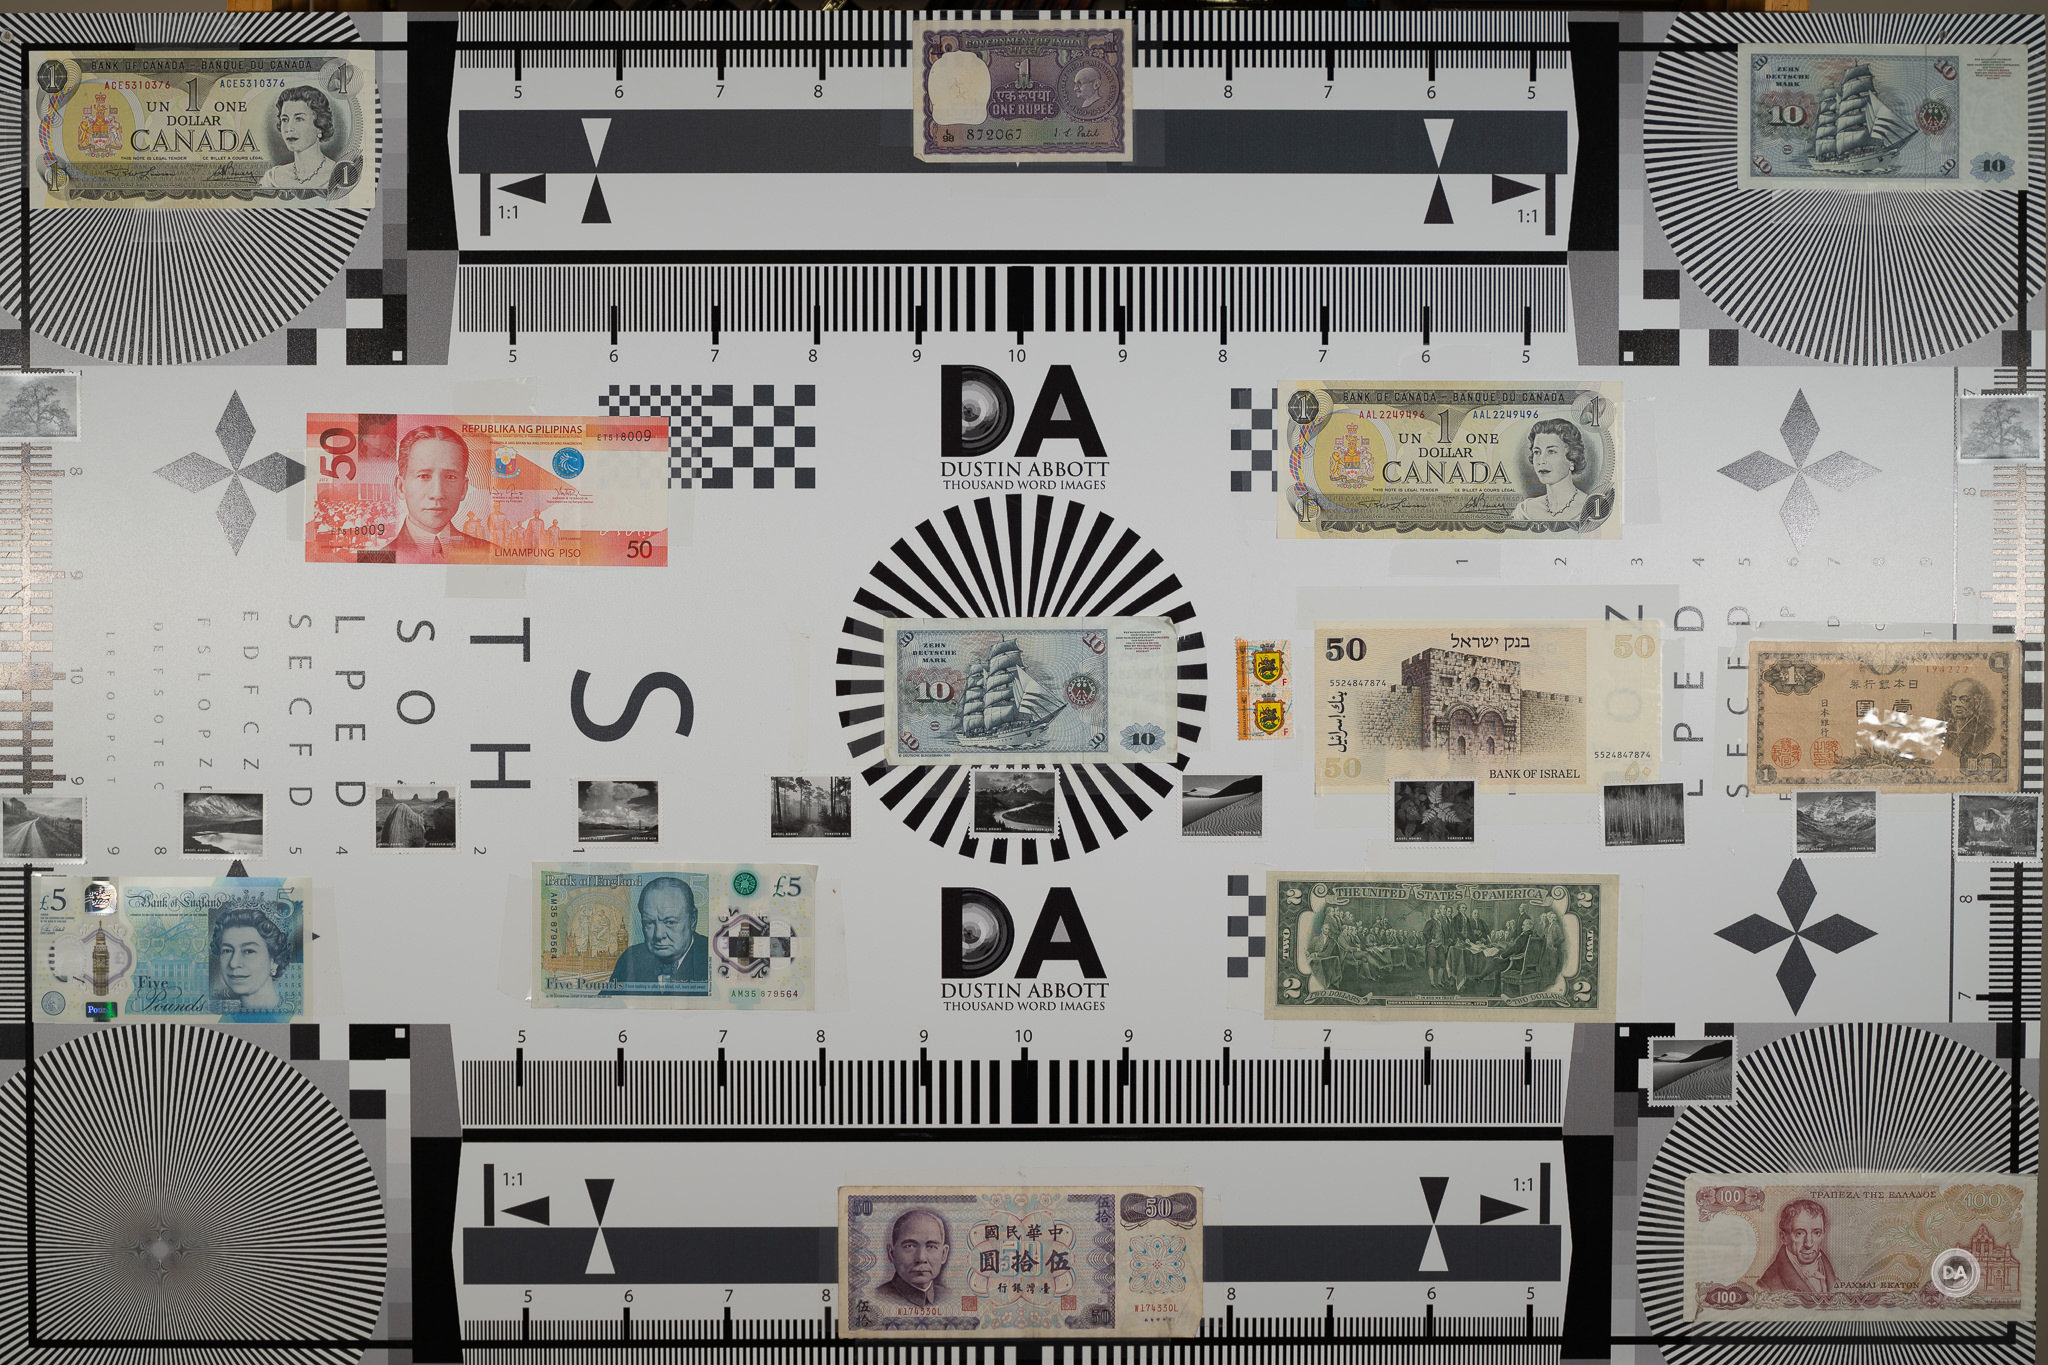
So far, so good. What about sharpness? These tests are done on the 45MP Nikon Z8 body, and crops and comparisons will be shown at 200%. Here’s the test chart:
And here are F2.8 crops from across the frame, including the center, mid-frame, and lower right corner.
Macro lenses tend to be very sharp, typically, but as we saw from the MTF charts, essentially the closer you get to your subject, the better the lens performs. At the test chart chart distance, the results are pretty ho-hum, with unexceptional contrast or rendering of fine details.
That’s true for real world results, too, which are reasonably sharp but lack the high contrast, high detail “bite” that I expect from macro lenses.
Stopping down to F4 does improve contrast somewhat, but it doesn’t radically improve sharpness.
A look at the more distant MTF diagram earlier showed that the lens is actually sharper in the mid-frame zone than it is in the center at distance, and that proved true in my tests. I found center and corner results at F5.6 (usually the aperture value that produces peak sharpness consistency across the frame) to be only okay, but the mid-frame result at F5.6 is quite sharp.
If I shift over to the upper left corner, where I have the identical bill, the results aren’t nearly as good.
If you buy this lens, you might want to remember that compose accordingly.
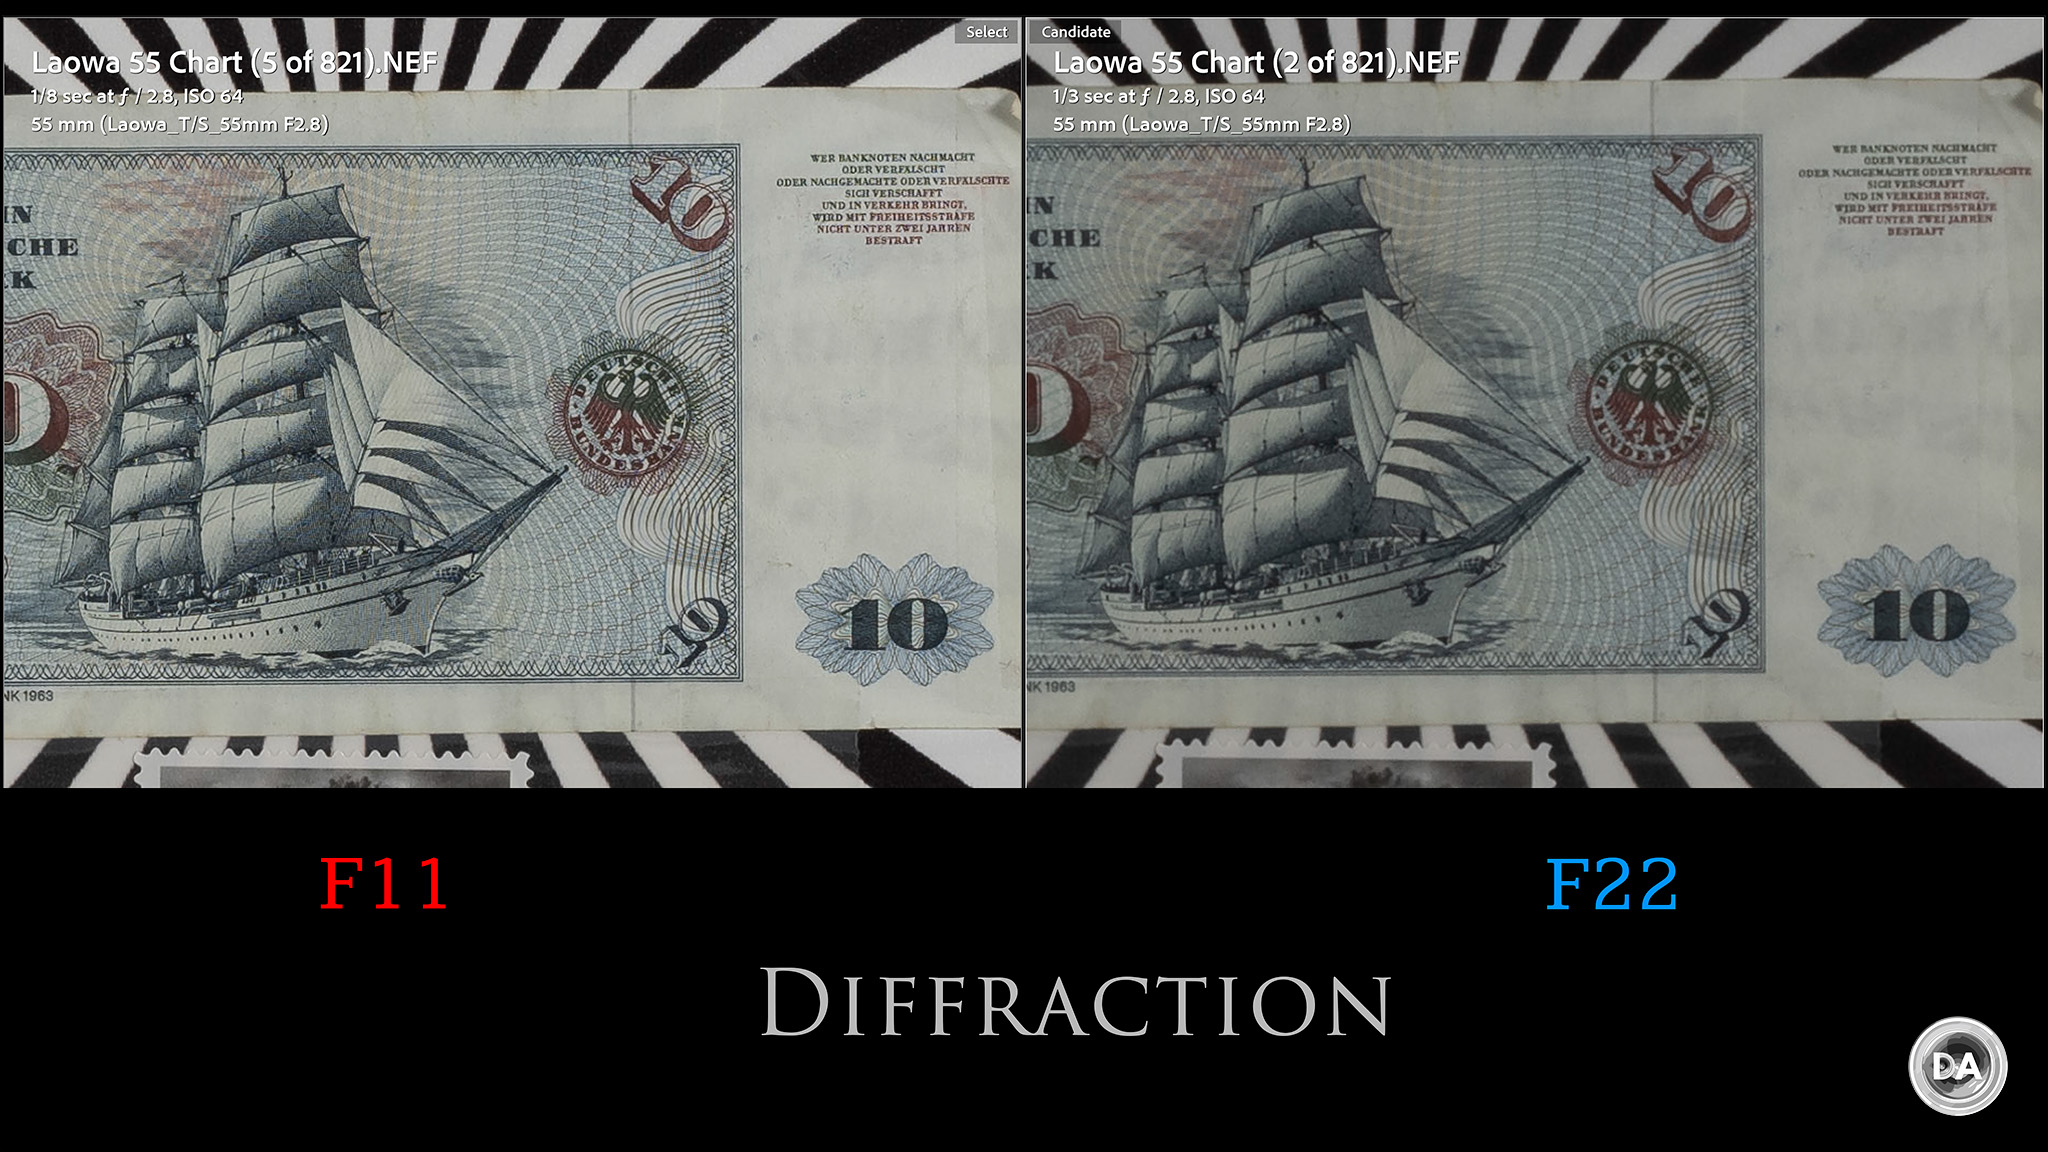
F8 and F11 remain fine, but you’ll see a pretty obvious amount of softening after that due to diffraction. Minimum aperture is F22. I found that the camera didn’t quite meter correctly when the aperture was set to F22, with a mild underexposure. I’ve found this to be pretty common with lenses that lack electronics.
The most important aspect of image sharpness for a macro lens is in the macro area, and the MTF suggest that performance is most consistently good at very close focus distances. It’s pretty common to select smaller apertures at macro distances because otherwise depth of field is so tiny that it’s almost unusable.
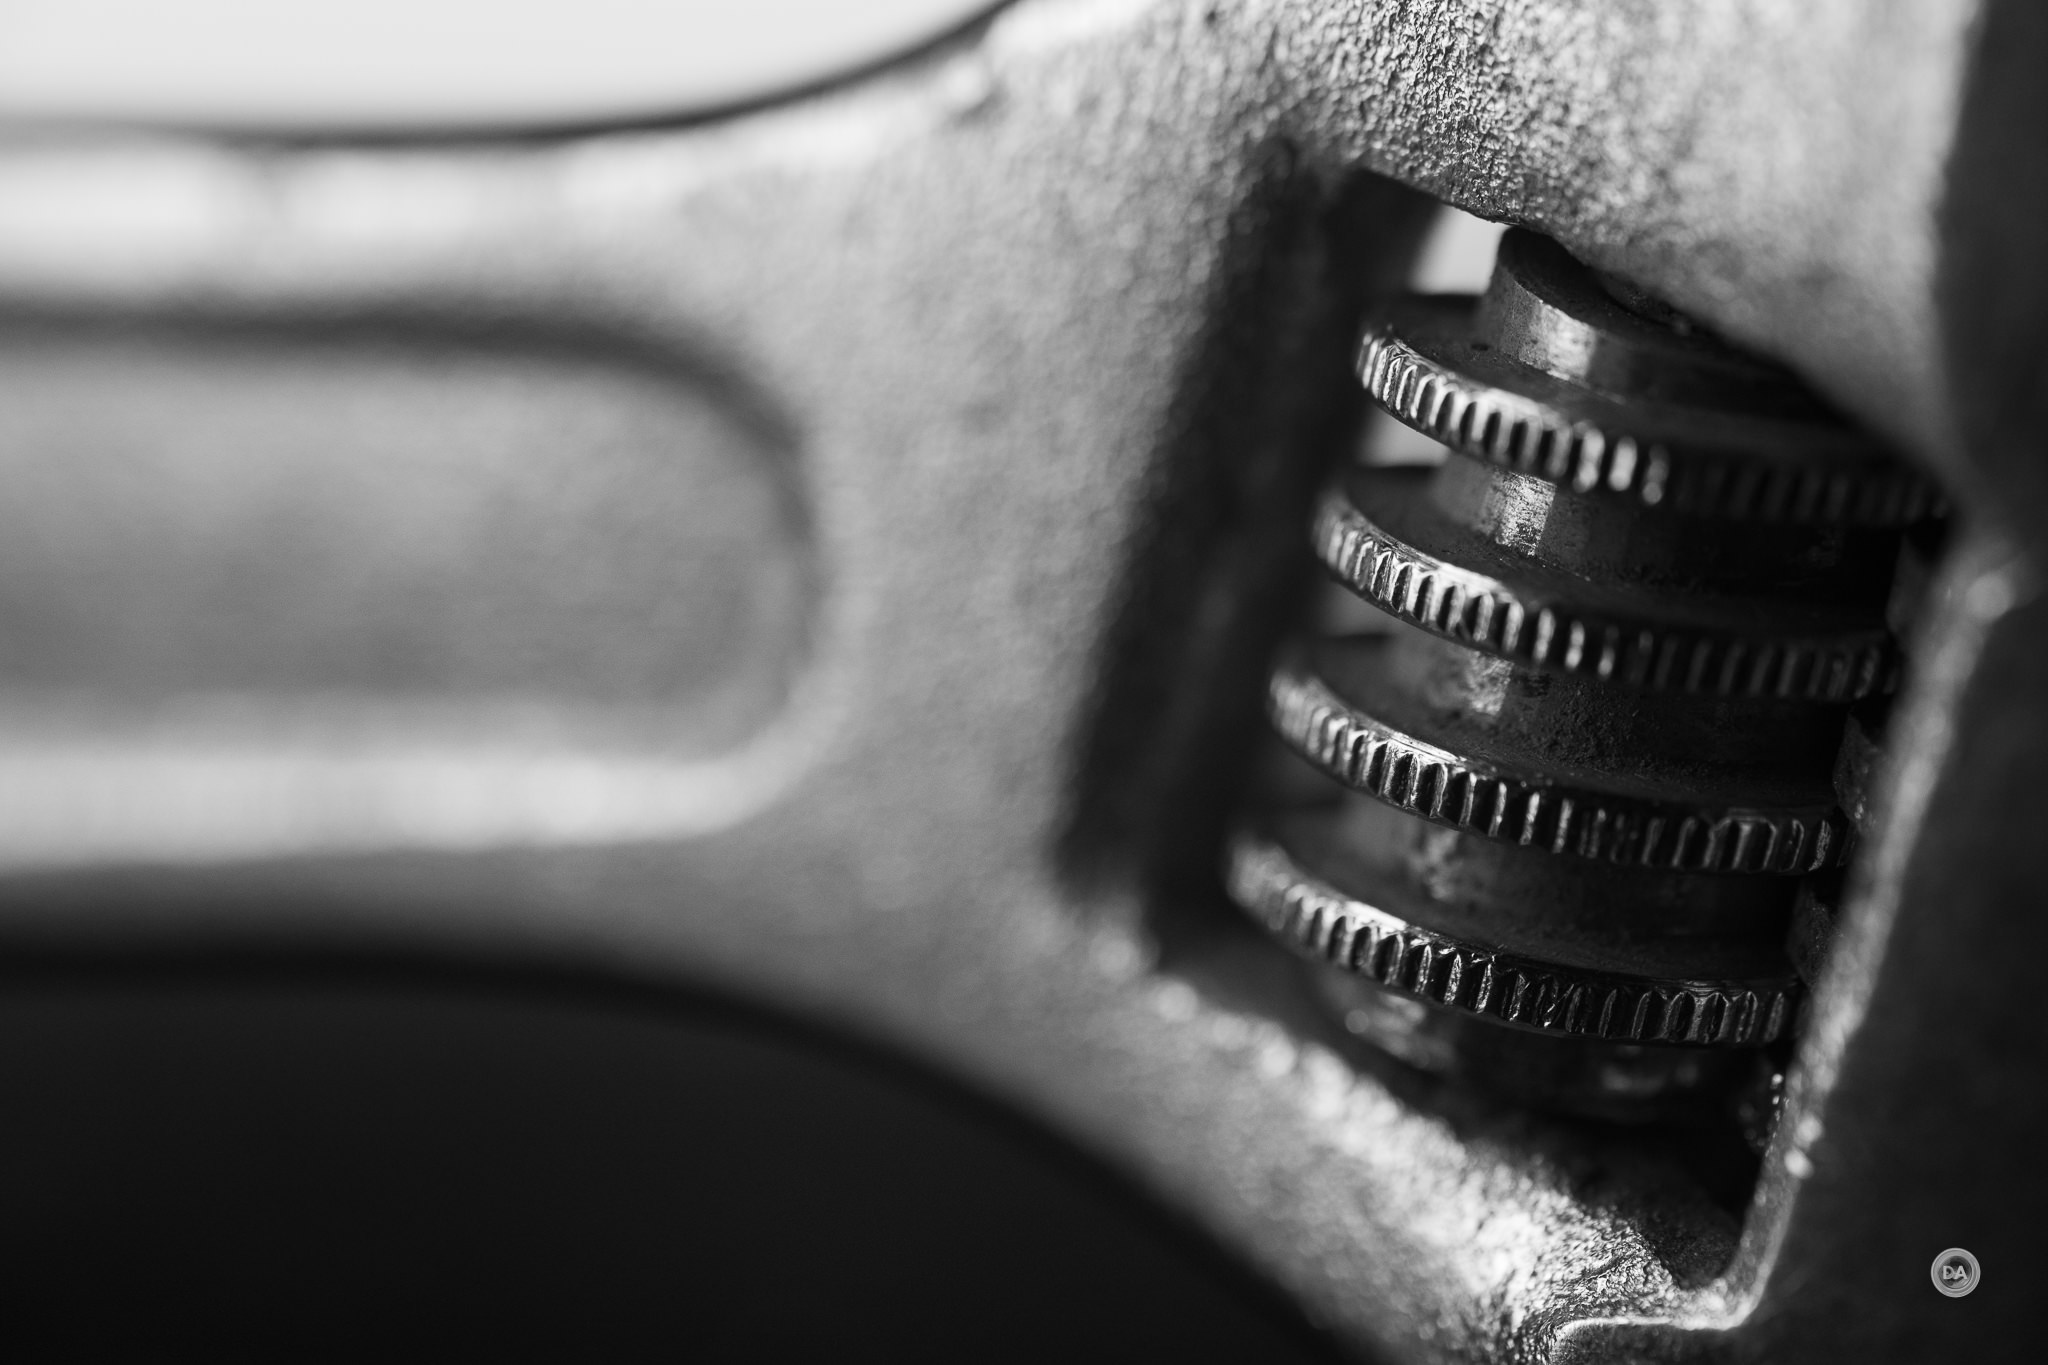
I’m somewhat spoiled by owning some very good macro lenses, so I’m not necessarily blown away by sharpness and contrast in macro images from the Pergear 100M, but they are good enough to be useful. This shot (I think at F5.6) of the gears on an adjustable wrench have enough detail to look interesting.
This shot at F2.8 shows enough detail and contrast to work when viewed large, but the fine details aren’t exquisitely well resolved when viewed at a pixel level.
I do think there is enough sharpness to satisfy those whose budgets will only cover a lens like this. Obviously you can get superior results with a superior lens (the Laowa 100mm F2.8 2X Macro is optically superior, for example), but you’ll almost always pay dearly for that superior lens.
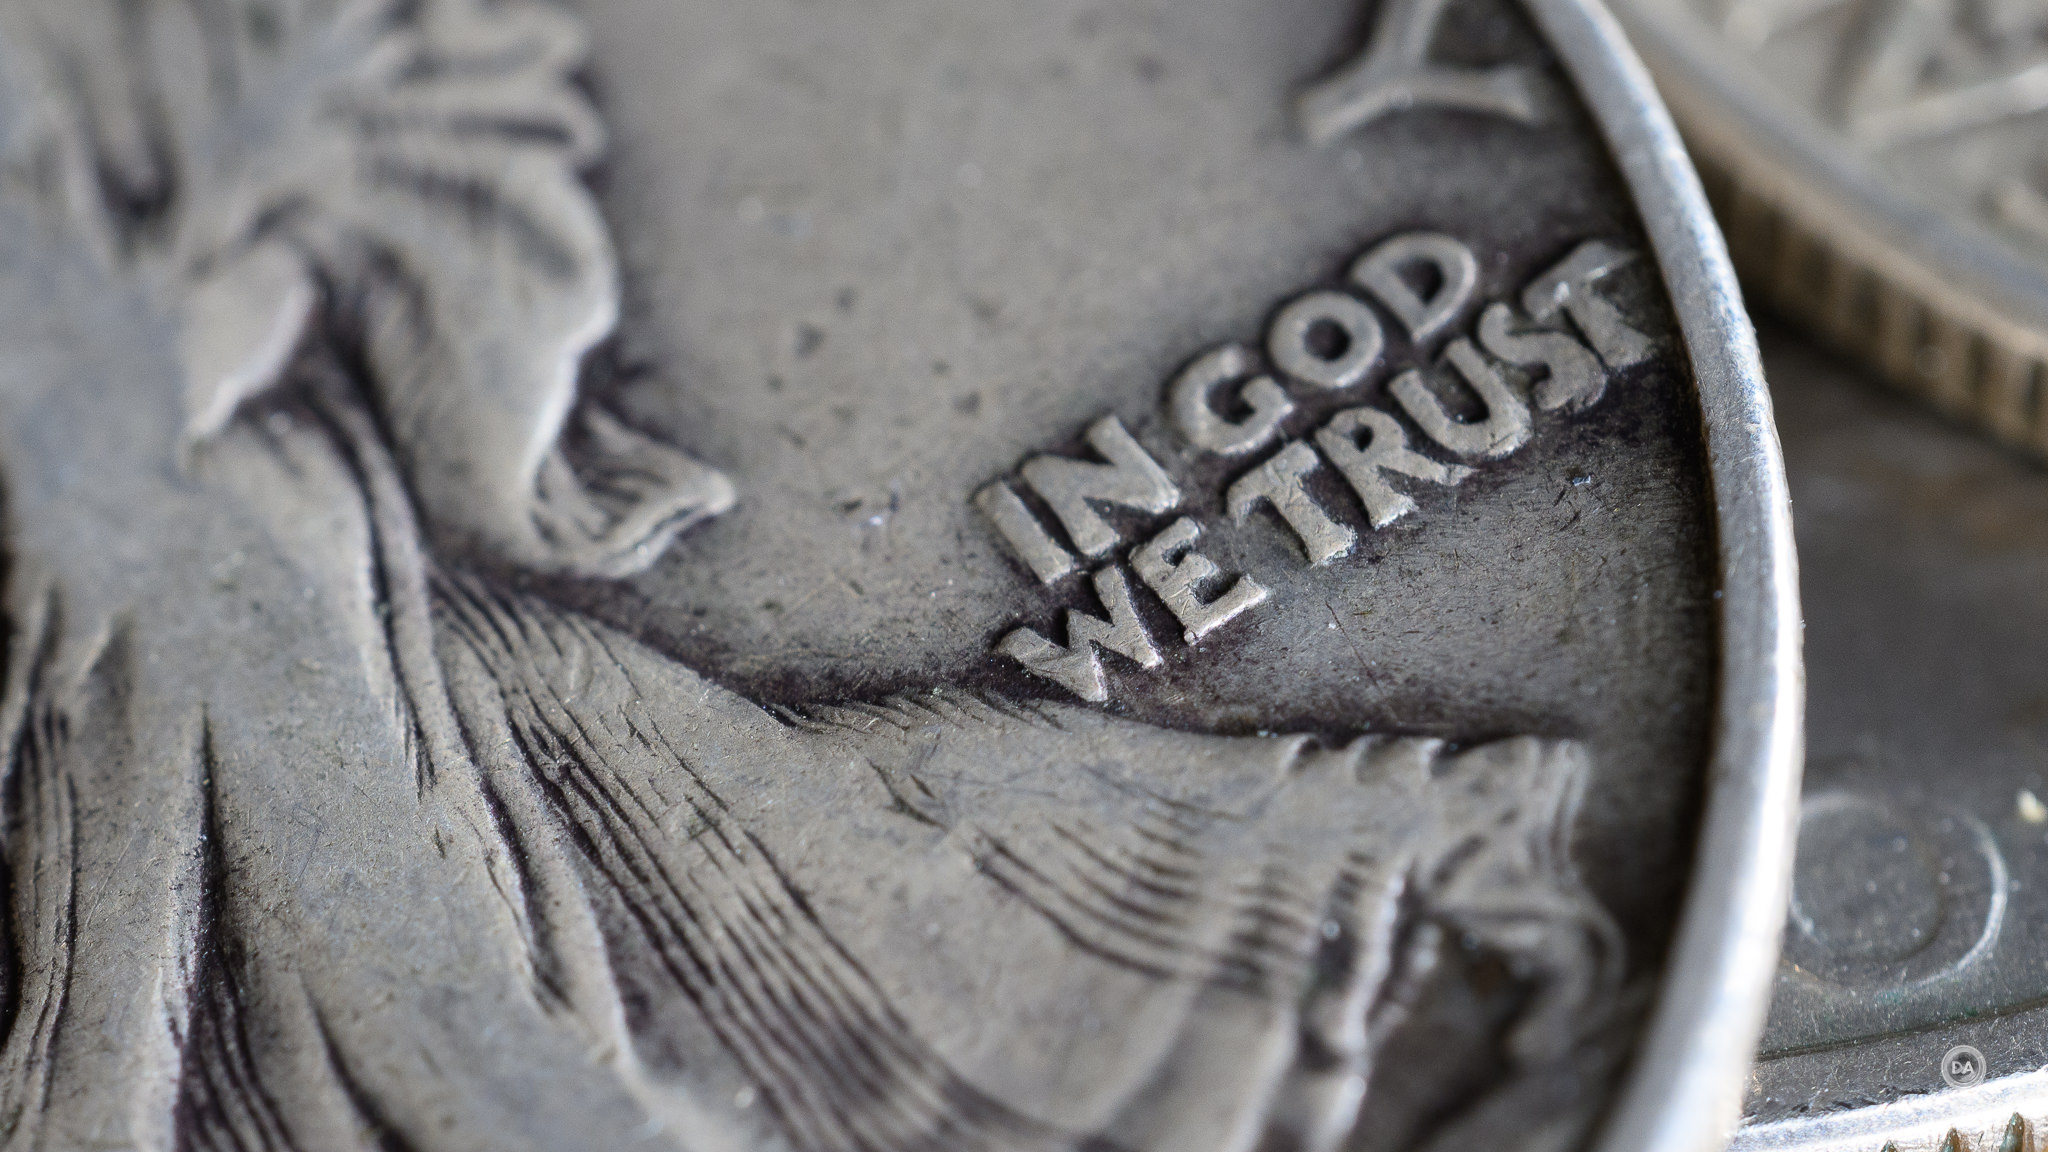
There’s plenty of performance here to shoot the classics like the ring in the pages of a Bible, for example.
Or how about the strings on a guitar?
Bokeh is reasonably good from the Pergear 100M. You can see from the macro images above that it is very easy to produce a shallow depth of field when shooting at macro distances, which means a LOT of bokeh. I also felt like bokeh was pretty good in other circumstances, too, like the specular highlights in this shot of a classic SLR.
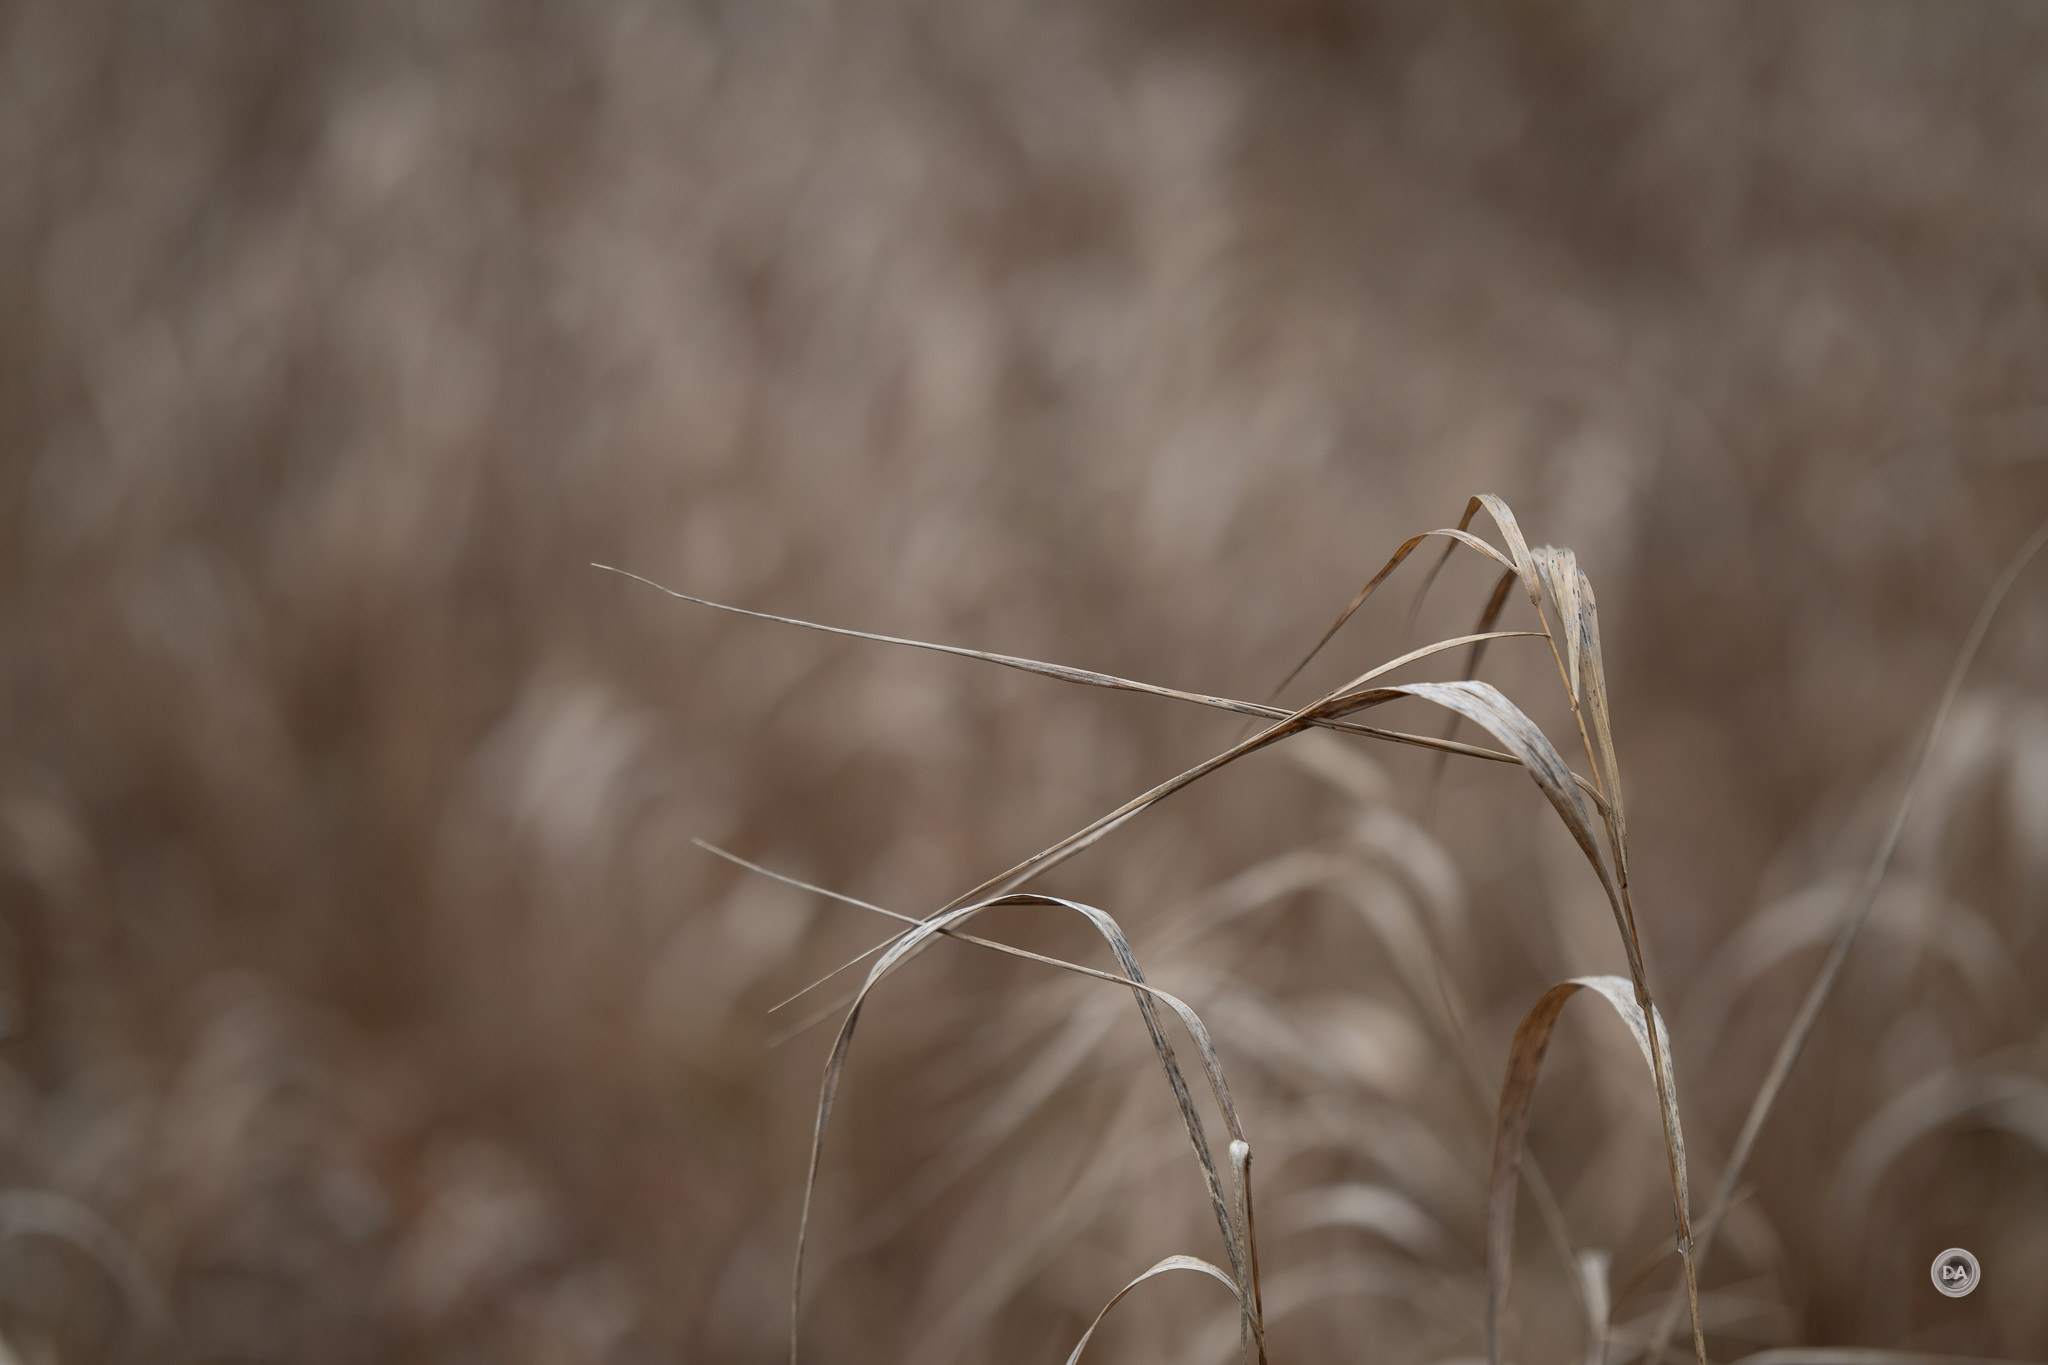
There’s a bit more edges than what I would like in the bokeh of this shot of dried grasses, but it doesn’t look bad.
At close (but not macro) distances, it isn’t hard to completely blur out a background.
Because of the focus challenges outside of the macro range, I didn’t love the Pergear 100M for non-macro images. I also didn’t feel like the optical performance was as good there, though you can still create some interesting images with a little patience.
The best use of the Pergear 100mm F2.8 2X Macro is doing macro with it. Put it on a tripod and have fun making creative images. It’s a great way to cope with a cold, snowy day like the one I’m experiencing while creating this review.
If you want to see more images, check out the image gallery here.
Conclusion
The Pergear 100mm F2.8 2x Macro is a bit of a mixed bag. On the build side of things, it feels fairly well made, and that’s particularly true when you consider the lost cost of the lens. It’s also fairly heavy, however, and the mechanics of the focus ring aren’t perfectly executed.
The short focus throw outside of the macro range makes this a less appealing lens to use for general purpose photography, and I liked it best as a macro lens.
The flare tendencies of the lens can be harnessed to creative use, and while the Pergear 100M is far from the sharpest macro lens that I’ve used, it’s not fatally flawed either. The fact that it has twice the level of magnification as many other macro lenses that can just go to 1:1 means that there are even more possibilities of images you can make. I was able to create a lot of images that I enjoyed with it, and it that is true for someone like myself who has used and reviewed many hundreds of lenses (and dozens of macro lenses), then I suspect you’ll be able to thoroughly enjoy your macro experience with the Pergear 100mm F2.8 2x Macro, which qualifies as one of the best full frame macro bargains out there.
Pros:
Good level of build quality
Very inexpensive
Low distortion
Low vignette
Minimal fringing
Reasonably sharp at F2.8
2x magnification
Strongest performance is at macro distances
Bokeh quality pretty good
Some will find flare artifacts and light leaks artistic
Very decent full frame macro lens for a budget price
DISCLAIMER: This article and description contains affiliate links, which means that if you click on one of the product links, I’ll receive a small commission. As an Amazon Associate I earn from qualifying purchases.
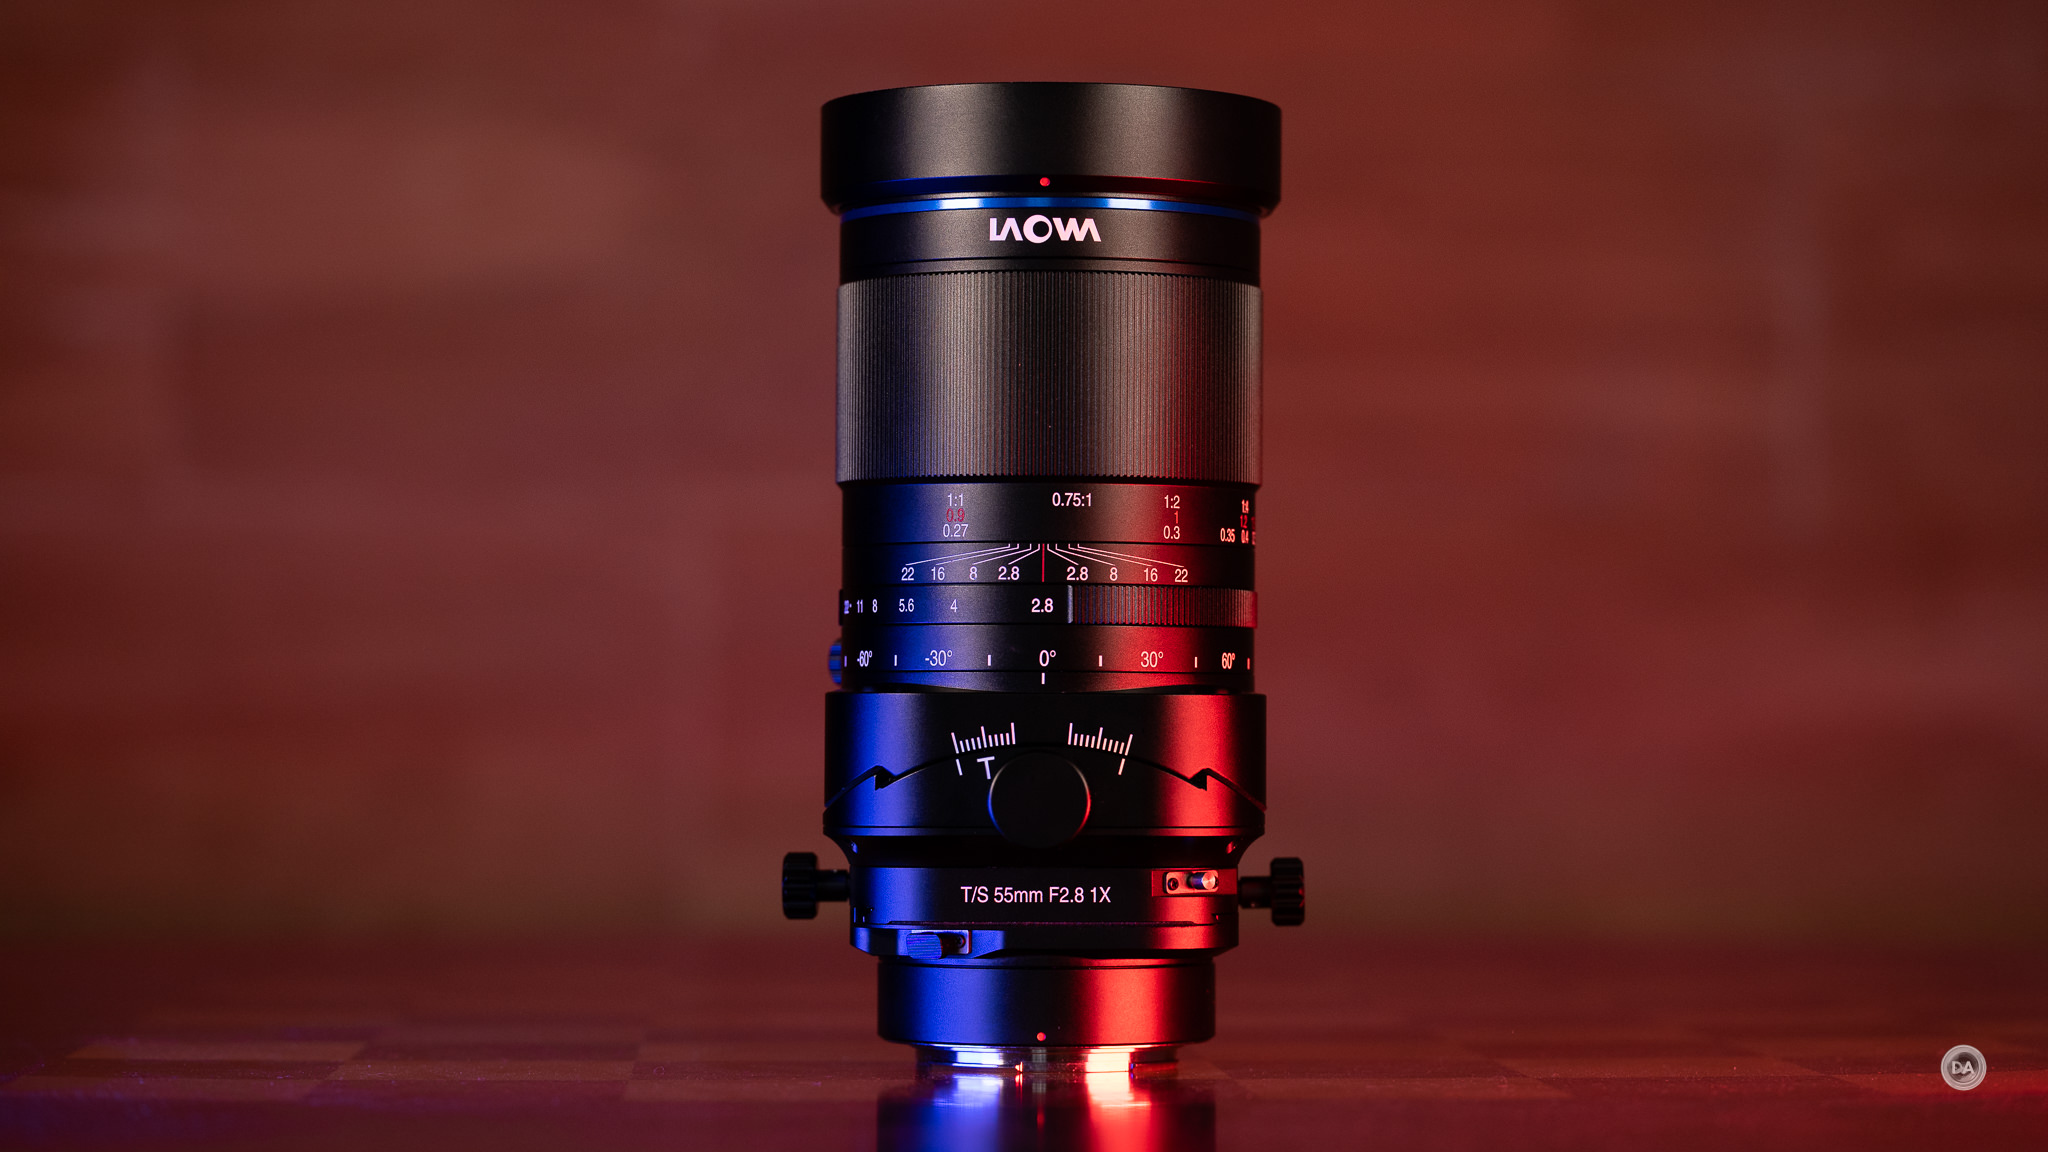
Tilt/Shift lenses are very complicated instruments, and Laowa has worked on making everything even more complicated by making their newest lens a macro lens, too. There’s no question that the new T/S 55mm F2.8 is big (168.55mm or 6.63″), heavy (1345g or 47.5oz), and expensive ($1249 USD), but it is also one of the finest lenses they have yet made optically. It’s a lens that you’ll pretty much exclusively have to use off of a tripod, but it’s also capable of producing extraordinarily good results. Sound interesting? Let’s dive into it together (which you can do in either my video review, linked below, by reading the text review, or by checking out the photos in the galleries below.)
Thanks to Laowa for sending me a review loaner of this lens. As always, this is a completely independent review. All opinions and conclusions are my own.*The tests and most of the photos that I share as a part of my review cycle have been done with the 45MP Nikon Z8, which I reviewed here.
The T/S 55mm is one of two lenses releasing simultaneously from Laowa, with a 100mm option also available.
As noted, the size and complexity of all the moving parts on a tilt/shift lens make it a difficult proposition to use handheld. There are at least seven different adjustment dials and levers of this lens, as it can move up to 12mm of shift and 10° of tilt.
The Laowa T/S 55mm will be available in a wide variety of lens mounts, including full frame: Nikon Z (tested here), Sony E, Canon RF, and L Mount, but also two medium format mounts, including Fuji GFX and Hasselblad XCD mount. The medium format availability tells us that this is a lens that is overengineered for the full frame image circle, which should point to some incredible performance.
Image quality is pretty pristine, and, of course, the kinds of images you can get are both unique and interesting.
DISCLAIMER: This article and description contains affiliate links, which means that if you click on one of the product links, I’ll receive a small commission. As an Amazon Associate I earn from qualifying purchases.
Tilt/Shift lenses are very complicated instruments, and Laowa has worked on making everything even more complicated by making their newest lens a macro lens, too. There’s no question that the new T/S 55mm F2.8 is big (168.55mm or 6.63″), heavy (1345g or 47.5oz), and expensive ($1249 USD), but it is also one of the finest lenses they have yet made optically. It’s a lens that you’ll pretty much exclusively have to use off of a tripod, but it’s also capable of producing extraordinarily good results. Sound interesting? Let’s dive into it together (which you can do in either my video review, linked below, or by reading on in this text review.)
Thanks to Laowa for sending me a review loaner of this lens. As always, this is a completely independent review. All opinions and conclusions are my own.*The tests and most of the photos that I share as a part of my review cycle have been done with the 45MP Nikon Z8, which I reviewed here.
The T/S 55mm is one of two lenses releasing simultaneously from Laowa, with a 100mm option also available.
As noted, the size and complexity of all the moving parts on a tilt/shift lens make it a difficult proposition to use handheld. There are at least seven different adjustment dials and levers of this lens, as it can move up to 12mm of shift and 10° of tilt.
The Laowa T/S 55mm will be available in a wide variety of lens mounts, including full frame: Nikon Z (tested here), Sony E, Canon RF, and L Mount, but also two medium format mounts, including Fuji GFX and Hasselblad XCD mount. The medium format availability tells us that this is a lens that is overengineered for the full frame image circle, which should point to some incredible performance.
Image quality is pretty pristine, and, of course, the kinds of images you can get are both unique and interesting.
So let’s dive deeper into the lens and its performance and determine if this is a lens that you should personally consider.
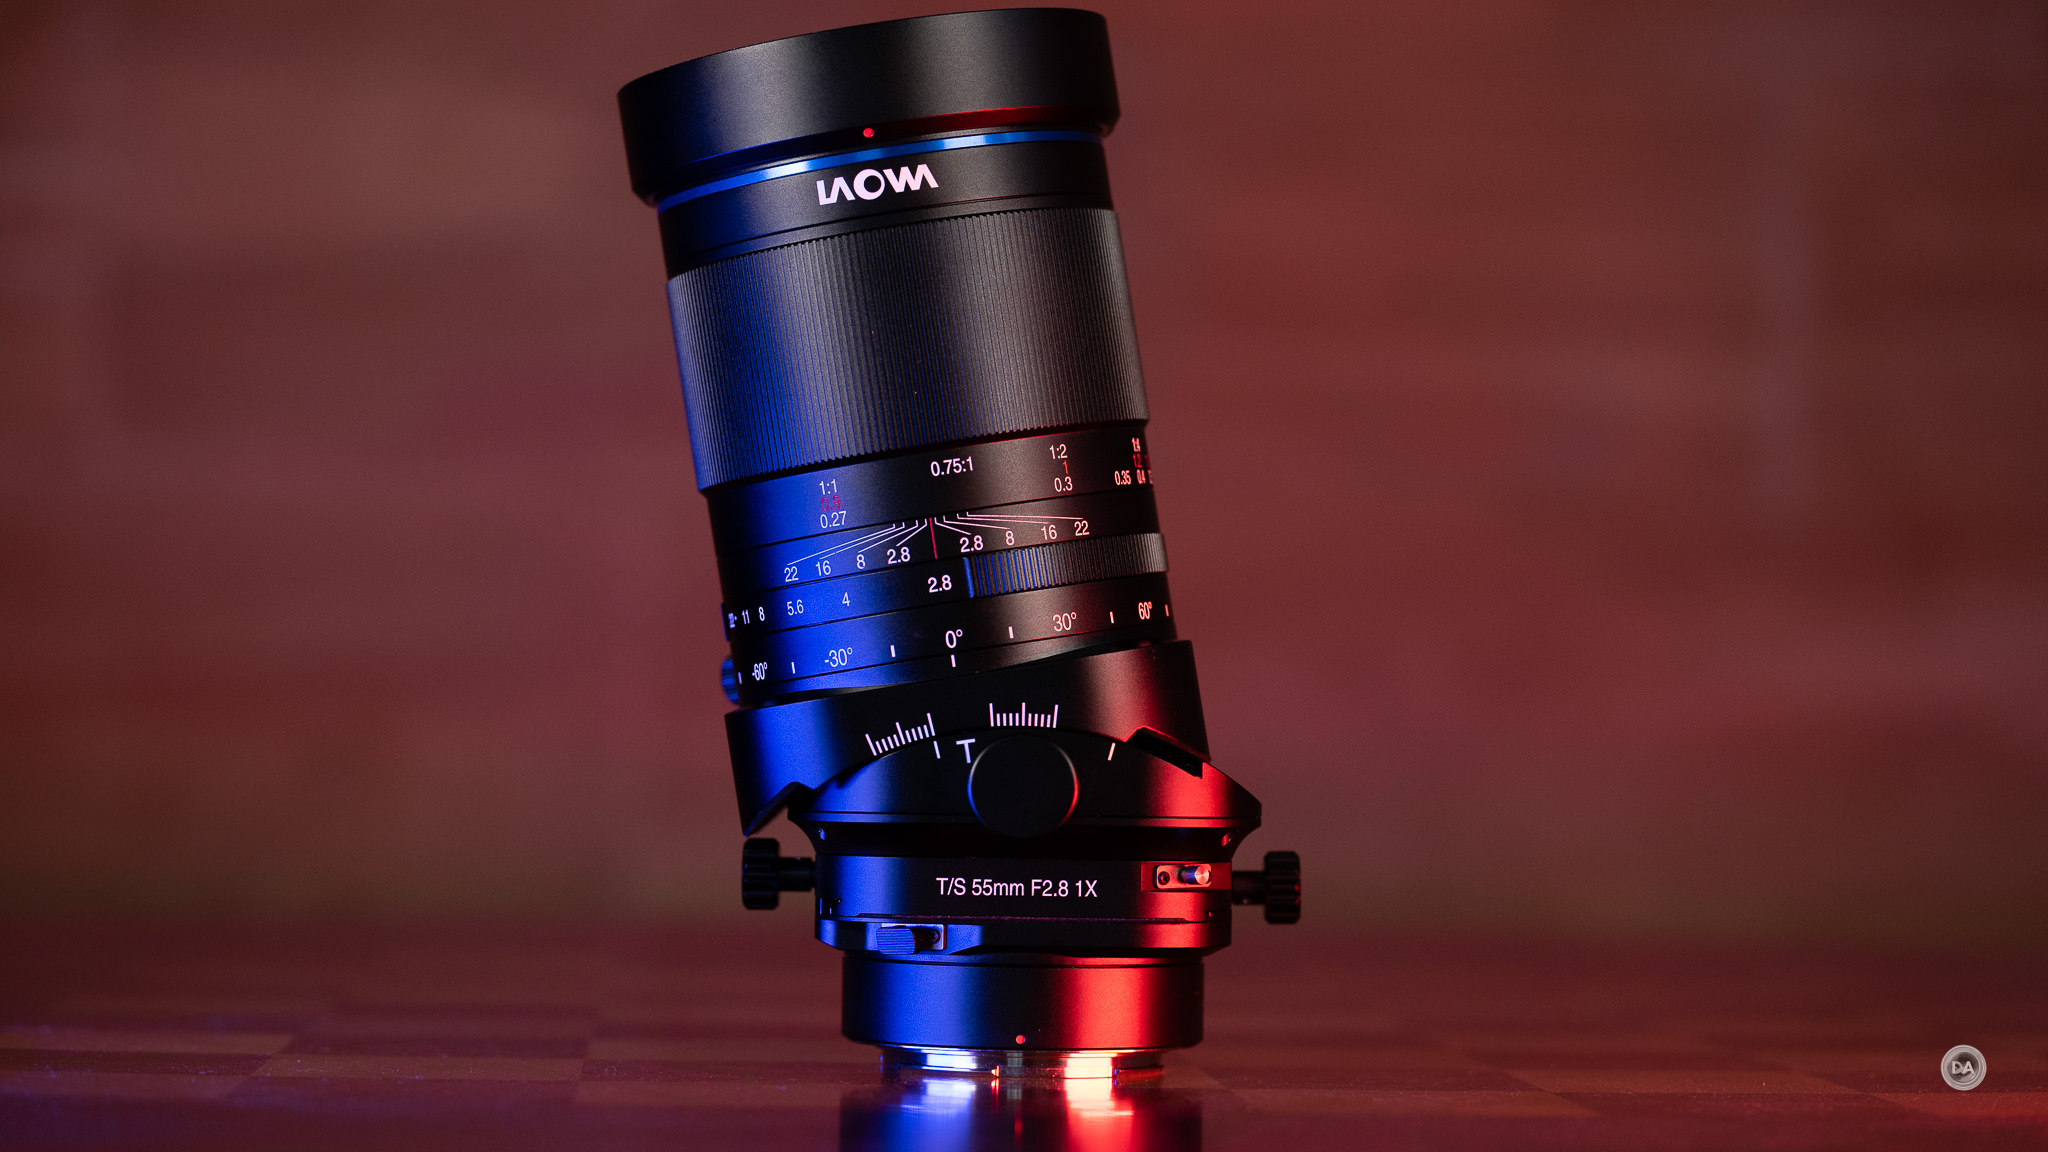
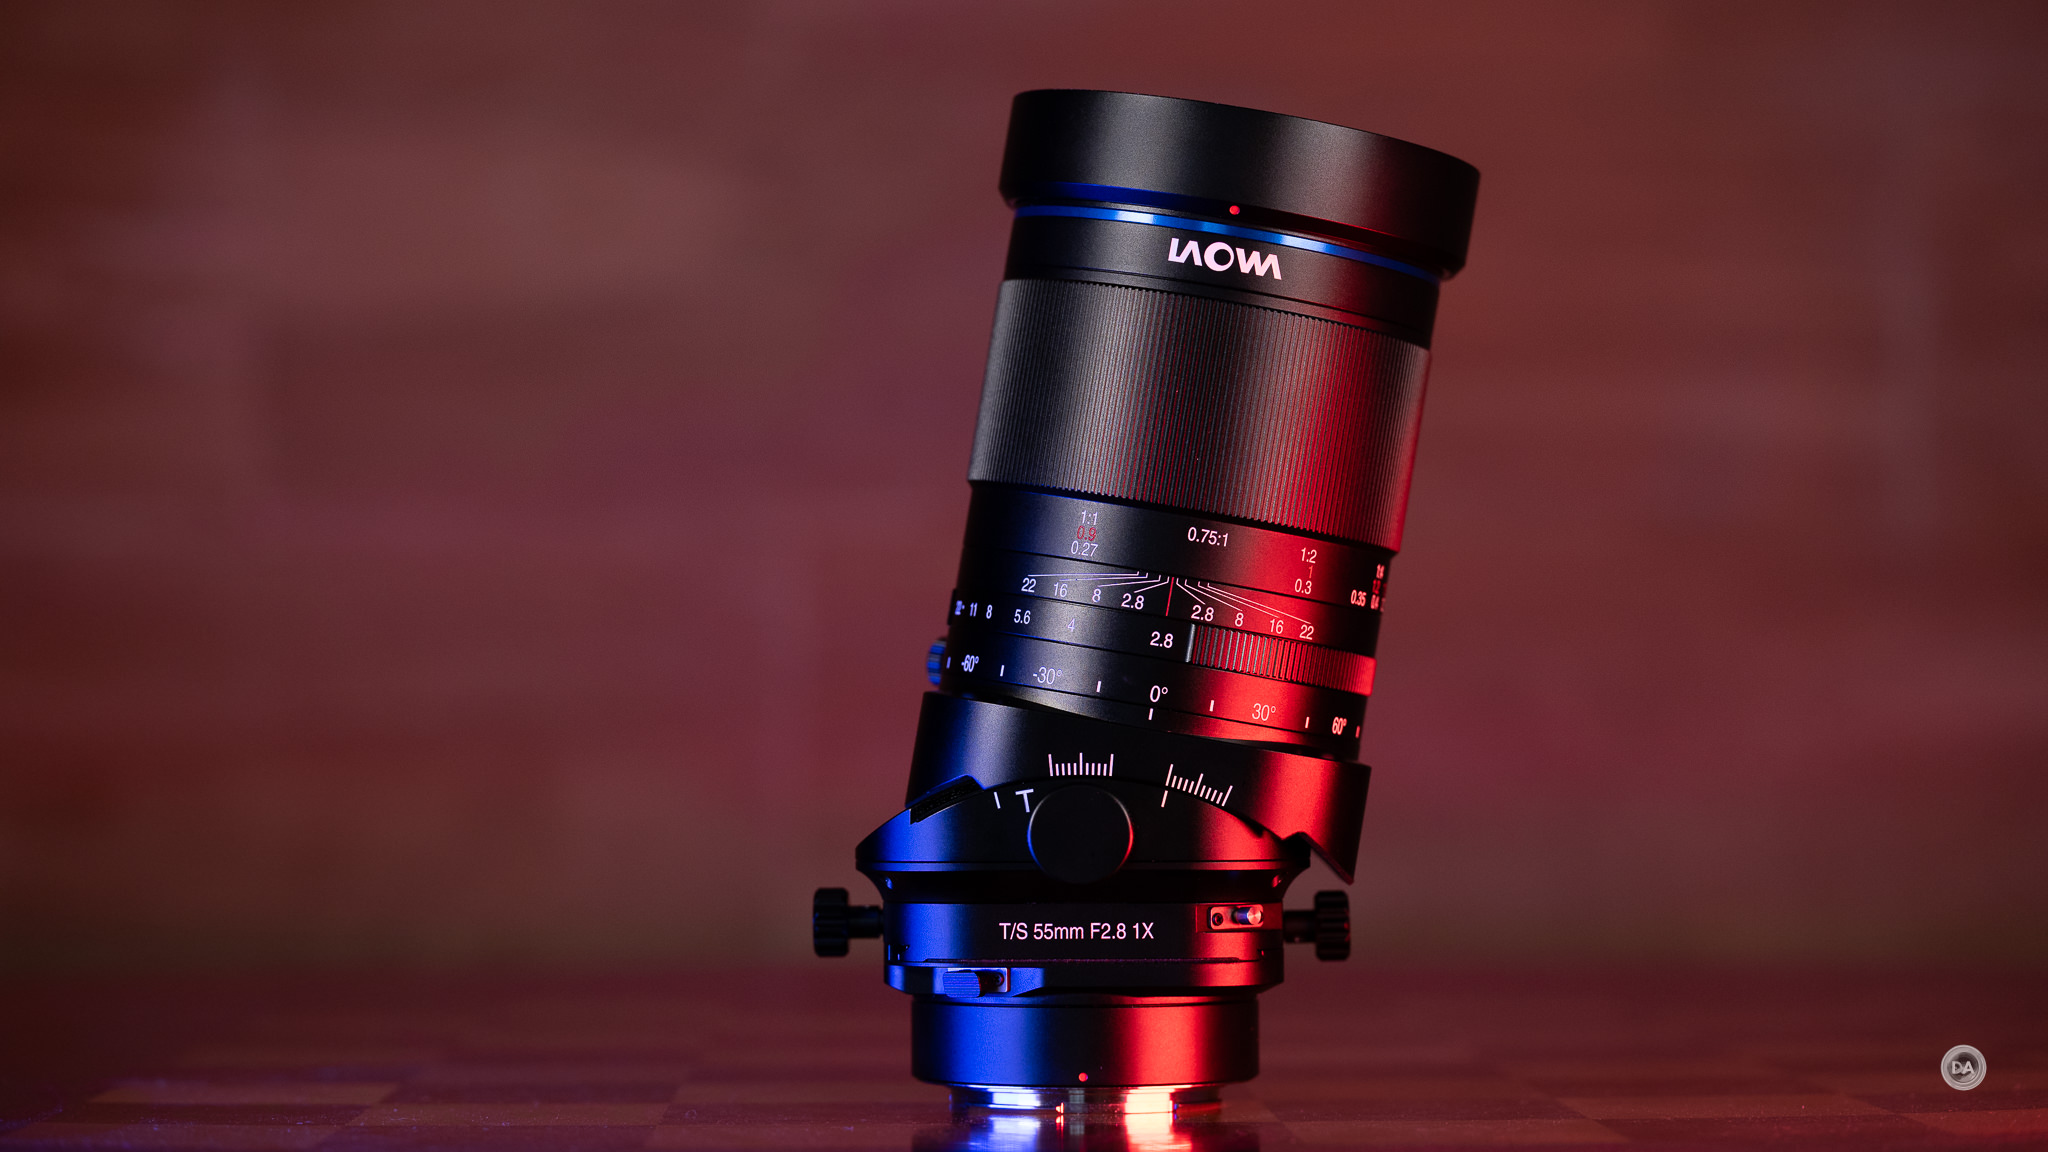
Build and Handling
This is a big lens. One of the first things I noticed about the lens is how big and heavy it was. It has a tripod foot, for one, and when you look at the profile of the lens, it looks a bit like a 70-200mm zoom in girth and length, and is in fact heavier than a number of the modern 70-200mm lenses.
The diameter is 85mm (3.34″), and filter threads are a large but common 77mm.
The length is very slightly extended by a surprisingly slim metal lens hood. It is very shallow, so I would say that it offers much protection value than it does shading value. Fortunately the T/S 55mm has proven to be quite naturally flare resistant, so it isn’t really needed.
This is a fully manual lens, so no electronics. Both focus and aperture control will be manual via the rings, though fortunately both of these work well. The aperture ring is located right after the tilt/shift mechanisms and has light detents only at the full aperture stops, though you can stop anywhere between those full stops if desired.
Between the aperture and focus rings are hyperfocal scales.
The aperture iris itself has an unusually high blade count of 15 blades, but you can see here that iris is still very circular even when stopped down to F22 (minimum aperture).
The manual focus ring itself is very nicely damped, and I’ll go into more detail on the manual focus experience in the section below.
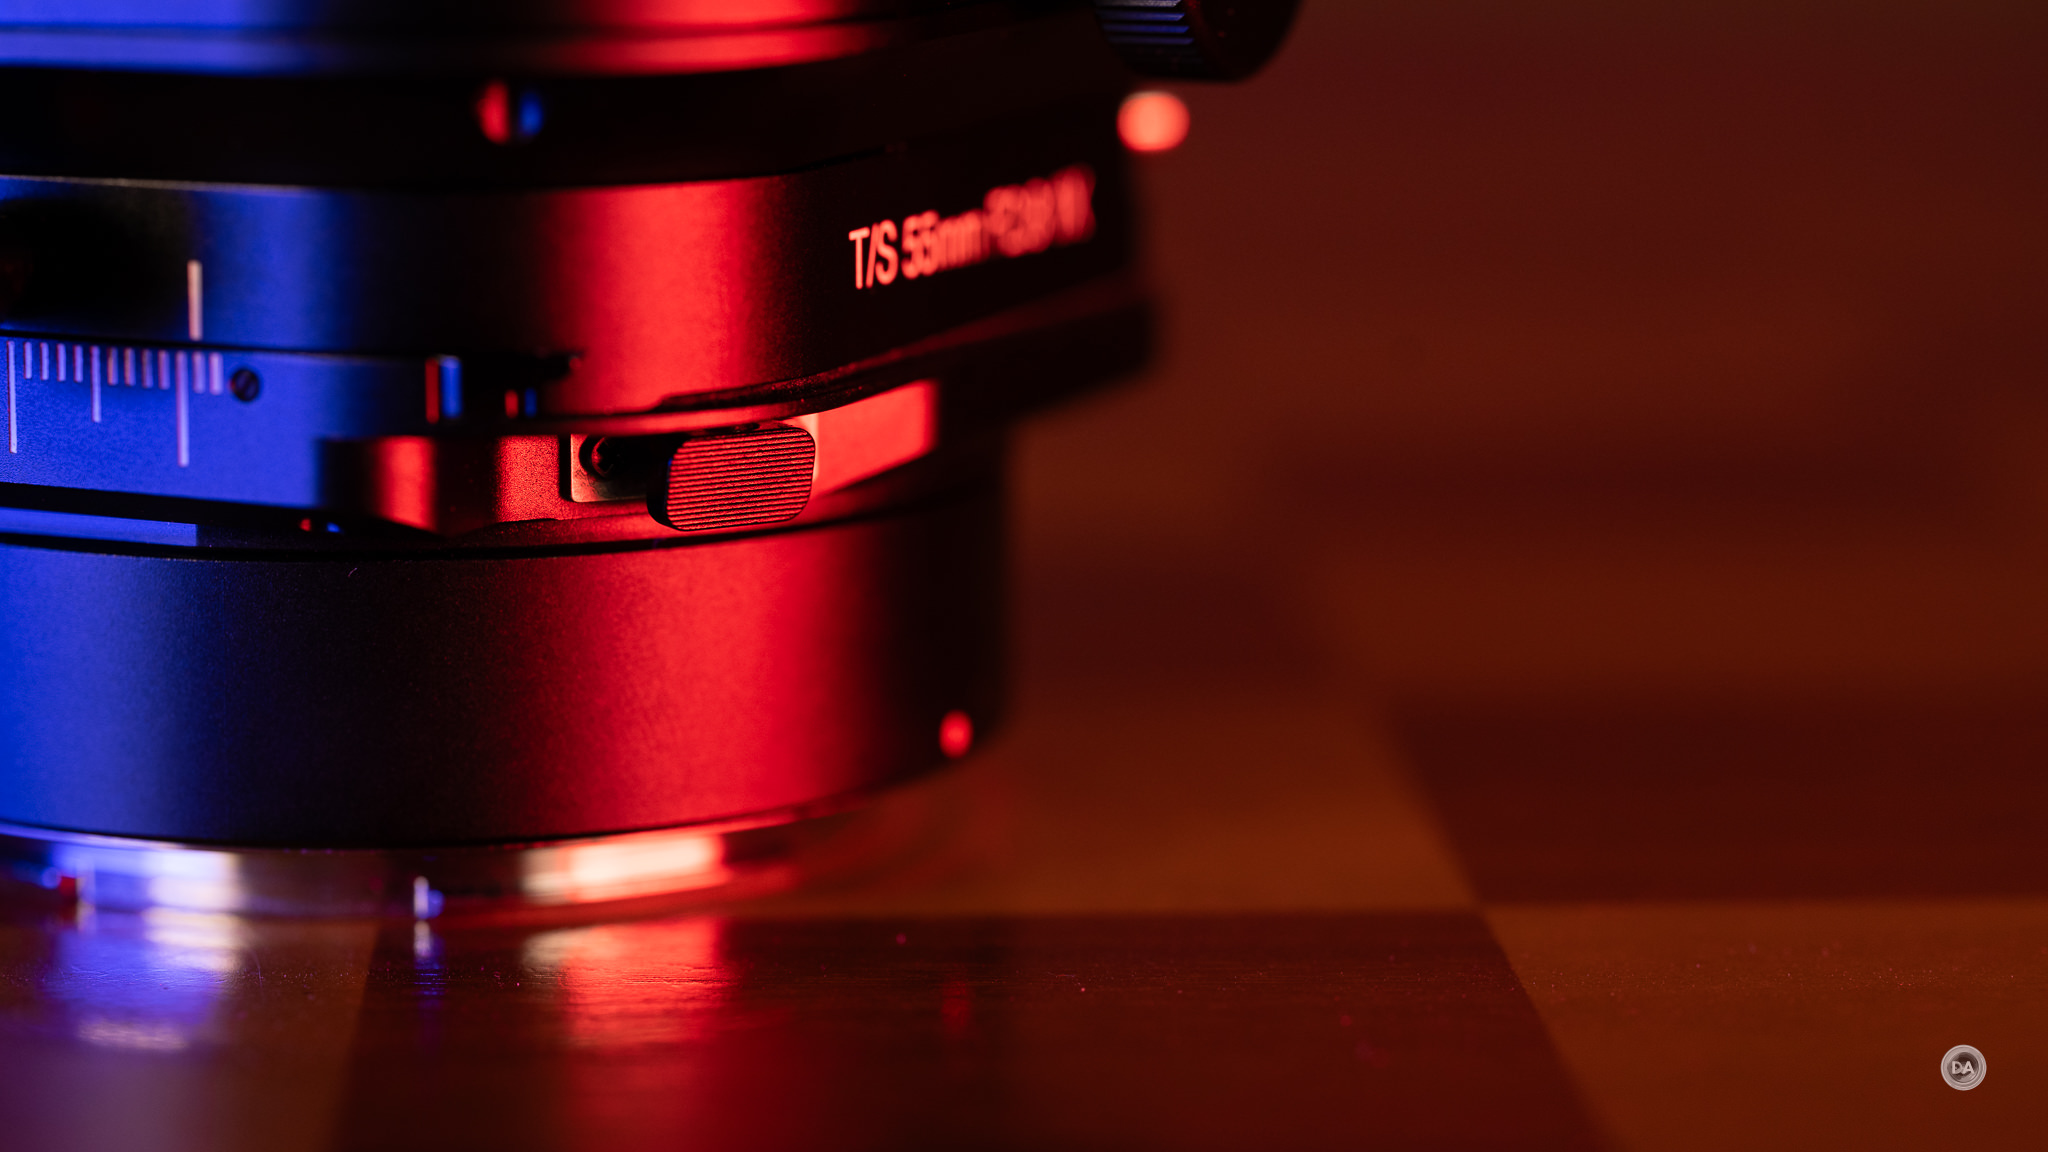
The first third of the lens has a tremendous amount of complexity. after the lens mount itself there are two widening sections which contain first the shift and then the tilt sections. Both can be rotated 360° via small depressible levers.
You’ll probably find the shift section very uncomfortable on your knuckles if you are holding the grip and either of the main adjustment knobs are rotated to that side. There is very little clearance between the camera grip and one of those adjustment knobs (certainly not enough room for your knuckles), so I definitely recommend rotating that section to where those knobs are in the 6 and 12 o’clock positions.
The tripod foot section can also be rotated via yet another adjustment knob, meaning that three sections of the lens can be fully rotated.
If you are not familiar with tilt/shift lenses, you’ll either need to spend some time or do some research to become familiar with how everything moves and what kind of changes that will produce.
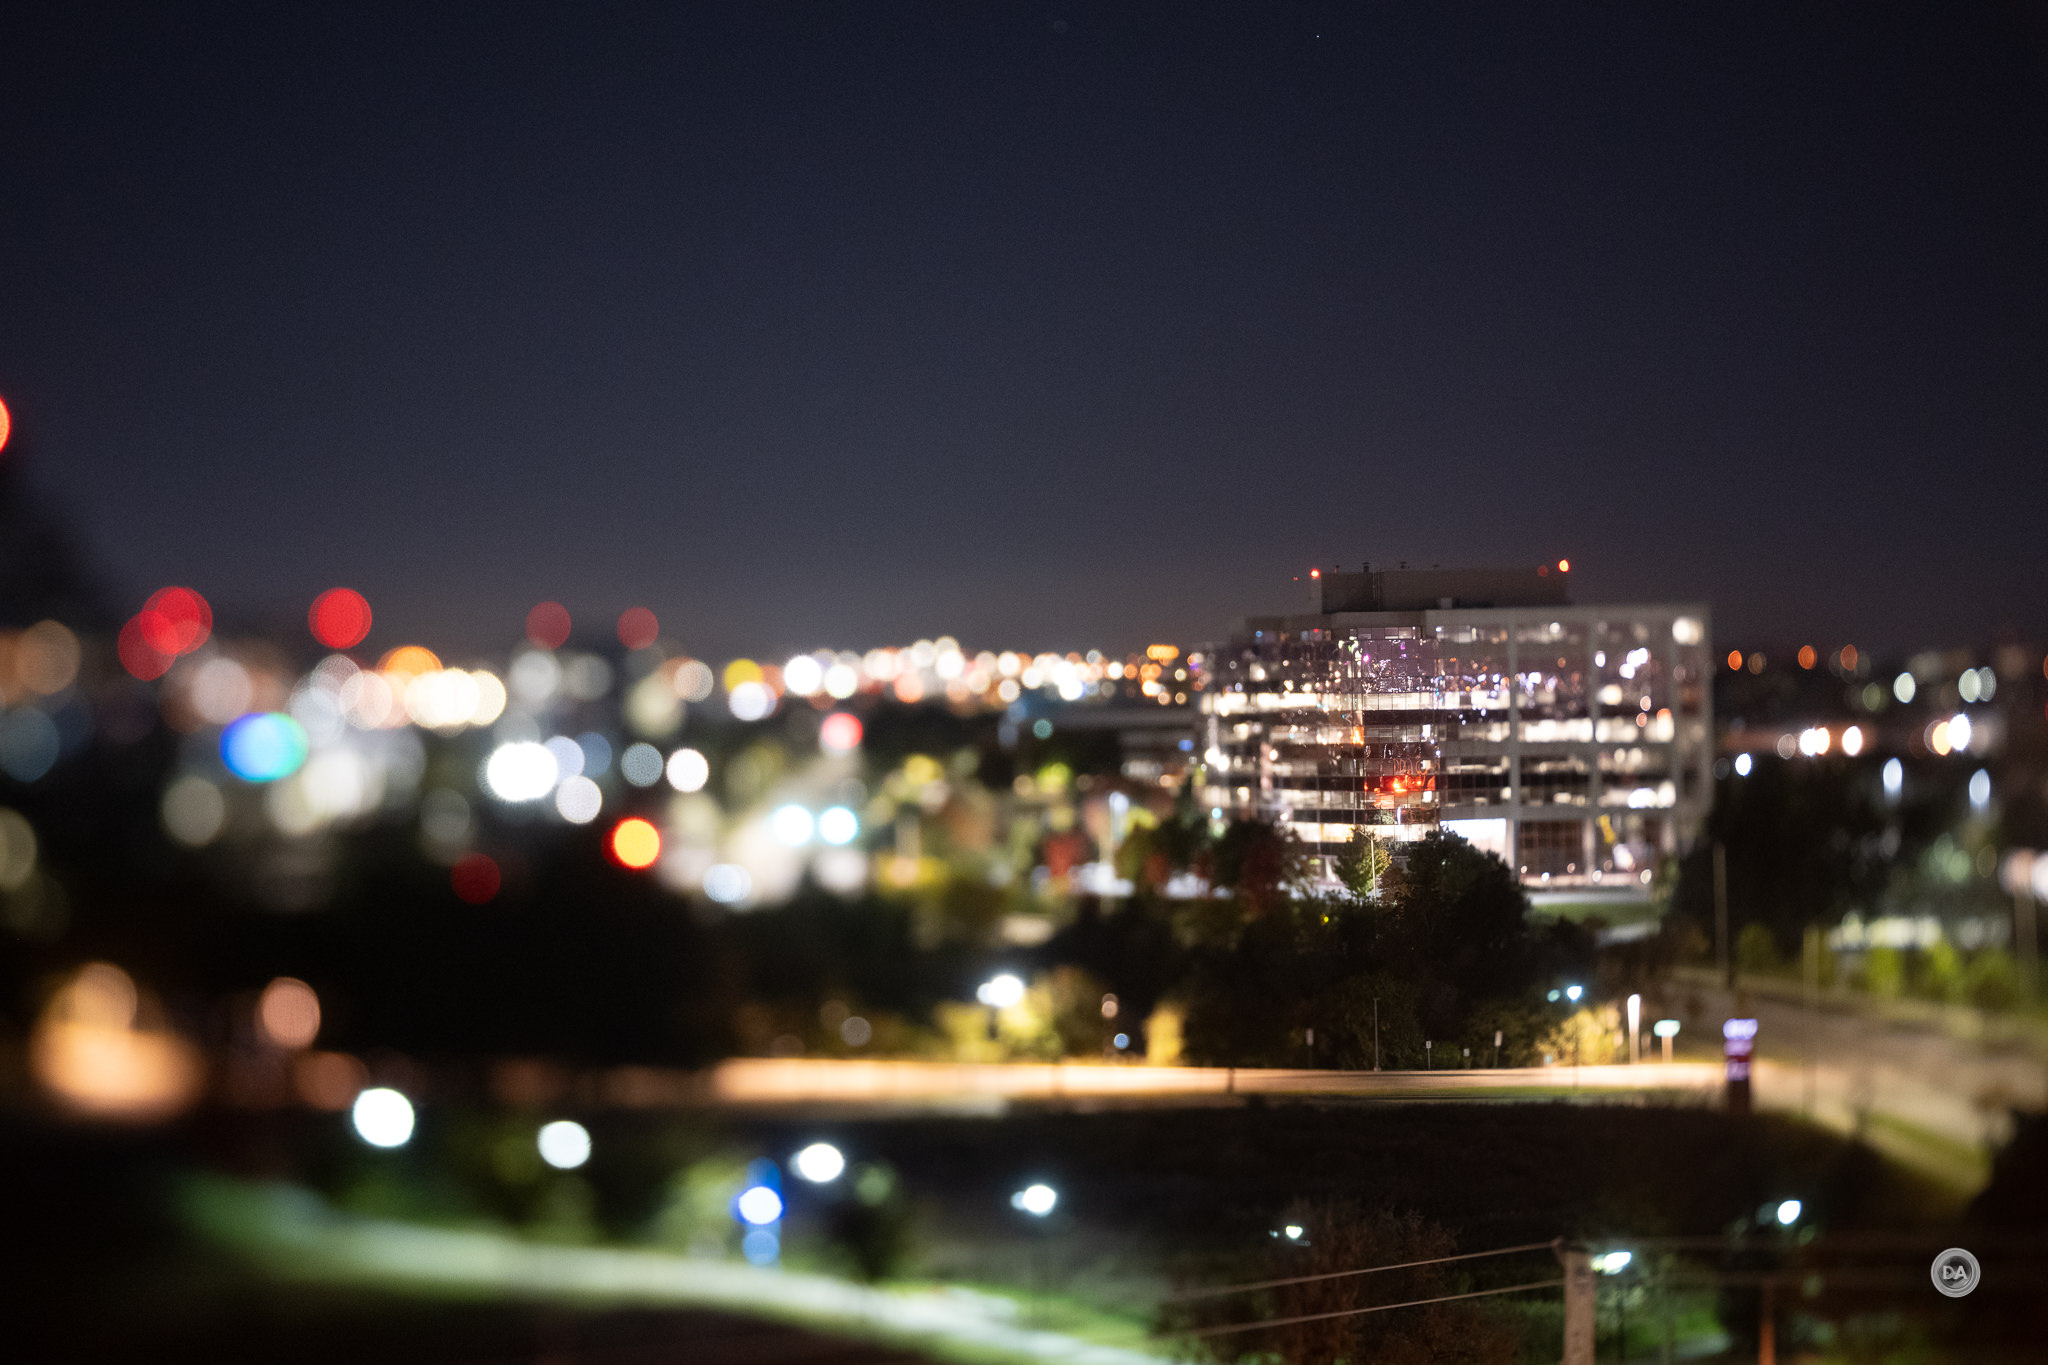
The lens can tilt up to 10° in either direction.
This can allow you to very clearly change the plane of focus. Where a typical lens has a flat(ish) plane of focus that can create defocus before and after the plane of focus, like this:
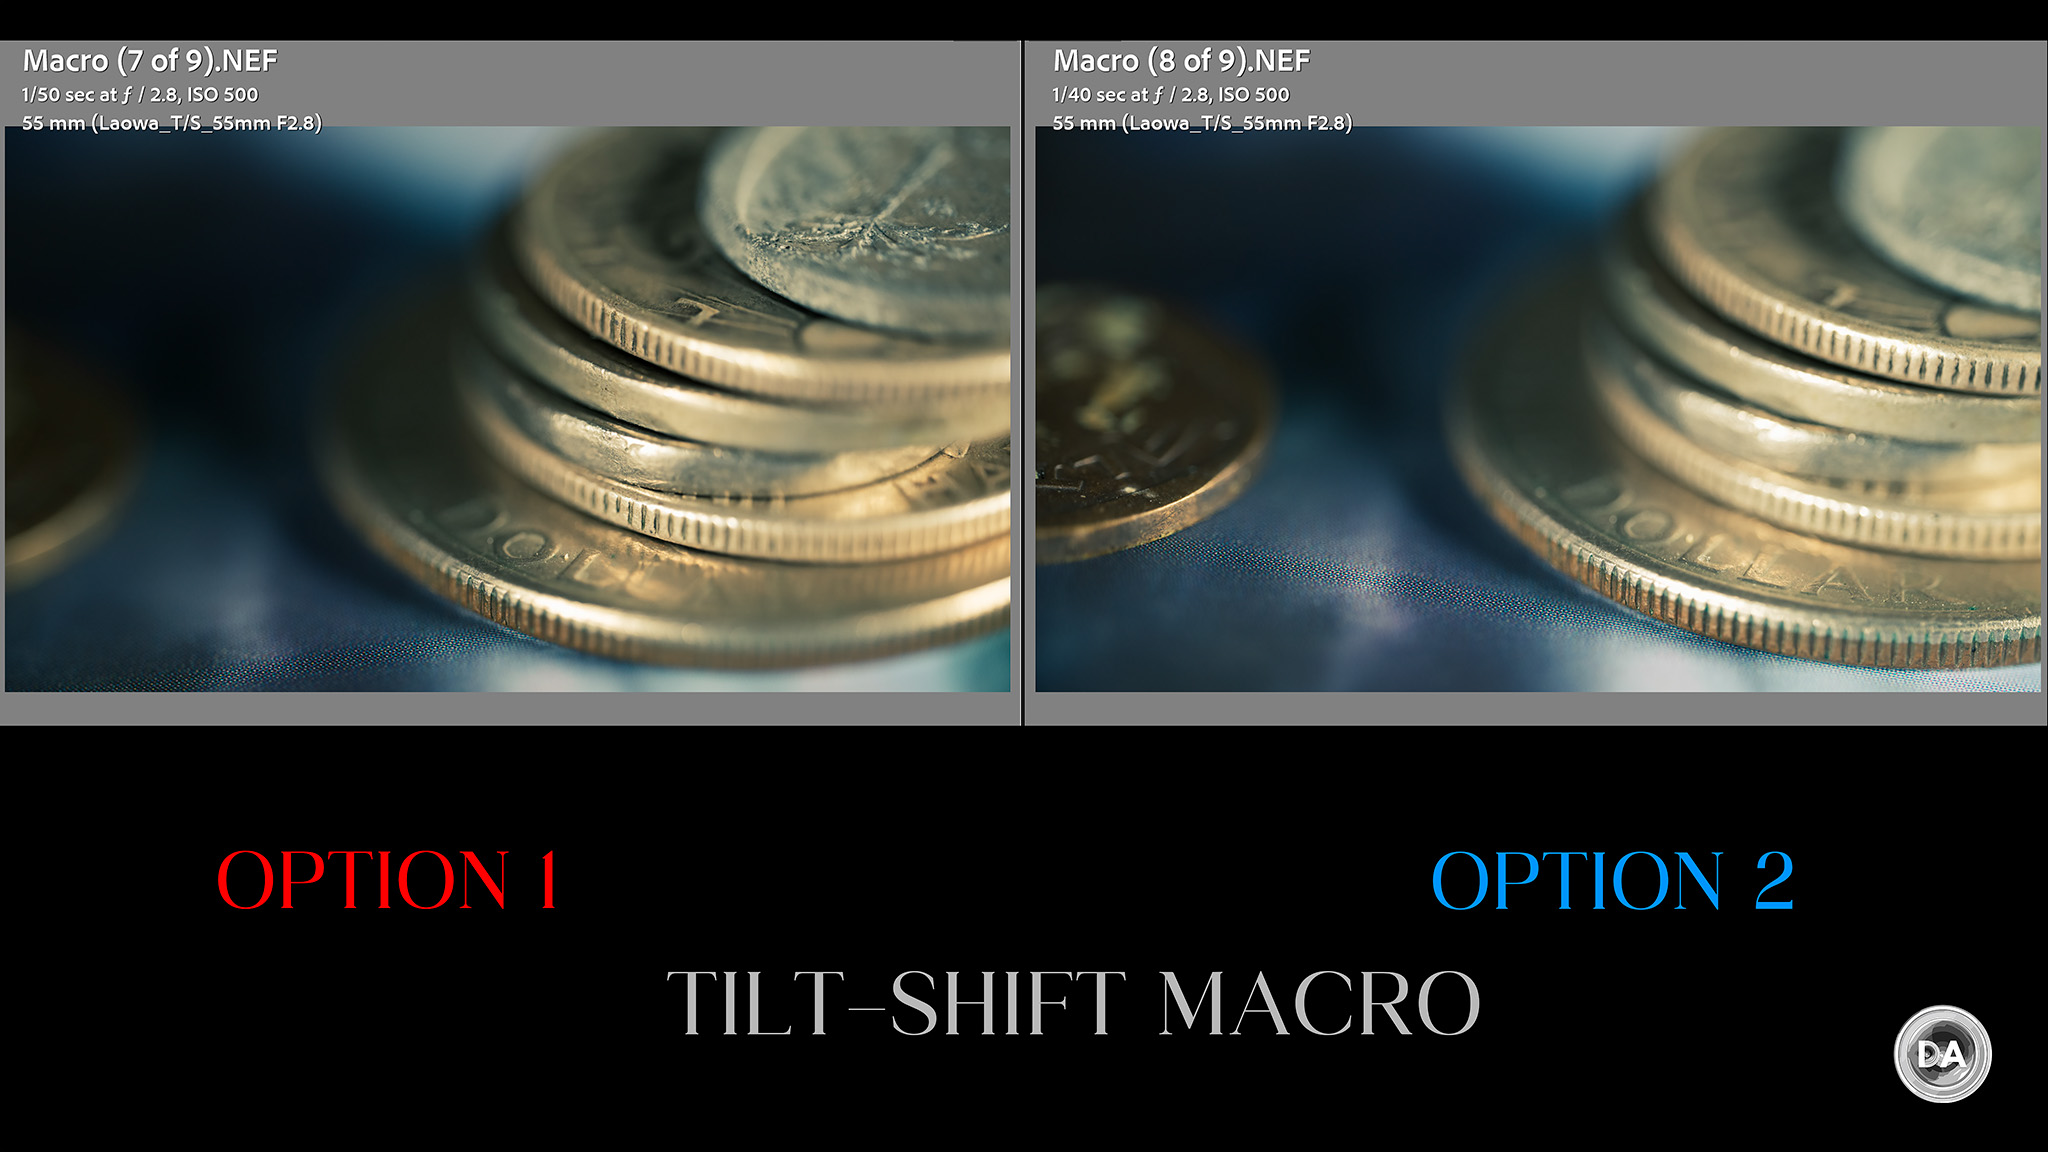
A tilt lens changes that plane of focus and allows for very unique images, where now the plane of focus is tilted to where half of the image is in focus. Adding a little shift to that allows focus to even skip the foreground and just a very narrow section of the image to be in focus, like this:
This can work to either focus the eye very specifically, but can also create those large specular highlights that we see above…something that you could create unless you had a subject very close to the camera. Software can try to imitate an image like the one above, but getting it organically is very difficult.
Tilting in the opposite direction will reverse that plane of focus, so now (next morning) only the building on the left is in focus, while the right side of the image is completely defocused.
Those types of images aren’t for everyone, but one thing is certain: you just can’t create them organically without having a tilt lens.
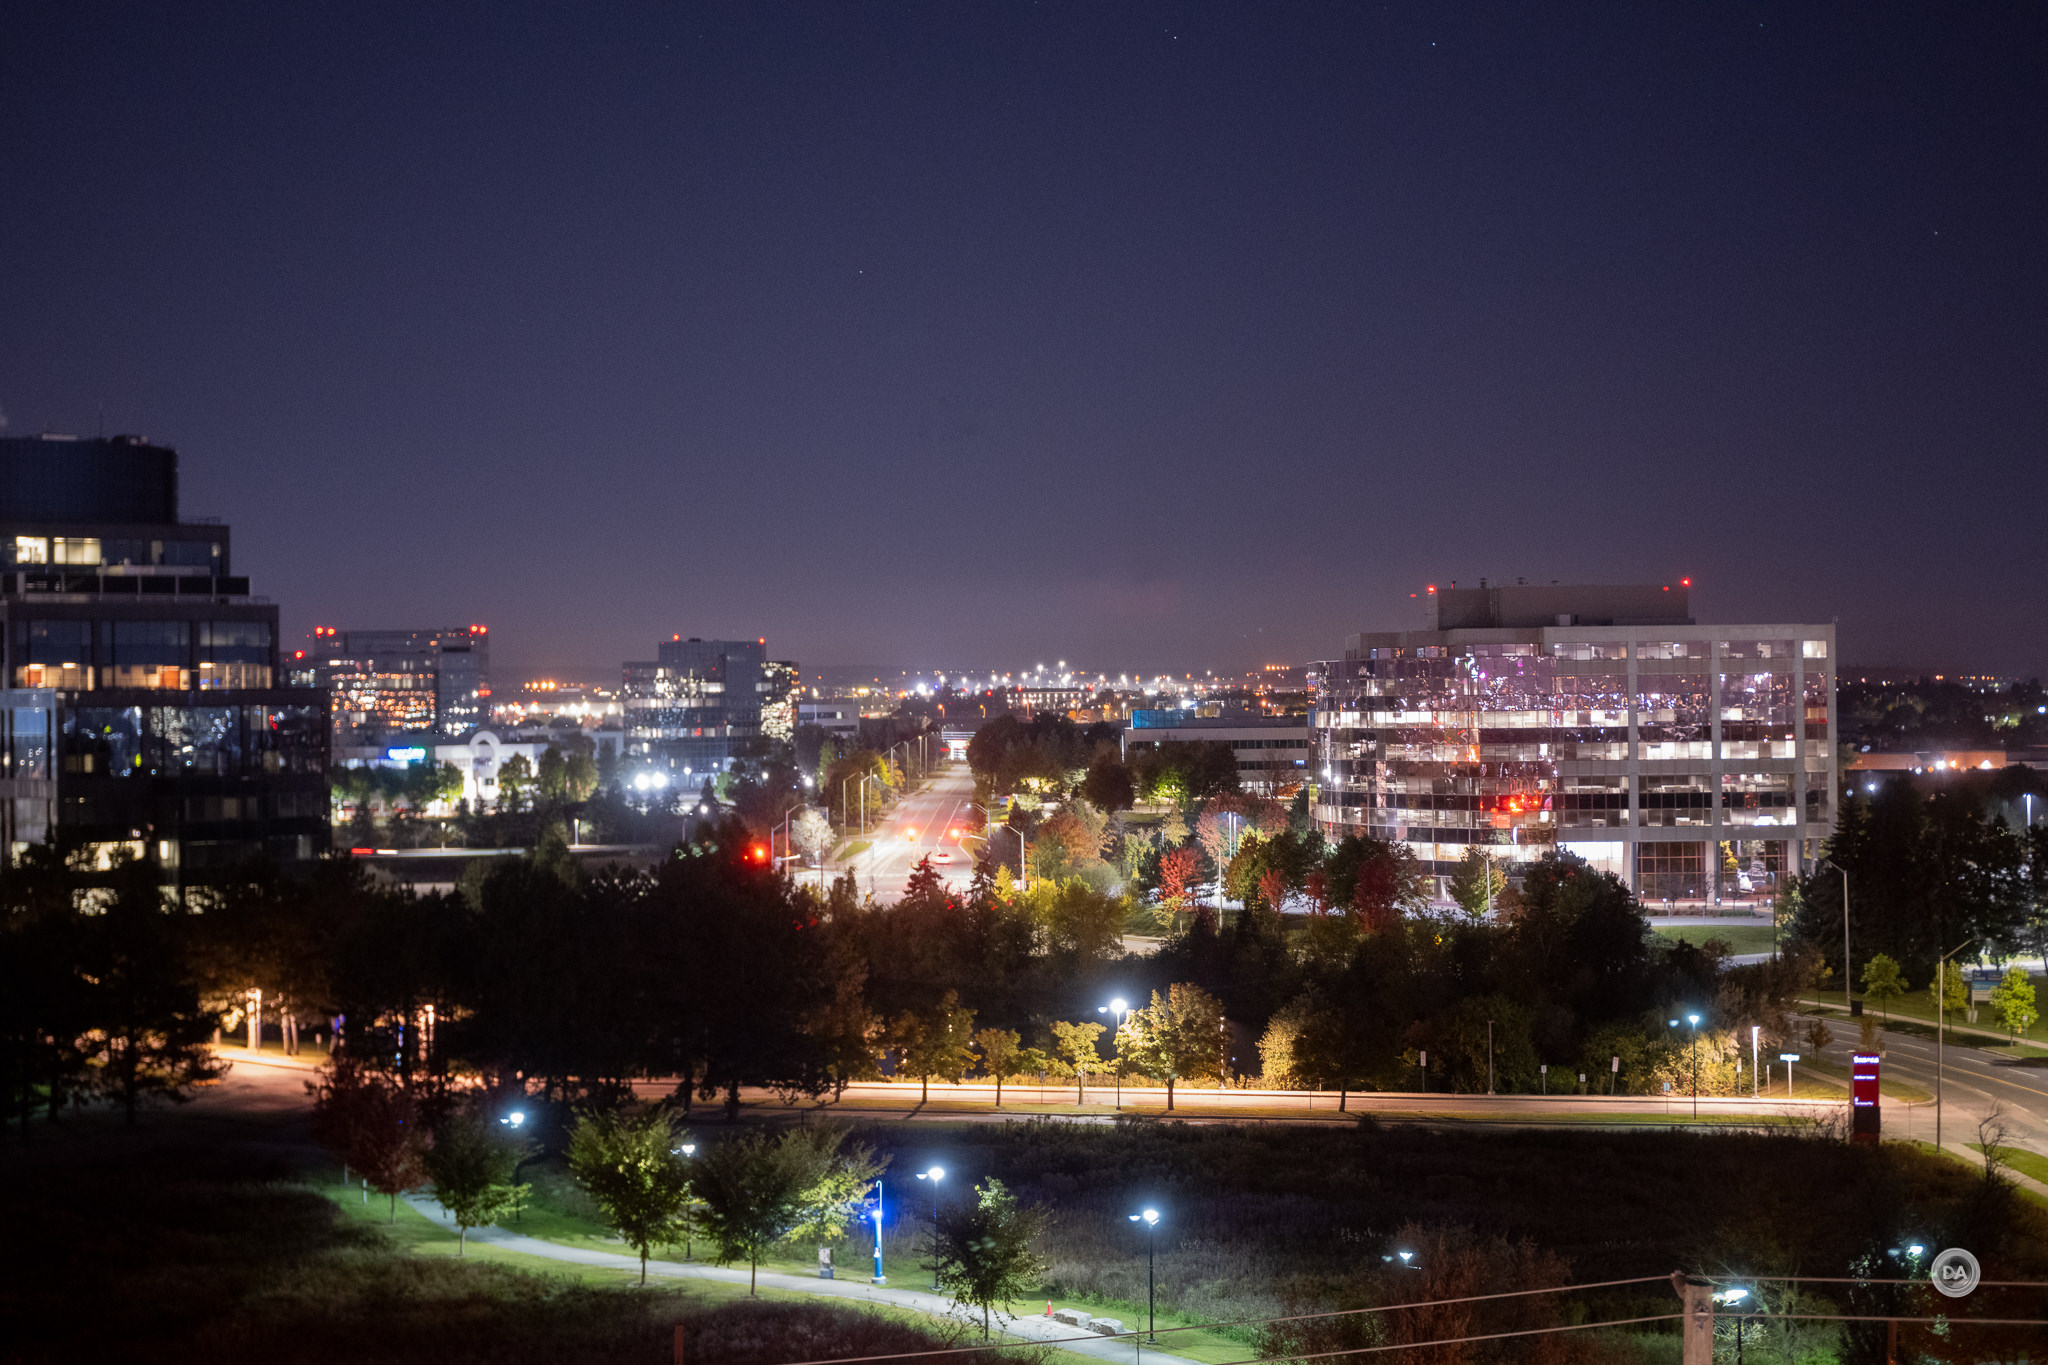
But we’ve also got 12mm of shift, which is 1mm more than the Laowa 15mm F4.5 Shift (which I reviewed here) or 2mm more the Laowa 20mm F4 Shift (which I reviewed here). I don’t consider 55mm to be as useful for shifting as compared to wider focal lengths, but I do appreciate the broader latitude in shifting that we’ve got here. Shift lenses are very useful in a number of settings. One significant one is that they allow one to adjust the lens in such a way to offset the inevitable “keystoning” effect that comes when you try to compose images to include the details you want. Things like trees and buildings lean towards the center, and often your resulting image looks little like the scene did when you viewed it (though again, this effect is less pronounced on a narrower angle of view like we get from a 55mm lens). A shift lens like the T/S 55mm overcomes this by allowing you to physically move (shift) a section of the lens up to 12mm in either direction (with 360° of rotation) to allow you much more control in properly aligning lines by actually controlling the plane of the optics relative to the sensor.
This can also be useful in creating panorama images. 55mm isn’t particularly wide, but by shifting one direction, back to center, and then to the other side and taking a shot in each position, like this:
I can then merge those images very easily into a panorama with next to no loss of image because the perspective is consistent across all three. Here’s the result of quick combining the three.
That panorama is 13794 x 5142 pixels, so can you imagine how big of a high resolution print you could make from that?
You can rotate that whole section and then do the same thing vertically, capturing a high, middle, and low image, like this:
You can then combine those into a vertorama, like this:
Once again we have an extremely high resolution image here.
Obviously there is a lot of flexibility in how you can approach a given subject with a tilt/shift lens, and the T/S 55mm also sports a fast maximum aperture of F2.8…plus macro. The possibilities are endless.
The heavy weight of the lens necessitated a tripod collar. The foot itself attaches via two locking knobs, allowing you to remove the foot if desired. The foot is Arca-grooved, so you can go right onto most tripods with it and won’t have to worry about adding a quick release plate.
The foot isn’t quite as robust as what I would like, in that there is a bit of flex in it. I found that when I tried to line up my test charts, I would get a bit of sag that would require me to frame high and then allow everything to sag down to the correct position.
Minimum focus distance is 27cm, and you can achieve 1:1 (1.0x) magnification with very high performance at that distance.
The lens itself is all metal and glass, and has a high grade of construction. The knobs don’t feel cheap or fragile, which is very important as they will endure some stress over years of future use.
There is a nice anodized finish to the T/S 55mm, and it does feel like a premium lens. That’s appropriate, because it is priced into the premium range at essentially $1300 USD.
Manual Focus on Nikon
Manual focus is an overall positive experience on my Nikon Z8. Here’s a few reasons why:
Clear, useful EVF. On paper, the EVF of the Z8 is nothing special, but, in practice, it works very well. I’ve got much higher resolution viewfinders on Sony cameras, but Sony viewfinders do some weird things when the shutter is half depressed. And I typically want the shutter half depressed when manually focusing, as this helps stabilize the viewfinder while I focus. Nikon’s viewfinder is clear and makes it easy to see focus moving as I turn the manual focus ring.
Effective IBIS (VR). I’ve been impressed with the real world stability of Nikon’s in camera VR. It works effectively and allows for both a stable viewfinder experience as a I focus and also stable results when I take the shot. To my knowledge, no manual focus lens to this point has included lens-based image stabilization, so having effective in-camera stabilization is very important.
Useful manual focus aids. There are three primary manual focus aids that I’ve utilized when manually focusing, including the onscreen focus confirmation box (put it where you want focus to be, and it will turn green when proper focus has been achieved), magnification of the image to visually confirm focus, and focus overlays (peaking). With some lenses Nikon includes a directional arrow that points you the direction you need to turn the focus ring to focus in the right direction, but that isn’t always the case. I’ve found that the focus box is quite accurate, though, and it makes manual focus fairly easy.
The Laowa T/S 55mm is a purely manual lens, with no electronics, and that subtly changes the calculus, however. On the positive side, Nikon is unique among the brands I test in allowing one to manually create some proper metadata for a lens. You can manually input the lens name, focal length, and maximum aperture. This not only helps with VR (the camera knows the proper focal length), but also helps images to be sorted properly in your editing software because that name transfers in the EXIF data. Note the information given to my image in Lightroom:
The good news there is that I can search for images with that name designation rather than them all falling under the “unknown” category. I can even sort them by the proper focal length. What won’t always be properly reported, however, is the aperture. It will always be F2.8, which means that sometimes that will be right and in other cases very wrong.
On the negative side of the equation, the lack of electronic means that A) you will get no automatic magnification of the focus area when you start to manually focus and B) Nikon’s innovative focus guide won’t work. I don’t love Nikon’s manual zoom function, so I don’t love the manual focus process quite as much here.
On a positive note, the manual focus ring on the T/S 55mm is a treat, with a good amount of focus throw (I estimate about 165° of rotation). I also found that there was a reasonable amount of focus room from one meter to infinity (about 35°), which allowed for some precision there, too. That may not seem like a lot, but I’ve also been reviewing the Pergear 100mm F2.8 2x Macro at the same time, and it has less than 15° of rotation from one meter to infinity, and I find it very difficult to nail focus with because even the smallest rotation is the difference between being completely in or out of focus. The T/S 55mm is much easier to nail focus with, and I’ve had a lot of well focused results at a variety of focus distances.
It is worth noting that the beautiful focus ring makes doing focus pulls during video a treat. There’s nothing quite like a well calibrated true manual focus ring for smooth pulls.
Image Quality Breakdown
The Laowa Tilt/Shift 55mm F2.8 Macro has an optical design of 14 elements in 11 groups, and while this doesn’t have the designation of being an Apochromatic design, the performance feels very similar to one of their Apochromatic designs. I’ve shot a lot of my product photos with the T/S 55mm over the past two months, and those shots tend to be very demanding because the depth of field is shallow and there is either shiny surfaces or white lettering on black lenses…all of which is very susceptible to fringing. You can see that this lens produces none of that.
But beyond macro performance, there is a decided quality to the optical performance that feels very much like a Zeiss Otus performance. Something about the quality of the optical glass and the combination of sharpness, contrast, color, and defocused region that feels very rich and defined.
Images just had a sparkle to them that lesser lenses can’t match. I also shot the Sirui Aurora 85mm F1.4 lens at the same time during this portrait shoot, and you can see that there is a very different richness to the image from the Laowa.
I actually went away from this session wishing that Laowa would package these optics in a smaller, more conventional lens, as they are exceptional.
We’ll start our detailed examination with a look at vignette and distortion.
There’s nothing to be concerned about here at all. I see no distortion that requires correction, and while Laowa’s wide angle lenses often exhibit heavy vignette, there’s not much here. I used a +42 to correct, which is under two stops in the corner. Remember that this is a lens that also covers a much larger medium format sensor, so I would expect a lot of the vignette-affected area is actually cropped off on full frame. I never found a need to correct the vignette in real world images.
As noted, the control of chromatic aberrations (color fringing) is exceptional. There is no visible fringing before or after the plane of focus whether in my chart tests:
You can see no fringing in standard text, either.
There’s nothing on shiny surfaces, either.
I see no lateral chromatic aberrations near the edges of the frame, either.
In short, all of this is exceptionally good. This feels like an Apochromatic design in the way that colors are all accurately focused, which is a big part of of the overall “look” of images.
So far, so good. What about sharpness? These tests are done on the 45MP Nikon Z8 body, and crops and comparisons will be shown at 200%. Here’s the test chart:
And here are F2.8 crops from across the frame, including the center, mid-frame, and lower right corner.
Those results are, put simply, fantastic. Extremely strong center and mid-frame, and the corners aren’t far behind. Real world results are very crisp, with great microcontrast and fine detail.
Here’s another real world example, and you can see just how crisp the details are even at F2.8 in the crop.
There must be some degree of focus shift, as I found that results as I stopped the lens down weren’t focused as well even though with a manual focus lens there was no focus changes in between captures on my test chart. I can see some minor contrast increase at F4 and F5.6, however.
The truth of the matter is that no further sharpness or contrast is needed, as the lens is already intensely sharp from wide open. Real world focus results should be accurate, as you mostly will focus at the aperture you want to take the photo at.
I found it fairly easy to nail focus and get very sharp results, even when focusing at medium distances, like in this shot.
Minimum aperture is F22. I found that the camera didn’t quite meter correctly when the aperture was set to F22, with a mild underexposure. You can see that diffraction will significantly soften the image after F11:
Because this is an APO lens in everything but name, it does tend to deal with the same common issue for APO lenses, namely that you can’t just turn off that sharpness and contrast in the defocused region. We can see that geometry isn’t too bad, though you will definitely get some lemon shaped specular highlights near the edge of the frame.
In this shot, for example, the bokeh is just okay, with more definition to defocused textures than what is optimal.
In this shot you can see the absolutely amazing contrast, but also that the background isn’t particularly creamy.
That being said, I liked the overall look of portrait type images, as the rich colors made up for a bit of bokeh.
Bokeh is subjective, of course, so I’ll let you decide for yourself. Here are a few more samples:
Sharpness, contrast, and bokeh are all excellent at macro distances. Depth of field is tiny at 1:1 macro distances, and so backgrounds are going to be strongly blurred anyway. Sharpness and contrast up close is excellent.
The value of a tilt/shift lens for macro is the different ways you can approach a scene. In the first example, I’ve used some subtle tilting and shifting to make the coin on the right be completely out of focus, while the plane of focus runs diagonally across the coins on the right side of the image, including some of the top pile. In the second example, I’ve changed focus to where now the the left side of the image is in the plane of focus while the top coin on the right is no longer in focus at all. It also makes more of the “Dollar” imprint in focus.
Flare resistance is nice and strong with the T/S 55mm. I did a comparison shot with a cheaper Pergear Macro that I was also reviewing of a scene with intense sun coming through a window. You can see that the Laowa is pretty much impervious (on the left) while the Pergear image on the right is absolutely flooded with veiling and prismatic haze.
In short, this is a very, very strong performer optically. The Laowa Tilt/Shift 55mm F2.8 Macro is one of the very best optical instruments that I’ve seen from Laowa. I suspect that the performance of the 100mm will be similar. If you want to see more images, check out the image gallery here.
Conclusion
The Laowa Tilt/Shift 55mm F2.8 Macro is going to be a very interesting addition to the various platforms that it comes for. This is an extremely versatile lens, able to produce standard images, macro images, along with tilt, shift, or some combination of the two…all with stunningly good image quality.
I found the T/S 55mm a lovely portrait lens as well, though obviously shooting with a manual focus lens that won’t get focus confirmation does take a little more work and patience.
If you’ve never used a tilt/shift before, there will be a learning curve, as there is a lot of different ways you can position the lens, each of which will produce either subtly or obviously different results. The lens is also quite expensive ($1300 USD), large, and heavy, so there are a few other prices to pay as well. A manual everything lens isn’t going to be for everyone, and this is a lens for those who don’t mind (or even prefer) moving at a slower pace with their photography. I do think that it will be quite rewarding for those that do so, however.
Pros:
High level of build quality
Knobs and levers feel well made
Good mechanical movement of tilt and shift functions
DISCLAIMER: This article and description contains affiliate links, which means that if you click on one of the product links, I’ll receive a small commission. As an Amazon Associate I earn from qualifying purchases.


 7Artisans AF 35mm F1.4 X-Mount Review
  Sony FE 50-150mm F2 GM Gallery
  Sony FE 50-150mm F2 G Master Review
  Viltrox AF 35mm F1.2 LAB FE Gallery
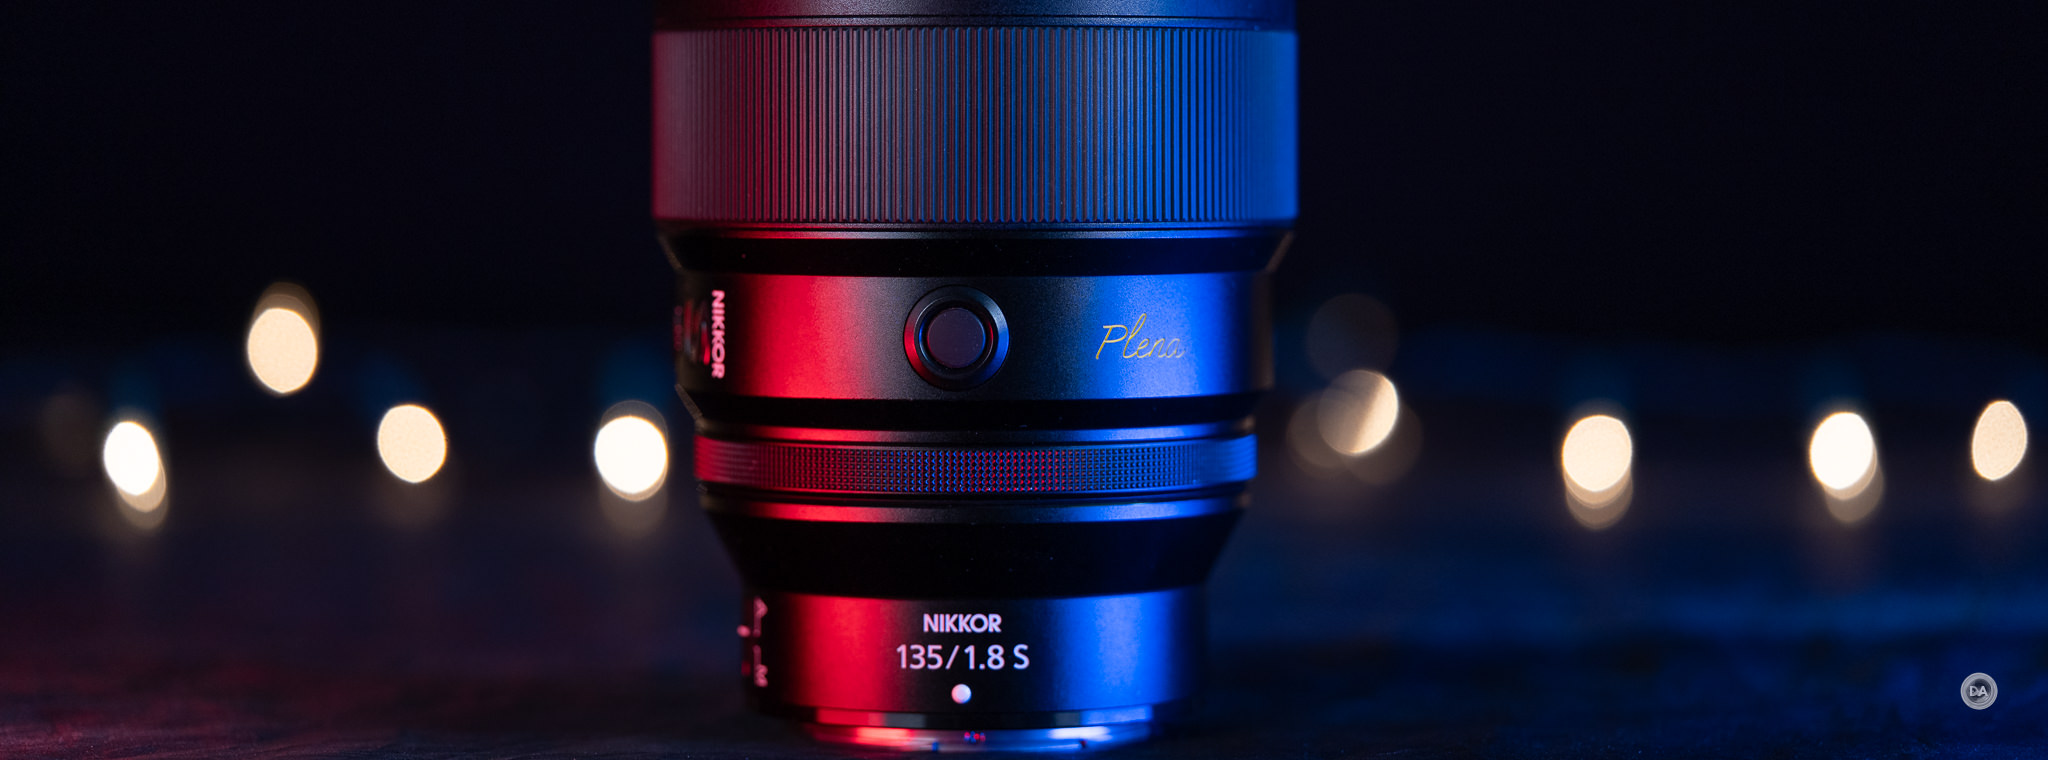
 LAB vs PLENA: Nikon 135mm Showdown