Probably few people in North America have previously heard of GOOVIS (a name that doesn’t translate particularly well), but this is a company that has a well developed reputation in Asia for its work in high definition head-mounted displays (HMD). GOOVIS holds more than 150 global patents, and the product I’m reviewing from them today – the GOOVIS ART – shows every indication of being a mature, polished product. This is a not a VR (Virtual Reality) device; it is a head mounted display that allows you to watch what looks like a big screen (110″ at a 4 meter distance) in a very compact device. Most importantly, it just works – effortlessly and effectively. I’ve allowed a bunch of people to strap on the GOOVIS ART and tell me what they think, and the response (all the way up to my 85 year old father-in-law) has been a lot of “wow”.
The ART can be had for as little as $469 USD, and it might just become your best friend if you routinely commute on public transit systems, planes, or live in a small space where having a big screen just doesn’t work.
Thanks to GOOVIS for sending me a review sample. As always, this is a completely independent review. All thoughts and opinions expressed here are my own.
AI SUMMARY: The article offers a detailed review of the GOOVIS ART head-mounted display, highlighting its high-quality micro-OLED screens, impressive resolution, and user-friendly design. It emphasizes the device’s plug-and-play connectivity with smartphones and other media devices, along with its adjustable settings for IPD and diopters, making it adaptable for various users. The open design provides a balance between immersive viewing and situational awareness, making it versatile for different activities like commuting or working out. Overall, the GOOVIS ART delivers a crisp, visually stunning experience at an accessible price point, though its open design may lead to some light leakage and reduced immersion.
Strengths:
Excellent display clarity with high resolution and contrast
Easy to set up and operate
Comfortable, lightweight, and adaptable fit
Situational awareness maintained due to open design
Weaknesses:
Compatibility issues with older smartphones or devices
The basic principle is simple – the GOOVIS ART does not use an internal power supply but rather runs off of the USB-C cable that you plug into your phone, tablet, or media device. If you are using a source with HDMI, there is a simple adapter you can use that will adapt from the HDMI to USB-C.
When something like my iPhone 15 Pro is connected, the ART’s display will immediately turn on and mirror the display of the phone. When you go into media content it will display the proper horizontal view and fill the screen. There really isn’t much to figure out; I was shocked by how quickly I was up and running. As we’ll detail later on, that’s less true if you are using an older playback device.
There are several features that also help to accommodate the broad spectrum of human vision. First of all, there is a locking/unlocking switch on the top left that allows adjust the IPD (interpupillary distance adjustment) from 58mm – 74mm. This allows you to make sure that there is the proper distance between your eyes. The second adjustment is an independent diopter on the outside on each side to give you independent control for each eye. You can adjust from 0 to -3.5 to adjust for your vision…in each eye. This allows you to get very crisp detail even without wearing glasses, though if your vision falls outside that range, there is room to wear your glasses.
Other controls include the ability to switch between 2D and 3D, and you can long press that same button to swap between left-right images (the 3D function is side by side). I have been able to find some 3D content, but it isn’t easy.
There are also volume controls on the top of the ART as well which apply not only to the built in speakers but will also control the volume of any headphones you’ve attached to the 3.5mm earphone jack on the forehead section. If you are using Bluetooth buds your volume controls will be separate. The USB-C cable connects into the right side of the forehead rest, and there are several cable routing straps built into the head straps so that you can keep cables out of your way. I was able to use the GOOVIS ART even while working out by just running the cable under my shirt and putting my phone in my pocket. It worked surprisingly well, as the display moves with me even when I’m on my back and repping weights.
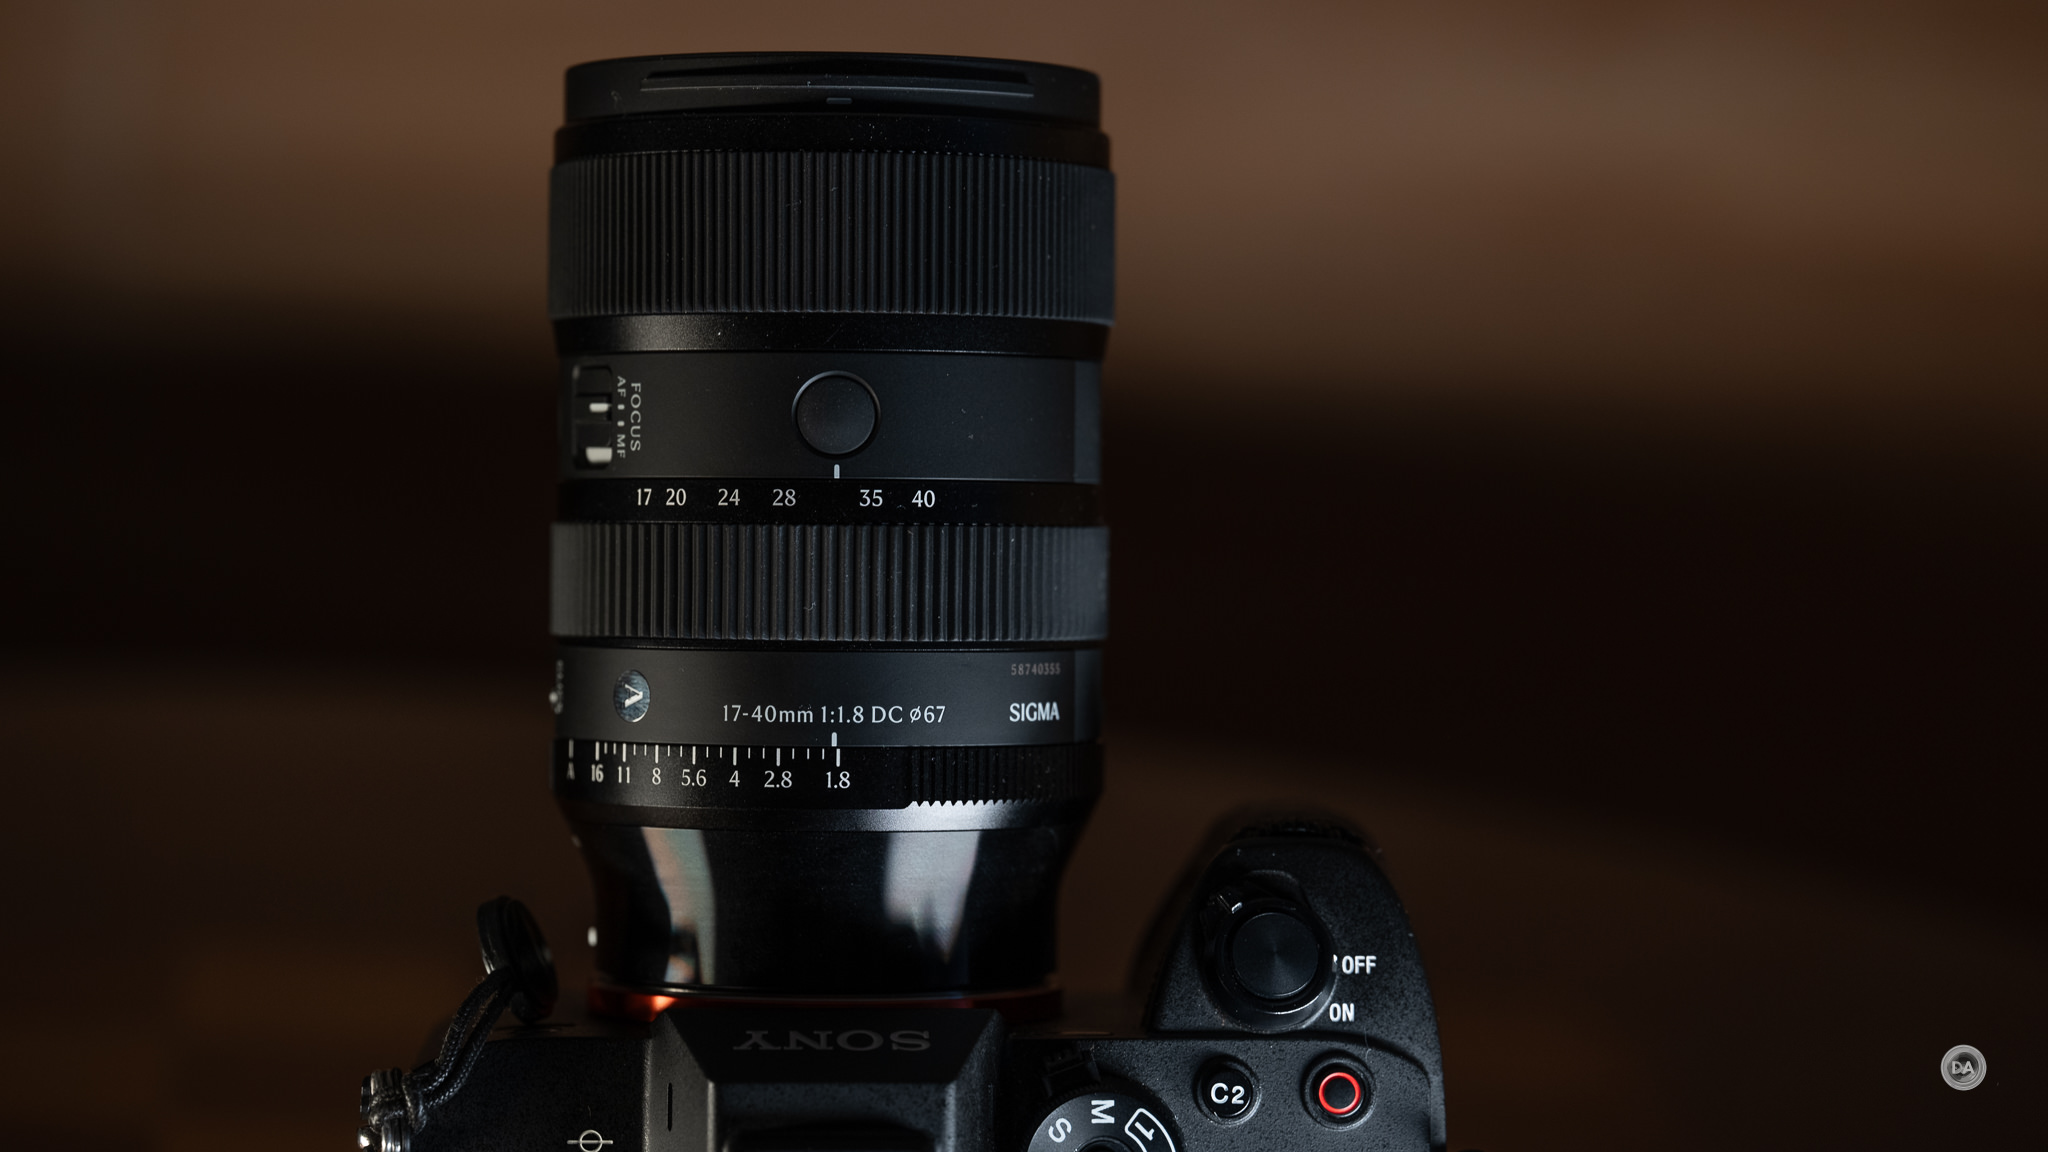
The twin displays each have a native 1920 x 1080P resolution and look very crisp. Resolution is an extremely high 4496 PPI (pixels per inch), considerably higher than, say, the 3,386 PPI of the Apple Vision Pro. The contrast ratio of the display is rated at an extremely high 100,000:1, and black levels look impressively good. The display type is a micro-OLED. Lag is extremely low if you want to use it for gaming, with a response time of <0.01ms. The GOOVIS ART uses Glass-Plastic Hybrid Aspheric Lenses (ASPH) lenses that produce very crisp results and delivers a distortion level less than 1%. Bottom line is that the display looks fantastic, and many people will be shocked by how much the viewing experience will change even familiar viewing material.
I never say audio/video sync issues, though one thing to watch out for is that many apps will default to the built in speaks when playback starts. You can swap to your Bluetooth buds either by clicking the audio device icon in the upper left part of the screen (on your playback device) or often by pressing or squeezing your Bluetooth buds control for play/pause. I did run into one app where there wasn’t an option presented, but I plugged in wired headphones and had no problem.
You can connect the ART to a wide range of devices, from gaming consoles (would be very cool with a Nintendo Switch!) to smartphones to cameras to drones. Connecting the display to your camera while filming sounds interesting, but I never could figure out a way to make it work.
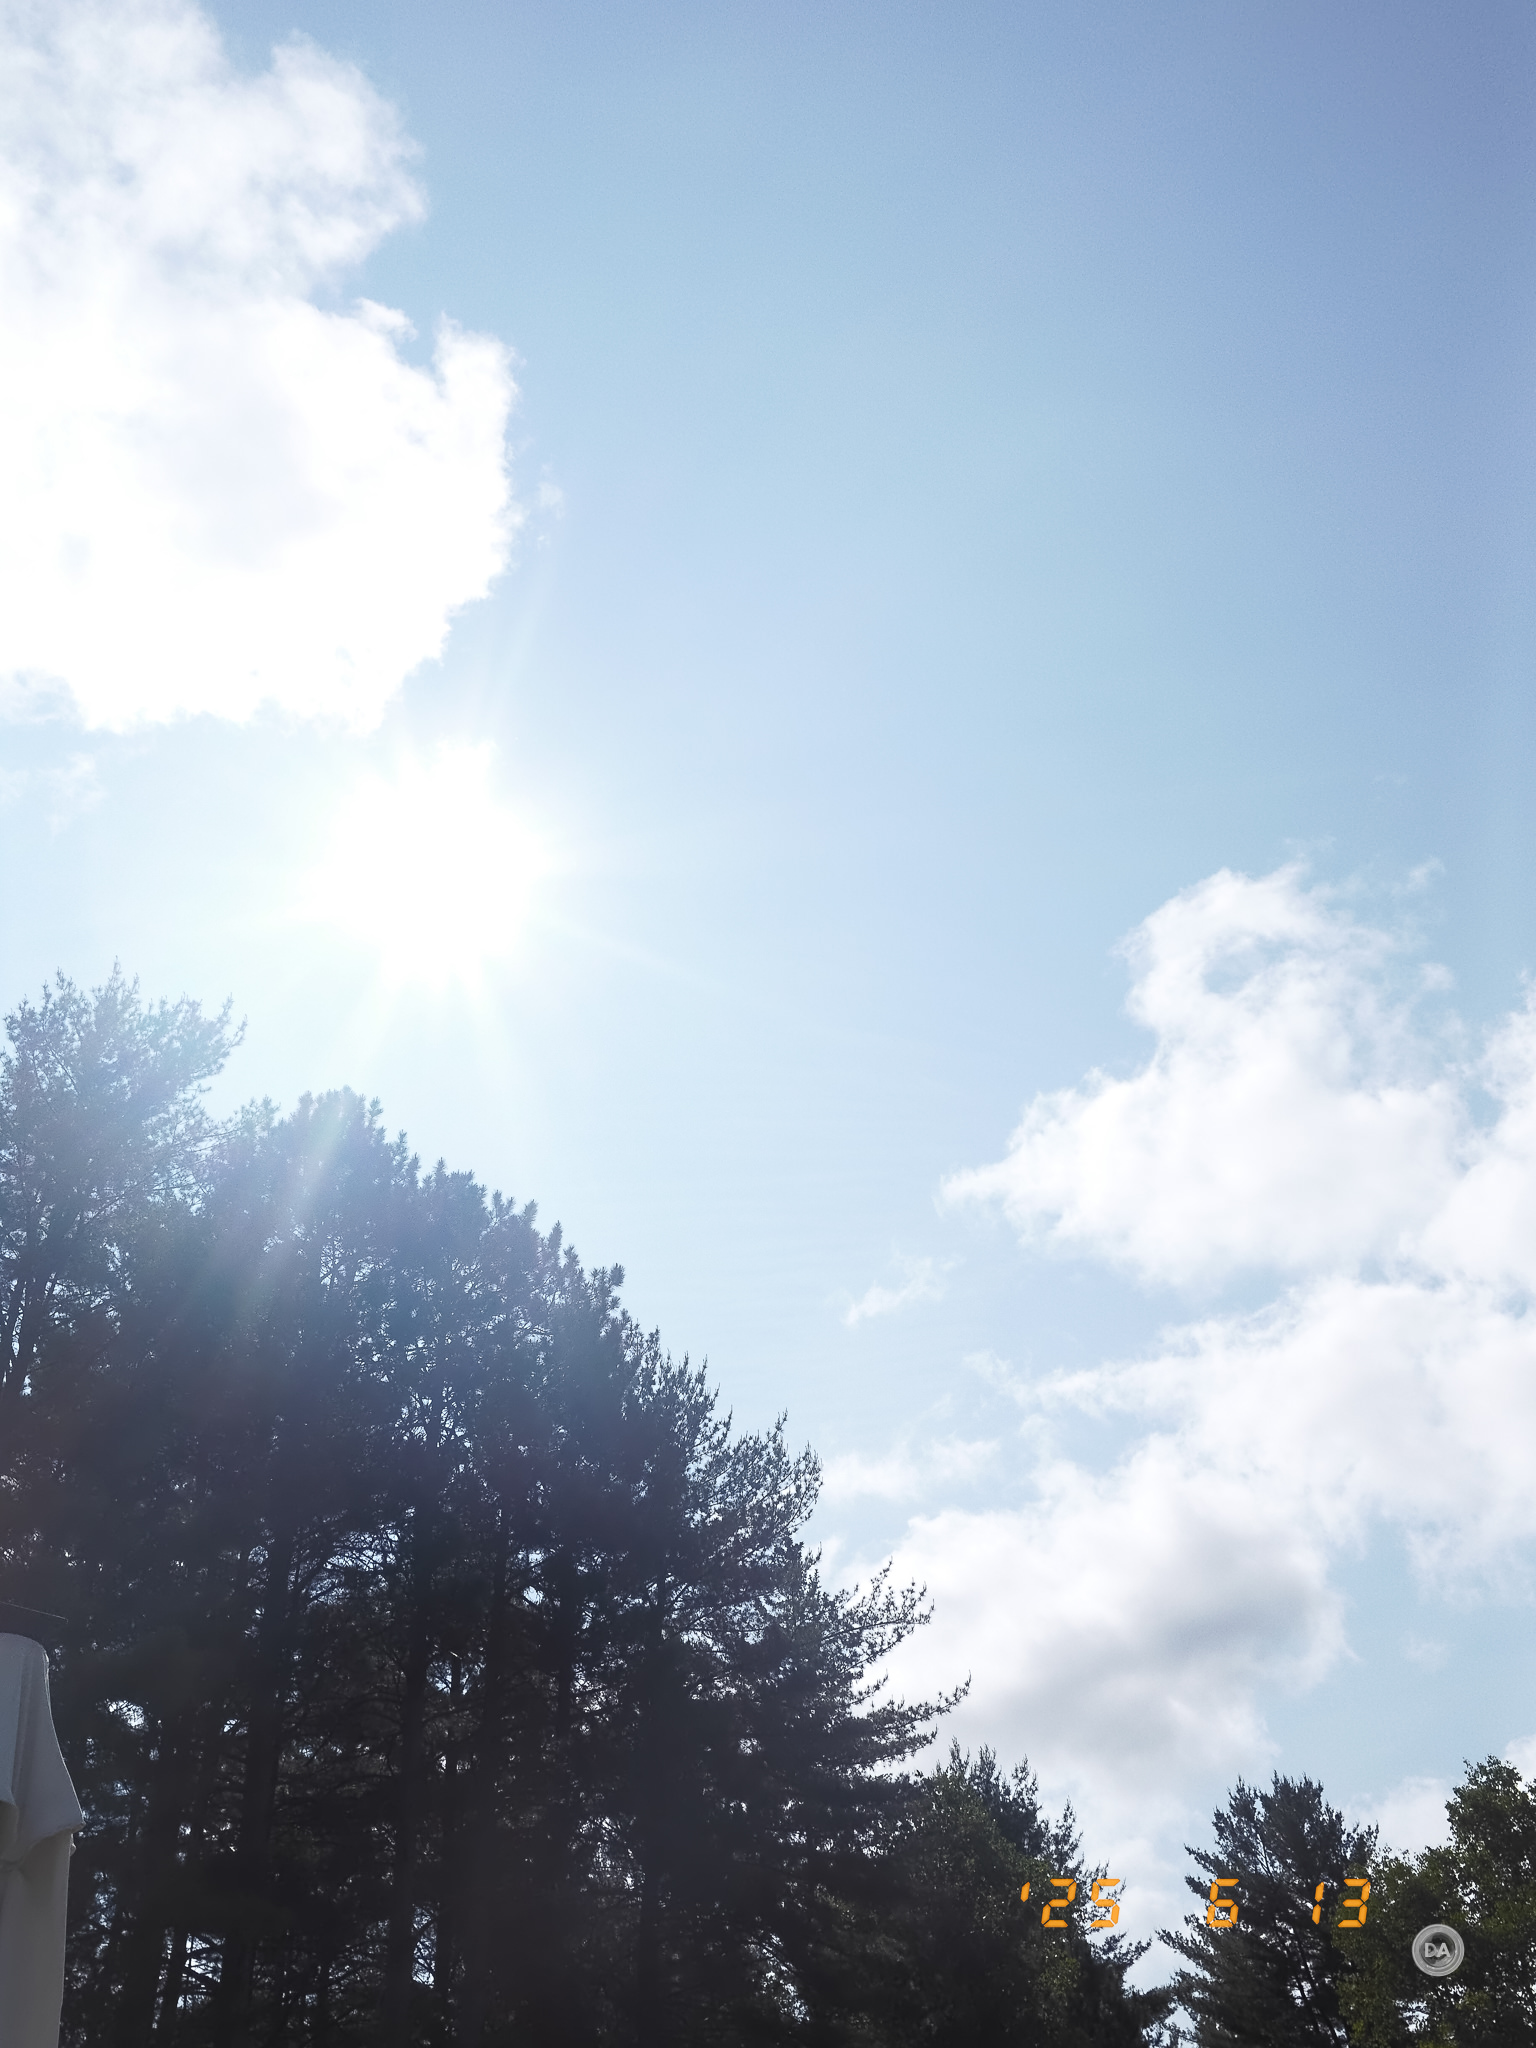
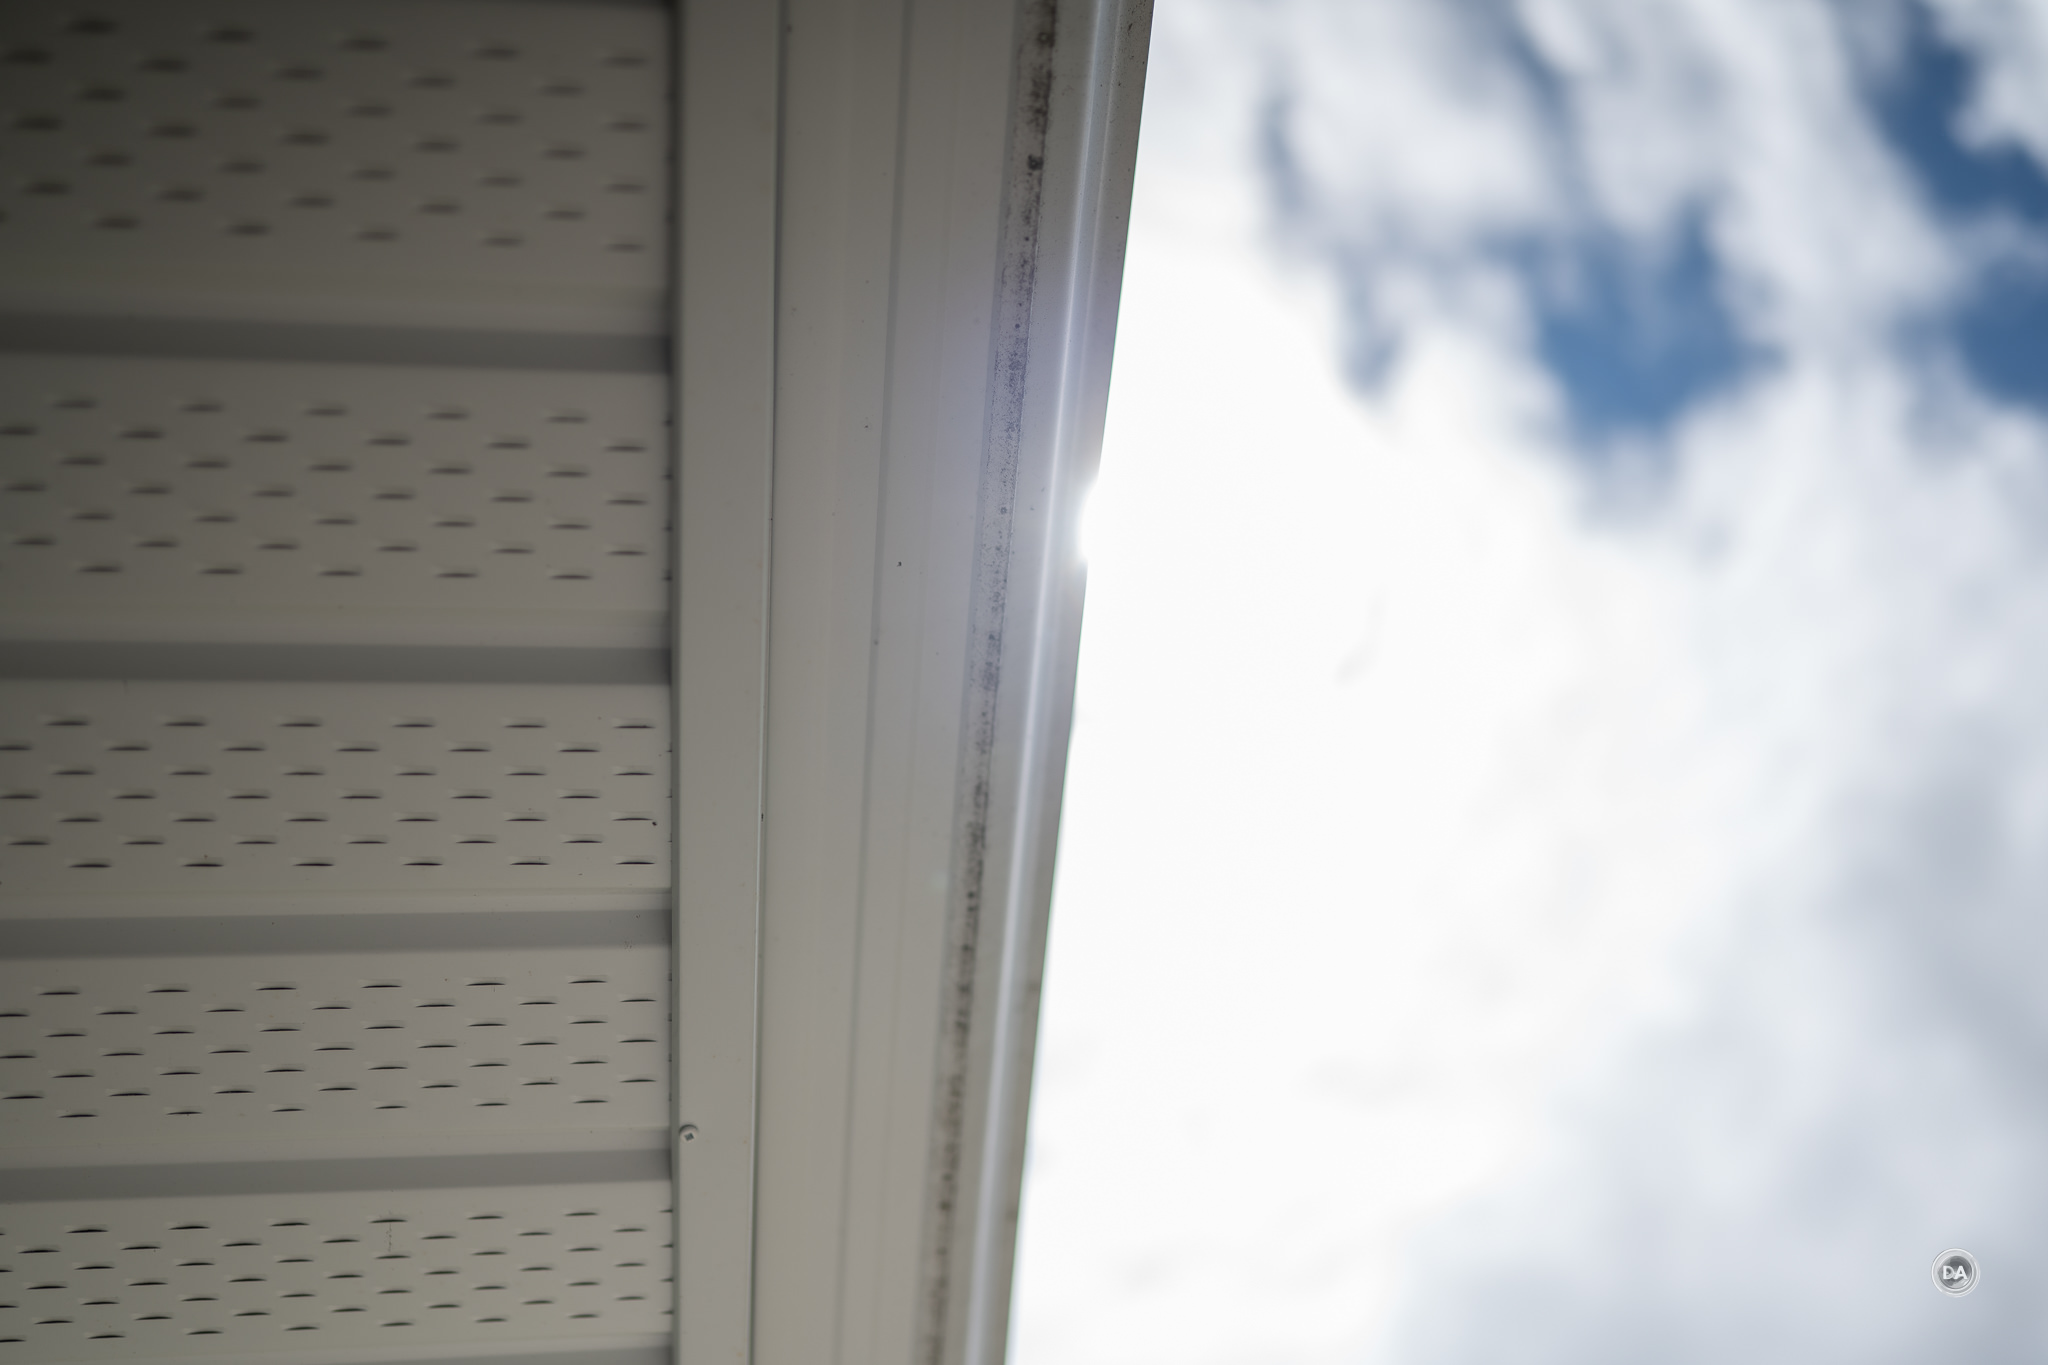
One of the unique features about the ART is that the display floats in front of your eyes but does not obscure your peripheral vision. The downside is that your ambient light could potentially impact your viewing experience (though it still works surprisingly well in brighter conditions), but the upside is that if someone comes to talk to you, it is possible to look around the display to see them. I could wear the display while working out, and still see to grab the weights.
The GOOVIS ART is very lightweight at just 110g, though if you add the padded forehead section (you’ll want to!) and the requisite USB-C cable the weight comes in at a still lightweight 277g. I never found wearing it got uncomfortable. You can add a “zero pressure headband” option, but I just found that it added unnecessary bulk and didn’t deem it necessary.
I never found using anything other than my phone to be necessary for playback, but if you have an older phone, you might potentially have some direct compatibility issues. Here’s a page where you can check your device. Direct iPhone compatibility, for example, only begins at the 15 stage, though there seems to be a deeper range of Android device support. You can get their D4H1 portable streaming device in a kit if you want to avoid using your phone. I tested the D4H1 device, which is about the size of standard 10,000 mAh power bank. This makes sense, as the D4H1 does have a built-in 8000 mAh power bank that will provide up to 6 hours of playback. It also has 16GB of storage along with a micro-SD slot for expanded storage if you need more space. That could be a good alternative if you in a situation where you won’t have Wi-Fi for streaming. The D4H1 runs a standard Google TV interface, which is familiar and easy to set up, and I do like the fact that it comes with a standard Google TV remote. Having a remote control is nice, actually, particularly if you need pause playback. My one critique of the D4H1 is that it leverages an HDMI output. That’s fine, if you are using it essentially like a dongle for a non-smart TV, but it means that you have to use the HDMI to USB-C adapter to use it with the ART, which feels unnecessarily clunky. I like having the HDMI out as a an option, but a USB-C output should have been a key component of design if GOOVIS is going to package it with their HMD models.
One tip: if you are on a long flight and using your phone as the media device, having a Qi wireless charger might be smart if you are using your phone since the USB-C port will be tied up with the connection to the display.
I found that I could often turn the display brightness down to about halfway because the display is so bright. I didn’t find any specification for how much power the ART draws, but I never noticed any kind of really obvious hit to my battery life.
All told, I found using the ART fairly painless and it made personal viewing a real joy. I’m not a binge watching, “down-the-rabbit-hole” type of media consumer, but I suspect the GOOVIS ART would truly enable that kind of behavior. Maybe its a good thing that your battery will die after a while…
Go outside and get some fresh air while your phone is charging!
I had little experience but a lot of interest in HMD going into this review, and I was pleasantly surprised by how easy the GOOVIS ART was to use and also by how great the viewing experience was. I wasn’t sure how the more “open” design would work, but I actually did find that in many situations I valued being able to retain some situational awareness. The downside is that the experience is potentially less immersive than more closed designs like their G3 models. At under $500, this is a pricey yet achievable bit of personal entertainment bliss.
Keywords: Goovis, ART, HMD, Head Mounted Display, Goovis ART Review, Prime, Disney+, Netflix, Cinema, Coupon, Review, Hands On, Dustin Abbott, Real World, Comparison, Sample Images, Video, Photography, let the light in, weathersealing, #letthelightin, DA, #HeadMountedDisplay, #GOOVISARTReview, #MicroODLEDScreen, #4KPortableDisplay, #PersonalEntertainmentDevice, #AugmentedRealityHeadset, #OpenDesignHeadset, #USBCConnectivity, #HighResolutionVRAlternative, #LightweightHMD, #SituationalAwarenessGlasses, #HighContrastDisplay, #AdjustableIPDAndDiopter, #GamingAndMultimediaHeadset, #VisualClarityTechnology, #WearableDisplayForWorkouts
DISCLAIMER: This article and description contains affiliate links, which means that if you click on one of the product links, I’ll receive a small commission. As an Amazon Associate I earn from qualifying purchases.
The very first lens I reviewed from Laowa was their 12mm F2.8 Zero D wide angle prime, which I reviewed at the end of 2016 on Canon EF mount. I ended up buying that lens later on, though actually to use on Sony FE. I used the lens (with adapter) by itself, but also with the Magic Shift Converter to get what became a 17mm F4 lens with 10mm of shift in either direction. I had fun with that combination. Fast forward nearly nine years and Laowa is releasing a new (and improved) version of that lens. Whereas the original lens was a manual everything option, the new Laowa 12mm F2.8 Zero D Lite has autofocus (a manual focus version is also available), and is much smaller and lighter. It now sports weather sealing along with another key improvement – the ability to use traditional screw on filters in a common 72mm size. This lens will come in autofocus versions for Nikon Z (tested here) and Sony FE, with manual focus variants available for Z mount, E mount, Canon RF mount, and Leica L-mount. What’s more, the price is even cheaper – just $699 for this new lens. This are obviously a lot of key upgrades here – does that make this a lens a worthy option for these platforms? Either read on or watch the video below to get my thoughts.
Thanks to Laowa for sending me a review loaner of this lens. As always, this is a completely independent review. All opinions and conclusions are my own.*The tests and most of the photos that I share as a part of my review cycle have been done with the 45MP Nikon Z8, which I reviewed here.You can find the product listing page for the Laowa 12mm F2.8 Zero D Lite here.
AI Summary: The Laowa 12mm F2.8 Zero D Lite is an updated version of their original wide-angle lens, now featuring autofocus and a more compact, lighter design. With the inclusion of weather sealing and the ability to use standard 72mm screw-on filters, it offers a significant improvement in usability. This lens, available in autofocus for Nikon Z and Sony FE, and manual focus for other mounts, maintains low distortion but is still challenged by heavy vignette. Priced at $699, it is competitive considering its ultra-wide angle capabilities compared to other lenses on the market.
Strengths:
Smaller, lighter design and more affordable price compared to its predecessor.
Attractive, modern design language with weather sealing.
Excellent low distortion, maintaining straight lines in images.
Autofocus capabilities for both stills and video with quiet performance.
Ability to use standard screw-on filters for added versatility.
Great center sharpness, good flare resistance, and impressive sunstars.
Weaknesses:
Autofocus glitches noted during testing, possibly firmware-related.
Heavy vignette that can impact metering and requires correction.
Corners can be somewhat soft, especially at wider apertures.
Lack of in-camera corrections for lens issues like vignette.
Laowa’s market expertise has largely been in two areas of lens design – macro and wide angle. They have have produced other lenses, but the majority of their lenses fall into one of these two baskets. This includes a lot of unusually wide angle lenses. When the 12mm F2.8 Zero D was released nearly ten years ago, that was an uncommonly wide focal length. Since that point, Laowa has gone even wider, and in many ways this new 12mm Lite (which we’ll refer to it as in this review to distinguish from the older lens) most resembles the AF 10mm F2.8 Zero D that I reviewed last year. The 12mm Lite is ridiculously wide, with a 122° angle of view. This is the kind of lens that you need to watch to make your feet aren’t in the frame, and if you point the camera towards your feet, it’s a long way down!
The 12mm F2.8 Zero D Lite has familiar Laowa strengths and weaknesses. One of the primary strengths is right there in the name: Zero D. The “D” refers to distortion, and while it may not be mathematically zero, the 12mm Lite has impressively low distortion. Interior lines look nice and straight in this shot without any correction.
The greatest weakness is also familiar for Laowa, and that’s vignette. I’ve always found vignette very heavy on Laowa’s wide angle lenses, and that is only exacerbated by reviewing on the larger diameter Z-mount. Vignette is at the “max-out-the-sliders” level and is heavy enough to impact metering on cameras.
This was considered proper metering in my Z8, but if I clicked the “auto” adjustments in Lightroom, it felt the need to add about 1.3 stops of exposure (that’s a LOT!) This isn’t new for Laowa lenses, but it definitely does present a challenge for some types of photography. This is an extreme instrument – is it worth buying? Let’s dive in and find out.
Laowa 12mm F2.8 Zero D Lite Build and Handling
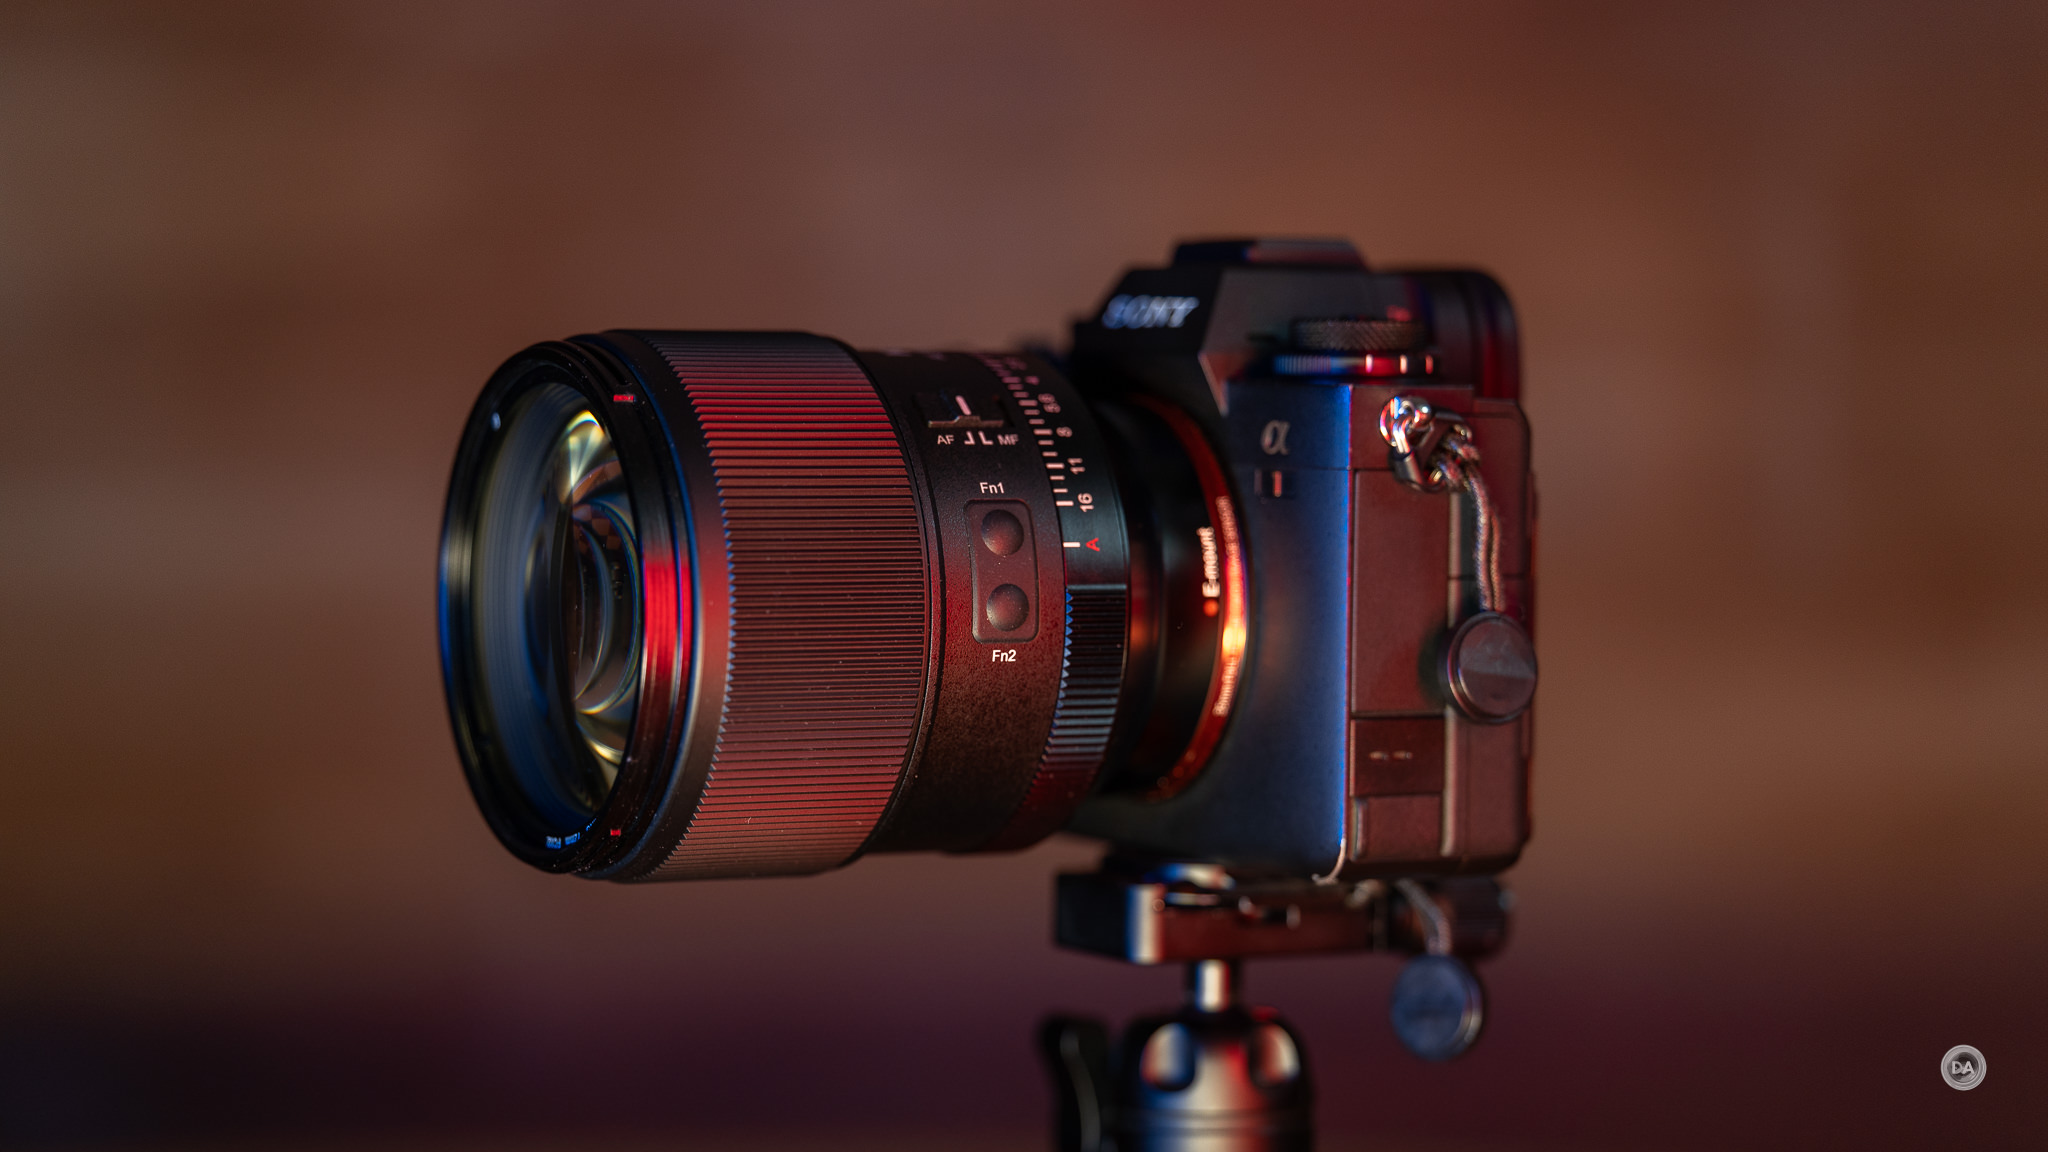
I’m doing this review on a Nikon Z-mount version, and there will also be a Sony E-mount autofocus version available. Because Canon has still not opened their platform to license autofocus, the RF and Leica L mounts of this lens will be manual focus only, with similar MF versions for Sony and Nikon available. The version I’m testing has 5 aperture blades to allow for clearly defined sunstars (bokeh won’t really be a thing here!):
You can get a higher blade count option in manual focus, but frankly I think this is the best option. Look at how gorgeous that clean, simple sunstar is. You don’t really need round specular highlights in a 12mm lens anyway.
The winners here are Sony E-mount and Nikon Z-mount users, as they have access to an autofocus lens that works well and makes Laowa a more accessible brand, because switching to autofocus means a few other things as well. The inclusion of electronic contacts means:
We get full EXIF data – information like the lens name and aperture value for the shot is now included.
Information for VR (in body image stabilization) is automatically transferred so the lens stabilization works properly.
Any manual focus aids dependent on electronic communication will now work.
What we don’t seem to get (at least in the pre-release copy I tested) is in-camera corrections. As we’ll see, distortion is so low that it doesn’t really need correction, but vignette is another story. This is a chronic weak area for Laowa wide angle lenses, and, as we can see below, the JPEG has just as much vignette as the RAW images.
That’s unfortunate, though that is something that could potentially change in the future.
The Laowa 12mm Lite carries forward the new Laowa design language that is a major departure from their previous look. Previous Laowa lenses had a black anodized metal look, while this new lens has a cobalt blue/grey type finish that looks fresh and unique.
The lens has a completely different profile from the long, slim original 12mm F2.8 Zero D. The Lite is 77.2mm (3.04″) in diameter and just 80.6mm (3.09″) in length. That definitely favorably compares to the 113mm length of the older lens. The weight is also reduced to just 390g (0.86lb) from 699g (1.4lb). That’s an impressive amount of size and weight reduction!
This hasn’t come at the cost of poor build quality. The lens has a reassuring density and the materials still feel like metals rather than plastics.
Laowa has managed to retain traditional screw-on filter threads in a relatively common 72mm size for this lens (quite an accomplishment on an F2.8 lens this wide!) That’s a huge improvement over the first generation lens and adds a huge extra layer of versatility for a wide angle prime.
Look at how much more interesting the long exposure version of this image is:
It is much harder to achieve this with lenses that can’t be easily filtered.
The lens sports an AF/MF switch on the side of the barrel, which is always welcome.
Most of the lens barrel is dominated by a wide manual focus ring. It’s different than typical Laowa fare due to this being a mirrorless autofocusing lens, which means that focus is now focus-by-wire (input on the ring will be routed through the lens’ focus motor). Body specific manual focus aids will all be available. The damping is nice and smooth, allowing for good focus precision.
There is a flat section on each side of the ring with the brand logo stamped there. What’s interesting is that due to there being no hard stops on a focus-by-wire lens, those logos could end up pointing anywhere. But they can be used to some advantage as it does give you some point of visual reference for a focus throw. The ring is not linear, however, but speed specific. The focus throw is about 100° and seems to be fairly linear.
There is some badging on the lens along with a nice scalloped curve near the lens mount that has a nice visual look and tactile feel.
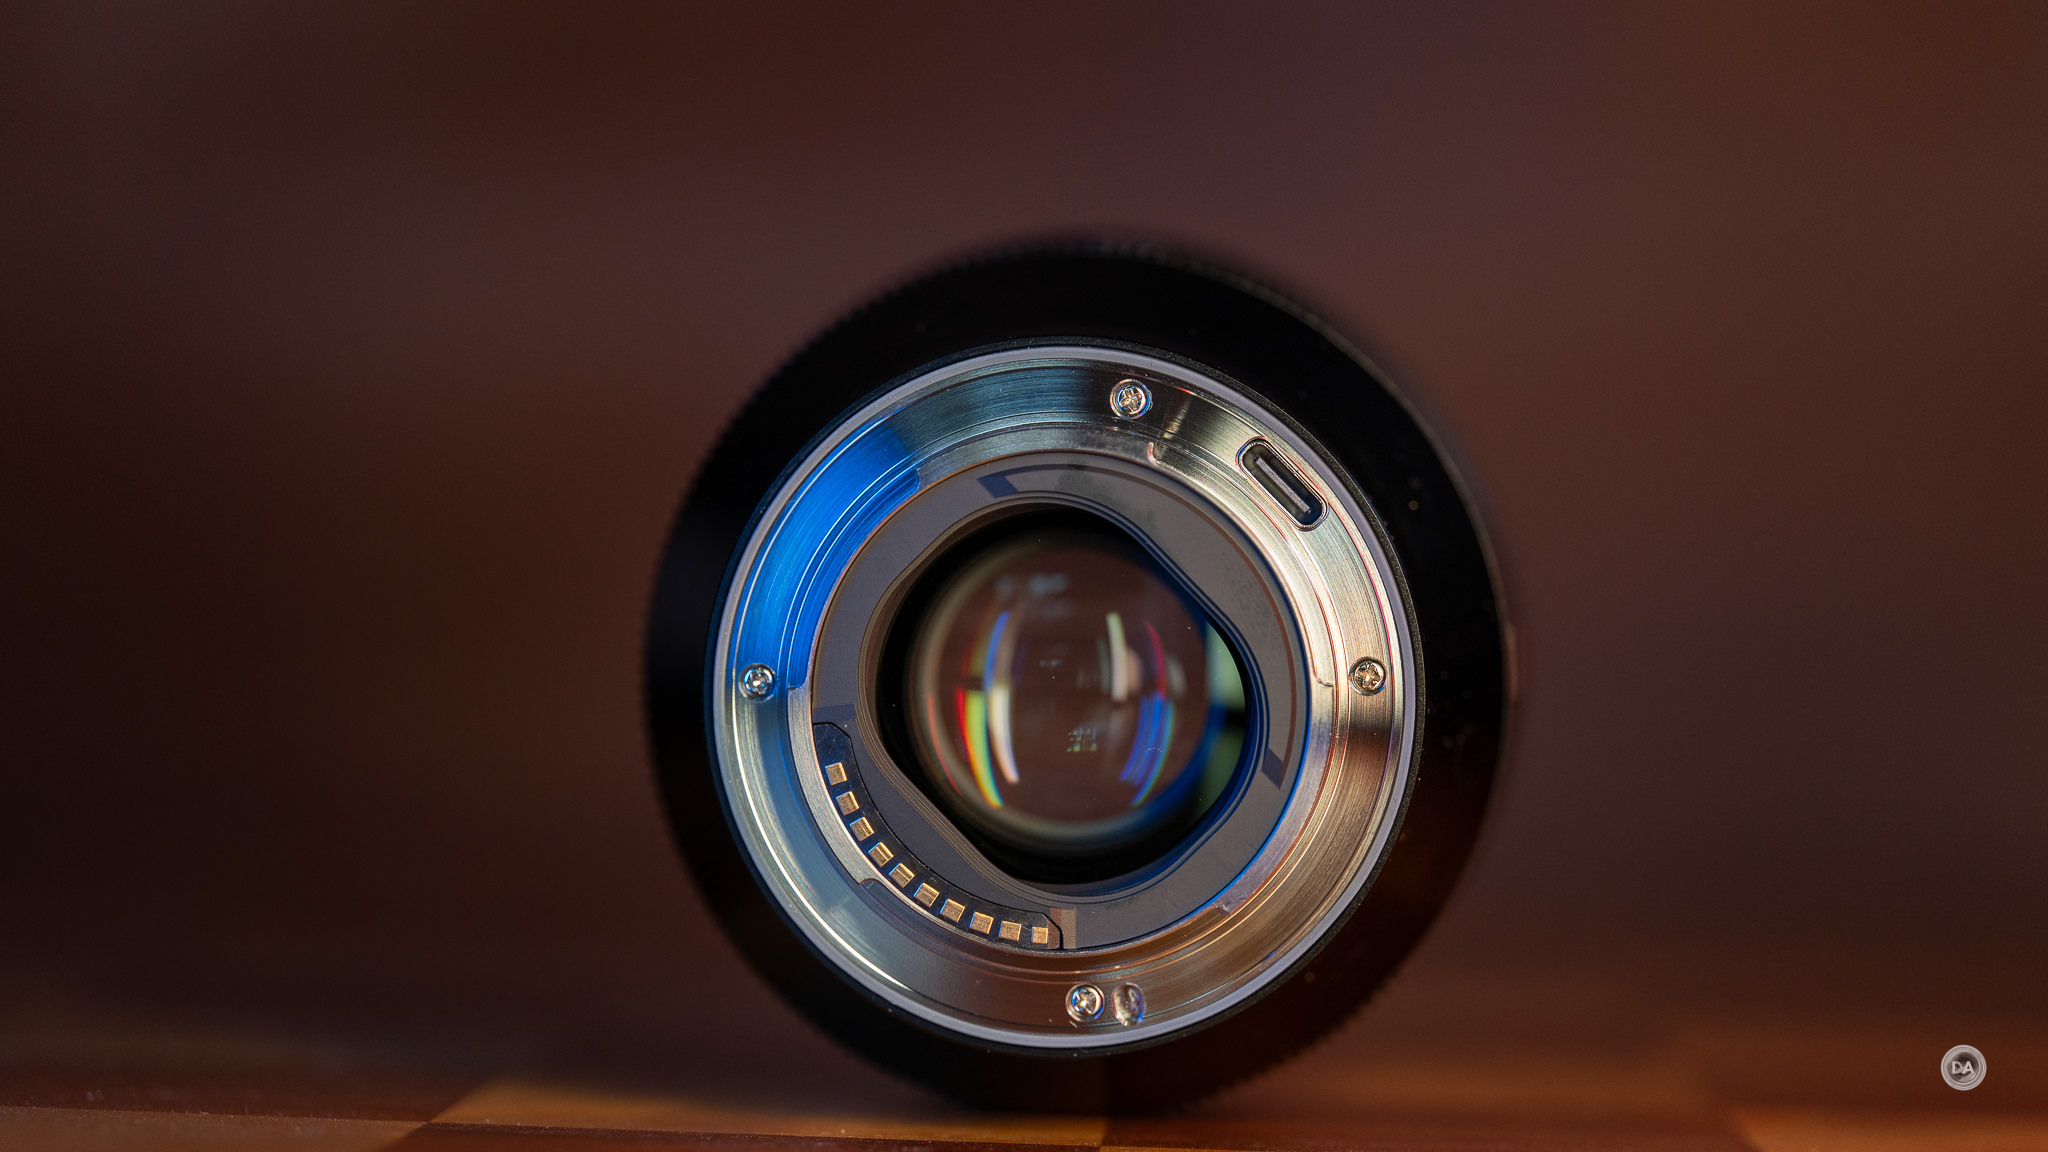
There are electronic contact points along with a nice weather sealing gasket in a faint blue color. It’s nice because it is visually different than everything else. There are no other internal seals, however, so weather resistance is limited to just this gasket.
The lens has a shallow metal hood that can be removed. It won’t block much sun and is more than to protect the front element from bumps.
The front cap is (thankfully) a traditional pinch camp which fits easily into a pocket.
There is no aperture ring, so the aperture iris will be controlled from within the camera. As noted earlier, there are just five aperture blades to allow for easy sunstars.
Minimum focus distance is 14cm (5.51″), which means you can get very close to your subject. Resulting magnification is a very high 0.21x.
As per usual, the big challenge is getting close enough to your subject without shading it, as 14cm is measured from the sensor. You’ll only have about 4cm between the end of the lens and your subject at MFD. The good news is that when shooting video you won’t really have any limitations on focus. By the time you’re past the minimum focus distance you’ll be bumping into your subject. Up close you can get some interesting looking images.
The AF 12mm F2.8 Zero D Lite is another nice looking lens from Laowa that will look great mounted on your camera. It is nicely sized, and is light enough that it won’t be a strain to bring along. Their new design language is nice, and, what’s more, it is unique from everyone else.
Autofocus for Stills
This is the second autofocus lens that I’ve tested from Laowa (after a decade of testing manual focus only lenses from them). It’s also the first that I’ve tested on Nikon. Autofocus in general seems roughly comparable on Z-mount, though I do think I’ve seen a couple more glitches from my loaner lens. I’ve had a couple of situations where I needed to remove the lens and remount it because autofocus wouldn’t work even when I toggled the switch back and forth. I would end up with this result:
…rather than this one:
It could be copy specific, or perhaps a firmware update is needed.
The focus motor (probably some type of STM motor, though I haven’t seen it specified) is very quiet; I can only hear the slightest whirring if I press my ear right up against it.
Other than the glitch I described, autofocus works great…even when shooting in high speed bursts on my Z8. I took nearly 200 shots of guys spiking (or trying to) during beach volleyball, and it seems to me like every shot was properly focused.
Shooting from a low angle like this resulted in some wild keystoning and stretching of the image, but the resulting images were dynamic and fun.
Now, to be fair, autofocus isn’t as demanding in a lens like this. Such a wide focal length means that most everything is in focus most of the time. You can see from the photo above that even though the focus is accurately on the foreground volleyball player, pretty much everything else is at least somewhat in focus even at F2.8.
That being said, I found that autofocus changes did happen quickly in my formal speed tests. They aren’t necessarily well damped (focus seems to jump a bit), but there does seem to be plenty of thrust in the focus motors. I felt like autofocus was good on Sony with the 10mm; it is also very good here on Nikon with the 12mm. This shot, for example, I snapped on the fly while walking; I wanted to quickly nail a shot while others weren’t in the frame (and a lot of the periphery is in the frame with this focal length!)
The one thing you do have to be careful with with such a wide angle lens is composing with people near the edges of the frame. People will get very distorted and stretched near the edges of the frame. People will rarely be happy to be depicted like this:
That stretching effect (or keystoning where tall objects like buildings seem to lean into the frame) is just the nature of the focal length; it’s not actually distortion.
Video AF
I was also pleased with my video tests. Focus pulls are fast and confident and have no visible steps or hunting. There is, however, a surprising amount of focus breathing for such a wide focal length. That will negatively impact video capture in some settings.
My hand test where I alternately cover and the uncover the camera’s view of my face was smooth, with good transitions from my hand to my eye and vice versa.
Natural focus transitions when shooting video clips were fairly smooth, and the wide focal length while moving is visually interesting.
Laowa has done an impressively good job in making the transition to autofocus.
Laowa 12mm Zero D Lite Image Quality Breakdown
Laowa promises optical improvements over the first generation manual focus lens. It is a slightly different optical design, which stands to reason considering how different the physical profiles of the two lenses are. This new design is 16 elements in 9 groups, with 4 of those elements being ED (Extra Low Dispersion) elements and two being ASPH (aspherical) elements. Laowa also notes their propriety “Frog Eye Coating” on the front element, which is similar to a fluorine type coating to add some moisture and fingerprint resistance. The MTF shows an extreme sharp center of the frame performance with a linear drop towards the corners.
I can attest from real world shots that the center is very sharp, even at F2.8 and at closer focus distances.
When stopped down, it is possible to get very reasonable results even at the edges of the frame (this shot and crop at F5.6):
Taking a closer look at distortion and vignette reveals a tiny amount of barrel distortion, but this is actually probably more a byproduct of the close focus distances.
Distortion is well controlled, with just a tiny amount of barrel distortion. I could dial in a +2 or +3, but at the risk of introducing some pincushion distortion in other parts of the frame. I would say that leaving what tiny distortion is there uncorrected might be the best choice. Vignette is another matter, however, and is very heavy. I needed to max out the slider (+100) to correct the vignette, and I would say it could use even a bit more. That being said, here’s a look at the recent 14-24mm F2.8 LK Samyang adapted to Nikon via the Megadap ETZ21 Pro adapter. Even though the Laowa is much wider, it has much less distortion and vignette.
While there is always something worse, there’s also no question that the Laowa’s vignette will be an issue, and, as I discussed previously, I did feel that it sometimes lead to some metering issues.
There are minimal amounts of LoCA (longitudinal chromatic aberrations) before and after the plane of focus. Depth of field isn’t particularly shallow, so it makes this type of fringing less likely.
No problems there.
LaCA (lateral chromatic aberrations) typically show up along the edges of the frame with high contrast transition points. There is some fringing there, but nothing particularly obvious.
I didn’t notice issues with lateral aberrations in real world shots.
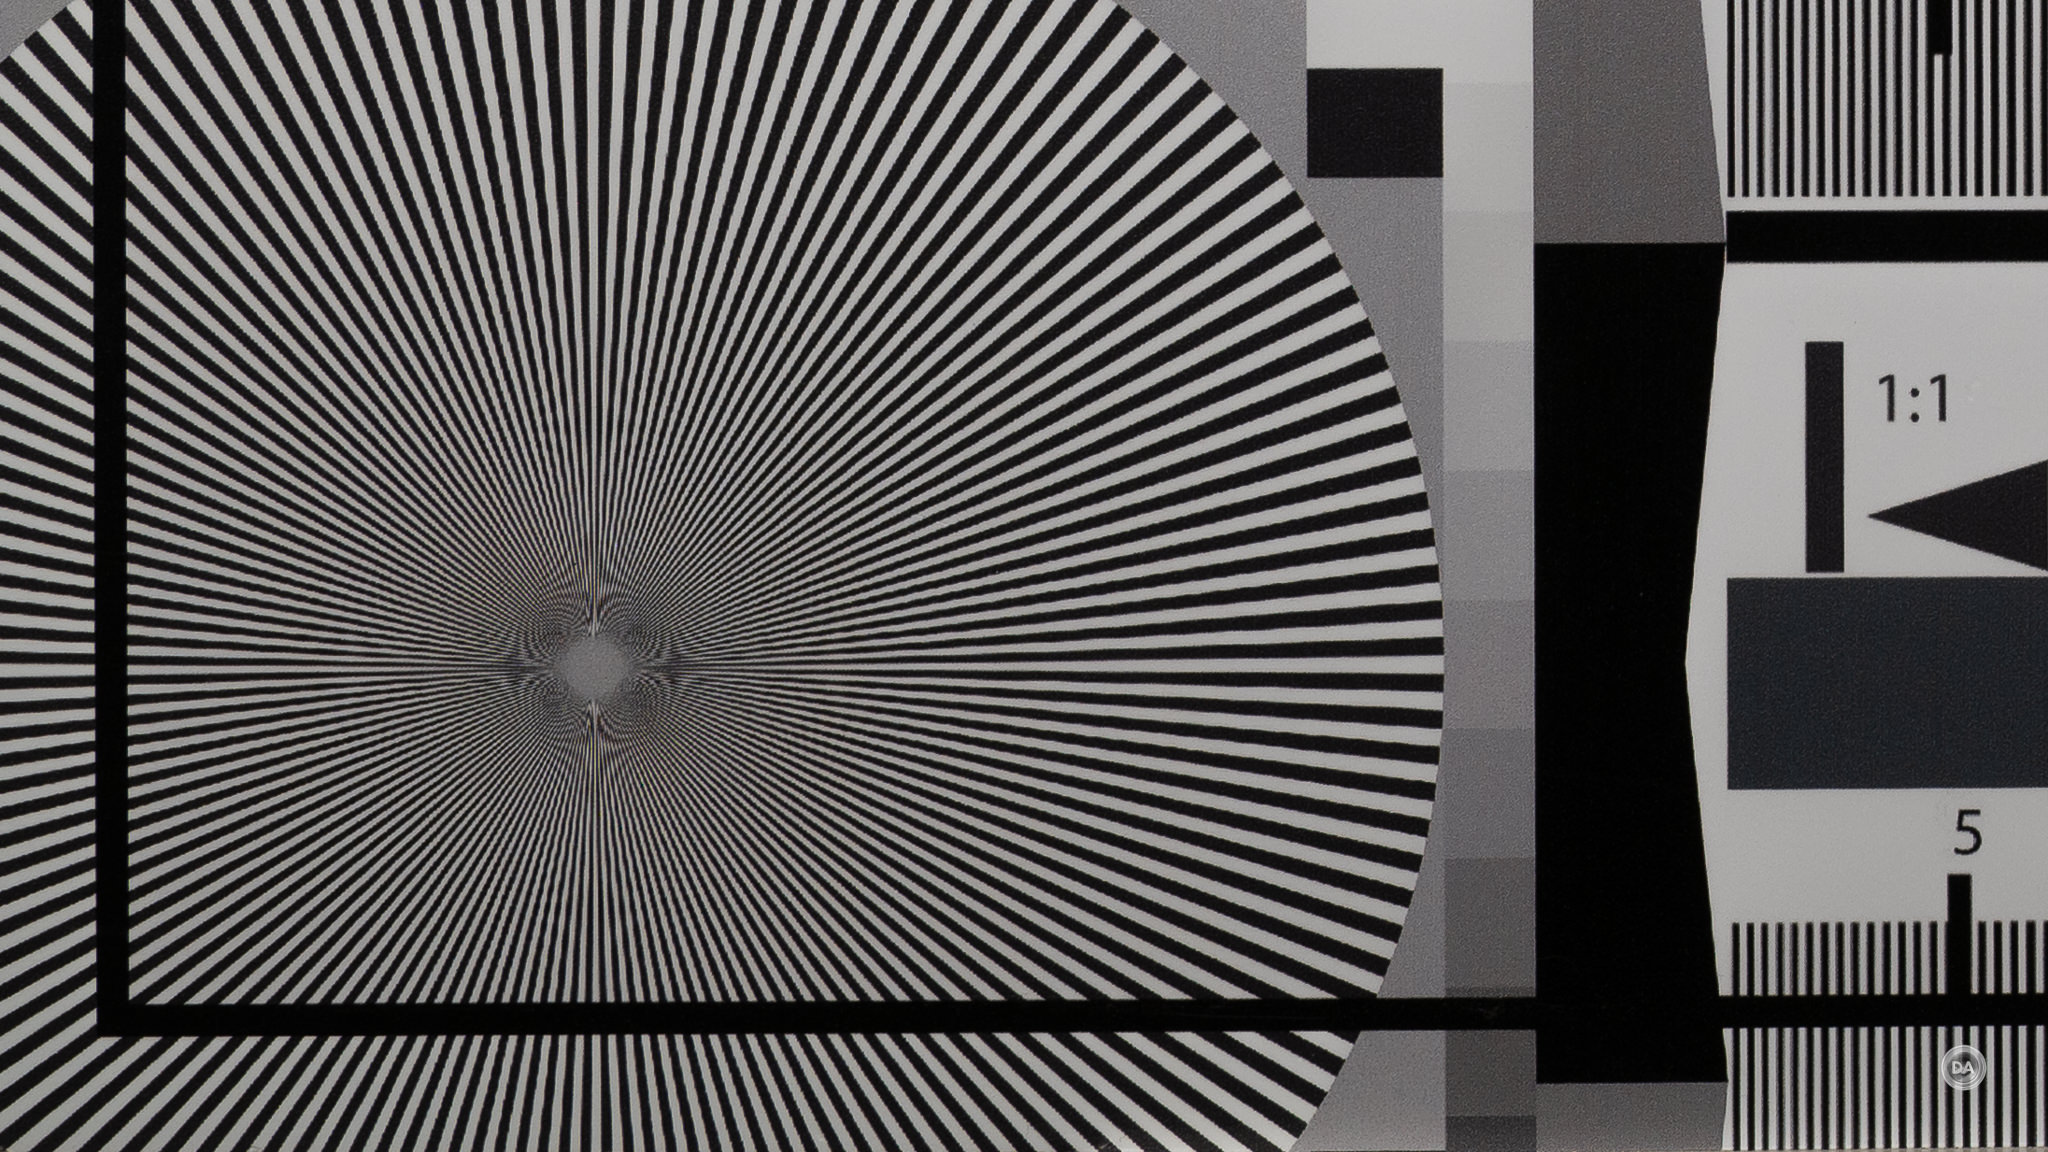
We’ll move on to inspecting our test chart. Before I jump into my test chart results, I will offer the caveat that the very short test distances required to frame the chart don’t always produce optimal results, particularly if there is any field curvature. That curvature means that all sections of the chart aren’t in focus at the same time, which can make something like the corners look softer than what they actually are (though the MTF chart suggests that the corners at F2.8 aren’t exceptional anyway). I will do some follow up testing to ensure I’m giving a complete picture on performance. This test has been done on a 45MP Nikon Z8 sensor. I use a high end tripod and two second camera delay to ensure vibration doesn’t affect images. Here’s a look at the test chart that we will examine at high magnification:
If we take a look at crops (at 200%) at F2.8 from the center, mid-frame, and lower right corner, we find that center performance is excellent (high contrast and detail), the midframe looks shakier, and the corners are impacted both by the vignette and also general softening.
I took my tests outside to a fence where I could set up with more distance between myself and the subject. Instead of being 18 inches away, I could now be about five feet away. I found the same results to be true, however. There’s definitely some field curvature at work, as I got significantly different results when focusing in the center and then on the lock at the edge of the frame.
When focused in the center and examining the center at 100%, the results are definitely better than when focused on the corner. When looking at the corner/edge of the frame, however, the results are definitely better there when focused in that area. Bottom line is that the plane of focus isn’t particularly flat, making it difficult to get everything in focus at the same time…at closer focus distances. This won’t really be an issue at further distances, which will probably also be more normal.
As you stop the lens down, depth of field increases, and that focus variance diminishes. By F5.6, for example, the corners are looking better even on the test chart.
I wouldn’t say that corner performance ever reaches the level of the center, but you can easily get landscape images that are largely sharp right into the corners when shooting at apertures like F5.6 or F8.
Sharpness consistency seems to peak at F8, with results looking good everywhere on my test chart (corners are not exceptional, but solid).
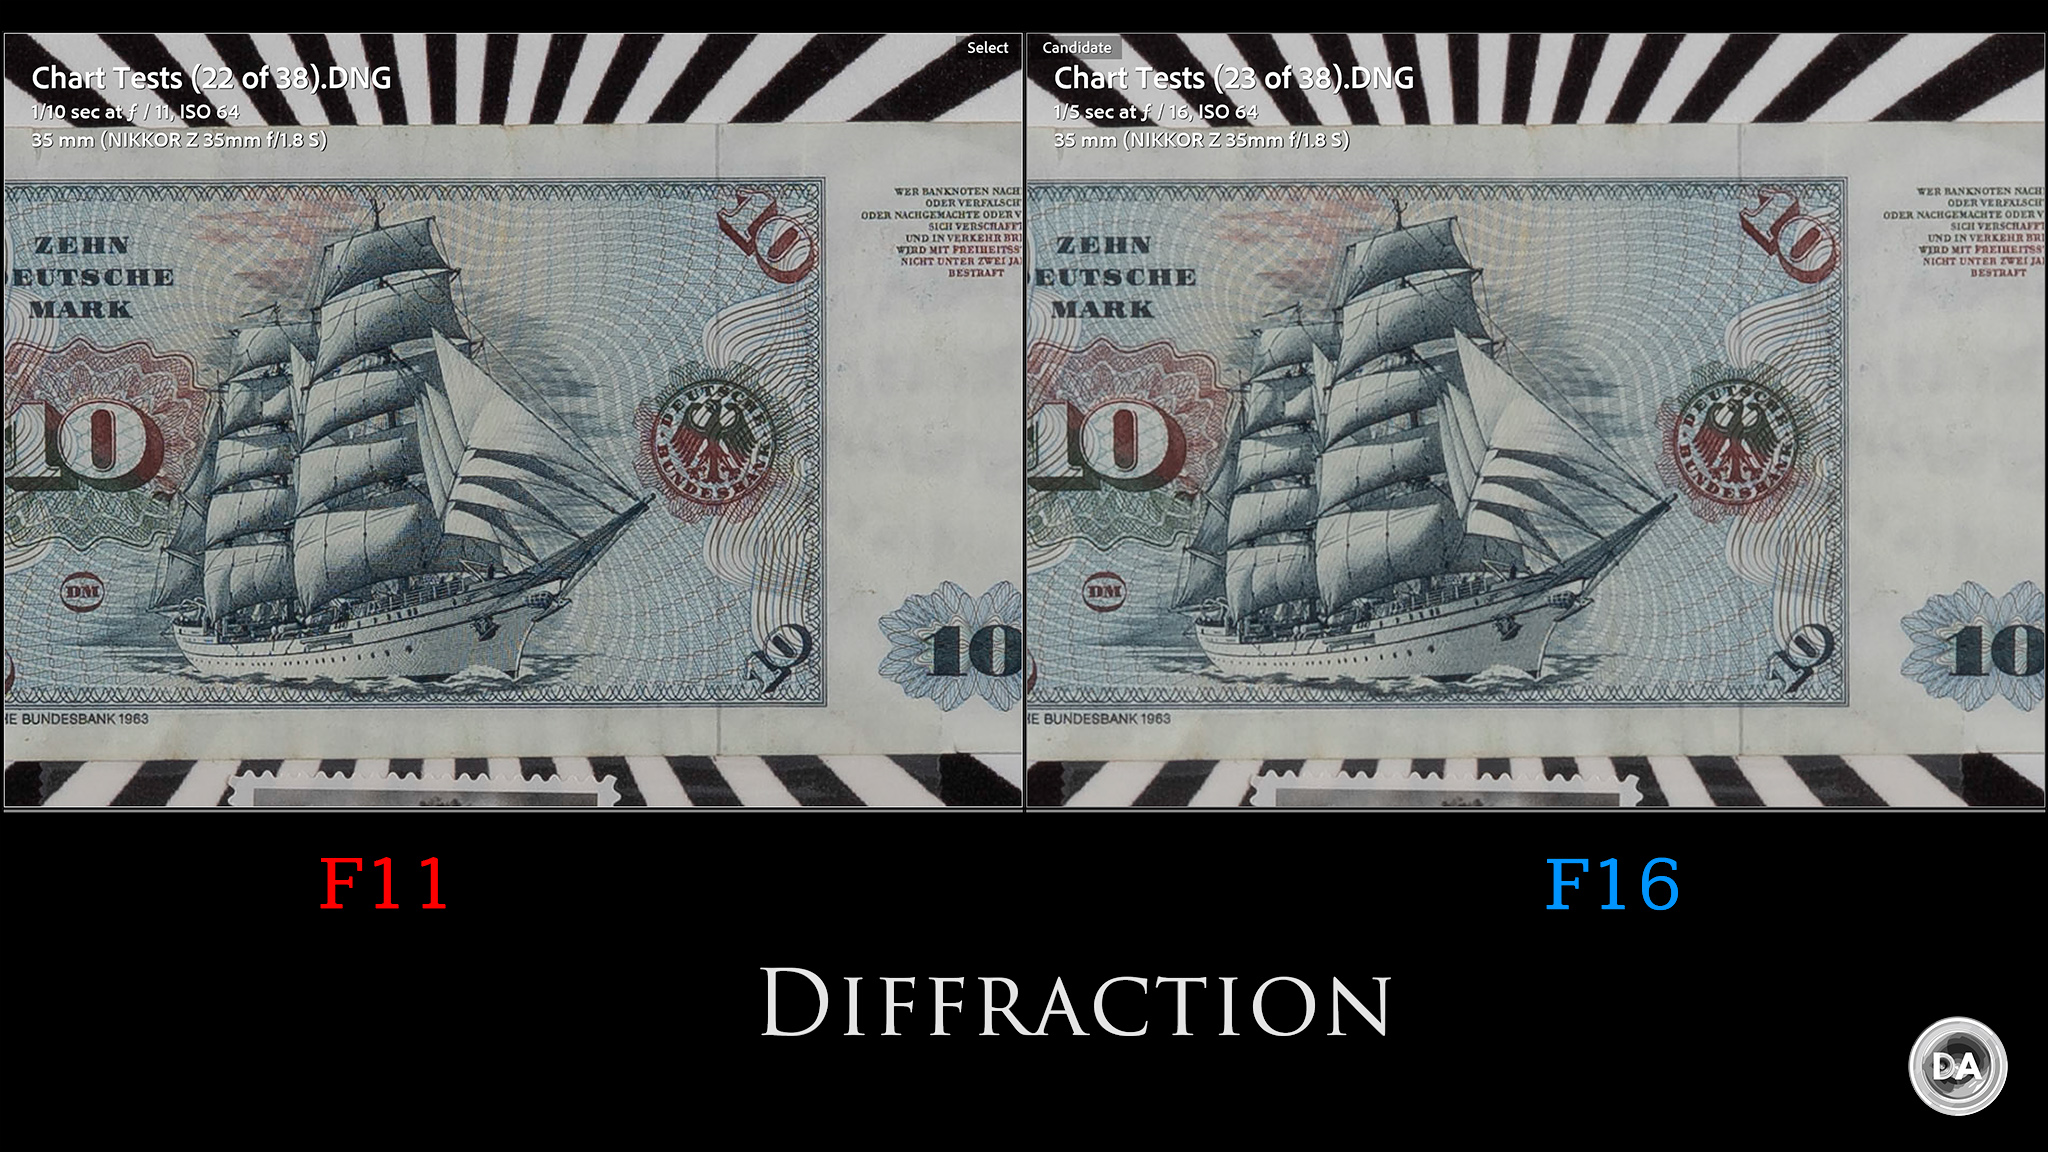
By F11 you will start to see a mild regression due to diffraction on my high resolution Z8 body, and that diffraction will become more pronounced by the minimum aperture of F22.
Bokeh isn’t going to be a big factor with a lens like this, as opportunities to strongly blur a background will be minimal. The bokeh I do see is okay but nothing exceptional.
I would call flare resistance a mixed bag. On the plus side, the coatings do an effective job of preserving contrast. At F2.8, the ghosting patterns are minimal and non-destructive. When stopped down to smaller apertures like F11, however, those ghosting patterns can potentially become much more destructive, though this is really dependent on composition and when the sun sits. Here’s a variety of images shot at different angles and apertures to allow you to determine this for yourself.
I did not have a chance to test coma during my review period, which was abbreviated by a few mitigating circumstances. My experience with similar Laowa lenses expects me to believe that there will be minor issues with star points losing shape in the corners, though here on Nikon I think the bigger issue will be with the heavy vignette bringing the potential for noise.
Optically I would call the Laowa AF 12mm F2.8 Zero D Lite solid. It isn’t without flaws, but I’m not sure any of them are fatal flaws. What’s more, there is nothing else this wide in Nikon’s own lineup, with the 14-24mm F2.8 S being the widest FX lens available. Add to this that the Laowa costs $699 USD, and the Nikkor zoom costs $2000, and I suspect there will be some interested customers. You can get some really extreme images with a lens like this…particularly when you pair it with an ND filter to get long exposures.
If you would like to see more images, check out the gallery linked here.
Conclusion
I’m glad to see Laowa revisiting some of their older lens designs and giving them a modern update, particularly when that update comes with autofocus. Hard to imagine that these second generation lenses added weather sealing, autofocus, and the ability to use standard filters while also being smaller, lighter, and cheaper. That’s a winning combination.
I often felt like Laowa lenses were priced a little too high to become mainstream options, but that may change with a lens like the 12mm F2.8 Zero D Lite AF lens. Moving the price to $699 USD makes this much more competitive, particularly when they are going wider than just about anyone else. I find incredibly wide focal lengths a little harder to use (12mm is about my limit), but there are some photographers who obsess over going ever-wider, and it is true with modern high resolution cameras that you can easily crop into images…but you can’t make them wider.
I think potential buyers of the Laowa 12mm Lite will have a lot of fun with it. It’s an attractive lens, and having the ability to easily filter it will make this a compelling option. I’m glad to see it on Nikon and Sony. It has a few flaws, but
Pros:
Smaller, lighter, and cheaper than the lens it replaces
Love Laowa’s new design language
An extremely wide angle of view + large maximum aperture
Good autofocus performance for both stills and video
Low distortion
Weather sealing gasket
Stable video autofocus
Ability to use traditional filters
Mostly good flare resistance
Great looking sunstars
Good center sharpness at wide apertures
Gets pretty sharp across the frame when stopped down
DISCLAIMER: This article and description contains affiliate links, which means that if you click on one of the product links, I’ll receive a small commission. As an Amazon Associate I earn from qualifying purchases.
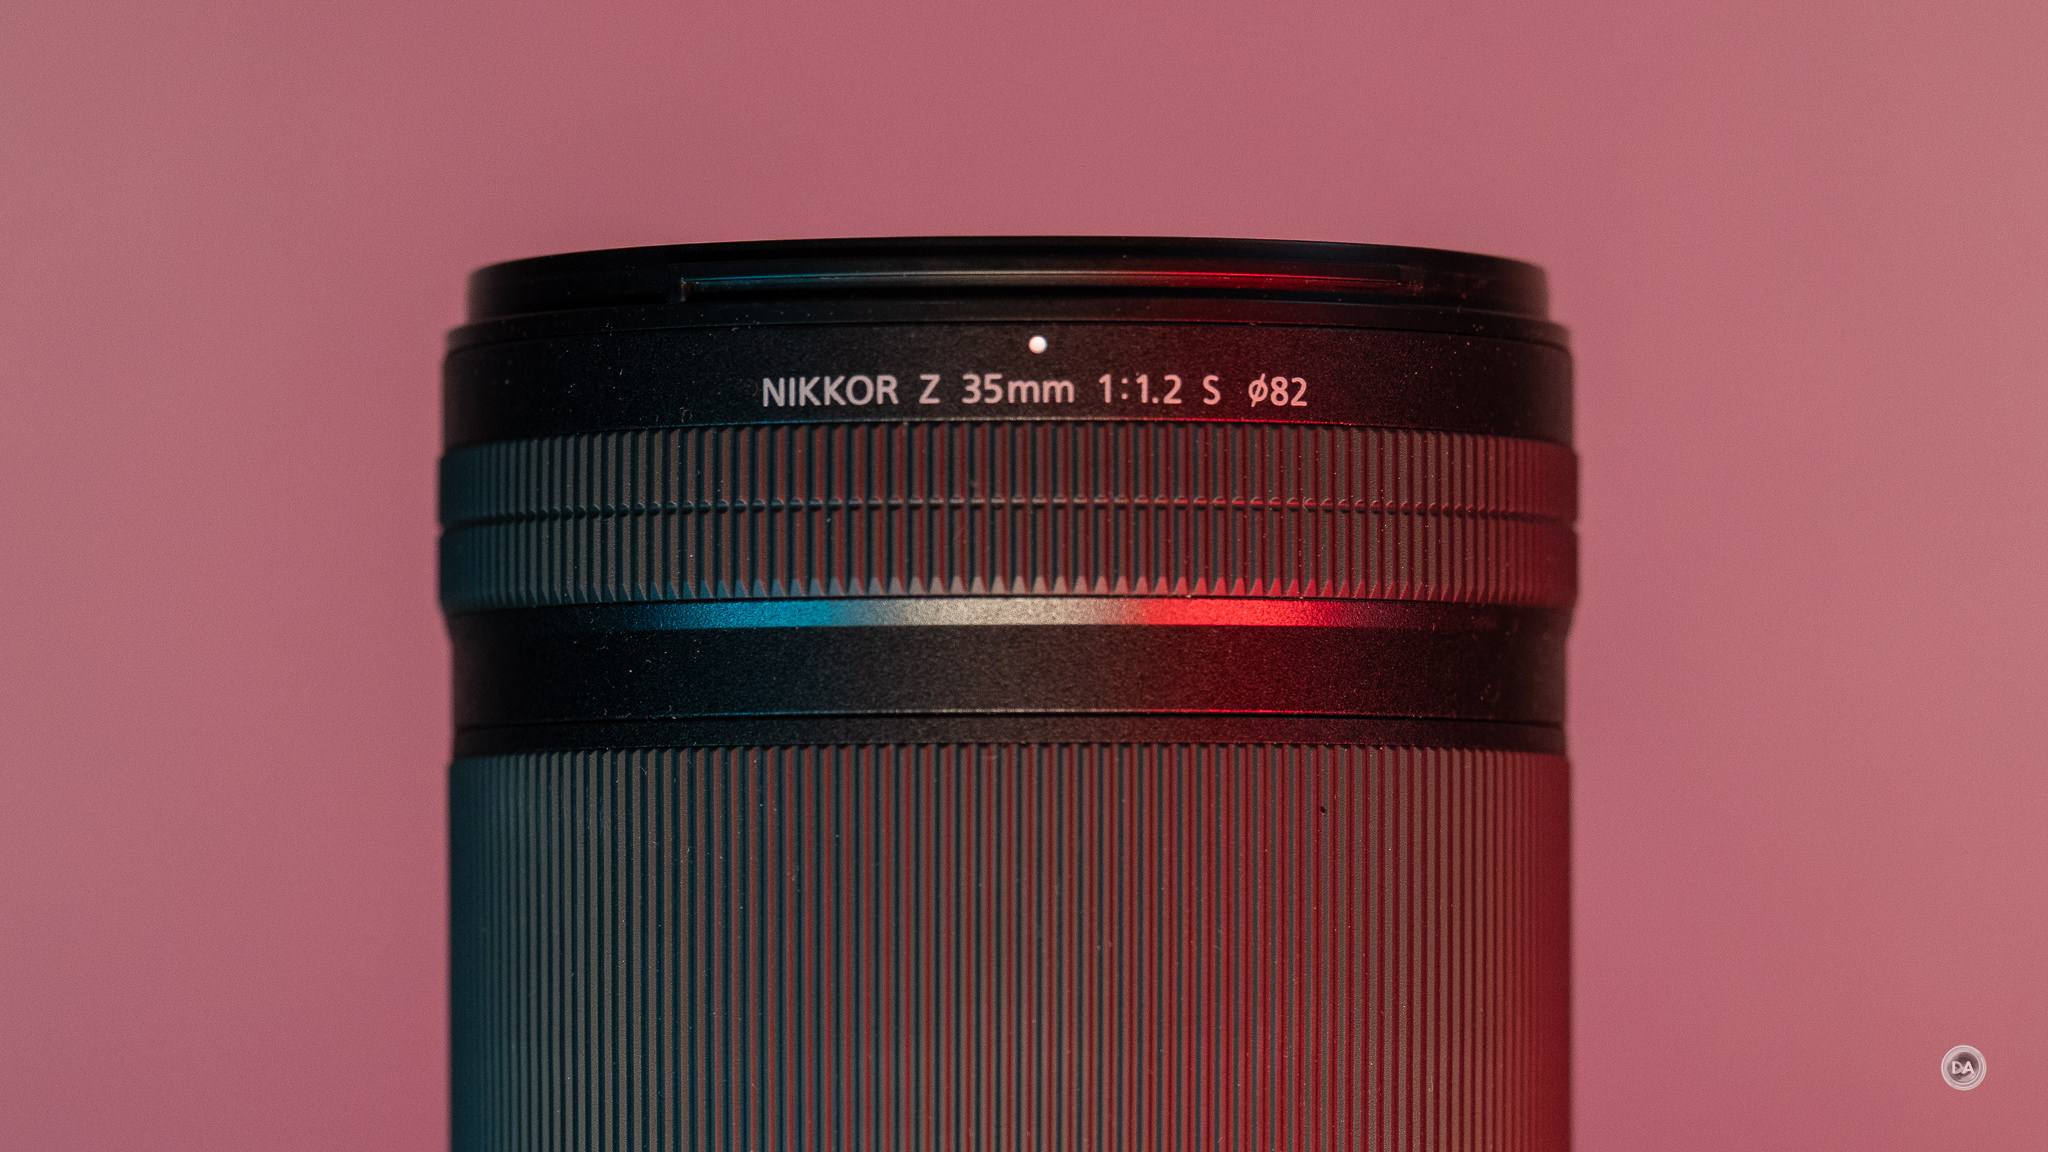
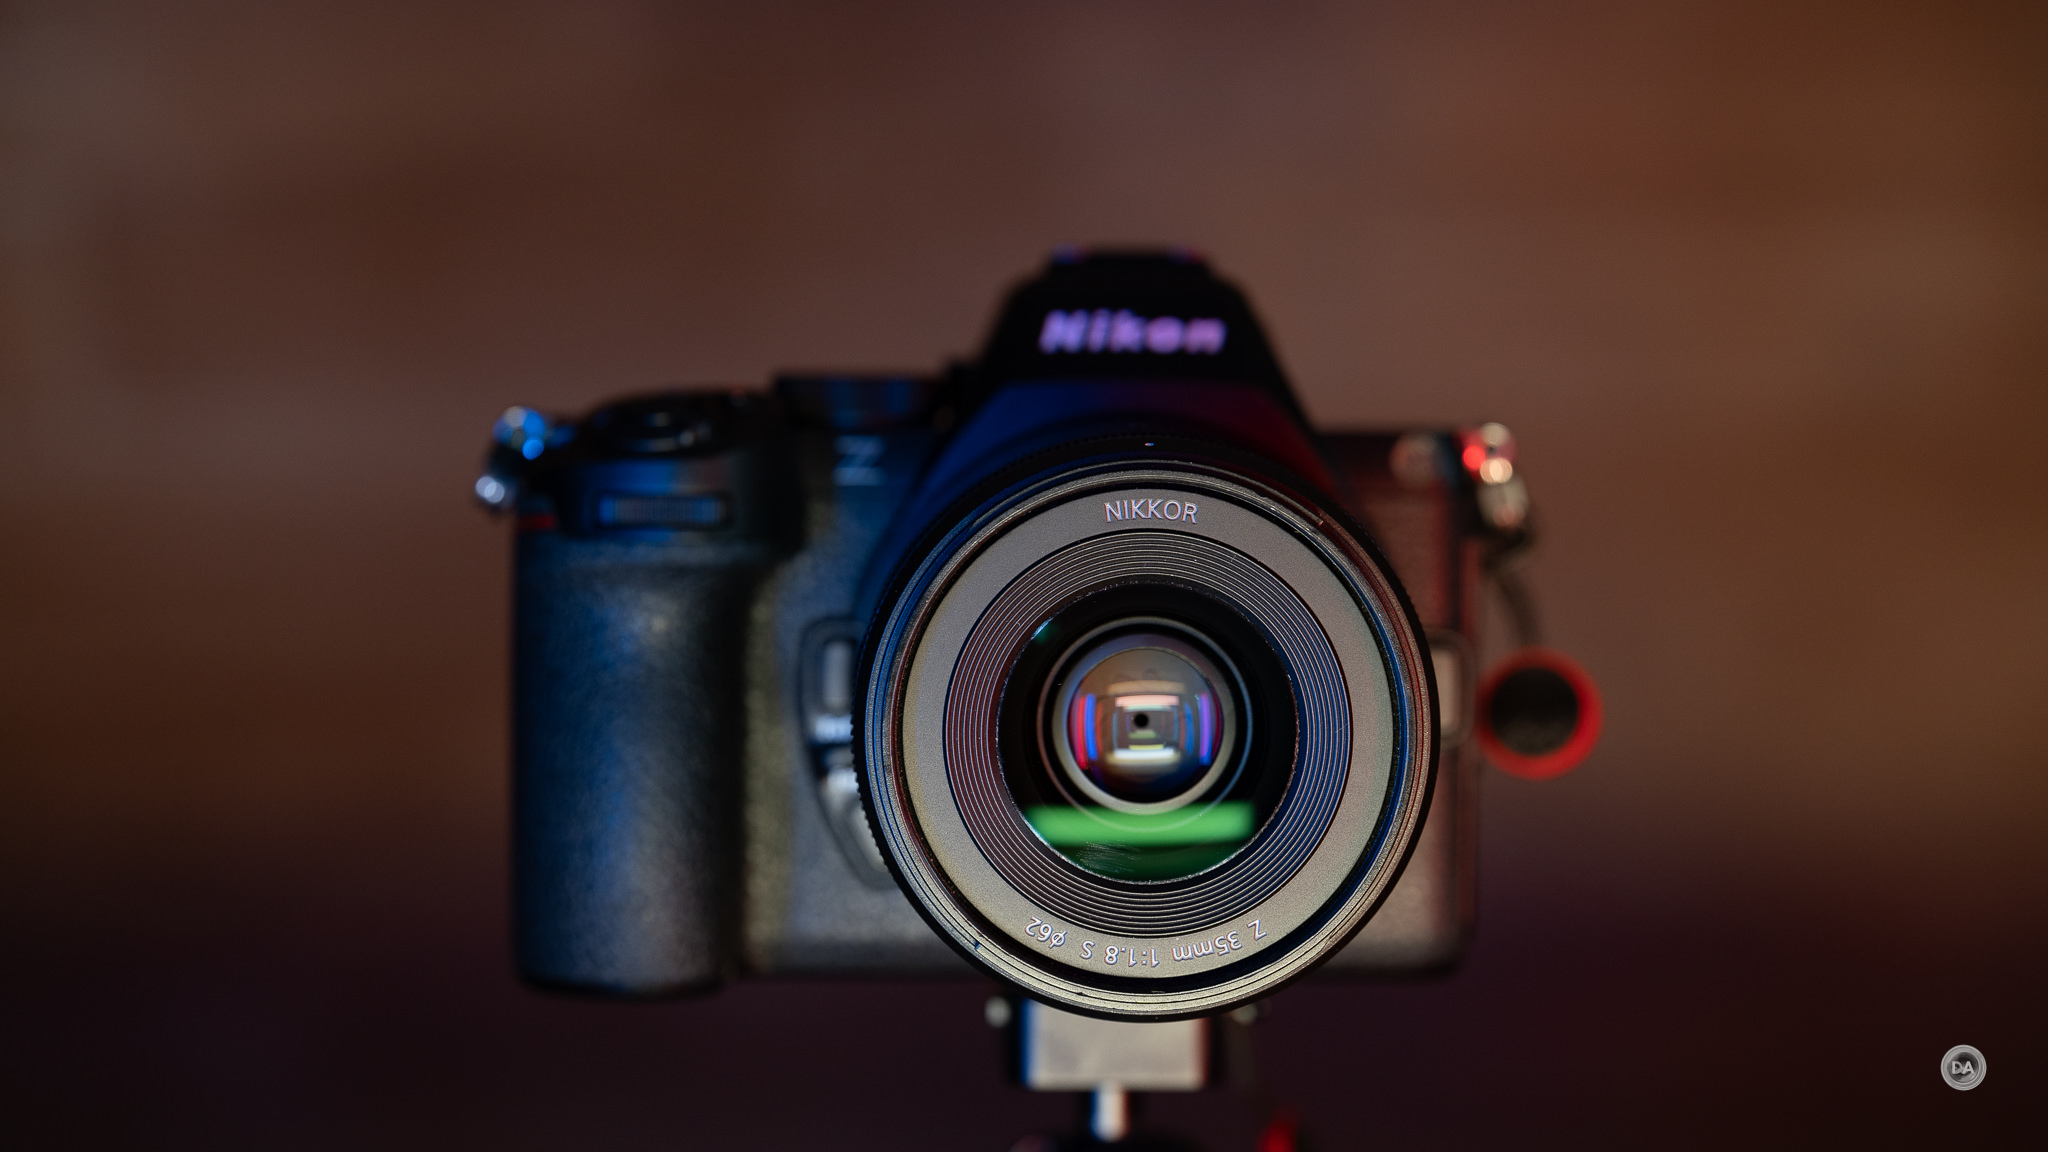
All of Nikon’s Z-mount F1.2 S lenses are extreme instruments. They are big, heavy, and expensive…not for the faint of heart. But if you’re interested in premium performance (and you have a strong back), they are delivering uniquely amazing results. Nikon’s newest is the Nikkor Z 35mm F1.2 S lens, and it sits near the top of the categories of biggest, heaviest, and most expensive of the many 35mm lenses I’ve tested. Is the 35mm F1.2 S worth the big bucks? As with all of these premium fast aperture S-line lenses, the answer is “it depends”. For many photographers they are overkill, but but for some (particularly those who earn a living with their cameras), they may just be some of the best investments you can make. We’ll explore all those details in either the video review below or in this text review.
Thanks to Chris at Nikon Canada for sending me a review loaner of this lens. As always, this is a completely independent review. All opinions and conclusions are my own.*The tests and most of the photos that I share as a part of my review cycle have been done with the 45MP Nikon Z8, which I reviewed here.You can find the product listing page for the Nikkor Z 35mm F1.2 S here.
AI Summary: The Nikon Nikkor Z 35mm F1.2 S is a high-end, large, and heavy lens tailored for professional photographers seeking top-tier performance. It delivers exceptional sharpness, beautiful bokeh, and excellent flare resistance across various lighting conditions. Its rugged build and weather sealing make it suitable for demanding environments, though its size and weight may be less practical for extended use. Overall, it offers outstanding optical quality, making it a valuable tool for portrait, wedding, and astrophotography, but it may be overkill for casual shooters.
Strengths:
Exceptional image sharpness and detail, even at F1.2
Beautiful, smooth bokeh and pleasing background blur
Excellent flare and ghosting resistance with advanced coatings
Robust build quality with weather sealing for outdoor use
Weaknesses:
Very large, heavy, and less portable for prolonged use
Limited feature set and somewhat awkward control placement
Higher price point that may not appeal to all photographers
Autofocus not as fast or precise as some rivals for fast action
I love fast 35mm lenses. The truth of the matter is that once you get to a focal length like 85mm or longer, even F2.8 provides a really shallow depth of field in many situations. But 35mm lenses are a different story. Depth of field is much bigger at 35mm, and it takes a fast aperture to really create a shallow depth of field. Having access to that fast aperture allows one to be much more creative with framing and depth of field.
The primary audience for this lens is pretty obvious from Nikon’s marketing – they are going after wedding and portrait photographers. It’s a little hard to summon weddings on demand, so that won’t be featured in this review, but I will try to recreate a few of the wedding detail type images that this crowd will be looking for. Here’s one using Nikon’s “Red” color profile.
The 35mm F1.2 S is excellent at F4 and F5.6, but so are a lot of smaller, lighter, and cheaper lenses, so a lot of the images I share will be at very large apertures.
This is an extreme instrument – is it worth buying? Let’s dive in.
Nikkor 35mm F1.2 S Build and Handling
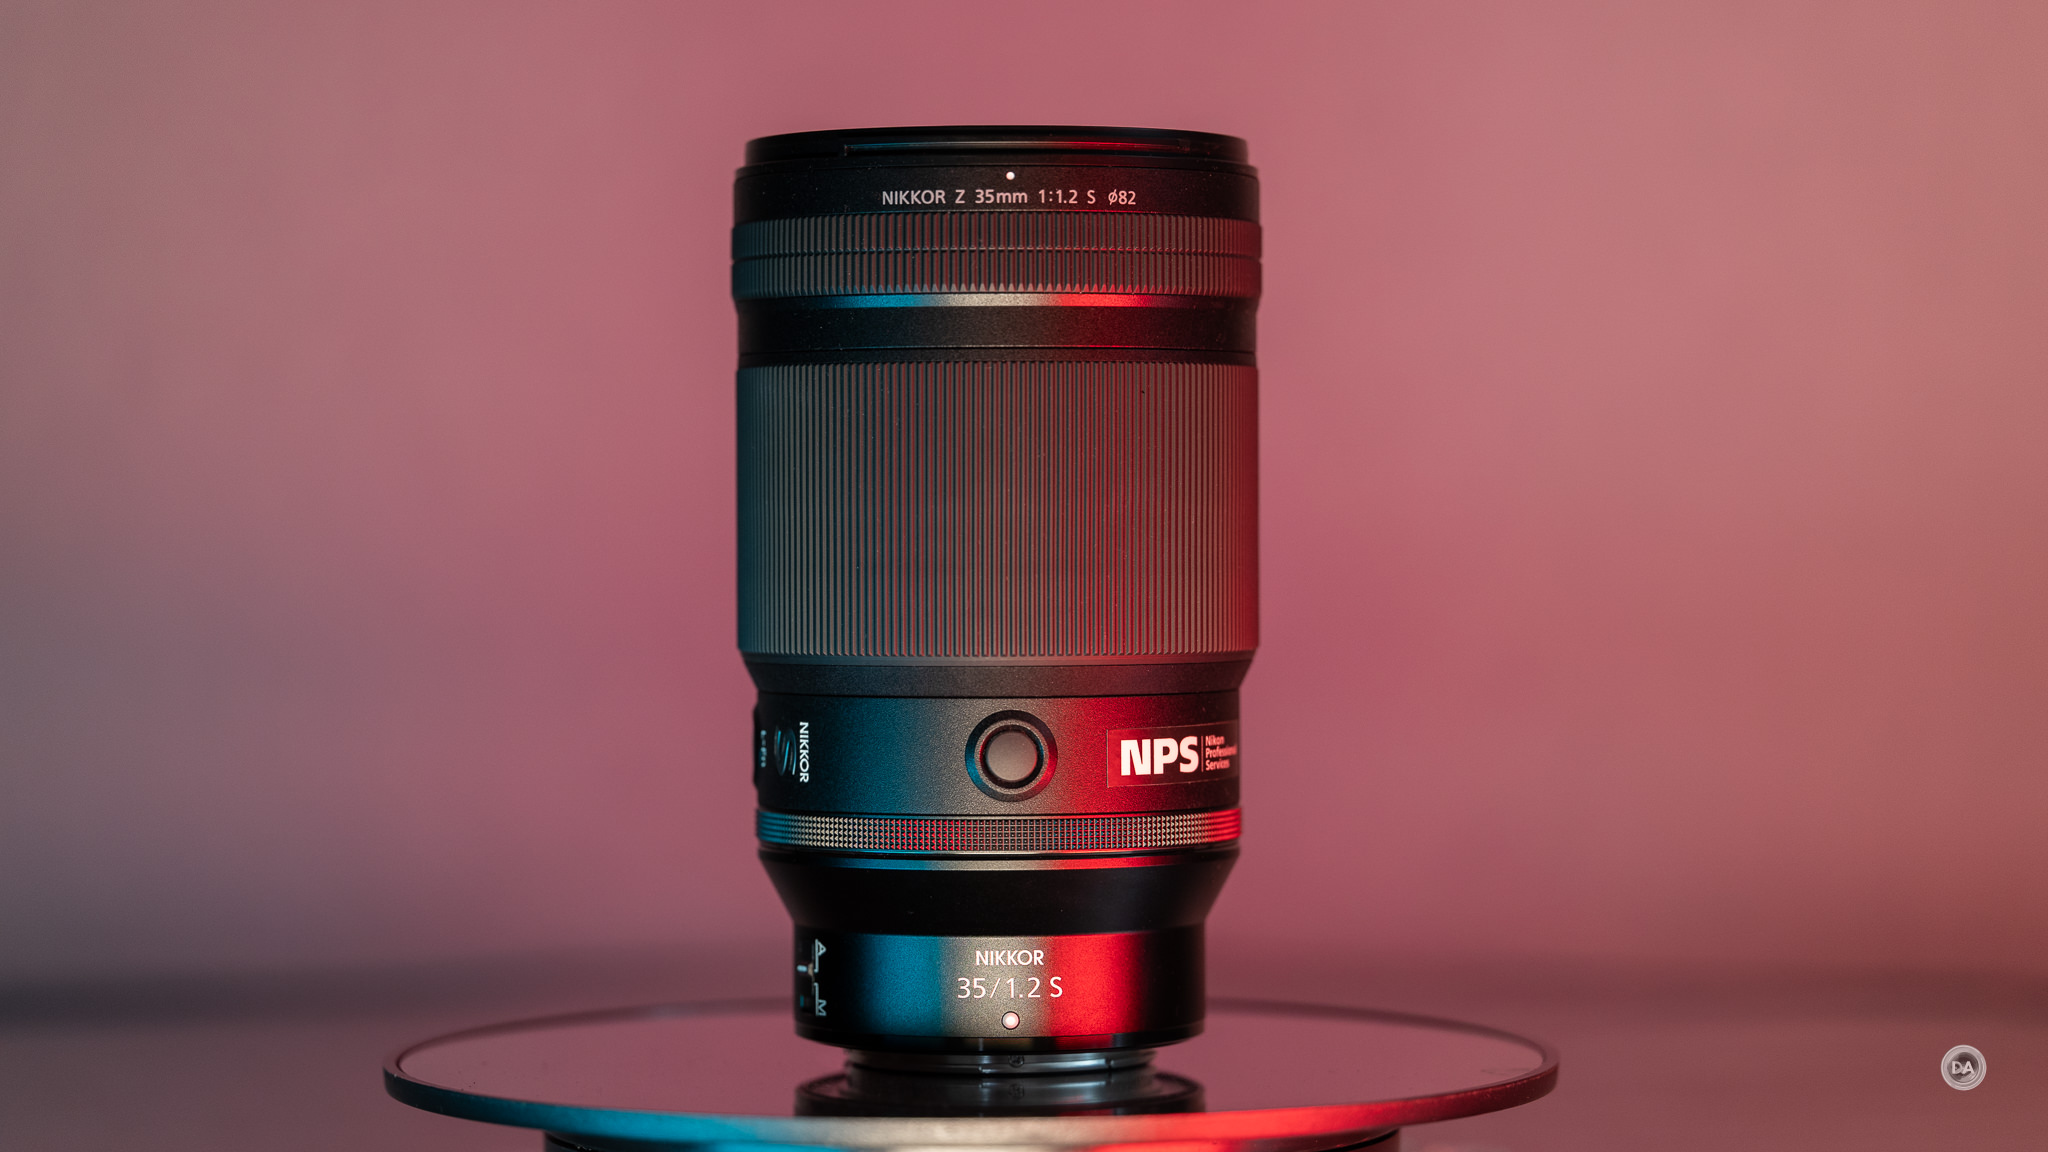
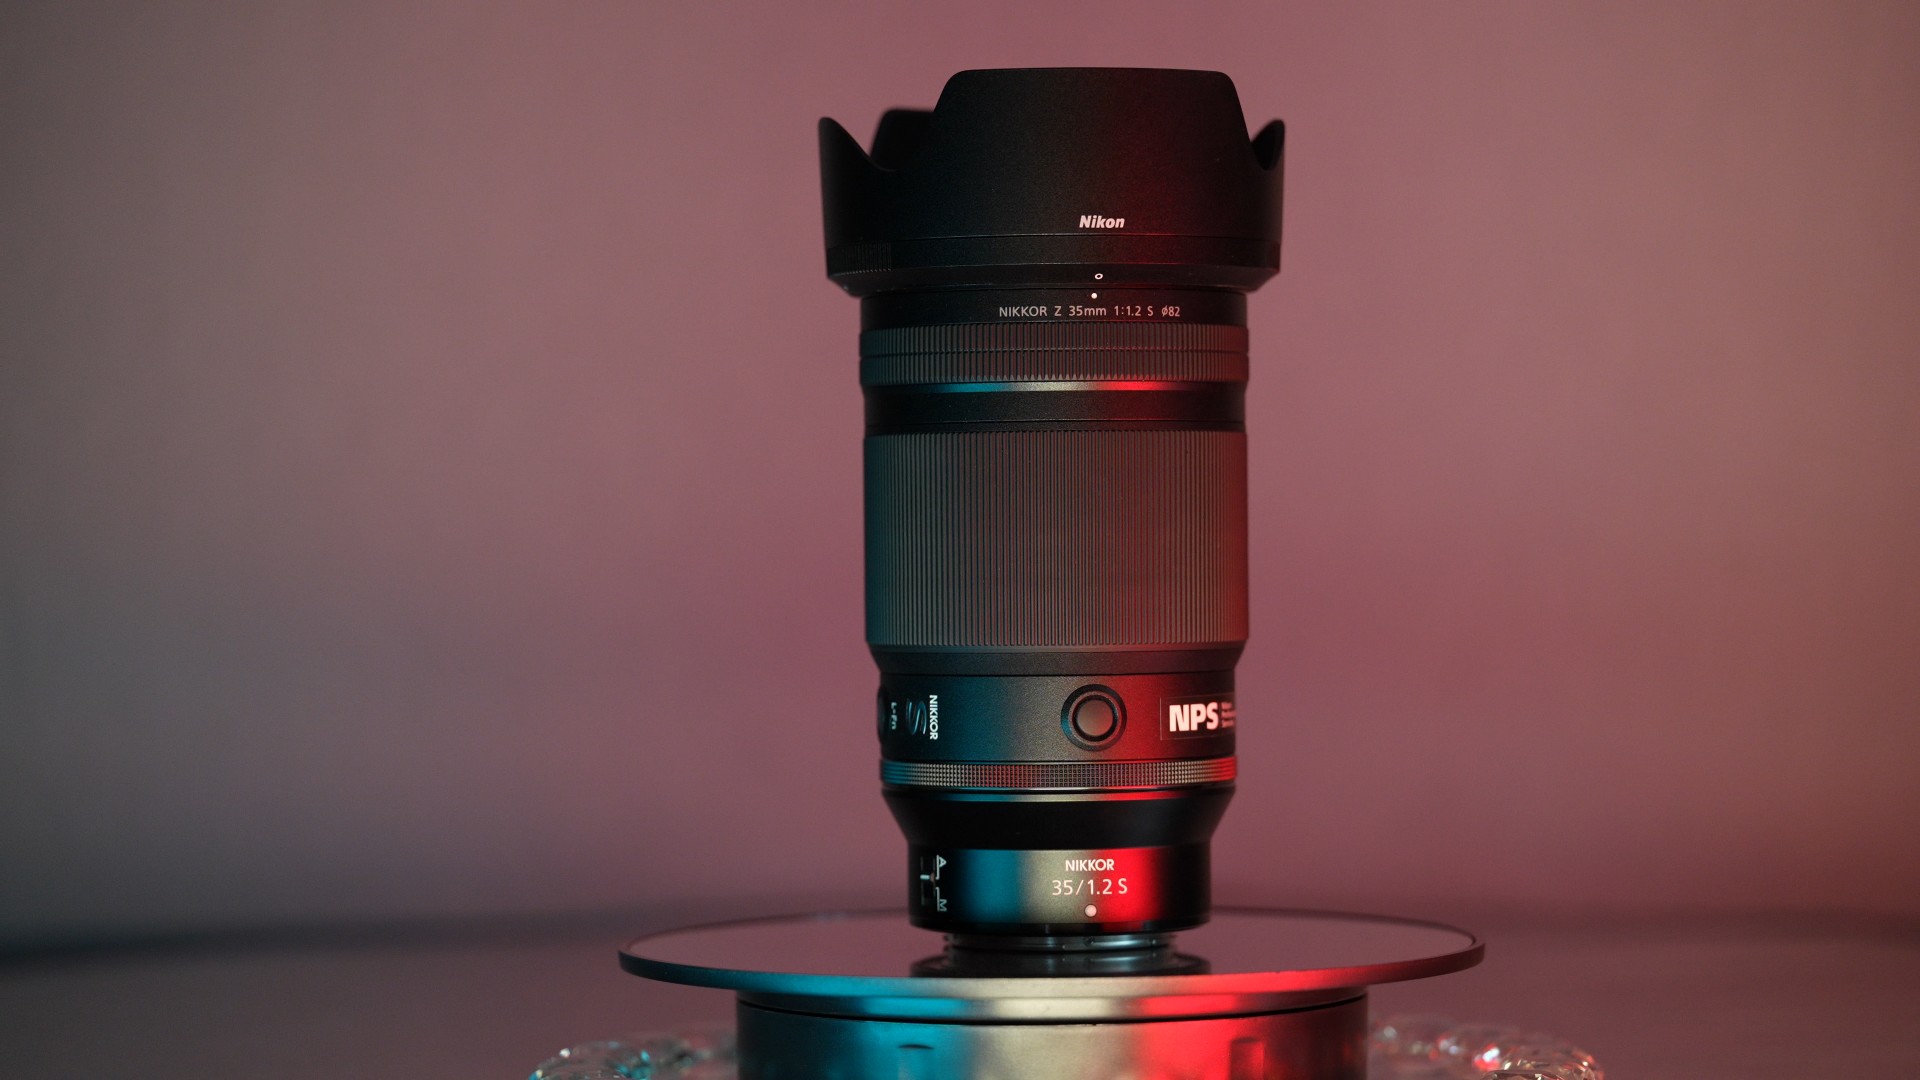
Nikon’s lineup of Z-mount premium lenses – the S-Line lenses – is known for many things, but being small is not one of them. Nikon has taken the old Zeiss Otus philosophy where performance is by the greatest object and size and weight are not really significant considerations. I think they can get away with it, too, when they often have a Small | Medium | Large option at that given focal length. It’s true now of a 35mm, 50mm, and 85mm, where F1.8, F1.4, and F1.2 options all exist or surely will in the near future. (though ironically the F1.4 options are often the smallest!). I thought Nikon was brilliant for giving the 135mm F1.8 Plena (which I reviewed here) a name (Plena). I think every lens this big, expensive, and high performing should have a name. Come on, Nikon, couldn’t this 35mm F1.2 been the “Athena” or something?
*My test loaner comes through Nikon Canada’s Professional Services, so there is some additional stickers on it that aren’t “stock”.
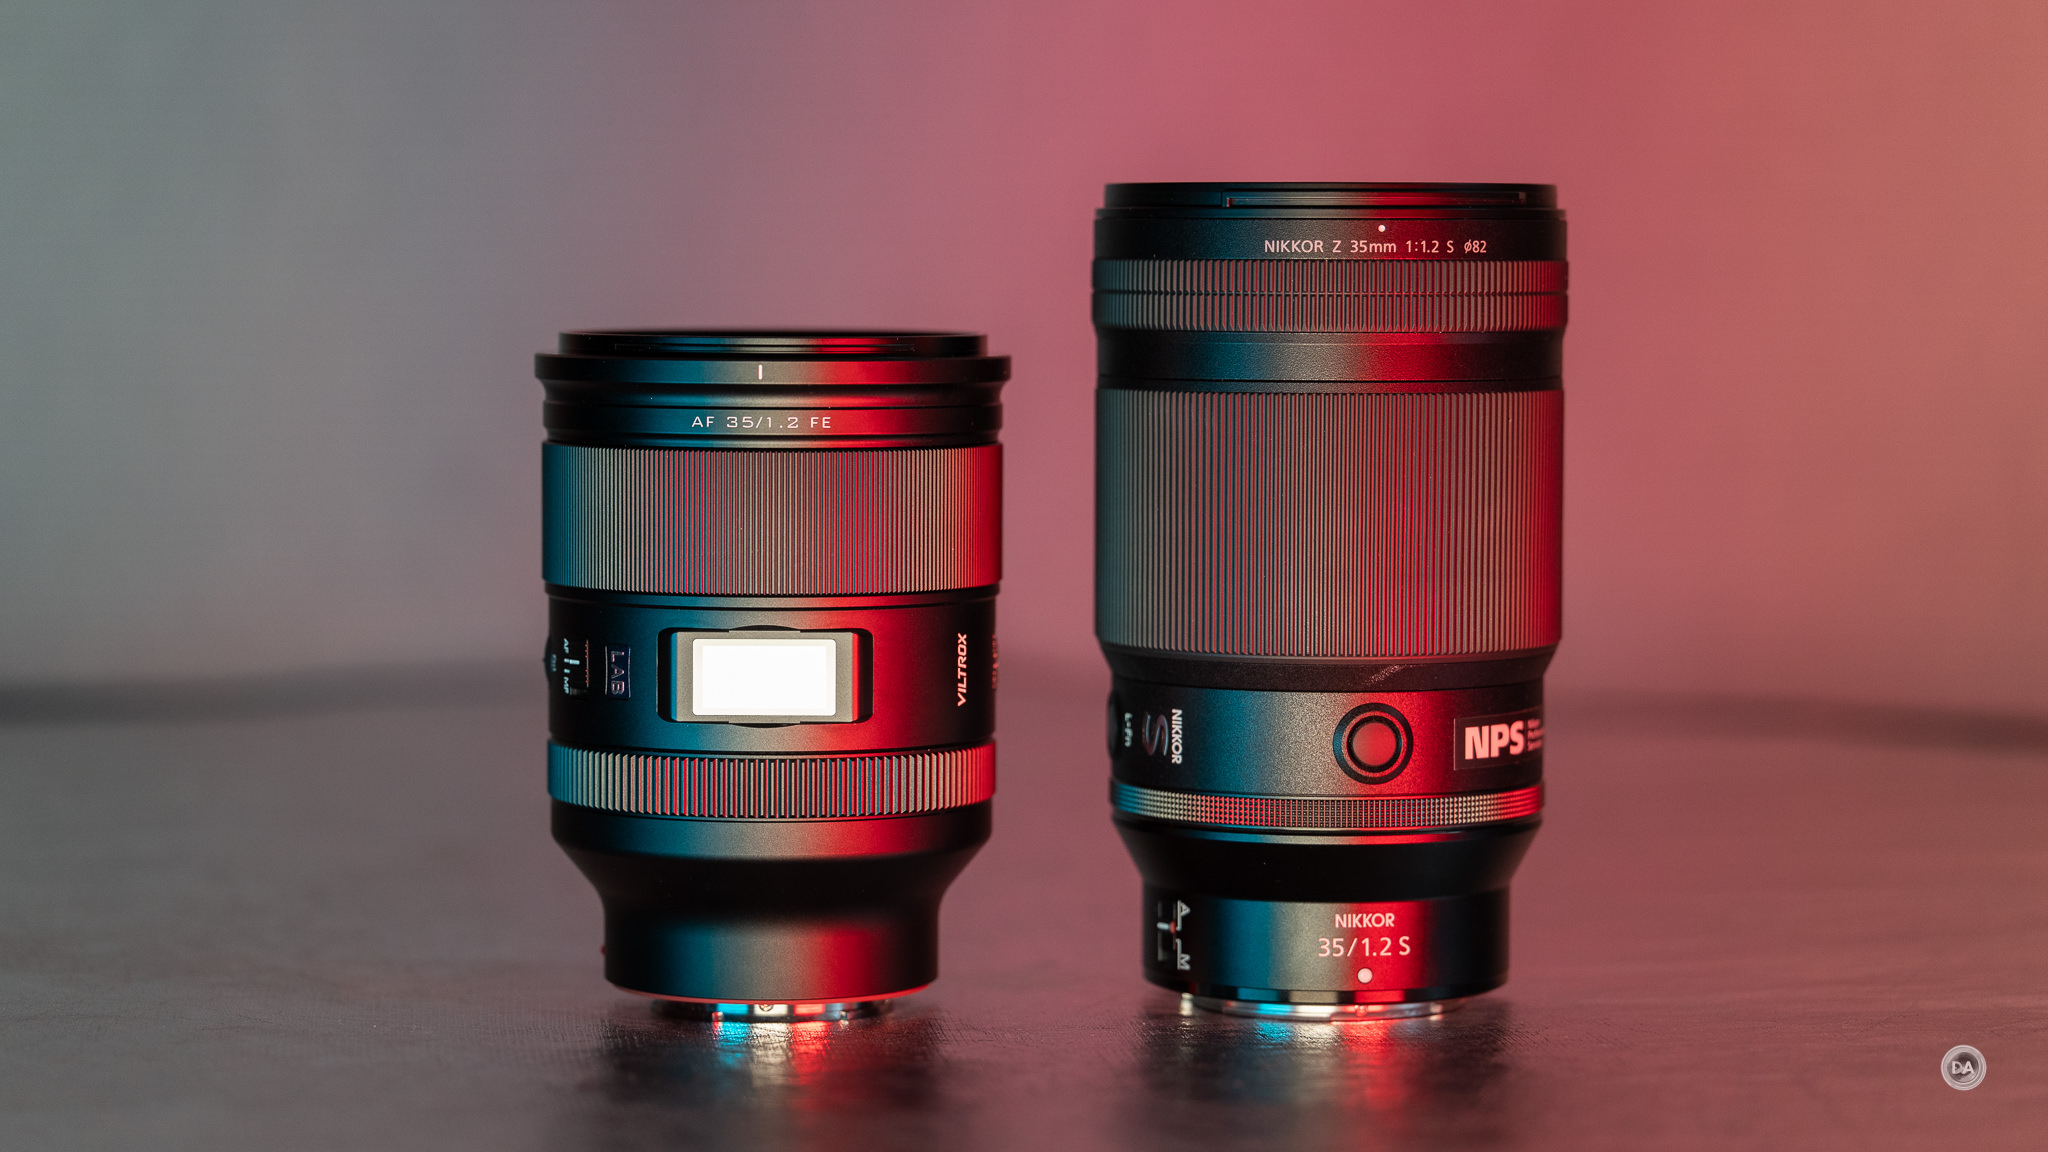
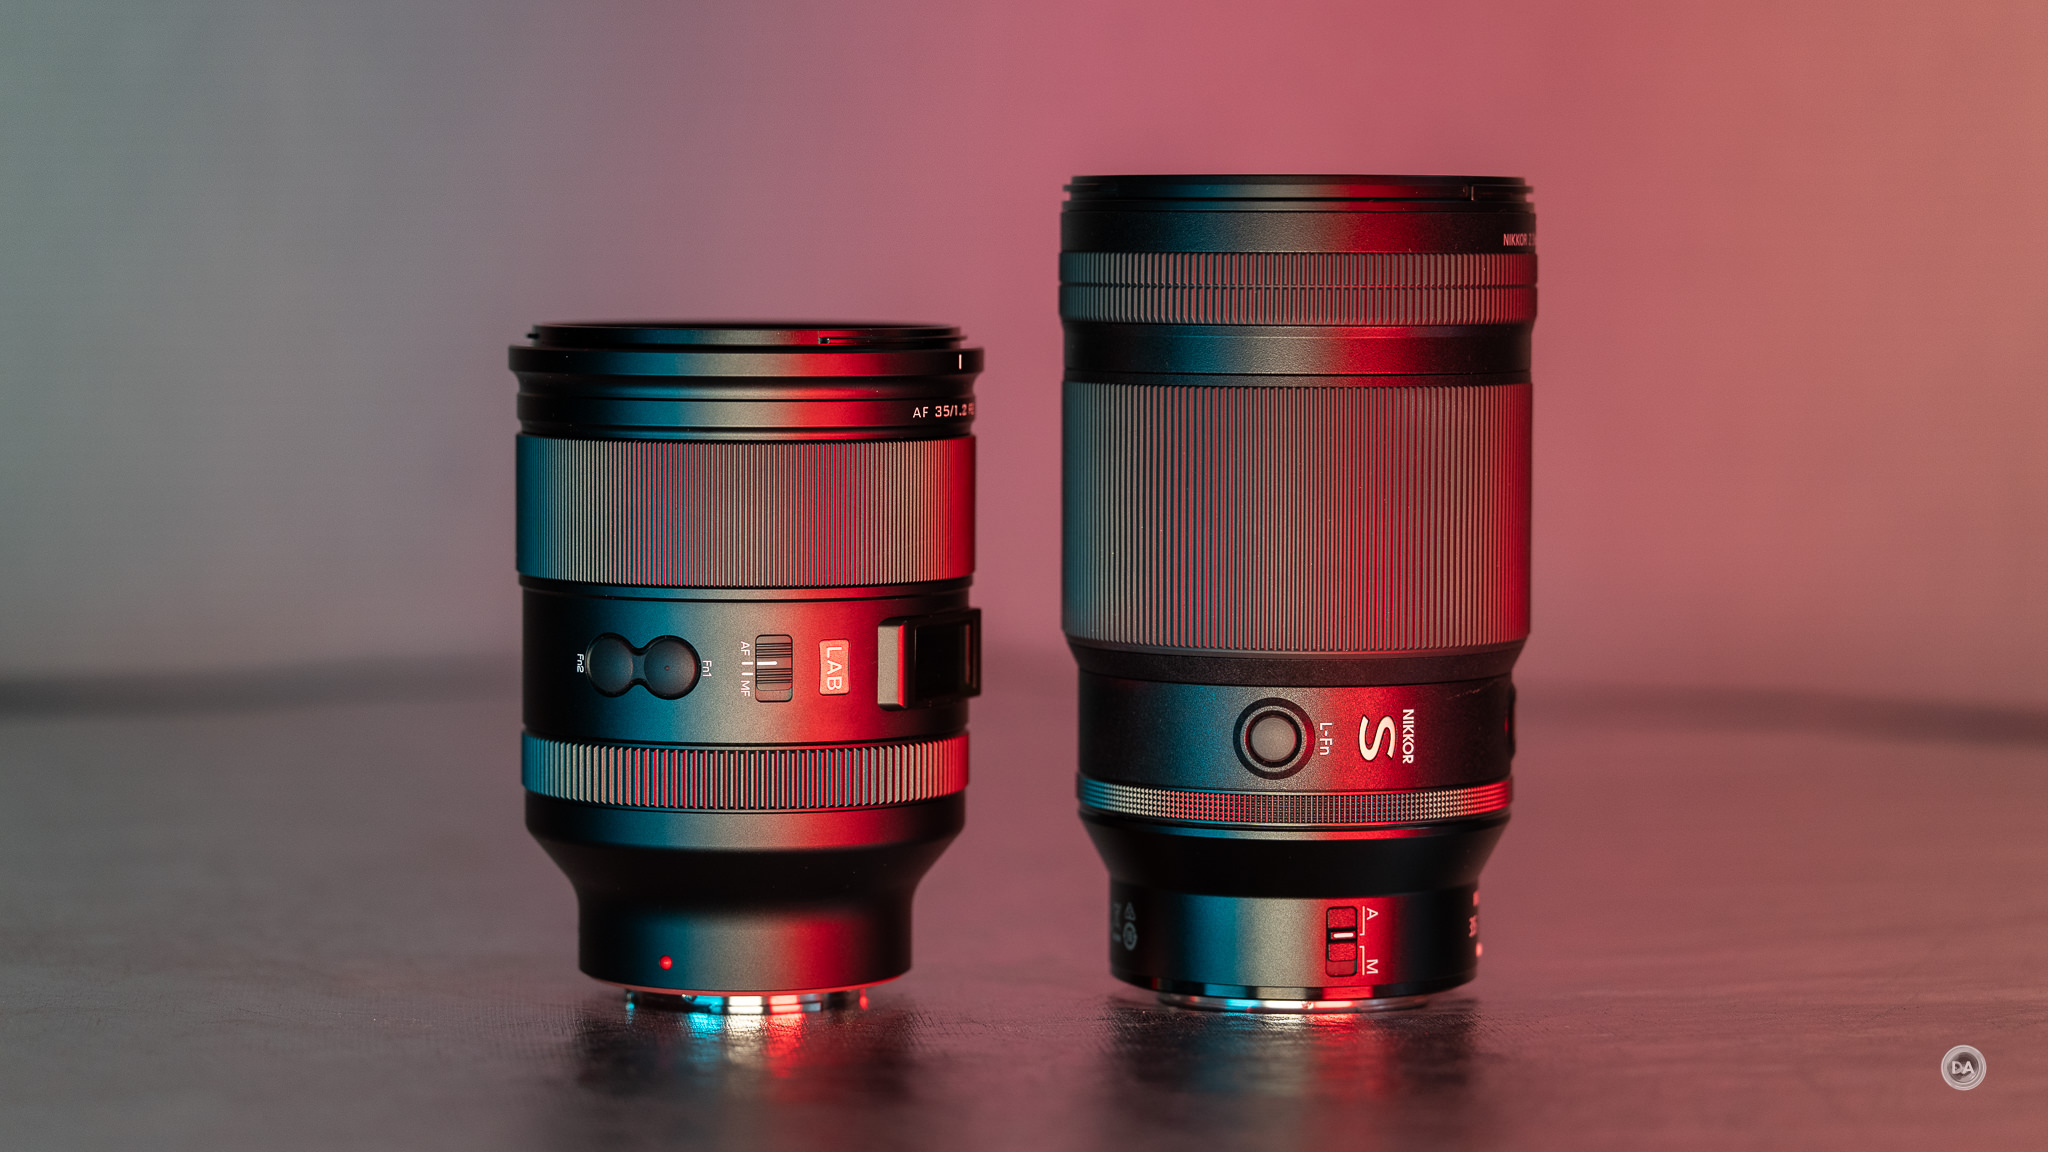
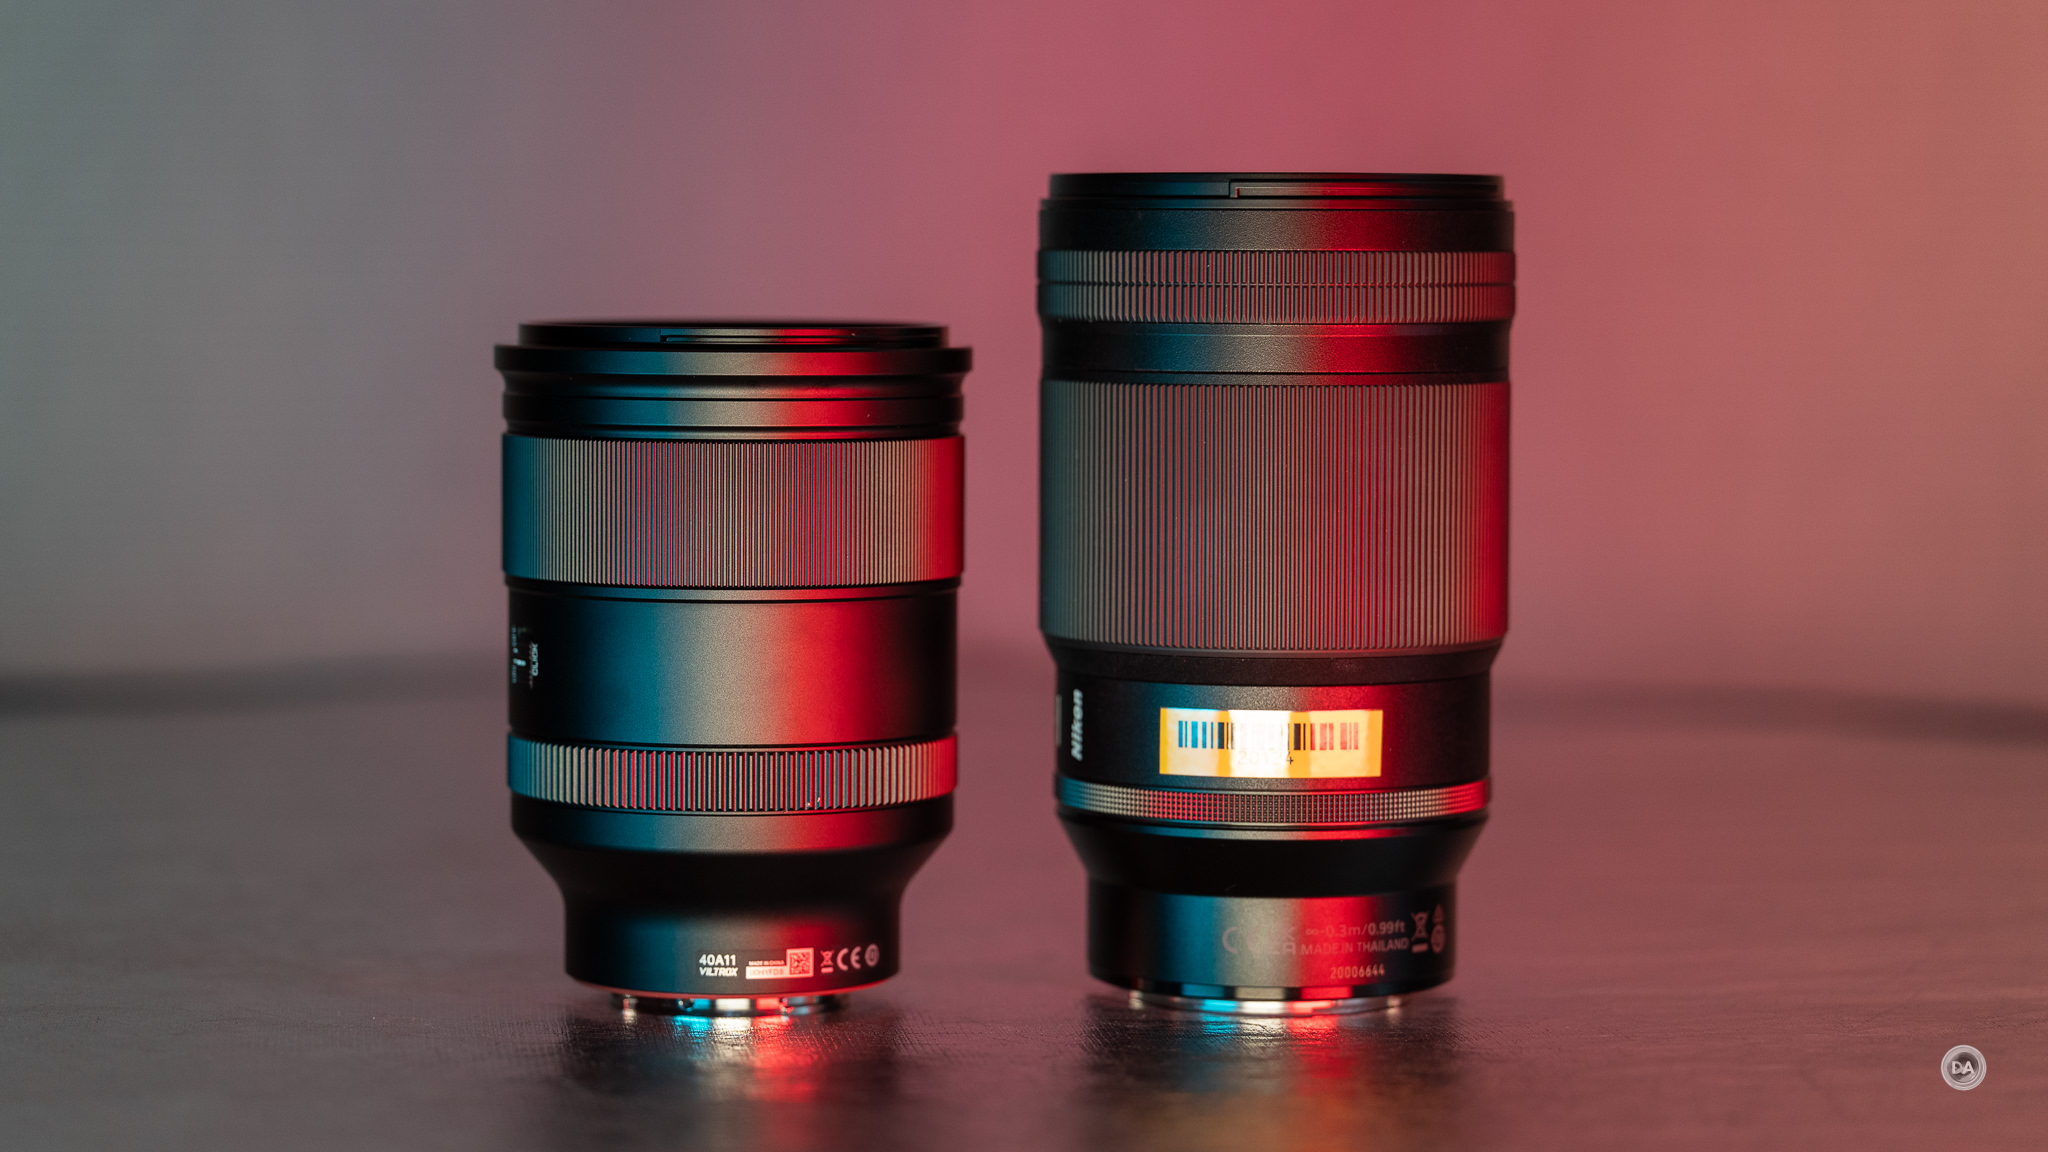
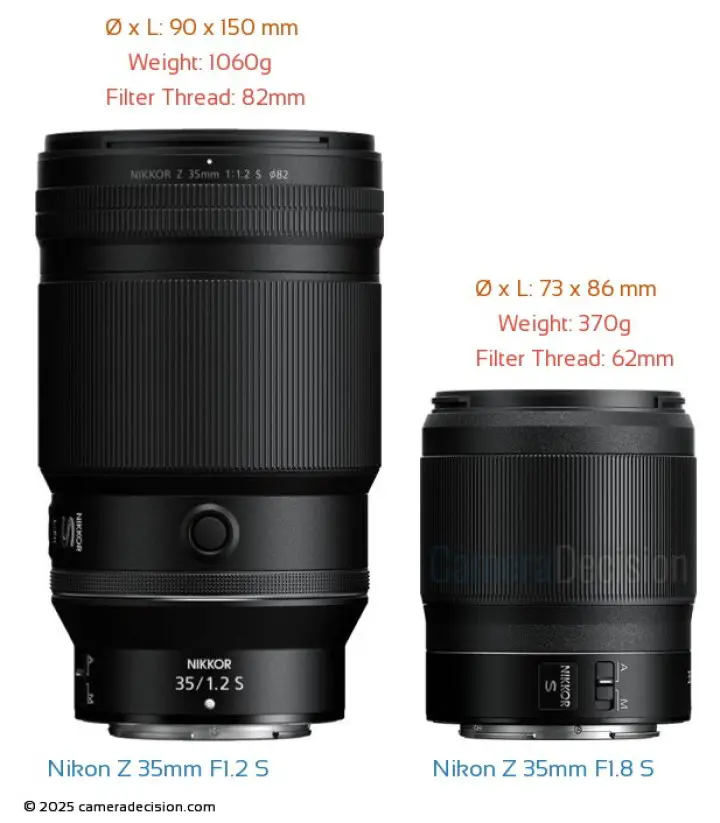
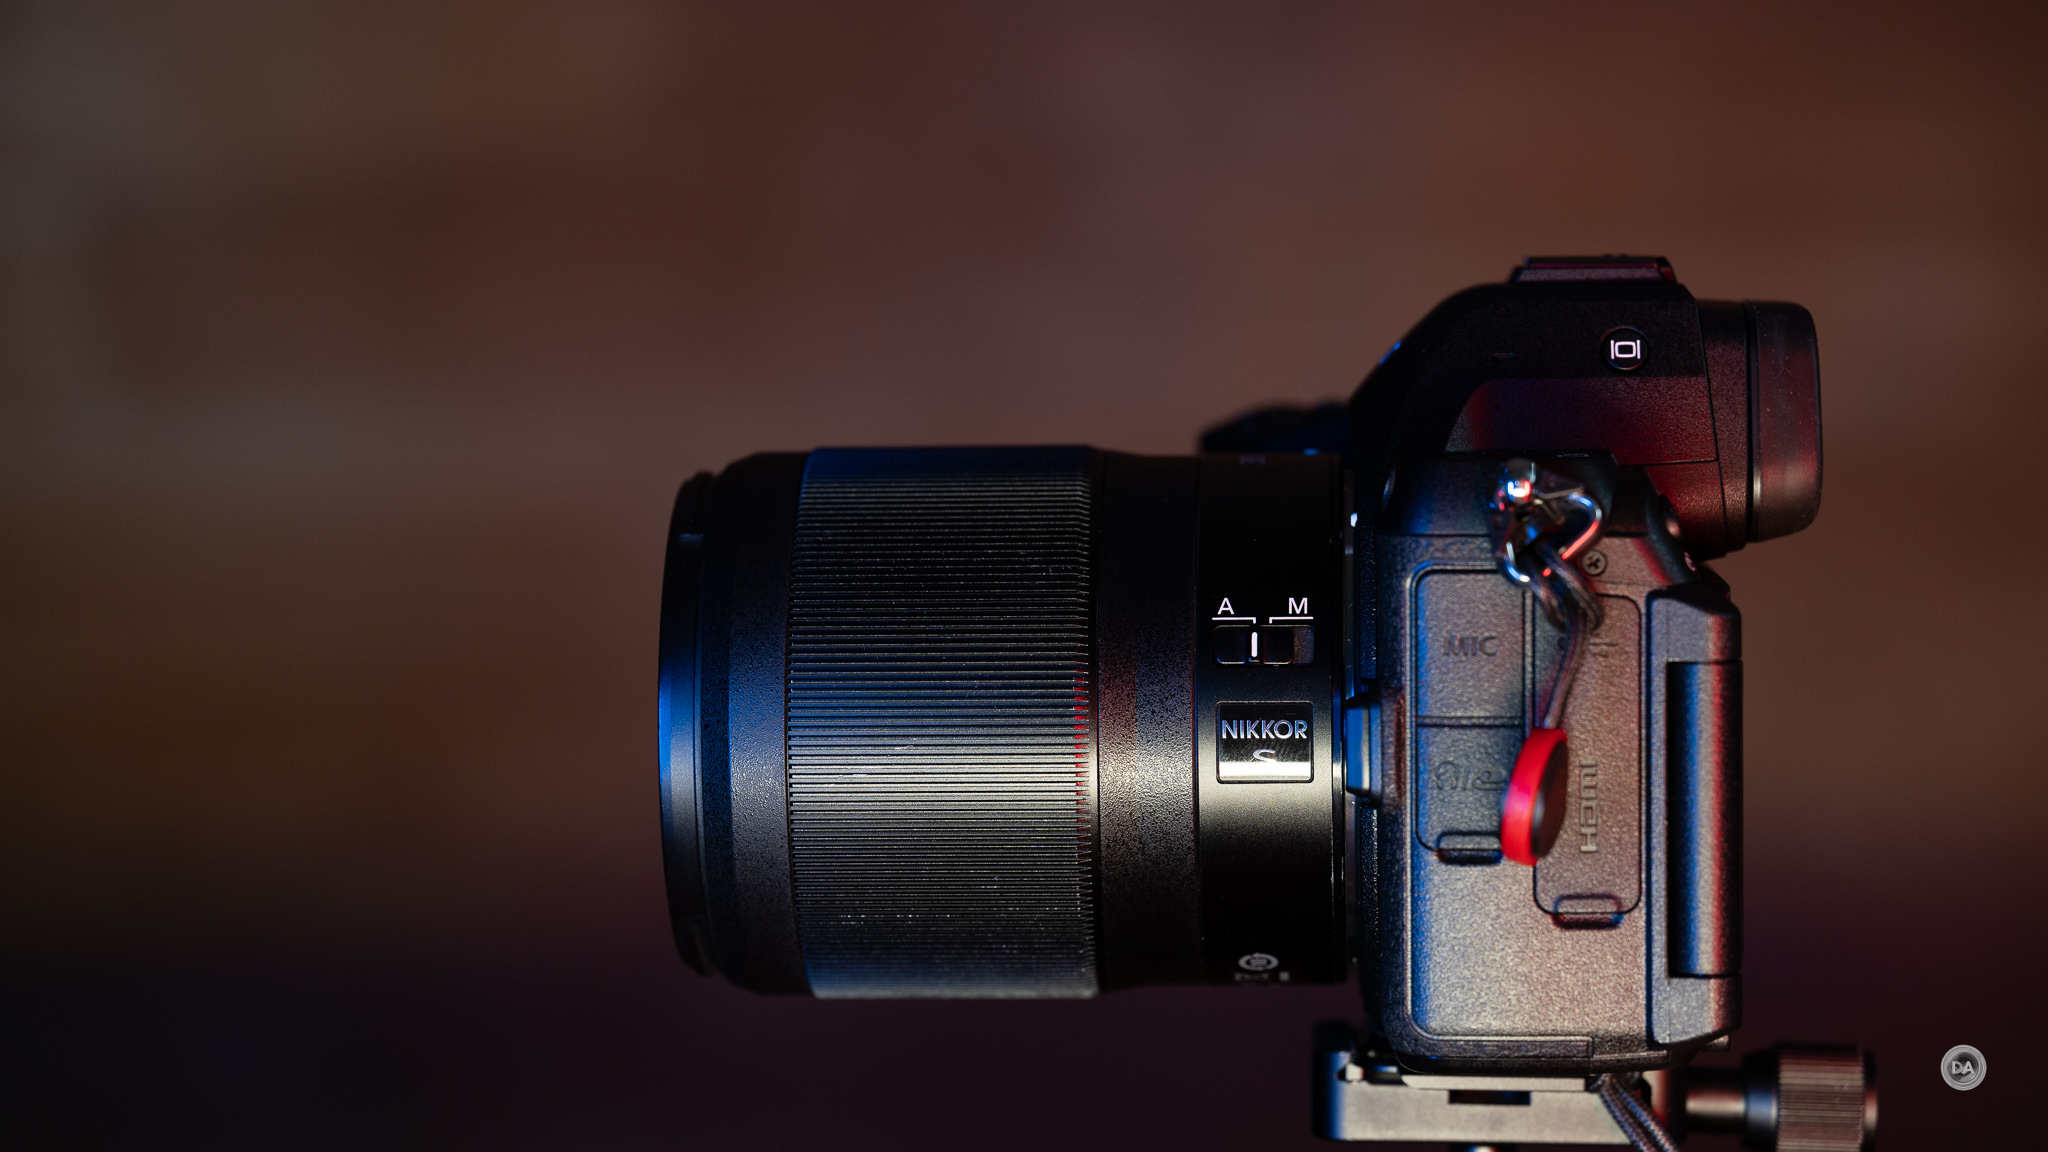
This is a BIG lens. That is the first thing that you notice about it. It is 90mm (3.5″) in diameter and a whopping 150mm (5.9″) in length. It weighs 1060g (2.3lb). That makes it very similar in size and weight to a fast zoom lens like the Tamron 35-150mm F2-2.8! While the Viltrox LAB 35mm F1.2 hasn’t made it to Z-mount yet (I anticipate that arrival sometime in the summer of 2025, however), the 35mm F1.2 S is much larger and heavier than the E-mount version of that lens.
Wow!
You will feel that weight. I made a journal entry on my phone that after a half hour of hiking carrying the 35mm F1.2 S on my Z8 using a Peak Design Slide Lite strap (my strap of choice!) in a cross-body position my traps were burning. I switched sides a few times (which I normally) wouldn’t do on that length of hike. A wider Slide strap might work better, or finding some other carrying solution that will help mitigate the weight. I’ve shot a lot of weddings in the past when I was doing them more, and I think I’d find this lens a little much over a ten hour shooting day…but maybe I’m just a wimp.
What makes this a big, heavy lens is that there is a massive amount of glass inside right past those 82mm front filter threads.
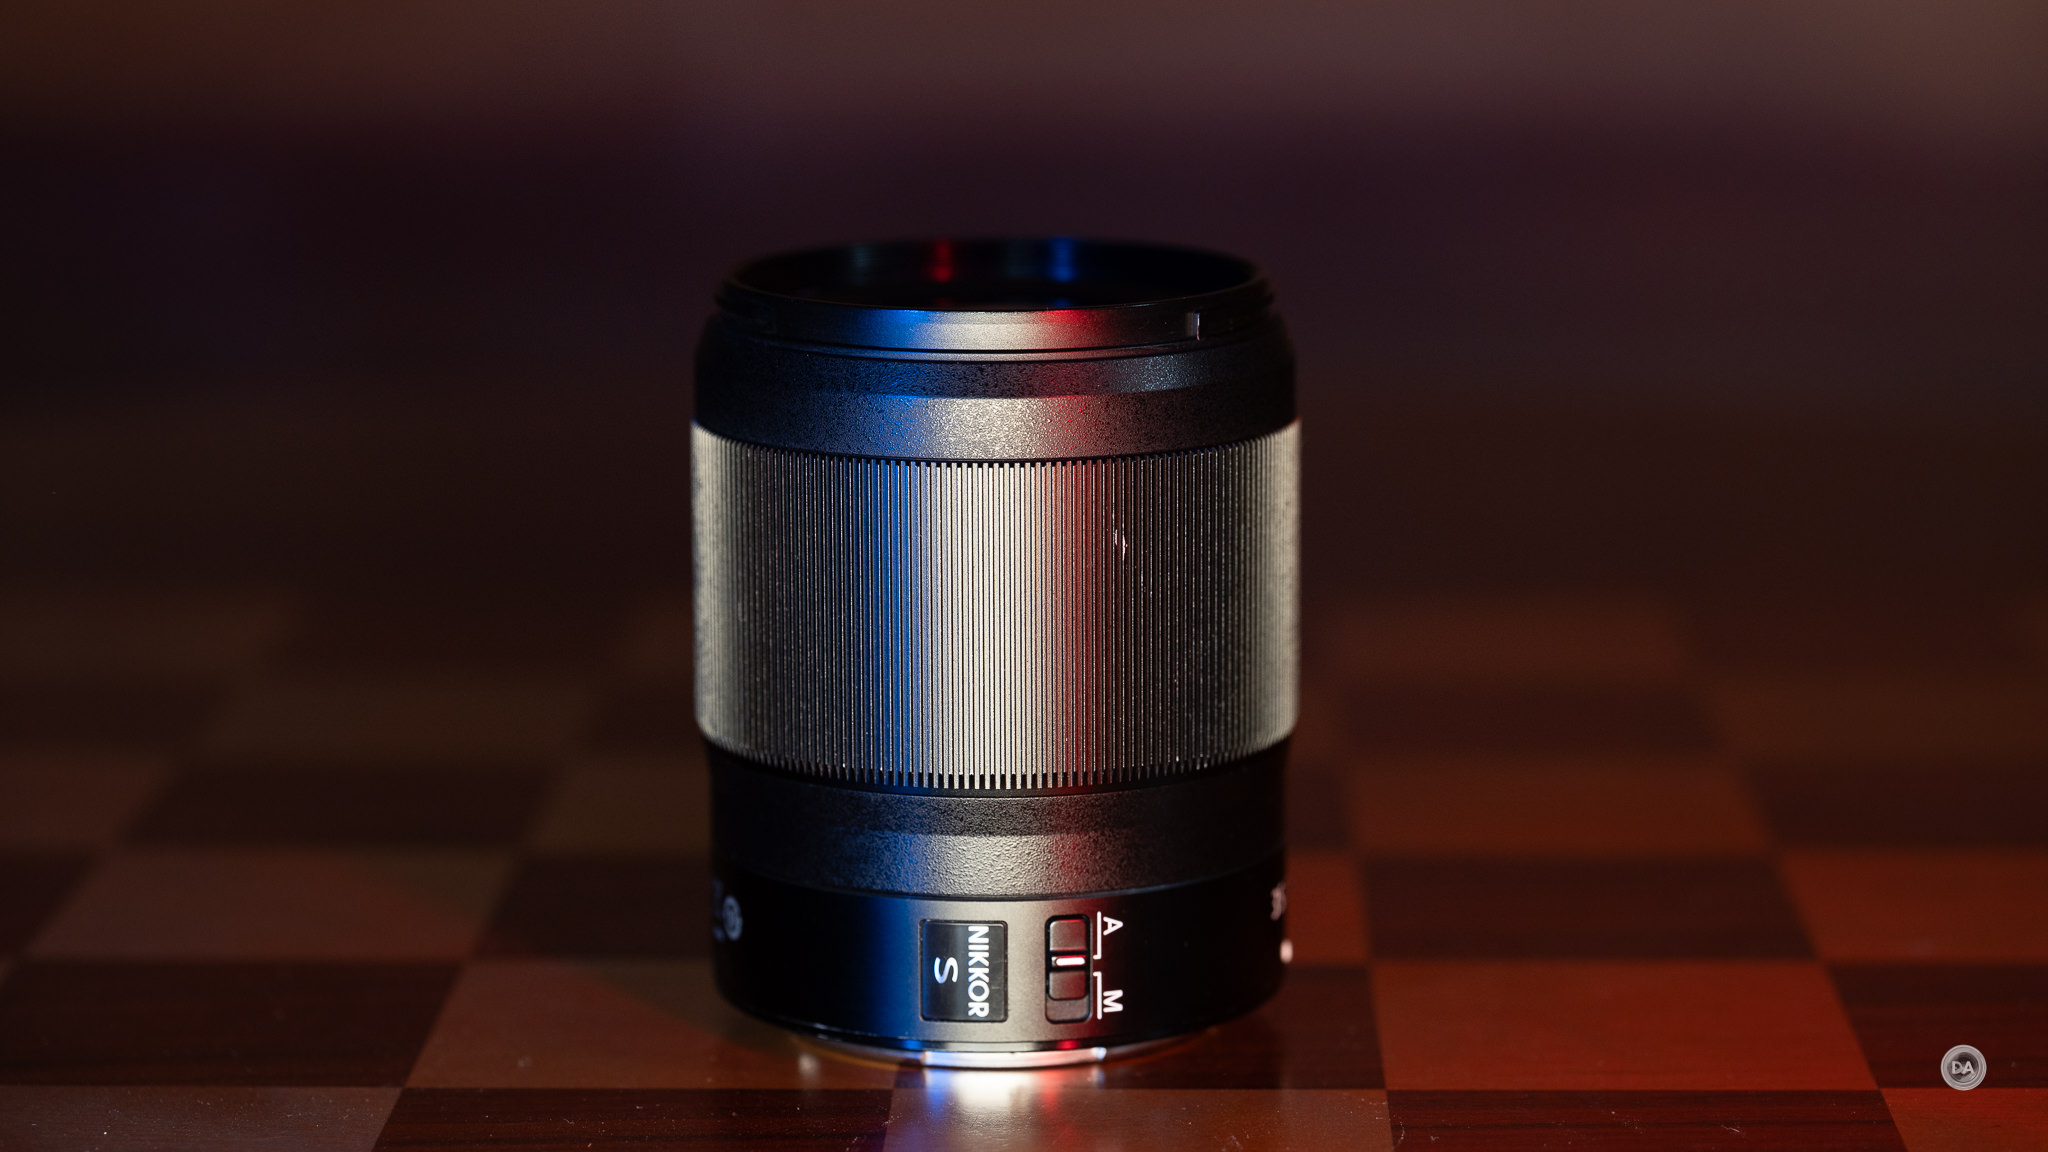
The 35mm F1.2 S is a premium lens with an excellent build. It has a tough outer shell of metal alloys and engineered plastics, and a thorough degree of weather sealing.
There is a protective coating on the front and rear elements and then roughly 11 (by my count) internal seals at the rings, buttons, and switches. That allows you to have confidence when shooting in the elements.
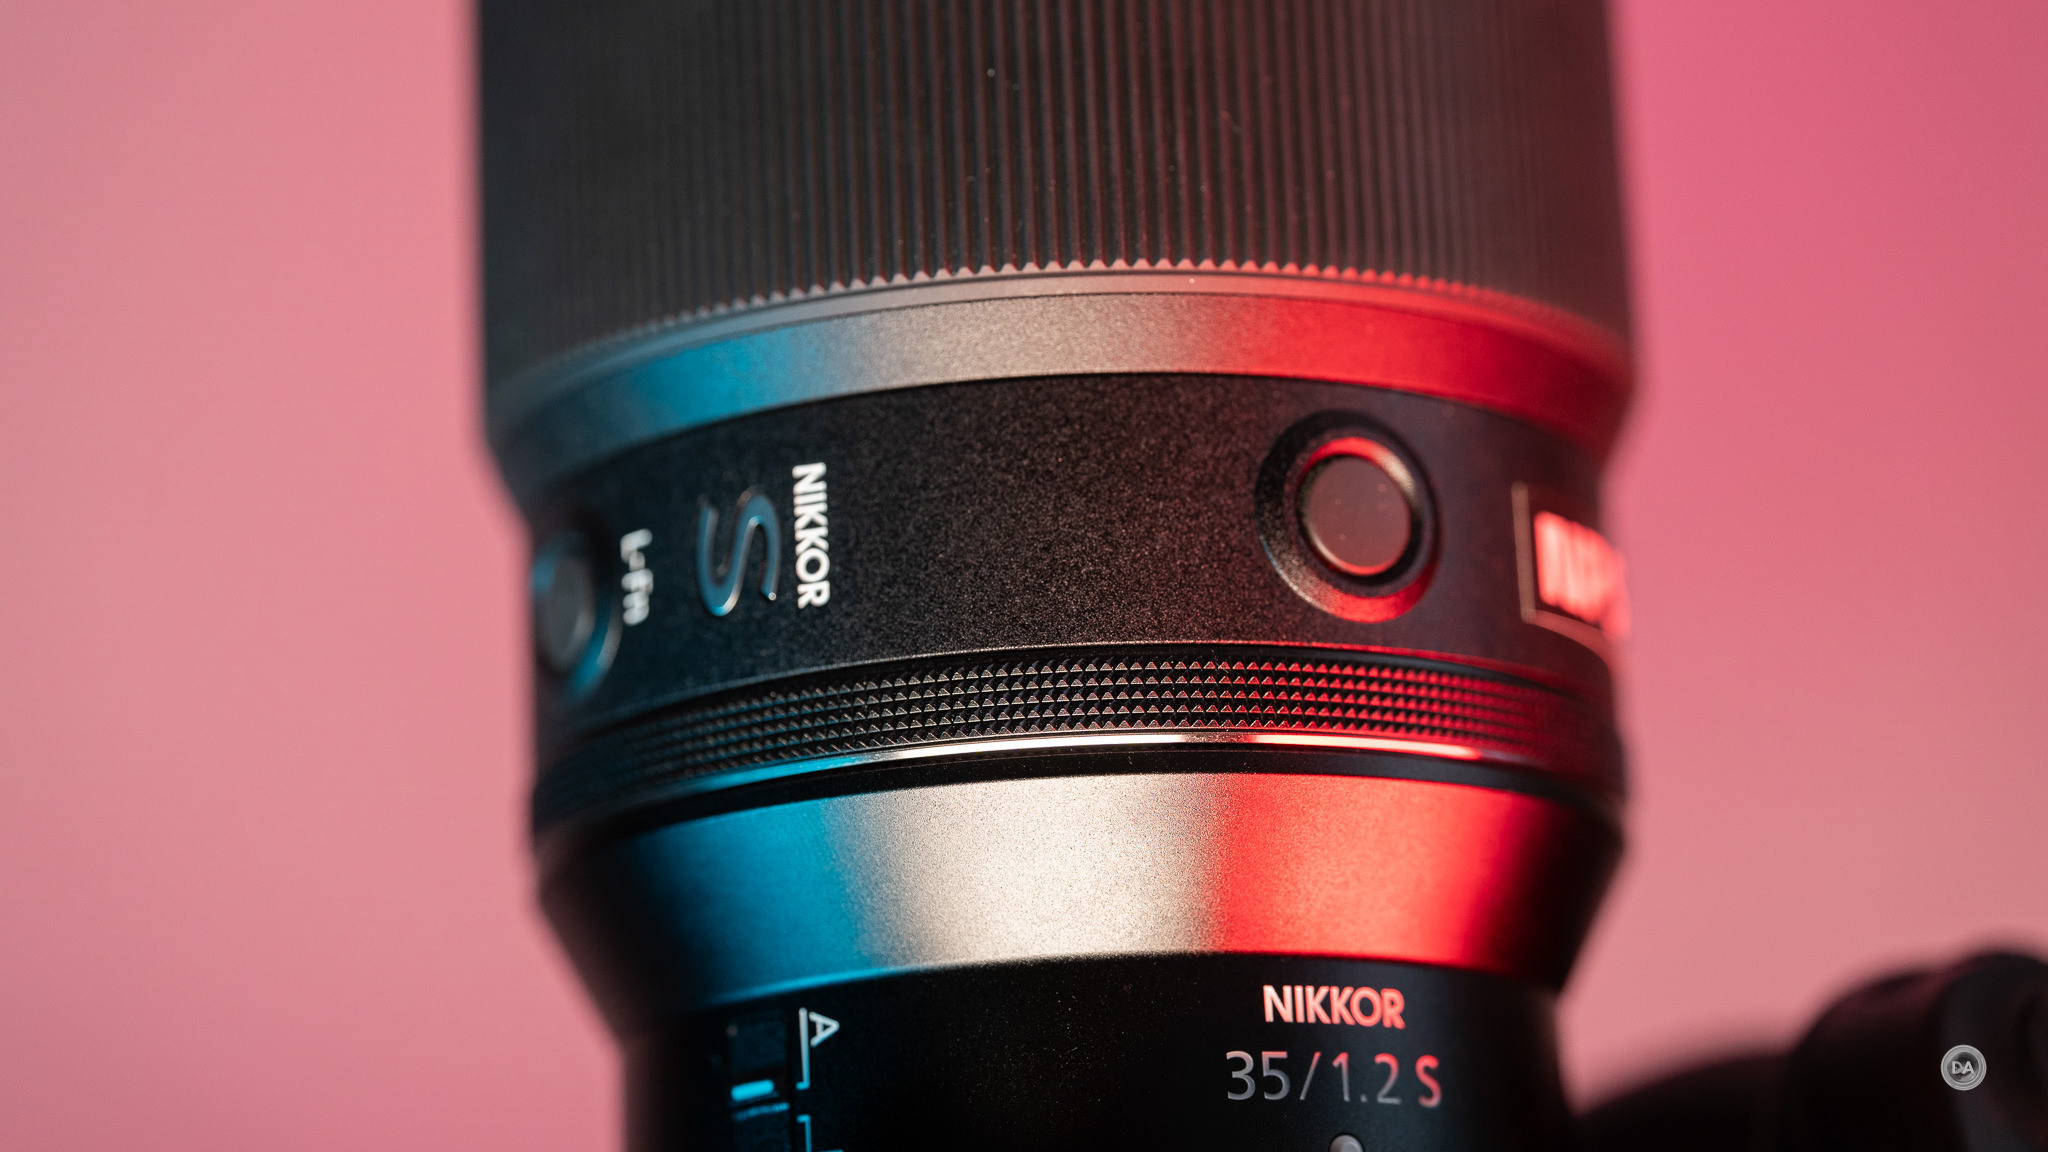
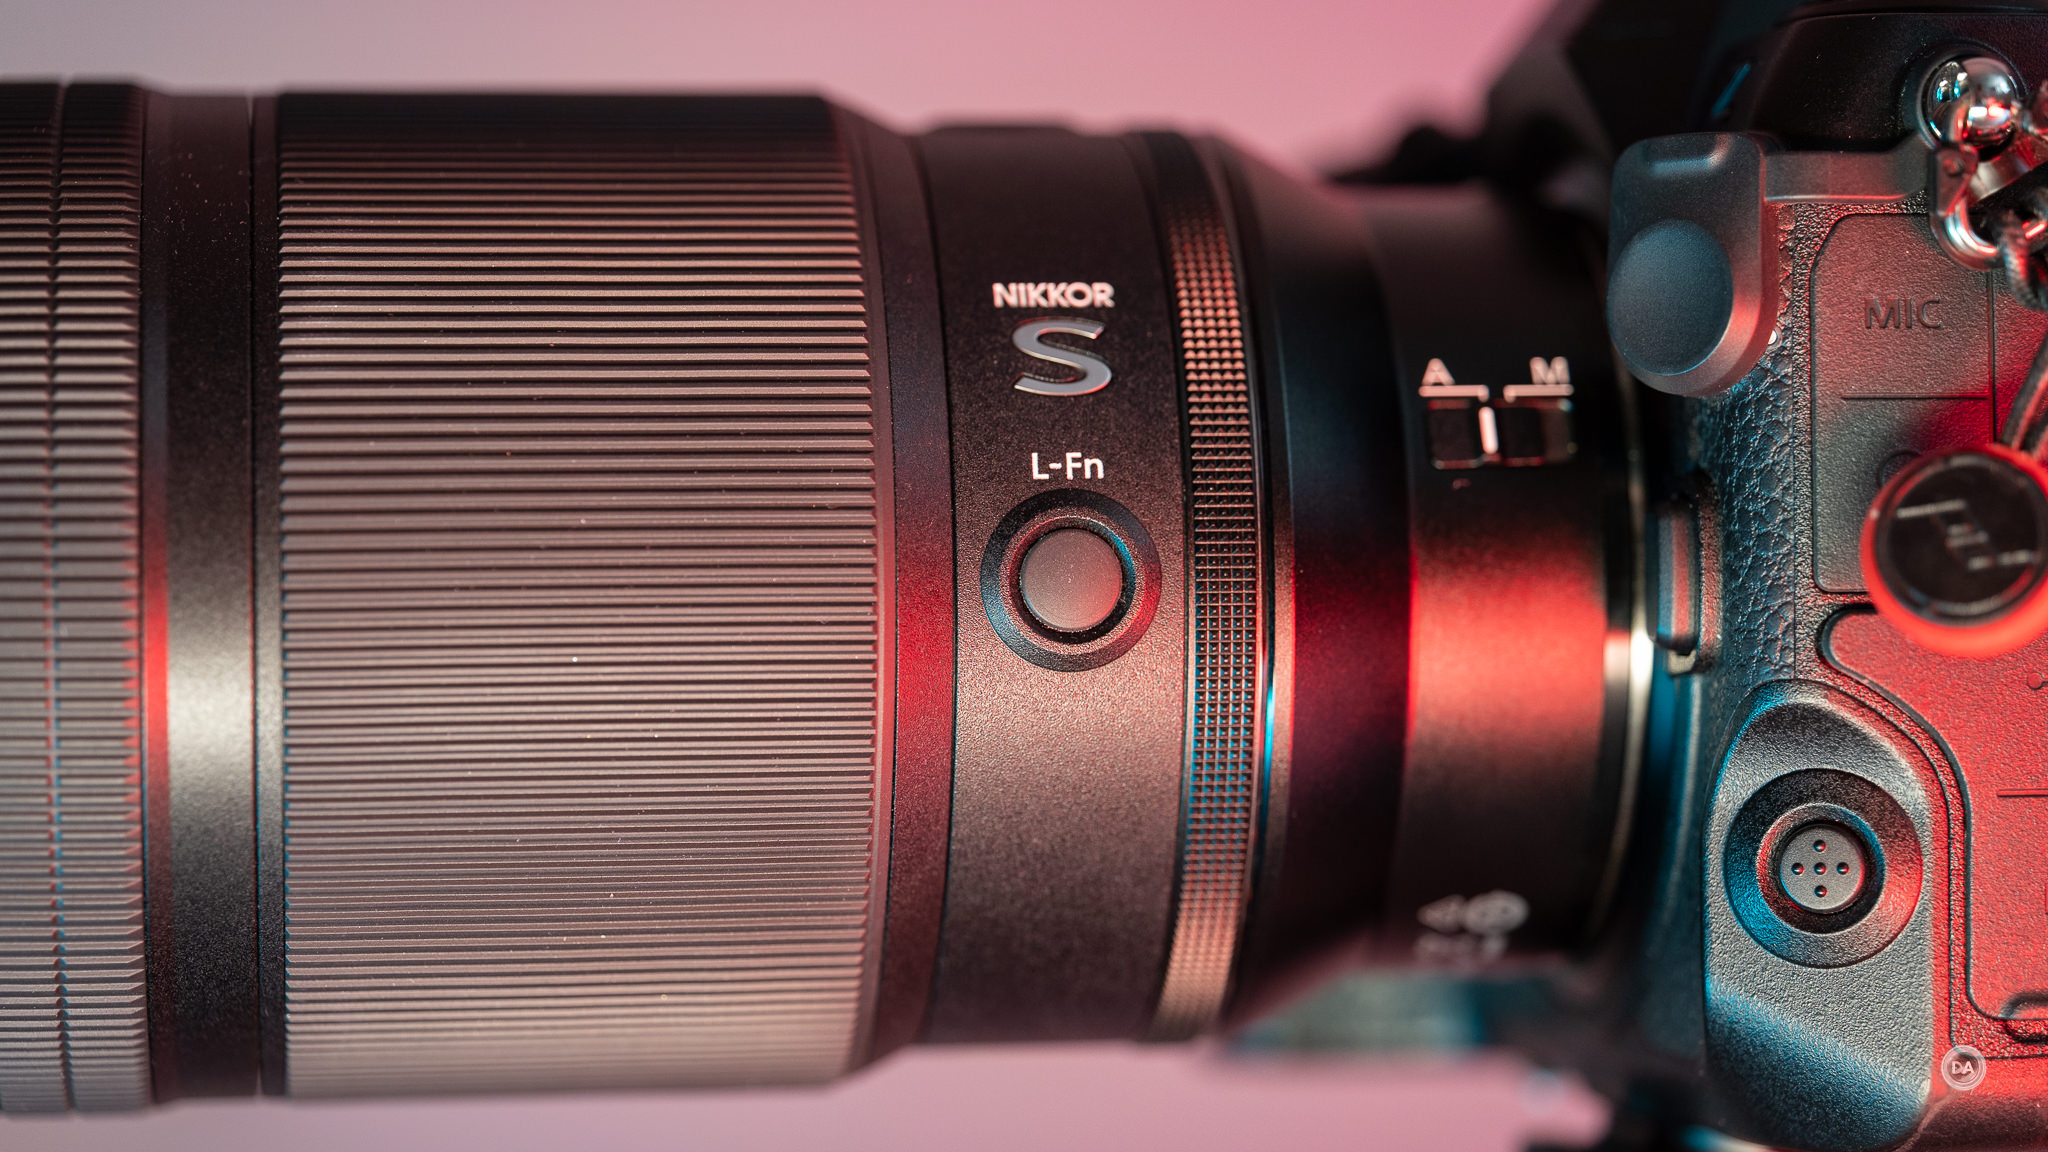
I’m a little underwhelmed by the feature set of Nikon’s premium lenses. The feature set is essentially the customizable control ring, an AF | MF switch, and two redundant Function (Custom) buttons. These buttons don’t have separate functions but a shared, single function that is programmable from within the camera. There are two to allow one to be close to hand whether shooting in horizontal or vertical modes.
At least this design has a specific purpose (more on that in the image quality section).
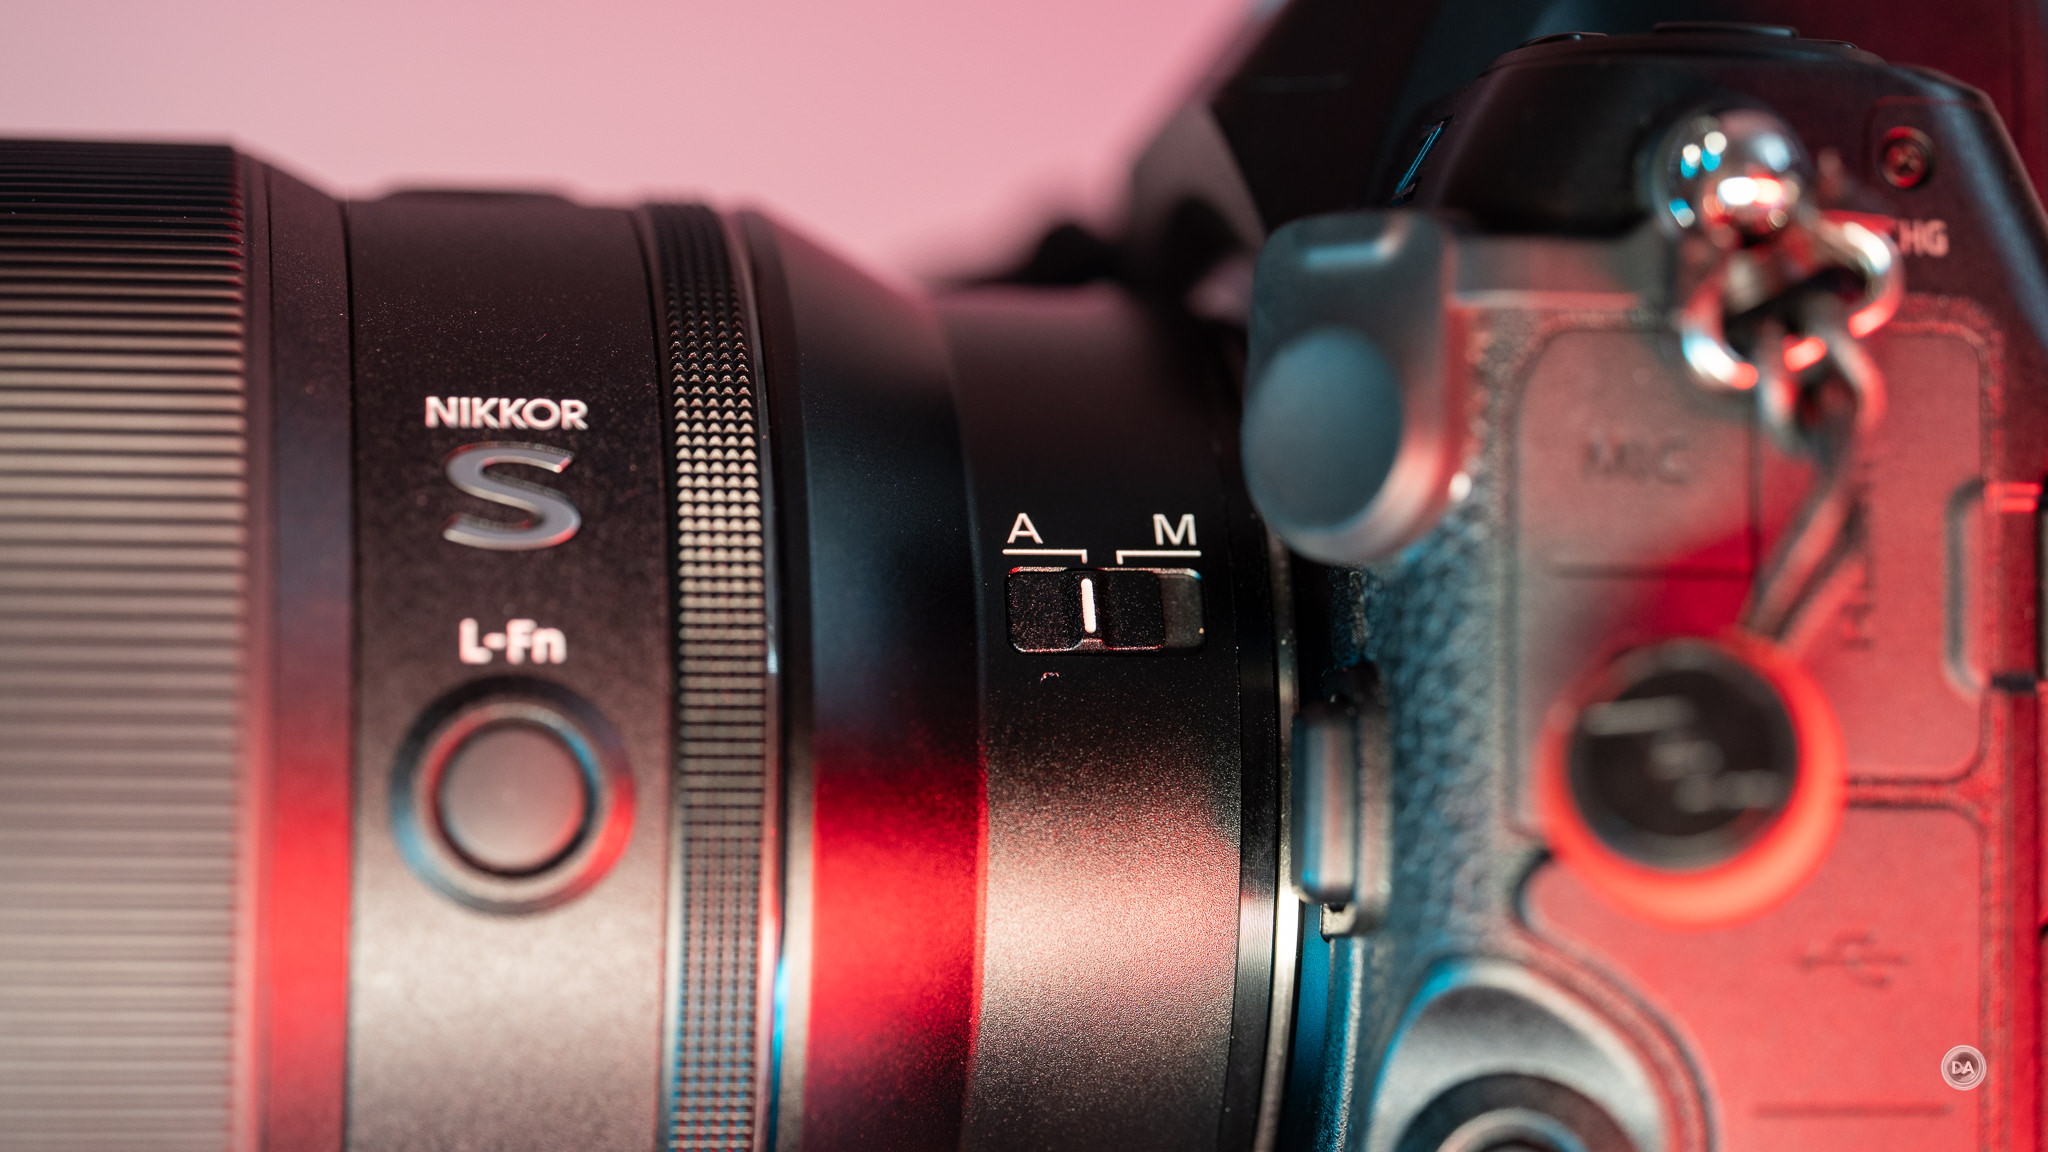
Nikon has a specific design ethos of the feature set of these upscale S-Line lenses, which includes a few more control points than the average lens. That starts very early on the lens with an AF | MF switch that is located very close to the lens mount.
I’ve complained about this placement on a number of lenses. On my Z8, there are two controls located way too close to this area. There is a flash sync port behind a rubber cover along with the camera release button. That means if I’m reaching around with my left thumb to operate the switch, I’m having to thread the needle through a couple of obstacles. Perhaps placing it on the same tier with the Fn buttons would have made more sense.
Next comes Nikon’s clickless “customizable control ring”, which could serve as a manual aperture ring but could also function to control ISO, exposure compensation, or a few other functions – whatever you’ve set up the ring to do in the menus. Those controls can be found in the Custom Settings menu, then by selecting group F (Controls), and finally choosing custom setting F2 (Custom Controls Shooting) to change the function of the ring.
As an aside, I will note that I was able to do smooth aperture racks through the control ring without any visible steps. I like it fine for that purpose for video, but didn’t like this application of it for much else. The ring is way too sensitive and the rotational throw too short to be very useful. You’ll rack through most of the aperture in a small twist, and if I set it to exposure compensation or something similar, I’m at +/-4 EV before I know it. I’ve given Viltrox some grief over their own version of the customizable control ring, but I’d take it over the Nikkor any day of the week. What’s more, the LAB lens has the OLED that we’ve seen on some S Line lenses but for some reason not on this one.
There’s no click/declick option, and the ring would actually be more useful with clicks in stills mode because you could more easily use with precision for aperture control. The absence of the OLED also makes the control ring less useful because its not directly connected to any display but on the camera. A lens like the Viltrox also allows you to program A-B focus for smart focus pulls.
Put simply, I’m not particularly impressed by the implementation of the limited features we have here. A $2800 USD lens deserves better.
The aperture iris has eleven rounded blades, and the aperture iris definitely does a nice job of keeping the specular highlights round. Here’s a look at F1.2, F2, and and F2.8:
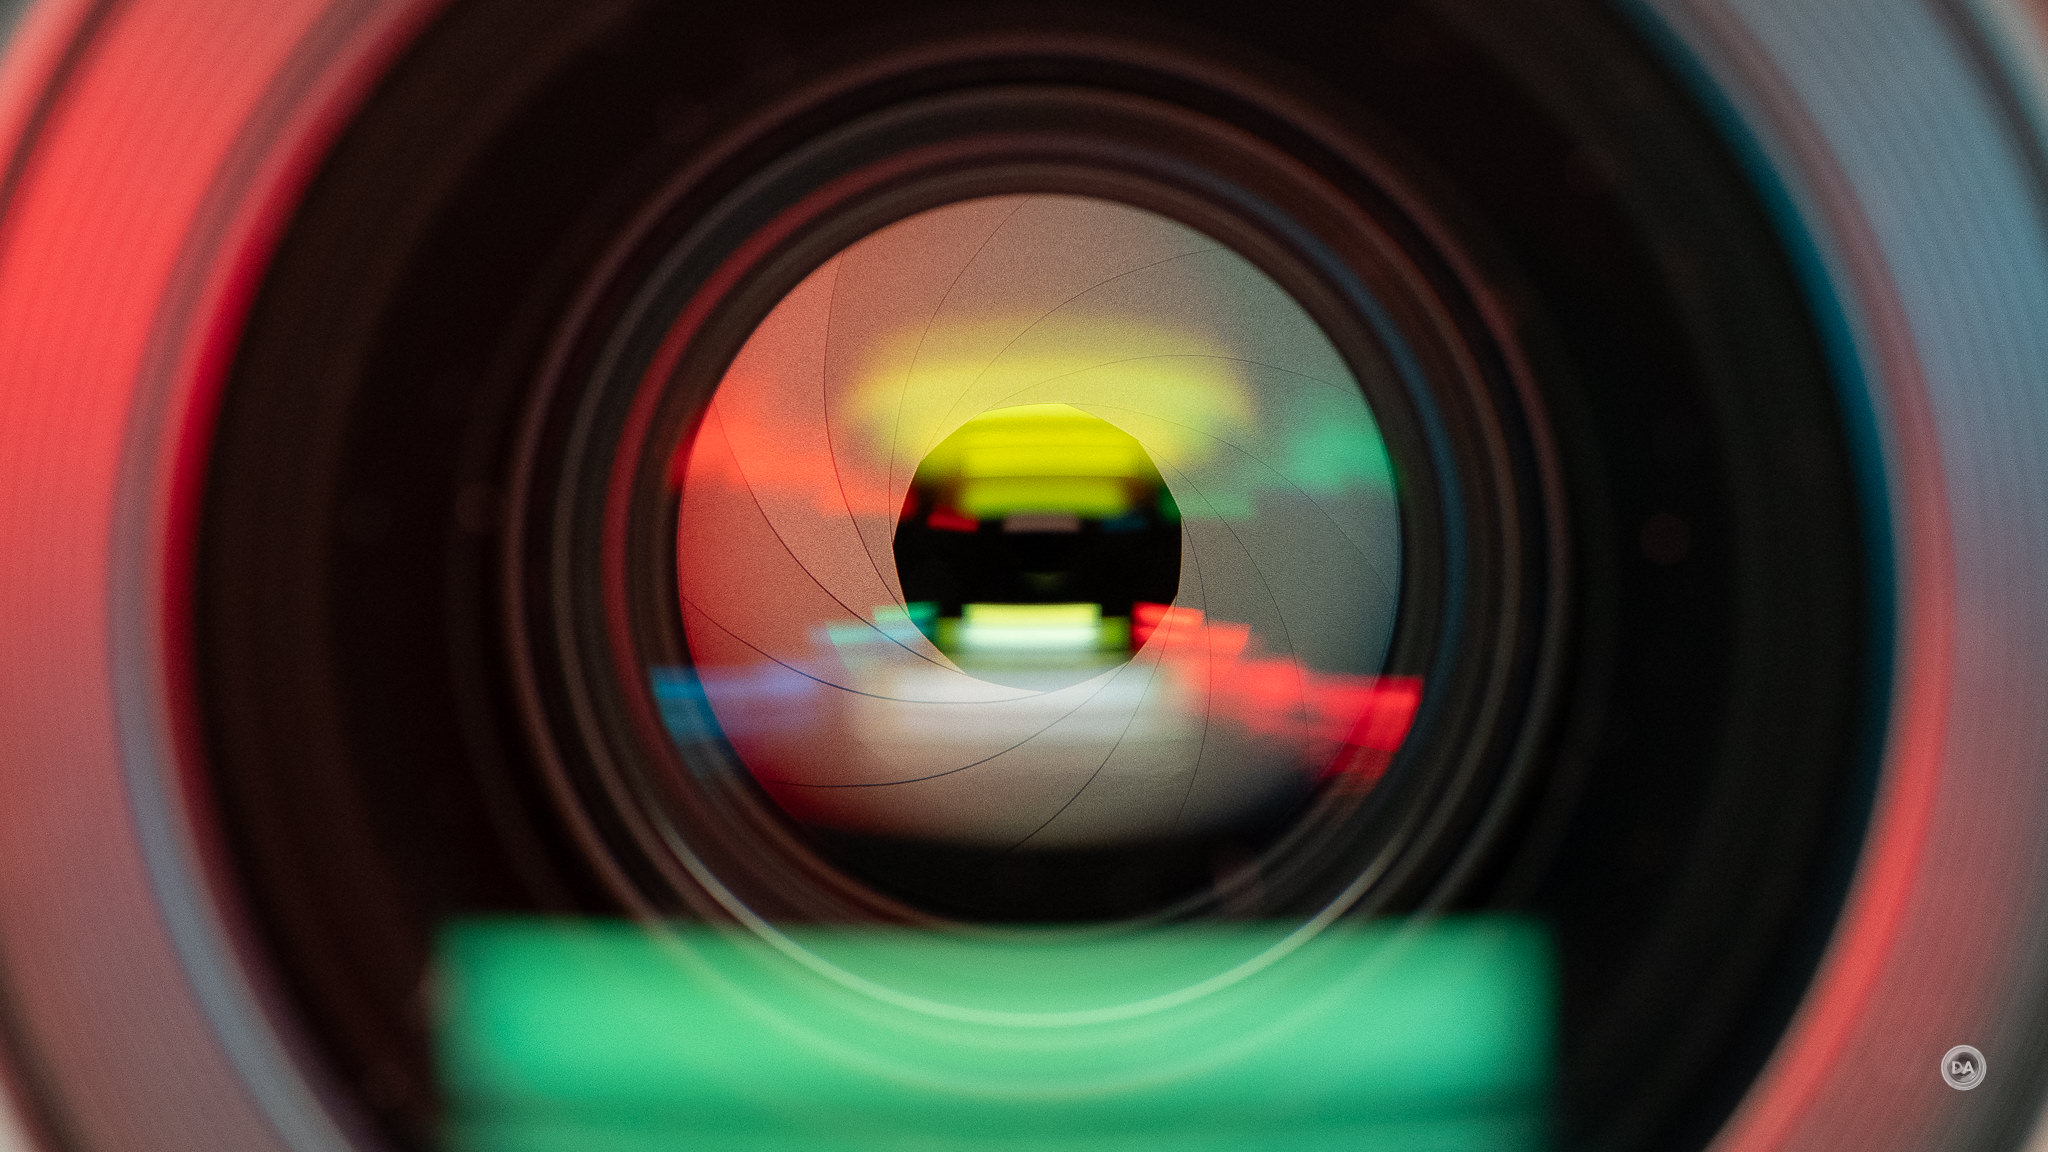
Here’s what that aperture iris looks like from the inside.
I’m not sure what dictates whether the front or back of the aperture blades are facing out. The Plena was the opposite of this, with the back of the blades showing. I much prefer the look of the 35mm F1.2 S, which gives you a nice “James Bond” type view.
The manual focus ring is slightly raised and has a rubberized, ribbed texture. It moves very smoothly and has a nice amount of weight to it. I was able to pull off really smooth manual focus pulls and focus with very nice precision. I also love the fact that I can do full time manual overrides even when in AF-C mode.
You’ll note that there is a third rubberized section near the front of the lens that looks like another ring but is actually just a section with extra grip for either aesthetic purposes or to provide a section to grab when mounting/unmounting the lens.
There is no lens based stabilization, so you will need to rely upon the in-camera stabilization if your camera is so equipped.
The lens hood is petal-shaped and does have a small lock on the right side. It is made of plastics and feels fairly ordinary. Unlike the Viltrox, it doesn’t have a rubberized front edge. I do feel like these premium lenses deserve slightly nicer hoods.
Minimum focus distance is 30cm, giving a maximum magnification figure of 1:5, or 0.20x. The LAB 35mm F1.2 can only focus as closely as 34cm and delivers a lower 0.17x magnification. Score on for the big Nikon! Here’s what that looks like.
Close focus contrast and detail are good, though stopping down a bit will add more contrast. Here’s an F1.2 shot.
There is no VR (vibration reduction, or optical stabilization) built into the lens. That’s not a problem on a body like my Z8, which has good camera based stabilization, but could be a problem for those of you shooting on a camera without VR.
This is a big, heavy, expensive lens, but it is also beautifully made and is a nice match for a beefier camera like my Z8. I’ve been a bit critical in this section, as when a lens is priced this highly ($2800!), it comes with a set of expectations. I feel somewhat underwhelmed not only in the feature set but the implementation of some things like the customizable control ring and the position of the AF | MF switch. Maybe you don’t care about the features and just care about the performance, and if so, great! For me as a reviewer, however, I try to be even handed in handing out praise where deserved but also critiques where I feel they are warranted.
35mm F1.2 S Autofocus Performance for Stills
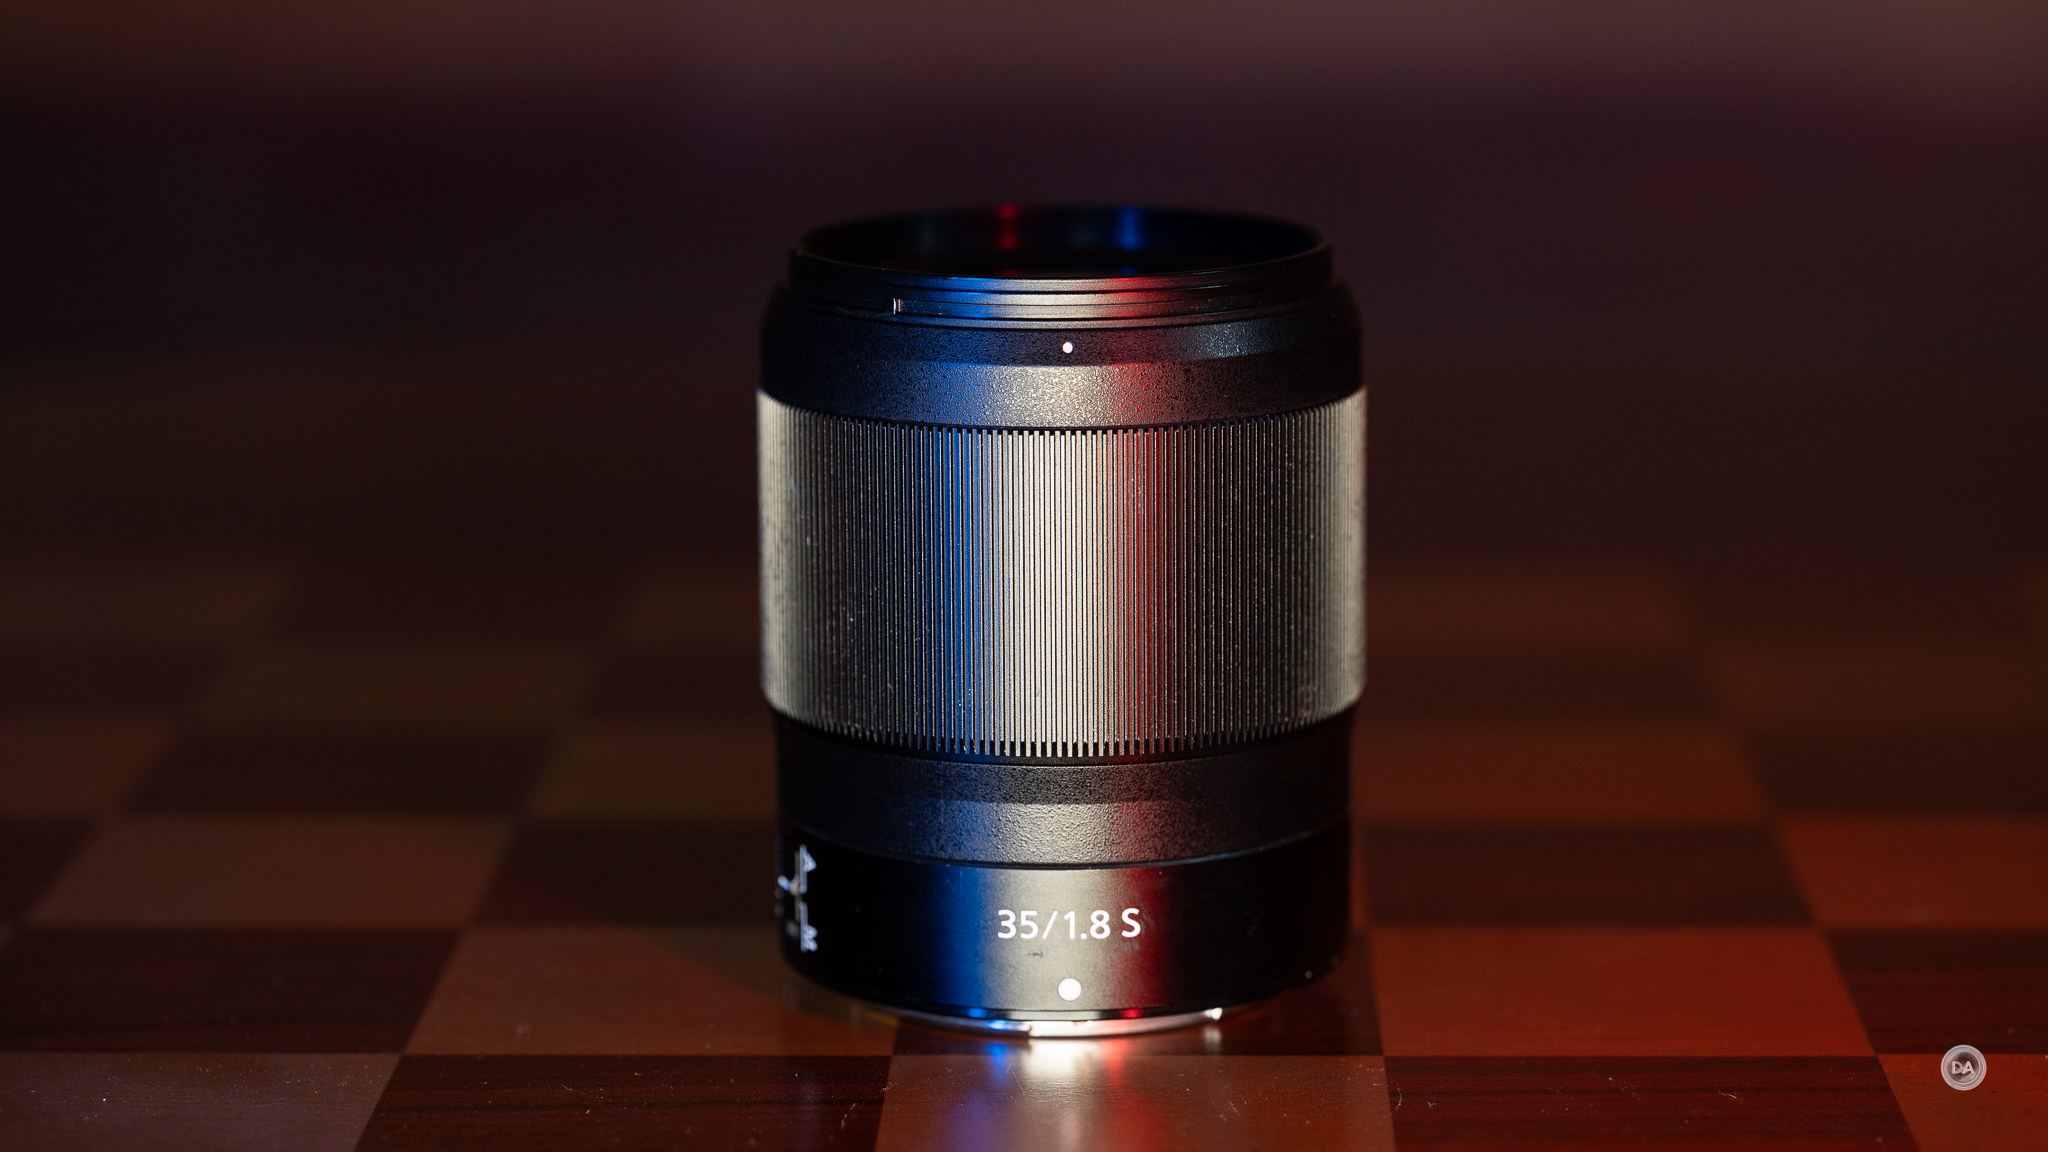
Nikon still uses STM focus motors in their premium lenses, which I also find a bit surprising (at least on other platforms. I tend to associate Linear or VCM style motors with the more premium lenses on other brands, but in all fairness, Nikon’s dual STM focus motors are getting the job done here. It’s not as fast as a lens like the 35mm F1.8 S (my review here), but its fast enough that I didn’t really notice focus during use.
I’ll be curious to see how the LAB 35mm F1.2 performs on Z-mount when it comes, as it has a more sophisticated QUAD HyperVCM focus system. On paper, the LAB 135mm F1.8 had a better focus system than the Plena, too, but when using the lenses side by side I would take the Plena every time for focus. Perhaps that will prove true here, too, but at least on Sony I found the LAB 35mm F1.2 to be exemplary.
That being said, I saw a few signs that suggest to me that the 35mm F1.2 S isn’t quite going to match the Plena’s focus performance. Focus pulls are a little slower. Still relatively fast, but you can see focus taking place rather than an instantaneous racking back and forth. There’s also a bit of focus noise, though it is just a light “schnick” sound as focus racks and forth. Outdoor focus seems to happen a little quicker than my indoor tests.
With some lenses I’ve been able to grab focus on bees flying in and out of the hive, but I took nearly one hundred shots in half a dozen bursts and didn’t have a lot of success in grabbing them in the air.
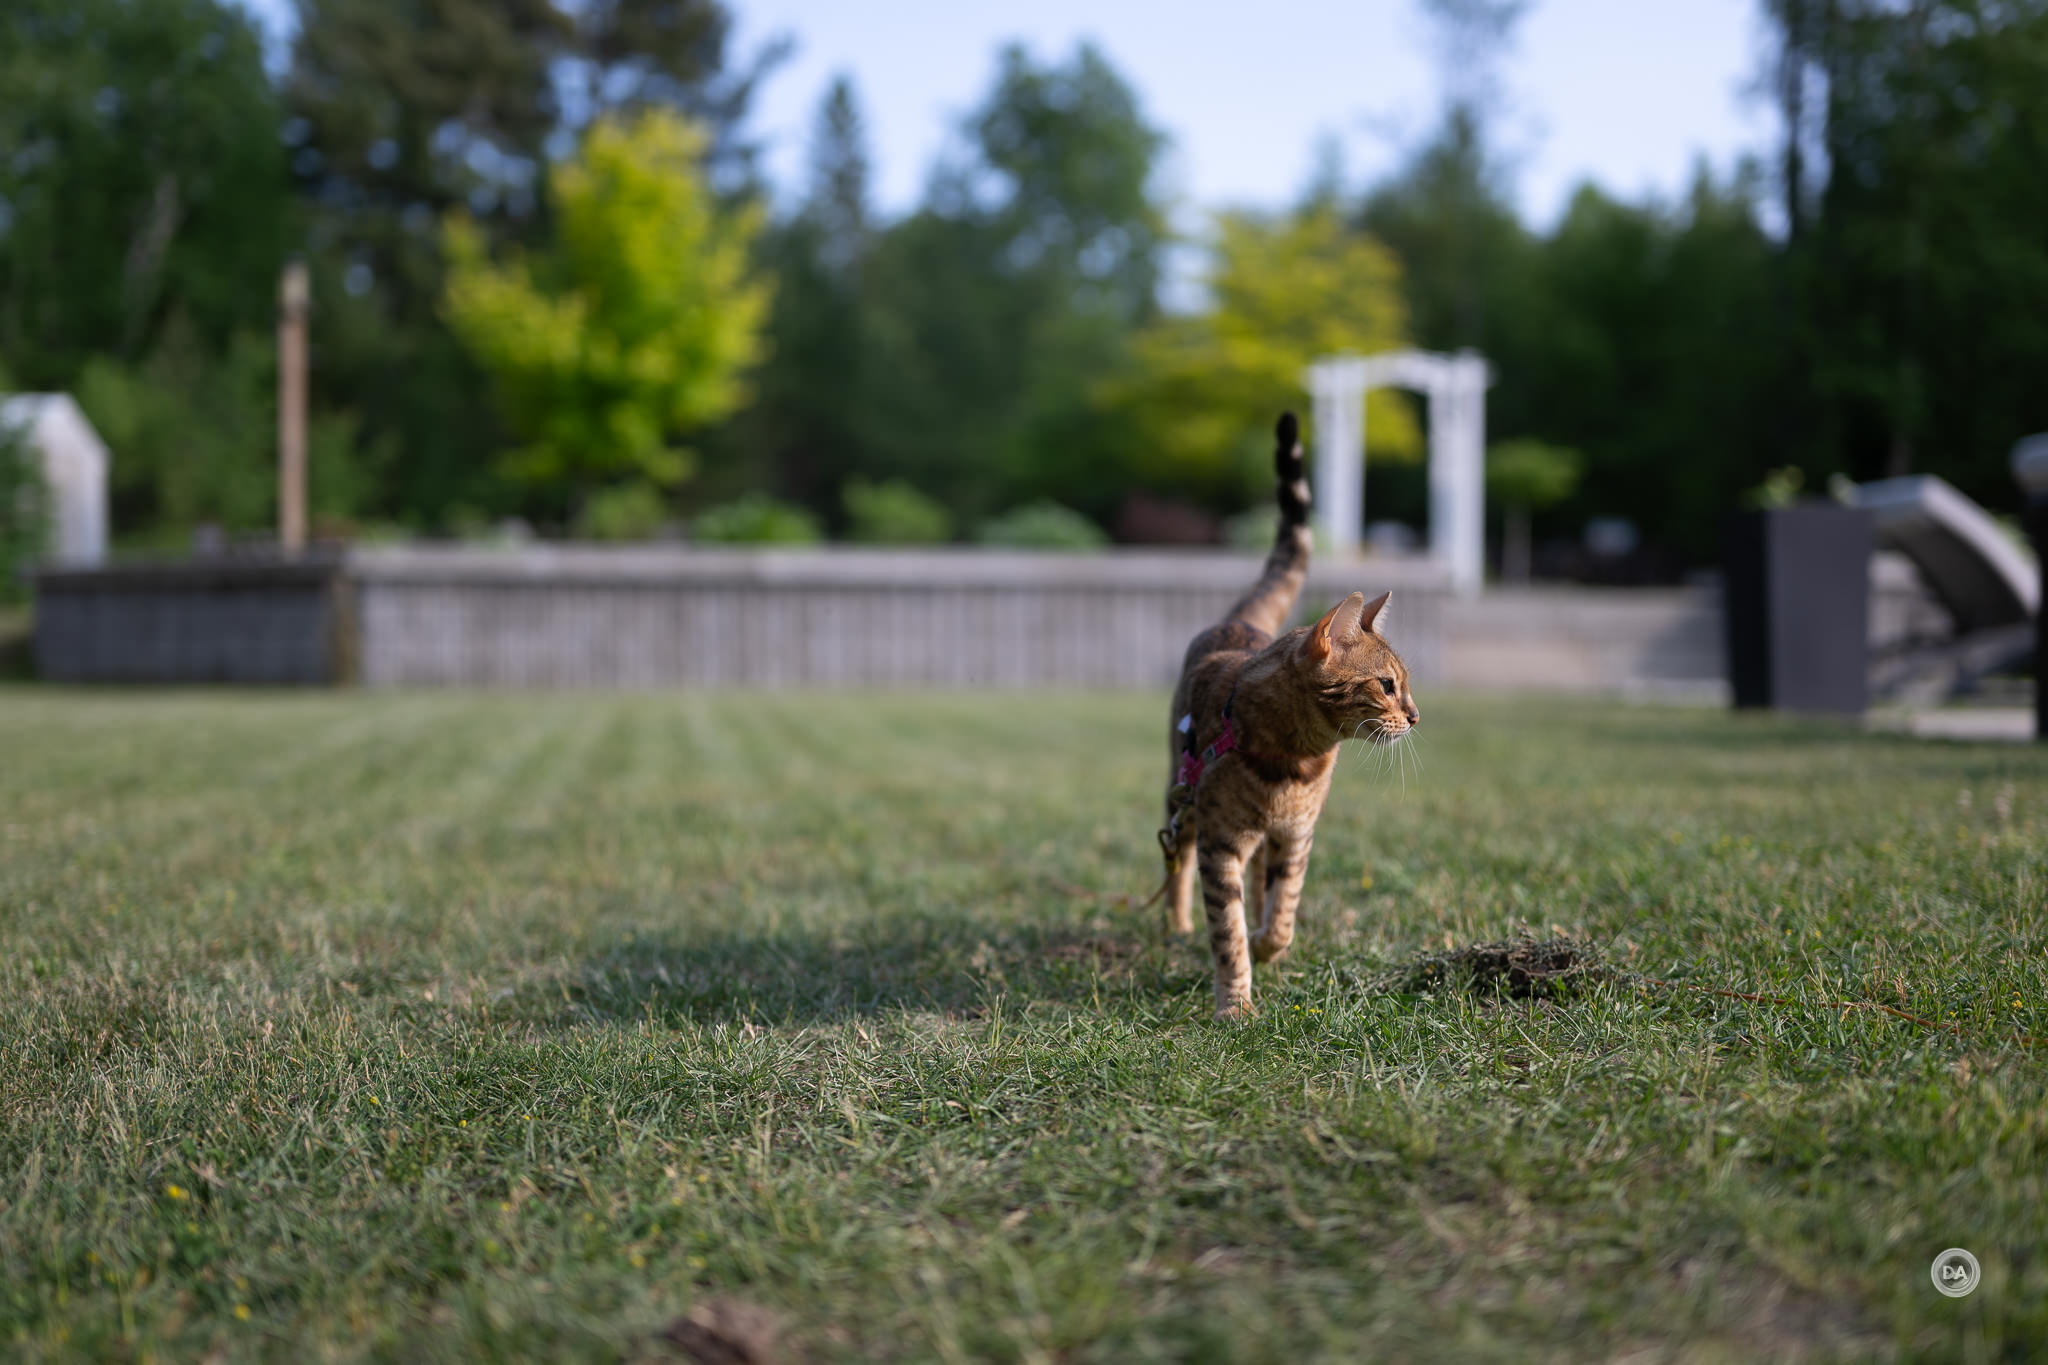
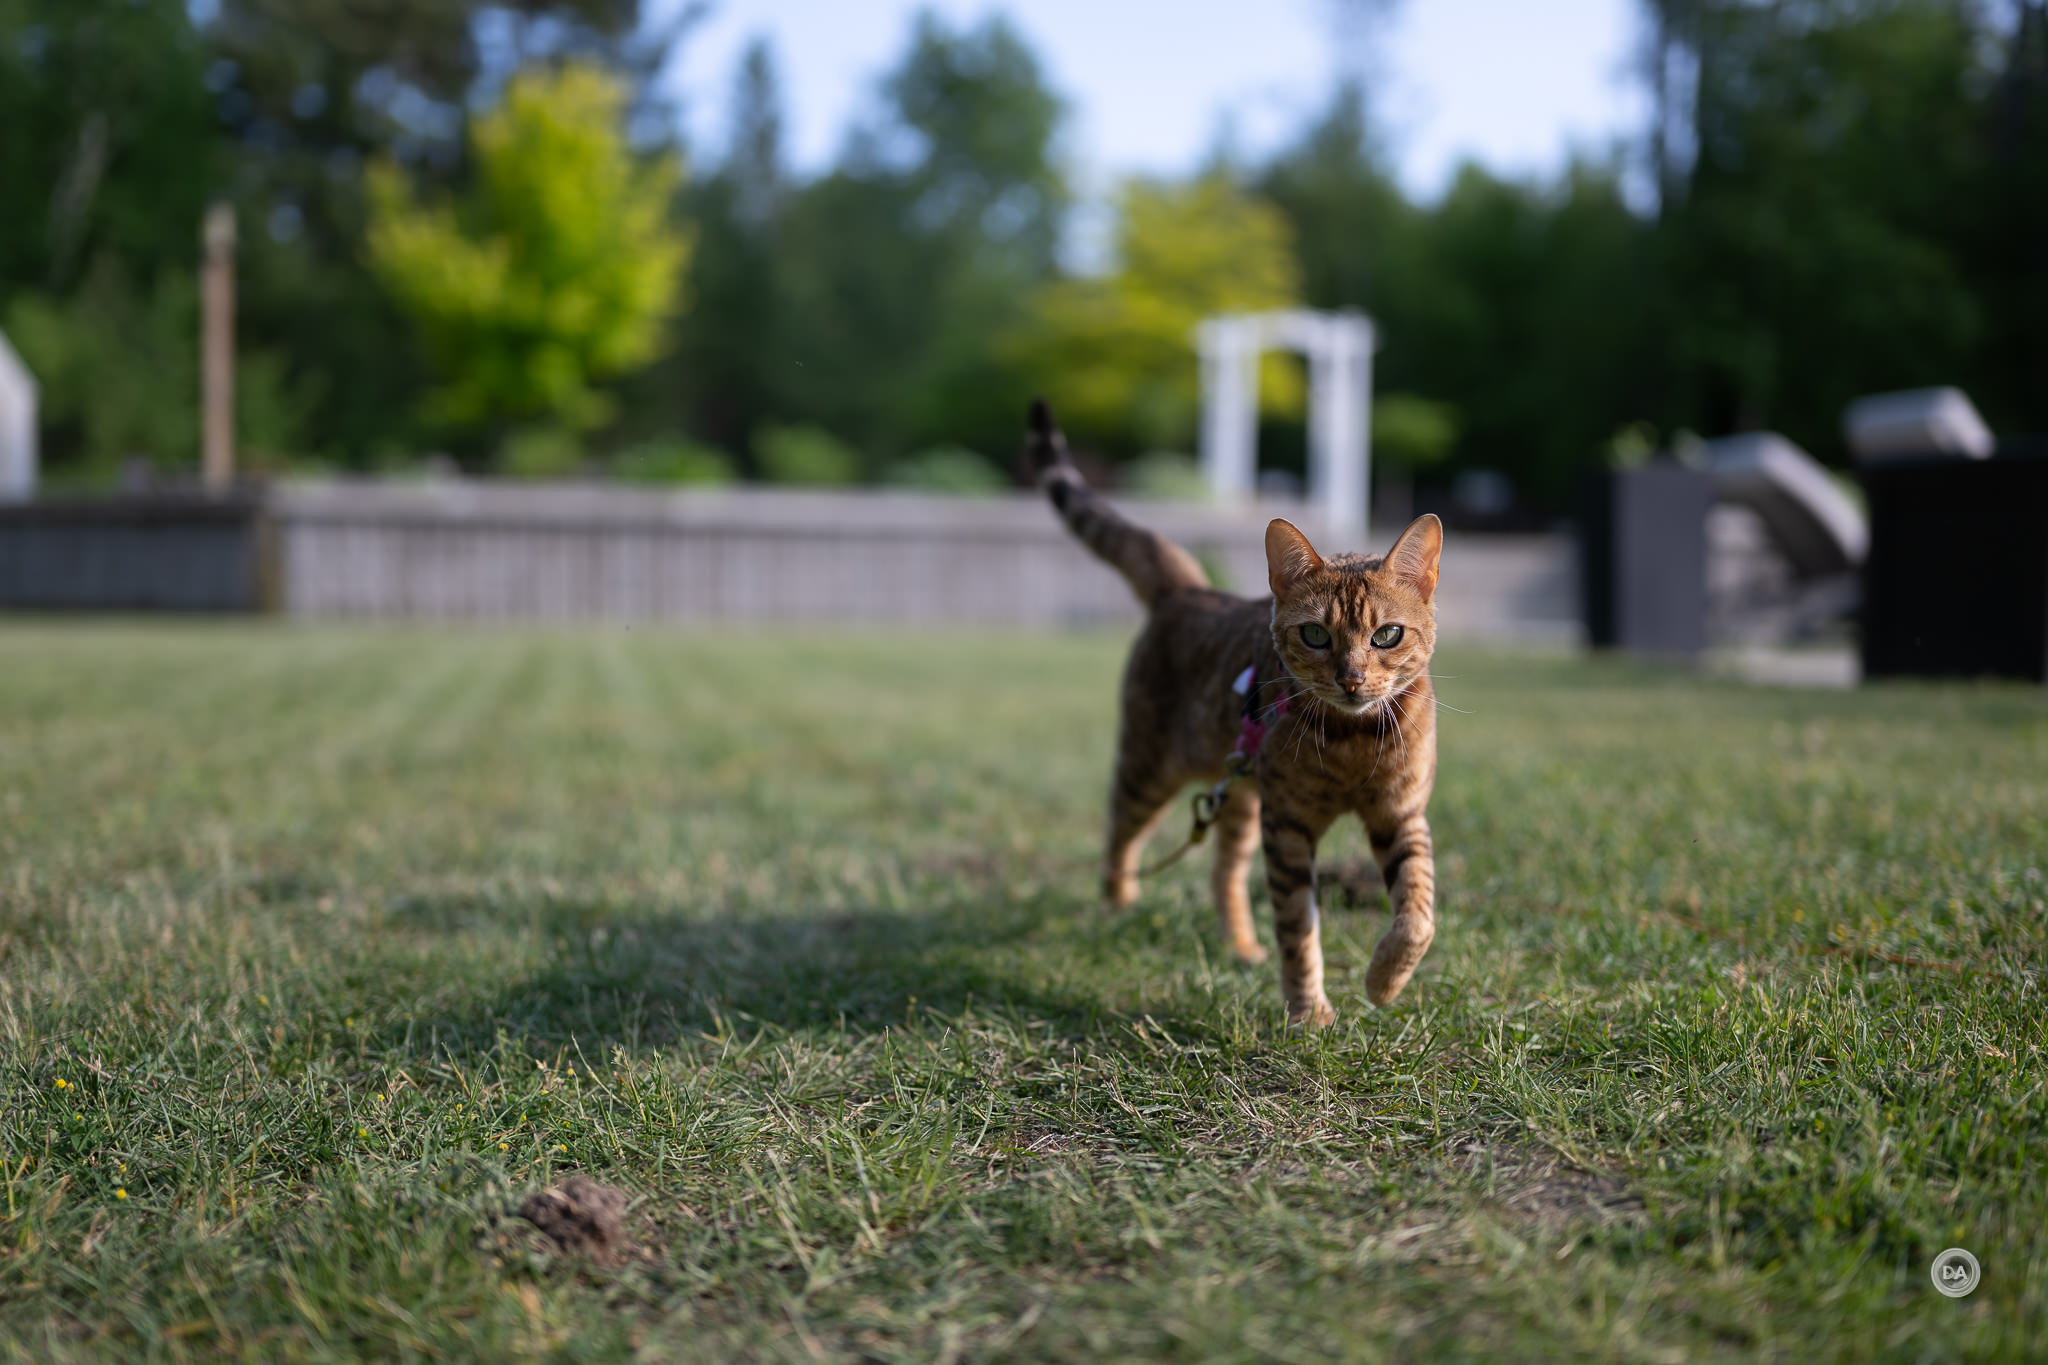
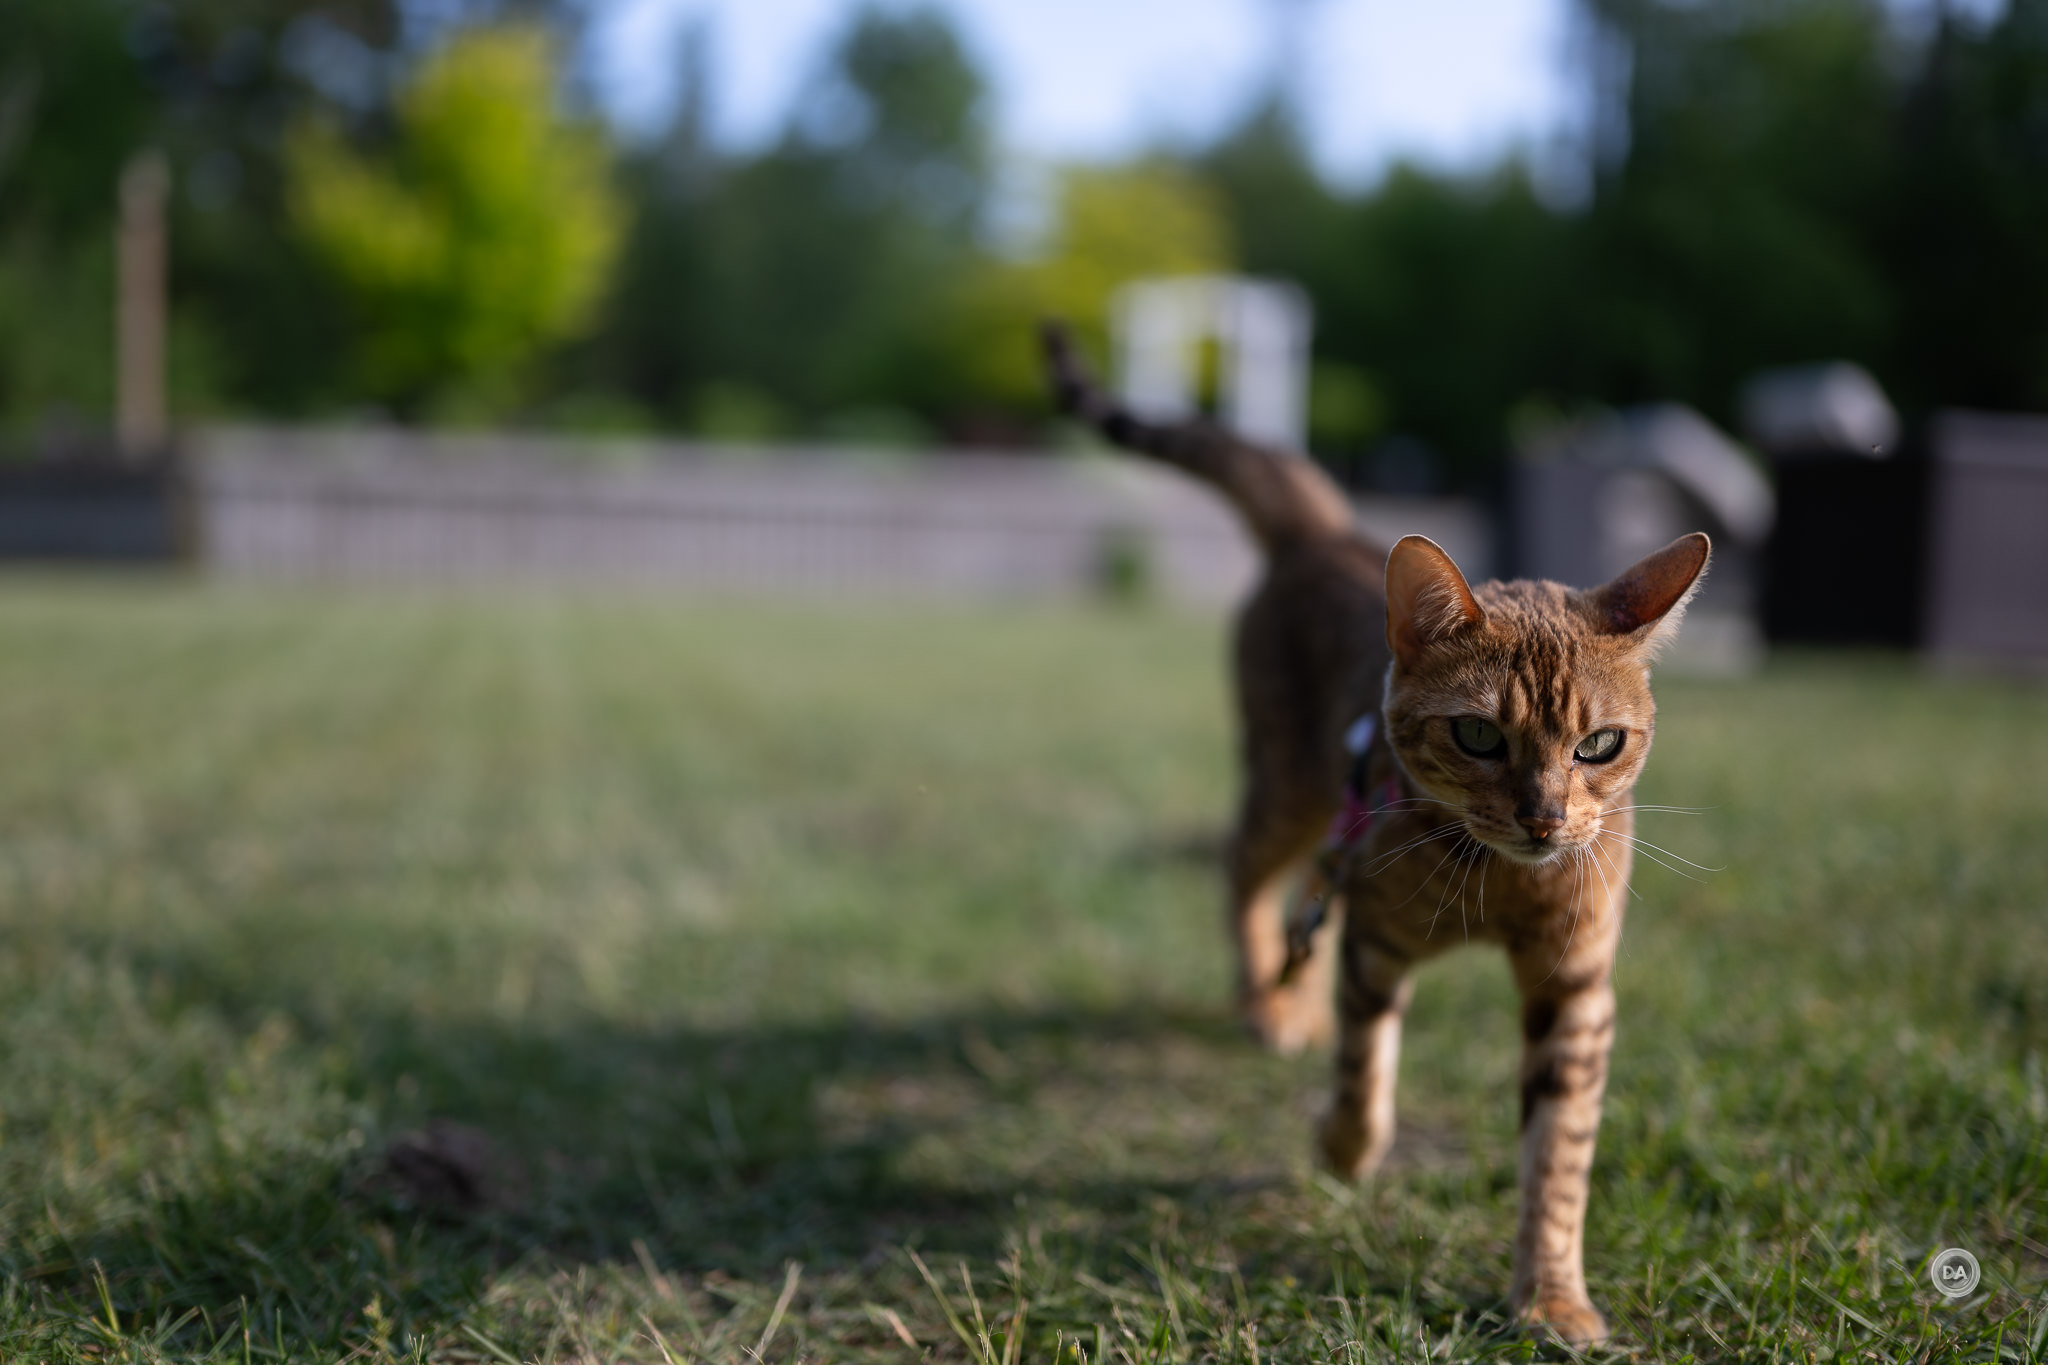
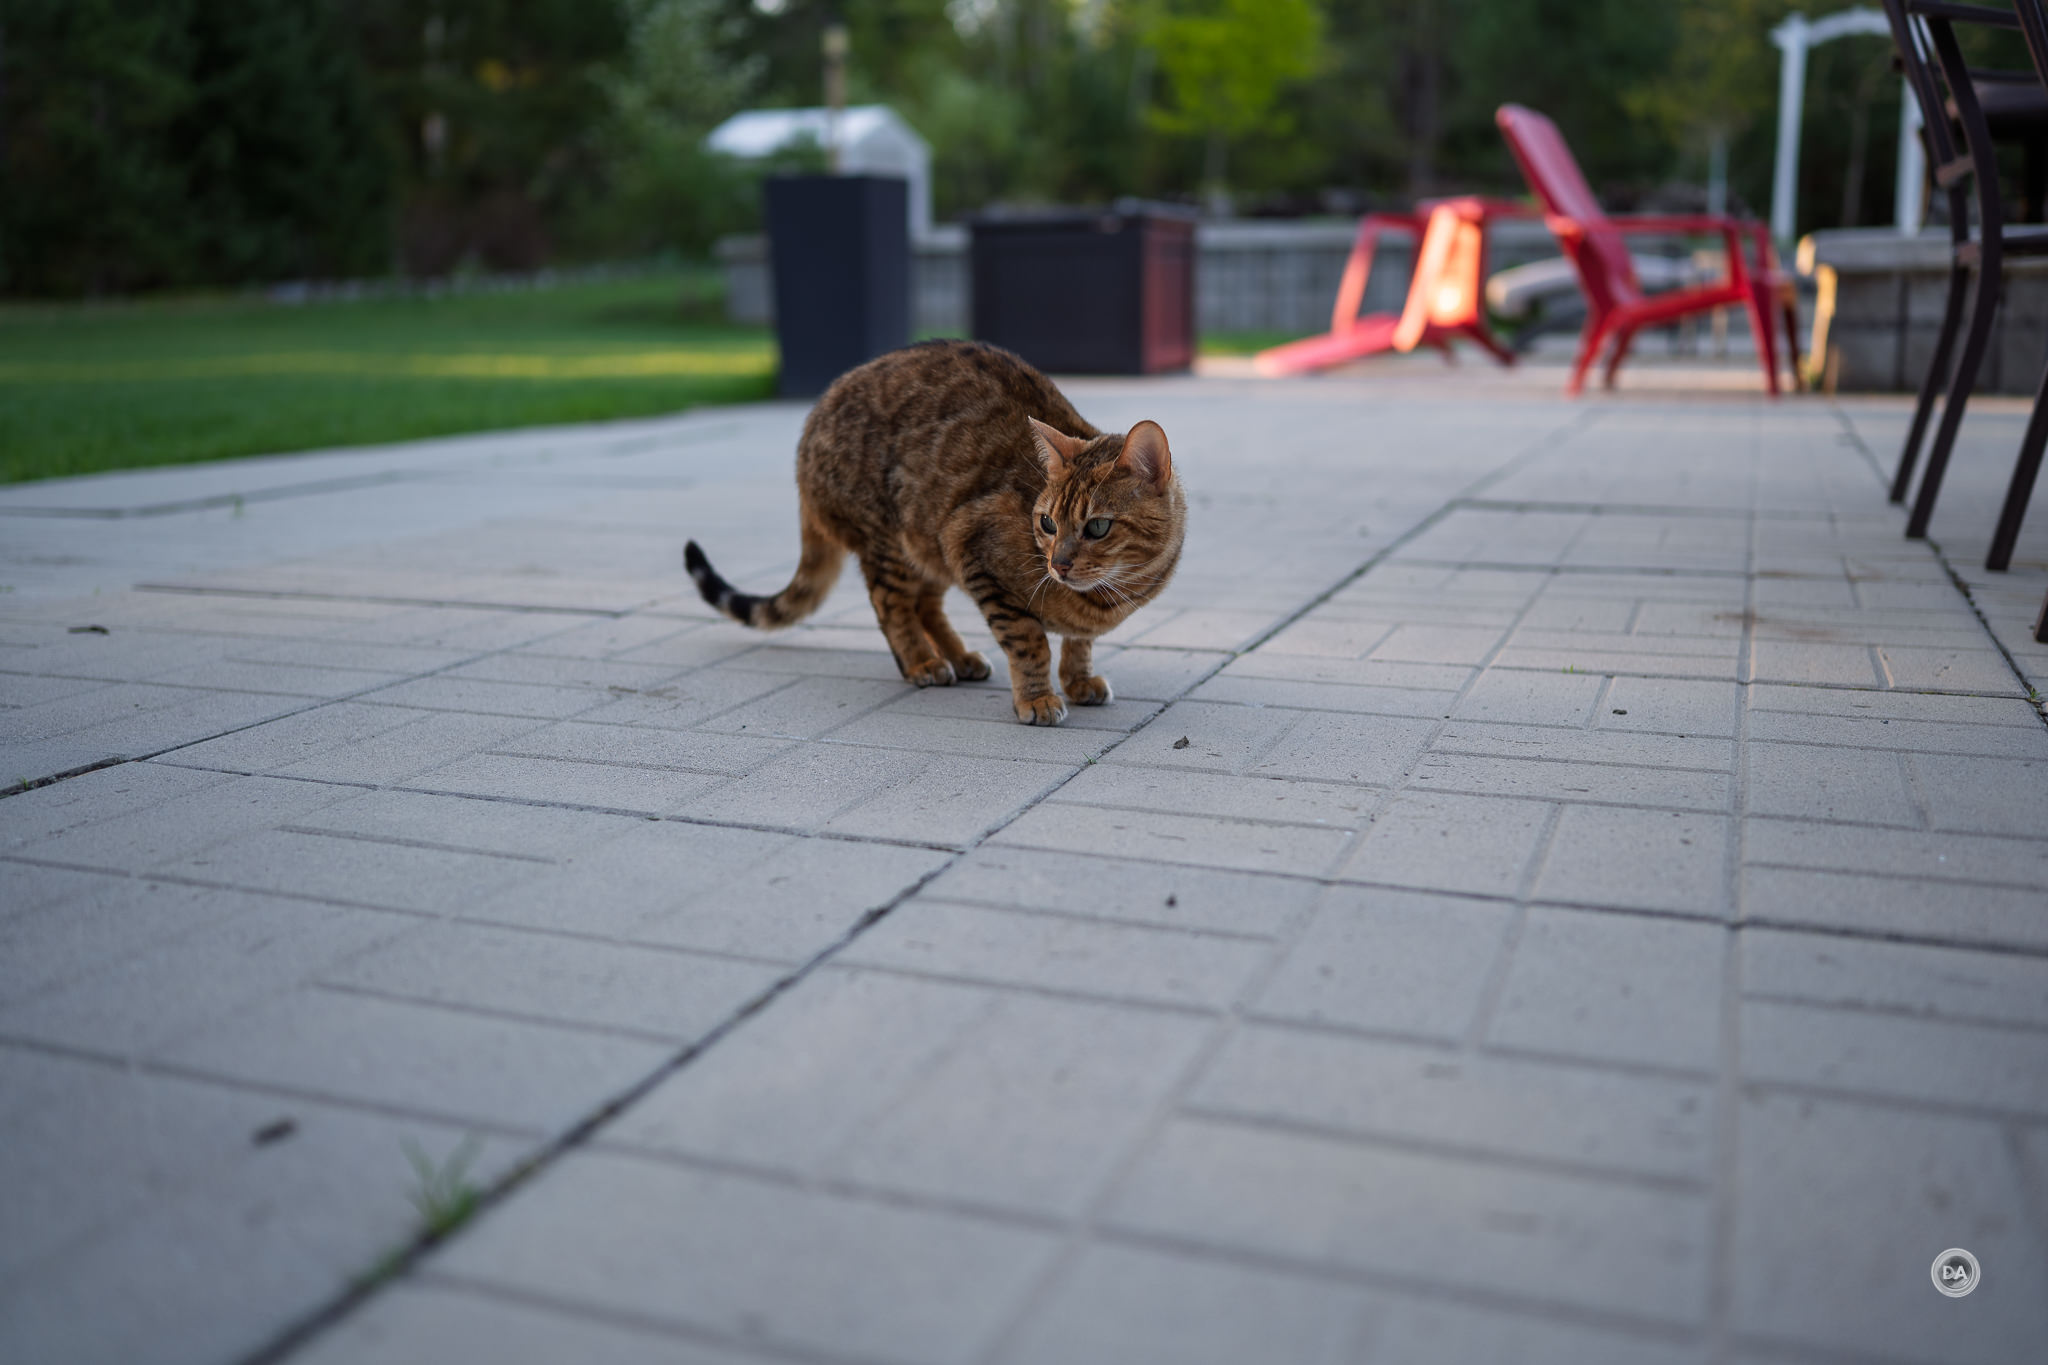
That’s a huge challenge, obviously. I was able to successfully track Nala as she moved towards the camera, with each frame well focused. She wasn’t moving fast, but she was moving steadily, so nailing every frame at F1.2 gives me great confidence that I would have no problem tracking a bride moving down an aisle, for example.
Shooting shallow depth of field shots was no problem.
I also had no problem focusing up close on a ring on a finger, which is one of the key shots where a lens like this might be used in a wedding or engagement shoot.
So autofocus for stills was generally good. There have been relatively few autofocusing 35mm F1.2 lenses to compare to at this point, and the only ones I’ve done in the past five years have been on Sony. I’m not sure this lens is sports ready, but I do think AF will handle anything you might encounter in a portrait or wedding shoot.
Autofocus (Video)
Video autofocus is a little more of a mixed bag. On a positive note, focus breathing is nearly nonexistent. There’s only a tiny amount of shift in the size of objects whether in or out of focus.
Nikon’s cameras (at the moment) handle video AF in two different ways. Touch to focus (selecting a focus point on the screen) happens independent of any finetuning you might do through the camera’s settings. You can slow down or speed up focus speed and tweak the reactiveness to subject changes for normal tracking, but the touch to focus settings override those settings. That often means that touch to focus isn’t great.
In this case the speed of changes is very fast, but there is also a tendency to do some micro-pulsing or an occasional fast rack in the wrong direction. This is pretty standard fare on Nikon with the current state of play, unfortunately.
But things are much better when I move to a situation where my dialed in settings for focus rules apply. My hand test, for example, went well, with good transitions from my hand to my face and back.
Likewise normal focus pulls when you move the camera from one subject to another are better damped and controlled – more cinematic.
I had no problems with static settings either. Focus does a good job of staying locked on a subject on camera without hunting or pulsing.
Video AF still isn’t quite as sophisticated on Nikon as Sony or Canon, generally, and the 35mm F1.2 S proved to be about average in performance.
Nikkor Z 35mm F1.2 S Image Quality Breakdown
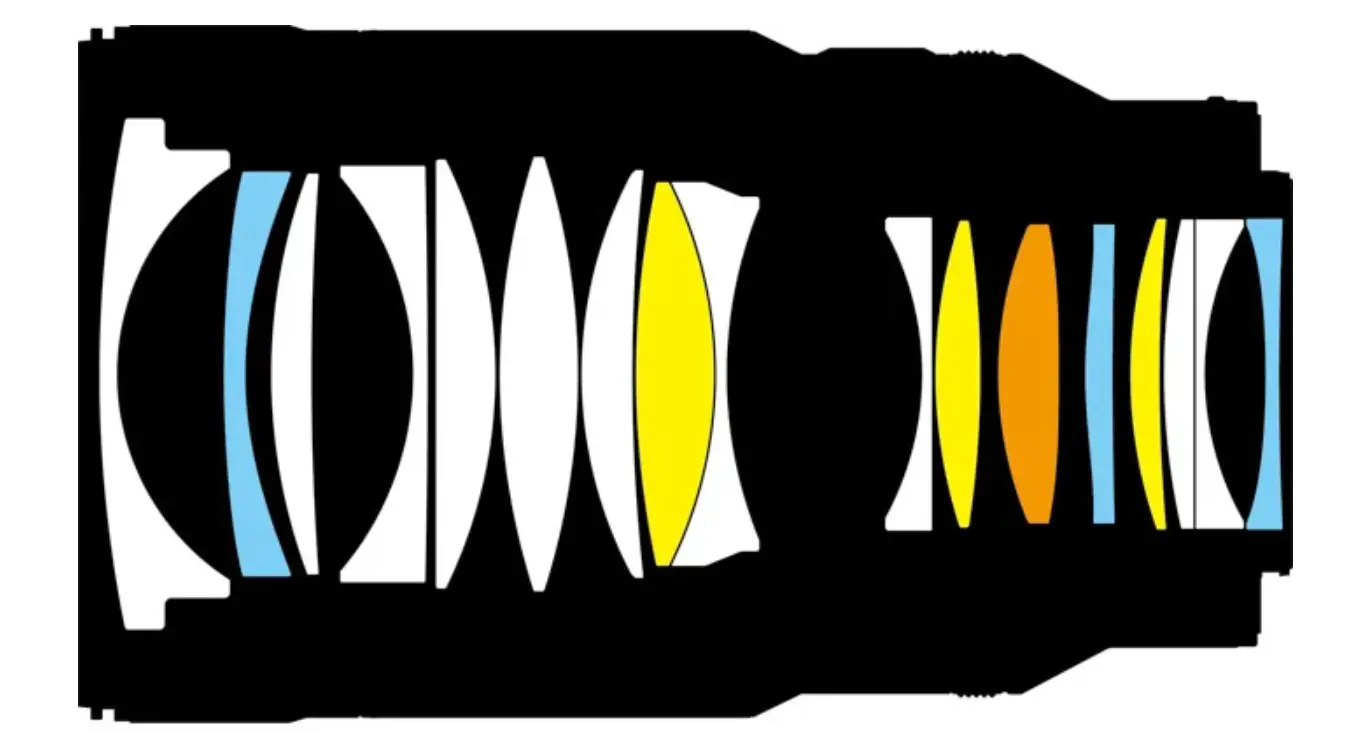
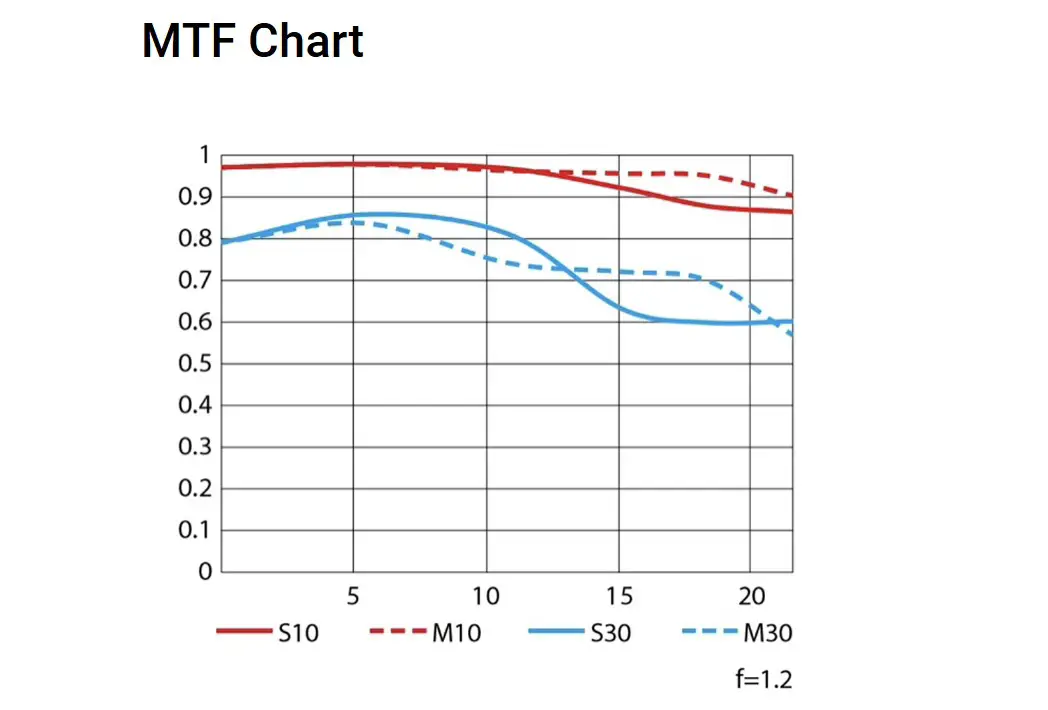
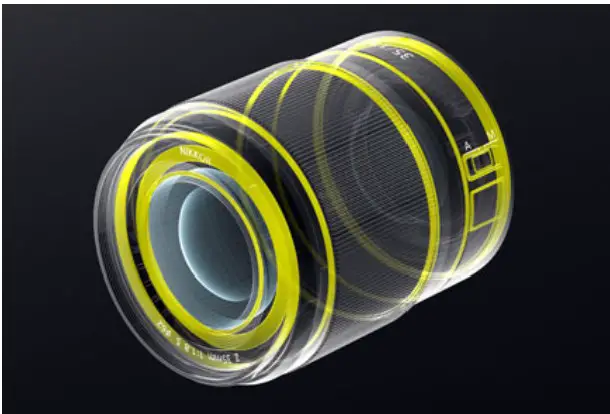
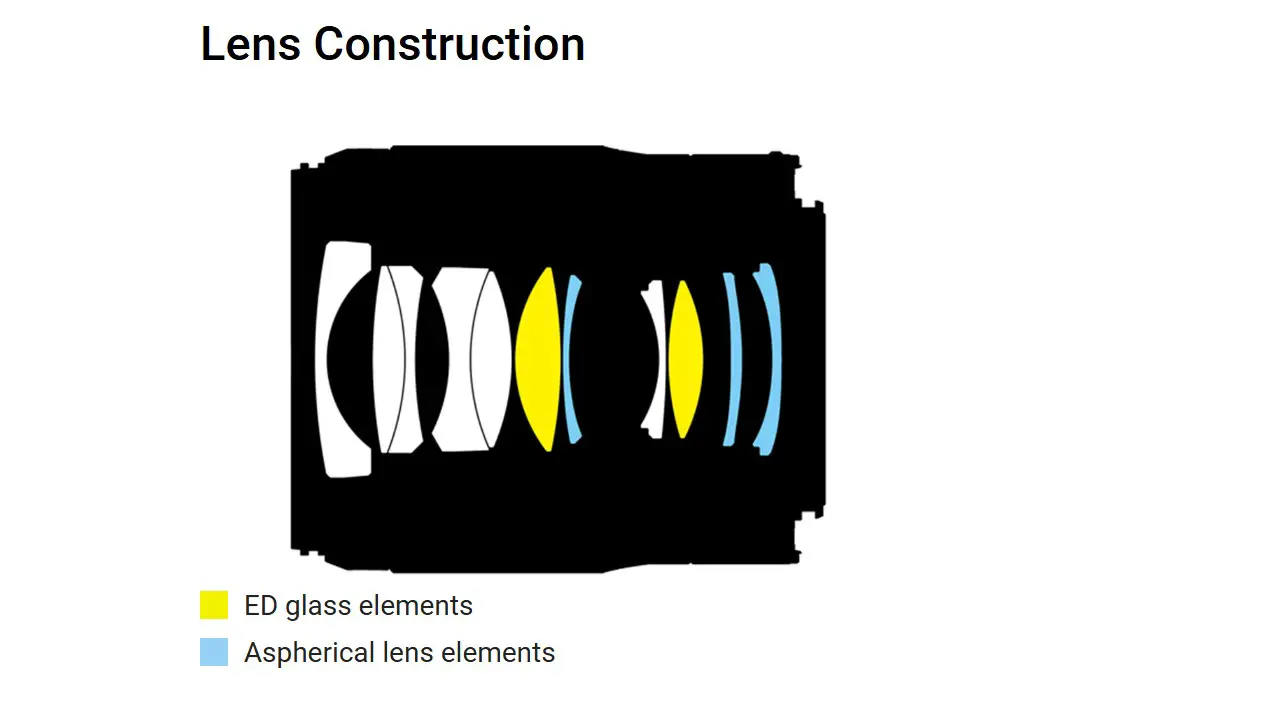
Here’s where this lens needs to shine. Large aperture lenses are actually often at a disadvantage when it comes to autofocus because they have much larger glass elements to move, and they are almost always at a disadvantage when it comes to size, weight, and cost. This is a big, heavy, expensive lens, but that is in the service of exceptional performance. The 35mm F1.2 S needs to deliver. This is an optical design of 17 elements in 15 groups, which includes three ED elements, three aspherical elements, and one aspherical ED element.
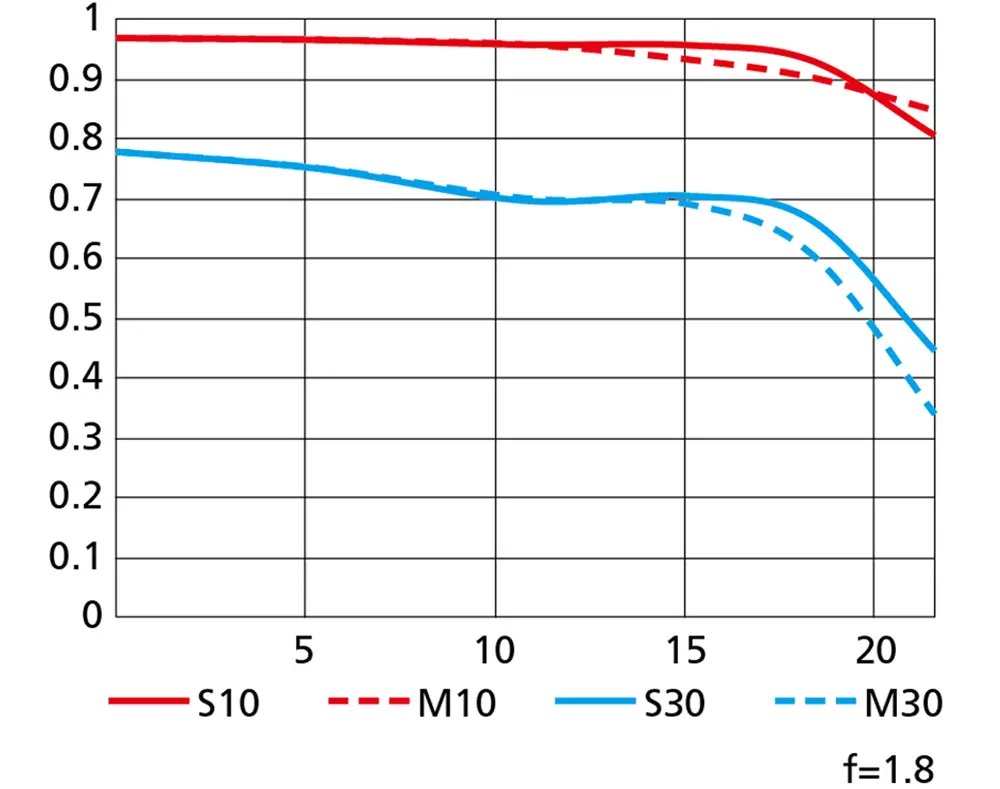
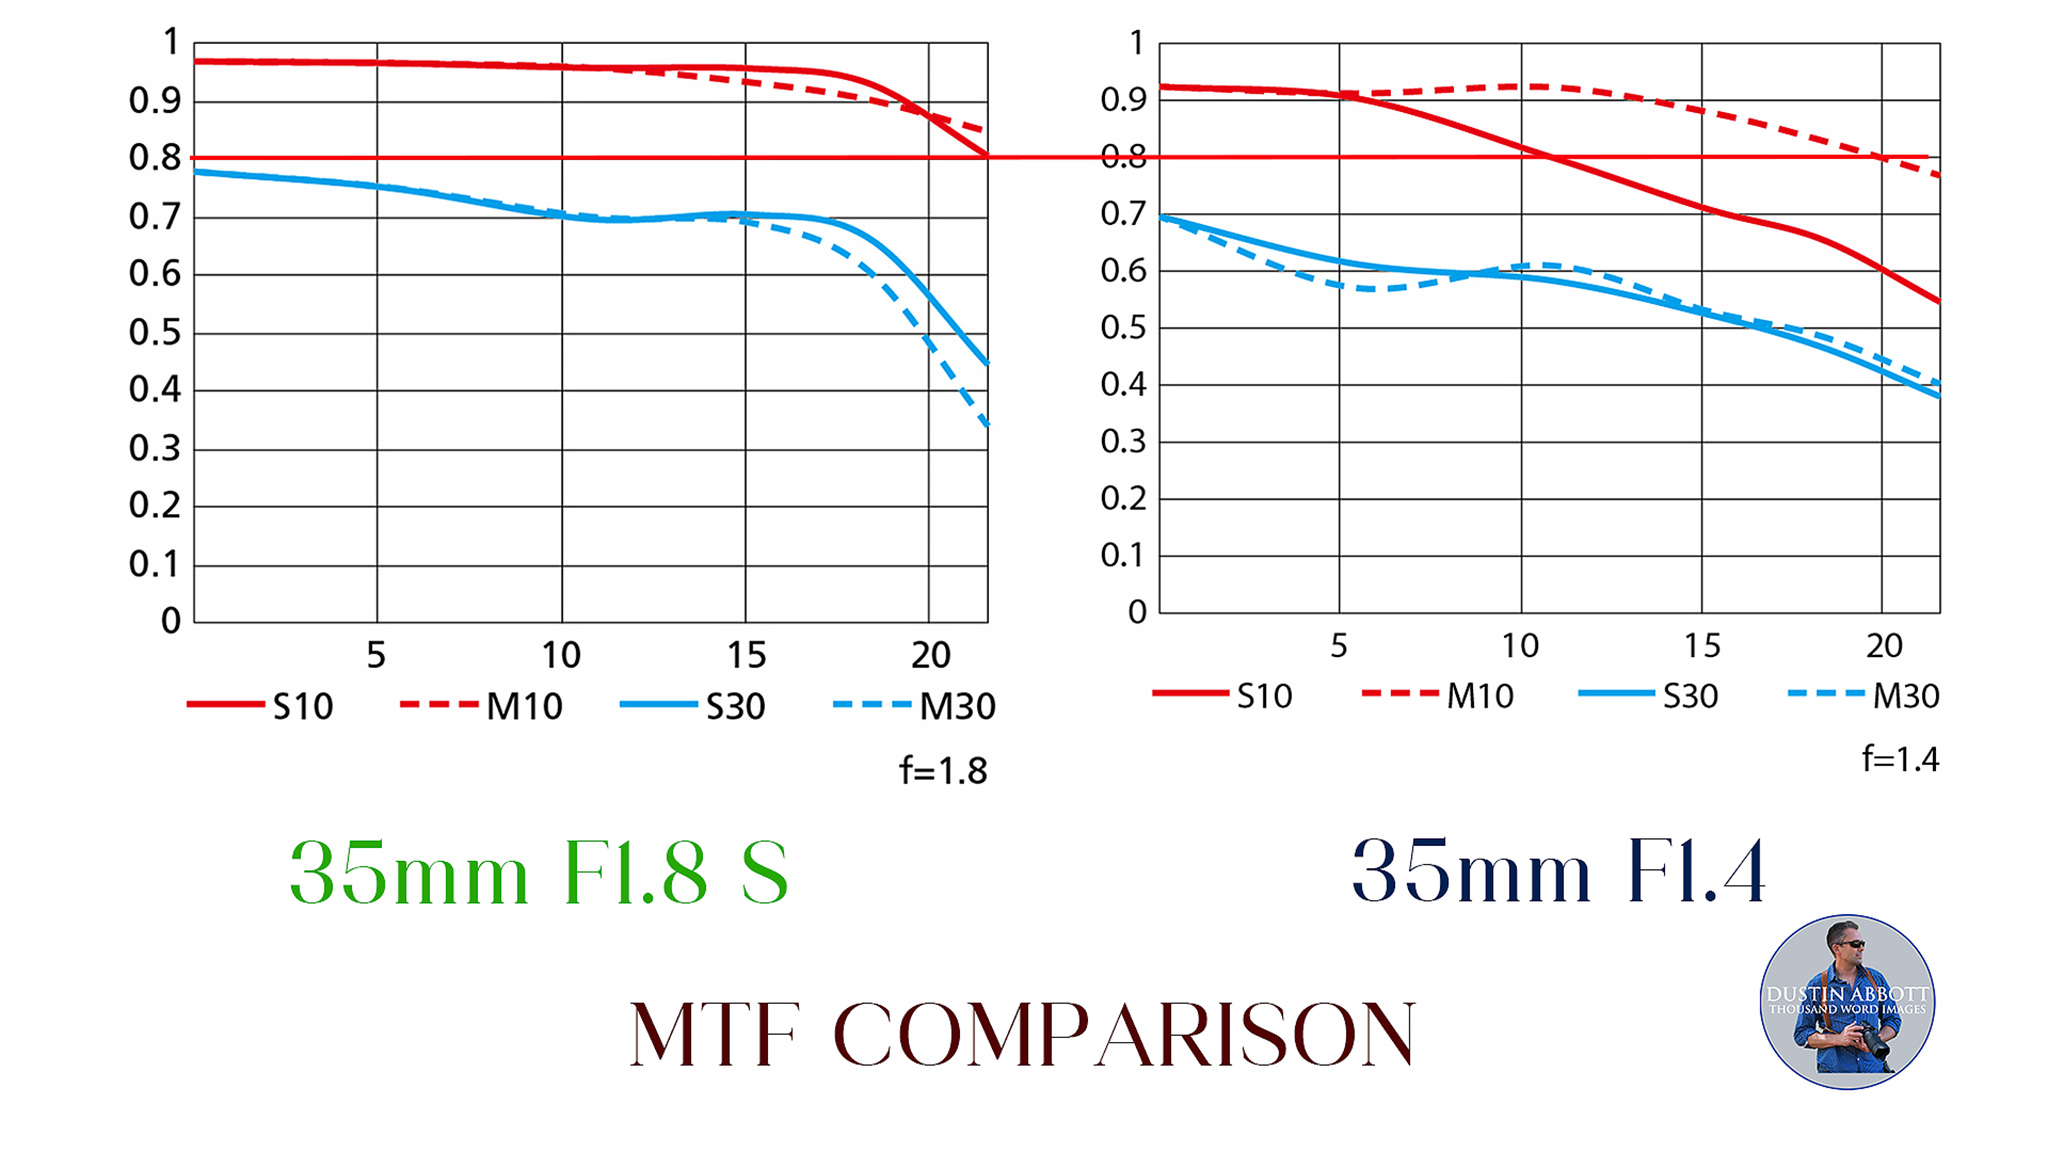
The MTF chart looks good at F1.2, but not exceptionally good. It doesn’t look as good as the Viltrox LAB 35mm F1.2 on paper.
I’ll revisit that comparison once the Z-mount version of the LAB comes out to verify results.
At the moment, however, the 35mm F1.2 S is the only such lens available on Nikon Z mount, and while Viltrox does have an adapter that I’m assuming works fine with their lenses, the LAB does NOT work via my Megadap adapter.
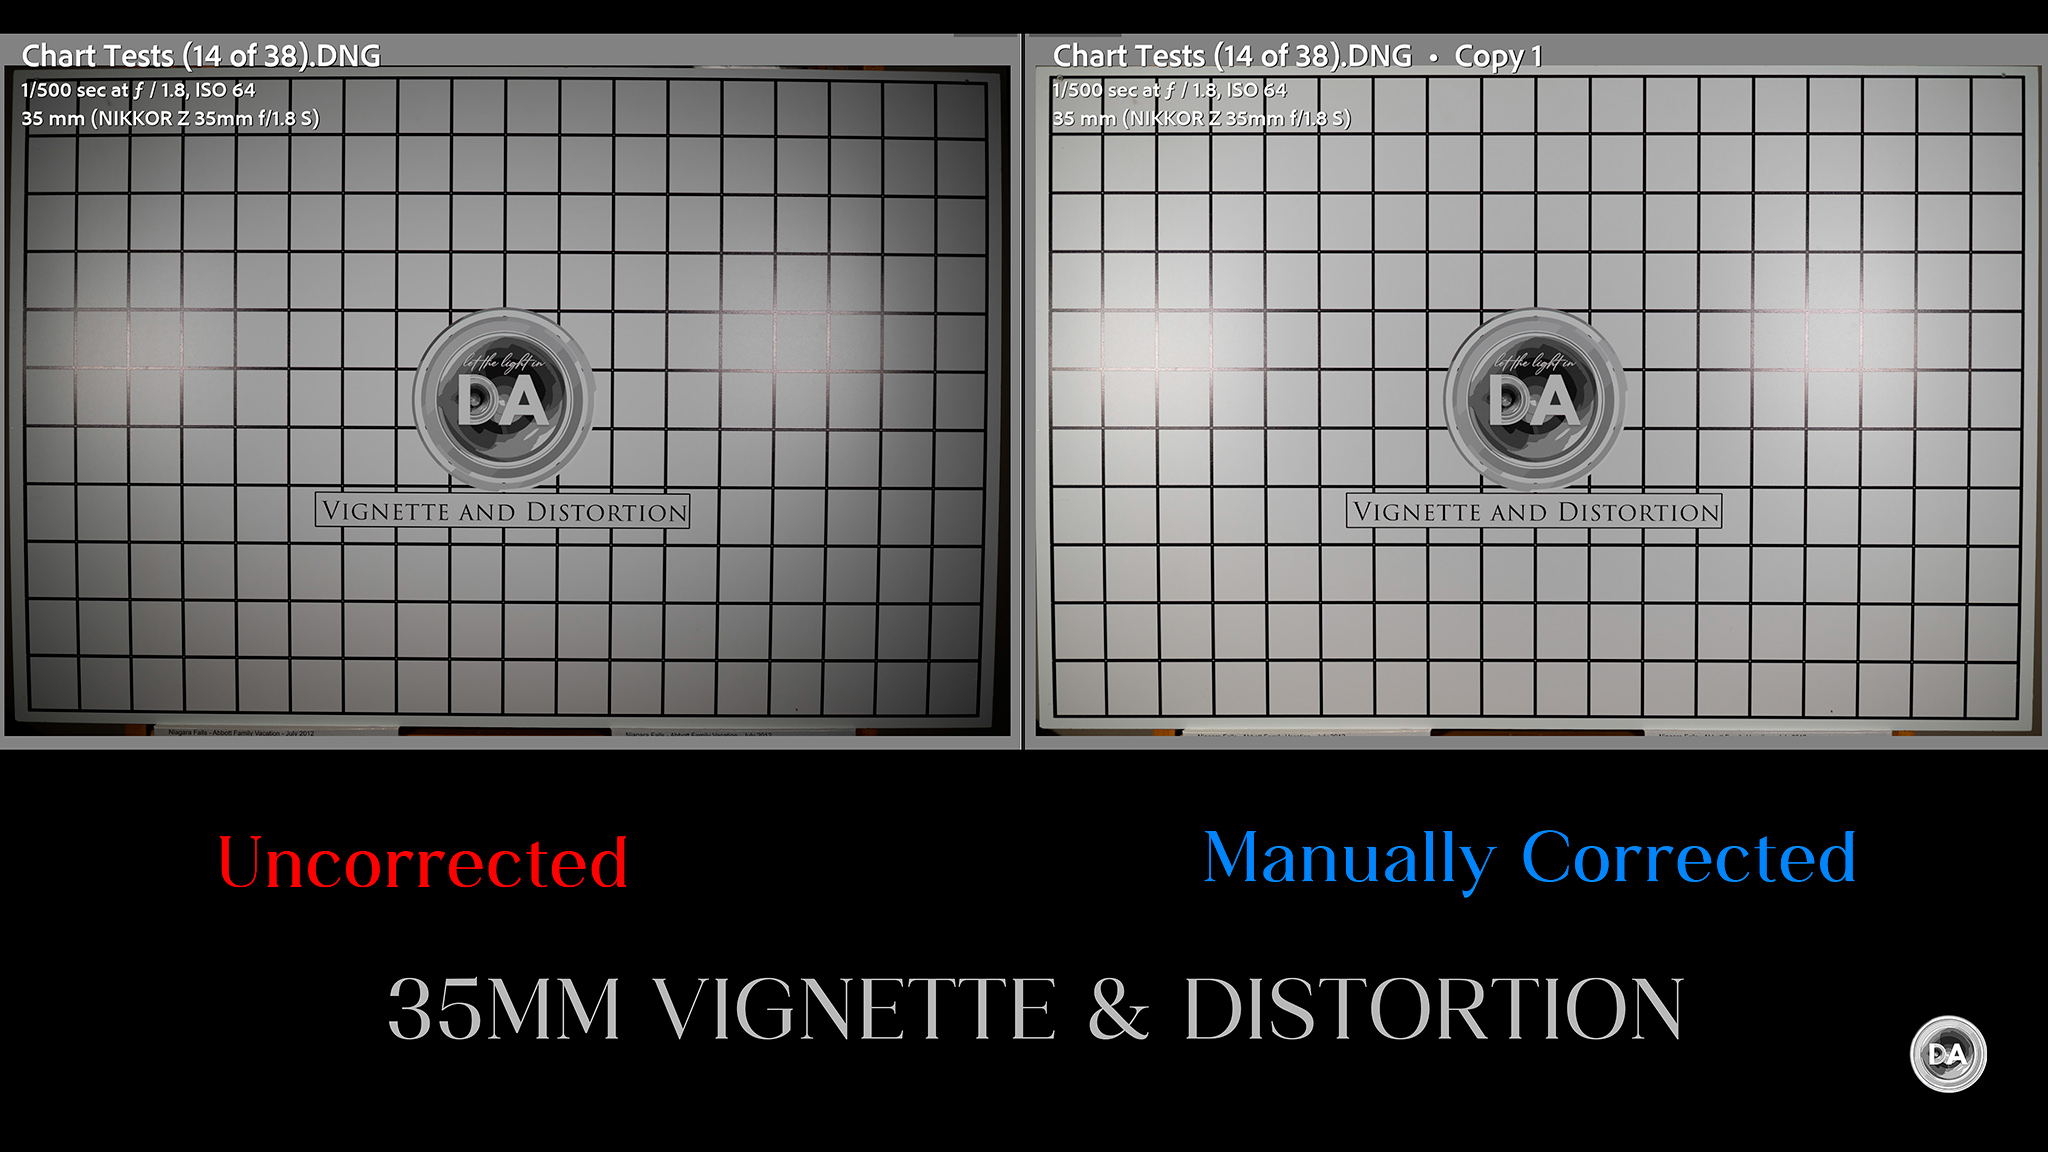
Let’s move on to the actual performance. The Plena was designed to provide very even illumination to the whole frame, including the periphery, but that’s not nearly as true here.
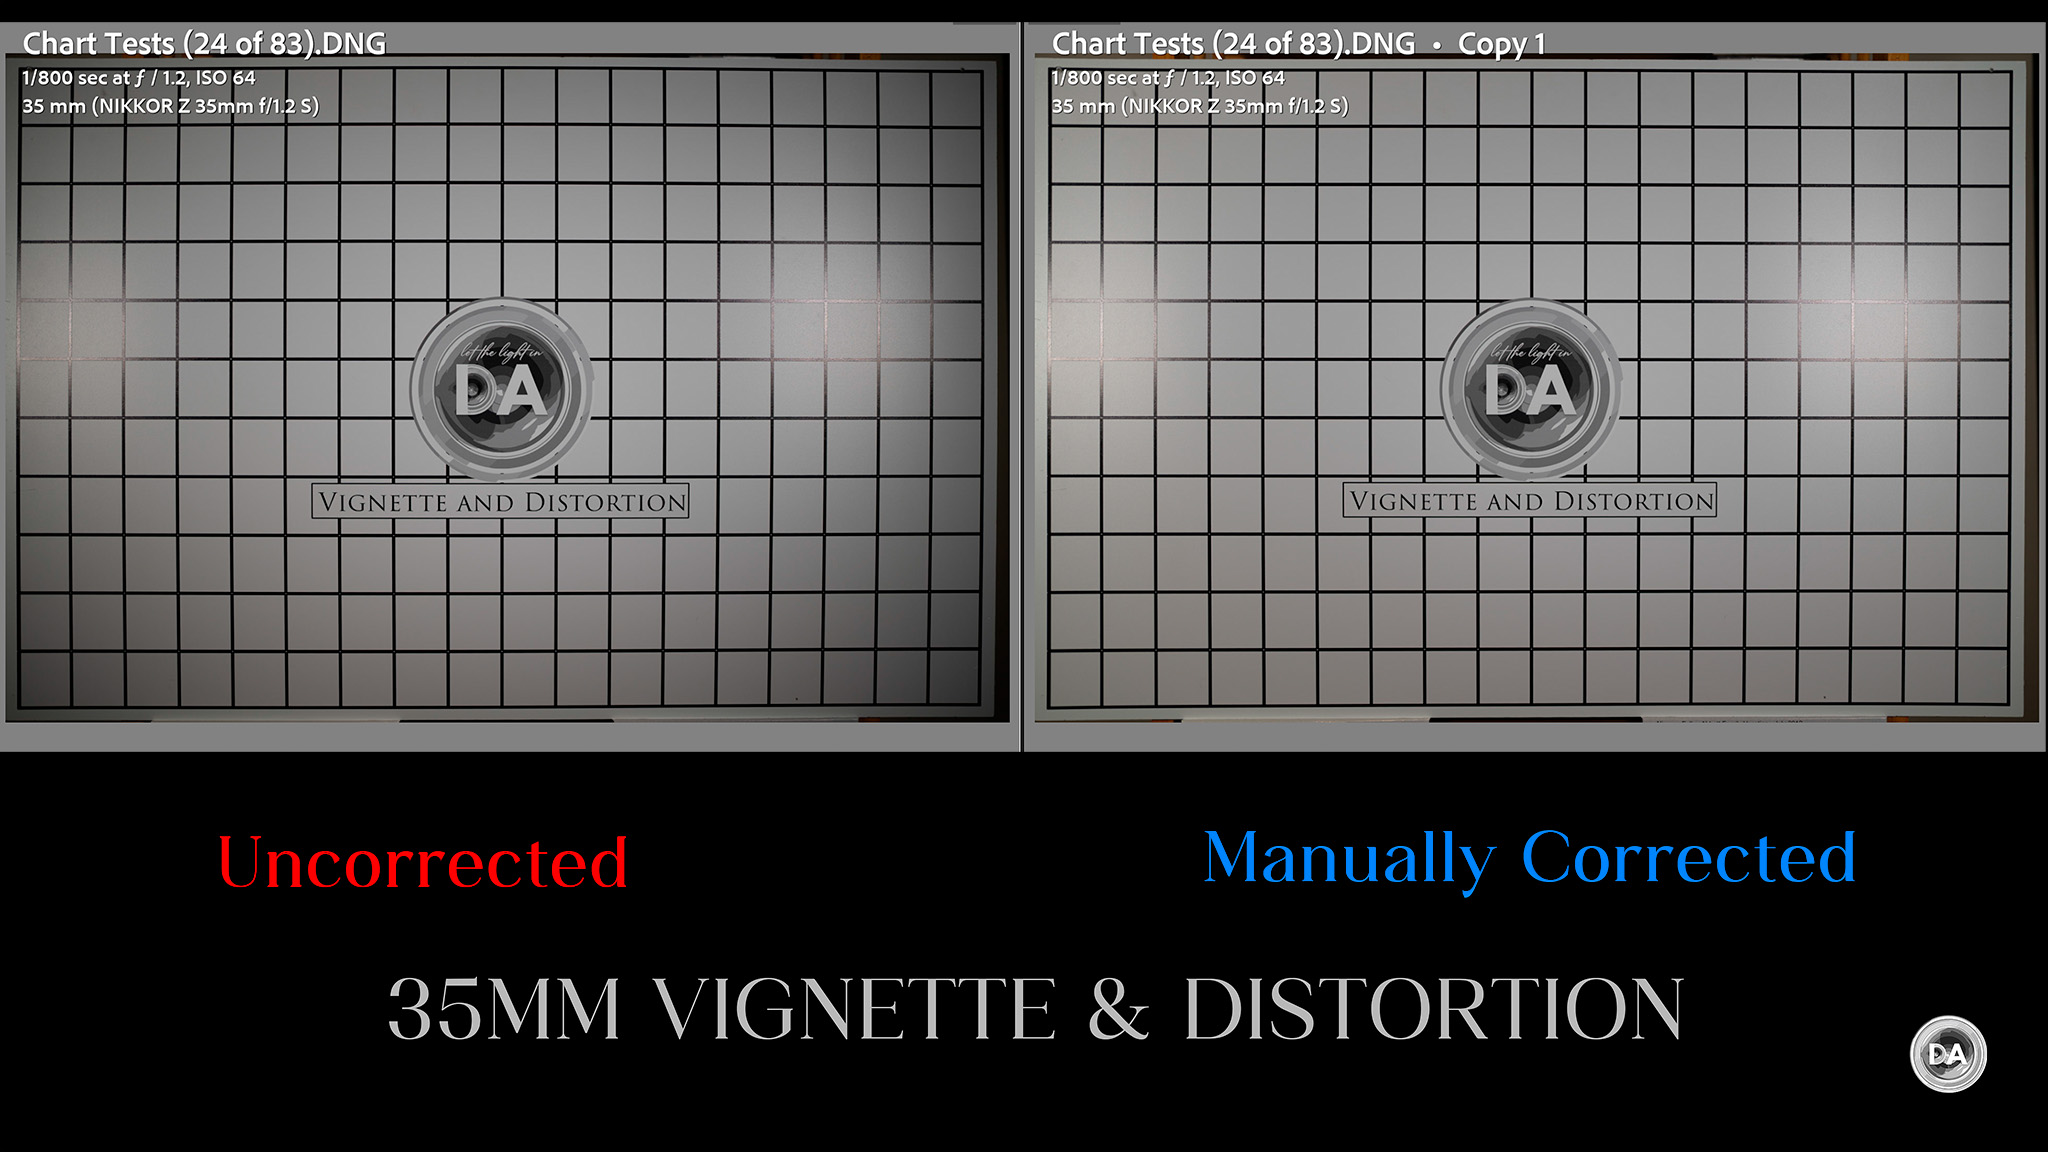
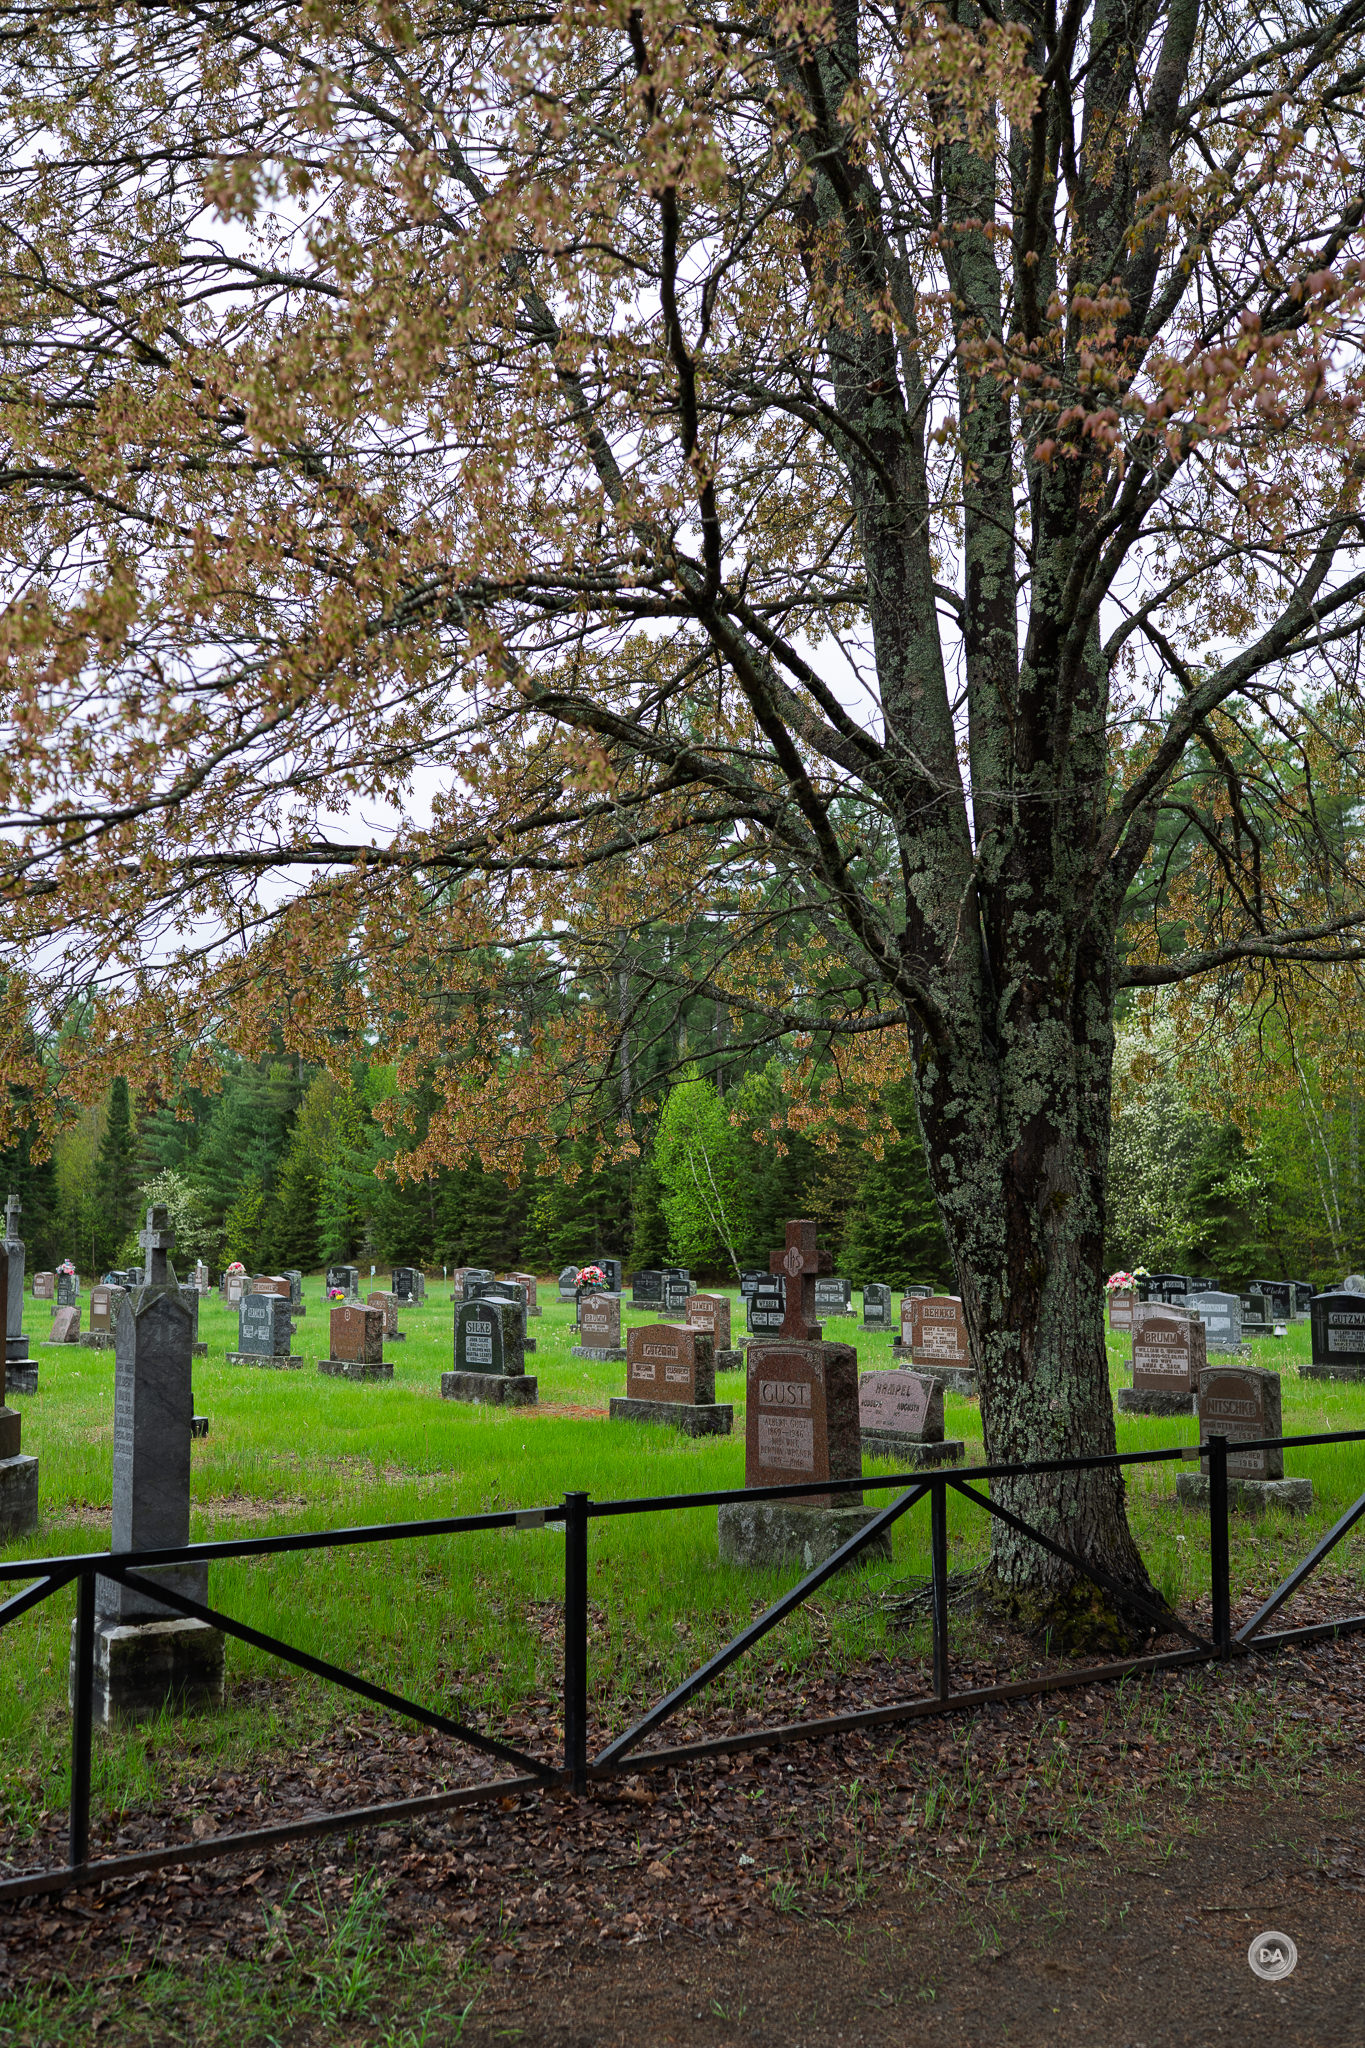
Distortion is well controlled, with just a tiny amount of very linear barrel distortion, that can easily go without correction and corrects easily if you decide to correct it. Vignette is another matter, however, and is very heavy. I needed to use a +77 to correct the vignette. That being said, I needed to use a +70 to correct vignette on the E-mount version of the LAB, which means that the larger Z-mount opening (which always requires more vignette correction) will mean that the Z-mount version of the LAB will almost certainly be worse and will require maxing out the sliders to correct the vignette.
The correction profile in camera or editing software works great, though, and so this isn’t a real world problem. Here’s an F1.2 image with an even foreground, and you can see that no vignette lingers.
There are minimal amounts of LoCA (longitudinal chromatic aberrations) before and after the plane of focus.
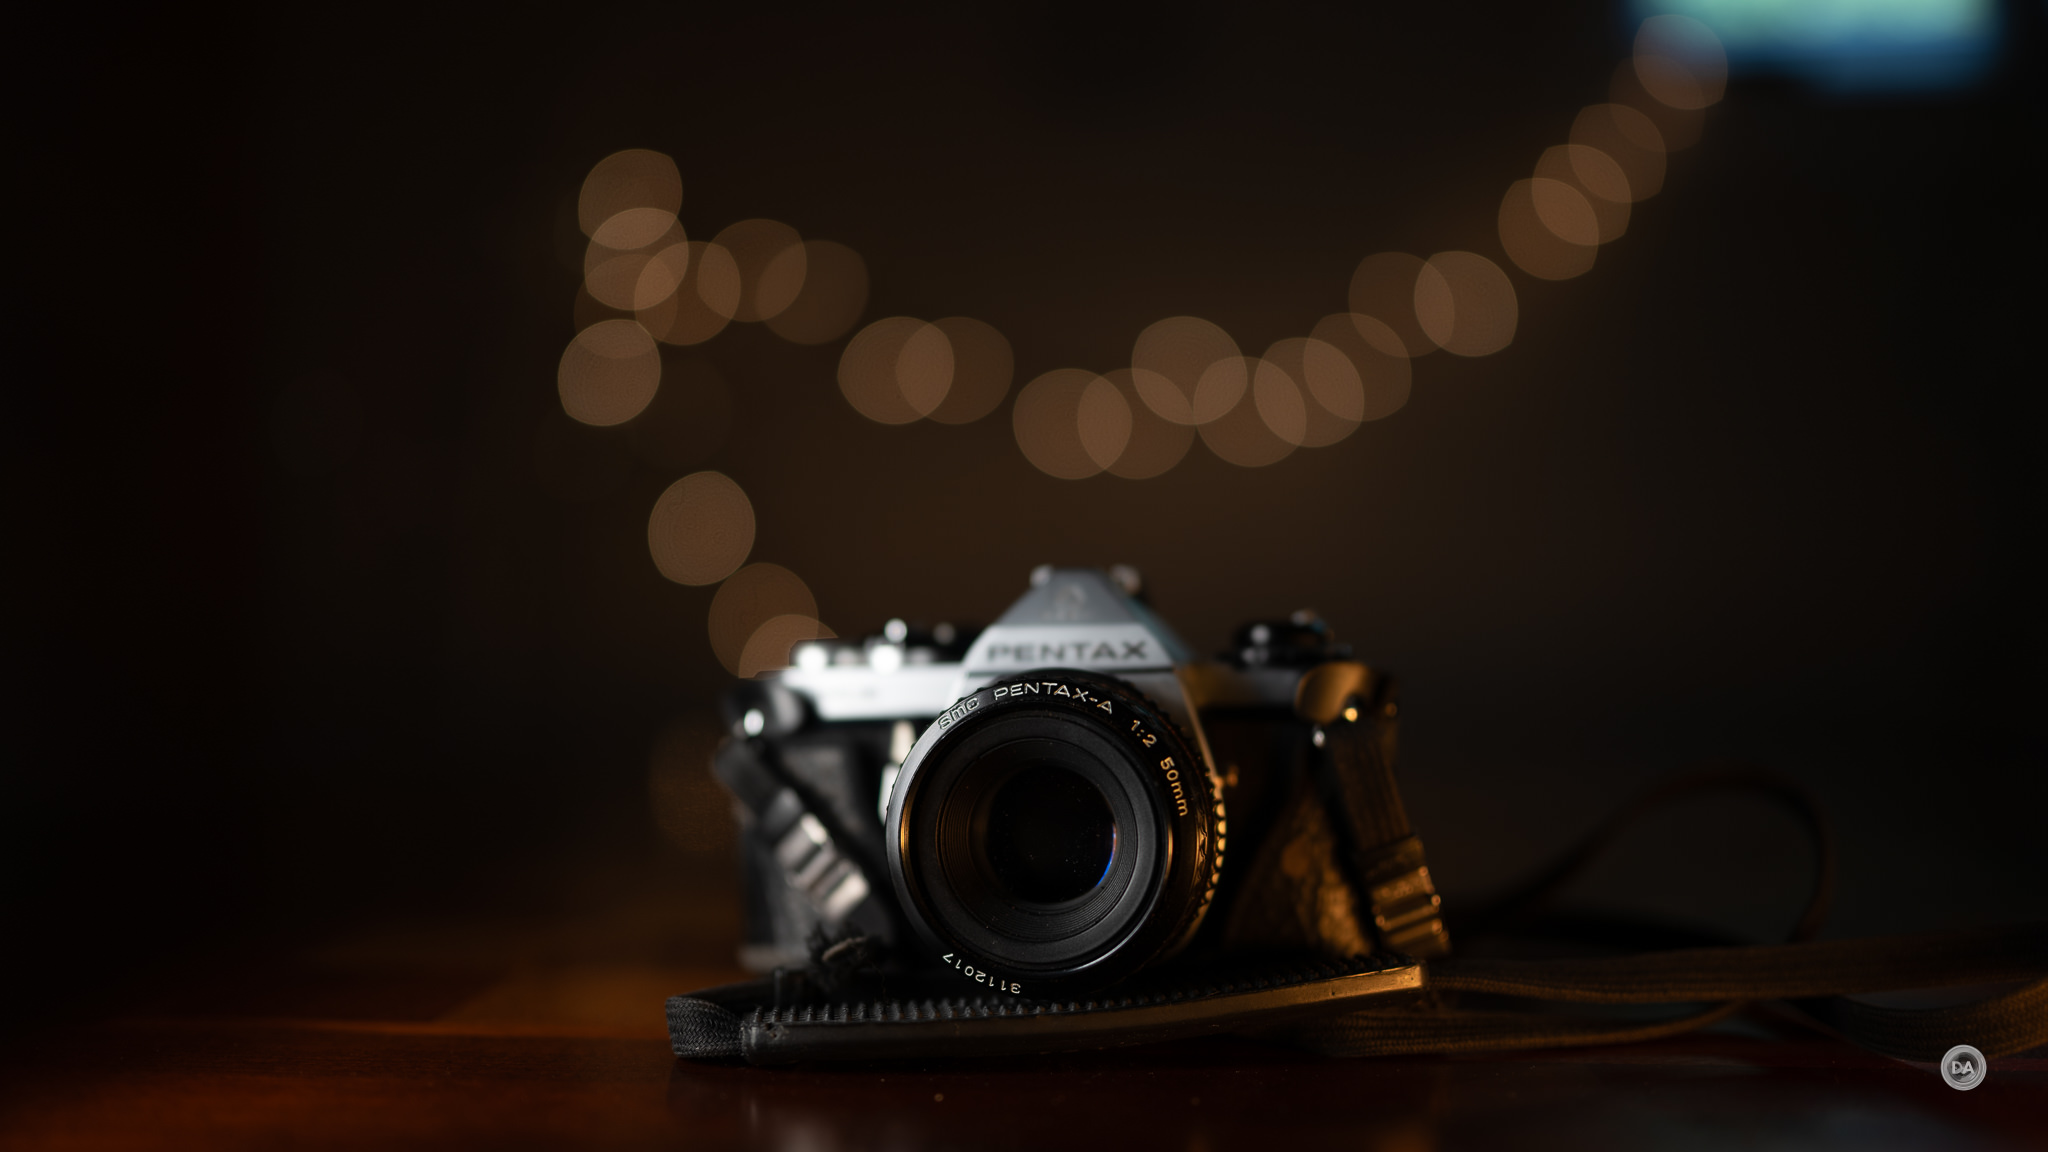
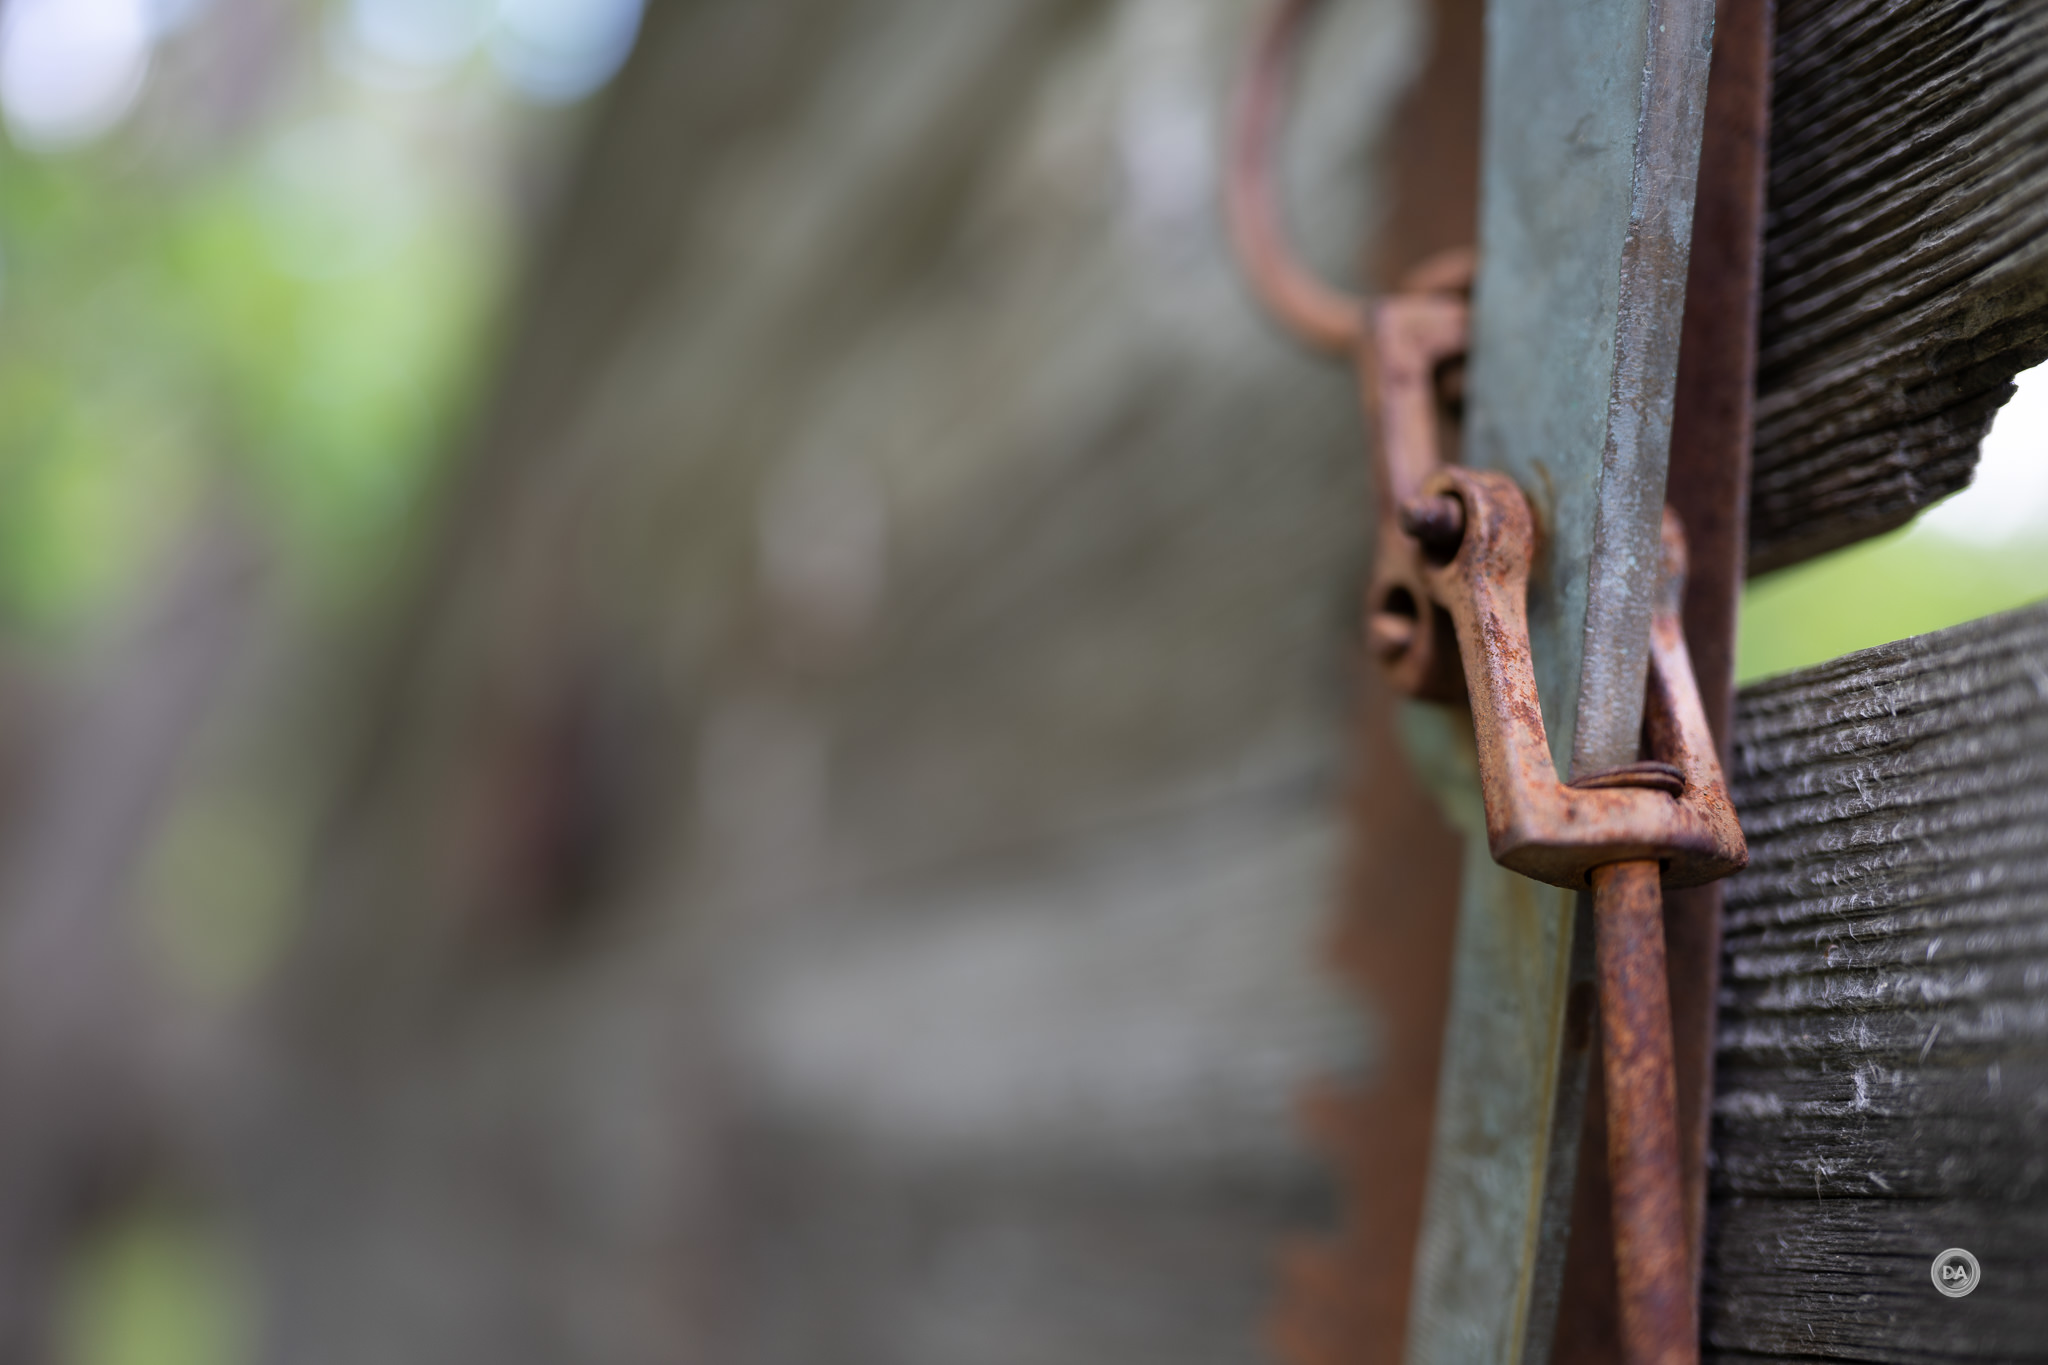
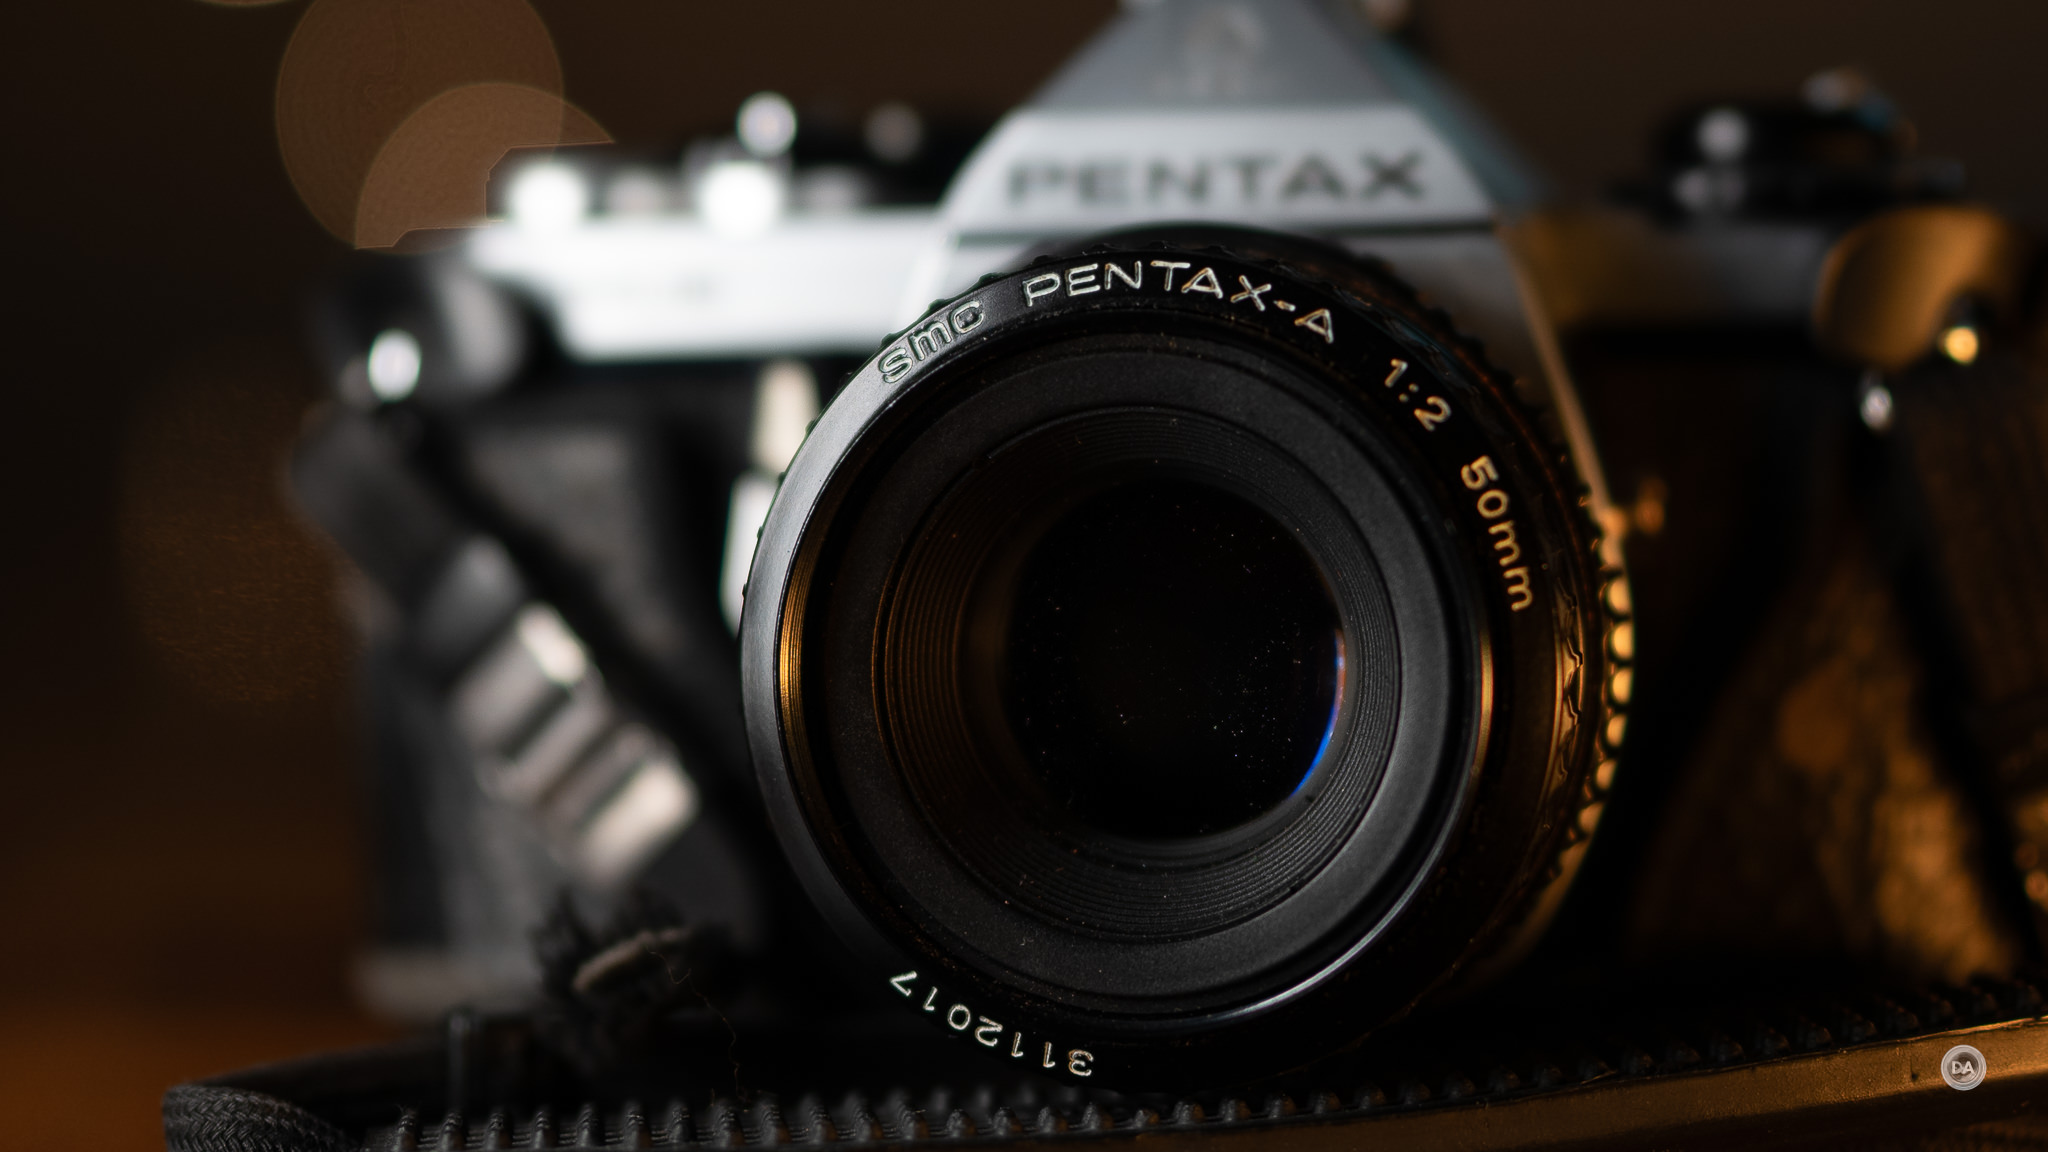
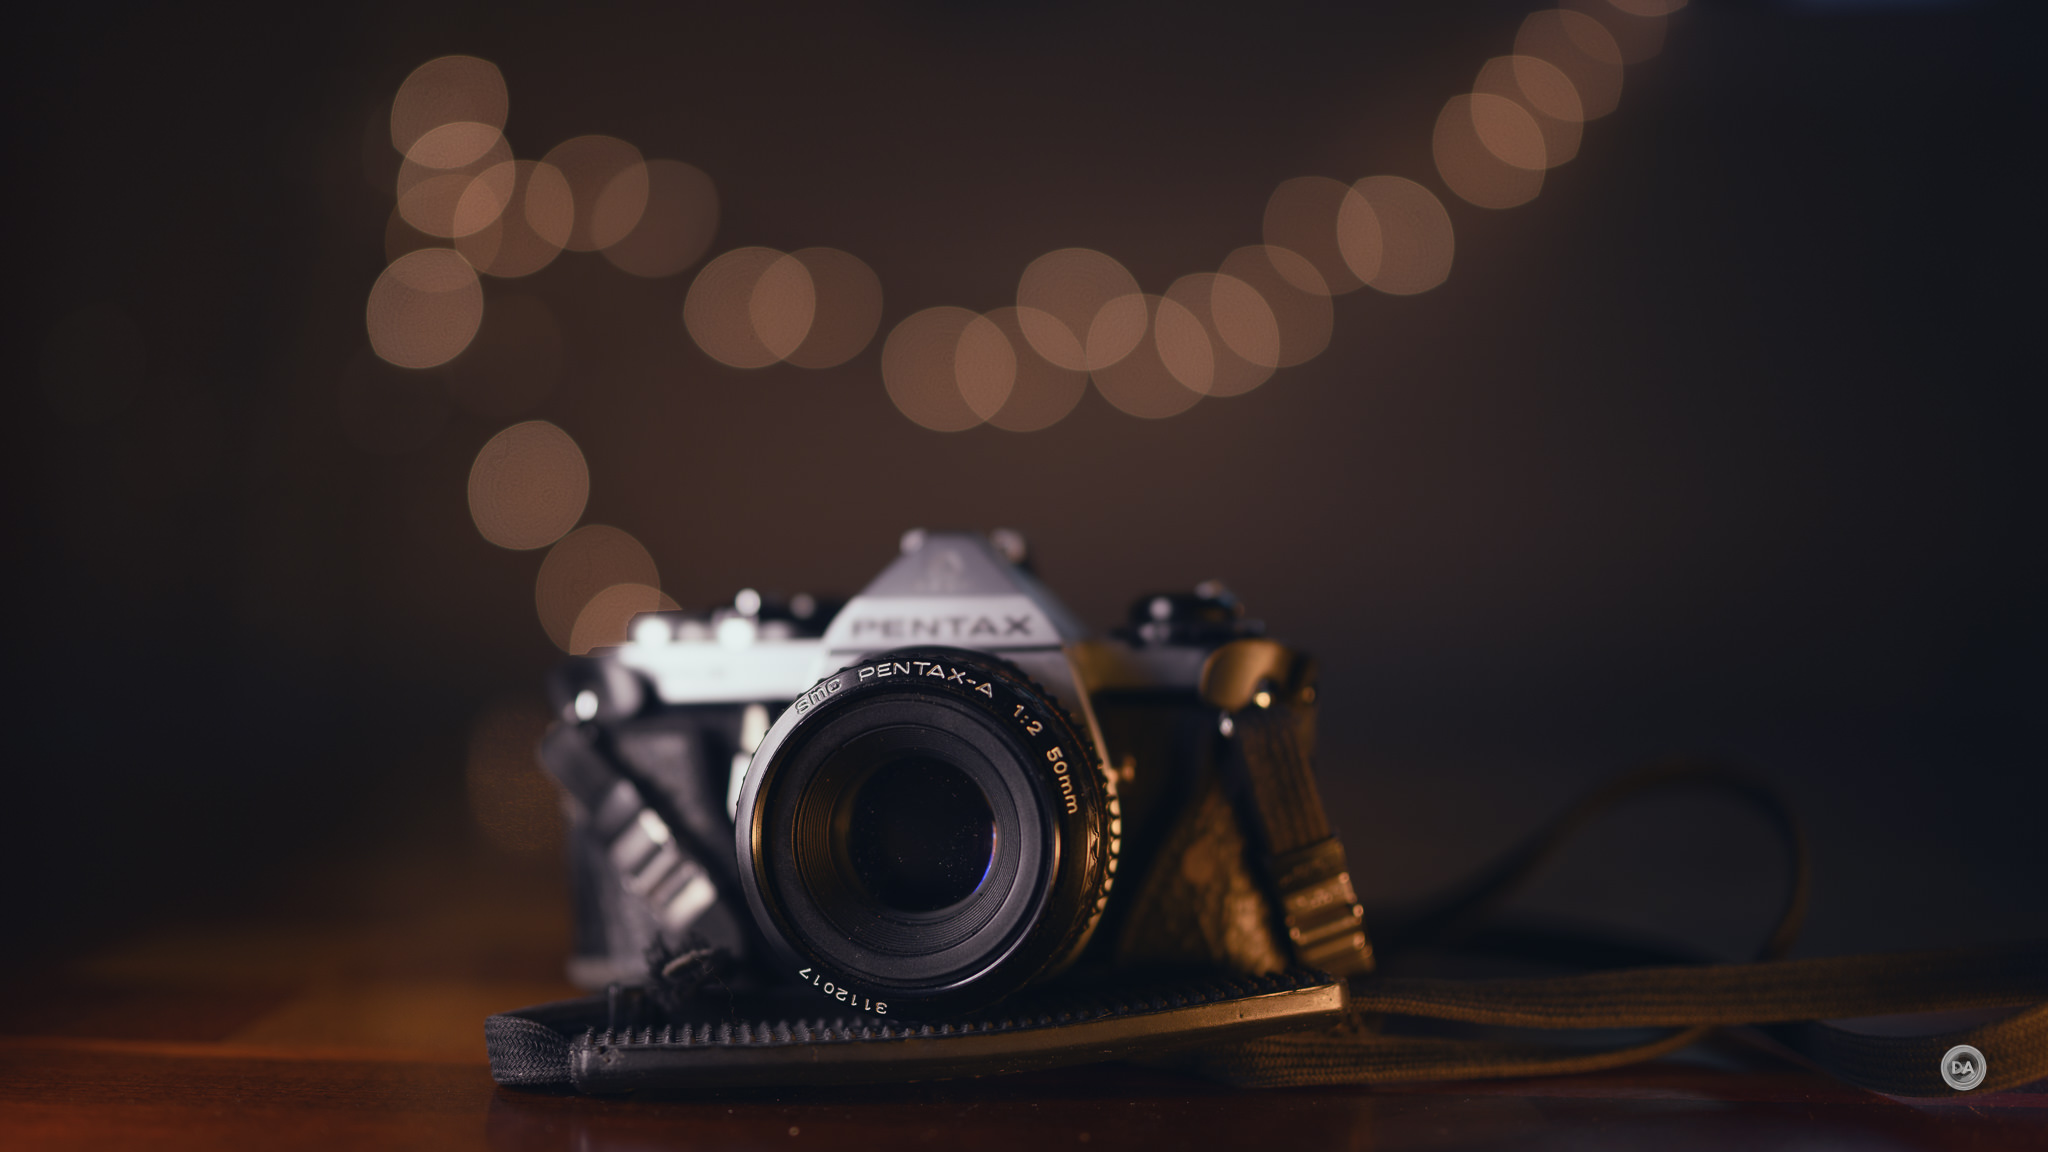
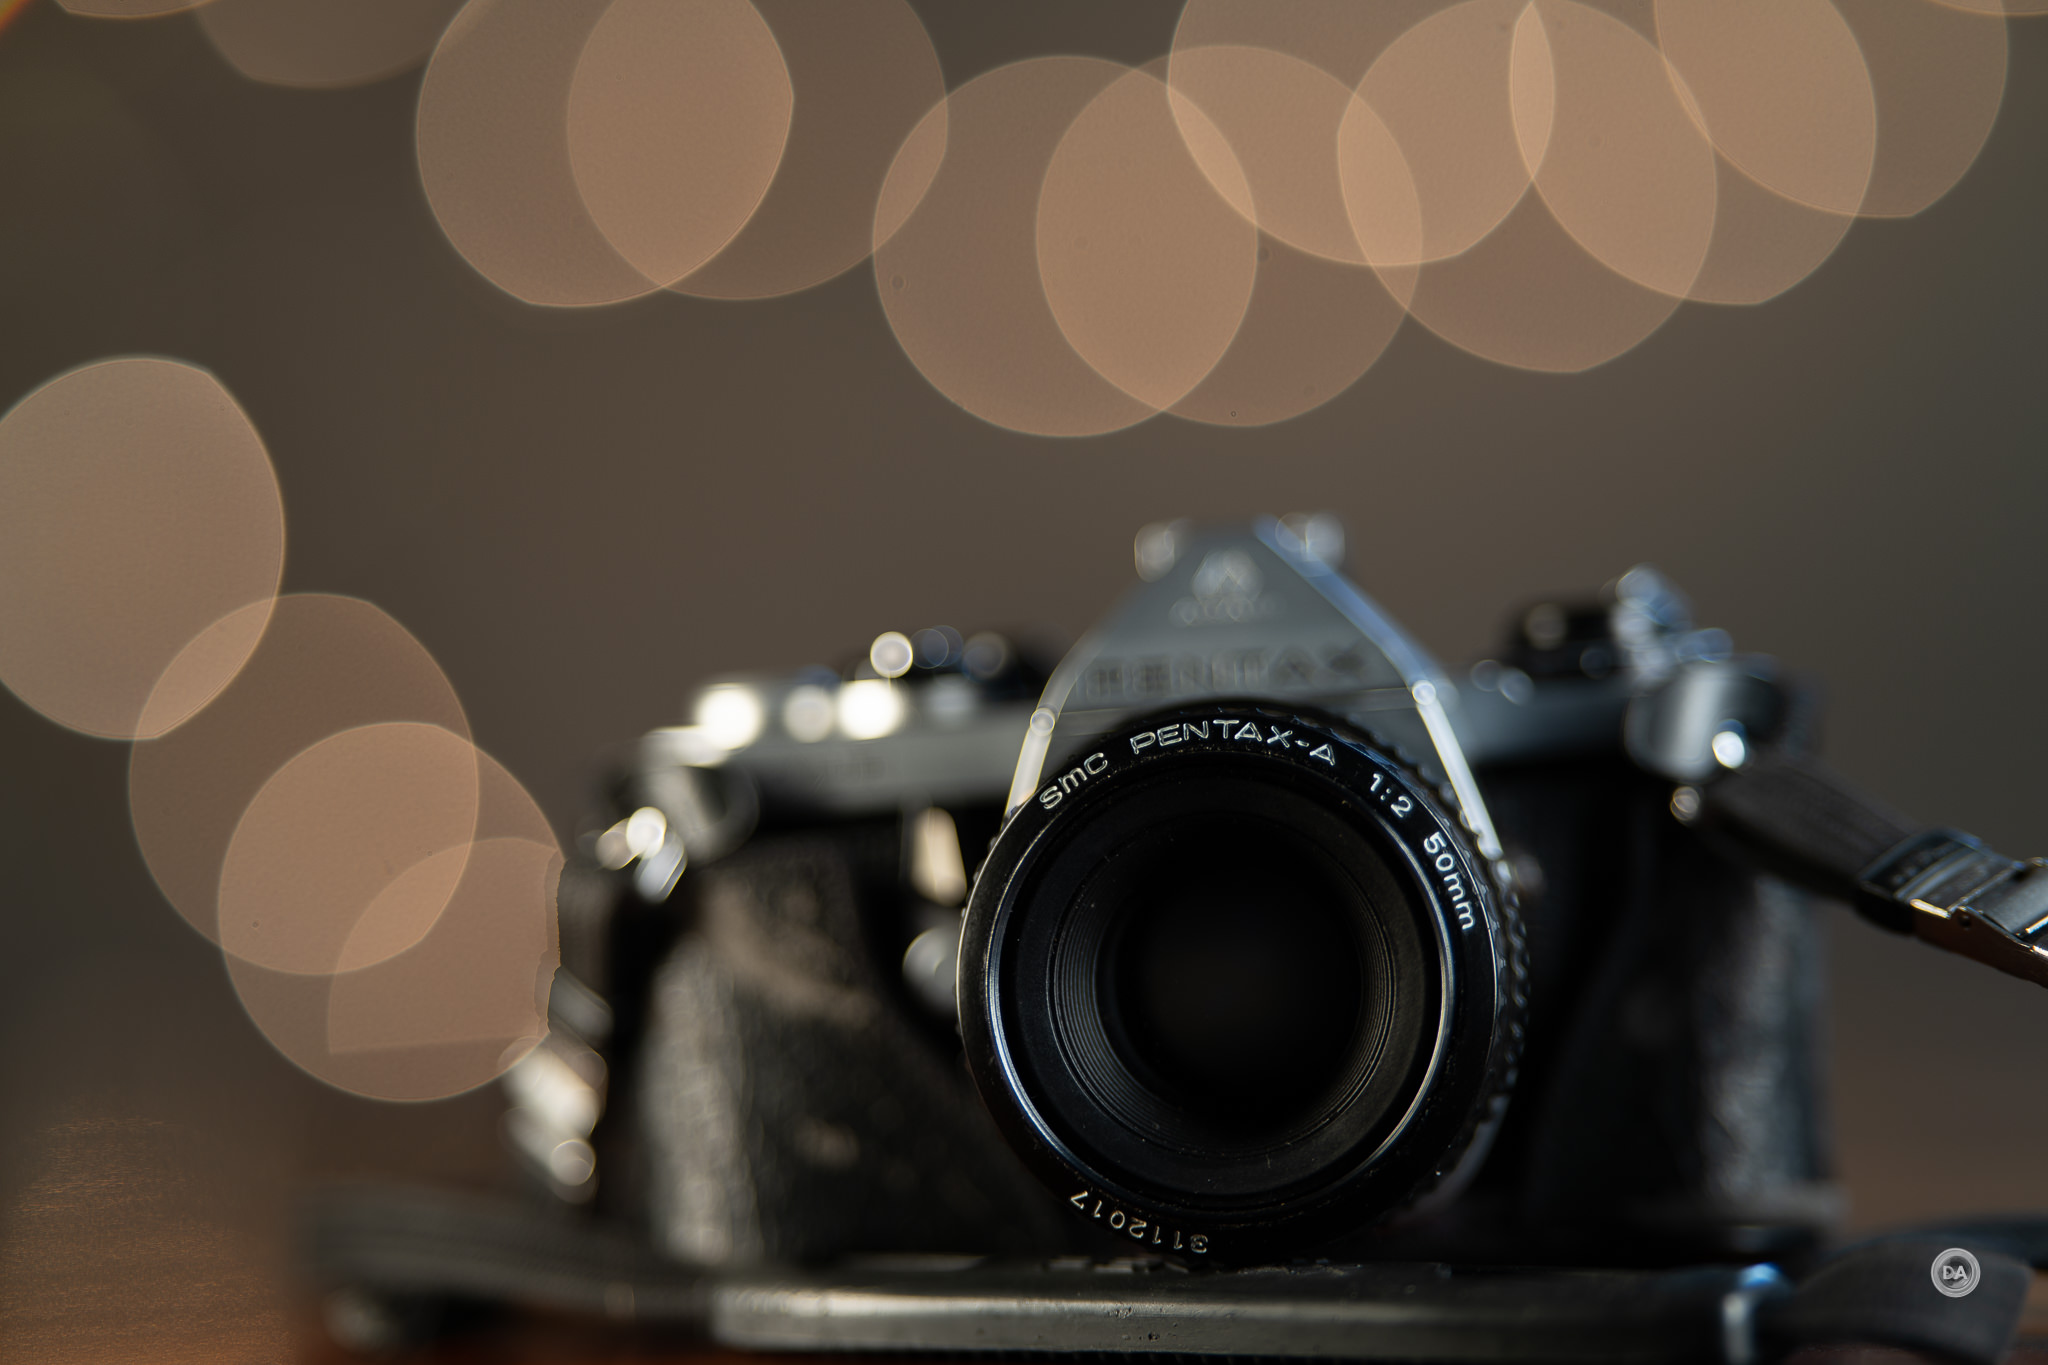
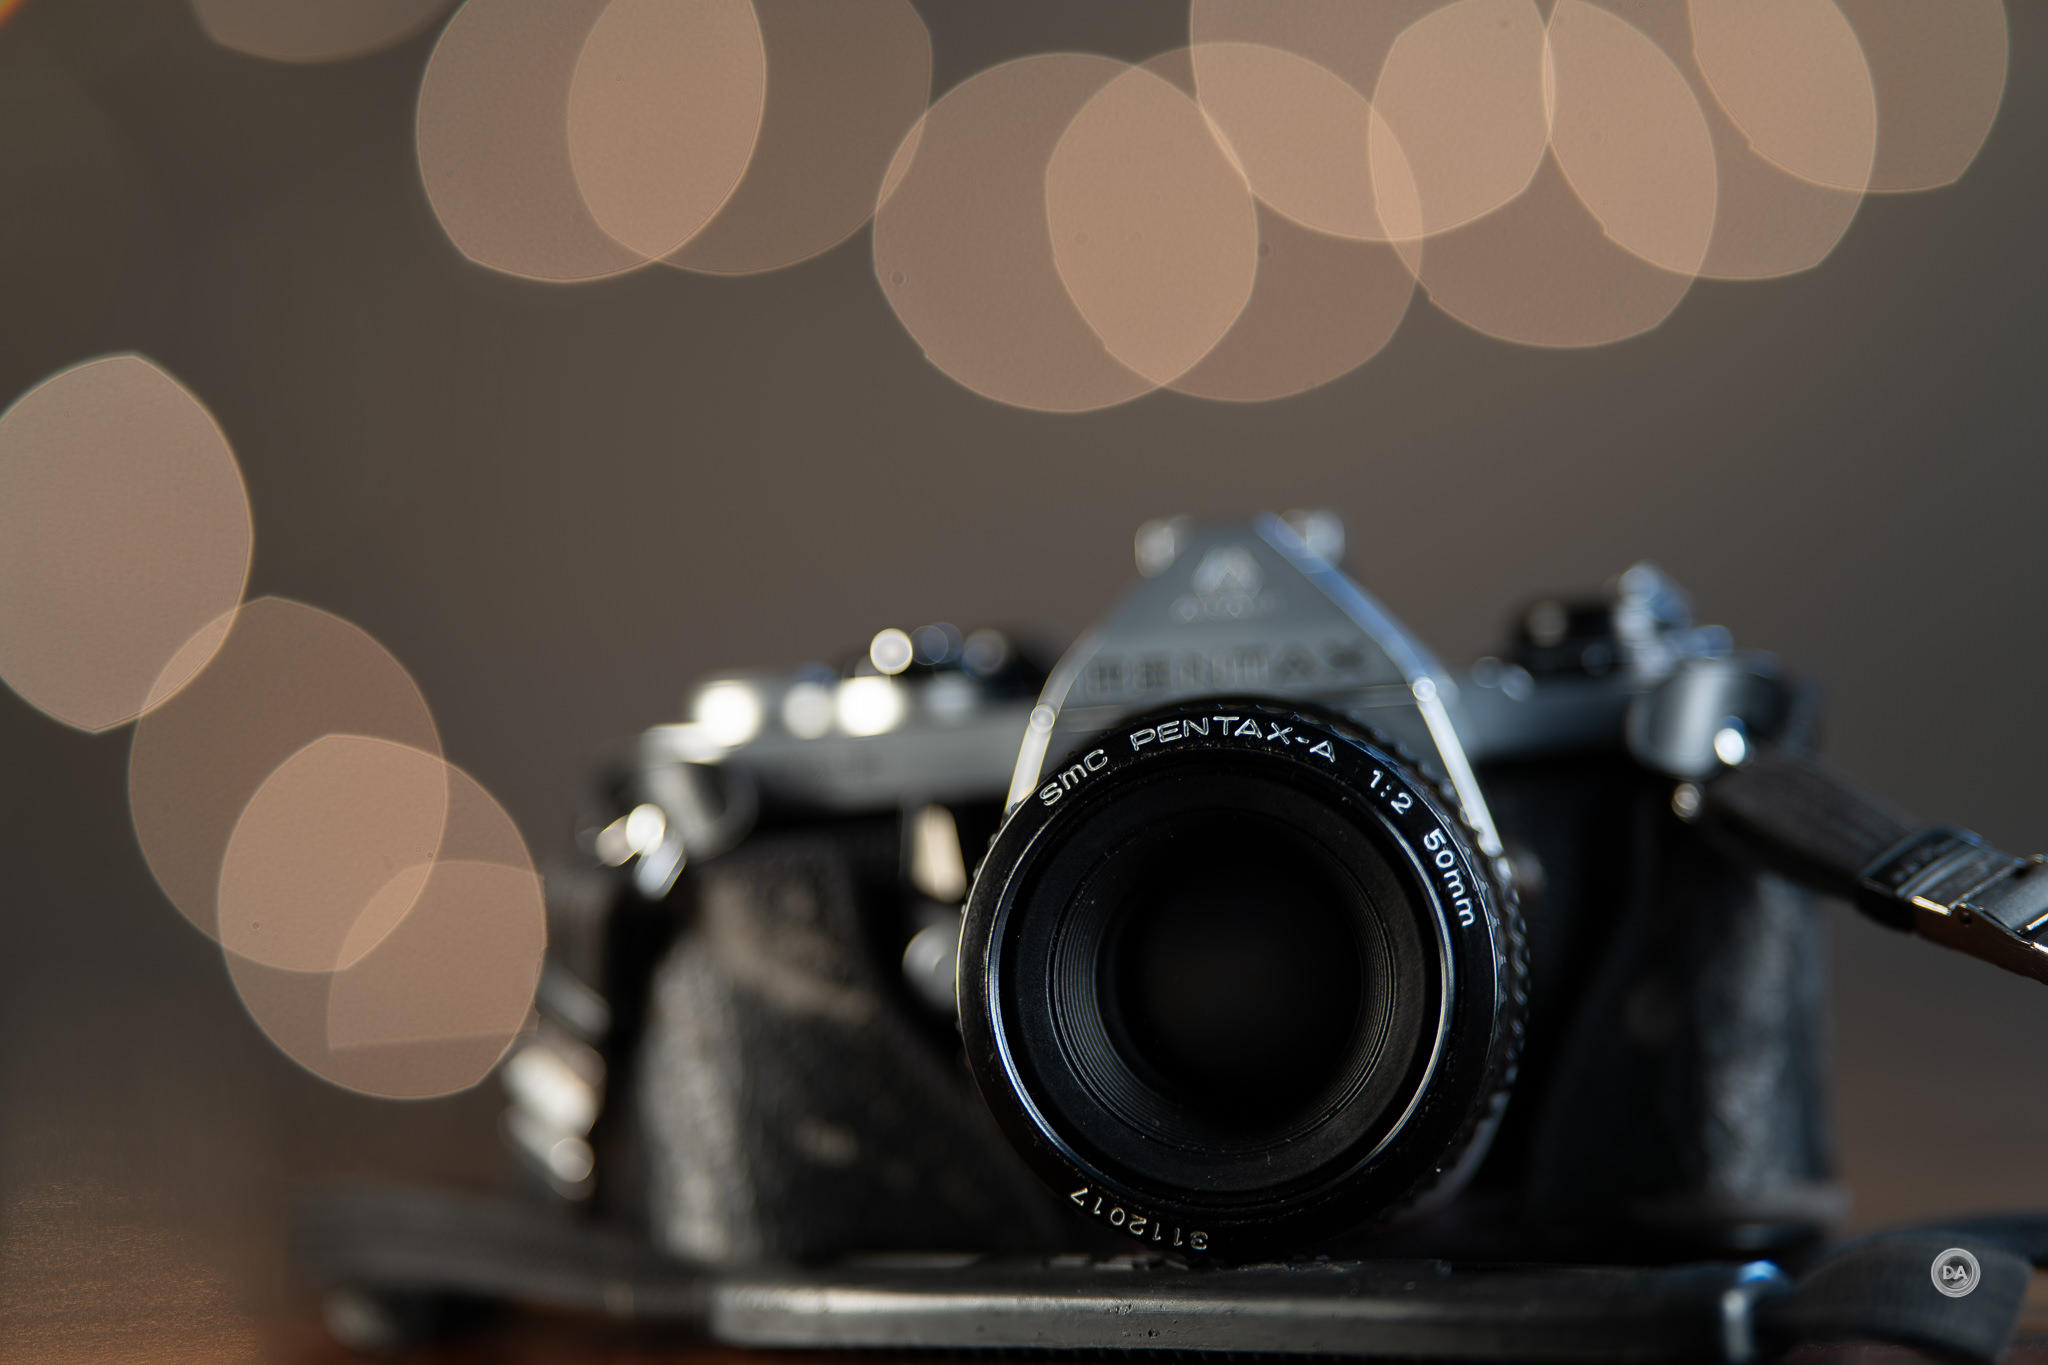
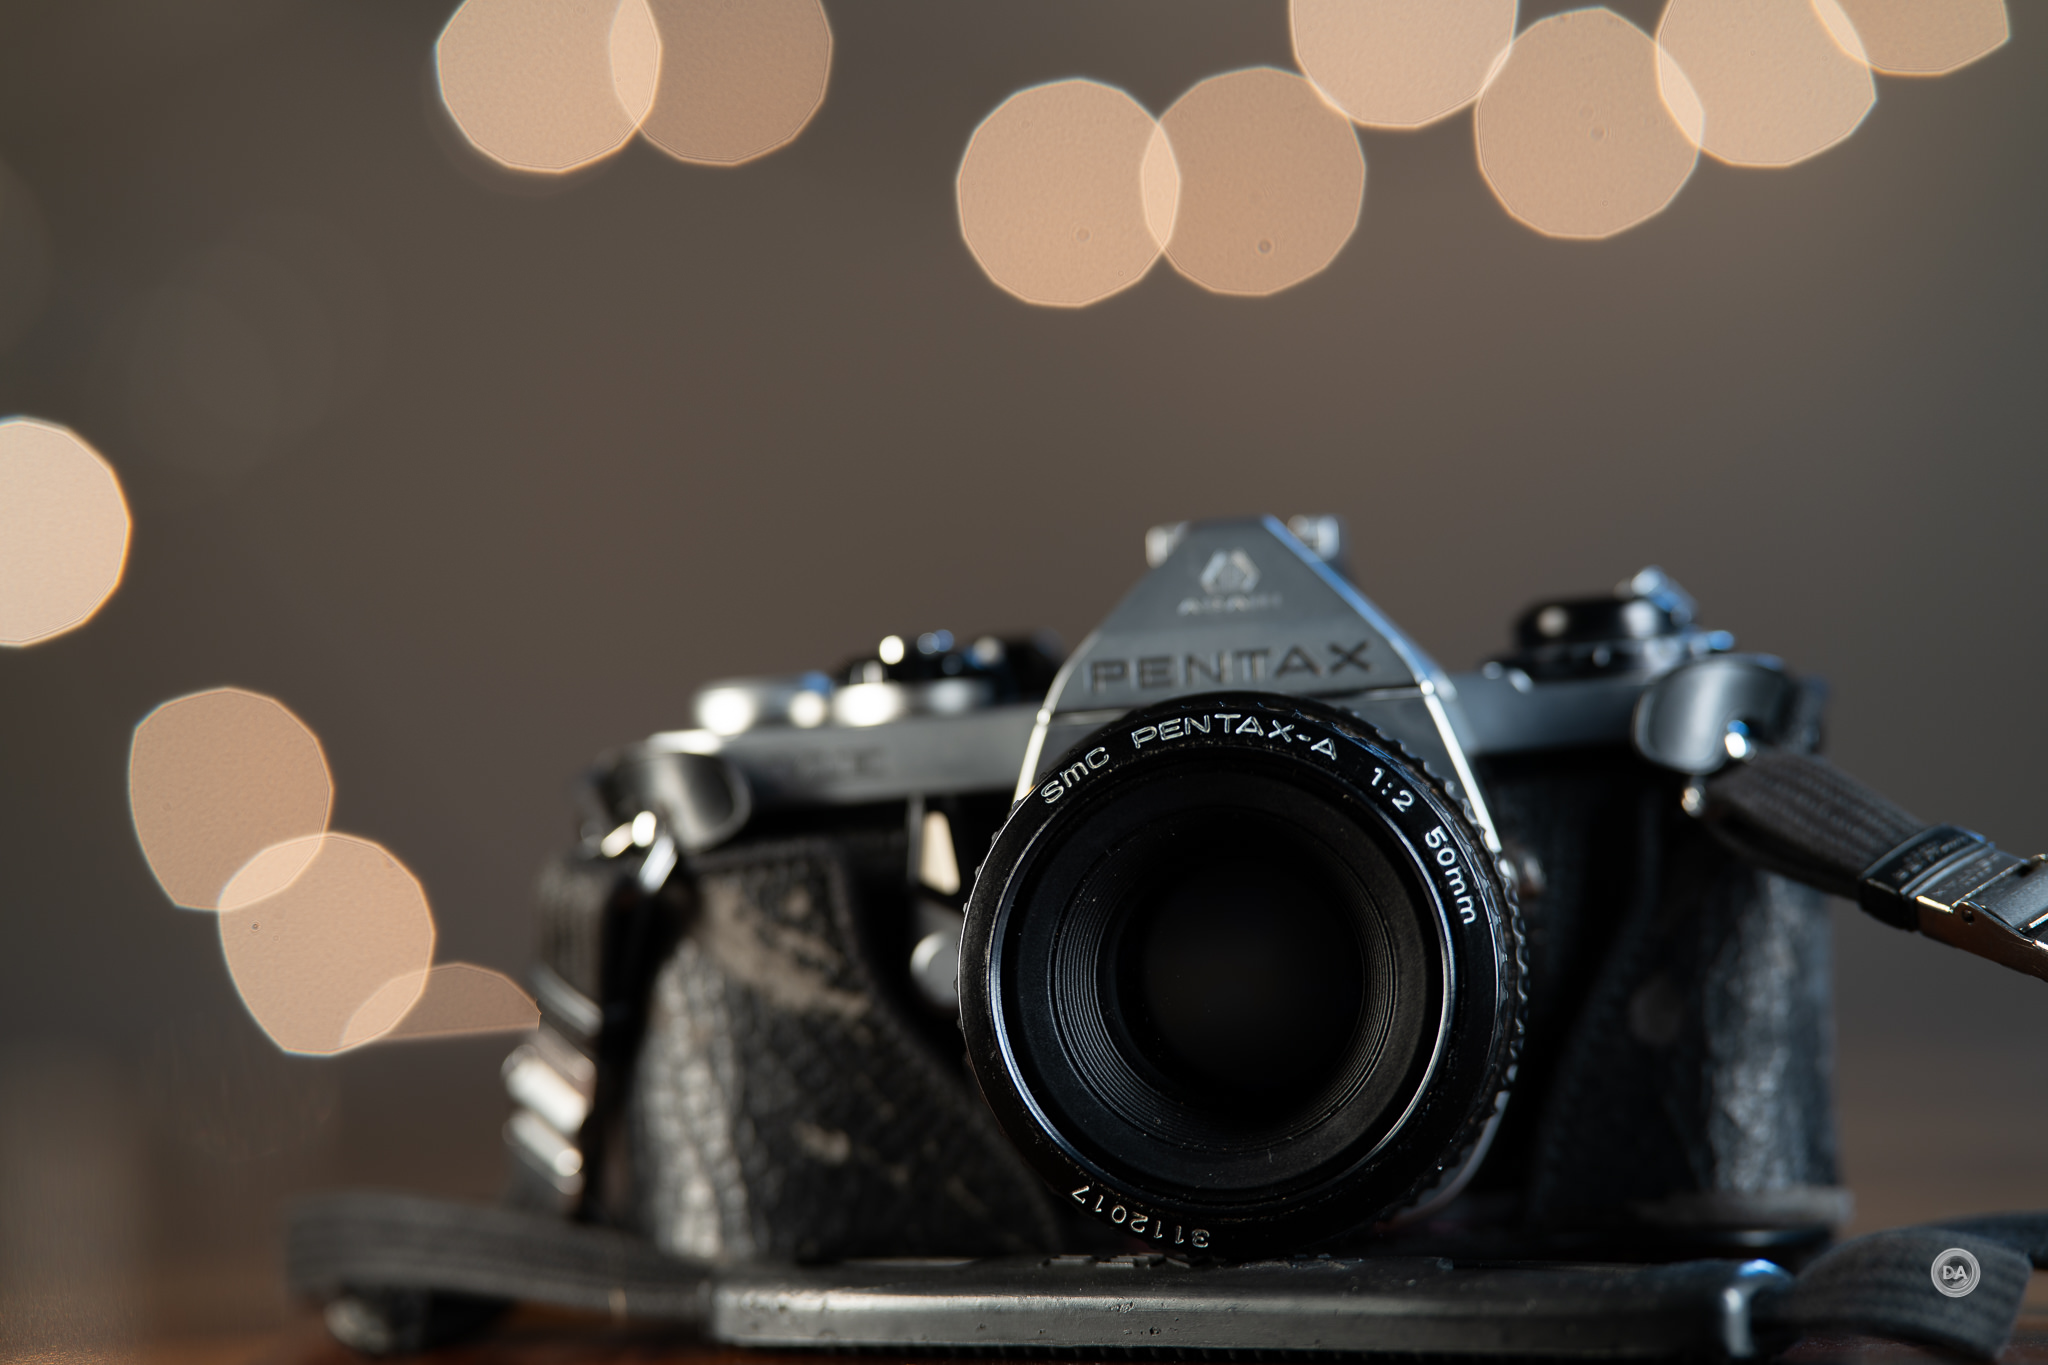
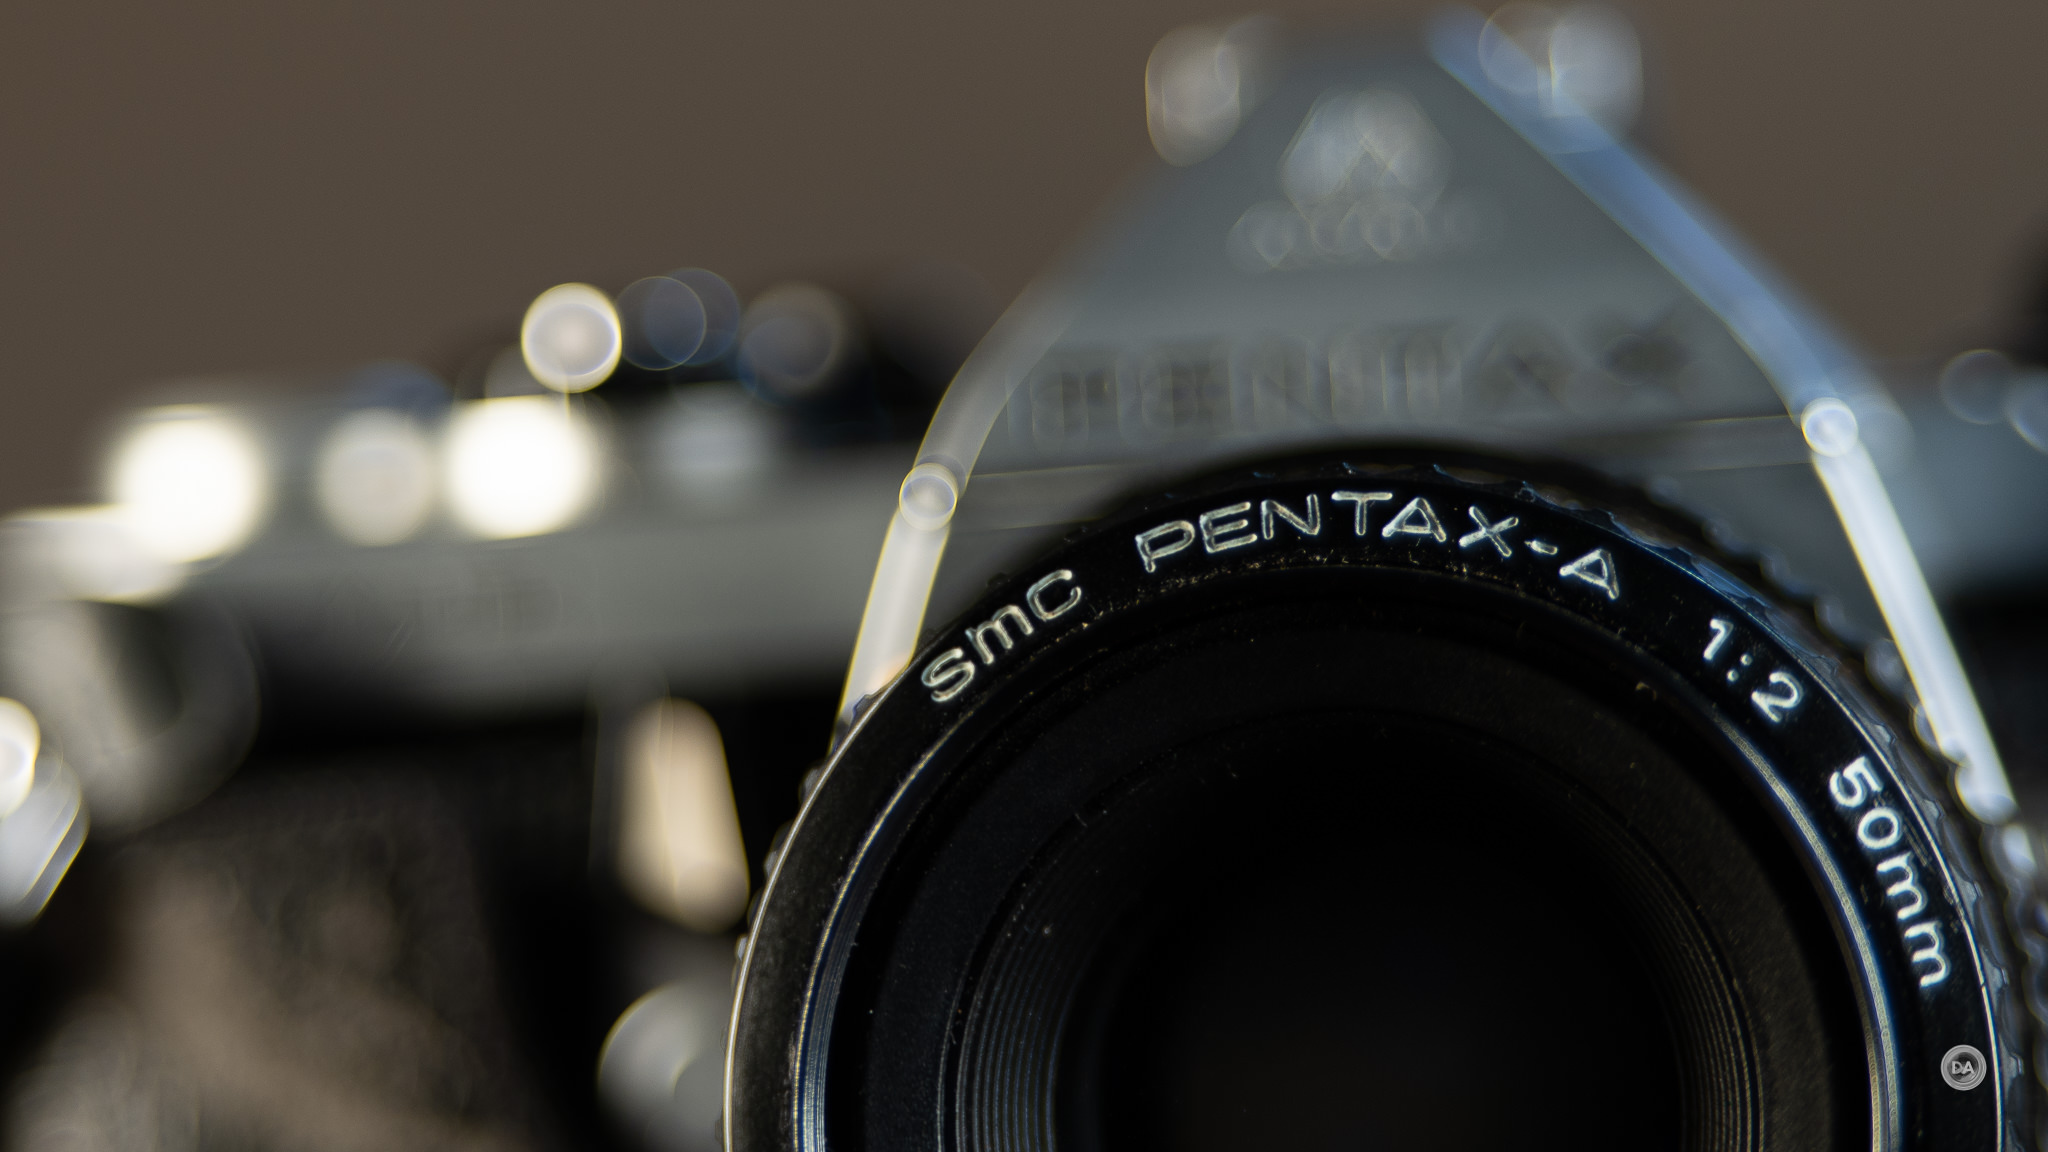
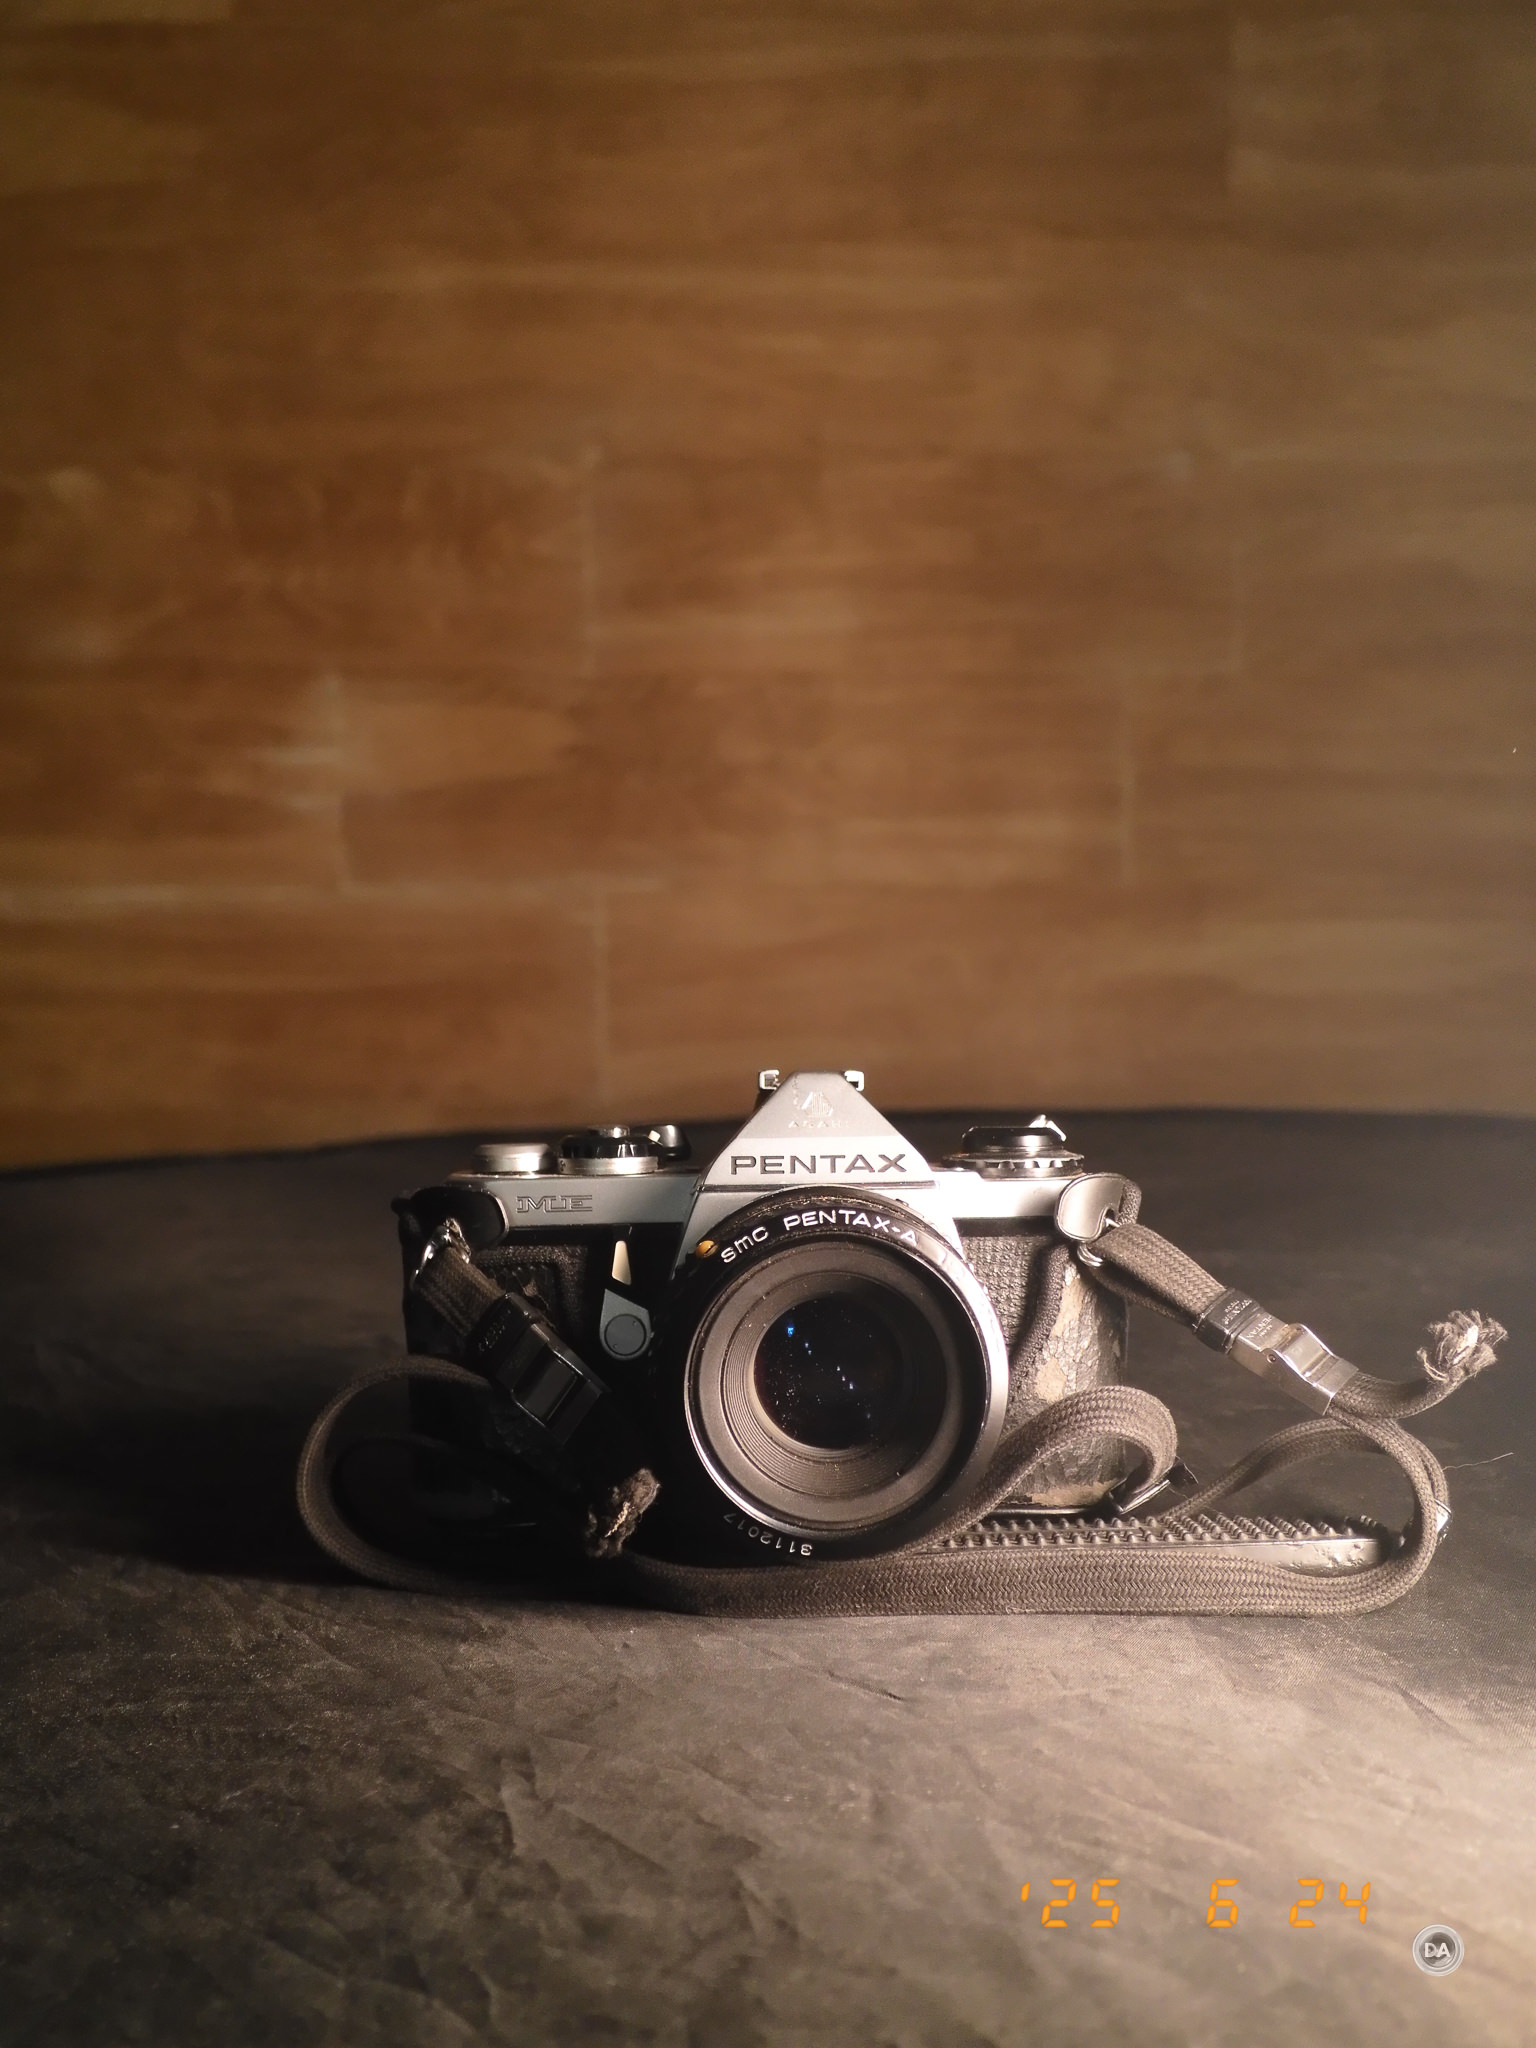
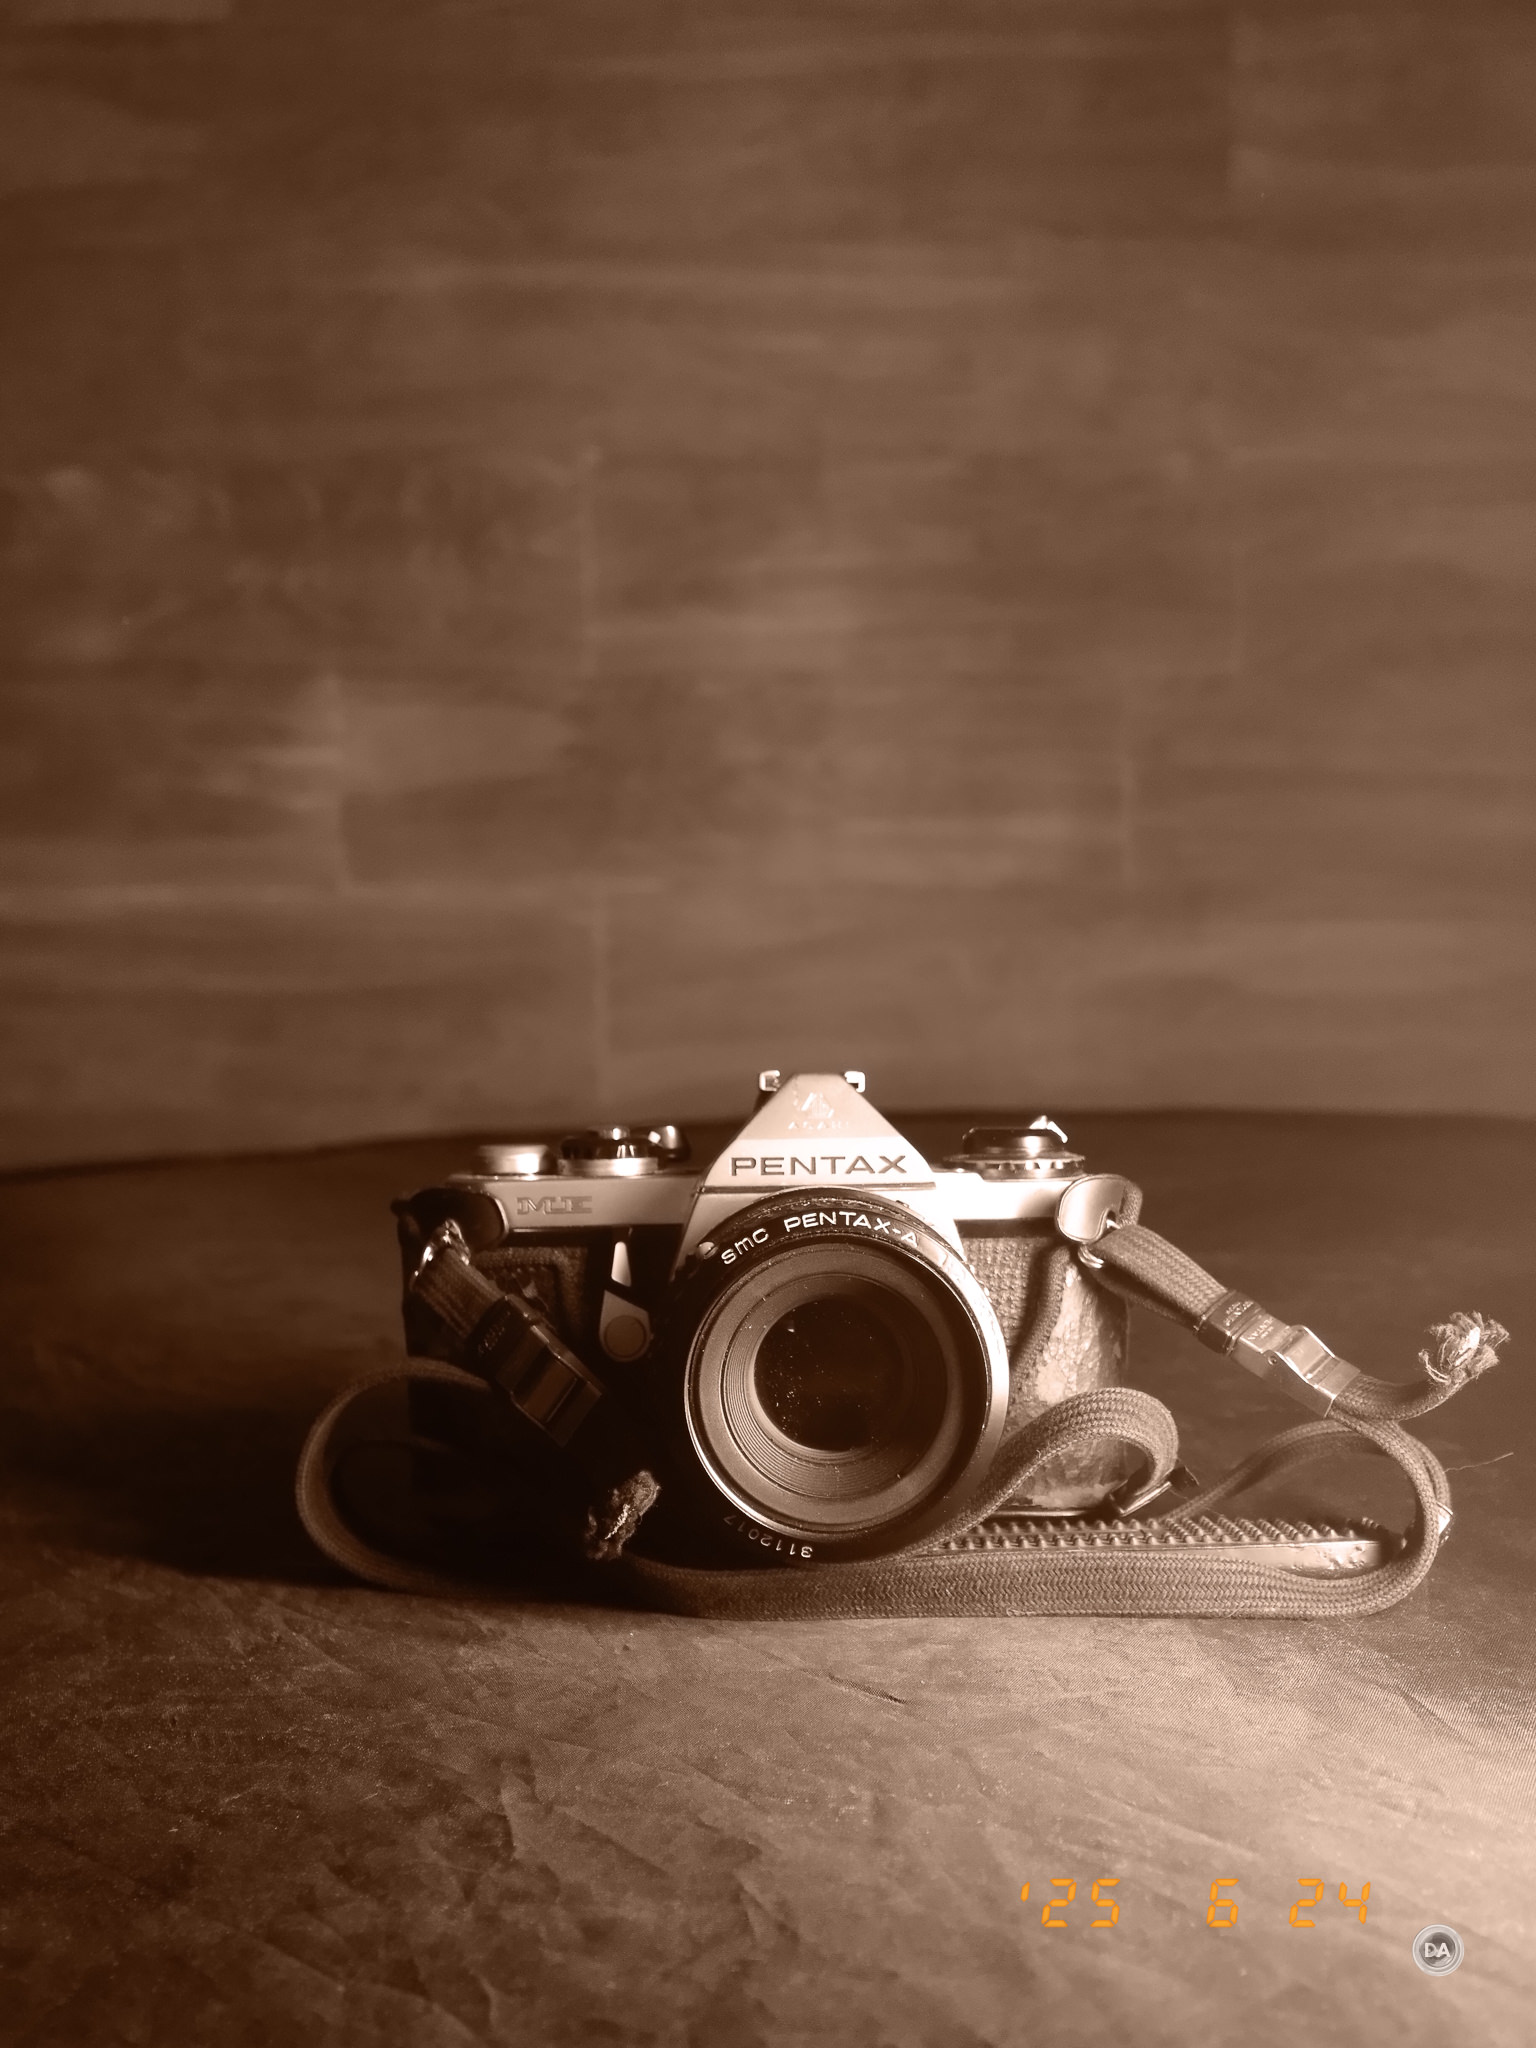
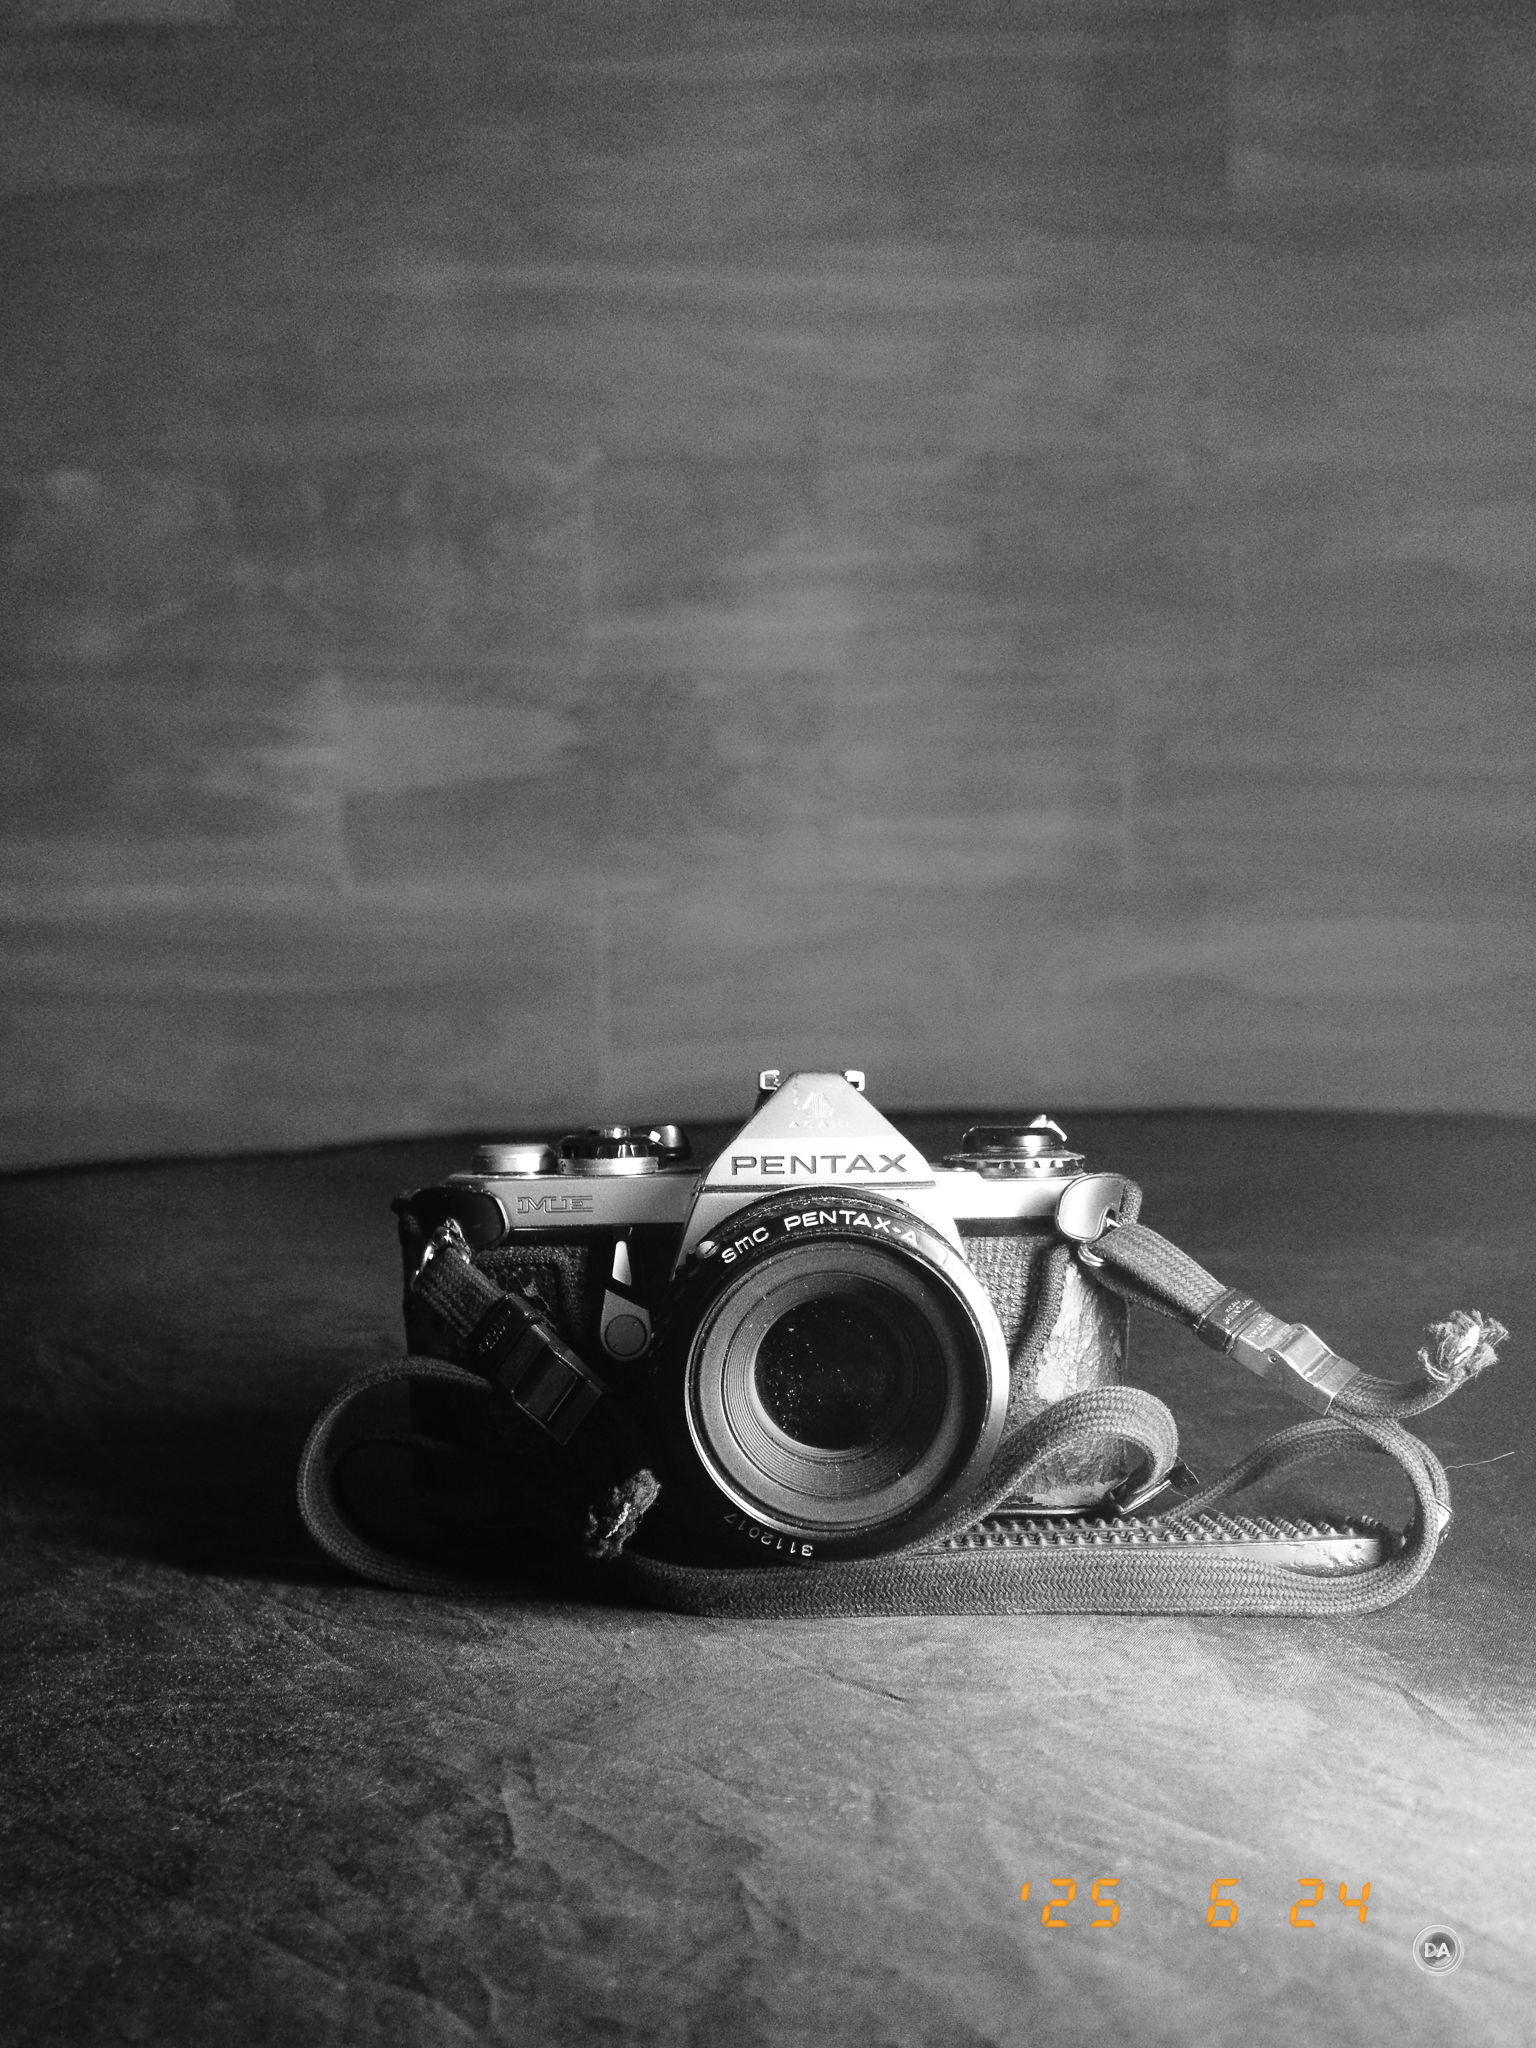
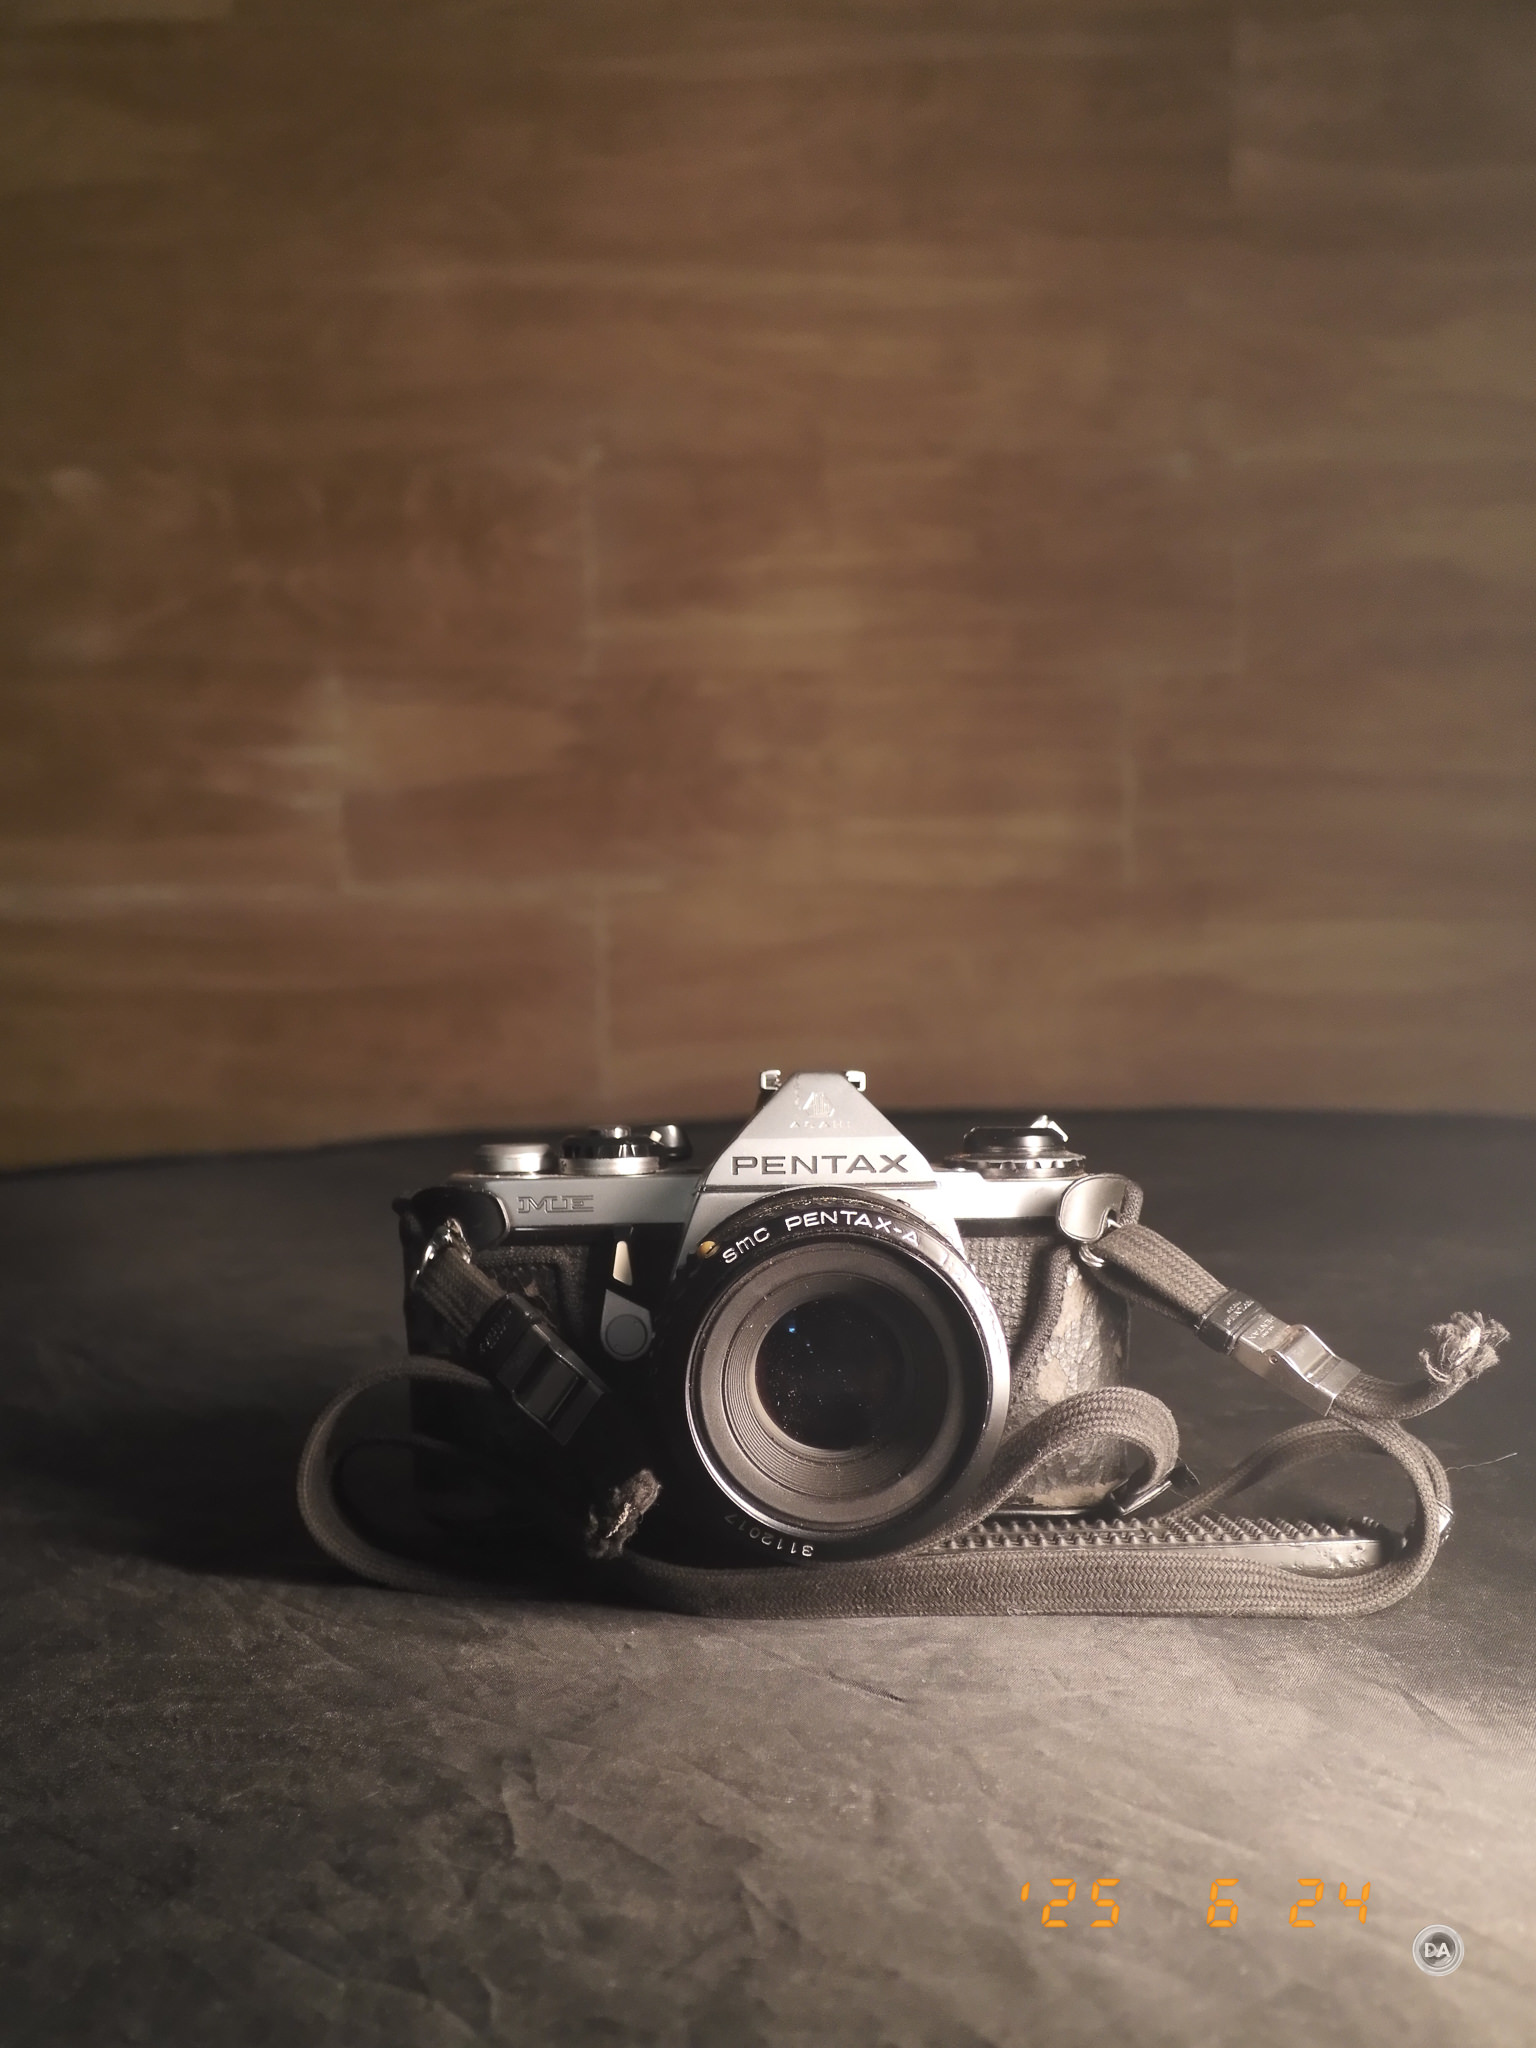
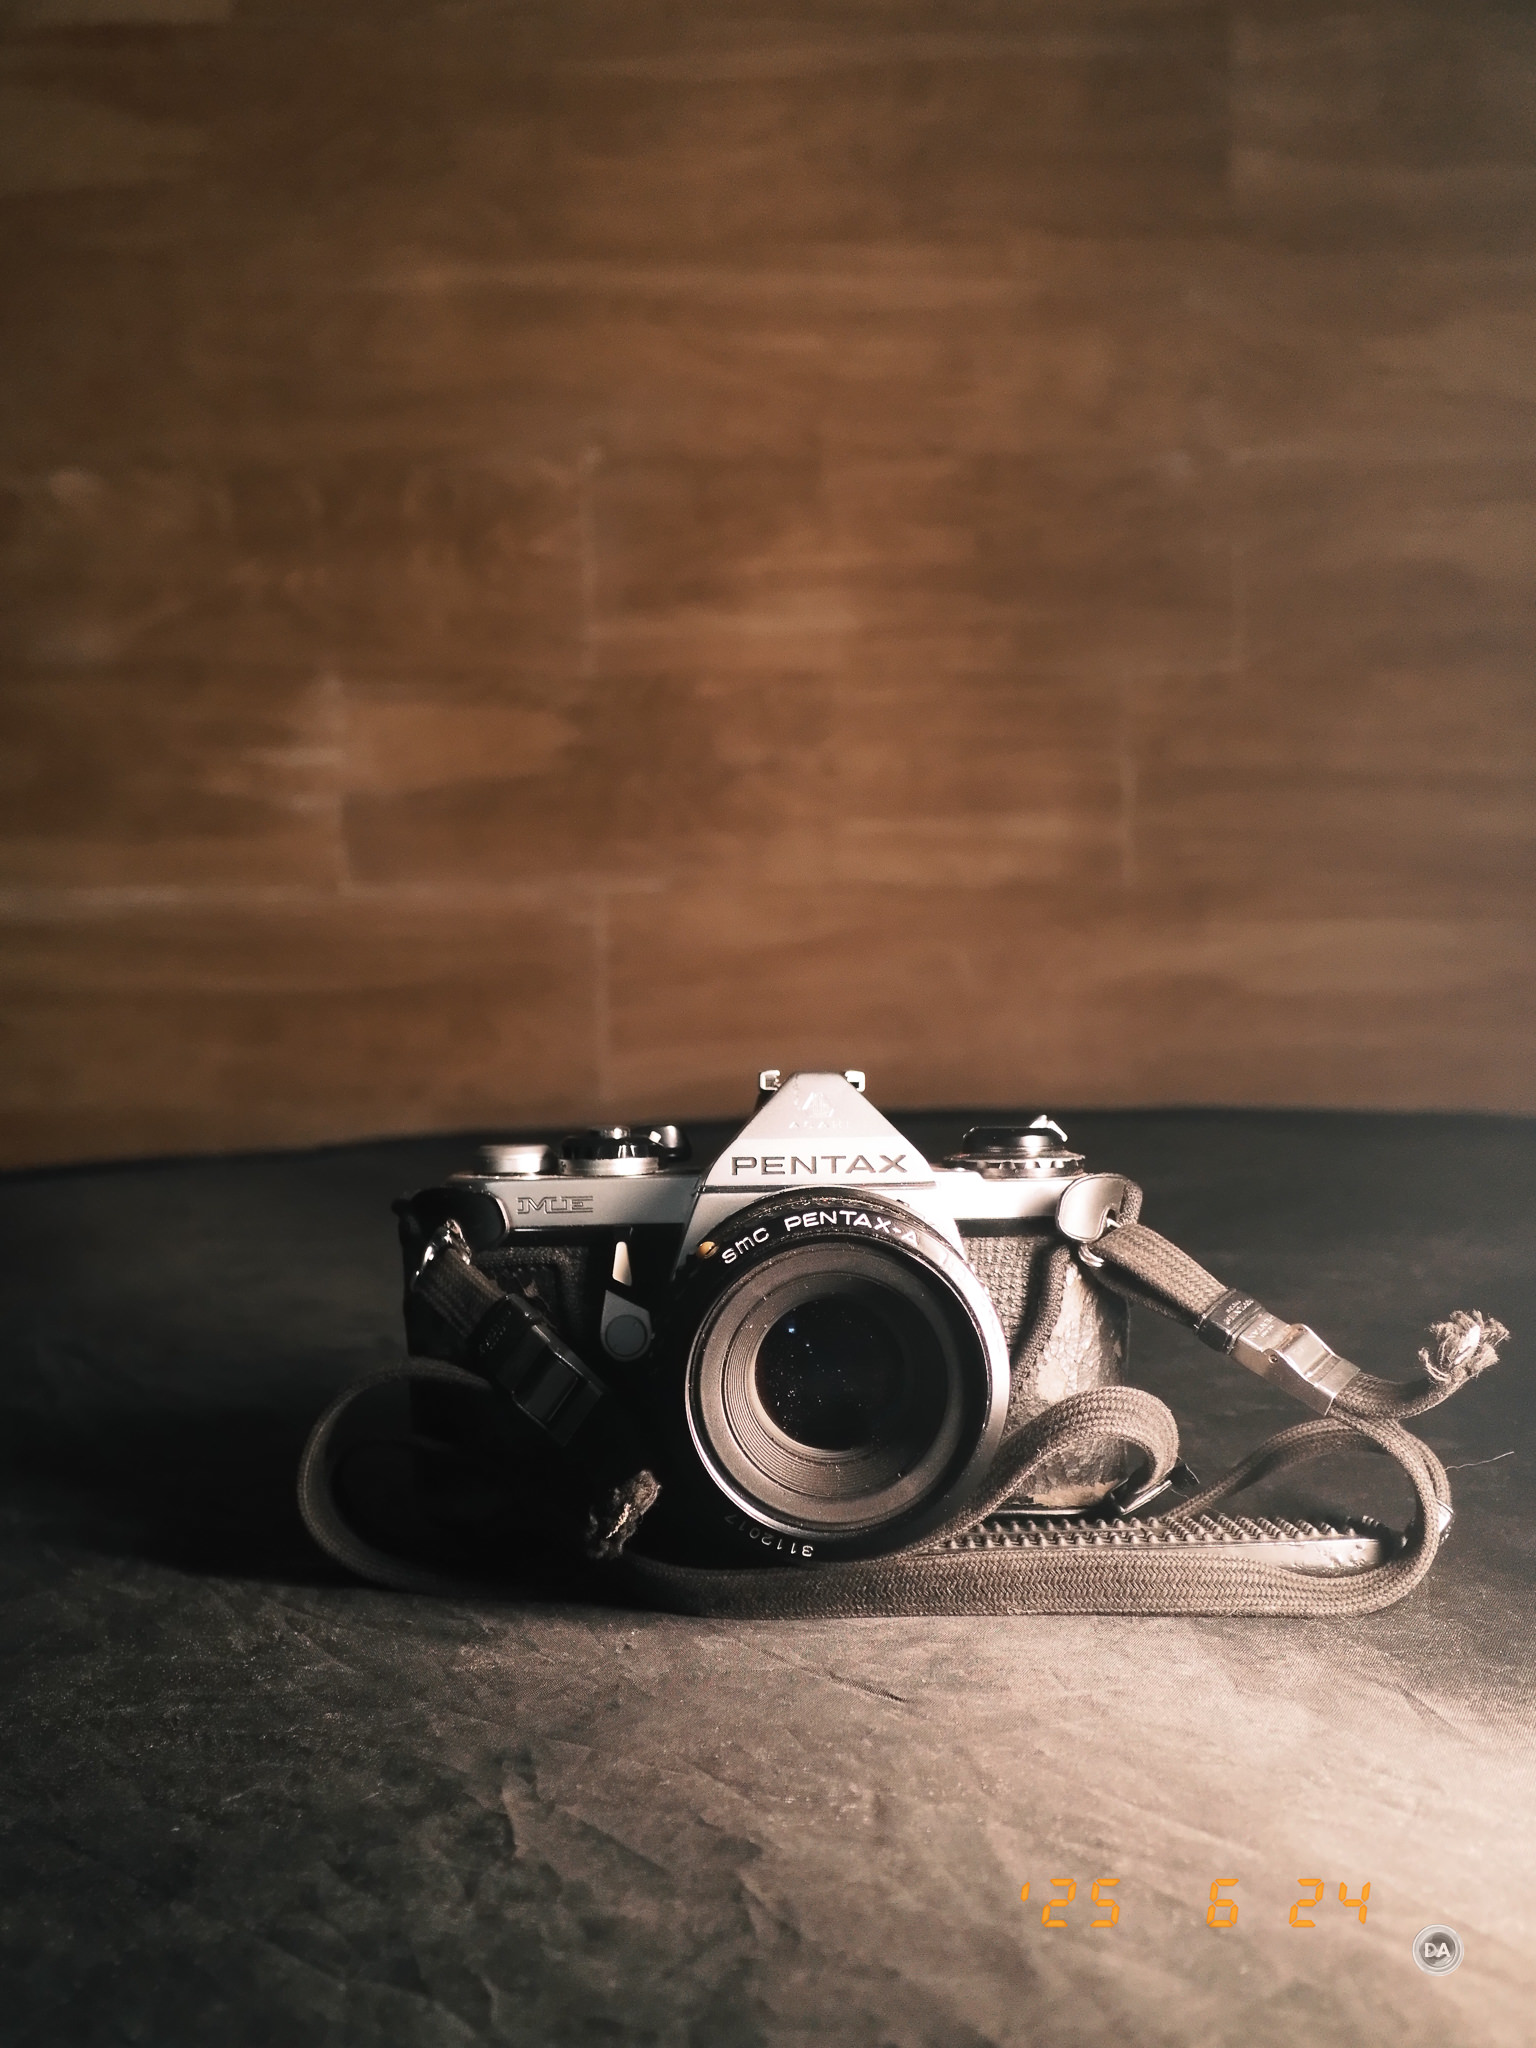
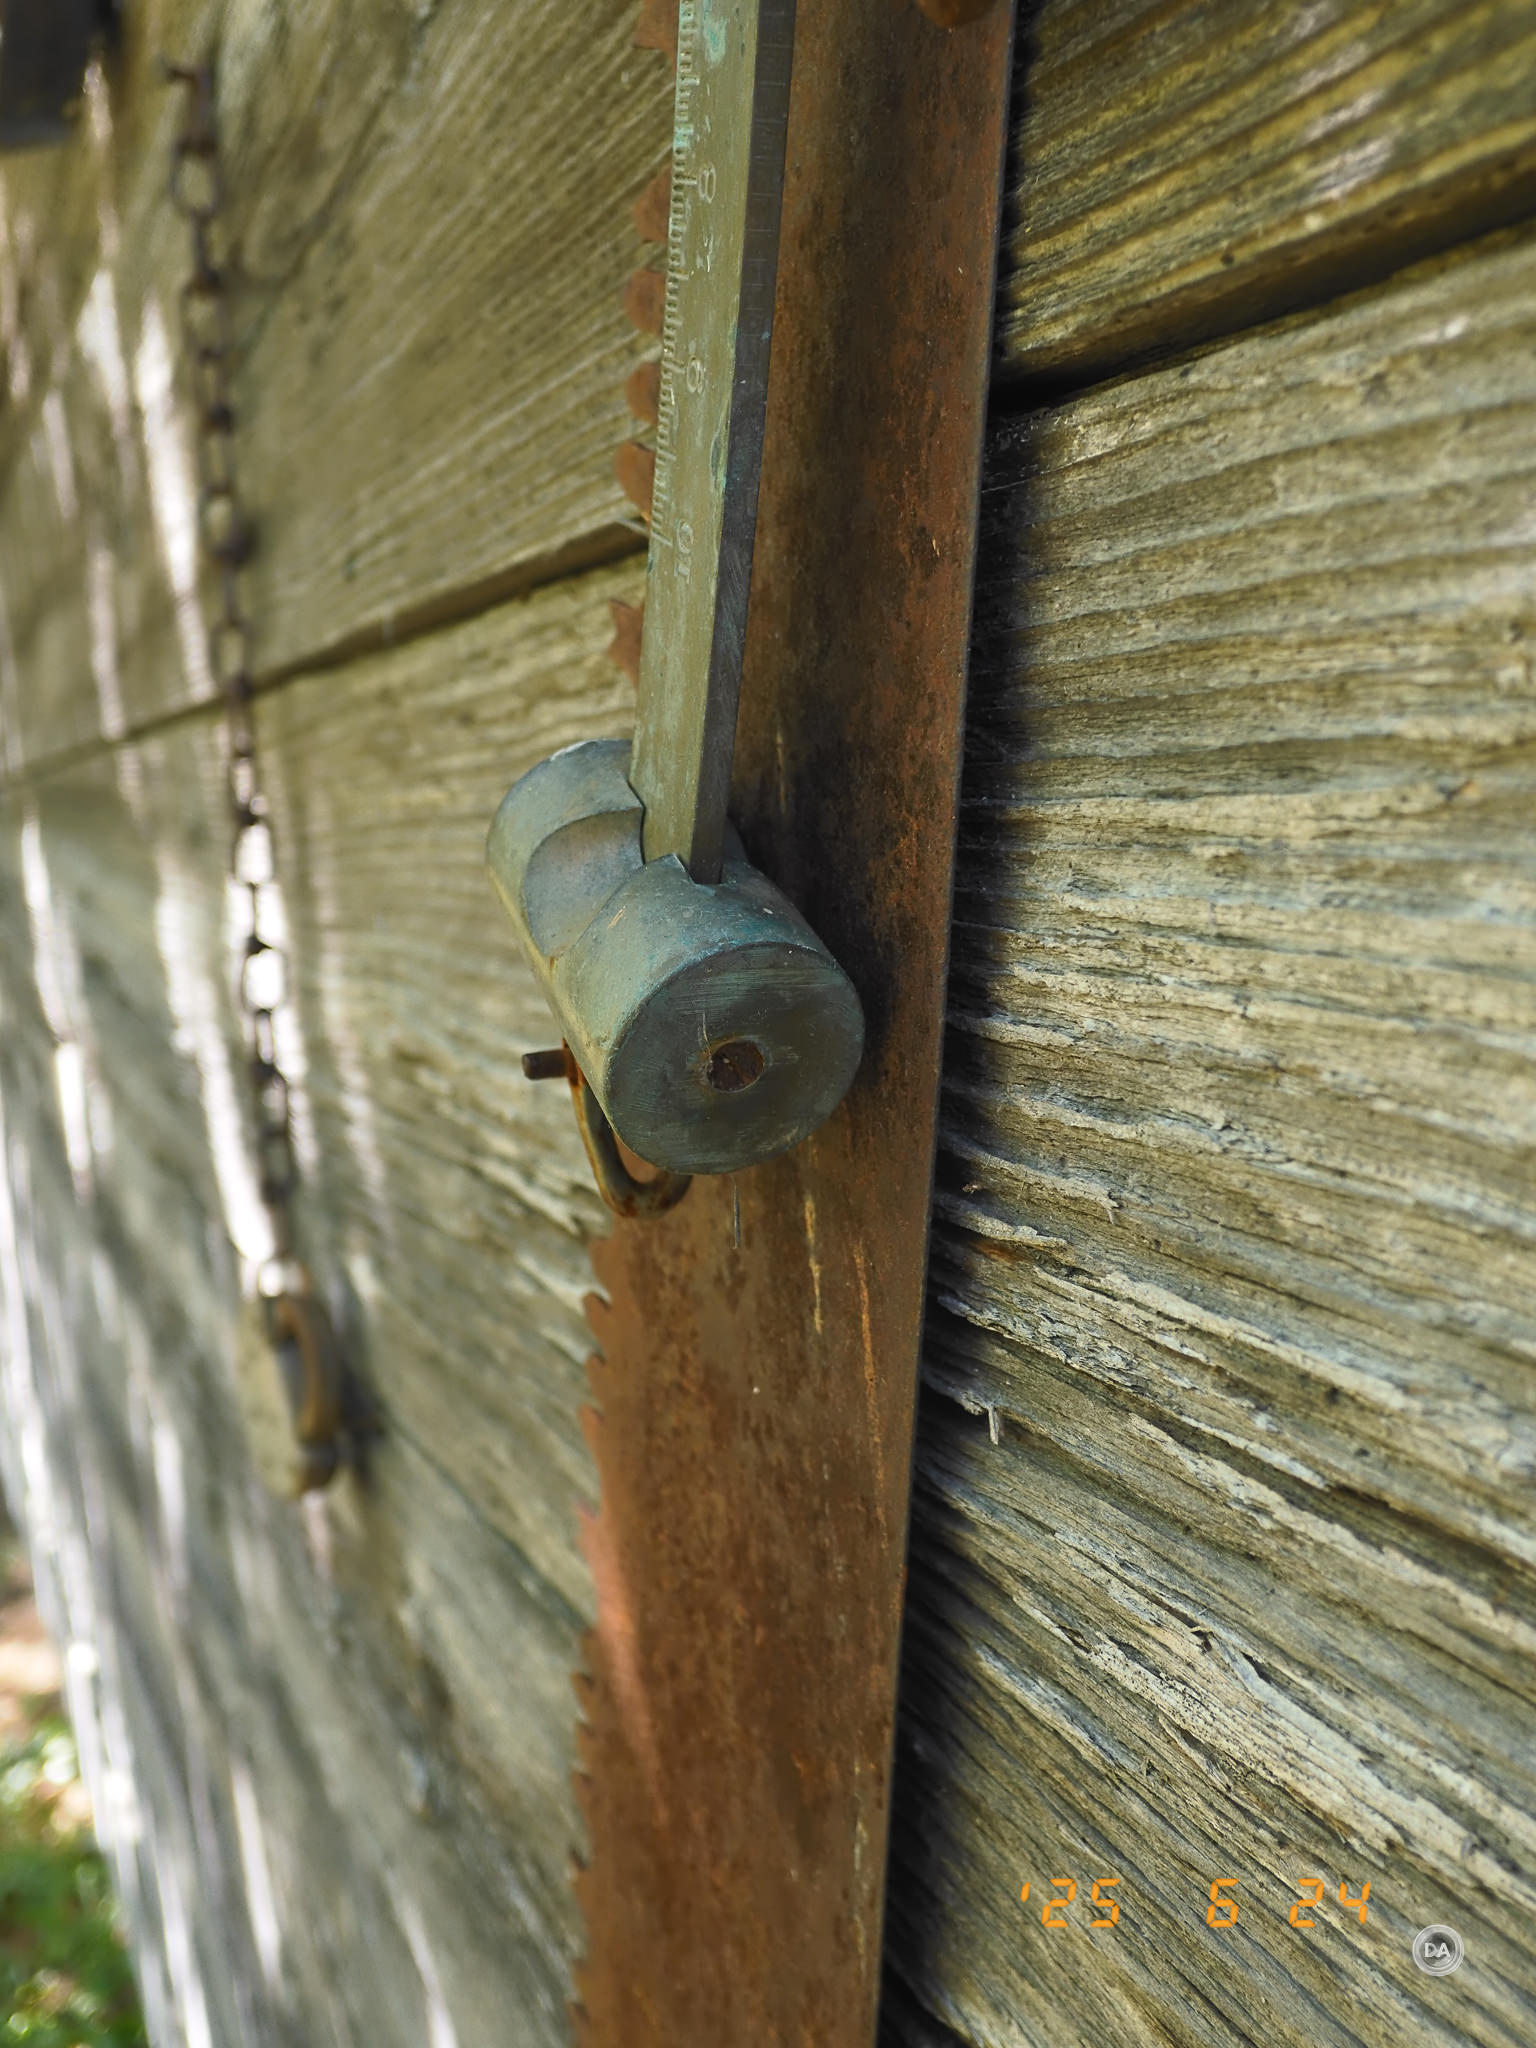
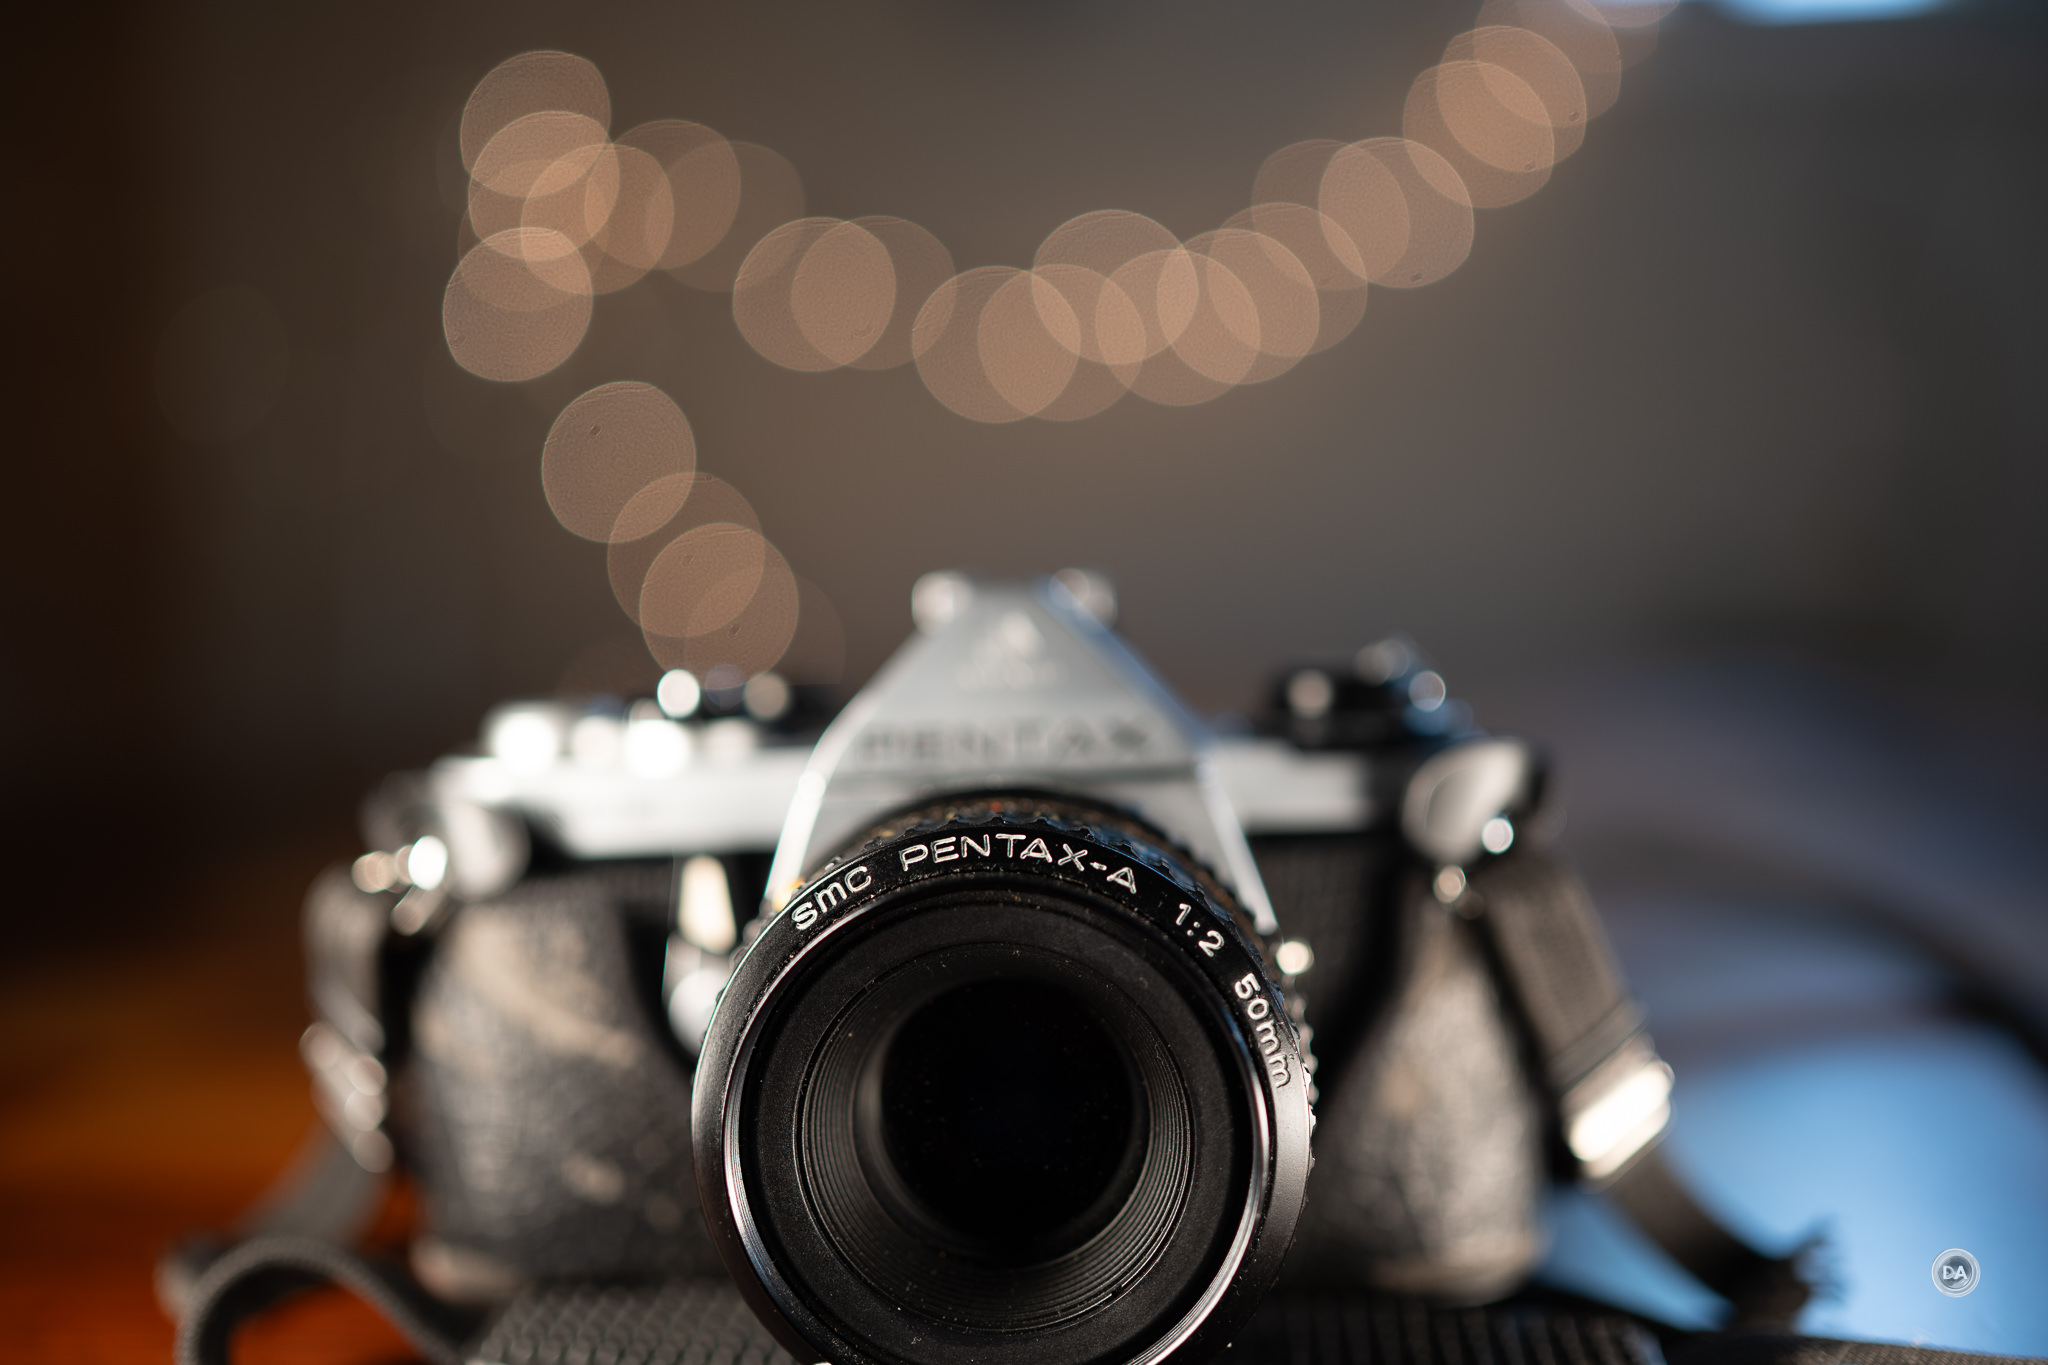
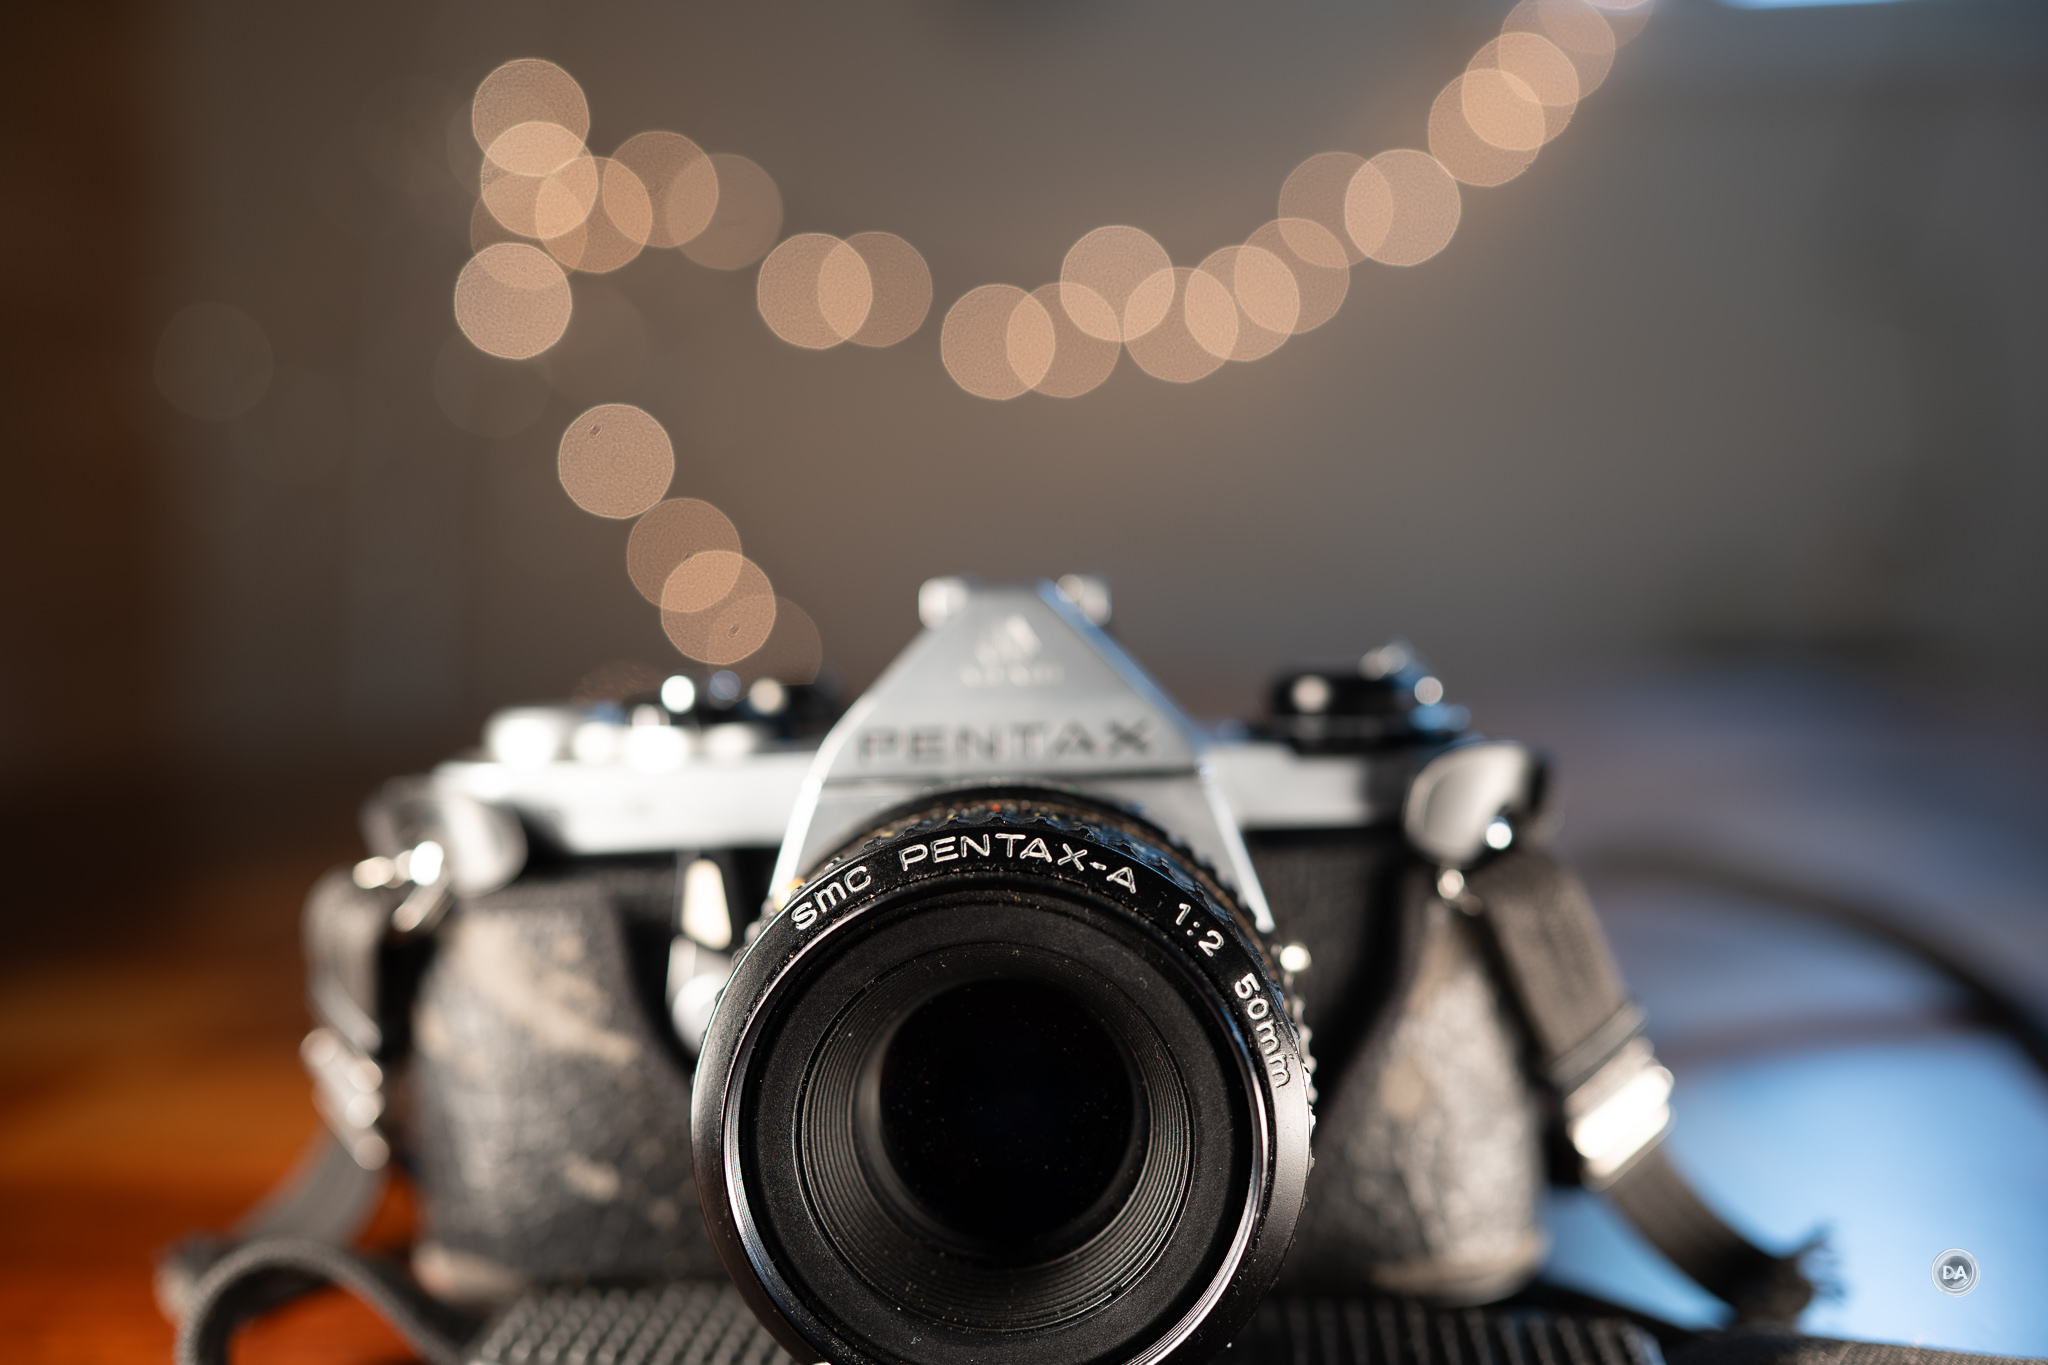
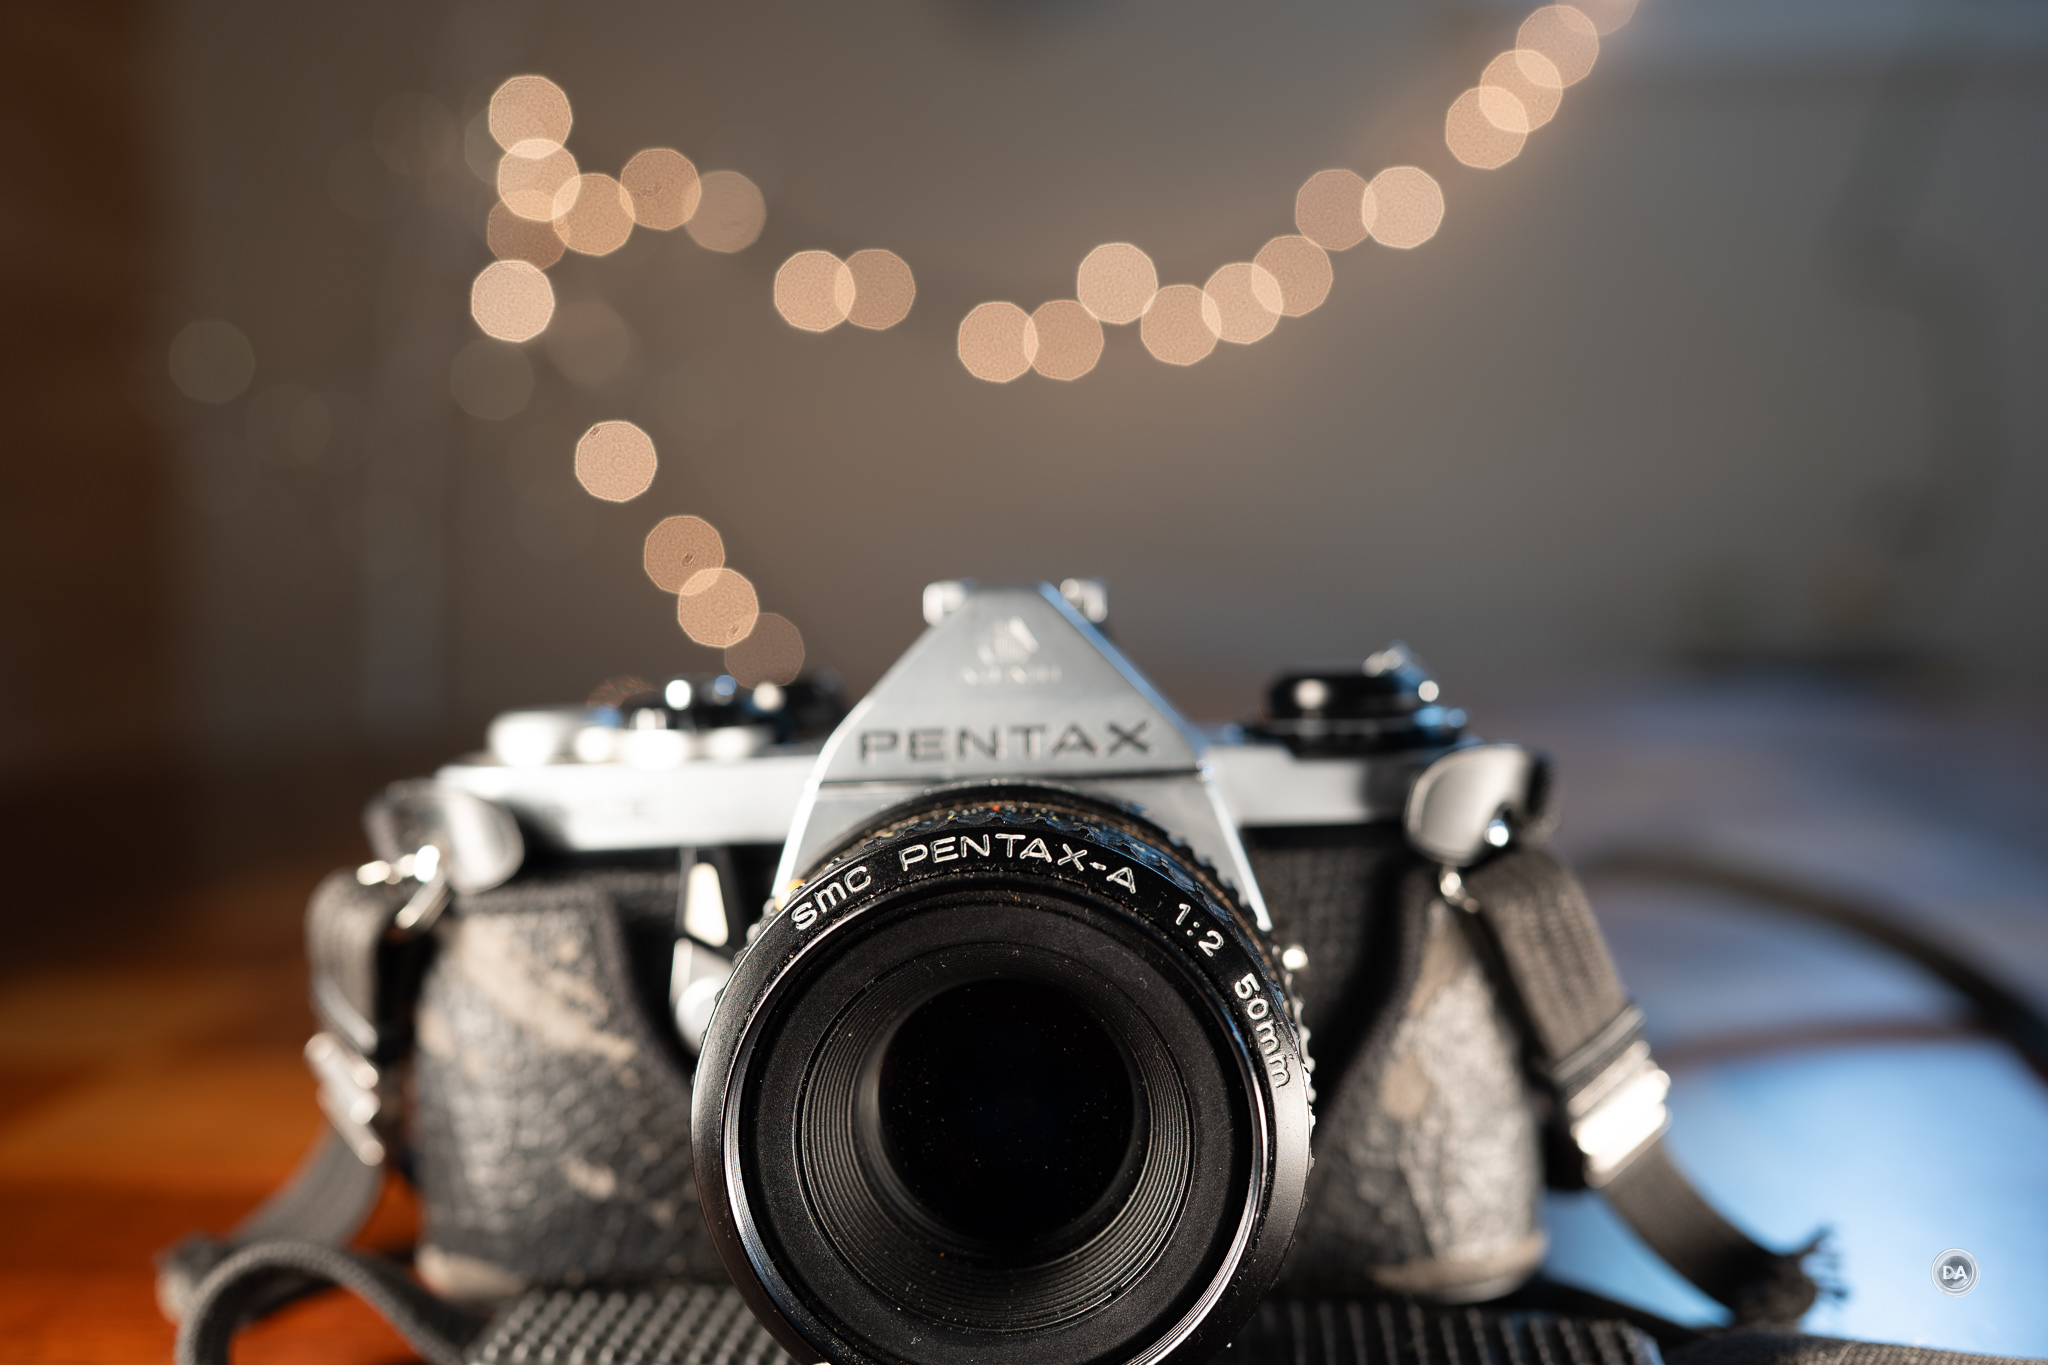
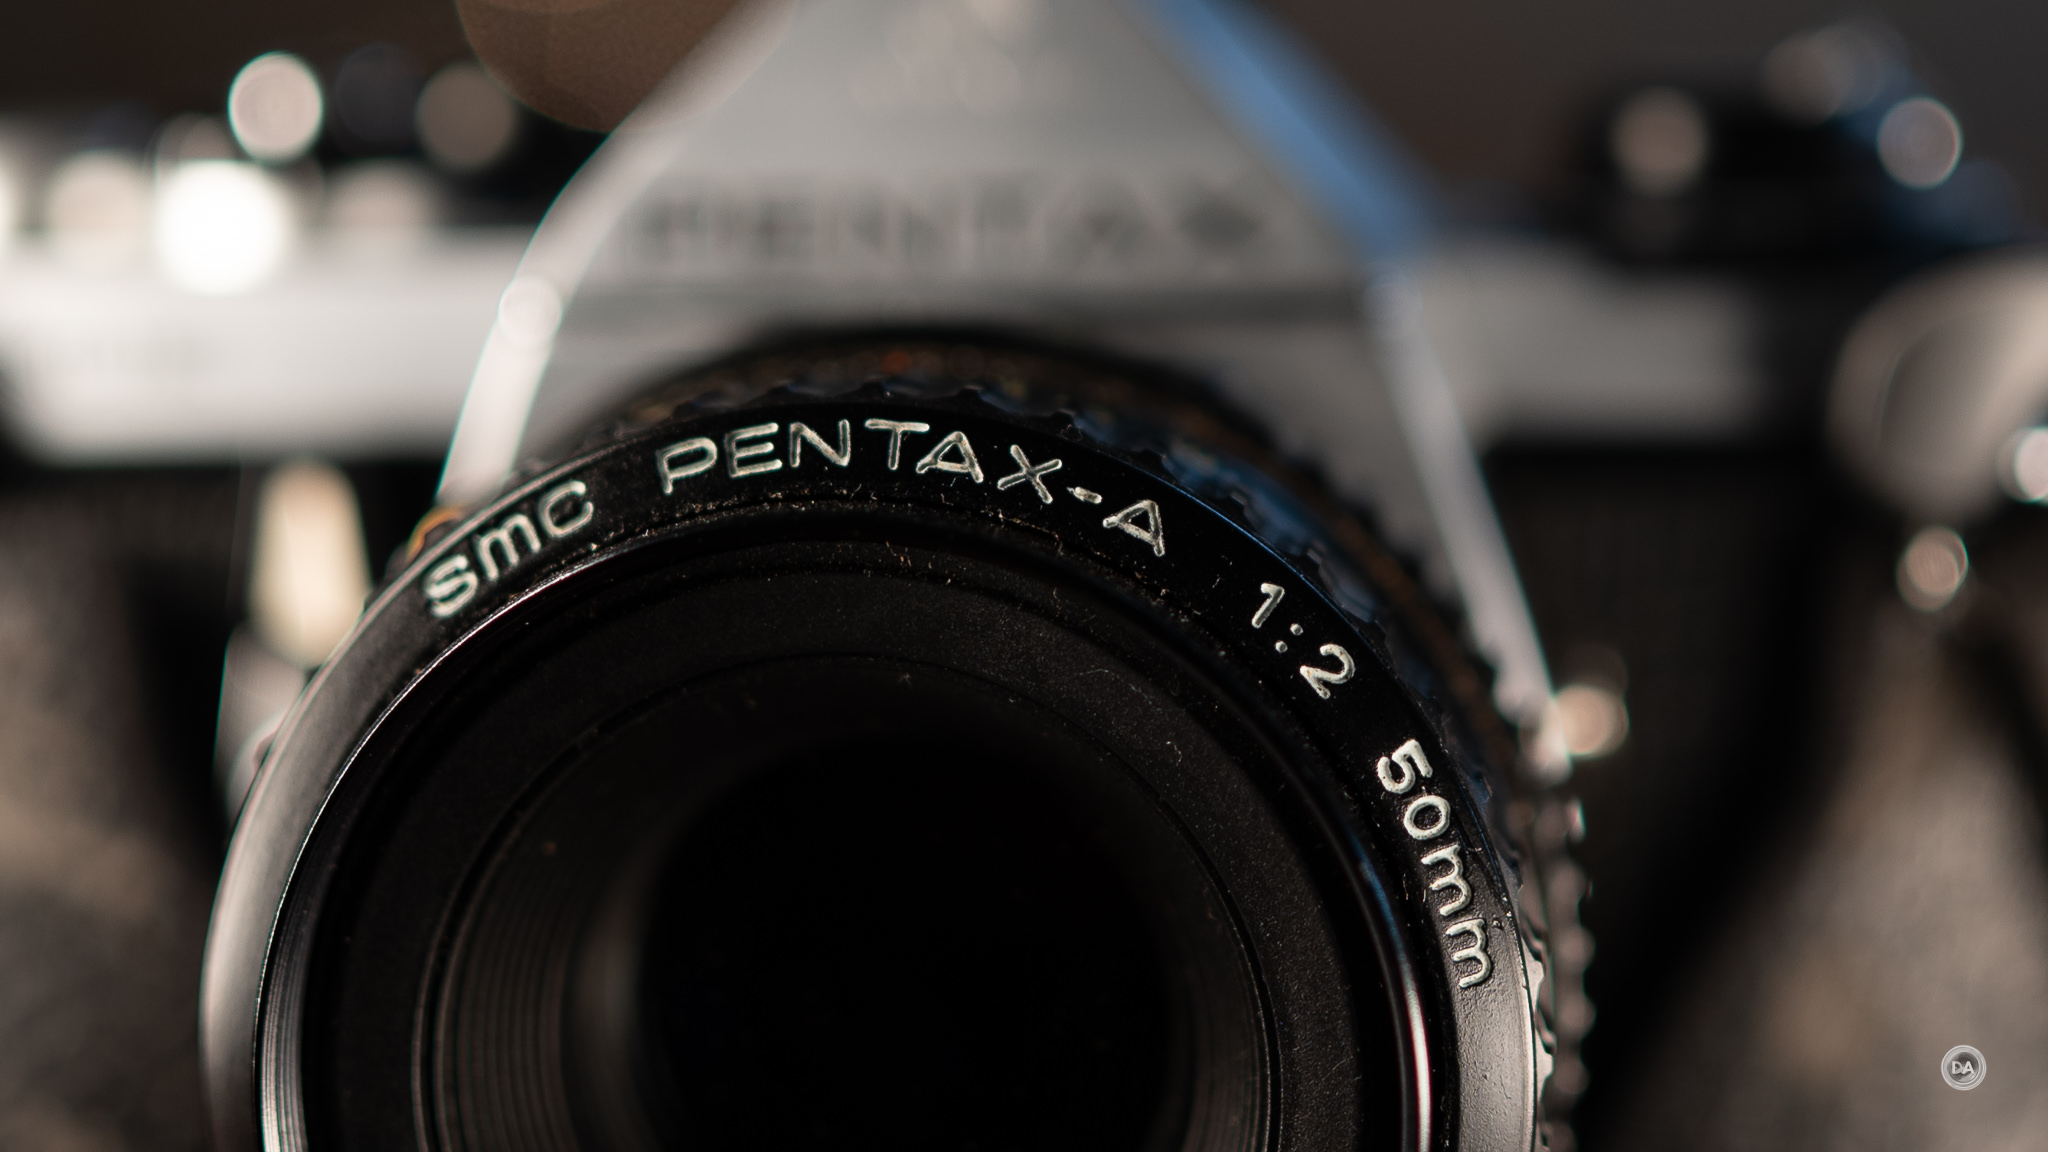
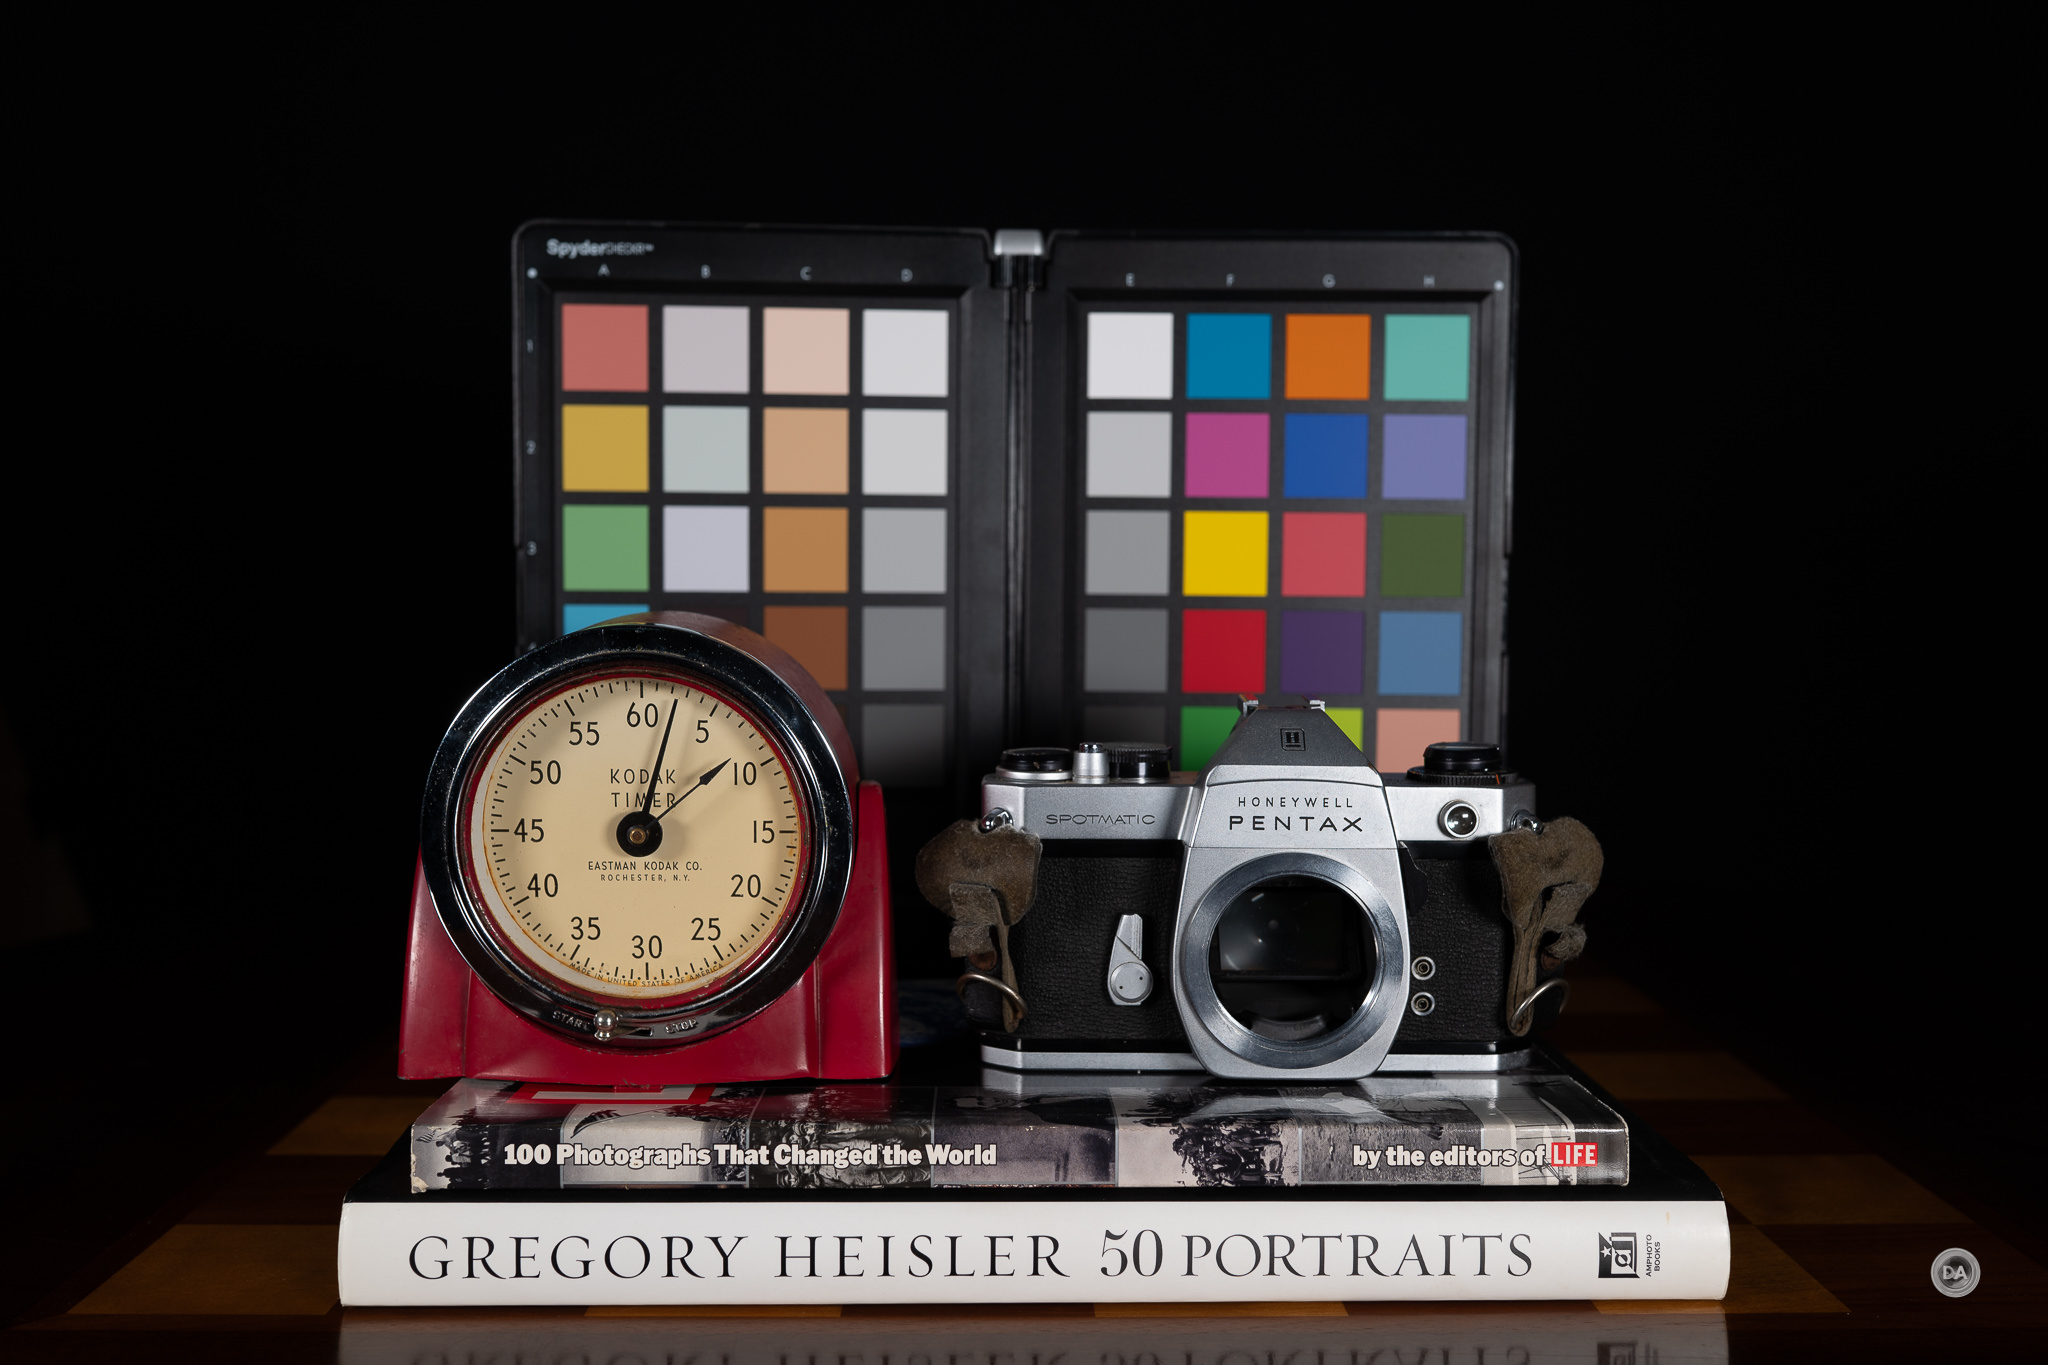
I like to use my Dad’s old SLR as a real world test, and I saw only a tiny amount of green fringing in a few spots.
No problems there.
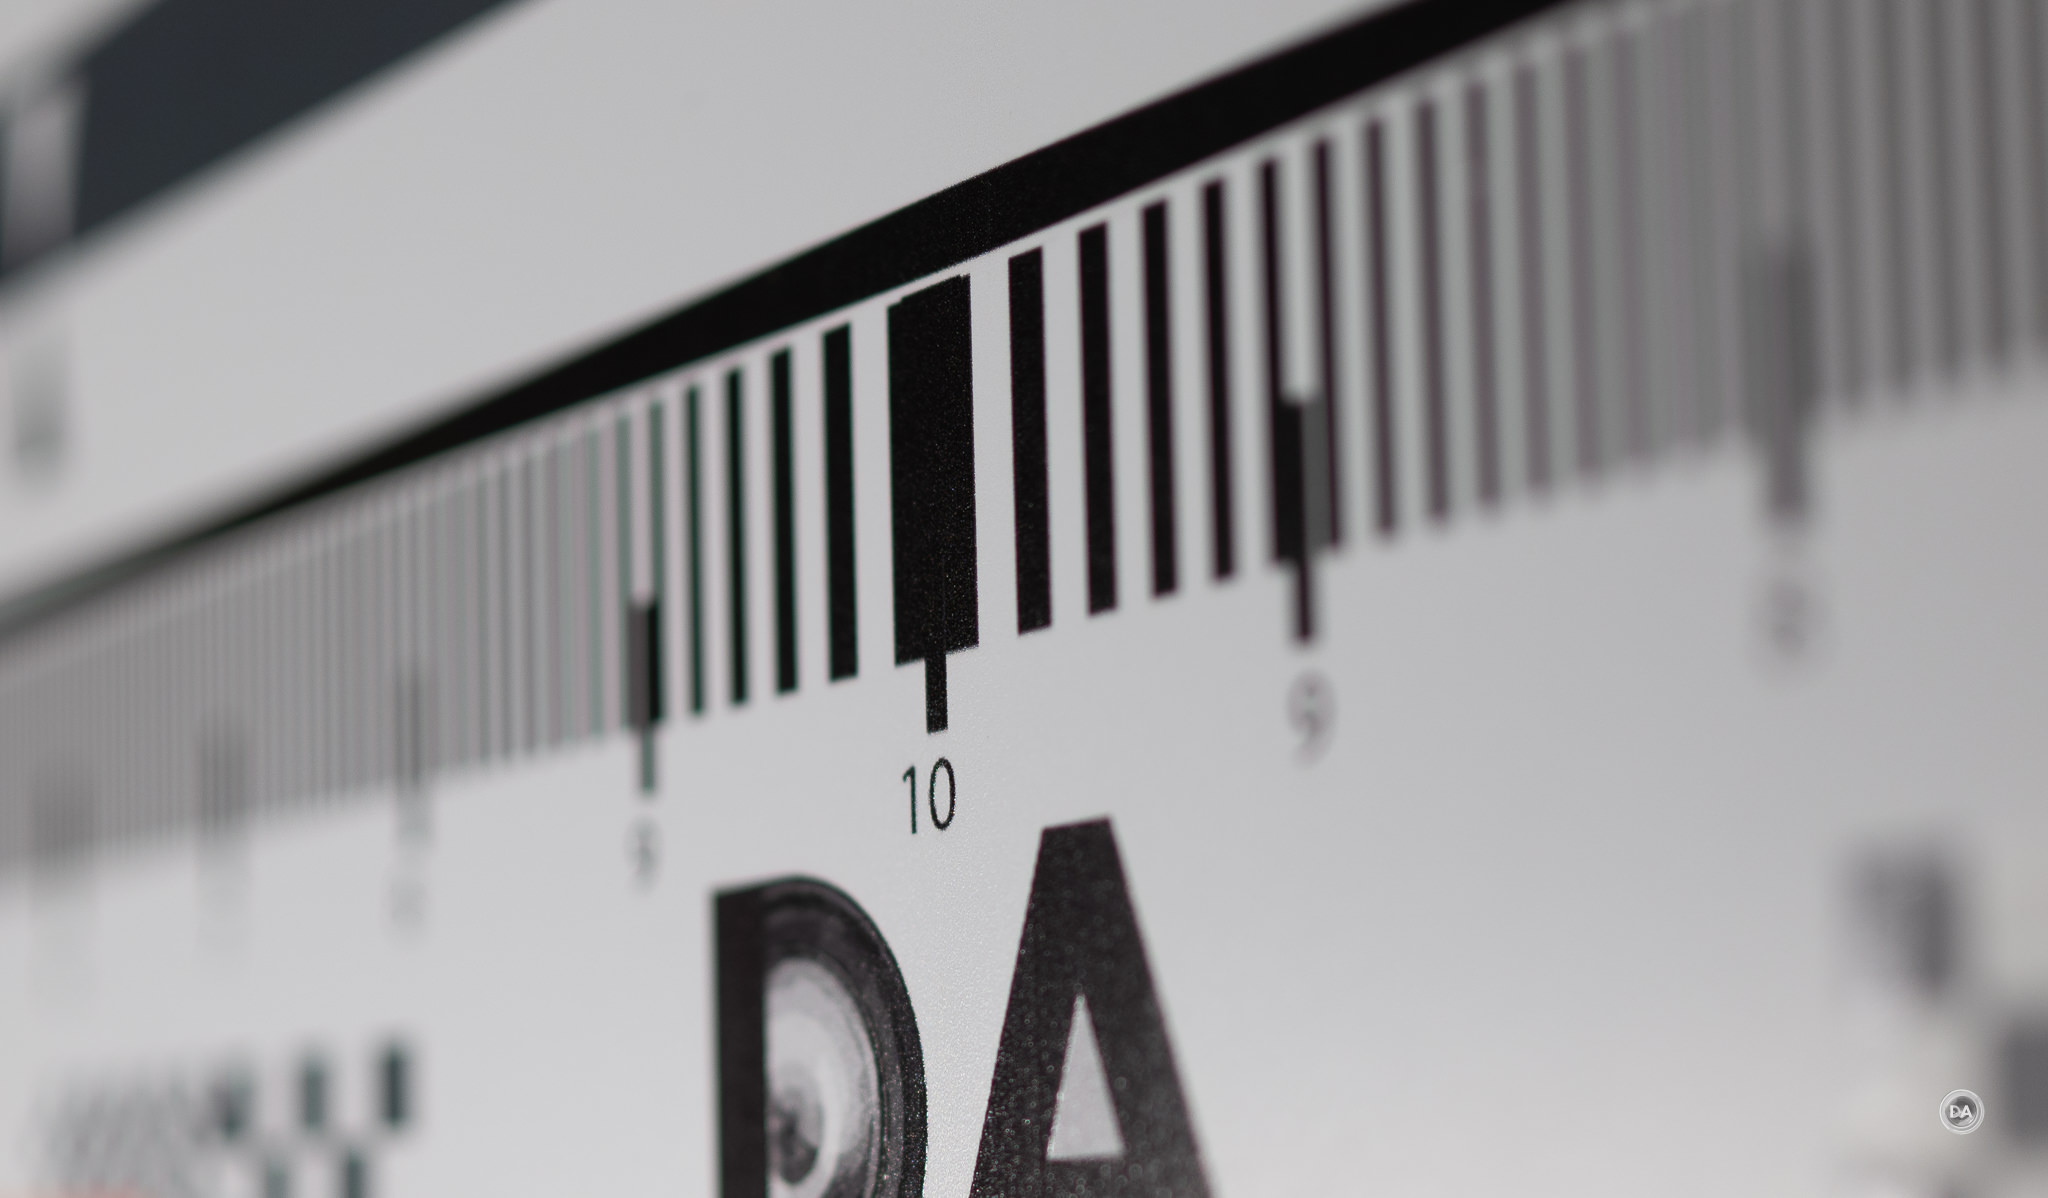
LaCA (lateral chromatic aberrations) typically show up along the edges of the frame with high contrast transition points. I saw nothing but clean transitions on either side of the black and white transitions.
Outside of the vignette, that’s a great start to our optical examination.
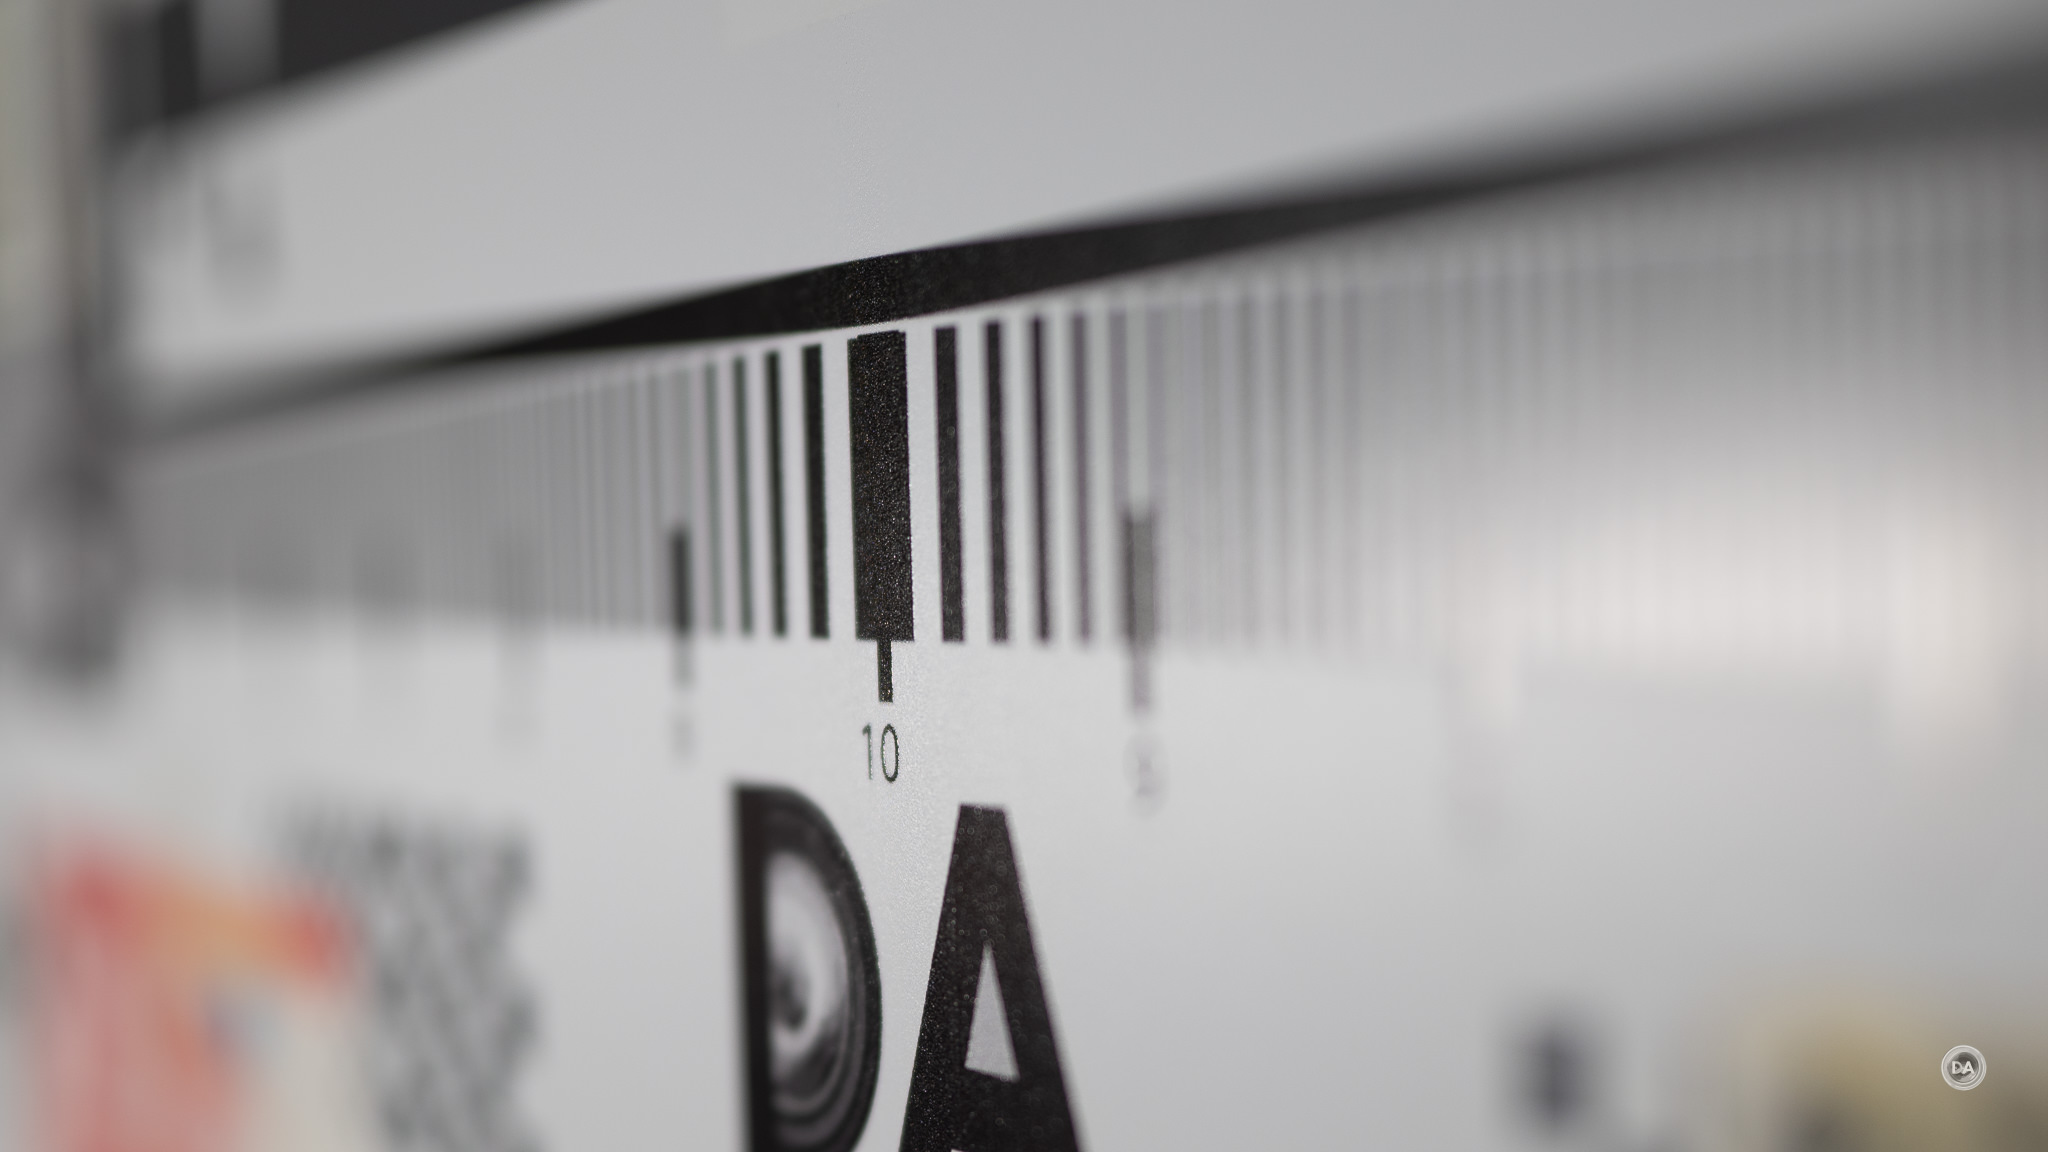
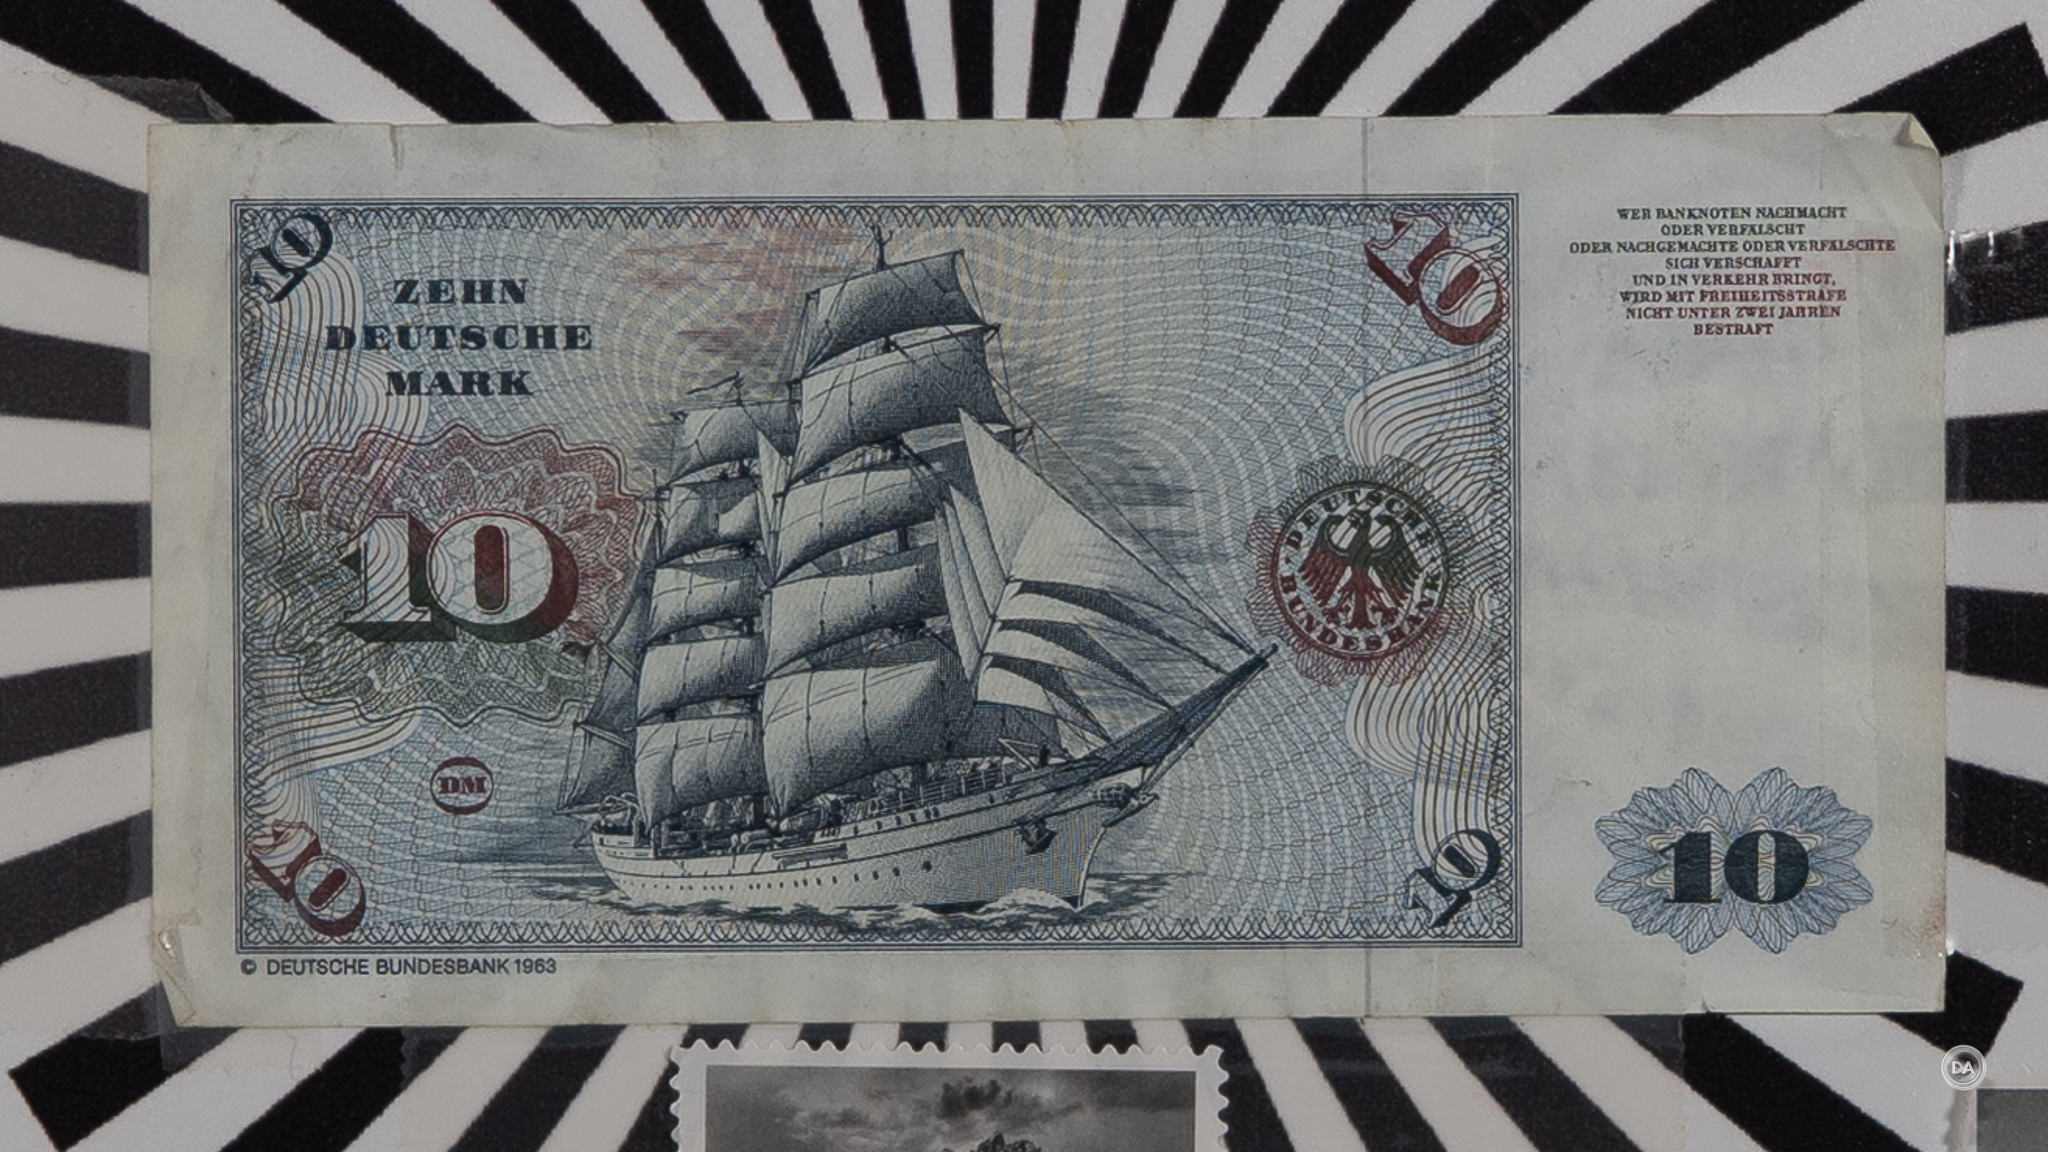
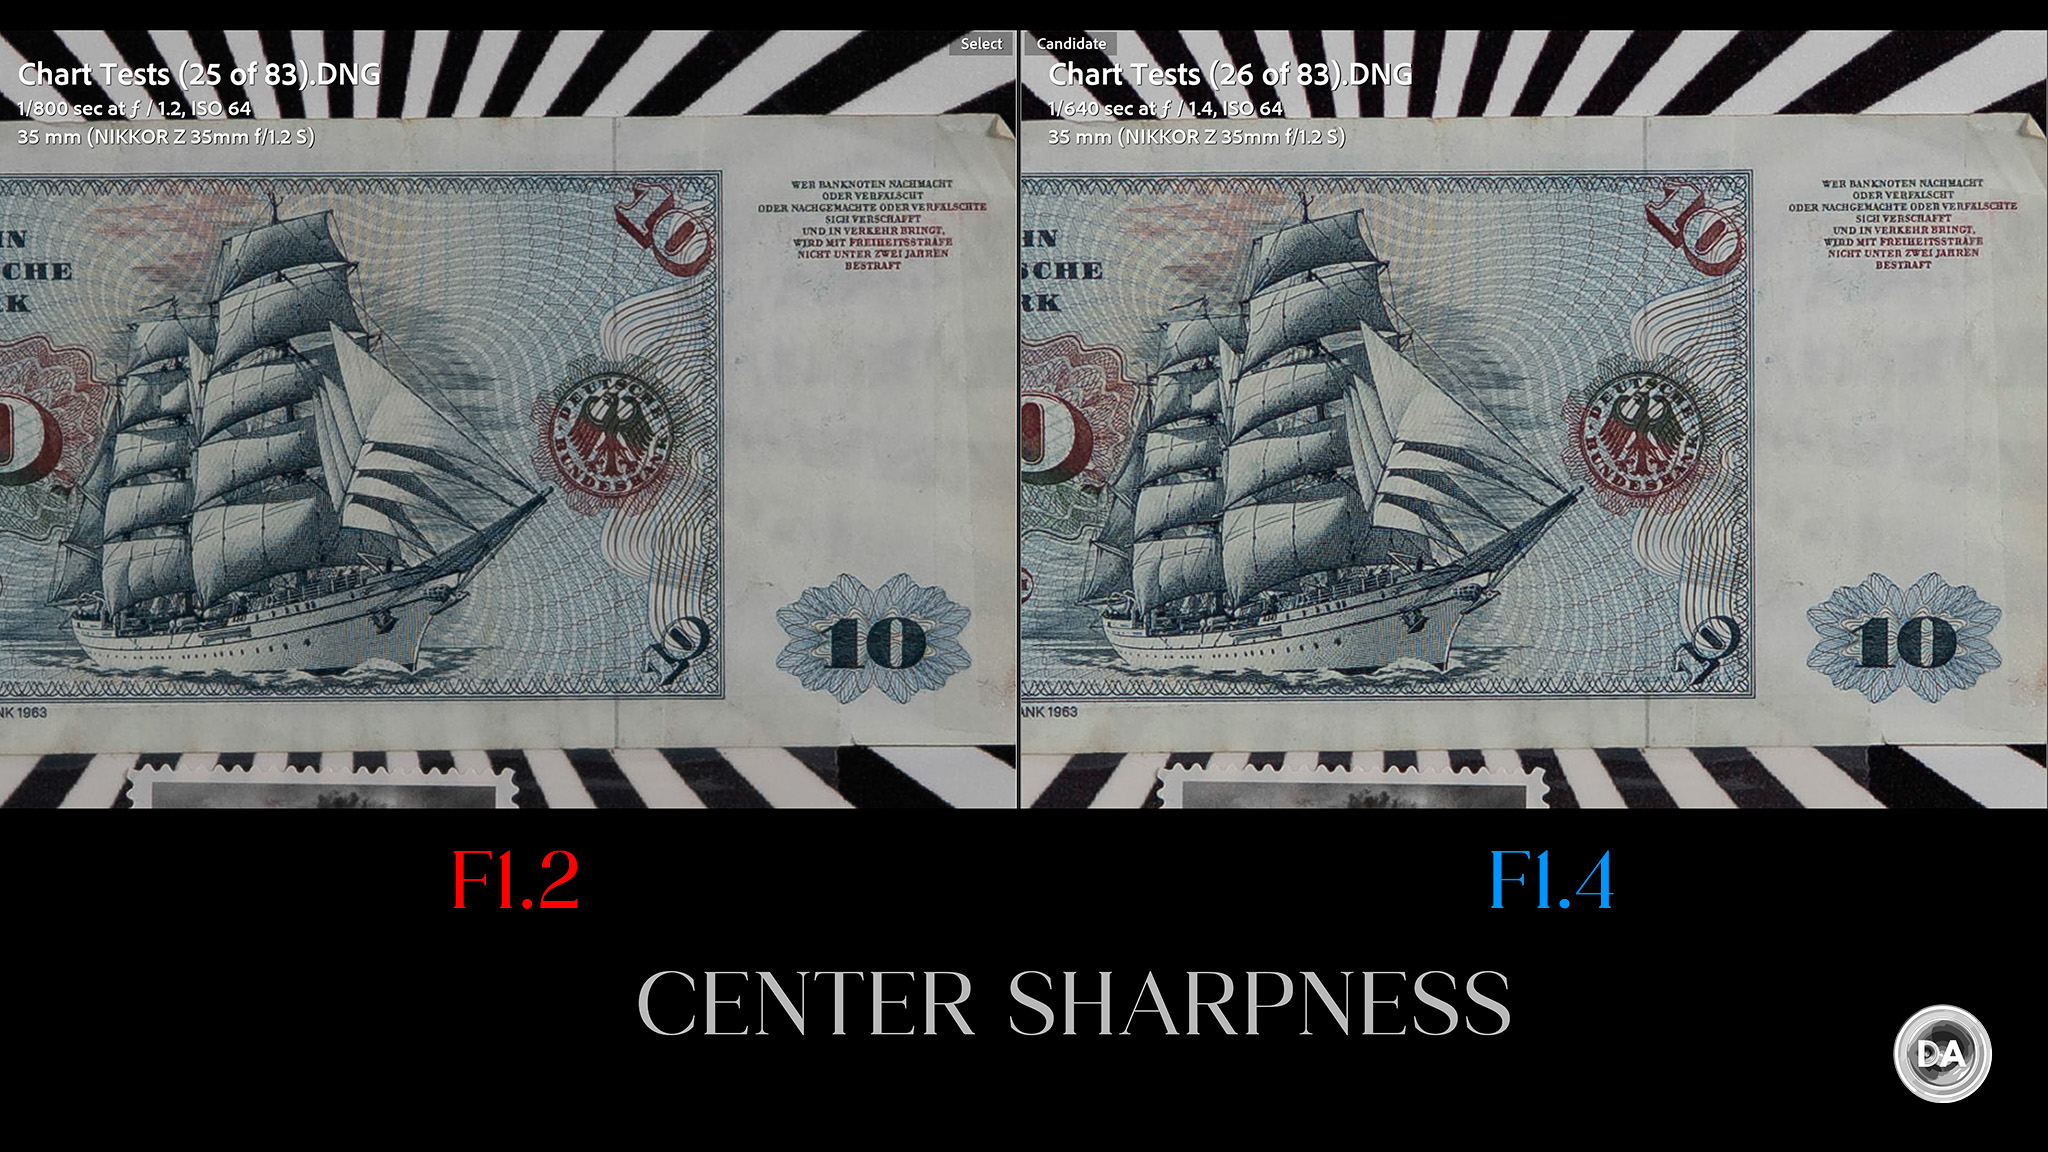
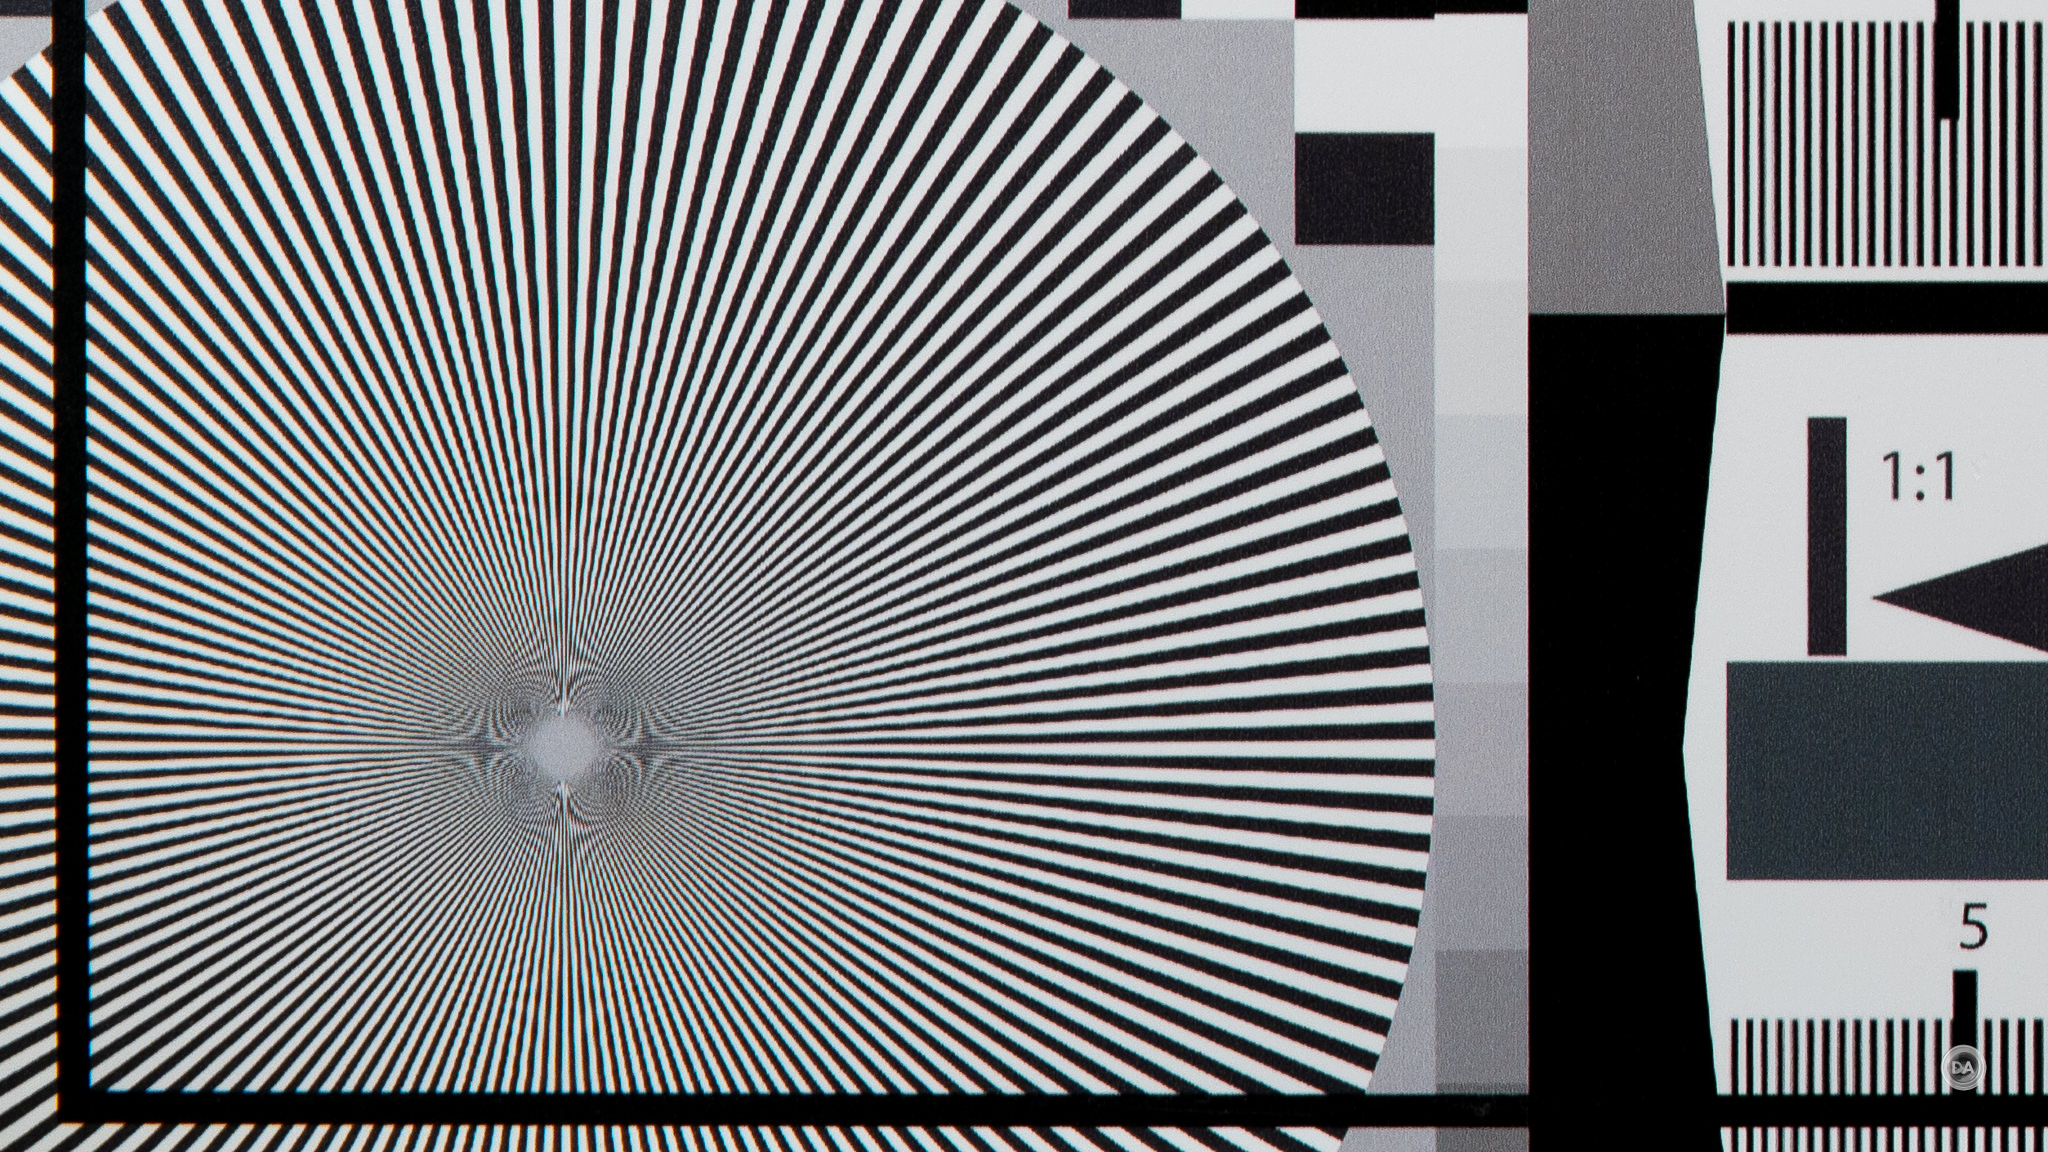
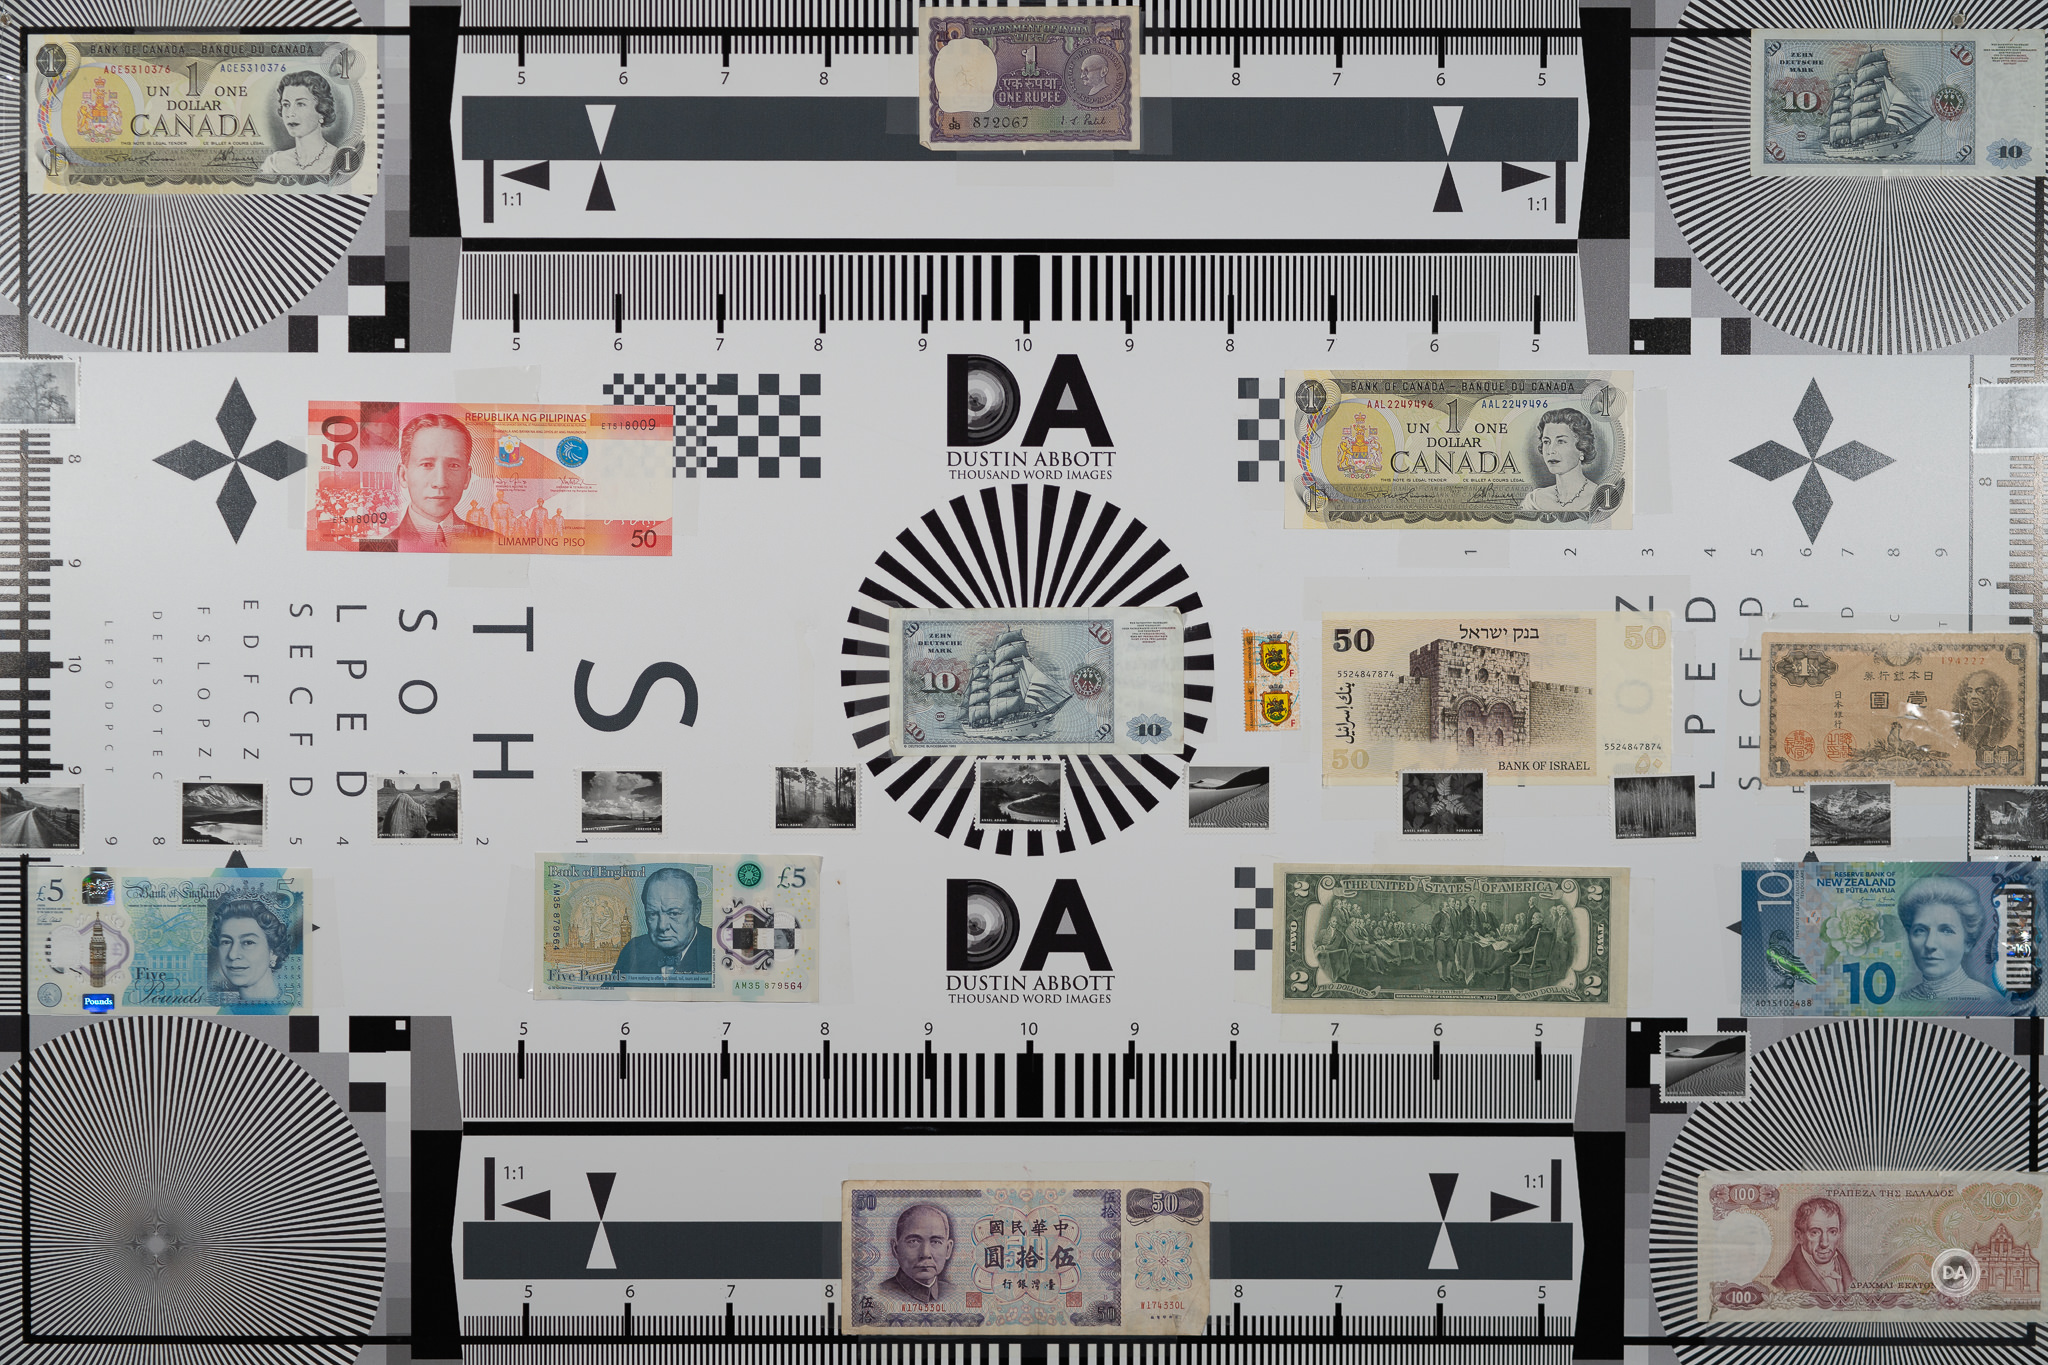
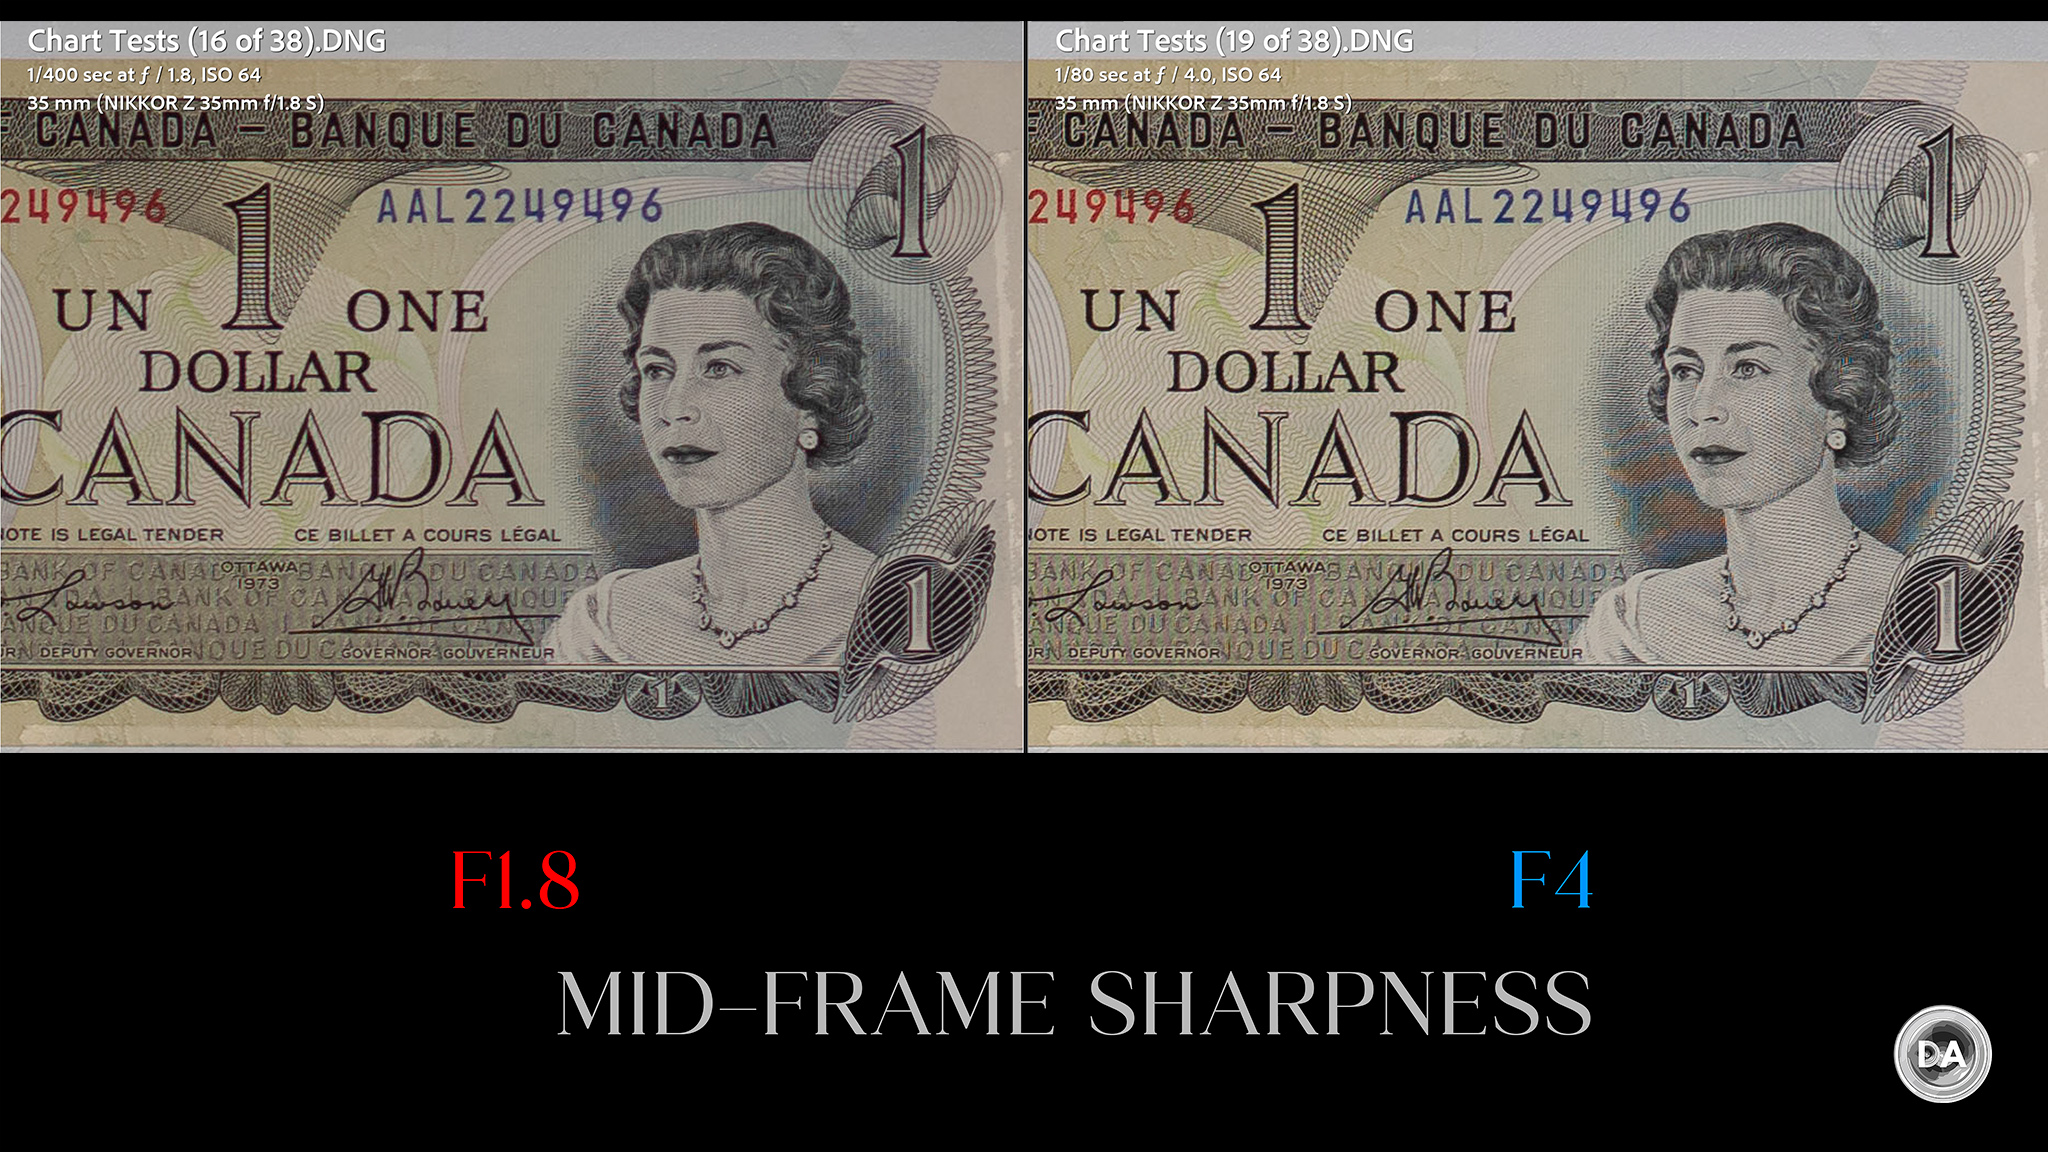
We’ll move on to inspecting our test chart. This test has been done on a 45MP Nikon Z8 sensor. I use a high end tripod and two second camera delay to ensure vibration doesn’t affect images. Here’s a look at the test chart that we will examine at high magnification:
If we take a look at crops (at 200%) at F1.2 from the center, mid-frame, and lower right corner, we find that center and mid-frame performance is exceptionally good, and that the corners, while dark, are good until the last little bit.
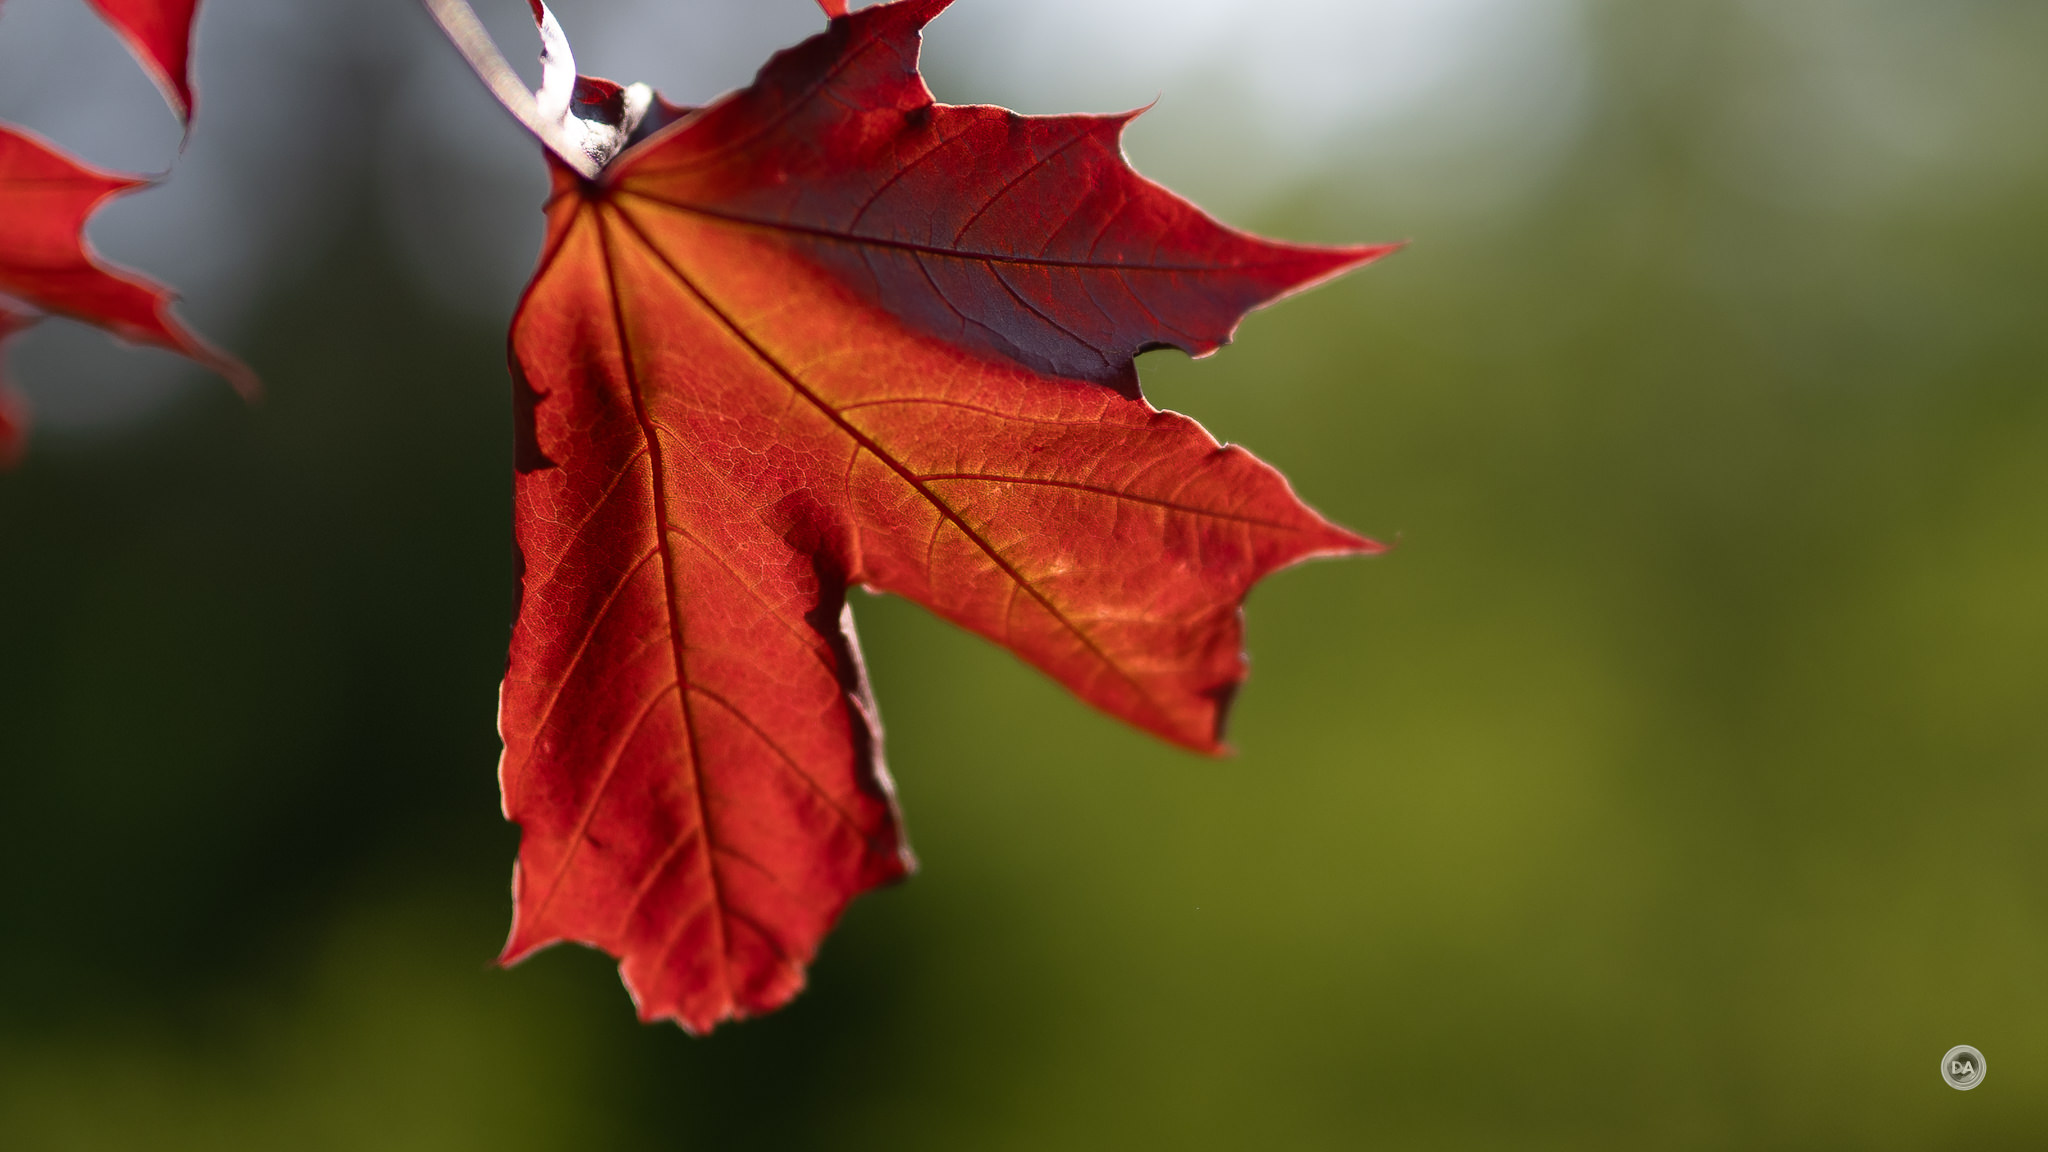
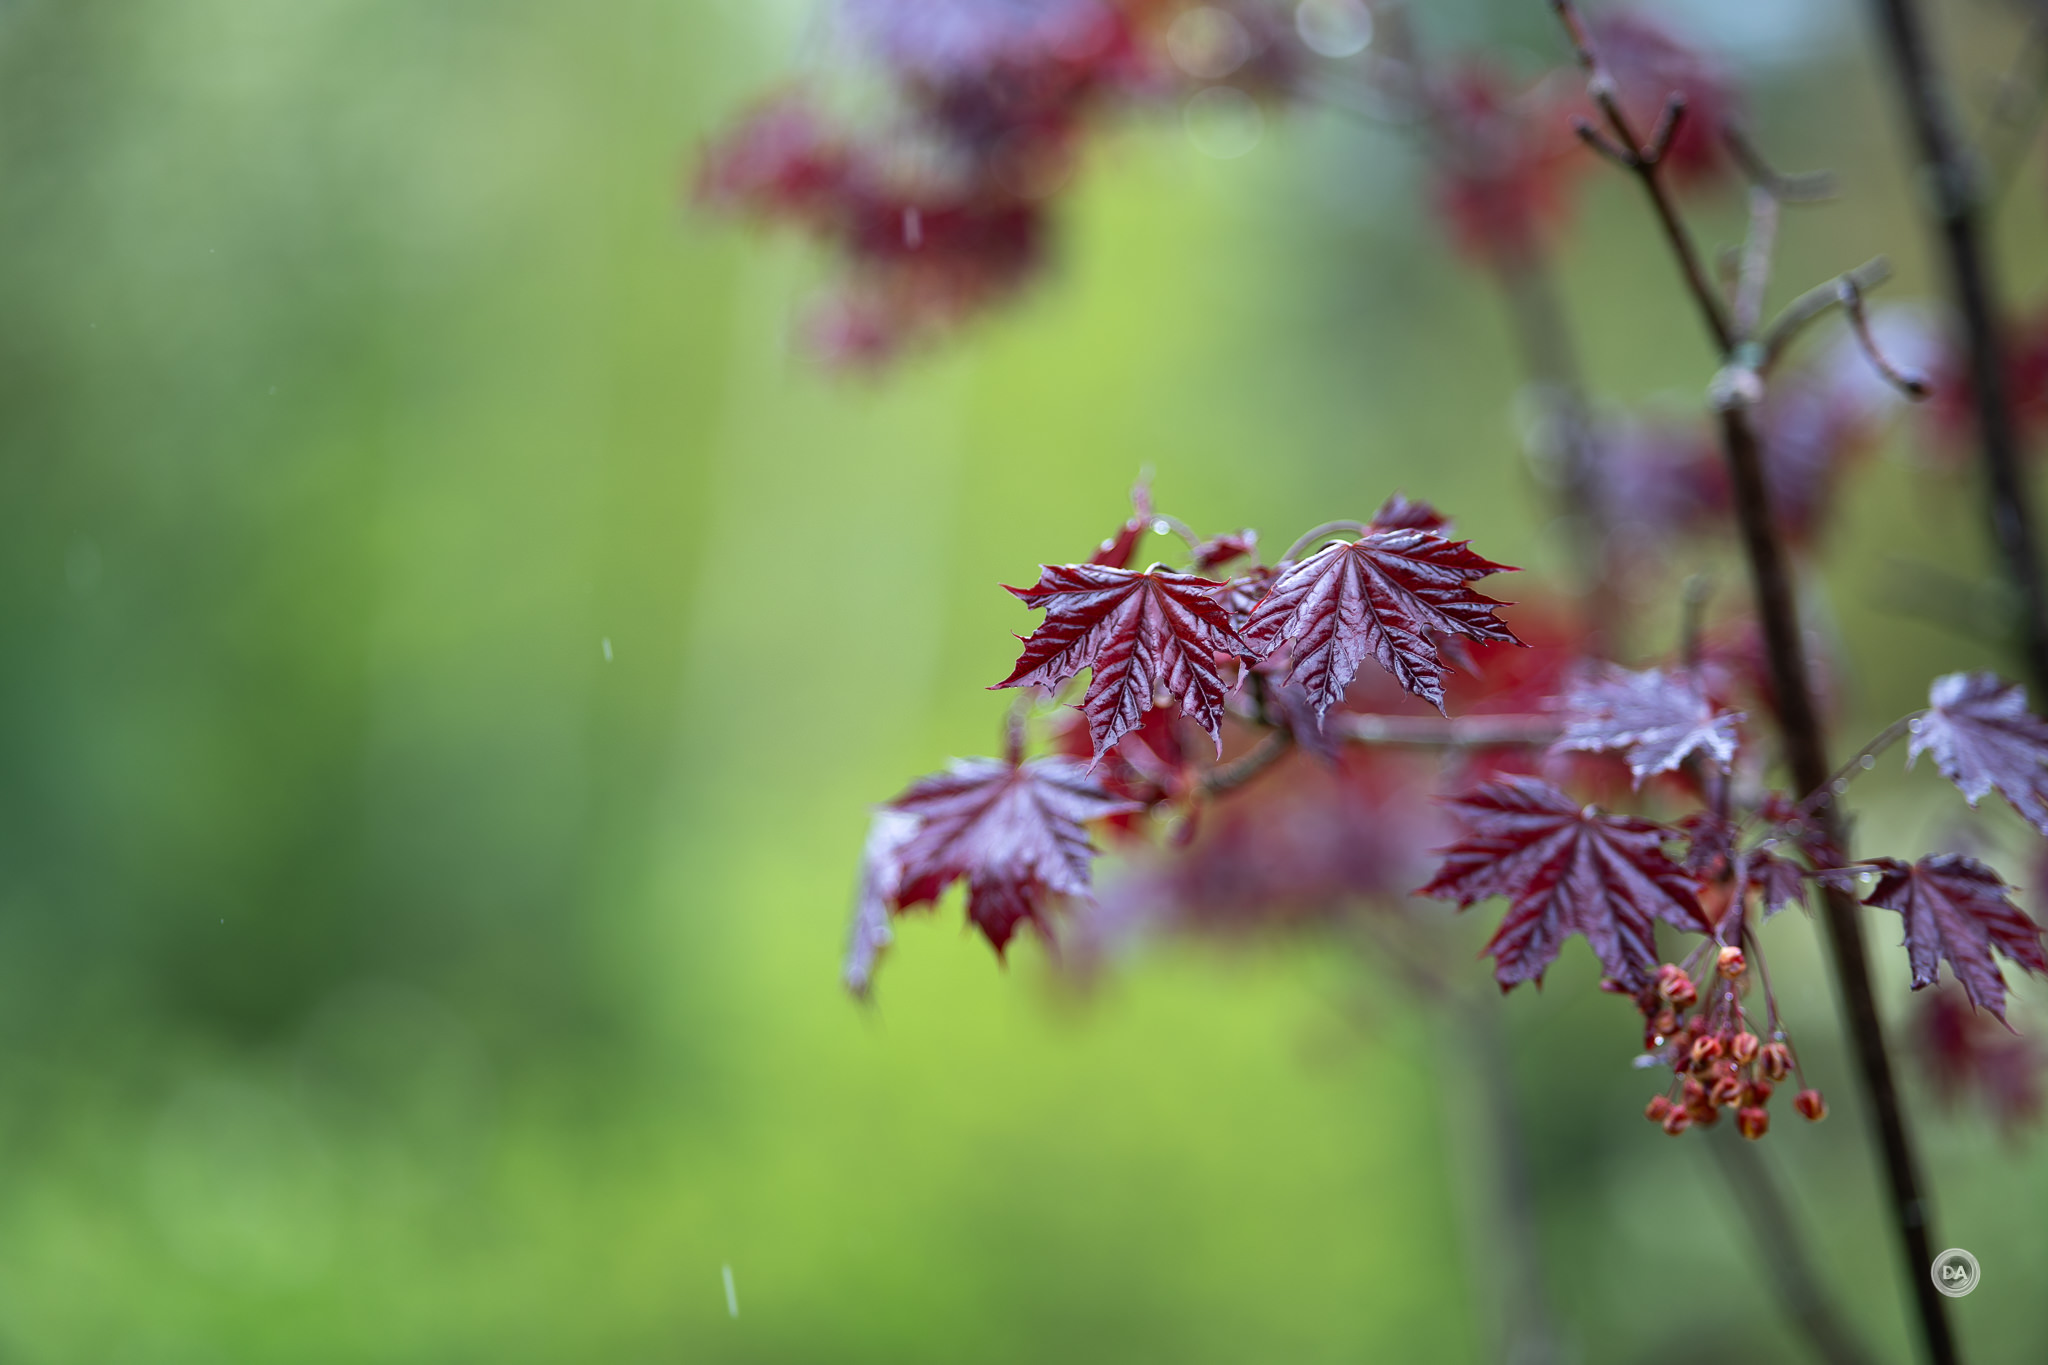
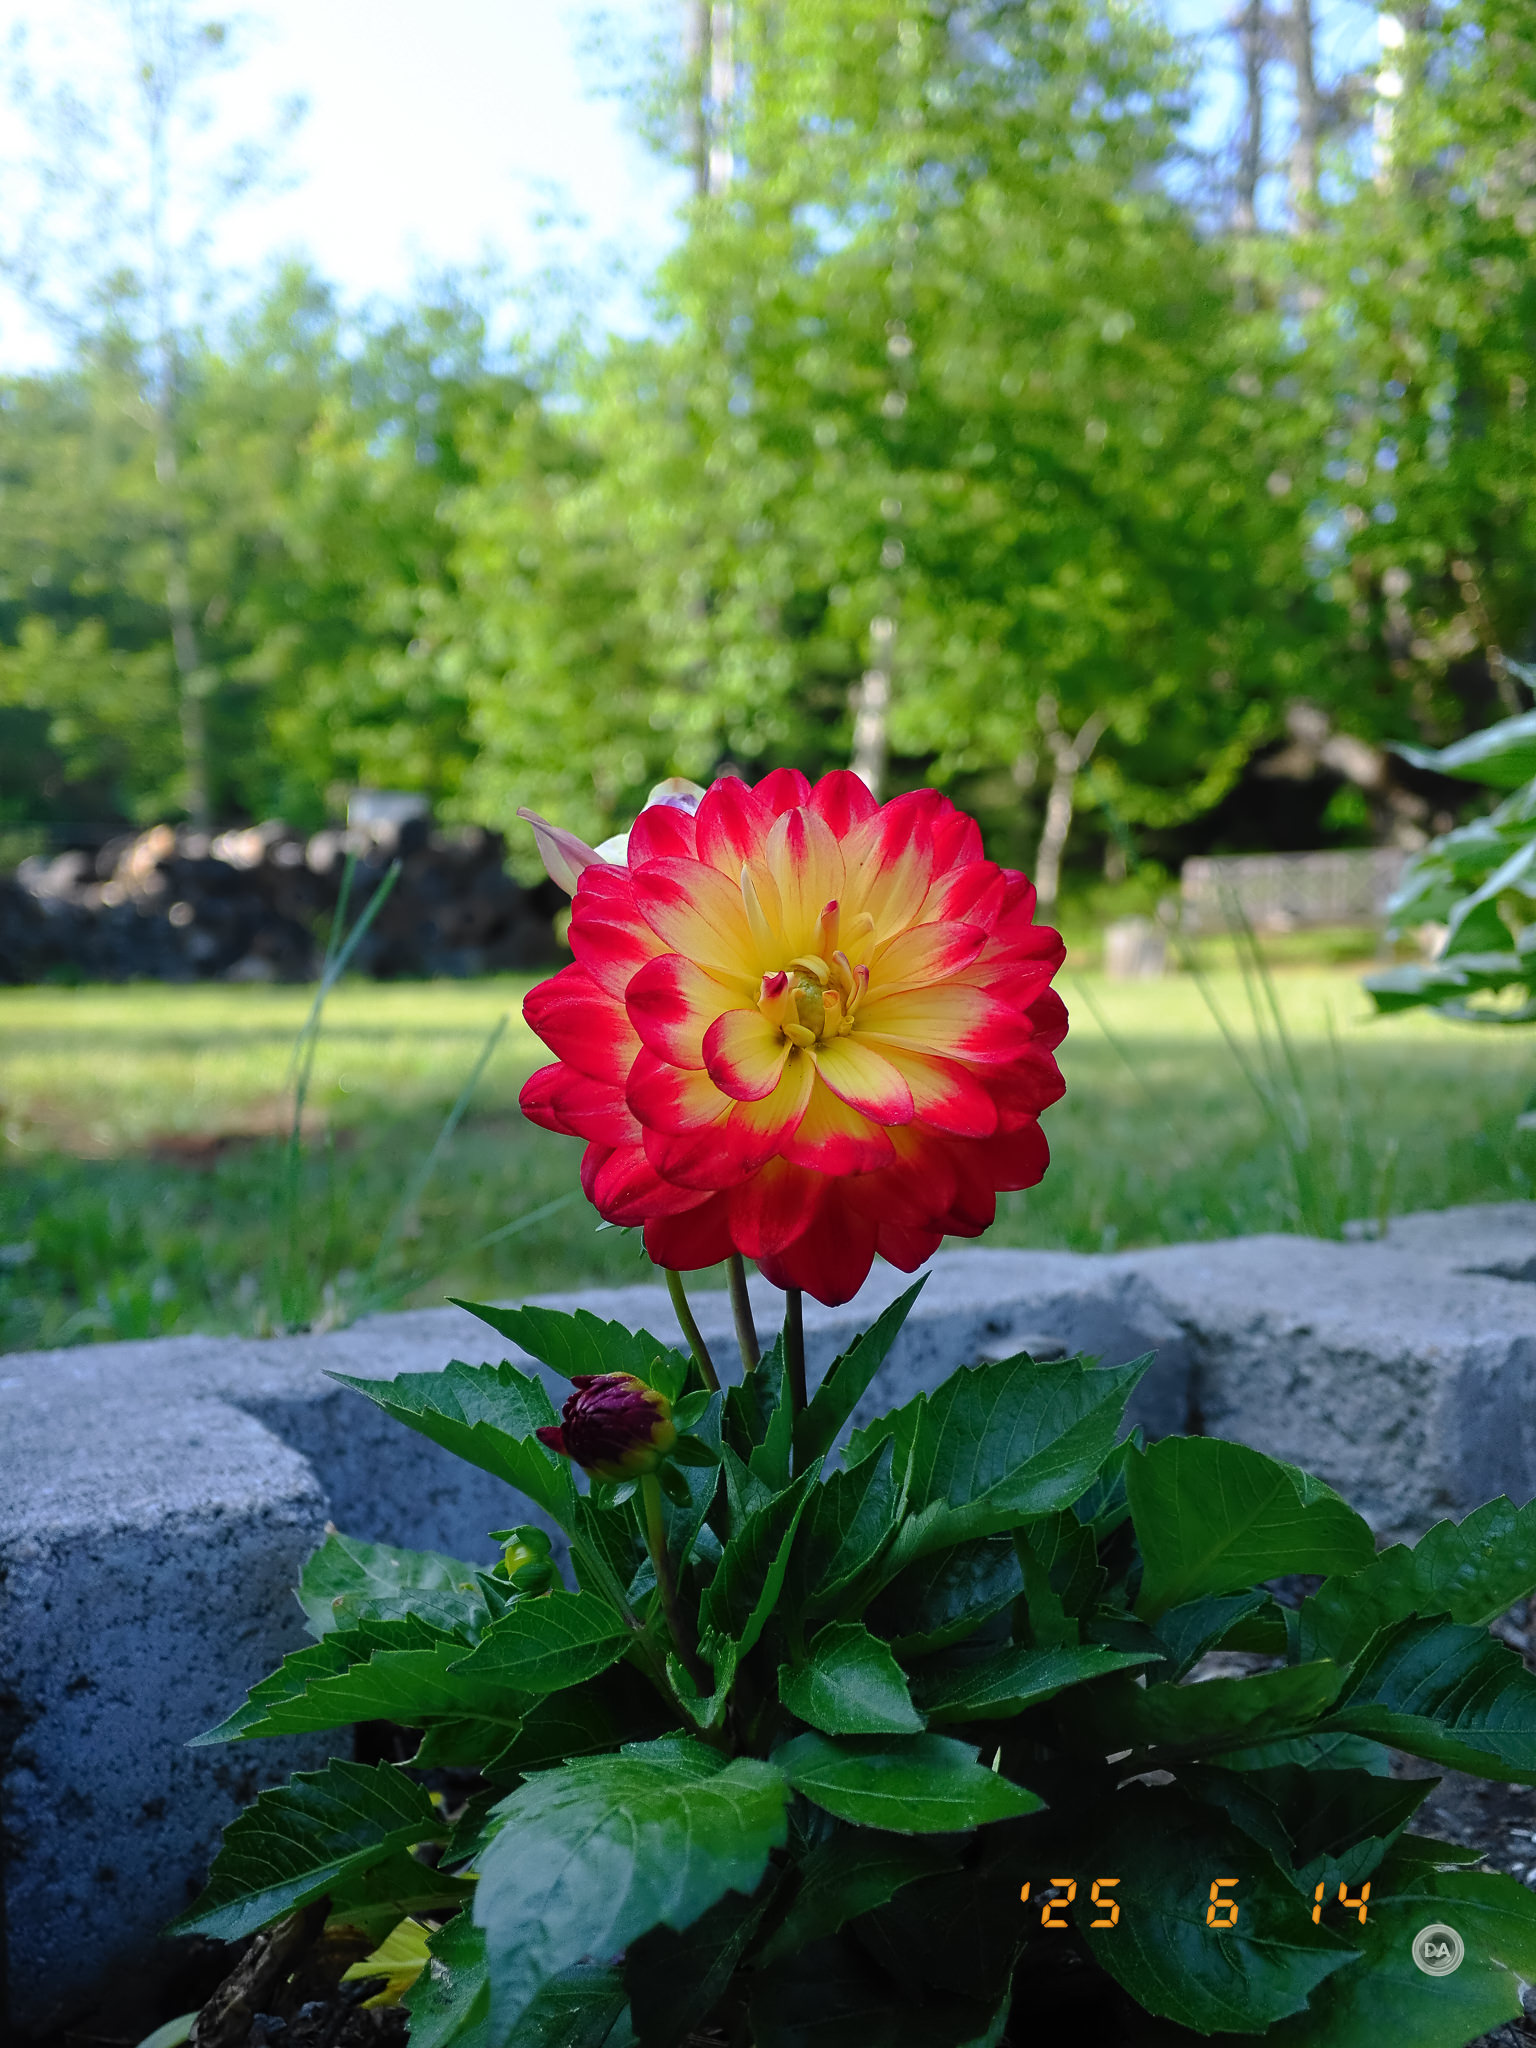
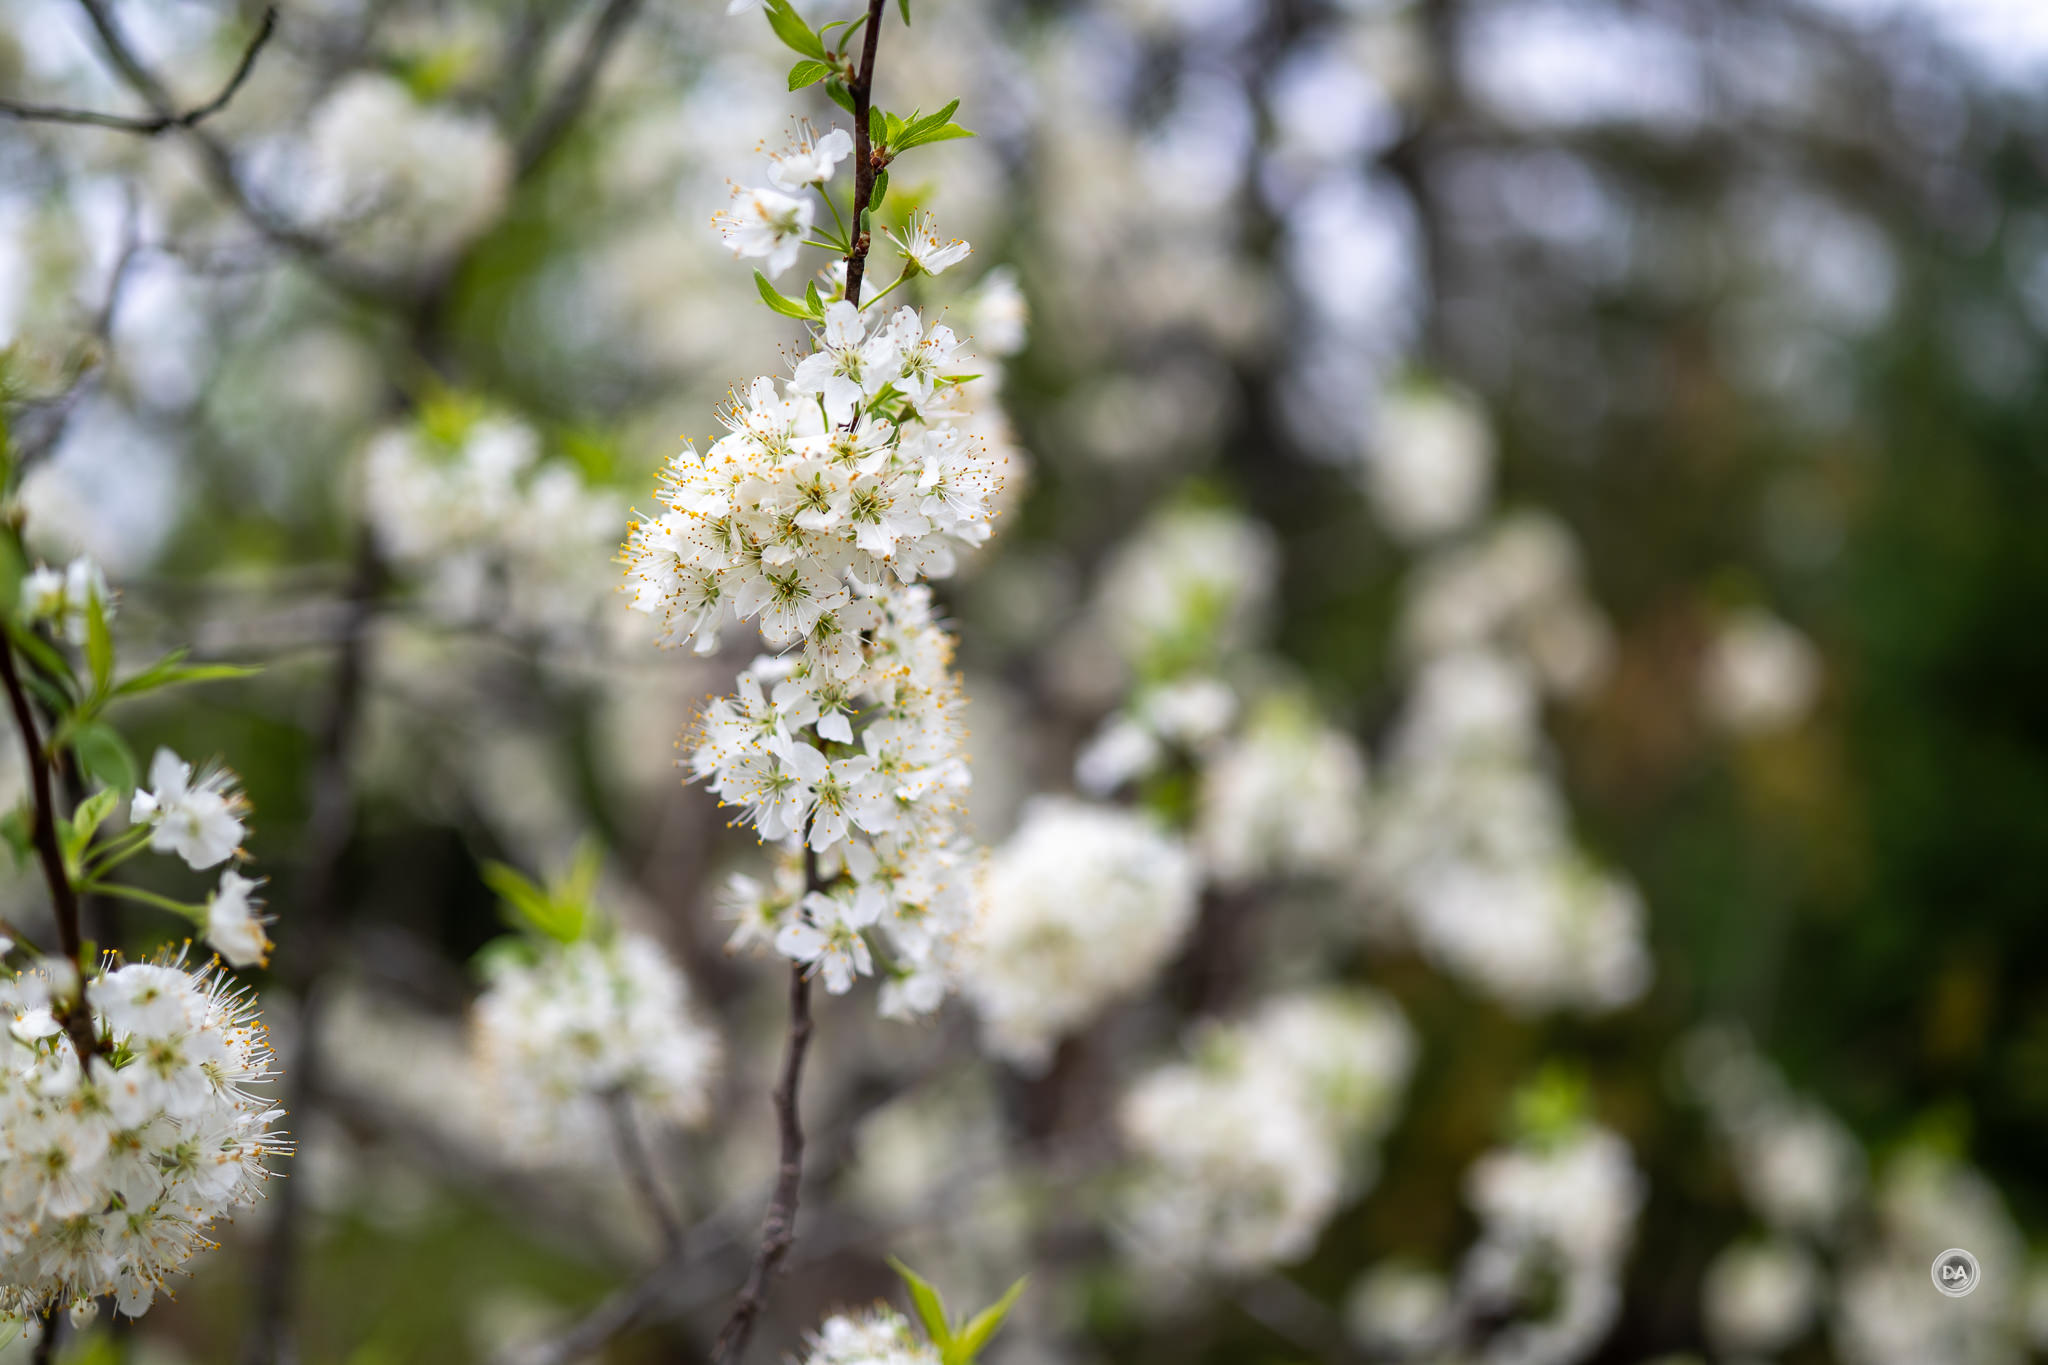
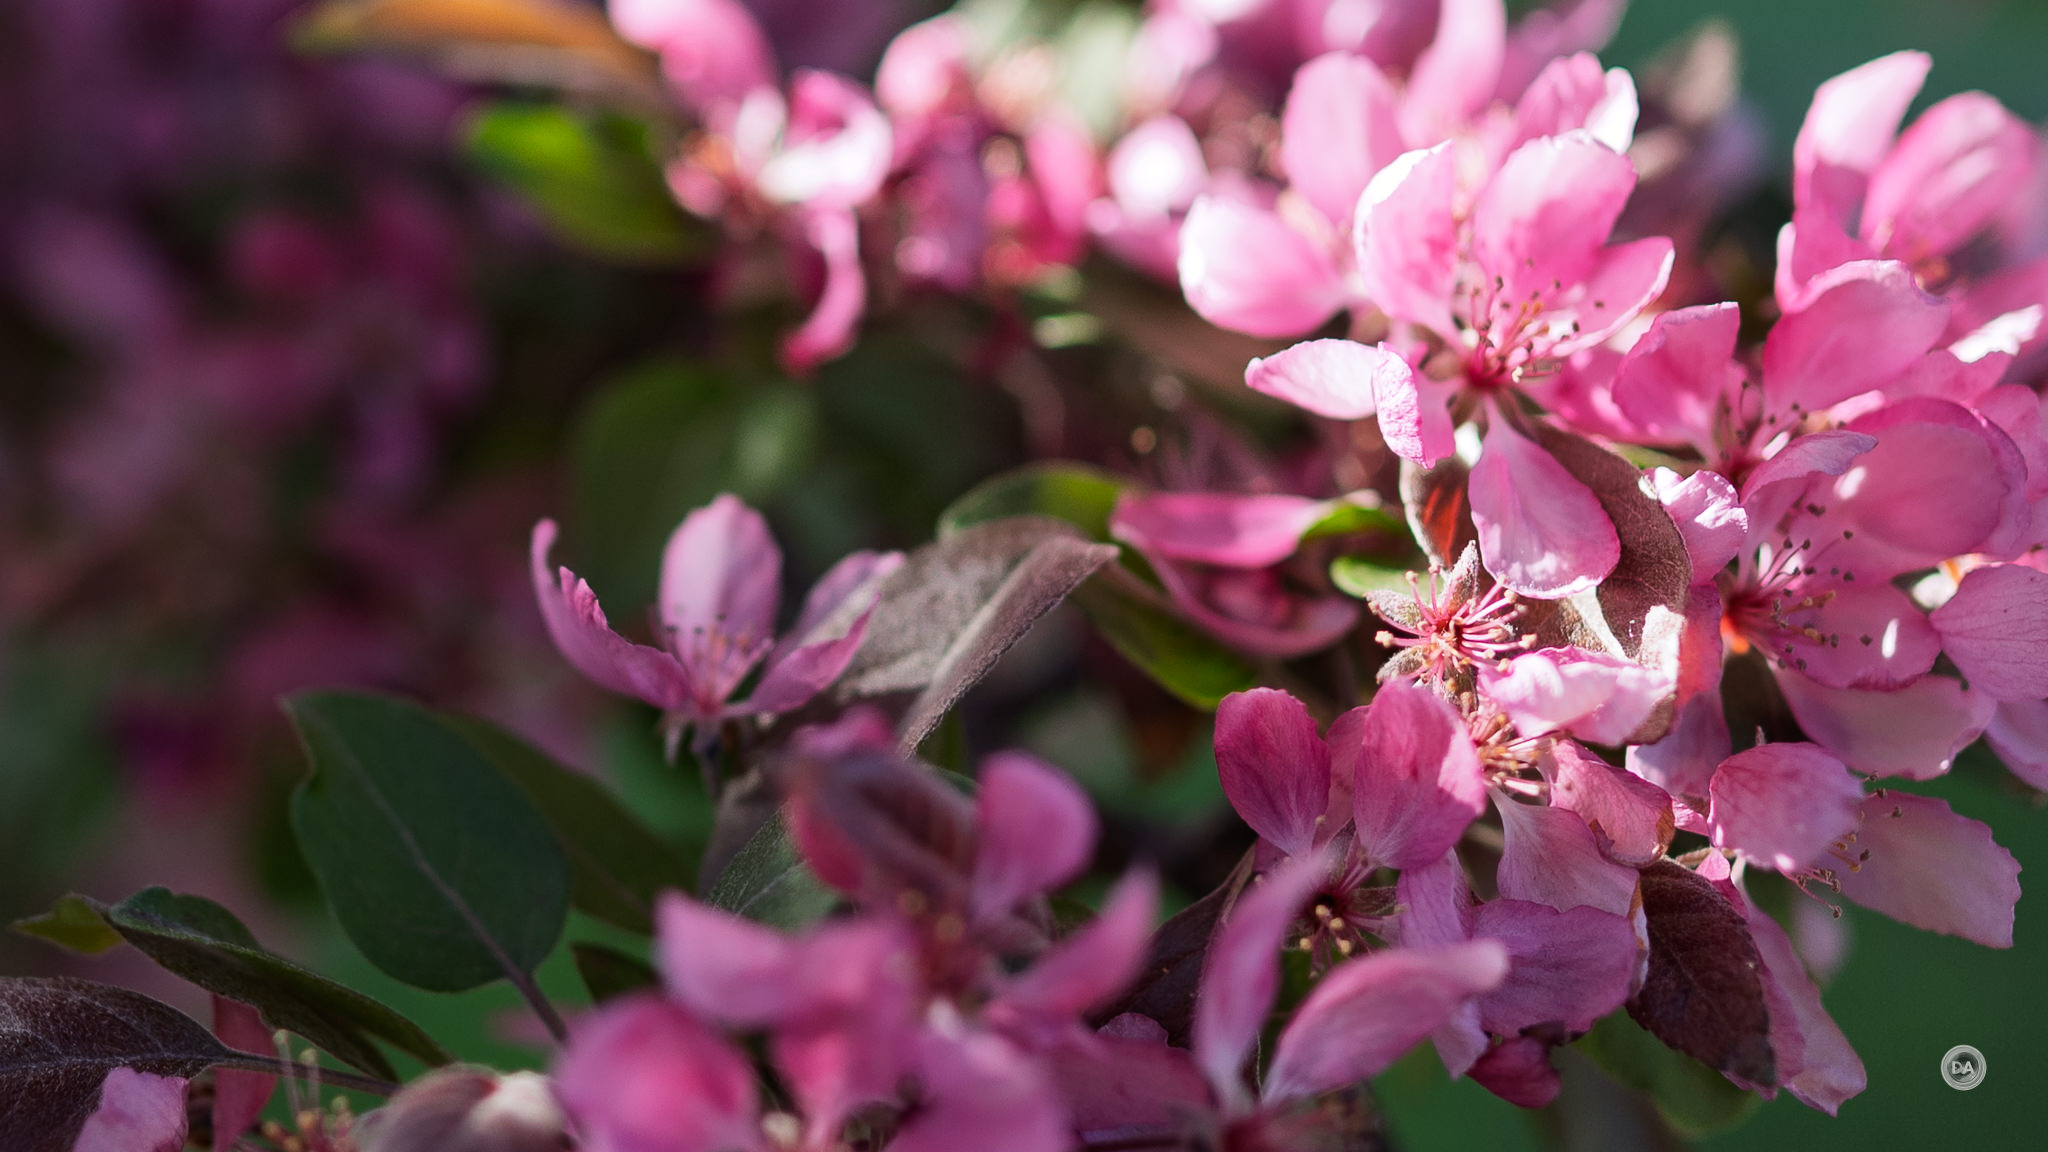
Out in the real world this equals to pin sharp results with great contrast. This Crimson King maple leaf at F1.2 shows beautiful detail and contrast.
The crop shows that the edges of subjects are nice and crisp without the “bleeding” at the edges I sometimes see with cheaper lenses.
Stopping down even to F1.4 provides a surprising amount of additional contrast in the center and the mid-frame.
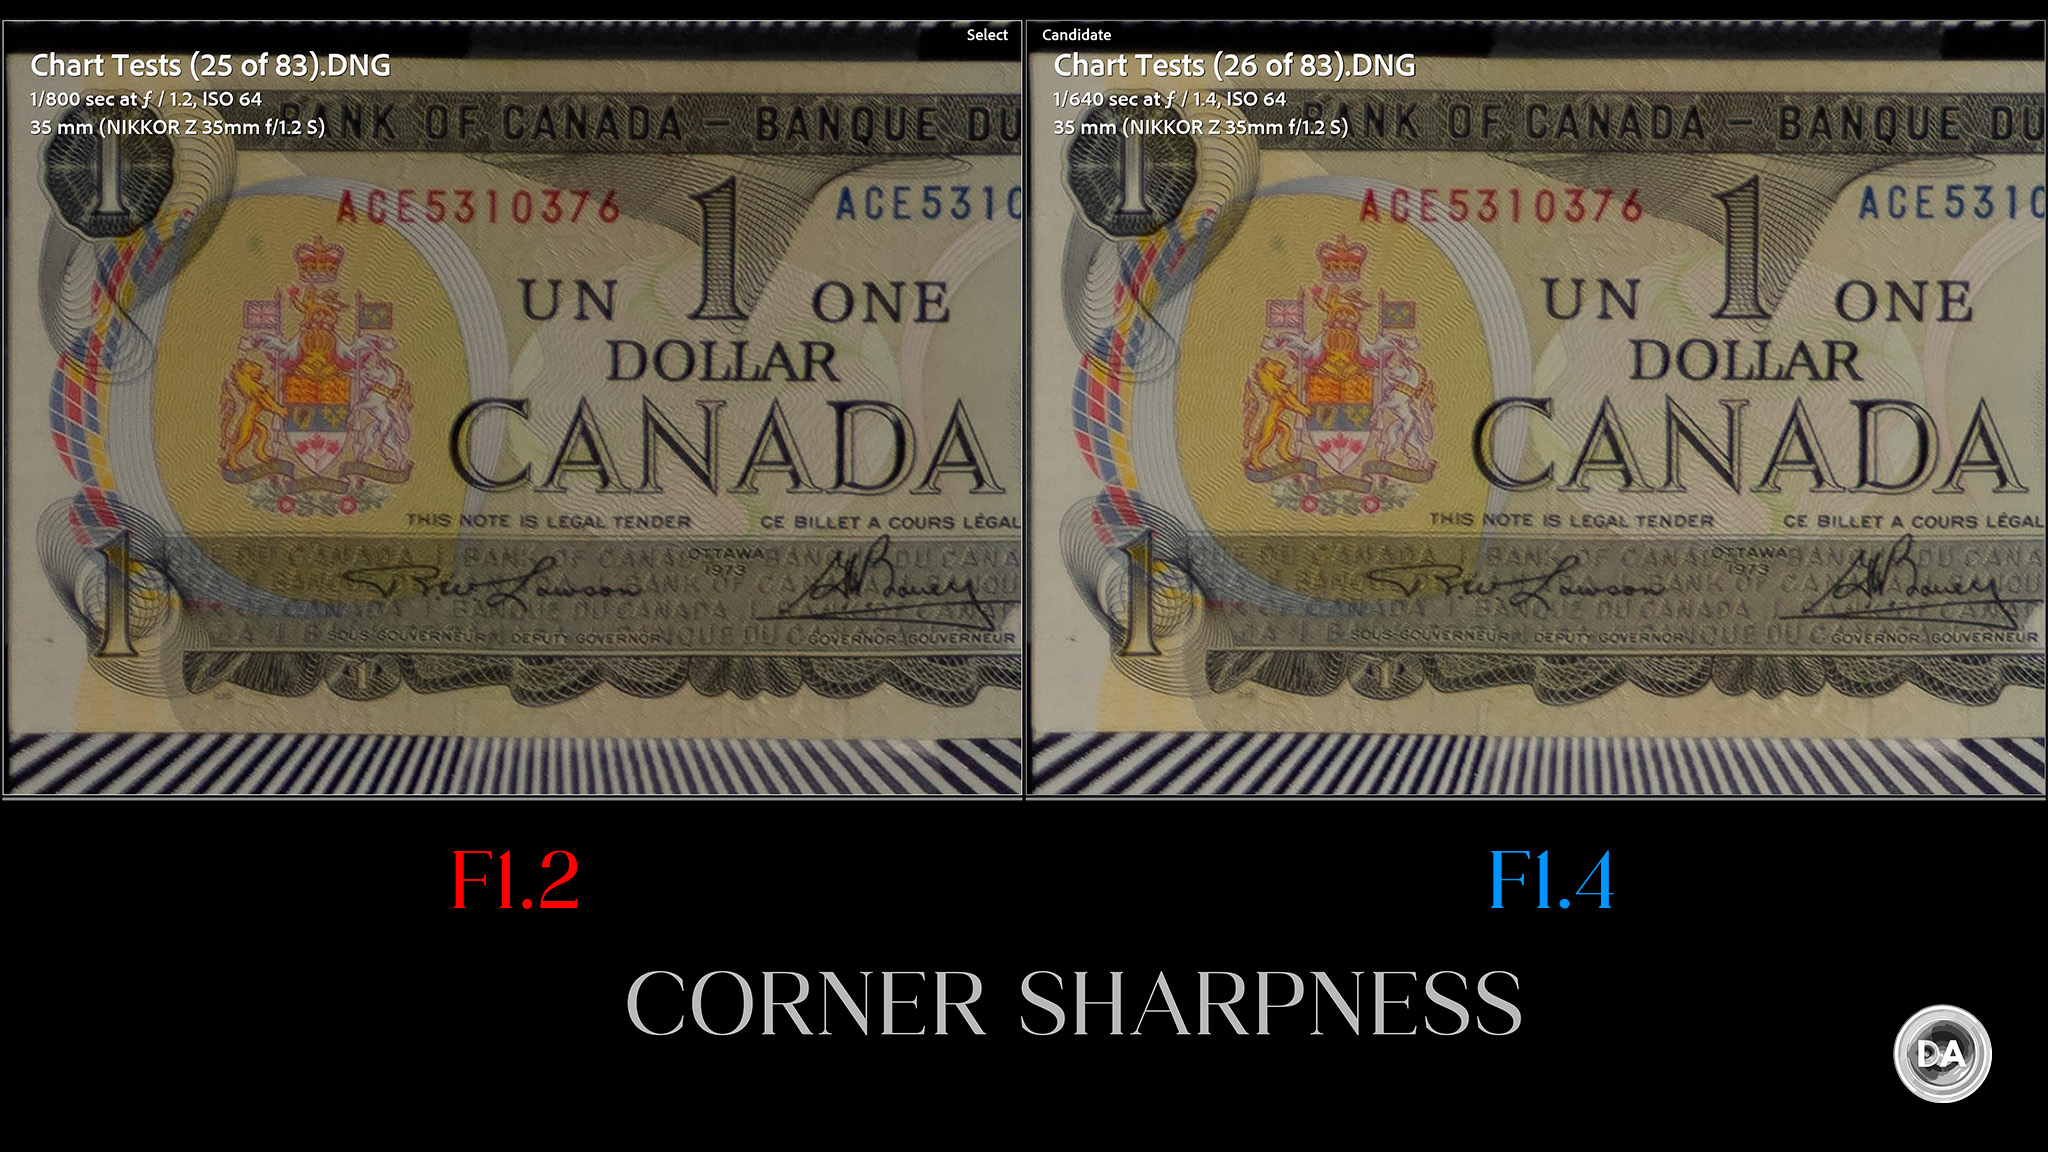
The corners don’t see quite that same bump, though there are a little brighter and show a bit more contrast.
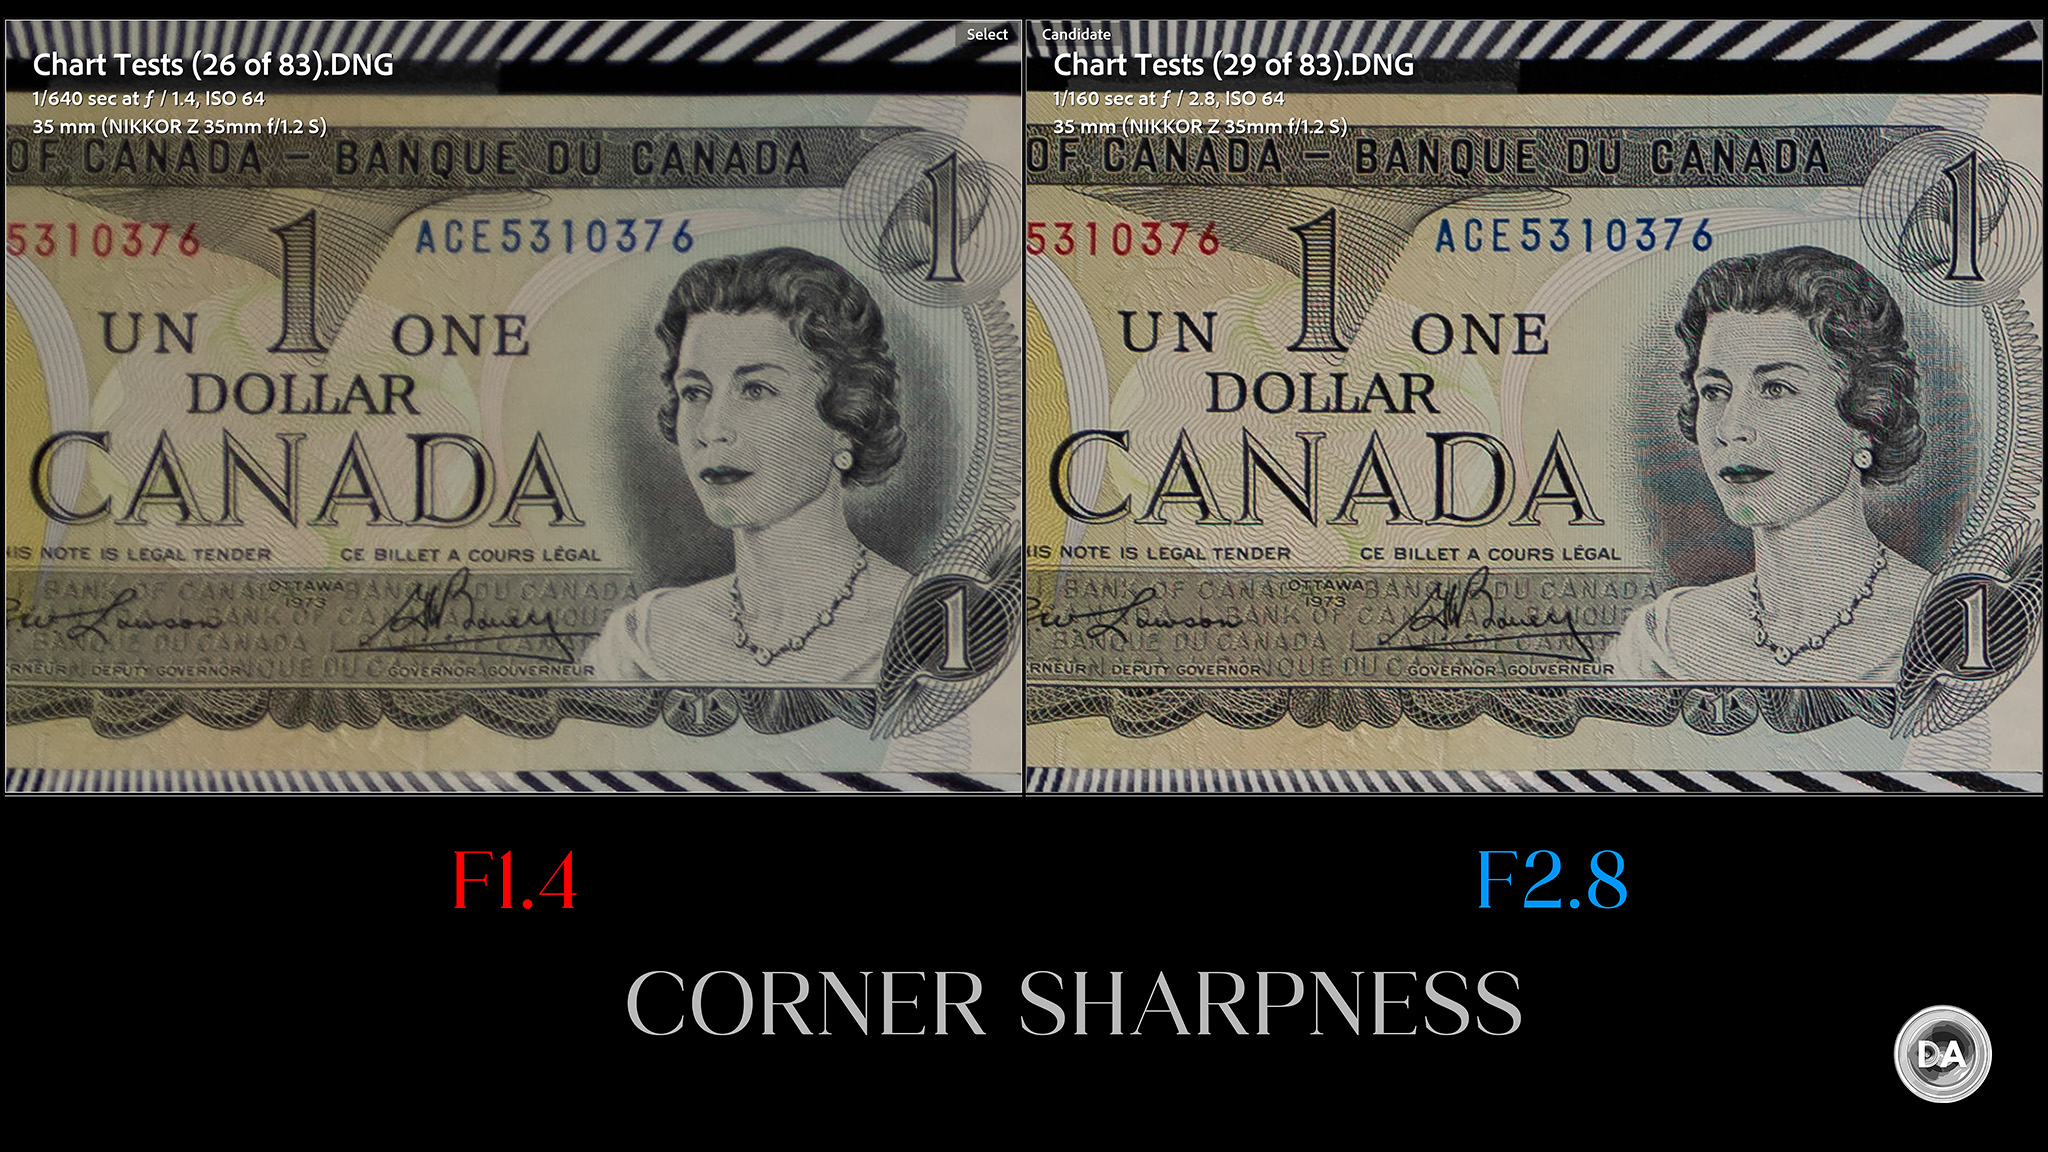
Stop on down to F2.8, however, and you’ll find the corners just as pin sharp as everywhere else. It is a rare lens that achieves this level of corner performance at any aperture.
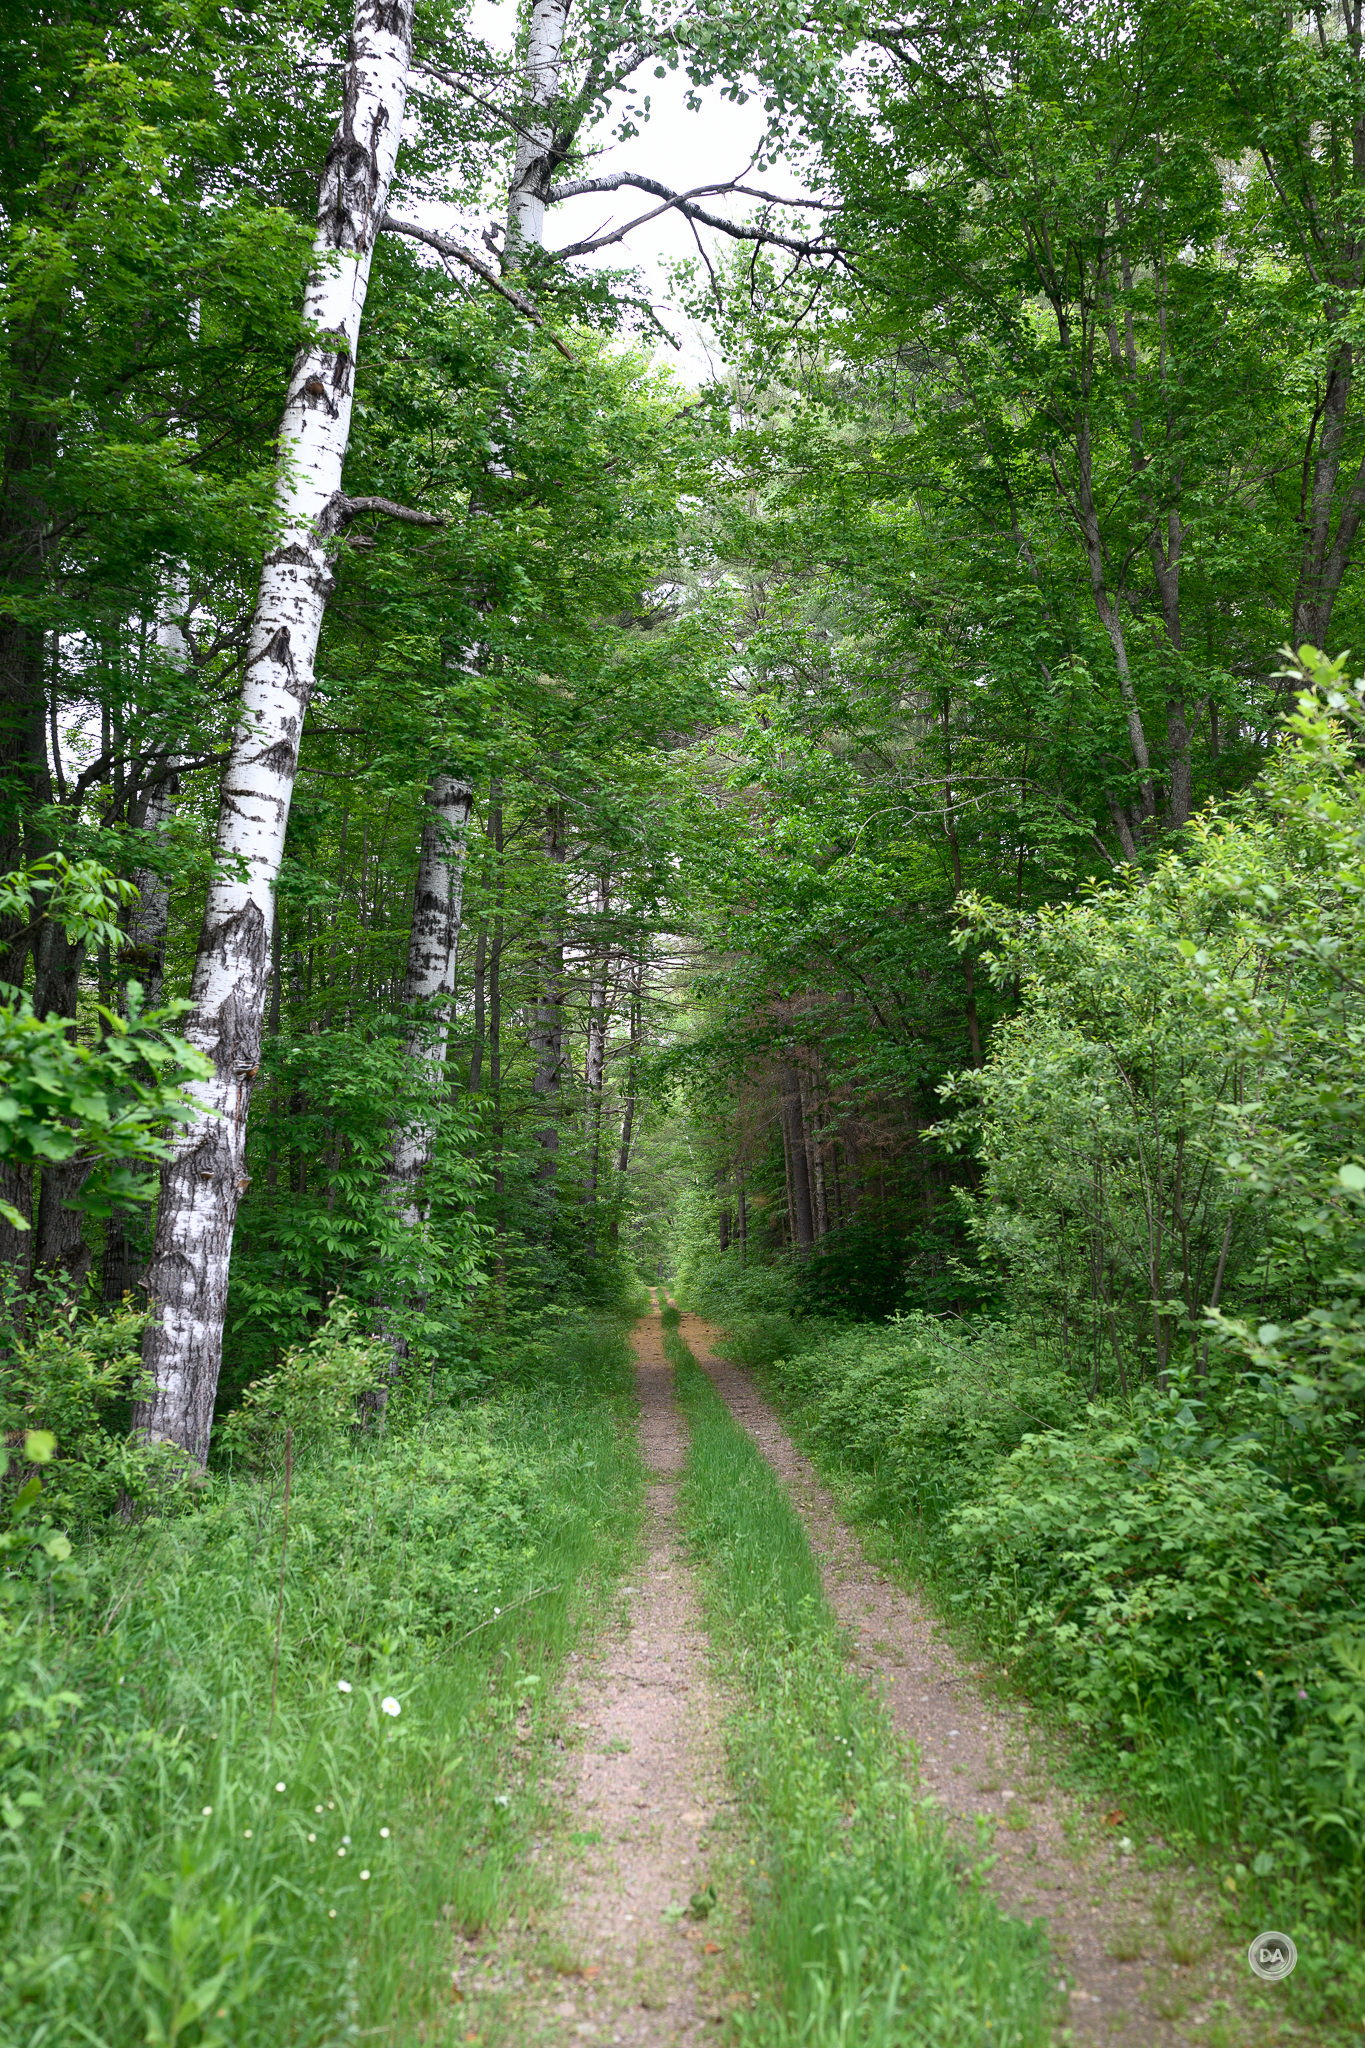
Stopped down a bit, and this is a killer landscape lens with exceptional detail from corner to corner.
But the joy of a lens like this is shooting at F1.2, where it delivers the kind of performance that few if any 35mm F1.2 lenses have ever delivered.
You almost have to zoom into images to appreciate what’s being done at F1.2. This image looks nice…
…but it is only when viewed at high magnification that you can appreciate how those fine details are being rendered.
Physics will affect even the mightiest of lenses, however, so expect diffraction to start to soften the image by F11 and more obviously by F16, which is minimum aperture (though this lens is still sharper than many lenses at its weakest!)
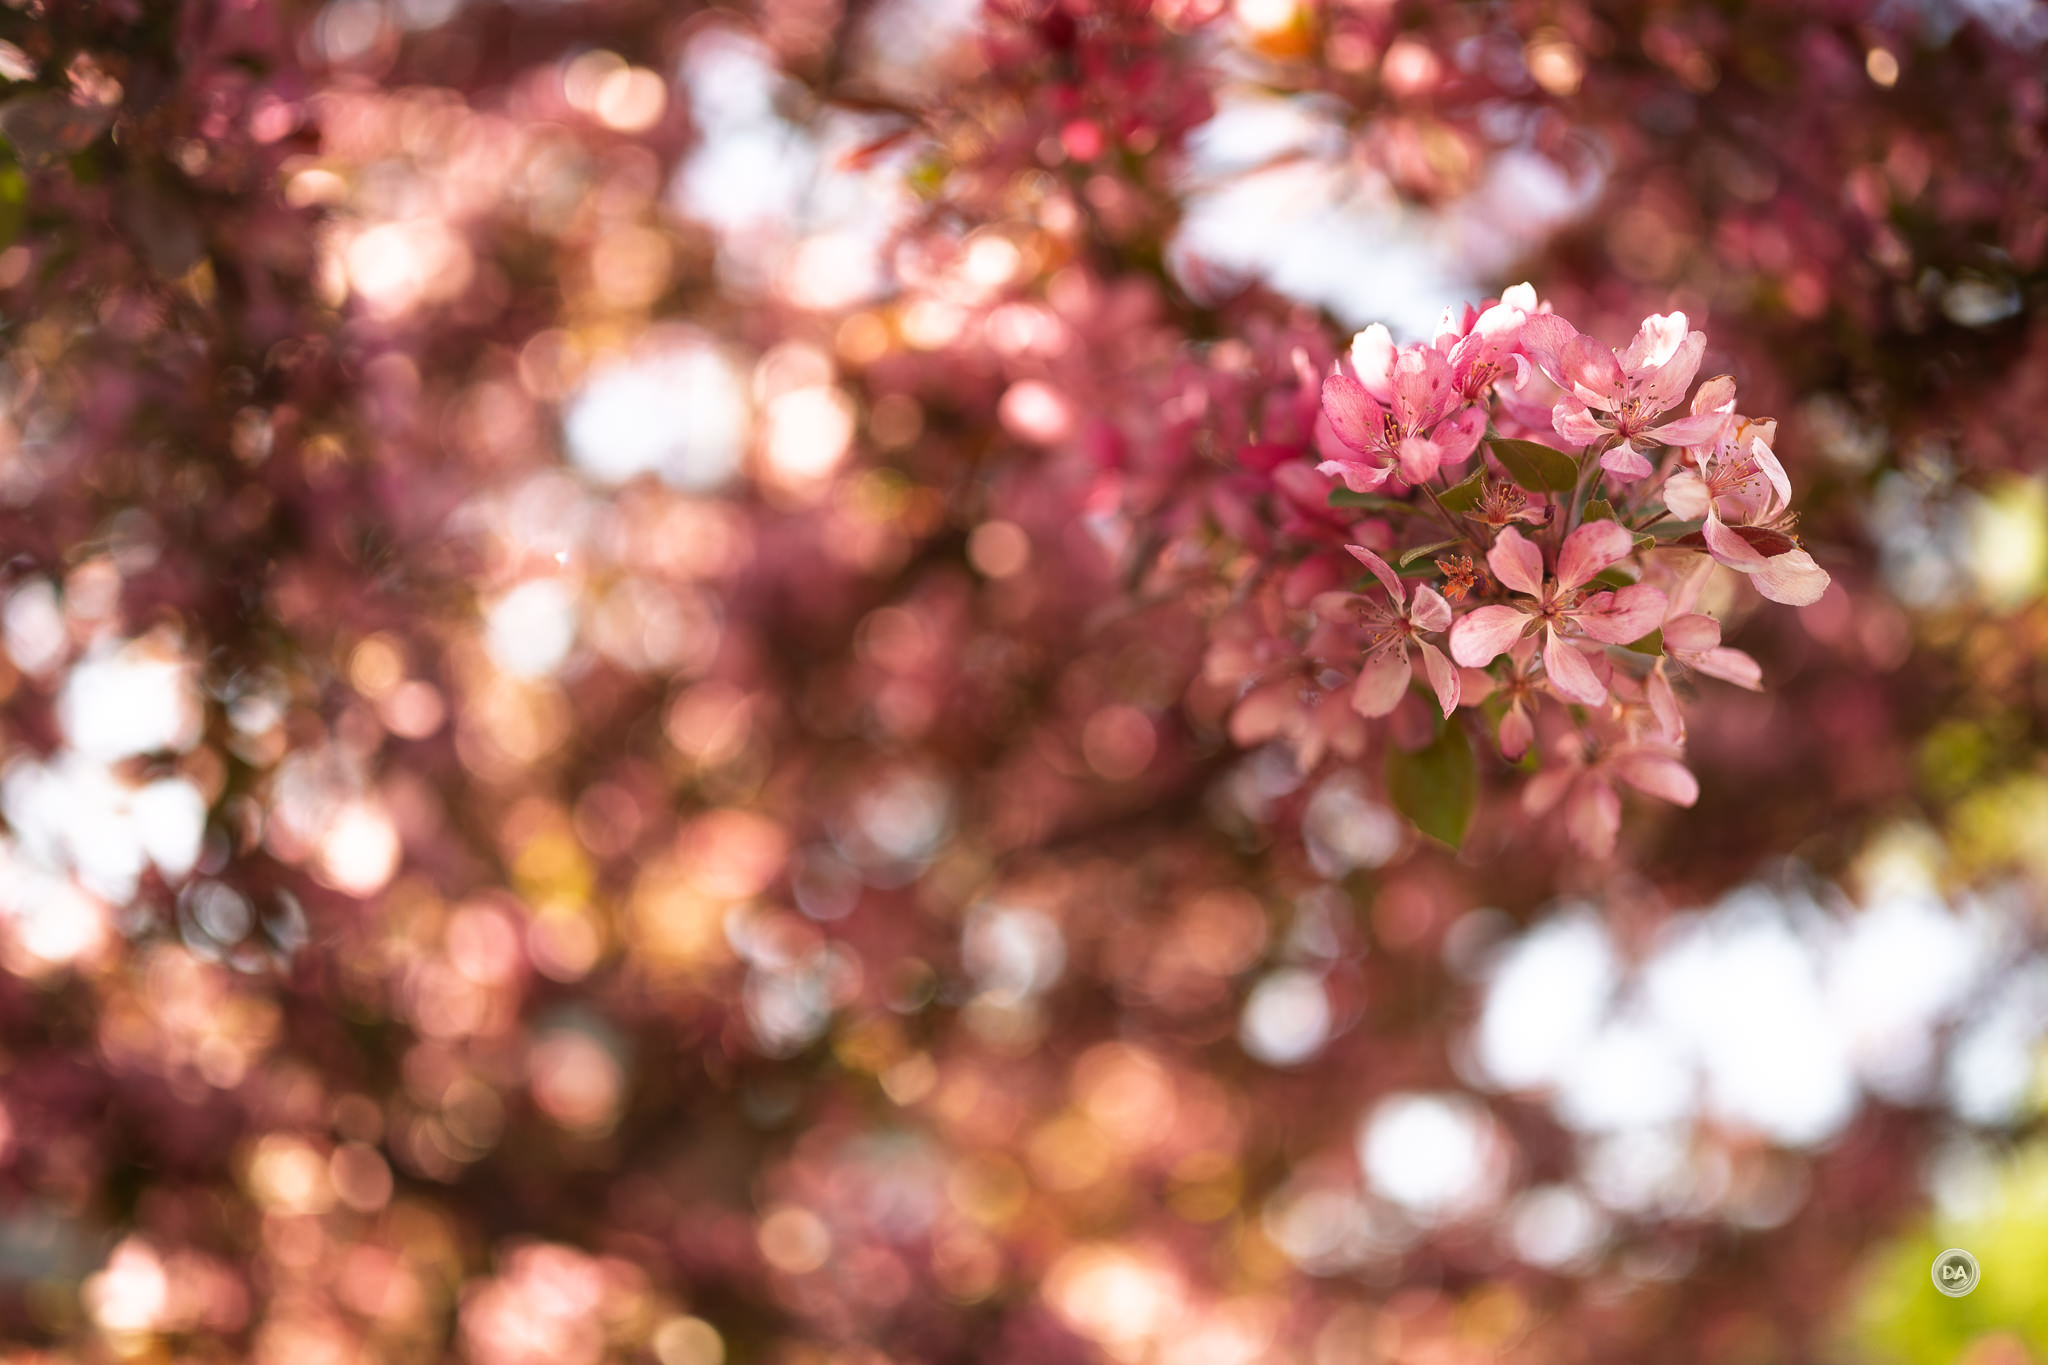
I’m not sure that buying the 35mm F1.2 S just on the strength of sharpness is worth doing, however, as the 35mm F1.8 S is very sharp as well. The bigger reason to buy this lens is its ability to give you that wide(ish) angle of view while having beautifully soft bokeh. This image, for example, looks pretty exemplary.
You can even create bokeh out of mosquitoes!
You can make backgrounds beautifully disappear.
It also handles shiny situations well, allowing you to get those stylish wedding detail type shots with a lot of big, round specular highlights.
People photos show a nice cutout effect and dimensionality.
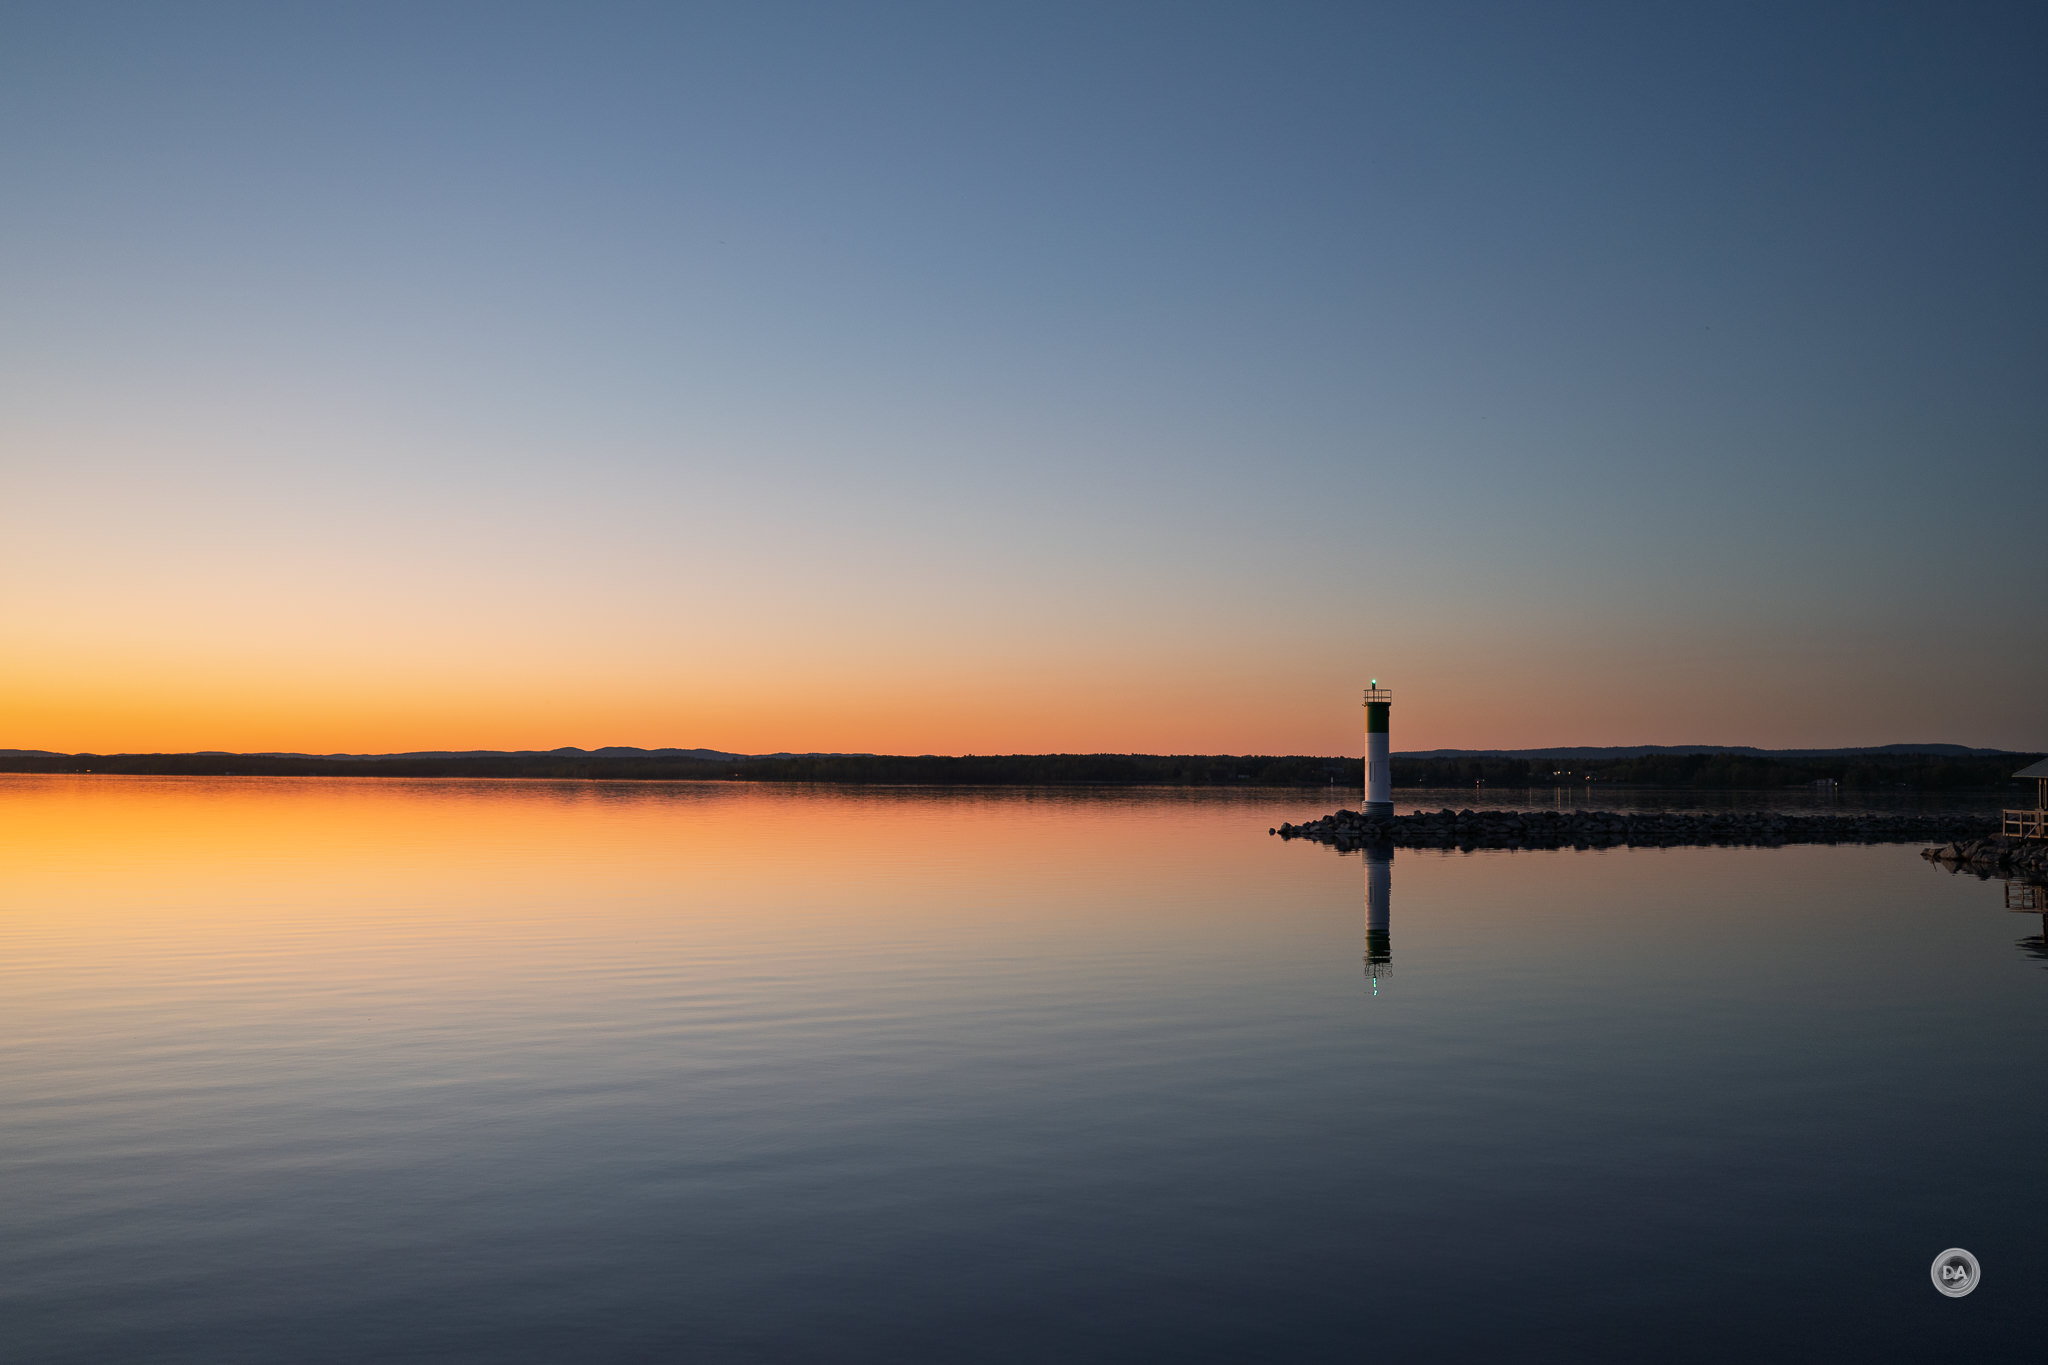
I also found that flare resistance in many situations was good. When the sun is barely in (or right out of) frame at bright apertures, all you can is a nice glow without anything destructive.
More direct shots into the sun at any aperture seem to hold up well. There are three different kinds of coatings employed here, including Meso Amorphous Coat, Nano Crystal Coat, and Super Integrated Coating. These are clearly doing an exceptional job here.
There is both good and bad when it comes to astro performance. The heavy vignette does negatively impact images a bit at F1.2. Star points are nice and crisp, however, without much evidence of fringing, though you will see some coma towards the edge where stars look more like birds flying out of frame.
I tried stopping down to F1.6, but I didn’t see much of an improvement by that point.
Overall, however, I would say that performance for the night sky is good because of being able to suck so much light in at F1.2 while also having good sharpness and low fringing.
You pay the big bucks to get something exceptional, and that’s what this lens is optically.
The Nikkor Z 35mm F1.2 S is priced like one of the best 35mm lenses ever, and that’s exactly what it is. If you’d like to see more images, check out the gallery linked here.
Conclusion
The idea of a 35mm lens that is this big, this heavy, and this expensive is going to seem absurd to the average photographer. The Nikkor Z 35mm F1.2 S is an extreme instrument in every way, but fortunately that includes the performance of the lens.
Those who routinely do wedding and portrait work will often want the best tools possible for their work, as it allows them more flexibility to play with depth of field and to create high end images that will delight their customers. Lenses like the 35mm F1.2 S will allow people to do that.
This is not a practical lens. If you want practical, consider the 35mm F1.8 S or even the 35mm F1.4 instead. But if your goal is to have the best 35mm prime lens you can get on Z-mount, this is it. The Nikkor Z 35mm F1.2 S is not a flawless lens, but it is an exceptional one. Just be sure to start hitting the gym.
Pros:
Beautiful built lens
Very good weather sealing
Good up close performance and magnification
Aperture racking and manual focus work well
STM focus motors work quickly
Low distortion
Exceptional control of fringing
Extremely sharp
Amazing contrast
Gorgeous bokeh
Great flare resistance
Nice three dimensional rendering
Cons:
Big and heavy
Don’t love the control ring integration
The AF | MF switch’s position is not convenient when mounted on my Z8
Keywords: Nikkor, Nikkor Z 35mm, F1.2, F1.2 S, Nikkor Z, Nikkor Z 35mm F1.2 S review, Nikon 35mm, Nikon Z 35mm, Viltrox, LAB, Viltrox AF 35mm F1.2 LAB Z, Nikon, Nikon Z8, Z, Z-mount, Z8, Review, mirrorless, Full Frame, Sports, Tracking, Dustin Abbott, Real World, Comparison, Handling, Focus, Portraits, Resolution, High ISO, Image Quality, Sample Images, Photography, 45MP, #letthelightin, #DA, #NIKON, #Z8, #NIKONZ8, #NikonZ35mmF1_2S, #NikonLens, #PrimeLens, #PortraitPhotography, #WeddingPhotography, #Astrophotography, #FastAperture, #ProfessionalPhotography, #CameraGear, #NikonZmount, #PhotographyGear, #LensReview, #UltimatePortraitLens, #NikonPhotographers
DISCLAIMER: This article and description contains affiliate links, which means that if you click on one of the product links, I’ll receive a small commission. As an Amazon Associate I earn from qualifying purchases.
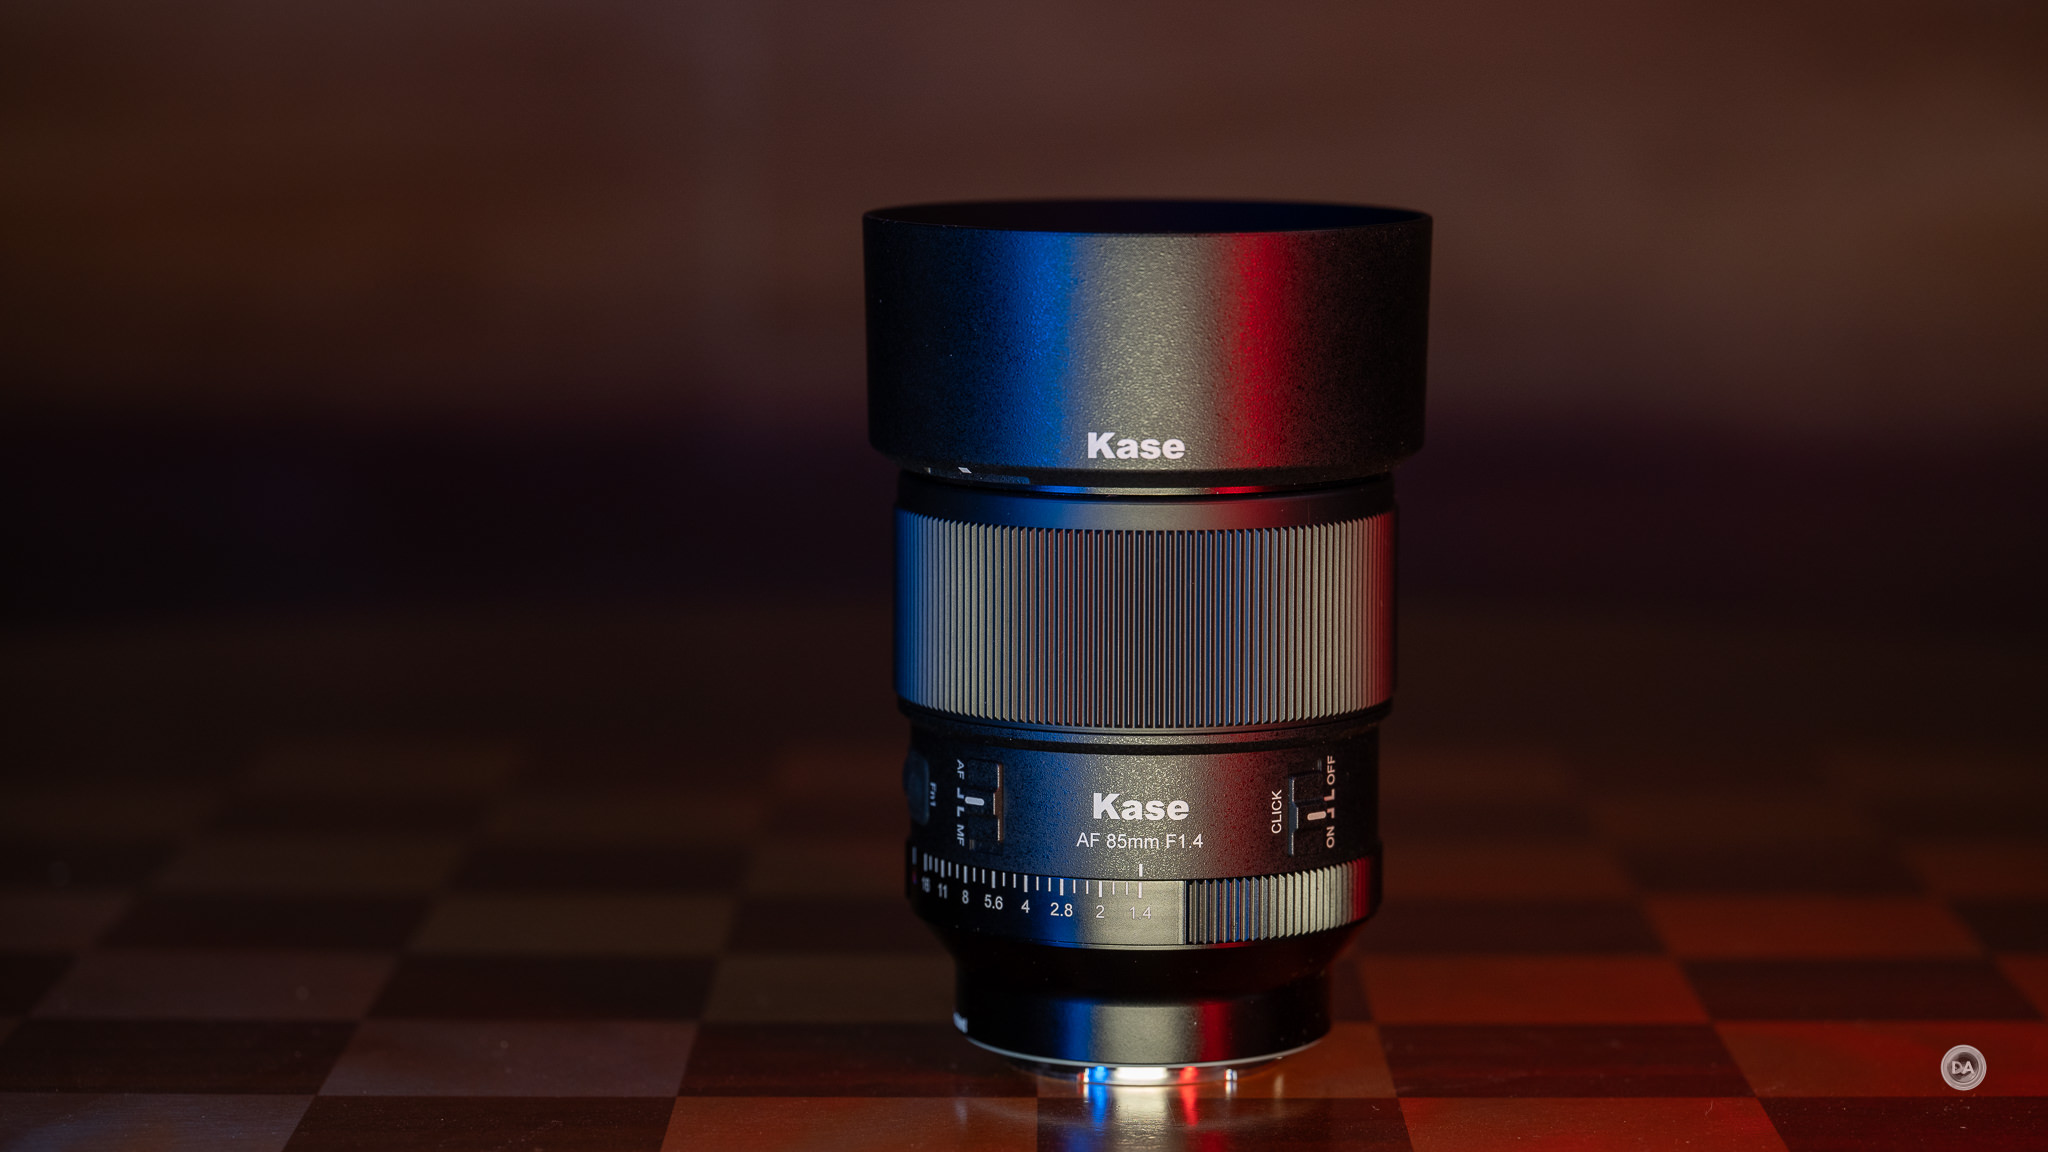
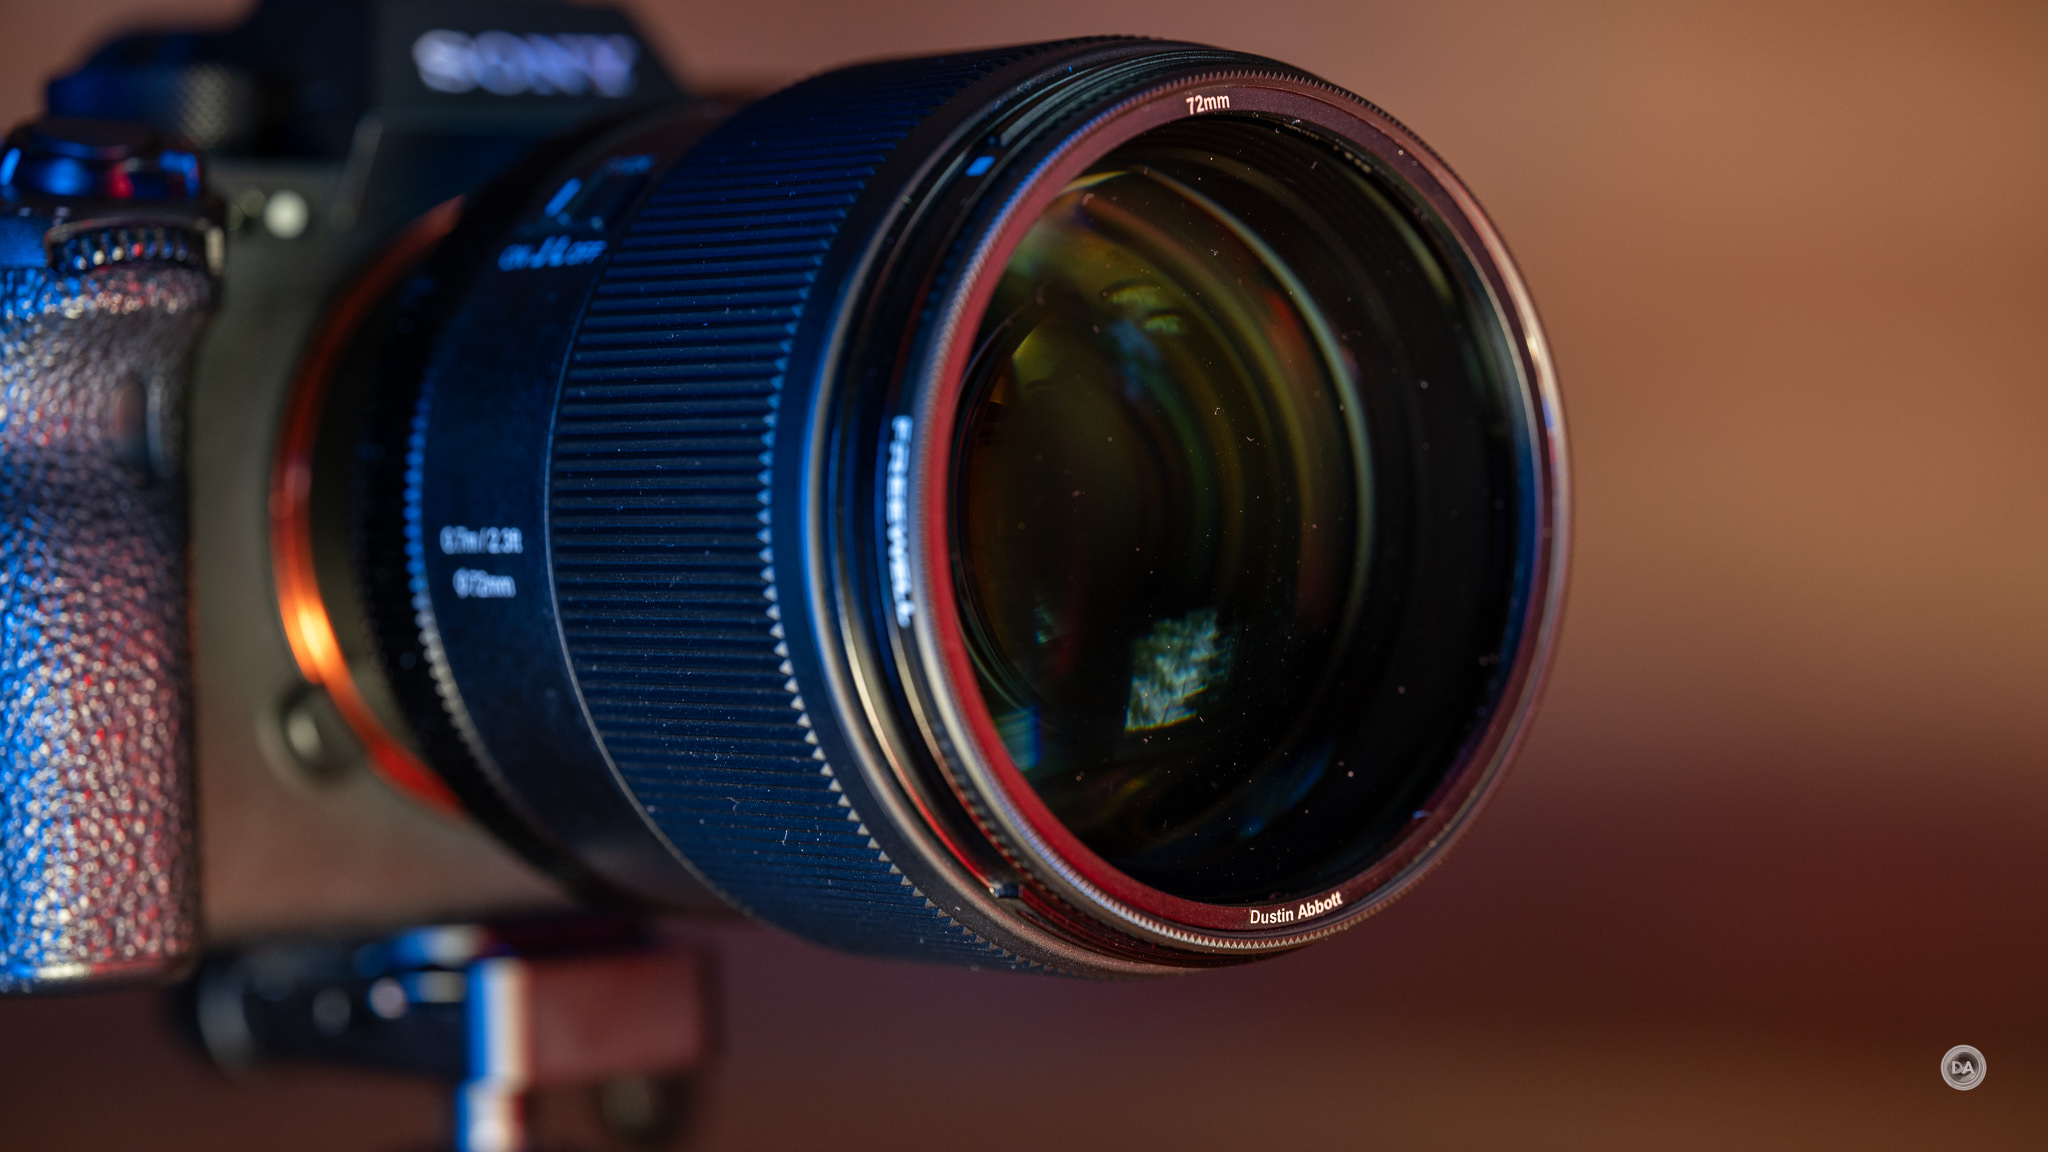
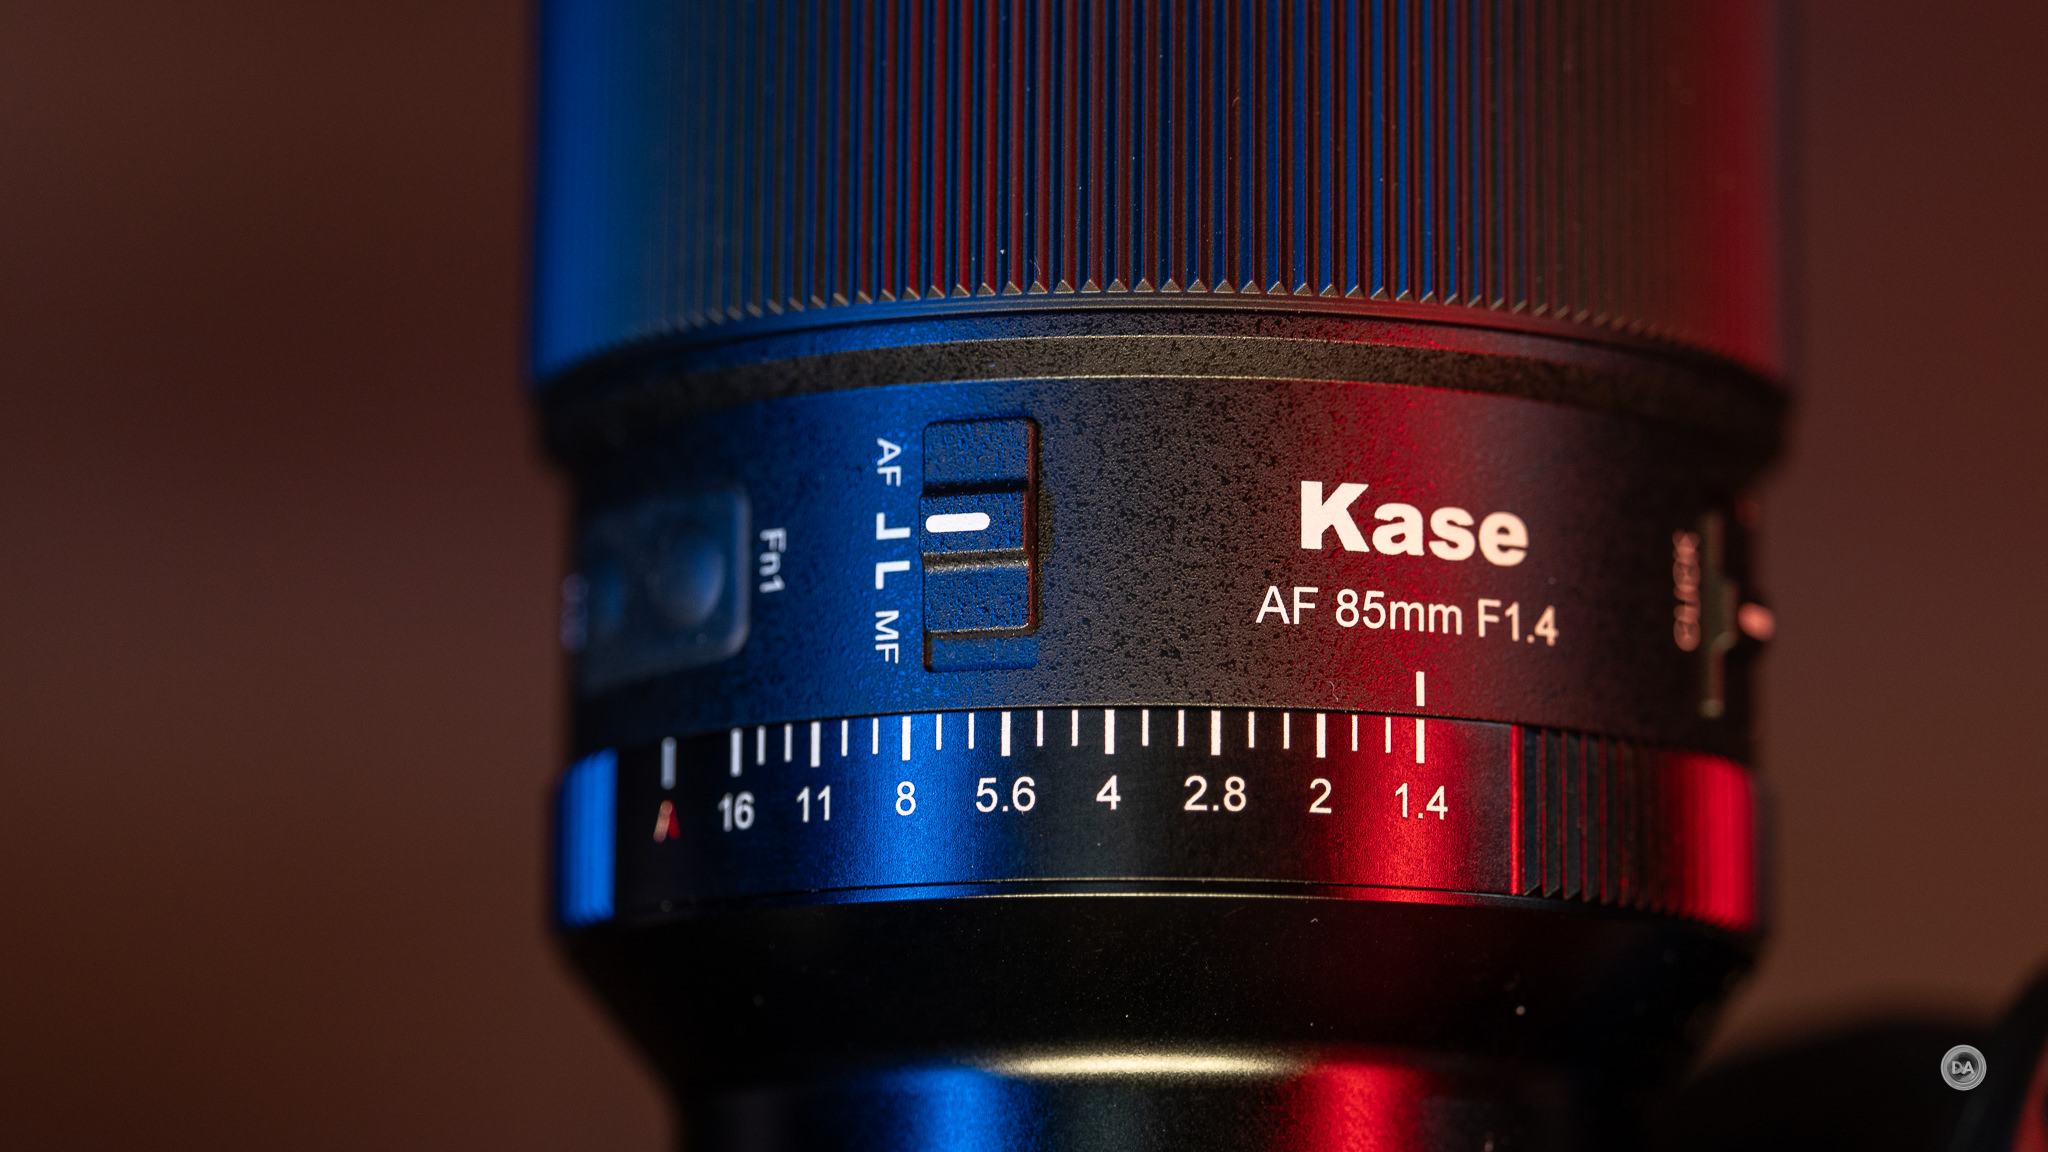
The company Kase has long been known as a filter maker, with a wide variety of filters and filter systems. But they have just released their first lens, and it is a surprisingly ambitious one. The Kase AF 85mm F1.4 is a full frame 85mm F1.4 lens complete with a wide variety of unique features, a surprisingly compact size, and a nicely strong performance. Is Kase going to be the most recent Chinese company to really disrupt the lens market? Is this $738 USD lens now the 85mm to buy on Sony? Find out more in either the video review below or by reading on in the text review.
Thanks to Kase for sending me a review copy of this lens. As always, this is a completely independent review. *The tests and most of the photos that I share as a part of my review cycle have been done with the Sony a7RV and the Sony Alpha 1.You can find the listing for the AF 85mm F1.4 FE here.
AI SUMMARY: The Kase AF 85mm F1.4 lens is an impressive first effort from a company primarily known for filter design, offering unique filter compatibility and compactness while delivering strong performance. It features innovative magnetic filter integration, a well-built metal body, and versatile functions like customizable focus points and firmware updates via USB-C, adding to its appeal. Although its autofocus may be slightly slower than some competitors, it remains accurate, quiet, and suitable for portrait and general photography, with excellent optical qualities such as balanced sharpness, contrast, and creamy bokeh. Priced competitively at around $738 USD, the lens stands out for its rendering, build quality, and filter-friendly design, making it a compelling option among high-end 85mm F1.4 lenses.
Strengths:
Innovative magnetic filter system integrated into the lens design
Compact, well-built, and weather-sealed construction
Excellent optical rendering with smooth bokeh and balanced contrast
Versatile features like customizable focus points and firmware updates via USB-C
Weaknesses:
Autofocus speed is slower compared to some competitors
Slightly decentered aperture blades affecting shape and contrast at F1.4
Minimal flare control with some light leak issues
Lack of an aperture lock feature which could improve handling in certain shooting conditions
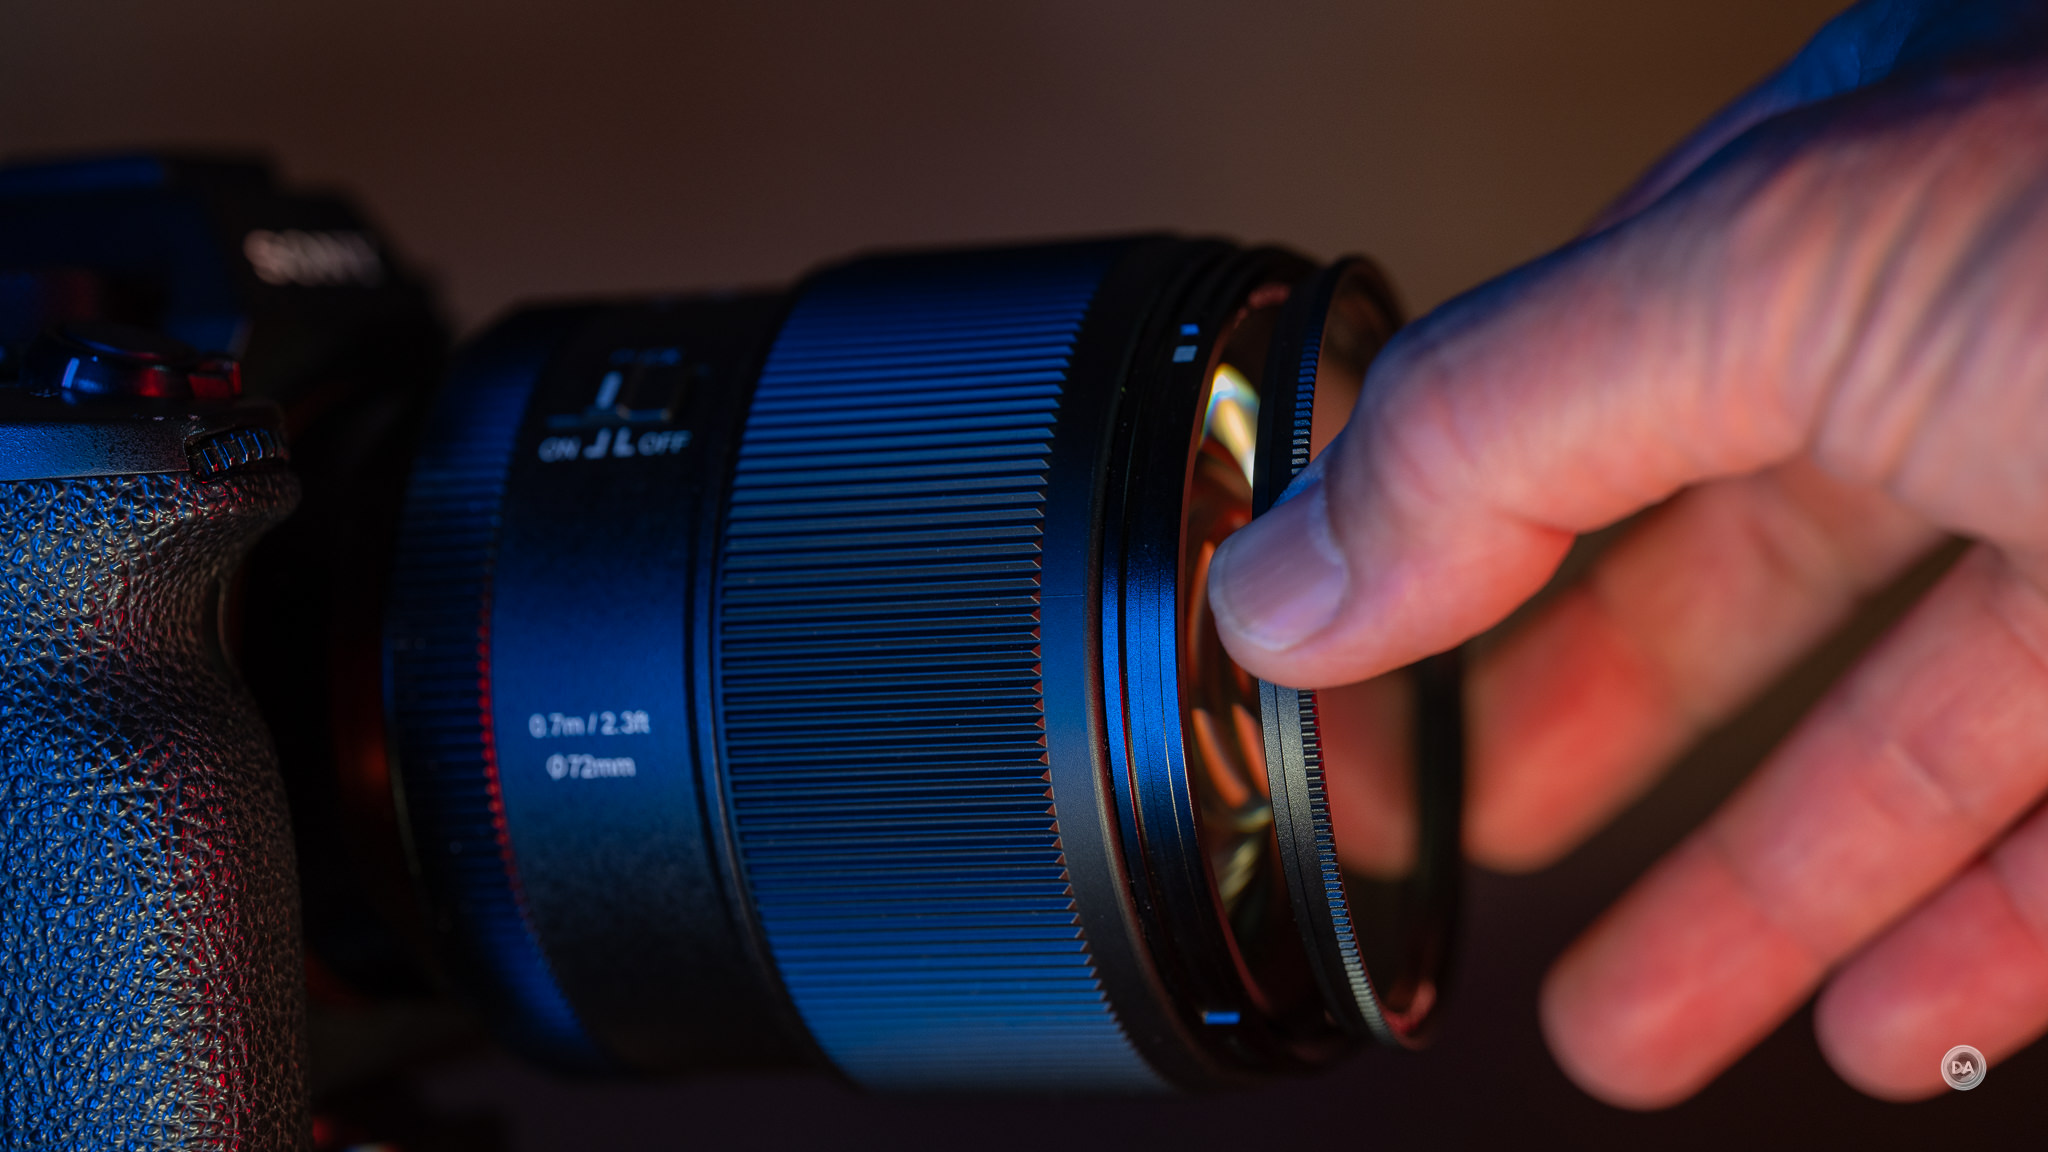
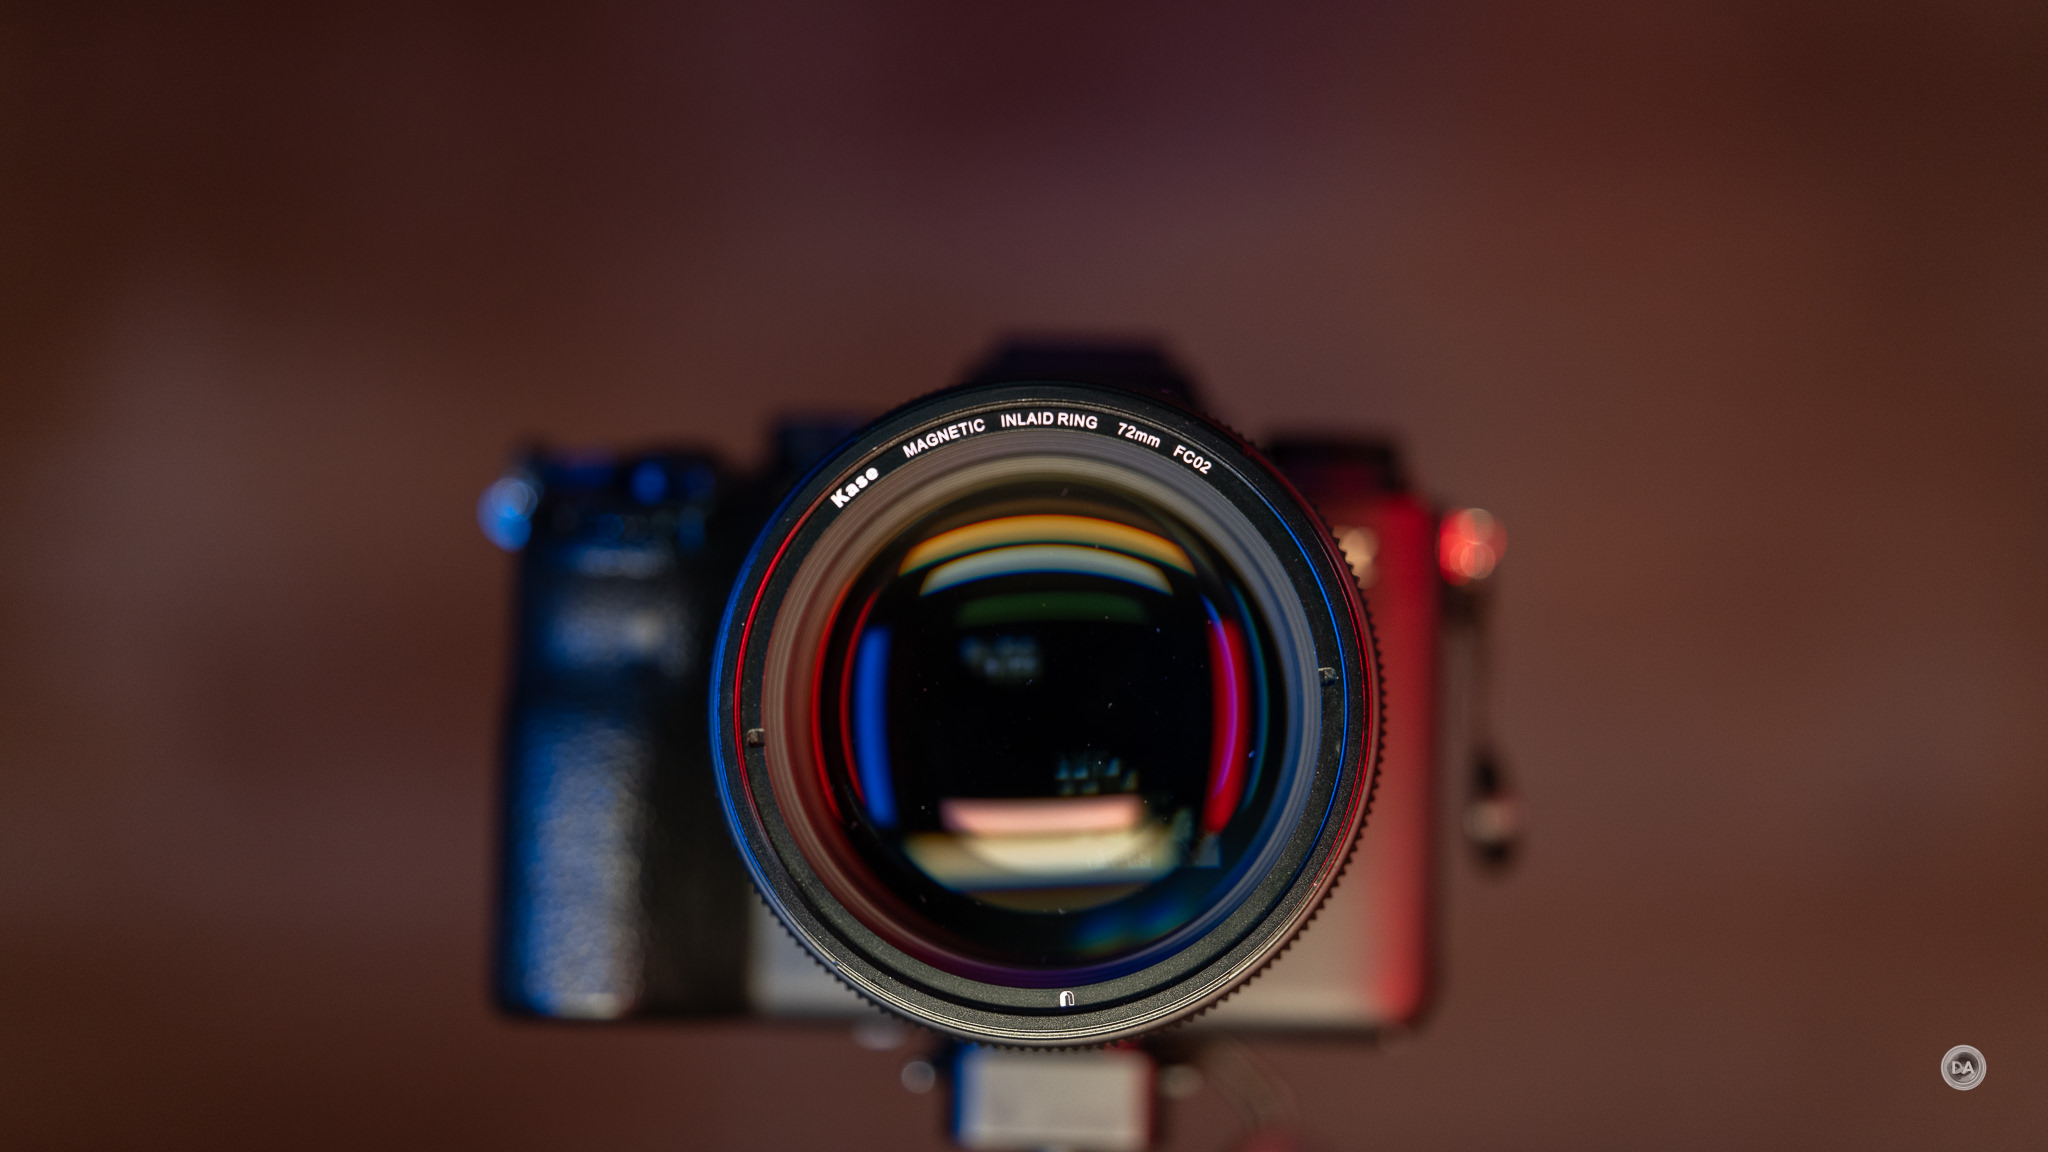
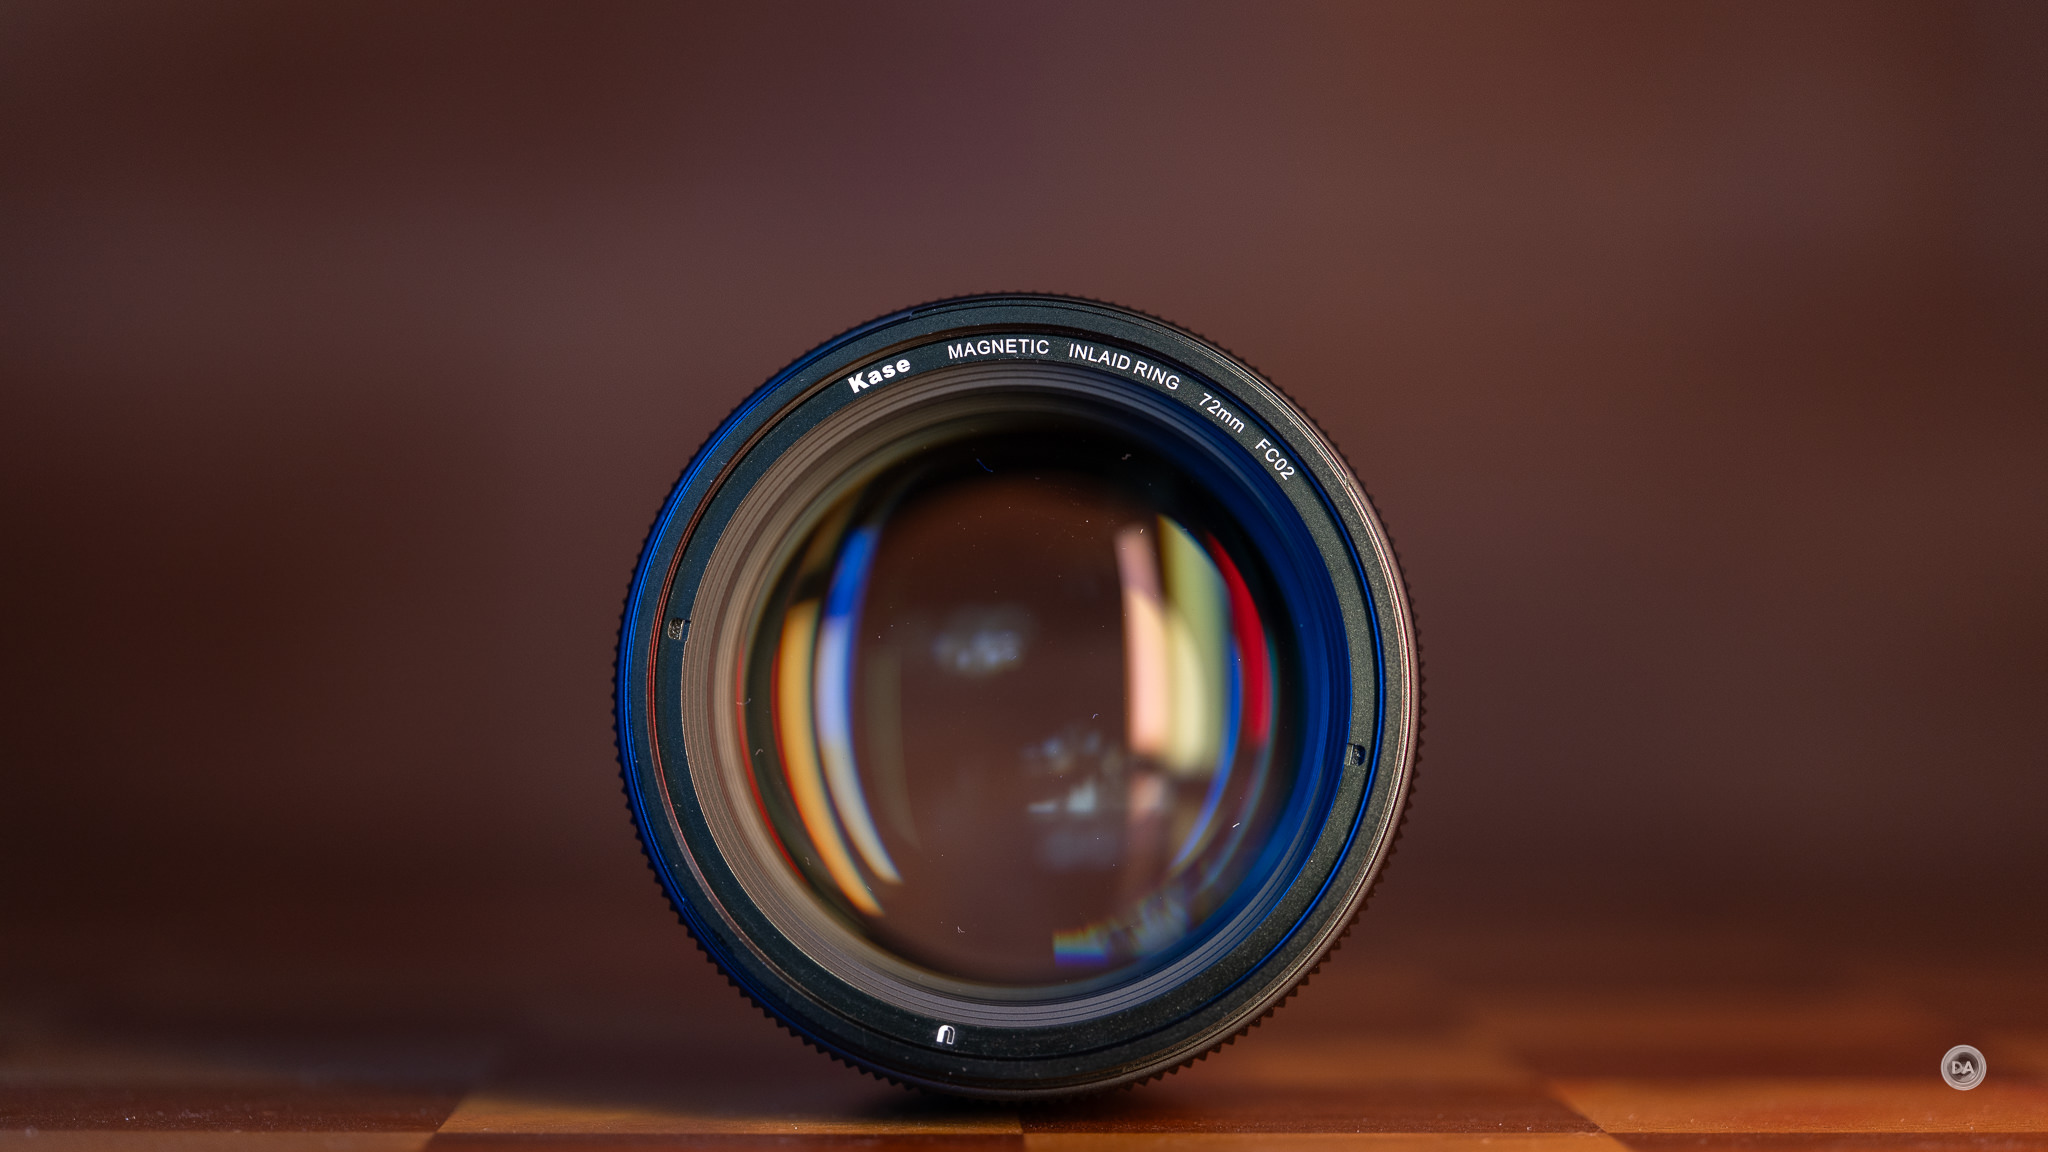
Kase’s background in filter design is shown in some of the unique features of this lens, which should prove to be the most filter friendly lens that I’ve ever tested. It’s been nearly six years ago that I reviewed my first magnetic filter system, and at that point you needed to screw in a magnetic filter adapter onto the front threads of the lens, after which you could quickly hot swap filters magnetically. Kase has incorporated a magnetic rotating ring right into the lens design, allowing you to skip the adapter and just drop magnetic filters right onto the lens. And, while they included a standard UV/Protection magnetic filter in my package, it just so happened that the Freewell CPL (circular polarizing) filter that I reviewed years ago was in a 72mm filter size, so I dropped it on there and found that it worked perfectly as well. Sweet!
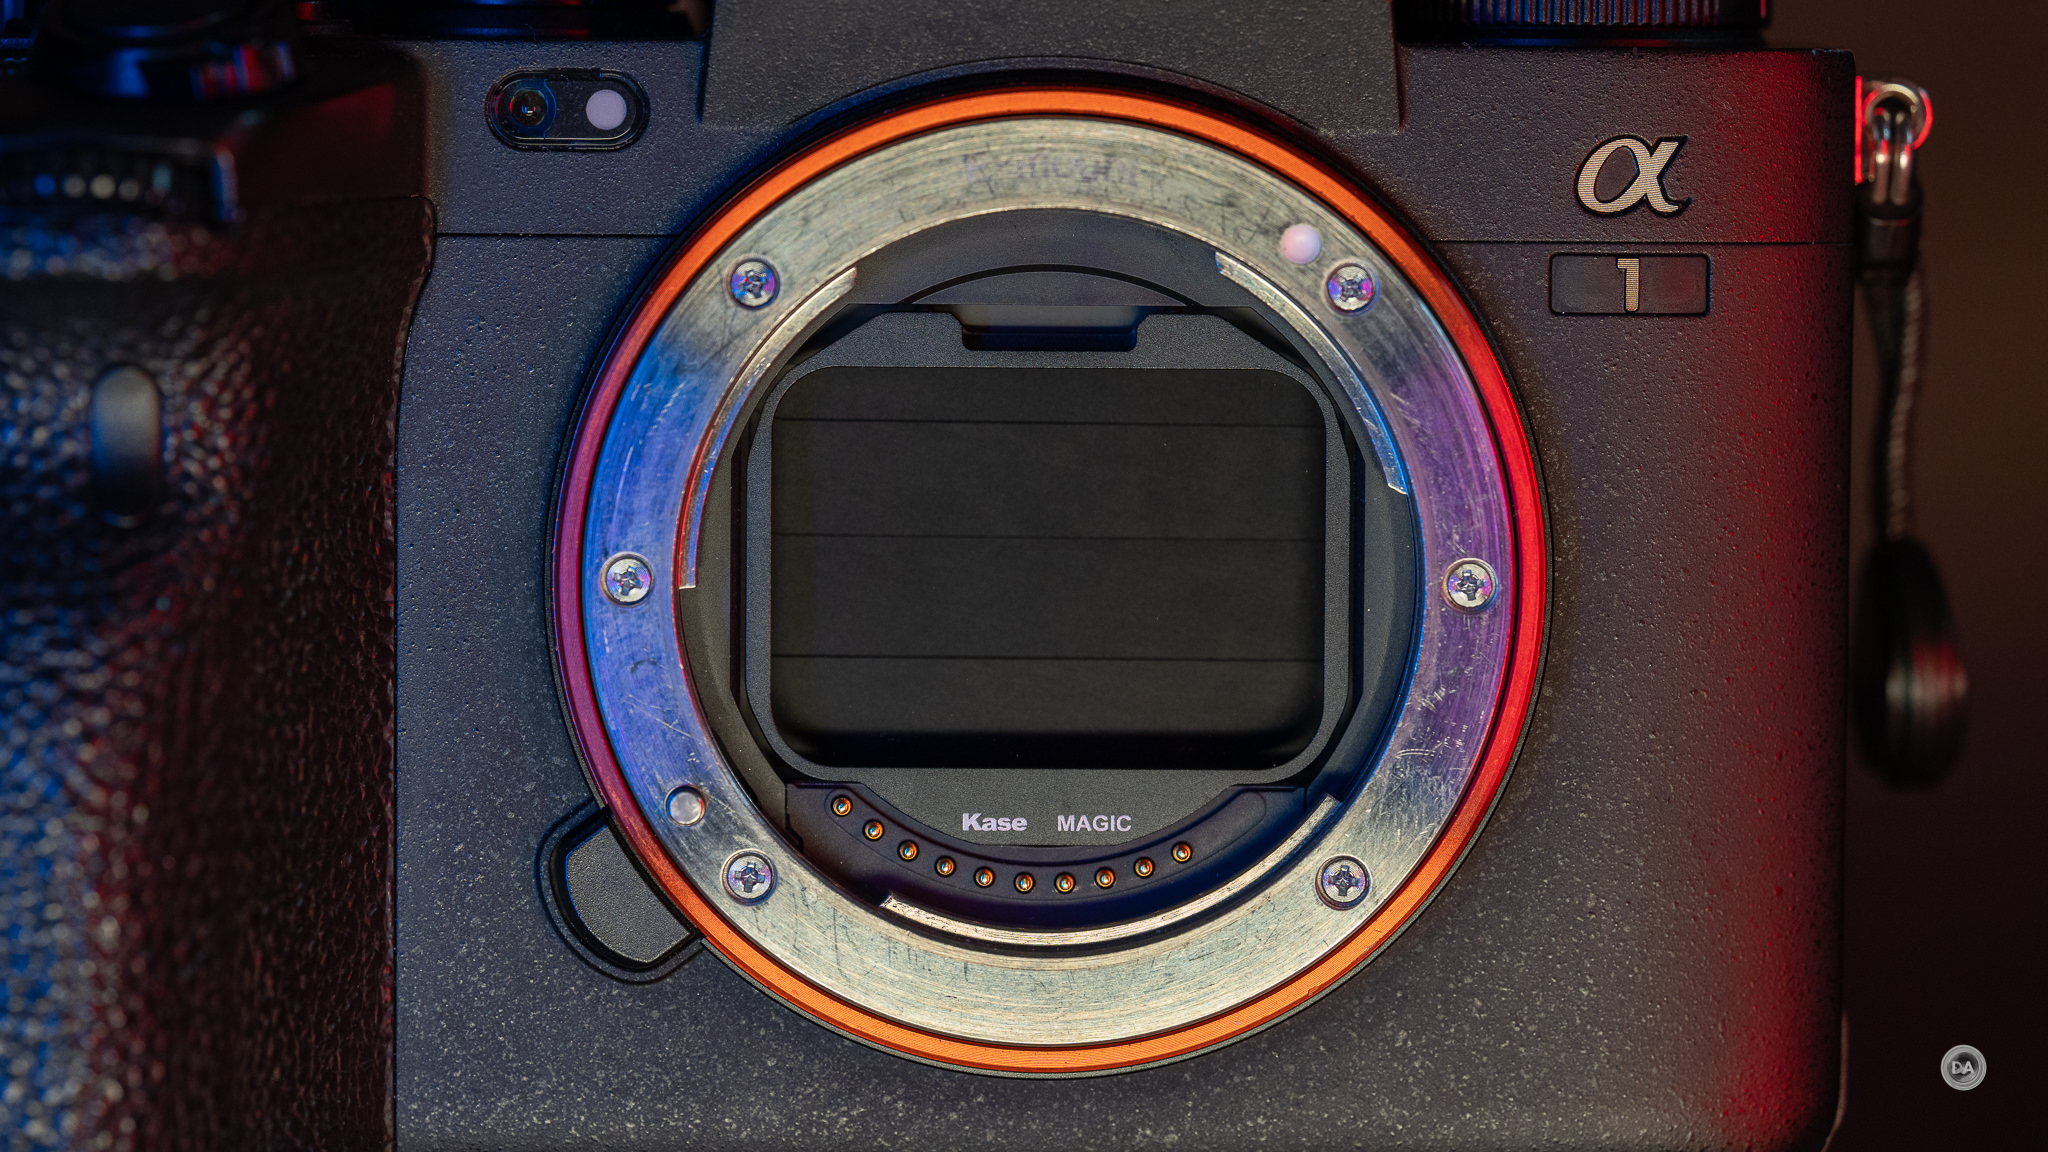
What’s more, they are also including their “Magic Clip In Filter” for Sony buyers as a free gift. This appears to be an ND4 filter, and is designed to drop in right in front of the sensor. They even include a little “guitar pick” designed to allow you to easily lift the filter out.
All of this is a great, as it allows potential buyers more control over the light, potentially allowing for more effective flash sync, proper shutter speeds for video, etc…
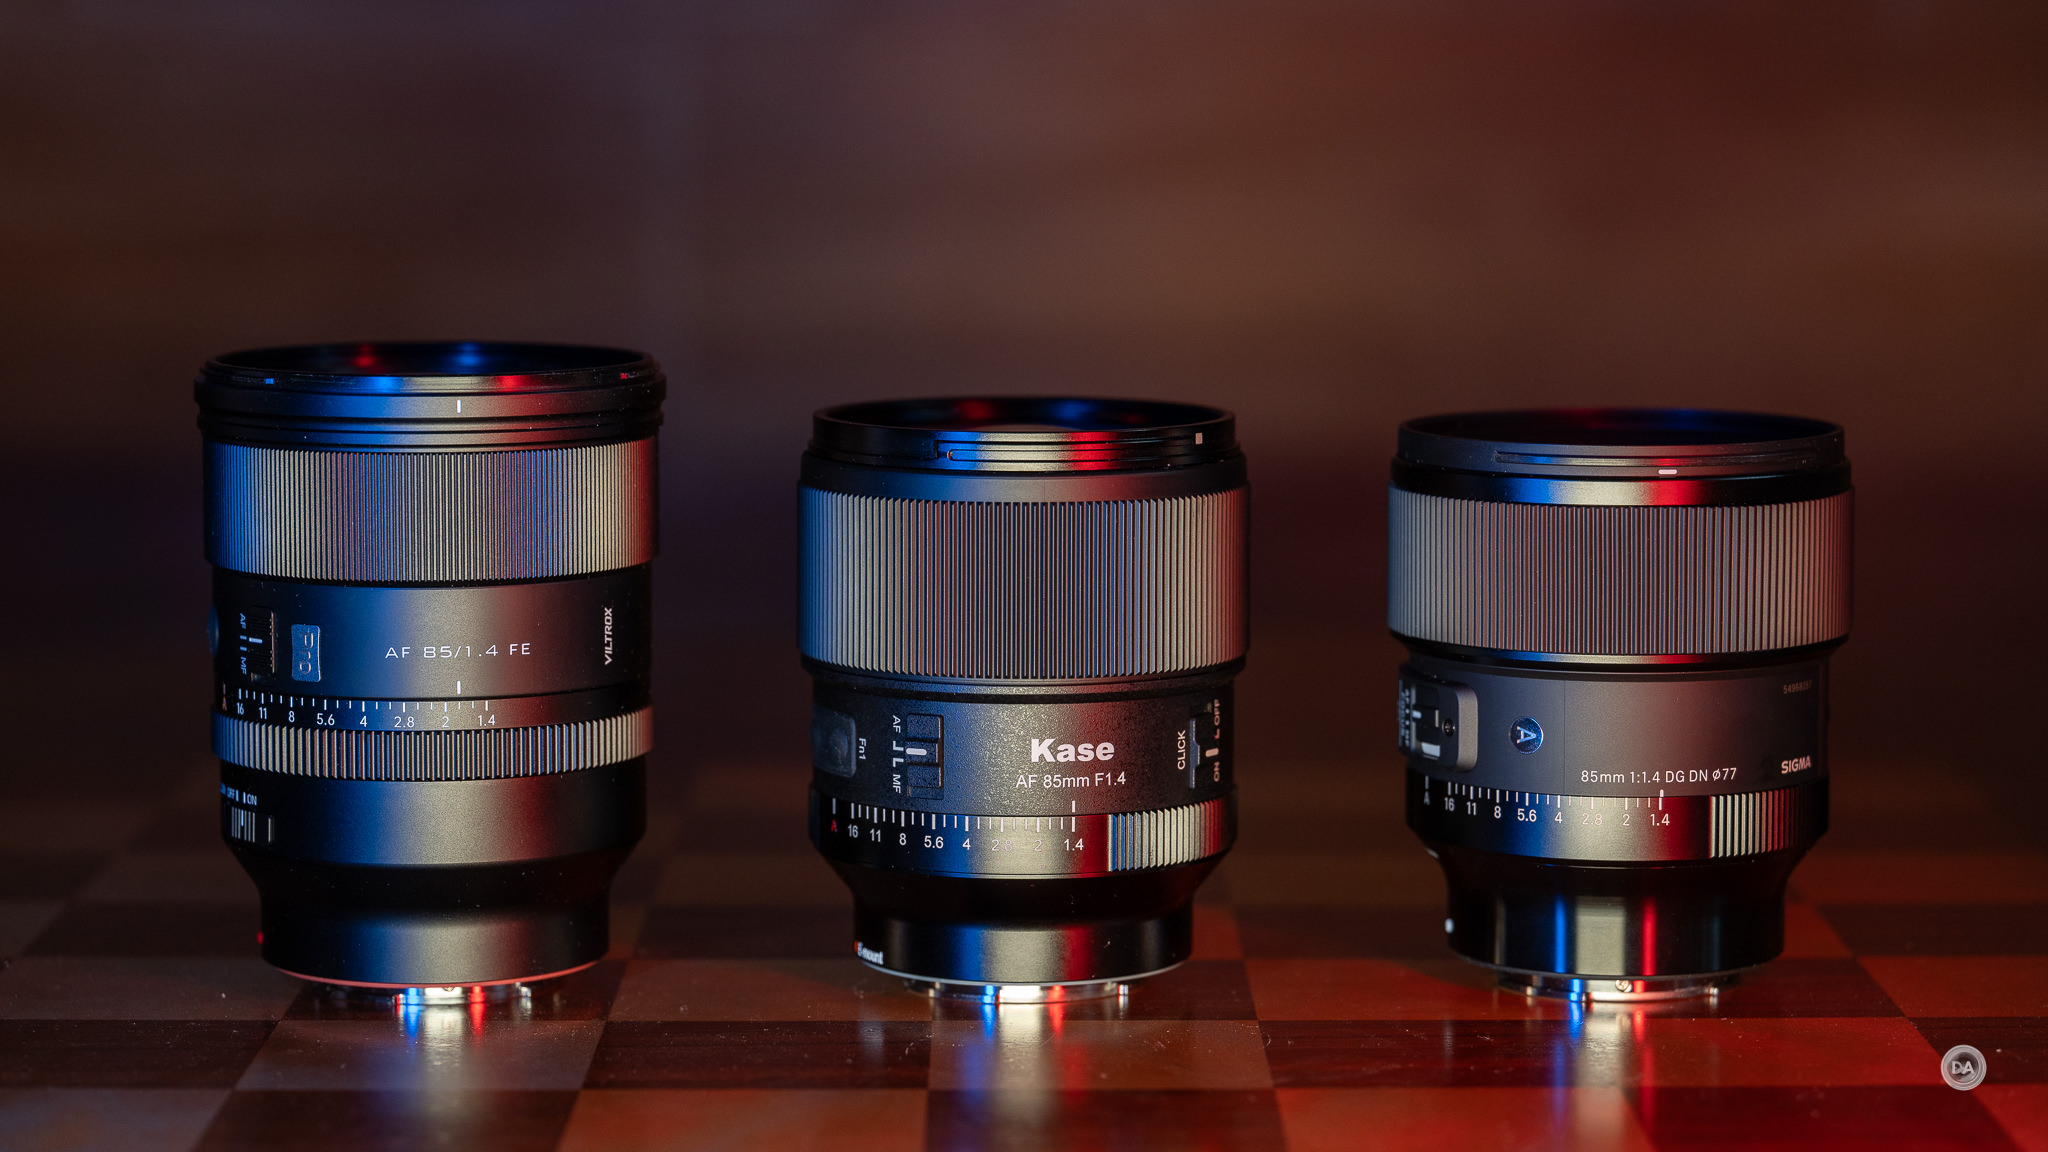
There have been a number of new 85mm F1.4 lenses released for Sony, most recently including the Viltrox PRO 85mm F1.4 and the Sirui Aurora 85mm F1.4. In many ways this new Kase 85mm most reminds me of the Aurora, though Kase has managed to bring a more compelling package with both better features and better performance. Let’s explore why that is…
Kase 85mm F1.4 Build and Handling
I really like Viltrox’s recent PRO 85mm F1.4, but there’s no question that its a bigger lens. Kase has done a really great job with managing the size of the 85mm F1.4, as it is both feature rich while also being nice and compact.
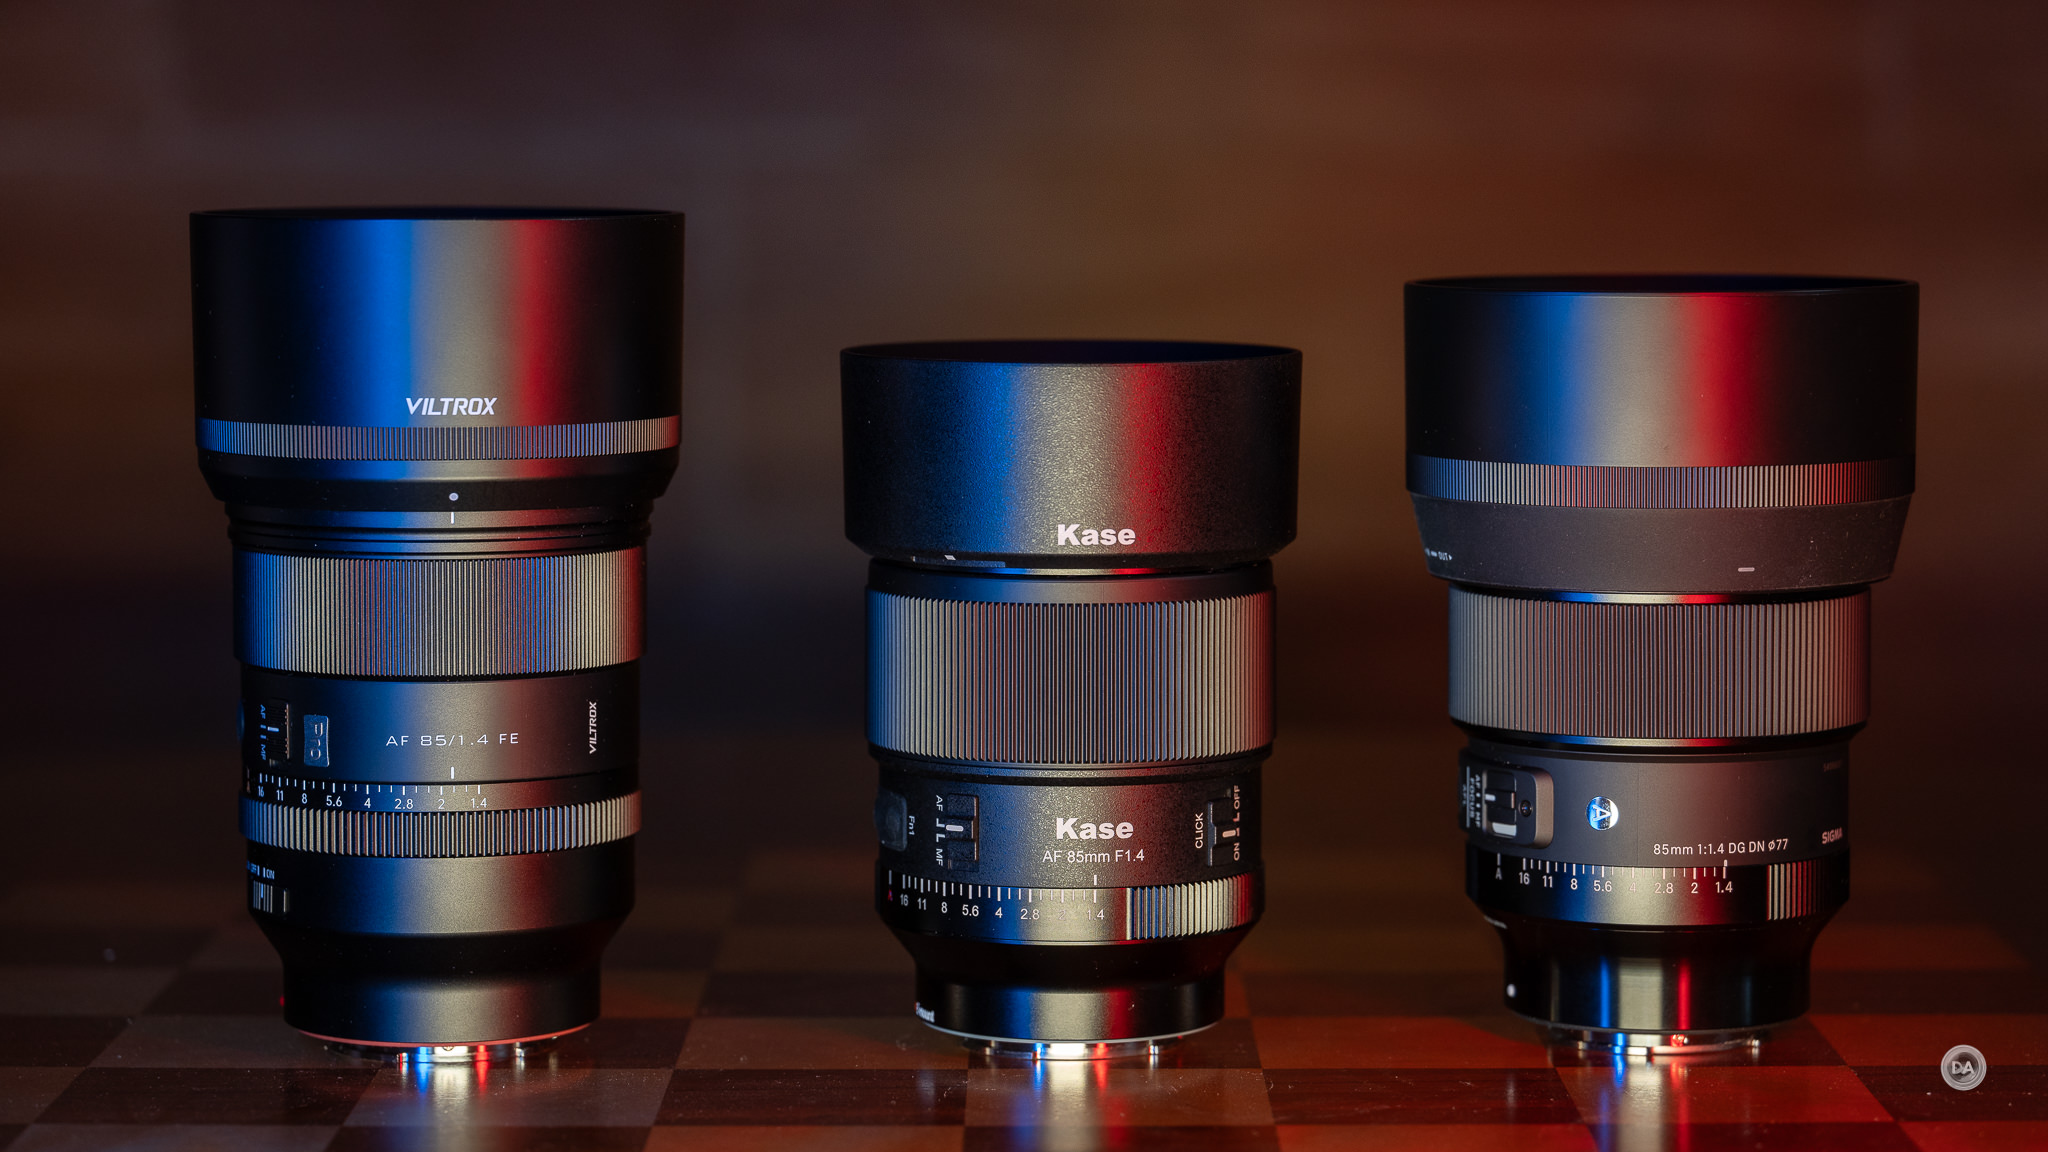
What’s more, the Kase 85mm F1.4 manages to stay compact even when the lens hood is used, something that diminishes the compact nature of the Sigma 85mm F1.4:
The diameter is 82mm (3.24″) and the length is 99mm (3.89″). That makes it very similar in size to the Samyang AF 85mm F1.4 II. It weighs in at 580g (20.45oz), making it a little lighter than the Sigma 85mm F1.4 but heavier than than the Samyang (509g) or the Sirui Aurora (540g).
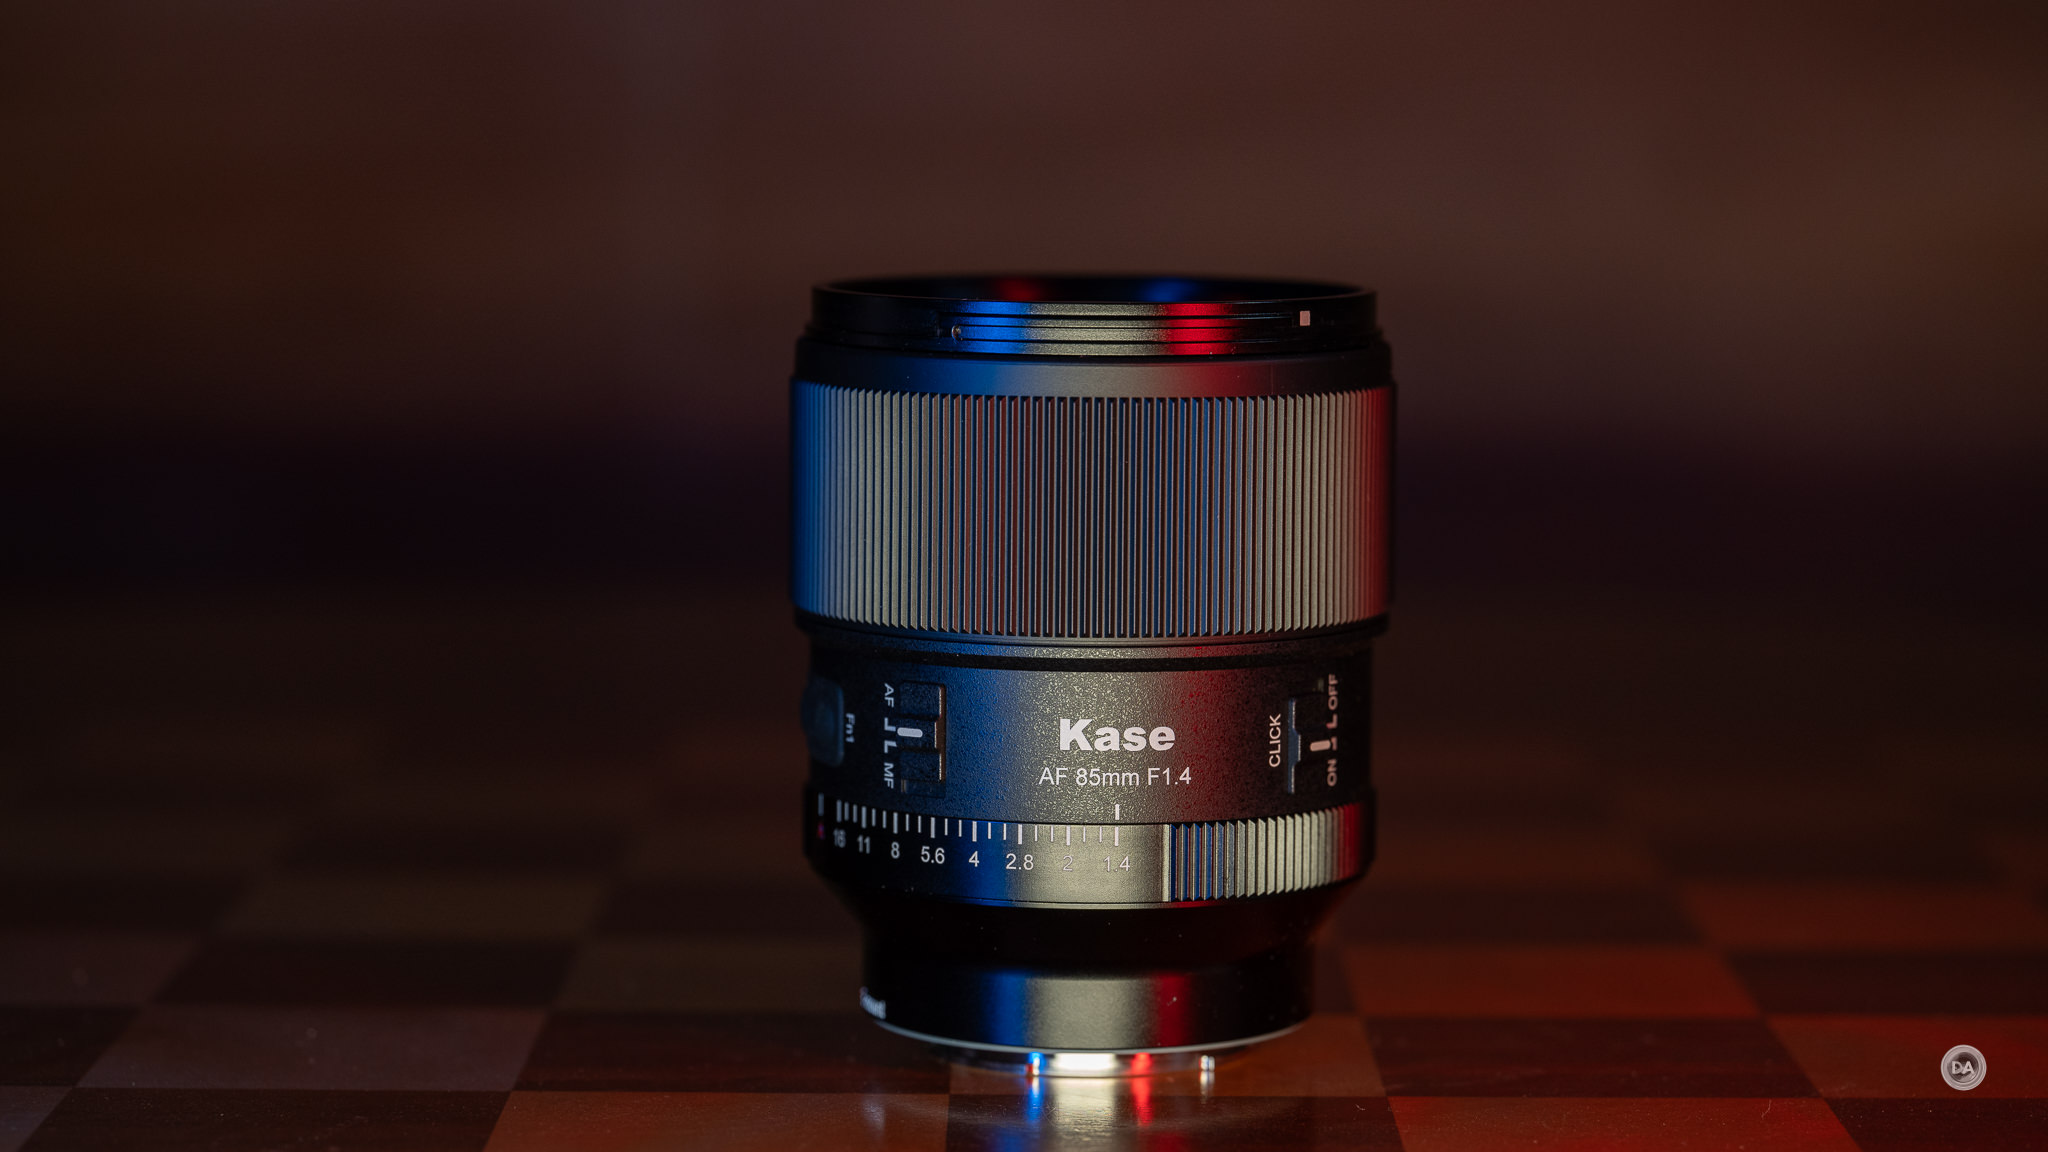
Overall my impression is that the lens is compact but very well made. It has a reassuring density and a premium feel. I think the design language is nice and clean, though it doesn’t break any new ground.
There is a weather sealing gasket at the lens mount, though I haven’t yet seen a cutout diagram showing the position of other seals. I suspect there are other seals as that has become the standard for this class of lens, and Kase does claim that it is sealed against dust and moisture.
The body of the lens is molded and made of metal alloys. There is a lightly flocked finish on the barrel that is offset by glossier sections on areas like the aperture ring and near the lens mount. The ribbed textures of the aperture ring is reminiscent of a Sigma ART lens, and I would say that Sigma ART lenses represent a fair standard for the level of build quality.
The hood is more compact than competing lenses. The quality feels good, with thicker plastics, a flocked finish that matches the lens barrel, and good precision in the bayonet mount. It clicks into place nicely, though there is no lock.
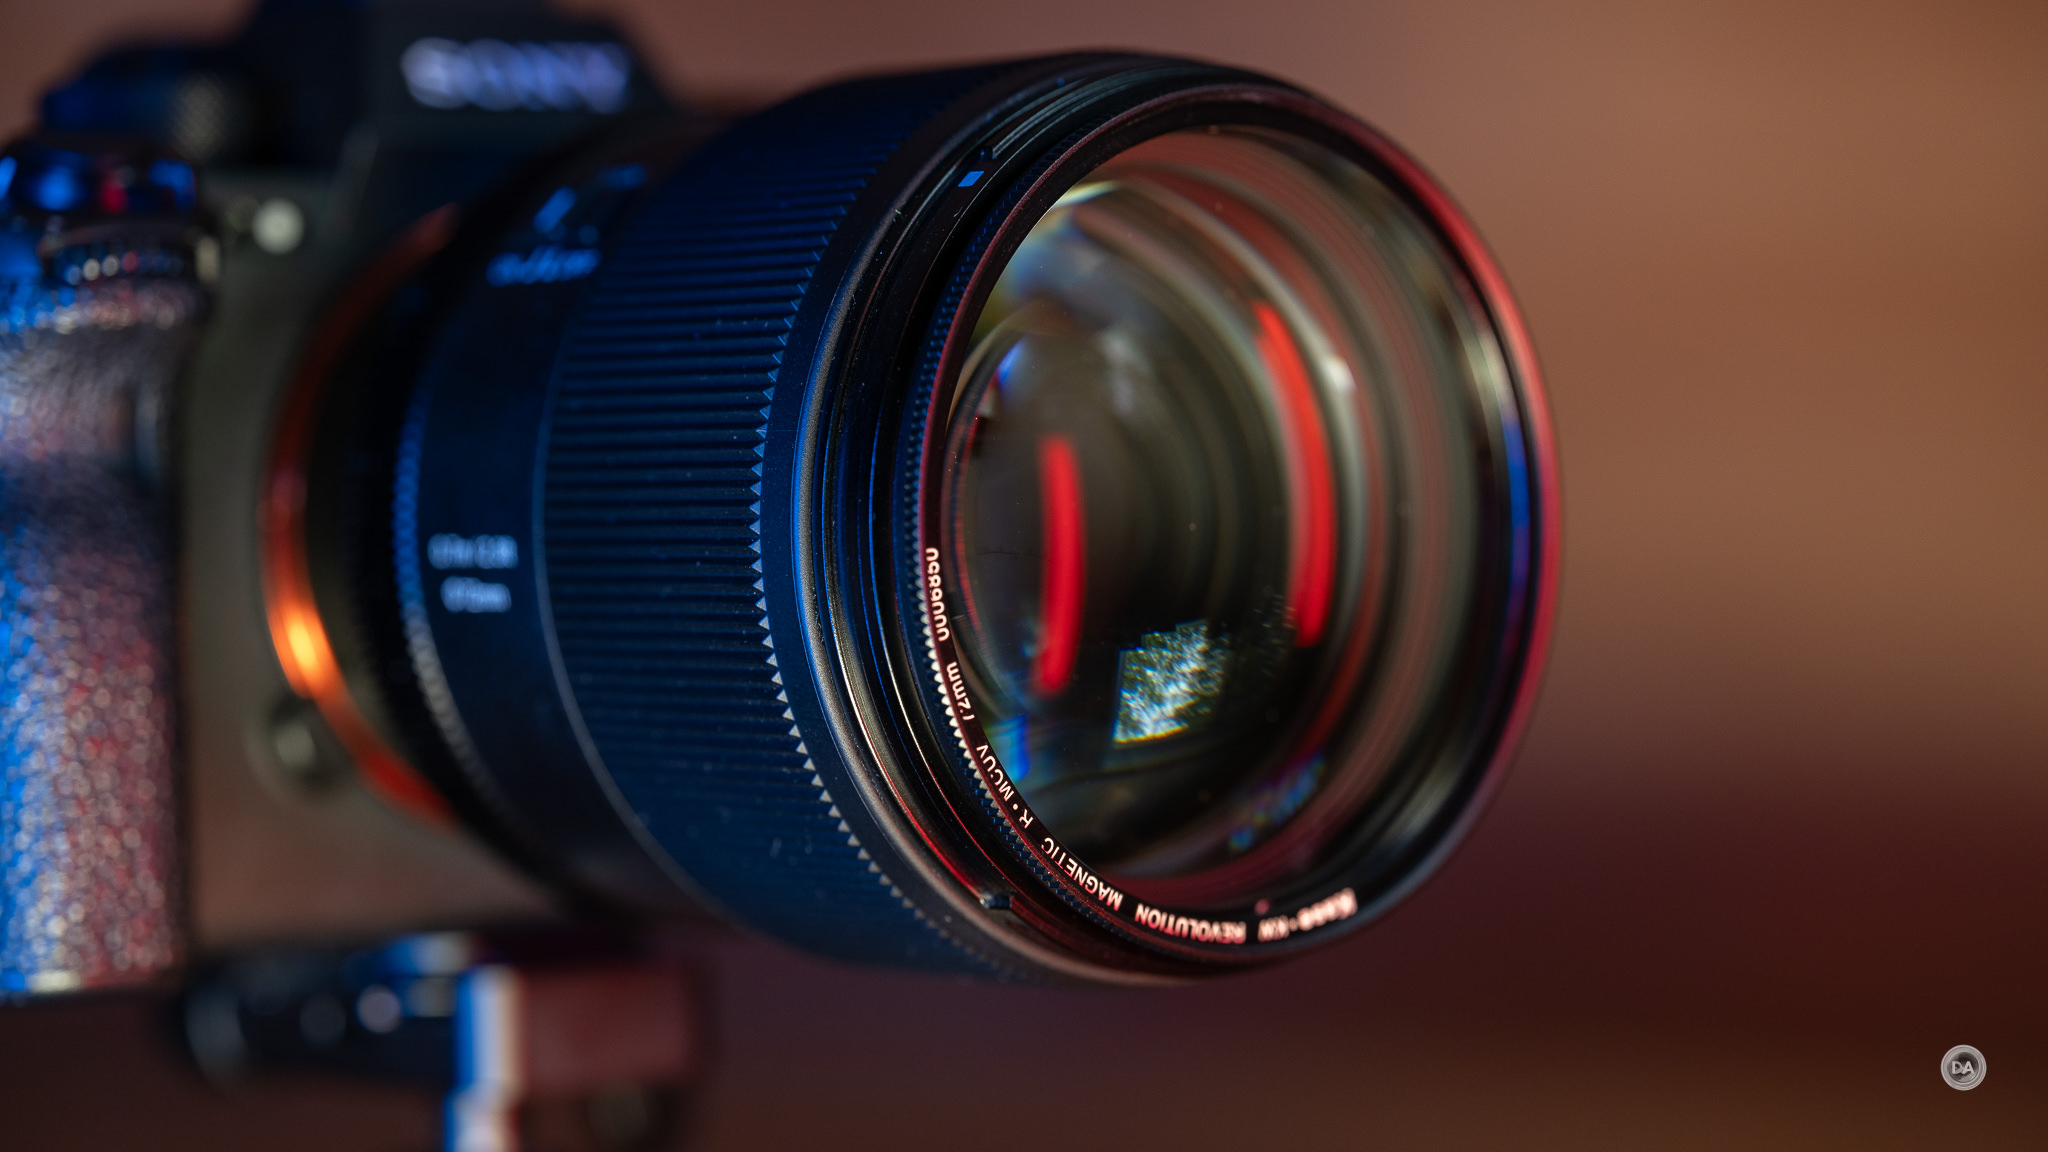
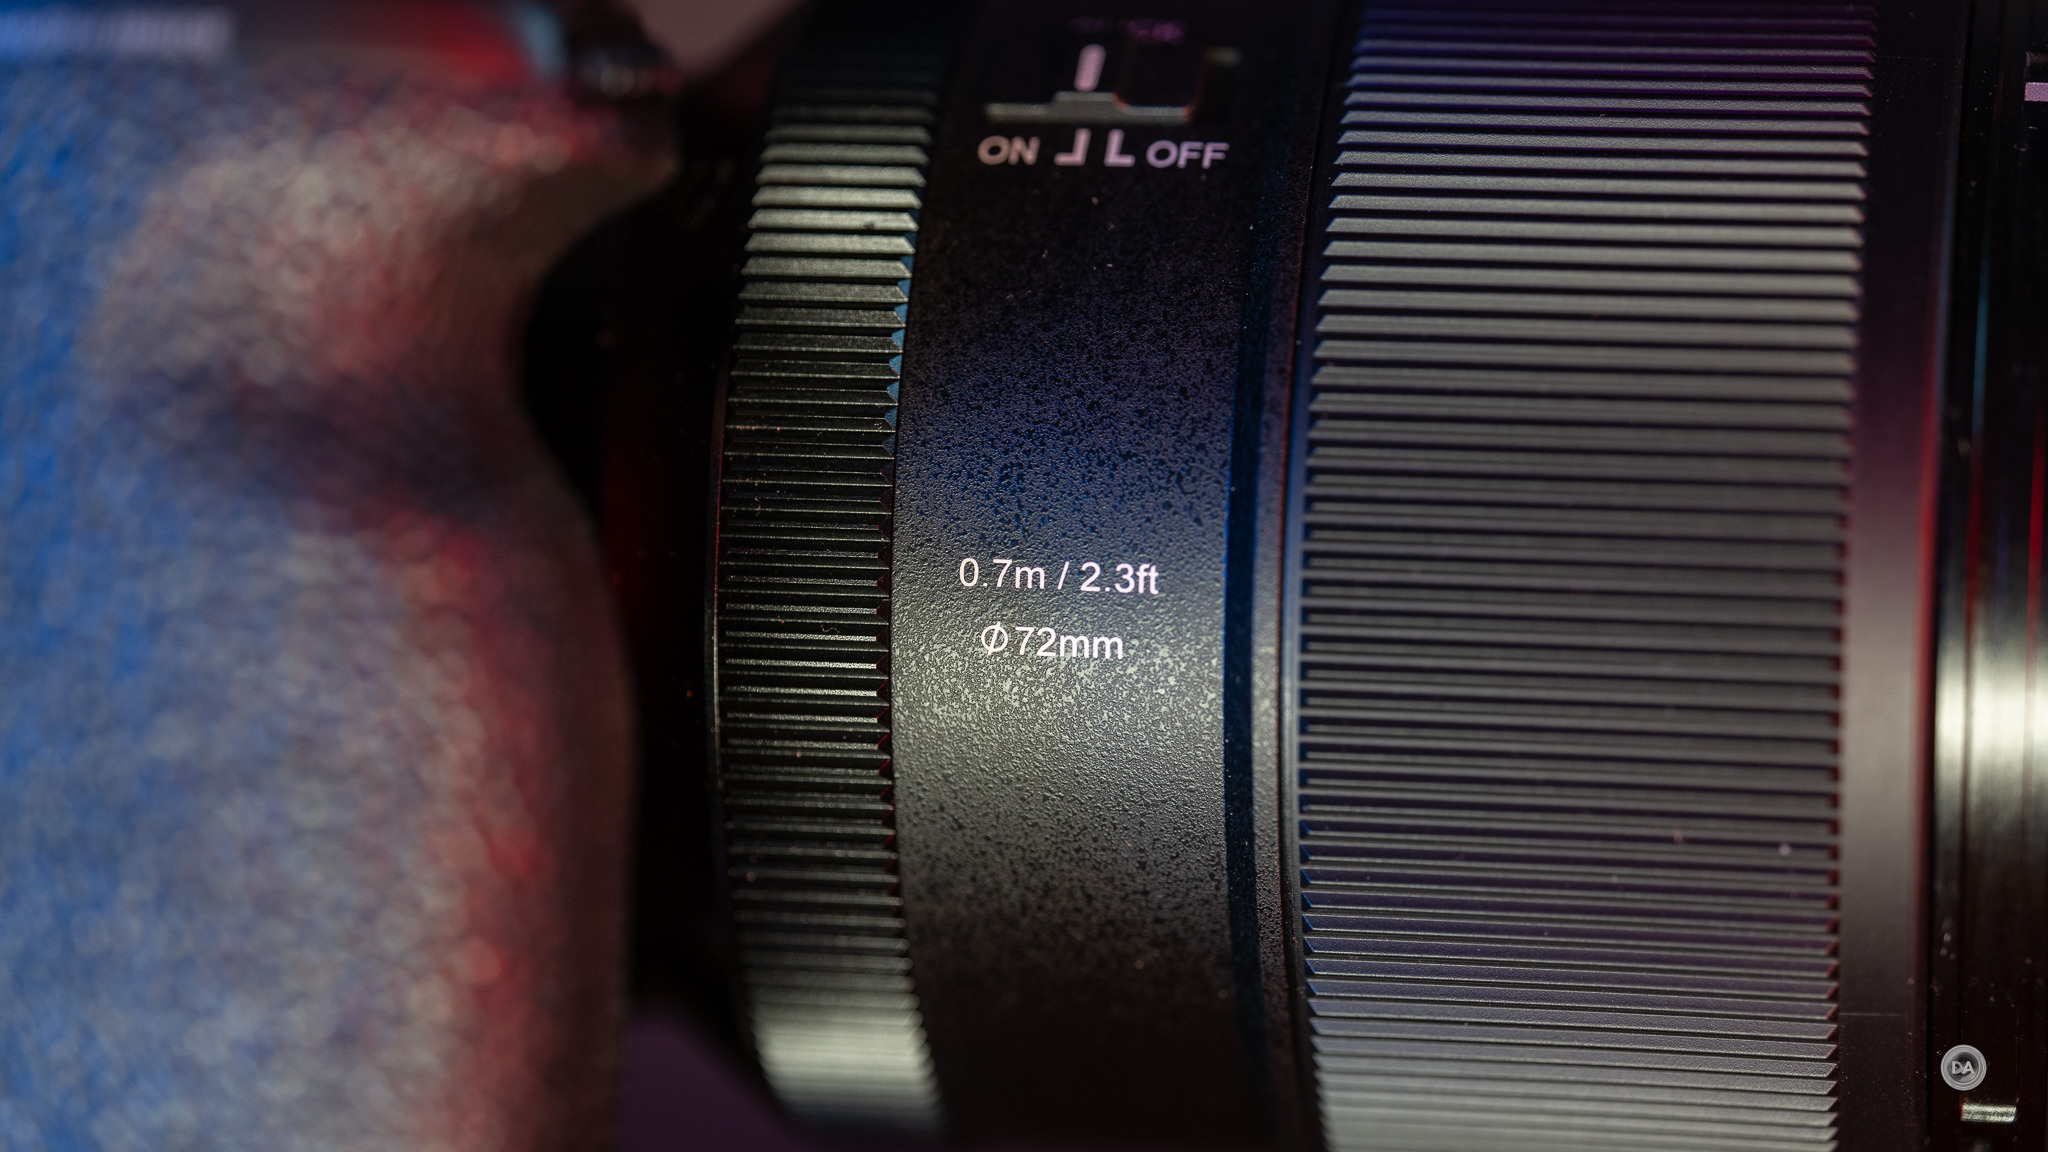
As mentioned previously, the front filter thread is 72mm, which matches the Samyang and is a bit smaller than the 77mm on lenses like the Viltrox, Sigma, or Sony GM lenses.
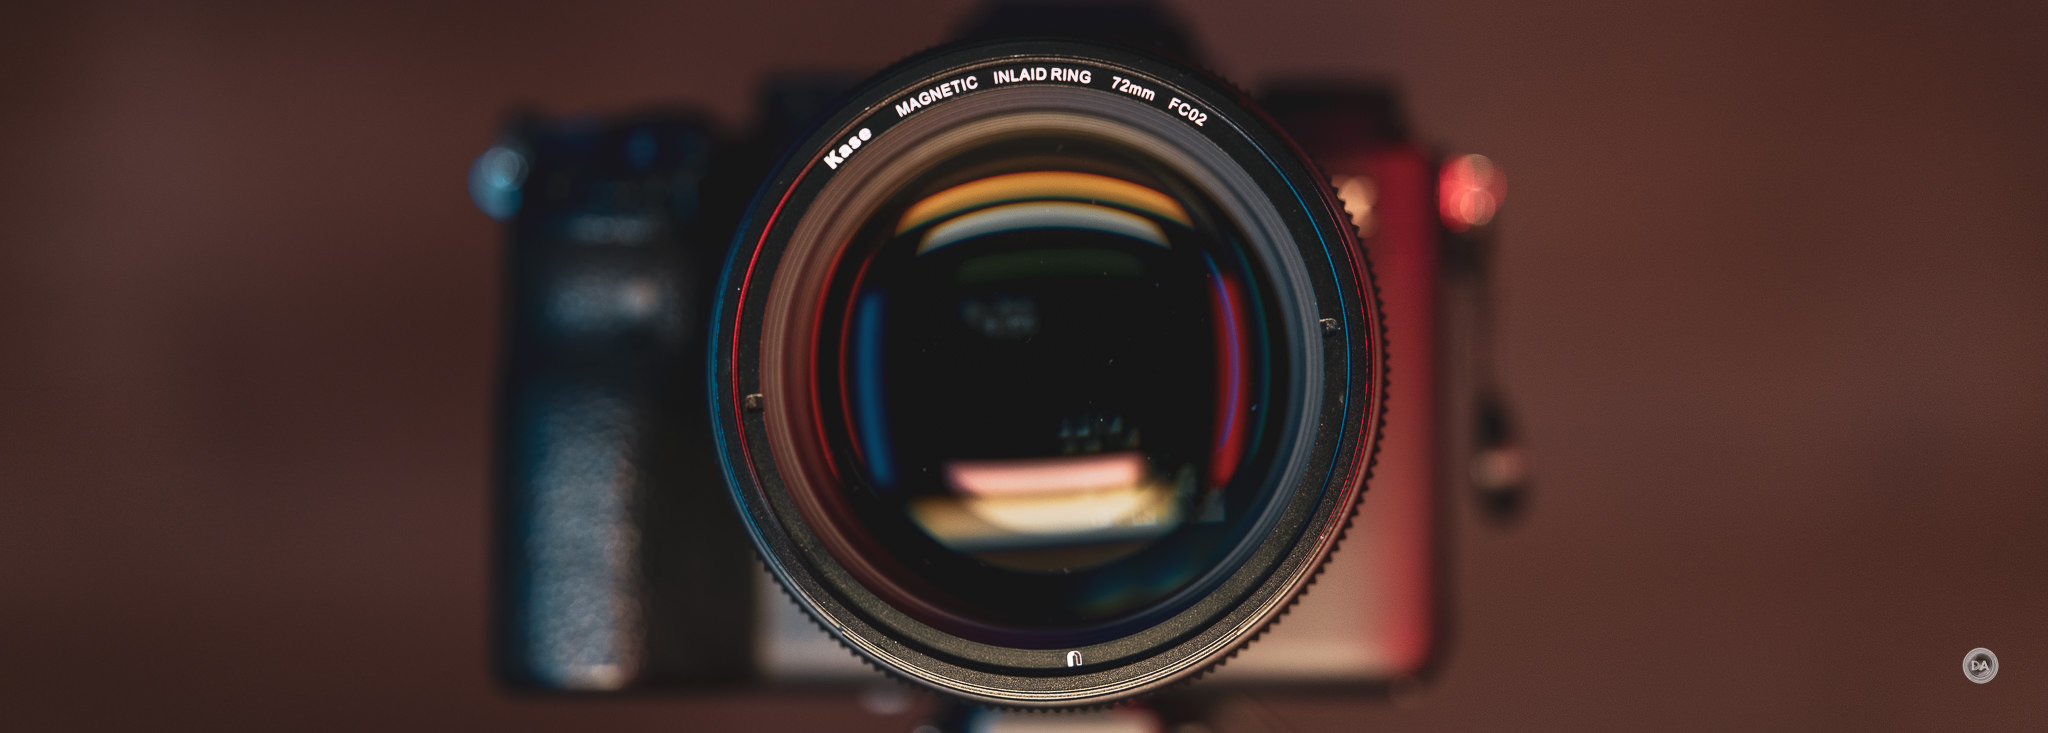
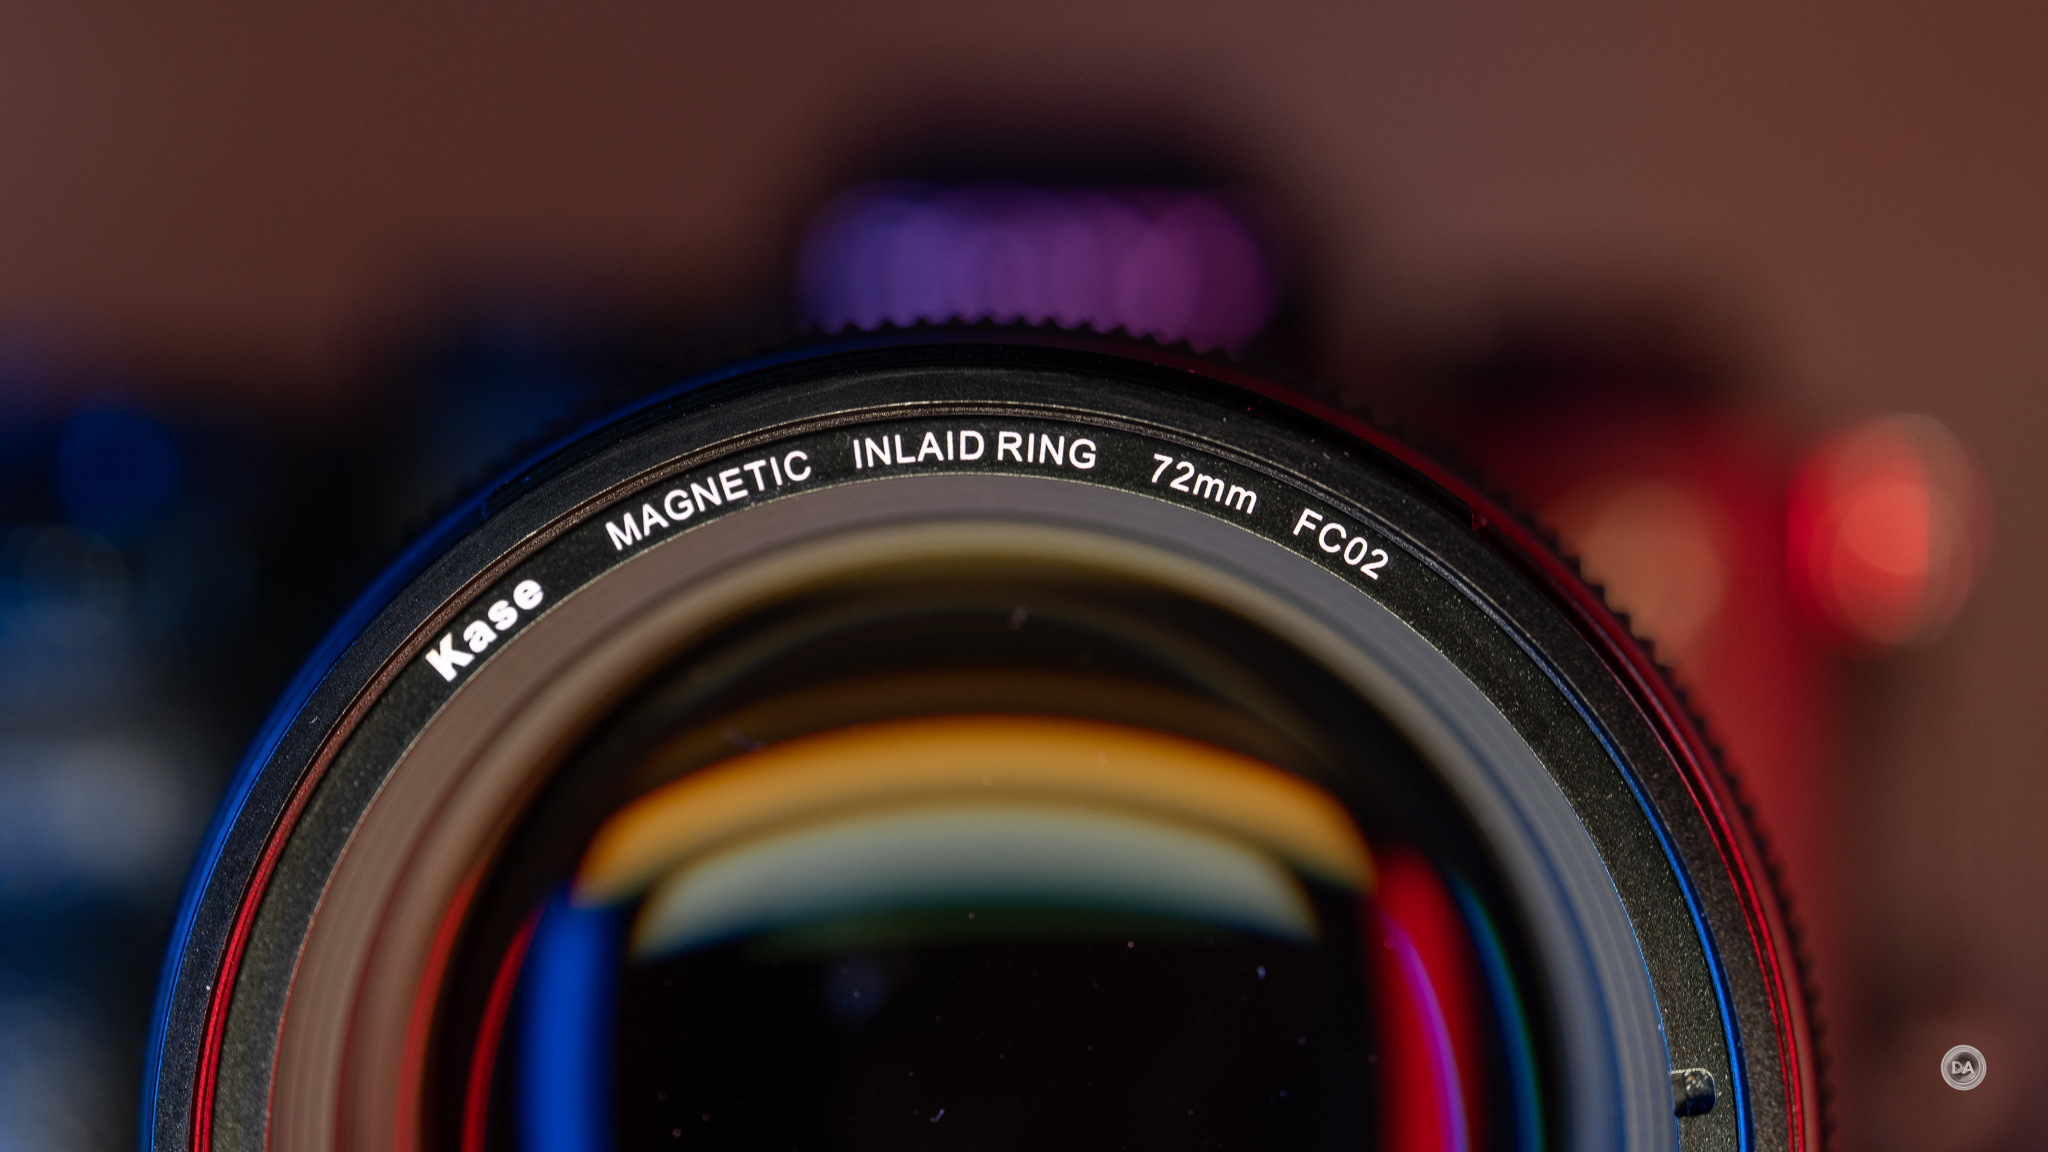
The headline here is the very clever implementation of the magnetic filter mount. A closer look reveals that the “magnetic inlaid ring” not only allows for a nice attachment of filters but also has the ability to rotate, allowing you to rotate Vari-ND or CP-L filters without worrying about disrupting the magnetic connection.
The only downside of this will be for those of you with a bit of OCD – this means that the text on the facade of the lens will not always look nicely straight up and down as shown here. It could be rotated to any position.
As noted, I was able to use both the included filter from Kase along with an older Freewell filter that I already owned. The magnetic connection on the Kase filter was definitely stronger, though I was still able to use the Freewell filter without issue.
If you want other Kase magnetic filter options (I’m not a fan of using UV/Protection filters, myself), you can check out their full lineup of Revolution Plus magnetic filters.
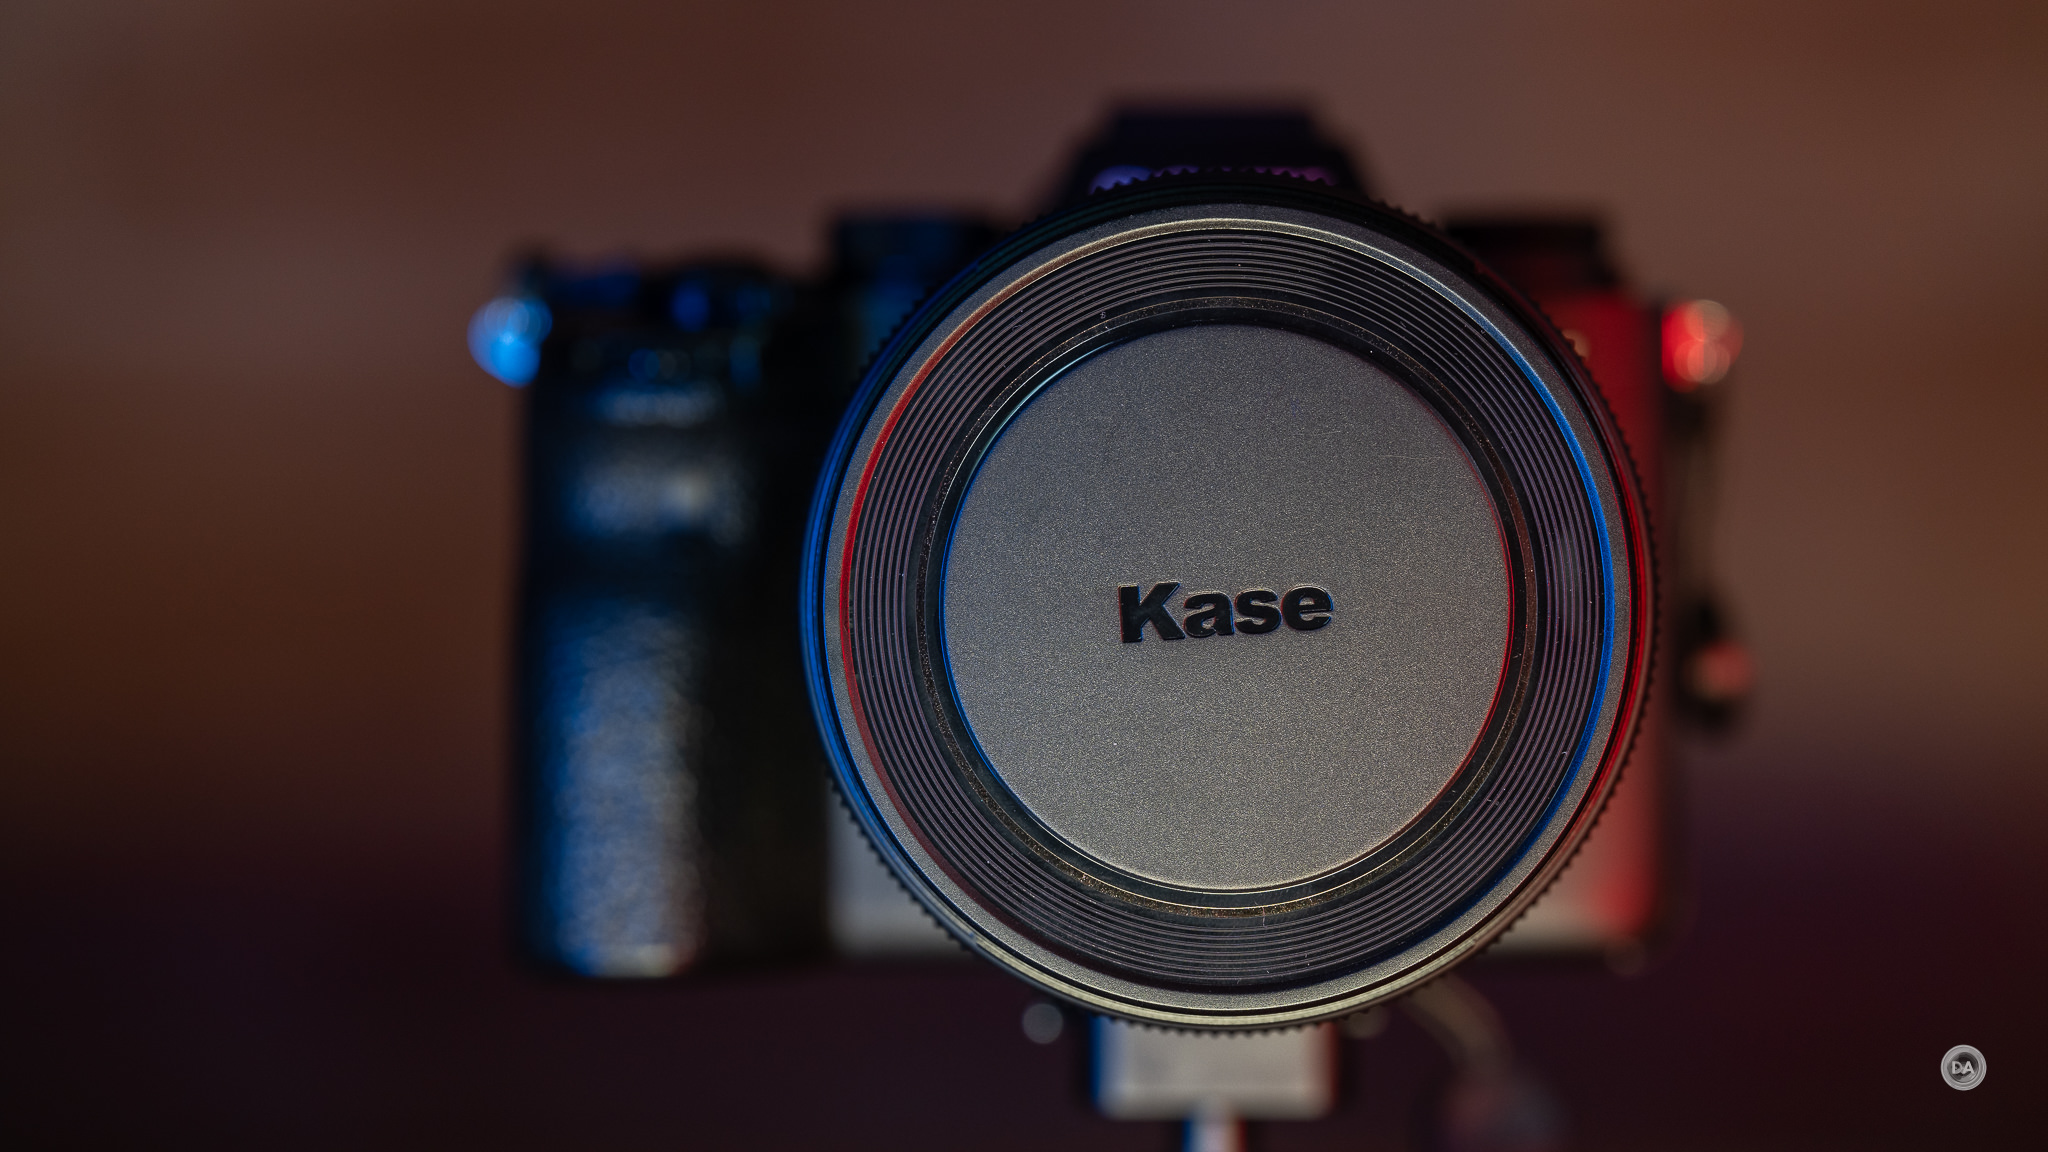
Kase includes two choice for a front cap. One is a traditional pinch cap while the second is a magnetic cap that smartly snaps into place.
If you are a hood user, the pinch cap is easier to use because it is center pinch. The magnetic cap requires you to free it from the sides, which is harder to do with the lens hood in place.
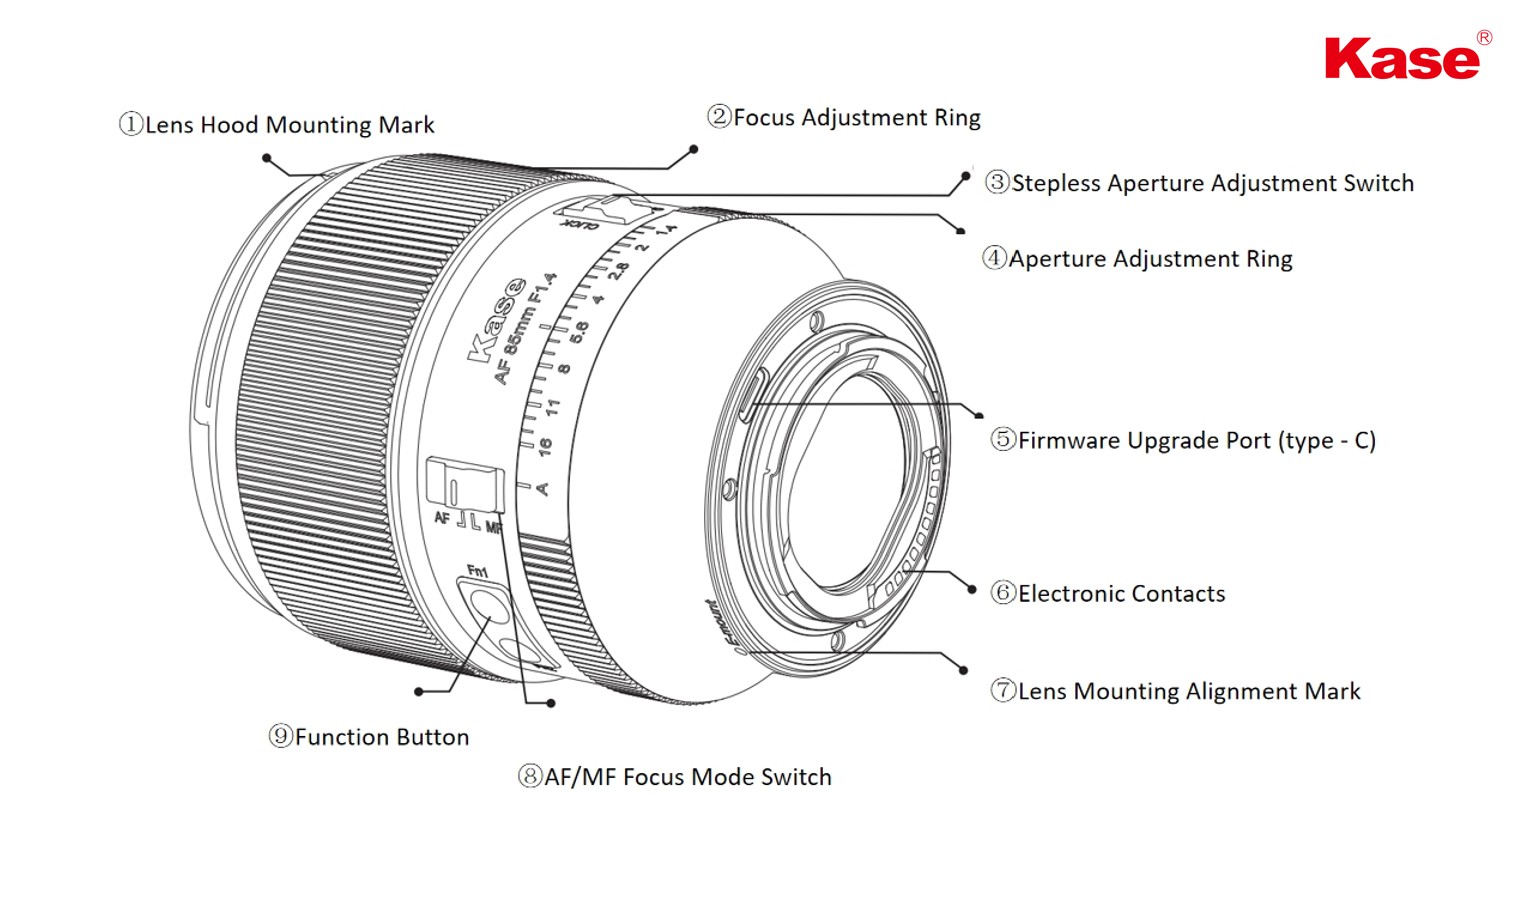
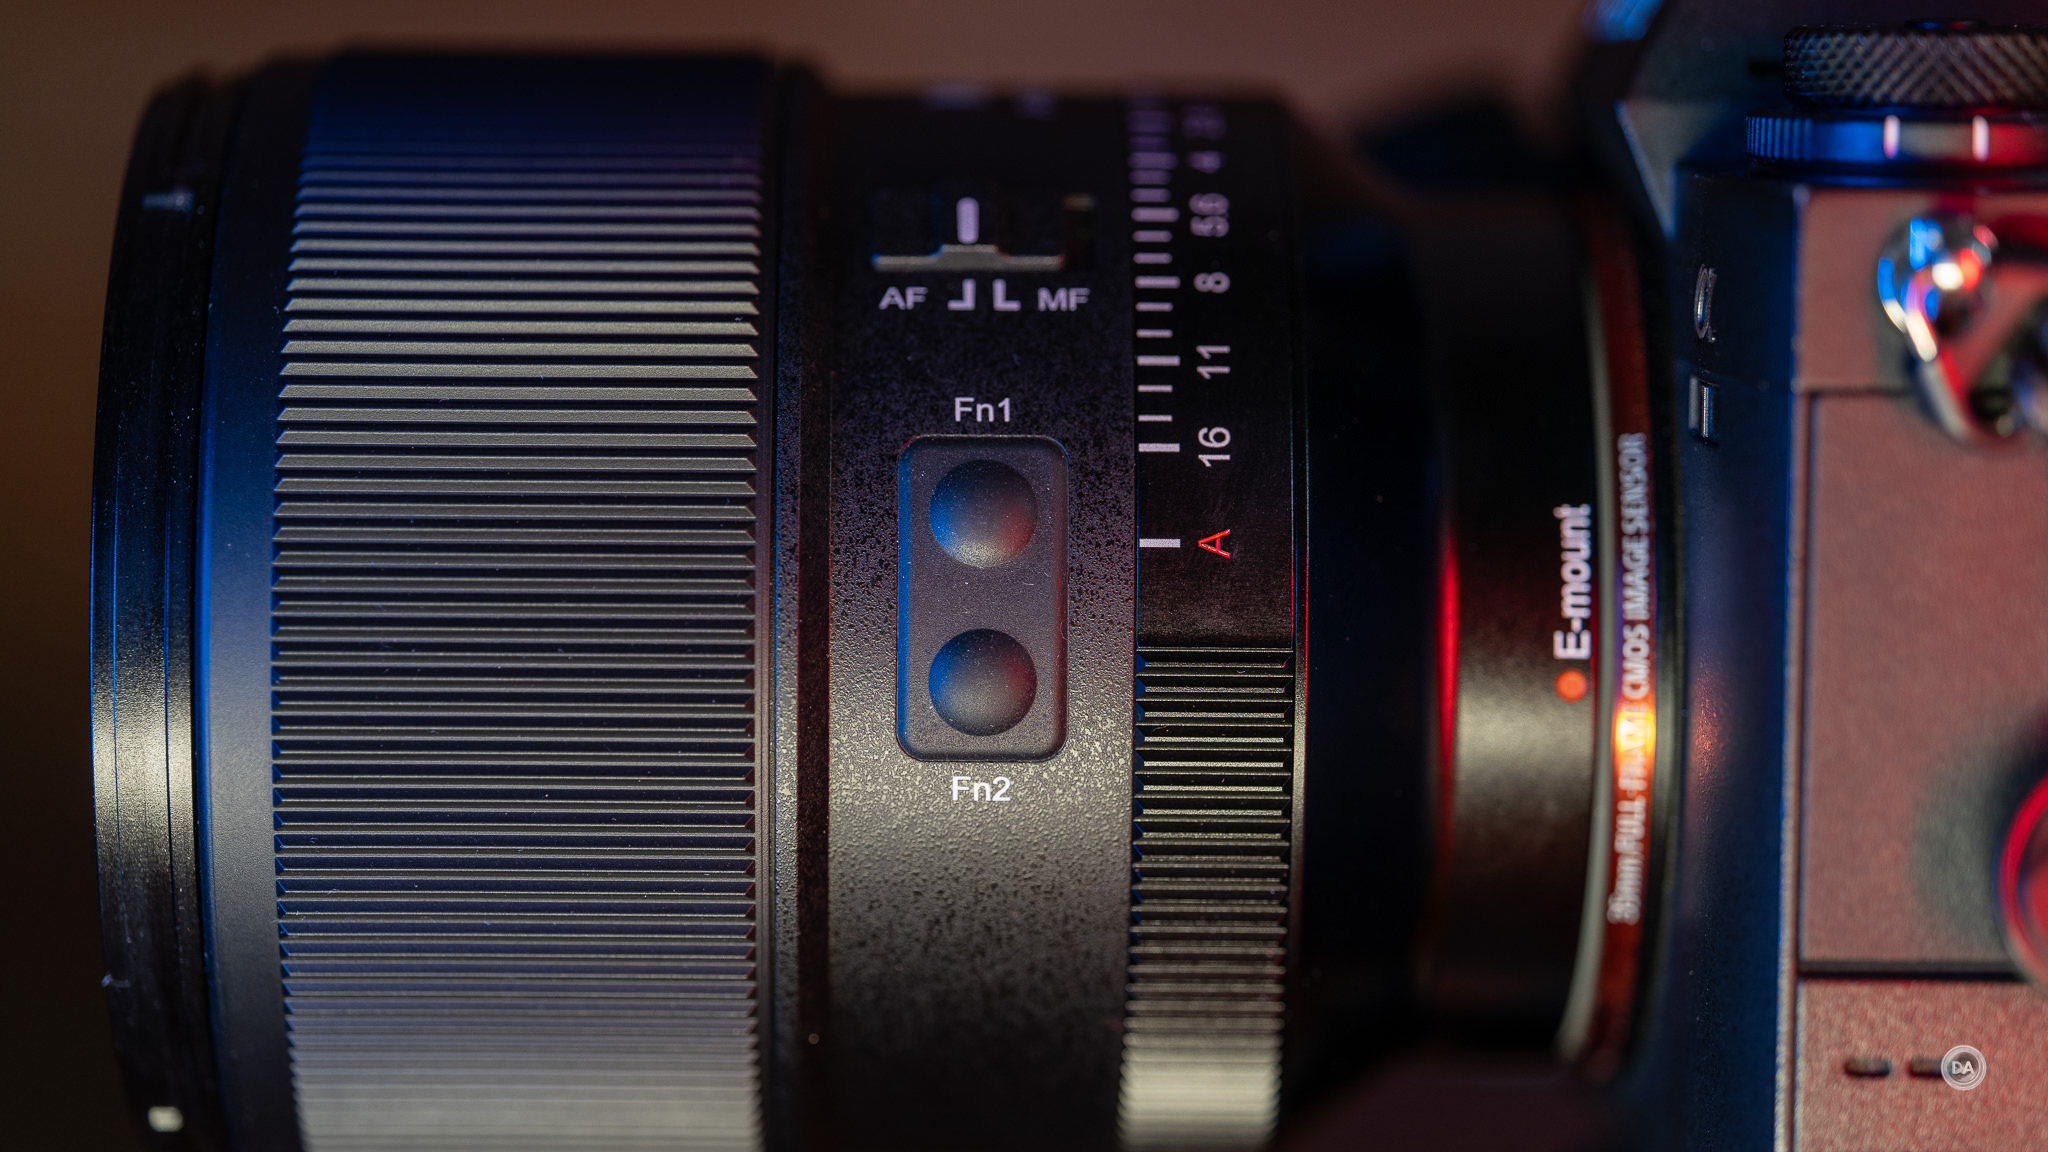
There is a full set of features outside of the filter options. Here’s a look at everything on this lens:
The Kase 85mm F1.4 has a few features that alternative lenses do not, and only lacks one feature that some others have. The missing feature is an iris lock (Sigma and Sony GM), which allows you to lock into or out of the aperture ring. It would have been useful, too, as there isn’t a particularly firm detent between F16 (minimum aperture) and the A (Automatic) option. In fact, when declicked, there is no resistance here…which could potentially disrupt aperture racks.
What you might notice that we do have from the photo above is a second Fn (Function) button. The Fn1 button works in typical fashion with whatever function you have assigned from the camera. The Fn2 button is interesting, though, as it serves two purposes. The default function is that it will automatically shift to the minimum focus distance (short press). A long press, however, will lock it to your current focus point, allowing you to set a custom focus point that you can instantly return to with a click. That custom point seemed to last if I power cycled the camera on and off, but reset to the minimum focus distance function if I took the lens off the camera.
This is a cool function that is genuinely useful in both settings. I like being able to instantly go to MFD in order to shoot closeups with maximum magnification. It isn’t always obvious where that closest focus distance is.
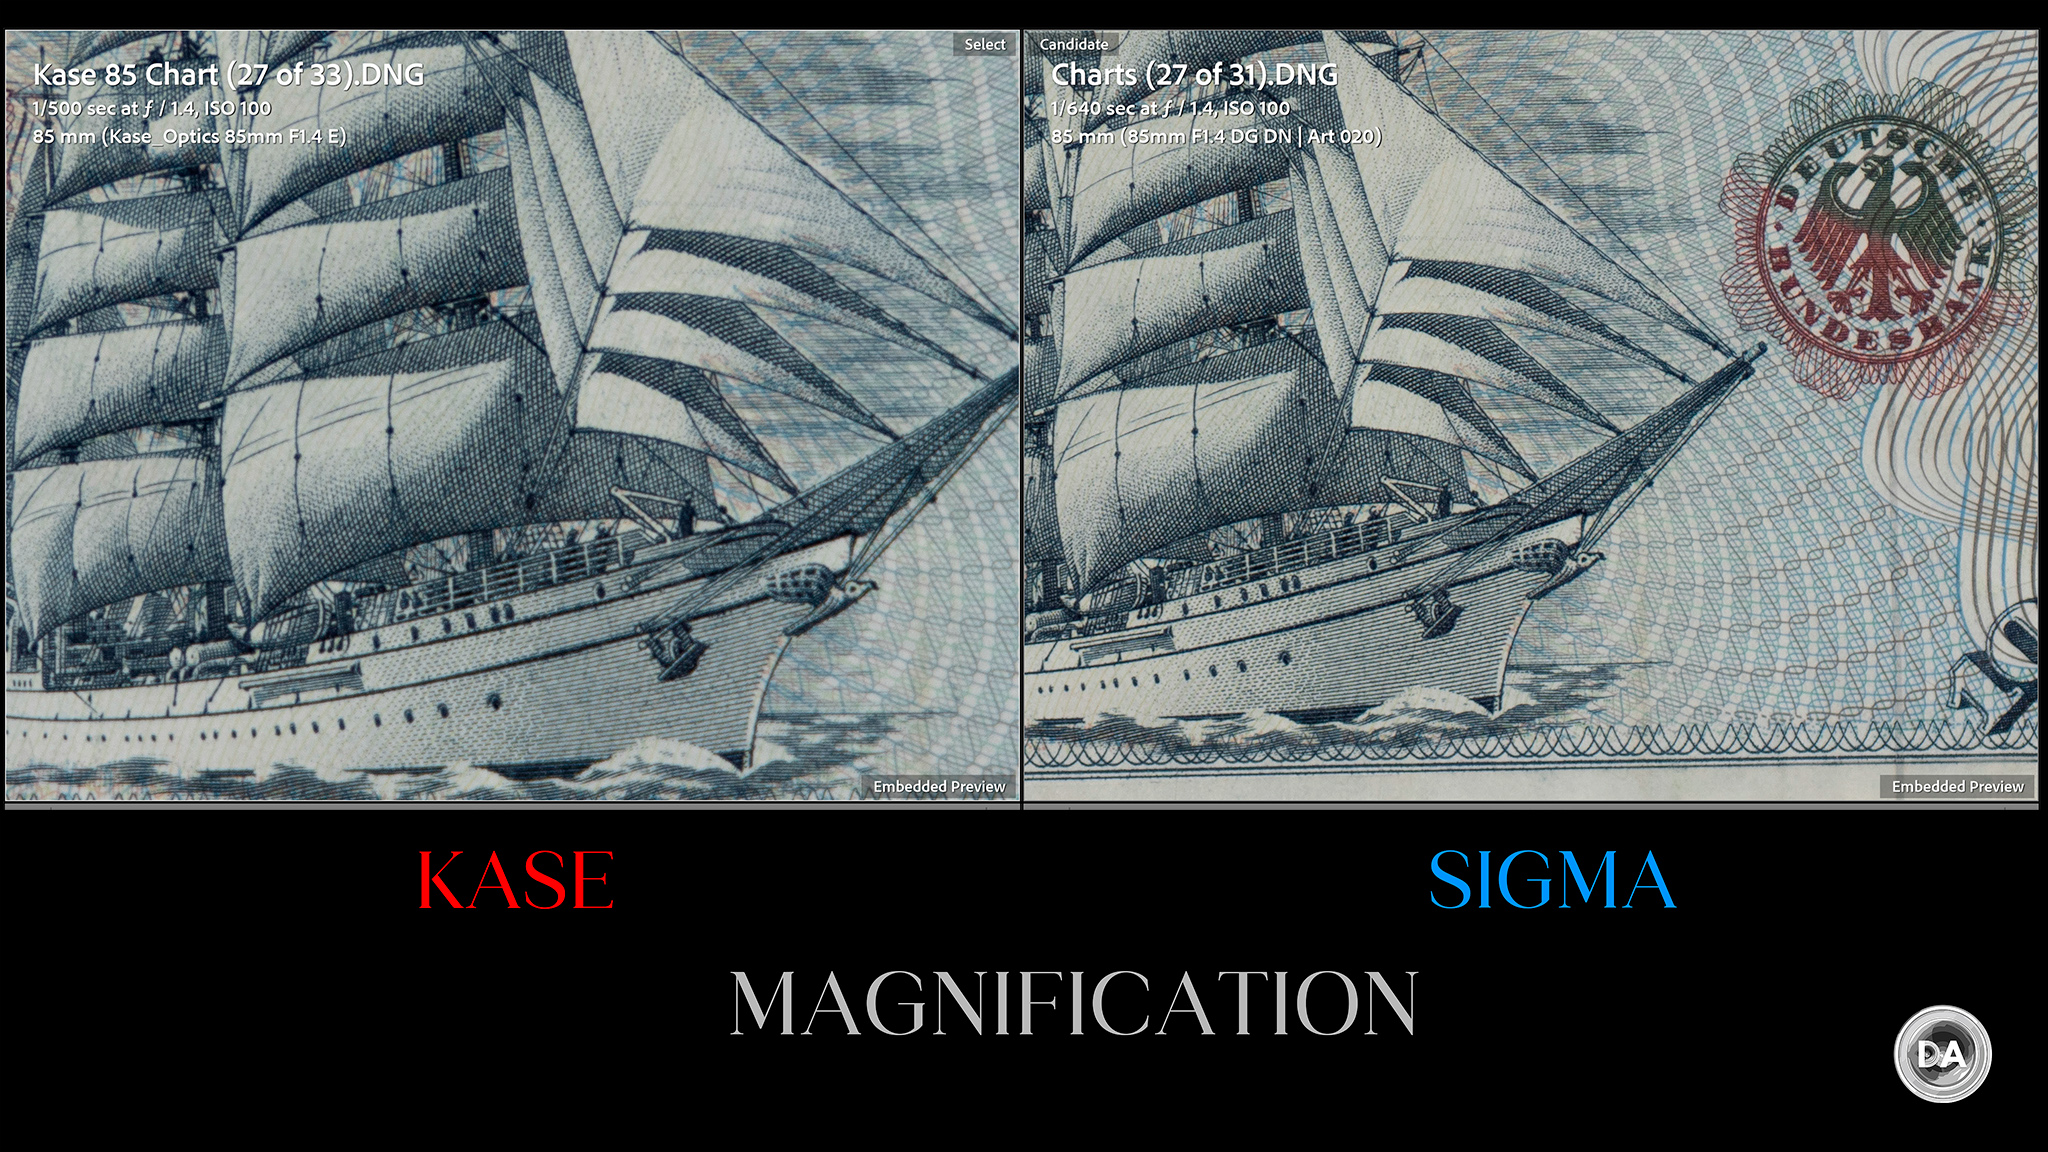
Speaking of that minimum focus distance. It is a bit closer than the typical 85cm that you typically see on 85mm lenses. You can focus as closely as 70cm, which allows for a higher than usual magnification of nearly 0.14x.
Most of the competing lenses are in the 0.11x range. You can clearly see the Kase advantage in magnification, though this is offset somewhat by the fact that contrast suffers at close distances compared to some competing lenses.
So, while you get higher magnification, it comes at a penalty…at least at F1.4. Stop down a bit and you’ll get higher contrast.
Stopping down isn’t a bad idea anyway; depth of field at 70cm and F1.4 is ridiculously small.
There is an AF | MF switch on the left side, giving you quick control over that function.
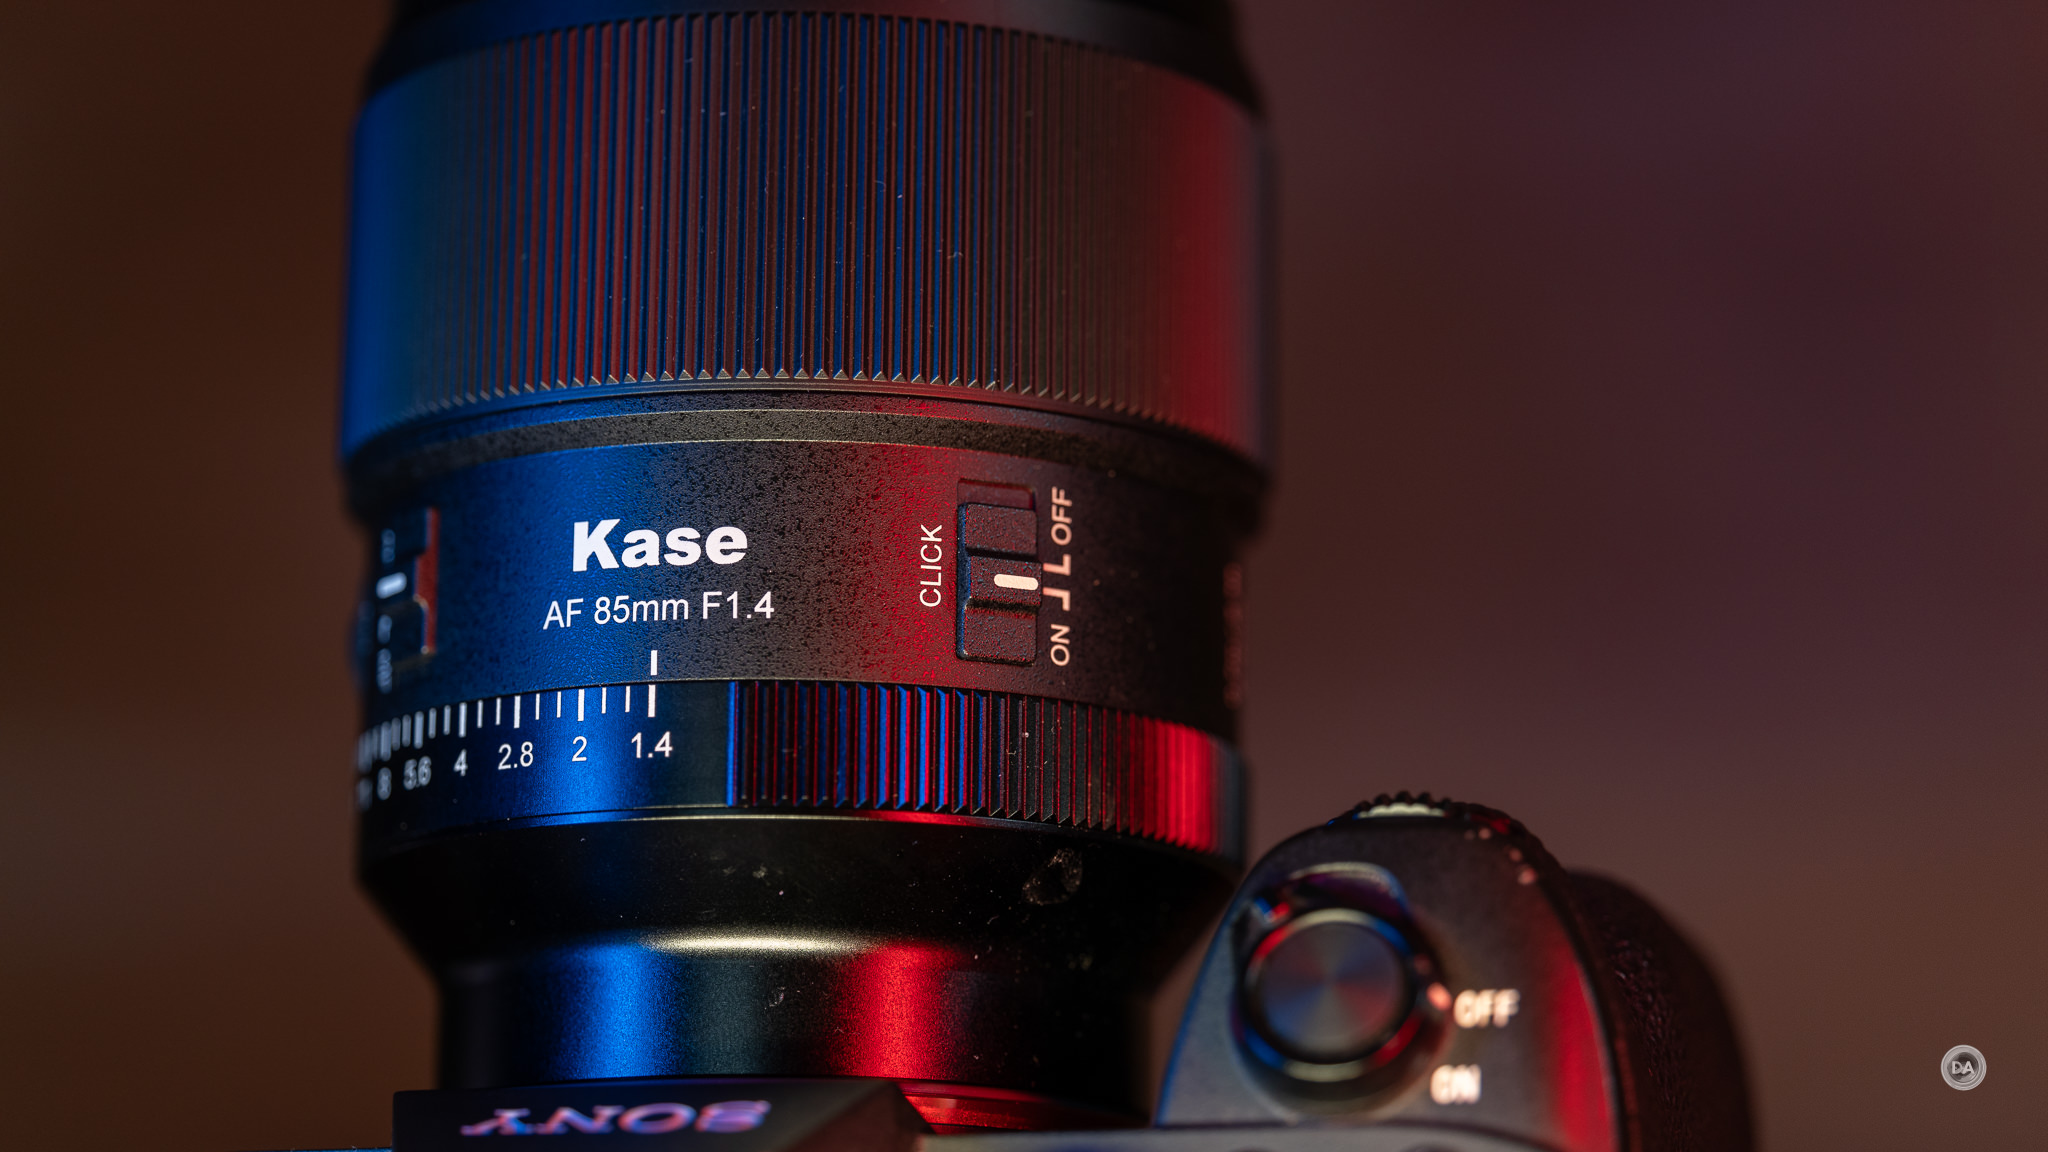
There is also a Click | Declick switch on the right side of the lens. In click mode there are definite detents in one-third stop increments, and when the clicks are turned off, you can smoothly move through the aperture range.
I could do reasonably good aperture racks, though I could faintly see some stepping as the aperture changes were made.
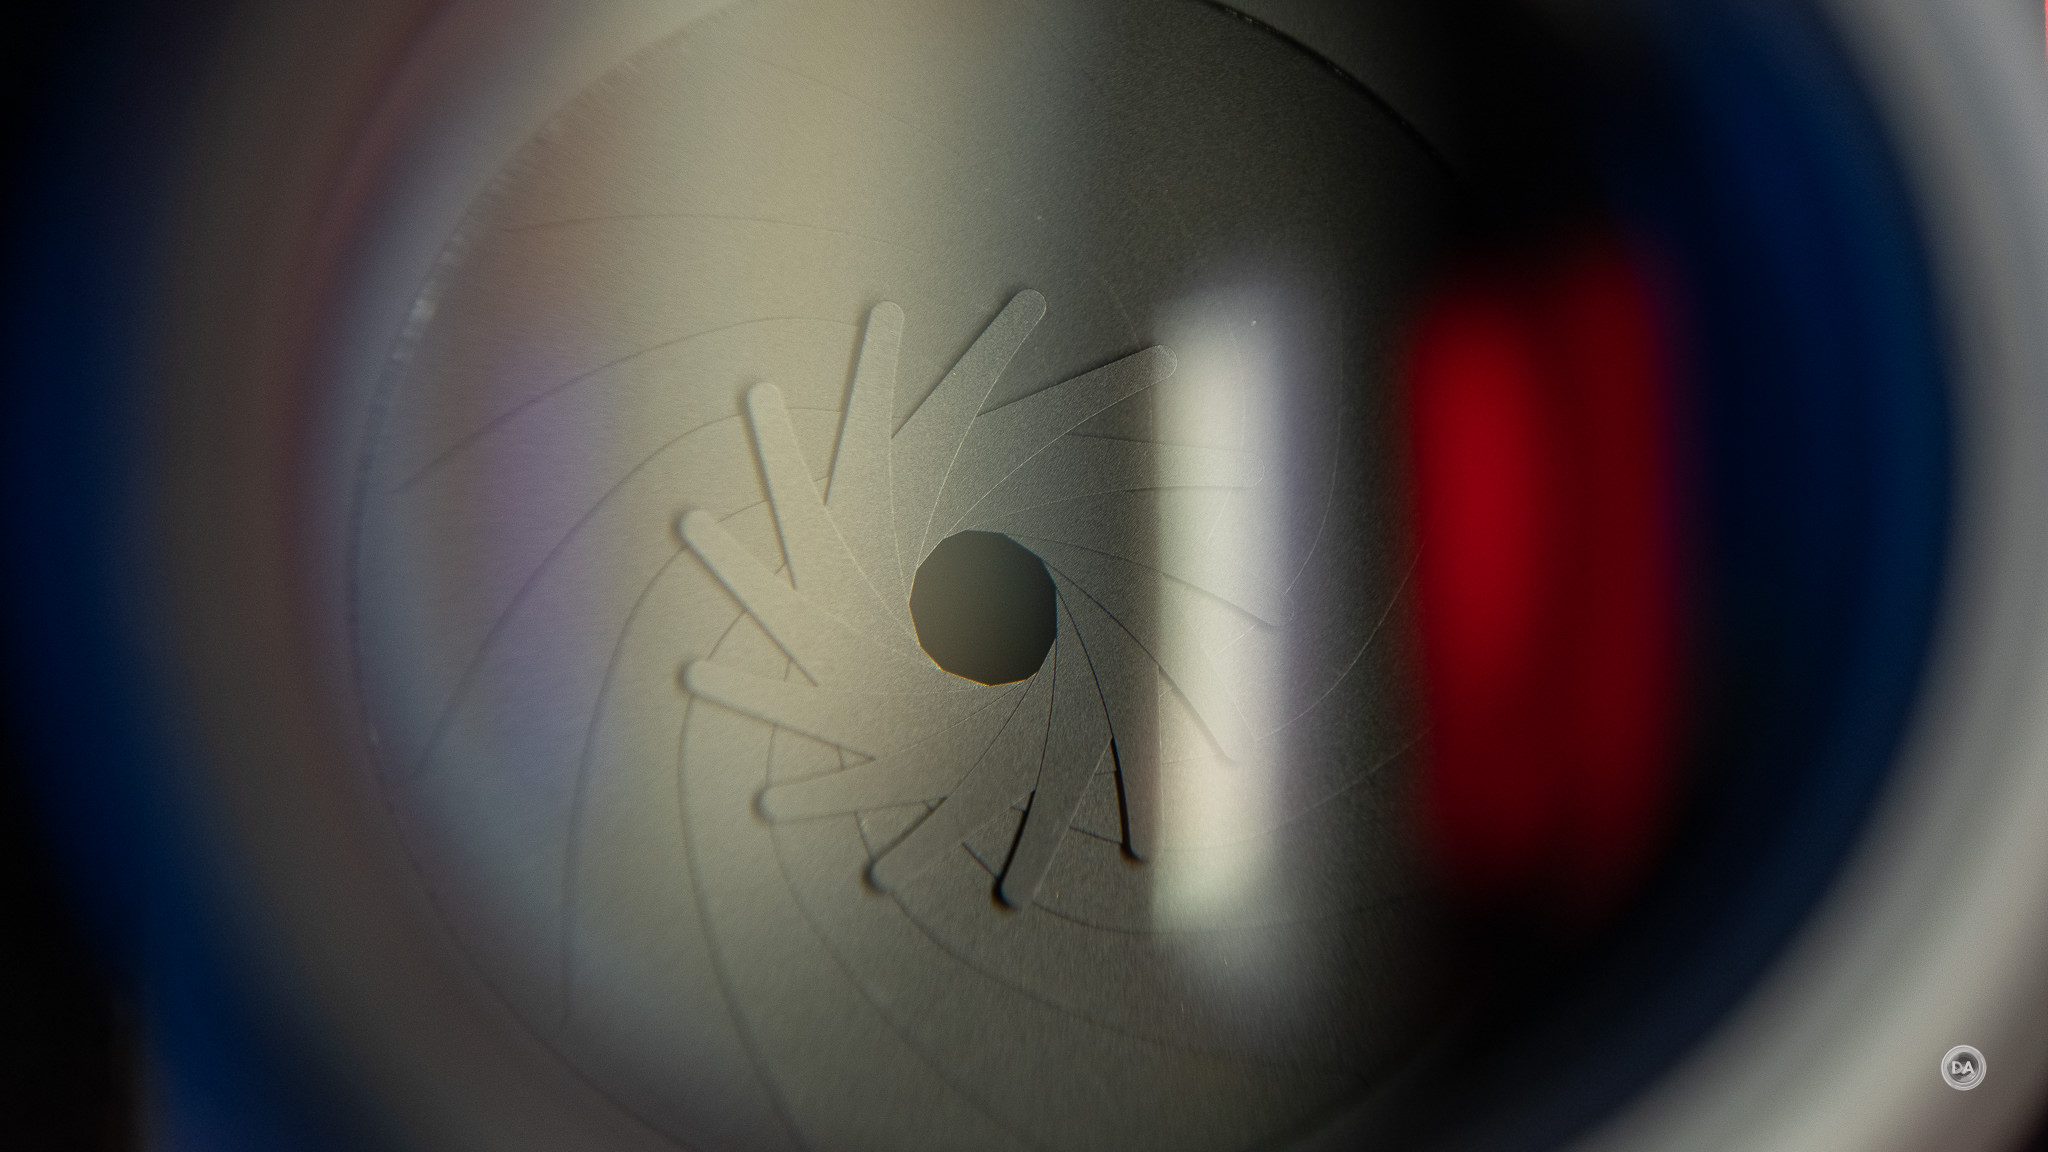
The aperture iris has a high 13 blade count, though the aperture iris on my copy wasn’t perfectly centered (as you can see above).
The geometry is a bit odd. In some ways the roundest shapes are achieved wide open, with more deformation coming as the aperture is stopped down. This is opposite of what is typical, and I wonder if the slightly decentered aperture blades are contributing to that. Here’s F1.4, F2, F2.8, and then F4.
The manual focus ring is very nicely executed. It has deep ribs and feels very Sigma. The focus action has nice damping and it focus smoothly. The focus throw is speed dependent and not linear, so doing repeatable focus pulls can be challenging.
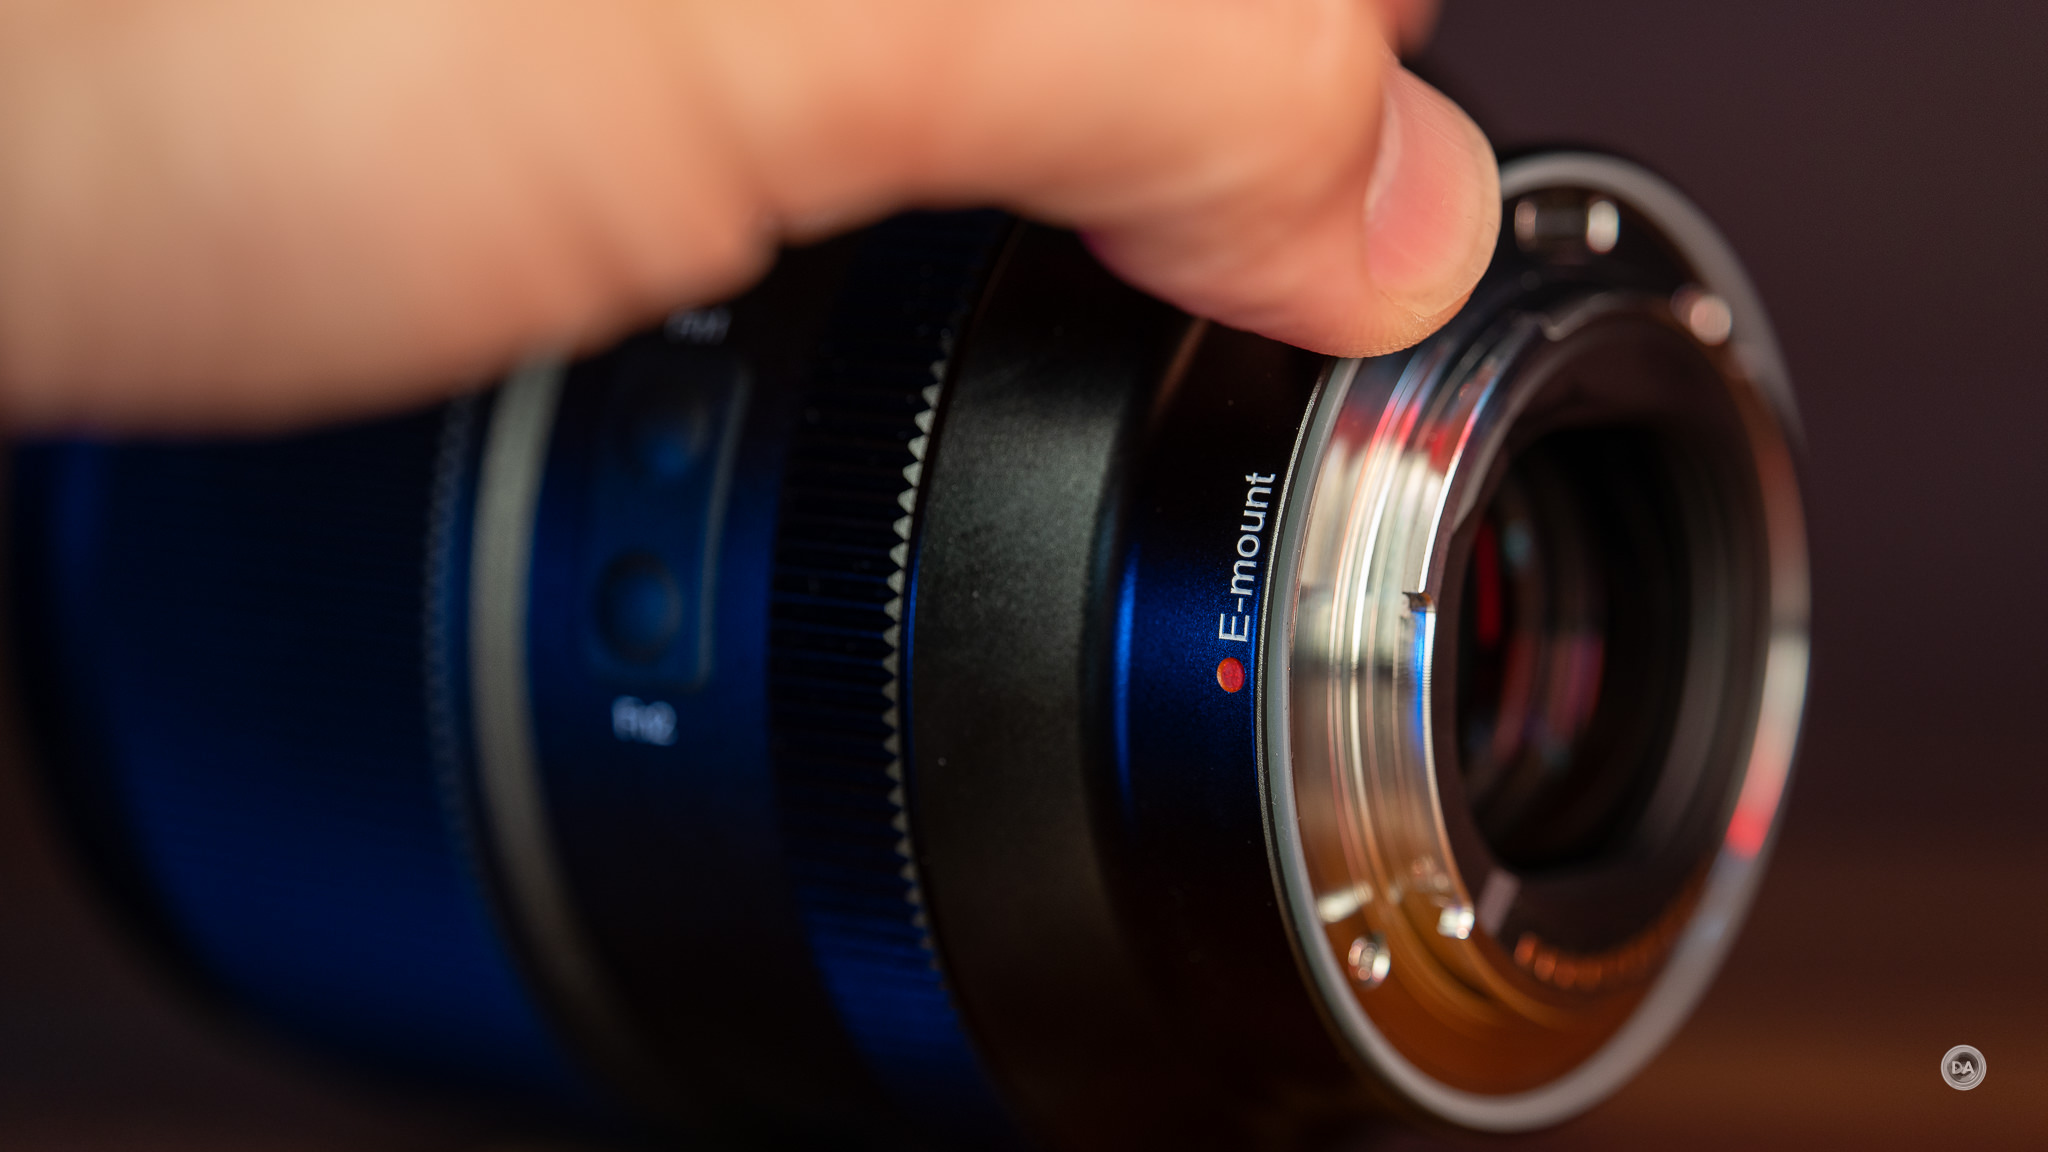
Kase has a USB-C port in the lens mount that allows you to do firmware updates right to the lens. I’m a fan of this approach, as it eliminates the need for a separate dock or lens station for firmware updates, and I find the process a little more intuitive than even doing firmware updates through the camera.
Kase is new to the lensmaking business, so there is no track record to point to yet in terms of how consistent they will be in supporting their lenses with firmware.
There is no lens based stabilization, so you will need to rely upon the in-camera stabilization if your camera is so equipped, but that’s true of every other lens in the class.
The Kase 85mm F1.4 in no way feels like a first effort. This feels like a mature, well executed package that manages to bring some innovation to a crowded space. And, at a price of around $738 USD, this lens competes well with lenses like the Sigma for considerably less, and bests the similarly priced Samyang. The fly in the ointment will be the Viltrox Pro AF 85mm F1.4, which is a very strong performer at considerably less money (under $600 USD), though it is a lot bigger and heavier. Kase is standing behind their product, too, offering a 3 year warranty, which is longer than what a lot of other inexpensive brands offer.
Autofocus for Stills
One area where there is a lot of parity amongst the 85mm lenses is when it comes to autofocus. At the top of the heap we have the Sony FE 85mm F1.4 GM II, which is powered by multiple high thrust XD Linear Motors. The next tier is occupied by the Viltrox Pro AF 85mm F1.4, as it has a more powerful HyperVCM focus motor, which uses newer technology but only has a single focus motor. Pretty much everyone else (including Kase) is relying on an STM focus motor. STM, or Stepping Motor, is a fairly ubiquitous technology among low to mid-tier lenses.
Autofocus speed is on the lower side of these competitors, though fortunately that’s still fast enough for most things. Average is very good in 2025! In my formal tests you can actually see autofocus taking place rather than an instant transition from one subject to another, though focus happens smoothly and linearly without any pulses or hesitations.
Accuracy is very good, however, with all tested subjects. I got consistent and accurate lock on subjects, and focus is fast enough that I didn’t really notice it in normal situations.
Focus speed is fast enough for moderate movement but don’t expect this to be a sports lens. I really liked this moving shot of Ferrari because of his pose and also the extremely shallow depth of field.
Focus will work fine for portrait work, which is arguably the most important application for this lens.
Although is is a first lens for Kase, it certainly matches the more similarly priced competition from Sirui and Samyang. The Viltrox Pro AF is a little faster, but it is also bigger and heavier.
Video AF
Video autofocus follows a similar pattern to what I saw with stills focus, though I would argue that the slower focus speed is less of a negative here. Autofocus pulls are generally confident and without visible steps. Speed is fine, and nothing feels too abrupt.
The biggest challenge is that focus breathing is fairly strong, so you get that “zooming” effect from perspective changes.
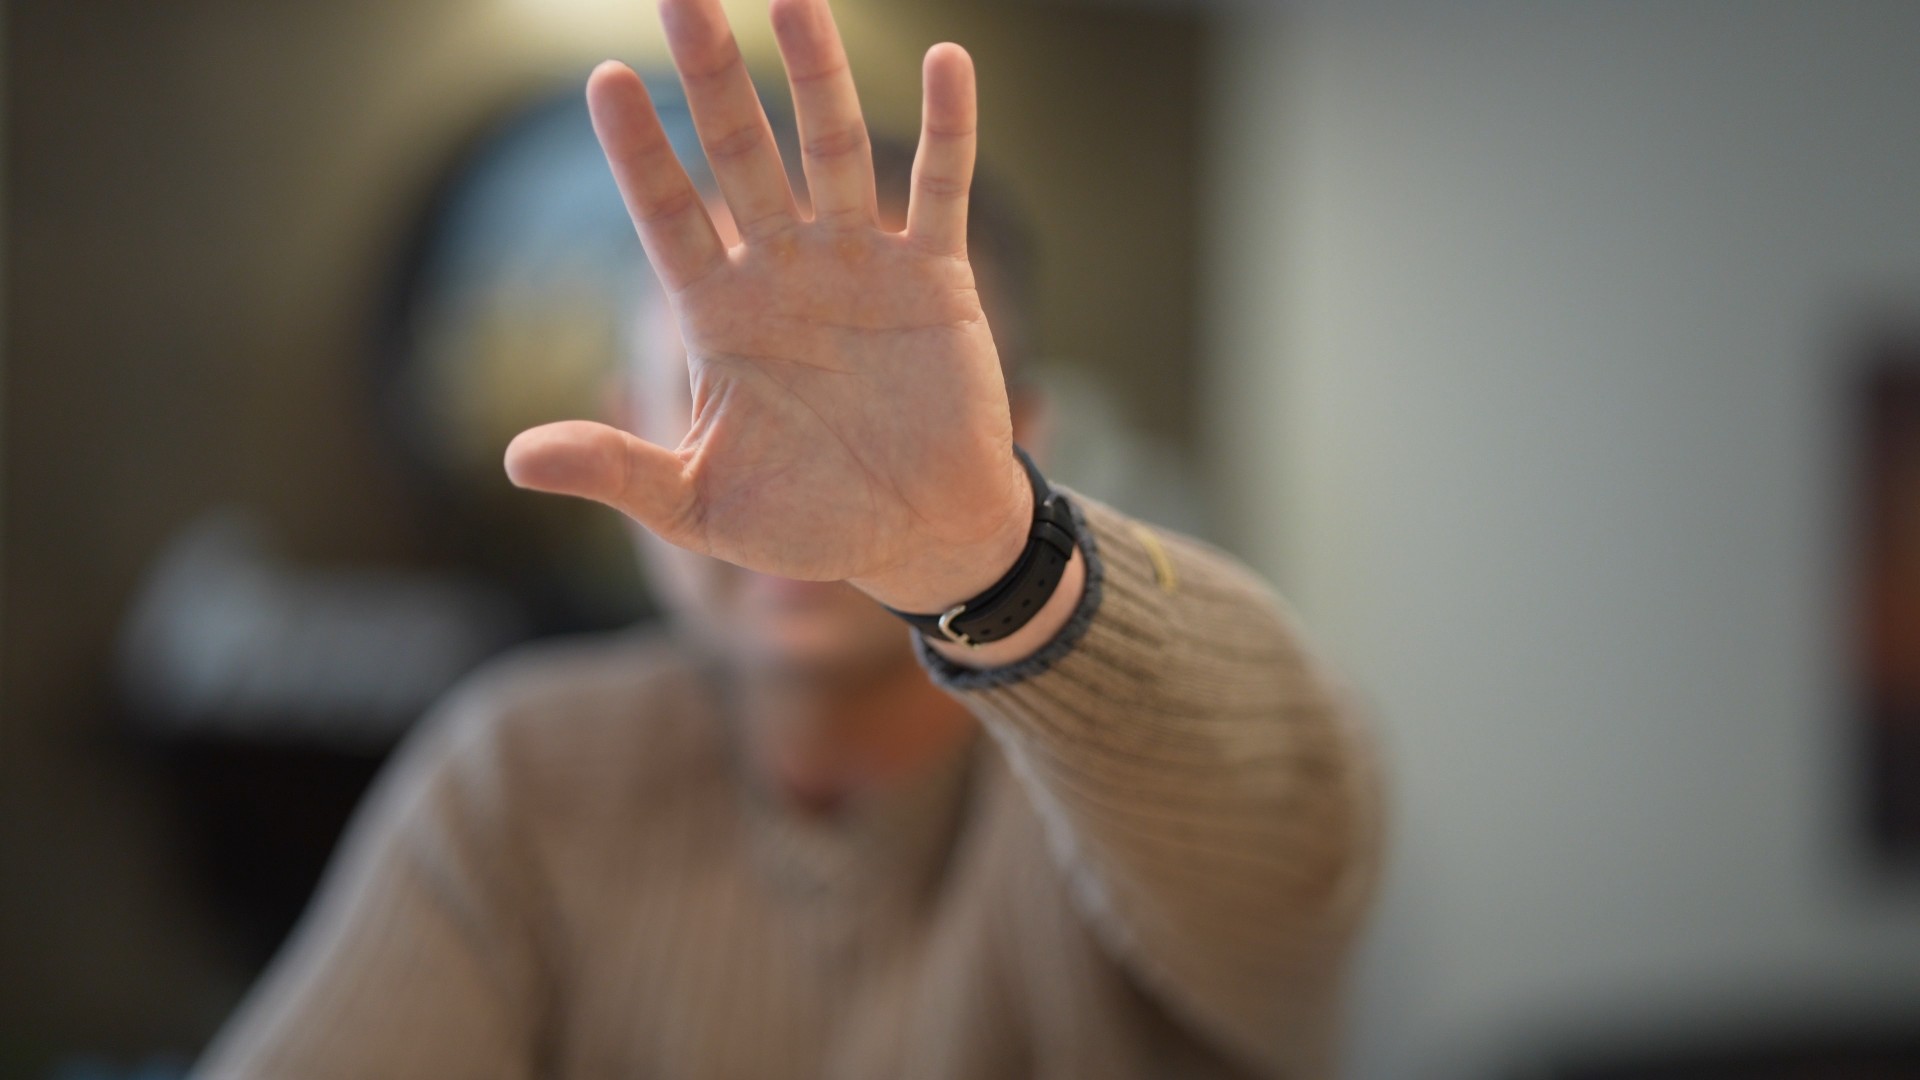
My “hand test” where I alternatively block and unblock the camera’s view of my face with my hand went well, with smooth and confident transitions from my hand to my face and back, though that focus breathing makes the transitions less cinematic. Sony’s focus breathing compensation does not support any third party lenses, so don’t expect any software assistance.
Typical clips with either static or moving subjects were all fine. I had no issues with video focus.
Kase AF 85mm F1.4 Image Quality
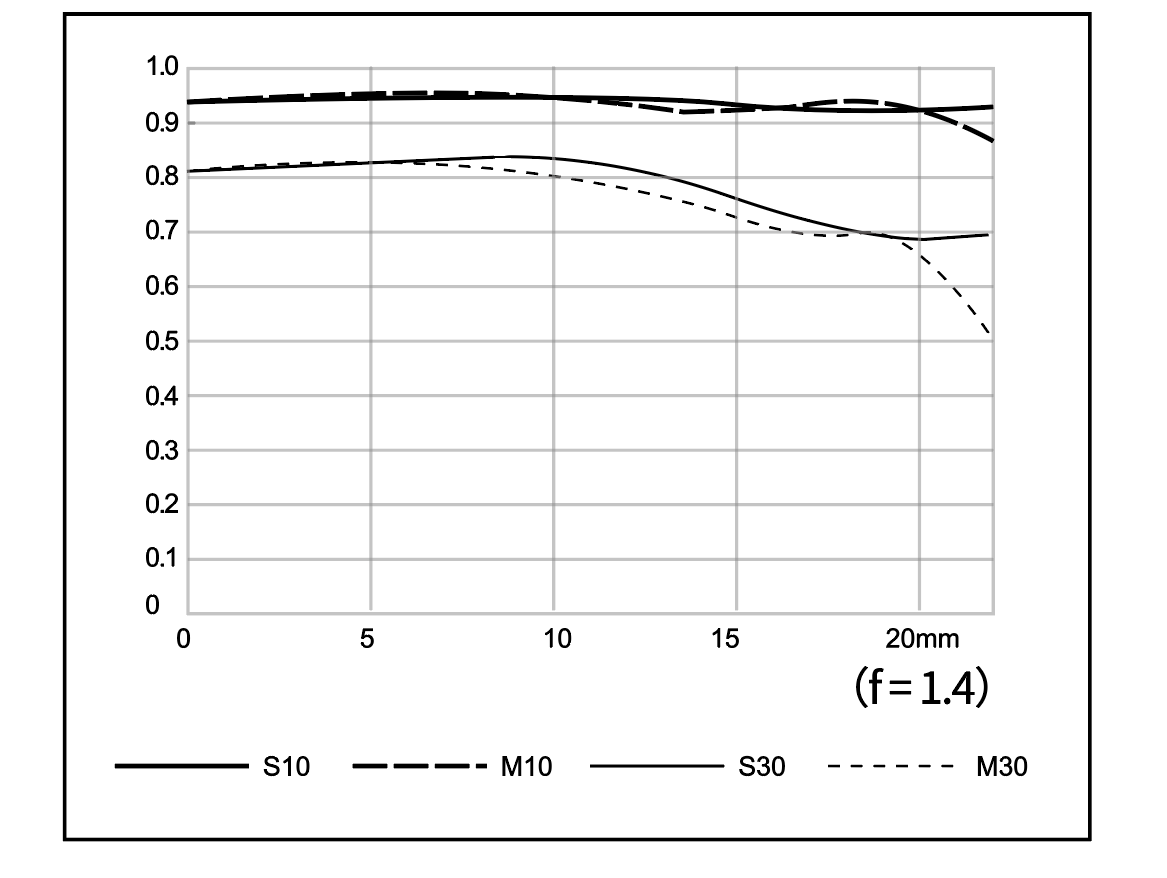
The Kase 85mm F1.4 sports an optical design of 13 elements in 10 groups. This includes 5 ED (extra low dispersion) elements and 2 HR (high refractive index) elements. The result MTF shows a strong center and midframe and a mild dip in the corners at F1.4.
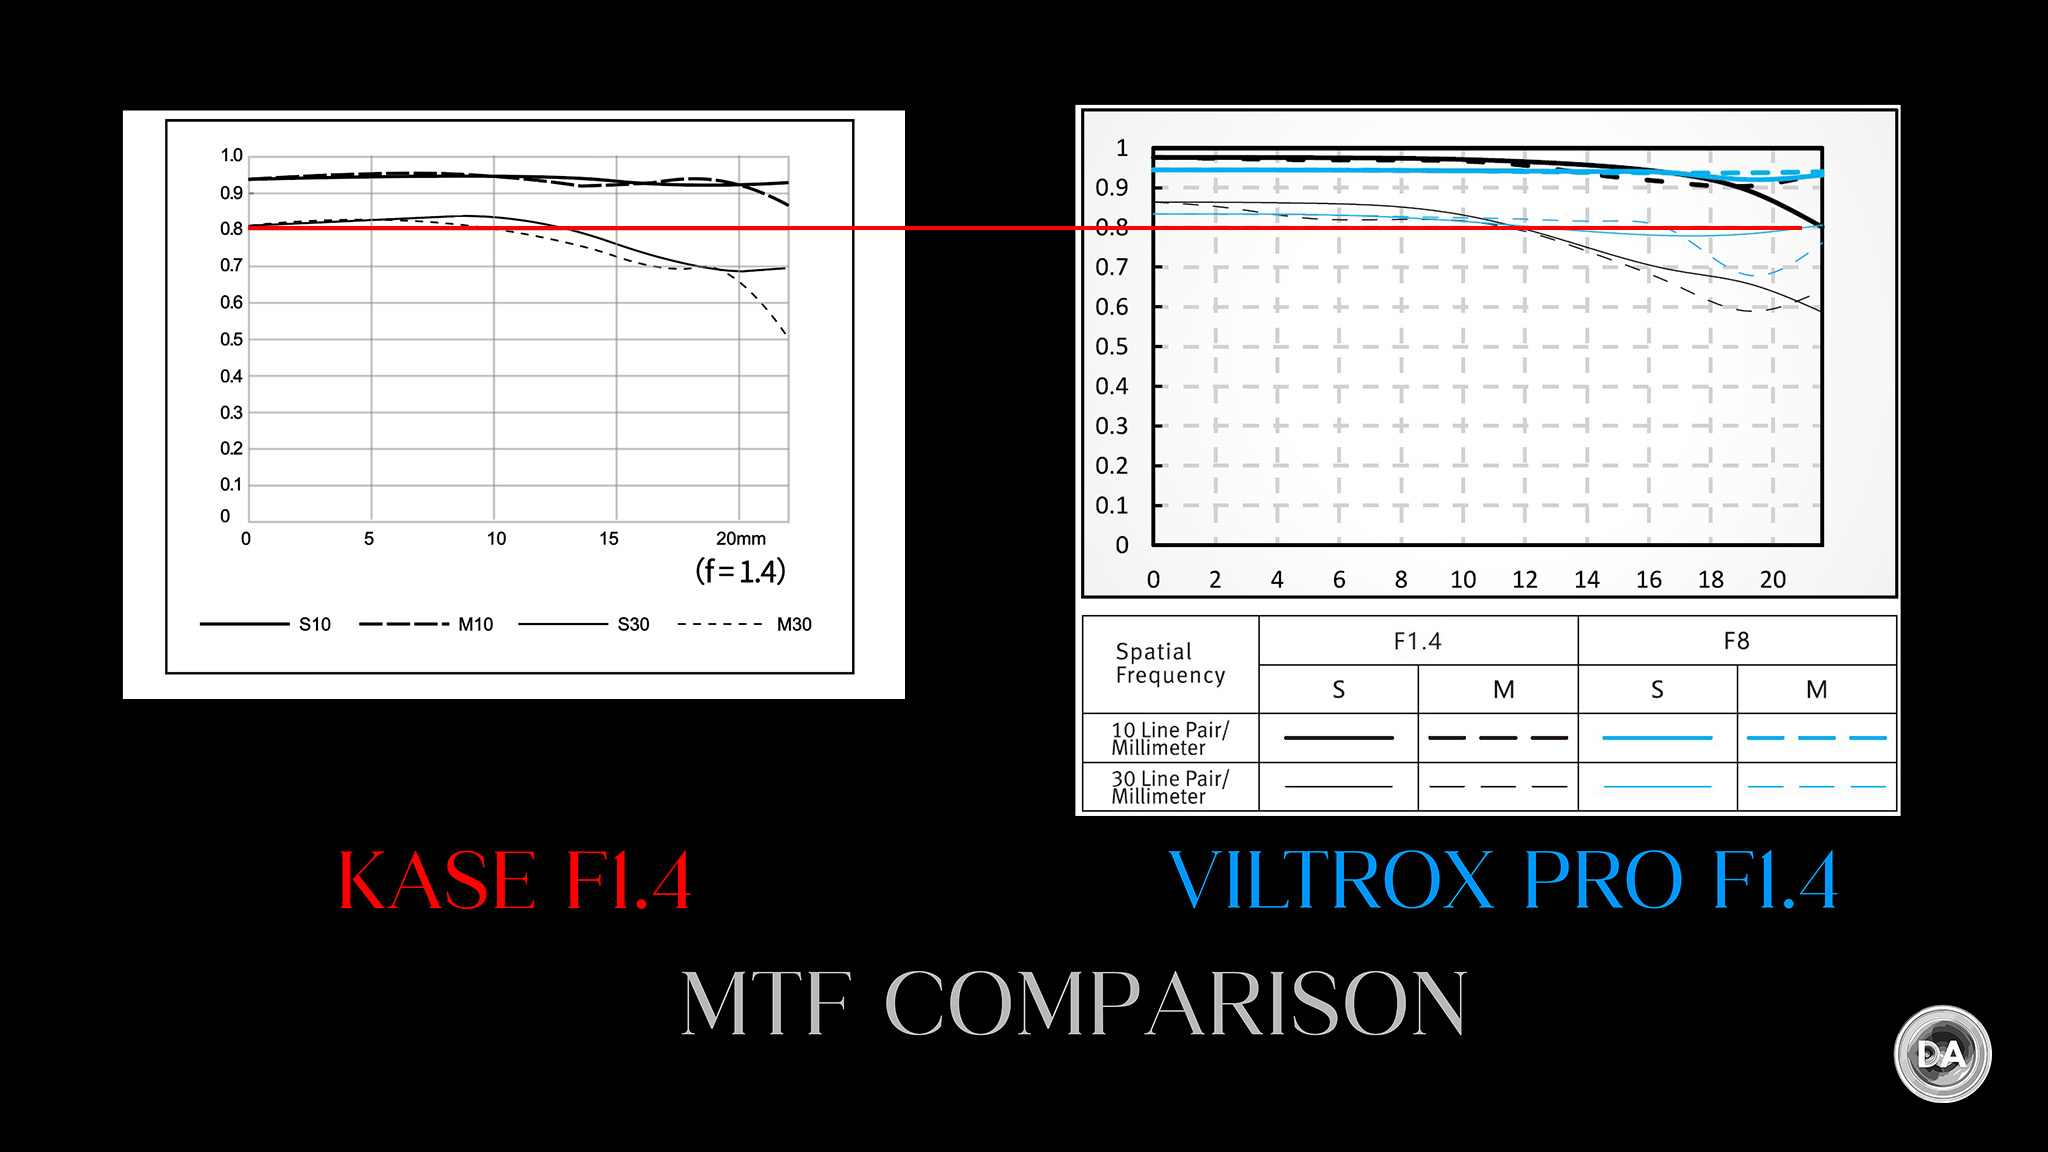
So, on paper, how does this compare with the recent Viltrox Pro AF 85mm F1.4? I like putting the MTF charts onto a grid and putting a line through 80% to show what lands above and below that threshold. My experience is that anything at 30 lp/mm that falls above 80% looks pretty fantastic. On paper, the Viltrox is a bit sharper in the center, about equal, and slightly softer in the corners. We’ll see if that holds up in real world results.
The Viltrox is slightly higher contrast in the center of the frame, both lenses are similar in the mid-frame, but my copy of the Kase underperforms the MTF in the corner, producing noticeably softer results than the Viltrox.
This can’t quite match the Viltrox (or Sigma) in raw sharpness, but is capable of easily besting what I recently saw from from the Sirui Aurora in December 2024.
The Kase is sharper and has much higher contrast. I would definitely choose its performance in general over the Sirui. I would say that it also compares favorably to the slightly more expensive ($699) Samyang lens.
And, as we’ll see in a moment, I think the overall rendering and bokeh from the lens is pretty fantastic.
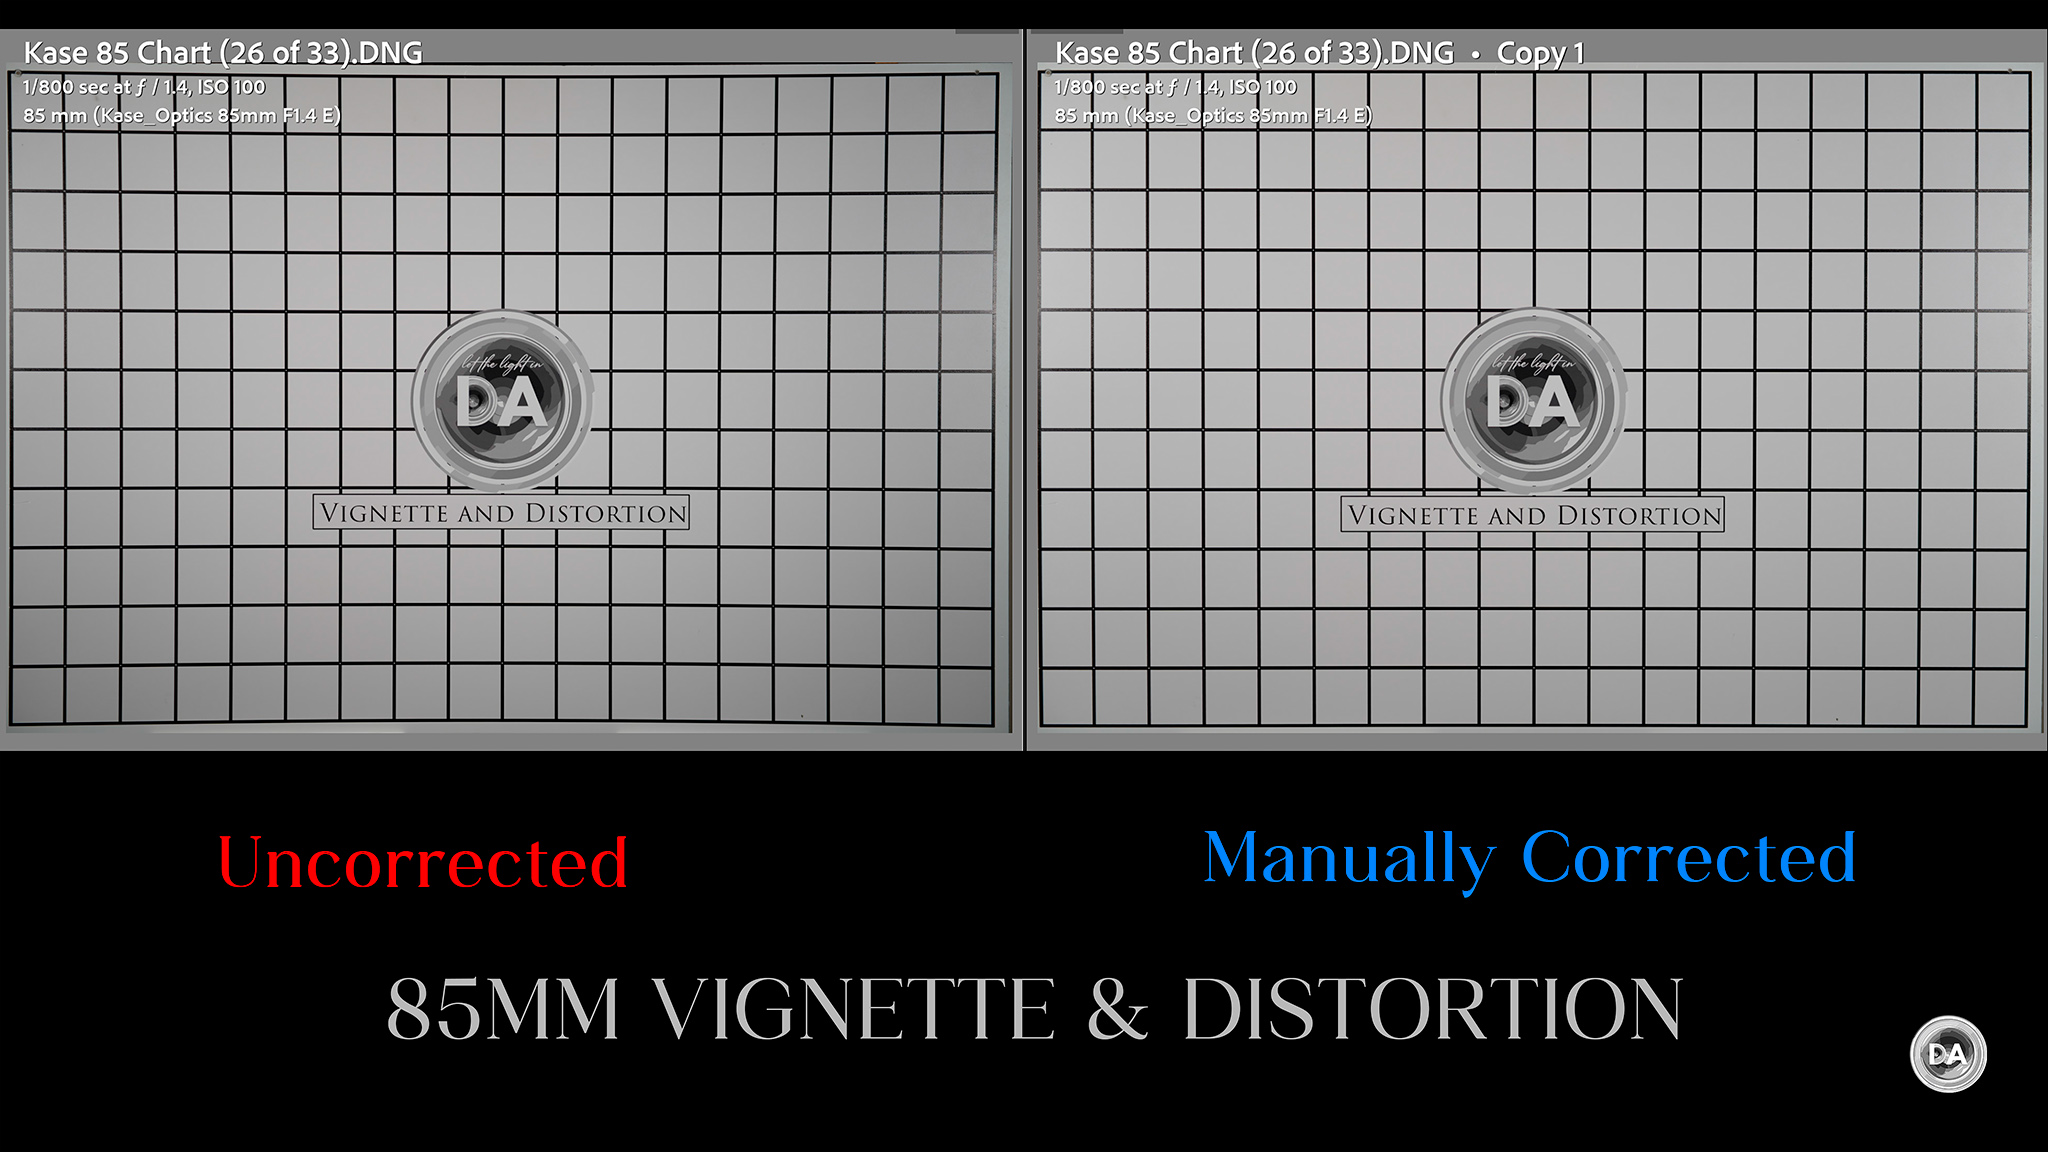
The Kase 85mm F1.4 has a minor amount of pincushion distortion, which in one area where it definitely bests the Sigma ART lens. The Sigma suffers from a really significant amount of pincushion distortion.
The Sigma needs a -9 to correct all that distortion, while the Kase needs only a -4 (and you could easily leave that uncorrected, as a little pincushion distortion can be flattering). The Kase also has lower vignette (+31 to correct) than either the Viltrox (+48 to correct) or the Sigma (+56 to correct). This is the lowest vignette of the current crop of 85mm lenses on Sony despite having a smaller diameter than some competitors. Here’s a look at the before and after with manual correction.
There is very little of longitudinal chromatic aberrations (LoCA) visible on my test chart before and after the plane of focus.
I didn’t really see fringing on shiny textures, either.
There are only minimal issues with lateral style chromatic aberrations found in the contrast transitions near the edge of the frame.
I saw little issues with LaCA in real world images. Overall we have gotten through this section with minimal damage.
So let’s return to focus on resolution. These results are shot on a 61MP Sony a7RV and the crops are shown at roughly 200% magnification level. Here’s a look at the test chart that the crops are taken from.
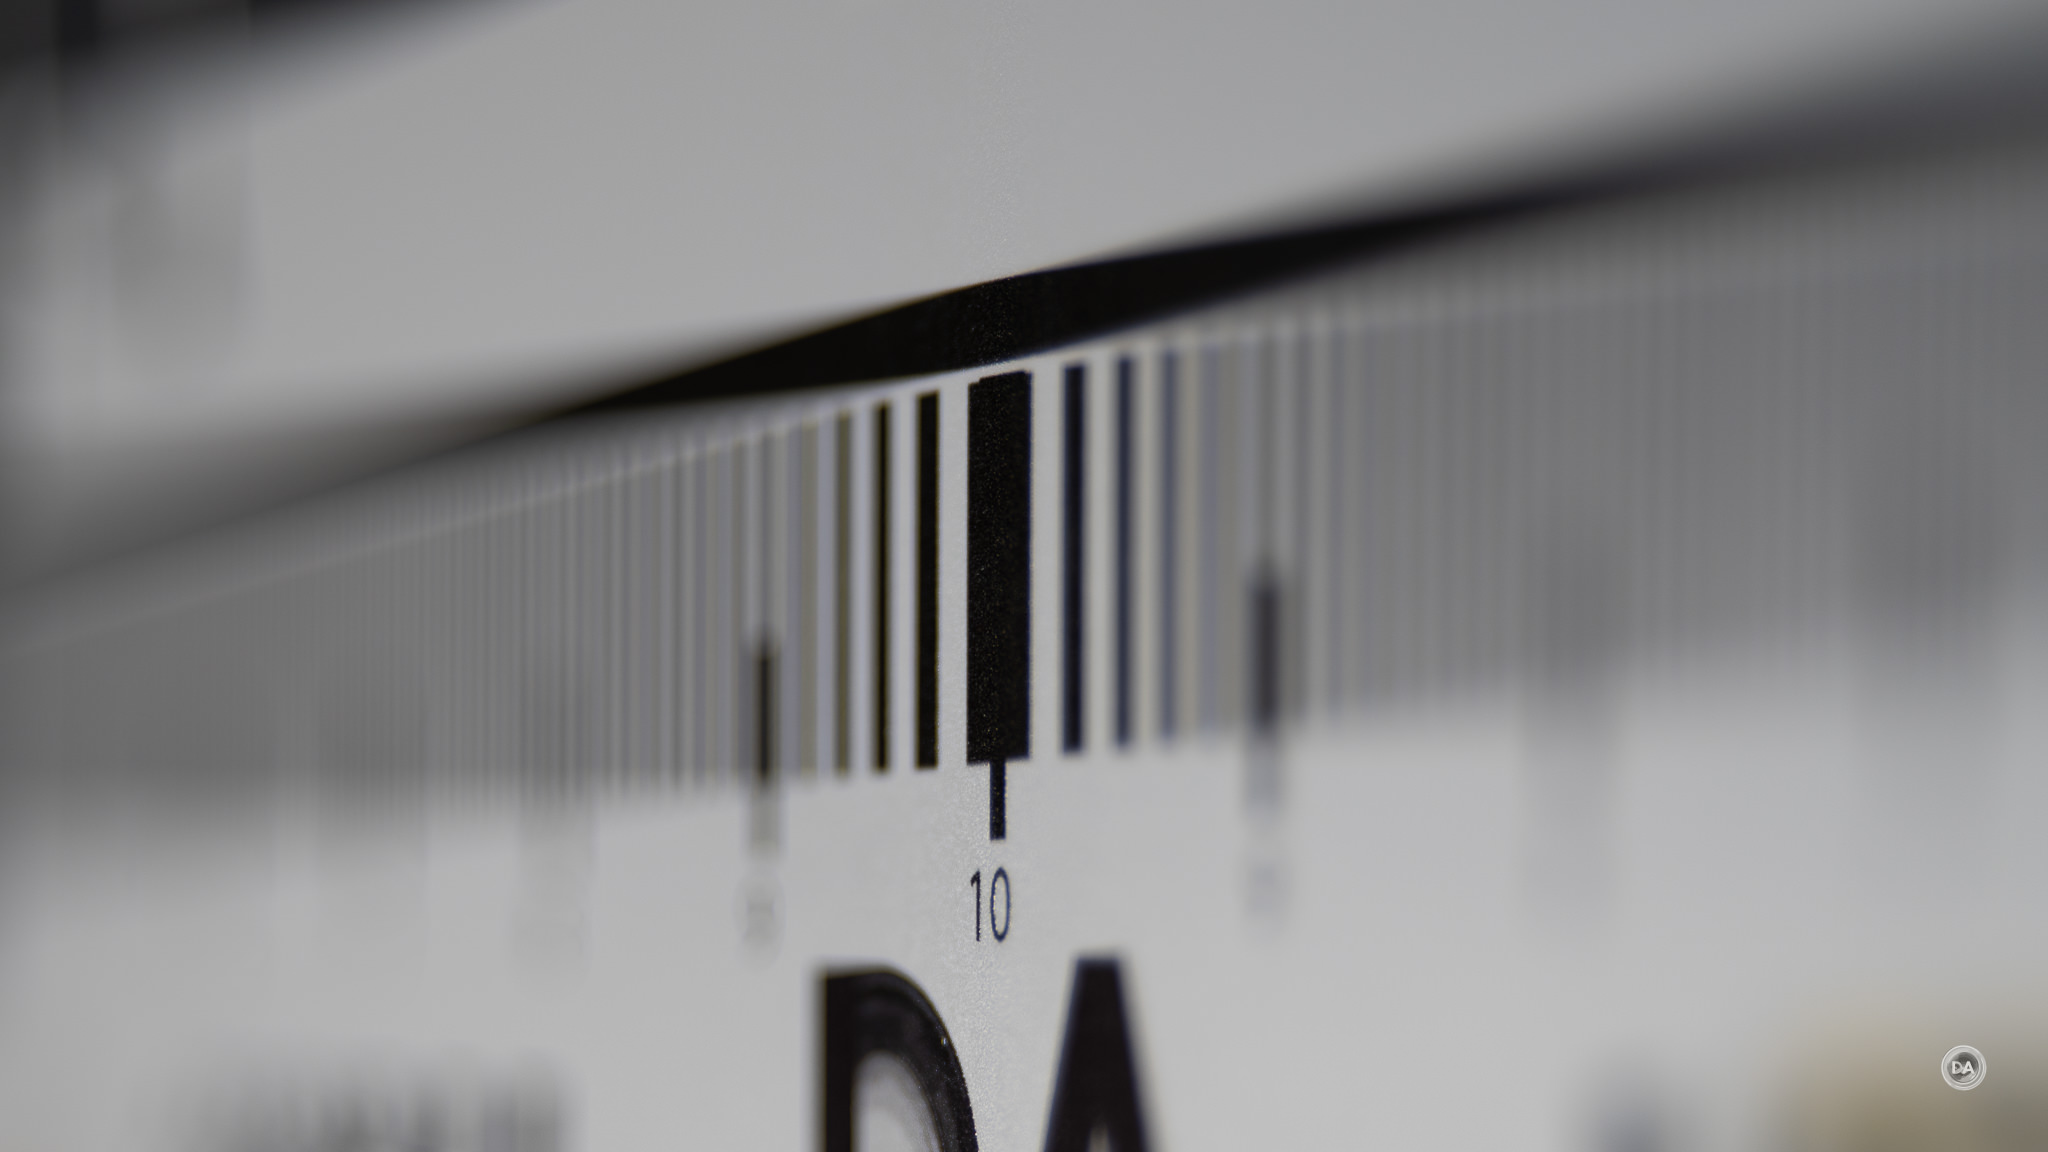
If we zoom in and look at the 200% crops from the center, mid-frame, and lower right, we discover that sharpness and contrast are excellent in the center and mid-frame, but with a stronger than expected fade into the corners.
A real world shot with a reasonably flat plane of focus shows less of a drop off near the edge of the frame.
It seems like the drop off is more reserved for the far corners, which means that in most images this probably won’t be a factor.
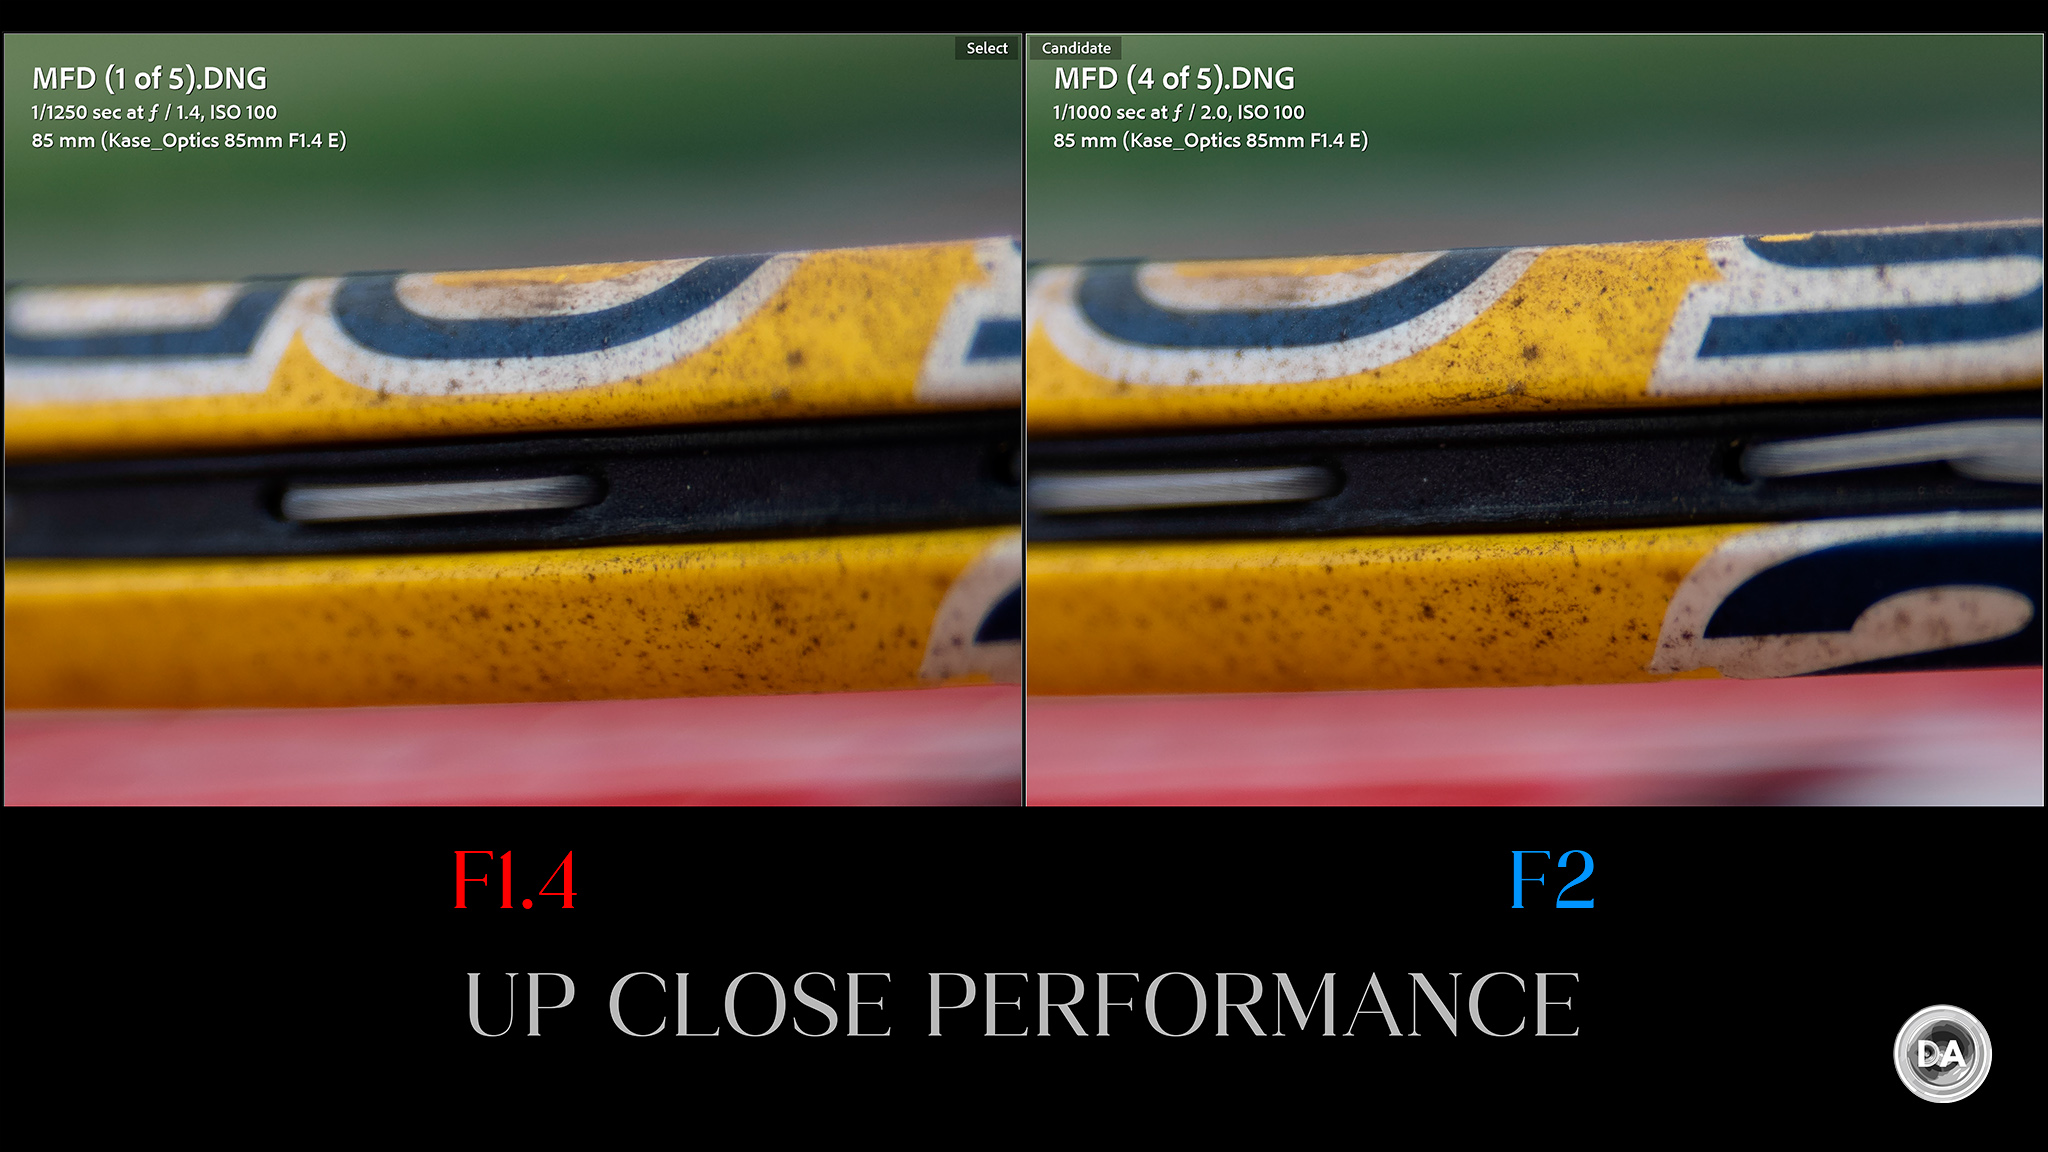
I did feel like contrast was a little lower at closer focus distances and improved at medium distances. Here at close distances contrast at F1.4 looks decent but not exceptional.
Step back a bit and contrast looks a little stronger (also at F1.4)
We are not going to see Sony GM levels of contrast at F1.4, but there’s enough for most people for doing portrait work.
…and tightly crop it into a very different looking image like this:
So what happens when you stop the lens down? Even by F1.8 I see an uptick in contrast, and by F2 the center and midframe look great.
Corners are sharp by F5.6, though not to the levels we see elsewhere in the frame.
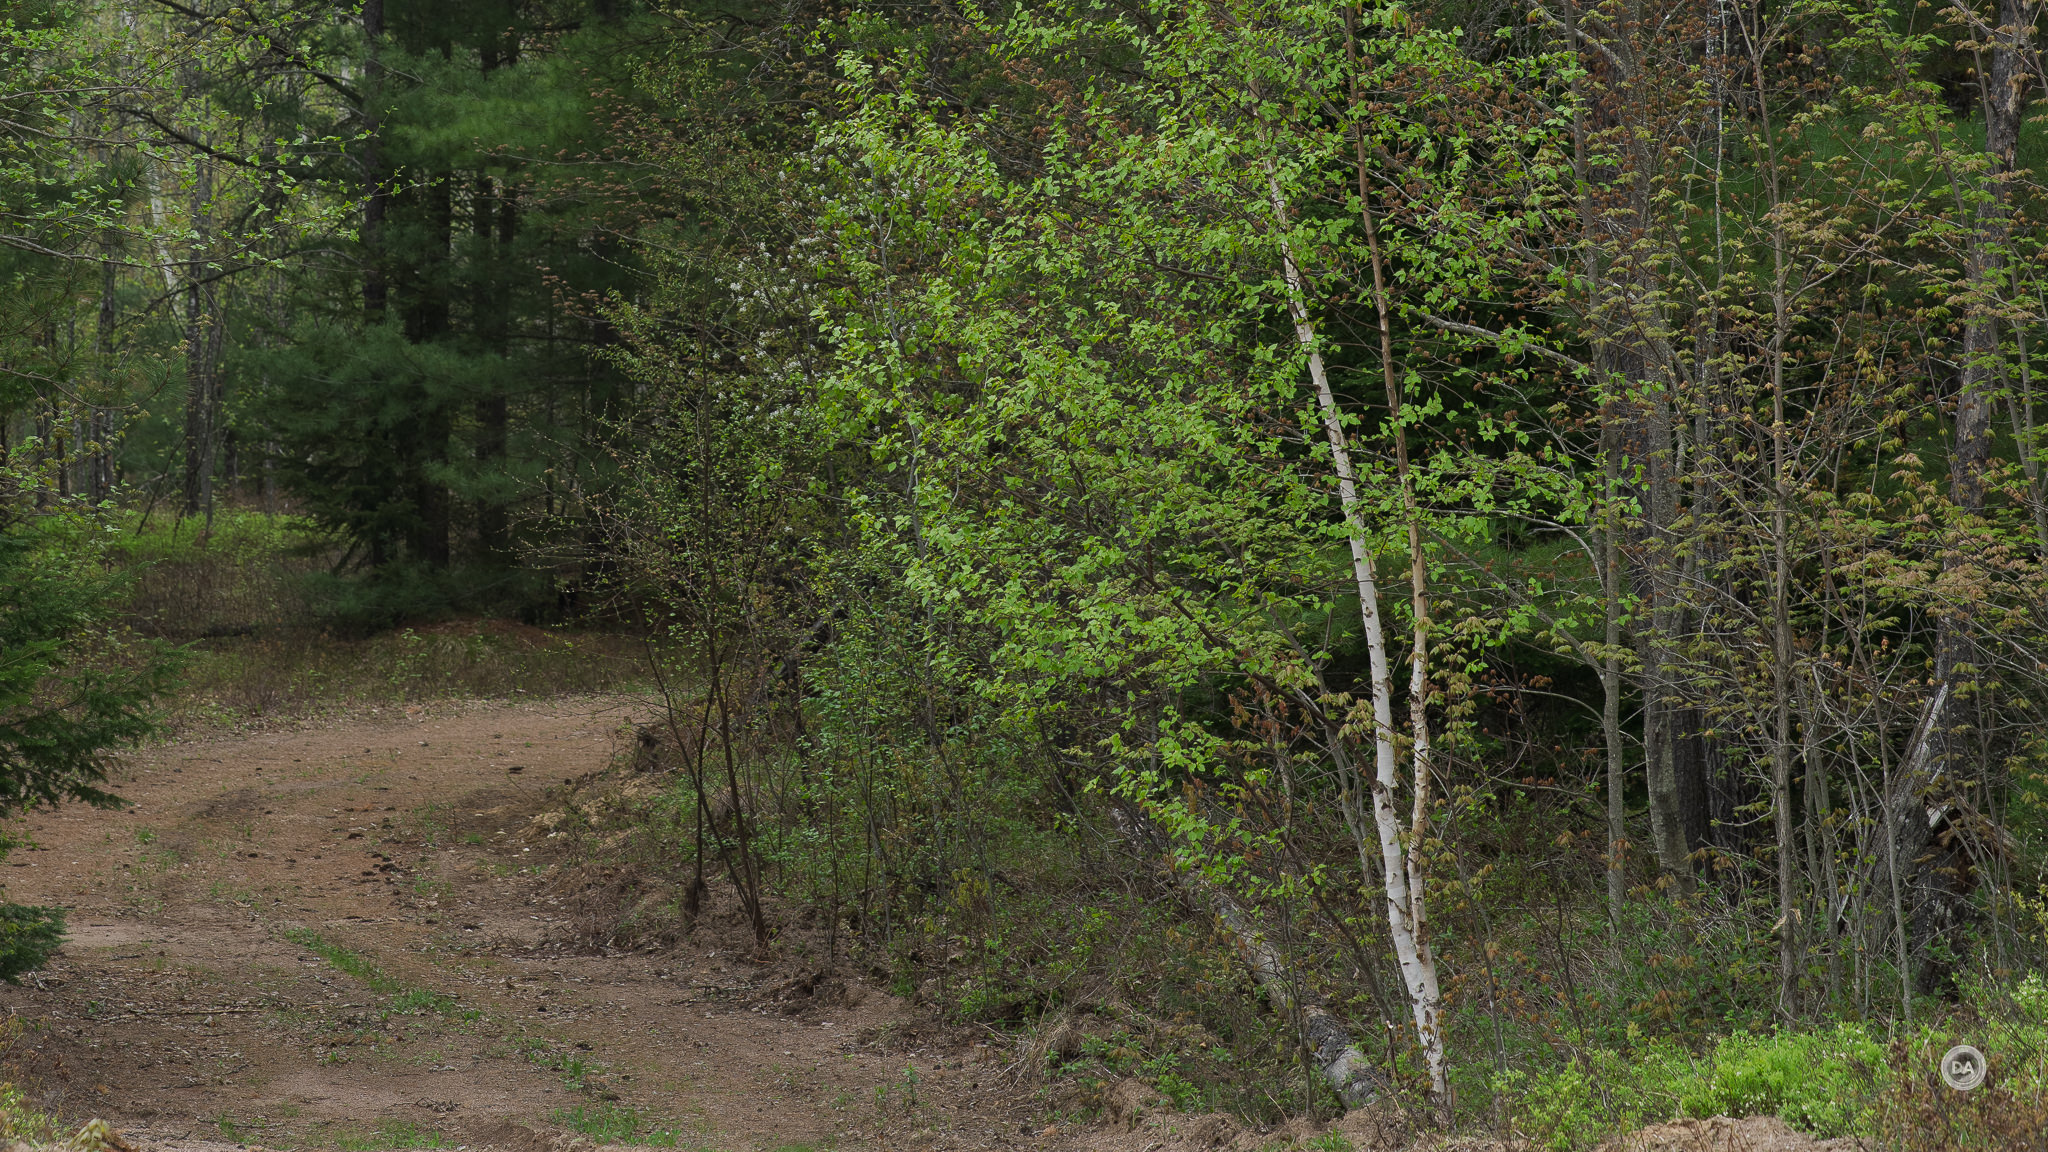
That’s on my chart, though. Real world landscapes at F5.6 look great to me even near the edges of the frame.
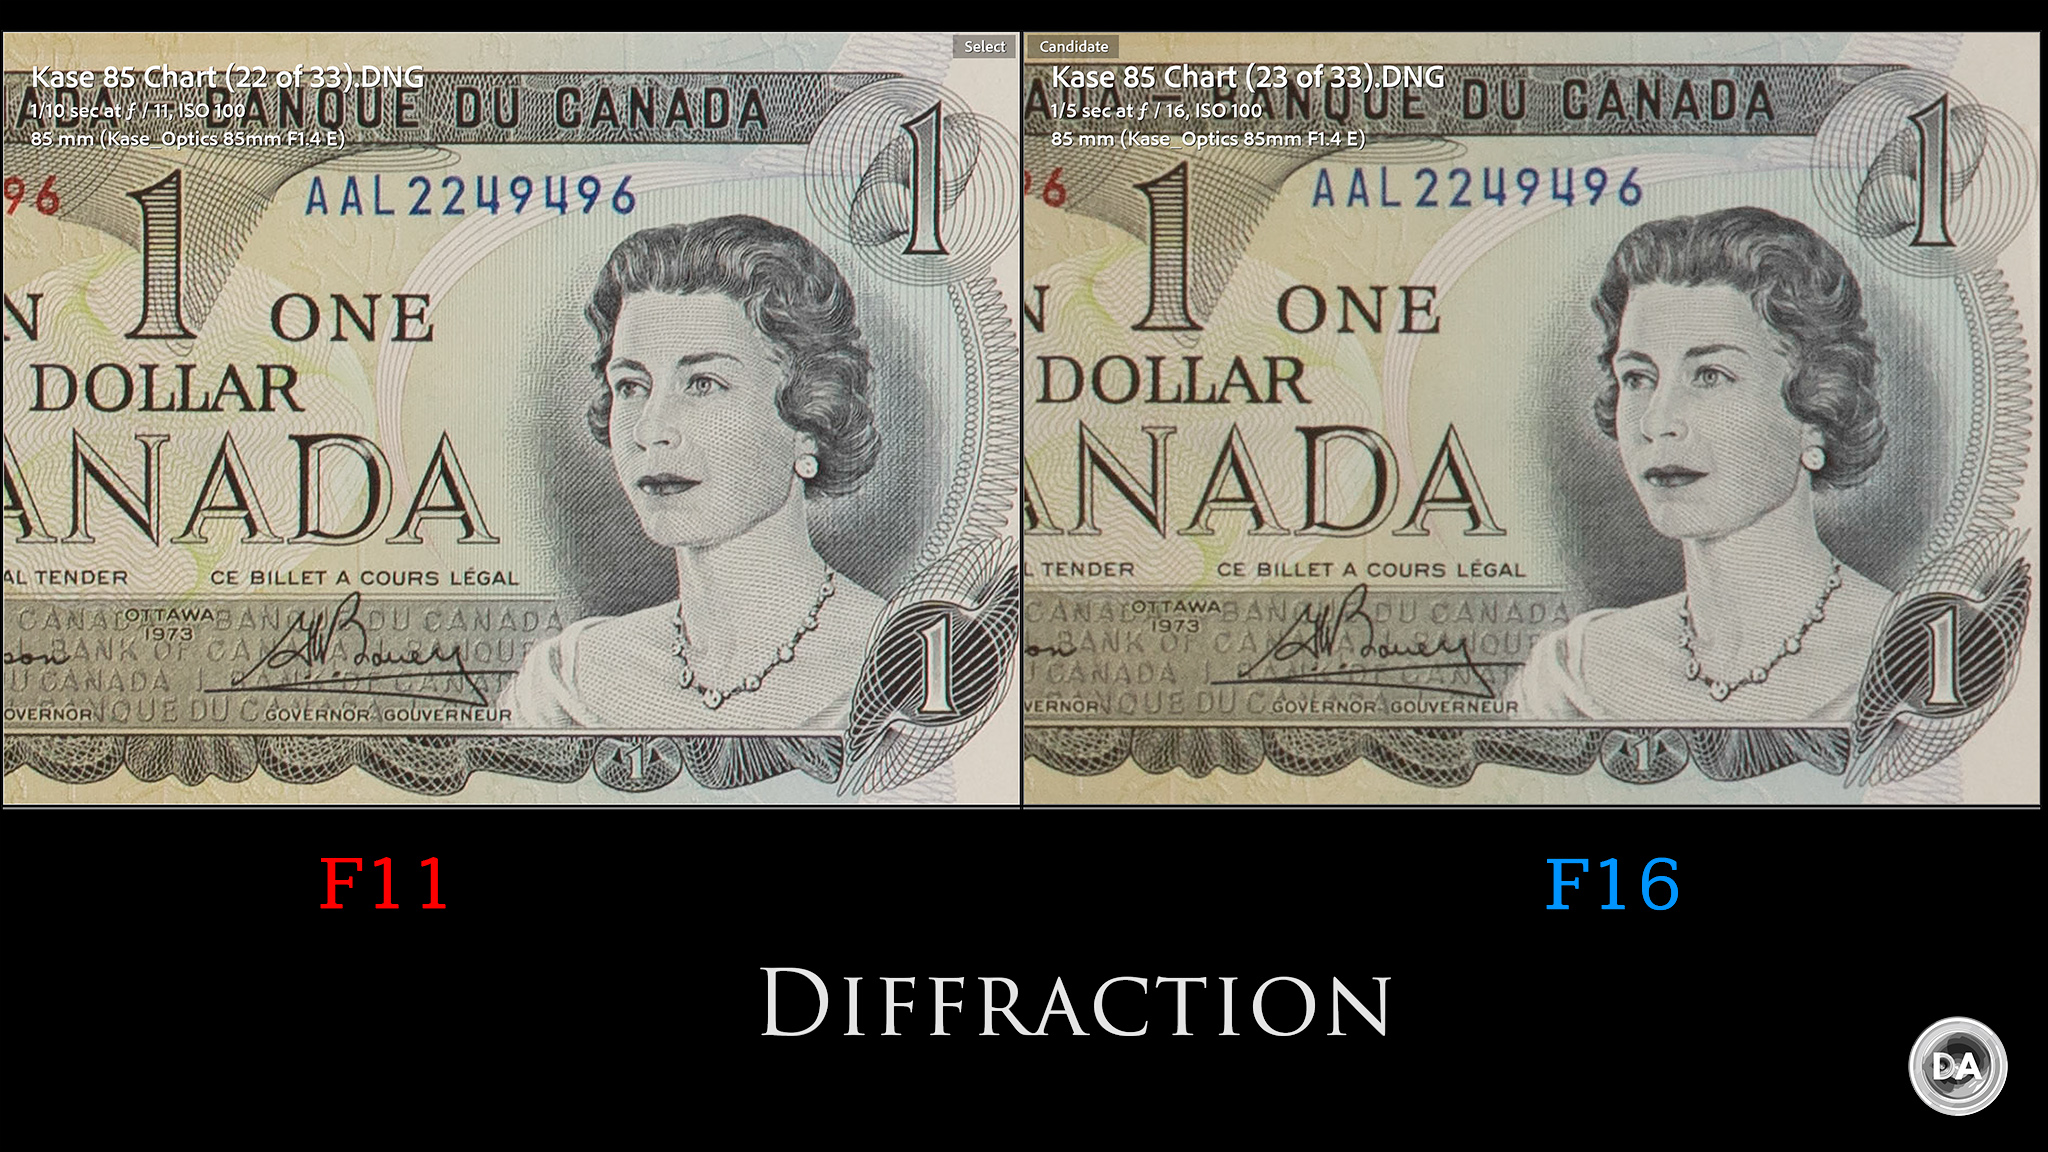
Diffraction is an unfortunate reality on higher resolution cameras, so you will see a faint softening by F11 and a more obvious softening by the minimum aperture of F16, though frankly results at 100% will still look fine.
Sharpness is very good. I would call it middle of the pack in terms of the current options on Sony in absolute sharpness, but where the Kase 85mm F1.4 really excels is in the balance of sharpness, contrast, and bokeh rendering. The Sony GM II lens is amazing in the sharpness and contrast departments, but produces rather flat rendering to my eye. The Sigma and Viltrox are a little better balanced, but none of them have nicer bokeh than the Kase.
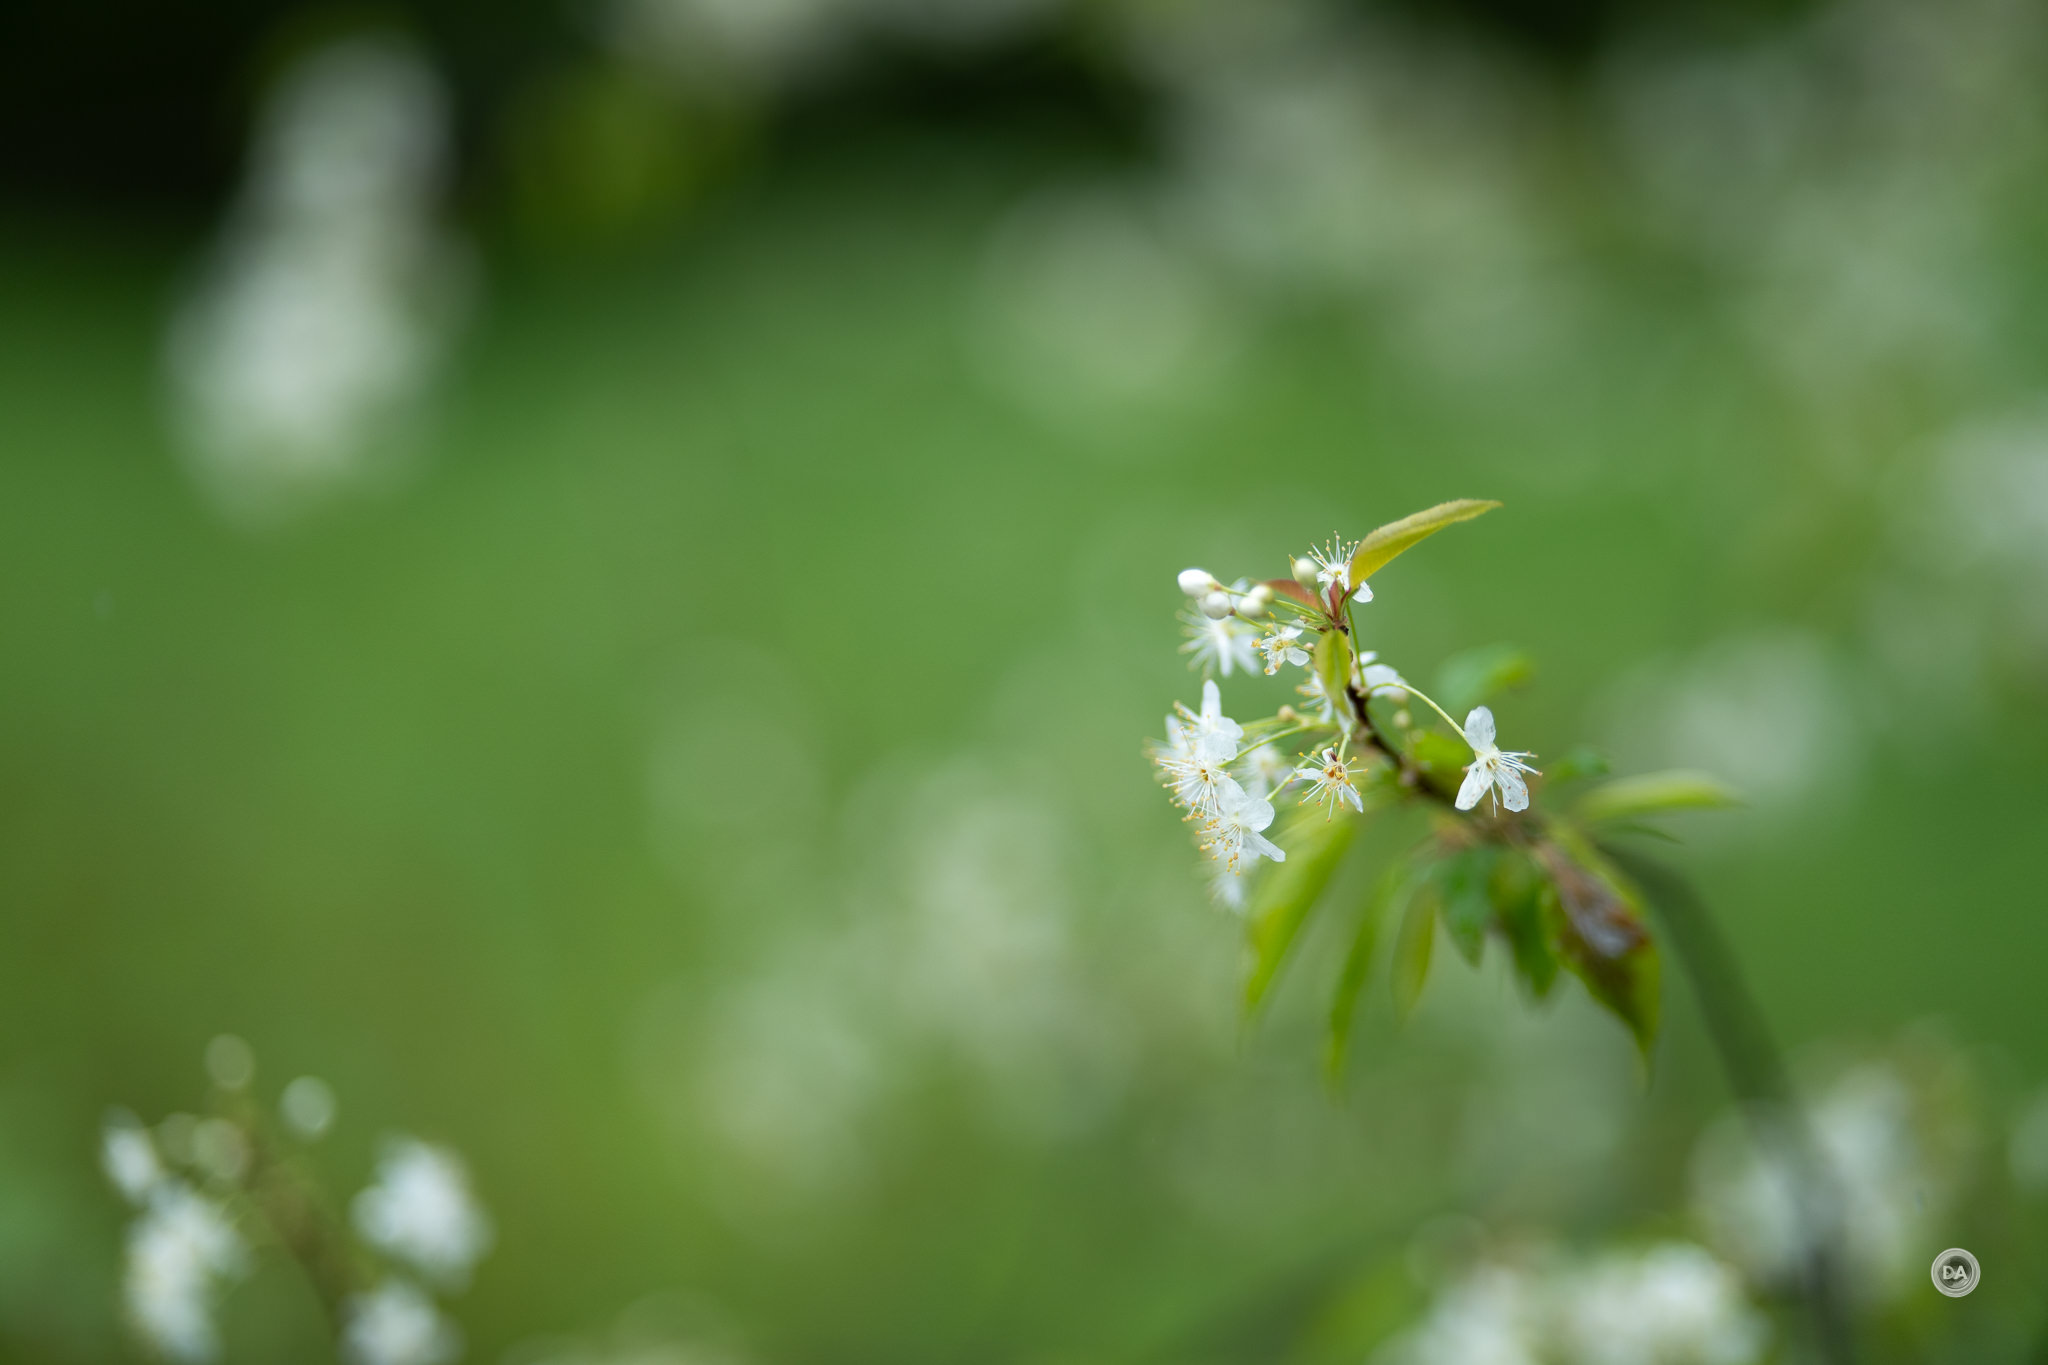
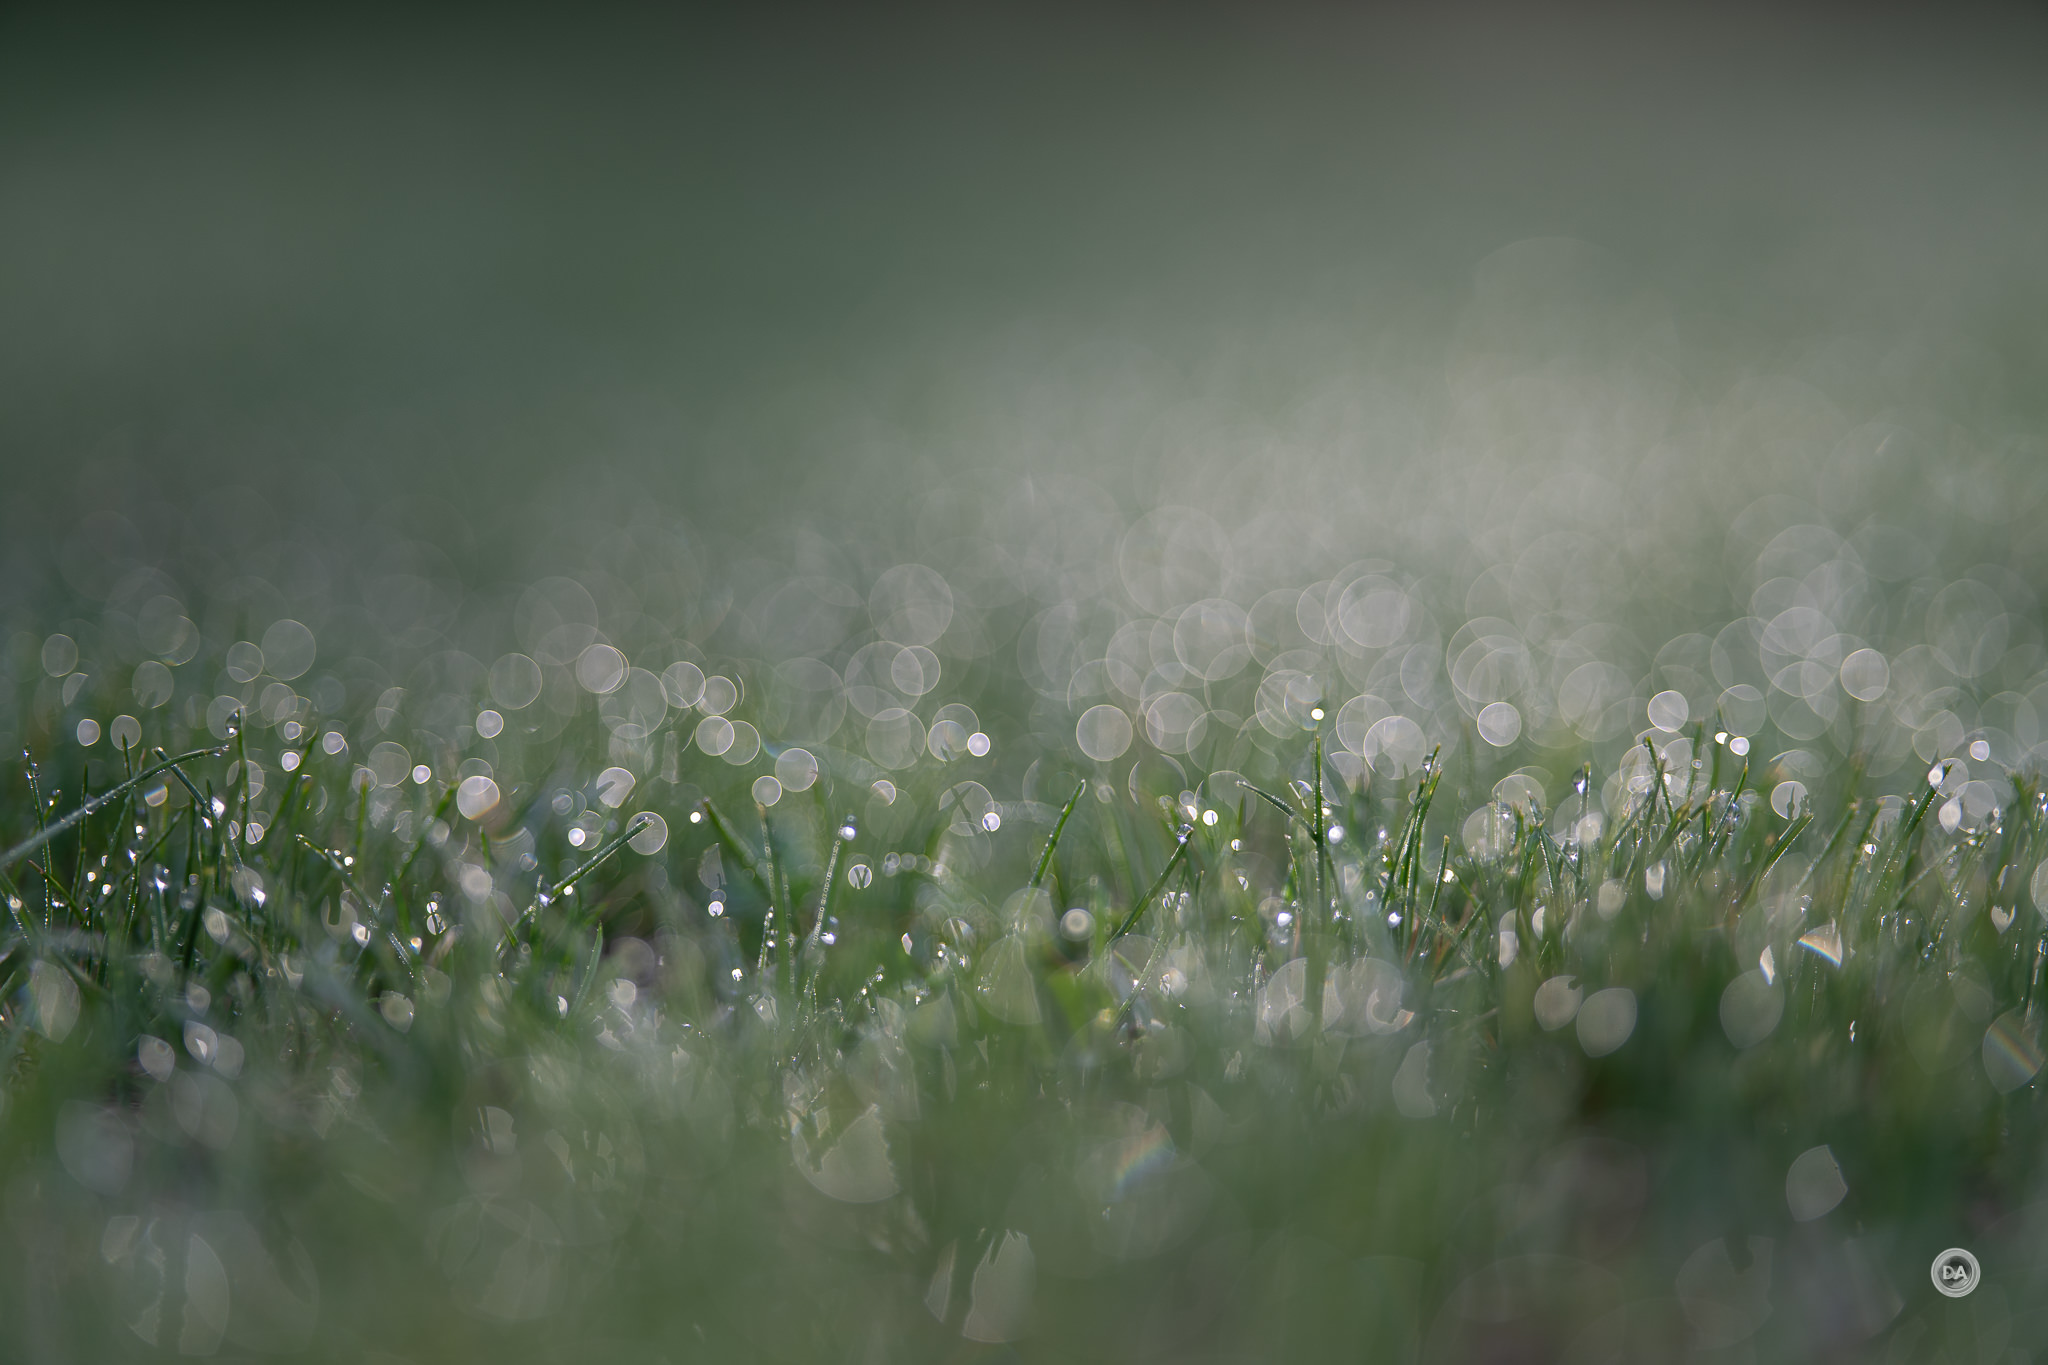
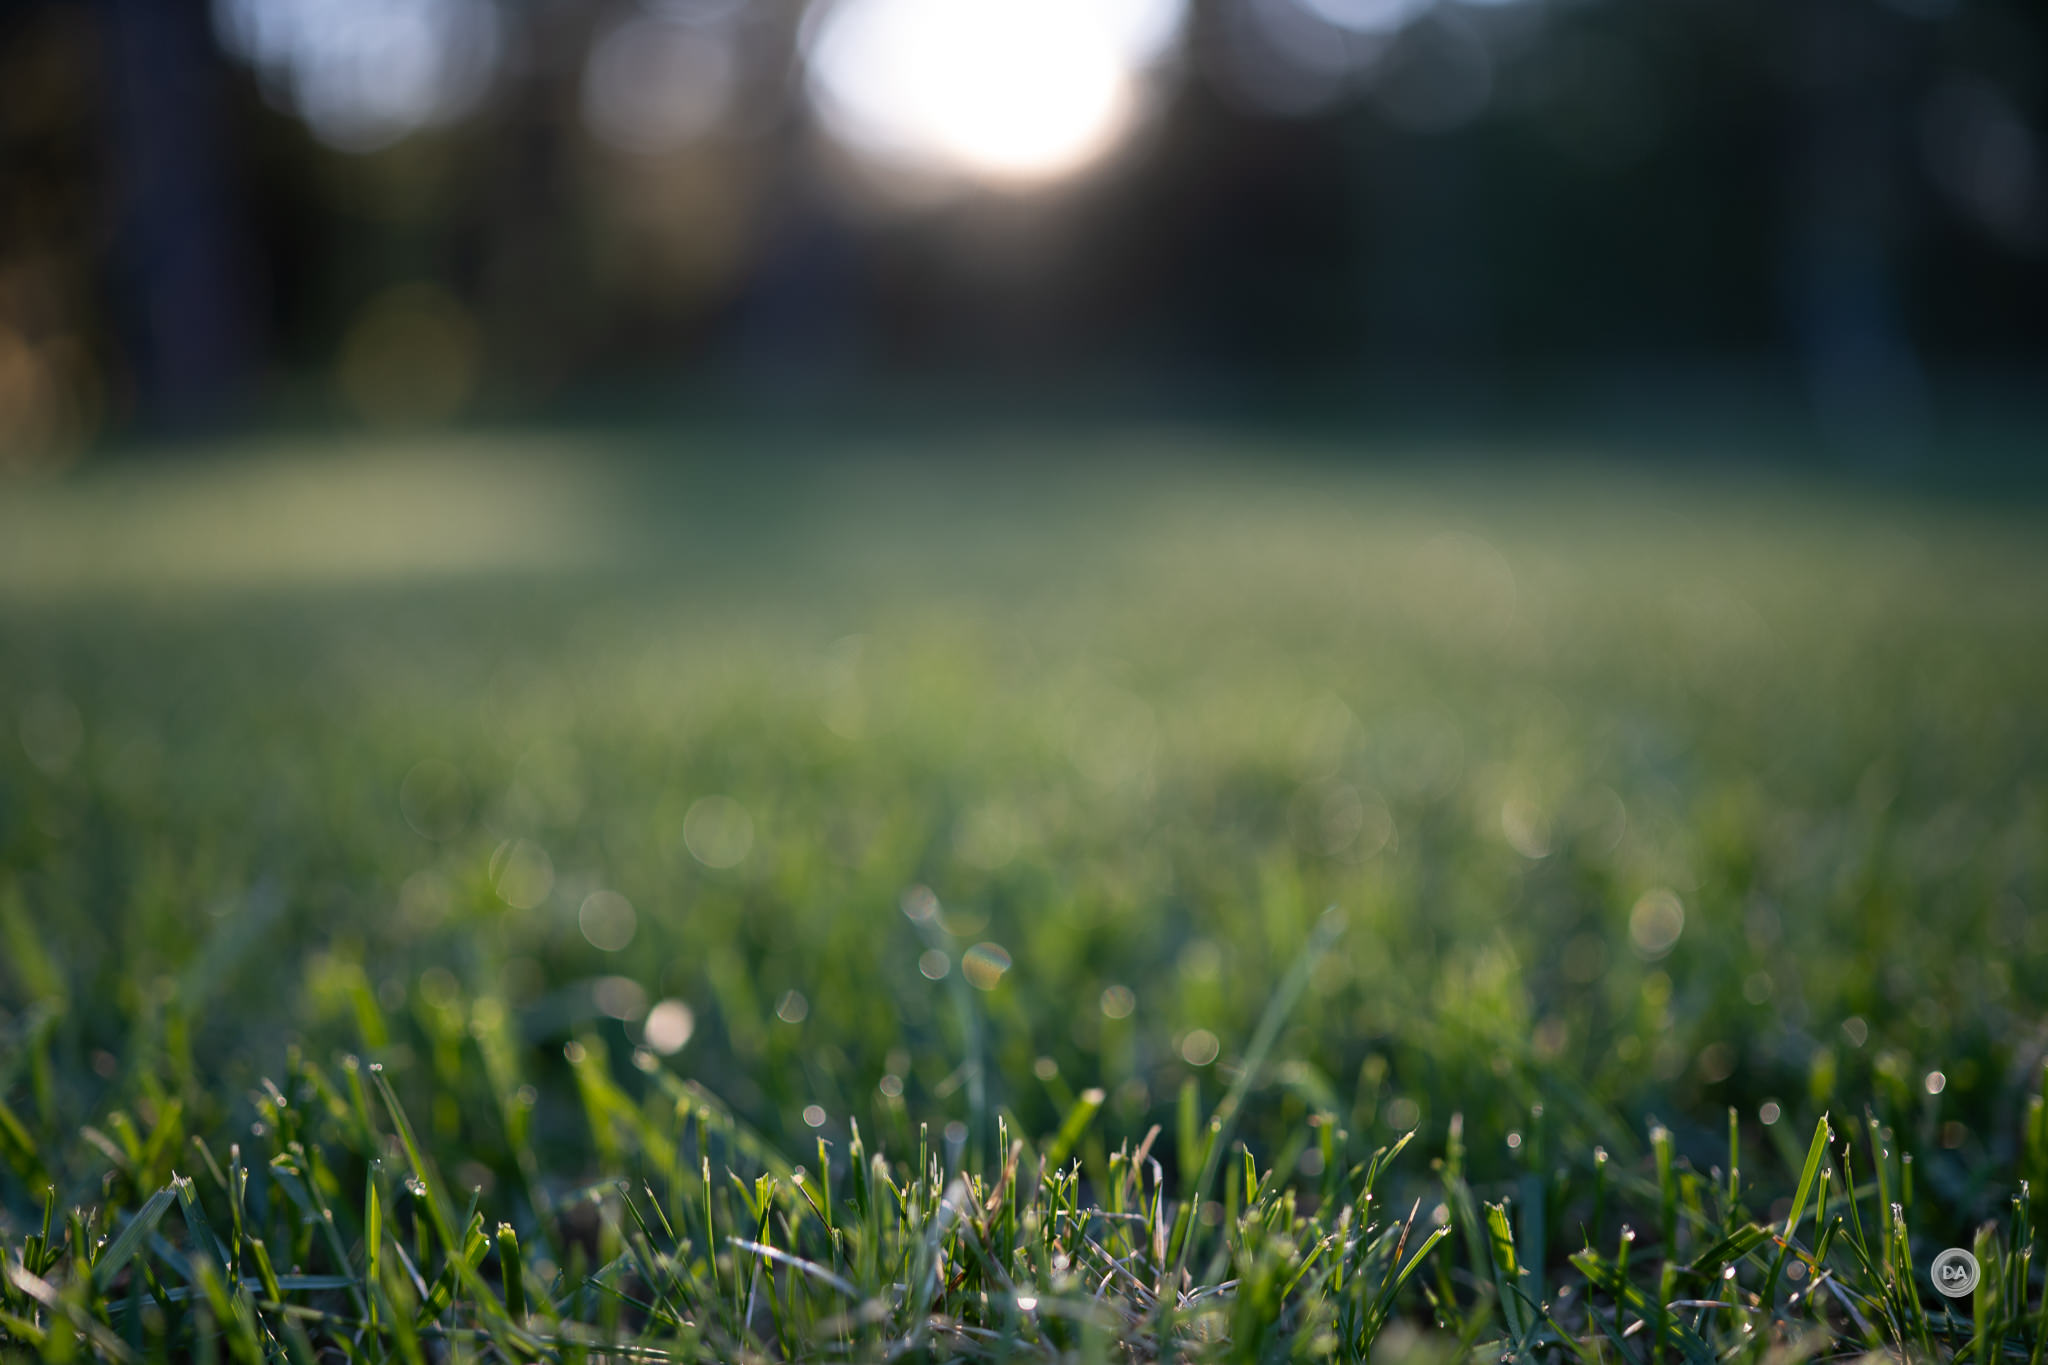
We’ve already seen the worse of the Kase 85mm, namely that the specular highlights aren’t consistently very round, but the overall rendering and handling of the transition zone is excellent. This early morning dew shows a bit of what I’m talking about.
Backgrounds are typically very soft and creamy.
The lens transitions to defocus quickly, so at close focus distances the background melts away almost immediately.
I stopped down to F5.6 and focused about halfway towards the scene, and the bokeh still looks nice and soft.
This shot has a lot of transition zone in it, and I still didn’t find anything to criticize.
Shooting normal shots inside a house shows a nice handling of defocus, even with hard edged items that aren’t really out of focus.
I also liked the color rendering fine overall. Skin tones look nice in the shot above. All of the bright spring colors during my review period looked nice, too.
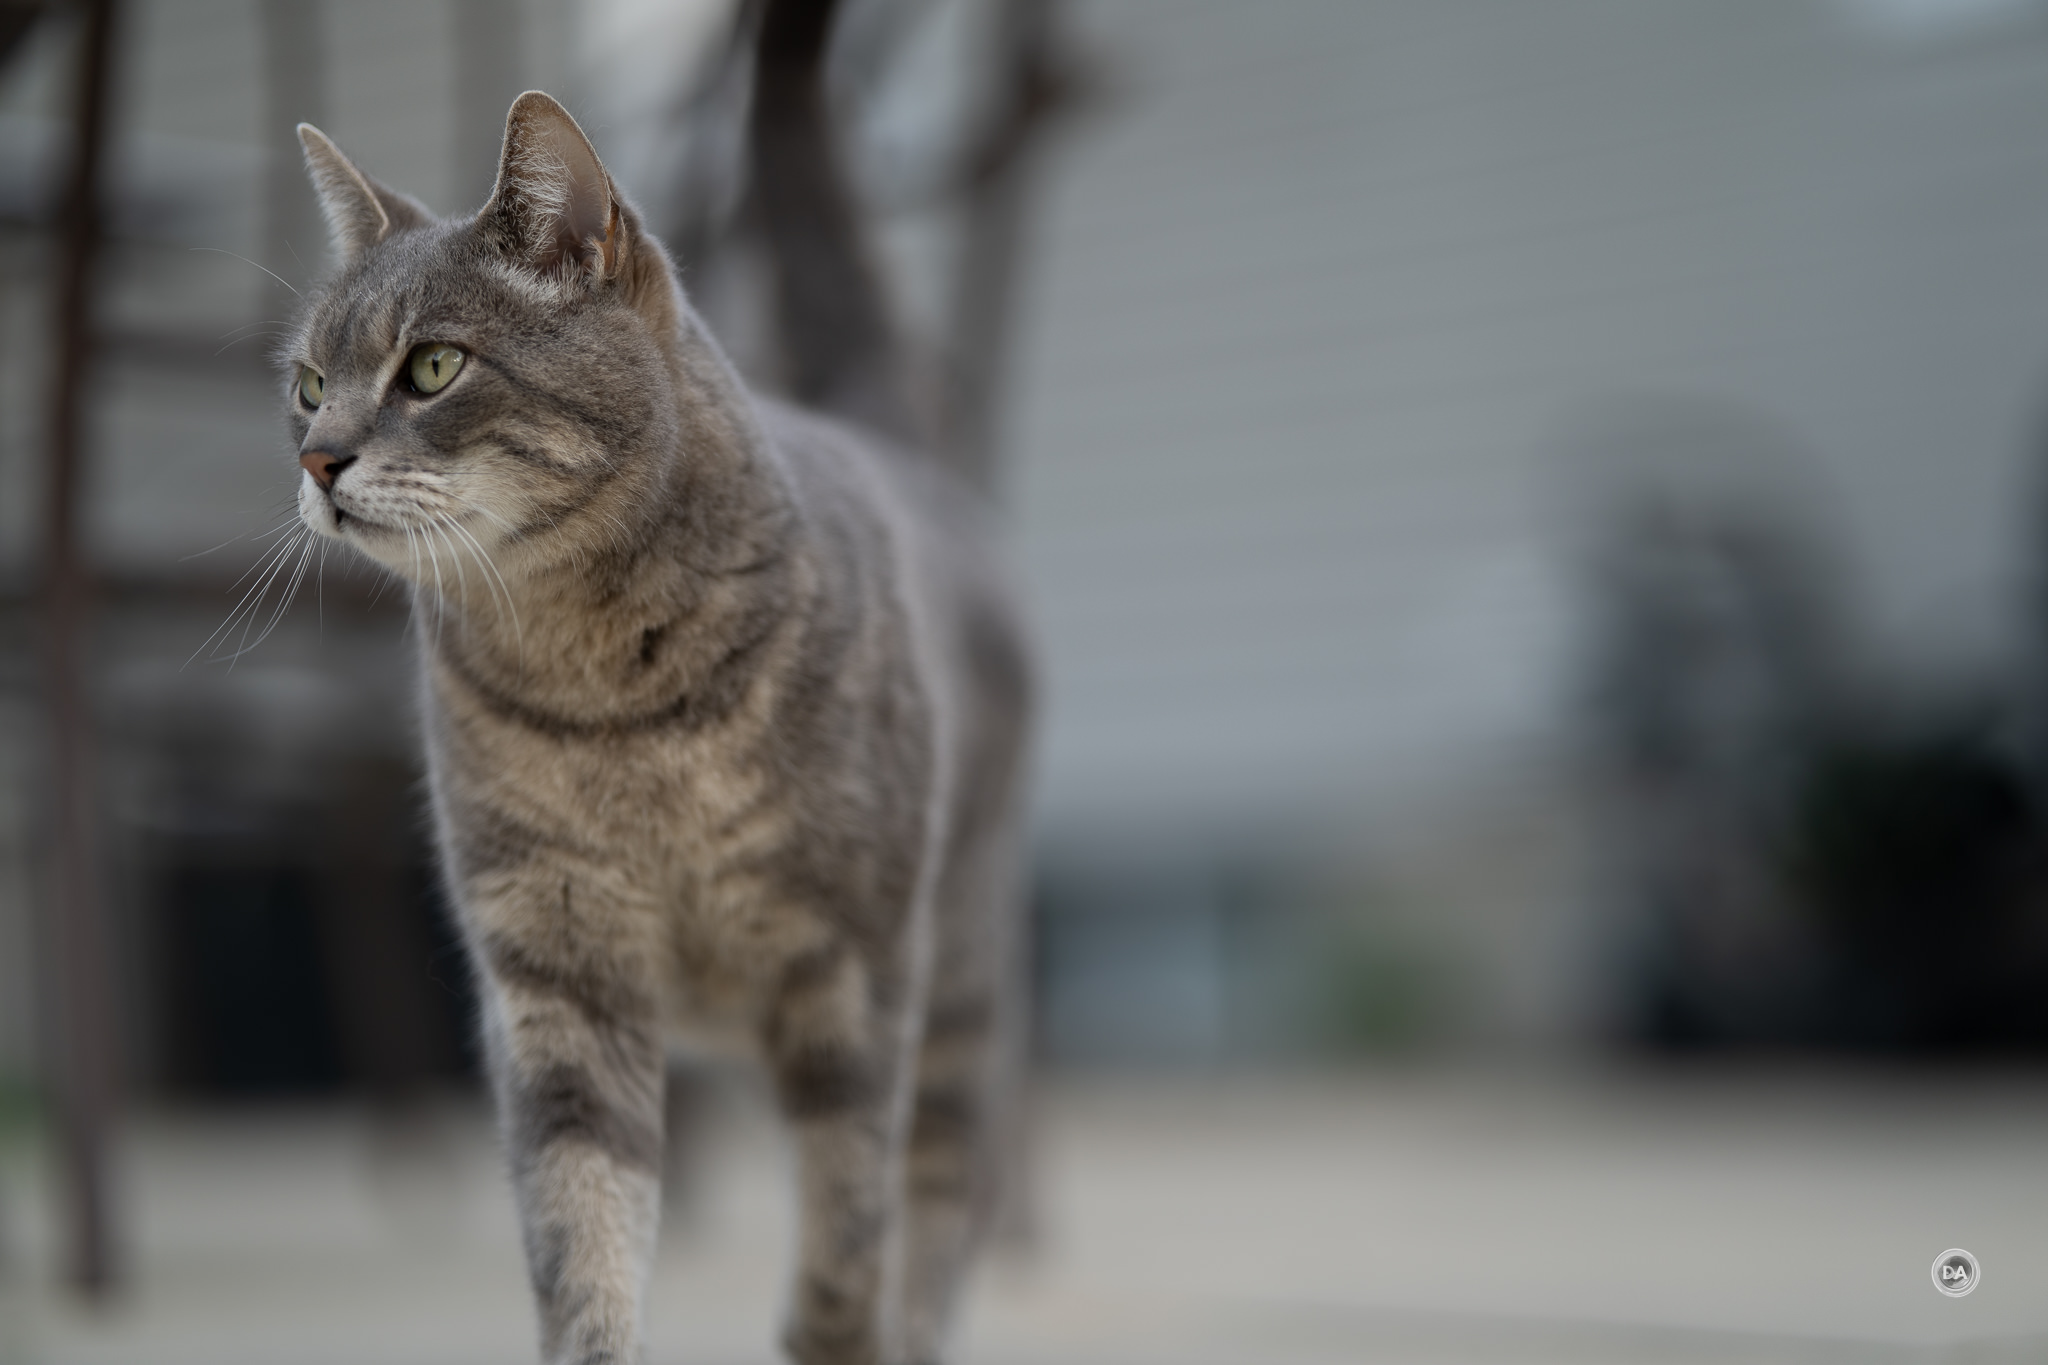
And, while contrast isn’t necessarily top notch, I did think that there is very nice 3D subject pop at medium distances.
The biggest flare issue that I saw was a bit of light leak problem in the corner. There is only minimal flare related issues otherwise.
There’s a lot to celebrate here, really. Kase has come onto the scene with a lens that is fairly competitive in all areas. Welcome to the club!
You can see more images by checking out the image gallery page here.
Conclusion
The last six months has been a great one for new 85mm F1.4 options on Sony FE. This lens from Kase is perhaps the most unexpected, however, as I’m not sure anyone knew that they were developing this lens. It’s a surprisingly mature effort for a first lens release, and manages to tick all the right boxes. I’m particularly impressed with the clever ways they’ve implemented their filter expertise into this design, making it perhaps the most desirable of the options for those who like to use filters as a part of shaping light and color.
Autofocus is probably the weakest link, but not because it is bad. Focus is quiet and accurate but not as swift as a few competitors. It is perfectly adequate for most people in most focus situations, however, so I’m not concerned.
The optical standout quality to me is the lovely rendering, with soft creamy bokeh. I think the Kase AF 85mm F1.4 FE is a great alternative for those that want a reasonably sharp lens but a less sterile rendering than the 85mm F1.4 GM II. The price of $738 USD is competitive, though less expensive options do exist. I’m not sure if there is a niche for Kase with so many alternatives on the market, but the lens really should carve out some spaced based on its merit…particularly if you want to use filters.
Keywords: Kase AF 85mm F1.4 FE, Kase AF, Kase, #KASE, Kase 85mm, Normal, Full Frame, F1.4, f/1.4, STM, Kase AF 85mm F1.4 FE Review, Magnetic, Magnetic Ring, Sony a7IV, Sony Alpha 1, Sony a7RV, Review, Hands On, Dustin Abbott, Real World, Comparison, Sharpness, Bokeh, Flare Resistance, Autofocus, Image Quality, Sample Images, Video, Photography, let the light in, weathersealing, #letthelightin, DA, #KaseAF85mmF14, #Best85mmF14, #FilterFriendlyLens, #CompactPortraitLens, #AffordablePrimeLens, #MagneticFilterSystem, #KaseLensReview, #SonyFEComparison, #OpticalPerformance, #BokehReview, #FirstKaseLens, #SonyAutoFocus, #CameraGear2025, #PhotographyGear, #Budget85mmLens
DISCLAIMER: This article and description contains affiliate links, which means that if you click on one of the product links, I’ll receive a small commission. As an Amazon Associate I earn from qualifying purchases.
No modern camera company does “vibes” quite like Fuji (well, maybe Leica, but that’s a whole other level of customer). It’s not unusual for a new Fuji camera (particularly X100 series) to be sold out not just for months but sometimes even years. It’s unclear whether some of that is intentional (do they not make quite enough of them intentionally?), but there’s no question that they manage to effectively design and market cameras that have a certain “it” factor. But I would argue that no camera in modern history has tested the “vibes” waters more than the Fujifilm X-Half. The X-Half fully embraces the retro craze, going back about as close to film as you can while still being purely digital. This is a tough review for me, since the X-Half does not excel in most of the metrics I typically evaluate. I’m not really a “vibes” kind of guy, but I’ll do my best to evaluate this camera by its actual intended criteria rather than the typical criteria I would apply to other cameras. You’ll be able to find my full thoughts in the video review or this text review.
Thanks to Fujifilm Canada for sending me a review loaner of this camera. As always, this is a completely independent review, and the thoughts and opinions expressed here are my own.Visit the product page for the camera here.
The Fujifilm X-Half is a retro-inspired, ultra-compact camera designed primarily for lifestyle and nostalgic shooters rather than technical perfection. It features an 18MP 1″ sensor, fixed FUJINON 10.8mm F2.8 lens, and a unique vertical orientation with small LCD screens and a basic optical viewfinder. While its build, style, and film simulation modes evoke a vintage vibe, its autofocus, sensor performance, and lack of RAW support are notable limitations. Overall, it appeals most to users seeking a fun, stylish, and emotionally resonant camera rather than a high-performance imaging tool.
Strengths:
Extremely stylish and nostalgic aesthetic
Compact, lightweight, and portable
Touchscreen response and innovative features like “film” mode
Authentic film simulation options and unique vertical framing aids
Weaknesses:
Basic autofocus with poor low-light performance
No RAW image recording
Small, hard-to-see LCD and limited viewfinder usefulness
Sensor not suited for high-detail, demanding photography
The Fujifilm X-Half is inspired by the classic “half-frame” cameras of yesteryear from Ricoh or Agfa (Auto Half or Paramat). It utilizes a rotated 18 MP 1″ sensor in a 3:4 vertical format. It has a fixed FUJINON 10.8mm F2.8 lens that has a full frame equivalent focal length of 32mm. Here’s a look at some the basic specs.
Spec List
18MP 1″ Vertical 3:4 CMOS Sensor
FUJINON 10.8mm f/2.8 Lens (32mm Equiv.)
Rear Vertical LCD & Sub LCD Screens
Optical Window Viewfinder
Film Camera Mode & 2-in-1 Mode
13 Film Simulation Modes and 26 Filters
Frame Advance Lever & Exposure Comp Dial
1080 x 1440 Vertical Video Recording
X half App for Image Development
Obviously there is little on the spec list that is going to jump out at you, as this is not the typical camera release that attempts to push the envelope of resolution, autofocus, or video specs. This is a camera for someone like my daughter, who purchased an old used point and shoot camera because she likes the “look” of the flawed images it produces: images that are washed out, overflashed, and lower resolution. I asked her why she likes it, and what I heard it that there is a nostalgic, emotional connection to those images that she doesn’t get from her electronically enhanced iPhone.
Gen Z has been born into the peak of technological advance. They have grown up with technologies that someone like me (Gen X) finds amazing because they are so much more advanced than what I grew up with. But many of them are experiencing some technology fatigue, and increasingly they are embracing “retro” technologies and experiences that are less technically perfect. That’s clearly the audience that Fujifilm is trying to tap into. Have they done it?
Build and Features
The Fujifilm X-Half first stands out for its compact size. It has a similar aesthetic to the bestselling X100 series (intentional, I’m sure), though it is half the size. It’s also much more plasticky feeling. The body alone (including the lens, but not the battery or memory card), is just 191g (6.7oz). It feels almost weightless. Add the memory card and battery and the weight only rises to 240g (8.5oz).
The dimensions are 4.2 (W) x 2.5 (H) x 1.8″ (D), or 105.8 x 64.3 x 45.8 mm. The depth is not the grip; it is the lens. There isn’t really any grip to speak of, this is the kind of camera you pinch rather than hold.
If you look a the camera from the front, it is instantly identifiable as a Fuji camera, with a classic camera grip texture, an opening for the optical viewfinder, and a flash that looks a bit like a tiny LED panel.
I’m reviewing the “Charcoal Silver” finish version, and there is also a Silver and Black option as well. The Charcoal Silver is a graphite color that looks very smart.
That front aesthetic is definitely classic Fuji but just on a smaller scale. The flash is small and not super bright. No real specifications are given for it. Here’s a look at a show without flash on the left, with the flashed result on the right.
Shooting against a backlit scene produced a pretty typical “flashed” look (and focus couldn’t handle even this minor amount of backlighting.
Far less conventional is the rear view, where we find a small vertical rather than horizontal LCD screen along with a small sub LCD to the left of it. It is a 2’4″ display with 920,000 dots of resolution.
This reflects the fact that the X-Half is completely built around the idea of vertical photos. The goal is to give you a unique camera where you can shoot and compose in the more comfortable horizontal position while getting vertical photos. Rotating the camera still produces vertical images that would need to be manually rotated.
I didn’t find the quality of the display particularly impressive, and I also found it very difficult to see in bright sunlight. I missed an EVF as an alternate place to compose or to review images.
The optical viewfinder has a very low magnification of 0.38x and has roughly 90% coverage. It basically feels like looking through a very small window, and there are no electronic overlays.
There is one switch and on button on the back. The switch allows you to move between Stills and Movie, while the button allows playback for reviewing images or videos. All other controls are handled via touch on either the main or sub screens.
There are surprisingly few physical controls for a Fuji camera, as this is an area that Fuji is typically known for.
Touch control is pretty straightforward, however, with swipes up, down, and to each side opening a different sub-menu, often with some additional control or options in the sub-screen. Touch is reasonably responsive. I feel like the average user will be able to get up to speed with the menu system fairly quickly, though I personally prefer more physical controls.
On top you’ll find a cold-shoe (not TTL flashing or similar) and the single main physical control – an exposure compensation wheel.
I would say that the control scheme definitely favors something like Aperture Priority (AE) mode, as Manual mode requires you to touch the shutter speed square on the LCD screen and then scroll in the pop up menu to get to your preferred shutter speed value. It’s pretty clunky. Aperture Priority, by contrast, allows you to use the Exposure Compensation dial along with the physical lever on the lens to change aperture. It allowed me to use the camera in the most conventional way possible. You can also the the Program (Auto) mode if you don’t want to think about the controls at all.
The shutter button is located in the center of the Exposure Compensation wheel. There is only a single shot option for the shutter; no burst rates are available.
At the rear of that wheel is an old-school lever that works in a few different ways. It will pop out when you turn the camera on. One application is for the “2-in-1” image feature, which allows you to combine two vertical images into a single 33MP diptych style frame.
This can be used for story-telling, friend shots, or other artistic styles. You can tweak the size and style of the frame in between the images in the settings. Both original images will be saved to the memory card along with the combined image.
The second application of the lever is in “Film Camera Mode”. You start by selecting a Film Simulation of your choice on the sub-LCD, then swipe down on the main screen to access the quick menu and select Film Camera mode. This mode emulates the old film camera process, starting with selecting how many images you want in your “roll” (36, 54, or 72). You can choose whether or not you want the date stamp on your images (another old school touch), and then you start the process. Once you enter the mode the LCD screen transforms into a retro digital display that shows number of photos taken on your “roll” along with a few other options (AF | MF, whether or not you want the date stamp, and a distance scale if you really want to go old school and just manually focus. The lever is now used to “advance your film”.
During this time your images will not show up for review on your LCD, and composition is only done through the analog viewfinder. You are also locked into this particular “film” for that roll (Reala ACE in our example). The roll must be “developed” by using the dedicated X-Half App available for iOS and Android. Alternately you can pair the X-Half with an Instax Link printer to just print images and have a truly non-digital experience.
Once the roll is finished you can wirelessly transfer it to the X-Half app for “development”. You can develop partial rolls as well, though that will end your ability to use that “roll” in camera. While in “Film” mode images won’t show up on your SD card, either. After development they will show up, however, along with a single image showing your “negatives”.
To me this is a gimmicky feature, but for those fully embracing a film type experience, this might feel like a blast to you.
The left side of the camera has a switch to turn the flash on or off, and under that a compartment housing the USB-C port, which is the only connection port on the camera. Charging can also be done through this port.
The bottom of the camera has the standard 1/4″ tripod mount along with a compartment that houses the battery and SD card. The battery is the NP-W126S and is rated up to 880 frames per charge in this application when using the OVF. You shouldn’t have to charge the X-Half very often!
The lens itself has a lever for accessing the aperture. The aperture range is from F2.8 to F11, with the ability to also select Automatic mode.
There is also a small manual focus ring on the front of the tiny lens. It moves nicely, though the optical viewfinder doesn’t give you any indication of focus at all. You’ll have to rely on the LCD screen in normal mode or the on-screen distance scale during film mode.
It takes a lot of rotations to move in close focus area, and focus speeds up in other zones. Unfortunately I didn’t find the distance scale very accurate. I was about about 3 meters away from this barn, for example, so I focused to that zone according to the screen. It isn’t accurate at all, and it looks like focus was more like 1.5 meters ahead of the camera.
The camera definitely has a retro charm to it, and the small size will certainly be a compelling selling point to potential buyers. The price will vary from market to market, but in the US it comes to market at a fairly steep $849 USD. The price here in Canada is basically $999, making it expensive but a relative value compared to the US price. This is a camera that is priced on desirability rather than performance, but people will probably buy it in droves.
Autofocus Performance for Stills
Autofocus performance is very basic for a modern camera. It has just 9 Contrast AF points, though it does have Eye Detection. You can select between AF-S, AF-C, and Manual focus.
Eye detect works okay but not great. I’ve definitely seen instances where focus locks on the background rather than an obvious subject even with a face in obvious view. Focus in general seems to prefer background focus to foreground focus.
Expect some hunting at times, and focus at its best is never fast. Low light shooting will definitely induce some hunting.
Autofocus during film simulation mode is tough because you literally have zero feedback other than a confirmation beep. It truly is a guessing game whether focus landed on the right subject or not. Part of the charm, I guess. For me, however, it meant that about 2/3rds of the roll I shot were throwaways because focus really, really didn’t want to land on foreground objects, and I had no idea that focus was missing.
You have a single box to work with on screen, and it doesn’t seem like you can move that around at all.
Focus, in my opinion, is pretty frustrating if you have any kind of expectation of getting consistently focused results. AF-S seemed to be more accurate than AF-C in my opinion.
Video Performance
Video specs are pretty basic. You record in either .MP4 or .MOV codecs at “Full HD” specs. This isn’t a convention resolution, however, at 1080 x 1440 pixels. Frame rate is largely at a 24FPS setting, though you can shoot a high speed option up to 48FPS. You can use film simulations and different picture effects.
Footage is pretty basic, as you might expect. This is not a high end sensor and this mode is designed for casual fun rather than serious video recording. It gets noisy very quickly if the lighting isn’t optimal. you can see that in the screenshot above.
This is a small 1″ sensor with all the accompanying limitations of a small sensor. Resolution is 3648 x 4864, or 17.74MP. I’m not going to do a deep dive into the sensor, but rather give you my impressions.
First of all, this is a JPEG only camera. There is no RAW recording, so choosing the right film simulation really matters, as that is going to impact your image. Here’s the same scene taken with a few different film simulations.
At its best, detail looks decent.
There is far less latitude for processing JPEG images, and the sensor is not going to match the typical Fuji APS-C sensor for dynamic range or even ISO performance. Here’s a beach scene that arrived from the camera blown out because I didn’t realize that the the maximum shutter speed is only 1/2000 sec. I was able to reasonably recover the image, though there are still a few blown out hotspots remaining.
High ISO situations cause image quality to deteriorate quickly. There is color noise, a lot of detail, and images generally look a little rough. This shot is at ISO 12,800.
Fuji colors are typically very good, and that’s true here if you can shoot in optimal conditions.
I also really like Fuji’s Acros monochrome options, which have a great general look to them.
You can dial in a number of other looks as well, including light leaks, grain, halation, and more. Finding a combination you like will help you get the images in camera that you want.
The attached lens struggles with flare resistance. Contrast reduces and there are a few flare artifacts.
I was able to get some images that I liked out of the camera, but frankly image quality isn’t competing with my iPhone on a technical level. This is a vibes camera, period, and the people who will love it are those who aren’t looking for technical perfection anyway.
Conclusion
The Fujifilm X-Half is the kind of camera that I don’t think we would have seen released even five years ago. So much of the industry is focused on ever better specs, and while Fuji has done some of that themselves, it seems like the past few years have seen them focused on more lifestyle products that appeal to photographers (and non-photographers) more based on the joy of use and the style of the products rather than their technical advancement.
That’s not my cup of tea, necessarily, but I can’t argue with the success that Fuji has had with this approach. The X-Half is another Fuji camera that may appeal to those who don’t traditionally like cameras, or who even might think that their phone camera is too technically perfect. It’s definitely NOT a camera for pixel peepers, but might really appeal to those for whom photography is part of a lifestyle – the joy of the moment rather than the pursuit of perfection.
If that’s you, maybe the Fujifilm X-Half is just the camera you’ve been looking for.
Pros:
Very stylish
Extremely compact and lightweight
Touchscreen responsiveness is decent
Some innovative ideas at work
Delivers a fairly authentic film shooting simulation
Fuji’s film simulations are always great
Will probably have the “it” factor
Delivers a more comfortable way to shoot vertical images
DISCLAIMER: This article and description contains affiliate links, which means that if you click on one of the product links, I’ll receive a small commission. As an Amazon Associate I earn from qualifying purchases.
I noted in my recent review of the Nikkor Z 50mm F1.8 S that Nikon’s marketing strategy at the typical prime focal lengths (35mm, 50mm, and 85mm) is a bit unconventional. In the past the usual strategy was entry level (F1.8), mid-tier (F1.4), and premium (F1.2) options. But Nikon actually released F1.8 lenses at these focal lengths first, but rather than the typical entry level “plastic fantastics” they actually created more premium mid-tier options included in their premium S-line lineup. They then followed those up with F1.2 options (large, expensive, and excellent), and only then have started to create F1.4 options. The F1.4 lenses are actually the least expensive options, and, ironically, tend to be about the same size as the F1.8 S lenses. But thanks to a newfound connection at Nikon Canada (thanks, Chris!), I’ve got an opportunity to work through some of the catalog lenses in Z mount. The most recent of those is the Nikkor Z 35mm F1.8 S, which was originally released in late September 2018. Does it hold up as well as the 50mm F1.8 S? Find out my thoughts by watching the video review or by reading on in the text review.
Thanks to Nikon Canada for sending me a review copy of this lens. As always, this is a completely independent review. All opinions and conclusions are my own. *The tests and most of the photos that I share as a part of my review cycle have been done with the 45MP Nikon Z8, which I reviewed here.You can visit the product page for the Nikkor Z 35mm F1.8 S here.
AI SUMMARY: The Nikon Nikkor Z 35mm F1.8 S lens is a durable, compact, and reliable option that offers strong optical performance, especially in sharpness and contrast. It features weather sealing and excellent close-focus capabilities, making it versatile for various shooting situations. However, its higher price point and limited feature set for a premium lens might pose drawbacks, particularly given the competition from newer or more affordable alternatives. Overall, it remains a very capable lens that suits many shooters, but it doesn’t fully stand out in its price range.
Strengths:
Robust, weather-sealed build
Reliable autofocus and close-focus distance
Excellent sharpness and contrast across the frame
Compact, lightweight, and versatile design
Weaknesses:
Higher price relative to performance
Limited features compared to other premium lenses
Noticeable vignetting and some chromatic aberration
As with the 50mm focal lengths, the Nikkor 35mm options have a clear separation between the F1.8 S and thAs with the 50mm focal lengths, the Nikkor 35mm options have a clear separation between the F1.8 S and the F1.2 S…but then the waters get murkier between the F1.8 S and the newer F1.4 lens. The latter two lenses are within a few milimeters of each other in their dimensions, and the weight difference is only 45g (the F1.4 version is slightly heavier). The F1.2 S, on the other hand, is massively larger, some 64mm longer and weighing nearly 700g more! Camera Decision does a great job of presenting the difference in scale:
That’s a BIG difference!
The thought behind the F1.8 S-Line lenses was to produce high quality optics at an affordable price, and while that makes these lenses somewhat unconventional, they do make a lot of sense once you start to use them.
I always enjoy a 35mm lens. It’s a excellent general purpose focal length, and this lens provides a lot of solid attributes – reasonably compact, very good image quality, and consistently good autofocus.
Like the 50mm F1.8 S, the 35mm F1.8 S is not a new lens. It was one of the first released by Nikon when Z mount launched in late 2018, so is it sill holding up to scrutiny over six years later?
DISCLAIMER: This article and description contains affiliate links, which means that if you click on one of the product links, I’ll receive a small commission. As an Amazon Associate I earn from qualifying purchases.
I noted in my recent review of the Nikkor Z 50mm F1.8 S that Nikon’s marketing strategy at the typical prime focal lengths (35mm, 50mm, and 85mm) is a bit unconventional. In the past the usual strategy was entry level (F1.8), mid-tier (F1.4), and premium (F1.2) options. But Nikon actually released F1.8 lenses at these focal lengths first, but rather than the typical entry level “plastic fantastics” they actually created more premium mid-tier options included in their premium S-line lineup. They then followed those up with F1.2 options (large, expensive, and excellent), and only then have started to create F1.4 options. The F1.4 lenses are actually the least expensive options, and, ironically, tend to be about the same size as the F1.8 S lenses. But thanks to a newfound connection at Nikon Canada (thanks, Chris!), I’ve got an opportunity to work through some of the catalog lenses in Z mount. The most recent of those is the Nikkor Z 35mm F1.8 S, which was originally released in late September 2018. Does it hold up as well as the 50mm F1.8 S? Find out my thoughts by watching the video review or by reading on in the text review.
Thanks to Nikon Canada for sending me a review copy of this lens. As always, this is a completely independent review. All opinions and conclusions are my own. *The tests and most of the photos that I share as a part of my review cycle have been done with the 45MP Nikon Z8, which I reviewed here.You can visit the product page for the Nikkor Z 35mm F1.8 S here.
AI SUMMARY: The Nikon Nikkor Z 35mm F1.8 S lens is a durable, compact, and reliable option that offers strong optical performance, especially in sharpness and contrast. It features weather sealing and excellent close-focus capabilities, making it versatile for various shooting situations. However, its higher price point and limited feature set for a premium lens might pose drawbacks, particularly given the competition from newer or more affordable alternatives. Overall, it remains a very capable lens that suits many shooters, but it doesn’t fully stand out in its price range.
Strengths:
Robust, weather-sealed build
Reliable autofocus and close-focus distance
Excellent sharpness and contrast across the frame
Compact, lightweight, and versatile design
Weaknesses:
Higher price relative to performance
Limited features compared to other premium lenses
Noticeable vignetting and some chromatic aberration
As with the 50mm focal lengths, the Nikkor 35mm options have a clear separation between the F1.8 S and the F1.2 S…but then the waters get murkier between the F1.8 S and the newer F1.4 lens. The latter two lenses are within a few milimeters of each other in their dimensions, and the weight difference is only 45g (the F1.4 version is slightly heavier). The F1.2 S, on the other hand, is massively larger, some 64mm longer and weighing nearly 700g more! Camera Decision does a great job of presenting the difference in scale:
That’s a BIG difference!
The thought behind the F1.8 S-Line lenses was to produce high quality optics at an affordable price, and while that makes these lenses somewhat unconventional, they do make a lot of sense once you start to use them.
I always enjoy a 35mm lens. It’s a excellent general purpose focal length, and this lens provides a lot of solid attributes – reasonably compact, very good image quality, and consistently good autofocus.
Like the 50mm F1.8 S, the 35mm F1.8 S is not a new lens. It was one of the first released by Nikon when Z mount launched in late 2018, so is it sill holding up to scrutiny over six years later?
Nikkor 35mm F1.8 S Build and Handling
The 35mm F1.8 S is slightly smaller and lighter than the 50mm F1.8 S. It measures 73mm (2.87″) in diameter and 86mm (3.39″) in length. The 50mm F1.8 S is 76mm (2.99″) x 86.5 mm (3.41″) in length. It’s reasonably compact and easy to bring along.
It weighs in at 370g (13.05oz), which is 45g lighter than the 50mm. I consider any lens under 400g to be lightweight. The outer barrel is made of a robust polycarbonate material with some metal components, including the mount. There is a weather sealing gasket at the mount along with internal seals throughout the lens.
I count 8 seal points overall in this diagram. Nikon’s language around the weather sealing is fairly confident. They say, “Extensively sealed against dust and moisture, especially around all moving parts of the barrel.” (Emphasis mine).
The feature set of the 35mm F1.8 S is fairly brief. There is an AF | MF switch along with the S-Line badging near the lens mount…and that’s it.
There is just a single ring on the lens barrel. This is an area of differentiation from the newer 35mm F1.4, as that lens has two rings. It has a dedicated manual focus ring along with Nikon’s customizable control ring that can be assigned to adjust aperture, exposure compensation, or ISO. In this case, however, the single ring is the customizable control ring, meaning that manual focus is the default function but is also just one of the potential uses for the ring.
This leaves me with a bit of quandary, as I do like having an aperture ring, but I also really like Nikon’s full time manual override and do find it often necessary when autofocus doesn’t want to grab a close object. The shot below found autofocus stuck on the background and I had to use manual override to pull focus to the right zone where autofocus can take over. I would give the win to the newer F1.4 lens for having a separate control ring, as I decided that I would just have to skip the manual aperture control in order to retain manual focus override.
If I set the control ring to power aperture, I was able to do a smooth aperture rack without visible steps. They’ve done a good job with with. I like the aperture control better for that (in video) than in stills.
The feel of the ring is fairly good, with good damping and precision. I like Nikon’s options for controlling the behavior of the manual focus ring, allowing you to choose a linear response and your desired focus throw distance.
The aperture iris is made up of nine rounded blades, allowing for a circular aperture shape when the lens is stopped down. As you stop the aperture down, the overall shape is “roundish” but you can slightly see the shape of the aperture blades (F1.8, F2.8, and F4 shown below).
The front filter size is 62mm, which is shared with the 50mm F1.8 S, 50mm F1.4, and 35mm F1.4. The 85mm F1.8 S moves up to a 67mm filter size.
There is a fairly deep lens hood included. There are ribs inside and a ridged grip section to make it easier to mount/unmount the lens. My loaner copy didn’t include the hood, so here’s a picture of the lens hood from Nikon’s website.
The 35mm F1.8 S lags can focus as closely as 25cm, which bests the 35mm F1.4 (27cm) or 35mm F1.2 S (30cm). That gives us a 0.19x magnification, which is very useful. It’s interesting to note that the 35mm F1.2 S gives the highest magnification of the trio (0.20x) despite having the longest minimum focus distance, which tells me that there must be some focus breathing at work here.
The up close performance is good, though the plane of focus that isn’t entirely flat. That’s less of an issue in the real world, however, and I got nice up close results.
The 35mm F1.8 S has held up fine in terms of build quality and the execution of what is there, though most premium lenses now feature a separate aperture/control ring and a custom button. The current price of the 35mm F1.8 S sits at right under $850 USD (2025 has been a volatile year for prices), leaving a $250 gap between it and the cheaper F1.4 version. That may be enough to shift more buyers in the direction of the F1.4 lens. If you’re on a tighter budget and are flexible about focal length, I do feel like the 50mm F1.8 S provides a stronger value (it’s MSRP sits more than $200 cheaper for some reason).
Autofocus for Stills
Like the 50mm F1.8 S, the 50mm F1.8 S utilizes a stepping focus motor (STM) that is, for the most part, surprisingly fast. Focus changes happen very quickly whether indoors or outdoors, and most of the time you won’t think about autofocus at all because the job just gets done quickly and efficiently. I was able to track moderate action without difficulty on either my Z8 or the Z5II that I was testing at the time.
Eye AF was nice and “sticky”, grabbing the correct subject and locking focus accurately.
The previous image was on the Z8, but I saw similarly good focus on the Z5II.
It’s spring, so I did a lot of shots isolating spring blossom and new growth, and got well focused results throughout.
Here’s another example:
I could hear a light “schnick” sound as focus went back and forth during my focus speed test. I don’t recall hearing something similar during my test of the 50mm F1.8 S, so the focus motor may be a bit louder in this application.
Still, focus accuracy was good throughout my tests and I never lacked speed to do what I wanted, so I’m happy with AF here. I often associate STM focus motors with lower to mid-tier lenses on other brands, but Nikon’s STM motors have all seemed to function pretty well.
Video Autofocus
I’ve learned that I need to be a little more proactive within Nikon’s menu options to get the Video AF results that I want, as I can’t rely as much on the default settings as I might on Sony or Canon cameras.
My first test was video focus pulls, and I saw quick and reasonably confident pulls from one subject to another in my standard test. I didn’t see any visible steps from the STM motor. What I did see was a bit of micropulsing where it felt like focus had perhaps slightly overshot the target and pulsed back. You will see a periodic quick rack in the wrong direction, which is another thing that I’ve seen in all of my Nikon tests thus far. That means that this is more of a camera/focus system issue than a lens specific issue. This behavior was basically identical to what I saw from the 50mm F1.8 S.
Focus breathing isn’t as well controlled as what I saw from the 50mm F1.8 S. It’s a bit more obvious.
My “hand test” where I alternately block the camera’s view of my face with my hand and then remove it went well, exhibiting more confidence and no pulsing relative to what I saw in just the autofocus pull test.
I also found that the lens was nicely stable for doing on screen presentations. It stayed locked on my eye as I spoke without any unnecessary focus changes or pulses.
Where the focus motor shines best is when making transitions in the real world world. It is able to pull off nicely damped focus changes that seem fairly cinematic to my eye.
Image Quality Breakdown
The Nikkor Z 35mm F1.8S is an FX (full frame lens), though it can also be used on DX cameras where it will give a full frame equivalent of 52.5mm due to the 1.5x crop factor on DX. This almost certainly has produced some crossover appeal for this lens, as both focal lengths are very popular. The optical design here is 11 elements in 9 groups, including 2 ED (extra low dispersion) elements and 3 aspherical lenses. The MTF chart shows a very even performance across the frame with only a slight drop in the extreme corners.
The 35mm F1.8 S isn’t quite as impressive as the 50mm F1.8 S either on paper or in practice. I found the 50mm F1.8 S results to be almost apochromatic in appearance, but I would consider the 35mm F1.8 S very good but not great.
That being said, it does show a clear advantage over the newer 35mm F1.4 in terms of pure sharpness. I like to line up MTF charts and put a line through the 80% threshold. Anything above that at 30lp/mm will look extremely sharp.
Unliked the 50mm F1.8 S, none of the performance here lies above that threshold, but it also has a roughly ten point advantage relative to the F1.4 lens all across the frame. It definitely is capable of delivering crisp real world images, however.
The 50mm F1.8 S has an optical performance that is defined to me above all by its intense levels of contrast. The 35mm F1.8 S doesn’t quite match that, in part part because it does struggle with a bit longitudinal style chromatic aberrations. Not that they are bad (at all), but it doesn’t have quite that same degree of perfect correction. You’ll see some on my test chart after the plane of focus:
You’ll also see it on shiny surfaces like the outlines of the metal frame of my vintage Pentax.
Lateral chromatic aberrations near the edge of the frame are essentially non-existent, so that won’t be a problem.
This latter is important on wider angle lenses like this because lateral CA can have a negative impact on landscape style images. I didn’t notice any issues with lateral fringing in landscape style images (particularly those with bare branches near the edge of the frame).
If we move on to vignette and distortion we find a small amount of barrel distortion which required just a +5 to correct for. It is very linear and corrects easily enough.
Vignette is another story. I had to add a +100 (maximum) to correct for the vignette. This is the great challenge of the Nikon Z mount generally; its large diameter does make illuminating the edges of the sensor more difficult.
We’ll move on to inspecting our test chart. This test has been done on a 45MP Nikon Z8 sensor. I use a high end tripod and two second camera delay to ensure vibration doesn’t affect images. Here’s a look at the test chart that we will examine at high magnification:
If we take a look at crops (at roughly 200%) at F1.8 from the center, mid-frame, and lower right corner, we see a very strong center, a bit of a dip to a still strong midframe (this being probably the weakest area relative to the 50mm F1.8 S), and corners that I think still mostly look good other than being dark even after the correction profile is added.
I personally compose a lot of images in the rule of thirds mid-frame zone, so that different in mid-frame contrast is where I most see the difference relative to the 50mm F1.8 S. I find that midframe contrast levels at F1.8 are good but not exceptionally good like the 50mm.
Stopping down a bit will increase that contrast level, though, and this image, for example, shows that gorgeous deep contrast levels in the color gradations that I associate with the 50mm F1.8 S.
There is slightly more contrast at F2, but a more significant advantage comes in the center at F2.8, which is now exceptional. I can noticeable improvements in the mid-frame and corners, but I wouldn’t call the midframe exceptional until F4:
and the corners until F5.6.
By F5.6 you can have sharp, deeply contrast images across the frame.
Expect the typical diffraction pattern on high resolution cameras where the image is a little softer by F11 and softer still at the minimum aperture of F16, though frankly I’ve seen much worse when it comes to diffraction.
So, my conclusion is that sharpness and contrast are good, but not as exceptional as what I saw on the 50mm F1.8 S.
But how about the overall rendering from the lens? Does it have that “special sauce” that makes images look exceptional?
First we’ll look at specular highlights (bokeh balls).
There’s a very fine amount of green fringing around the edges of specular highlights, but nothing worth mentioning. Like the F1.8 S, however, the insides of those specular highlights are fairly busy. Not onion rings, but what looks like a microscope slide with bacteria on it. I found the bokeh balls on the 50mm F1.4 to be much smoother than those of the F1.8 S, and I wouldn’t be surprised if something similar is true of the 35mm F1.4, too.
General bokeh is fairly good, though. There’s perhaps a bit more hard edges than what I would like, but the overall look is fairly good.
What it is not is exceptionally soft and creamy. I’ve reviewed a number of the 35mm lenses on other platforms in the past year, and I’ve definitely seen softer, creamier backgrounds than this.
If I mount the Sony 35mm F1.4 GM and shoot at F1.8, the Sony definitely delivers softer looking backgrounds (less edges, more uniform).
I found that the Viltrox 35mm F1.2 LAB was even better…and that’s a lens that inevitably will be coming to Z mount and will probably cost no more than $200 more than the F1.8 S. Obviously it will be a much bigger, heavier lens, but if you’re looking for image quality, that will unquestionably be an attractive alternative.
This image I think looks fairly good, but all of the specular highlights definitely look defined.
My early morning grass shot that I like to capture during the more pleasant months looks good but exceptional.
What I did like, however, was a shot like this:
I feel like there is good 3D pop on the subject, and while the background isn’t strongly blurred out, it fades away in an unobjectionable way. That is in part because the transition zone is handled pretty well. It does become nervous or jittery.
Colors are nice and crisp. This shot of a camera looks very nice and clean.
This blue hour shot has very deep color saturation, but not in an unnatural way.
Here’s another where the image just looks very pure.
Flare resistance seems like a strength to me. Nikon’s coatings are doing a good job of thwarting ugly flare artifacts, which is true at large apertures…
…and at smaller apertures like F11.
What’s more, that sunstar looks fairly nice.
This is a solid lens optically. It has good sharpness, good rendering, but it doesn’t feel as exceptional to me as the 50mm F1.8 S. There’s no one area where it particularly stands out, and that fact that it retails at a higher price point is a somewhat counterintuitive relative to performance. I’m intrigued to test the less expensive 35mm F1.4, as while I know that lens will be a bit softer in terms of sharpness and contrast, it could potentially deliver nicer rendering. At the same time, however, I could also see some of the DNA that I loved from the 50mm F1.8 S in certain images. You can check out more photos by visiting the image gallery here.
Conclusion
As you’ve probably picked up, I’m a little less wowed by the Nikkor Z 35mm F1.8 S-Line than I was with the 50mm F1.8 S. That lens was much better in reality than it was on paper, and while the 35mm F1.8 S is definitely probably the nicest 35mm F1.8 lens optically that I’ve tested, the problem is that it is priced to compete with a number of 35mm F1.4 lenses. I suspect what some of those lenses start to arrive (like the scheduled Viltrox Pro 35mm F1.4), Nikon might want to consider discounting the price of a 7-8 year old lens.
In the meantime, however, once you’ve paid the price you’ll end up with an extremely competent lens. It’s got a sturdy (if simple) build, good autofocus, and a fairly strong optical performance. What’s more is that it is fairly compact and lightweight, making it an easy lens to bring along and one you can match with either FX or DX bodies.
The F1.8 S-Line lenses made little sense to be as an outside observer before I added Nikon to my review kit. They seemed like overpriced lenses due to the maximum aperture of F1.8, but the reality of the lenses in this series makes much more sense. They bring a premium performance at a mid-tier price, as similar lenses with F1.4 aperture would be almost certainly be priced well over $1000 (as equivalents from Canon and Sony are priced). So while F1.8 lenses may not be the sexiest options out there, these F1.8 S-Line lenses are pretty special for their ability to give more Nikon shooters a chance to shoot with better glass. That I can applaud.
DISCLAIMER: This article and description contains affiliate links, which means that if you click on one of the product links, I’ll receive a small commission. As an Amazon Associate I earn from qualifying purchases.
Sigma’s 18-35mm F1.8 that was released ten years ago became a cult favorite, particularly with the video crowd. Even full frame users often used it to help mitigate crop factors and because of the flexibility of having a zoom range AND a fast maximum aperture. Last year Sigma launched the 28-45mm F1.8 DG DN | ART lens, a lens I gave a fairly glowing review to because I felt it captured some of that “specialness” that is rare. That was a full frame lens, however, and as such was bigger, heavier, and more expensive than what APS-C shooters need. But Sigma is back with a true successor to the 16-35mm in the form of the 17-40mm F1.8 DC | ART. This is the first of the APS-C lenses in the current mirrorless era that has received the ART identifier (excepting a few very early primes that were definitely not ART worthy back in 2012 and 2013 when mirrorless was still an experimental oddity!) Has Sigma managed to recreate the magic that made people love the 18-35mm F1.8 so much “back in the day”? Is this lens a bargain at $829 USD ($1249 CDN)? We’ll explore that question in either my video review and text reviews. Or, just enjoy the photos below.
Thanks to Sigma Canada (Gentec) for sending me a review loaner of this lens. As always, this is a completely independent review. *The tests and most of the photos that I share as a part of my review cycle have been done with the APS-C mode of my Sony a7RV.
Some of the key selling features of the 17-40 ART include:
Prime-like optical performance
Full range of video features
Custom (Fn) button
Aperture ring with declick and iris lock options
Internally zooming design
Thorough weather sealing.
This is a slight deviation of the original zoom range, going a little wider (17mm vs 18mm) and a little longer on the telephoto end (40mm vs 35mm).
The APS-C crop factor of either Sony E, Fuji X, or L-mount is 1.5x (Sony is tested here, but I suspect we’ll see this lens on all these and perhaps Canon RF as well), meaning that 17mm has an effective full frame focal length equivalent of 25.5mm, which looks like this:
Meanwhile the 40mm end has a full frame equivalency of 60mm, which looks like this:
*Canon’s RF-S has a crop factor of 1.6x, so the effective focal range shifts to 27.2-64mm.
The advantage of an APS-C specific lens is that Sigma could produce a bigger zoom range (25.5-60mm) than what we saw on the 28-45mm full frame lens from last year. That could obviously be very useful for a lot of reasons.
The 28-45mm was a very large lens – over 153mm in length and weighing 950g – which leads us to the second big advantage of developing for the smaller sensor – the 17-40 ART, which still large, is considerably smaller and lighter than its full frame big brother…and even the DSLR era lens that it is the spiritual successor to.
The idea of a lens like this is that it is a “bag of primes” of focal lengths and optical performance while retaining a maximum aperture that is competitive with many prime lenses. You’ve got 24mm (ish), 35mm, 50mm, and even a slightly more telephoto 60mm equivalency. That’s very useful. And, in what we’ve come to expect from Sigma, the 17-40 ART does really deliver optically, be it from a distance or close up.
This is a not a perfect lens (it has some fringing and isn’t parfocal), but it is a very, very sweet lens.
Keywords: Sigma 17-40mm, DC, ART, Sigma 17-40mm F1.8, Sigma 17-40, F1.8, Sigma 17-40 Review, #SIGMAEmount, #SIGMA #SIGMA1740mmF18Art, #SIGMAArt, #SIGMADC, Full Frame, Review, Sony Alpha 1, Sony a7RV, Review, Hands On, Dustin Abbott, Real World, Comparison, Sharpness, Bokeh, Flare Resistance, Autofocus, Image Quality, Sample Images, Video, Photography, let the light in, weathersealing, #letthelightin, DA
DISCLAIMER: This article and description contains affiliate links, which means that if you click on one of the product links, I’ll receive a small commission. As an Amazon Associate I earn from qualifying purchases.


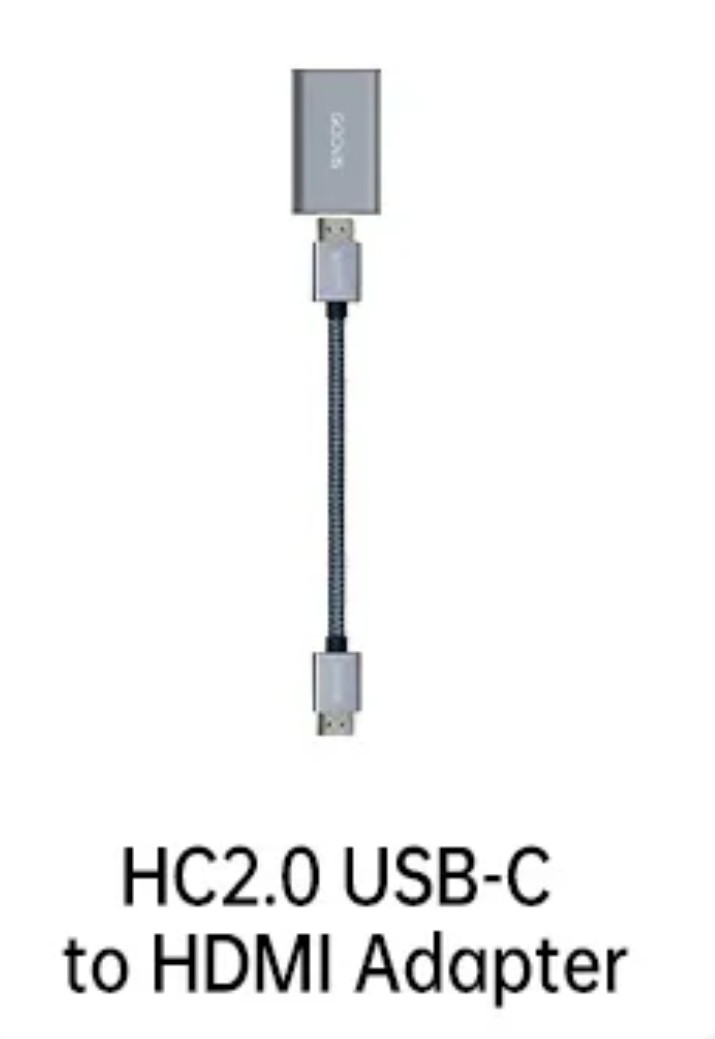


 Laowa AF 12mm F2.8 Zero D Review (Z-Mount)
  Nikkor Z 35mm F1.2 S Review
  Kase AF 85mm F1.4 Review
  Fujifilm X-Half Review
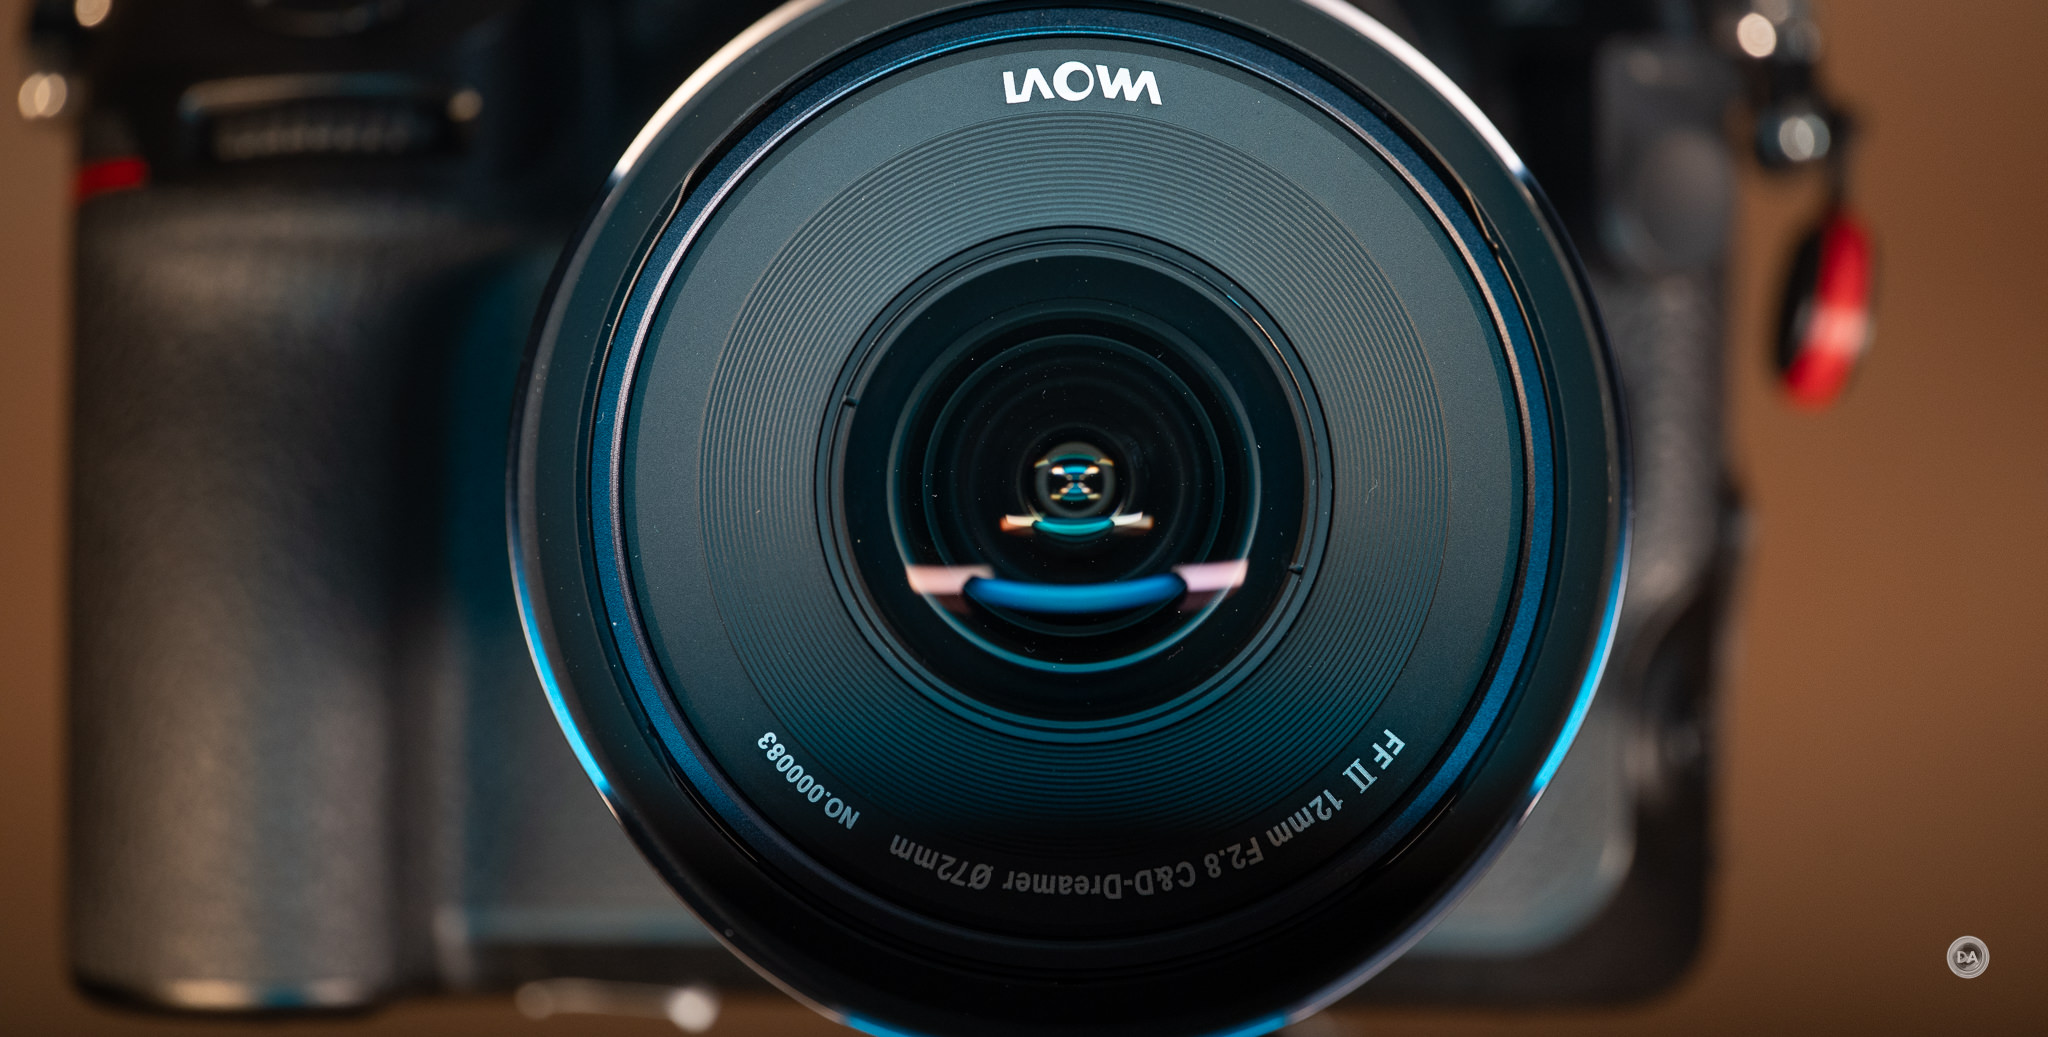
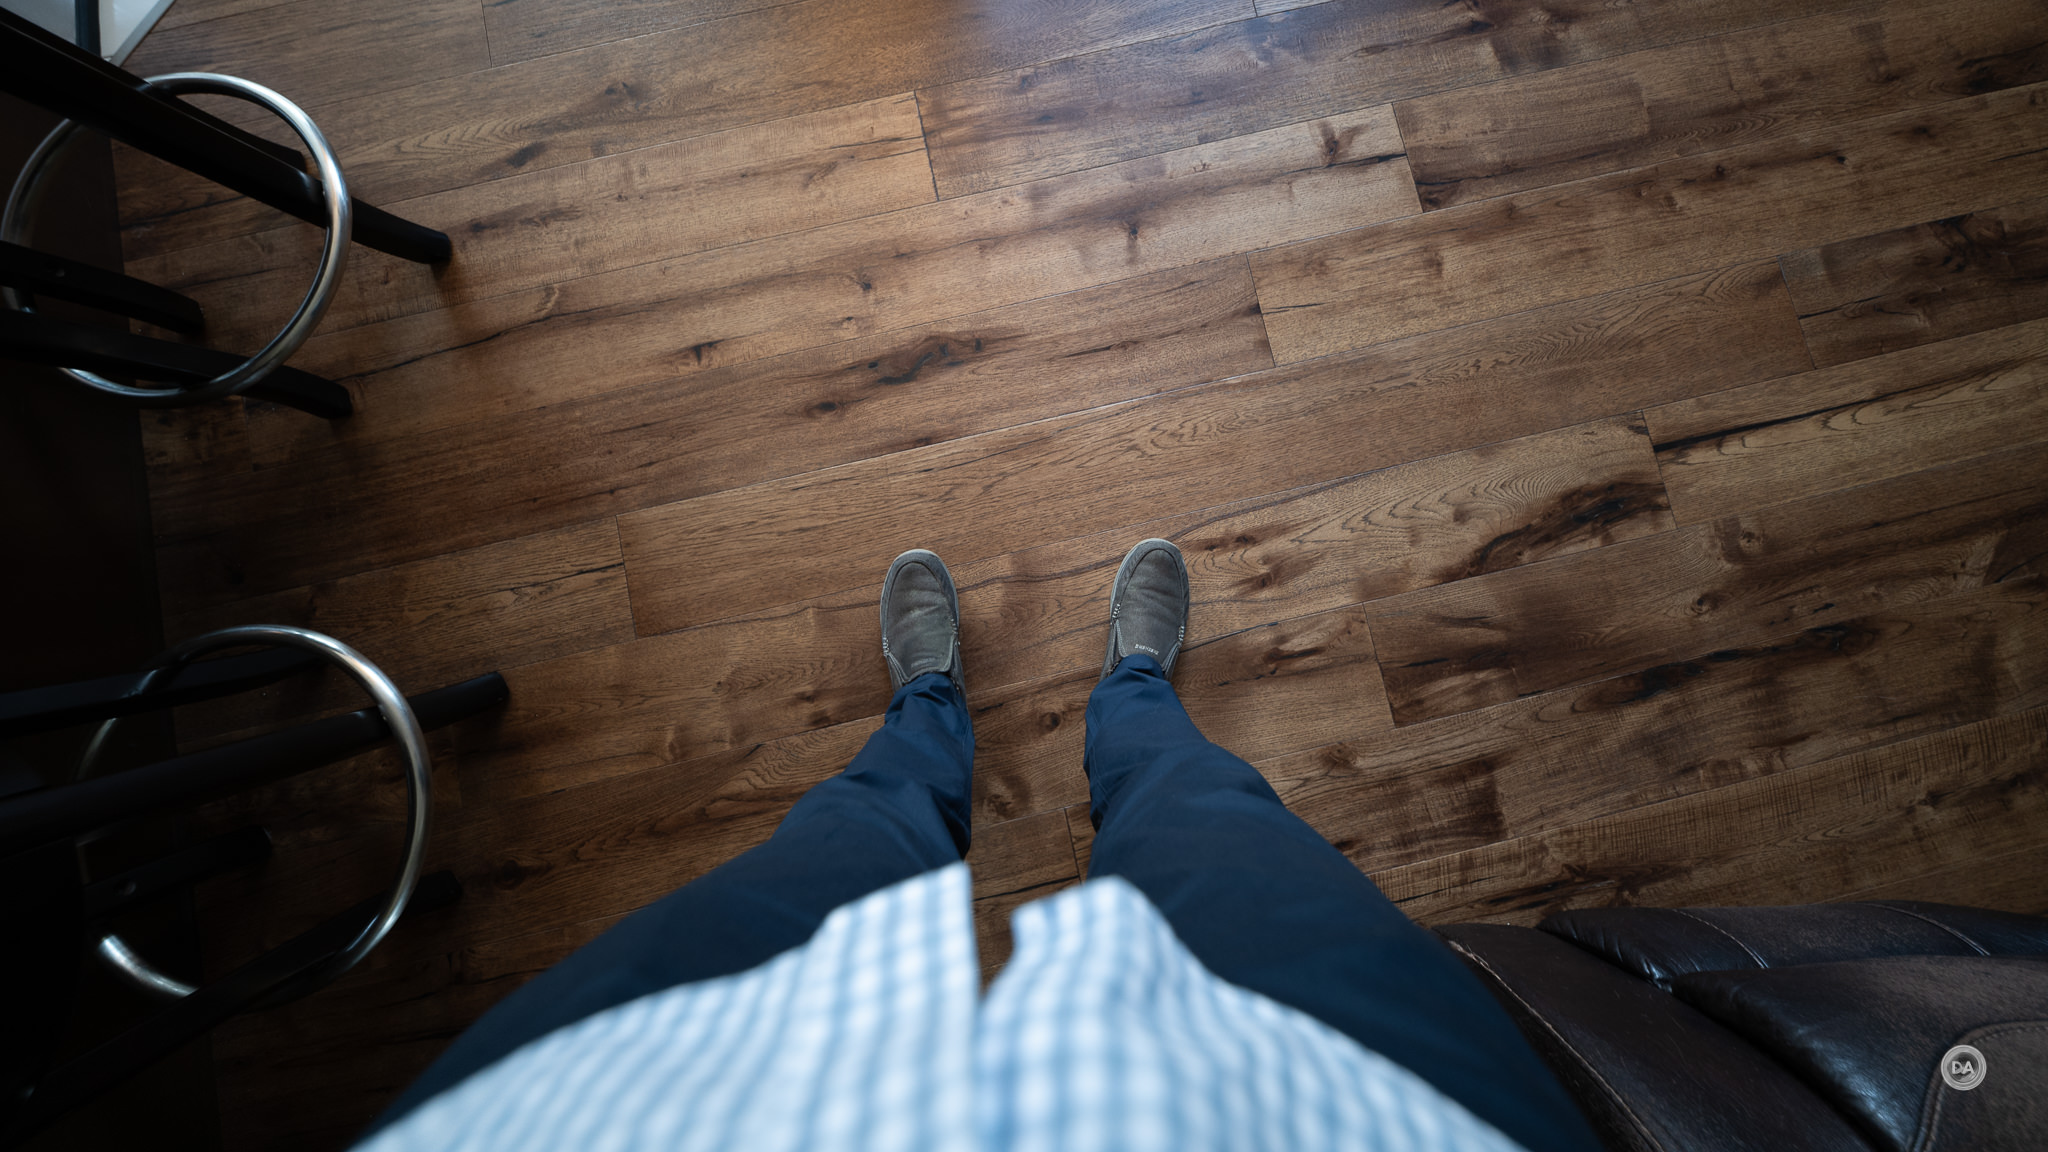
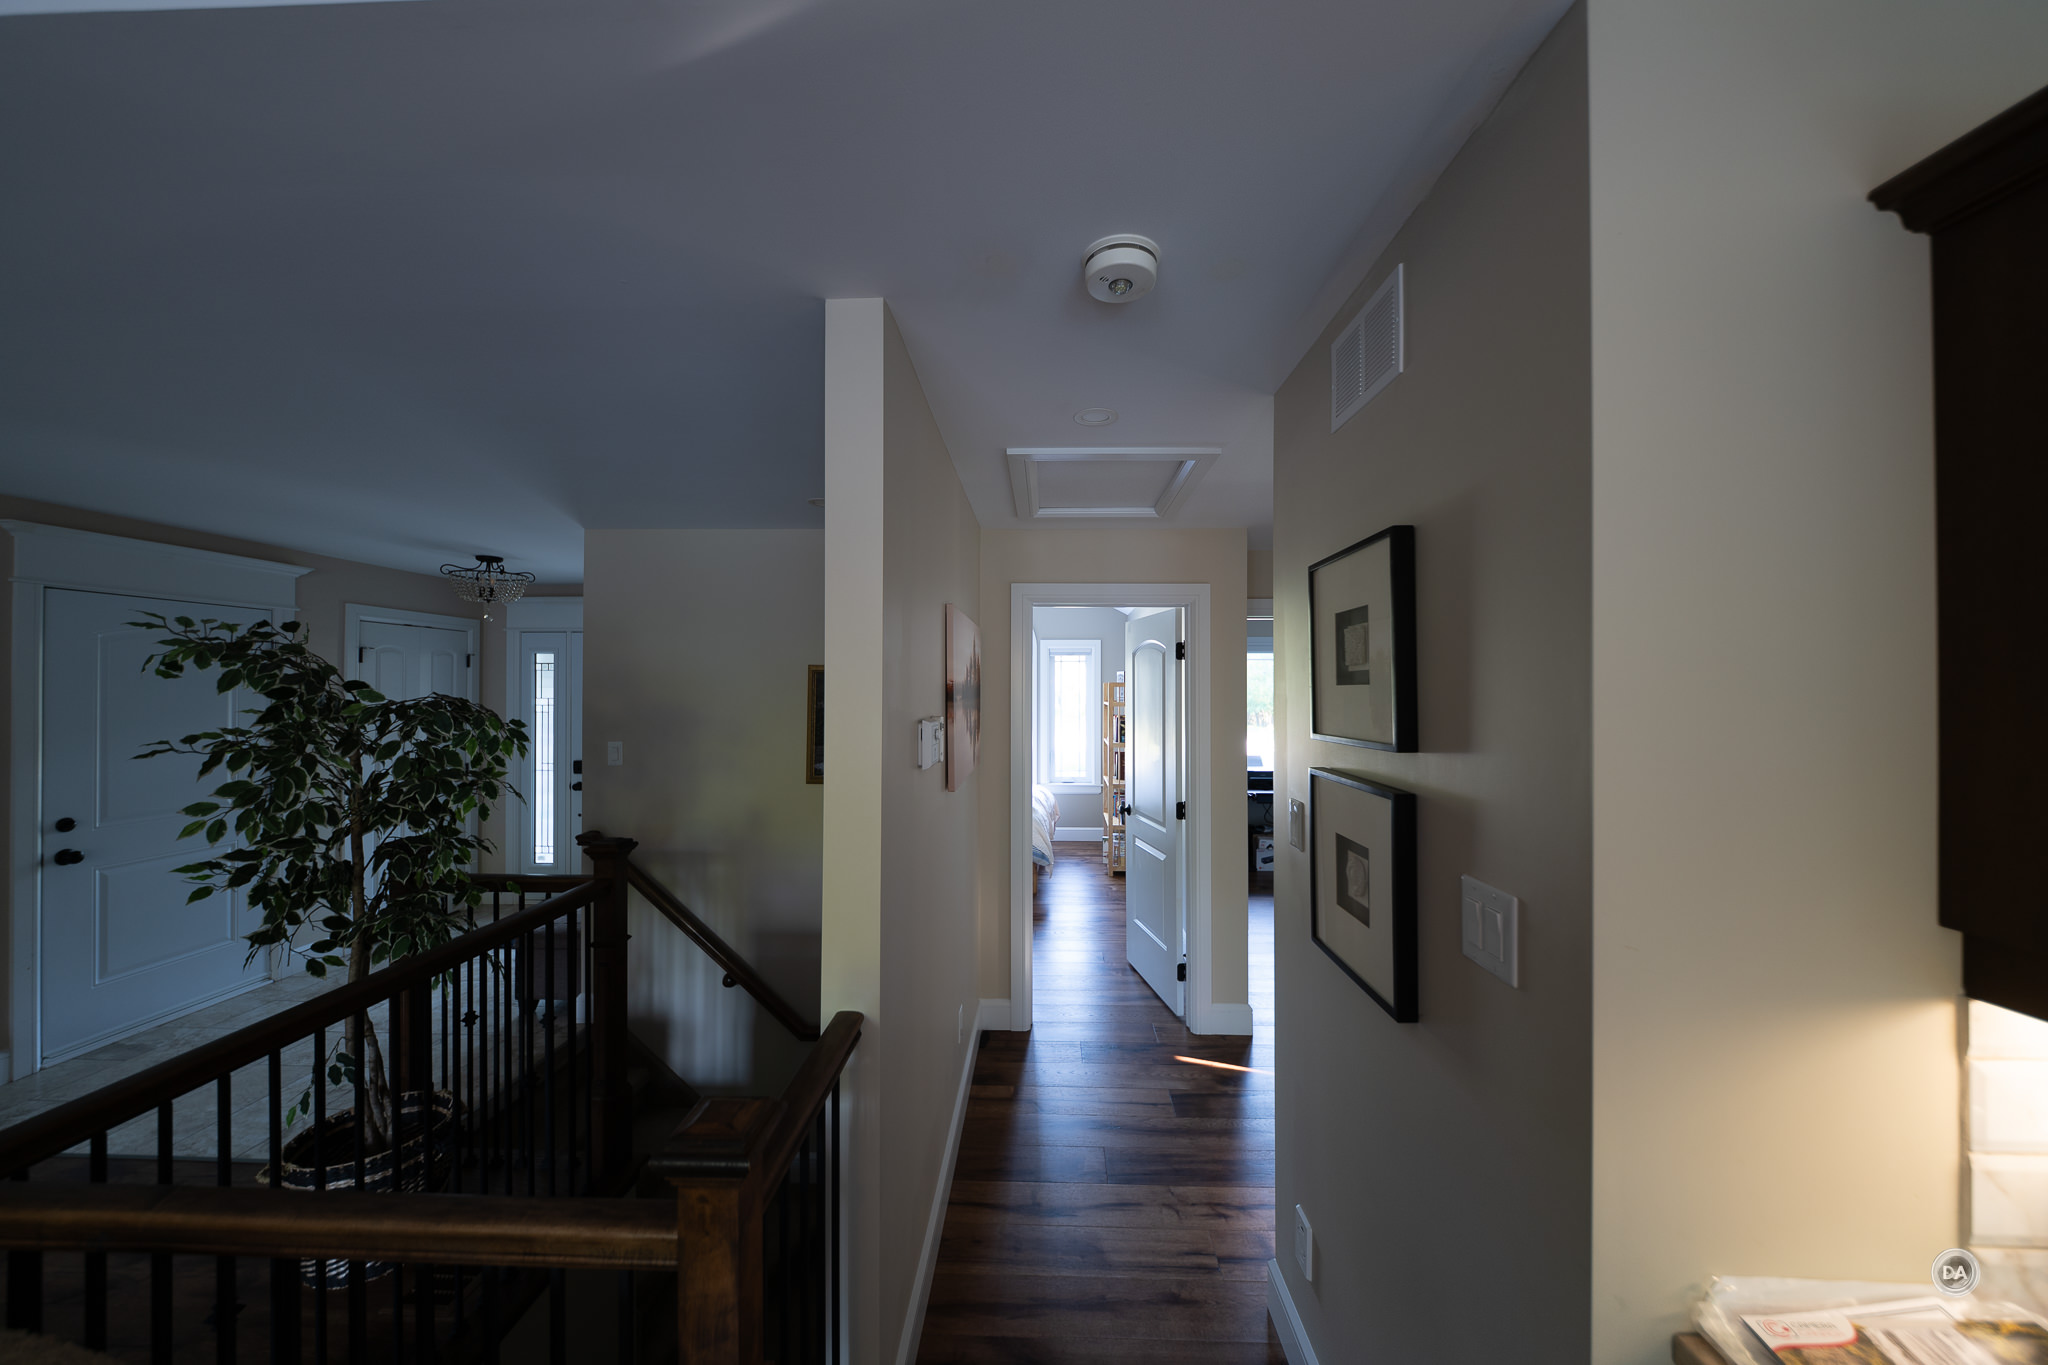
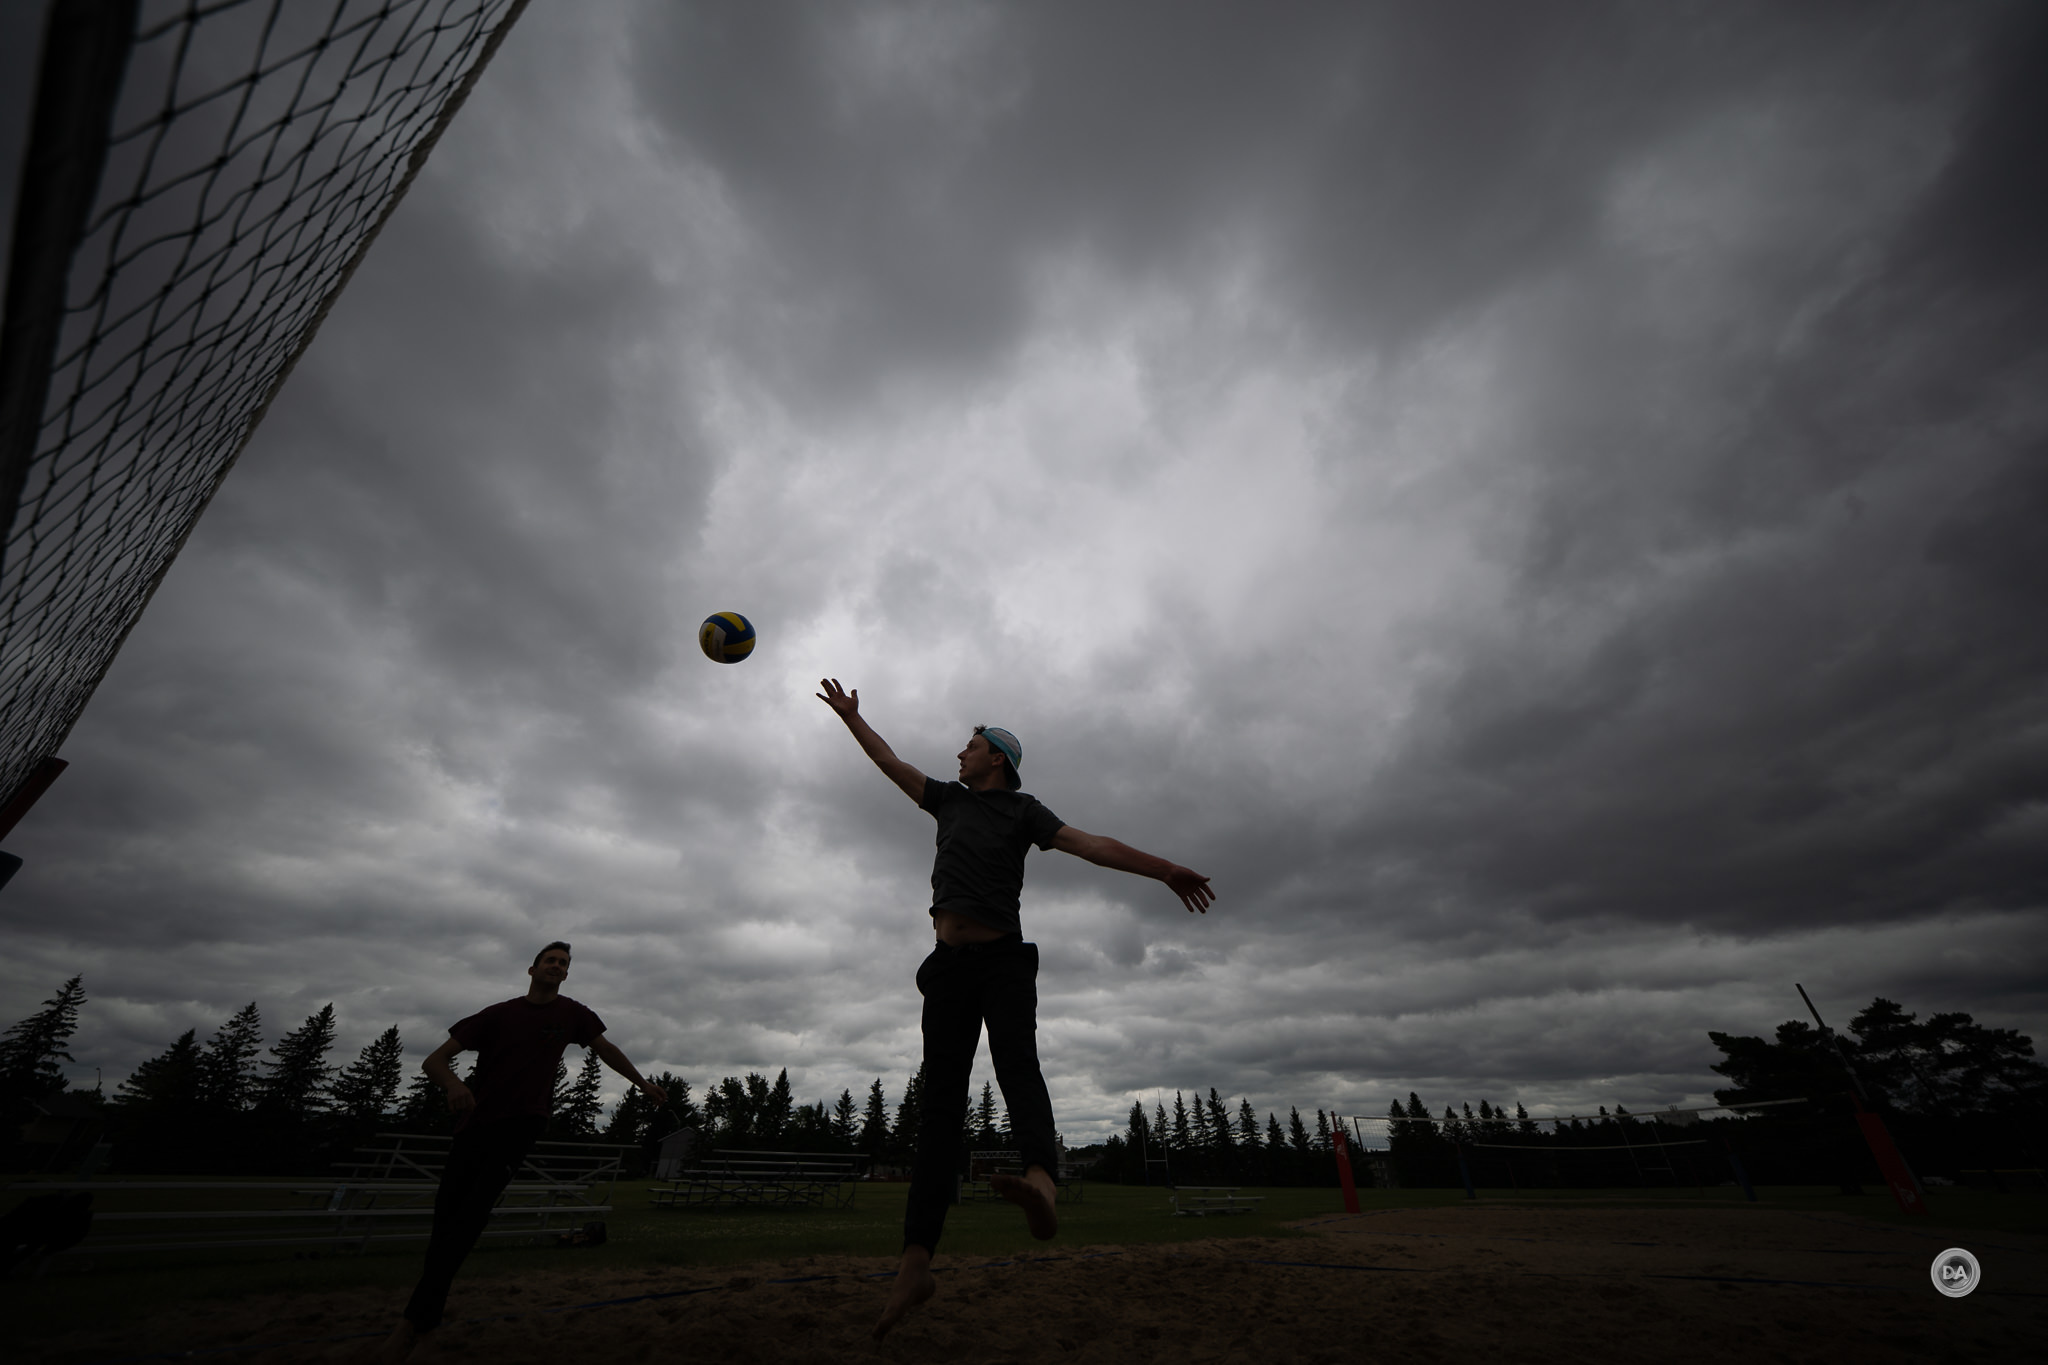
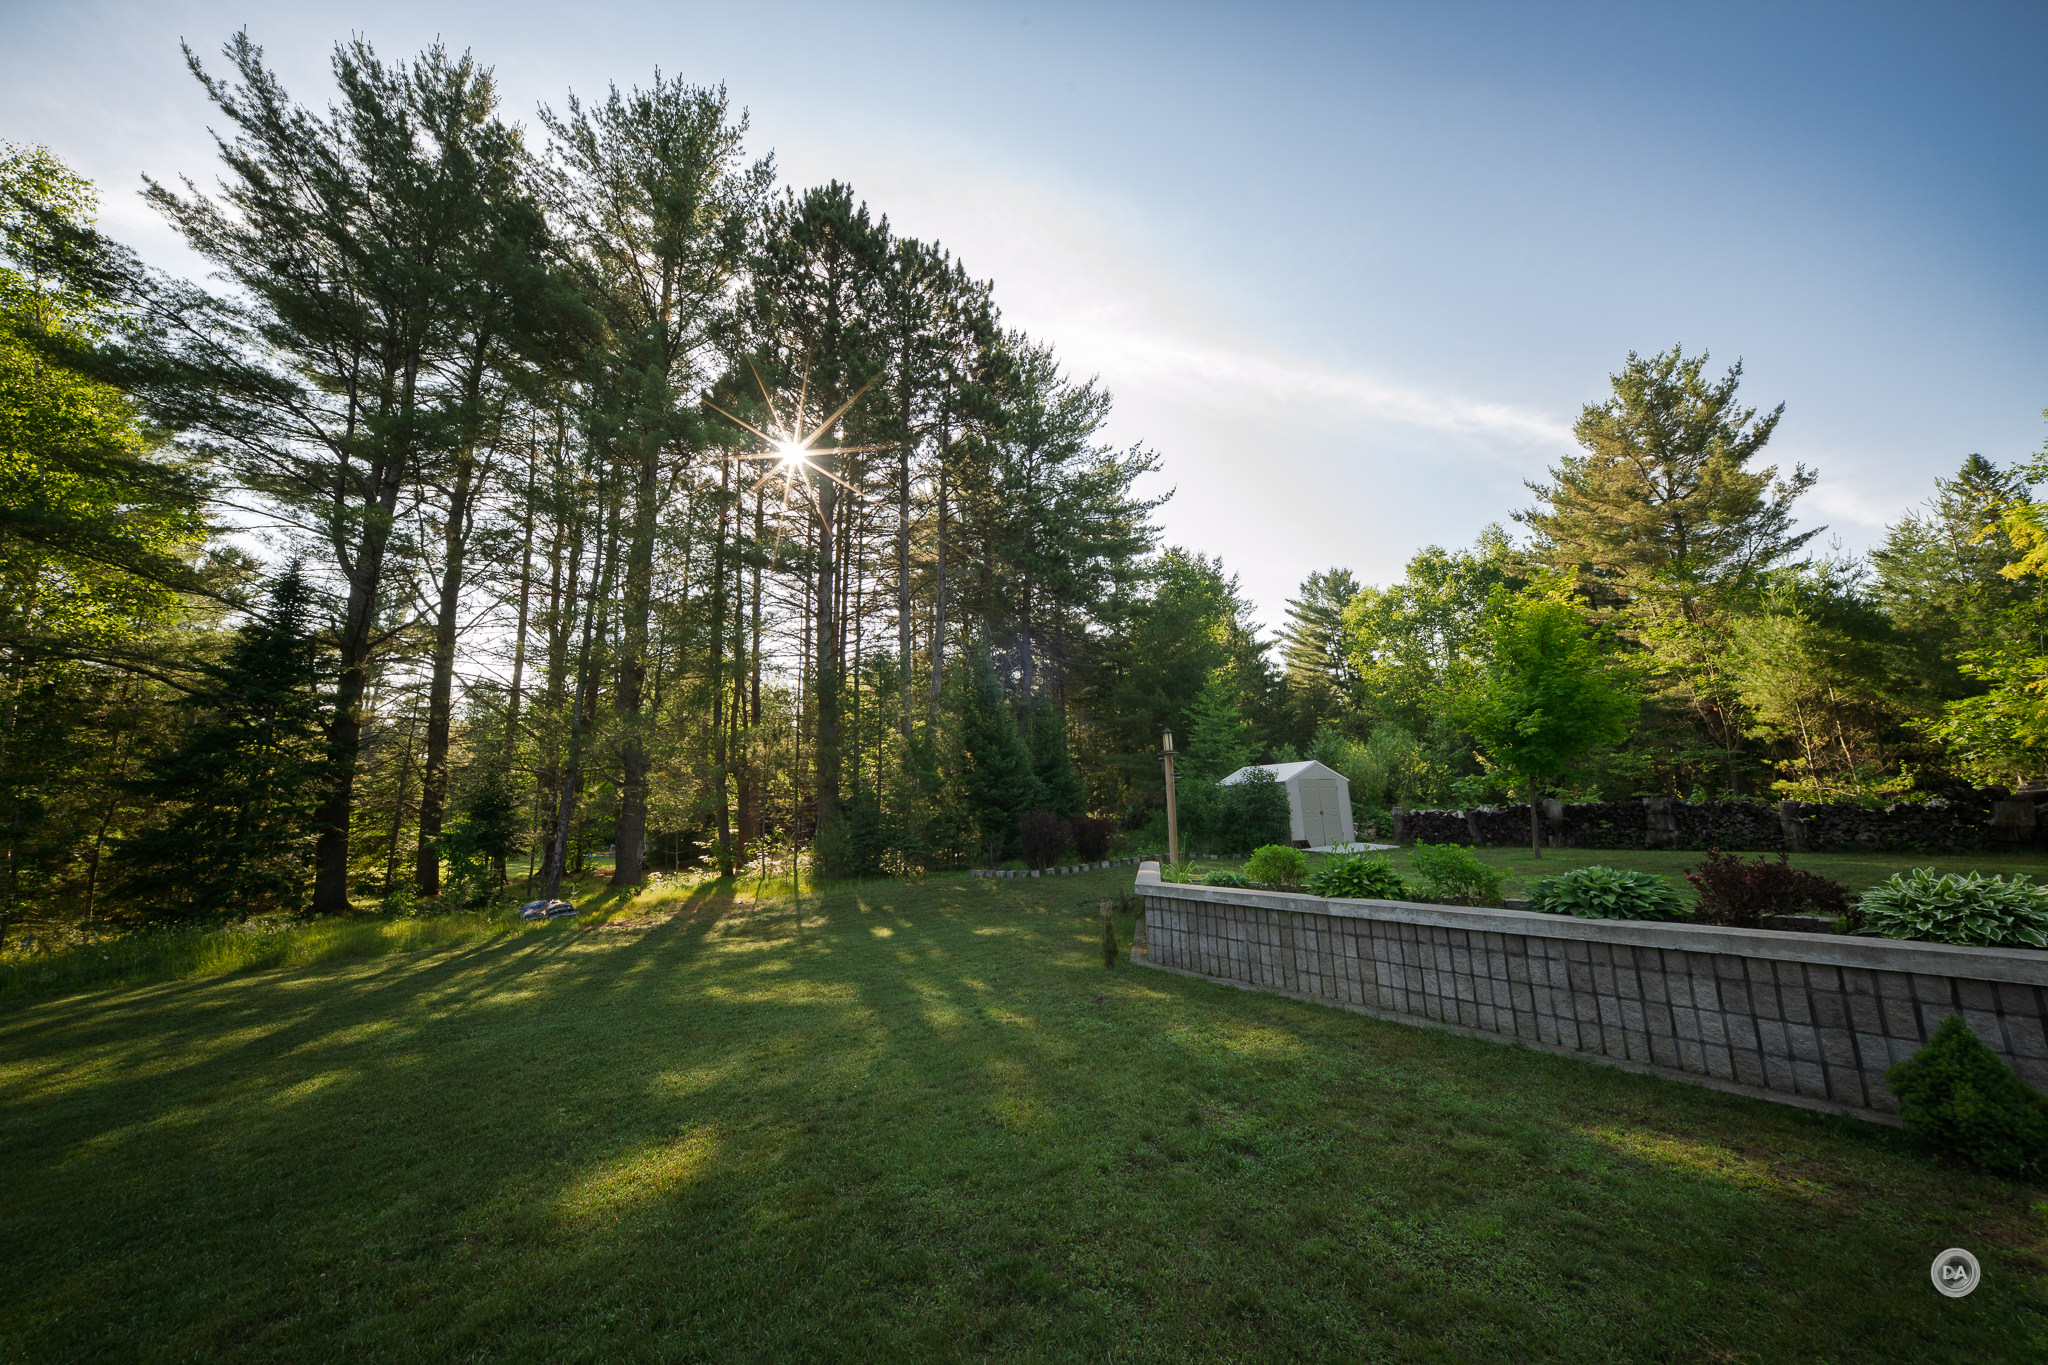
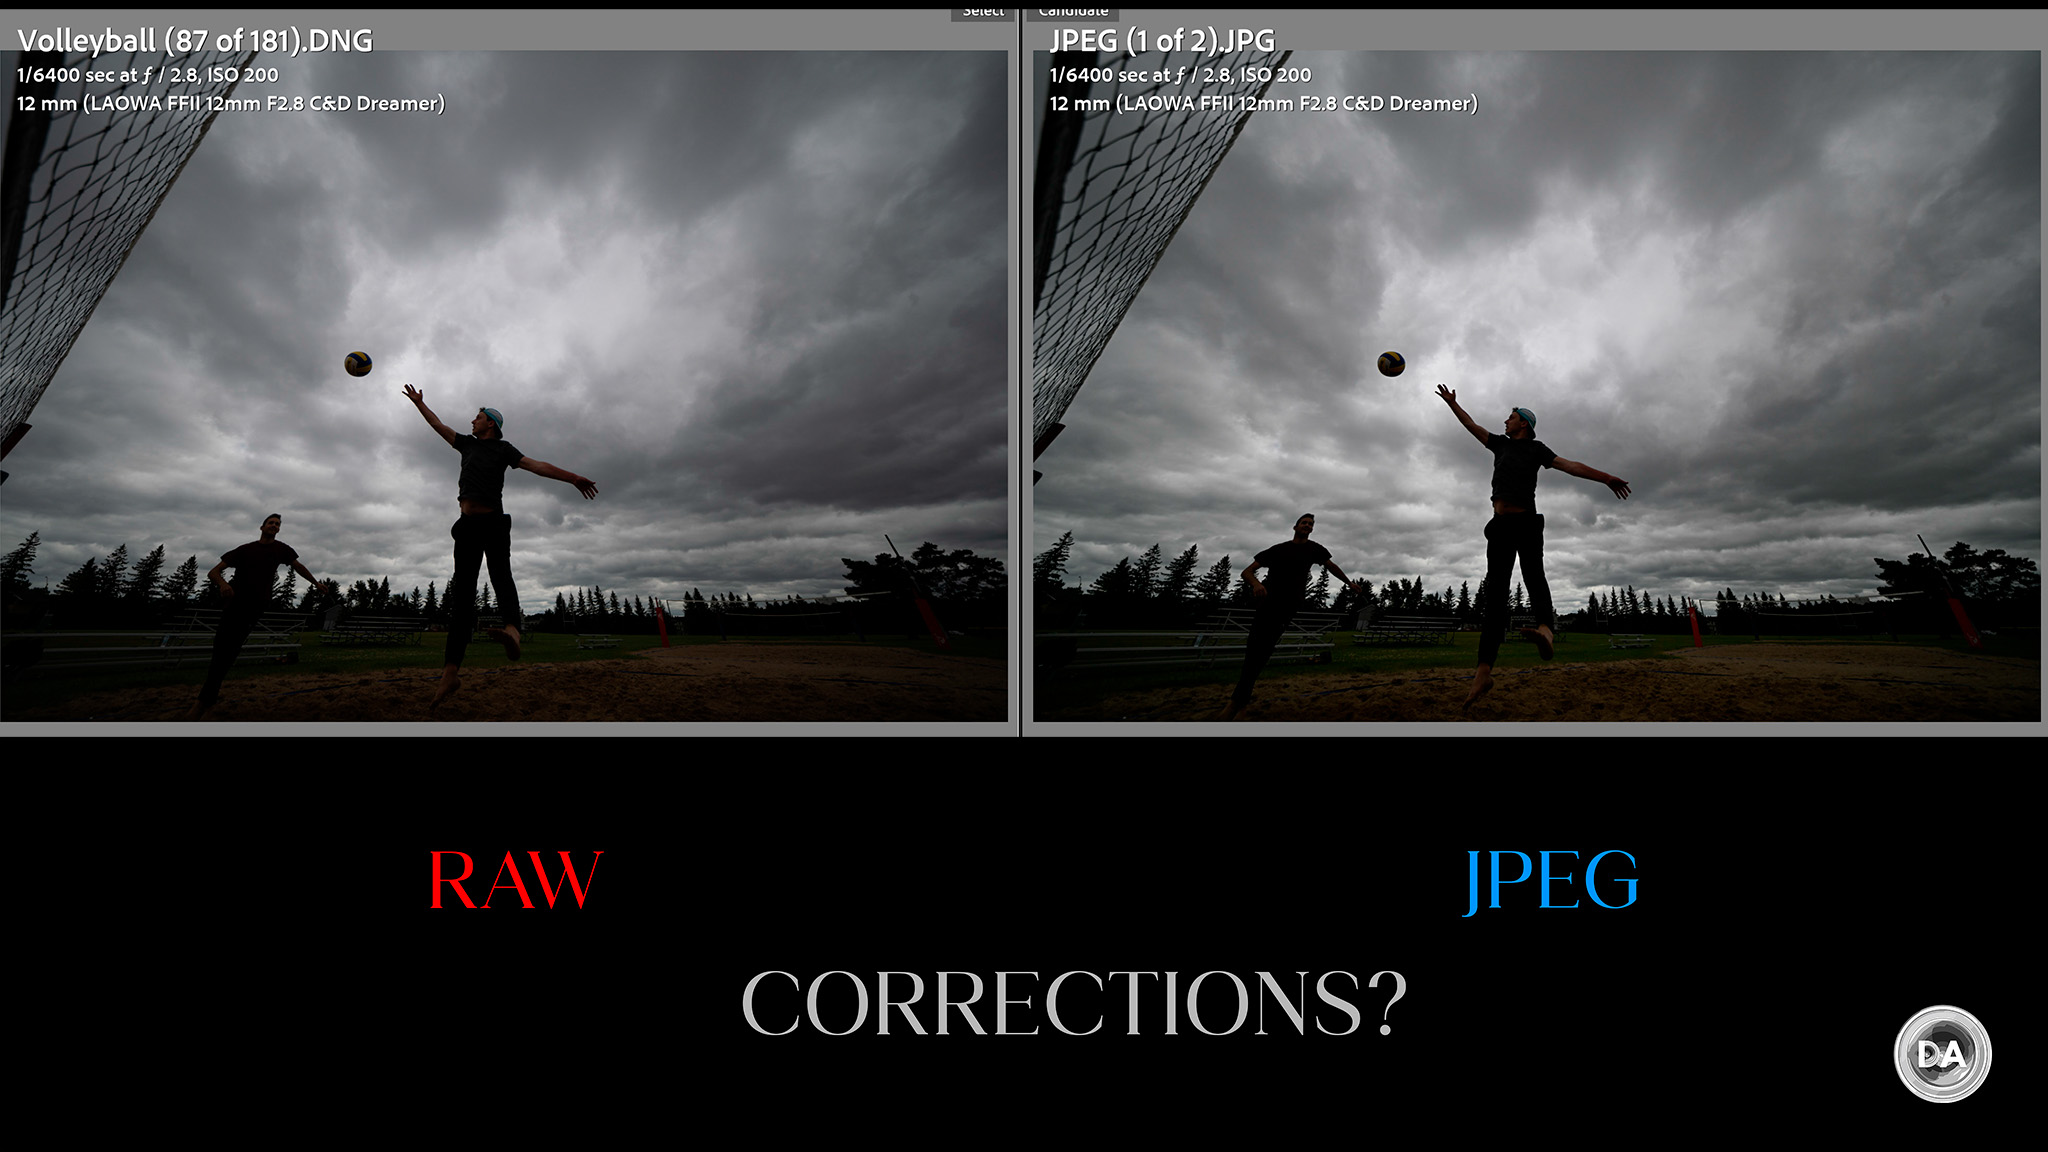
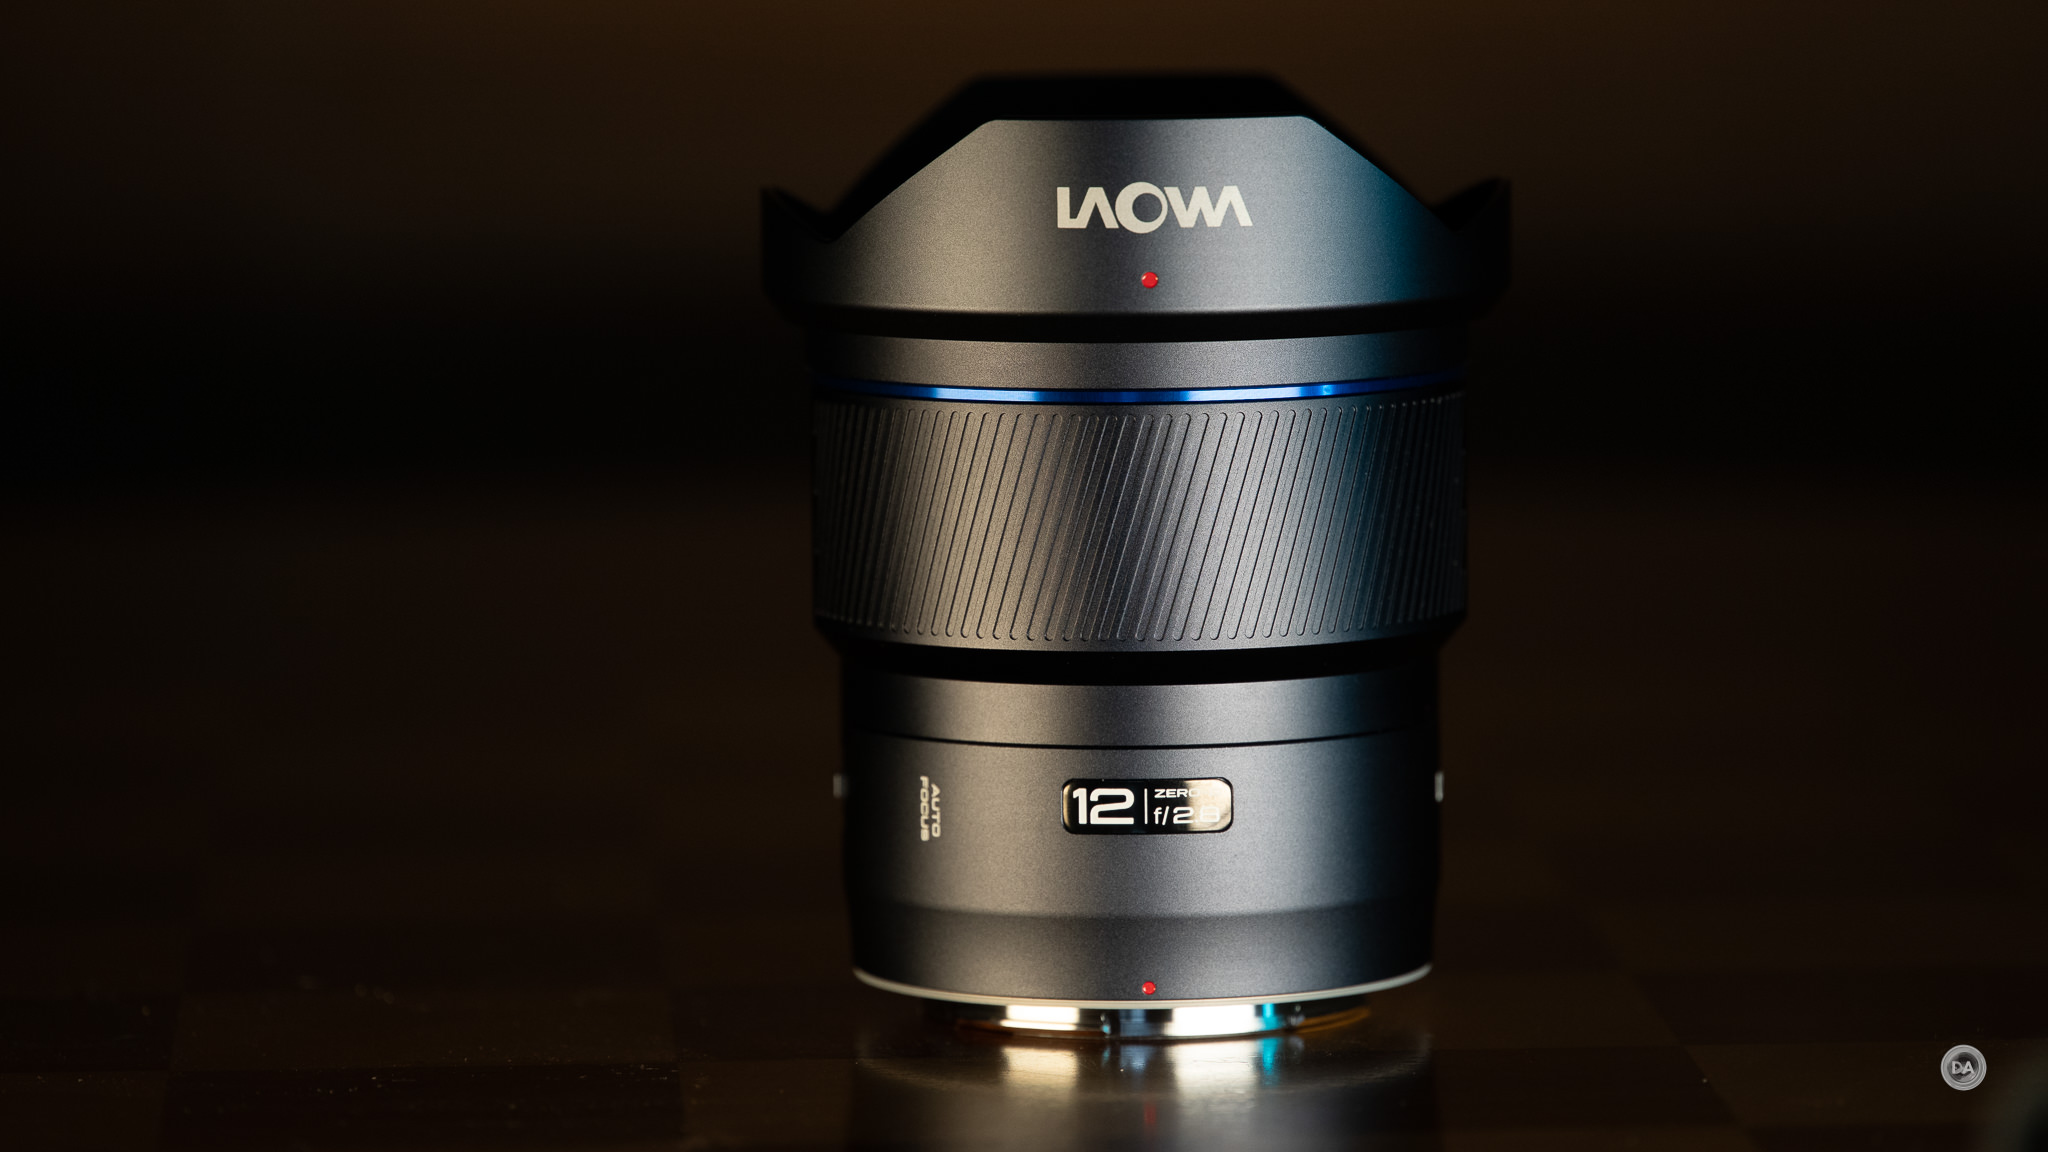
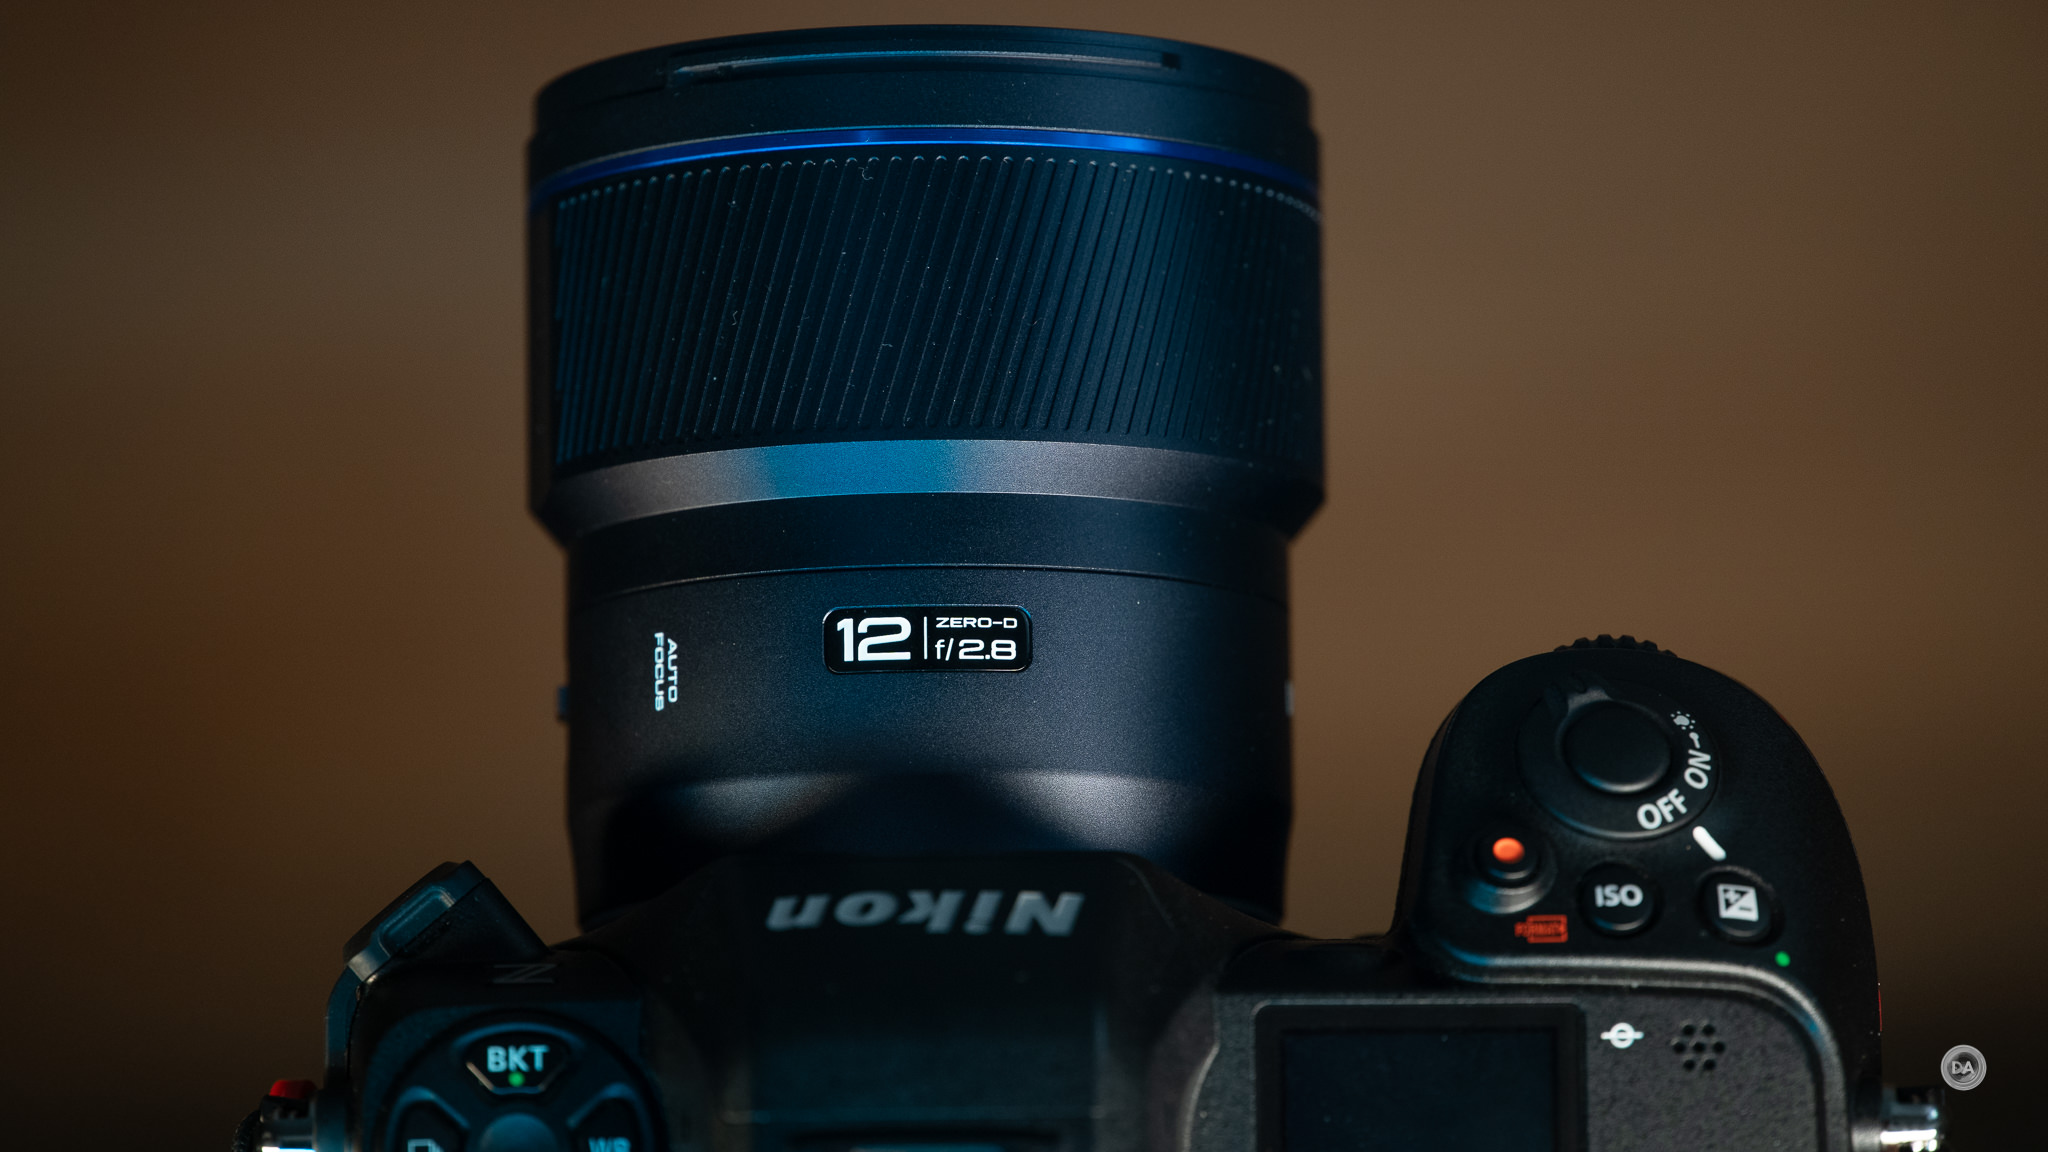
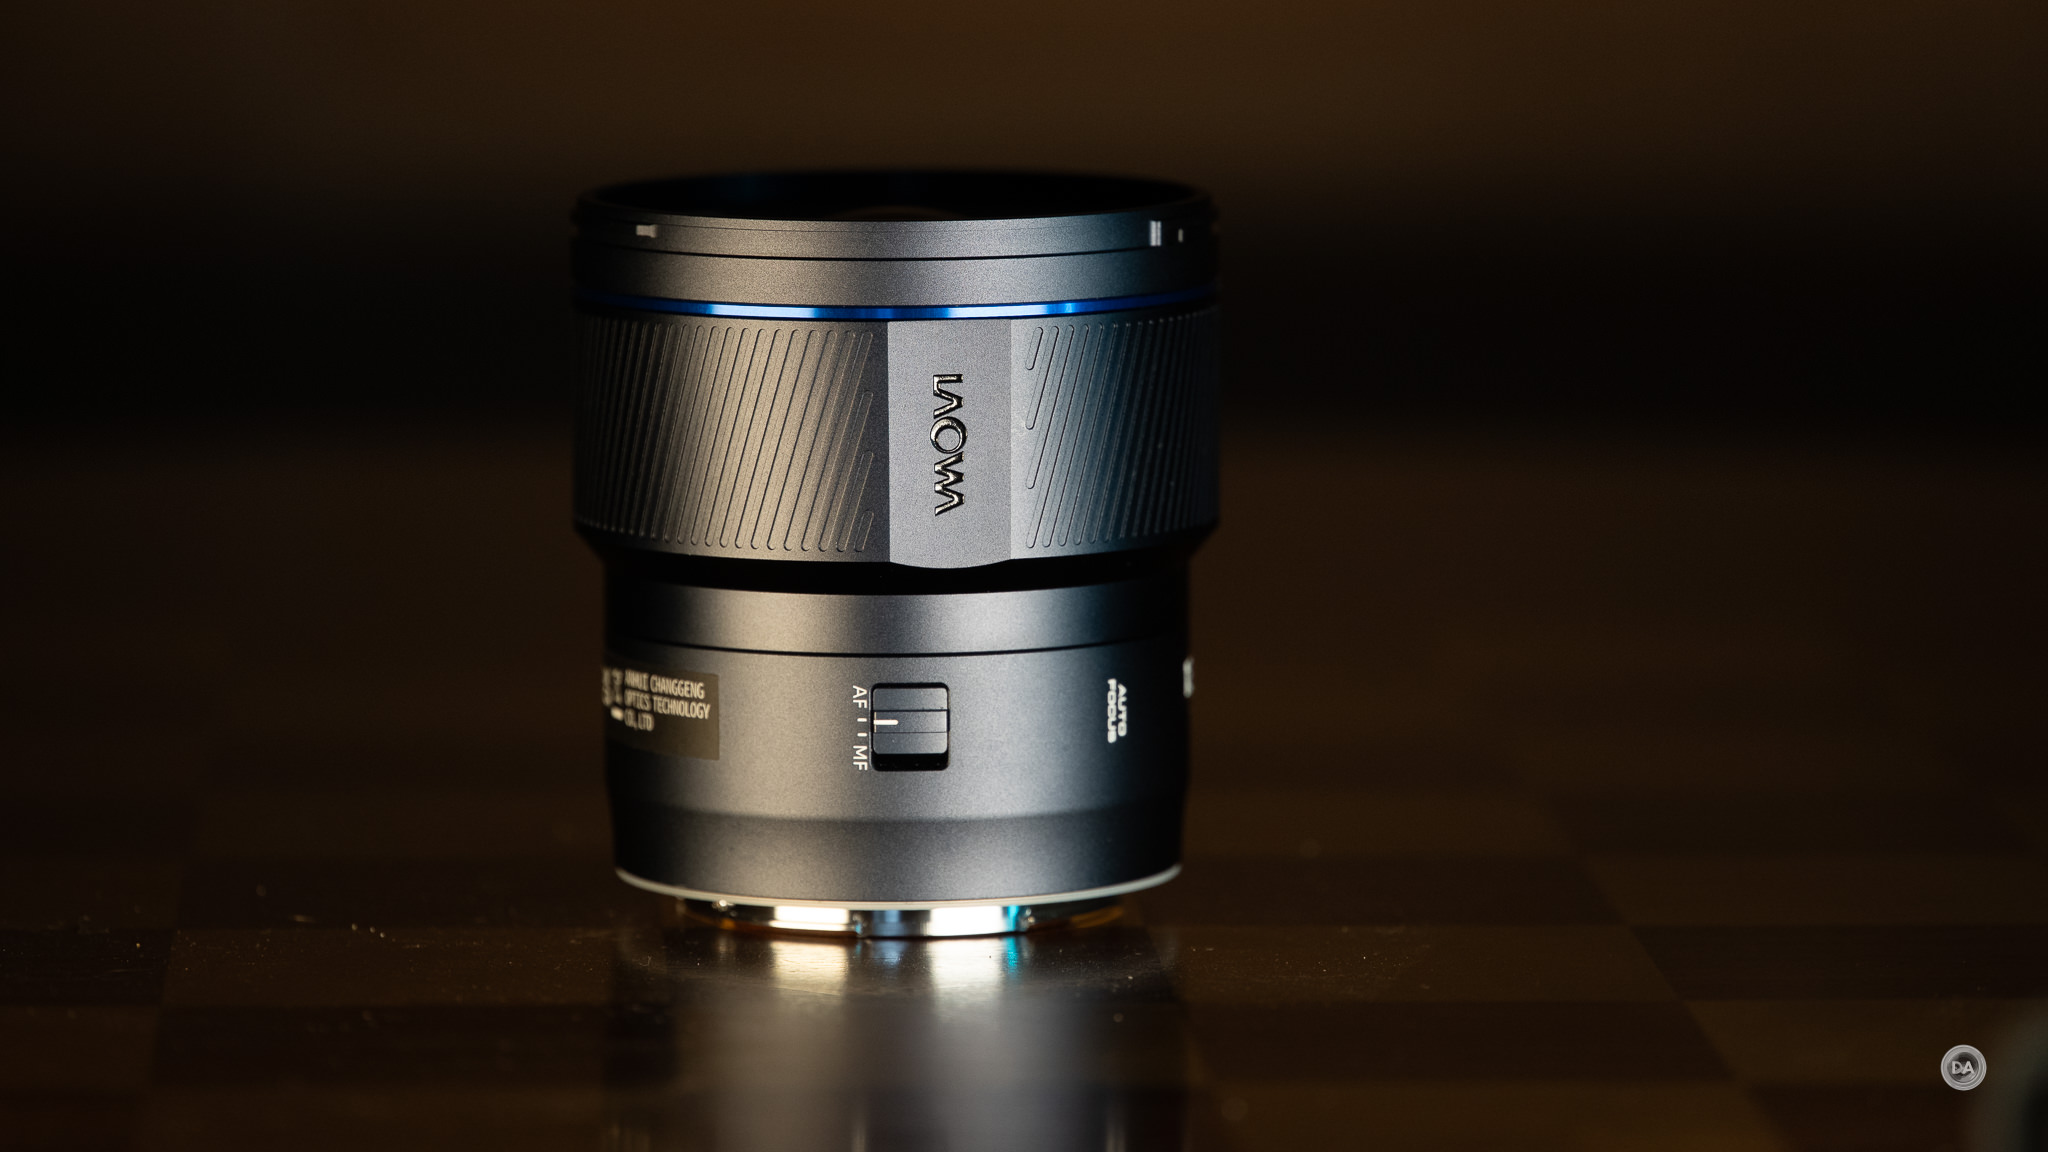

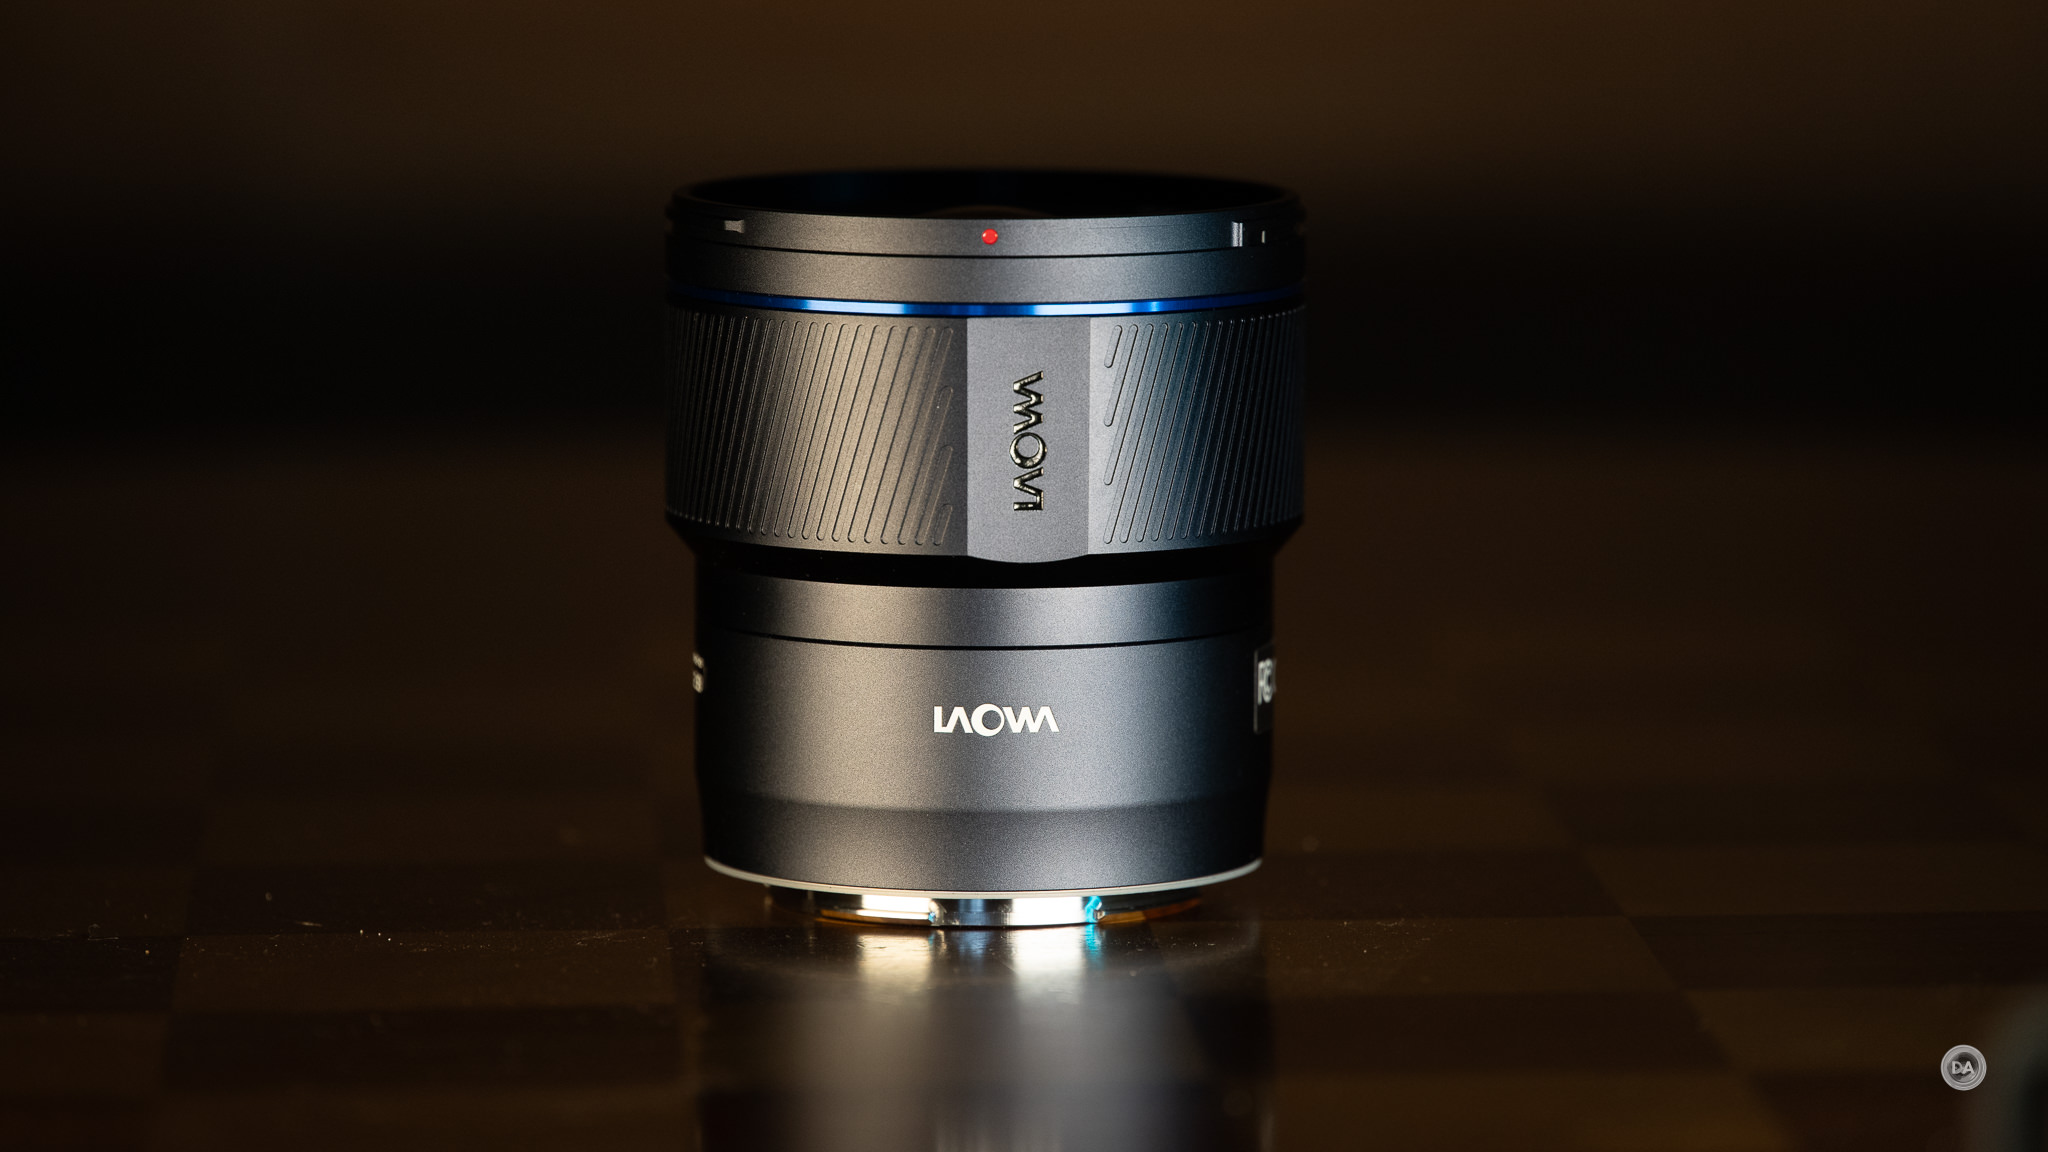
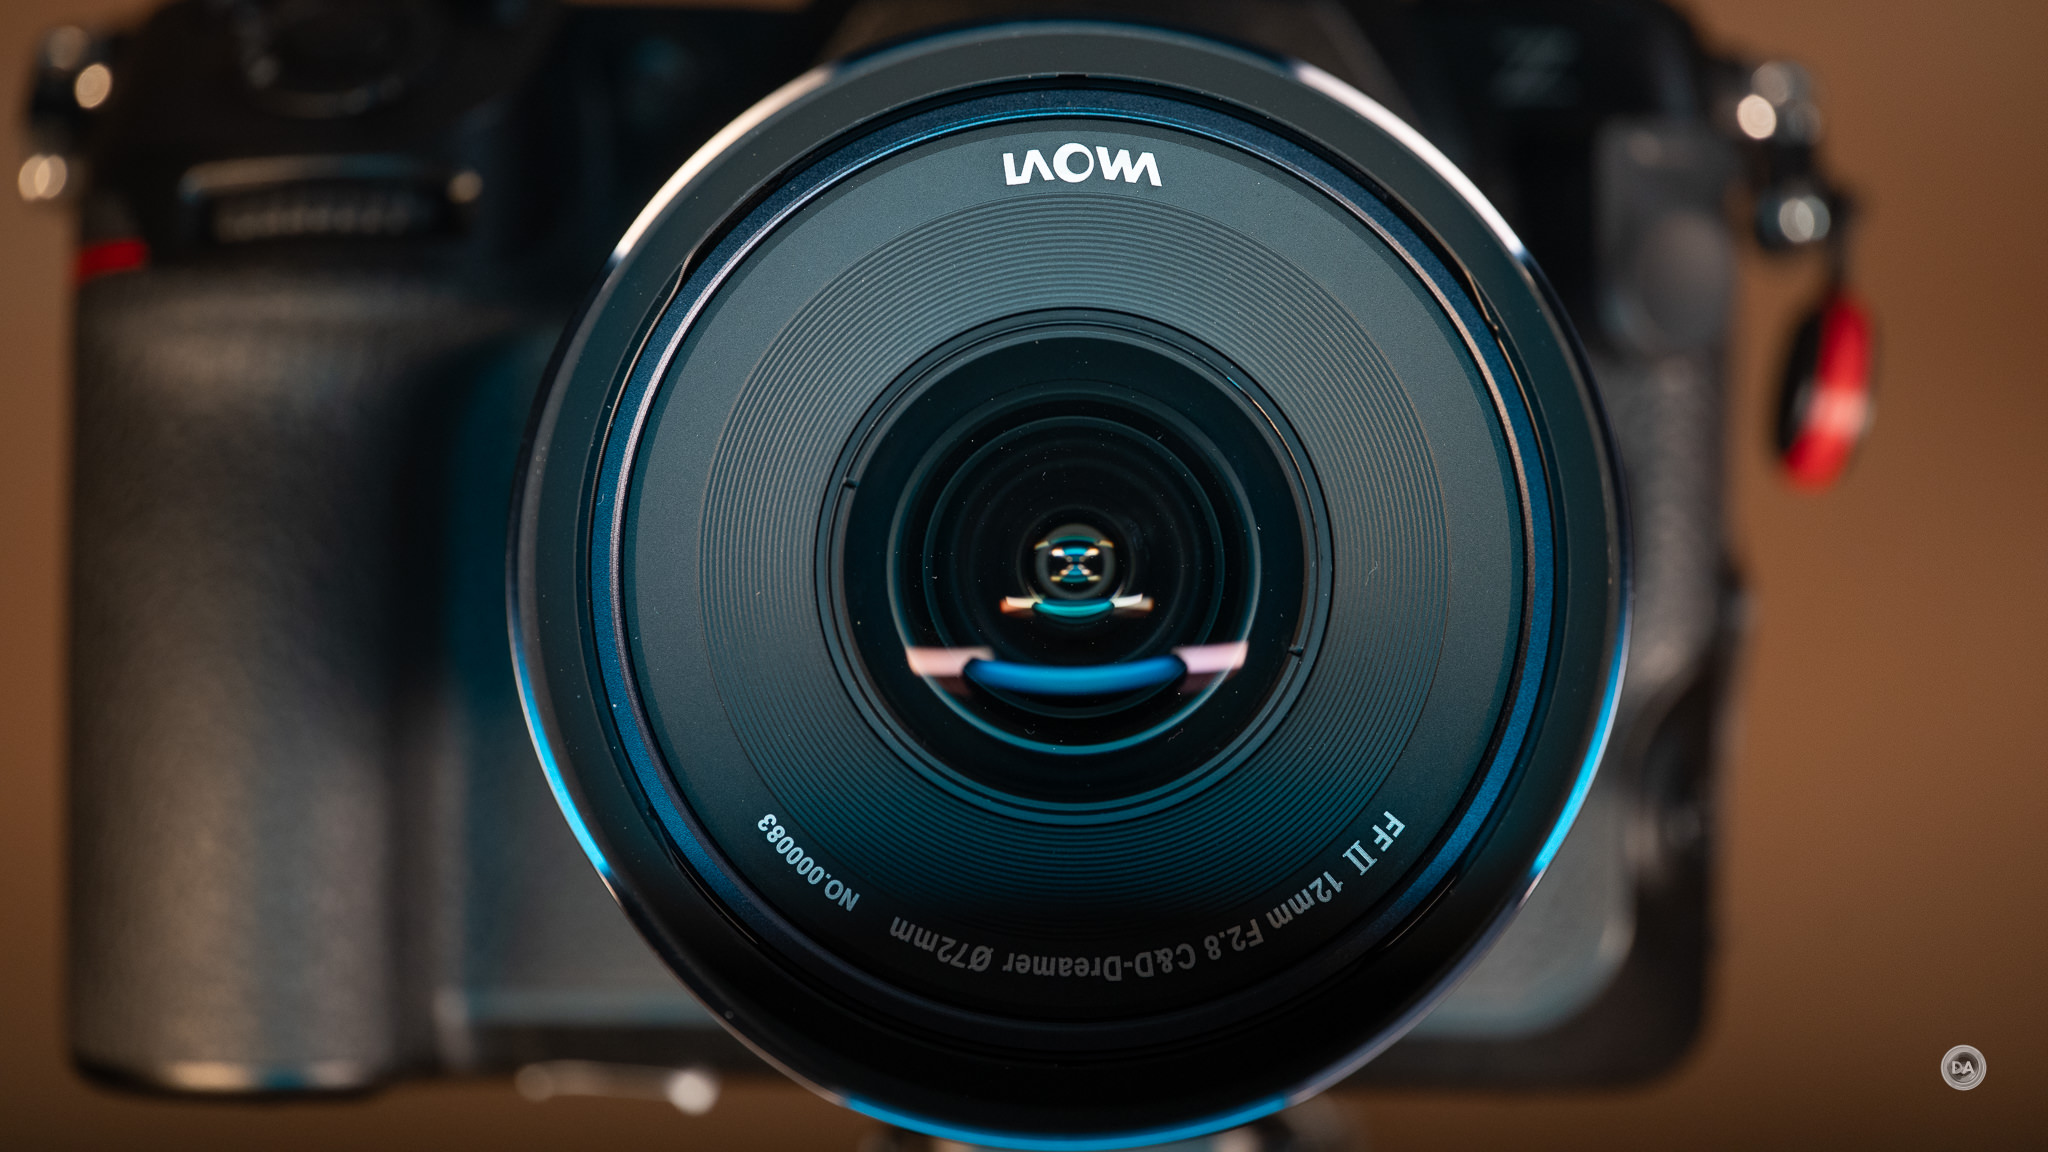
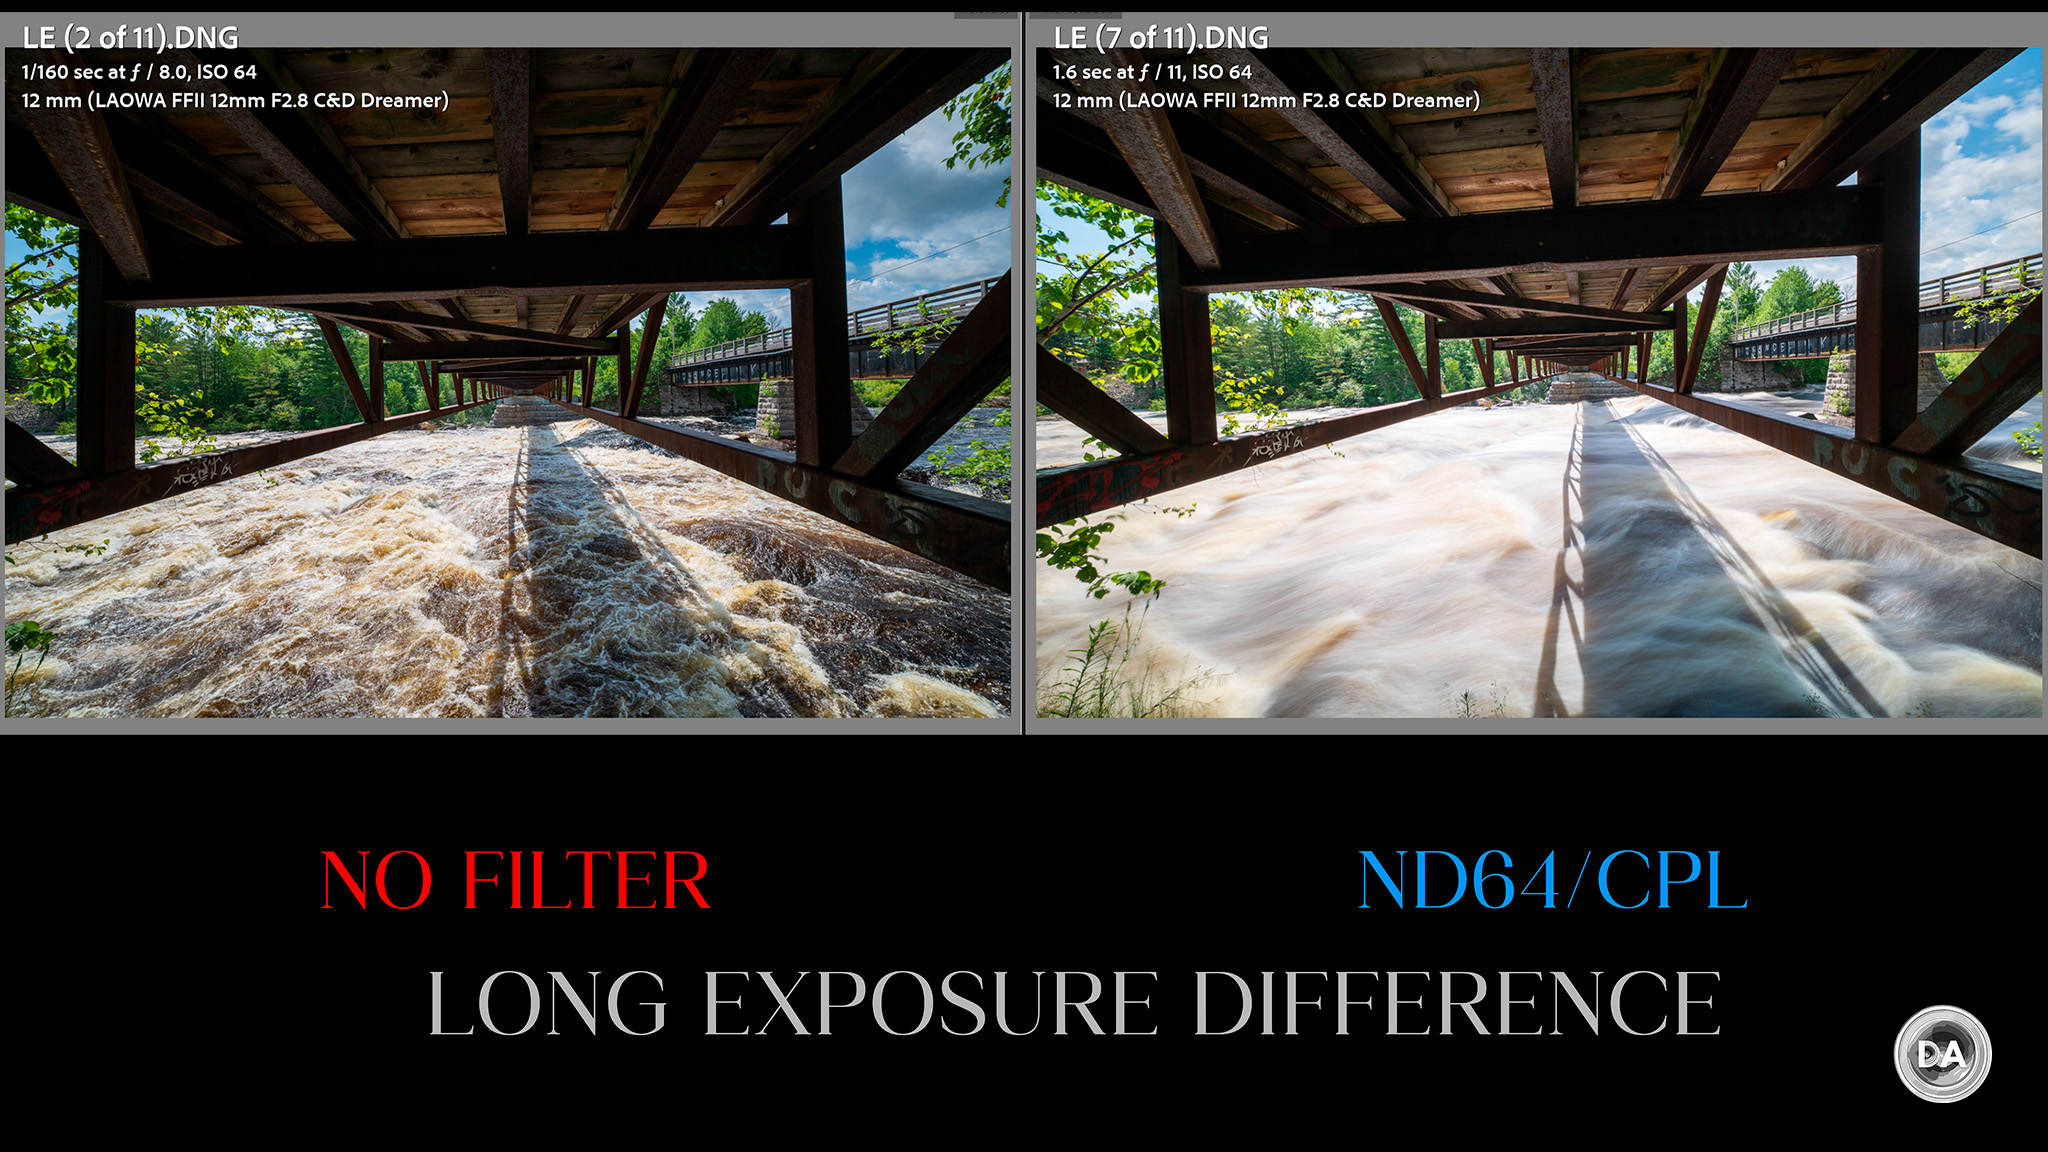

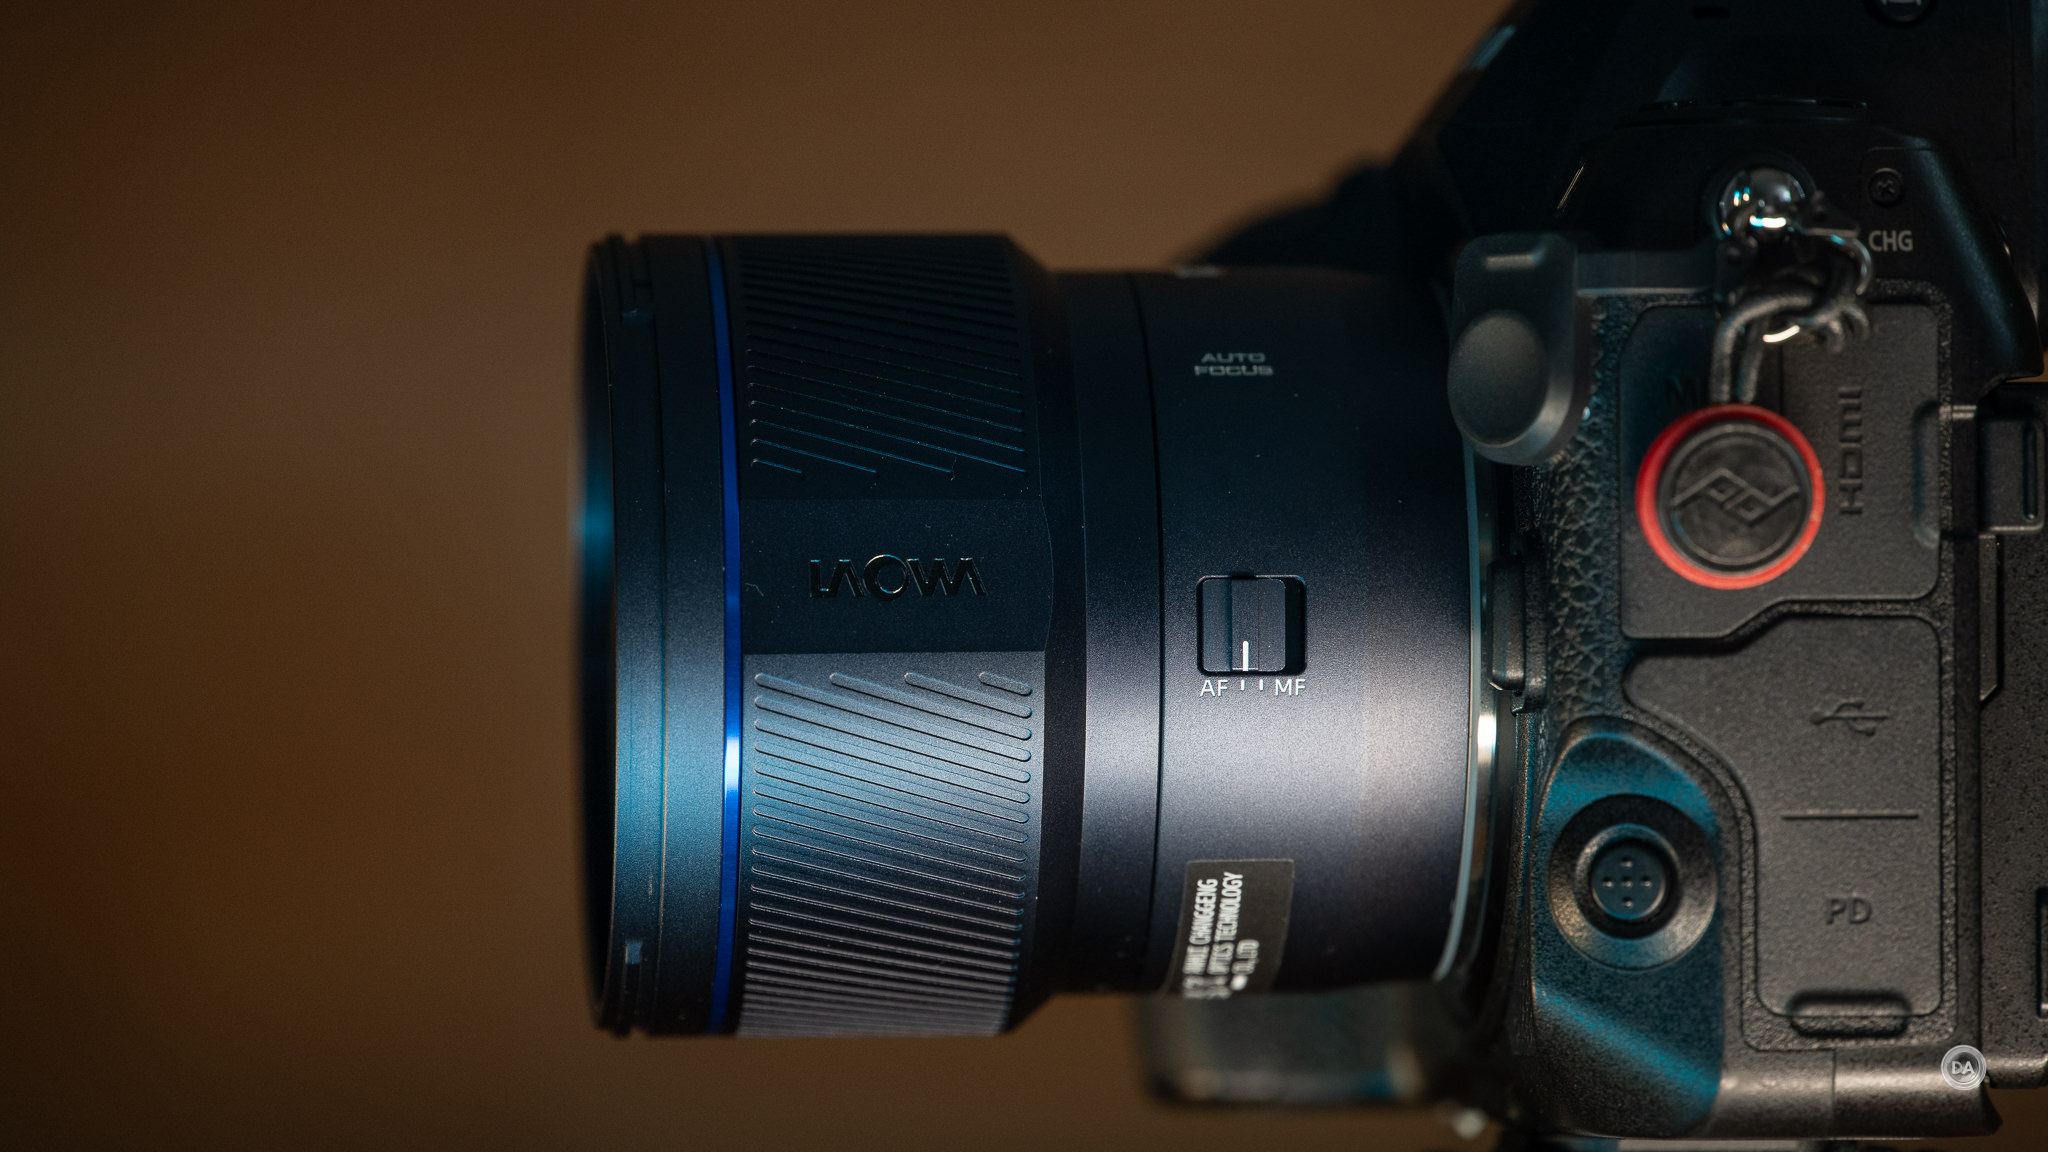
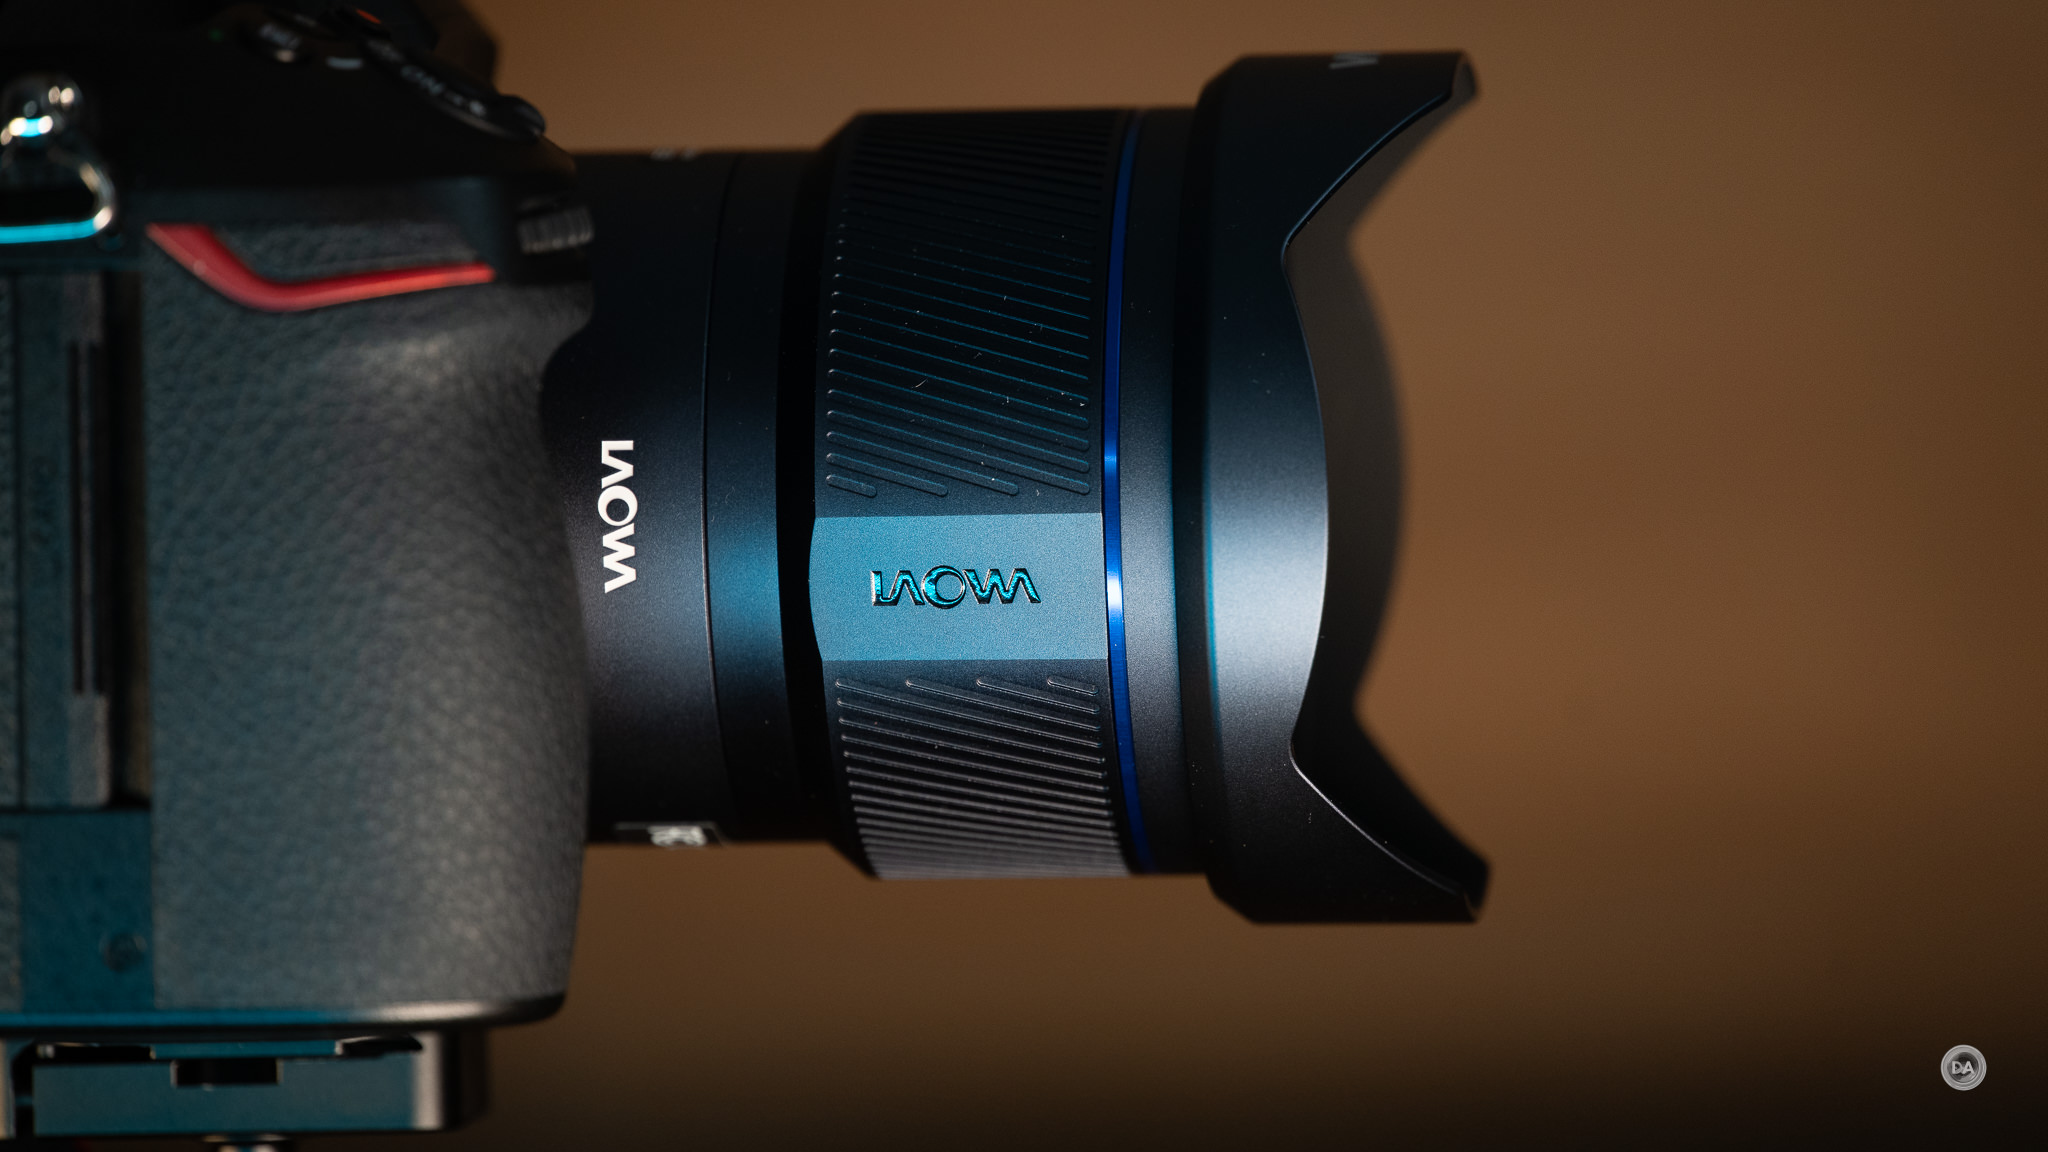
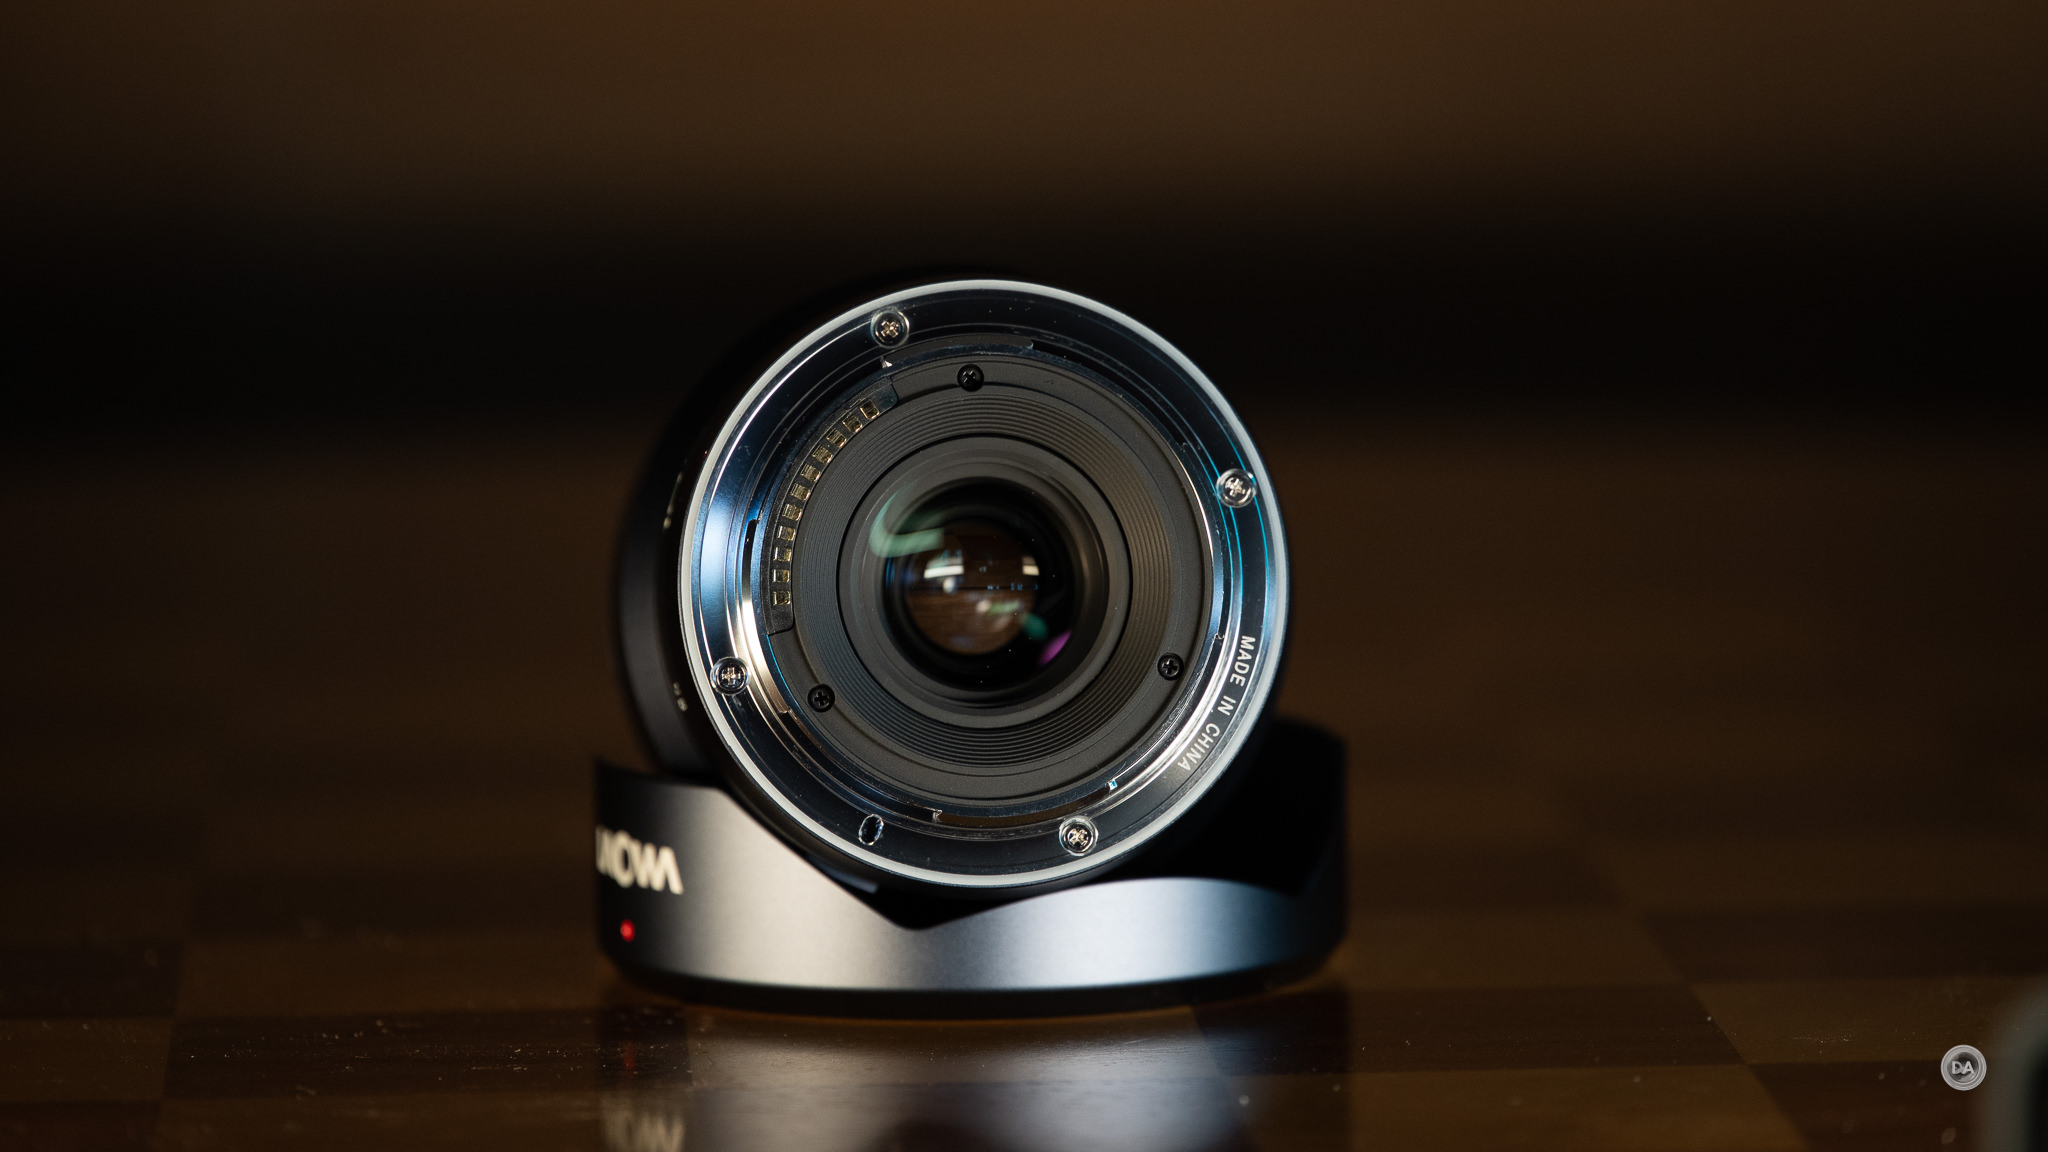
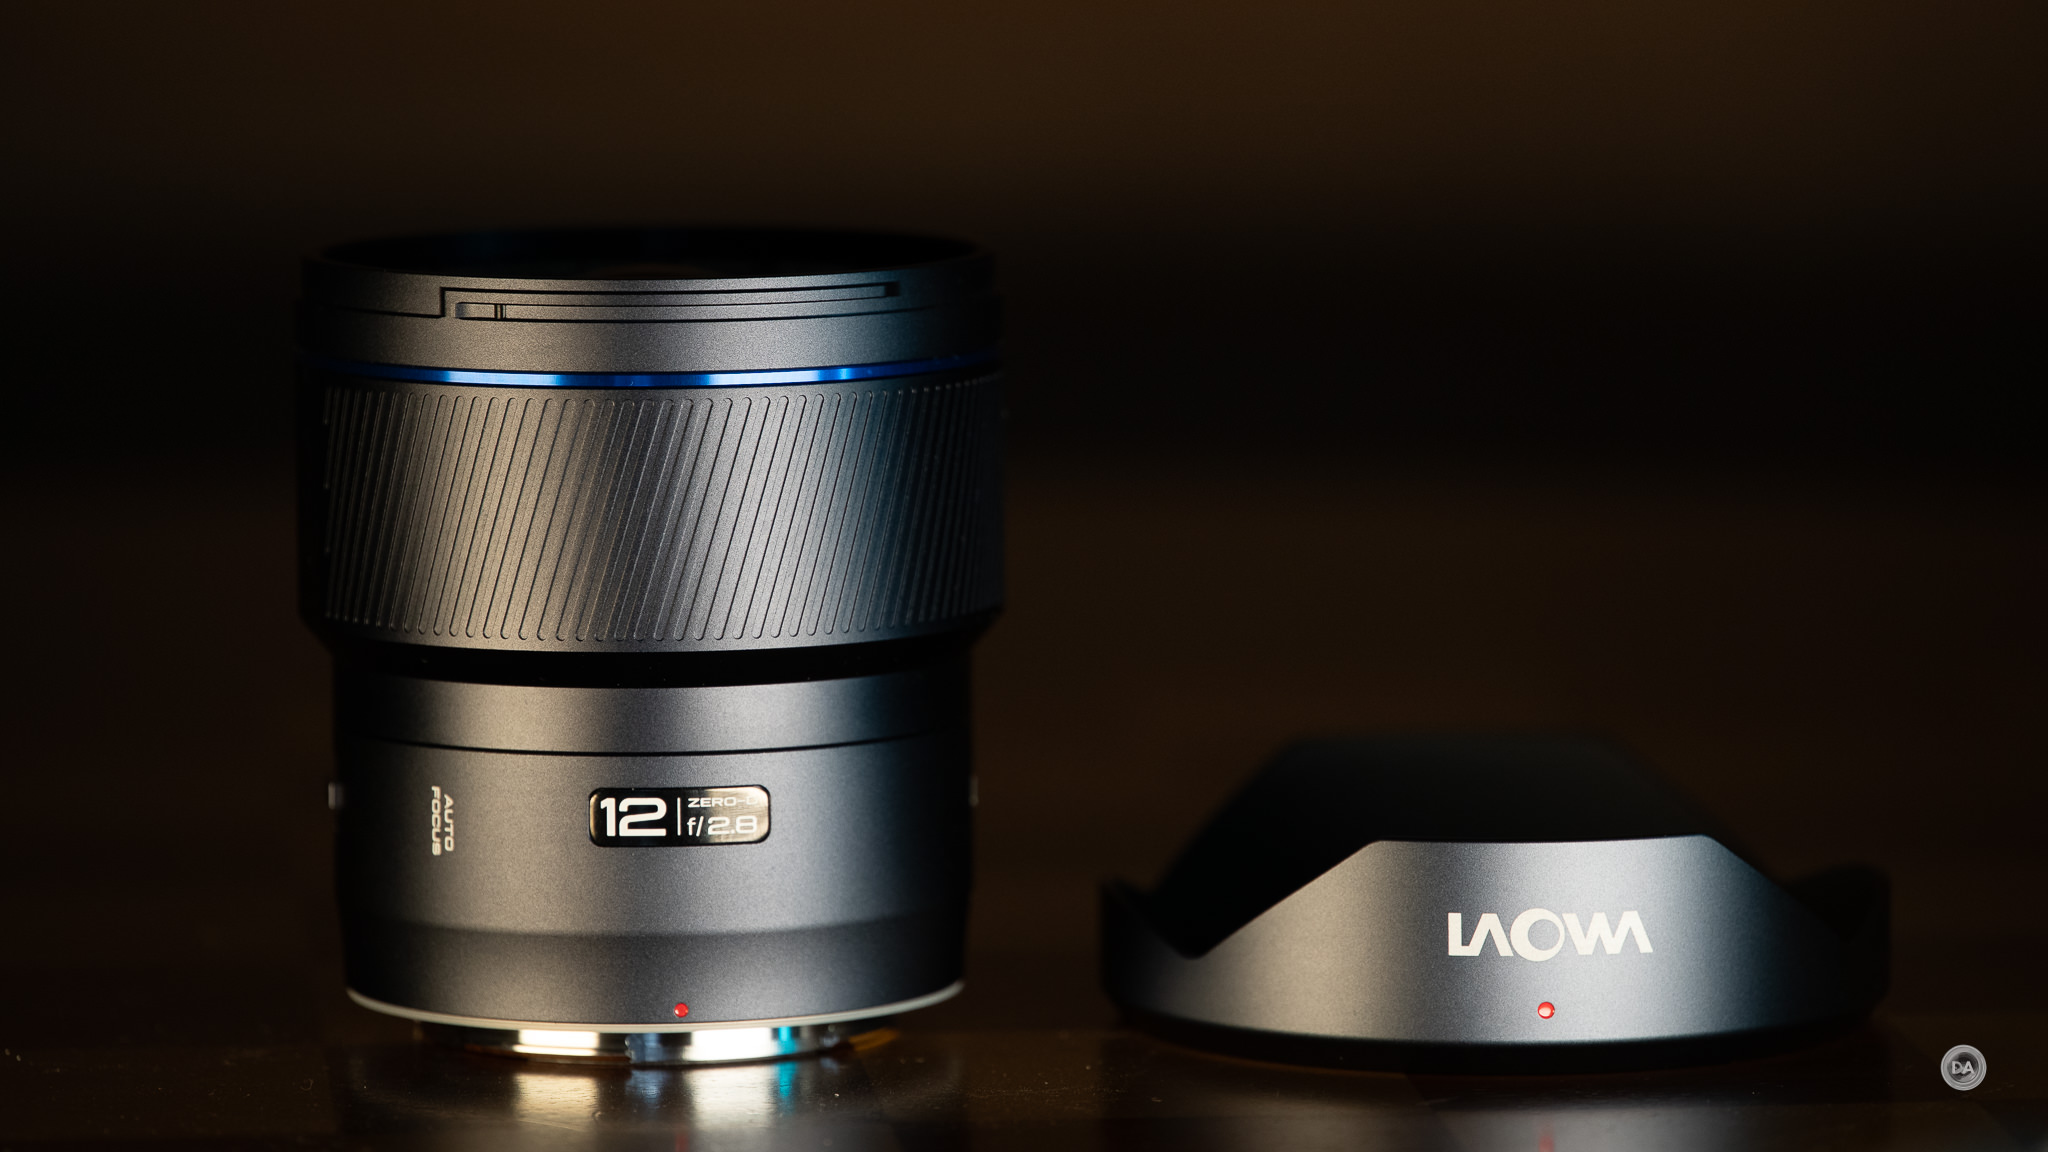
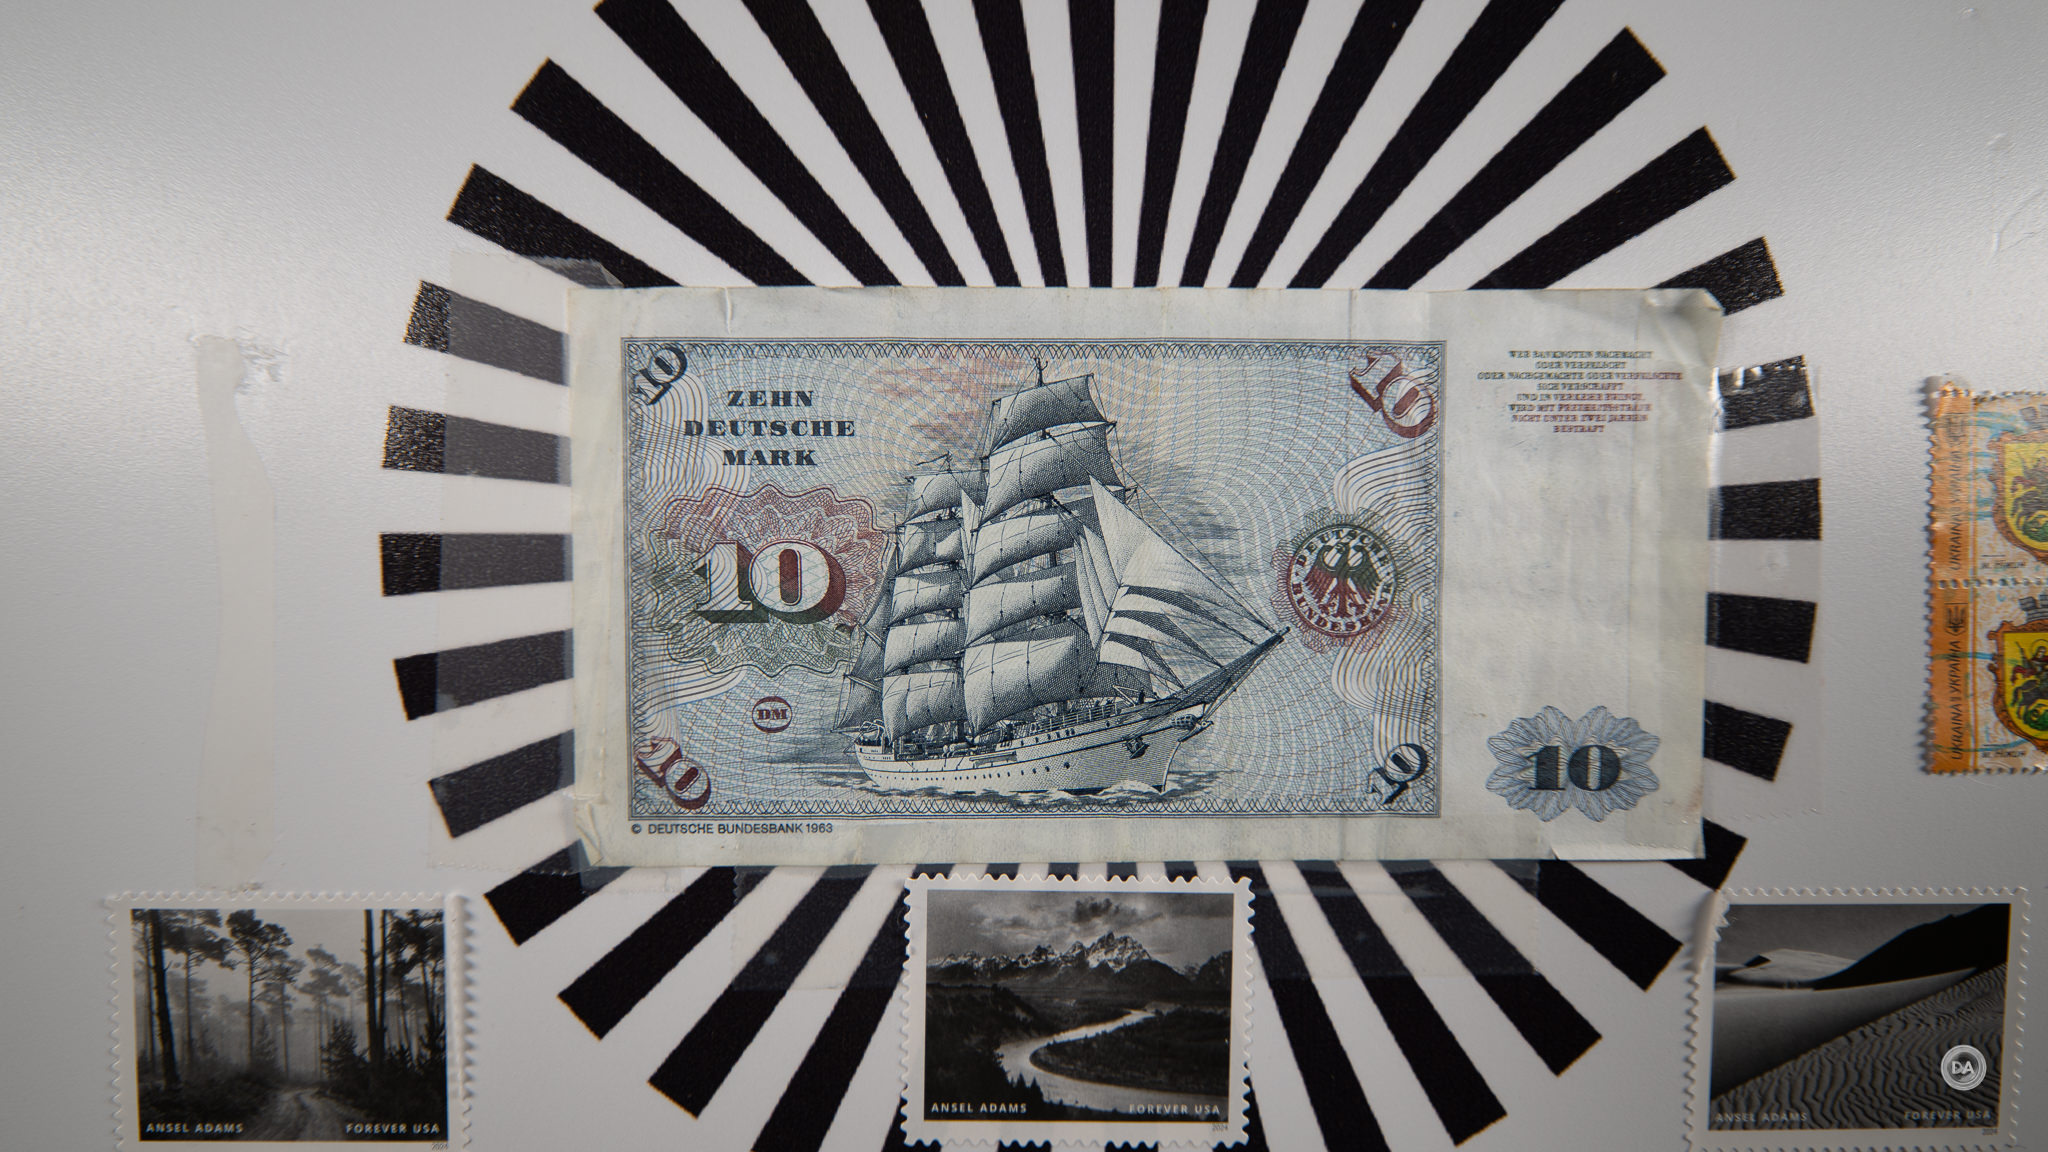
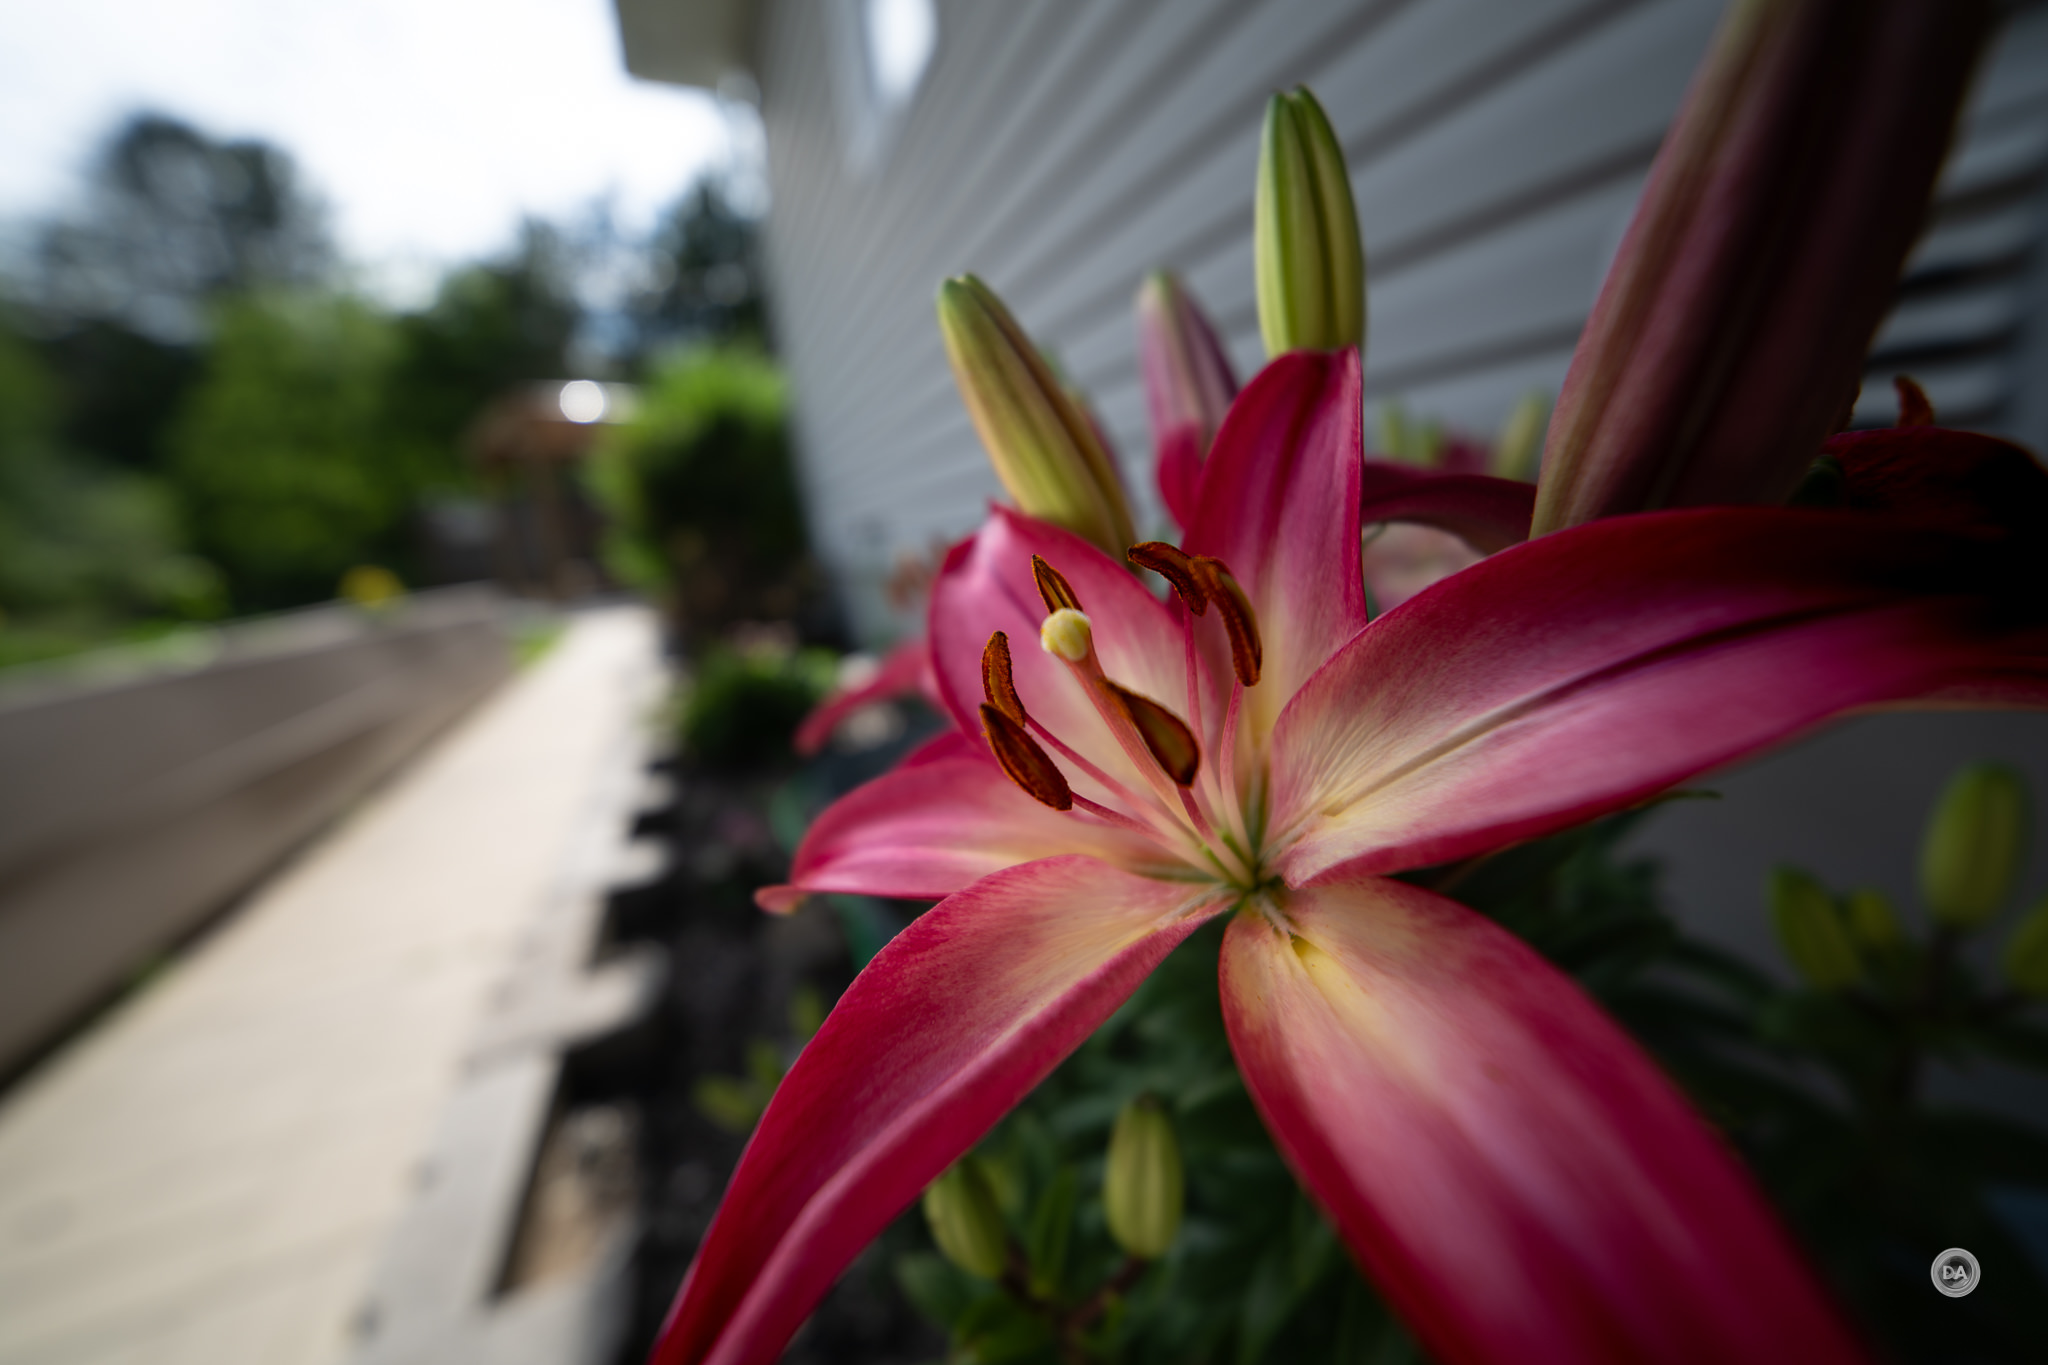
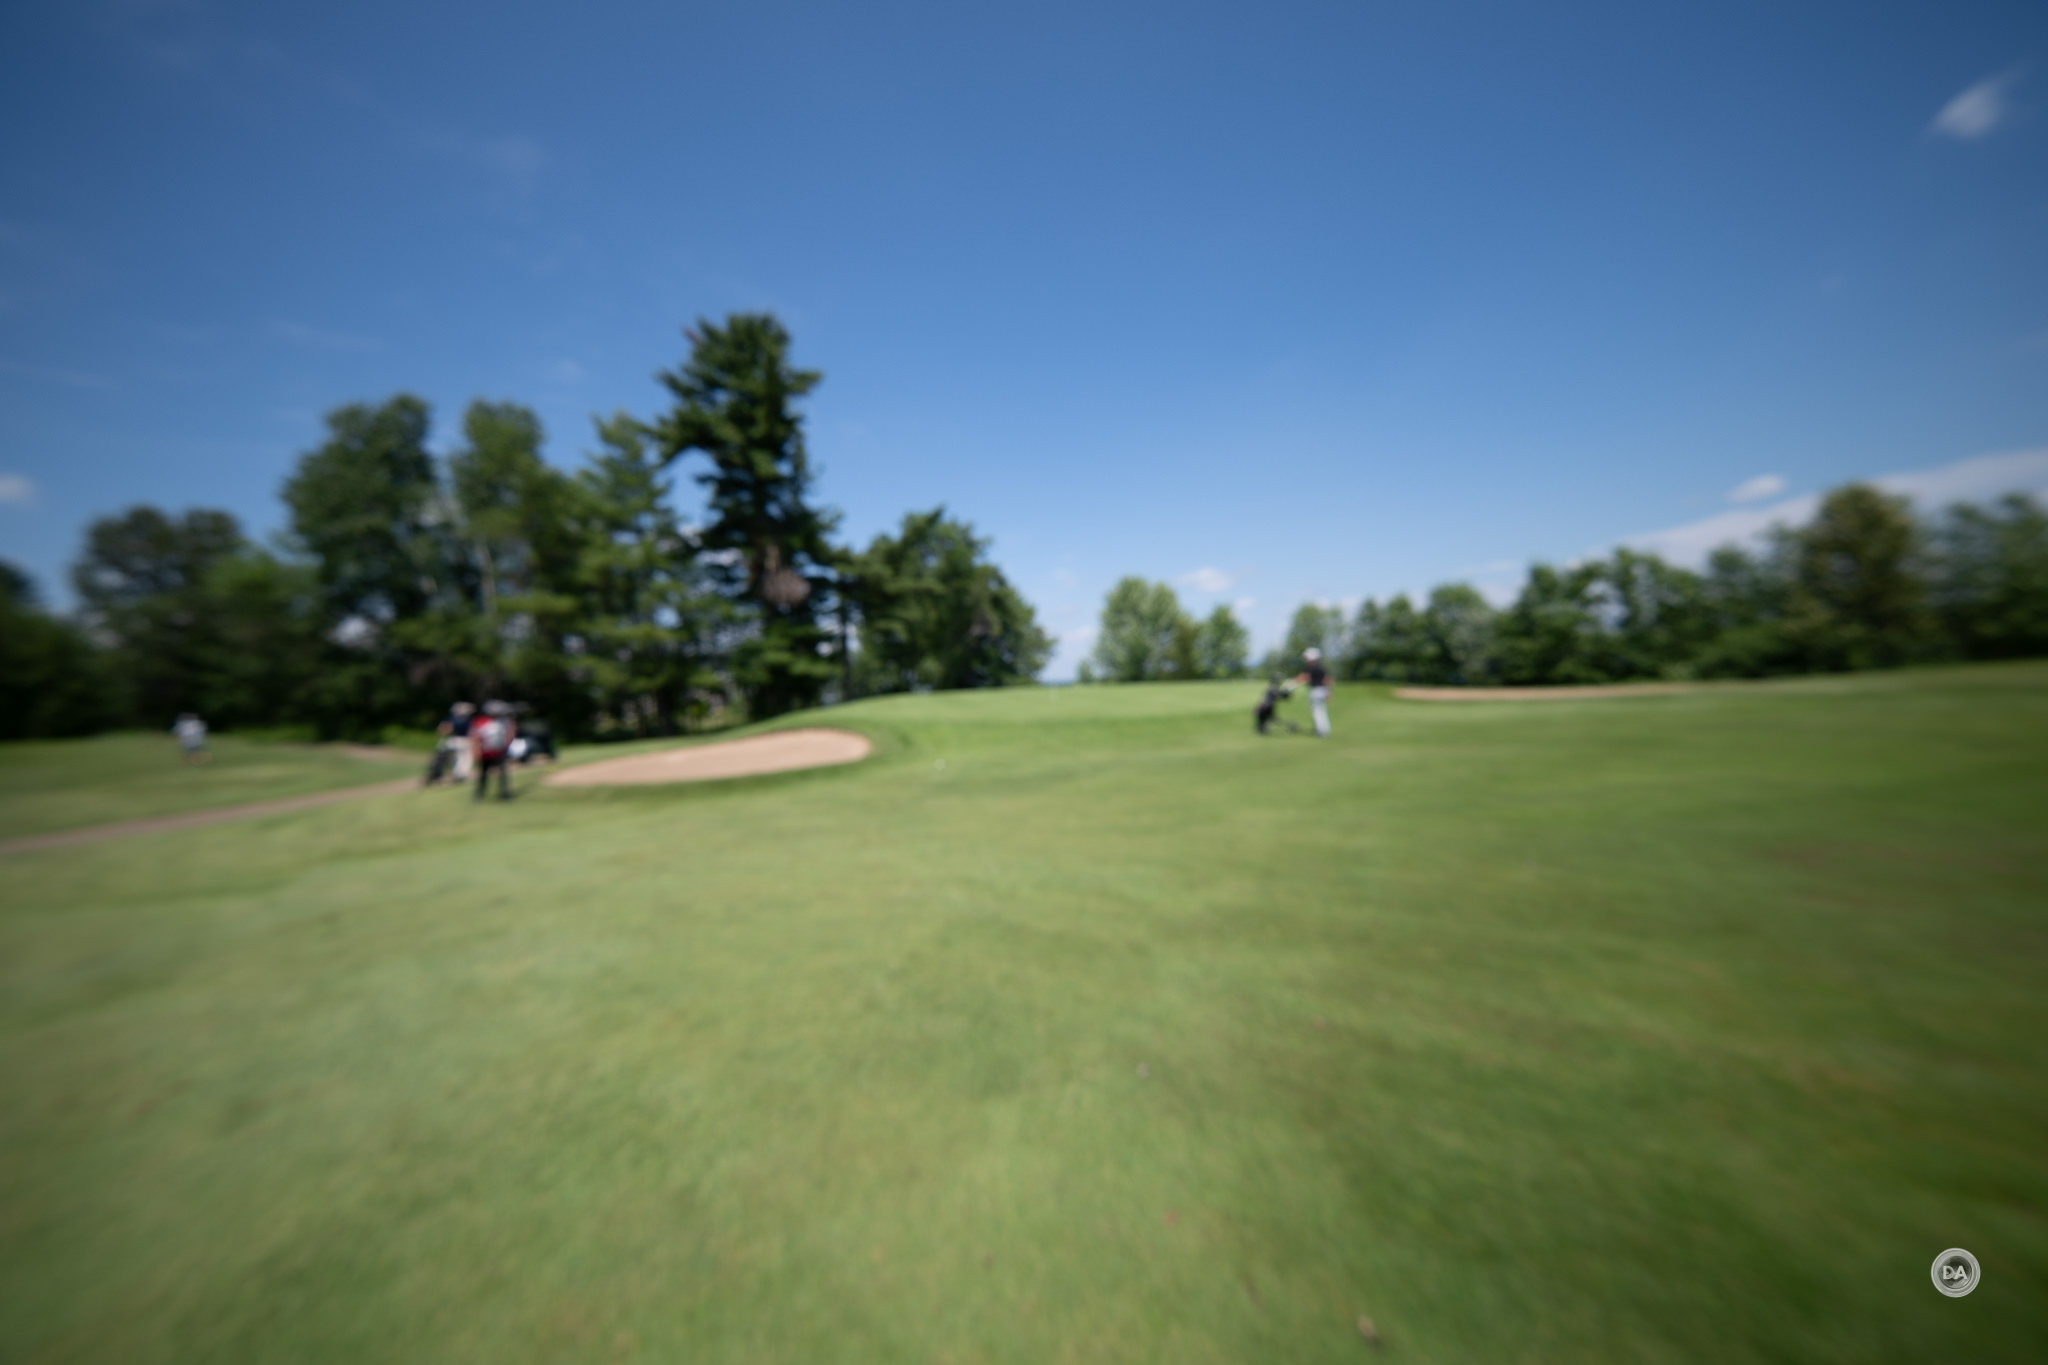
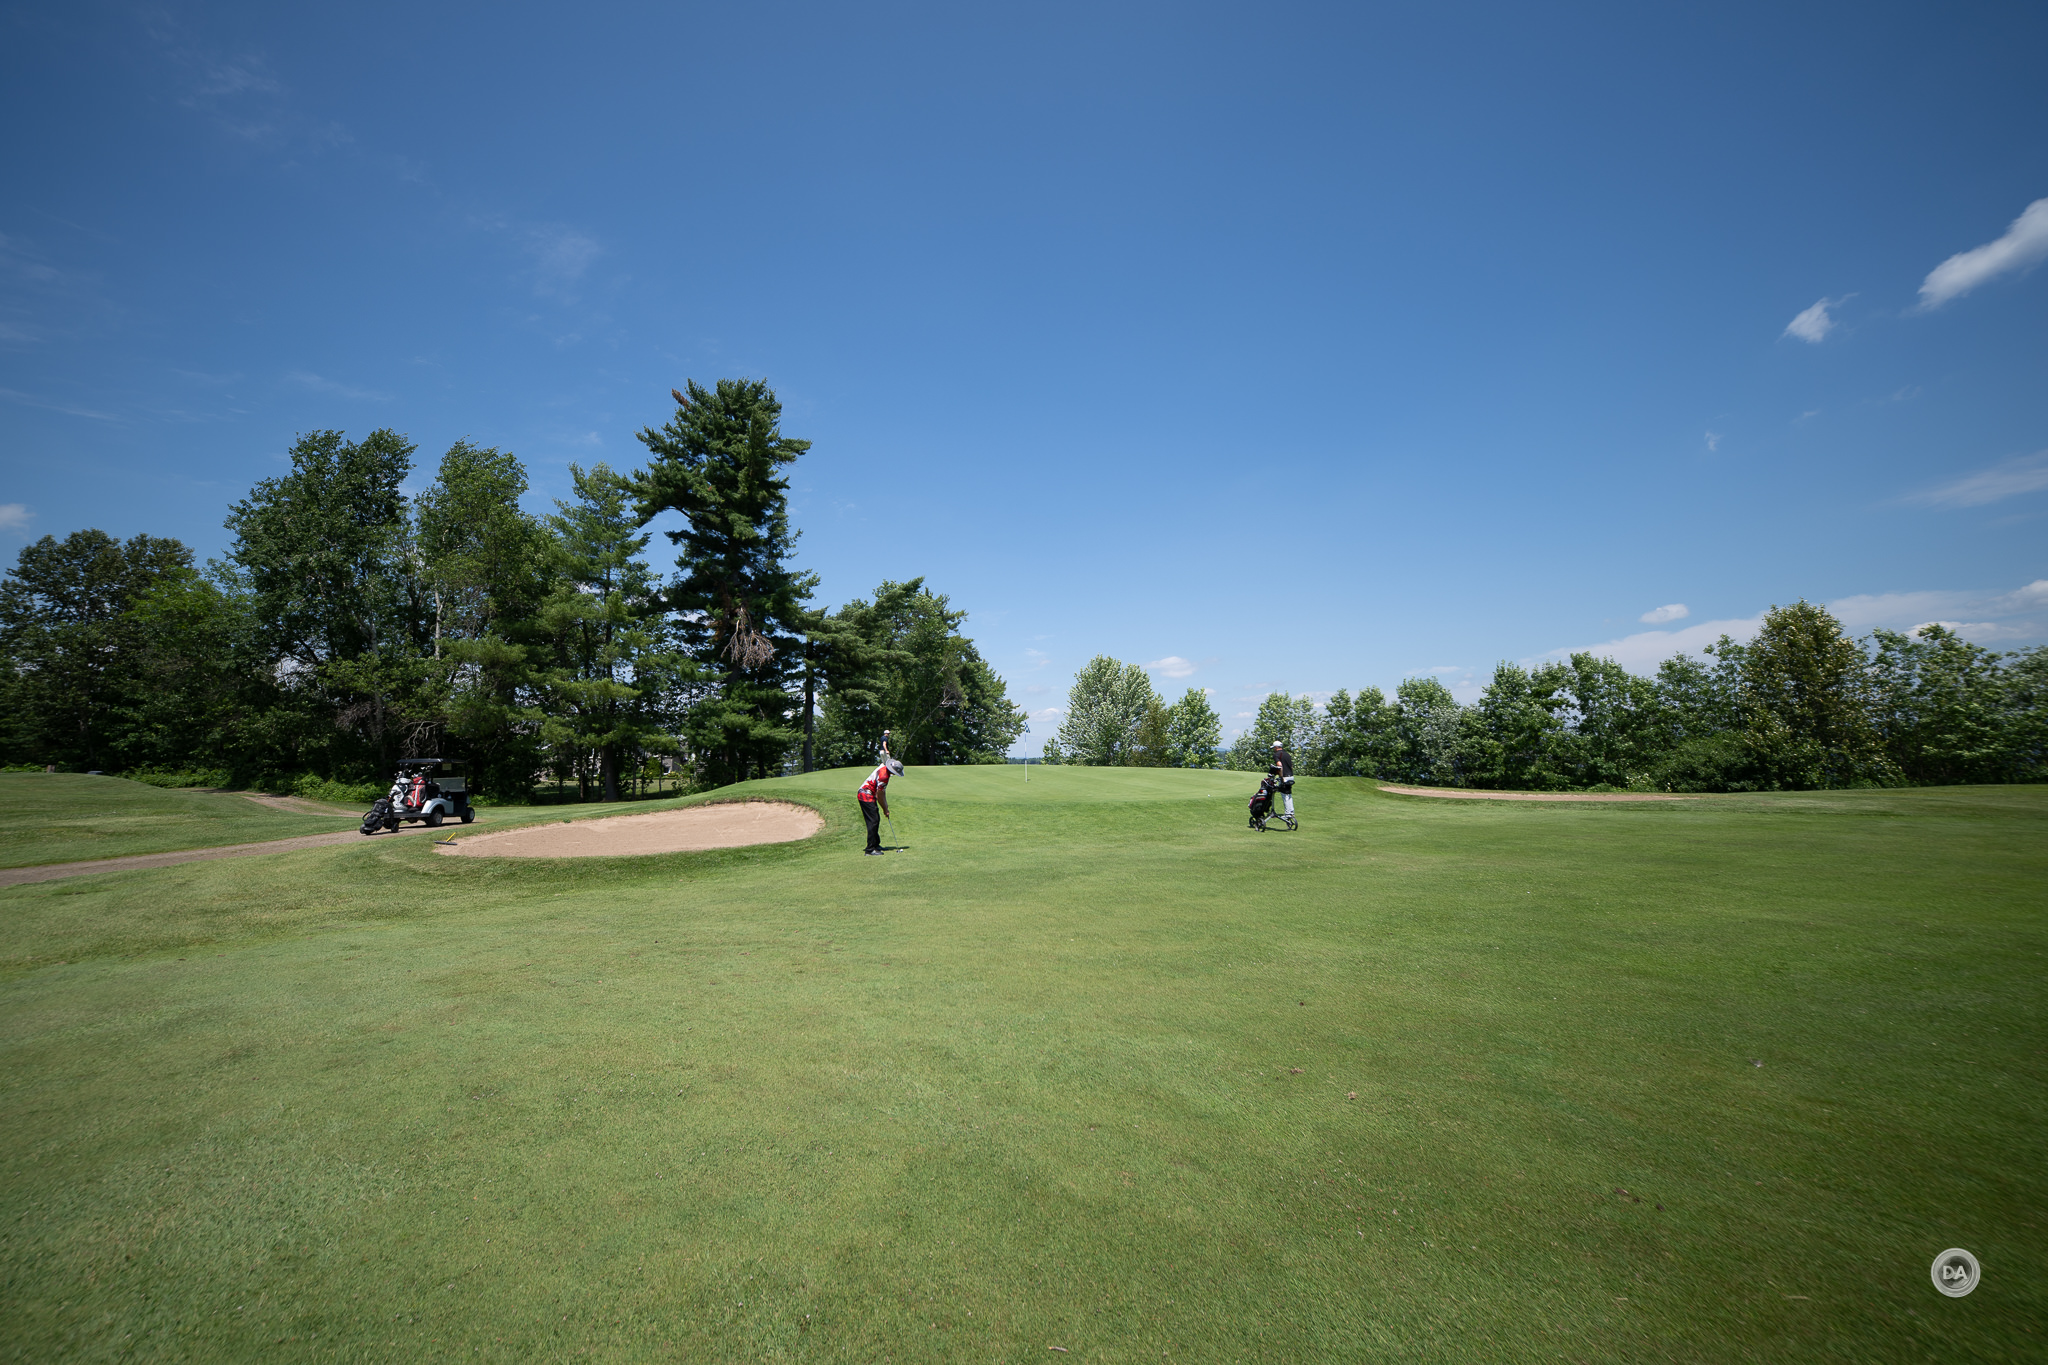
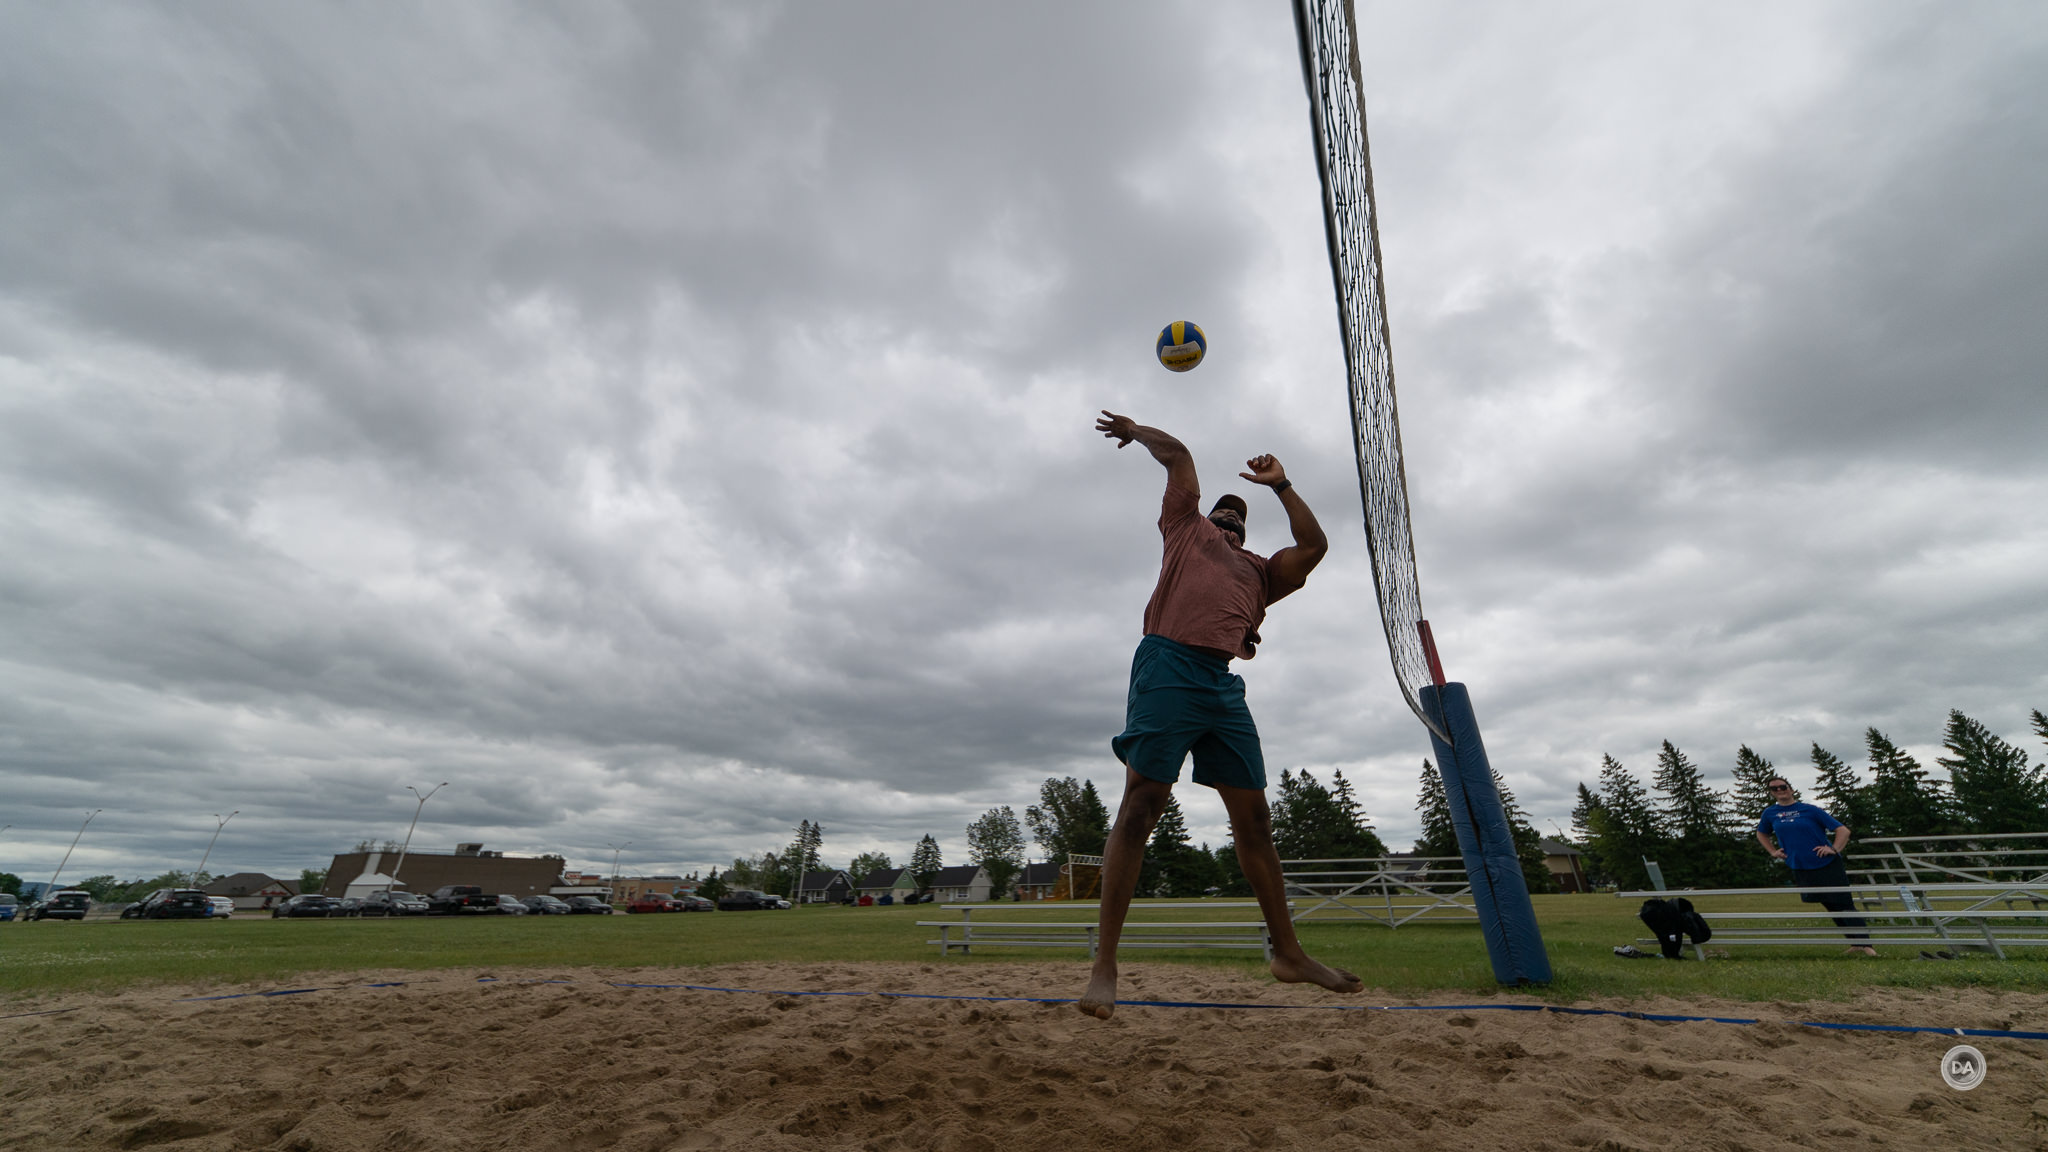
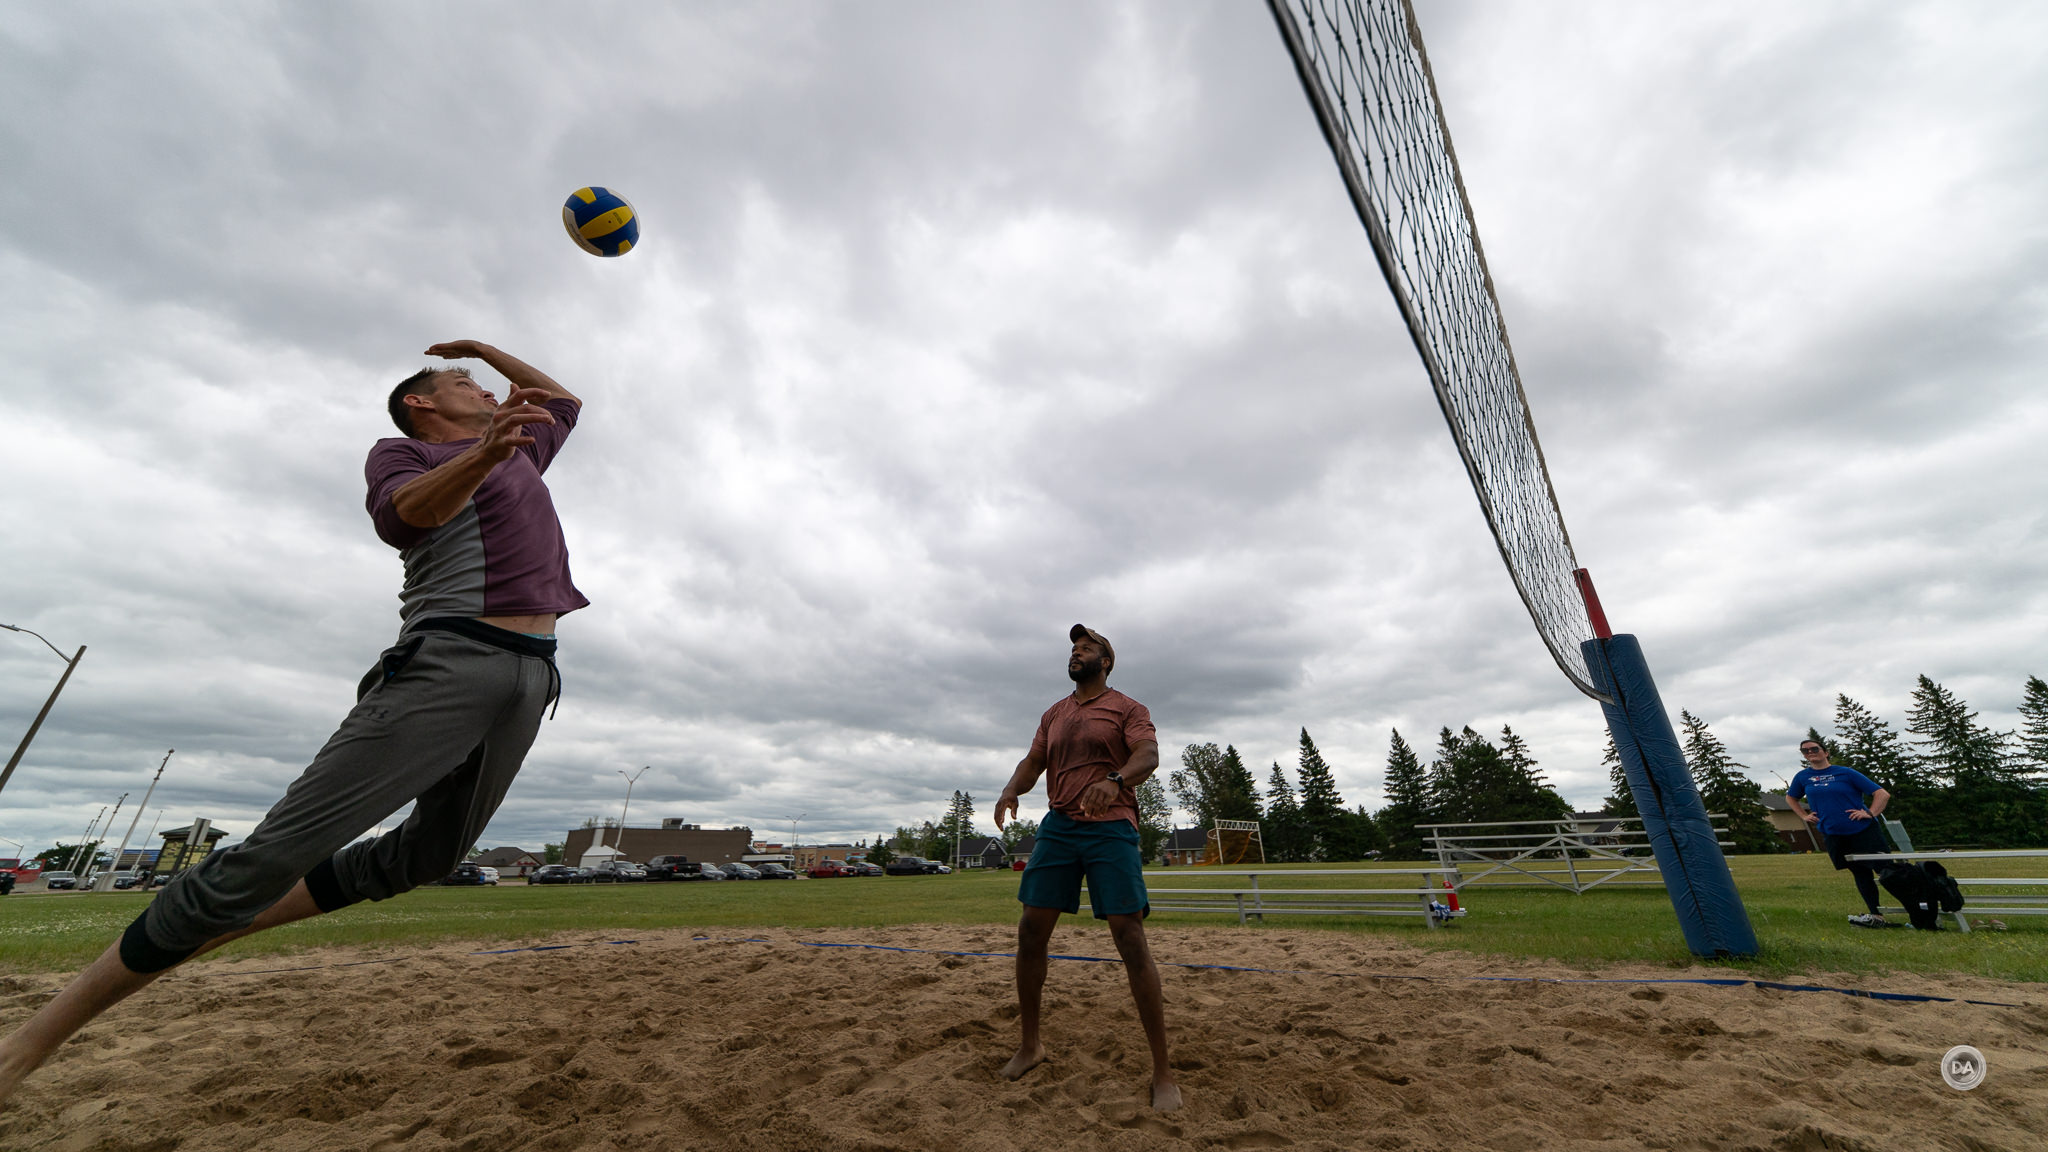
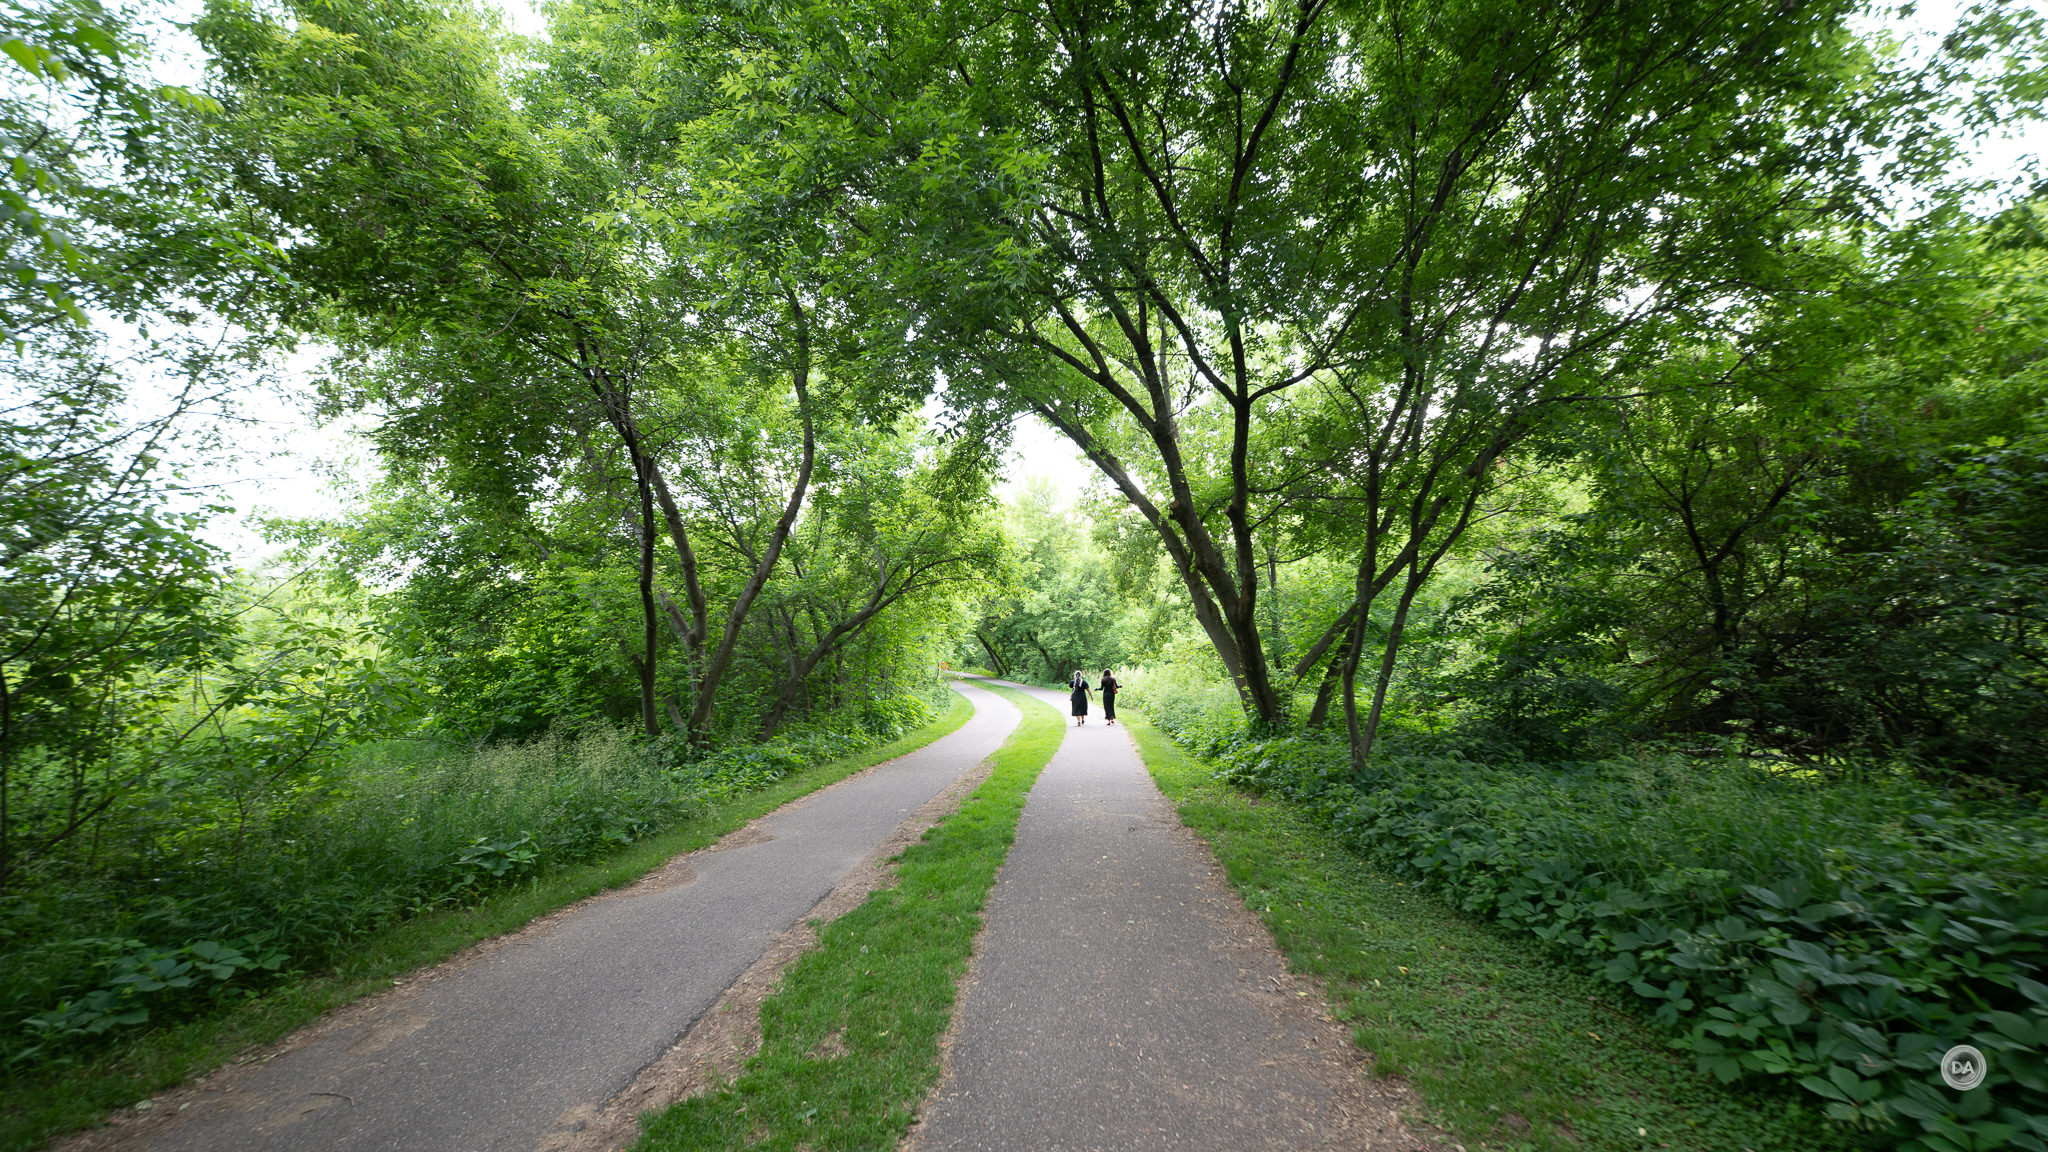

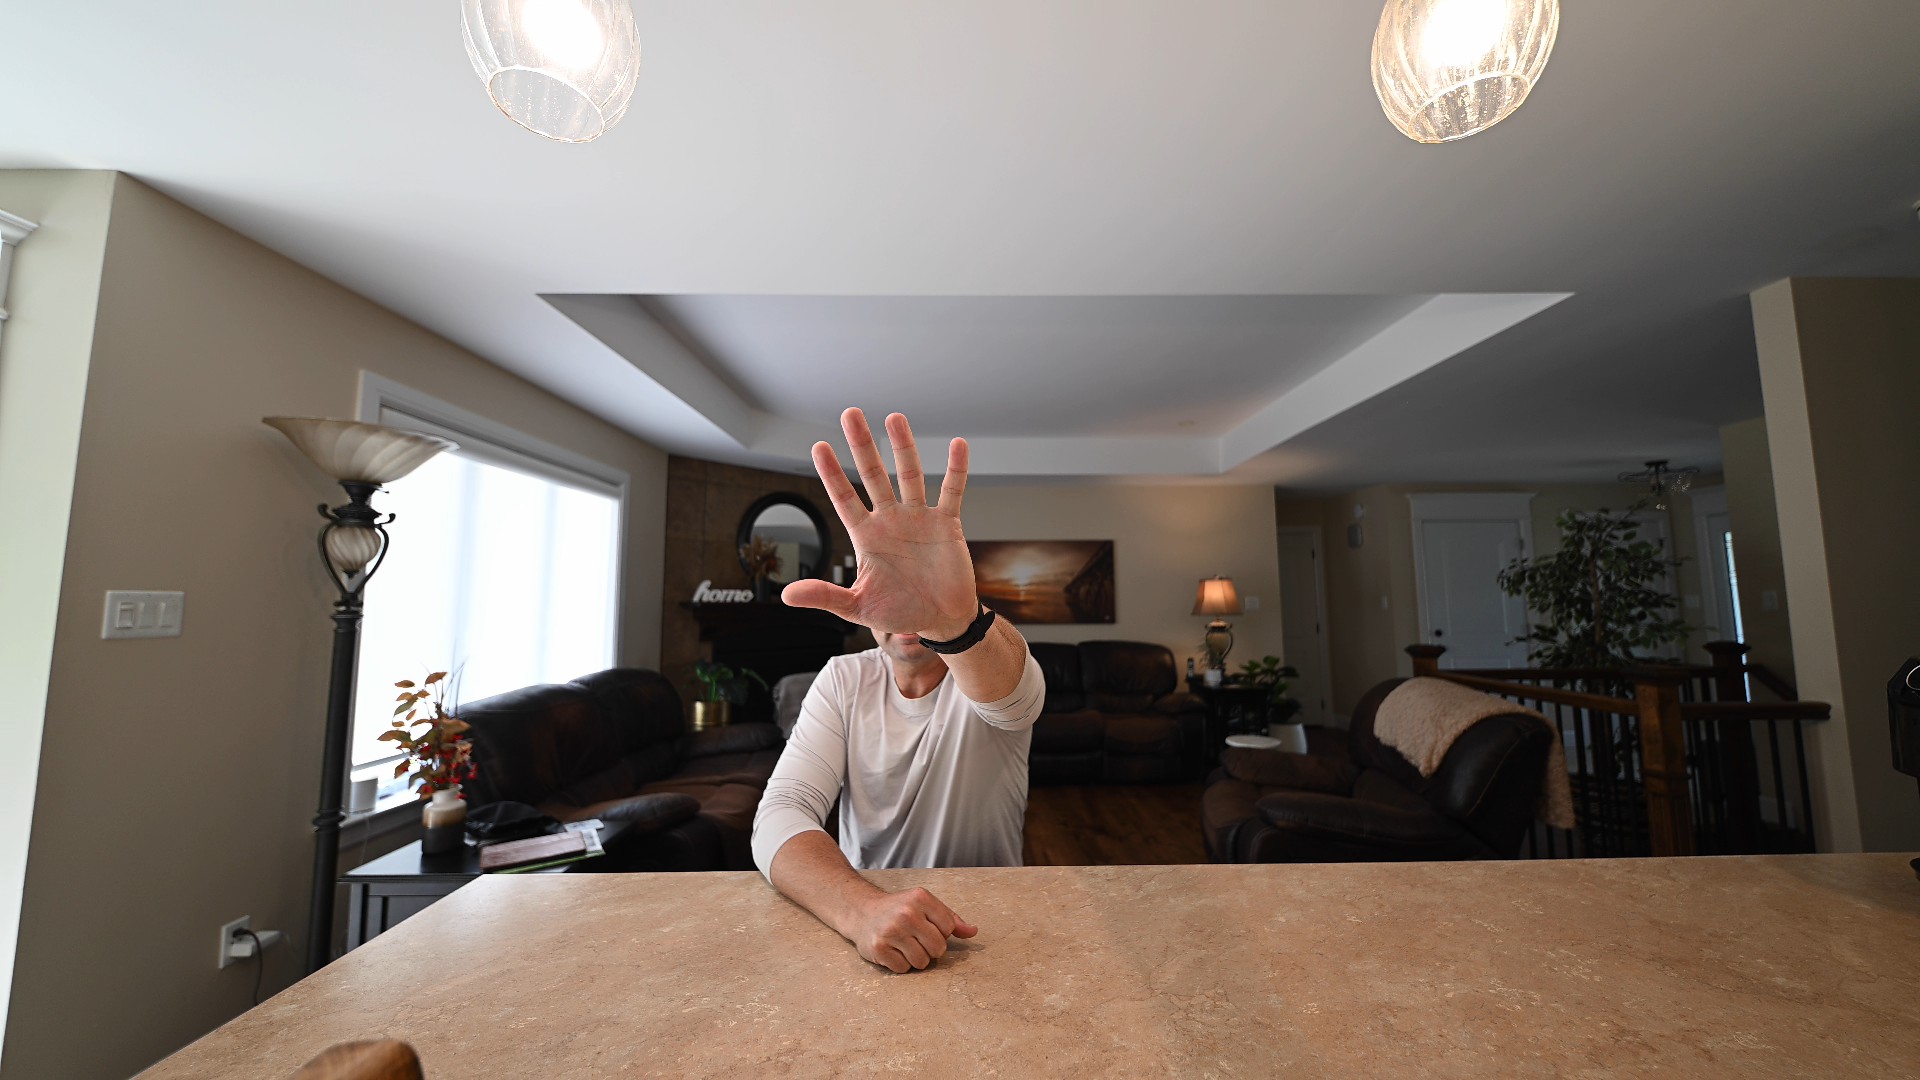
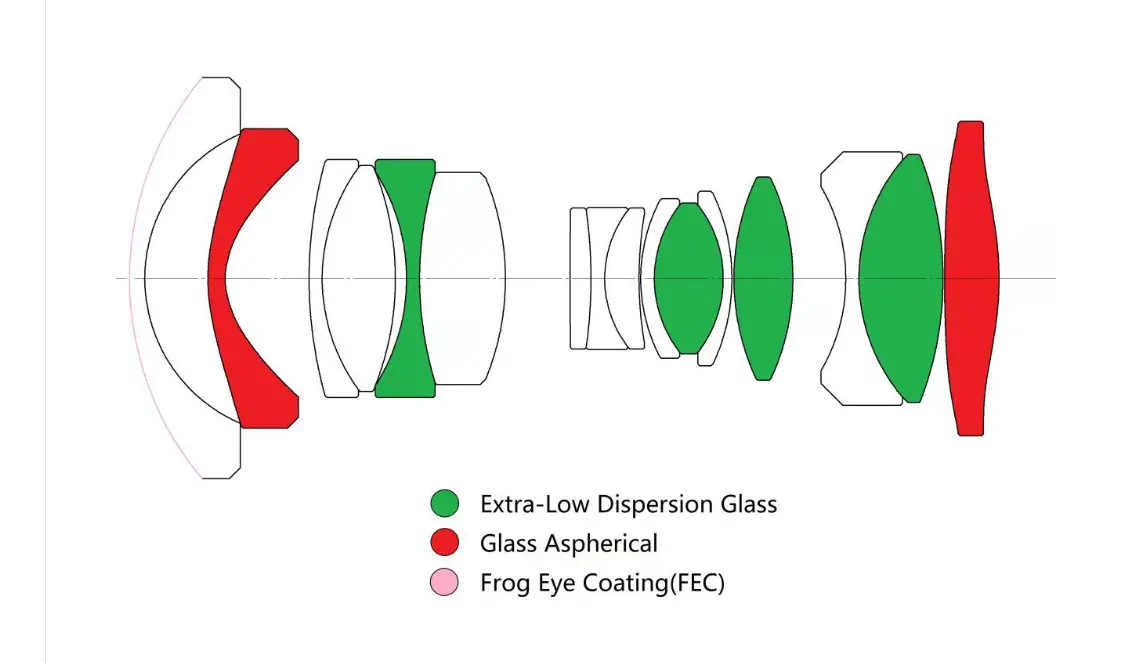
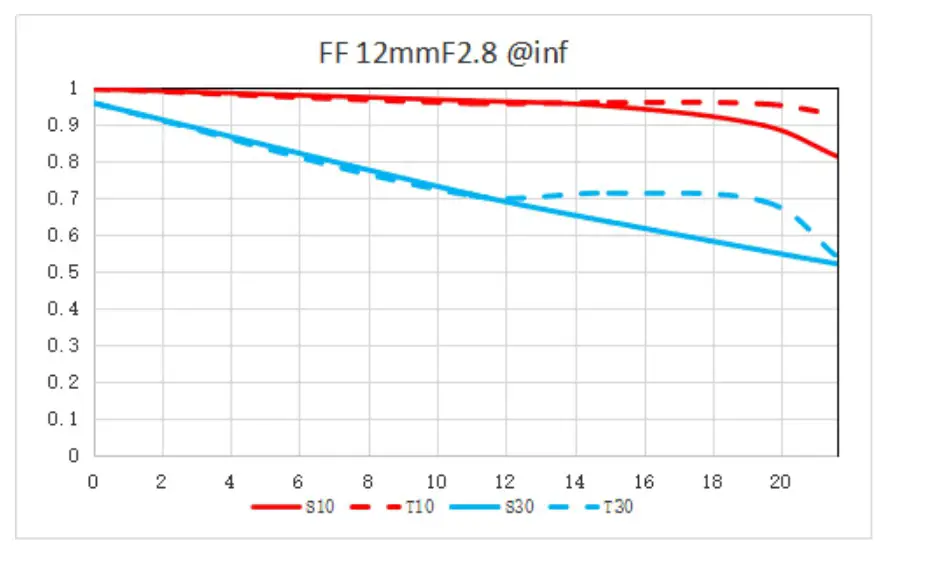
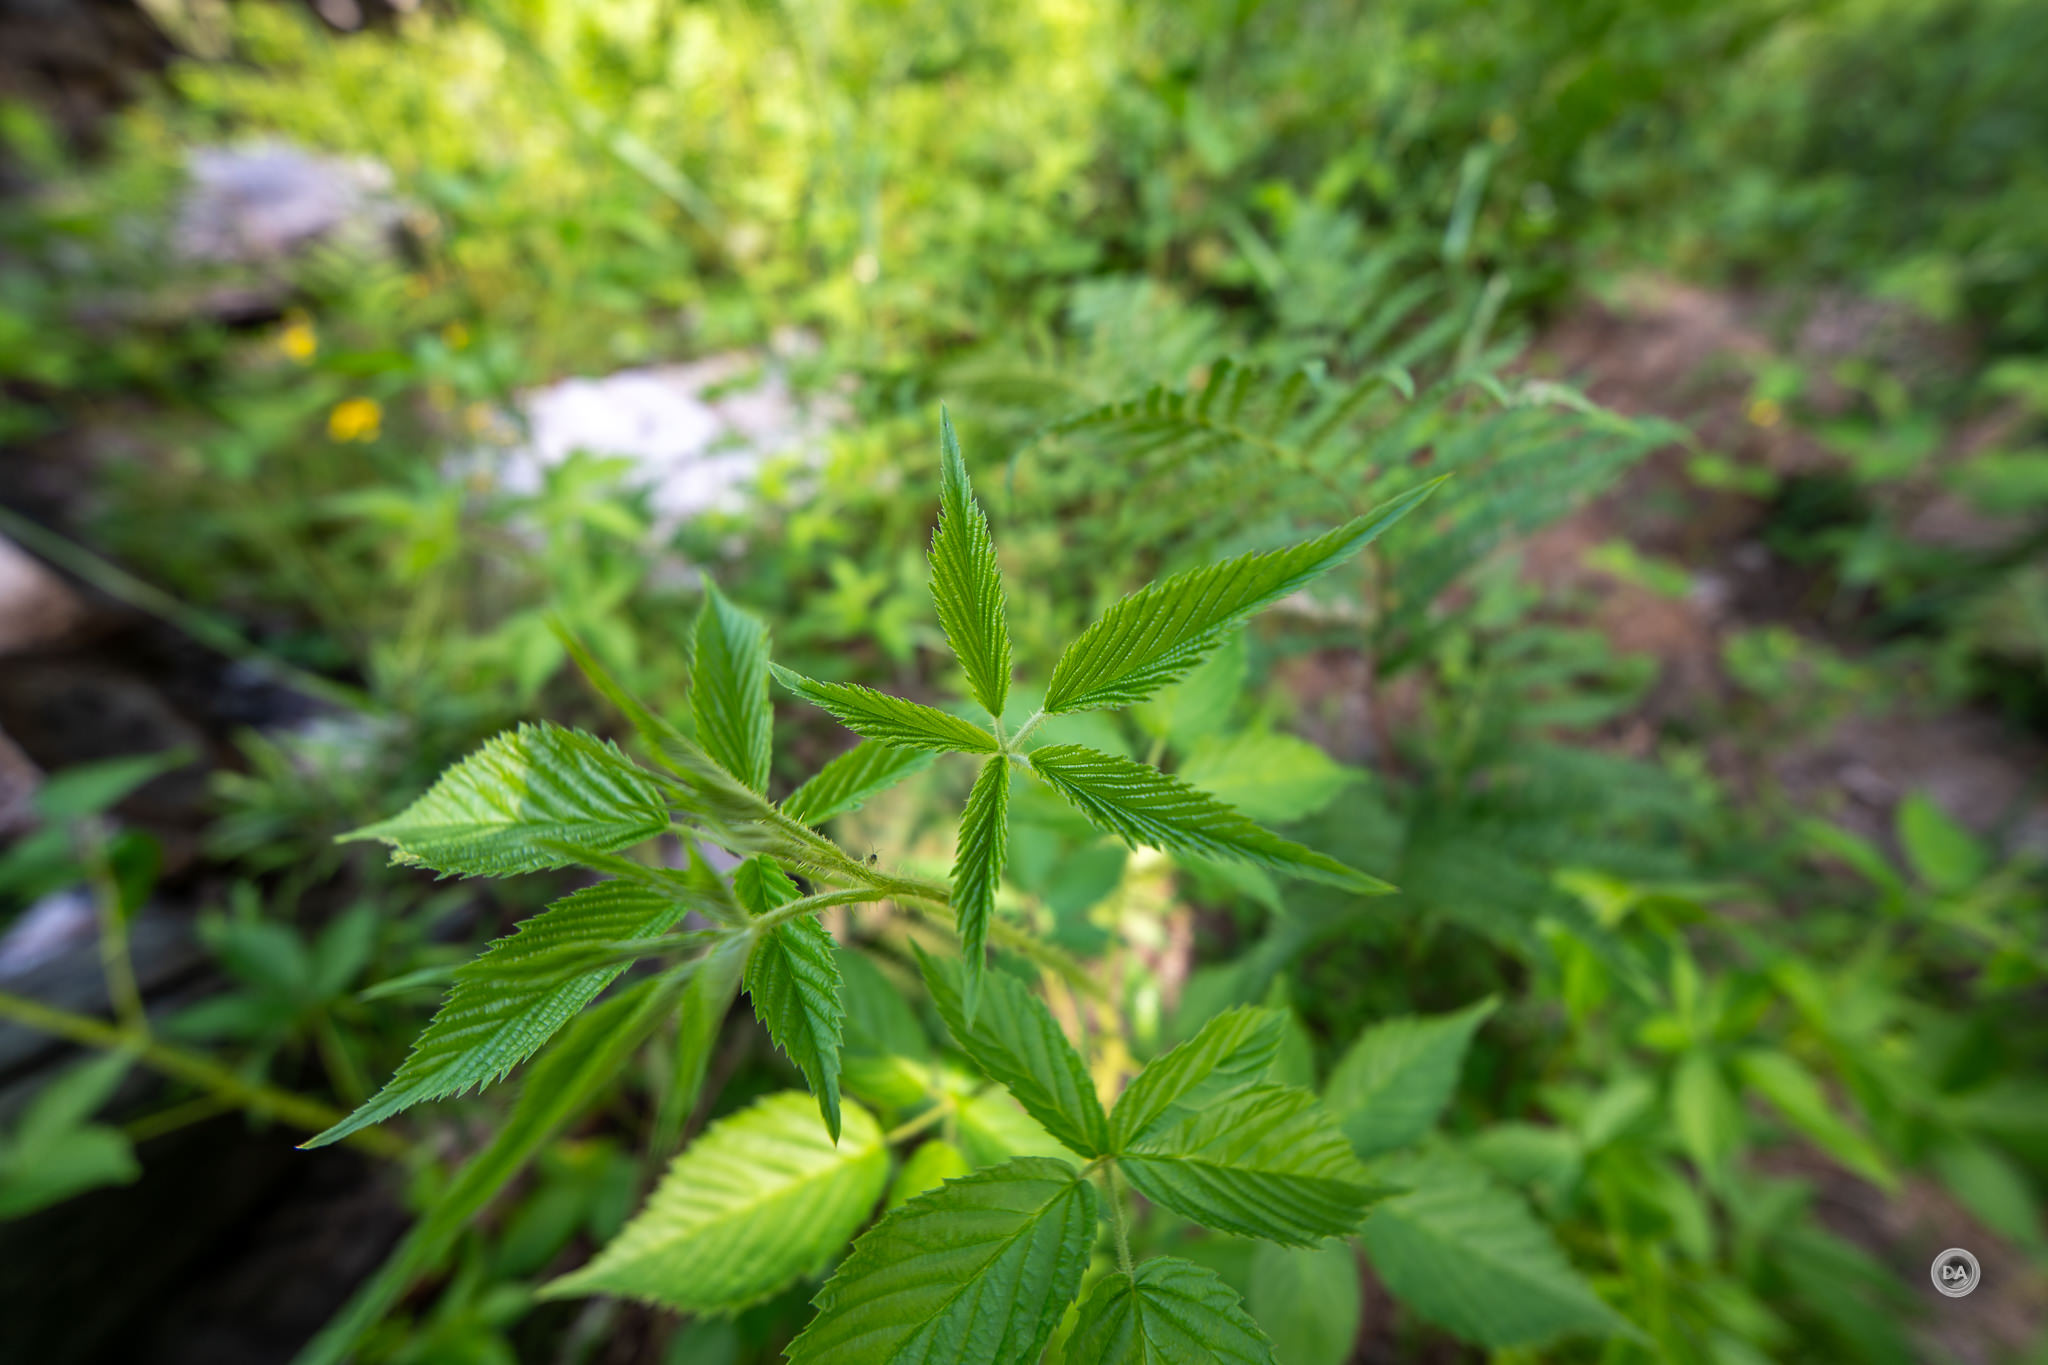

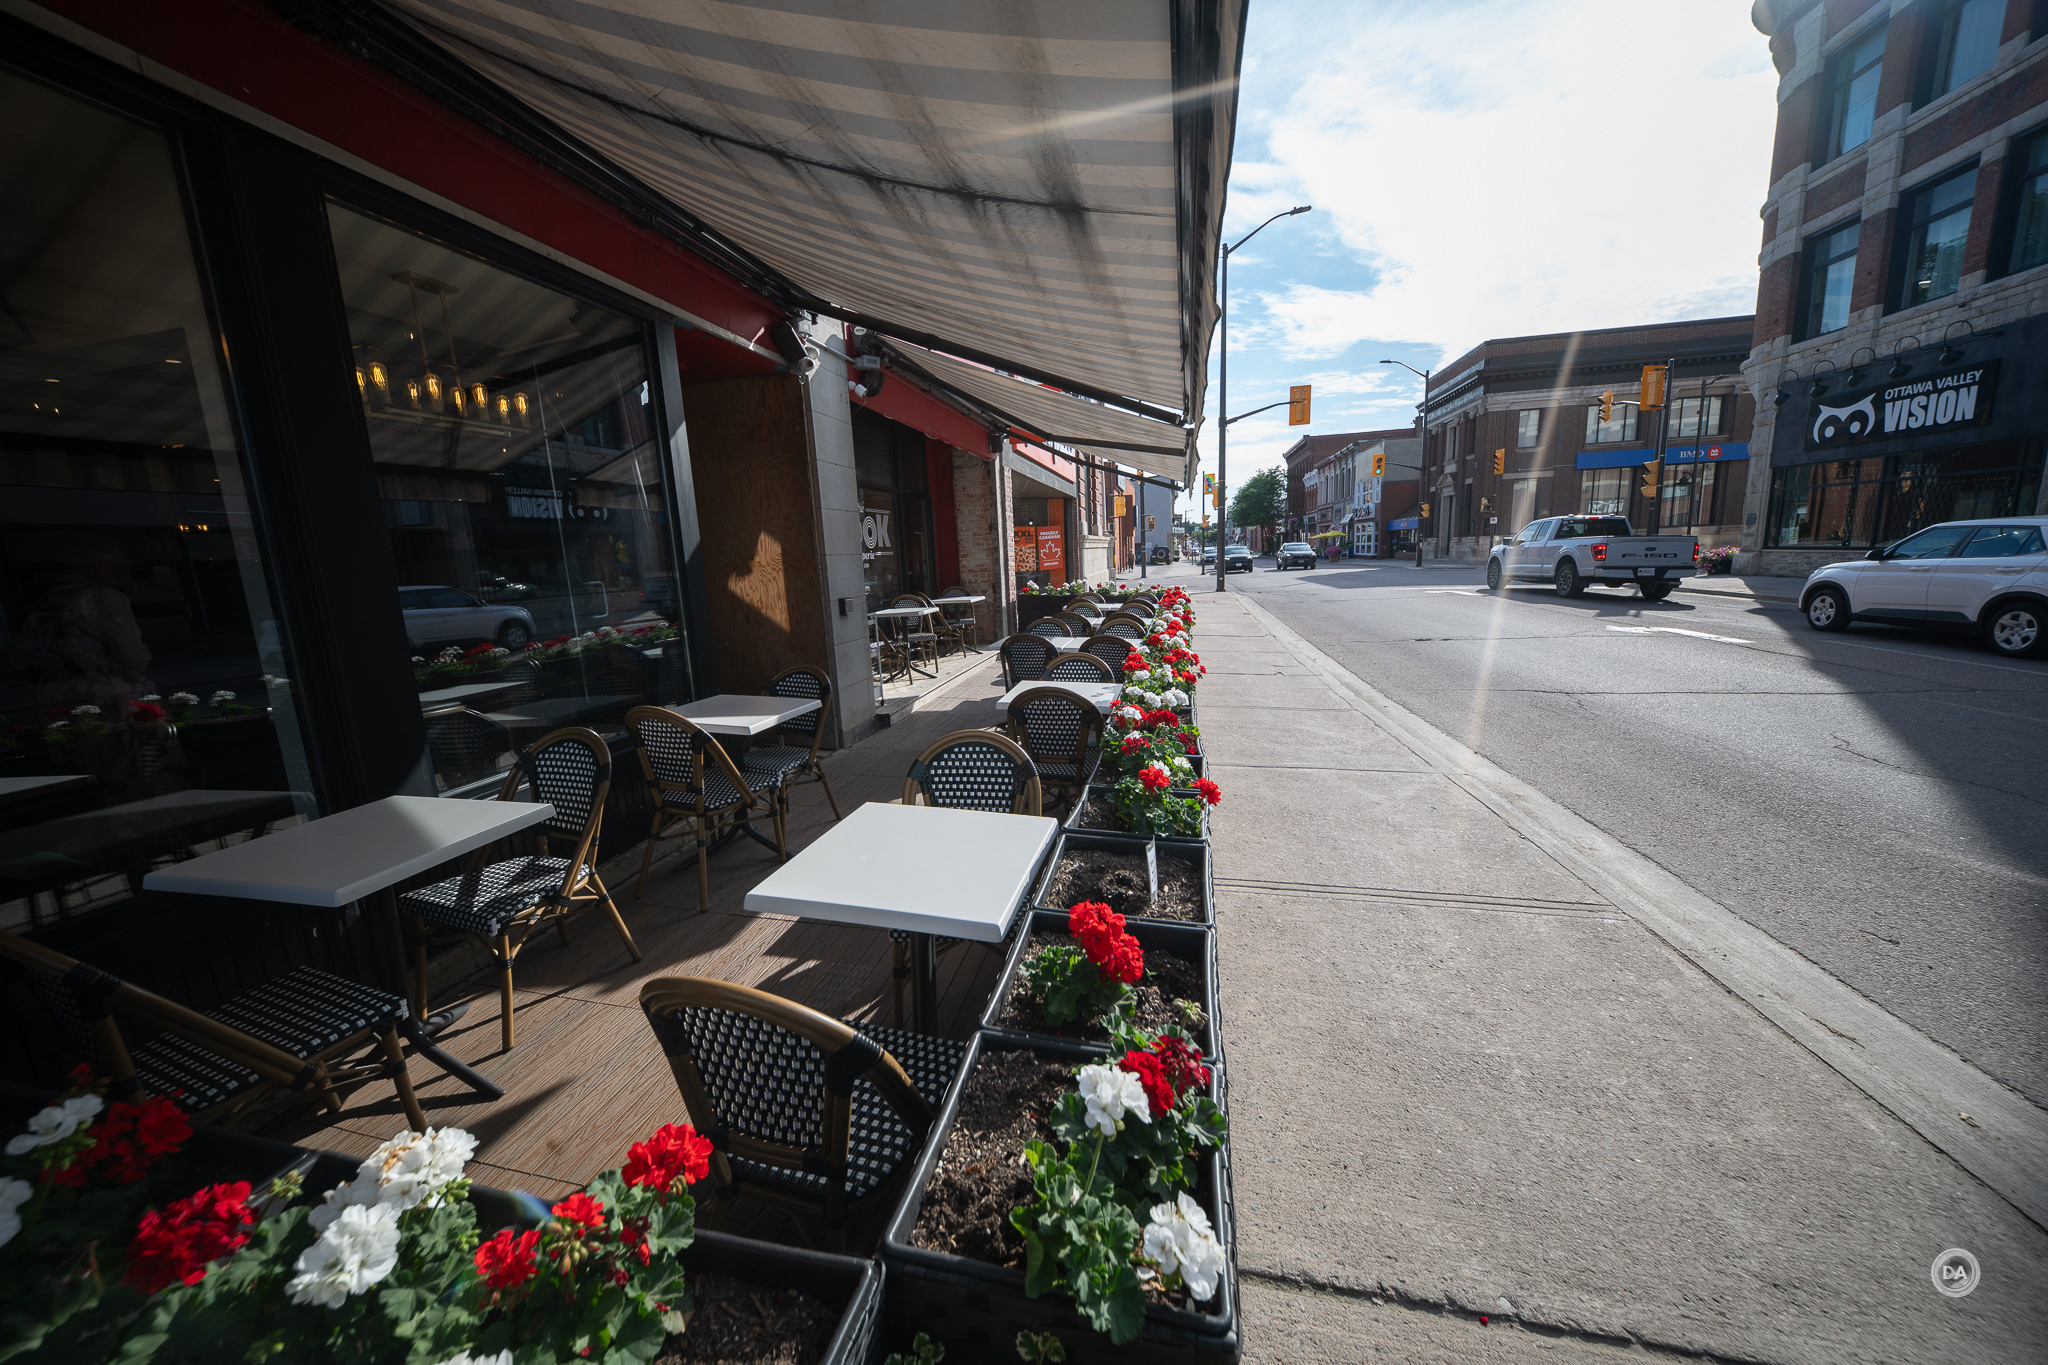
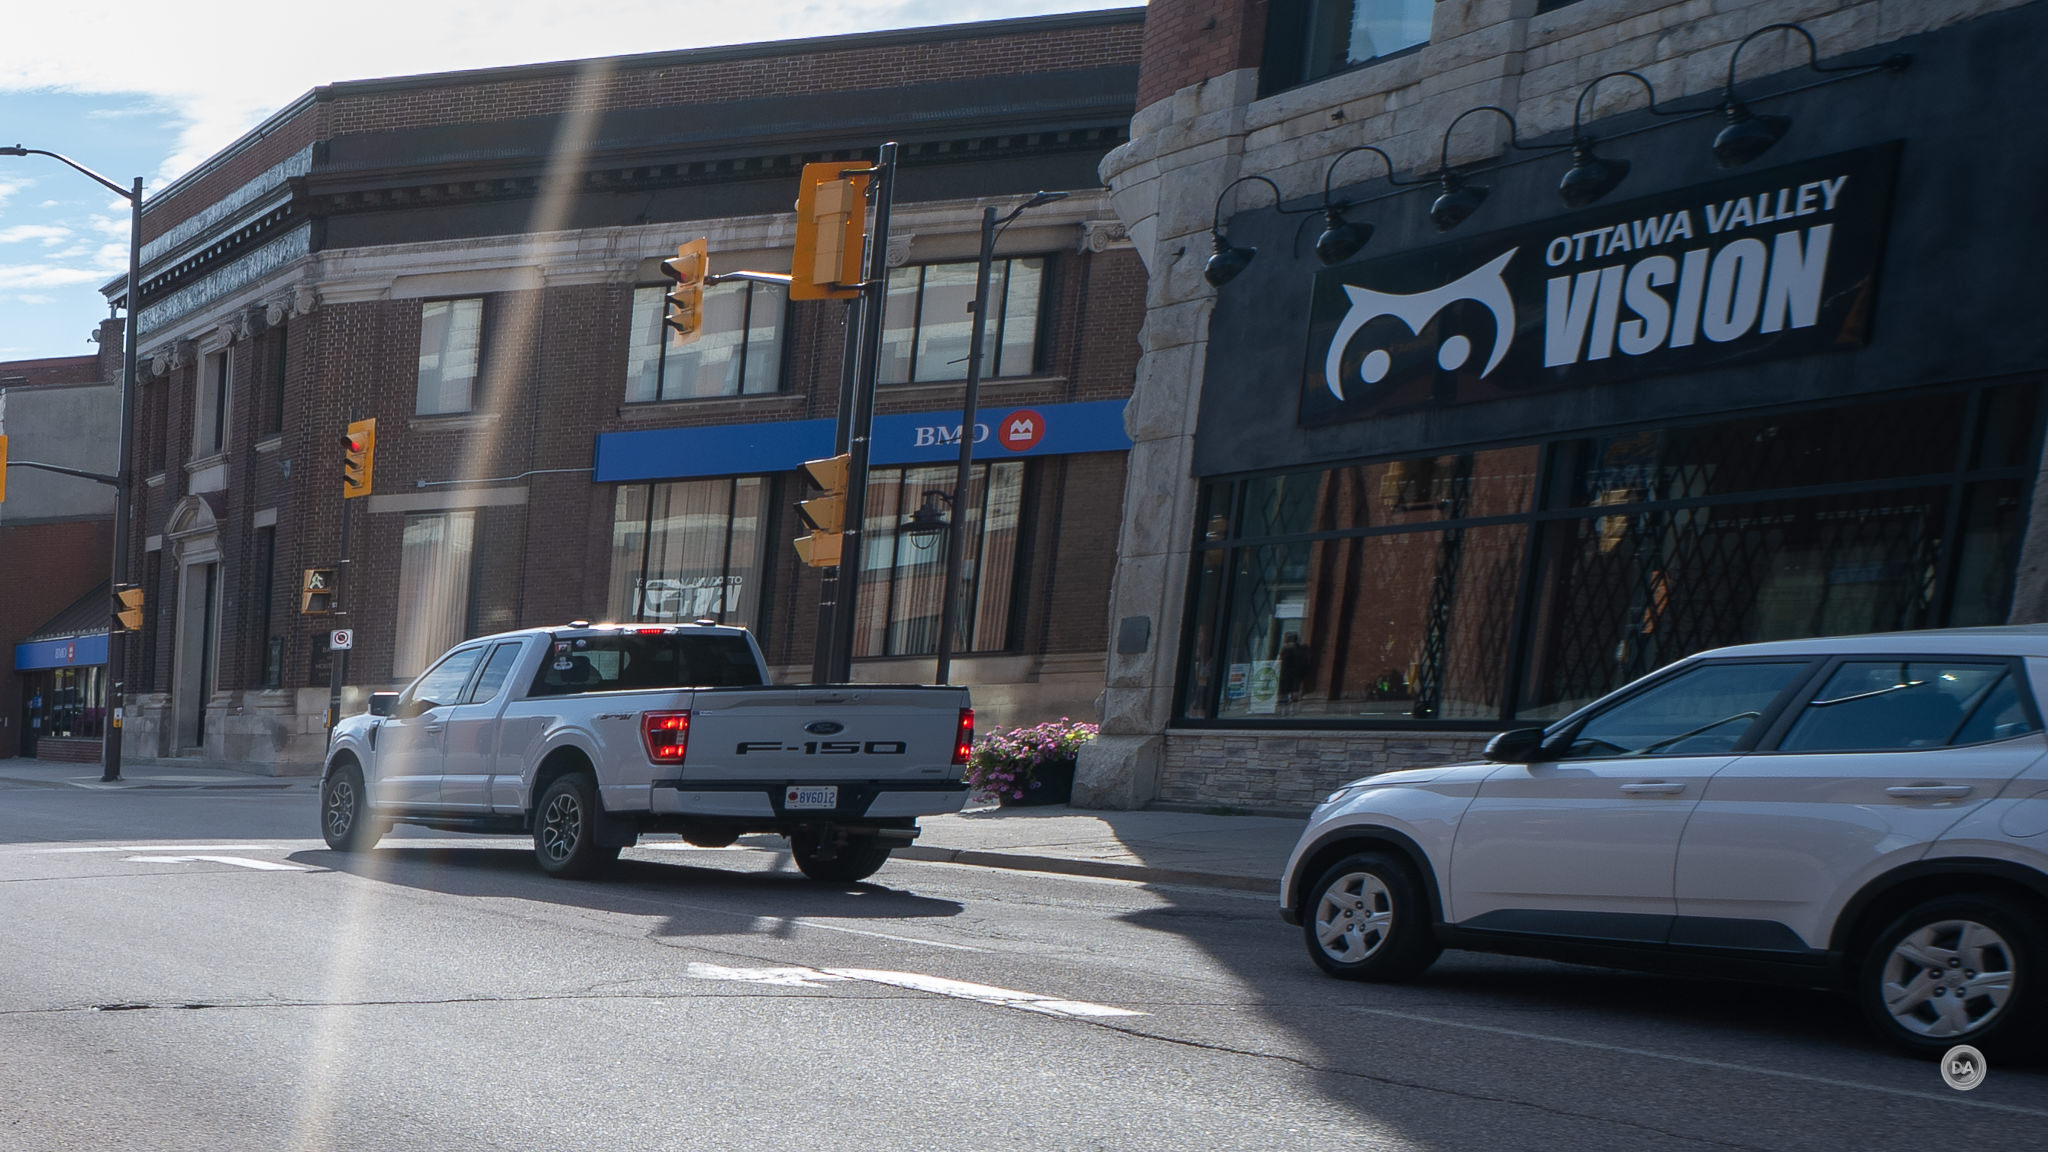
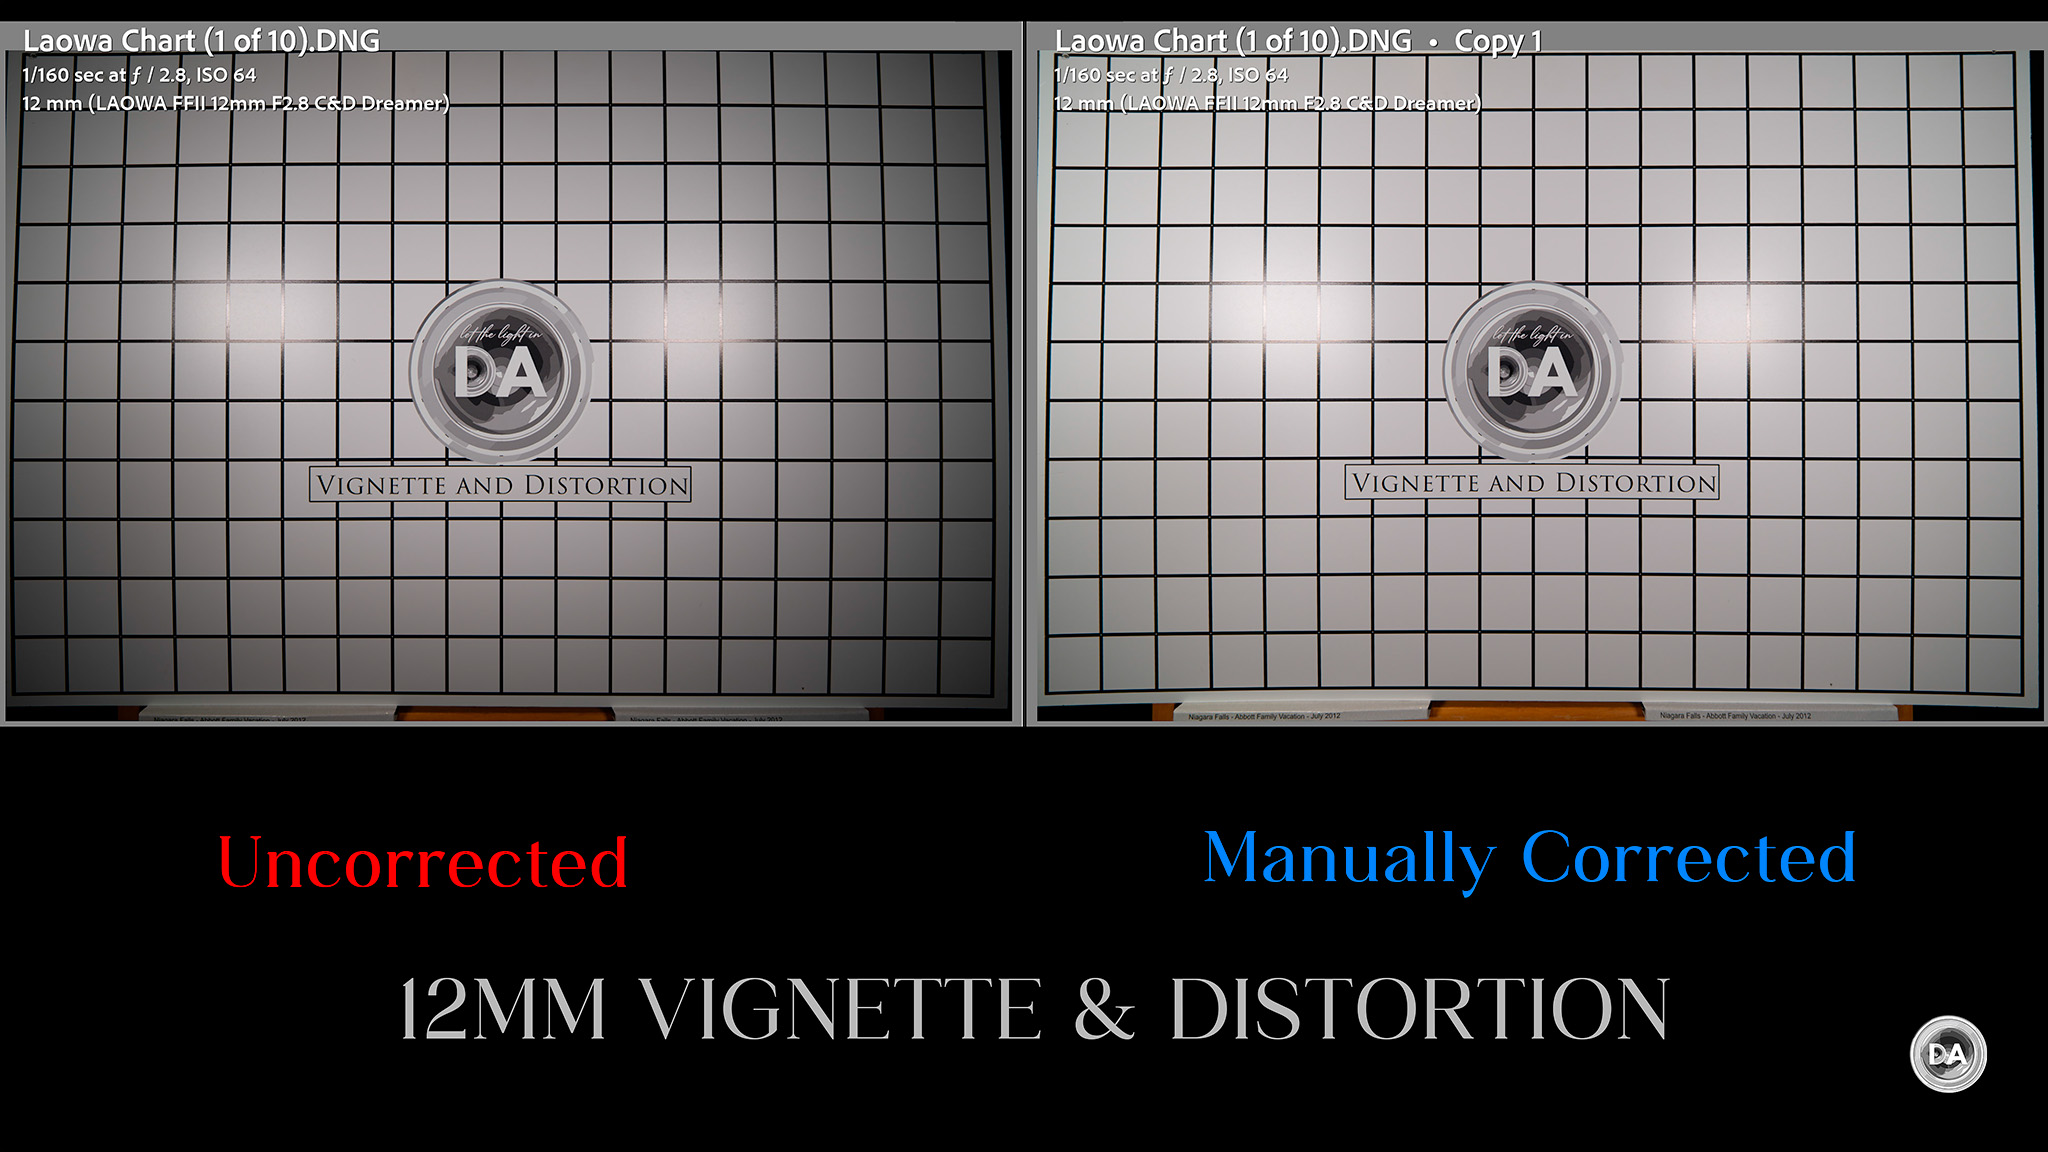
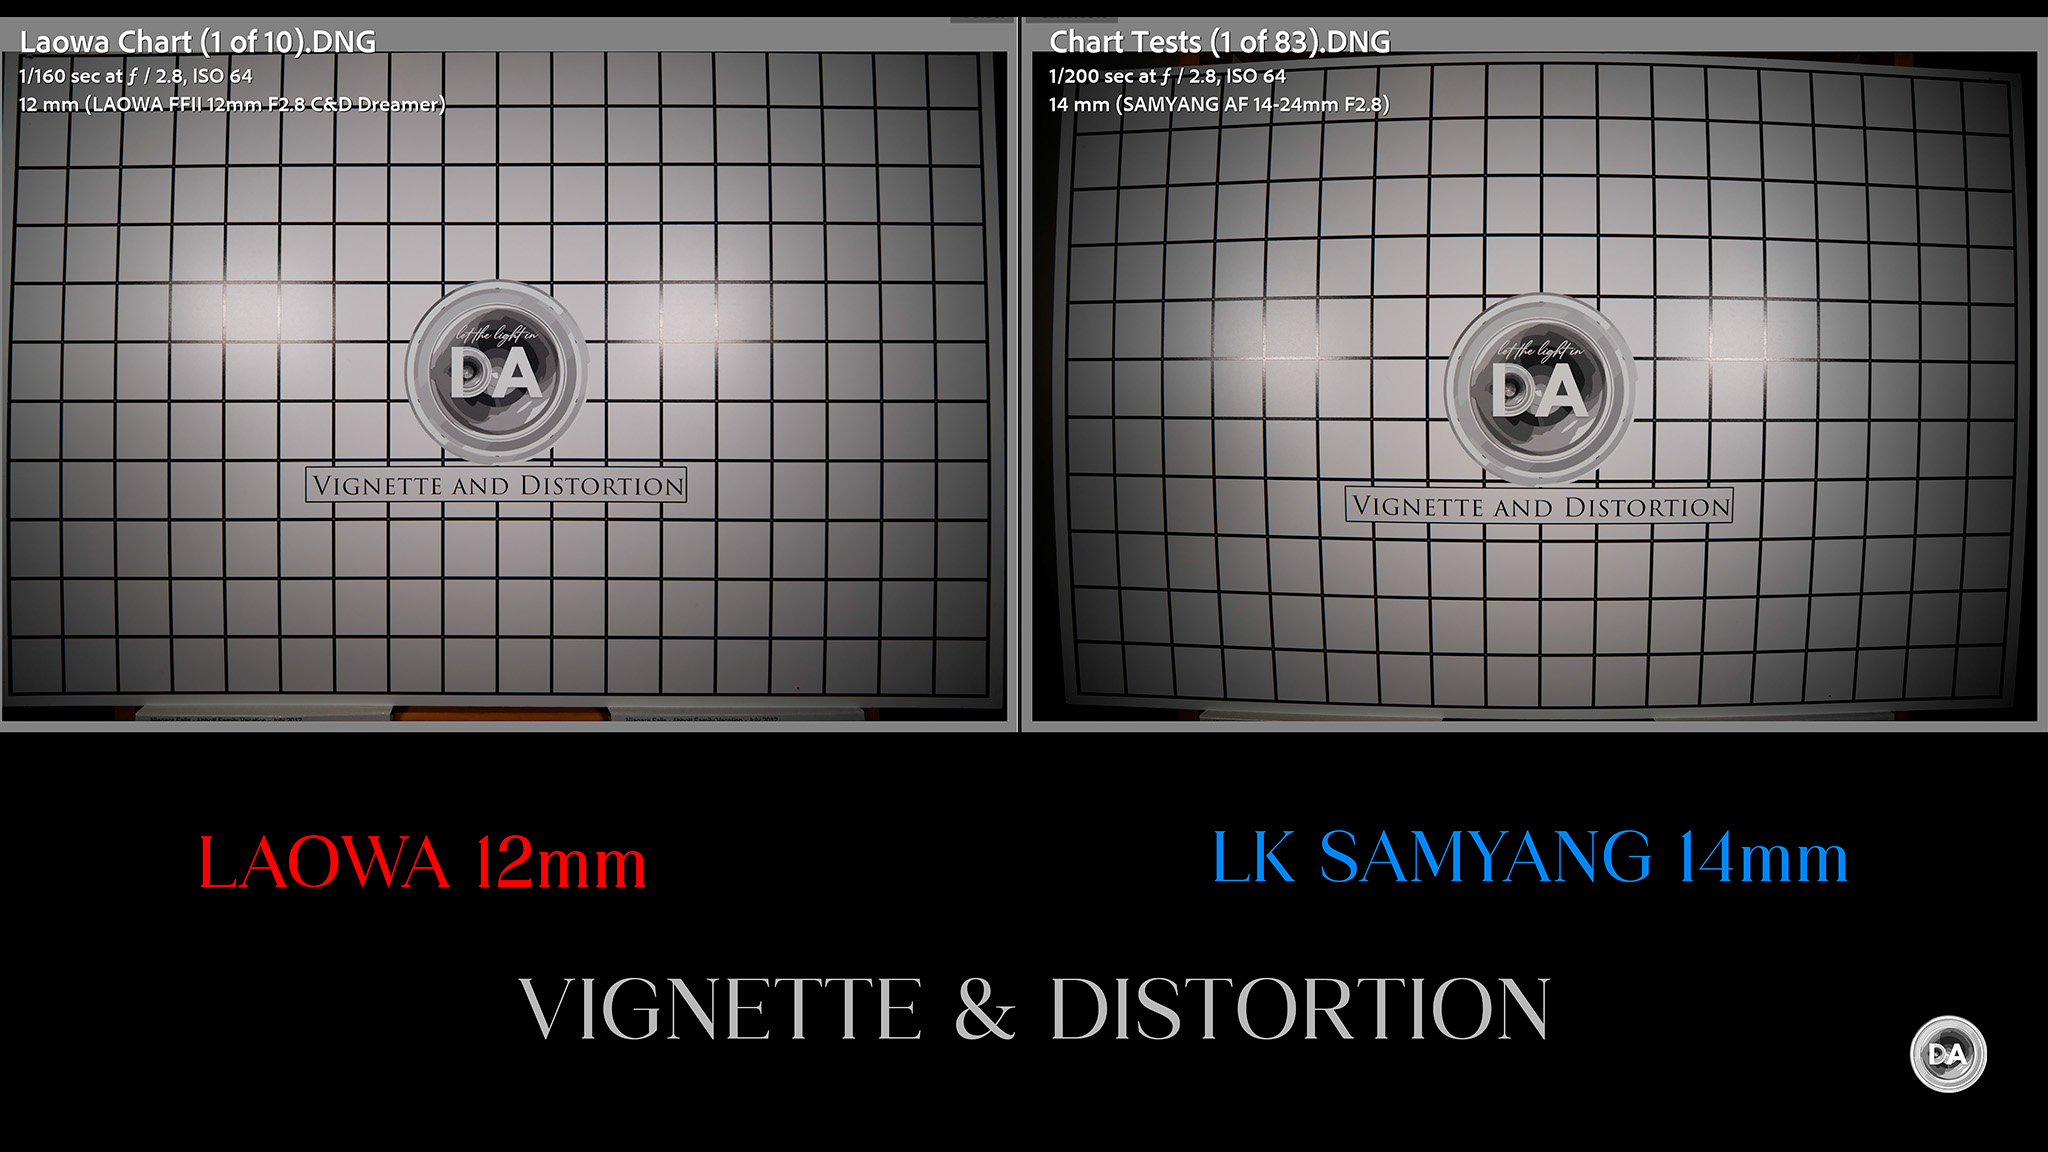
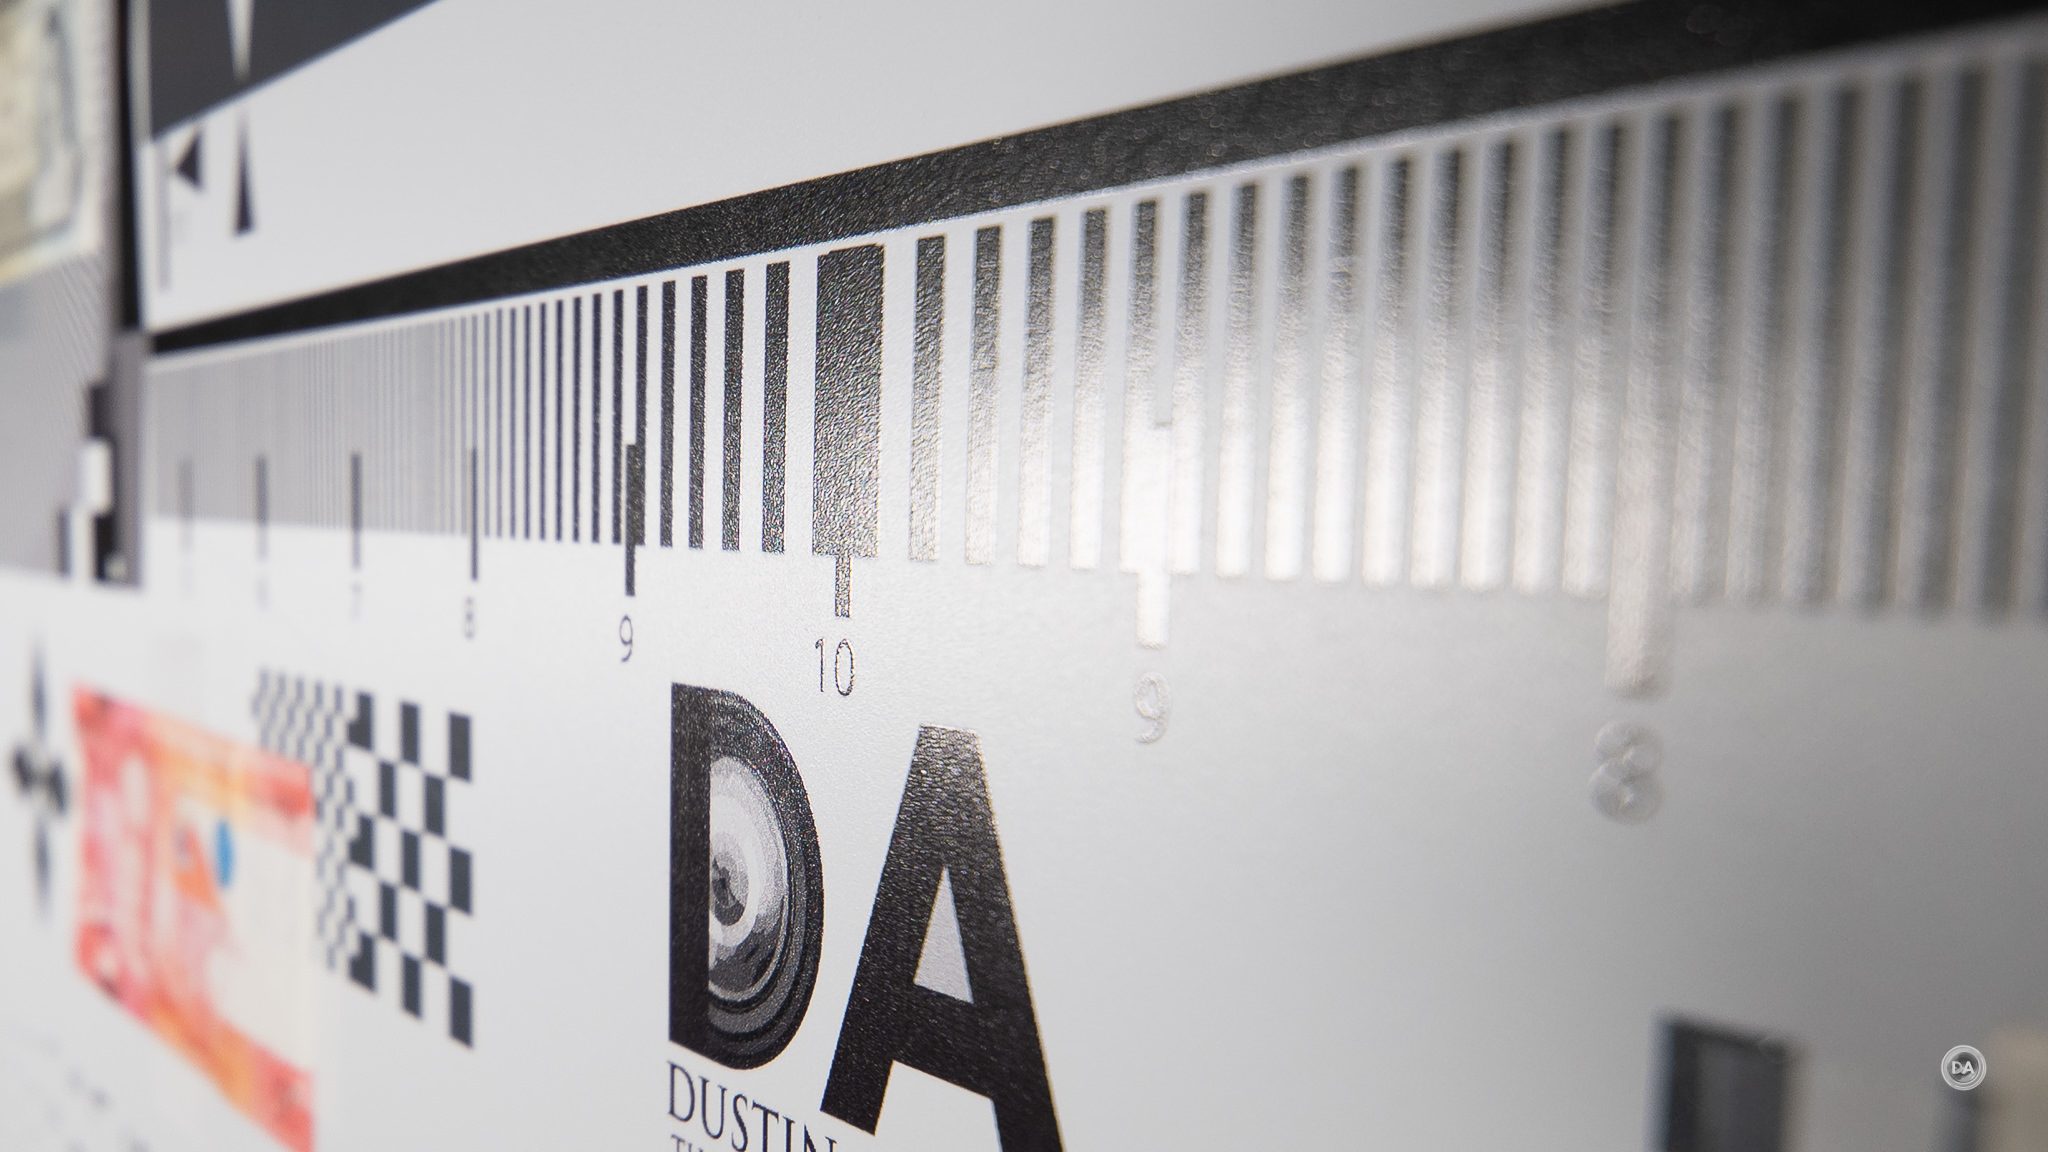
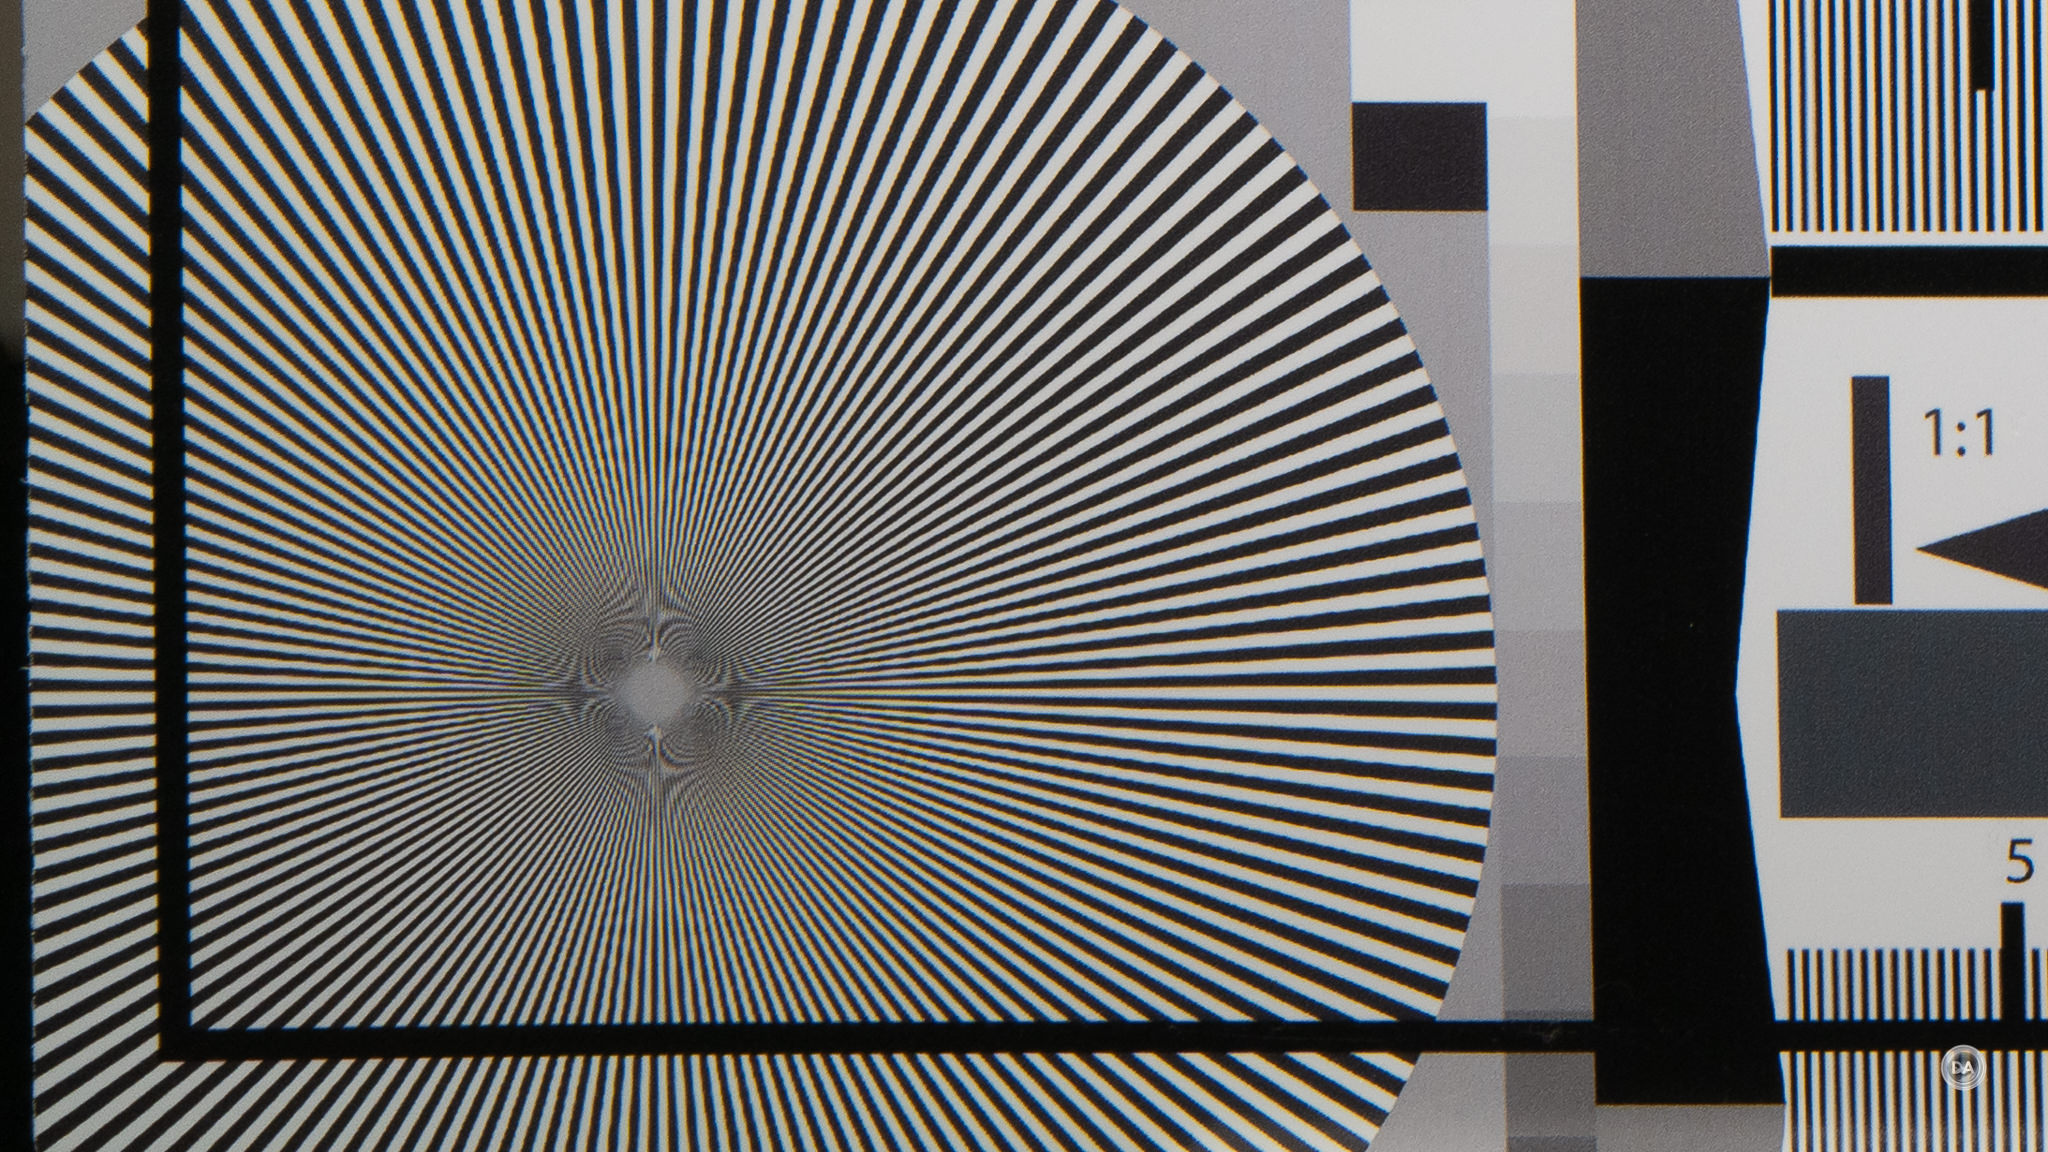
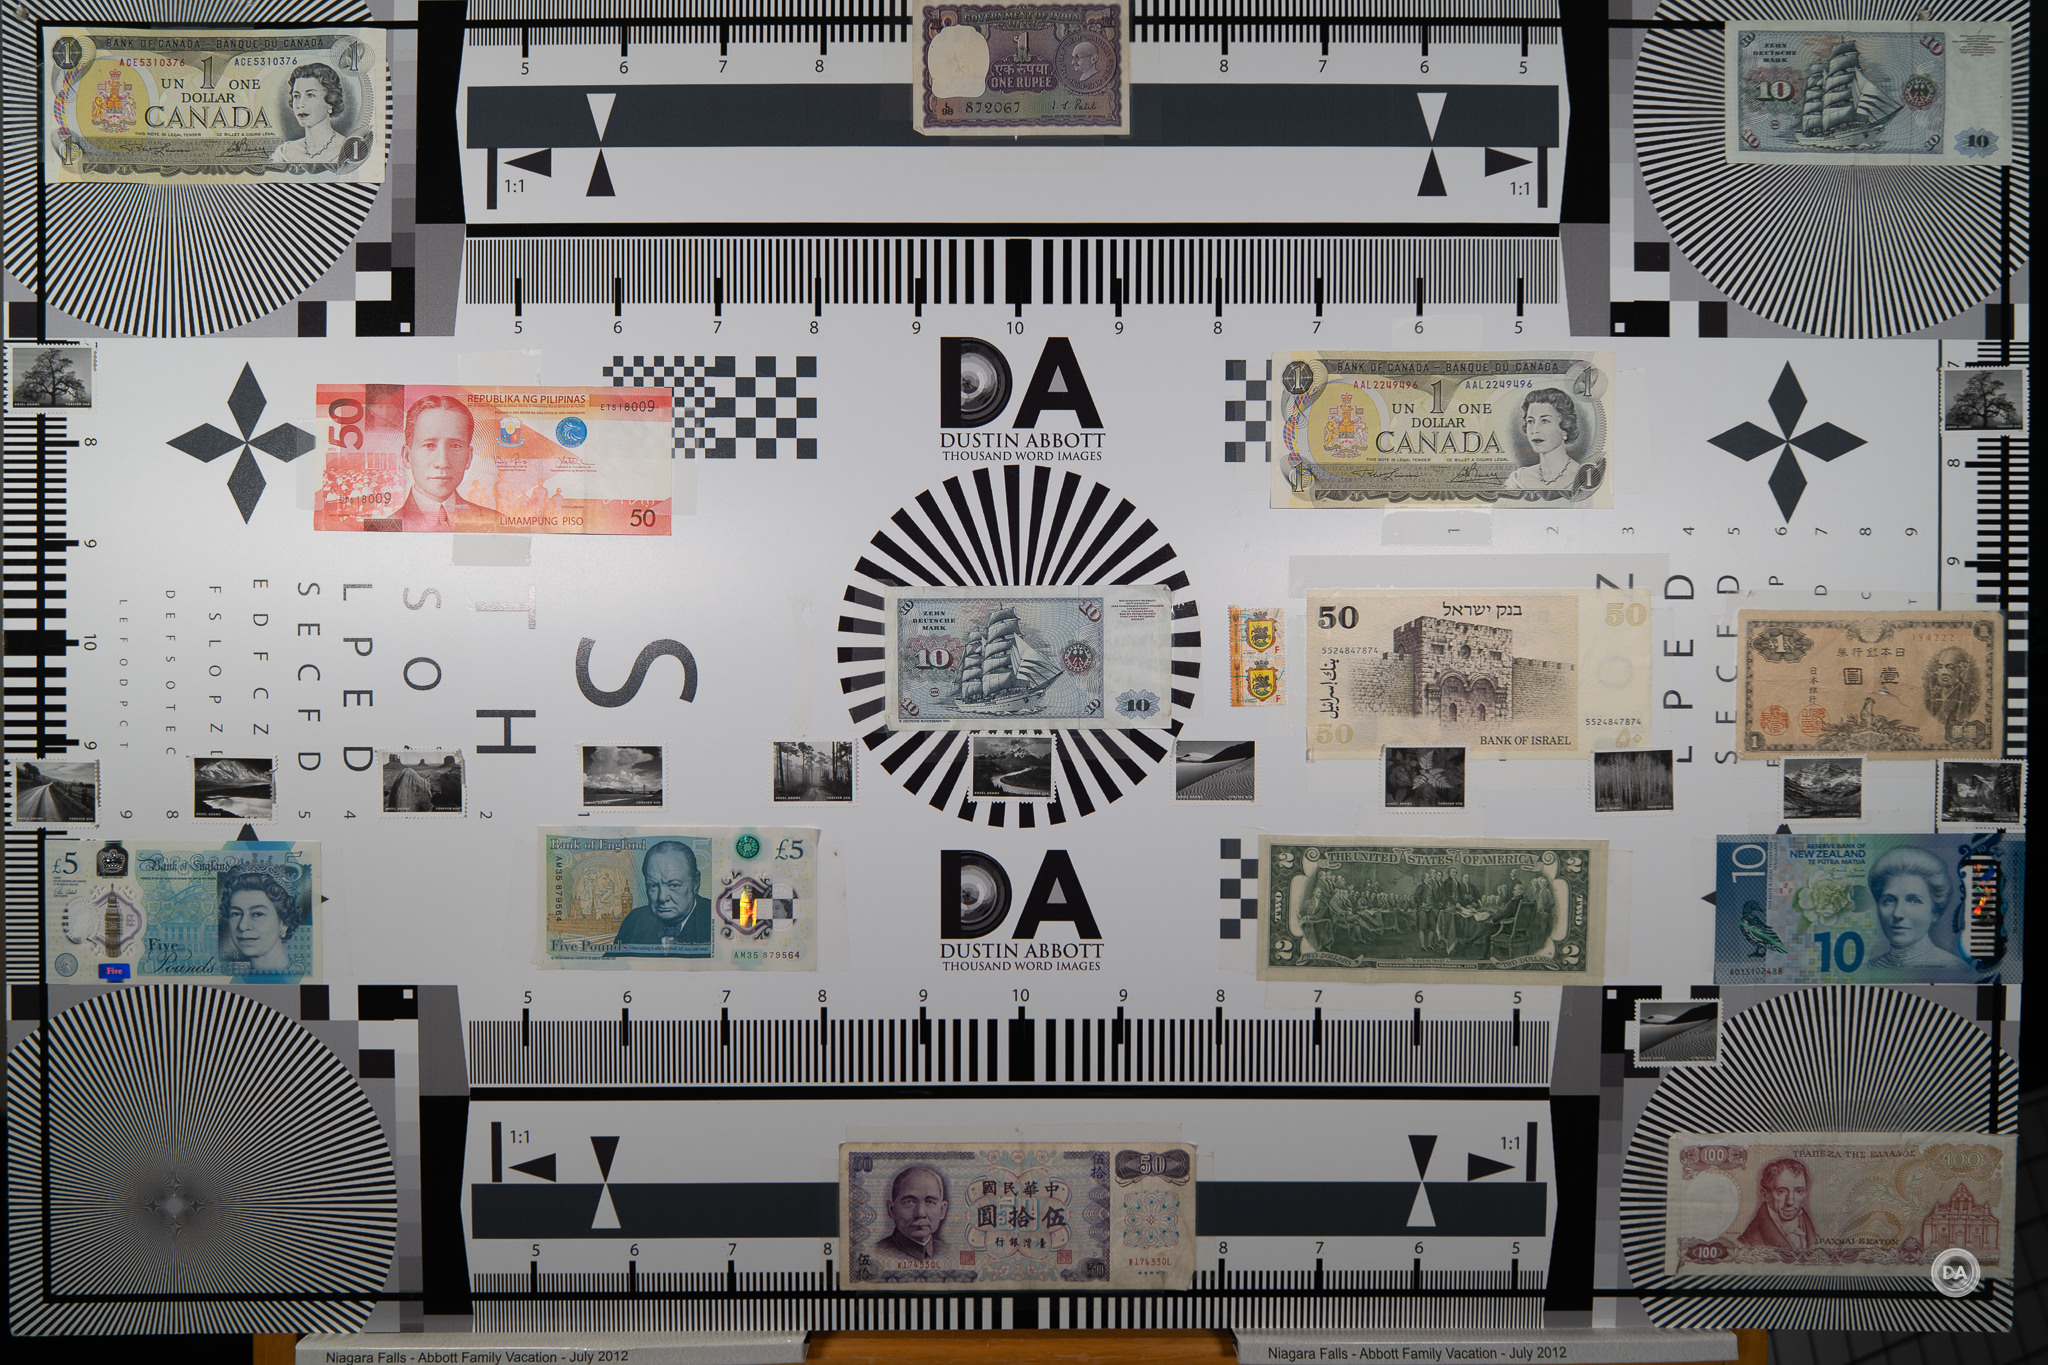
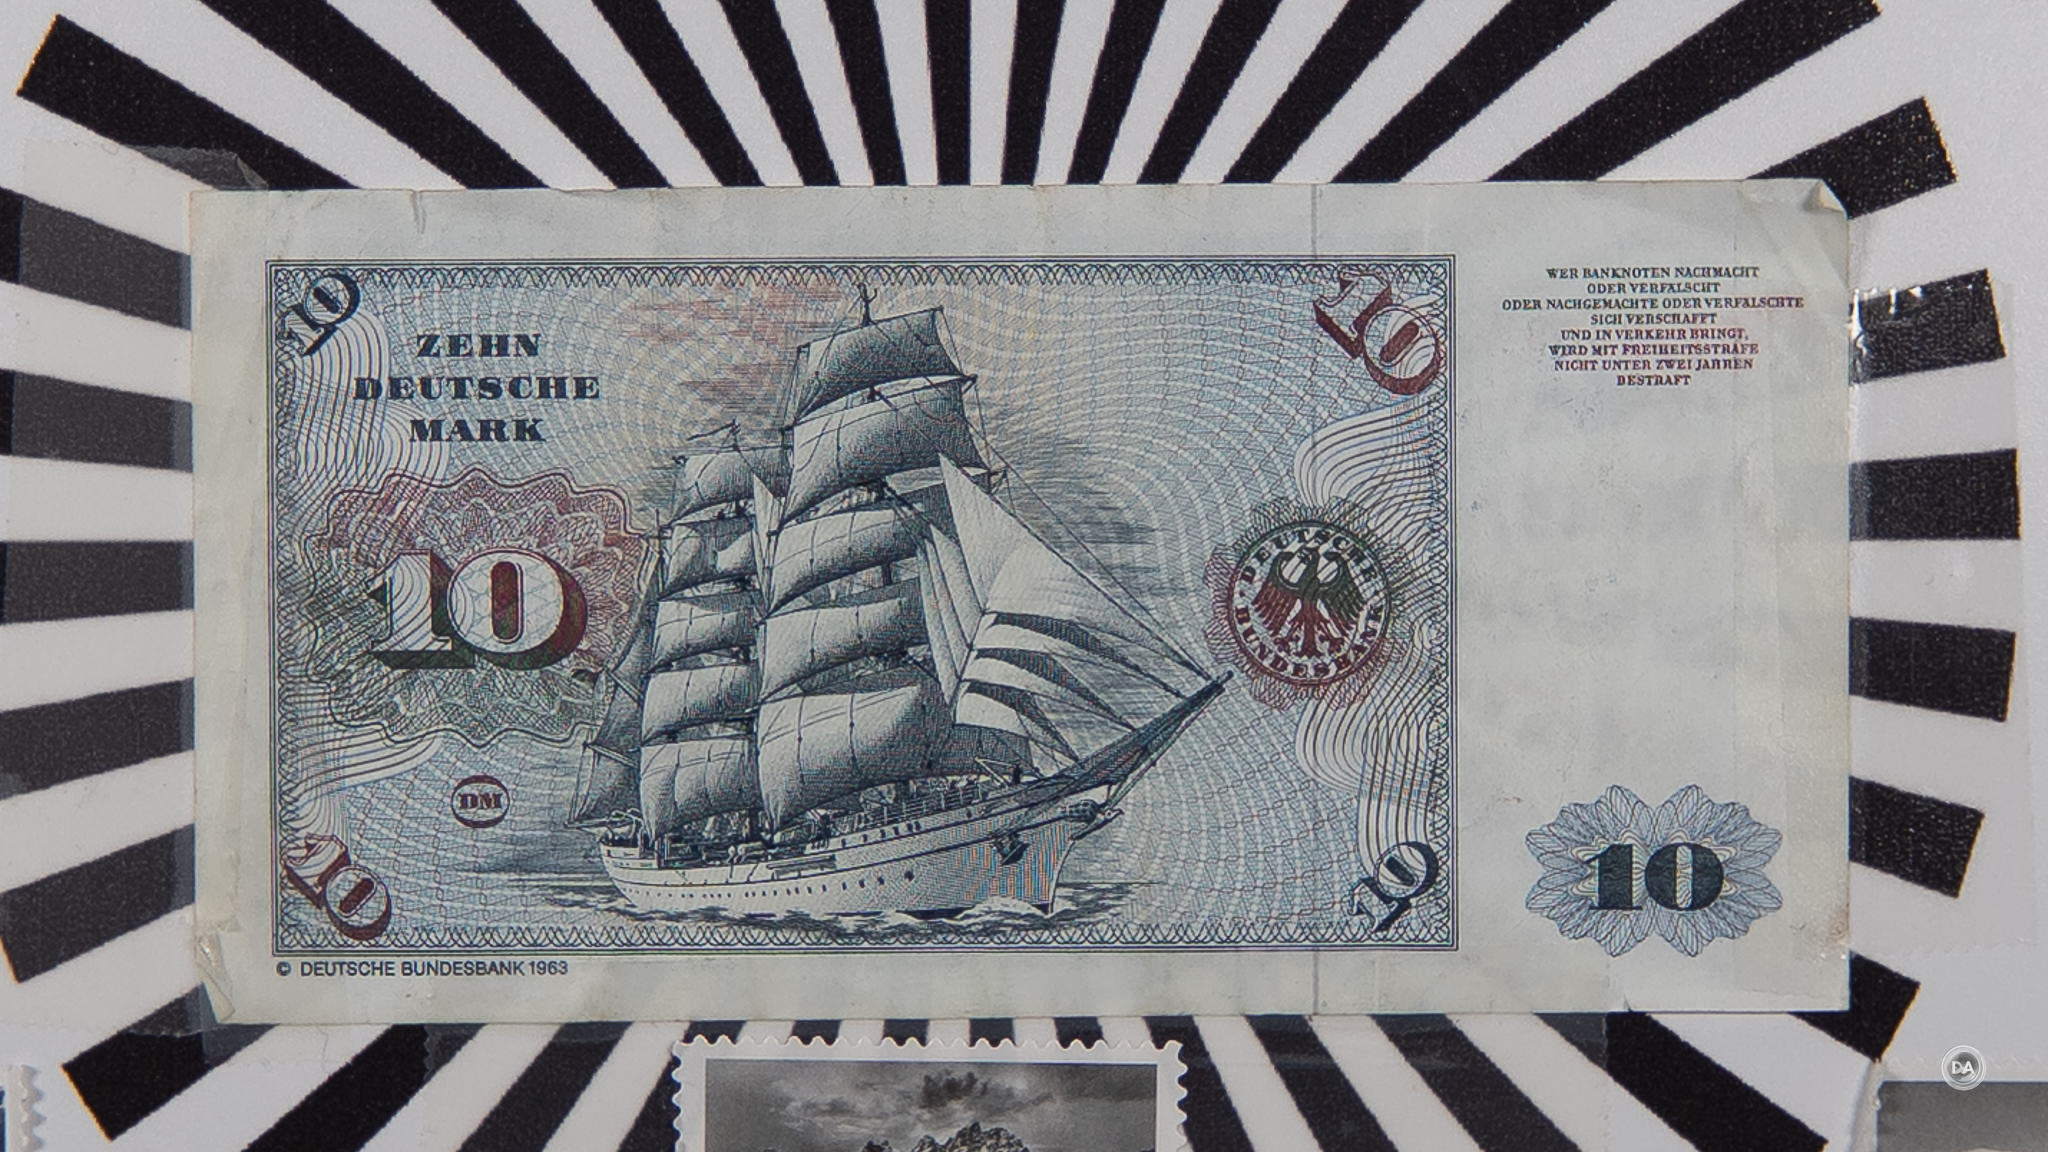


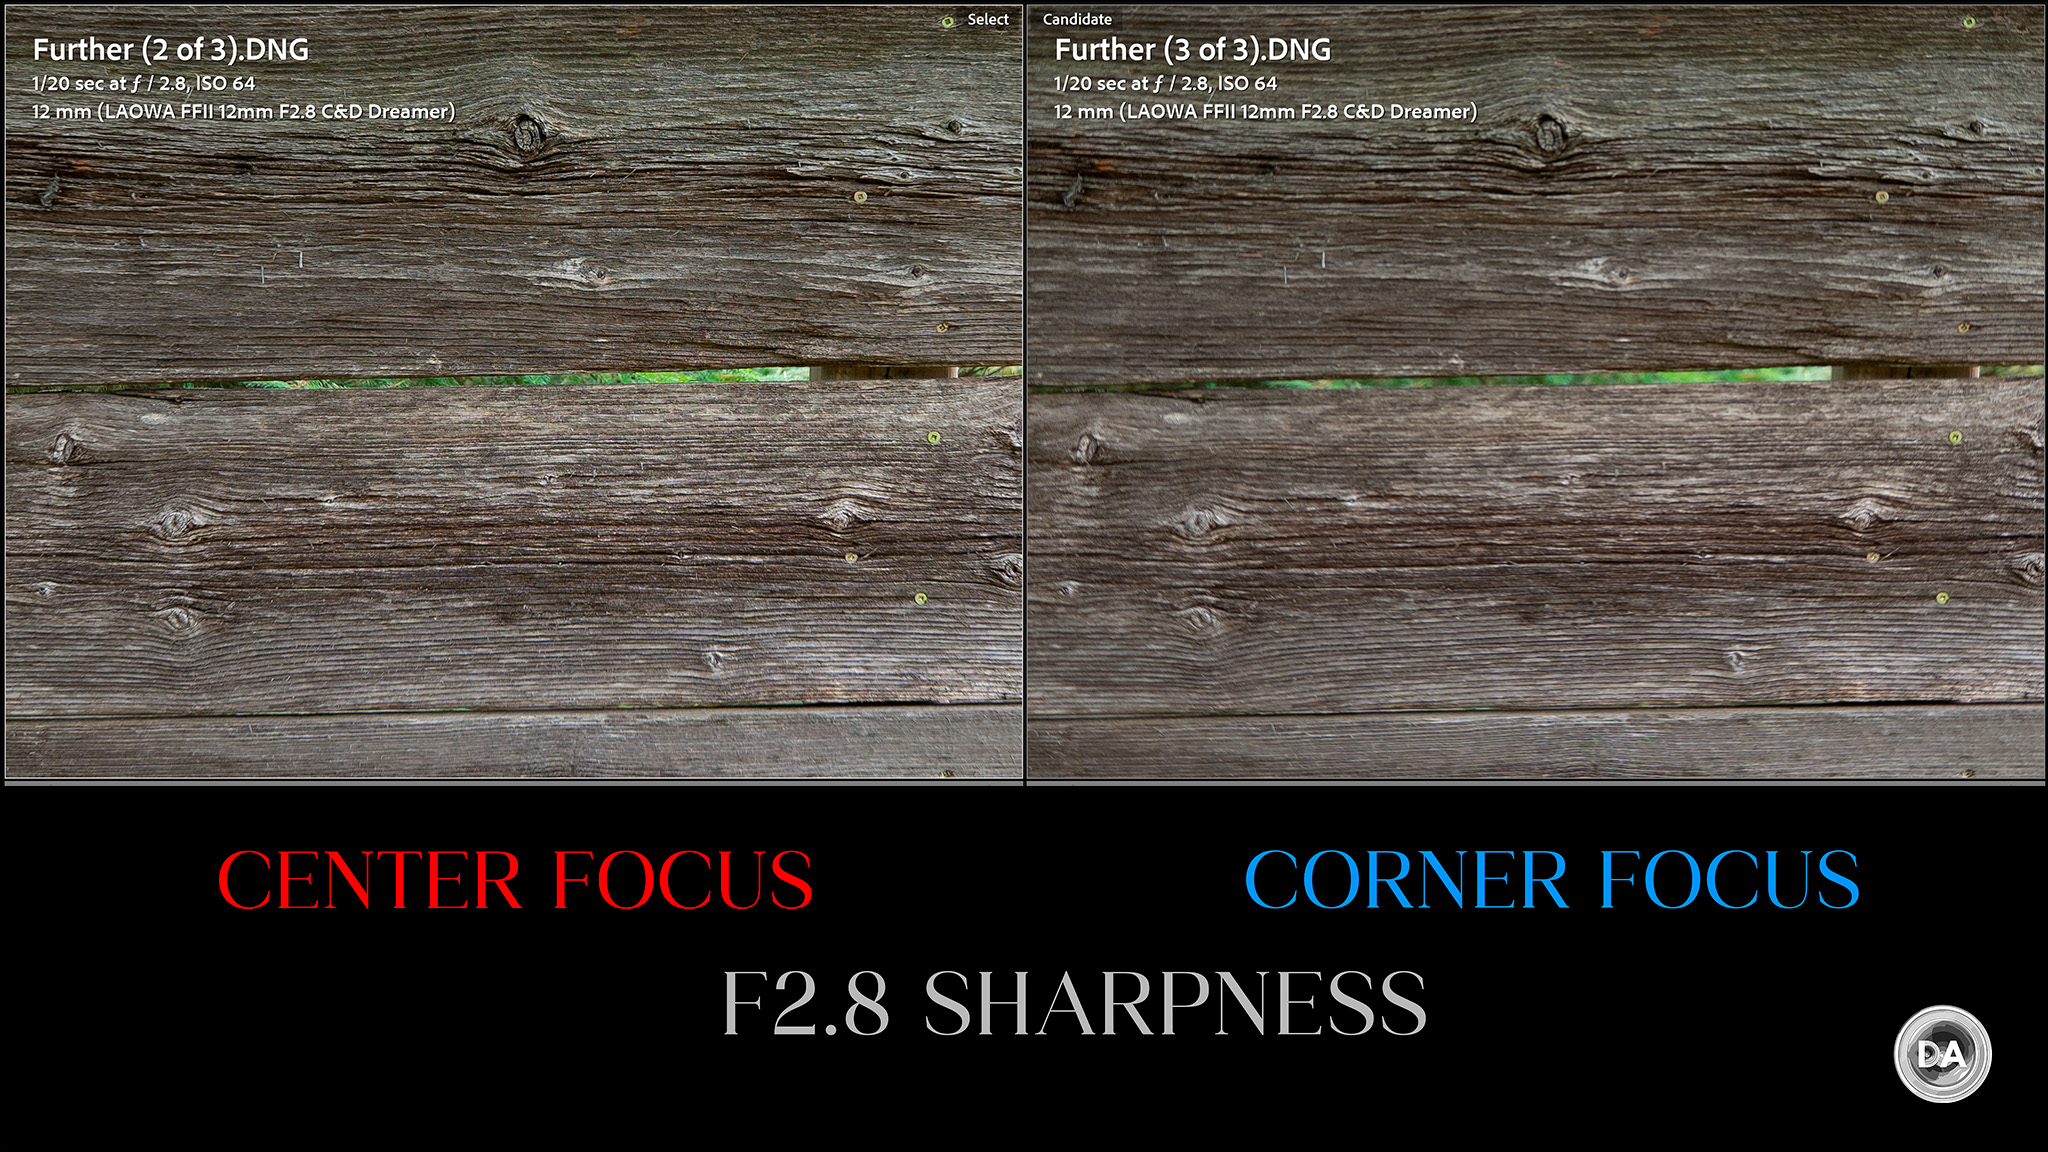
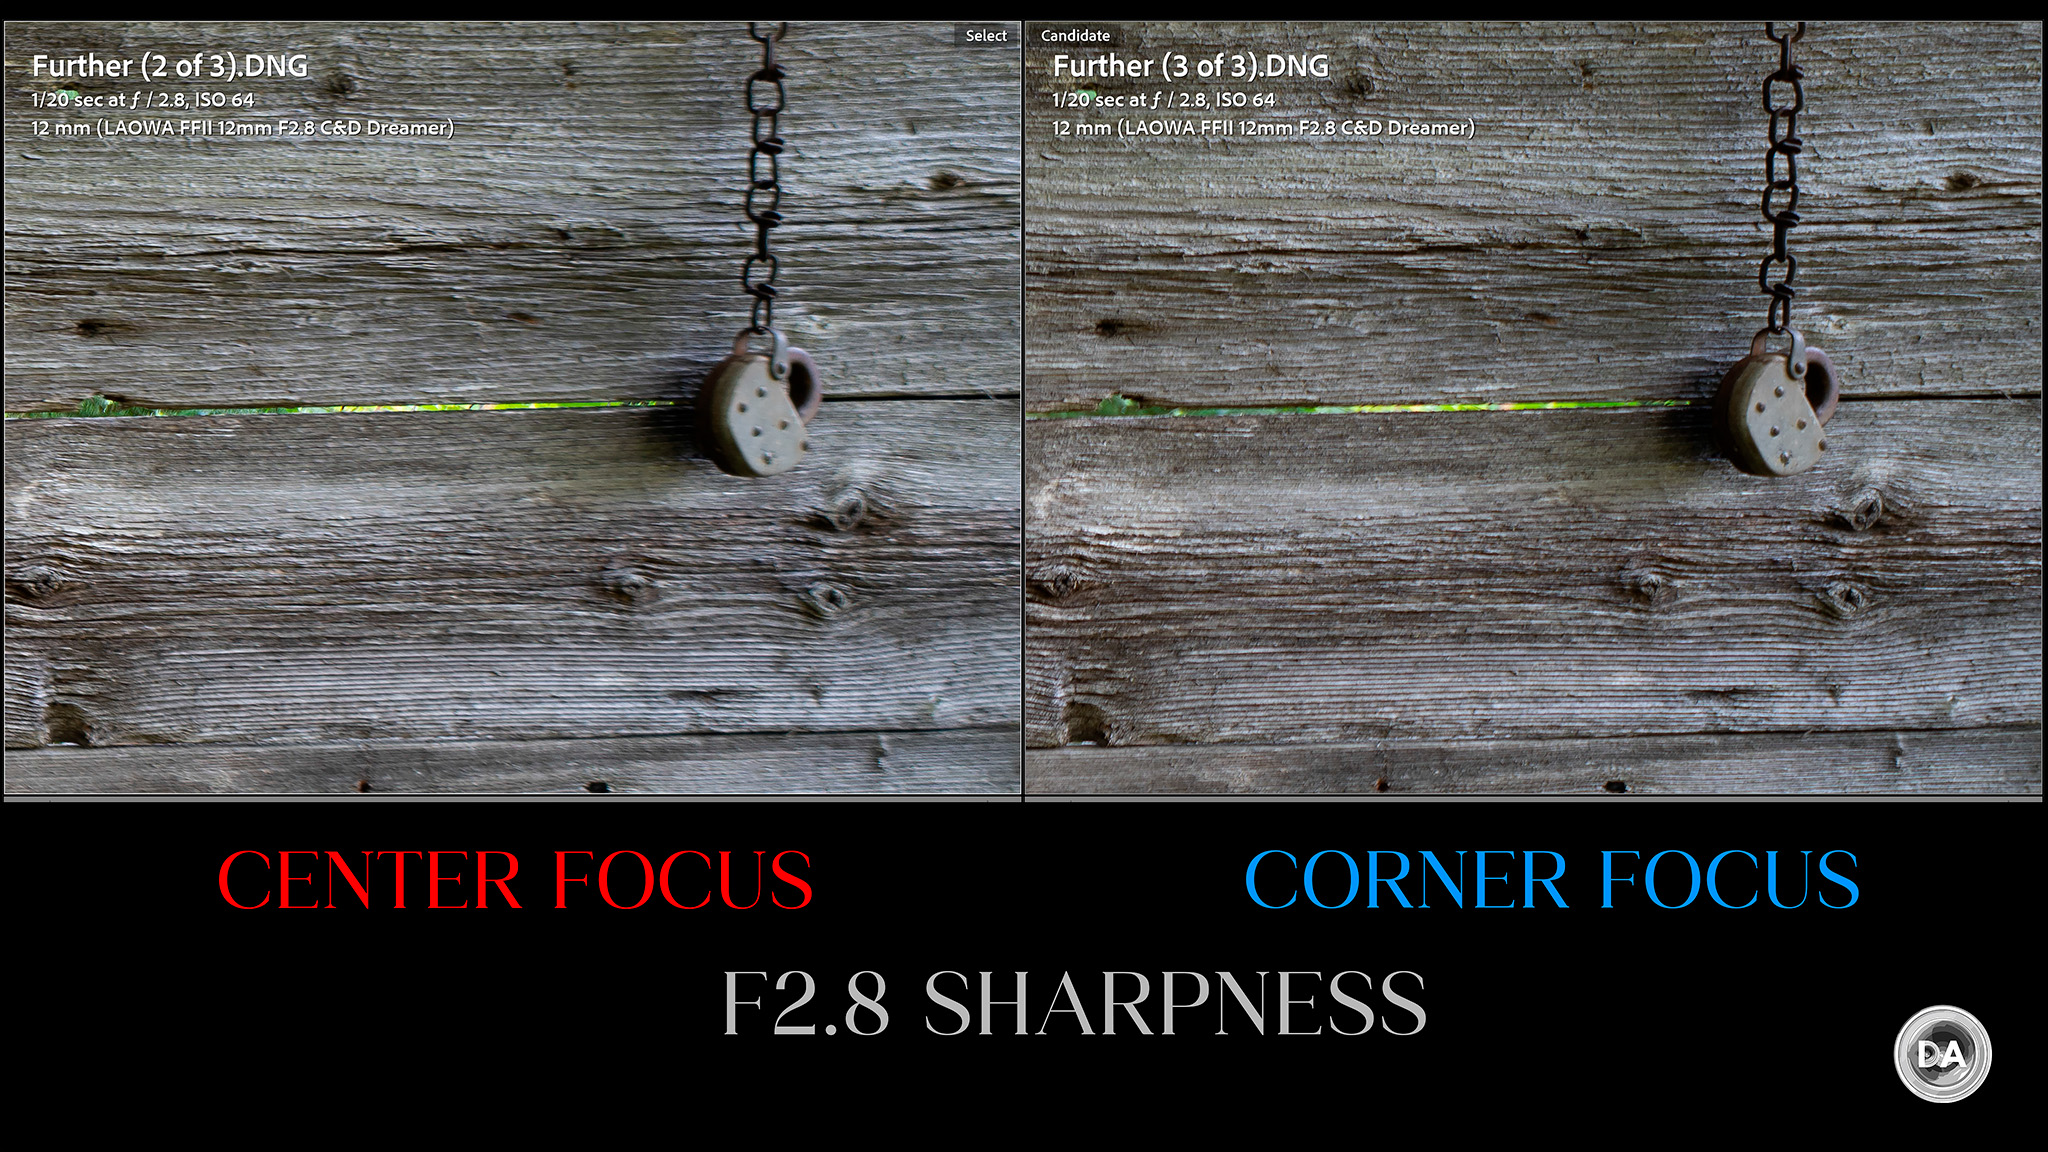

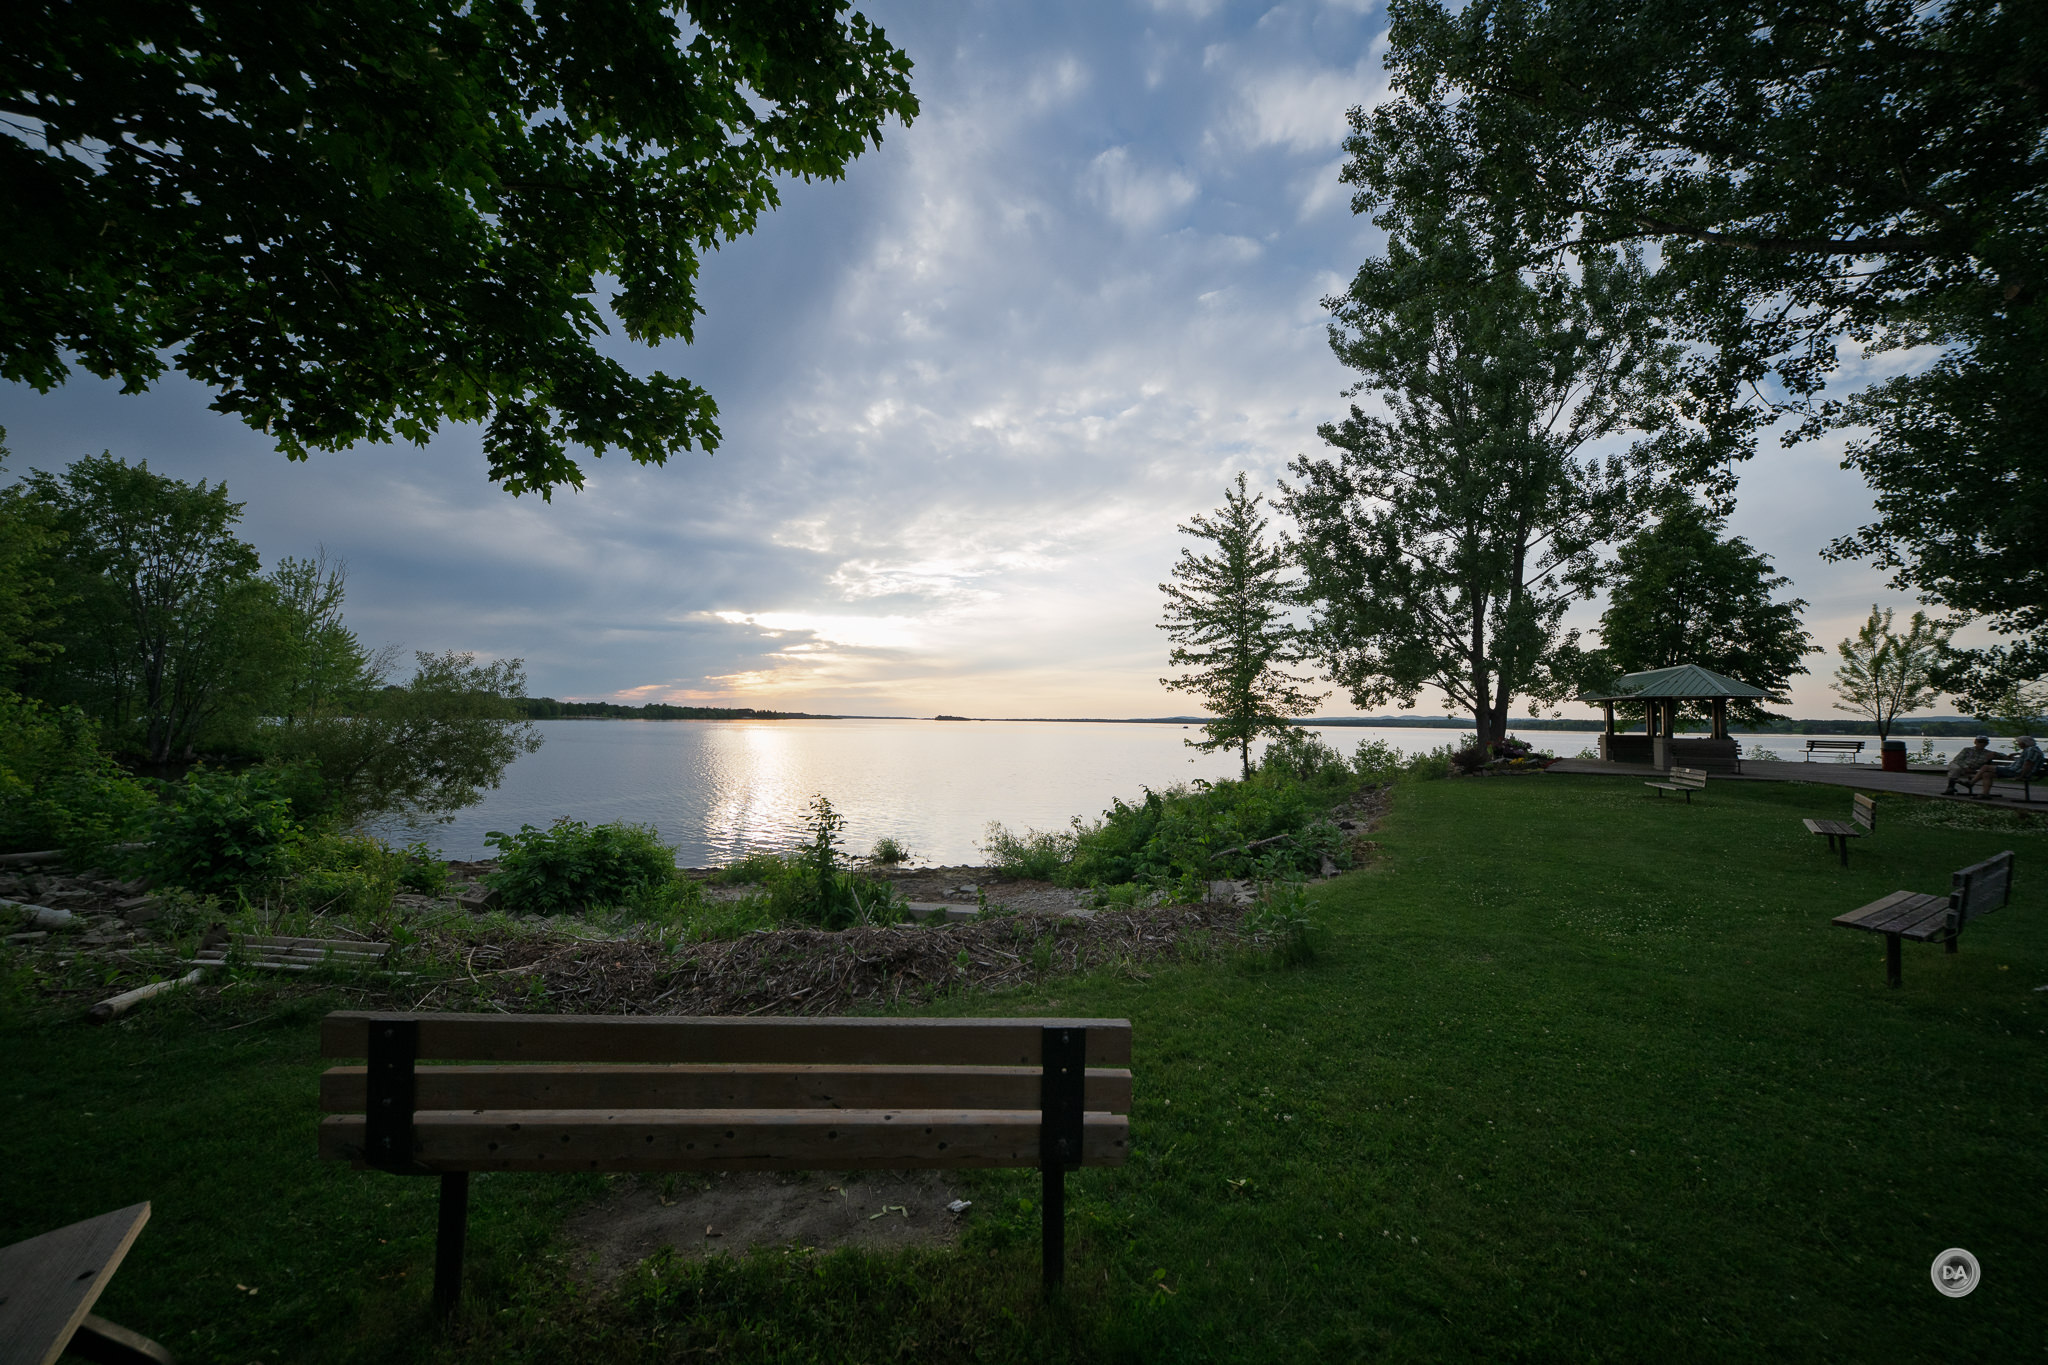

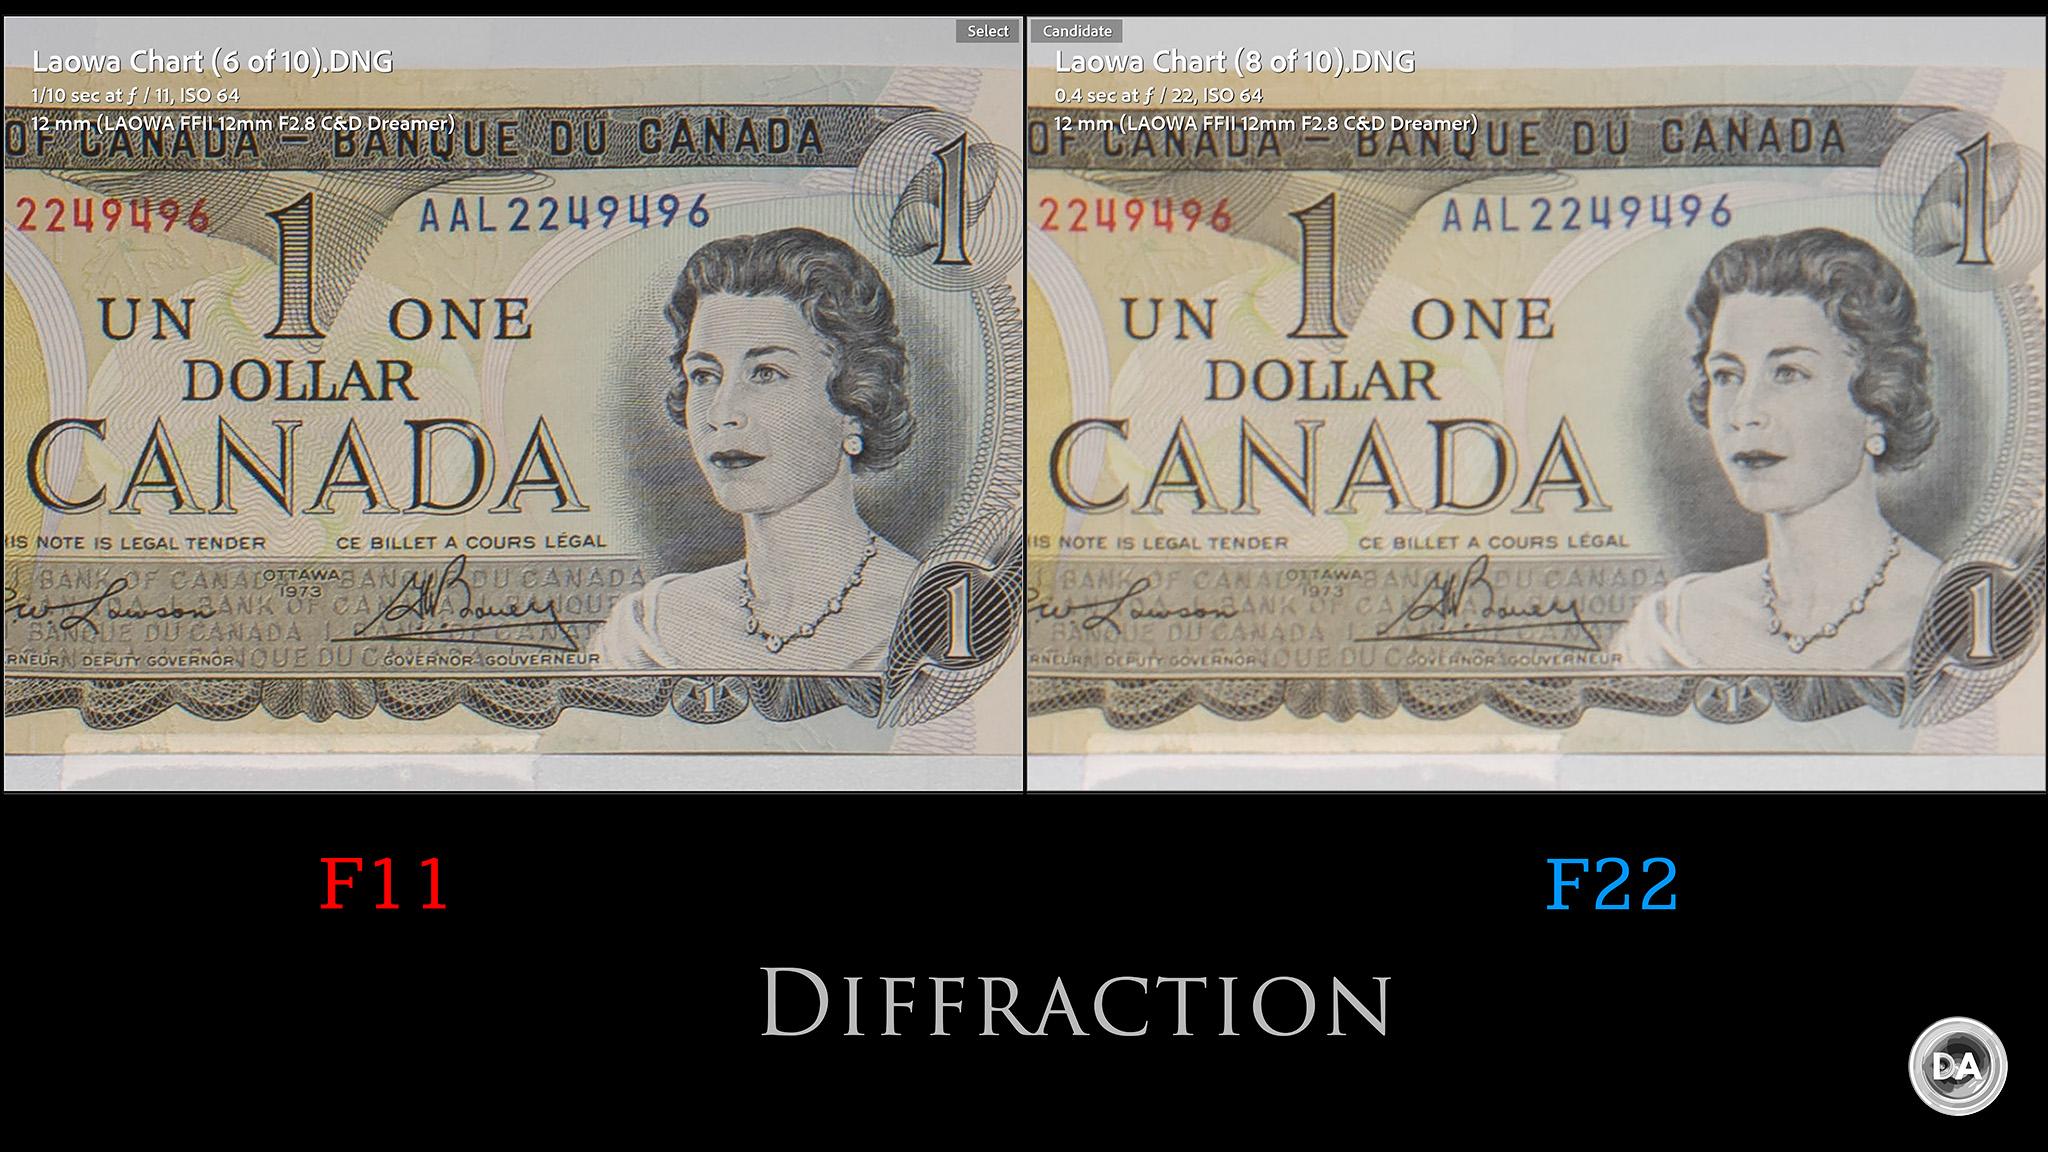
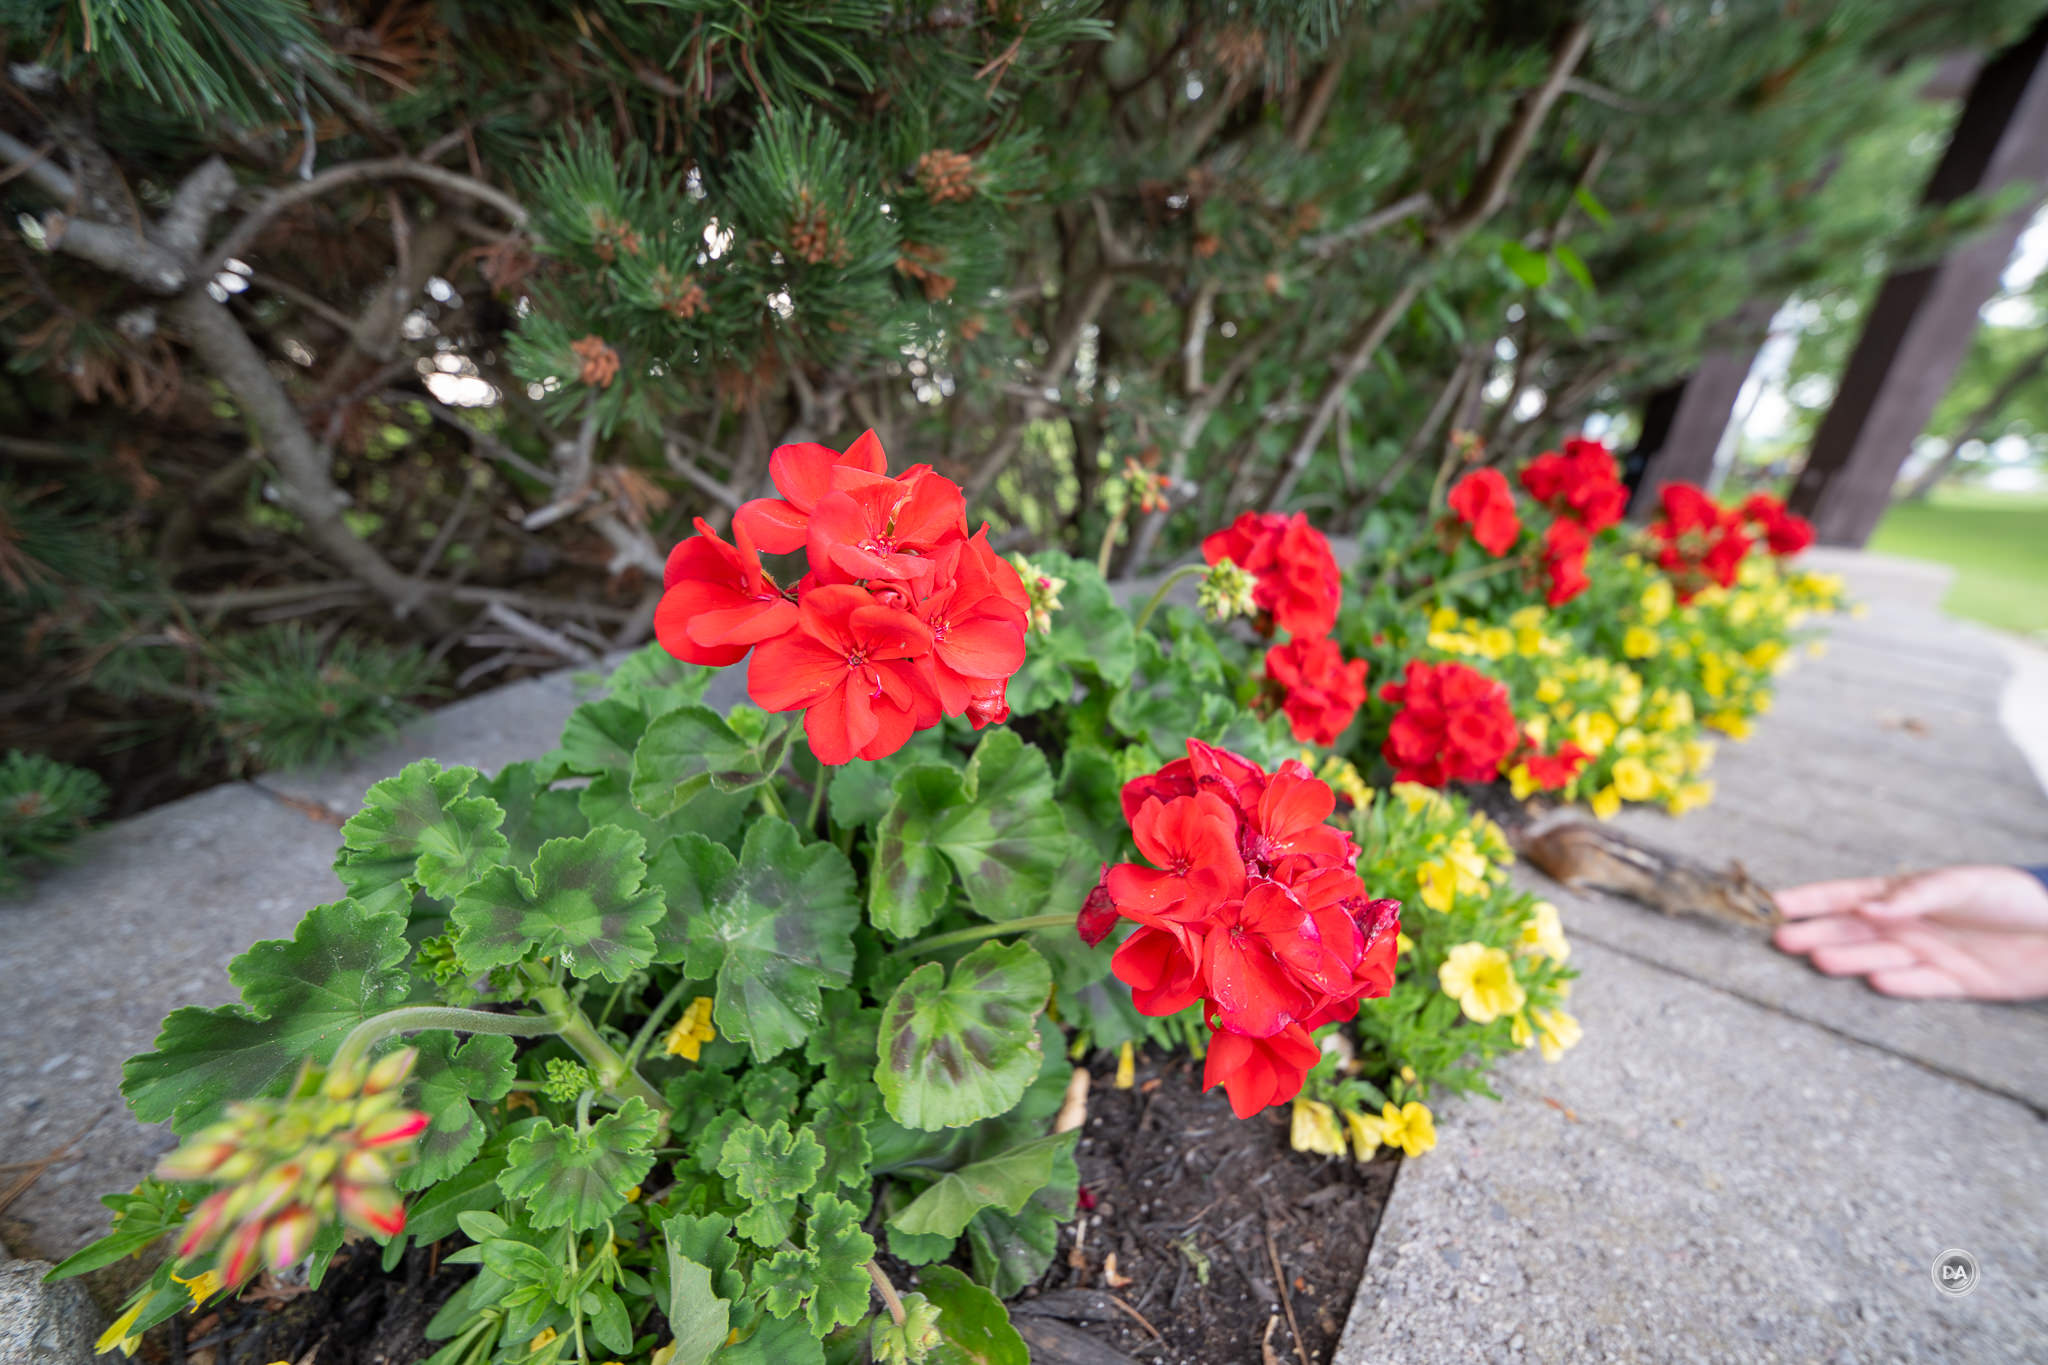
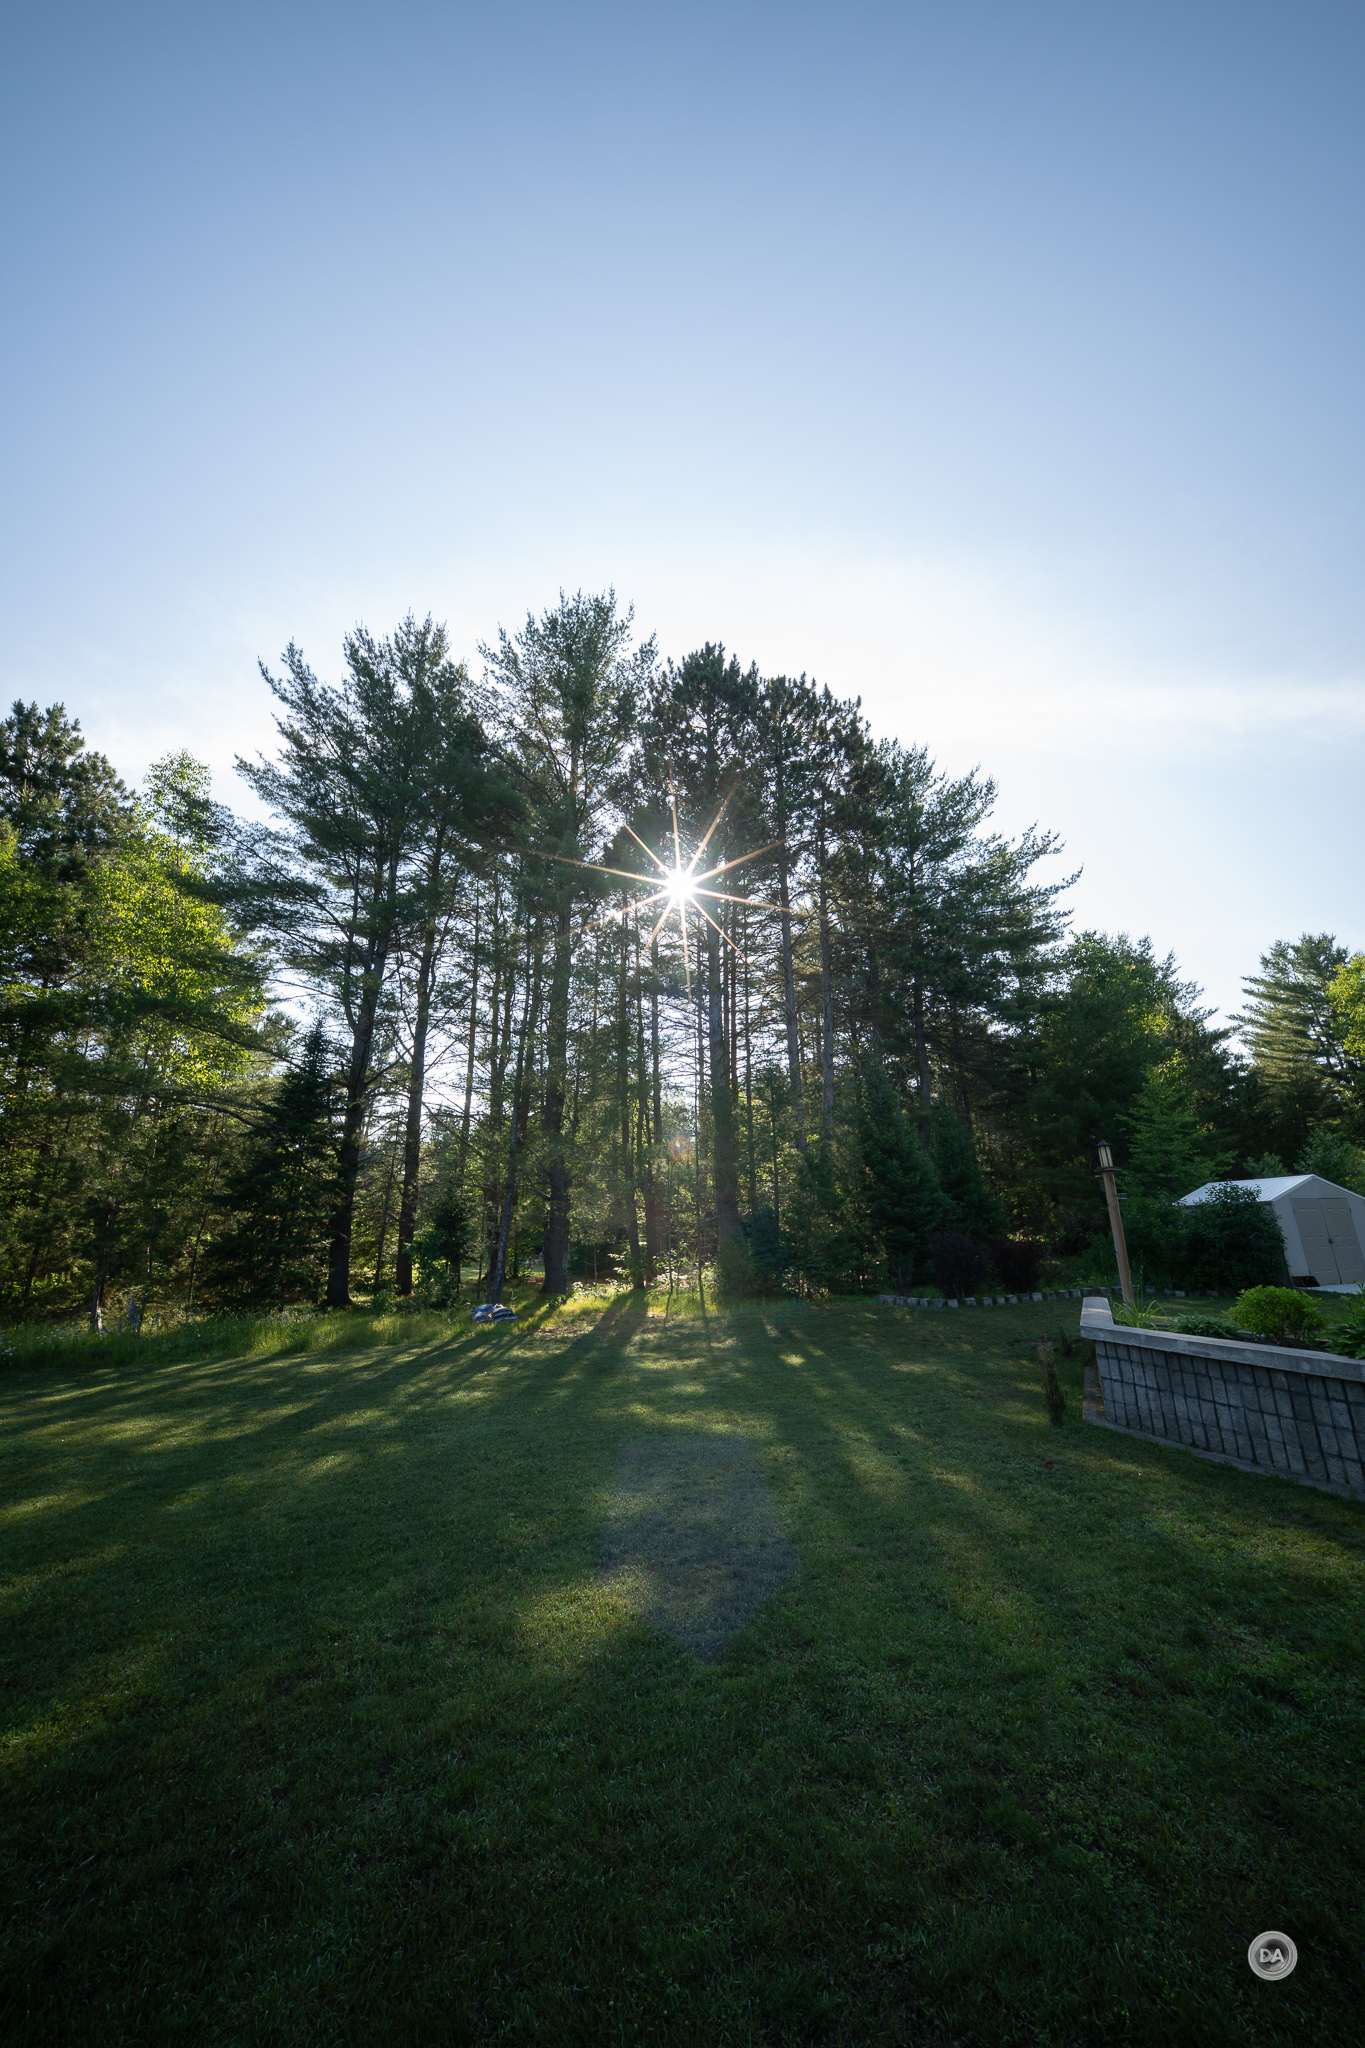


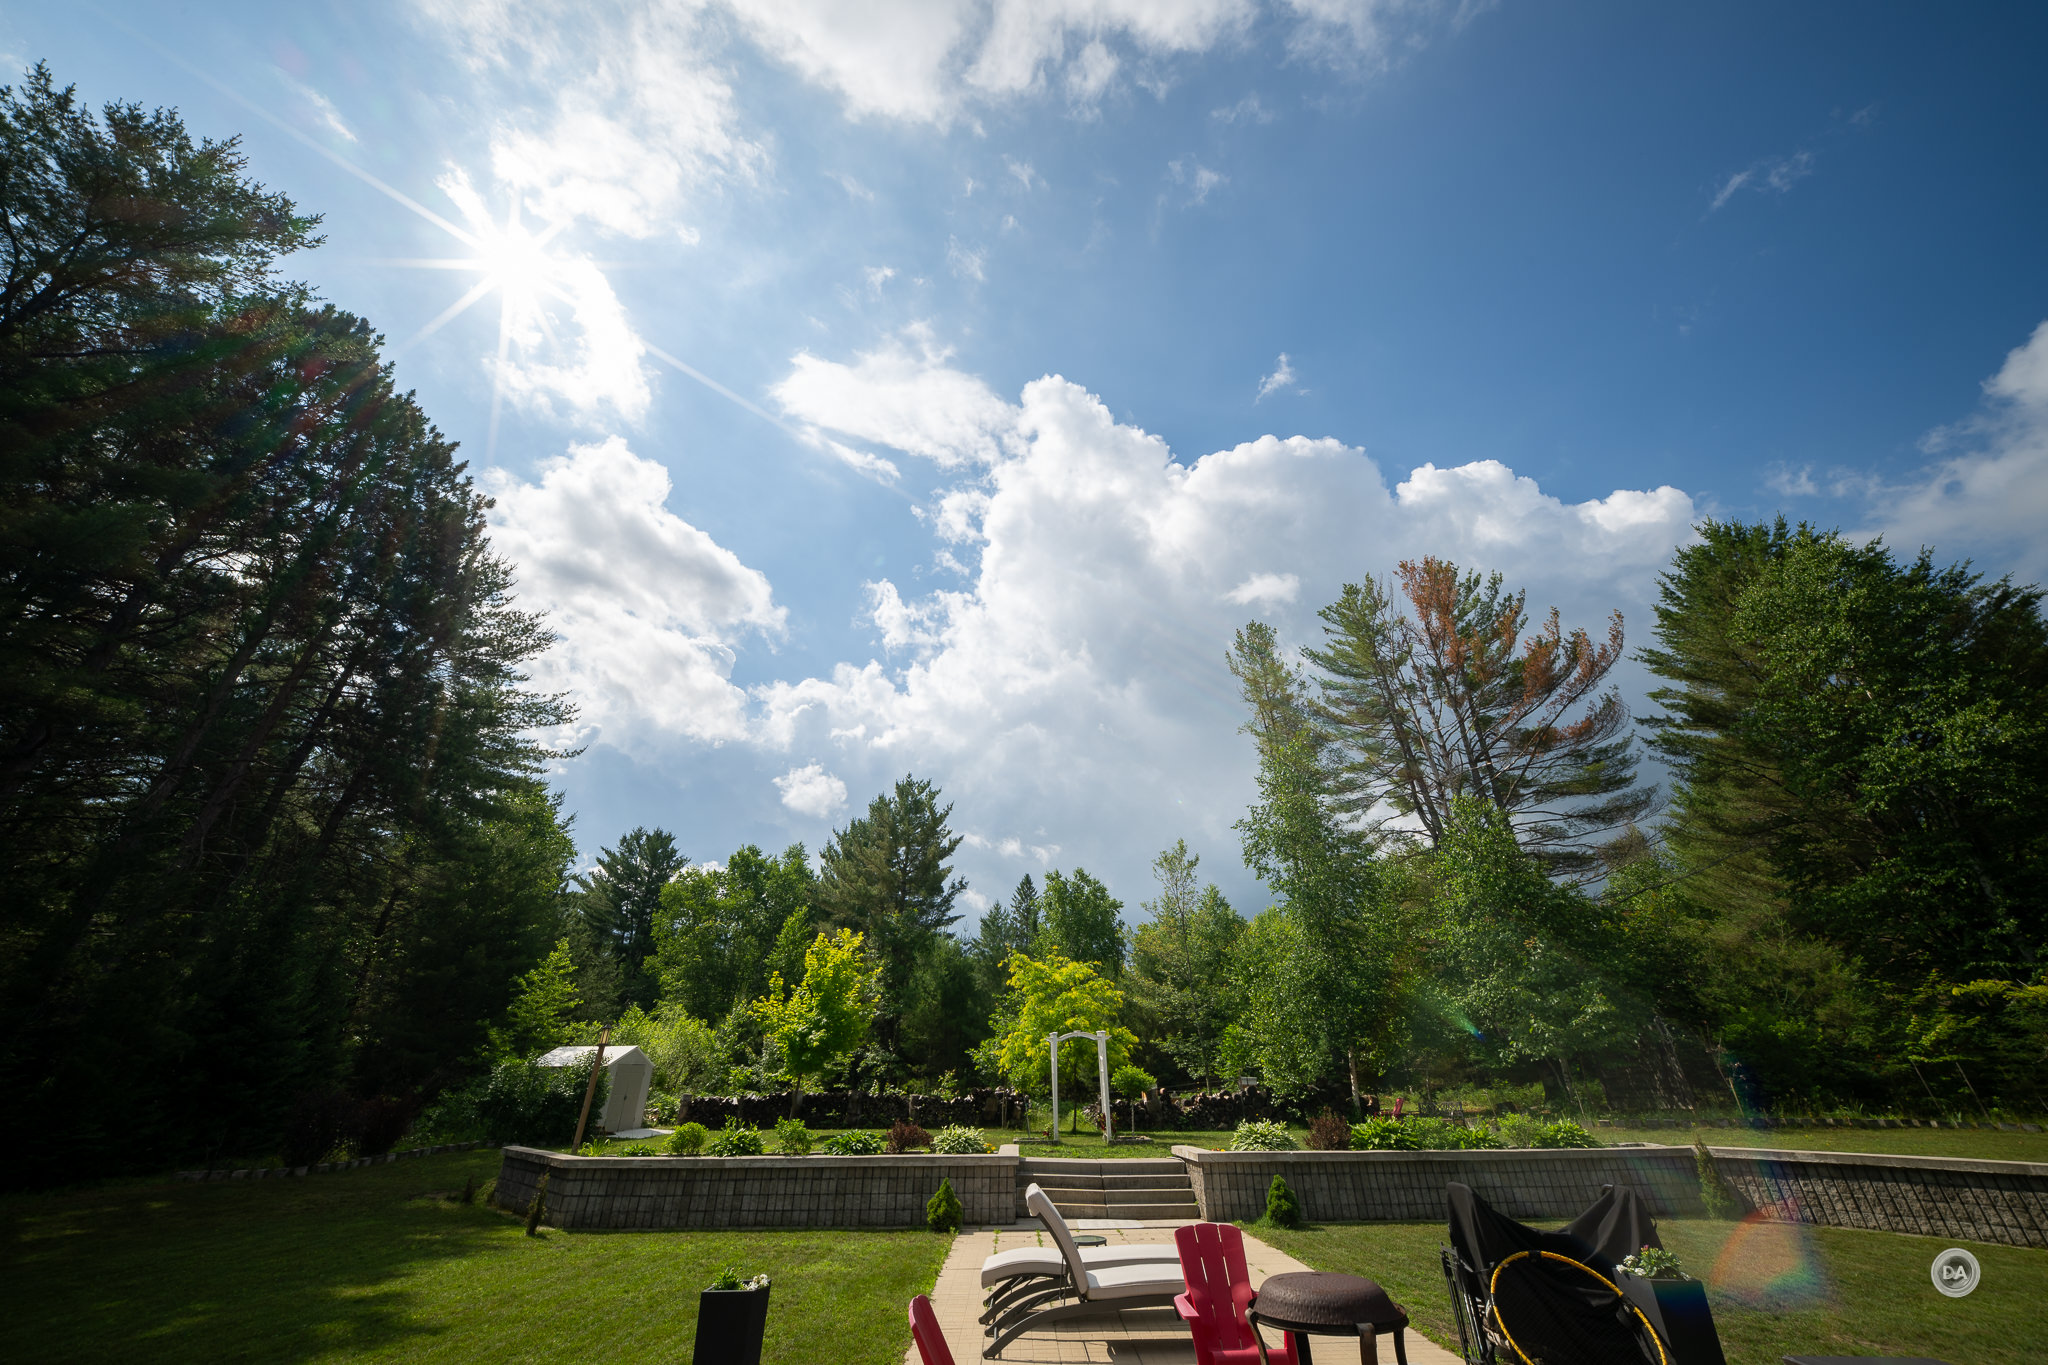
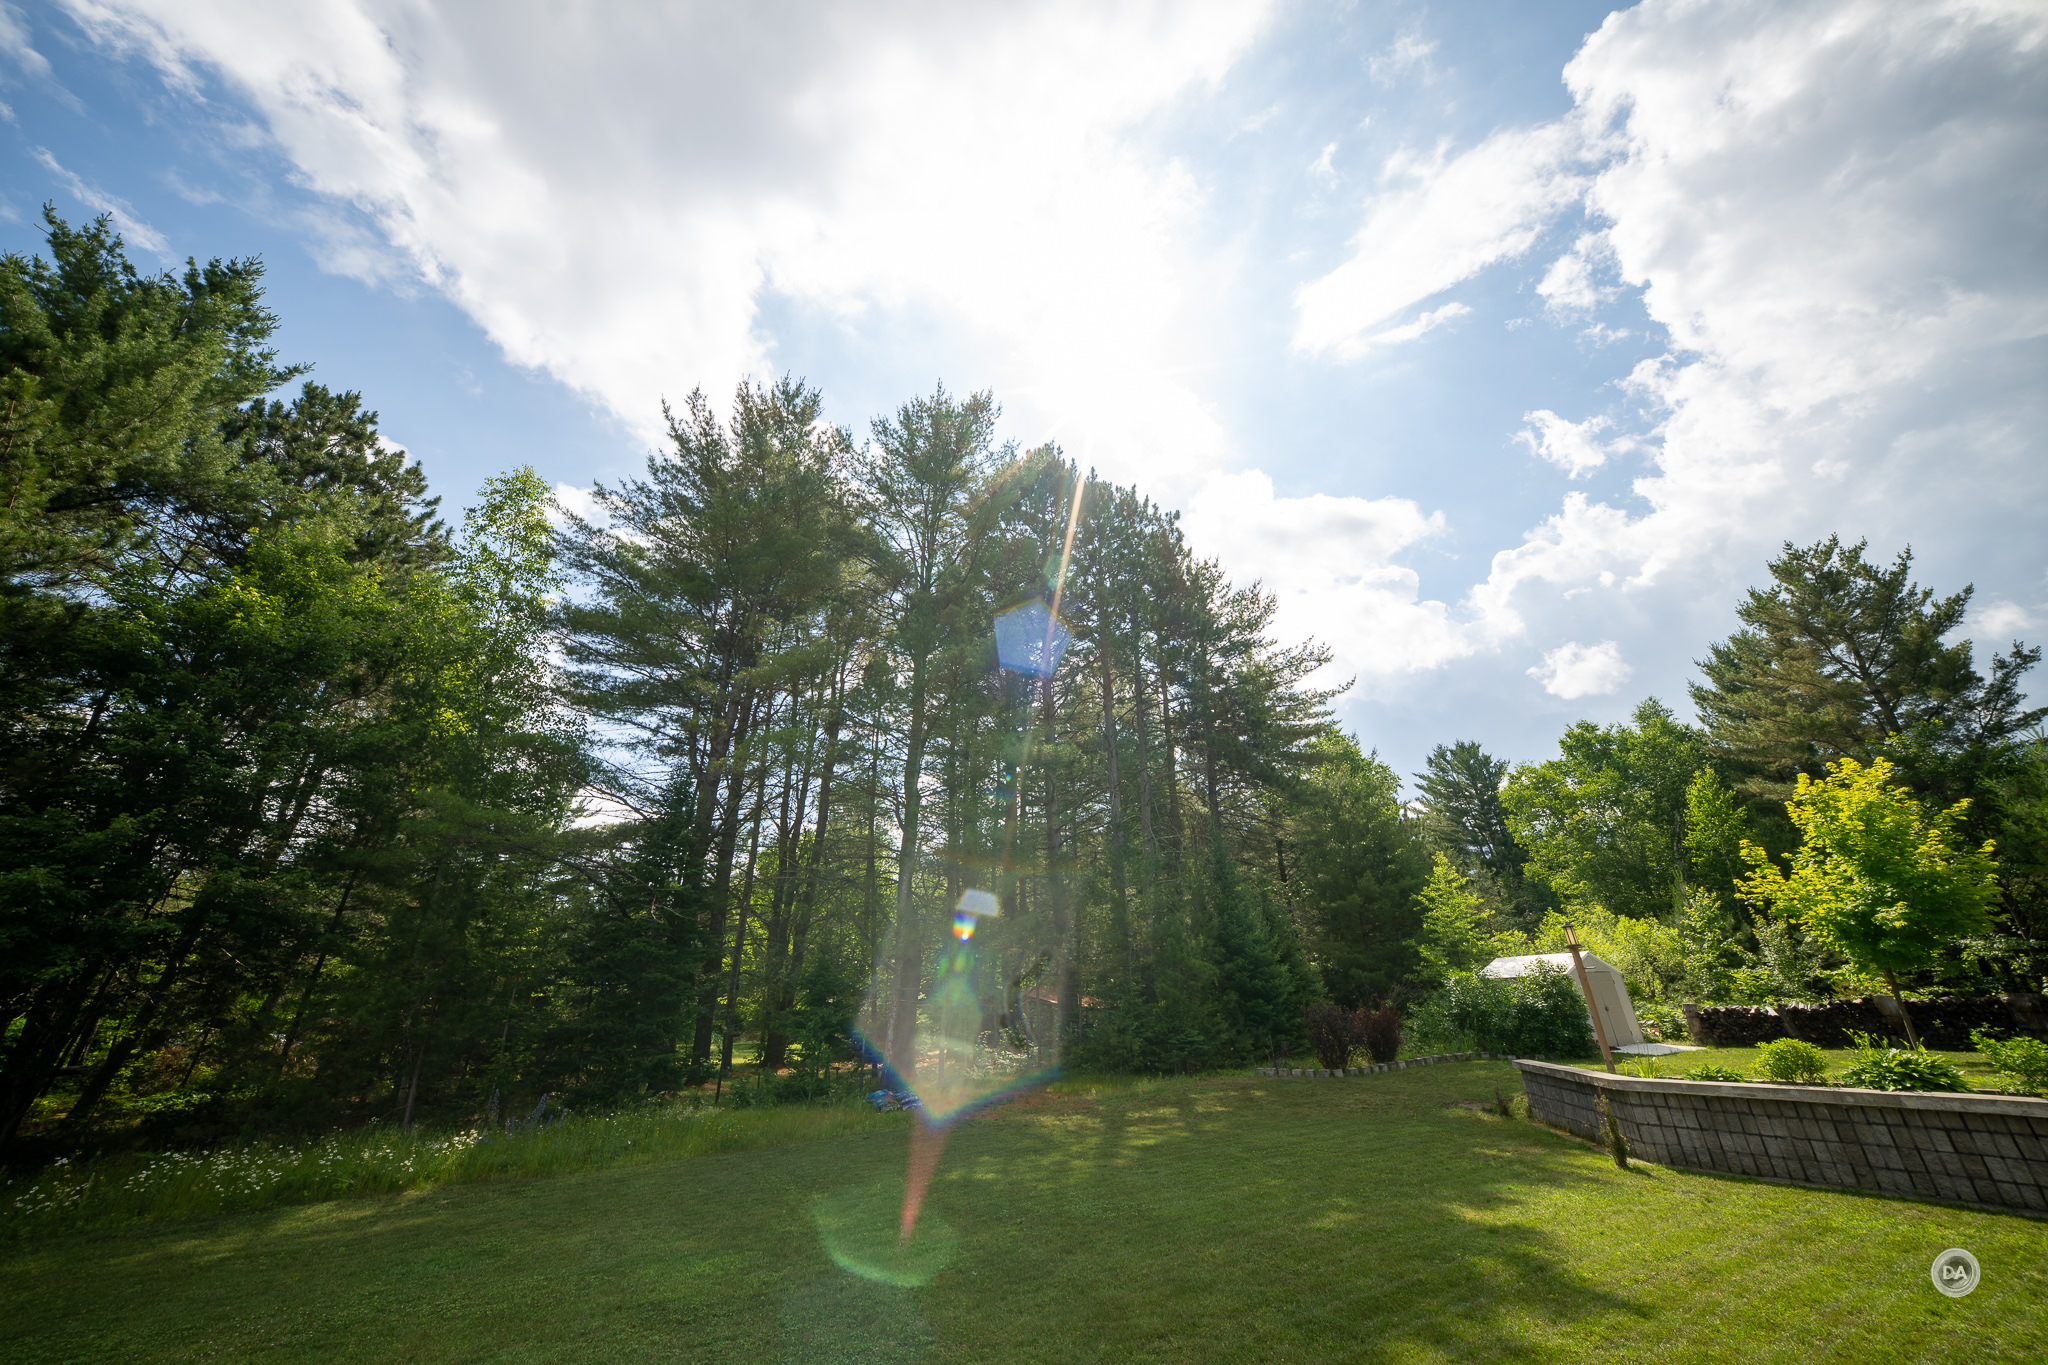
 GOOVIS ART Head Mounted Display Review