What do people want in a small, portable camera? A fixed prime lens and a camera high on style, like Fuji’s X100VI that I reviewed earlier this year? Or Sony’s own ZV-1 II camera with a fixed zoom lens? But Sony also has the third option covered, and that is a compact vlogging oriented camera with a more typical interchangeable lens mount. The Sony EV-10 II is Sony’s second generation vlogging specific interchangeable lens APS-C mirrorless camera. The main improvements are the upgrade to the 26MP sensor found in the a6700 (from the 24M sensor of the original EV-10), improved autofocus, much more robust video specs, and an upgrade to the common NP-FZ100 battery found in most of Sony’s better cameras. Does all of this add up to a camera worth considering? Find out my full thoughts in my video review below , read my full text review, or just enjoy the photos in the galleries below.
Thanks to Sony for sending me a review loaner of this camera. As always, this is a completely independent review. All thoughts and opinions are my own.
And what are the main things that are missing that people will be looking for?
No viewfinder
No IBIS
Bottom line: at a price tag of right under $1000 for the camera alone ($1100 with the PZ 16-50mm lens), this is the cheapest camera to get Sony’s new 26MP sensor and updated AF system. My experience says that you can get cheaper CAMERAS from other brands, but if you are interested in using more than one or two lenses, nothing beats Sony E-mount for lens selection and thus lower costs in the long run.
Keywords: Vlog, Sony, EV-10 II, EV, 10, II, Sony EV-10 II Review, APS-C, Video, YouTube, Review, Hands On, Dustin Abbott, Real World, Comparison, Sharpness, Bokeh, Flare Resistance, Autofocus, Image Quality, Sample Images, Video, Photography, let the light in, weathersealing, #letthelightin, DA
DISCLAIMER: This article and description contains affiliate links, which means that if you click on one of the product links, I’ll receive a small commission. As an Amazon Associate I earn from qualifying purchases.
What do people want in a small, portable camera? A fixed prime lens and a camera high on style, like Fuji’s X100VI that I reviewed earlier this year? Or Sony’s own ZV-1 II camera with a fixed zoom lens? But Sony also has the third option covered, and that is a compact vlogging oriented camera with a more typical interchangeable lens mount. The Sony EV-10 II is Sony’s second generation vlogging specific interchangeable lens APS-C mirrorless camera. The main improvements are the upgrade to the 26MP sensor found in the a6700 (from the 24M sensor of the original EV-10), improved autofocus, much more robust video specs, and an upgrade to the common NP-FZ100 battery found in most of Sony’s better cameras. Does all of this add up to a camera worth considering? Find out my full thoughts in my video review below or read on in my text review.
Thanks to Sony for sending me a review loaner of this camera. As always, this is a completely independent review. All thoughts and opinions are my own.
And what are the main things that are missing that people will be looking for?
No viewfinder
No IBIS
Bottom line: at a price tag of right under $1000 for the camera alone ($1100 with the PZ 16-50mm lens), this is the cheapest camera to get Sony’s new 26MP sensor and updated AF system. My experience says that you can get cheaper CAMERAS from other brands, but if you are interested in using more than one or two lenses, nothing beats Sony E-mount for lens selection and thus lower costs in the long run.
Build and Handling
The ZV-E10 II is a very compact and lightweight camera, though it has grown a little bit since the original ZV-E10. The dimensions are 114.8 x 67.5 x 54.2 mm (w x h x d), or 4.5 x 2.7 x 2.1″. The width is the same as the first generation camera, but the height has grown by 3mm and depth by 5.5mm. This is mostly to accommodate a very positive change – the swap from the smaller NP-FW50 battery (1080mAh) to the larger NP-FZ100 battery (2280mAh) employed in their better cameras.
The weight of the camera with the battery and memory card inserted rises a bit, from 343g to 377g (13.3oz). There are always two perspectives about this kind of change, as for some people their absolute priority is to go as small and light as possible. But this change increases the rated number of shots from the ZV-E10’s 440 shots and 80 minutes of actual video recording to 610 shots and (perhaps more important in a vlogging camera!) 130 minutes of actual video recording time in the ZV-E10 II. That’s an additional 50 minutes of video recording, and while it is often fairly easy to swap batteries when shooting stills, having to swap batteries during long format video recording can be disastrous. Having a spare battery or two is still a good idea, but there’s no question that you’re better off with this level of battery life if you were going out for a day in a new city while traveling or vlogging. It’s much more likely that 130 minutes of recording time would get you through the day if you just had a camera on a strap around your neck than 80 minutes.
The secondary takeaway from this is that you get a much more robust grip than you did on the ZV-E10. You can see that the original grip is rather small, while the ZV-E10 II has a more accommodating grip that gives more space for the fingers to wrap around it. I found that the camera still wasn’t tall enough to accommodate my hands (my pinky has to wrap underneath), but my other fingers were comfortable on the grip.
You can see from the comparison image above that the extra grip space has allowed for a minor restructuring of controls. The Powerzoom controls remain at the front of the camera, but the ON | OFF lever has moved from a separate switch mid camera to a position to the right of the shutter button. I found that I did sometimes hit the Powerzoom control when trying to turn off the camera due to not having the muscle memory initially, but the advantage of having the power toggle there is that it is much easier to control the camera one handed.
The video record button and the C1/Background Defocus button are in the same location as before, but the mode control has changed from a button selector to a three position switch (STILLS | VIDEO | S&Q).
This is a better system, as it gives quick and direct control as opposed to having to interact with the LCD screen.
The C1/Background Defocus button is unique to this type of camera, and it’s native purpose is to open the aperture to the widest option to defocus the background. That’s only going to have limited effectiveness with a slower lens like the kit zoom, as this doesn’t actually magically make backgrounds more defocused. I did note that (as expected) that this feature will not work with a lens with an aperture ring unless you have the aperture ring in A (auto) mode. If you have an aperture preset and hit the button, you will get this message:
I personally wouldn’t find this function particularly useful, as I’m always aware of aperture and can quickly switch it to my preferred aperture setting anyway, but those who want to operate as simply as possible might appreciate this function. This also serves as the C1 button, however, which means “customizable”, so you can assign many other values to it instead if you don’t want or need a Background Defocus option.
The ZV-E10 cameras have a unique and more robust built in microphone. This three-capsule microphone is more robust than most on-board microphones, with better pickup and noise reduction performance (a wind reduction muff is included). You have the option of choosing Auto recording or choose from Front, Rear or All Directions settings to match your shooting environment or priorities. This might allow you to prioritize getting sound from in front of the camera, or recording your voiceover behind the camera, or mixing the environmental sounds with your voice. Further expanding your options is the fact that the “hotshoe” is Sony’s MI-shoe, or multi-interface shoe. This will allow you to record digital audio through a compatible microphone.
The bottom of the camera is mostly the same, though the battery door is oriented a little differently to accommodate the larger battery.
The font view is largely the same. The slightly taller body of the ZV-E10 II makes the LCD screen look a bit smaller, but both are a 3″ fully articulating touchscreen LCD. The resolution is slightly higher at 1.036 million dots rather than .921m dots on the older model. Sony’s touch capabilities have improved over the past few years, and are now more responsive and allow for full menu navigation and many other options.
I have zero complaints about the LCD screen itself, though…
There is no viewfinder in this design, and (due to muscle memory) there were many time that I pulled the camera up to my eye only to then remember that there was no viewfinder. I did find that in bright sunny conditions that I really missed having a viewfinder, as seeing the LCD screen in some lighting was difficult.
The right side view is mostly the same, though the difference in the thickness of the camera is very apparent from this angle. The grip material is a bit different than the typical grip on, say, the a6xxx series. It’s largely a series of raised microdots.
A bigger change is found on the left side of the camera, as (thankfully!) the single UHS-II rated SD card slot has been relocated to the side of the camera instead of in the battery compartment on the bottom of the camera. I vastly prefer the side location, as bottom locations will often be interfered with if you are using a QR plate or something similar. This change means that there is a slightly different organization of the ports located there, though it adds up to the same thing.
The USB-C and microphone input are located in the top compartment, with the micro-HDMI and headphone monitoring jack located in the bottom compartment. The new SD card slot falls in the middle of the two.
The rear view is pretty much identical, though with a minor change to the top plate and a little sculpting to allow easier access to flipping out the screen and for accessing the top wheel. All other button and dial positions are the same.
The controls are adequate, and between the two wheels it is easy enough to control most functions.
The Powerzoom controls have two functions. If you have a Powerzoom lens attached (like the E 16-50mm F3.5-5.6 PZ OSS II lens), you can directly access the Powerzoom function in a much easier way than by the controls on the tiny lens itself. A secondly application is in video mode, however, and it will allow you to control the Clear Image Zoom or Digital Zoom function. It’s very welcome to have the ability to smoothly control zoom and be able to get smoother results for video.
The ZV-E10 II can be bundled with the Sony E PZ 16-50mm f/3.5-5.6 OSS II lens. The lens retails for $298 when sold separately, but only adds $100 when sold in a bundle with the camera. It’s worth getting the lens in kit, as you aren’t going to find a better zoom lens for $100. This is the MK II version of the lens, and offers both improved OSS (Optical Steady Shot) for more stability and faster autofocus. Optically it is the same as the previous generation lens.
There are more exciting lens options out there, but it does provide a decent general purpose lens for either video or stills use, and the PowerZoom function is definitely useful in certain applications.
The other big thing that the 16-50mm PZ adds is optical stabilization, allowing you to get stable results for your video and vlogging captures. For just $100 it is well worth adding to the kit.
So other than the missing viewfinder (which I do miss!), the Sony ZV-E10 II is a good handling little camera that is easy to use.
Autofocus and Bursts
This is another area of key upgrade to the formula. The previous generation EV-10 had an older generation AF system inherited from a camera like the a6400, which had 425 Phase Detect autofocus points backed up with a Contrast AF system. The EV-10 II inherits the more advanced AF system from the a6700 which touts 759 Phase Detect points over a 495 point Contrast AF system. It has intense coverage across the frame.
It has the updated Bionz XR processing unit that allows for more processing speed for a variety of camera function, including autofocus.
What the a6700 has than the EV-10 II lacks is the AI processing unit to give more advanced tracking. The EV-10 II does have the ability to track subjects, though the categories are limited to Human, Animal, and Bird. Frankly serious tracking (in my eyes) needs a viewfinder, as it is very difficult to properly frame a fast moving subject when you can’t block out ambient light.
We still have an excellent focus system here, however, easily able to track action and deliver well focused results.
I was able to put the camera in the hands of a stranger with an 85mm lens attached (128mm full frame equivalent) and got perfectly focused results of our group of hikers due to the excellent face recognition (and despite the narrow depth of field).
I was also able to get very nice focus results even at F1.4 of a snake I spotted along the trail. Eye AF in animal grabbed the proper focus even though the scene was very complicated (lost of branches, grasses, and leaves in the way).
I also had zero problems grabbing shallow depth of field shots. The one below is at F1.2 taken with the excellent Viltrox Pro AF 27mm F1.2 (an amazing lens!)
I don’t really have any complaints about autofocus for stills. I was able to get well focused images in a variety of situations and don’t really have any complaints.
What is unique here is a shift to a purely electronic shutter. Rather than a hybrid mechanical/electronic shutter, Sony has gone all in on the electronic shutter. That shows some confidence with this processing unit and that they anticipate the readout to be fast enough to having less rolling shutter issues. The advantage is that we now have a max shutter speed of 1/8000th rather than 1/4000th, but the dark underside of the switch is that the max flash sync speed is only…gulp…1/30th second. Don’t buy this camera for studio work!
Max burst rate is 11 frames per second, which is pretty good, though the buffer depth will be the issue if you are shooting anything other than JPEGs. Now, to be fair, the buffer depth has actually improved. Extra fine JPEG depth has moved from 99 frames to 143, and full RAW (uncompressed) has grown from 46 to 59 frames. Where I got trapped is that Lossless Compressed RAW is now an option (it wasn’t before), which reduces the buffer depth to 22 frames. But because I was shooting a prerelease camera, Lightroom currently can’t open the RAW images from the camera, so I also needed to shoot JPEGs. Lossless Compressed RAW + JPEG drops to 17 frames, which meant that on my rope swing burst sequences, I actually ran out of frames before the big splash.
But if you want a deep buffer, you do have the option of choosing Fine JPEG (rather than Extra Fine), where you can get over 1000 frames before the buffer fills. That should be enough for you! Overall these specs are actually pretty good for this class, and considering that the storage medium is only UHS-II SD, that tells me that the processor is doing a great job of moving information.
Video
Obviously video is a very important aspect of a vlogging oriented camera, and there are a number of ways where Sony has improved the video recording capabilities.
Before hitting that, however, I do want to quickly comment on the microphone capabilities. As noted previously, there are three different microphones in the system and three options for how sound is recorded. I definitely found that selecting the right mode made a big difference, with the “Front” priority for vlogging do a great job of getting my voice and not sound from behind the camera. Sound quality isn’t at the level of having a separate mic system, but definitely sound better than the average audio from a camera.
Video recording in the original ZV-E10 was rather bland. It was limited to 8 bit internal video recording with a limit of 4K30. The new ZV-E10 II is much more robust. It starts with 10 bit internal recording and resolution as high as 4K60. And there isn’t a big crop for that recording, either, with 4K30 being a full sensor and 4K60 only having a very mild 1.1x crop. The footage is downsampled from a full pixel 5.6K readout and looks highly detailed. There is now a much wider variety of resolution, codec, and bit-rate options available. Here’s a quick look at them:
Also of note is that Full HD recording is available up to 120FPS for true slow motion capture.
I like the quick CineVlog option on the touchscreen that switches to the S-Cinetone color profile and shoots a widescreen 2.35:1 look with black bars top and bottom that is recorded at 24FPS for a cinematic look. It’s a nice touch for those who are looking for quick and easy cinematic looking footage.
Bitrates are as high as 600Mb/s. Gamma curve options include HDR-HLG, Sony S-Log 2, Sony S-Log 3. The camera includes S-Cinetone and S-Log 3 color, which make for better grading control and full utilization of the 14-stop dynamic range. You can also assign LUTs or use the Creative Looks mode to apply preset color effects to your footage while shooting. There is no RAW video output via HDMI, however. In camera footage looks pretty fantastic (this is a screenshot from a video clip).
Video AF did a great job of tracking my face/eye during vlogging segments and also of tracking for other video shots, including those with some action involved.
I’ve mentioned the background defocus option previously, and there is also a Product Showcase option that emphasize any product moved towards the camera rather than staying locked on the eye. This mode seems to work well and be quickly accessed from the on-screen options that can accessed by touch. The camera also receives Sony’s Focus Breathing Compensation corrections that will help eliminate or reduce focus breathing on any Sony lens.
While we aren’t into any truly high resolution options available on high end cameras, there’s no question that this is a MUCH more robust video camera than the previous generation, and if you are buying the ZV-E10 II for its intended purpose, this is well worth the price premium of $300 over the previous generation camera.
Image Quality Breakdown
As noted in the intro, the ZV-E10 II inherits the APS-C-format 26MP Exmor CMOS found in either the FX30 or a6700 cameras. This increases the resolution from 24 to 26MP and also increases both the dynamic range (nearly a half stop) and ISO capabilities (slightly) of the camera. The Bionz XR processor further helps with this. The ZV-E10 II is capable of producing great looking images with great color, detail, and dynamic range.
Unfortunately I was limited in being able to torture test this sensor due to Lightroom/ACR being unable to open the RAW images yet because of this being a prerelease review. All of the images shown in this review are all out of camera JPEGs. I will revisit this section when I have a chance to review the sensor on either this camera or the a6700.
According to Photons to Photos, dynamic range has increased from 10.53 stops to 10.95 stops, high enough to beat all of the APS-C competitors from Canon, Fuji, or Nikon. Low light performance manages to top the ZV-E10 despite the resolution bump as well, which is impressive.
In camera JPEGs look very good, capable of beautiful color:
…and also of great detail:
Skin tones look good in my shots as well:
Even with JPEG images I was able to recover a few images that didn’t meter the way I personally wanted even if technically correct. I’ve added nearly two stops into the recovered result here.
The native ISO range is from 100-32,000, though in the case of shoting JPEGs, I prefer to keep it at ISO 12,800 or less, as noise reductions gets a little aggressive above that. I can tolerate shots in color at ISO 12,800:
…but above that find only B&W tolerable. Here’s an ISO 32,000 JPEG:
That aside, the tests of others tell me that the High ISO performance here is about as good as you’ll find on an APS-C sensor, so overall this is a great little camera in terms of sensor performance.
I’ve used the Sony ZV-E10 II for big hikes, in the golf bag for beautiful moments that might pop up there, in a waist carrier on cycling trips, and at family events for a lightweight carry-along camera. I’ve also shot some B-roll footage for my channel with it, and, though I don’t actually Vlog, I have shot some Vlog sequences with it for intros. This is a very competent compact camera, though I do miss having a viewfinder…particularly in bright conditions.
There’s a far more robust suite of video options, a bigger battery to allow you to capture it all, and a great new sensor that affords more flexibility for both video and stills.
So is there a fly in the ointment? Perhaps. The ZV-E10 II has received a pretty significant $300 price hike, and while I think you can pretty easily make the argument that the various improvements are worth that increase, the $1000 price point moves it into contention with far more cameras. Sometimes people in this zone are looking at the price of competing cameras and wondering if a Sony is worth the additional cost. But as I mentioned in the intro, I think the value of Sony cameras is when you consider the lower cost of the whole ecosystem. There are dozens of reasonably priced compact lens options on Sony, either APS-C specific or full frame compatible, and there just isn’t any other brand that can match the sheer amount of available options. So if you’re interested in going deeper than just the kit lens, I think Sony just might be worth spending a bit more on the camera. Vlog away!
Pros:
New grip for larger battery is more comfortable
Battery life is much improved
Some handling and control improvements
Having zoom controls on camera is useful
Upgraded LCD resolution
Improved autofocus system
Deeper buffers
New sensor has higher resolution and better performance
Vastly improved video specs
4K60 mode has minimal crop
3 Capsule microphone offers better sound and more flexibility
Cons:
I miss having a viewfinder
No IBIS
Flash sync speed only 1/30th second
$300 price increase from EV-Z10 brings more cameras into contention
Keywords: Vlog, Sony, EV-10 II, EV, 10, II, Sony EV-10 II Review, APS-C, Video, YouTube, Review, Hands On, Dustin Abbott, Real World, Comparison, Sharpness, Bokeh, Flare Resistance, Autofocus, Image Quality, Sample Images, Video, Photography, let the light in, weathersealing, #letthelightin, DA
DISCLAIMER: This article and description contains affiliate links, which means that if you click on one of the product links, I’ll receive a small commission. As an Amazon Associate I earn from qualifying purchases.
Canon’s venture into mirrorless has had mixed success. The EOS M cameras have largely been critical flops despite having some unique strengths largely due to arriving with limited feature sets when compared to the competition. Canon has also really lagged in the key areas of autofocus, burst rate, and buffer size, reducing their mirrorless cameras (including the M3) to cameras suited for capturing only fairly slow subjects. Despite this Canon has managed to capture a pretty significant portion of the mirrorless market due to brand recognition, great image quality, and the ability to use EF lenses via adapter. In North America, however, a good percentage of M series sales have come due to highly discounted prices. But the EOS M5 arrives as a much more fully realized camera and is touted as essentially a Canon 80D (an excellent camera – read my review here!) in a mirrorless body. Is the Canon EOS M5 a true DSLR replacement? Read on to find out…
Prefer to watch your reviews? I’ve got you covered – just click on the video below!
I reviewed two EOS M5 bodies by using them exclusively on an extended trip to the state of Arizona, where I used them backpacking, for portraits, for some shots of animals and fish at a new aquarium, to shoot several religious events, and to record my family’s holiday celebration. I used them in a wide variety of real world shooting situations, and I feel that I can render an accurate verdict on the strengths and weaknesses of the new M5.
Build and Specifications
The video below gives you a very in depth overview of the physical design and characteristics of the M5. It’s worth watching.
One area that some original M users will lament is that while there was a trend towards smaller and lighter in the M/M2 bodies, the trend reversed with the M3 and has gone a step further here. The original EOS M weighed a negligible 262g and was easily pocketable with the EF-M 22mm f/2 lens attached. The M3 moved up to 366g (12.91oz). The M5 has taken yet another jump, and now weighs 428g (15.1oz). It’s still light in the big scheme of things, but it is worth noting the M series has gained about 40% in weight since its inception.
The camera is physically larger than the M3, too. The M3 was 110.9 x 68 x 44.4mm (WxHxD), or 4.4 x 2.7 x 1.7”. The M5 moves to 116.8 x 88.9 x 61mm (4.6 x 3.5 2.4”). Still, having used all three cameras (M, M3, M5), the M5 is by far my favorite to hold and use. It has put on just enough real estate to be a genuinely nice camera to use ergonomically. And, to be fair, the M5 has added an integrated EVF. The camera is arguably more compact now than the EOS M3 with the DC-1 EVF attached to it. And, when compared to the M1, the series has gained the EVF and a built-in flash along with a much larger, tilting LCD. The first EOS M was somewhat of an ergonomic disaster. It completely relied on the touchscreen for almost all control over the camera. The EOS M5 has matured into a fully functional camera with ergonomics that nearly rival that of any DSLR.
The grip on the M was little more than a nub, meaning that you squeezed the camera more than gripping it. The M3 was a big step in the right direction, but the M5 feels great in my hands. It feels like a real camera. A small one, yes, but big enough (and contoured enough) to actually fit my hands and feel useful.
The touchscreen LCD has grown in both size and resolution. It is a now a 3.2” screen with 1.62 million pixel resolution, resulting in a crisper, easier to see display. This screen also features a tilting design (85° up, 180° down) to better enable working from high and low angles. The built-in EVF means that the fully forward facing position of the screen is now underneath the camera rather than on the top, which results in a pretty serious ergonomic issue. If you have the camera on a tripod or selfie stick you might be physically blocked from tilting it to the forward facing position or have an issue where a good part of the screen is obscured. I find that just about all of my quick release plates (and even the mounting hub for my Cotton Carrier carry systems) will block the screen from fully tilting down.
In ordinary use I find the screen gets impinged pretty often. Think about it. If you have the screen tilted all the way down and facing forward, what exactly can you support it on? You can’t just set it on a flat surface (the screen is the lowest part). You can’t mount it on a tripod using a standard QR plate, as even the small QR plate from my Oben CT 3535 travel tripod is wide enough to impinge the screen and obstruct it from tilting down completely.
A solution to this problem proposed by one reader is to use a dual camera mount on the tripod and shift the camera over where the tripod mount is no longer in the way. That’s a workable solution for when you are operating from a fixed position, but may not be a great field solution. Canon should have gone all out and added their fully articulating screen like on the 80D; the current solution is going to lose them some potential customers in the Vlogging/Selfie industry. This is one of two ergonomic missteps that I have encountered.
Further compounding this issue is that, unlike the 80D or 5D Mark IV, you can’t actually remotely monitor video recording via the Canon Connect app. It will only work for stills mode. On those other cameras you could monitor video, change settings, and even move the AF point around, but Canon has regressed with the M5, and that makes things even worse on this front. This is a pretty major design flaw, though the screen is never impeded for shooting at high or low angles when you don’t need the to tilt the screen 180 degrees to face forward. This issue will only impact those that want the screen facing front for monitoring. Unfortunately this is a new ergonomic issue that didn’t exist with the M3.
I think that this is hard to spin as anything but a fail here. I personally feel that Canon should have invested in the additional engineering required to create a fully articulating screen like the 80D or similar DSLRs. The tilt mode is still handy for high or low shots (and for shooting video), but the design does not allow for easy monitoring with the screen facing forward. In a camera that is so well designed ergonomically this stands out as a serious misstep.
Another annoying quirk comes when you have the LCD screen tilted and facing up. This is a great position for shooting inconspicuously or from a low angle, but it is as if the “eye sensor” (the sensor that detects when you put your eye close to the viewfinder and switches the LCD off and the viewfinder on) becomes hypersensitive. When reaching down to select a focus point (or even using the “touch screen to capture image” setting) the screen will black out and switch to the viewfinder on occasion. You have to move your hand away and try again once it switches back to LCD with hopefully a better result, but I’ve had a few frustrating moments where this process repeats several times. I don’t know if the LCD is reflecting light/shadow in some way, but I only seem to have this issue when the LCD is tilted facing up. I had some similar issues when using my motorized gimbal system to shoot video. If there is a setting to reduce this sensitivity, I was unable to find it.
One final ergonomic change that may negatively impact some users is that the camera strap mounting lugs on the side of the body have changed from the M3’s somewhat standard ones to small, pinhole style lugs. The plus side is that the included camera strap connects a little more easily via this system, but for those of us who tend to use more third party options this creates an attachment issue as most third party straps are designed around connecting to standard lugs.
It may seem that I’ve gone negative here, but I do want to be transparent about the ergonomic issues that bothered me in real world shooting. Part of this is the challenge of trying to make such a compact camera a fully featured one. Overall I think that Canon has done a great job here. The M5 has some of the nicest physical controls of any mirrorless body, and many of the quirks I’ve detailed here are just as bad if not worse in other mirrorless bodies. Physical controls allow for intuitive settings adjustments, and include a front dial, quick control dial, dial function button, and exposure compensation dial. Each of these can be customized to adjust specific functions for more personalized control. I find it easy to get the camera set up to do what I want, and it has two fully configurable custom modes (one of which I have set up for action/tracking situations). The mode dial has more options on it than ever before (12 in all). It’s hard to believe now that the M1 had only three modes and only one real dial on the back. The M5 has arguably more physical controls than the average DSLR, and they are well placed and fully useful, too. On top of this there is full redundancy in the very responsive touchscreen.
One of the best new features in the M5 is called “Touch and Drag AF”. It allows you to use the touch screen to move your focus point around while using the EVF. I first tried it with the full screen enabled and didn’t like it due to my nose inadvertently moving the focus point, but when I switched it to the only having the right side enabled I was in love. It is one of the most intuitive features I’ve seen on a camera in a long time, and it works remarkably well. The sensitivity is just right, and it is very easy to quickly choose the focus point you want. It is the fastest, most intuitive way to select a specific focus point that I have ever seen. It frees you from “the grid” and allows you to select exactly where you want to. Yes, just touching the screen to focus and take the picture is great, but I find shooting this way means that you are mostly supporting the camera with one hand and, in my experience, this rarely gives the best results. I definitely prefer the Touch and Drag options in many settings. I have noted a glitch where periodically the camera will reset the “Touch and Drag” setting to Disable and I have to enable it again in the menu setting. Hopefully this should be an easy fix through firmware.
Built-in Wi-Fi with NFC allows for easy wireless sharing of both photos and movies to a linked mobile device. A new connectivity addition is the ability to use Bluetooth as an alternate way to connect. The M5 has a mini-HDMI out and uses a now somewhat dated USB 2.0 interface for connecting to a computer.
I noted in my M3 review that the LP-E17 battery far exceeded its rating, and the same is true here in the M5. Using things like WiFi will eat some extra battery life, but if you tend to use the EVF quite a bit you will find that it’s not unusual to get 500+ shots out of a charge instead of the rated 290. Buying an extra is always a good idea, but the last two M series cameras have been much kinder to battery performance.
One important point when using manual focus lenses (like Samyang/Rokinon’s EF-M lenses or legacy lenses via adapter) – you MUST change the setting in the custom menu (Others 3) called “Release shutter without lens”. These lenses do not have an electronic connection to the camera, and without this setting set to ENABLE the camera will not know a lens is attached and won’t allow you to take a picture with such a lens attached.
Flash Observations
The flash unit on the M5 has been relocated to the traditional DSLR point at the top of the center stack of the camera. The new flash boasts wider coverage (15mm vs 18mm for the EOS M3’s flash), but the guide rating is still only 5 meters at ISO 100. My primary flash units (Metz 64 AF-1) are rated for 64 meters at ISO 100, so bottom line is that the flash power is still fairly weak. Some have noted that using a bigger lens like the new 18-150mm IS STM kit lens can result in some shadow when using the built in flash. I’ll confess that I very rarely use the built in flash on any serious camera. It rarely produces optimal results.
One quirk that I noticed (something I hadn’t previously noted on any Canon camera) appeared when I tried to throw a flash unit on to take a quick portrait. The flash wouldn’t fire. I double checked the hot shoe connection, but still nothing. I wondered if Canon had introduced some “protectionism” against third party flashes (I mostly use Metz 64 AF-1 flash units). Out of curiosity, I raised the built-in flash and tried again.
Nothing.
I knew I was missing something then, and jumped into the menu. Under the “Flash Control” settings I found a setting that was disabled by default – a setting that allowed a flash to fire (even when the built in flash was raised.) The “logic” of disabling even the on-board flash by default is one that still has me scratching my head.
There is one odd way where the built-in flash is a slight step back. The flash unit popped up on a little stalk on the M3, and, if you used your finger, you could actually tilt it up a bit and bounce the flash. I used the on-board flash on the M3 very, very rarely, so this was a minor bonus for me, but the flash on the M5 is a far more traditional flash unit sitting on the top of the center stack much like any other DSLR. It feels far less flimsy, but it also cannot be tilted up and bounced. The original M required you to use a secondary flash unit; there was no built-in flash option.
For those wondering: the flash on the EOS M5 does NOT work as a wireless flash master or trigger. You will need to use an accessory of some kind to trigger an off-camera flash. The little 90EX flash that was sold sometimes in kit with the EOS M will serve this purpose if you are looking for a Canon option, though I personally like the combination of the Yongnuo YN-622C-TX master controller and Yongnuo YN-622C II receivers for off camera flash unit control (particularly if you want to use more than one flash). I’ve used these controllers for years and they reliable, effective, and inexpensive.
Digital IS
Canon has added a Digital IS with 5-axis image stabilization (IBIS) to the M5, but it only works when in video mode (adding this feature for stills, too, is pretty much a must for the next generation of EOS M body). The 5-axis IBIS minimizes the appearance of camera shake for sharper handheld shooting. This benefits recording while walking or moving, and can also be used in conjunction with lenses featuring optical IS for more effective overall stabilization. You can find more about this in the video section further down. You can see some footage taken with this combination in the video review.
Autofocus
The big news on the AF front is that Canon’s awesome DPAF (Dual Pixel Autofocus) has finally made it their mirrorless line. DPAF is very accurate, very fast, and definitely strides ahead anything that we’ve seen in the M series. It is the addition of DPAF that (above all) makes this camera competitive.
From Canon: “Dual Pixel CMOS AF offers smooth and fast focusing performance in a similar manner to how a camcorder acquires focus. This system integrates two separate photodiodes within each pixel to provide a broad and dense network of phase-detection gathering elements across a majority of the image sensor to reduce focus hunting for faster, more direct control of focus placement. When working with still imagery, this focusing system works to acquire focus quickly and accurately, making it ideally suited to shooting and tracking moving subjects so that critical focus is attained with each shot. When shooting video, a Movie Servo AF mode offers smooth and natural focusing when changing from different subjects or different distances within the scene, as well as the ability to specify tracking sensitivity, AF speed, and Face Tracking priority. Benefited by the Touch AF system, rack focus is possible simply by touching elements within the scene on the touchscreen in order to change focus in an intuitive manner. Subject tracking in movies is also heightened due to the Dual Pixel CMOS AF system’s ability to recognize subjects and maintain focus when working within changing or cluttered scenery.”
One thing I’m not crazy about is somewhat of a carryover from the M3. I find it near impossible to apply the proper amount of pressure to the shutter button to take only one photo in either High Speed or even regular speed modes. Single Shot is the only mode where I can reliably take just one photo since it is the only option. I’ve ended up deleting a lot of duplicate shots due to an overly sensitive shutter button. The difference between “enough” and “too much” pressure is a very small margin.
But the speed is definitely fantastic compared to the previous generations of the M series. The burst rate is 7 FPS (frames per second) or up to 9 FPS without continuous focus. I was able to get 19 full RAW images before slowdown, with about 4-5 seconds afterward required for the buffer to clear. That’s a far cry from the 4.2 FPS of the M3…and that was without continuous focus and with a RAW buffer limit of only 5 images. It only takes under three seconds to fill that buffer, though, so you still need to time your moments right. If you fire off a burst too soon and miss your moment, you may miss it altogether while waiting for the buffer to clear. I think it is safe to say that if you are really concerned more about “catching a moment”, it is safer to shoot in JPEG where buffer is less of an issue.
One of my least favorite aspects of the M3 was a quirk where the burst rate slowed to a painful crawl during exposure bracketing (for HDR). It made shooting exposure bracketing handheld very difficult, as it was easy to induce movement of either the subject or the camera due to very slow frame rate. A typical bracketing sequence took a good three seconds to get the three exposures. The M5 now flies through this, with no slowdown during bracketing. It allows you to get three bracketed exposures in (potentially) less than half a second (depending on shutter speed). Boom-boom-boom! Here’s a handheld HDR shot.
My torture test for autofocus came while shooting at the new OdySea Aquarium in Scottsdale, Arizona. An aquarium is a challenging environment due to dim shooting conditions, often quick, darting fish, and the various quirks induced by shooting through glass. Canon has claimed extreme sensitivity for their newest DPAF sensors, with both the 80D and 5D Mark IV claiming sensitivity down to a -4 EV (darker than moonlight). My experience with those cameras (I own both of them) says that I still get better, more reliable focus results using PDAF (phase detect or viewfinder AF) and the extremely sensitive center point that is rated to -3 EV. On paper the DPAF (LCD screen) option should be better, but my real world experience says otherwise.
That remains the case here. I had moments where I wished I had a DSLR in my hands, though with one caveat. One tends to forget when shooting with an LCD (or EVF) without a traditional AF grid that the rules regarding better focus towards the center point remain true. I found in several situations that I wasn’t able to lock focus when focusing off-center but was able to lock when moving back towards the center. When trying to track fast moving fish in those dim lighting conditions I felt like focus wasn’t up to the level of the 80D in viewfinder (phase detect) mode, though overall I could see a big improvement compared to previous generations of the M, and the ability to continue to track while shooting a burst is pretty huge.
I came away with a number of great looking images, however, even though I was using the fairly slow (in terms of aperture) EF-M 18-150mm IS STM kit lens (a very nice option, by the way). Here are a few more of my aquarium photos.
Though some have reported otherwise, I had no issue with shutter lag. In one shot mode I might have an issue with focus lock in a challenging environment, but not shutter lag. Some have described a shutter lag issue when using a flash, but I was unable to recreate this. It perhaps might come from fully depressing the shutter button before locking focus (pressing it halfway), but I haven’t shot like that, well, ever, and neither should you.
The autofocus system combined with a good implementation of the EVF makes the EOS M5 the closest thing Canon has made to a true DSLR replacement.
How About Tracking?
AF Servo tracking has essentially not existed on previous versions of the EOS M system. If you shot in burst mode the camera would not continue to focus but rather retained the initial focus position, making the cameras mostly useful only for either still or slow moving subjects. The M5 inherits the 80D’s DPAF, which is a vast improvement. It still has limitations, however. I noted during my review of the 80D (see the review here) that the 80D tracked better using traditional Phase Detect (viewfinder) autofocus. When tracking a subject moving towards you the 80D could effectively track using PDAF (Phase Detect) but delivered mixed results when shooting the same scenario via DPAF (Dual Pixel). Tracking movement from side to side was not bad, but the focus system was just not fast enough to track a fast-moving subject that was moving towards the camera.
The M5 is the same. It has inherited the DPAF, but not the Phase Detect system (it is a mirrorless camera!) It has the same strengths and limitations. A good framerate helps, as does a [somewhat] larger buffer, and the system can handle tracking in a number of situations…but not all. It is still not really that confident when tracking action moving towards you and tends to get “stuck” somewhere along the way. I do like being able to use the EVF to track with, as I find following movement with an LCD screen more challenging.
I would say the the M5 is perfectly fine for most event settings, though it isn’t quite as good at high ISO settings as full frame bodies. I was able to get consistent focus on moving subjects while covering a few religious events during my review period.
Tracking is good enough for many every day life situations, but not, in my opinion, good enough for fast moving sports. The AF is good enough for the camera to be a DSLR replacement in many situations, but still not in the most demanding AF situations.
An EVF…Finally
One of the chief complaints against the M series has been the lack of an integrated EVF (Electronic Viewfinder), a feature that a number of competitors do have. An EV-F plays a number of importation roles.
Perhaps most important is that while in certain light even the best LCD screen can become washed out or hard to see, an EVF (like a traditional optical viewfinder) has the advantage of being able to shade the eye from stray external light and enables clear vision of the actual lighting through the viewfinder. I shot a lot in the Arizona desert while doing this review, so this was pretty huge for me.
For many of us the natural way of shooting is having a camera brought up to the eye. It’s the way that our brain works, and is a part of the creative process. This enables one to choose to shoot in this traditional fashion and further aids in the M5 acting as a DSLR replacement.
I find using a telephoto lens much more difficult when trying to compose or track using an LCD screen. A viewfinder’s ability to isolate focus to only the camera’s field of view helps immensely.
An EVF is a fantastic asset for manually focussing. Mirrorless bodies continue to be the best place to use manual focus lenses (either current or vintage). The M5’s EVF helps A LOT! Not only can you see true depth of field in the viewfinder or use focus peaking (the camera highlights the edges of objects in focus with a color that you can choose from several options), but you also have the option to magnify the image in the viewfinder up to 10x (a more organic process here with the addition of the Touch and Drag focus). Once you learn the technique, there is no reason to ever miss focus again, and you can even acquire focus more quickly. The M5 is now officially Canon’s best platform to use MF glass on.
The previous generation M3’s solution to that problem was to release an EVF accessory (the EVF DC-1). I purchased a kit with the DC-1 included, and found the EVF beneficial in a number of situations. But having the EVF as an accessory (and an expensive one, at that!) means that A) You often didn’t have it along and B) it made the camera more bulky and C) it tied up the camera’s hotshoe. Having an integrated EVF is a far superior option.
At first I thought the M5 was lacking a “diopter” type control on the EVF. The DC-1 had a familiar wheel type diopter, but I saw nothing like that initially. After taking a closer look I discovered that the EVF has a slider underneath it that serves as diopter control. I found it difficult to move it smoothly until I moved the LCD screen down and out of the way. Even when you have easier access to the slider with the screen out of the way it remains very, very difficult to make slight adjustments. It takes a fair amount of force to move the slider, and thus it is hard to use the correct amount of force to move it a little but not a lot. Fine tuning this setting was a little frustrating, and one has to wonder why they went away from the common wheel design that is much, much simpler to use. At least this a setting that you can typically set and then forget about.
One other quirk is that sometimes images can seem quite oversaturated when reviewing them after capture in the viewfinder. It doesn’t always show accurate color saturation (post capture). My hope is that this bug will get squashed via firmware updating, though Canon has disappointed on this front before.
Overall the EVF in the M5 is a great addition. It does what I want it to and adds a lot of what makes using a DSLR great to the M5.
Testing with EF Adapter
This was a sore spot with me when I reviewed the previous generation EOS M3. I had skipped the M2 (which wasn’t really sold in the North American market anyway) and thus primarily compared the M3 to the original M. The EF Adapter was one of the few bright spots for a somewhat murky mirrorless launch for Canon, allowing M series users to access their entire kit of EF or EF-S mount lenses on the M system. It actually worked pretty well on the M “Classic”, so I was very disappointed that the EF adapter performance was actually worse rather than better despite Canon’s claims of faster, more accurate autofocus on the M3 system. They clearly had made tweaks to the way that the M3’s autofocus system worked, and the byproduct was that the adapter no longer worked as well (or with as many) lenses.
The picture is fortunately more rosy here on the EOS M5. EF adapter performance is (for the most part) much improved.
I worked my way through my kit of autofocus lenses via the adapter, and, for the most part, was pretty happy. There’s a fairly wide range of focus speeds, with most operating pretty close to normal in overall focus speed but with some surprising exceptions. The new Canon EF 35mm f/1.4L II is blazingly fast (probably the fastest focusing lens I’ve used on the system). Positive surprises were that the Tamron 70-200mm f/2.8 VC and primes (Tamron 45mm VC and 85mm VC) both focused quickly and confidently (though quickly is always a relative term with the somewhat slow but steady 45mm). The Tamron 24-70 VC was more sedate, though that has always been the primary area that it lags behind the Canon and Nikon first party competition. A surprise on the slow end was the EF 100-400mm f/4.5-5.6L II which was very slow despite being one of the fastest focusing lenses that I own through Phase Detect.
The biggest surprise to me, however, was the 40mm f/2.8 STM, as I found that it focused quickly with the M3 via the same adapter. I said this in my review of the M3, “The single best lens that I’ve used to adapt to the M is the 40mm f/2.8 STM pancake lens, which seems almost like a natural part of the system in both size and operation.” The size part is still true, but the 40mm STM does not “operate” like a native lens anymore. I threw it on the 80D out of curiosity and found that in Live View (DPAF like the M5), the lens also focused quite slowly. Ditto for the 5D Mark IV, although the lens focuses quickly in Phase Detect (viewfinder) autofocus mode (particularly on the 5D Mark IV; it just seems to spin everything up faster!). It’s somewhat ironic that the first STM lens designed [in theory] to go hand in glove with DPAF is now perhaps the poorest performer of the bunch. It liked the “hybrid” AF system in the M3, but doesn’t care for DPAF. A lens like the EF-S 24mm f/2.8 STM is very fast (it is the one that acts like a native lens), though it is somewhat redundant with the EF-M 22mm f/2 in existence. The Canon 100mm f/2.8L Macro IS focuses quickly via the adapter, as do many of the other USM lenses I have.
A popular lens to adapt to the system for many reasons is the new EF 50mm f/1.8 STM. It is light, compact, cheap, and fills a void that nothing else really is in the EF-M mount. It isn’t the fastest focusing lens anyway, but works reasonably well via the adapter. I used it quite a bit for portraits while on my “Traveling Light” trip to Arizona, though I definitely prefer it stopped down a bit as opposed to wide open. I’m spoiled by higher end lenses that deliver much better image quality at wide apertures. The fairly demanding 24.2 MP APS-C sensor of the M5 is a bit much for the 50mm STM before f/2.8!
Overall, however, I am much happier with the EF adapter performance on the M5. It goes back to fulfilling the role of being a great way to utilize your EF and EF-S mount glass on a second platform.
Image Quality
This has always been an area of strength for the M series. Even the original EOS M, though it had issues with handling and autofocus, has always been capable of producing stunning images with cleaner results than equivalent Canon APS-C DSLRs. The M5 continues that tradition and delivers some of the best images of any APS-C sensor camera.
My new favorite picture setting, Fine Detail, has been added to the M5 (I often tweak this setting by playing with the fineness and also by adding a hair more saturation). One 80D feature that didn’t make the transition is Flicker Detection (this helps time shutter release to minimize the effect from lights that constantly cycle i.e. sodium lights). These types of lights are often used in large arenas and even auditoriums, and can produce really unreliable color balance results…particularly in burst settings. The Flicker Detection feature is a great feature for event shooters and is an omission that I will personally miss on this camera.
One of the stranger quirks on the M3 was that in certain settings (typically foggy or snowy type scenes), images would have a strange green cast (a very un-Canon type problem). I have watched closely for signs of this on either of the two M5 bodies I have been testing, but thankfully there is no sign of it! The first photo below is from the M3, and shows the green cast. The second shot was taken in the same location and conditions with the M5 and shows accurate color balance.
Canon has elected to move the maximum ISO setting up one full stop higher than the EOS M3 (12,800) and 2/3rds stop over the 80D (16,000). The latter is interesting, in that the M5 is being pitched as being essentially an 80D in a mirrorless body. If the two share a sensor, then why the boost in native ISO range? I did a test to see if this was warranted.
In my test I discovered that the M5 does produce the cleanest result at 12,800 and 16,000 when compared with either the 80D or the original EOS M, though not by a large margin. Moving up through the final 2/3rds stops over ISO 16,000 shows usable but definitely noisier results. Downsampling the images (reducing their overall size in post) helps render the images more usable. I found that I could get better high ISO results on the 5D Mark IV when I tested it by shooting in the MRAW setting, but that is not an option here; the M5 has only one RAW setting.
The look of color noise is slightly reduced vs. the 80D, and I feel like the detail is a little better on the M5 image in my comparison.
When compared with the original M at ISO 6400 I found that Canon has been able to both increase resolution (24MP vs. 18MP) and reduce noise at the same time, which is impressive progress.
Here’s a look at ISO 25,600. The image actually looks pretty decent, with colors still rendered accurately if less vibrantly than at lower ISO settings.
In the right applications I see no reason that this cannot be used, although know that every stop past ISO 6400 will come with greater impact to the final image. Here’s a look at the difference between ISO 12,800 and ISO 25,600.
The M5 has a default limit of ISO 6400 under auto ISO settings. You can increase that setting all the way up to the ISO limit, which I did. I was shooting with the variable aperture 18-150mm lens a lot, and was more interested in getting an accurately exposed image than trying to keep noise down. When shooting events it is more important to me to eliminate motion blur and get accurately focused images. I can handle a little grain.
I found the M5 to be an effective platform for shooting a variety of different photography styles, including portraits.
The 80D had vastly improved dynamic range over previous Canon APS-C bodies, which is reflected here since the M5 inherits the same sensor. Since reviewing the 80D, however, I have switched to the new 5D Mark IV as my main camera body, and, as a result, I’ve gotten a little spoiled by its fantastic RAW files (pretty much the best ever from a Canon body). The M5 doesn’t have quite the same headroom to push shadows and highlights, but there is still great latitude for processing files. I felt a little more constrained in processing, but the end results speak for themselves. You can achieve fantastic results with the M5, with rich color, great detail, and a nice dynamic range. I continue to be amazed the M series ability to produce such fantastic results in such a compact package. I invite you to look at the Image Gallery here or view my travel article and photo gallery from Arizona.
Video Quality
Canon was the industry leader in DSLR video in a generation or two ago, but has lost that position in the current generation. They never had it in the mirrorless division, where the leaders have been Sony and Panasonic. The M5 is not going to be the camera that changes that, though there are three important advances on the video front for the M5. One is that now 1080P coverage includes the “better-for-action” 60FPS setting, but the competitors are at 120FPS…or more. Much more exciting is that Canon has introduced a new 5-axis digital IBIS (In Body Image Stabilization) to help produce smooth footage when shooting video (it doesn’t work for stills, unfortunately). It is designed to work in conjunction with lens Image Stabilization (like in the new EF-M 18-150mm IS kit lens) to achieve exceptionally steady results. In practice it works very well, and while it might not match what I can get with my Zhiyun Crane motorized gimbal, it is a major step forward. Yes, you could argue that Canon is just playing “catch-up” with some of its competitors, but they’ve done a very good job with implementation here.
The biggest advantage for the M5 over competitors is Canon’s DPAF, which provides better video Servo AF tracking than what most competitors can match. This is not to be underestimated, as it makes it a very good camera for vloggers or YouTubers…with one exception. I’ve already noted that there is a serious ergonomic issue for using the LCD screen to monitor from the front, and I’m REALLY disappointed that Canon stripped video support from the Canon Connect app for M5.
There is a microphone in jack but not a headphone monitoring jack. The M series is a bit better at recording audio directly due to built in stereo mics as opposed to the mono mic on most of Canon’s DSLRs.
I note that there is a slight crop factor applied when shooting video. It isn’t major, but the framing definitely tightens up some when you enter video mode. It was the same on the M3.
The video end of the M5 works well, though in terms of video codecs, 4K options, and other video metrics the clear advantage lies with the Sony a6300/a6500 or Panasonic GH4 (or recently announced GH5). It’s hard to recommend the M5 for video-first users (the lack of 4K support may be a deal-breaker for some), but if video is your secondary priority (or you are heavily invested in the Canon ecosystem), the M5 is a step in the right direction. The M5 has a good sensor, Canon color, and a good amount of manual control. The EF-M mount is an excellent one for adapting vintage lenses (often very good for video), and modern autofocusing lenses will benefit from the excellent DPAF focus.
What the M5 has on the video front is very good; it’s just that the competitors tend to have more. It is this single issue that gives me pause when I consider whether or not to add an M5 to my kit.
Conclusion
Canon’s mirrorless cameras have always presented a bit of a conundrum. There is so much good about them, but they have been let down by either major design missteps, slow focus, or a poor spec list when compared to competitors. A bit of that might still be true here, but it is much easier to give the Canon EOS M5 an unqualified thumb’s up. There are some genuinely excellent features packed into the compact body of the M5, including Canon’s DPAF, a 5-axis in body stabilization (for video), the very cool Touch and Grab AF, an excellent EVF, and some of the best physical controls of any mirrorless body. The new EF-M 18-150mm IS STM kit lens is a winner (my review will come shortly) and provides a credible all-in-option for those that want to do everything with one lens. The camera feels good in the hand and worked very well for me when I traveled exclusively with only two M5 bodies. I shot portraits, events, family times, landscapes, video, and even a little bit of animal photography over about three weeks and found the M5 generally a joy to use.
The exception to this was the issue with the tilt of the screen being so easily impeded and my regret that no 4K video is supported. There were some other minor quirks, but that’s true of any camera. The M5 produced great results for me, but it doesn’t exist in a vacuum. The Sony a6500 is an appealing alternative, though it retails for about $400 more and Sony has an annoying habit of quickly moving on to the next big thing at the cost of abandoning existing products (and customers). There’s no question that is Canon’s best mirrorless offering so far, and it is encouraging that Canon finally seems to be on the right track with the M series after it seemed like they just might abandon it, but at the same time the spec list of the EOS M5 still isn’t up to the level of the competition. Perhaps Canon’s greatest challenge is that they have priced the EOS M5 as more of a premium camera ($979 for the body only); that’s within range of the 80D. The question as to whether the market will perceive the M5 remains to be answered. The EOS M5 is the closest to a true DSLR replacement that we’ve seen from Canon thus far and stands as a tempting option for those wanting either a compact system or a great second body.
Pros:
Excellent physical controls and ergonomic design
Now has an EVF incorporated into the camera
Canon’s DPAF is an excellent focus system
Vastly improved burst rate and buffer
5 Axis Digital in body image stabilization (for video)
Touch and Grab AF using the touchscreen and EVF works fantastic
EF Adapter performance is improved with many lenses.
Battery life exceeds rating by a good margin
Cons:
Fully tilting the screen forward is plagued with issues
Sensor for EVF eye detect can be overly sensitive
Video modes still lag behind the competition
Diopter control is hard to set properly
You cannot monitor video recording via the Canon Connect app
AF Servo tracking is still limited in some situations
Thanks to B&H Photo for providing me with two EOS M5 bodies for my review period and travel to Arizona. They continue to be an excellent part who enable me to do a lot of what I do.
Canon EOS M5 | Amazon Canada
Canon EOS M5 | Simons Camera (Canada) Use the code BAG-SR900 to get a special Canon lens bag for the camera – only for my readers!
Purchasing your gear through B&H and these links helps fund this website and keeps the articles coming. Thank you for your support.
Great News! I can now offer a 5% discount on all purchases at Amplis Foto, Canada’s Leading Photographic Supplier. Please enter discount code: AMPLIS52016DA in your cart. It is good for everything in your cart, and is stackable with other coupons, too! It will take 5% off your entire order! Proceeds go towards keeping this site going and providing you with new reviews!
DISCLAIMER: This article and description contains affiliate links, which means that if you click on one of the product links, I’ll receive a small commission. As an Amazon Associate I earn from qualifying purchases.
Has Canon finally gotten mirrorless right? That’s the question on all of our minds as the Canon EOS M5 is released. At first glance everything seems mostly positive. The camera now has a rapid burst rate, built in EV-F, and has finally inherited Canon’s incredible DPAF autofocus. The camera is being touted as a Canon 80D (fantastic camera) in a mirrorless body. Over the course of my review I will be closely examining the camera and seeing if it actually lives up to that potential. Early signs are positive. These galleries contain images of this beautiful little camera along with a gallery of images taken with a variety of lenses (native mount EF-M lenses, EF lenses via adapter, and vintage, legacy glass used with adapters). Watch for my coming review of this camera after I travel with it to the American Southwest.
Canon EOS M5 | Amazon Canada
Canon EOS M5 | Simons Camera (Canada) Use the code BAG-SR900 to get a special Canon lens bag for the camera – only for my readers!
Purchasing your gear through B&H and these links helps fund this website and keeps the articles coming. Thank you for your support.
Great News! I can now offer a 5% discount on all purchases at Amplis Foto, Canada’s Leading Photographic Supplier. Please enter discount code: AMPLIS52016DA in your cart. It is good for everything in your cart, and is stackable with other coupons, too! It will take 5% off your entire order! Proceeds go towards keeping this site going and providing you with new reviews!
DISCLAIMER: This article and description contains affiliate links, which means that if you click on one of the product links, I’ll receive a small commission. As an Amazon Associate I earn from qualifying purchases.
Wow! When I made a video about preordering the day of the formal announcement of the 5D Mark IV, I had no idea that I was about to become embroiled in controversy. The initial response was positive from viewers (others than some complaints about the high price; complaints I shared). Then again, I’m rarely happy about the initial price of new Canon gear. Recent Canon lens releases (particularly the better ones) have been very expensive, though the lenses themselves have mostly been excellent (the new 35mm f/1.4L II is a great example). But over the next 48 hours the Internet hype machine got itself worked into a frenzy and before long I was getting more negative comments and dislikes than at any point in my decidedly non-controversial stint as a [very] minor YouTube personality. Why all the drama? Because I had the audacity to say that I was happy about the announced spec list of the 5D Mark IV and that I was preordering one.
Before I proceed to my actual review of the camera, here’s why I was happy. While reviewing the Canon 5Ds R, I found that it’s MRAW setting of 28MP hit a sweet spot for resolution for me, so I was very happy at the 30.6MP count of the 5D Mark IV. It also featured a number of the new innovations that the 5DsR had that really made life easier; things like a built in intervalometer, flicker detection, the white priority white balance, the Fine Detail Picture Style, and HDR mode. While reviewing (and owning) the 80D, I learned that I loved its responsive touch screen, it’s improved DPAF, the ability to focus at f/8 with a wide range of focus points, the improved dynamic range, and its improved video spec list. The 5D Mark IV had all of that. Finally, my most read article ever was about why I chose a Canon 6D over a Canon 5DIII in the previous generation, and some of the main reasons were its low light performance (both the sensitivity of the center focus point down to -3 EV, cleaner shadow performance, better high ISO performance) along with the useful features of Wi-Fi and GPS (both features that I have used a lot). Guess what? The 5D Mark IV had all of that, too. I was happy with the spec list because it combined a lot of features that I really like and use in real world shooting (and photography work) in one camera. So I preordered.
And caused a lot of controversy, apparently.
Before we move on to the actual review, let’s acknowledge the chief criticisms. Most of the complaints are actually from the video front. I heard a lot of “2012 tech” complaints that are mostly centered around the 5D4’s approach to 4K Video. People were disappointed at first that it featured only the 4K 30P standard; no 4K 60P. Then people discovered that the 4K video was delivered with a 1.7x (approximately) crop factor, and, to add insult to injury, at the space swallowing MJPEG codec. Lost in the shuffle was the fact that this would only be the second full frame camera (after the premium 1Dx II) from Canon to feature DPAF servo AF in video and a touchscreen to control video performance, or that it improved the 1080P capabilities all around. I can’t say whether or not the chief complaints were from those who actually use a DSLR for filmmaking or from those that are more into spec lists than real world cameras. Perhaps some of both. But this was the most vehement complaint.
One of the other major complaints was over the memory card slots. One CF, the other SD. People wanted CFast and XQD (or at least support for UHS II) cards. I’ll address those complaints in the review, but one of the first things I did was stick in a Lexar Professional SDXC 1000x card (150 Mbps transfer rate) and rattle off a burst. The result? 22 full RAW frames before it began to slow, which exceeds the 21 frame buffer rating. And this was from a UHS-II card, which is operating in “backwards compatible” mode. Furthermore, I was able to review the images by the time I had brought the camera down (though the red writing light stayed lit for a second or two longer). I shot another burst until it slowed, paused for a second, and then began shooting another burst. According to the time stamp I got 34 full 30.6MP RAW images in 8 seconds of shooting…on a SD card (and not even the best kind for this camera). My initial burst had 24 RAW images. When I got home I swapped out that card for my best UHS-1 card and upped that total to 28 RAW images before slowdown. The reality is for me (and most all non-sports shooters) is that this is plenty of performance from the SD standard. And beyond that, you can add more performance in burst situations be electing to go with a CF card.
I chose a Lexar Professional 1066x UDMA 7 as my primary CF card. This card had the fastest transfer rate. Using the CF card in optimal conditions I produced a burst of 32 frames before slowdown began. Clearly Canon has chosen to be very conservative with the buffer rating on this camera. That is more frames than what I am personally ever likely to need, and that’s probably true for 90% of shooters. True sports shooters will be better served by the 1Dx series or perhaps a 7DII (depending on the lighting conditions you shoot in).
I hear some complain that if Canon had gone with CFast that you could have unlimited buffer and just shoot RAW until the card is full. That does sound very cool, but how many shooters actually do that? When is the last time you just stood and shot as many frames as you possibly could of the same thing? By the way, if you really want to do that, just switch to JPEG and you can shoot until your card runs out of space. I personally tend to be a little more selective in my shooting because I know I’m going to have to edit all of those files when I get home!
My reviews are not of spec lists, though, but rather of relatively long term actual real world use of products. In the case of the 5D Mark IV I have been working on this review for 2 1/2 months, and am only now reporting my final conclusion on the camera. I have been publishing a number of videos that detail different aspects of the camera’s performance. You can view that playlist here, or you can elect to watch my final review here:
Ergonomic Improvements:
The physical body of the 5D Mark IV is going to feel very familiar to anyone who has used a 5D3, 5Ds, or 5DsR. Little has changed on the exterior with a few minor exceptions.
The remote cable port has moved. The 5Ds/R body featured the change to the USB 3.0 standard (appropriate to accommodate the increased data flow). The female USB 3.0 port takes up significantly more real estate than the USB 2.0 port, however, so something had to give. What was lost on the 5Ds/R body was the headphone monitoring jack; a significant loss for videographers. The 5D Mark IV solves this problem by moving something to a different location, namely the remote trigger port. It now occupies the spot where the “Mark III” logo used to be on the front of the camera. The 5D Mark IV says “Mark IV” right under the 5D logo up top, with the “EOS” label in a slightly odd location above. It works, though, and we get the headphone jack back.
New AF Mode selection button. The 5D Mark IV adds a little nub underneath the thumb stick that provides a redundant AF Mode selection (the little button near the shutter release still exists). This provides an improved ergonomic experiences as you are often using the thumb stick already to select an AF point. You can also reprogram it to some other function if you prefer.
A touch screen! It cannot be overemphasized how big of a difference having a touchscreen makes. It makes navigating menus simpler. It makes using the the Q menu extremely quick and intuitive. It is also the touchscreen that makes DPAF so special for either stills or video use. Simply touch where you want the camera to focus…and it does.
It bears mentioning that they stopped short, however. The 5D Mark IV could really have used an articulating screen like the 80D. The touchscreen eases the blow of having to move/eliminate a few of the buttons, and the lack of the articulating screen makes using the 5D Mark IV less practical than the 80D for Vloggers, YouTubers, and other solo video creators. DPAF and the touchscreen is really cool when you are behind the camera, but who touches the screen when you are in front of it? I’ve already had a few segments blown where the camera did not grab focus on me for some reason and I couldn’t tell until after investing the 15+ minutes in shooting the segment. I discovered the workaround after a while, though, as the Canon Connect app now supports video monitoring. I can use my phone or a tablet to get a wireless live feed from the camera via WiFi, change settings, and even direct focus by touching the screen. It doesn’t solve the camera angle problem for shooting at high or low angles, though. I just feel that an articulating screen allows you to take full advantage of that great touchscreen and the extremely rapid DPAF focus. It not here, though.
Still, overall the 5D Mark IV is a very well executed camera ergonomically. It is very easy to do what you want on it, and I have quickly adapted to its layout and prefer it to any other camera.
It is also worth noting that the 5D Mark IV has a great viewfinder. You have the ability to really customize what information is shown in there, and the way the level is implemented has really helped me (particularly with certain lenses where I’m trying to minimize distortion). The only downside here is that I suspect trying to change out the focus screen for something oriented for manual focus (a matte precision screen) isn’t going to be easy (more like the 5DIII; less like the 6D).
Vastly Improved GPS
One of the things I really liked about the 6D was the inclusion of GPS. I’ve done a lot of traveling with a 6D body (or two), and coming home to images already accurately geotagged was very nice indeed. But I had one chief complaint about the implementation of the GPS on the 6D; you had two choices – ON/OFF. If you chose “ON”, it meant that the GPS was literally always on…even if the camera was turned off. This meant that if you happened to not turn the GPS off it would slowly be draining battery life off all the time. There was no practical limit to this. If the camera sat for a week or so the battery would go completely dead. I had hoped that Canon would fix this via firmware update, but that was not be case.
Fortunately it HAS now been addressed…in the 5D Mark IV. The Mark IV includes two different modes. One is like the 6D’s “always on” and should be chosen if you are in a circumstance where you are frequently turning the camera on and off and want to be sure every single image is properly geotagged. But the second mode is going to be far more practical for day by day use. In this mode the GPS is on but only when the camera is powered on (or in standby mode). When you physically turn the camera off the GPS is fully powered down and will not be sucking the life out of the battery.
Even in the latter mode, however, be prepared for battery life to take a hit when compared to the 5D Mark III.
Early Adopter Issues:
My 5D Mark IV was delivered literally minutes before I left for an extended business trip. I happened to have my Tamron SP 15-30 f/2.8 VC lens along (I’m was using it as a comparison point for my review of the brand new Zeiss Milvus 18mm f/2.8), and I noted that when I tried to activate Live View mode to test DPAF that the camera would not activate Live View with the Tamron attached (the Zeiss lenses were fine). It’s not unusual for Canon to introduce some new quirk for third party lenses when releasing a new camera body. Firmware update time; one of the downsides of third party glass on new camera bodies. Tamron happily agreed to take all of the my three “pre Tap In” lenses (24-70 VC, 70-200 VC, and 15-30 VC) to update in one fell swoop. While on this topic I should note the that 85 VC is a great fit with the new 5D Mark IV; it focuses very quickly and very accurately. The time invested via the Tap In console meant that it focused better than most of my other lenses before AFMA on the 5D Mark IV itself. The end results are gorgeous. I’ve seen more of an impact from the second microprocessor in the 85 VC’s focus on the 5D IV (which also has an added Digic 6 chip dedicated just to autofocus) than I did on previous bodies.
The older three Tamron lenses were back in my hands within a week and the Live View issue is fixed. The experience was quick, and relatively painless, but it was a reminder of why Tamron and Sigma’s move to create their consoles for quick updates at home on their newer lenses was such a smart move.
Another bit of good news is that Reikan FoCal support has arrived more quickly than expected. Over the past couple of months I’ve gone through the process of using it to calibrate my rather extensive collection of lenses. It’s a somewhat laborious process when you have so many lenses to calibrate, but getting optimal performance from my lenses is important to me. I will note that the addition of the touchscreen made this process much simpler when it comes to something like changing values in camera.
Adapting to a New Sensor
Whenever you move to a new camera there is a period of adjustment where you learn to either unlock the potential or accept the limitations of the camera. While the 5D Mark IV does have some limitations, I have found that it is a highly adaptable, customizable camera that in many cases can be set up to do what you want it to do. This does make the camera a little more intimidating for inexperienced shooters, but the 5D series is really marketed to more experienced photographers. My initial concerns about the image quality (and perhaps those from other reviewers) came before I had learned to unlock the potential of the camera.
At full resolution “out of the box” I found the JPEGs had too much “smoothing” for my tastes. I preferred the native JPEG profile from the 6D. I wasn’t blown away by the TIFF files I was getting from DPP, either, but on September 20th Adobe added RAW support for the 5D Mark IV and I was quickly in heaven. The RAW files are BEAUTIFUL out of the 5D Mark IV. So much sharper and such incredible processing latitude. HDR is going to be far less necessary in the future; the dynamic range from the 5D Mark IV is impressive!
Update as of September 29th, 2016: I did some tweaking to the profile in the camera (JPEG), and made sure all of the noise processing settings were off. I also did a firmware update today (1.0.2). Between those two things I am much happier with the JPEG images I am getting. They actually look pretty great now, and give a bit of a processing guideline for tackling the RAW images. They look good enough that when shooting RAW + JPEG you may be able to give your clients the JPEG images and they’ll be happy right out of camera. The JPEGs have really rich color and look like they’ve already been “post-processed” in a good kind of way. I have chosen the Fine Detail profile as my default mode, though with some tweaks to the sharpness and contrast. As I continued to fine tune the profile to my unique preferences I found that I was happier and happier with the JPEG output. After getting things where I want I’m now pretty delighted with the 5D Mark IV’s JPEGs and RAW files alike. The JPEG files also benefit from the improved sensor performance of the 5D Mark IV; you definitely have more leeway to “push” them a bit compared to the previous generation.
It is worth noting that the MRAW (17MP) setting is also very nice on the 5D Mark IV and provides one of the best options for shooting in very high ISO settings (more on this in a moment).
Resolution and RAW
If you compare the RAW files side by side with the Canon 6D (as I’ve done a lot of during my various comparisons), the RAW files from the 5D Mark IV seem a bit “flatter”. The contrast is a bit lower, and the “sharpness” is a little less pronounced. This is actually a good thing. Video shooters are familiar with a LOG type profile for video that delivers a fairly flat image that you can then impose your unique preferences to during color grading. I feel like a somewhat similar concept is at work here, and the added dynamic range produces a RAW file with less extremes “baked in”. Similarly it seems that the files both need and can tolerate more sharpening than what I’m accustomed to. Perhaps the antialiasing filter is more aggressive, but I find that the images DO sharpen up better and when I downsample the RAW images to the dimensions of the 6D or 5DIII there is clearly more sharpness in the 5D Mark IV images.
I do feel that there is a bit of a learning curve to unlock the full potential from the camera, and as photographers become familiar with it they will ultimately appreciate that potential.
Here’s a video where I break down the overall resolution and image quality from the camera.
As anticipated, I feel that the 30.6MP pixel count is a “sweet spot” for me. Images have noticeably higher amount of information to work with, there is more latitude for cropping, and yet the file size (and impact on your computer when processing) is far less onerous than it was with the 5DsR. Canon was able to successfully raise the bar in all other areas of sensor performance while also increasingly resolution by about 39% over the 5DIII (and 52% over the 6D). I loved the 5DsR, but I’m not finding that I miss the extra 20MP and the additional challenges that it’s extreme resolution provided.
I enjoy being able to significantly crop an image and still retain similar resolution to my 6D. Higher resolution bodies bring a pixel density closer to that of crop sensor bodies (though only the 5Ds/5DsR have a pixel pitch that completely rivals that of the higher resolution APS-C bodies), so the additional “reach” benefit of APS-C bodies is somewhat undone, particularly when one considers the image quality strengths of the full frame sensor. Look at this photo of a squirrel:
In this second shot I have cropped the image to the exact same pixels of my Canon 6D; look how much extra reach I had “baked into” each frame while still retaining as much resolution as the previous generation.
I’m definitely happy with the megapixel value that Canon chose here.
Dynamic Range
I ran a controlled test with the Canon 6D (rated as having the best dynamic range of Canon’s previous generation), the Canon 80D (Canon’s best APS-C sensor), and the 5D Mark IV to test dynamic range performance. The 5D Mark IV is rated by DXO as having Canon’s best sensor…ever, though in their tests it still lags a slight bit behind the Sony A7R II and a bit further behind the Nikon D810. I’m a Canon shooter, however, so I’ll confine my comparison to what I’m familiar with.
In this controlled test it quickly became clear that as you pushed the limits further the 5D Mark IV distanced itself from the pack. The 80D showed a clear improvement over the 6D, but the 5D Mark IV showed an equal advantage over the 80D in my tests.
Real world shooting has demonstrated the value of this to me. I find that I have more processing latitude, and it affects me in the real world. I’m better able to recover skies, and, as is common in Canada, I will often lift the shadows in trees. In the scenes that I frequently shoot there is often a pretty big exposure difference between the tree line and the open areas, so I often lift the shadows in the forested area. In the past this has often resulted in shadow noise as well as textures becoming a bit muddy. I’m delighted to be able to lift those shadows in files from the 5D Mark IV and retain great detail with minimal color noise. Here’s a number of photos before and after applying Lightroom sliders to recover them.
Not only that, but I was frequently up against the limits of how much I could raise shadows in the past. While I still frequently reduce highlights by 100% in Lightroom’s sliders, I’m finding that it is rare that I need to raise the shadows 100%. Often a value between 40-60% is plenty. I do find that there is increased latitude in the highlights, too, meaning that I am able to better recover highlights, though not even close to the extent with which I can recover shadows. As a result I’m finding far fewer situations where I feel that I need to employ exposure bracketing or HDR. The advantage to the single exposure is that you don’t have to worry about movement or other factors that are a threat to typical HDR work. Here’s a comparison of a 3 stop underexposed image processed as I would process the HDR image (second image is a three bracketed exposure HDR).
While I do prefer the overall tonality of the HDR image, this is an extreme example (-3 EV). A slightly underexposed image that retained highlight information (between -1 to -2 EV) actually often produces a better result in all but the most extreme situations. In these images the first image is a single RAW with the shadows recovered. At a pixel level all the textures are very sharp and crisp. There is no issue with the wind moving the grasses and creating ghosts because it is just one exposure.
The second image is a combination of three bracketed exposures. It shows some ghosting artifacts in the grasses and trees but also isn’t quite as sharp as the single exposure.
In this video I demonstrate the superiority of the 5D Mark IV to previous generation cameras.
I can tell that you that in a very real way I am discovering an improved workflow due to the enhanced dynamic range of the 5D Mark IV. Even the JPEGs have more processing latitude than previous generation cameras. From portraits to event shots to landscapes I’m finding that it is easy to produce a balanced, great looking image from the RAW files.
Canon’s claim of improved dynamic range is backed up in the real world.
High ISO Performance
In the previous generation the 6D outperformed the 5D Mark III at higher ISOs. Is there an improvement in the new generation? Canon’s challenge here is that higher resolution results in more apparent noise, as was made clear by their limiting the normal range of the 5Ds/R at ISO 6400. The 5D Mark IV has 52% more pixels than the 6D and 39% more than the 5D Mark III. Despite this they have increased the ceiling of the normal range to ISO 32,000 (from ISO 25,600). This is a somewhat odd jump and equates to roughly a third stop more, while the expanded range remains the same (ISO 51,000 and 102,000). The latter two should be considered useful only in the most extreme of circumstances, and, in fact, one might be better off shooting at a lower ISO and pushing the results in post.
Compared head to head to the 6D at native resolution I didn’t see much of an advantage for the 5D Mark IV, though when compared at downsampled resolution it looks better at most all ISO settings. It did exhibit less color banding than the 6D for the most part save at ISO 25,600 (and beyond). It is a clear advantage over the 5DIII, however, which was more prone to color noise and banding in the shadows. I did discover a potentially helpful trick, though. Using the MRAW setting (17MP) resulted in a demonstrably cleaner looking image at ISO 32,000 (or 25,600). Better contrast and apparent detail despite technically having less resolution due to fewer pixels. I consider this to be a very valid alternative in low light situations. Here’s a sample at ISP 32,000 at the MRAW setting.
It is worth noting that JPEGs at high ISO look pretty good and could potentially be “improved” by enabling some of the noise reduction settings for High ISOs (this is a matter of preference). Some prefer more sharpness even it means more noise, while others prefer a “smoother” image even it comes at the cost of some of the detail. The 5D Mark IV gives you some options for getting the results you want.
If you want more detailed coverage of this aspect of the 5D Mark IV’s sensor performance, I recommend that you spend a little time and watch this video episode.
I didn’t see a major step forward at higher ISO settings, but that is in part due to adding a significantly larger amount of pixels into the equation. The fact that Canon has managed to do this while still making some minor gains at higher ISO settings is positive. This is pretty much where sensor performance is at, and the competitors from other brands are delivering a similar performance with some give and take. I wouldn’t be surprised to find that this will be an area of strength for the new 6D Mark II (expected next year) which will almost certainly have a lower megapixel rating (current rumors have it at 24-25MP).
The bottom line is that once you learn how to take advantage of the potential of the 5D Mark IV you will find that it can deliver excellent results in just about every situation.
Autofocus Observations
While on paper the focus system is a similar 61 AF points to that of the 5D Mark III, this is an improved AF system in every way. Some have called the revised AF system in the 5D Mark IV its biggest upgrade. While the number of AF points is the same, they aren’t as tightly clustered as before, resulting in higher coverage of the frame. The top to bottom measurement of the two groups on the left and right has increased by 24%, while the larger center group’s measurement has increased by 8%.
It is now easier to get an AF point where you want it. I tested the 5DsR a few months ago, and while it was improved over the 5DIII in its metering system and added a bit more f/8 support, I still noticed a significant improvement in the 5D Mark IV. Everything seems to focus faster, including third party lenses, and I’m noting good focus accuracy from the system, too. As more and more people get the 5D Mark IV in their hands their feedback has been universally very positive. Focus is simply awesome in the 5D Mark IV.
Another strength of the AF system is tracking. It has Canon’s EOS iTR AF (Intelligent Tracking and Recognition) that works to recognize faces, colors, and shapes to help select the proper AF point and allow for more accurate tracking. The AF system in the 5D Mark IV actually employs a dedicated Digic 6 processor (in addition to the main Digic 6+ processor), which is part of why it is so vastly improved. The end result is that tracking a moving subject has never been easier.
You can unlock the potential of the AF system by becoming familiar with the 6 different “cases” that you can choose from in the AF menu. Each of these is customizable, but they have descriptions in which they detail the scenarios that they were designed for. Choosing the right case for your situation helps establish the focus priorities and will result in better tracking and focus priorities.
You have a number of choices for what focus points are active. Spot AF utilizes a reduced size single point (a dot within the AF point box) for the situations where you want pinpoint accuracy (put this point on the subject’s eye when shooting portraits!). Single point AF utilizes the single point but the whole focus point box rather than the inner point. The coverage grows a bit as does the potential for focus to be on something other than what you want (a nose rather than an eye, for example). AF Point Expansion mode supports the selected point with four surrounding points (to the four points of the compass). Zone AF utilizes the selected point plus the 8 surrounding points in a large square. Zone Large AF allows you to select the large group on the left, right, or center. Auto AF point has all 61 points active. Getting the most out of the AF system will require you to pair the right selection to your task. Put simply, the more AF points that you activate will result in the camera doing more of the thinking. In some situations this is advantageous (it’s quick!), but if you are shooting in more precise situations (and with large aperture lenses where depth of field is very small) you may want to use fewer points and make sure focus is happening exactly where you want it to.
You now have two choices for making the selection of how many points are active. The M-Fn button near the shutter release is the standard method (clicking it will cycle through the options), though there is now a redundant control right under the thumb stick on the back of the camera. I’ve been using it more often, as I’m usually there selecting focus points anyway.
The focus system of the 5D Mark IV is somewhat complex, and the reality is that some photographers will find themselves overwhelmed by it. I’ve had a number of photographers that have expressed to me that they preferred the simpler focus system in the 6D over the 5D Mark III because they understood how to the use the former but were overwhelmed by the second. Others strongly prefer the more complex system because of its many advantages. There’s no question that the more complex system is better in an absolute sense, but whether or not it is better for you will come down to your own comfort level with the more complex or your willingness to learn how to best utilize it. If you were already using the 5DIII, for example, you will probably be delighted with the 5DIV. If you are upgrading from the 6D you may be initially overwhelmed.
One of the great features on the 6D was the excellent sensitivity of its center point, which would focus down to -3 EV (moonlight, essentially). In some ways this actually made it a better performer than the 5D Mark III in low light despite having an inferior AF system. The 5D Mark IV has inherited that greater center point sensitivity, and even one-upped it by allowing for -4 EV focus in Live View via DPAF. Bottom line: you shouldn’t ever find yourself in a situation where you can’t autofocus some way!
I’m also finding that my third party lenses are now more confident in focusing – both in speed and in my ability to use outer points with them. The new Tamron 45mm f/1.8 and 85mm f/1.8 VC lenses are standouts in this regard (I’ve tweaked them through Tamron’s Tap In Console). Here are a few samples:
F8 Focus
One of the biggest improvements made to the 5D Mark III via firmware was the addition of the ability to autofocus at a maximum aperture of f/8 (the standard limitation is f/5.6). This allows one to shoot an f/5.6 lens (like a telephoto such as the 100-400mm II) with a 1.4x extender attached (which reduces the amount of light that can reach the sensor by 1 stop, meaning that maximum aperture is now f/8). Still, the 5DIII was only able to use the extra sensitive center point in this kind of situation. That meant that 60 of the 61 points were completely unusable in this situation. The 6D did not support f/8 focus at all.
I was impressed by the improved performance of the 80D with a lens like the Canon EF 100-400mm f/4.5-5.6L IS USM II and a Canon 1.4x teleconverter. It allowed one to shoot with that combination (a maximum aperture of f/8) at a variety of focus points – far more than what was previously possible (27 of the 45). The 5D Mark IV takes this a step further, however, and enables f/8 focus on ALL AF points, and 27 of them remain cross type for extra sensitivity to boot. This makes a huge difference, and I can honestly say that I saw little difference in the autofocus capabilities in this scenario than I did in any other situation. What has been (to me) a somewhat frustrating scenario now just works. AF is extremely quick and accurate with this combination. I was able to focus with this combination effectively even in low light conditions. It is as if Canon has figured out this tech (probably with the help of that dedicated processor) and it now finally lives up to its potential.
This section has included some shots taken at 560mm, f/8 (400mm + 1.4x TC).
DPAF
If you have never used Canon’s DPAF (Dual Pixel Autofocus), you are in for a treat. I’ve been shooting a number of comparison series with the 6D over the past month, and it shocking how painful traditional Live View focus feels after having used DPAF. The technology debuted on the 70D (and was revelatory then), matured on the 80D, and is simply a delight on the 5D Mark IV. Touch the screen (about 80% of the sensor area is covered) and the camera focuses almost instantly. While still not quite as fast as the traditional phase detect AF (through the viewfinder), the difference is now almost imperceptible. Focus is incredibly fast in DPAF and makes tripod based shooting in particular a real joy. Now if only the 5D Mark IV had come with that articulating screen…
Tracking is also very impressive in DPAF mode. The face detection is almost eerily accurate, and I’ve been using this feature on xxD bodies for my YouTube channel for the past several years as it allows me to film my episodes at larger apertures without worrying that my face will be out of focus when I’m in front of the camera. The addition of DPAF to the full frame 5D Series gives it a serious advantage over the competitors.
Video Observations
Bottom line: Canon has made a lot of people mad on the video front with the release of the 5D Mark IV. What’s interesting is that the implementation of 4K video isn’t radically different on the 5D Mark IV than it was on the 1Dx Mark II, though the release of that camera didn’t have nearly the same amount of drama. What’s mostly different is that the 5D series A) has broader market appeal and B) is viewed as more of a hybrid/general purpose camera than the more sports/wildlife oriented 1D series. But let’s step back and take a rational look at the reality of the video features of the 5D Mark IV.
It is actually a better video camera than the 5D Mark III…without question. It has more shooting options, a better sensor to work with, produces sharper video than the 5D Mark III, has a useful HDR video mode, and most importantly, it has DPAF video servo focus and that great touchscreen. It adds the ability to create time lapse movies in camera. It is one of Canon’s best ever 1080P cameras, lacking basically only a 1080 120FPS mode (that frame rate is limited to 720P). The footage looks great, and no one is talking about how incredible DPAF is at tracking and how nice this is to have on a full frame body. I loved DPAF beginning on the 70D, found the 80D even more improved, and this is a great implantation here. If you are behind the camera it really opens up so many options. Canon’s major misstep here was not going ahead and implementing the articulating screen that makes using the camera for vlogging and/or YouTube so much easier. If you missed the tip before, you can remotely monitor video through the Canon Connect app on your mobile device, controlling not just settings and modes but also simply pressing on your screen where you want the camera to focus. Very, very nice! Still, a lot of YouTubers and Vloggers want that articulating screen, and in the “selfie age” that we now live in I think Canon may have missed an opportunity to move YouTubers and Vloggers upmarket.
If the camera only supported 1080P, people would have loudly complained over the lack of 4K support, but would have had to conclude that at the least the 1080P performance was very good. But the camera does support 4K, at least nominally, and it is the nature of that support that raised so many people’s ire. The criticisms are largely focused on 1) the codec (MJPG) and 2) the crop factor.
The codec. Canon’s decision to only support the massive MJPG codec has caused a lot of hair pulling for a number of reasons:
It’s huge. A 64GB card will only hold about 16 minutes of 4K footage because the bitrate is so high. Battery consumption is also pretty huge while recording 4K, and, of course, the massive file size adds a lot of stress on the processing end back at your workstation, too. If you move up to a bigger card (say 256GB), your battery will go dead before the card is filled.
The footage is not correspondingly epic. That massive, uncompressed footage should blow highly compressed h.264 footage away, right? Not according to a thousand head to head comparisons already out on YouTube. The 5D Mark IV footage has pros (mostly due to the nature of Canon’s superior color rendition) and looks great, but not really better than the footage from other cameras at a tenth of the file size. The MJPG codec is clearly not implemented because of its intrinsic advantages.
The crop factor. There was a collective groan when it was discovered that Canon’s 4K support would not be utilizing the full frame coverage but would instead be a cropped portion of the sensor. That crop factor is, in fact, is a significant 1.74x. This means that shooting wide angle video is difficult. My widest lens goes to 15mm, which with this crop factor is slightly over 26mm. Ah, but it gets worse. Canon has persisted in not allowing EF-S (APS-C crop specific lenses) to be mounted here, which means that Canon’s lenses designed for a crop factor cannot be used here. The end result is there is going to be a lot of videographers mounting Sigmas and Tamrons on there (a lens like the Sigma 18-35mm f/1.8 ART will mount and function perfectly). Third party crop sensor lenses utilize the EF and not the EF-S mount, so they will attach to the camera where Canon’s own crop lenses will not. I’ve just started testing the new Laowa 12mm f/2.8 Zero D lens and it is actually a very intriguing lens for shooting 4K video with on the 5D Mark IV as the focal length after the crop factor is about 20-21mm; right in the sweet spot for wide angle footage.
There is, however, one very positive aspect of the 4K support. Canon has designed the implementation so that right in camera you go through footage frame by frame and grab JPEGs at a decent 8MP size. I can attest first hand that this in fact valuable, as the files are large enough (and detailed enough) to actually be useful. I’ve got an image gallery of images like this. Here’s one of those screen grabs here:
This could be valuable for catching crucial moments like the first kiss at a wedding, or to grab segments in portraits where your subject moves into position and you can choose that perfect moment from the sequence. It will also be useful for getting clean images of fast moving subjects like insects and hummingbirds.
There are other lesser complaints. While the 5D Mark IV does support HDMI out, it is limited to 1080P, and there is not a true neutral profile (C-LOG) that provides the kind of footage that filmmakers most value. The 4K framerate options are limited to 24 and 30FPS with no 60FPS option (which the 1Dx Mark II does have).
The 4K footage does look quite good. Here’s a few unedited samples of it (only transcoded into MP4 and pieced together).
I’m not a videographer, and to be honest I don’t have a screen in the house at the moment that supports 4K, although I do like the idea of having some crop latitude in my footage without sacrificing quality. I find 1080P content painful enough to upload to YouTube, so I’m in no rush to switch to 4K, but there is also no question that Canon did a lackluster job of implanting 4K support in the 5D Mark IV. This is something that people value and even something that many people expect in a modern DSLR. Canon is clearly trying to push serious filmmakers towards their more expensive cinema line, but there’s one problem: people have options these days. They can move to a far less expensive Sony a6300 and get very good 4K support (though that new camera has already been replaced with the recently announced Sony a6500…ouch!).
But you know what? I’m actually really enjoying the 5D Mark IV for video work. After I accepted the limitations of the 4K video, I’m actually enjoying using it here and there and marveling at the tremendously detailed footage. I love the 1080P on the camera due to the great DPAF, sharp footage, and flexible video modes. I wasn’t using any of my full frame cameras for video work before, but the 5D Mark IV has rekindled my interest in using full frame for video. The moire suppression is the best I’ve seen so far. I did an extensive video for my YouTube channel covering all the highs and lows of the 5D Mark IV’s video features here.
Despite the video implementation actually being good in a number of areas, I think that this was perhaps Canon’s greatest misstep. If they had included a MP4 option for 4K they would have had a much more positive reception from the video crowd. I think they may have underestimated how much backlash there would be over its omission.
Battery Hungry?
Canon’s DSLRs are usually pretty fantastic when it comes to battery life. The 5D Mark IV used the LP-E6N battery that has been the staple in the newest generation of Canon bodies, though it is also backwards compatible with the older LP-E6 batteries. Though the rating for the number of shots isn’t really down all that much, I found that due to all the tech on the 5D Mark IV I’ve been burning through batteries faster than typical. The primary culprit is probably the GPS logging, and make sure that Wi-Fi isn’t on when you don’t need it, too. Even using the GPS in the Mode 2 (where it shuts off when the camera is off) has an impact on battery life. I suspect the extra voltage going into focus has a negative impact on battery life as well. If you shoot 4K video, too, you are very likely to see serious battery drain. The bottom line is that I’m seeing a low battery indicator more often now.
I’d recommend putting a backup battery or two on your wish list.
Conclusions
The Canon EOS 5D Mark IV is a bit of paradox. It is simultaneously one of the best cameras Canon has ever created along with being one of its most divisive ones. Whereas the 5D Mark III was universally accepted as an excellent choice for both professional and amateurs alike, things have changed. It is my opinion that the 5D Mark IV is a better camera in every measure than the 5D Mark III, but is that enough for the 2016 market that it is released into? It has better autofocus performance (including vastly improved performance with teleconverters), better resolution, better dynamic range, better high ISO performance, and faster shooting and buffer performance. And, despite all of the drama surrounding the video performance, it is actually a better video camera than the 5D Mark III. It has more shooting options, a better sensor to work with, time lapse movie mode, a useful HDR video mode, and most importantly, it has DPAF video servo focus and that great touchscreen. While the 4K support is unquestionably flawed, the reality is that it does serve some purpose, the footage looks great, and the image grab from 4K video is actually useful.
If the 5D Mark IV was being compared only to Canon cameras, it would be declared a smashing success. But things have changed since the release of the 5D Mark III, particularly on the video front. Nikon’s D810 still combines a higher resolution sensor with even better dynamic range, and the D820 may not be far off. Sony and smaller players like Fuji and Panasonic have demonstrated that quality 4K video can done in a mirrorless or DSLR form factor. Canon’s choices regarding the 4K implementation on the 5D Mark IV seem to have disenfranchised a lot of people, particularly considering that it is more expensive than its competitors (in some markets by a LARGE margin) and when one considers that the 5D series created the hybrid video/stills market. Time will tell whether these protests will affect sales, but the initial “mood” towards the camera was mostly negative (watch that change as people actually USE it!) In short, people expected more, realistically or not, and even the most positive are having a hard time justifying the implementation of the 4K video.
5D bodies are known for implementing some new technology, and while Dual Pixel RAW undoubtedly has useful future applications, the current form has extremely limited value. The amount of adjustments that you can make to focus, bokeh shift, and flare are so small as to be mostly imperceptible. Having Dual Pixel RAW enabled essentially doubles your file sizes, making them larger than those of the 5DsR and its massive 50+ megapixels of resolution. It also ties you (at least for the present) to Canon’s own Digital Photo Professional software to enable those effects. In its current form DPRAW holds no real attraction for me.
But at the same time I pride myself in be reasonably objective. I’m not going to fuss and complain over a camera I’m actually very happy with. If you, like me, are primarily a stills shooter who does some video, then you are going to love this camera. I think it may just be Canon’s best stills camera so far, combining a high resolution, high dynamic range sensor around Canon’s best focus system so far outside of the 1Dx series. The camera is ergonomically excellent and I find shooting with it a joy. It just does what I want, without fuss. A tear down from Roger over at Lens Rentals shows that it is more robustly sealed then previous generation 5D bodies. I love the images that it produces, and the file size is fully manageable. After some tweaking I love the JPEGs, and the RAW files have loads of processing potential. Most important to me is the ability to create amazing images, and I genuinely feel like I have greater potential to do that than before.
In short, Canon has (mostly) lived up to the potential that I saw when I looked at the specs and was delighted by them. After two and a half months of using the camera I am confident that this will be my workhorse for the next three or four years. I find it hard to rant and rave over a camera I’m personally very happy with.
But neither can I disagree with those who are highly disappointed over certain aspects of this camera, particularly when it is coming in at a very expensive price point that is significantly higher in every market save the US, it seems. Even though I had the money put aside for the Canon EOS 5D Mark IV, I almost changed my mind over putting in my order. But now that the money is spent and I plan to focus on enjoying the camera and letting it pay for itself. Bottom line: if you are debating whether or not to purchase the 5D Mark IV, do a realistic evaluation of your shooting needs and then consider if the 5D Mark IV meets those needs. It is in most ways an exceptional camera despite some of the early ranting on YouTube and the message boards. But once the drama is over and people move on, I suspect that you’ll find a whole lot of people shooting with and loving this camera. I will be one of them.
Pros:
Improved autofocus performance that is now exceptional
The best rated sensor from Canon yet
Great dynamic range
Strong high ISO performance despite MP upgrade
Higher resolution while retaining reasonable file sizes
Purchasing your gear through B&H and these links helps fund this website and keeps the articles coming. Thank you for your support.
Great News! I can now offer a 5% discount on all purchases at Amplis Foto, Canada’s Leading Photographic Supplier. Please enter discount code: AMPLIS52016DA in your cart. It is good for everything in your cart, and is stackable with other coupons, too! It will take 5% off your entire order! Proceeds go towards keeping this site going and providing you with new reviews!
DISCLAIMER: This article and description contains affiliate links, which means that if you click on one of the product links, I’ll receive a small commission. As an Amazon Associate I earn from qualifying purchases.
This week I began my review of a camera that I’m really excited – the Canon EOS 5D Mark IV (5D4). The 5D4 merges a lot of what I’ve liked about the 6D (low light performance, High ISO performance, GPS + WiFi), 80D (DPAF, touchscreen, improved dynamic range, enhanced f/8 focus), and 5DsR (resolution and build) into one comprehensive package. While some of the early dialogue (based mostly on spec lists) of the 5D4 turned negative, I feel like the consensus once people begin using the camera will be extremely positive. I will be sharing videos, articles, and photos about the 5D4 over the next month or so, but I am starting here with a gallery of images of the new 5D4 along an extensive gallery of images that I’ve taken with the 5D4.
Purchasing your gear through B&H and these links helps fund this website and keeps the articles coming. Thank you for your support.
Great News! I can now offer a 5% discount on all purchases at Amplis Foto, Canada’s Leading Photographic Supplier. Please enter discount code: AMPLIS52016DA in your cart. It is good for everything in your cart, and is stackable with other coupons, too! It will take 5% off your entire order! Proceeds go towards keeping this site going and providing you with new reviews!
DISCLAIMER: This article and description contains affiliate links, which means that if you click on one of the product links, I’ll receive a small commission. As an Amazon Associate I earn from qualifying purchases.
Ahh, the bloody days of the MegaPixel Wars. In the previous generation of cameras Canon had boasted the highest MP counts in most of its bodies, but when the Canon 5D MKIII and the Nikon D800 were released the roles were reversed. While the Canon had a modest bump to 22.3MP (from 21MP) the Nikon D800 jumped to 36.3MP (from the 12.1MP in the D700), and most of those who had previously argued in the Nikon camp that high megapixels were unnecessary now announced that high MP was the way to go, while many Canon apologists took the opposite tack. Both the D800 and 5D MK3 have been very successful cameras, though the D800 formula has been tweaked a good deal more (D800e/D810) over the last four years. Along the way Sony pushed the bar a bit higher with is A7RII mirrorless body and it’s 42MP. The voices grew louder for Canon to answer this challenge…and that answer eventually came in the form of the 5Ds/5DsR twins. The headline selling feature of these new bodies was an all new 50.6 MP full frame sensor; a massive amount of resolution that left the competitors in the dust. Canon also followed the lead of Nikon with its D800/D800e twins by having two identical models differentiated only be one not having the traditional low pass filter (D800e/5DsR). The removal of this filter allows for more ultimate resolution though at the cost of more moiré where repeating patterns occur. The Canon EOS 5DsR also comes at a price premium of $200. Different strokes for different folks.
Canon definitely has the bragging rights (for now), but the debate over the necessity of ultra high megapixels rages on. It is clear from the photography communities that I participate in that the 5Ds/R variants have been somewhat polarizing. While a new 5D model will typically have the majority of the crowd panting for an upgrade, the 5Ds/R seems to have brought more caution. While not scientific, I noted that after being on the market for six months the 5Ds had only 34 user ratings on B&H Photo and the 5DsR had only 36. I’ve seen a number of significant discounted prices in a way that I did not see in the first year (or even few years) of the 5D3. These have not been populist models (and, to be fair, that isn’t really their intention.) There are a few other upgrades over the 5D3 that I will detail in a moment, but the 5Ds/R is at best an incremental upgrade of the 5D3 in other areas, and perhaps even a mild regression in some. In short, there is only one real reason that would compel a person to upgrade or choose the 5Ds/R over the more inexpensive 5D3 – all those megapixels.
My review will focus primarily on whether or not having that massive amount of pixels is worth the inevitable trade offs. Obviously different photographers have different needs. Some people swear by the flexibility and absolute image quality provided by the 5Ds/R while others determine that its benefits aren’t worth the inherit weaknesses that come with such an extreme beast. My hope is to give you an informed opinion on this along with an assessment of who I think would benefit from ownership and who would not.
Prefer to watch your reviews? I’ve got you covered…just click below or follow the link to YouTube for full resolution:
I am a little late to the party in reviewing the 5DsR. I have been considering one for myself, so that is part of my logic, but I have another reason for reviewing one now (a good part of a year after release). That reason is the fact that the release of the 5D4 is expected this fall. I wanted to have a clear impression of the 5DsR so that I could compare and contrast with the 5D4 upon its arrival. That camera will almost certainly have different priorities/strengths from this one, and I want to bring my viewers/readers an informed opinion.
I have an extensive kit of lenses, but I have chosen to focus on a few very current lenses for both practical and professional reasons. The practical reason is that calibrating lenses to a body is a time consuming process, but such a high resolution body demands lenses to be properly calibrated as it will reveal every flaw. So I will primarily be using three lenses: the Canon EF 100-400mm f/4.5-5.6L IS II USM along with the new Tamron 45mm f/1.8 VC and 85mm f/1.8 VC primes. The former will help me determine whether or not the benefits for wildlife shooting (massive cropping ability/crop mode) offset the somewhat slower burst rate when compared with competing models. The Tamron twins are both among the highest resolving in their class and, more importantly, they have effective image stabilizers, which many 5Ds/R shooters have reported becomes extremely important as the high MP count really punishes motion blur.
Build and Handling
In this video I break down the feature set and design of the 5DsR:
If you are coming from a 5D3 (or even a 5D2), the layout of the 5DsR will seem very familiar. It is, essentially, a new sensor in the same 5D3 body. The button position is essentially identical, so 5D3 shooters will find everything falling to hand in a very familiar way. Canon is perhaps the best of the bunch when it comes to logical configurations and ergonomics, though I will say that I prefer the one handed image review operation of the 6D/80D over the 5D series, which requires both hands to hit “play” and “zoom” (left side of the screen) and then to actually zoom in (right hand). The thumbstick of the 5 series is very handy, though, and I would say it is the one handling feature that stands out as the most useful over Canon’s less expensive options.
The advantage of using essentially the same body for this new camera is that a number of the 5D3 accessories can be shared/used (battery grips, underwater housing, etc…). The 5DsR uses the new LP-E6N batteries, but is still backwards compatible with the older LP-E6 batteries used by the 5D3.
The downside is that the 5DsR lacks any of the modern connectivity features that are now standard on many cameras – WiFi, GPS, NFC, etc…
The only real noticeable difference from the 5D3 is that the bottom plate and tripod mount is significantly reinforced. You will note far more screw heads that you are accustomed to seeing on the bottom of Canon DSLRs. This (along with internal changes to the shutter/mirror mechanism) is all about reducing vibration and allowing as much stability as possible. That massive resolution will make motion blur and other defects more obvious, and Canon has designed this camera to help reduce that vulnerability.
Underneath the “hatches” on either side of the 5DsR you will find slight differences from the 5D3. On the left side the USB 2.0 port has been replaced with a USB 3.0 port (important for transferring all of that data!). The downside is that the size of the USB 3.0 port necessitated the removal of the headphone jack for monitoring audio (according to Canon engineers). This is an important omission for those interested in doing video.
On the right side of the camera the memory card slots (one CF/one SD) look the same, but, very importantly, the 5DsR (unlike the 5D3) now supports the UHS-I SD/SDHC/SDXC standard. You can take full advantage of the easier to work with fast SD cards rather than having to rely on CF for speed. I saw no difference in operation moving between a fast CF card and a fast SD card.
Here are the raw numbers from Canon’s three different “midsize” full frame bodies.
What stands out here is that Canon has (surprisingly) managed to shave a few grams off the 5D3’s weight. Unless you have extremely sensitive hands, you probably won’t notice the difference, but weight has a way of adding up, so every little bit helps. The 6D is both lighter and less bulky, so it does have a different feel in the hand. My wife has small hands, but when I had her use the 5DsR she still found it comfortable to use (though the 6D/80D are more natural fits).
Yes, the 5DsR has a slightly lower burst rate and rated buffer size than the 5D3, but when one considers that more than twice as much data is moving through that pipeline the insignificant reduction is pretty impressive. The 5DsR employs dual Digic6 processors to make this happen. I was able to get 14 50MP RAW shots in a burst before the buffer filled and the burst rate dropped. Some have asked if these figures improve when using MRAW or another lower resolution figure, but the answer is “no”. Canon’s DSLRs are designed to produce their rated burst/buffer figures at the most challenging settings, but I’ve rarely seen much of an improvement at less challenging settings. I still got 14 MRAW (28MP) shots before the buffer filled and the burst rate slowed down. I did get 16 SRAW (12MP) shots before the buffer slowed. The only real advantage I could perceive is that the buffer (write) did clear up quicker with the smaller sizes and the camera was ready to shoot again faster. But in many ways there is little practical advantage in burst rate/buffer to shooting at a lower resolution. If you want to keep shooting and shooting, choose JPEG. You can then shoot until the memory card is full.
These specs are not going to be good enough for serious sports shooters and even some wildlife shooters, but they are good enough for many other applications. This is more of a specialist camera, and not really designed to supplant the 5D3 as the everyday workhorse for many photographers.
One final thing worth noting is that while Canon cameras typically have excellent/logical menus, the 5DsR seems to have a little better one than most. It is nicely laid out with clear and easy submenus under six headings. The end result is text a little larger than usual and easy navigation despite a number of additional menu options. Less is hidden away in the custom menus and all the features are easier to access. Things like the various autofocus “cases” were explained nicely and I found that I was usually able to quickly find the setting I was looking for.
Bottom line: if you are familiar with Canon’s 5 series you will find the 5DsR both familiar and satisfying to use…just don’t expect a lot of revolutionary improvements. This isn’t so much an all-new model as it is a very big new engine in an existing model.
Other Upgrades
The unique demands of such massive sensor resolution (along with technology advancements in the years since the 5D3’s release) have led to a few other features, though the 5Ds/R is not a showcase of Canon’s newest technologies. Notably lacking are things like DPAF, a touch screen, or any kind of video advances (the 5DsR actually lacks a few of the 5D3s video features like a headphone jack or uncompressed HDMI video).
Included in the feature upgrade set is:
A reinforced tripod socket to help really anchor the camera down to provide additional stability.
A specially tuned mirror mechanism that can reduces mirror slap and helps limit the vibrations that can cause blur. There are also some options to program the shutter/mirror behavior to help reduce vibration further.
Flicker detection (like the 7DII/80D) that helps synchronize continuous shooting to get consistent exposures under lighting that flickers/cycles continuously (sodium lights are among the worst!)
A built in intervalometer for shooting time lapses and the ability to combine them into a movie in camera. The camera also has a built in bulb timer, which is certainly a nice option.
A nice little list, but, let’s be honest: no one is paying nearly $4000 for these feature upgrades. It’s really all about that incredible sensor! One final change over the 5D3 is a switch to USB 3.0 (to help facilitate moving those big files!). The female port in the camera is the micro B USB 3.0 jack – one that you may not have lying around (one is included in box). It is this change that resulted in the headphone jack being removed; there wasn’t room for both. Count this among the downsides of leveraging an existing camera body.
Canon has implemented a version of AF Servo focus during video (Movie Servo AF), though it pales in its performance when compared to the new 80D body and its advanced DPAF. The 5DsR’s Movie Servo AF tends to hunt more, focus comes more slowly, and it is prone to completely drifting out of focus at times. Tracking isn’t nearly as good, either, though face detect works pretty well. The 5DsR is capable of producing some beautiful video footage (like most of Canon’s DSLRs), but should not be seriously considered by those whose priority is video. Moiré (a 5DsR weakness) is much more of a video issue than it is a stills issue. The massive resolution of the camera is mostly wasted for video, as video resolution tops out at 1080P. Don’t choose the 5DsR if video is your priority; the 5D3 is a much better video rig.
Crop Shooting Mode
One tangible benefit from the huge sensor is a new crop shooting mode. This allows you to shoot in 1.3x crop mode (APS-H at 30.5MP) or 1.6x crop mode (APS-C at 19.6MP). This is still plenty of resolution in either mode. In practice, however, this isn’t as exciting as it sounds.
No, you can’t actually mount Canon EF-S lenses – the lenses still won’t physically mount. You can mount third party APS-C lenses (Sigma, Tamron, etc…) as they actually come in an EF (rather than EF-S) mount.
The viewfinder doesn’t “zoom in” in these modes. Your choice is to either have the area masked out or an overlay that shows the outline of the cropped area. A similar effect is shown when reviewing images.
Live View will show the cropped image, but when you review images on the LCD screen after capture they continue to show the “mask” rather than the actual crop.
The one advantage is that in APS-C mode there is enough AF point spread to cover almost the whole frame.
When the images are downloaded to a computer they will show up in the cropped look, but you do have the option to recover the full coverage by using the crop tool (it will show the full image with the crop over the APS-C section that you can then expand it back to the full frame area). Because the full frame image is actually being recorded the file size is not any smaller in crop mode.
It’s always nice to have options, of course, but one has to wonder if they wouldn’t be better off just cropping in post. That may not be an option for some of you, though, particularly those who give the client the memory card at the end of a shoot. Some may find a framing benefit in composition, too. I personally tried out the crop mode and decided for my purposes that I would rather crop in post where I can better see what I am doing.
Autofocus
Good autofocus is incredibly important in any camera, but even more so in a camera with enough resolution to reveal even the slightest miss of focus.
Familiar AF System = Good Thing
Once again the 5DsR has inherited something from the 5D3; in this case it is the 61 point AF system with 41 cross type sensors. The 5D3’s AF system was a huge advance over previous systems, and has continue to be recognized for its excellence. It is precise, highly configurable, and just works…period. The system has been given some new tweaks, however, most noticeably in an improved 150,000-pixel, 252-zone RGB+IR Metering Sensor. This is borrowed from the 7DII, and gives improved tracking performance through better AF point selection and face tracking. The majority of these improvements will be realized in AF Servo mode.
The improved metering system is also going to produce more precise metering, and I can attest that the camera does a very good job metering in various modes. The inclusion of the Anti-Flicker mode is one of the most useful new features to people like myself who shoot events. It gives you far more even results under artificial lights that cycle. This is a very tangible advantage over the 6D bodies that I typically use in this setting. Expect all of Canon’s better DSLRs to include this moving ahead.
This AF system has been thoroughly covered by many journalists and photographers, so I won’t spend a lot of time on it. What I will do is give you is a few real world observations.
The AF system works very well. The camera tracks well, the outer points continue to be completely usable (though they prefer first party lenses over third party, for the most part), and my focus consistency has been very good. The center point isn’t quite as sensitive as the 6D’s (but I haven’t really seen it matched yet), but being able to compose with focus point groups definitely helps you in both the ease of composition and its speed. My experience continues to be that you will get your most precise results with wide aperture lenses using single AF points or a single point supported by others, but I feel my focus results in most all modes are reliable (I don’t really use “all points active” mode).
Use with Teleconverter and f/8
I wanted to test the performance of the 5DsR with the 100-400L II + Canon’s 1.4x III teleconverter. The new Canon EOS 80D opens up more points with this combination than what the 5DsR offers, as it limits you to the center point + the supporting four points (to each point of the compass). Tracking is a bit more of a challenge with so few points, obviously, but if you keep the points on the subject the lens/camera combo tracks very well. I was able to run off a nicely focused series of a boy on a bike, though with a single point it is easier to track something moving towards you than across the frame.
Birders will probably find it better to just shoot with the bare lens and have all 61 AF points available for tracking. You have massive cropping potential in post. Lenses and teleconverter combinations with a maximum aperture of f/5.6 will continue to have all focus points available; it is only the f/8 combination that is limited.
Image Quality
This is where the whole existence of the 5DsR hinges. People buy this camera for the 50 megapixels…period. There is little other reason to prefer it over a 5D3. But there are both pros and cons to that amount of resolution and they come in both expected and perhaps unexpected ways. Let’s examine them together: (If you would prefer to watch this section, just click the video below)
I strongly recommend that you visit the image gallery here and check out a lot of different photos for yourself.
The Downsides of 50 Megapixels
There’s no getting around it…the 5DsR will cost you some money…and I’m not talking about the cash you will lay down to purchase one. There’s a good chance that a few weeks with the files from the 5DsR will have you wishing for a more powerful computer. I have a fast workstation that I run full wedding shoots through without wishing for more “grunt”, but waiting for Lightroom to generate a 1:1 preview to check critical focus on images frequently proved somewhat exasperating. A little tip: select the group of images in Lightroom that you want to test, go up to the Library menu, select Previews and then “Build 1:1 previews”. It will take a while to render them (and you can discard them later to free up buffer space), but it will save you a lot of frustration in dealing with the files. Even so, expect a much heavier load on your computer throughout your workload. It’s the nature of the beast. I’ve found a lot of frustration in my typical workflow due to slowdowns where normally I encounter none.
I’ve reconciled myself to the fact that if were to add the 5Ds R to my personal kit I would also have to upgrade my workstation. The full file size dimensions from the 5DsR is a staggering 8688 x 5792 pixels (aka huge!)
A secondary challenge of dealing with such massive files is that the 5DsR is very unforgiving of motion blur. No, higher megapixel counts do not create motion blur, but the sheer amount of pixels makes existing blur more apparent. You need considerably higher shutter speeds to avoid it. Faster shutter speeds often mean higher ISO settings, and this isn’t really the strength of the 5DsR. It has a much lower base maximum ISO setting (6400) than either the 5D3 or the 6D (25,600), and is only expandable to ISO 12,800. I have frequently shot up to ISO 25,600 with the 6D in event settings and find the files very usable (so long as you don’t need to tweak the levels much). The 5DsR is a great wedding camera in a number of ways, but just know that you probably should become familiar with maximizing its potential before putting it to work in a critical/professional situation. You probably need to invest in fast (aperture-wise) glass, and image stabilized lenses are even better (one of the main reasons I’m doing a lot of my review with the Tamron 45/85mm f/1.8 VC lenses).
If you are a tripod shooter, the 5DsR might be a natural fit for you, but if you shoot primarily handheld (as I do) you will find that you have to adjust your shooting style and settings. Practice good steadying techniques, increase your expectations for minimum shutter speed, and learn to love lenses with good stabilizers!
One final issue is the pixel pitch/density on the 5Ds (R) results in diffraction setting in much sooner than most full frame bodies. The 5D3, for example, has a DLA of 10.1 (images start to soften due to diffraction at f/10, essentially), but the 5Ds R has DLA of f/6.7; more like the 7D MKII or the 70D (the new 80D is worse still at f/5.9 due to its even denser pixels. Landscape photographers will get their sharpest results even before f/8, though in many situations the modest degradation of image quality at f/8 may be compensated for by improved sharpness from the lens at that setting.
You should also be aware that the massive resolution of the 5Ds or 5DsR is not going to be kind to substandard lenses. Want the best results with the 5DsR? Pair it with the best lenses.
The Upside of 50 Megapixels
The full impact of how much information is in a 5DsR smacked me right between the eyes when working with this image. When I zoomed to a pixel level in early images while in Lightroom I wasn’t wowed. At a pixel level the image quality isn’t really any better than the 6D, so at first I was underwhelmed. But then I started cropping and realized that you can crop…and crop…and crop and still have a very credible image left over. Take a look at this crop.
And here is the original image. Wow!
If you have a sharp lens attached to the camera body (I was using the Tamron SP 85mm f/1.8 VC lens – a wonderful lens!), you have incredible potential when shooting landscapes to crop to the framing you want even if you don’t have a lens with enough reach for the shot you want.
The same is true for shooting wildlife. The ability to deeply crop results in often doubling the reach of the lens attached…with one significant difference. A crop is not going to change the depth the field. Cropping from 300mm to 600 or 800mm is not going to give a shot the subject isolation that shooting it with a longer lens would. But there is no disputing the value of being able to deeply crop while retaining a lot of resolution. It allows you to put more pixels on your subject than any full frame camera before, and paired with some of Canon’s excellent lenses (and Canon shooters are blessed to have access to the finest collection of lenses in the world!), it is stunning how much resolution can be achieved. Take for example this shot of a robin. I was limited to 400mm, but after a deep crop the image is now more like a 600mm+ shot…and still with plenty of resolution for print or sharing.
While the 5Ds/R is punishing to poor lenses at a pixel level, it is worth noting that (paradoxically) in some ways it can make weaker lenses look better. I put my Voigtländer 20mm f/3.5 on the 5Ds R. I love the compact size of the Voigtländer as well as its beautiful color, but, even at its best, it isn’t incredibly sharp. The sheer amount of resolution from the 5Ds R results in noticeably sharper images from the little Voigt, particularly in the middle of the frame. Resizing those images to smaller dimensions can really help achieve images with much higher apparent sharpness. This image looks pretty impressive!
I found the same to be true when putting my vintage SMC Takumar 50mm f/1.4 on the 5DsR. The lens is a bit “dreamy” at f/1.4, but the 5DsR made it look its best!
It’s also helpful in giving you framing flexibility. You can turn a nice a full length portrait into a still extremely high resolution head and shoulders or even tighter crop. It will help with lenses like 85mm focal lengths that don’t have great maximum magnification. Also helpful is when shooting large groups or dealing with different crop ratios for prints. Go ahead and frame more loosely in those situations and leave plenty of room for cropping while retaining high resolution.
I’ve shot some images of large groups for either sports or in a business setting, and the ability to shoot a really big group while retaining a lot of sharpness on each face is very, very useful.
Combining the 5DsR with a good landscape lens is going to give you results that are currently unparalleled by any other 35mm camera. Landscape photographers (particularly those who do large art prints) are going to love what 50MP can accomplish.
Cut Through the Noise
The 5Ds R really requires some additional thought in controlling the noise from the camera. I’ve been spoiled over the past four years by using a pair of Canon 6Ds as my primary event cameras, and I really feel that they sport one of Canon’s best sensors for overall image quality and particularly for high ISO performance. In event work I feel that my shots even at the maximum normal range of ISO 25,600 are perfectly acceptable for event work and reportage, and I’ve actually sold some fine art prints taken at that setting.
The 5Ds R has a considerably reduced “normal” ISO range of 100-6400, with the ability to shoot at an “expanded” mode (5D3/6D have an “expanded” range of 102,400). When you are accustomed to shooting with the broader range of those cameras (particularly the cleaner high ISO performance of the 6D), a maximum of ISO 6400 can feel a little confining. The nature of the pixel density of the 5DsR does make for more apparent noise:
Here is an ISO 6400 shot with the shadows lifted 100% in Lightroom.
Is such a low maximum ISO speed setting appropriate? Many 5Ds R shooters say “no”, though with an asterisk. Reducing the image size (downsampling) images results in reduced apparent noise. When downsampling images to the same dimensions of the 5D3 the noise levels are similar or even slightly less. Look at the comparison images before/after downsampling (the third image compares the two side by side):
At full resolution, however, there is no question that the noise levels are not as good as the 5D3 (and even less so than the slightly better 6D), though there are options to improve that with a little work. Here is the comparison to the 6D at ISO 6400 after downsampling the 5DsR image (on right):
In some ways the image files behave more like recent APS-C images than the 6D files I’m so familiar with due to the incredible pixel density. Whether or not this is a good or bad thing will depend a lot on what you are shooting and whether or not you have the skill/inclination to unlock the full potential of the camera.
Just know that unless you take additional steps in post you are going to be dealing with noisier images than some of the competing options… I’m occasionally surprised at seeing noise at settings like ISO 400; that seems very much like two generations of cameras back.
Mode Flexibility
One of the things that makes such a high megapixel body tempting to me is that you can have the full resolution available when needed but shoot at more reasonable sizes at other times. The 5DsR has three useful RAW modes: full RAW (50MP), MRAW (a very useful 28MP), and SRAW (12MP). So even at its lowest setting it still has as much resolution as the Nikon D700 did. That MRAW setting has become my “go-to” choice, and I find that A) 28MP is still plenty of resolution for most all situations and B) the file size is much more manageable. The current rumor is that the 5D4 might have 28MP, and I hope that’s true.
Want to shoot JPEGs? You have even more resolution choices. Traditionally cameras give you two options each (Fine/Normal) at Large/Medium/Small sizes. The 5DsR ups the ante, adding two medium size options (39MP or 22MP) at Fine or Normal along with a Small Fine/Normal at 12MP along with a 2.5MP and 0.3MP options (S2 and S3). I particularly like the two Medium choices; both are very useful in different situations.
I’ve mostly been shooting at the MRAW 28MP setting. It’s a very useful resolution, but having that full 50MP on tap when needed is pretty fantastic. It is this ability that broadens the camera’s appeal. The 5DsR is capable of producing amazing results at most all of its resolution options; just choose what you want!
Do You Need 50MP?
This is really the $3499.99 question. If you don’t, then, to be blunt, you would be better off buying a Canon 5D MKIII (or even a 6D) and saving yourself some money. The reality is that some photographers will take better pictures with 50MP; others will take worse pictures. There’s a right and wrong way to employ that amount of resolution, and using it wrong will actually result in pictures that are more blurry or noisy. Either way expect more time spent in handling images. Ultimately the question of whether or not you need 50MP can only answered by you, but that is the key question. After spending more than a month with the 5DsR I’m still not sure of the answer for myself. After years of shooting professionally I’ve never yet had a client complain that my images weren’t “big enough” or lacked resolution. I can certainly see situations where I would enjoy having 50MP, and my time with the 5DsR has convinced me that it is just a good camera, period…but so is the 5D3. Anecdotal evidence from many 5Ds/R shooters is that they have come to love the camera for more than just the 50MP, while others concluded that it was overkill for their purposes and went back to something else. And that is the conundrum of the 5DsR. It is a great camera, but it is also a niche one. If you need 50MP, it’s not only the best 35mm option; it’s currently the only one. But if you don’t really need 50MP, look elsewhere, as that amount of resolution comes with a cost. I suspect the biggest market for the Canon EOS 5Ds/5DsR twins will be in the bags of photographers who don’t use them as their sole cameras and are able to use them in the way they intended: special tools for specific jobs.
Pros:
More than twice the resolution previously available in a Canon camera.
50.6 MP
Excellent ergonomics and easy to navigate menu
Excellent build that manages to shave a few grams off from the 5D3
Smoother shutter/mirror mechanism
Flicker detection
Built in intervalometer and ability to create time-lapse movies in camera
Excellent AF system that is an evolution of the excellent AF system in the 5D3
A variety of resolution modes allows you to tailor resolution to the need
50.6 MP
Cons:
Offers little in the way of other feature advancements
No WiFi, GPS, NFC, DPAF, or any of the other recent acronyms.
Lower native ISO range than any of Canon’s other current DSLRs (save the ultra budget Rebel T6)
Huge file sizes slow down handling/processing
More apparent noise at most ISO settings
Diffraction sets in earlier than other Canon full frame DSLRs
Thanks once again to the good people at B&H for providing me with a retail loaner to review. Please consider using the linkage below or in this article to help them…and me.
Purchasing your gear through B&H and these links helps fund this website and keeps the articles coming. Thank you for your support.
Great News! I can now offer a 5% discount on all purchases at Amplis Foto, Canada’s Leading Photographic Supplier. Please enter discount code: AMPLIS52016DA in your cart. It is good for everything in your cart, and is stackable with other coupons, too! It will take 5% off your entire order! Proceeds go towards keeping this site going and providing you with new reviews!
DISCLAIMER: This article and description contains affiliate links, which means that if you click on one of the product links, I’ll receive a small commission. As an Amazon Associate I earn from qualifying purchases.
In 2013 I was sitting at a stoplight when, without warning, I was struck from behind at a high rate of speed. I had just finished paying off my 2008 Honda Civic a few months prior, and earlier that day had completed a fresh detailing of the car. I remember looking at it with pride and thinking how nice it looked. Just minutes later pieces of it were scattered across the intersection and the trunk was crushed almost even with the rear seat. I was struck at speed by a full size truck. But, the car did its job and the Lord protected me and I walked away with nothing more than a slightly displaced rib that was remedied by a little chiropractic care and a few sessions of physiotherapy.
But I was left with the reality of having to replace my car at a very inopportune time. We had replaced our family van with a newer model just a few months previously and had scrimped to pay cash for it. We were debt free, but I had used up our available reserves to purchase the van. I had been looking forward to years of owning two nice Hondas without any debt. That wasn’t to be my reality. I got a taste of what it feels like to be in a position where the insurance company has written off your vehicle and then tries to offer you as little as possible in replacement. I found the whole experience frustrating. This was exaggerated by the financial position that I was in and by the fact that I liked my car and had no plans in mind for replacing it. I had told my 10 year old son that perhaps it might be his first car when he was old enough to drive – so my plans for replacing it were at least six years out!
After a period of haggling back and forth I finally had a check in hand for less than what I desired and more than the insurance company wanted to pay…and then I had to find a new car. I did a lot of searching, but eventually settled on the newly designed (for 2013) Ford Fusion. My brother-in-law, Allen, who works for a large conglomerate of car dealerships in Ottawa, Ontario, Canada set me up with a great guy named Jeff who got me a price far below what I could have negotiated on my own on a beautiful Bordeaux Reserve (burgundy) Fusion SE with a lot of very nice features. It was a sweetheart of a car, and my family can attest to the fact that I’ve loved driving it and owning it. It has featured in a number of my photos over the past three years.
I used the insurance money and what extra I could scrape together to “purchase it” (really a prepaid lease that I would have to pay the residual off in two years). Over those two years I would have to really discipline myself to save and scrimp so that I could have the lump sum ($15,000) available after two years to pay for the car. I did not want to go in debt over the car. In the early months I despaired, as despite my best efforts it just didn’t seem like I was making any headway in getting money put away. Life seemed stacked against that happening. I began to really pray over this and ask God to help me to meet the goal. I’ve tried to honor the Biblical principle of staying out of debt as much as possible in my life. I can’t even tell you exactly how it happened, but when August of 2015 rolled around I was able to walk into the dealership and hand them a bank draft for the final amount.
I was delighted to own outright a beautiful car that was only two years old and completely paid for. God’s blessings! I settled into the pleasure of having a nice car that I would enjoy driving for years to come…
…or nine months.
On June 7th, 2016, I had come to a complete stop on a quiet street in the city where I live as the car in front of me had to make a left turn onto another street. They had just cleared the intersection and I was just about to start accelerating when without warning a big impact launched me forward into the intersection. A quick glance into my rearview mirror showed the story – another full size truck! As I limped the car forward to the side of the road out of the way I thought, “not again!” I called the police, turned off the ignition, and did a quick self evaluation. Everything seemed okay except for soreness in my right knee that had come up and struck the steering wheel or column. I got out to check on the other driver, a young lady who feeling pretty sick over the whole situation. The damage to the truck she was driving wasn’t extensive, but my car hadn’t come out so well.
As soon as I evaluated it I was concerned. It had a significant amount of damage. Enough that it would be a significant repair that would both taint the resale value of my car and have the potential for future issues because of the stress on various points of the frame. At the same time, it didn’t look extensive enough to be a write-off situation. I was torn as to what outcome I preferred: neither seemed very promising. I got the vehicle to the recommended collision center and went home. My wife was in tears when I arrived, overwhelmed that this was all happening again.
I got the word out to friends to pray about the situation, including my knee. I felt like it would either start to improve the next day or hurt worse. Fortunately it was the former, and when I was medically assessed the knee was fine and neither was I physically damaged in any other way.
But I was concerned about the car. Once again the accident had come at an inopportune time. My wife and I are in the process of trying to put aside money for a down payment on a home and attempting to put ourselves into a sound financial position for making that transition to home ownership. I was not interested in putting out money for a replacement vehicle, and yet I feared that if the vehicle was written off I would have a hard time replacing my car with an equivalent for the amount of money that I would receive. I was not crazy about the potential of having my beautiful car heavily repaired, either. I pride myself in taking good care of my vehicles, and my car looked and drove like new. It would never quite be the same.
And yet I had peace.
I told the church that I pastor that evening in service that I believed that somehow God’s blessings would flow through this, though I couldn’t for the life of me figure out how. Later that week I heard from the collision center that their estimate for repairing the damage was much higher than I had anticipated, so I began to mentally switch gears from the repair scenario to the write-off scenario. I began to pray about the reality of having to find a replacement car, and began to do some shopping online. I drove some local cars, but wasn’t blown away by anything. And yet I still had a feeling of peace. I knew that God was capable of turning this around.
I got a call one week from the accident from the insurance company with the official word that my car was being written off. Before that conversation ended, though, I knew where God’s blessings were going to flow from! The claims adjuster made the comment that I had “picked the right kind of insurance for this situation” and went on to detail a few options that didn’t fully sink in at the moment. When I mentally put everything together in the aftermath I remembered that when I got the 2013 Fusion that I had elected for an optional “replacement value clause”. I paid $50 a year for it, but what it spelled out was that if I was in a situation in the first five years of ownership where the car was a complete write-off I would receive a payment equal to either what I paid for the car or for the equivalent value of a new, equal model.
I called my wife and said, “I know how God is going to turn this to blessings!”
The process is never as simple as what it seems, and there were still some frustrating moments along the way, but the end result was that I ended up with a check in hand for nearly every cent I had put into my car 3 years ago. In the meantime I had tried other vehicles that I didn’t like as much. I returned home from a car shopping trip in Ottawa and glumly told my wife that the car I wanted was the one that I had lost.
But my brother-in-law had told “his guy” about my situation. I started chatting with Jeff at Donnelly’s in Ottawa again. He found me a (nearly) new 2016 Ford Fusion Titanium (the premium trim level) that had only 8000 kilometers on it. It is the AWD (all wheel drive) model (very desirable when you live in Canada!) and is loaded with just about everything you can think of. Though the full retail sticker for the new car would have cost nearly 50% more than what I had paid for my 2013, Jeff got the price down for me to where I was able to buy the new car…and put over $1500 into our house savings account on top of it!
Wow! Talk about blessings!
What looked like a negative situation has been turned into a very positive one. I have a newer, nicer car that will be under warranty for a long time to come. I got a little money to add to the house account. And I got a great reminder of what these verses are all about:
Psalms 37:23-25 NKJV The steps of a good man are ordered by the LORD, And He delights in his way. (24) Though he fall, he shall not be utterly cast down; For the LORD upholds him with His hand. (25) I have been young, and now am old; Yet I have not seen the righteous forsaken, Nor his descendants begging bread.
Proverbs 10:22 NKJV The blessing of the LORD makes one rich, And He adds no sorrow with it.
Prayer works.
God’s blessings may come through unexpected means, but His blessings do come to those who honor Him. And I’ve got a sweet new ride to prove it!
Purchasing your gear through B&H and these links helps fund this website and keeps the articles coming. Thank you for your support.
Great News! I can now offer a 5% discount on all purchases at Amplis Foto, Canada’s Leading Photographic Supplier. Please enter discount code: AMPLIS52016DA in your cart. It is good for everything in your cart, and is stackable with other coupons, too! It will take 5% off your entire order! Proceeds go towards keeping this site going and providing you with new reviews!
DISCLAIMER: This article and description contains affiliate links, which means that if you click on one of the product links, I’ll receive a small commission. As an Amazon Associate I earn from qualifying purchases.


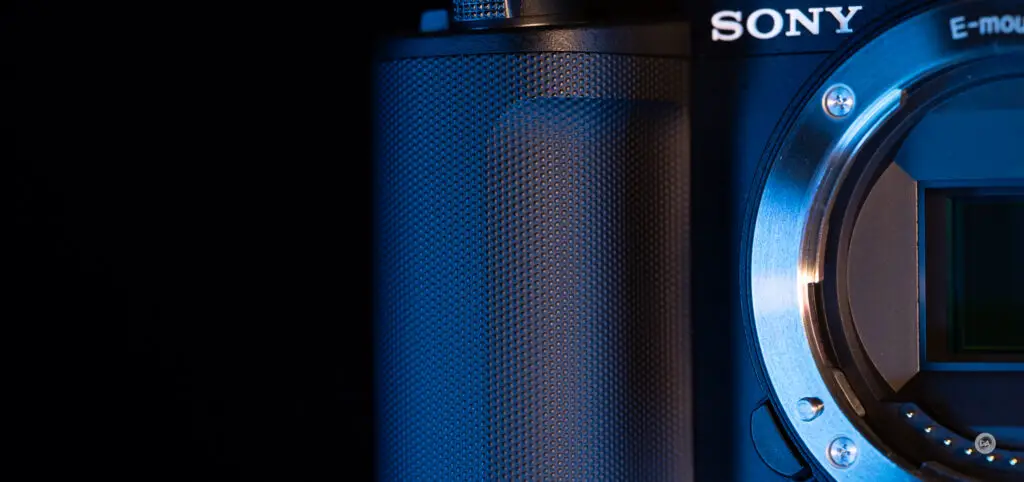
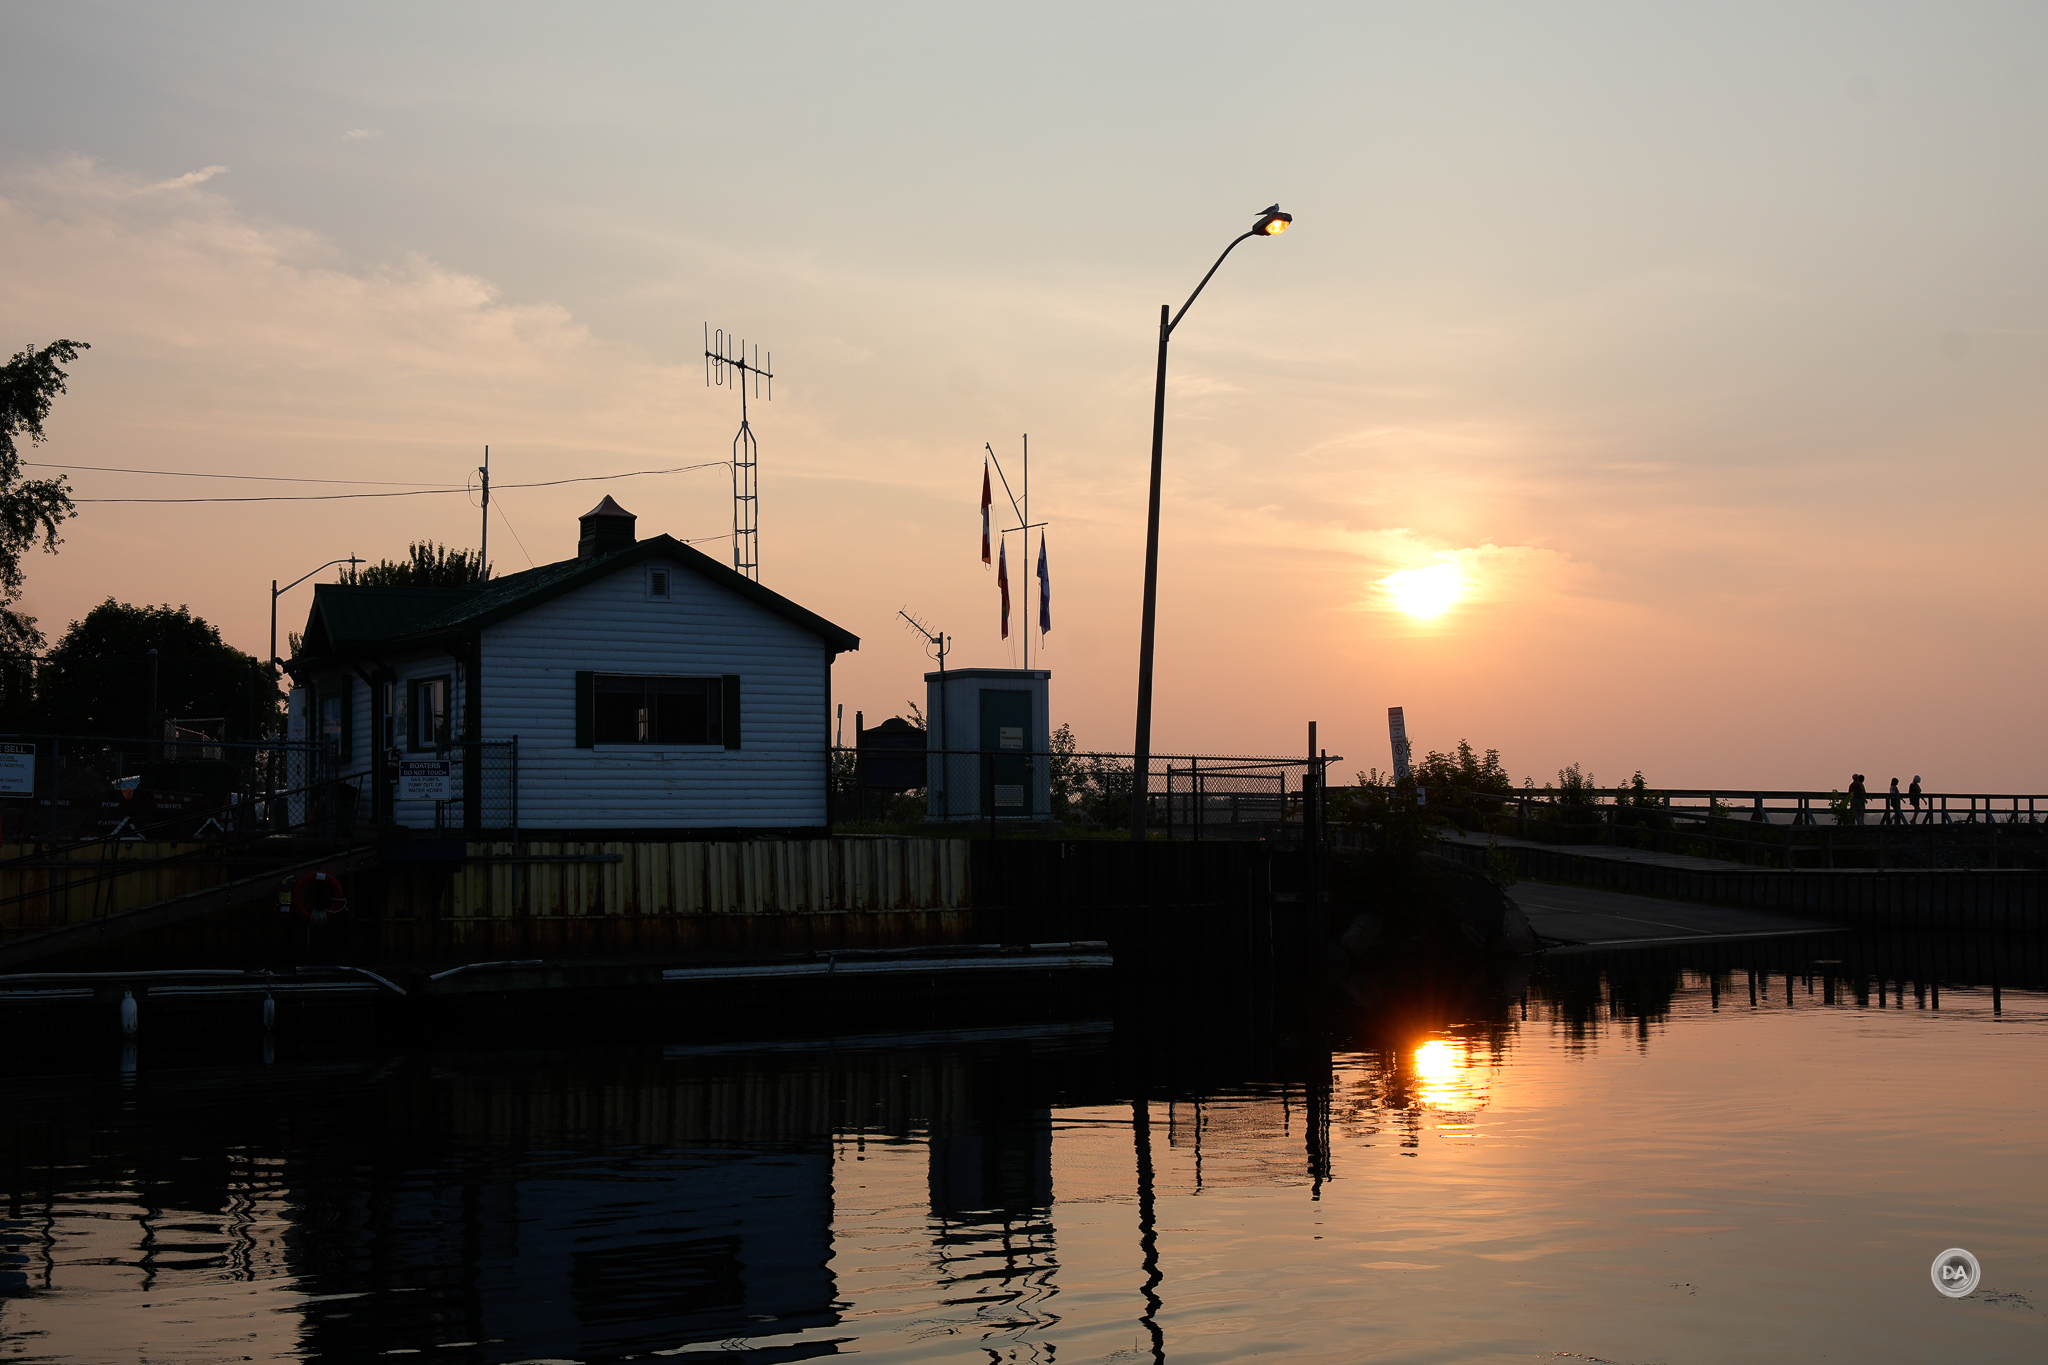
 Sigma 17-40mm F1.8 DC | ART Gallery
  Sigma 17-40mm F1.8 DC | ART Review
  Viltrox Pro AF 85mm F1.4 FE Gallery
  Viltrox AF 85mm F1.4 PRO FE Review
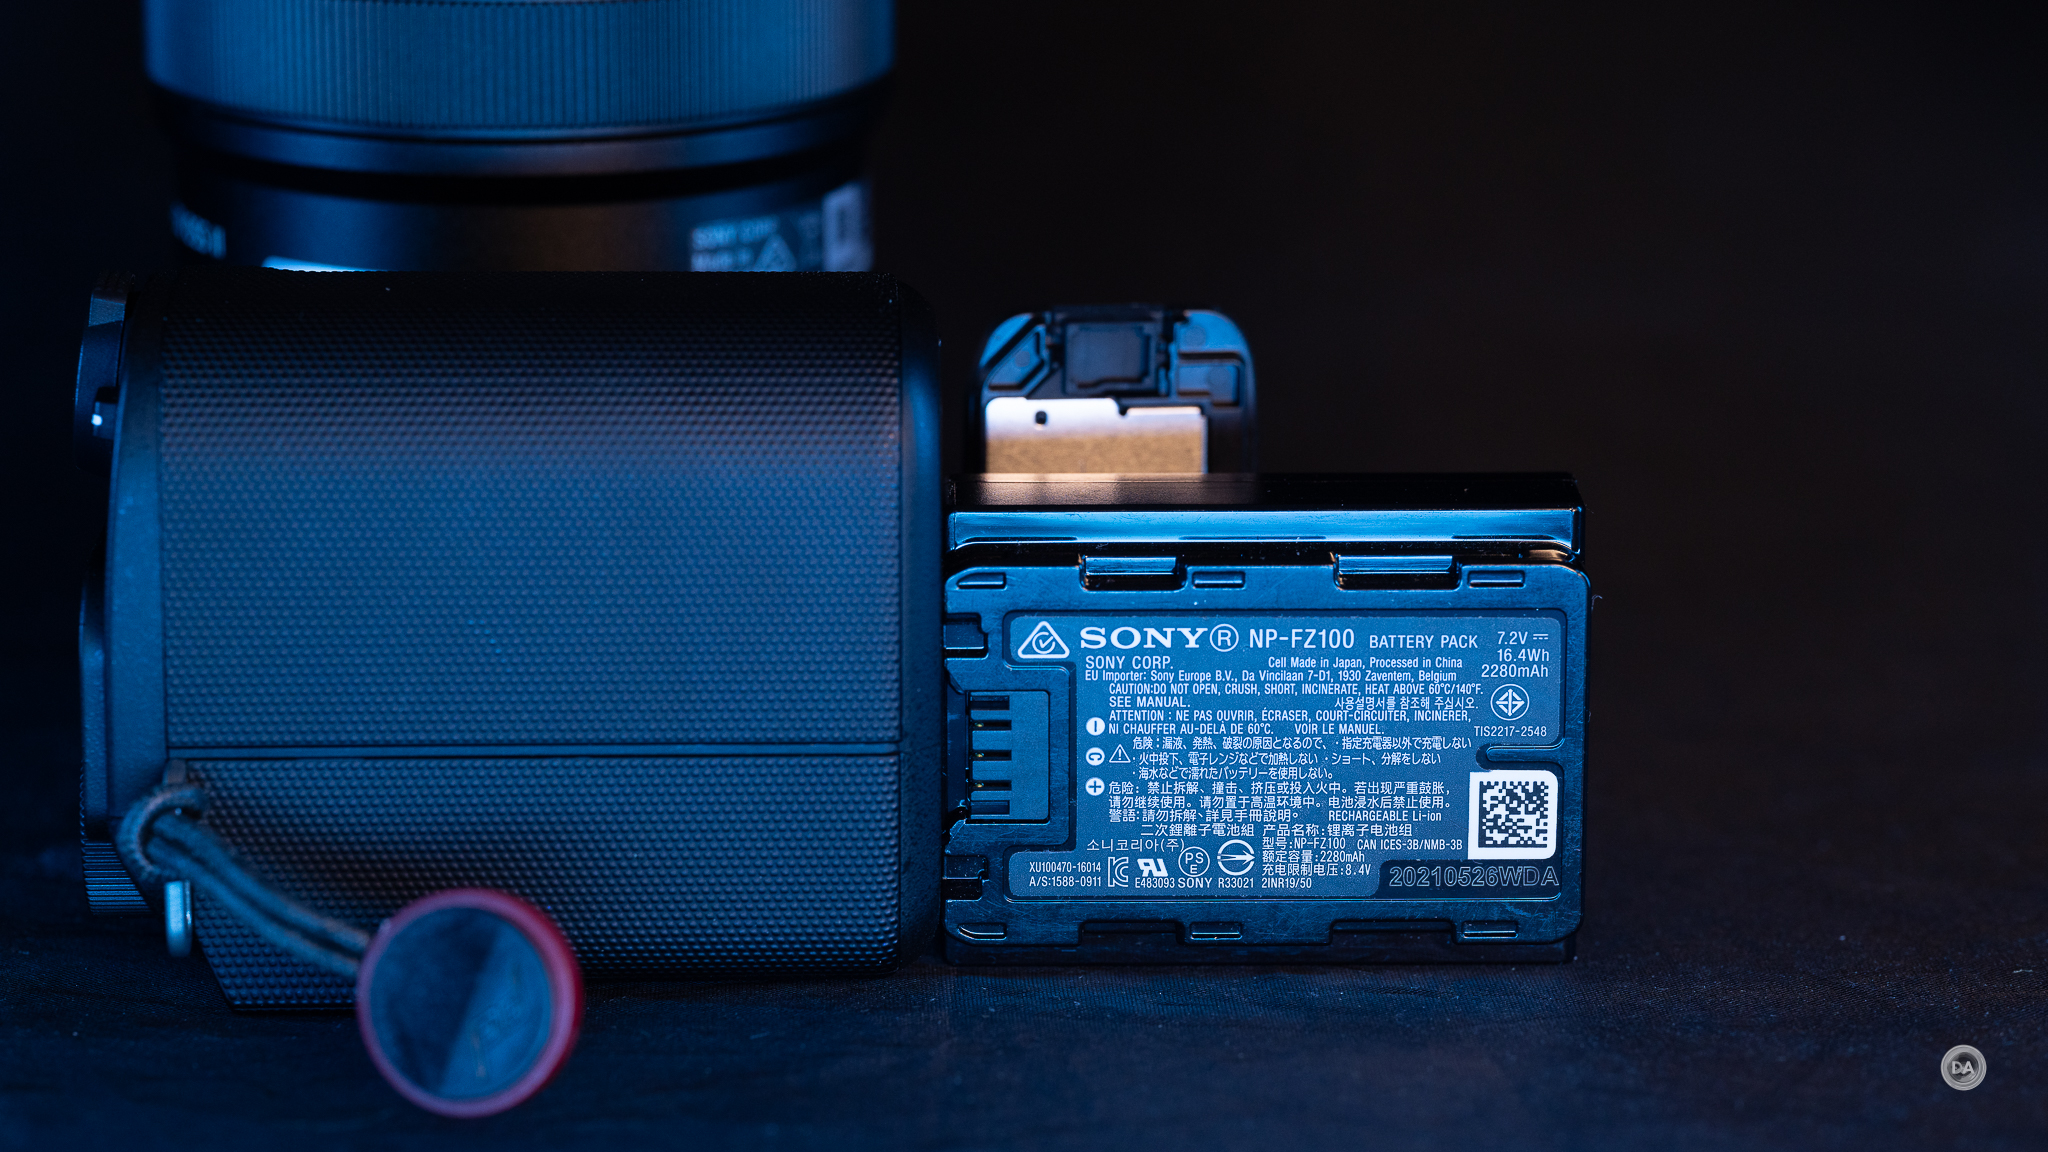
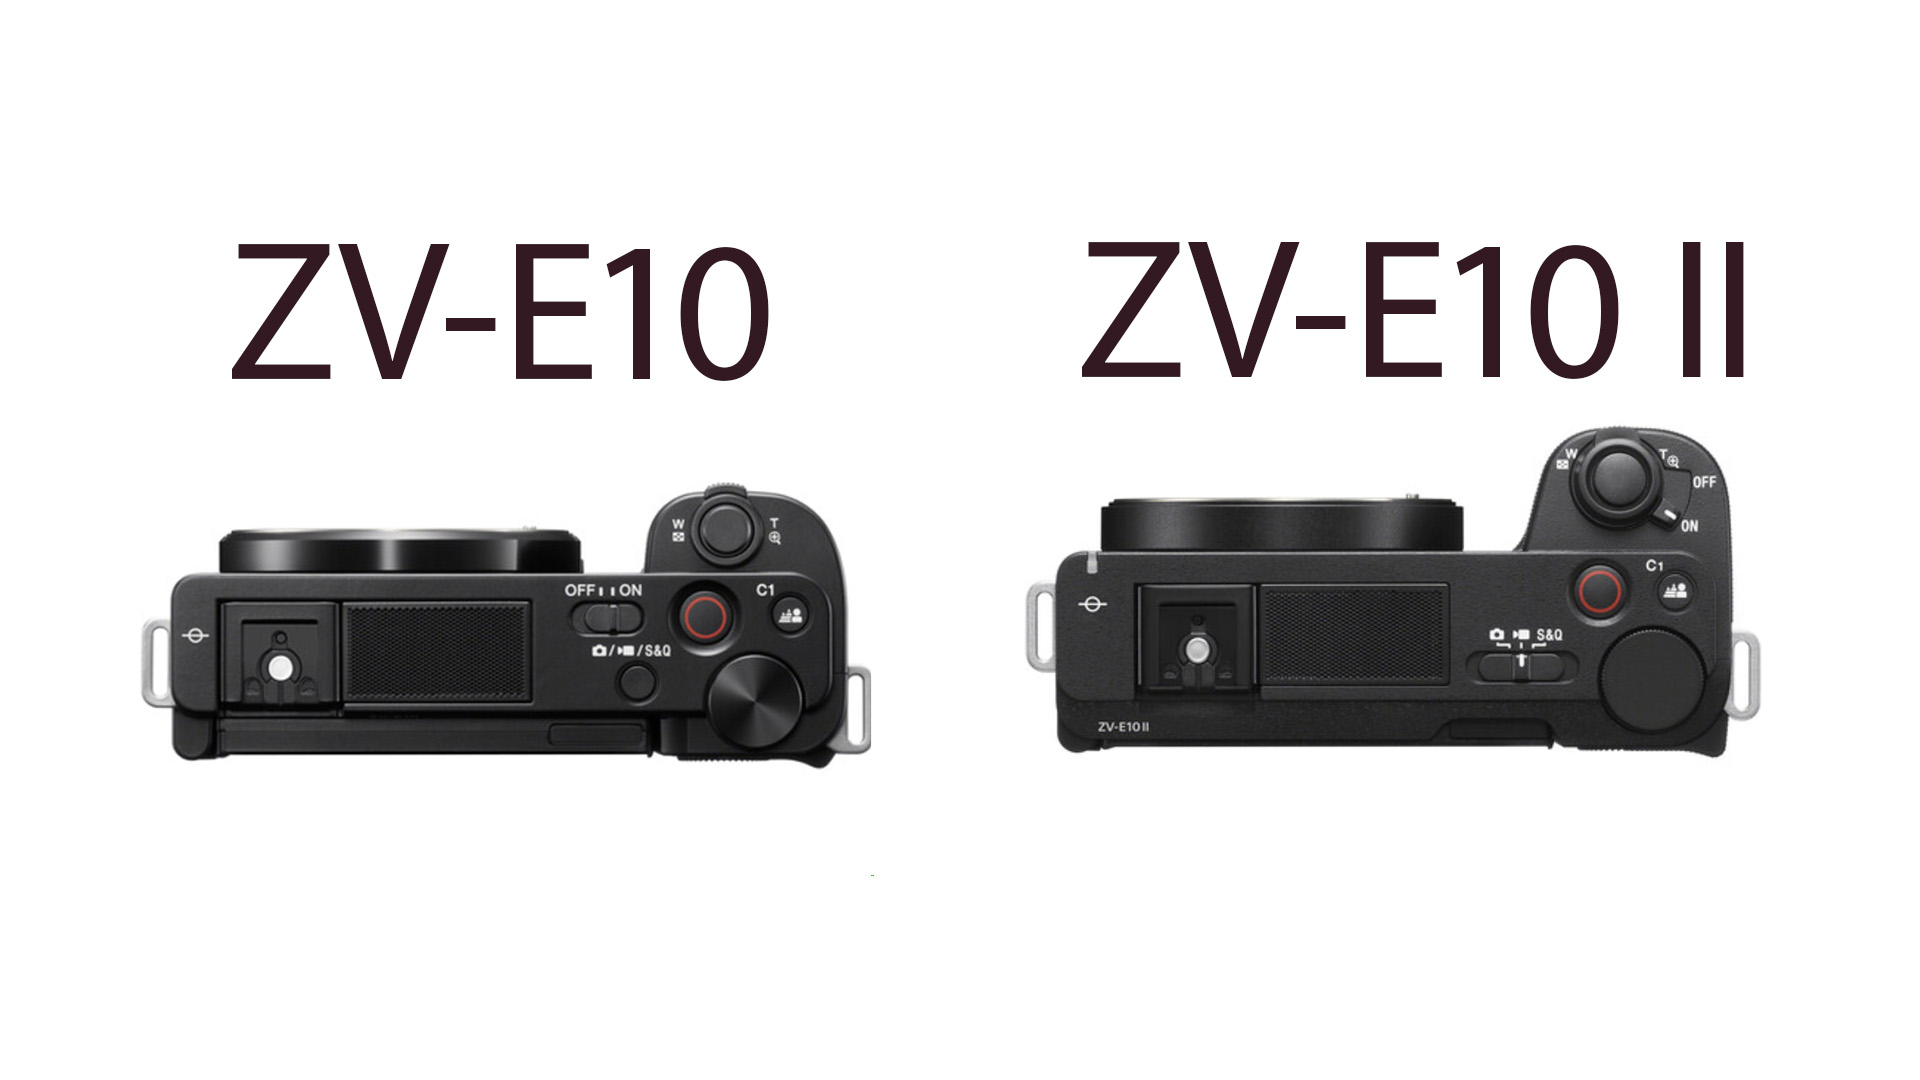
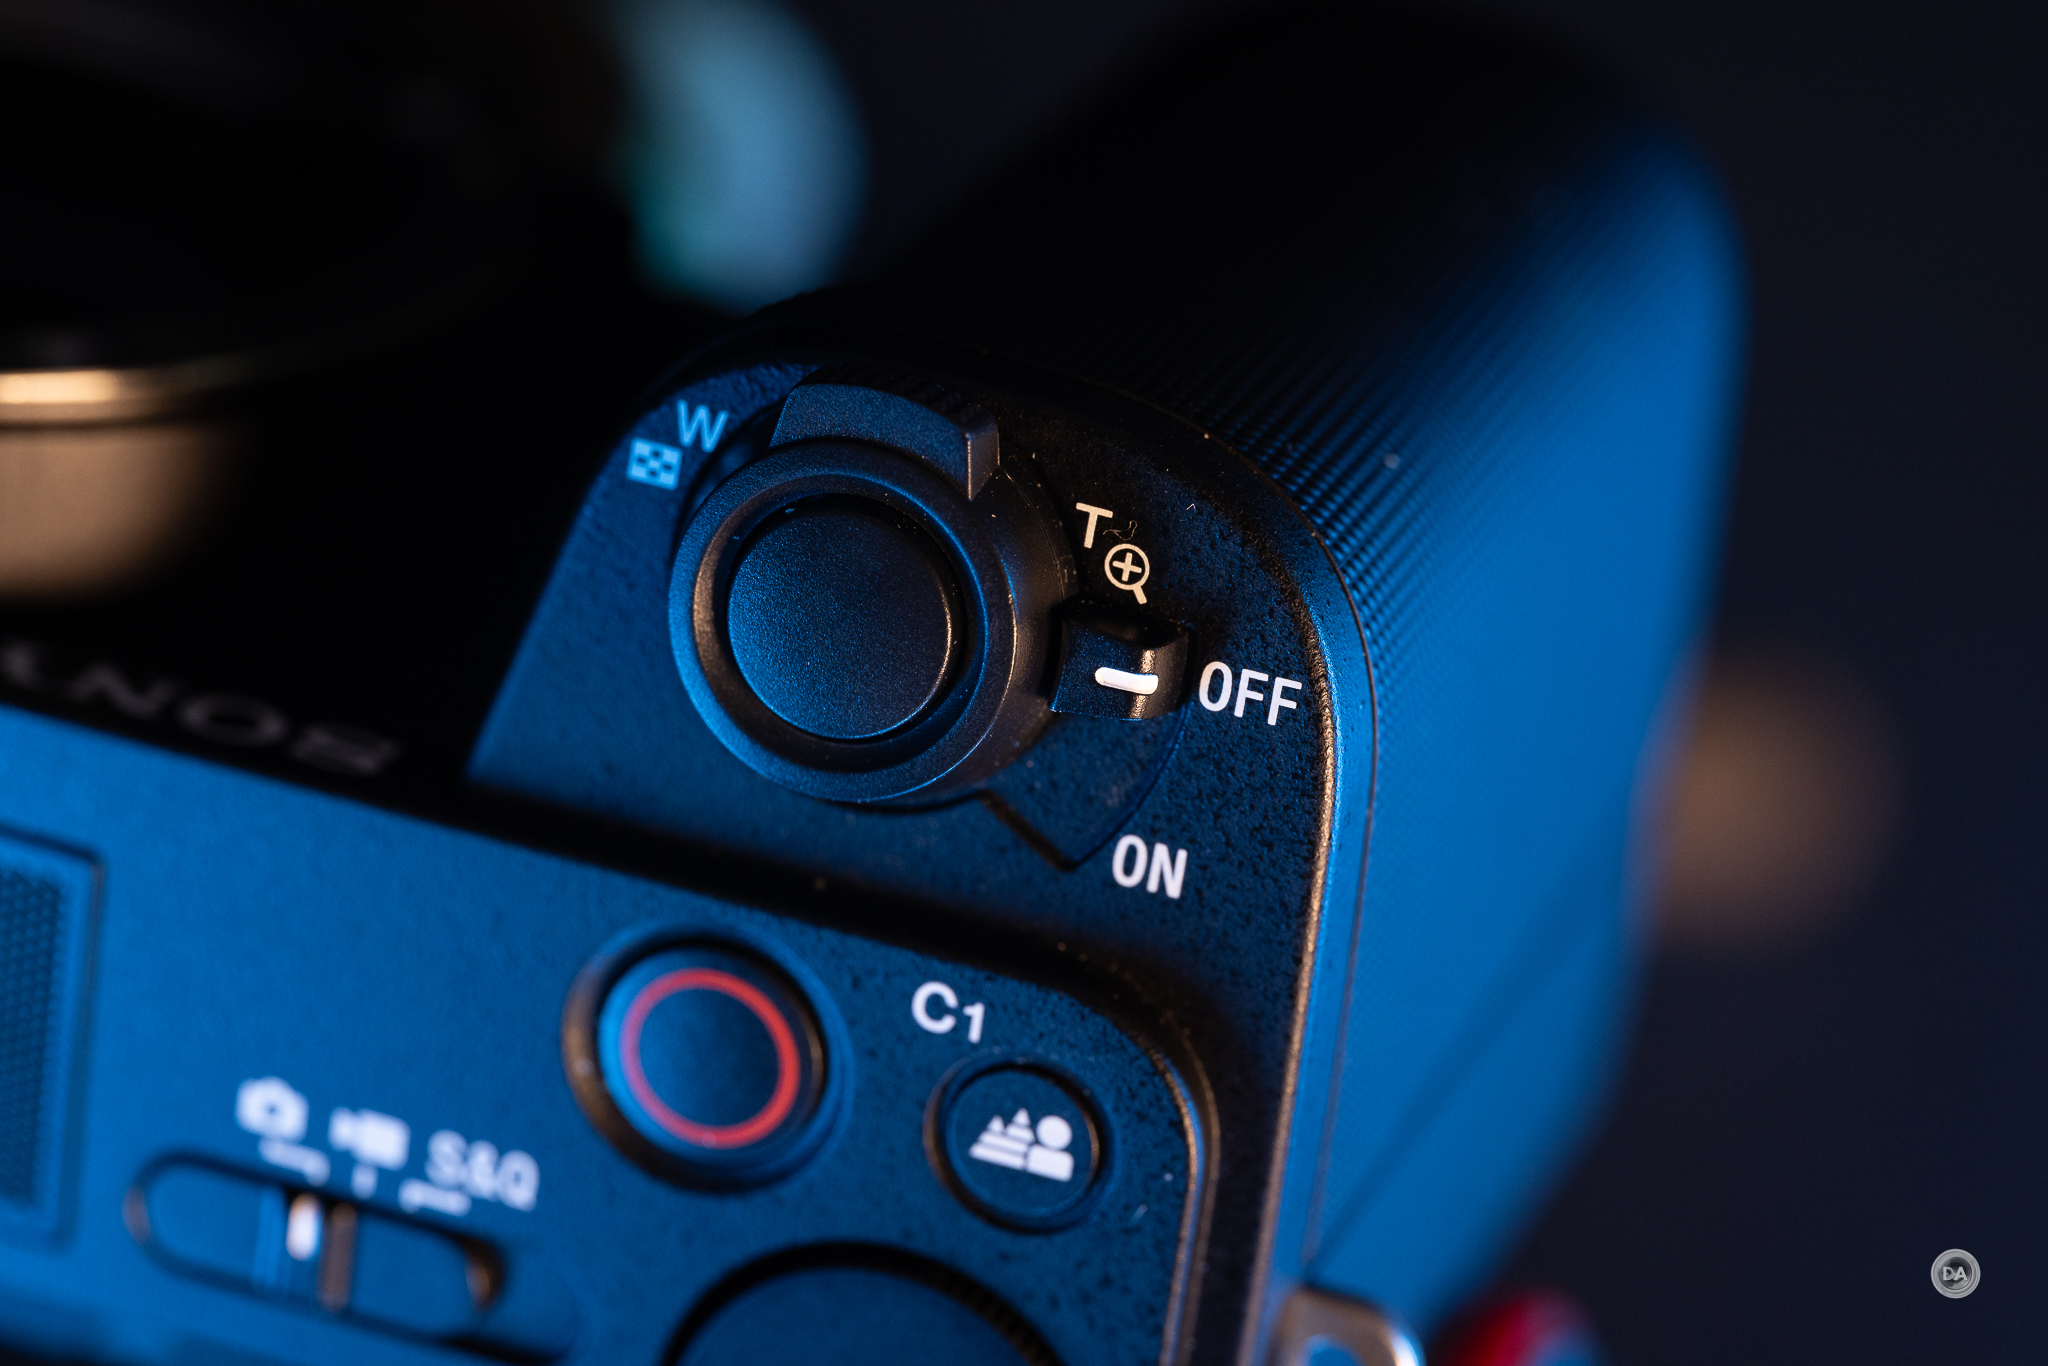
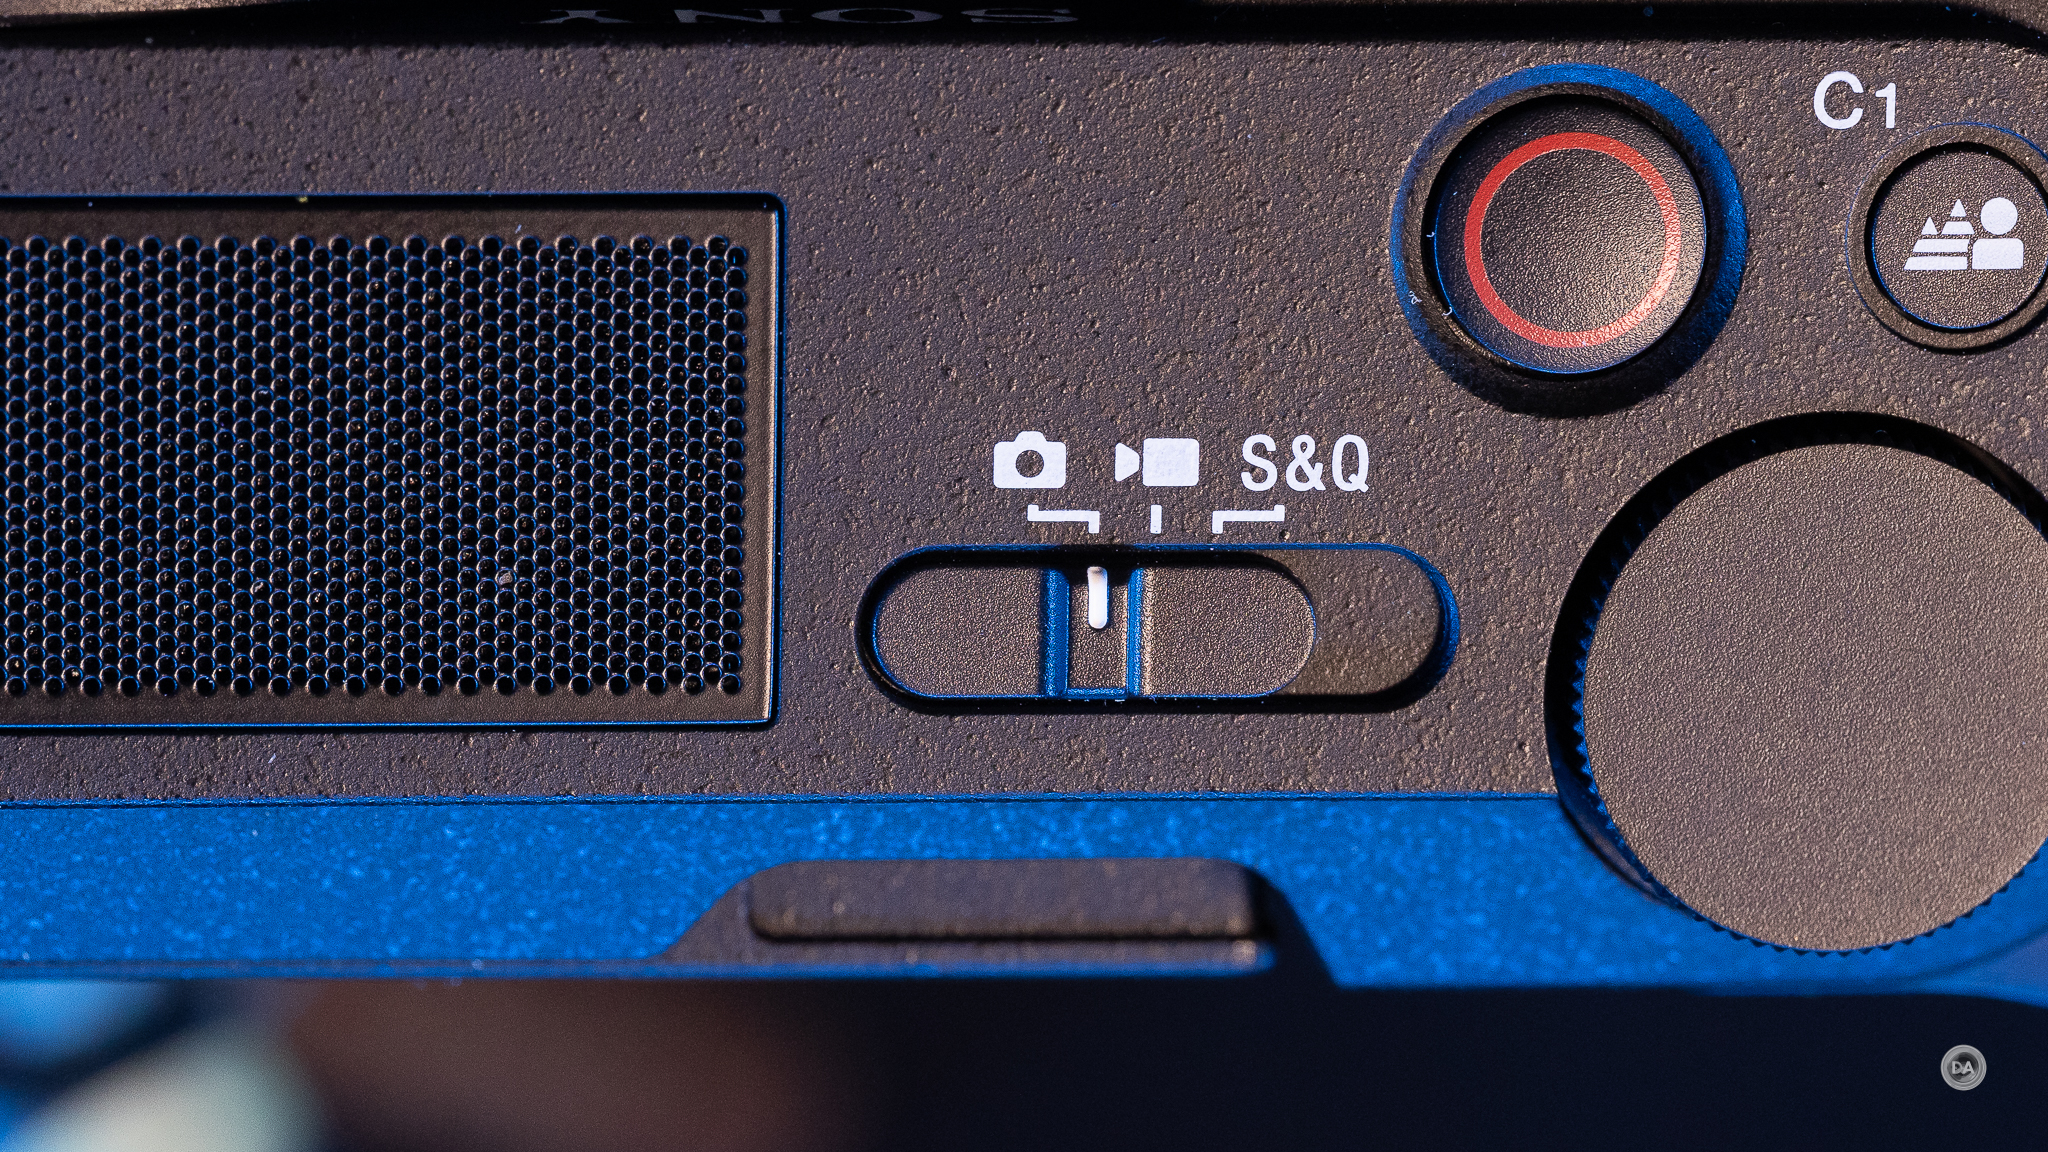
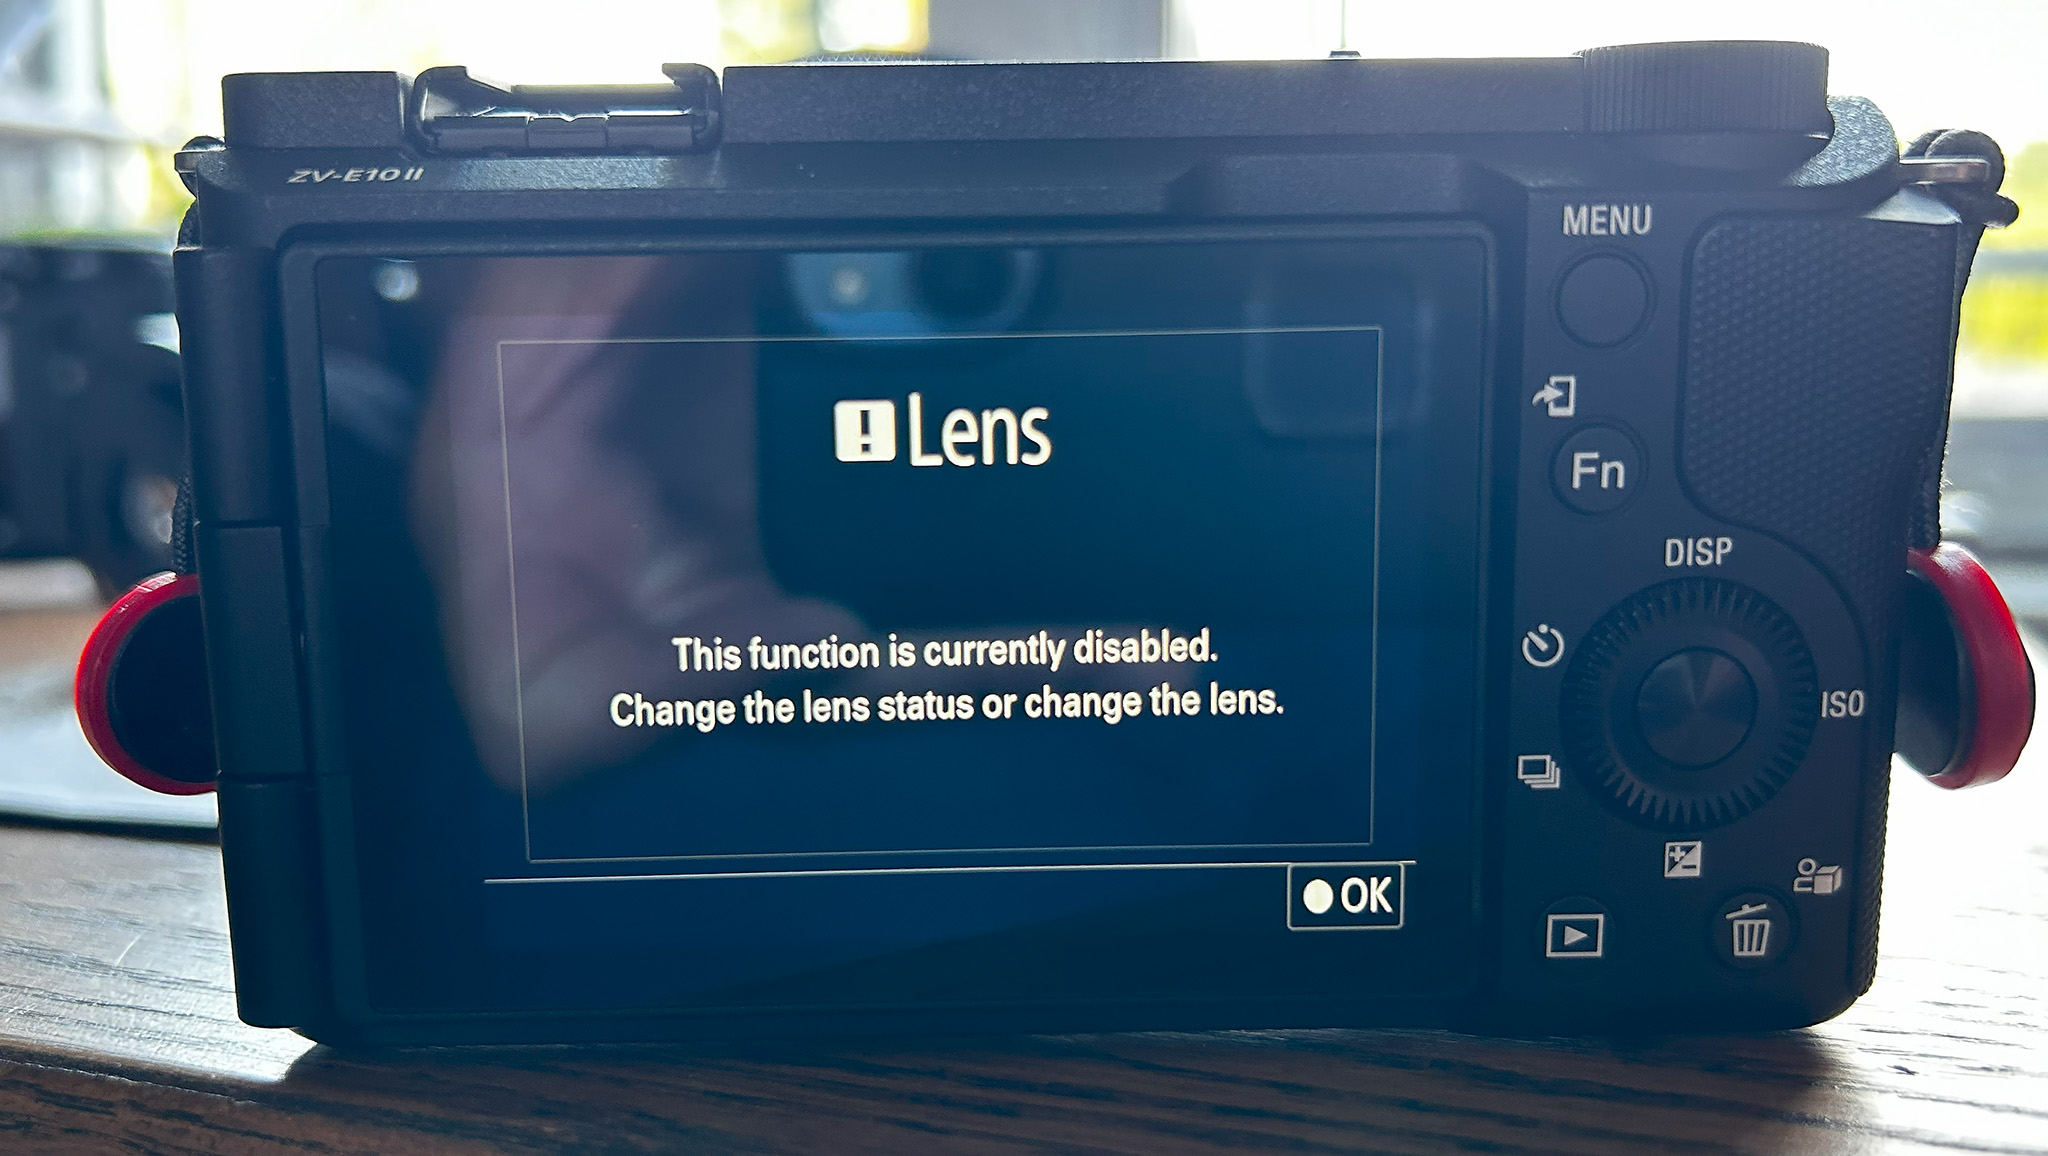
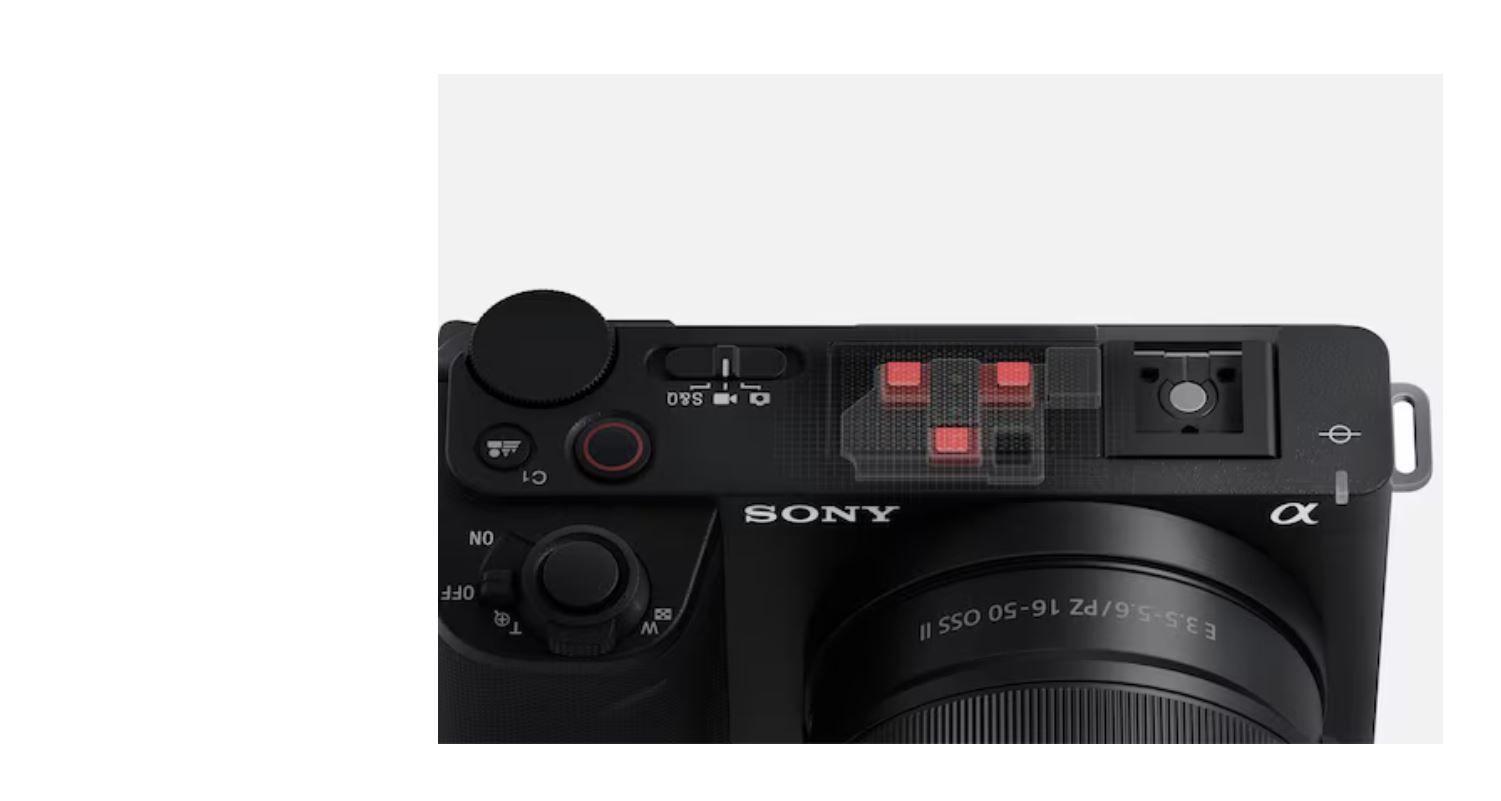
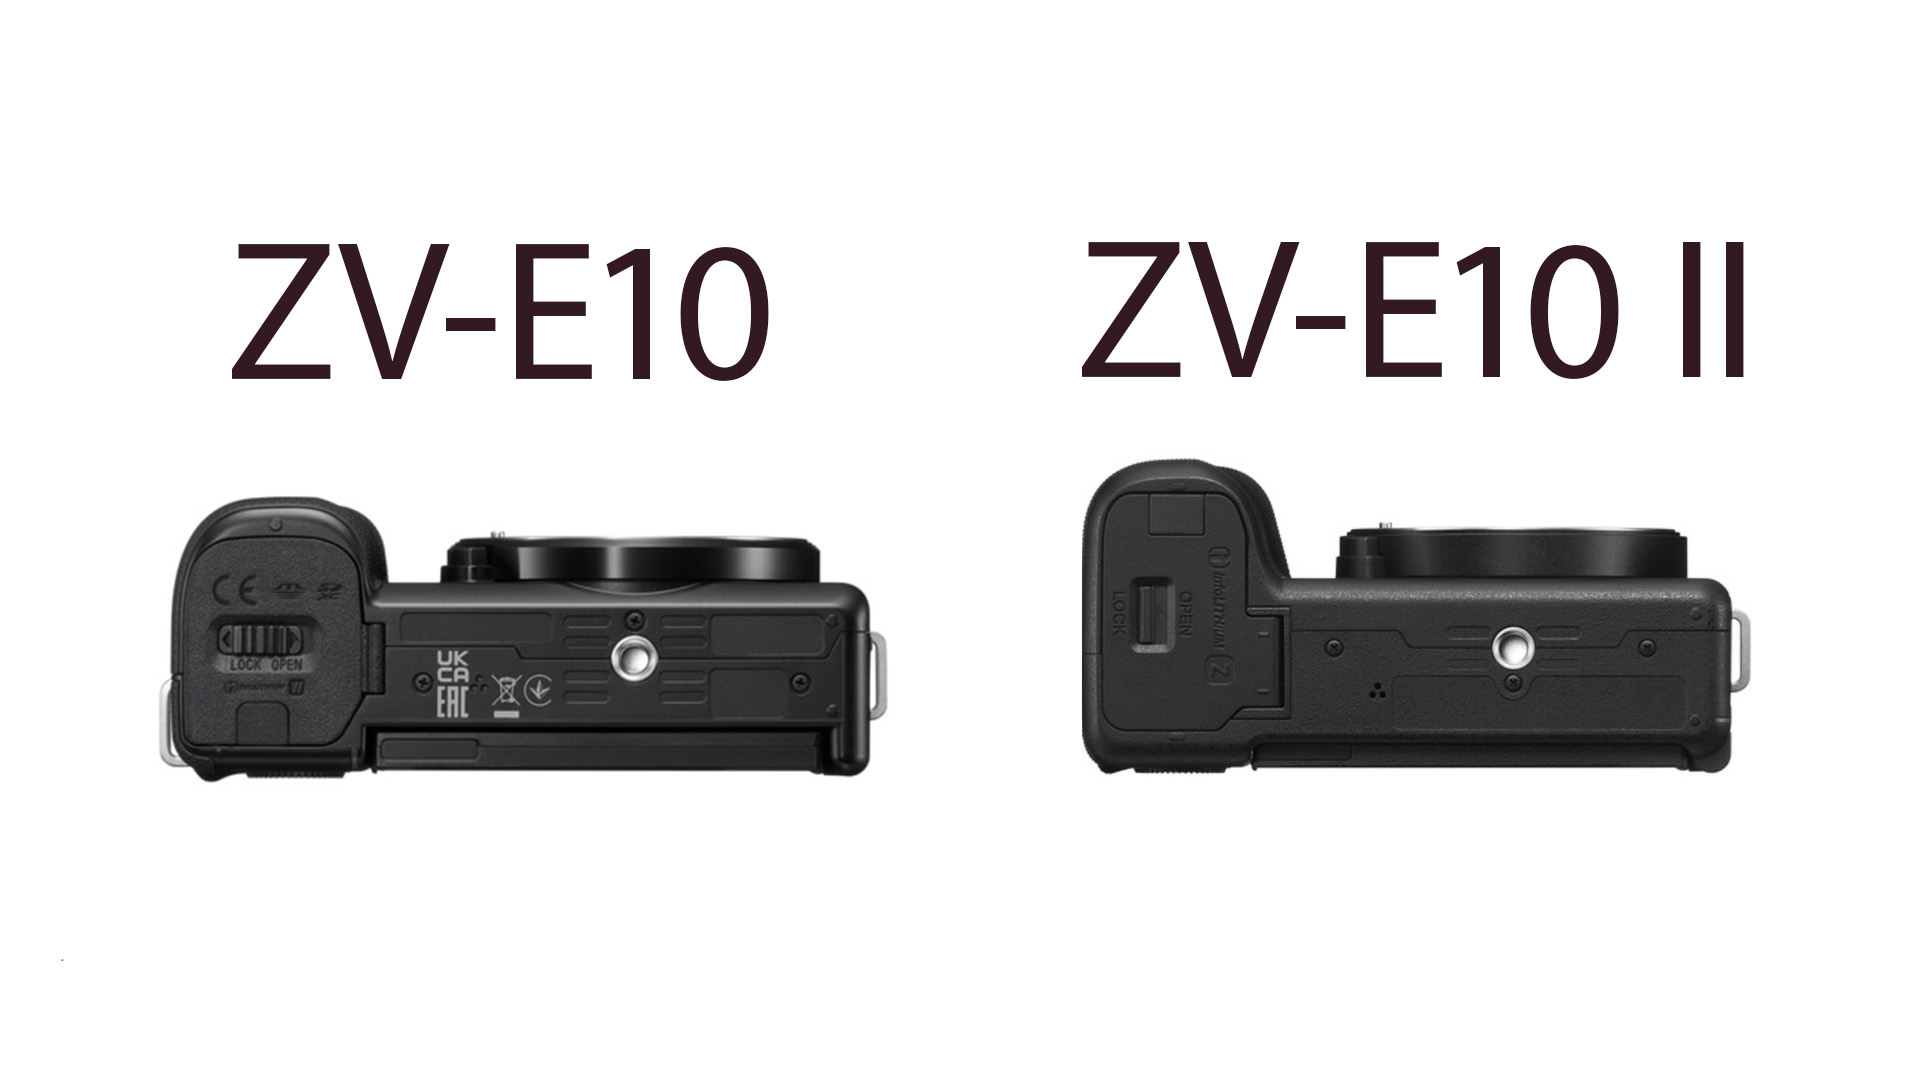
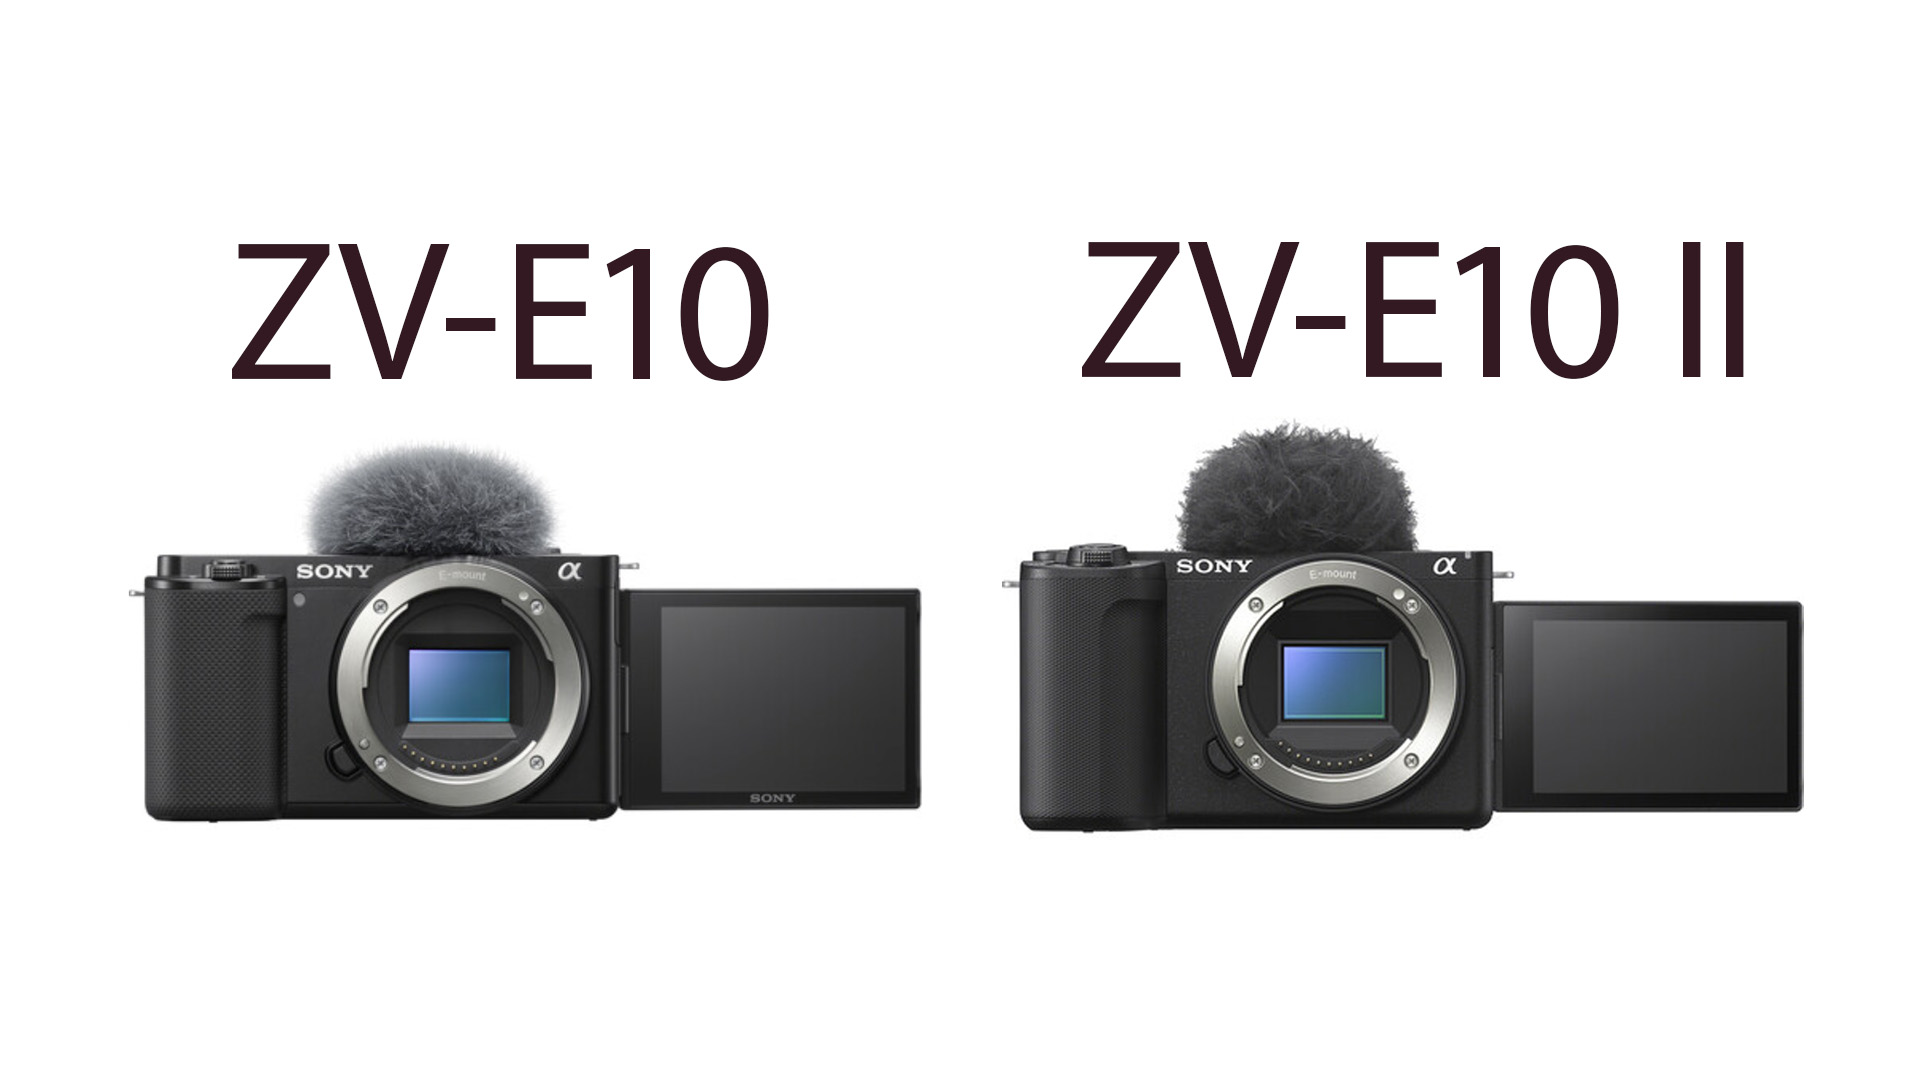

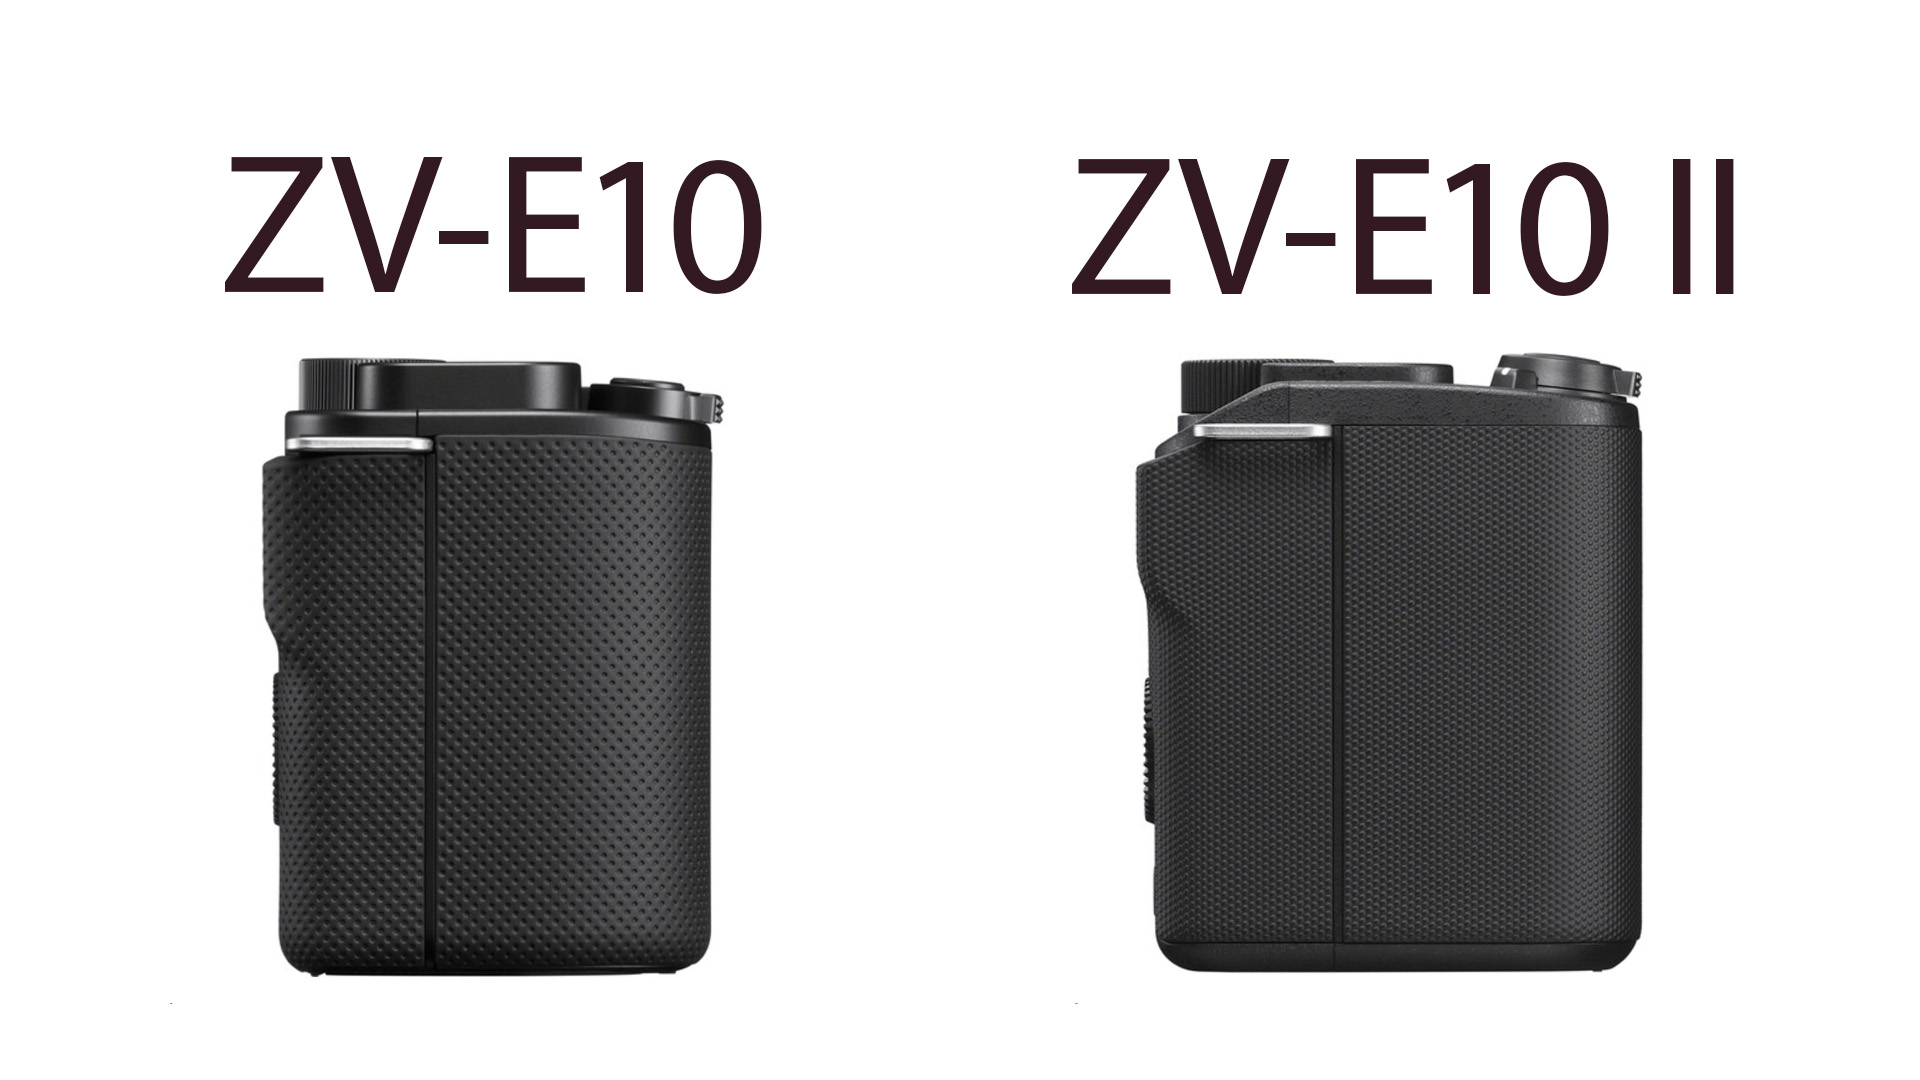

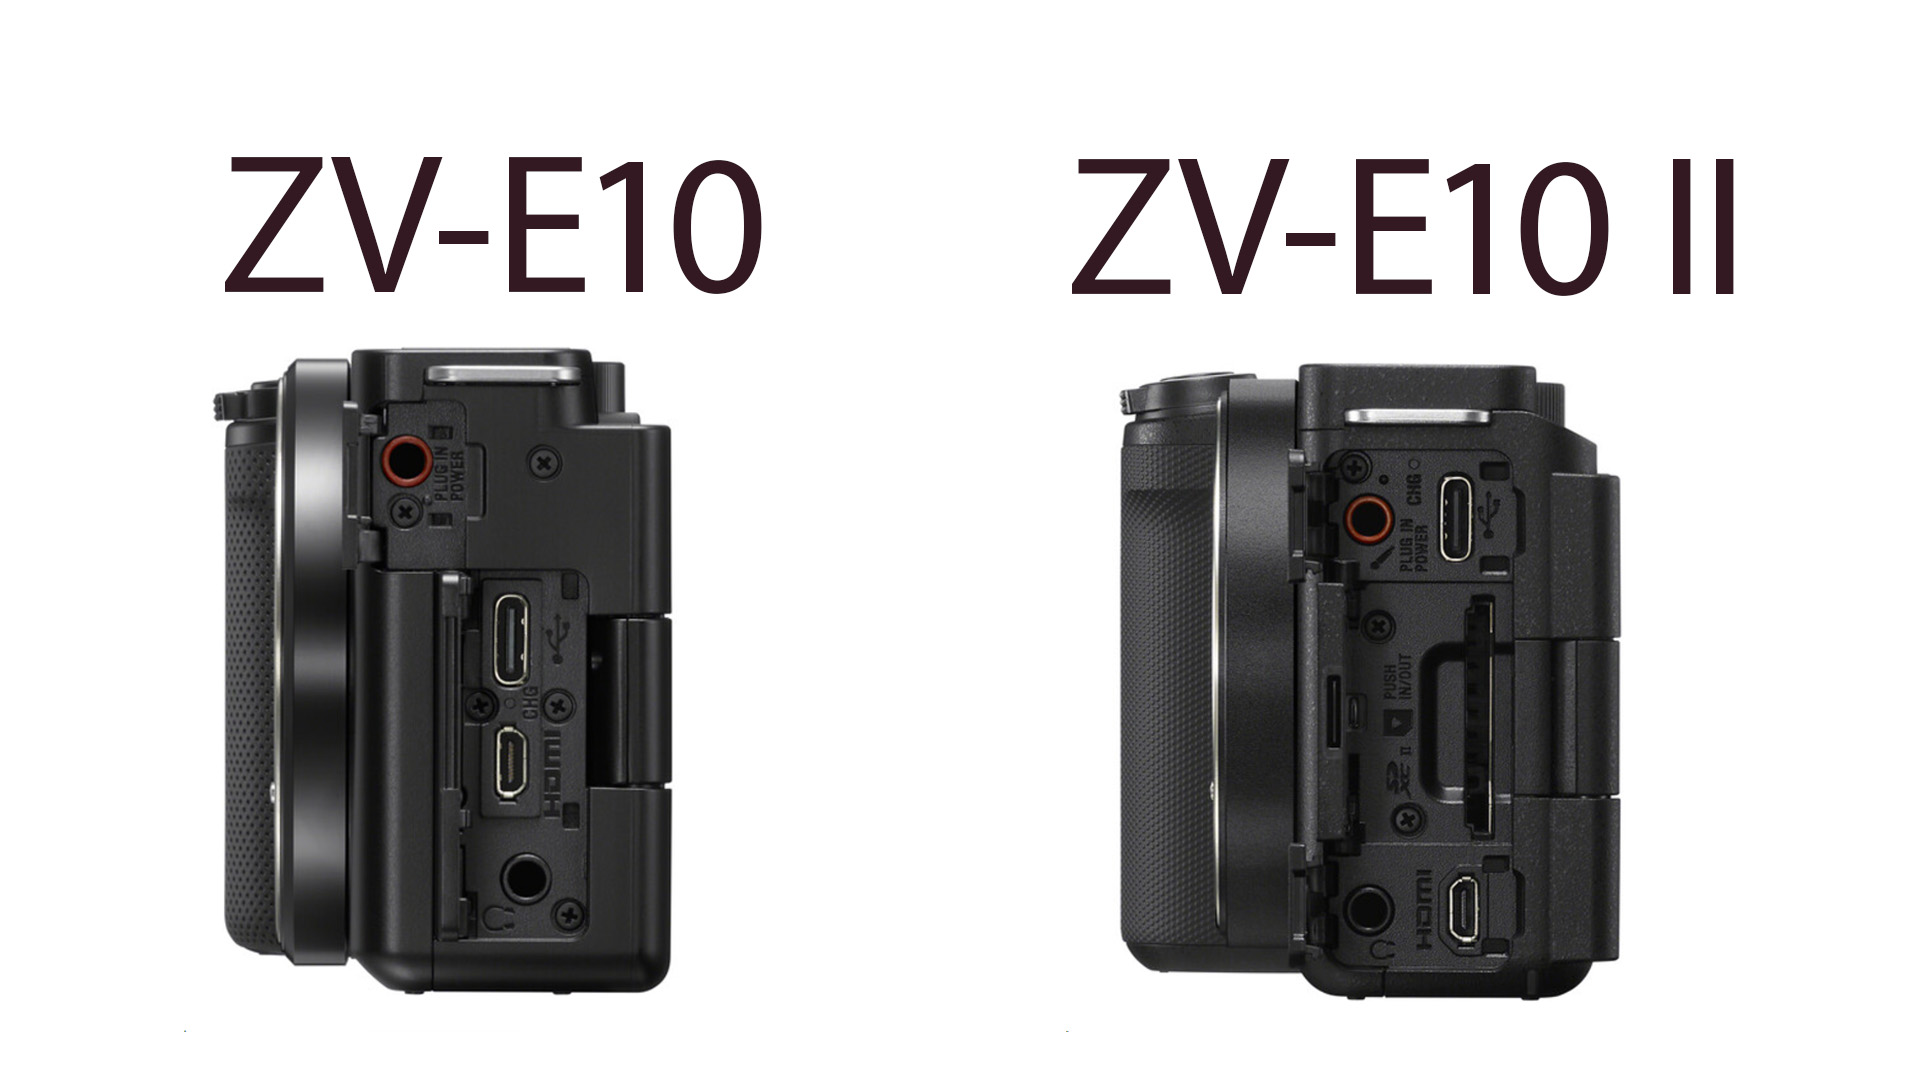
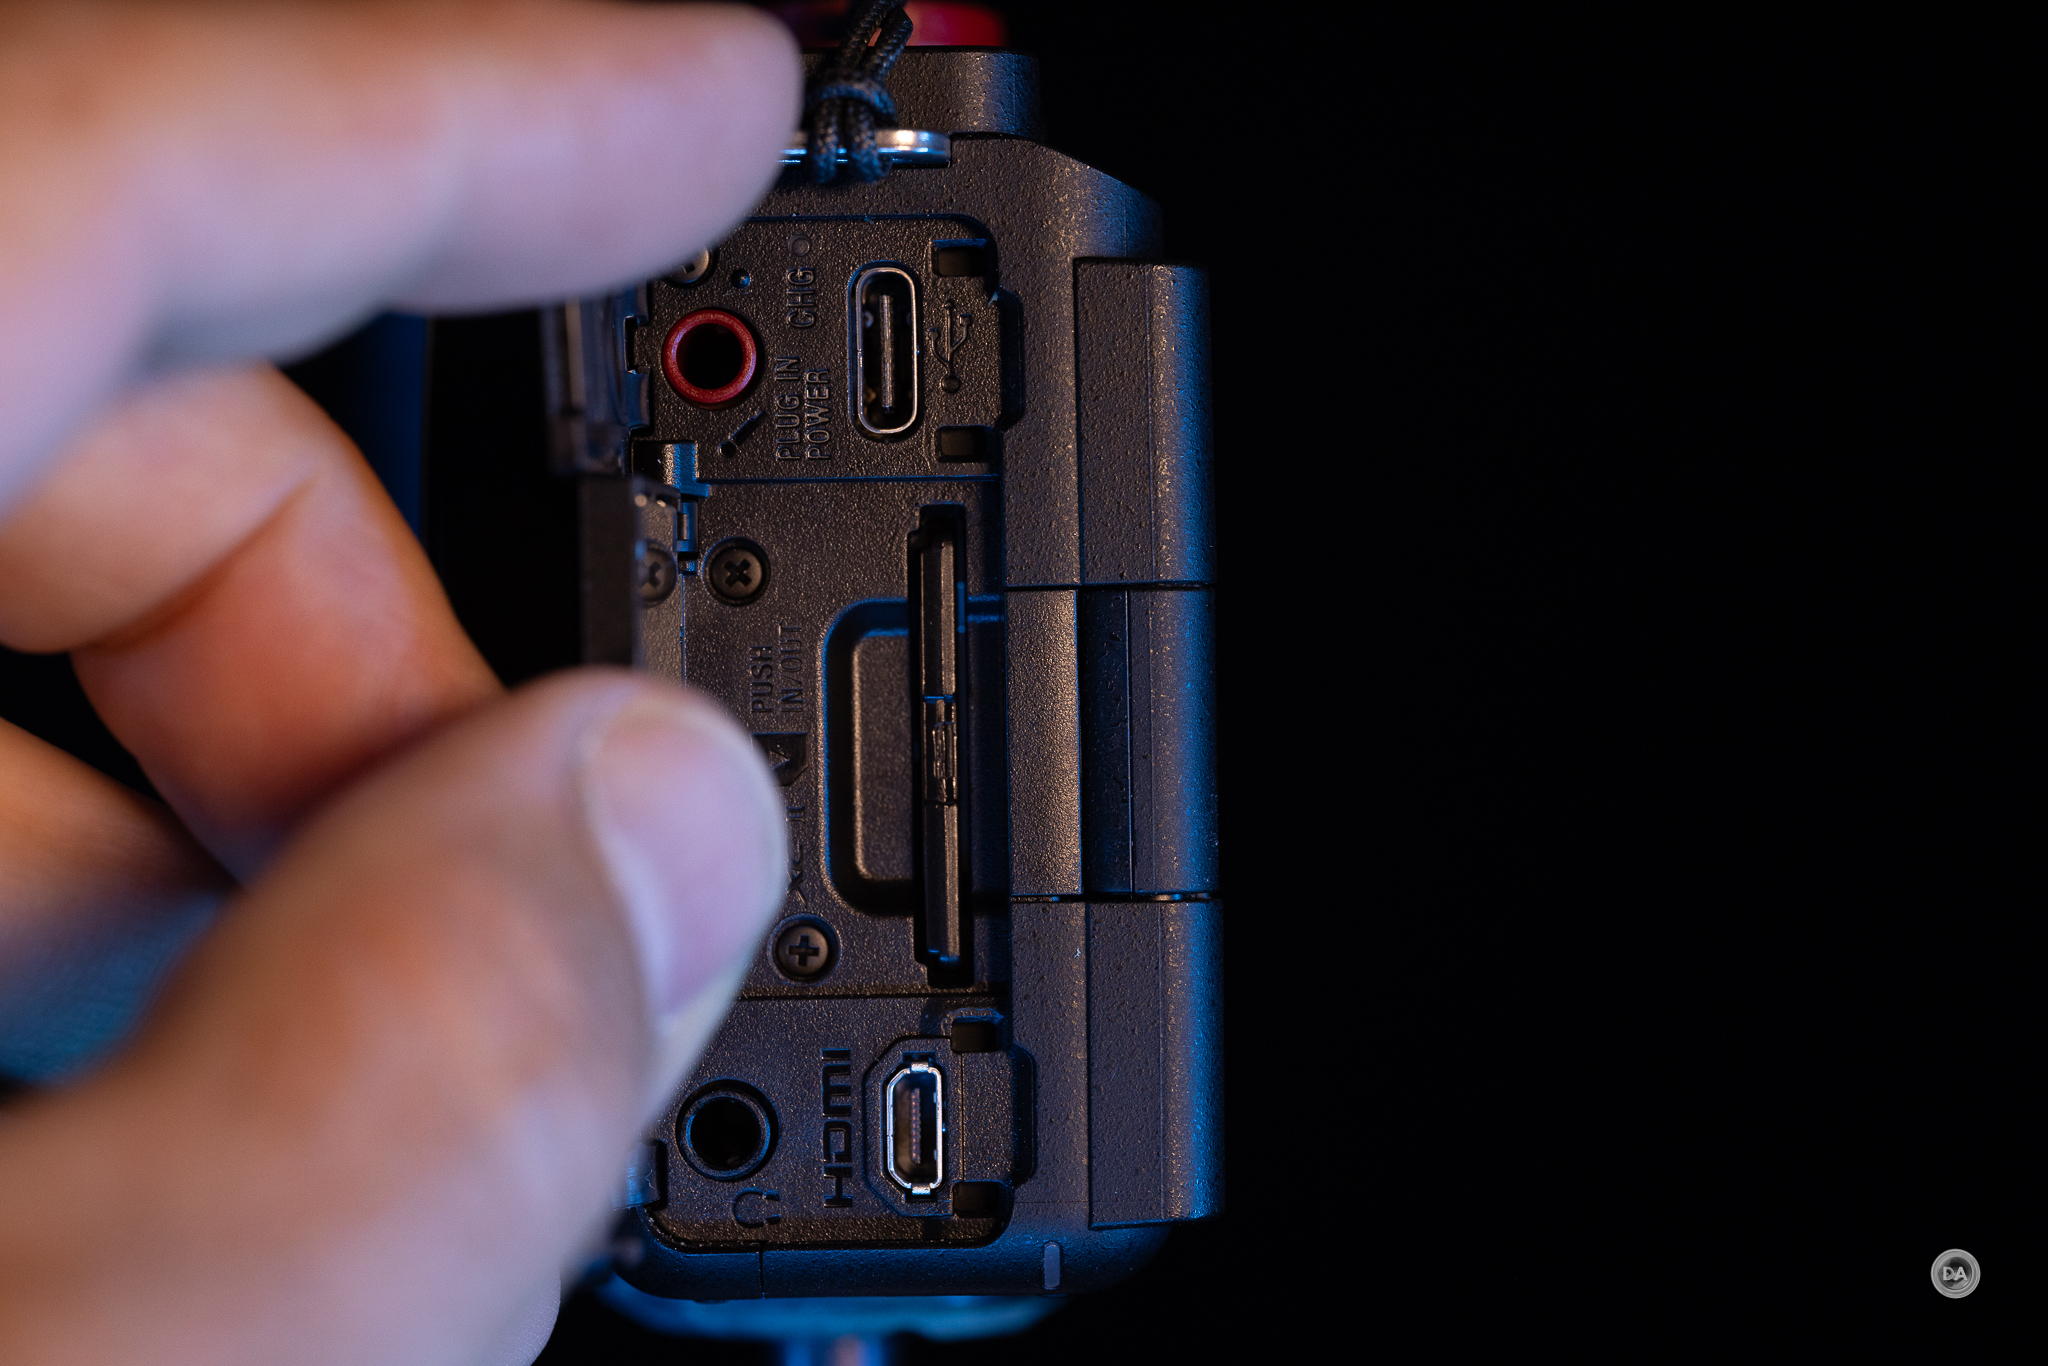
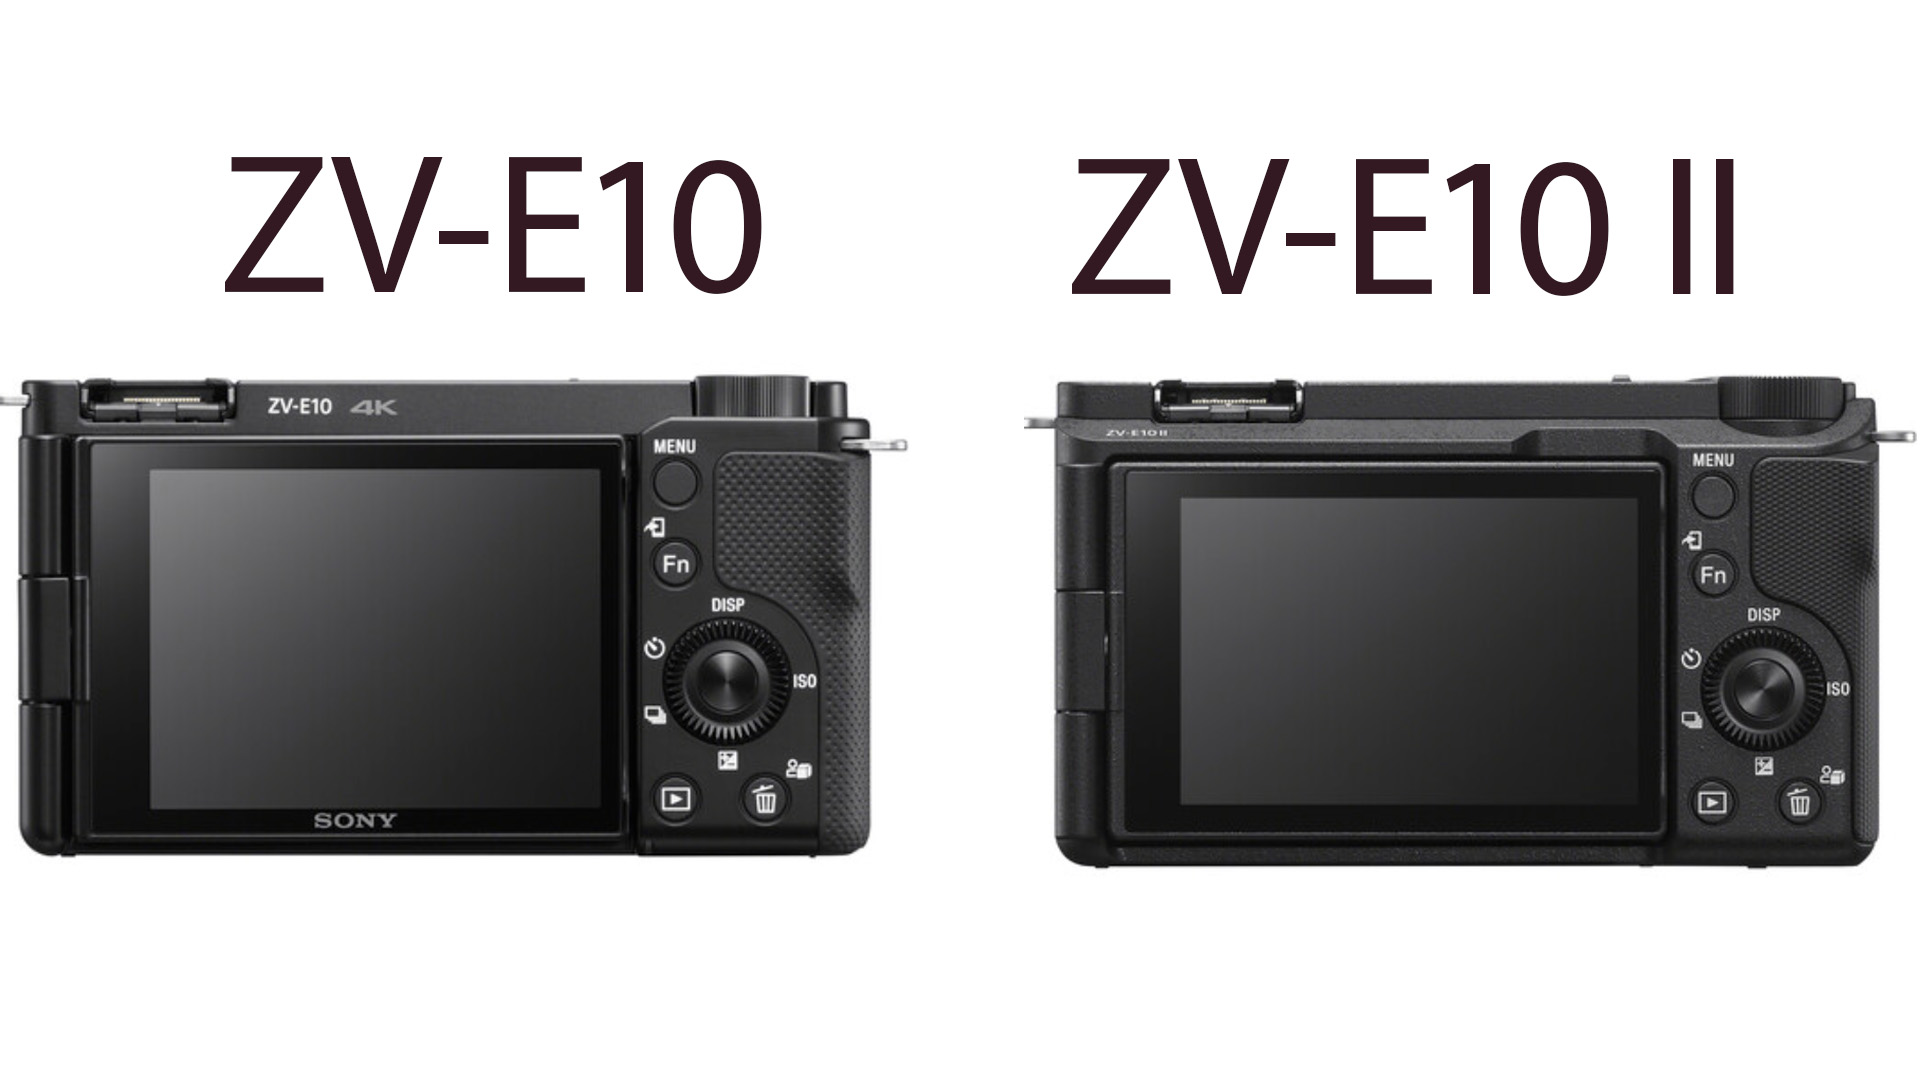
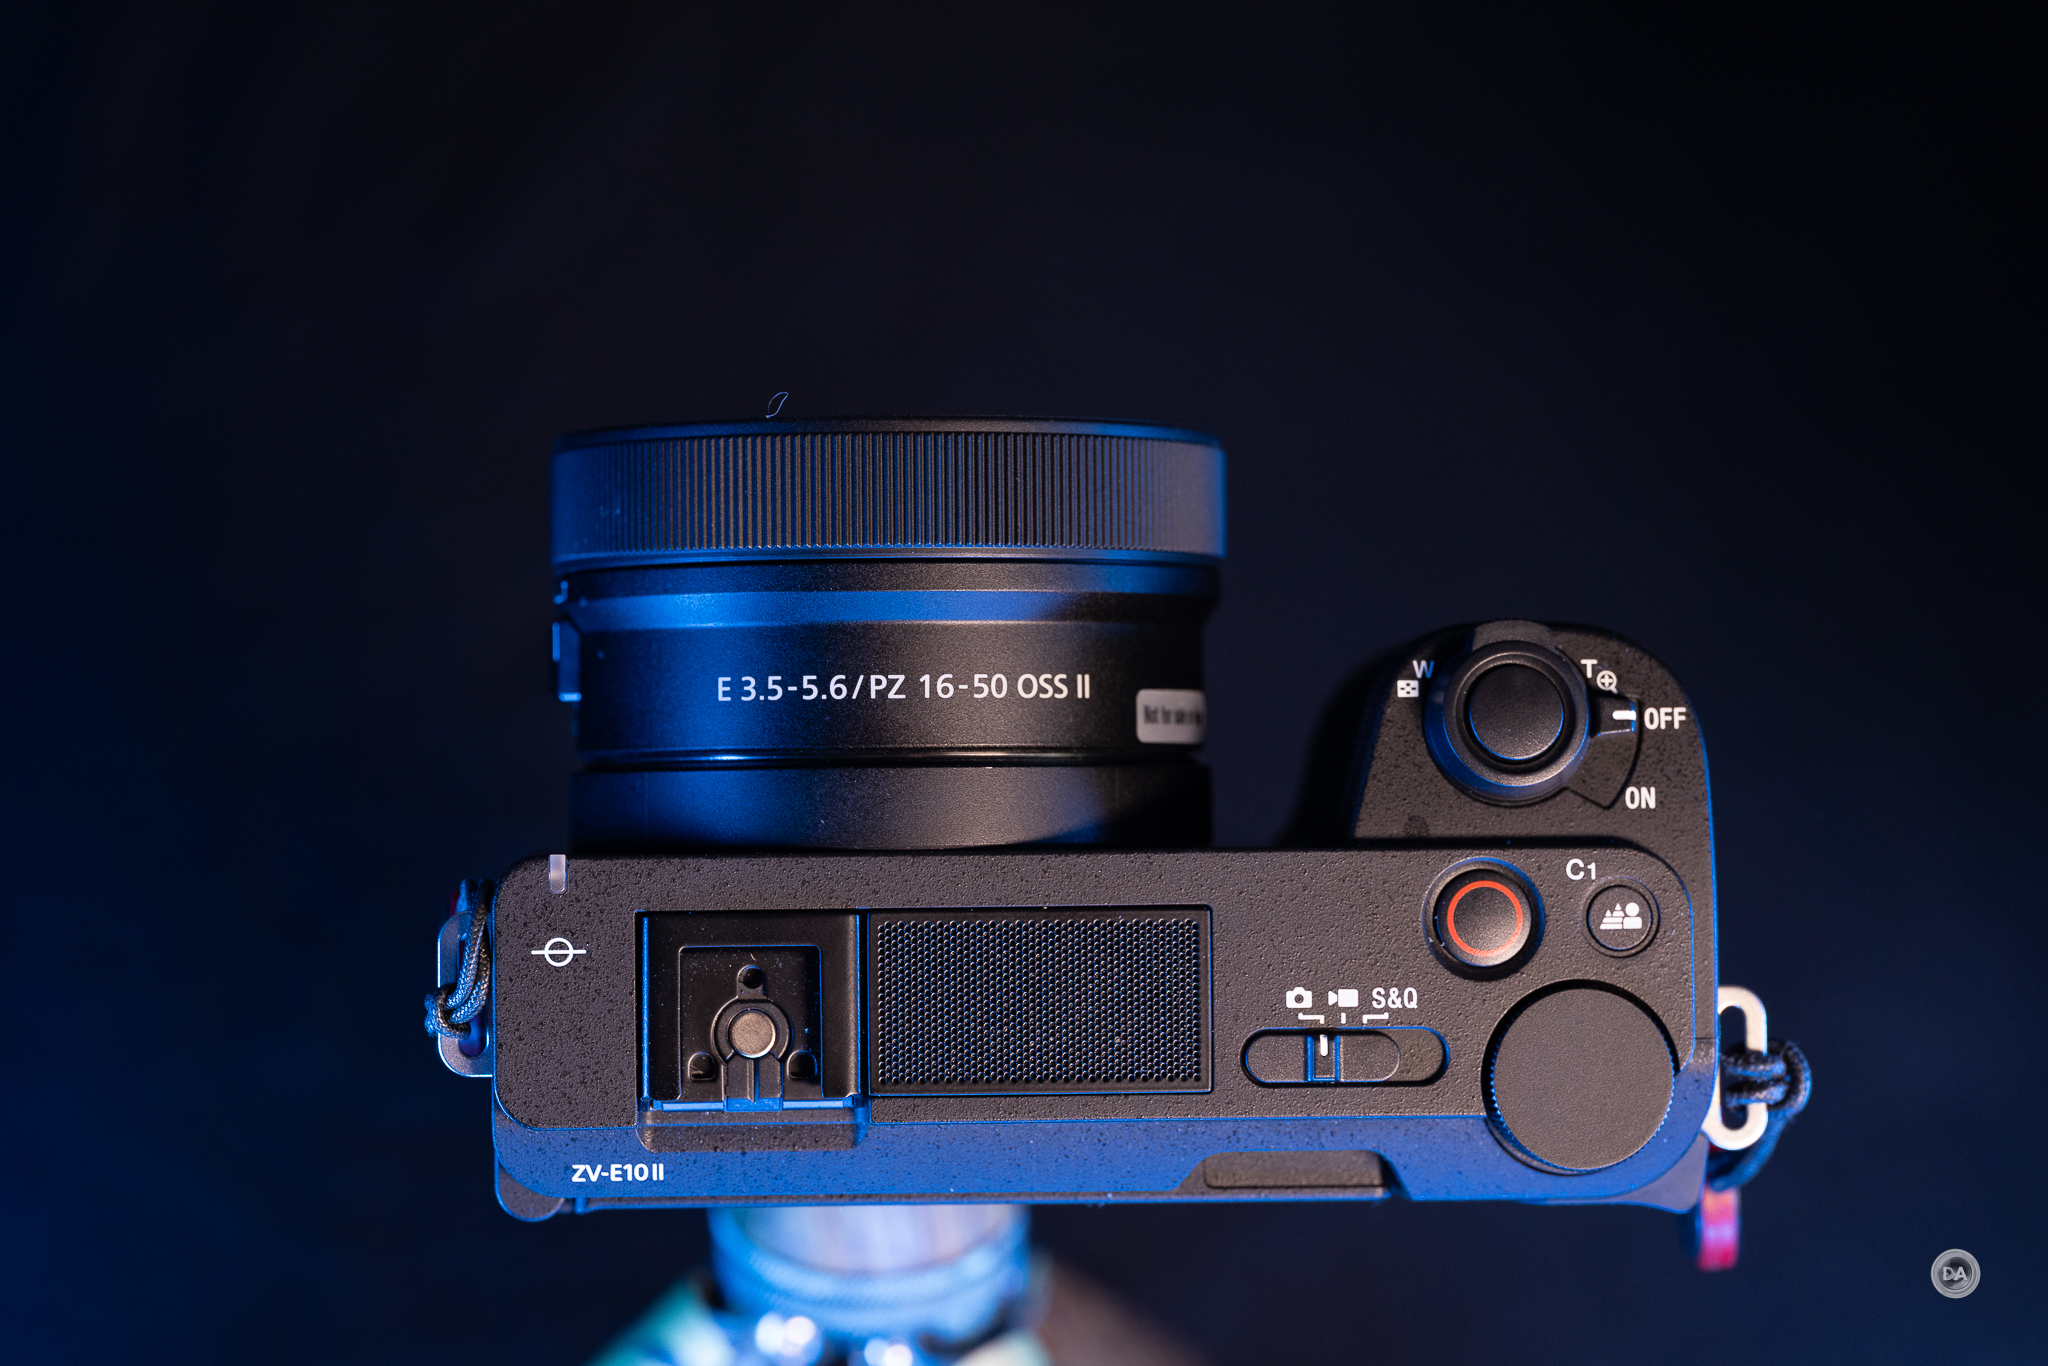
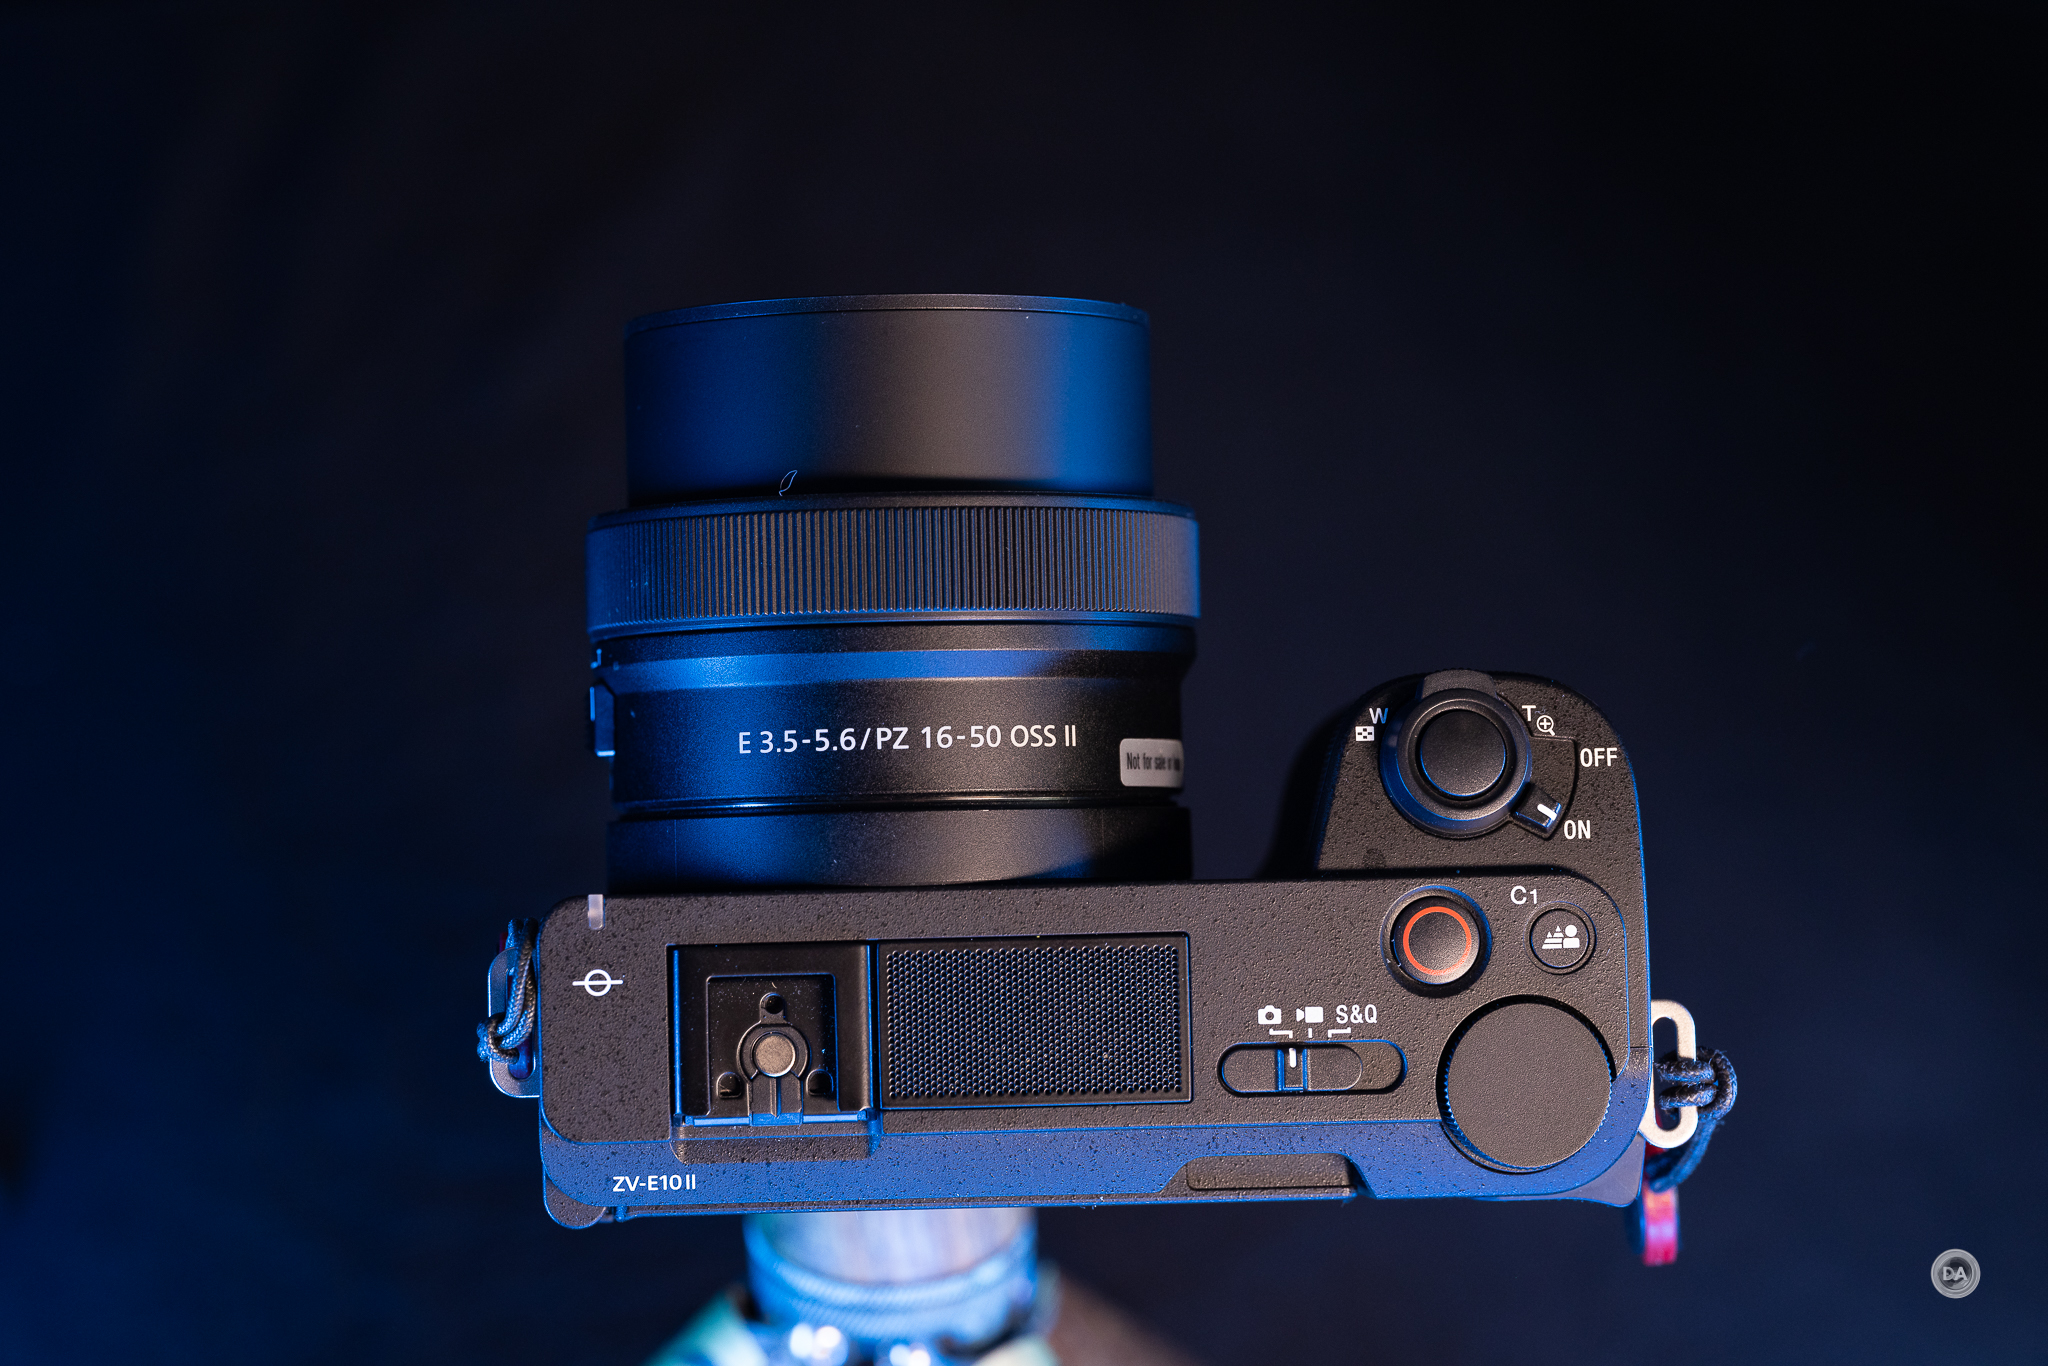
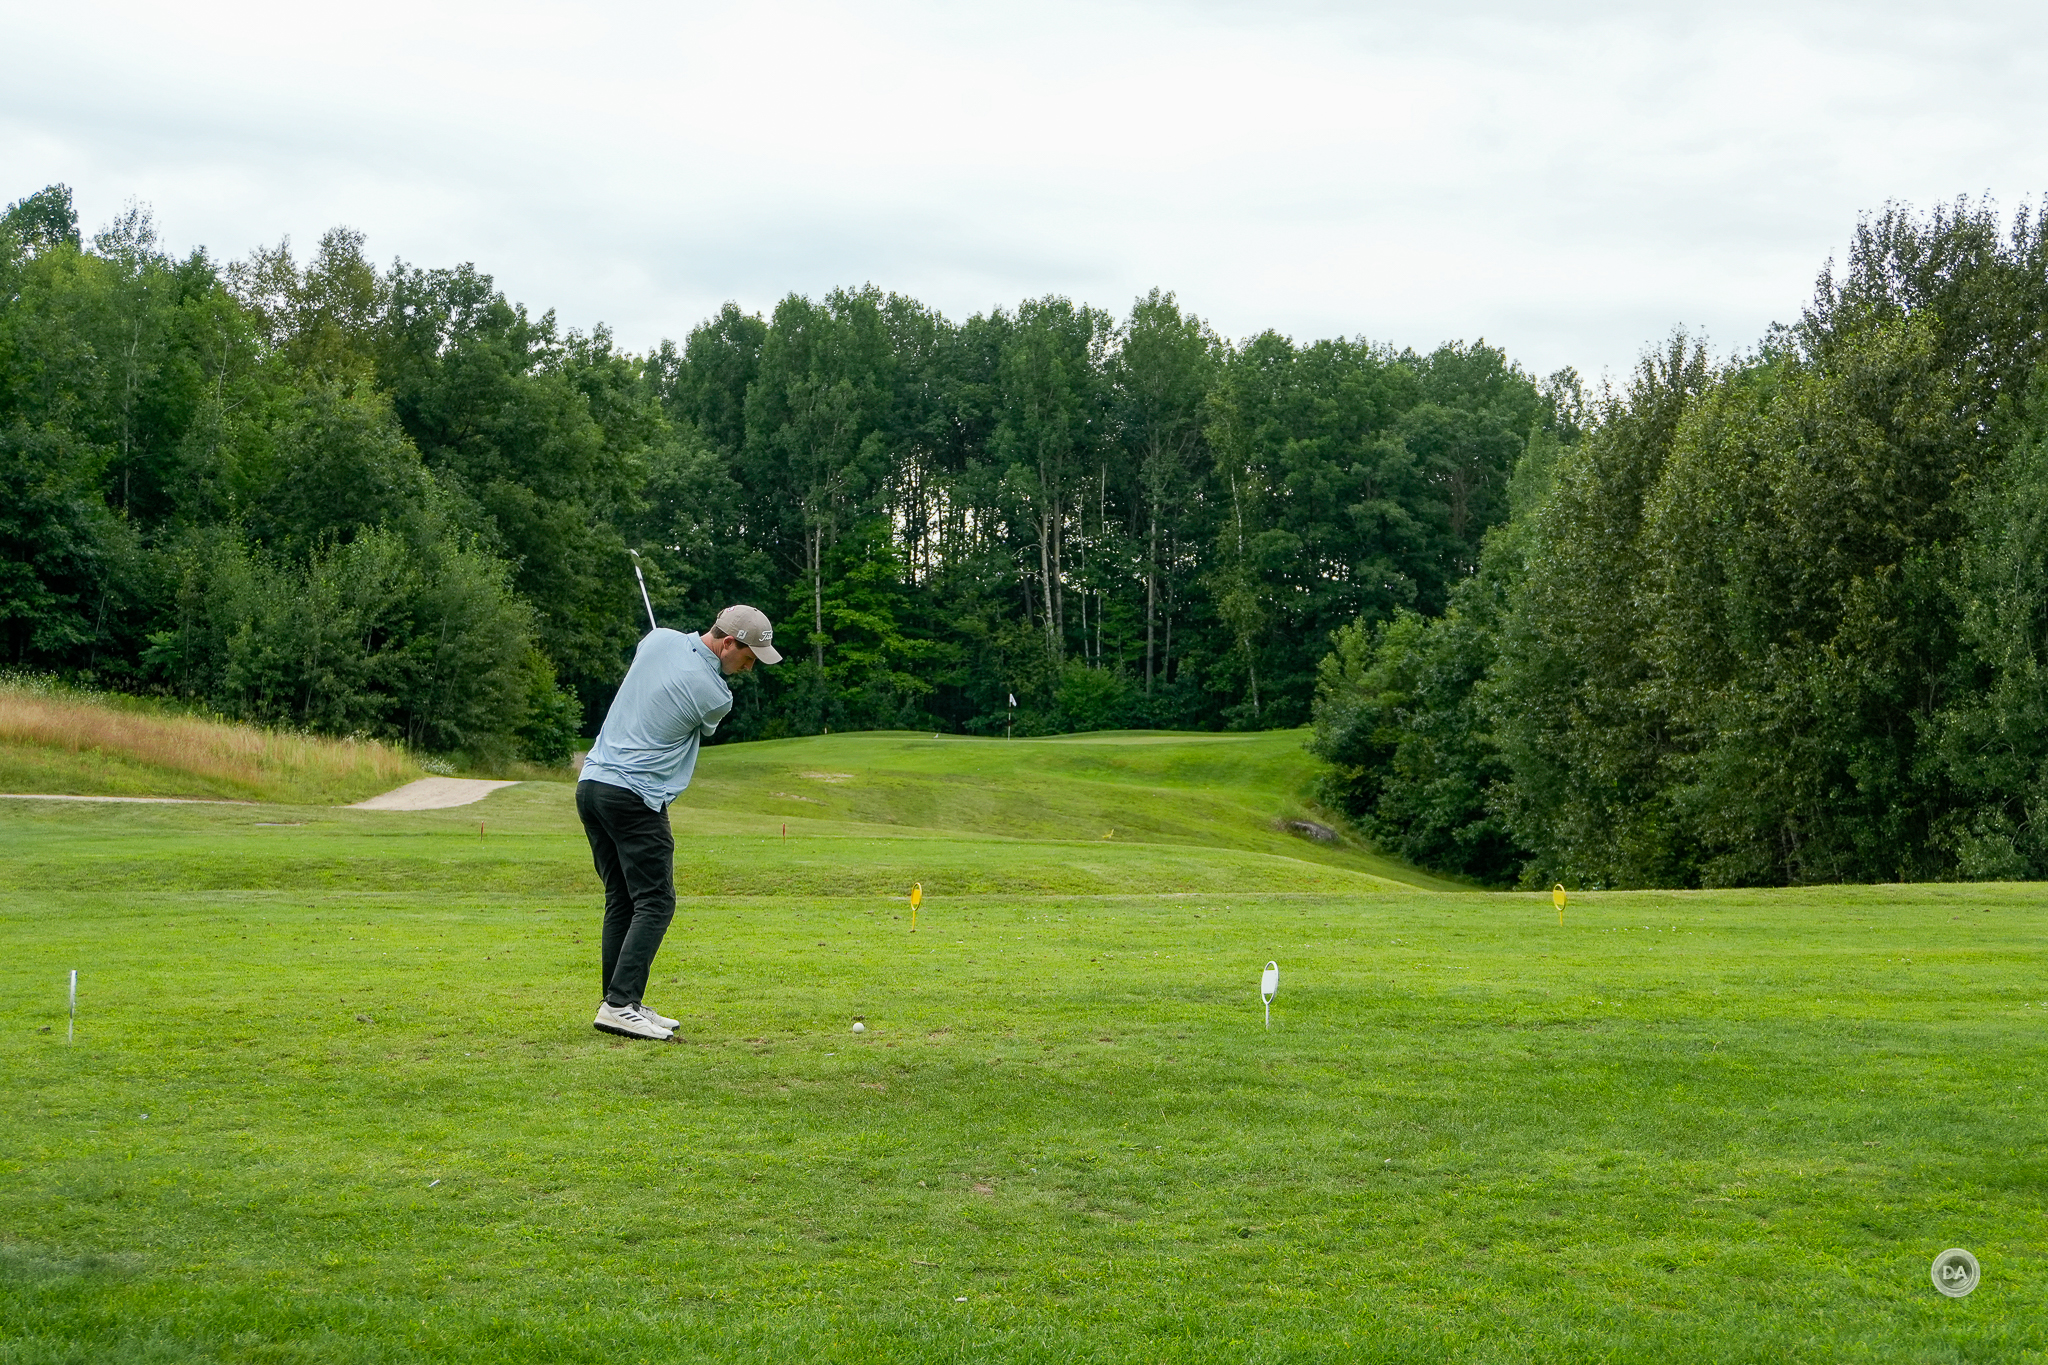

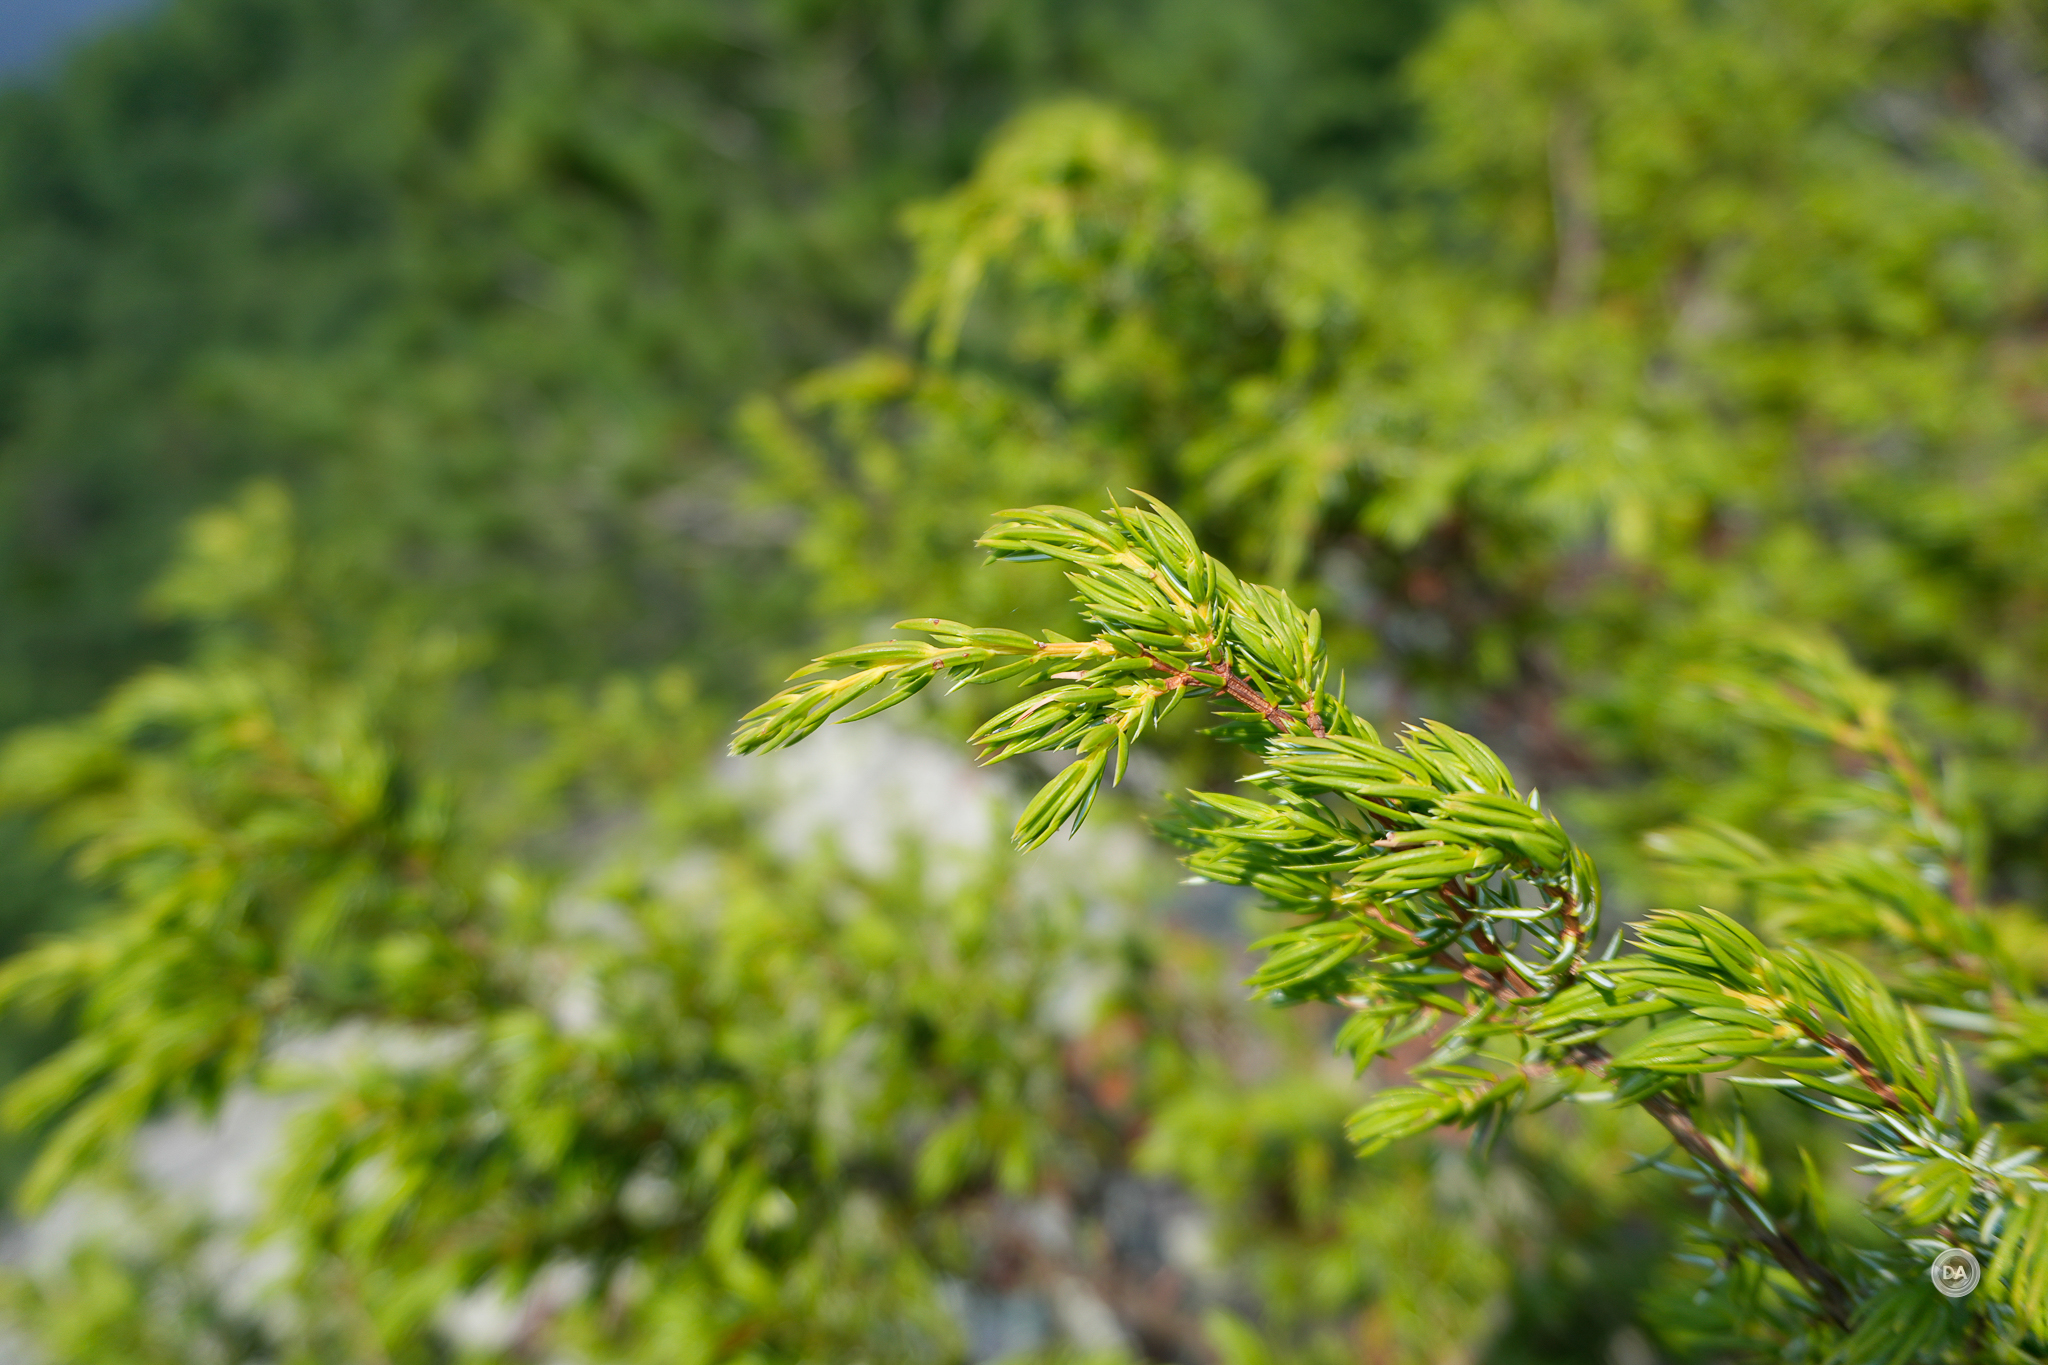
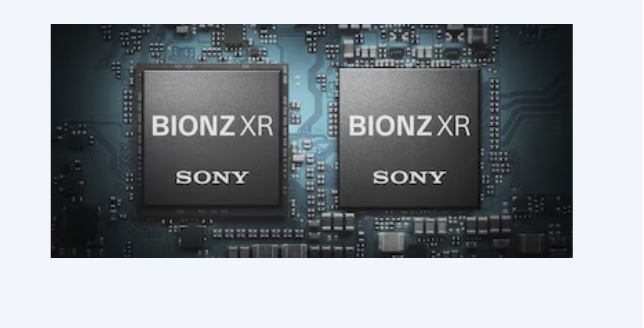
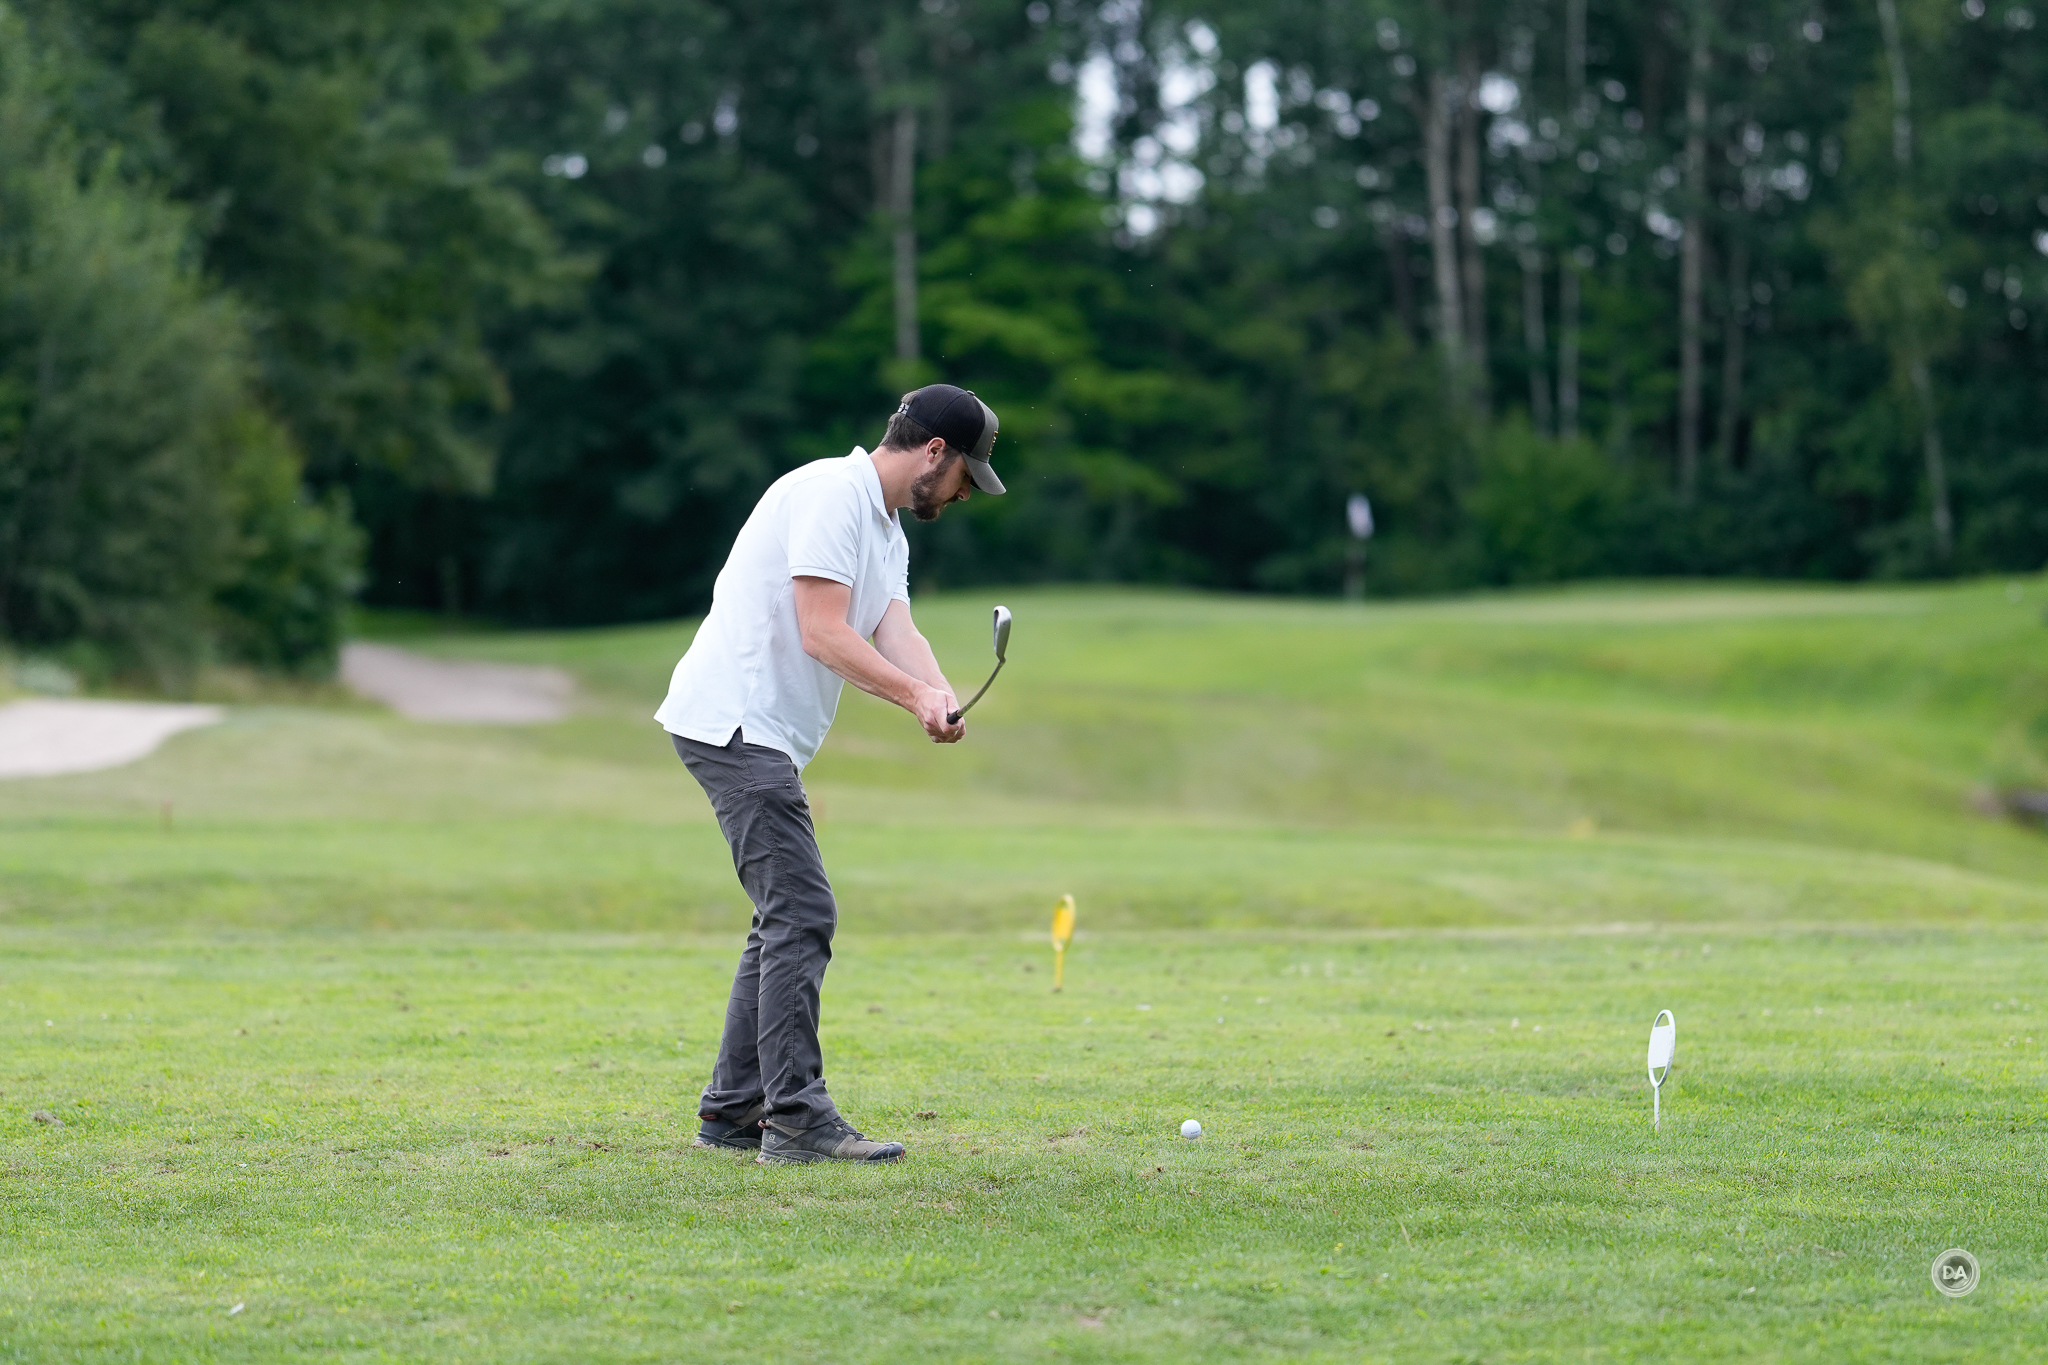
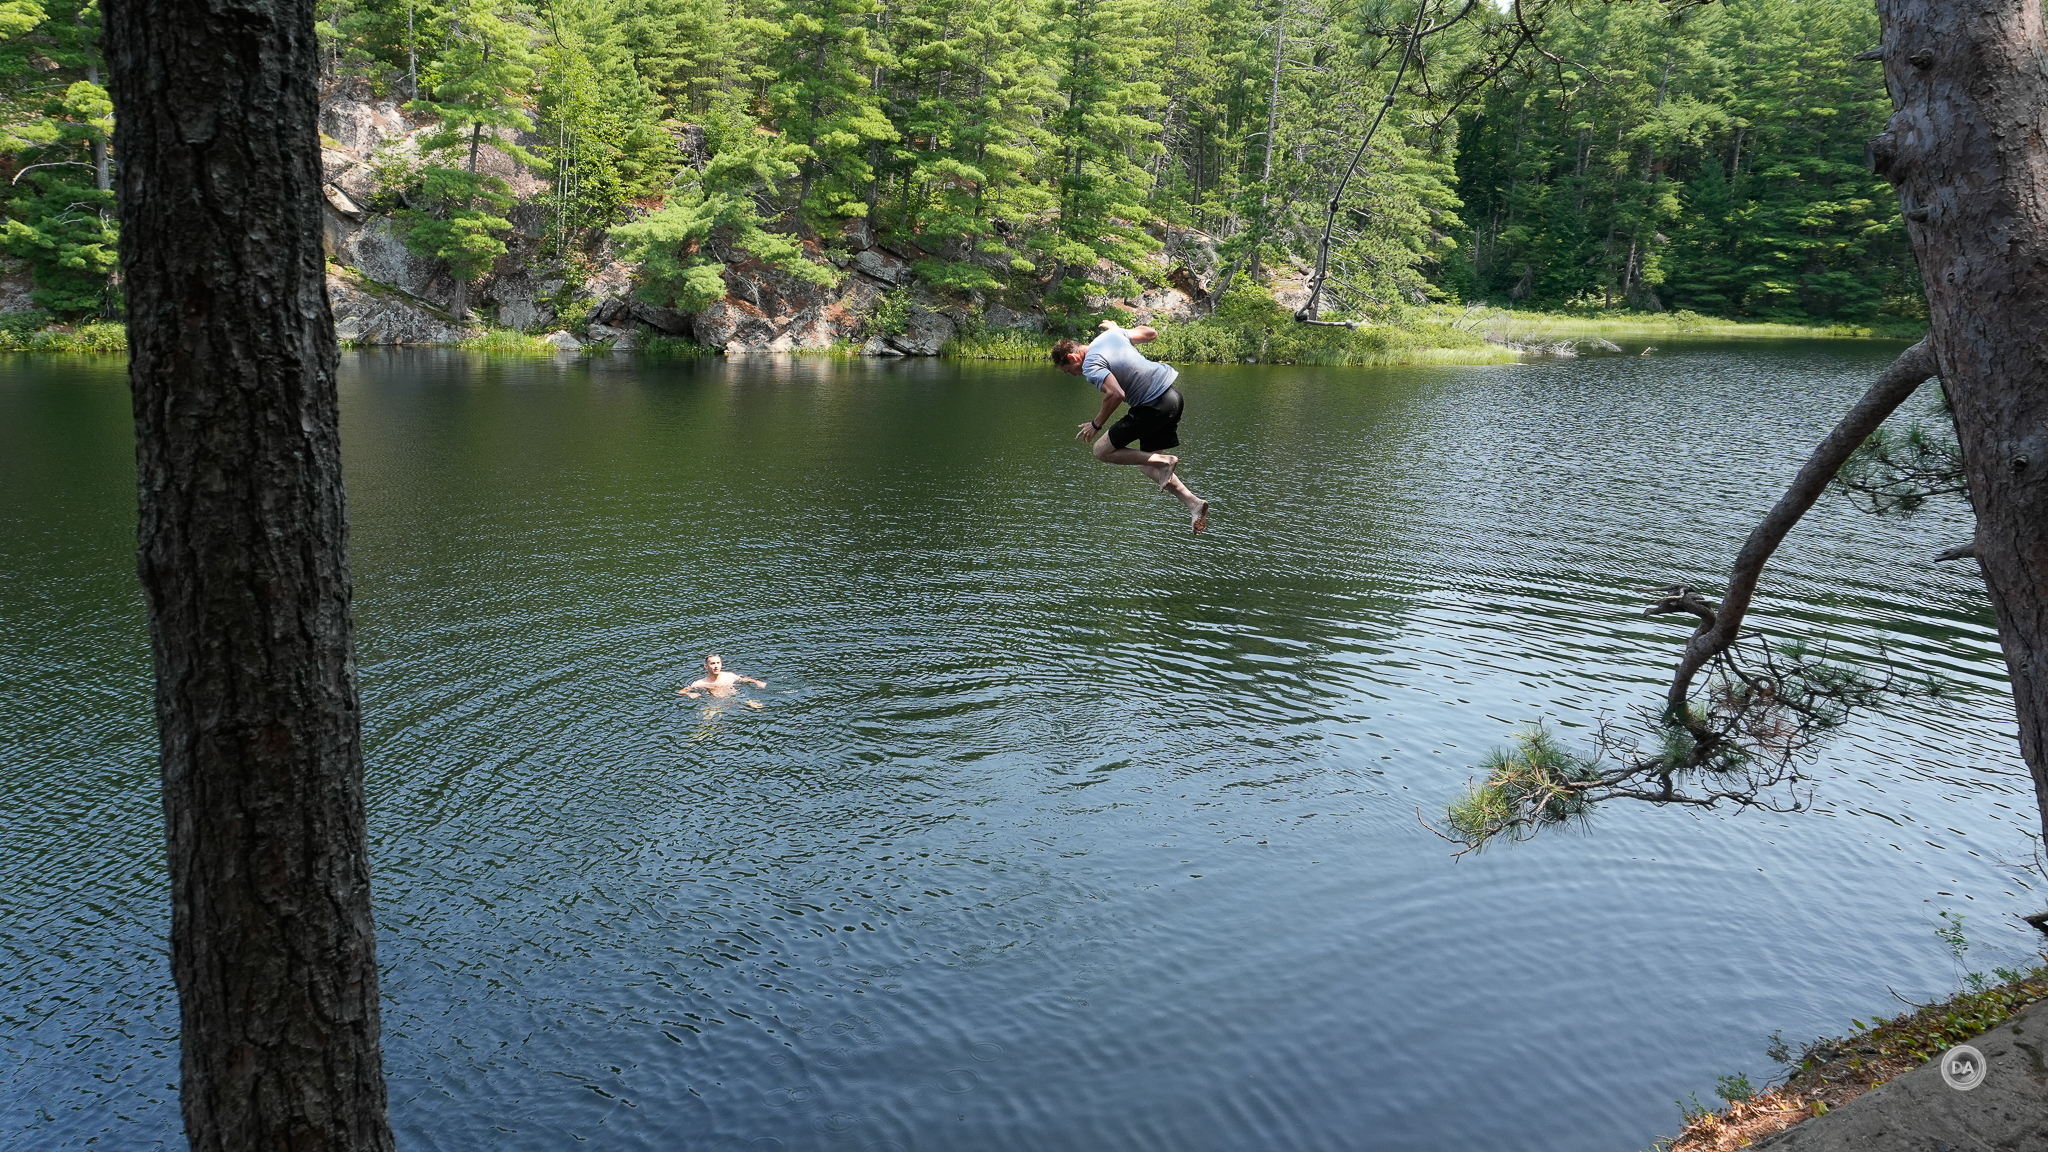
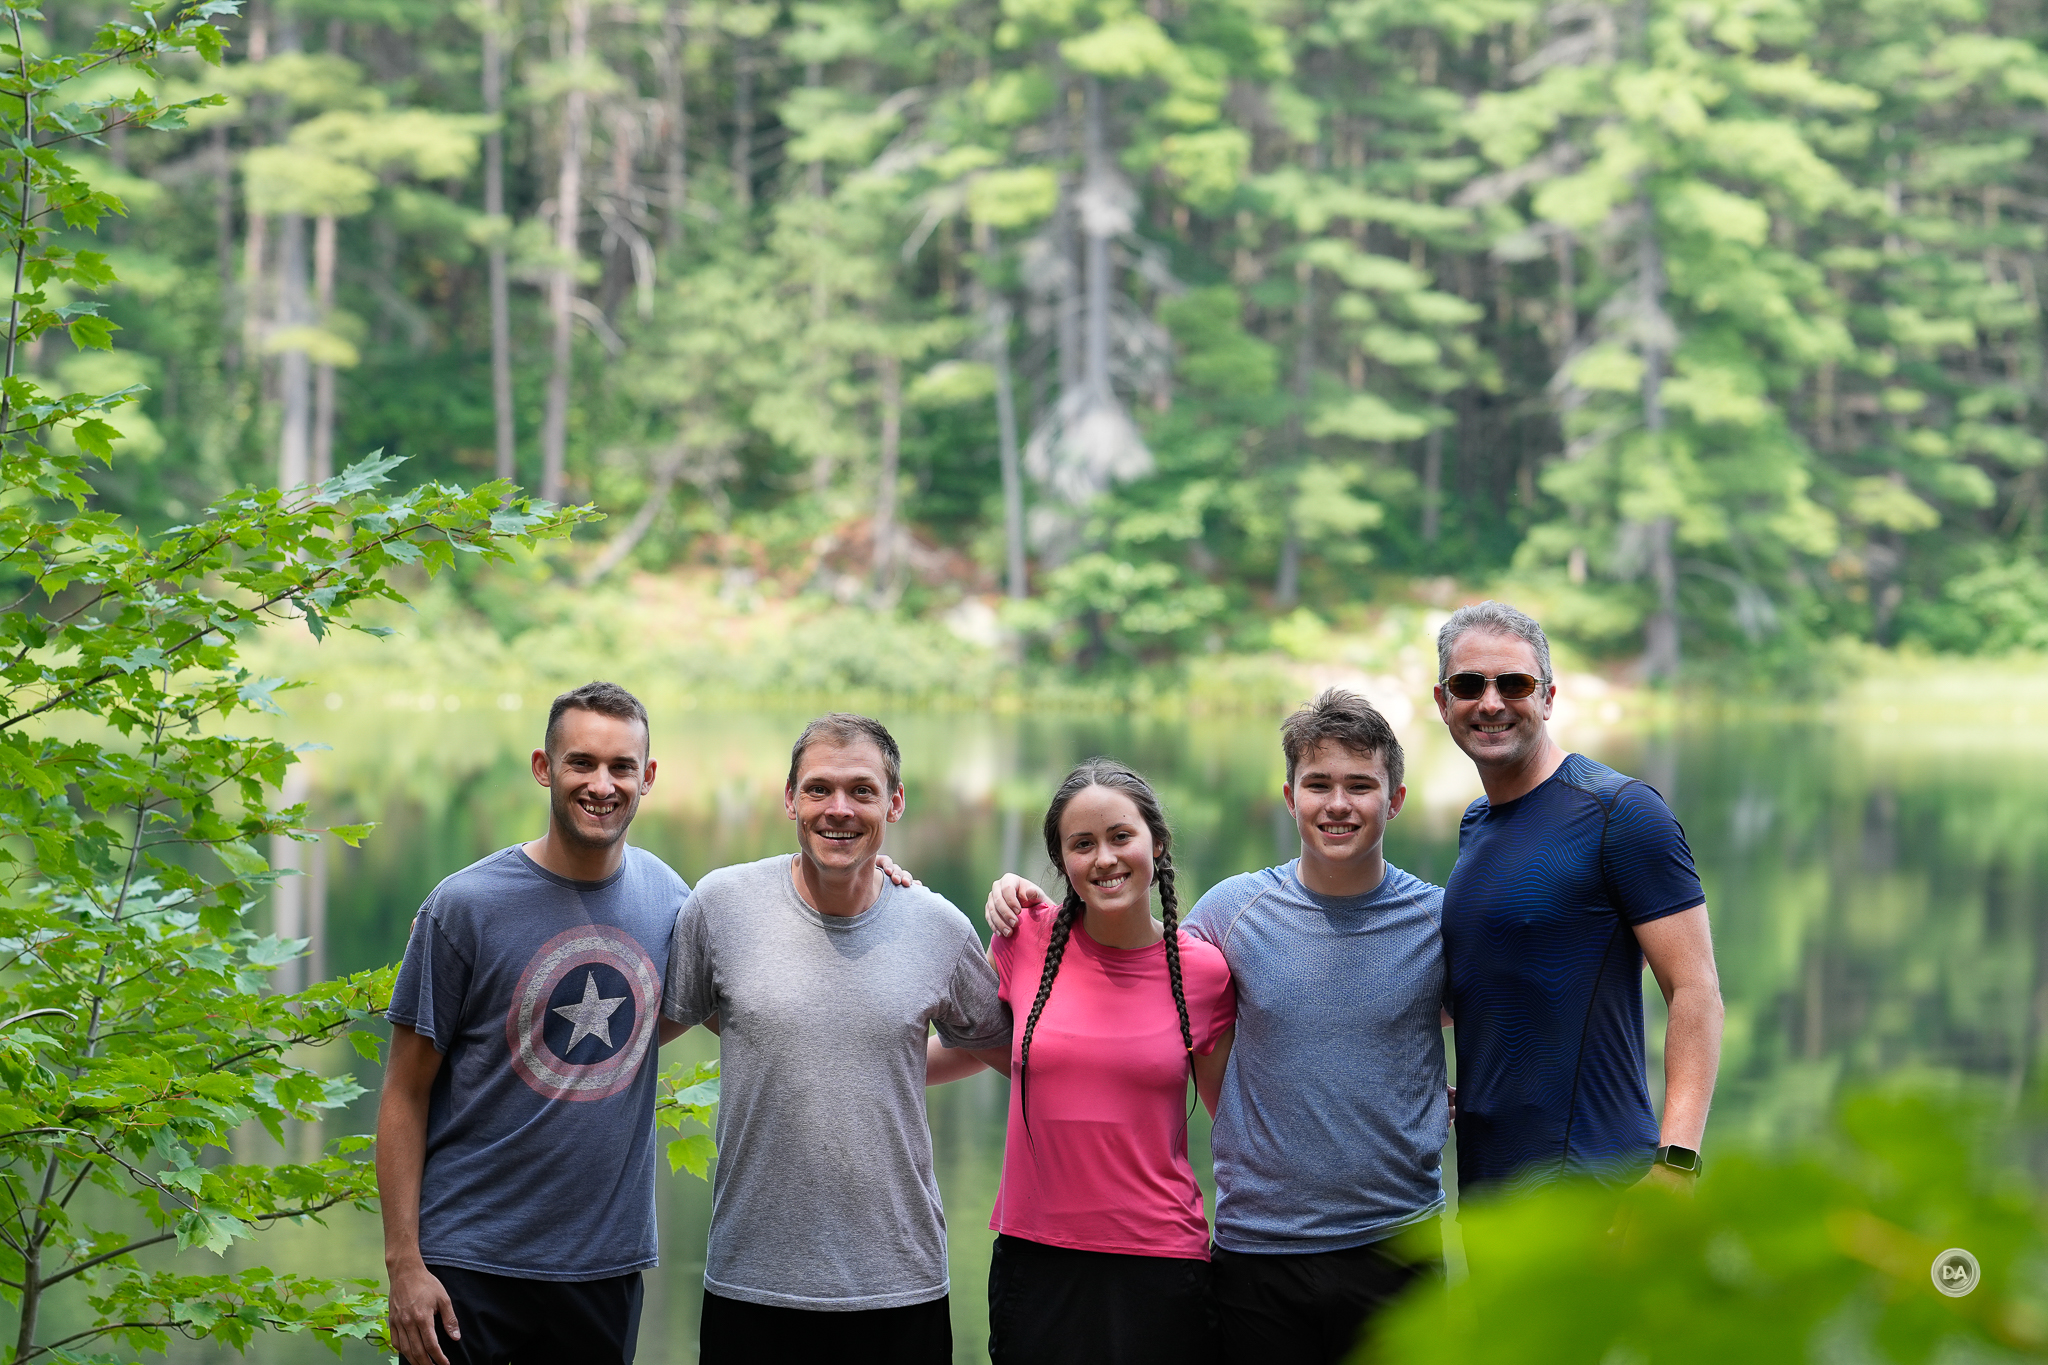
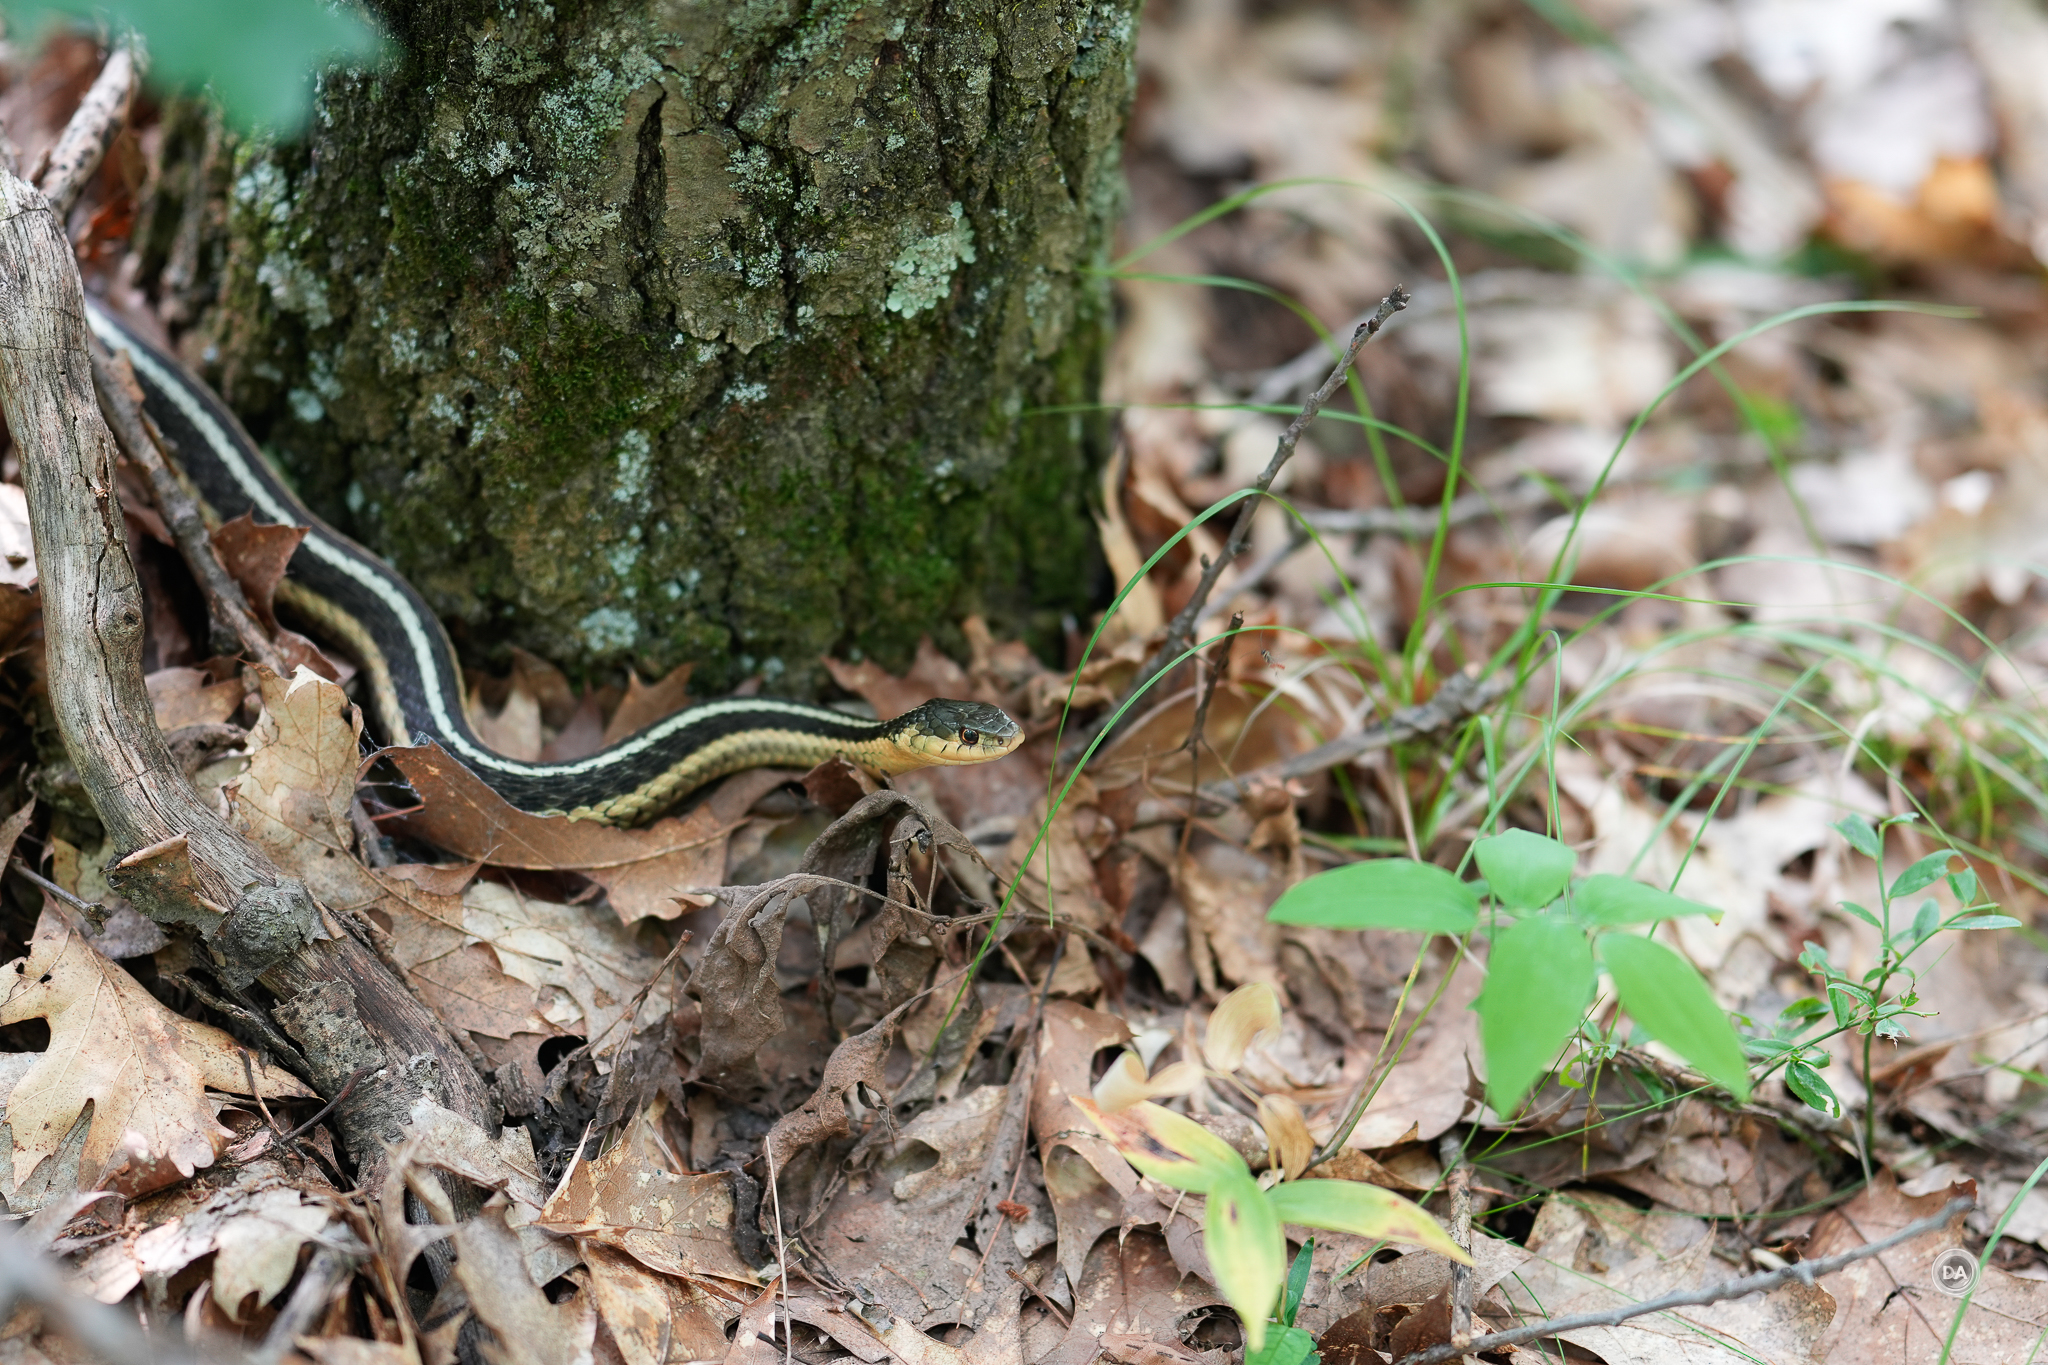
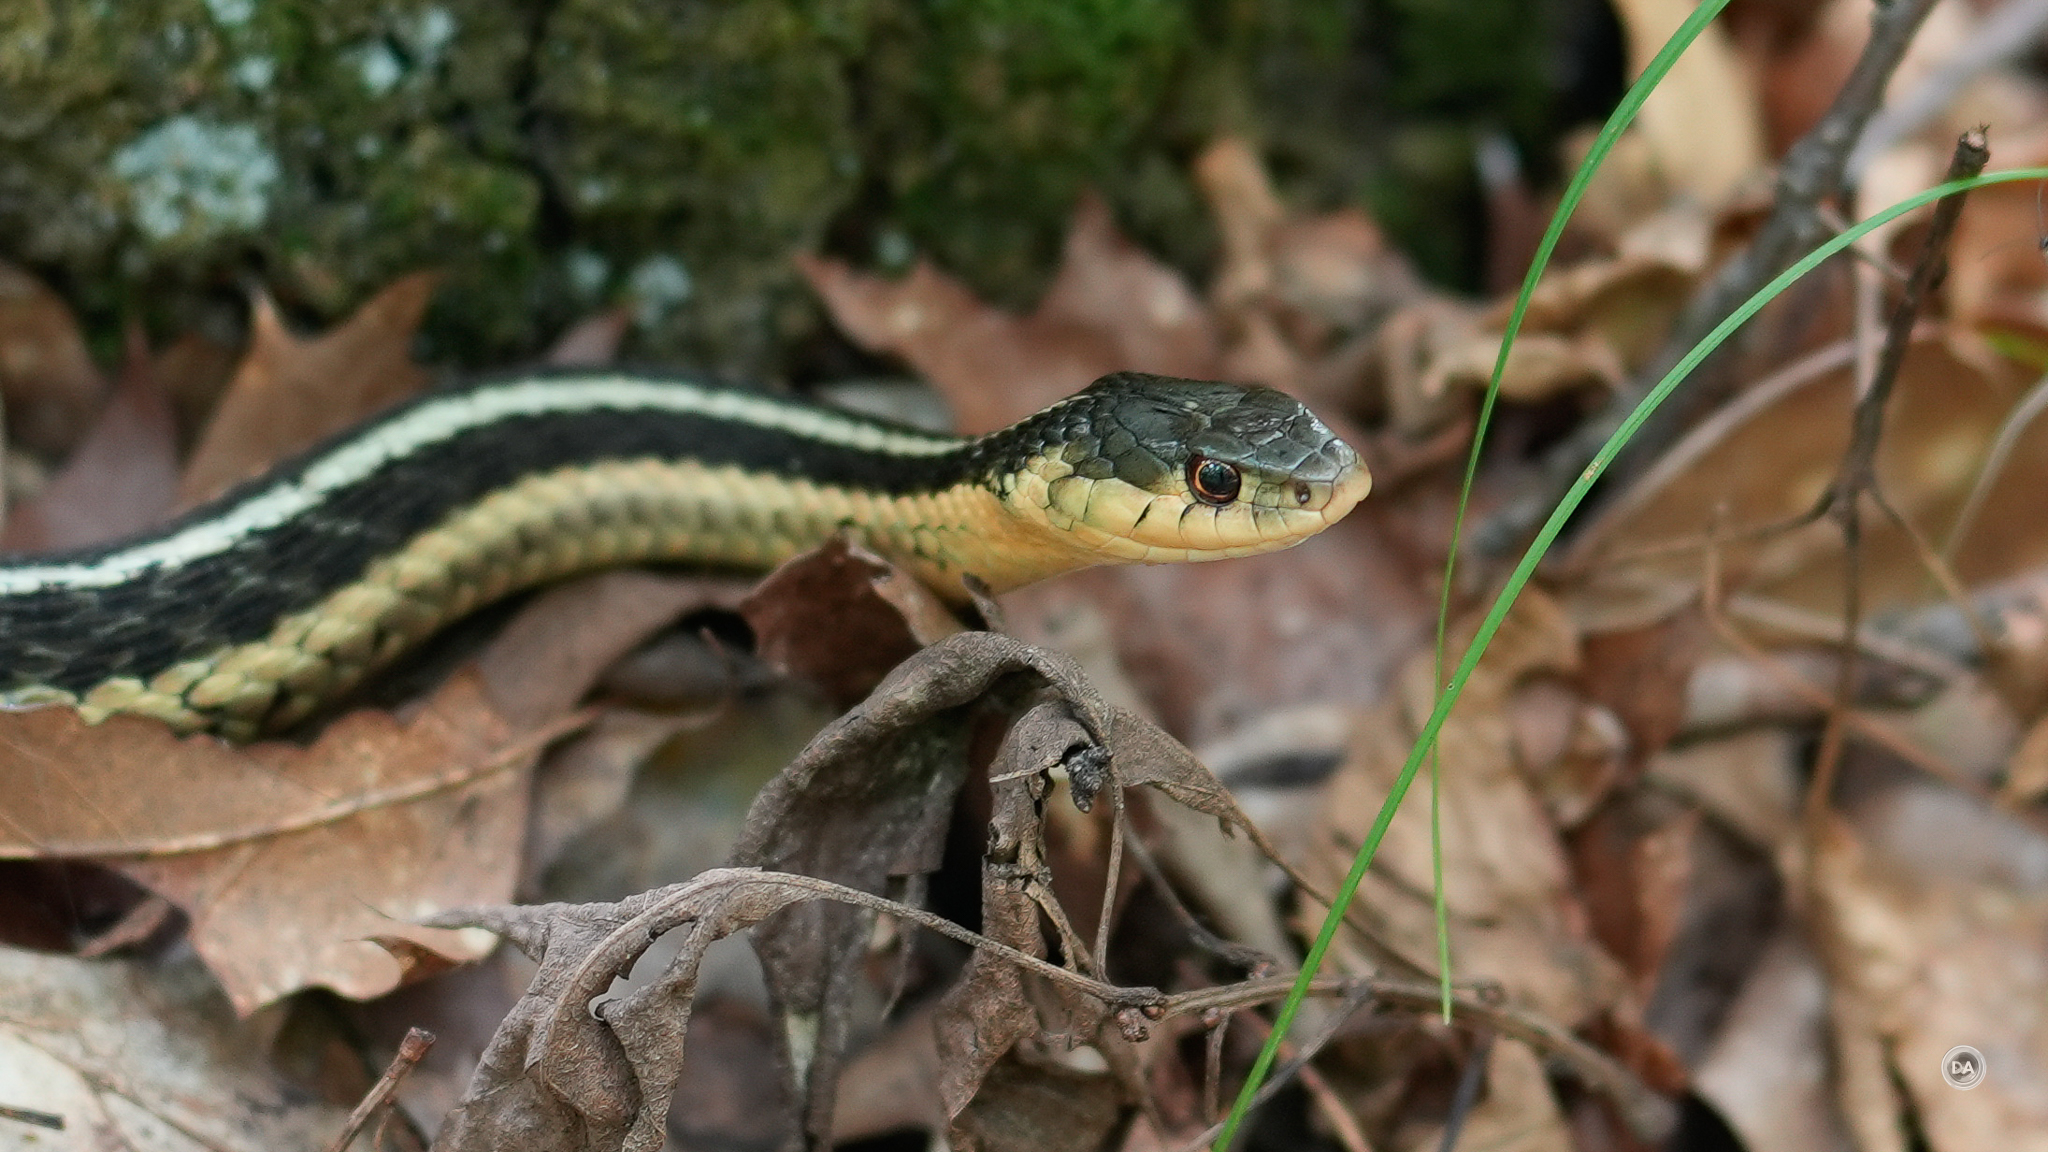
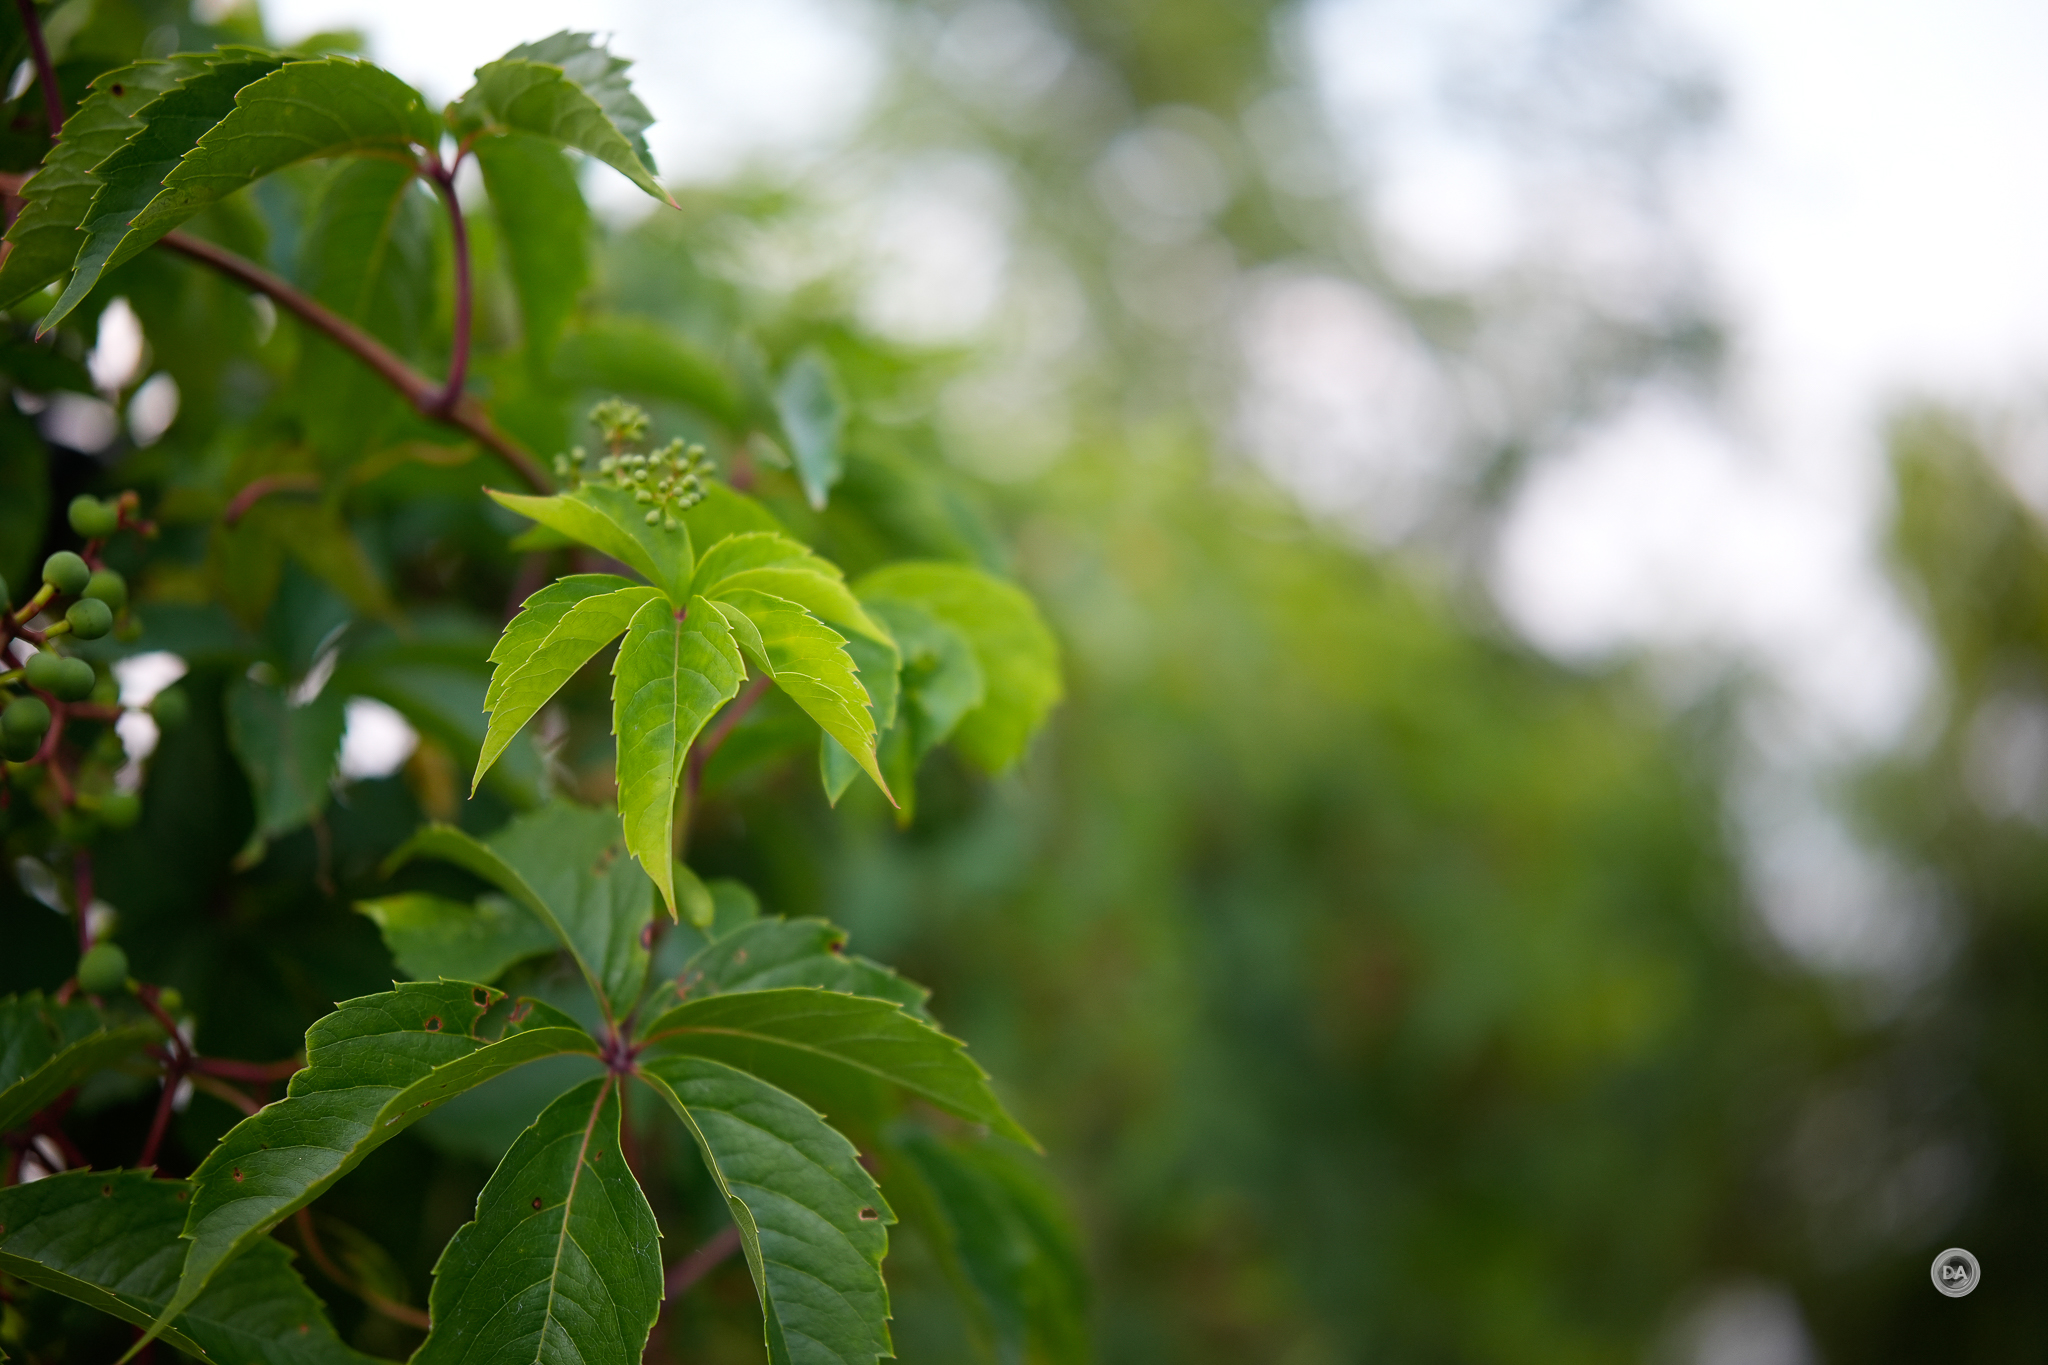
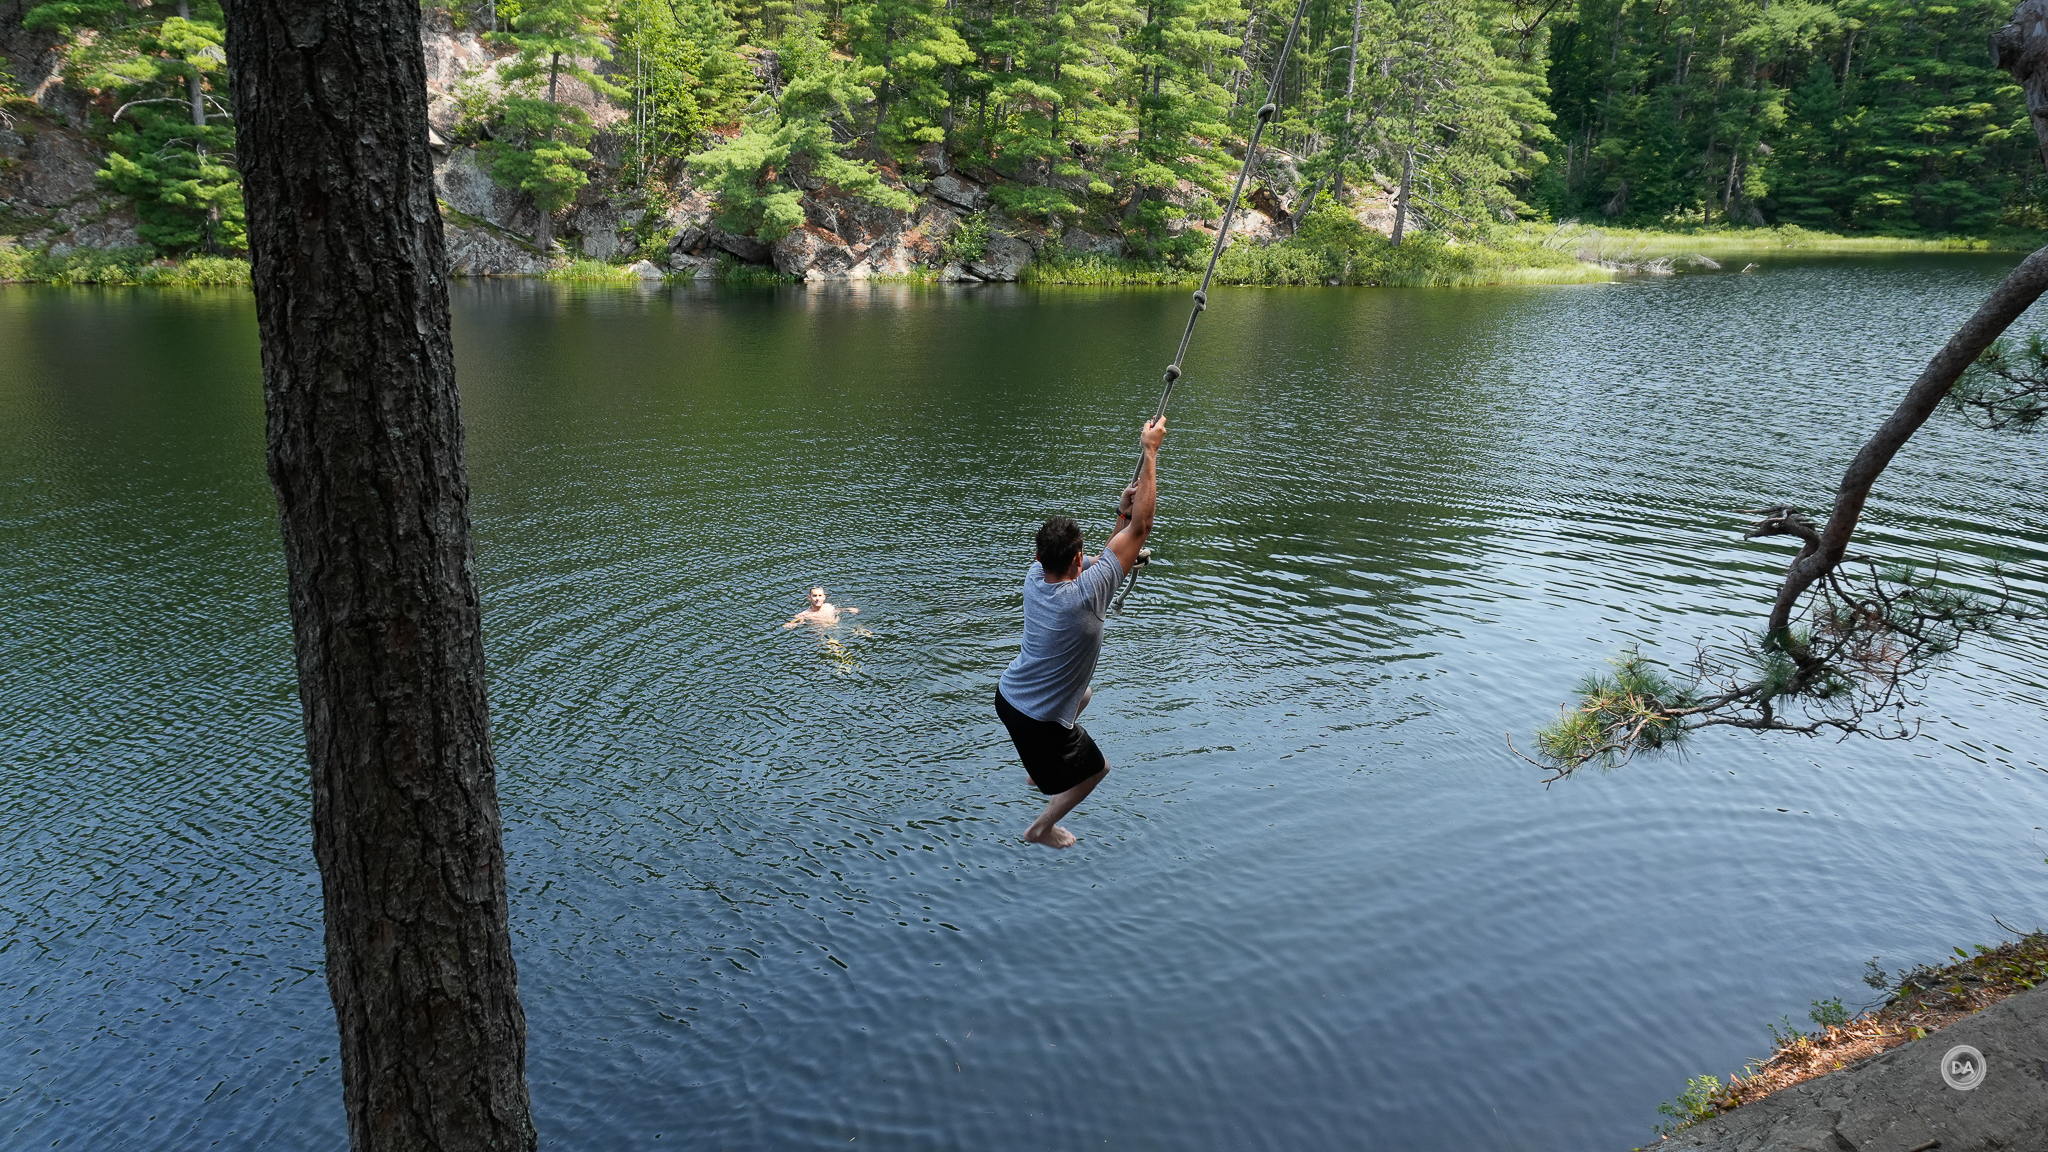
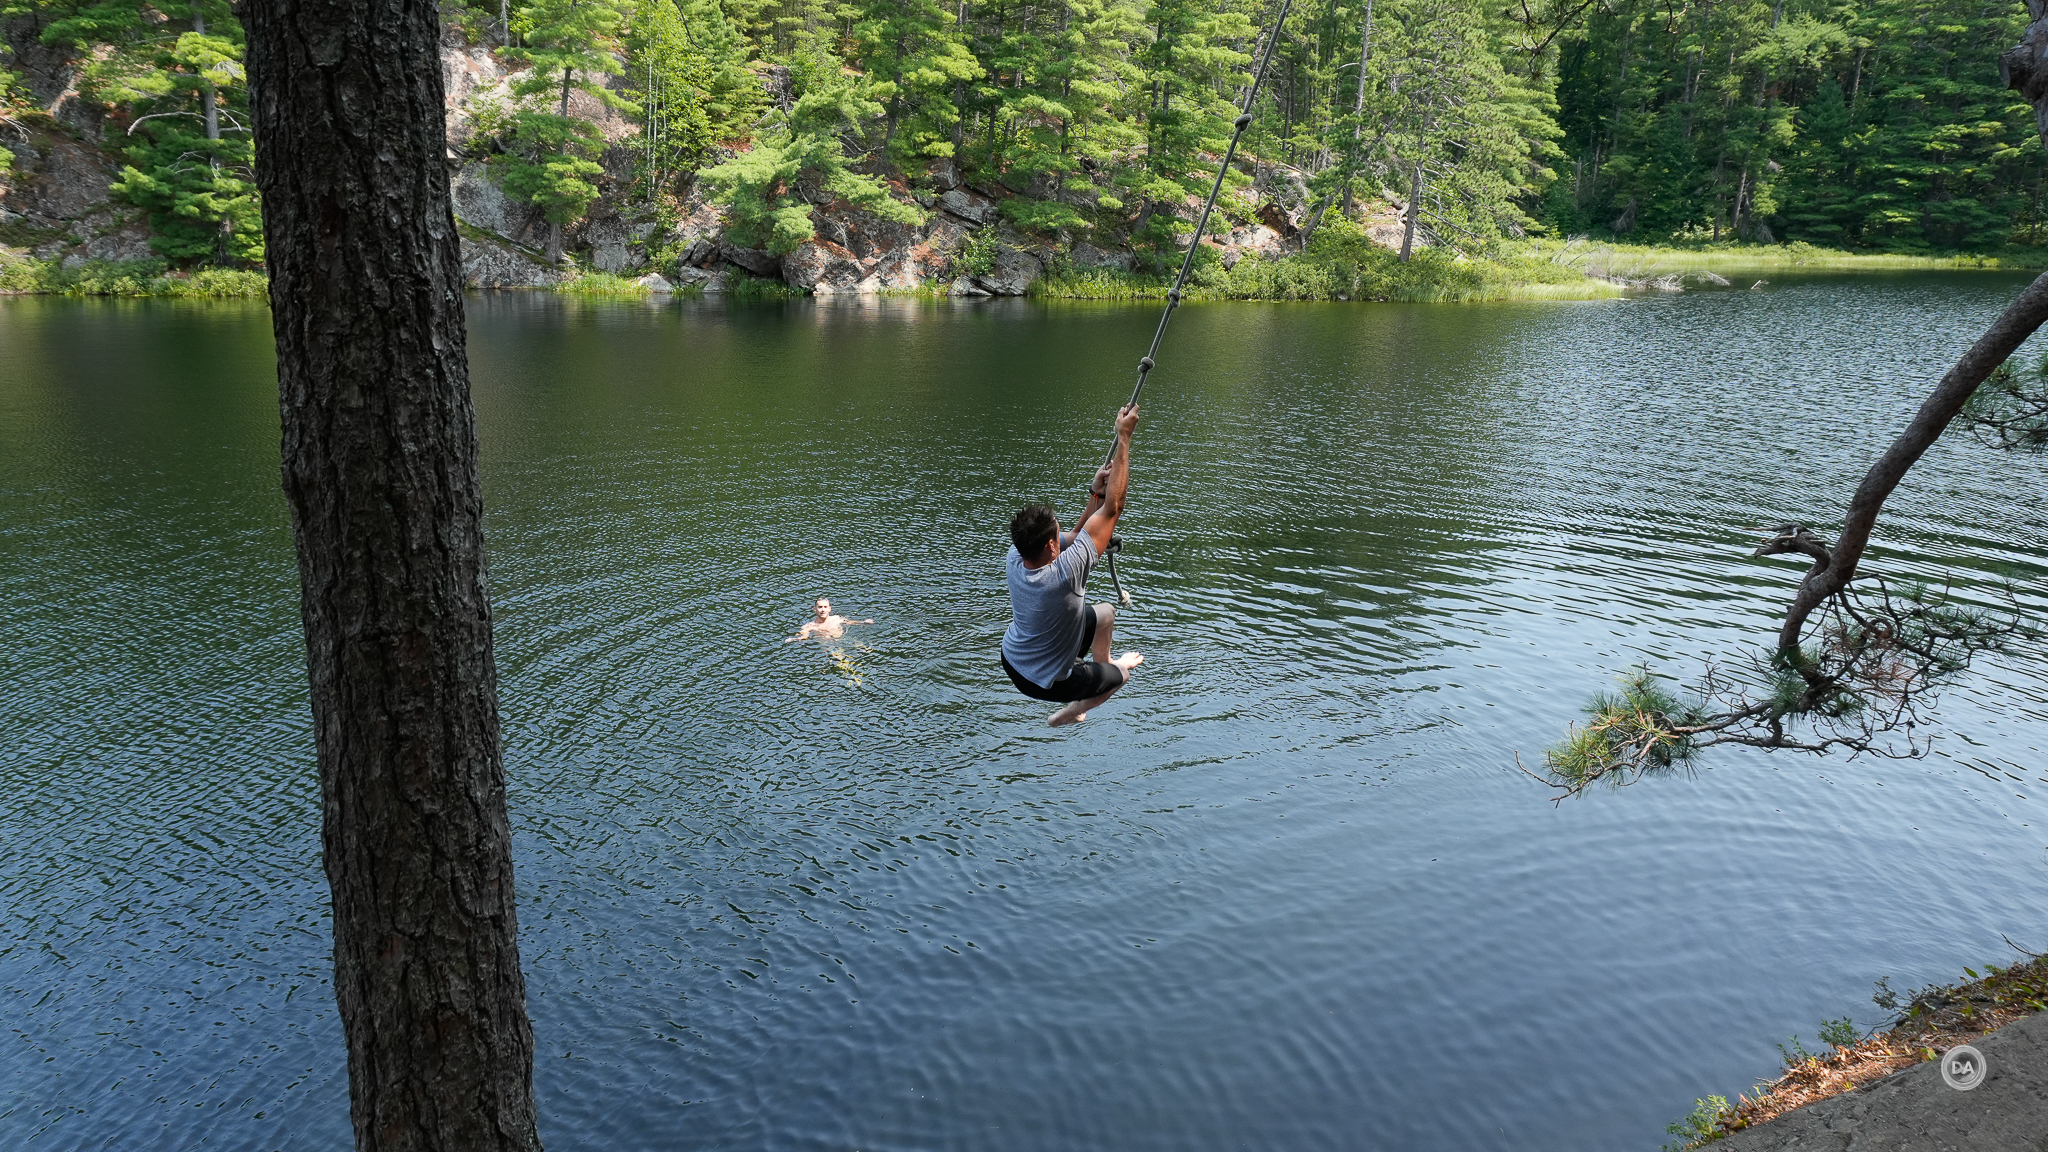
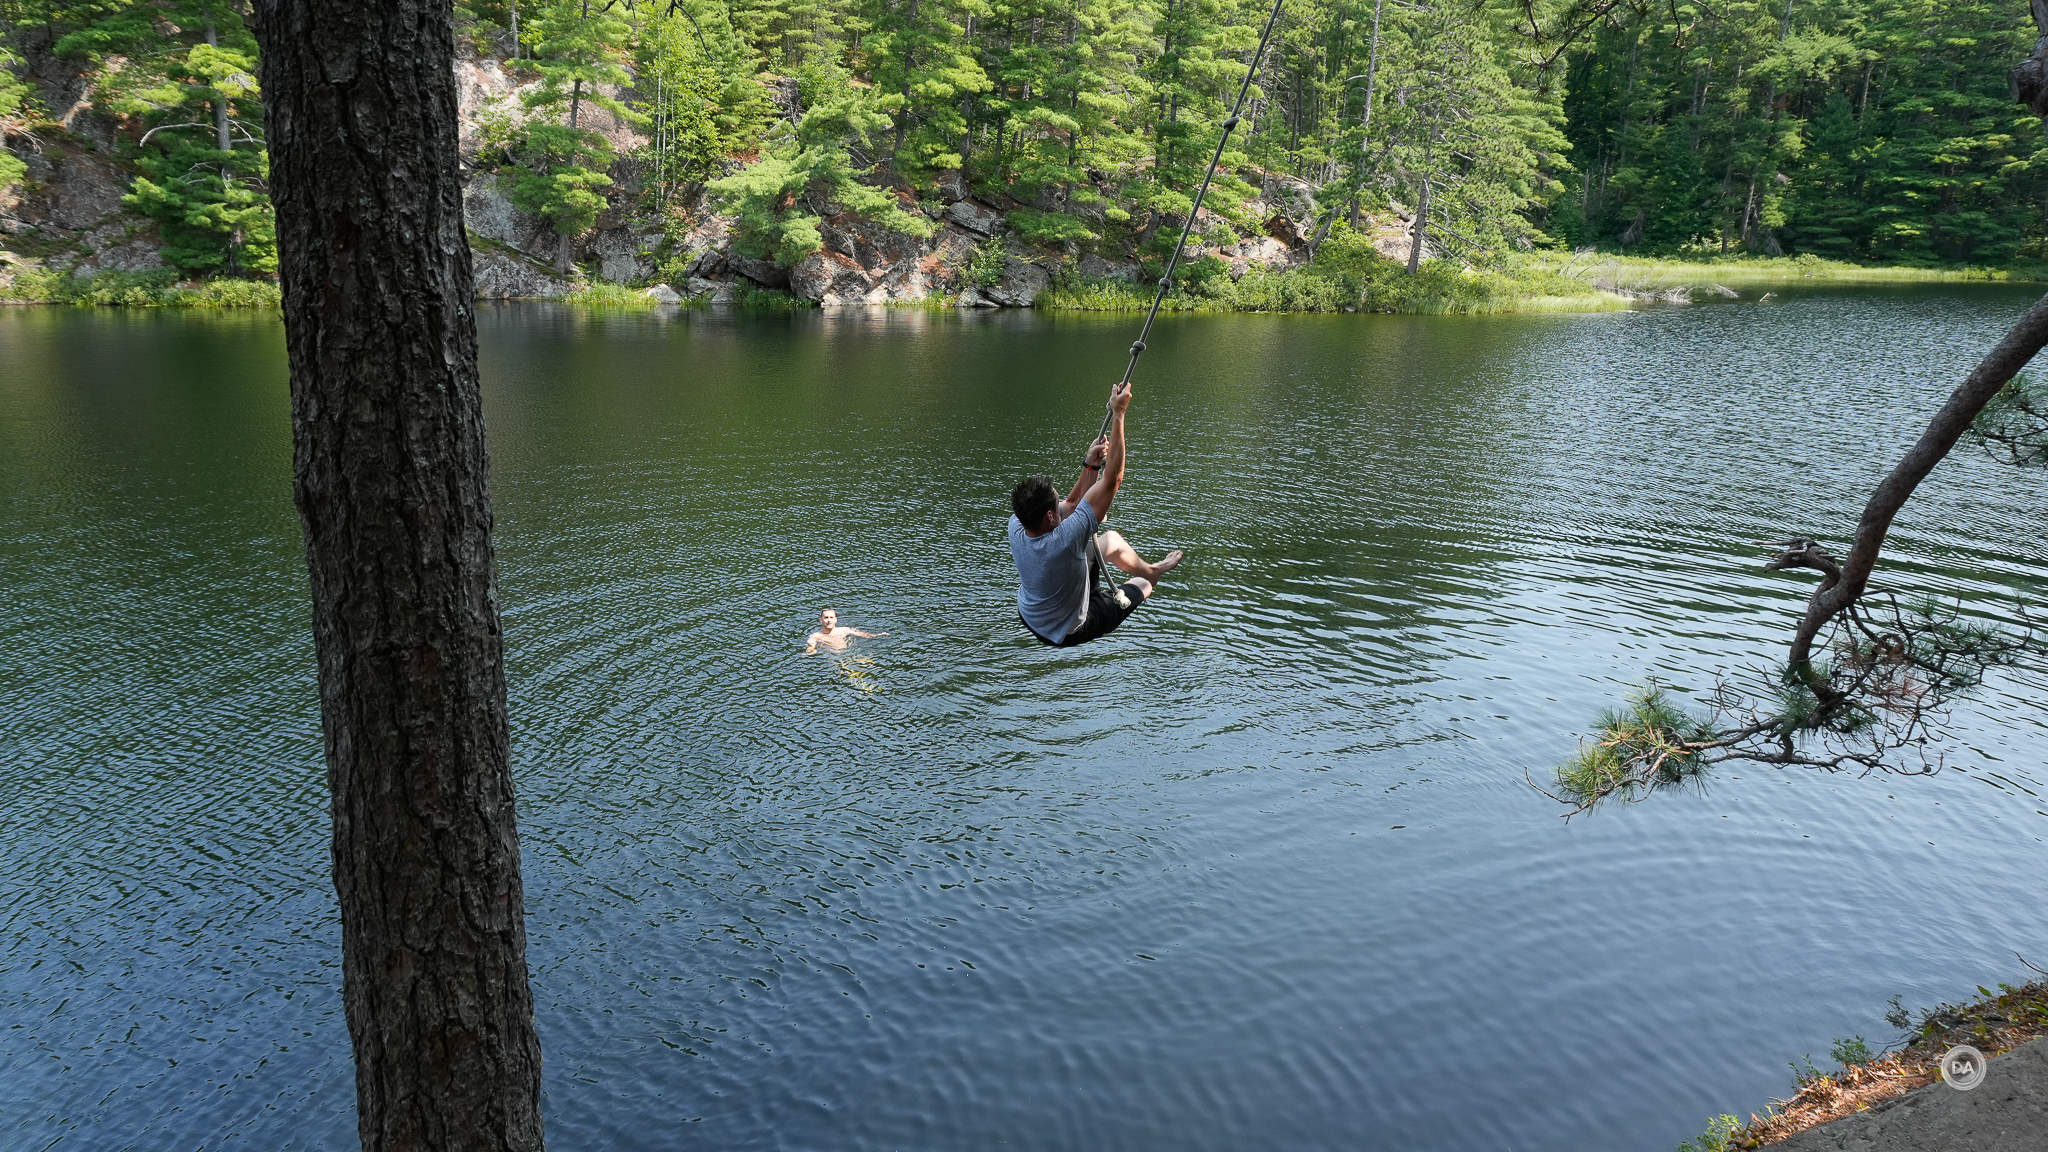
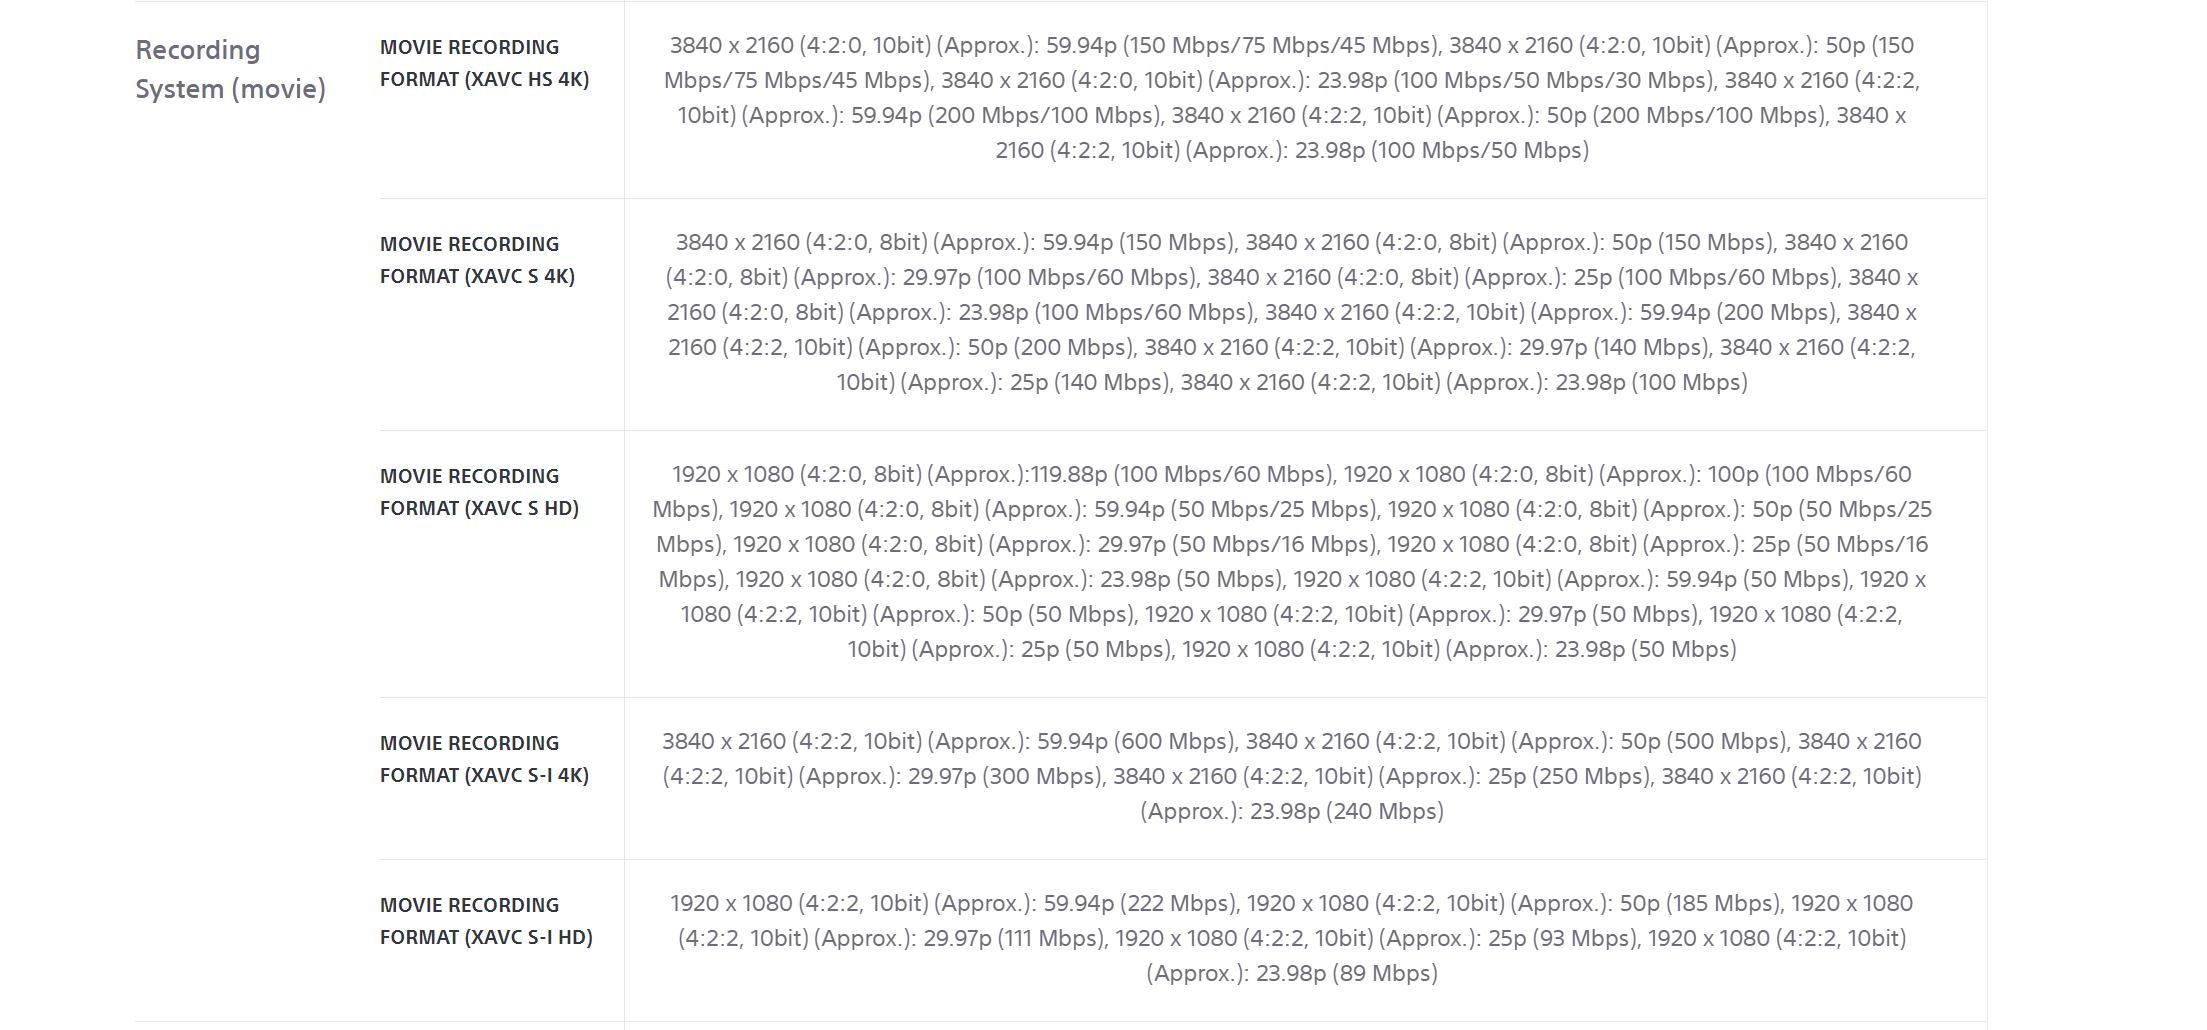
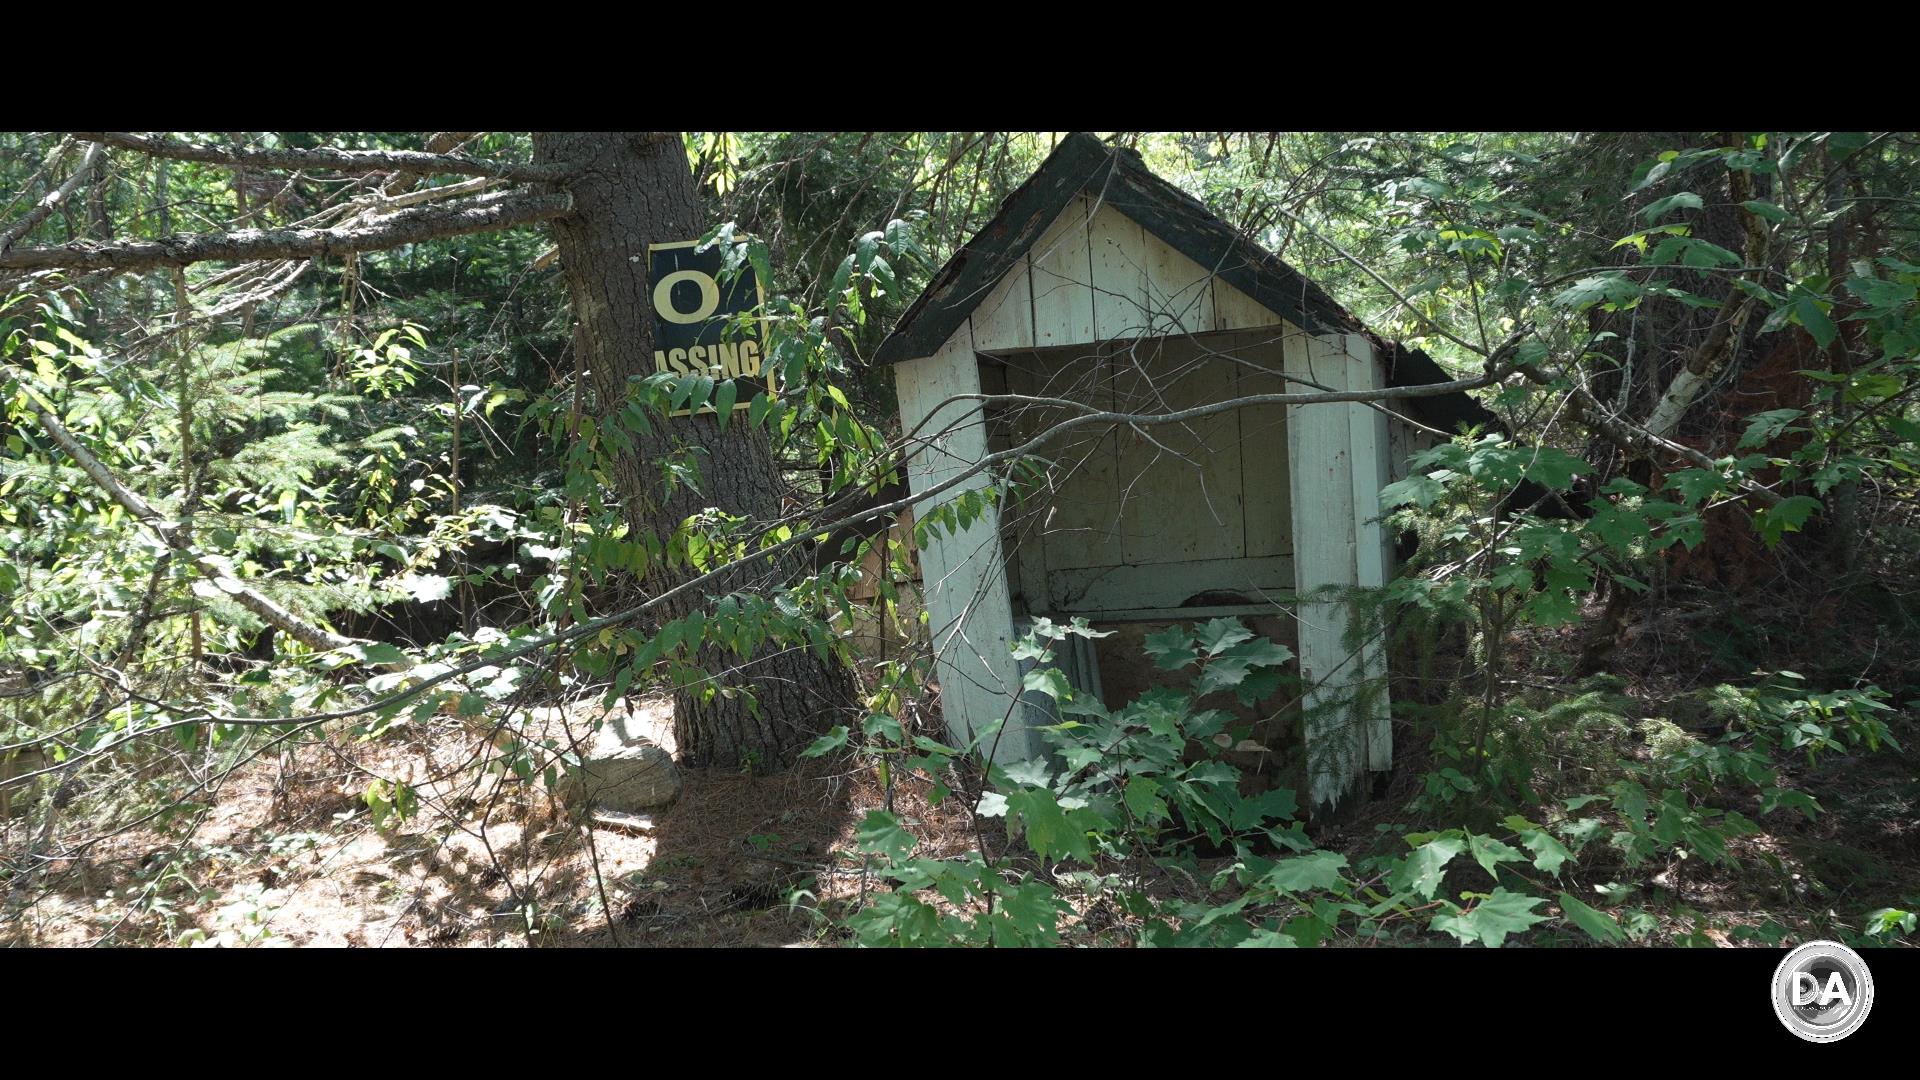
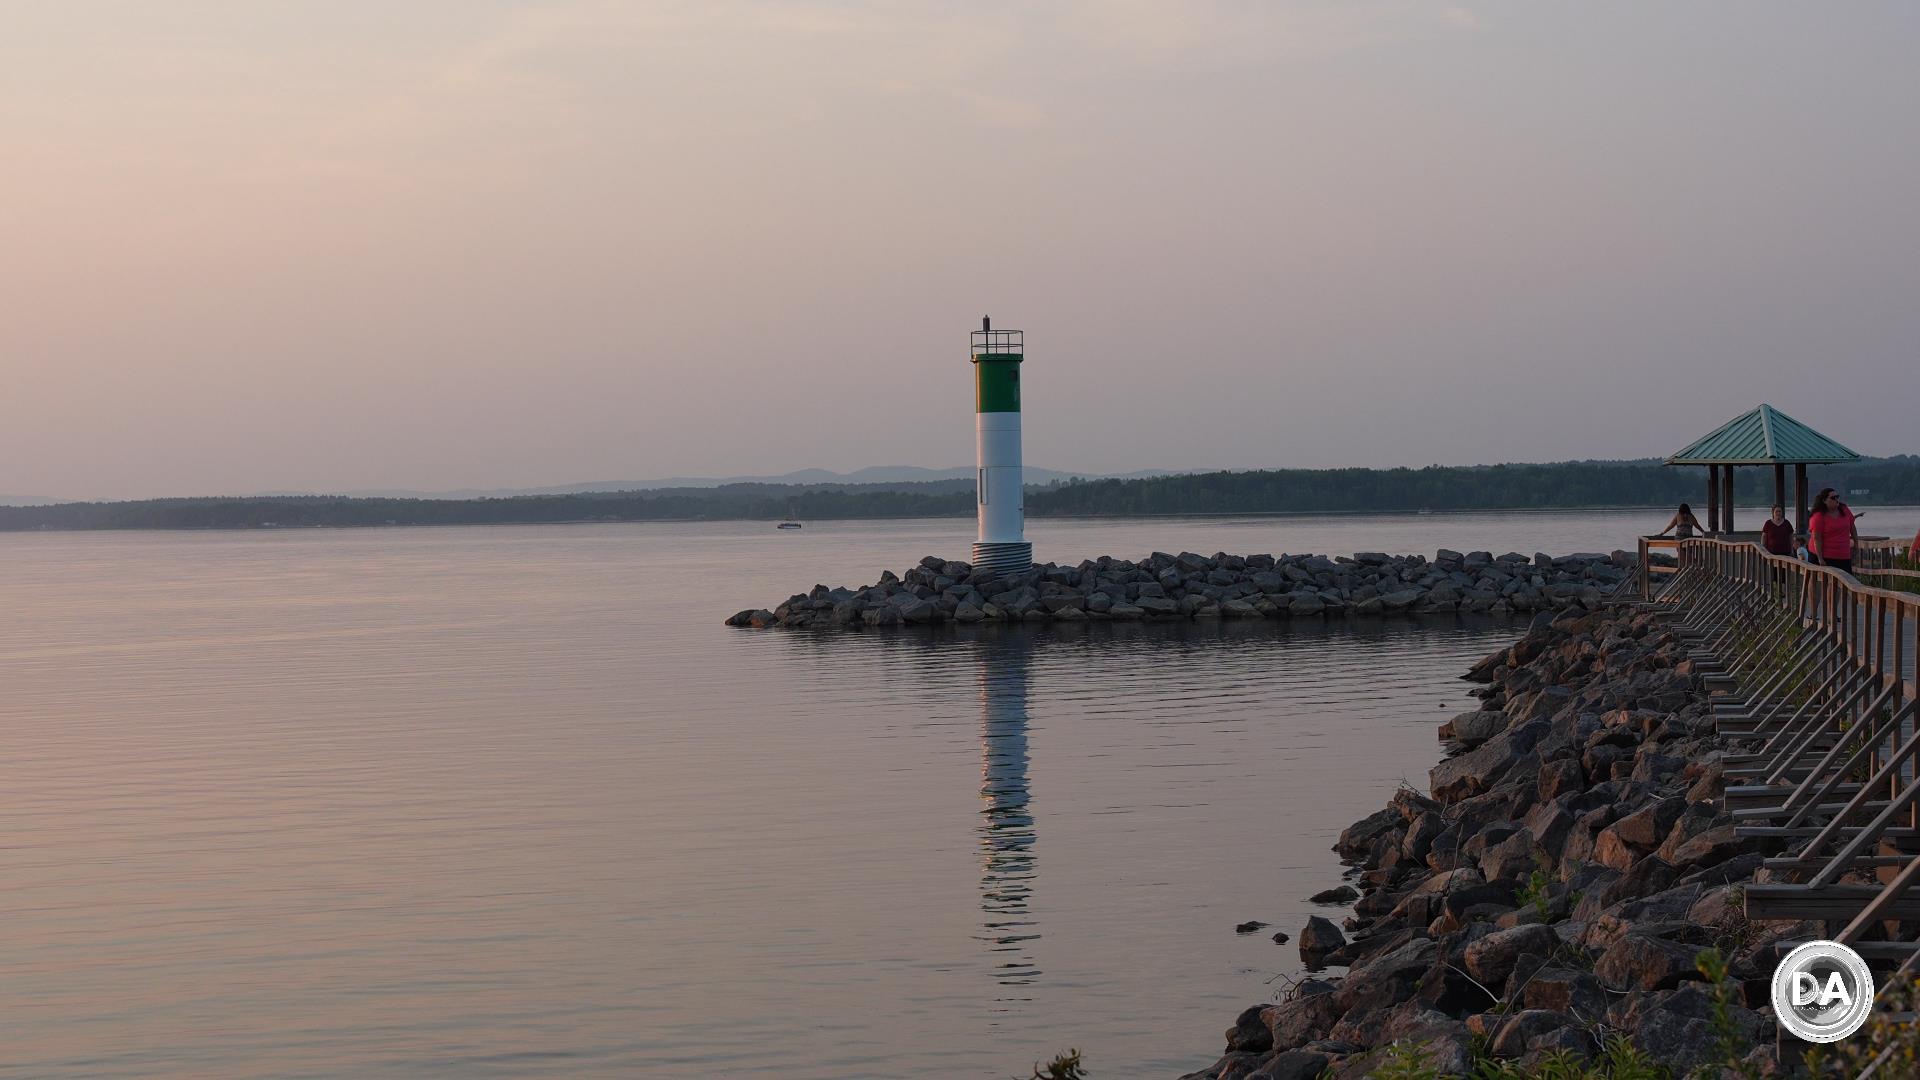
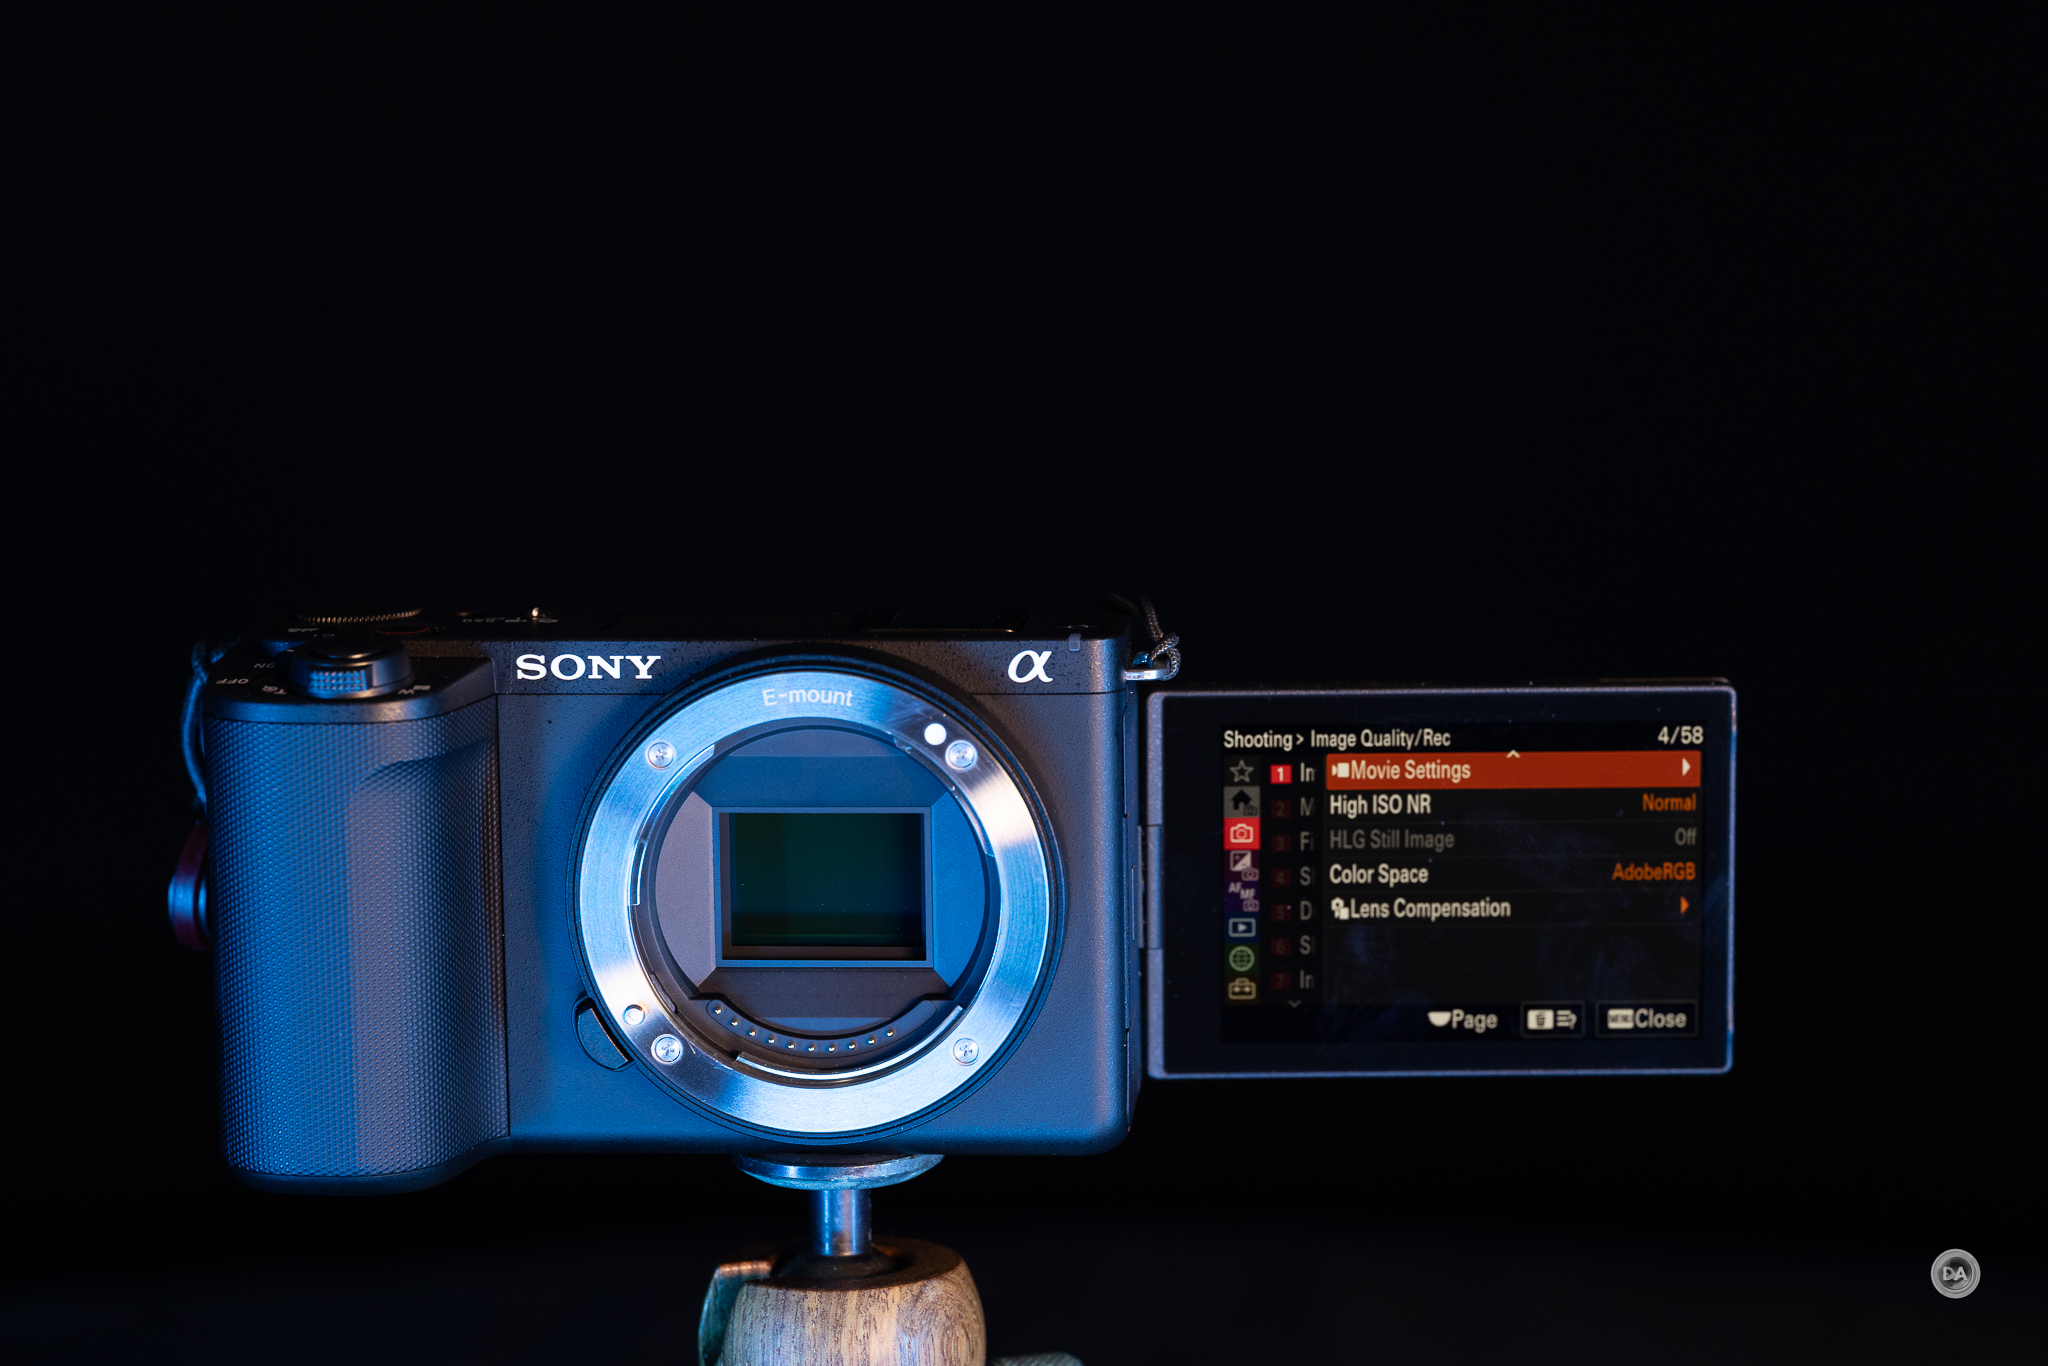
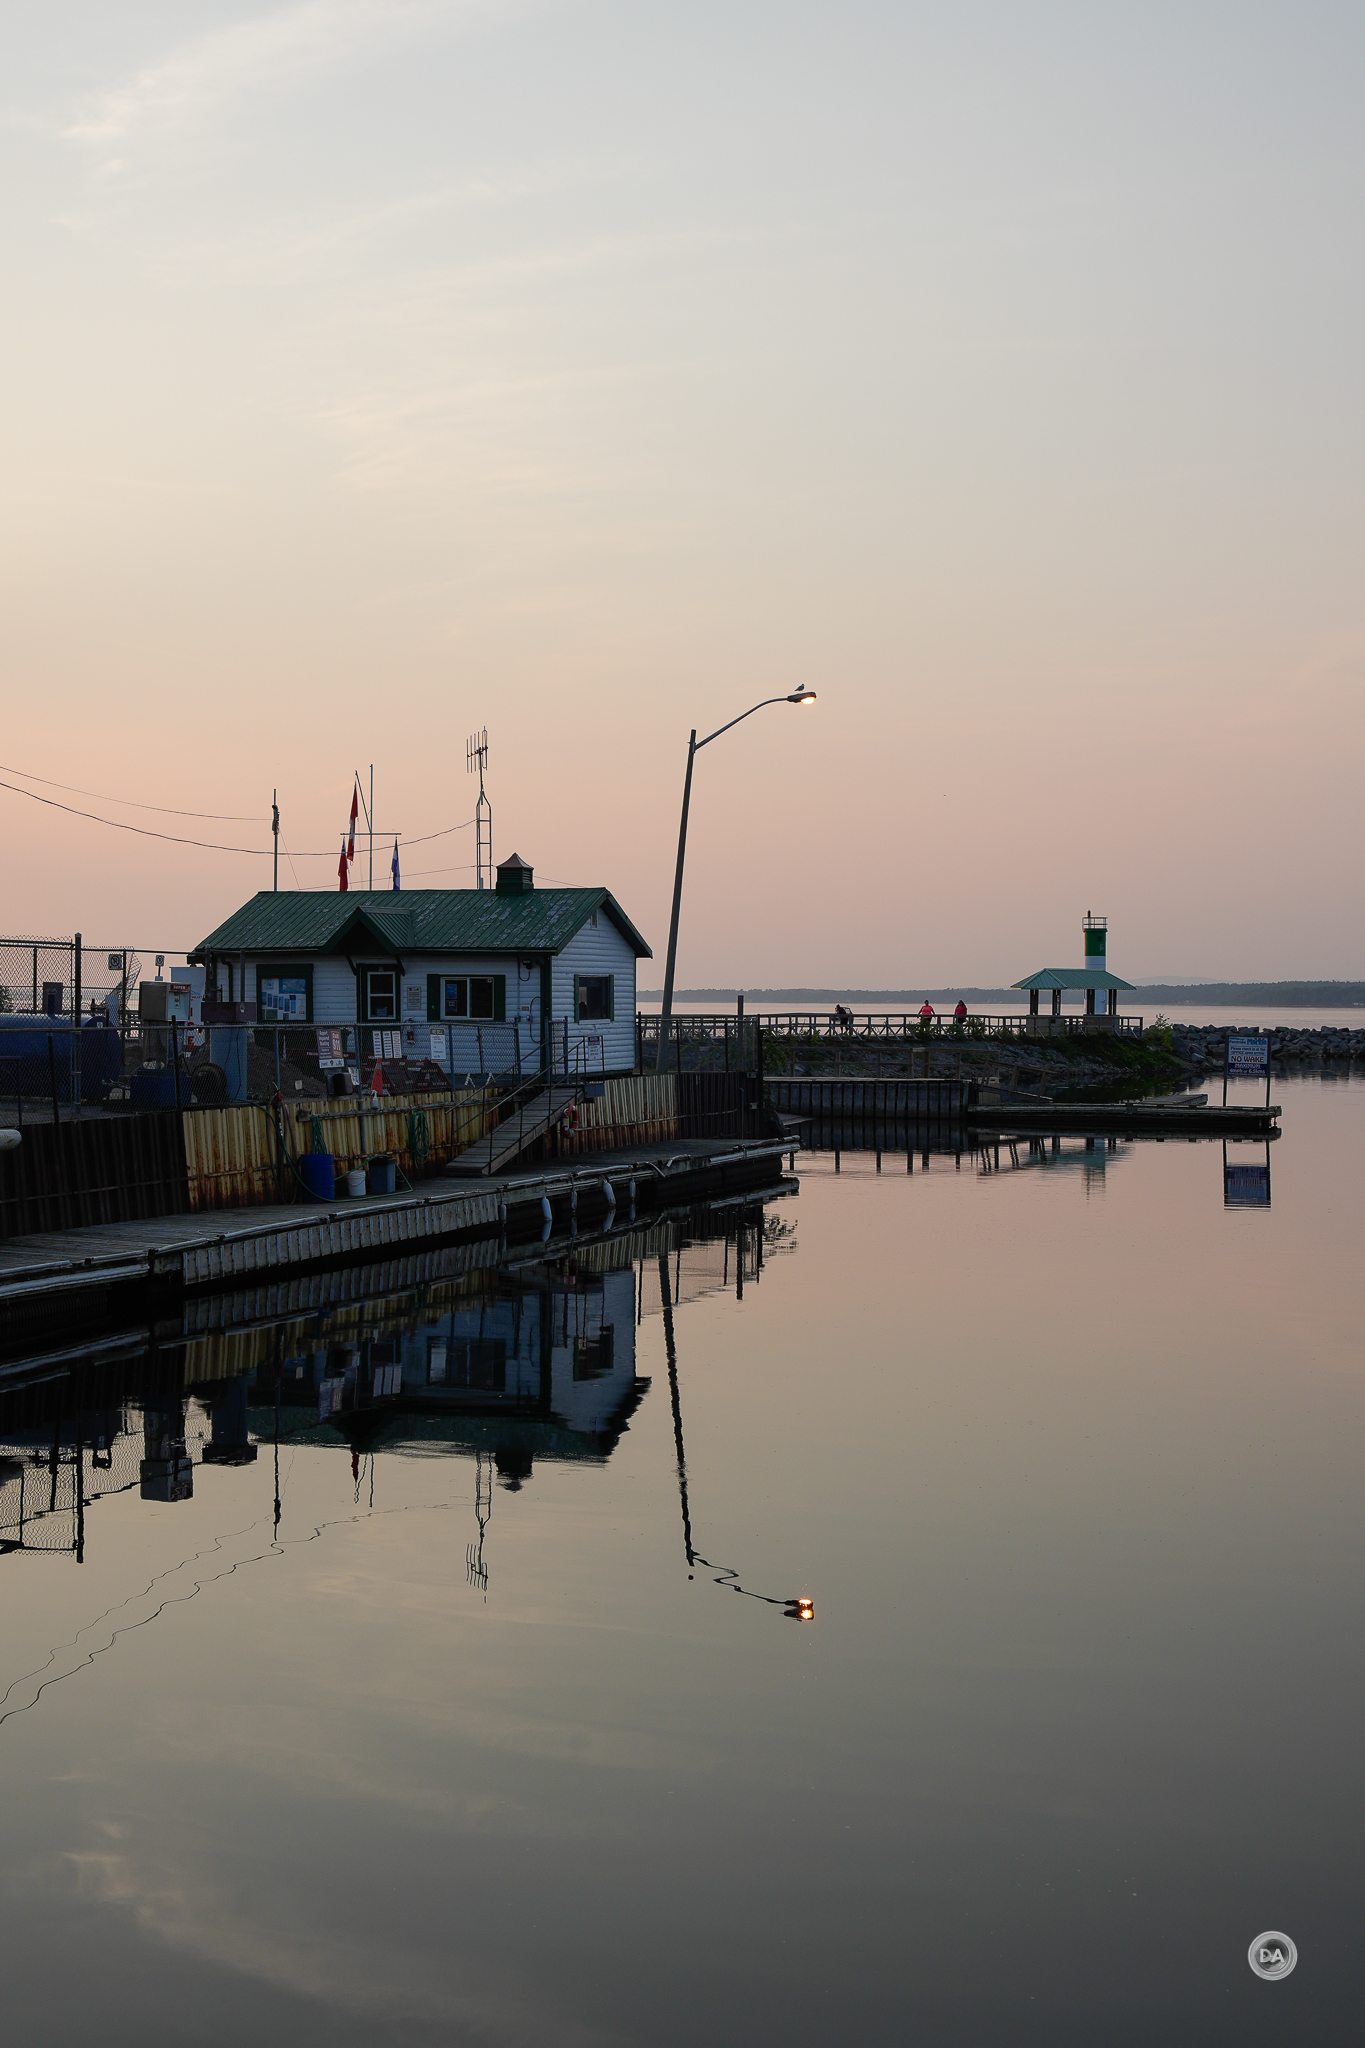

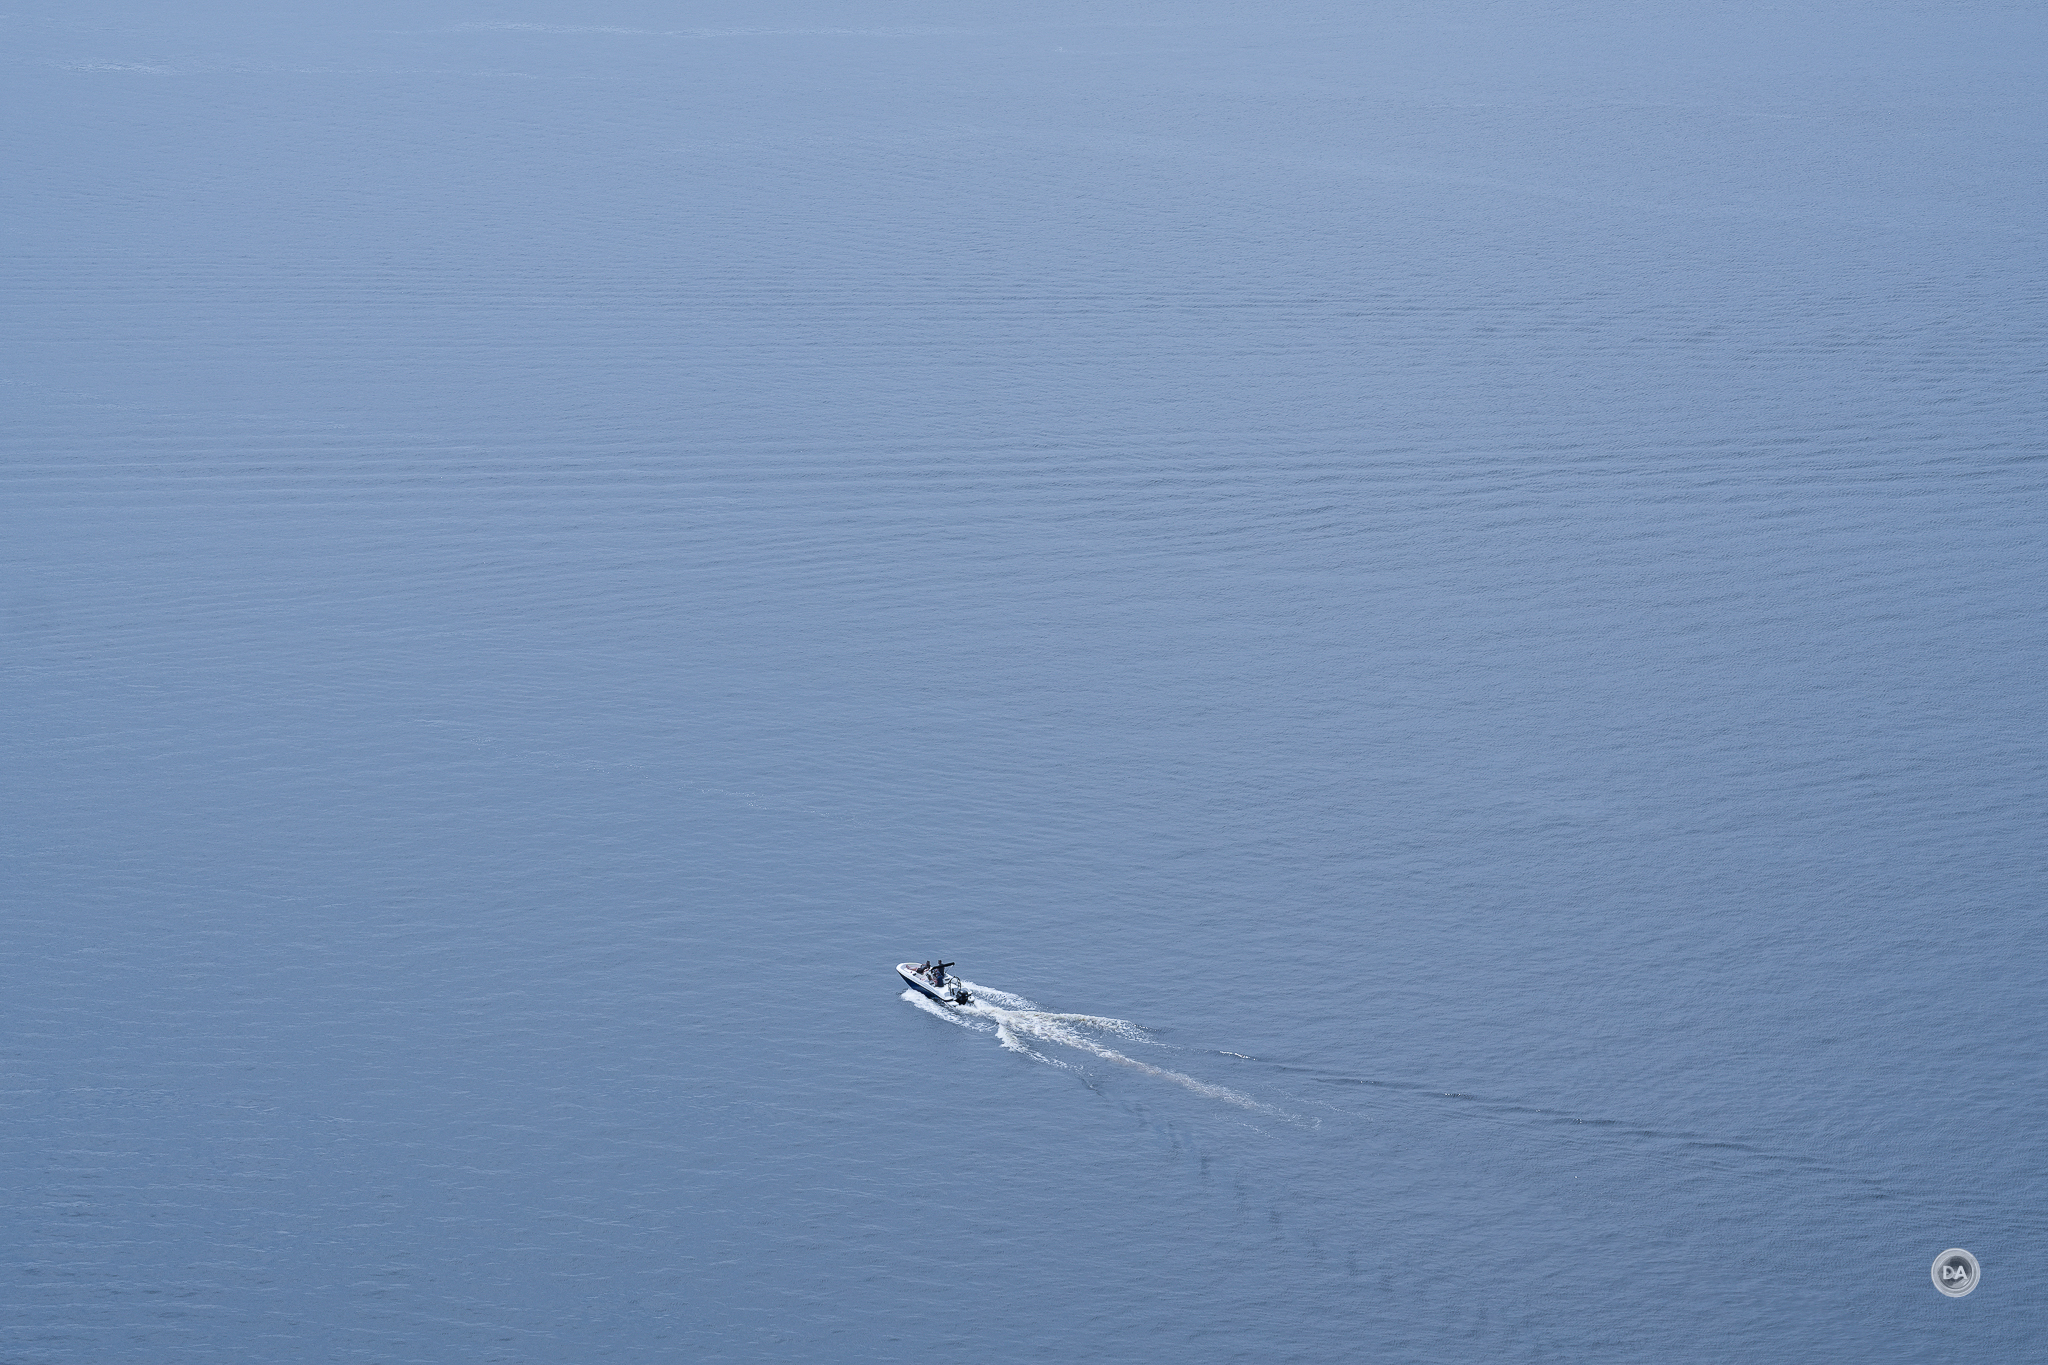
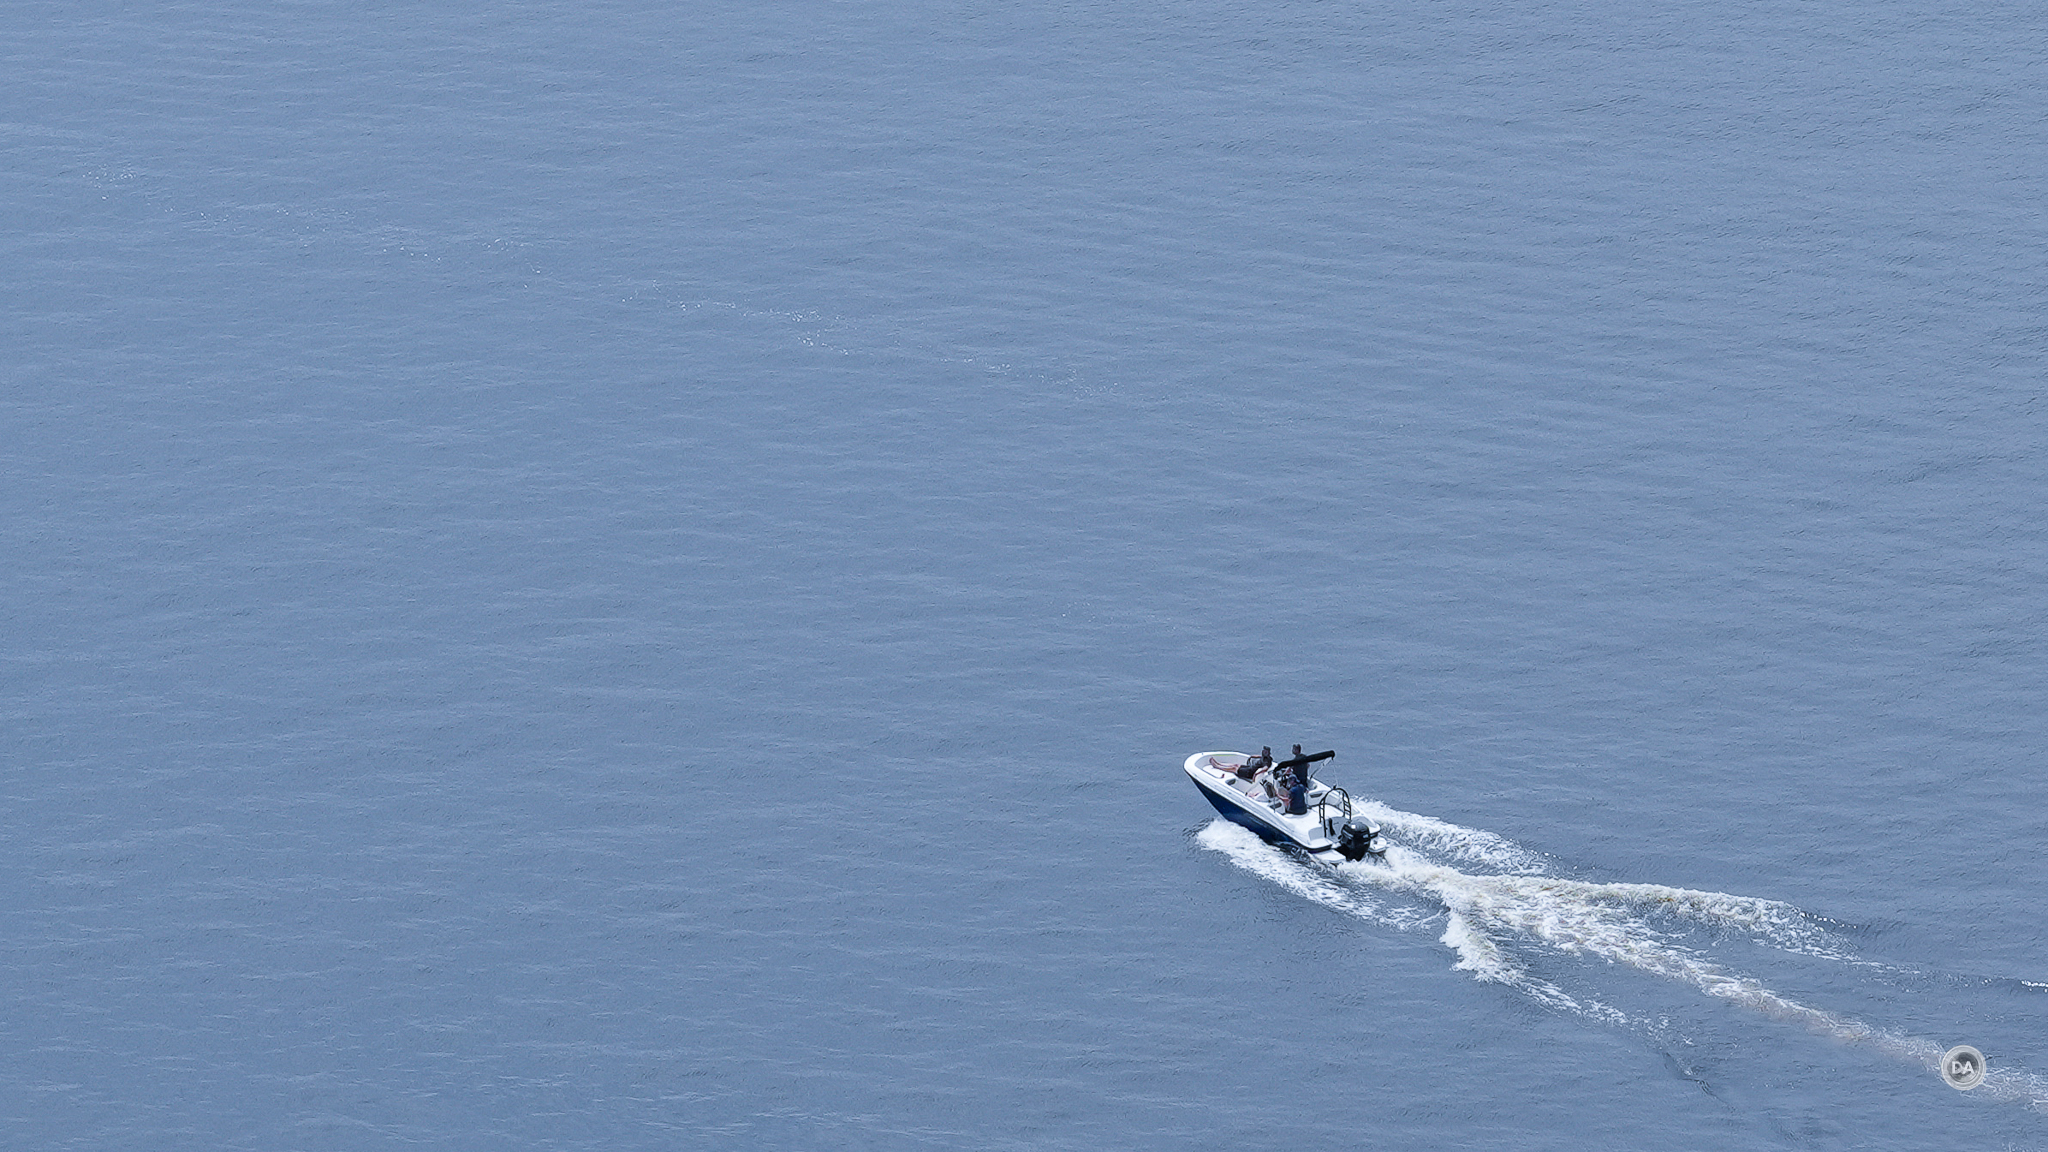
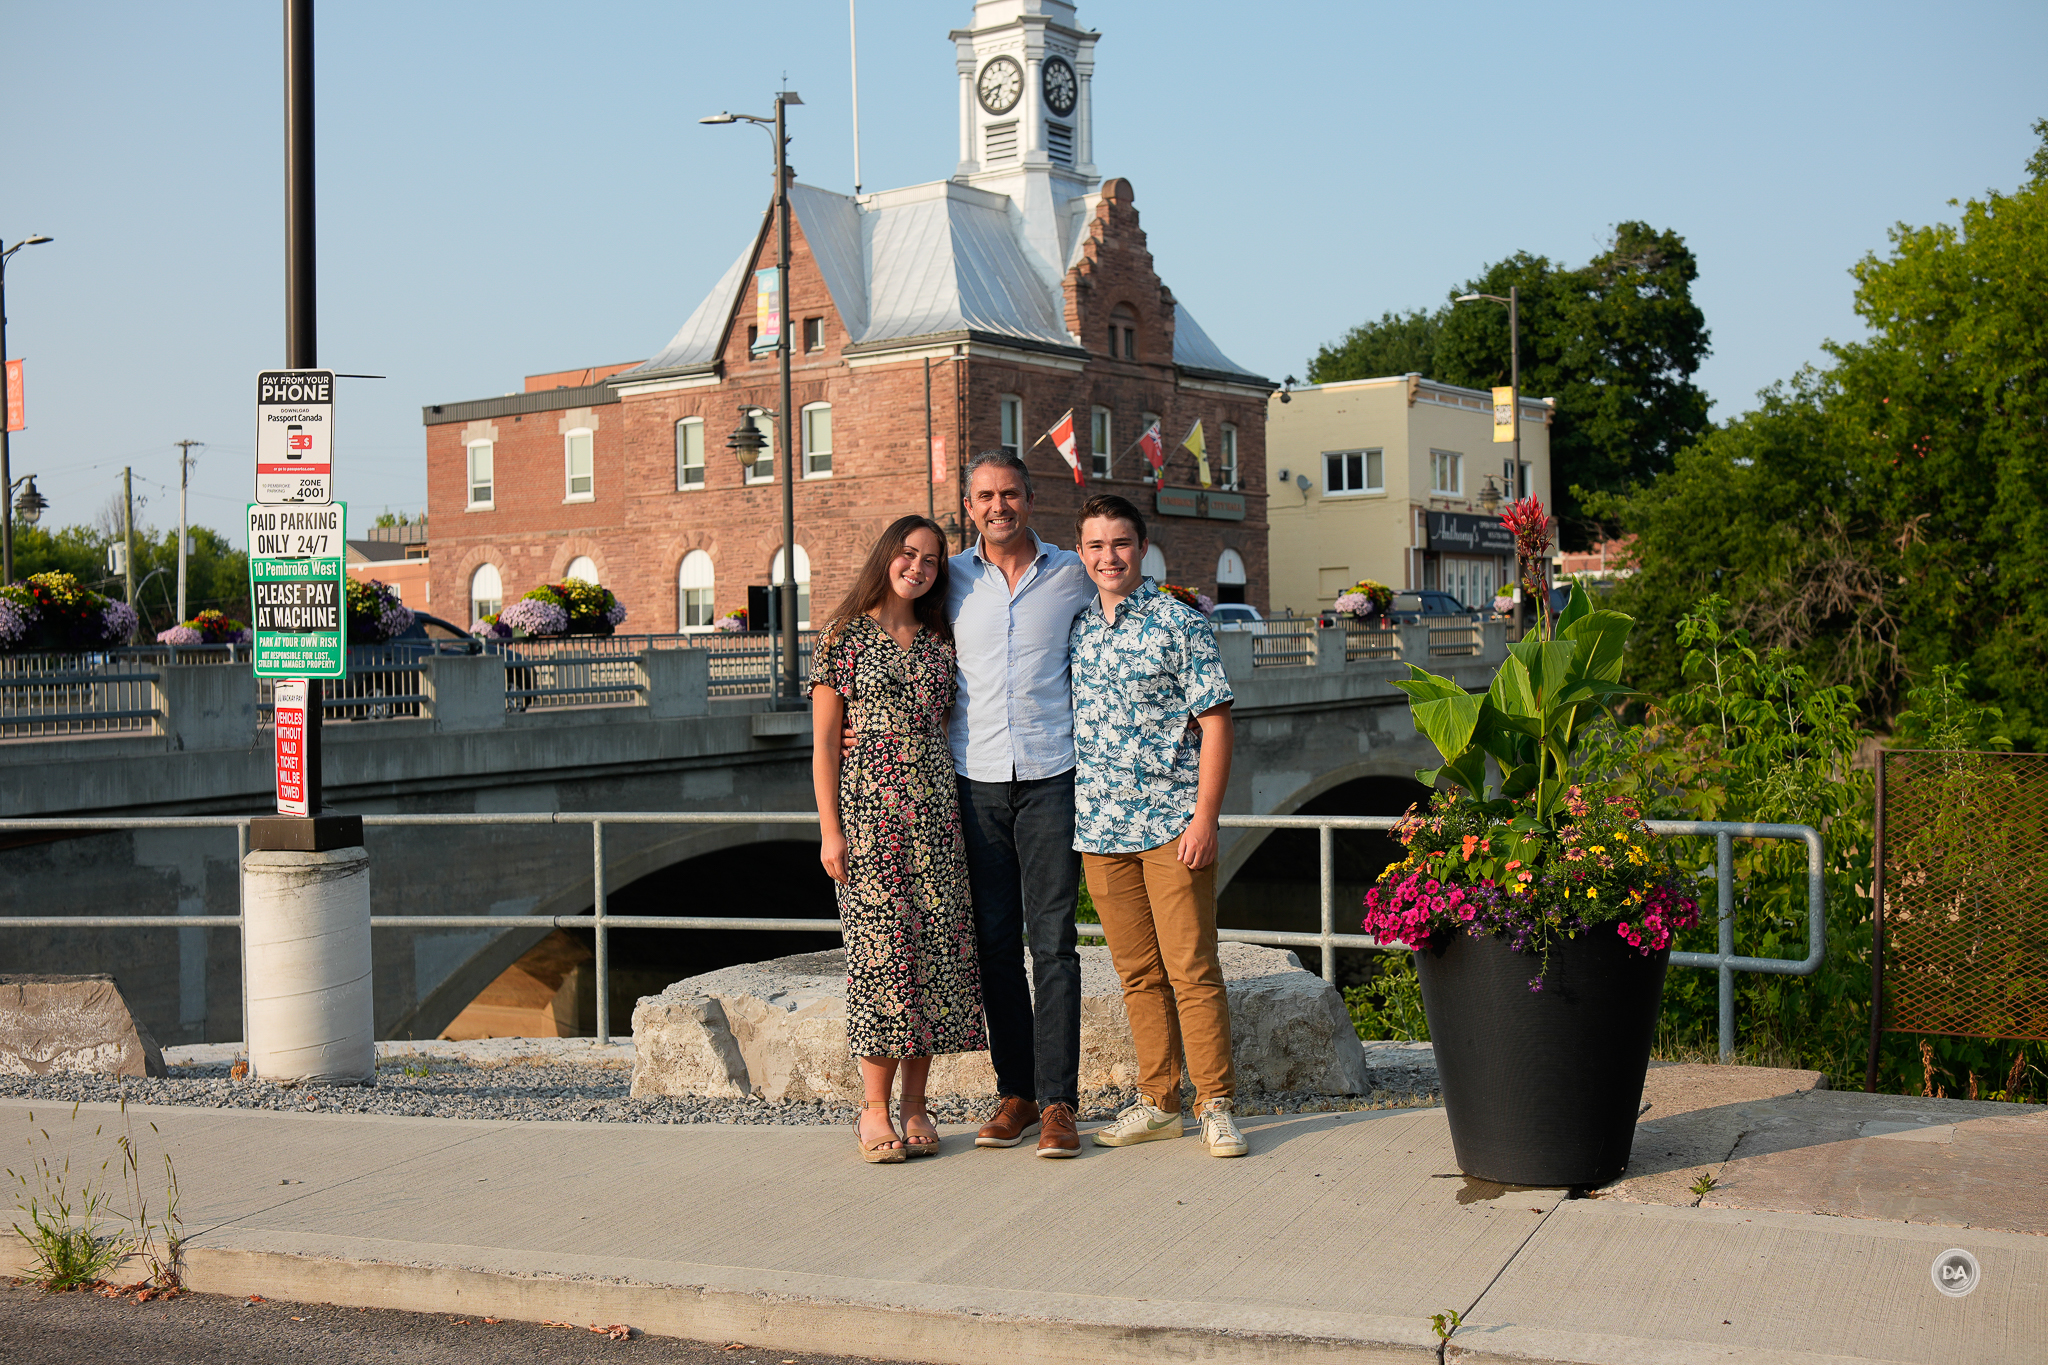
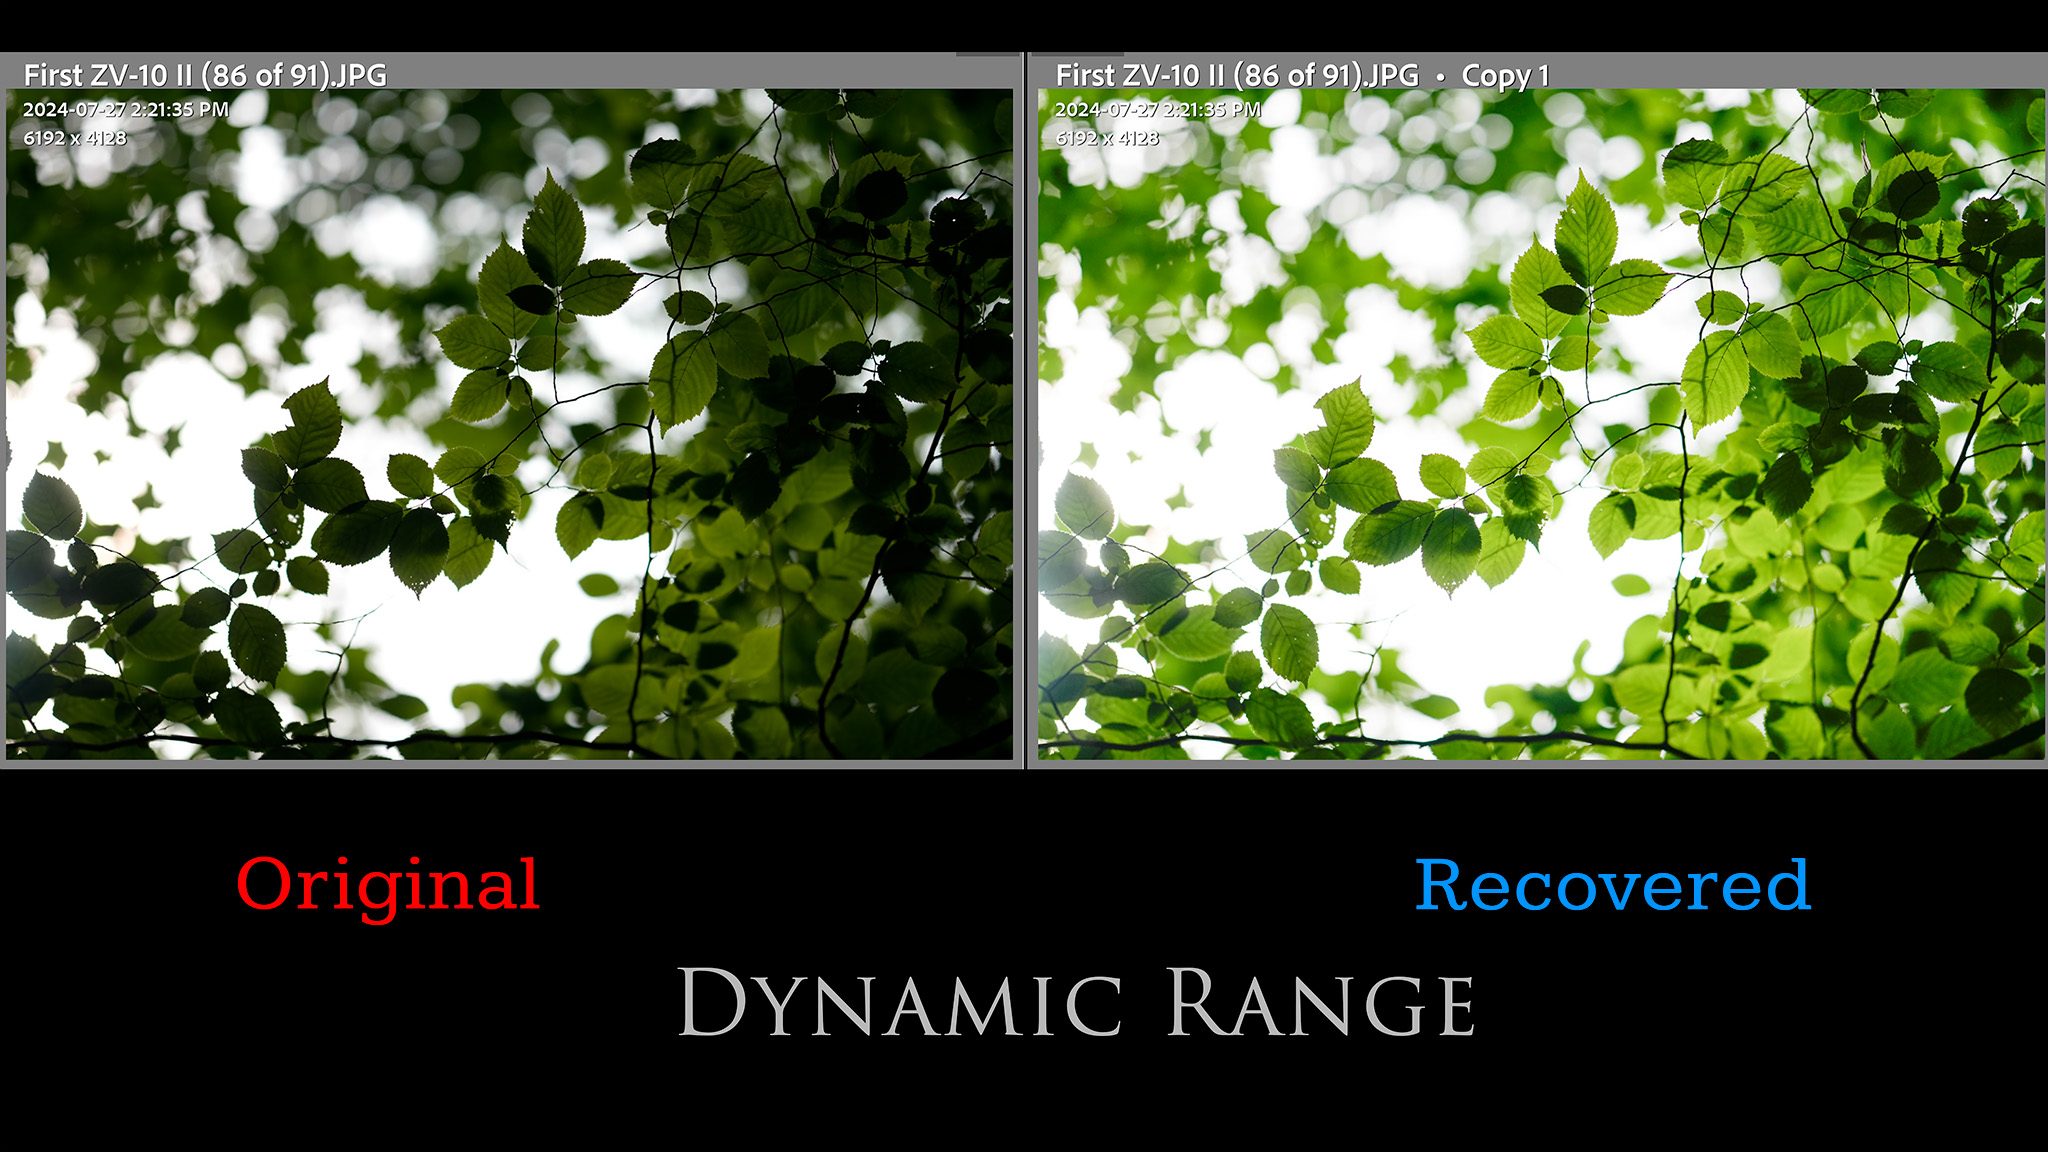


")


