llano 2-in-1 Dual Bay Camera Battery Charger Review
Dustin Abbott
April 14th, 2025
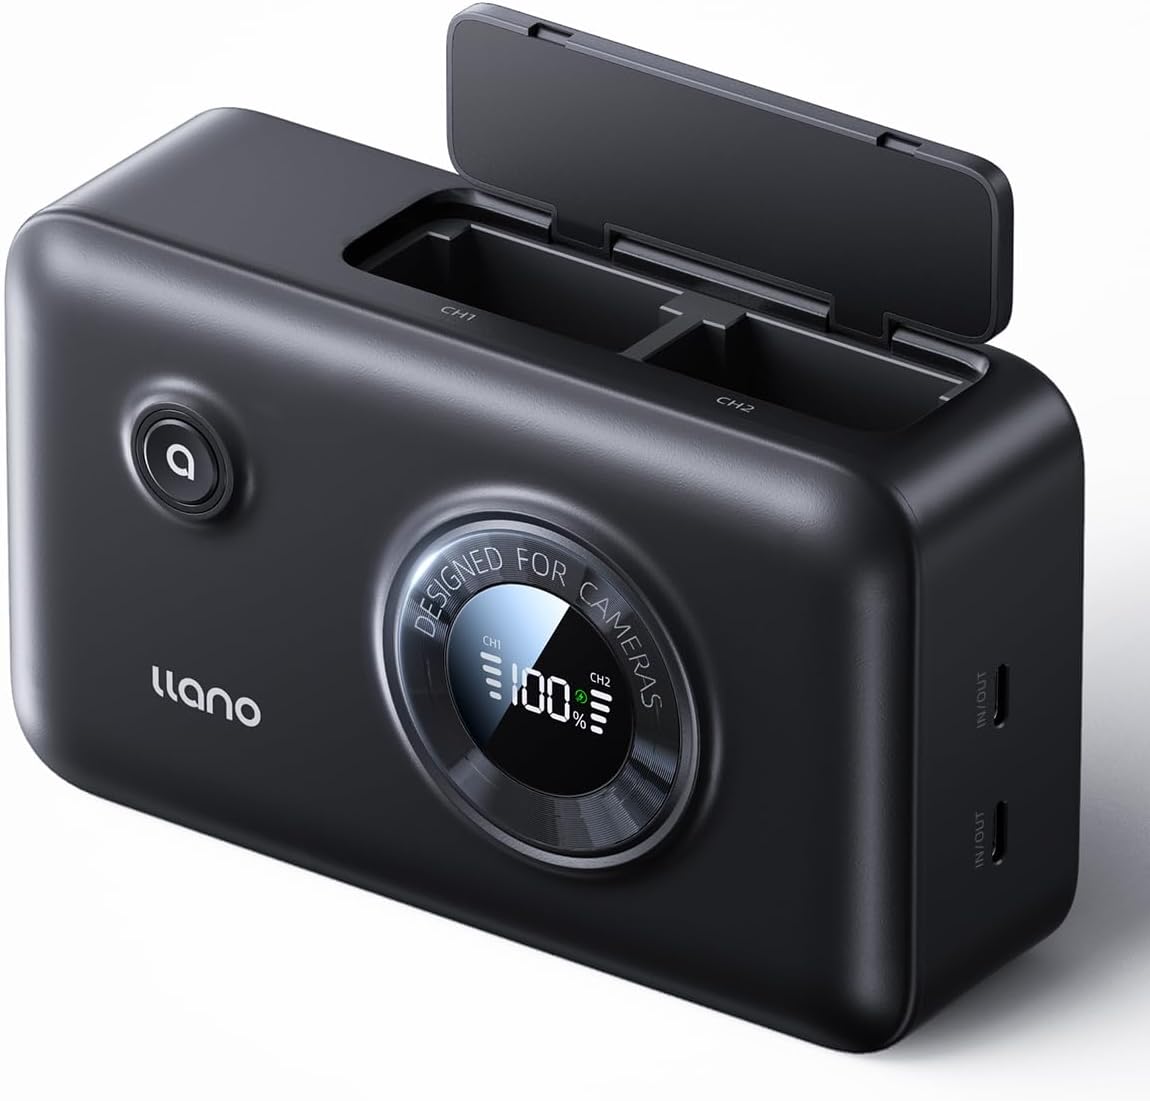
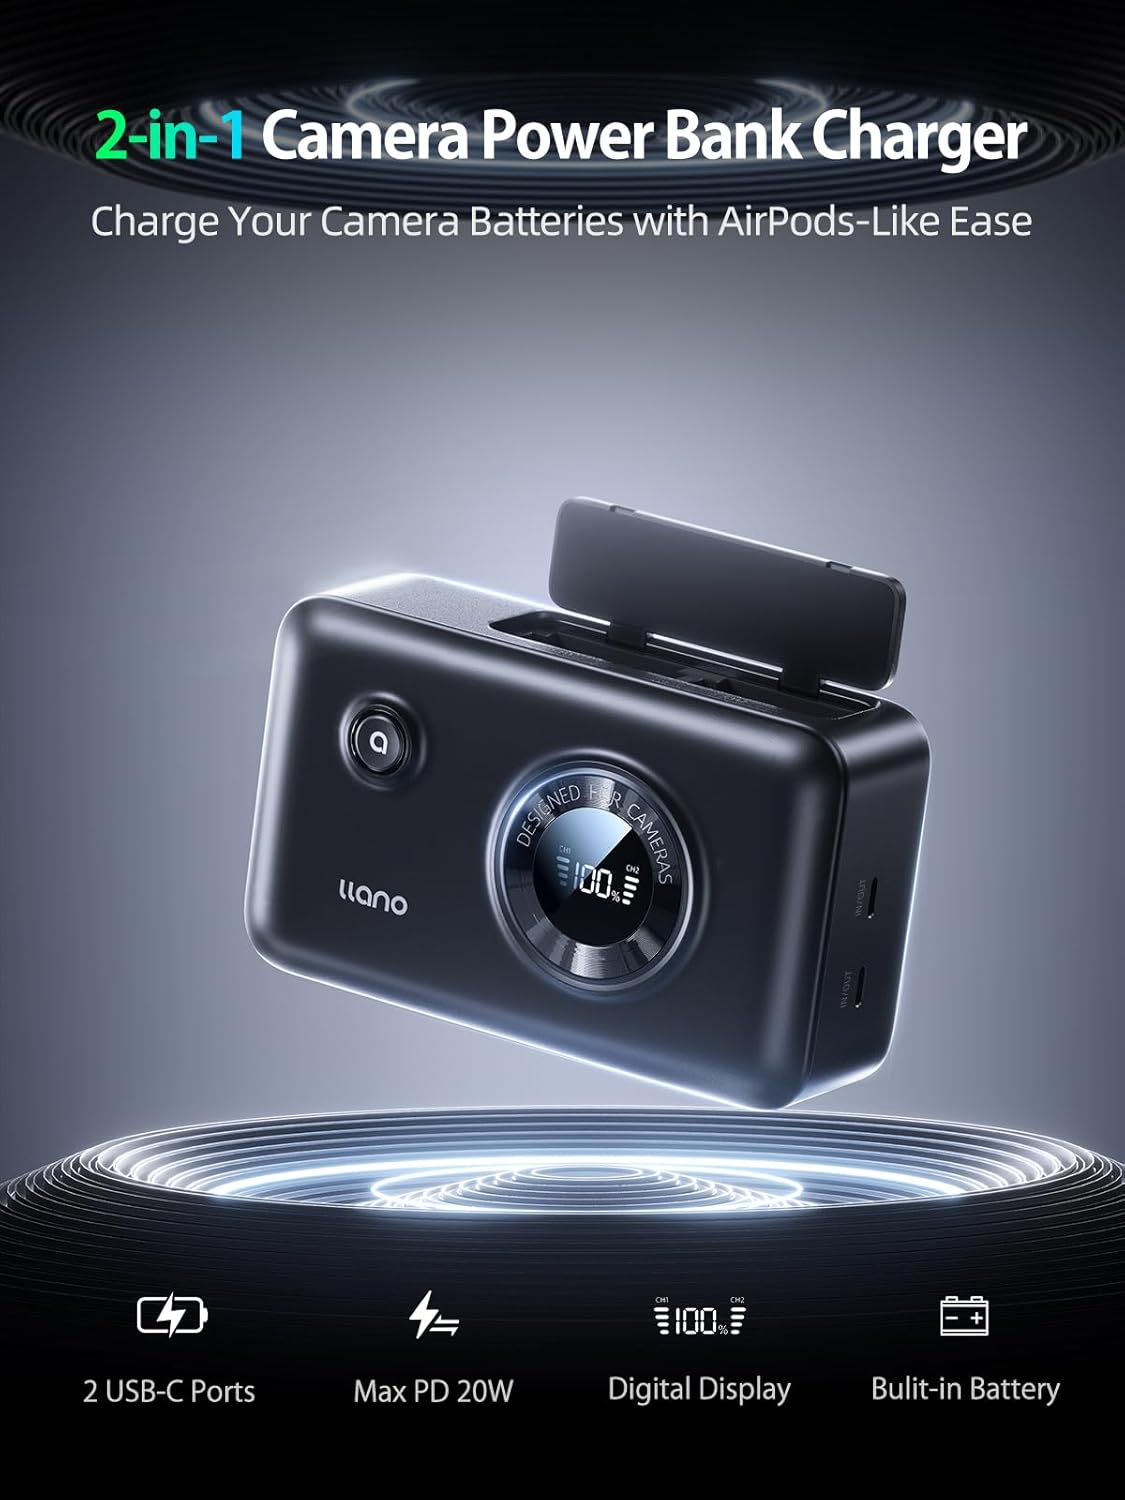
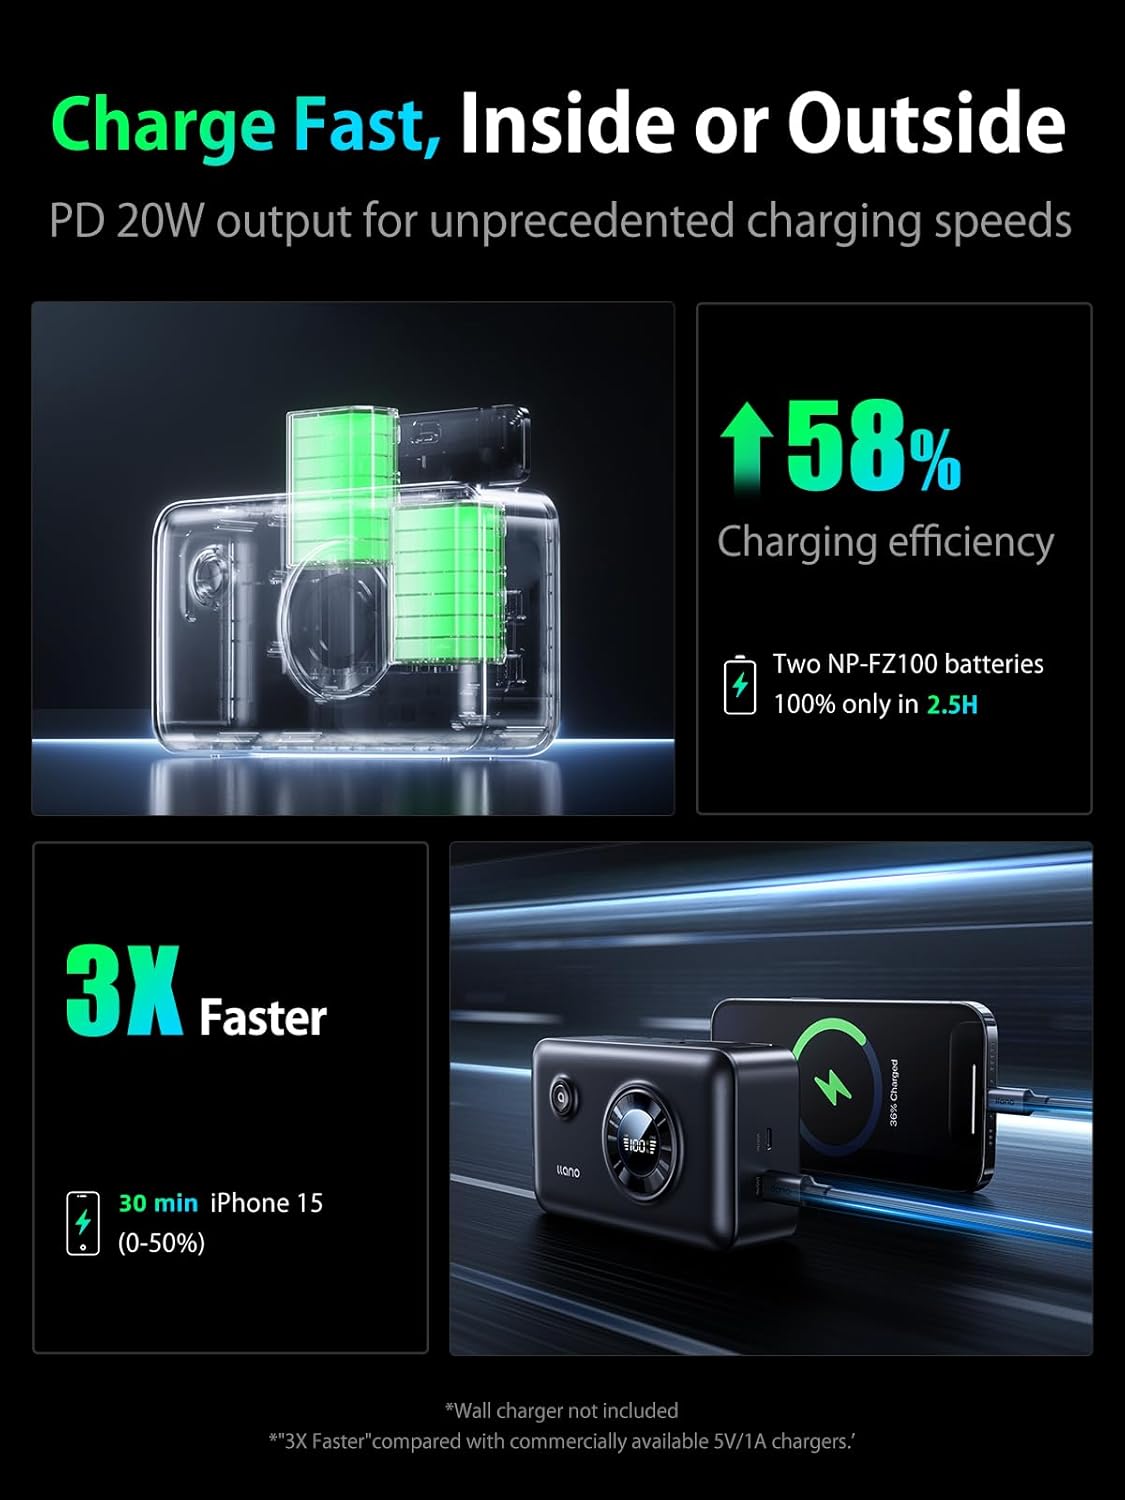
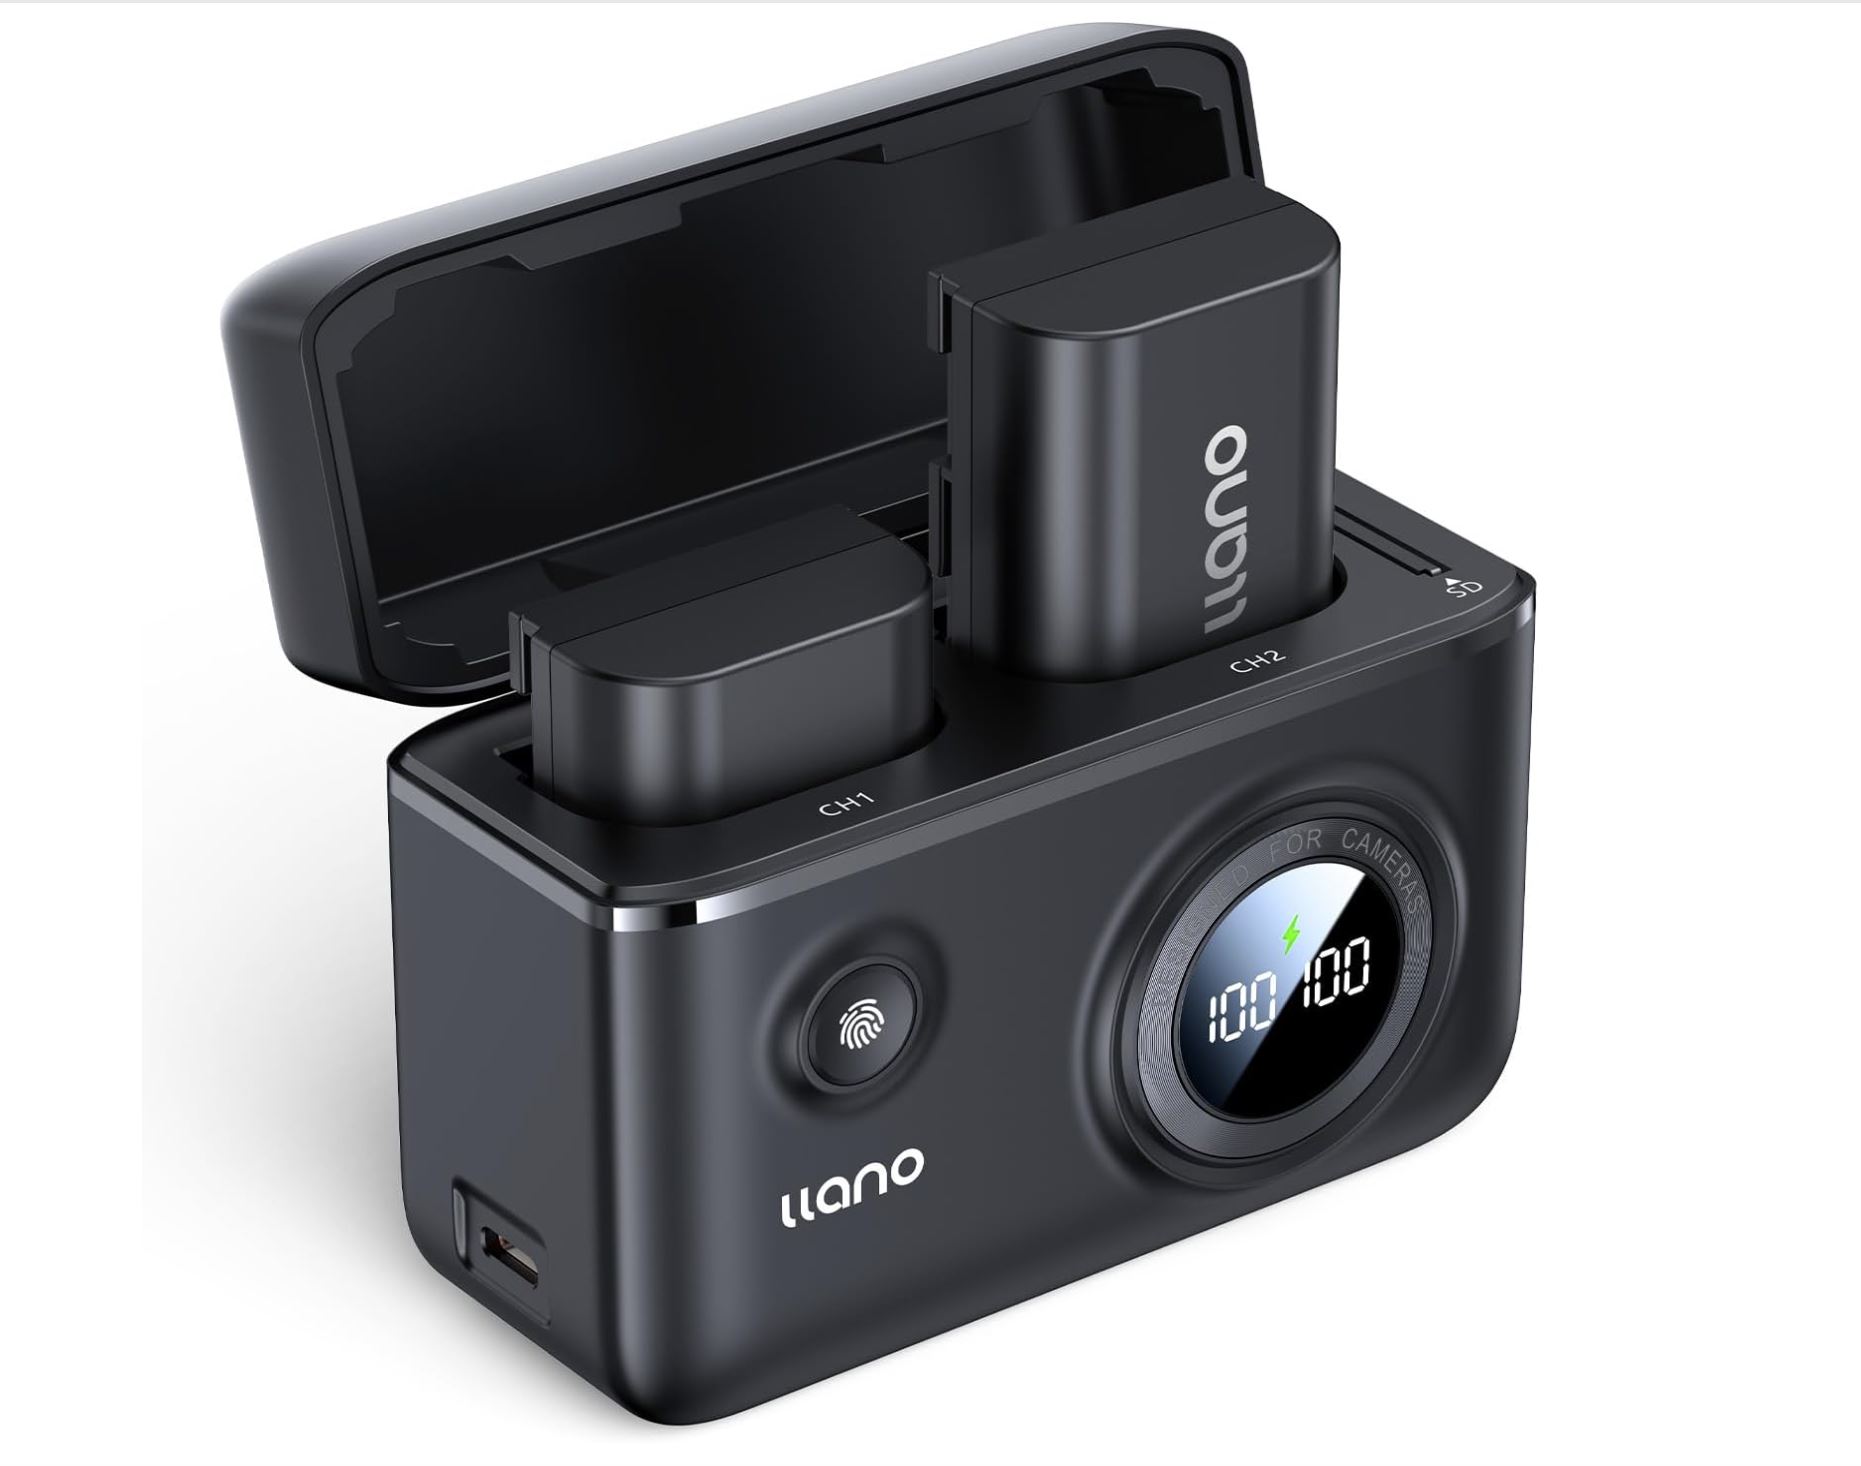
About a year ago I did a review of the llano dual bay battery charger, concluding that it was a clever way to charge your camera’s batteries and also to get discounted batteries. Since that point I’ve used the llano batteries a lot and without issue. But llano is back with an expanded concept – what about a dual bay battery charger that could charge your camera batteries and your phone or tablet, all off grid? They’ve made a combo battery charger and 12,400mAh power bank. It can put out power at a PD 20W rate, charge your camera battery faster, and only costs around $80. Sound interesting?
Thanks to llano for sending me a review sample. As always, this is a completely independent review. All thoughts and opinions expressed here are my own.
The full review can be found in the video linked above, but here are some of my review notes for those who are more text oriented.
Features and Observations:
Unboxing – a very nice presentation in the packaging
Nice soft touch materials
12,400 mAh power bank
Can do pass-through charging
Two USB-C ports (both in and out)
Shows rough state of charge at first. Click power button to start charging batteries in remote mode (means you can store batteries in there without constantly charging).
Charging one battery nearly 100% took about 36% of battery capacity. You should be able to charge two batteries plus your phone (100%)
Takes about 2.5 hours to charge two batteries completely
I’ve found that it takes only slightly longer to charge two batteries in the llano than one battery in a Sony charger.
Thinks I Like
Have personally had good success with llano’s batteries so far
Previous version required you to be tethered to some kind of charging source, while the new version can function completely independently.
Being able to potentially take one device to charge your phone, multiple batteries, earbuds, etc…
Well priced
Plug and play – essentially charge your camera batteries like airpods.
Both USB-C ports in and out, meaning you don’t need to worry about which to use.
Dual ports mean that you could use this to double your USB-C outputs.
I’m always glad to see more innovation on the practical side of things. Charging batteries is not the most exciting part of photography, but it is intensely practical. I’ve had a few key moments ruined because of a dead battery.
Who is this for? I think the llano 2-in-1 charger makes the most sense if you are a heavy user and often need to charge multiple batteries. You could charge one or two batteries in your camera bag while staying mobile and continuing to use your camera, assuring that you never run out of power.
If your typical shooting pattern involves only going through one battery a day, just purchasing a power bank and charging in camera probably makes more sense.
The llano 2-in1 charger comes in Sony, Canon, Fuji (x2), and Nikon flavors.
Keywords:Ilano, 2-in-1, Charger, Power Bank, Camera Battery, Camera, Dual Charger, Battery, USB-C, 12400 mAh, EN-EL15C, NP-FZ100, NP-W235, LP-E6NH, Canon, Sony, Demonstration, Test, Photography, OEM, Replacement, Charging, Coupon Code, Discount, Coupon
DISCLAIMER: This article and description contains affiliate links, which means that if you click on one of the product links, I’ll receive a small commission. As an Amazon Associate I earn from qualifying purchases.
Photographers are always looking for new and improved ways to power their cameras. There are few things more disappointing than having an amazing photo opportunity and discovering that your camera is dead. llano has a very slick approach, giving you a camera themed charging case with dual bays and the capacity to charge at up to 18W of power delivery. They sell a very reasonably priced kit that comes with two replacement batteries for your camera as well, and I’ve been successfully using those batteries exclusively in my Sony and Canon cameras for the past five weeks. So what do I think about the llano approach? Find out in my video review here.
Thanks to llano for sending me a review sample. As always, this is a completely independent review. All thoughts and opinions expressed here are my own.
The full review can be found in the video linked above, but here are some of my review notes for those who are more text oriented.
How Well Does the Charger Work?
Unboxing – a very nice presentation in the packaging
Includes batteries, charger, manual, wrist strap, pouch, charging cable.
Nice soft touch materials
Spot to store SD card
Front button allows you to monitor state of charge even if the charger isn’t plugged in.
Underreports state of charge vs camera (charger showed 78-80%, camera showed 92%).
Batteries click into place nicely
Battery charge time test (drew 13 watts initially – took about 170 minutes for full charge) – trickle charges at end. In camera charge draws 12-13 watts.
Vs Sony dedicated charger (costs as much as Ilano + two batteries – rated at 150 minutes) – Started 10:47 End 12:39 neither charger drawing any current. Sony drew 26 watts initially but slowed later. Much better charging feedback from Ilano.
Drew 17 watts when charging dual batteries (rated at 18W). Biggest advantage is that you can charge two batteries almost as fast as you can charge 1
Conclusion – a little slower than Sony charger, but dual bay, USB-C powered = more charging options, and a cleaner interface.
I can’t yet account for the long term reliability of the batteries (after only six weeks), but there is no question about value. 2 Ilano batteries + charger for under $100 – to get the equivalent from Sony or Canon would be over $250.
DISCLAIMER: This article and description contains affiliate links, which means that if you click on one of the product links, I’ll receive a small commission. As an Amazon Associate I earn from qualifying purchases.
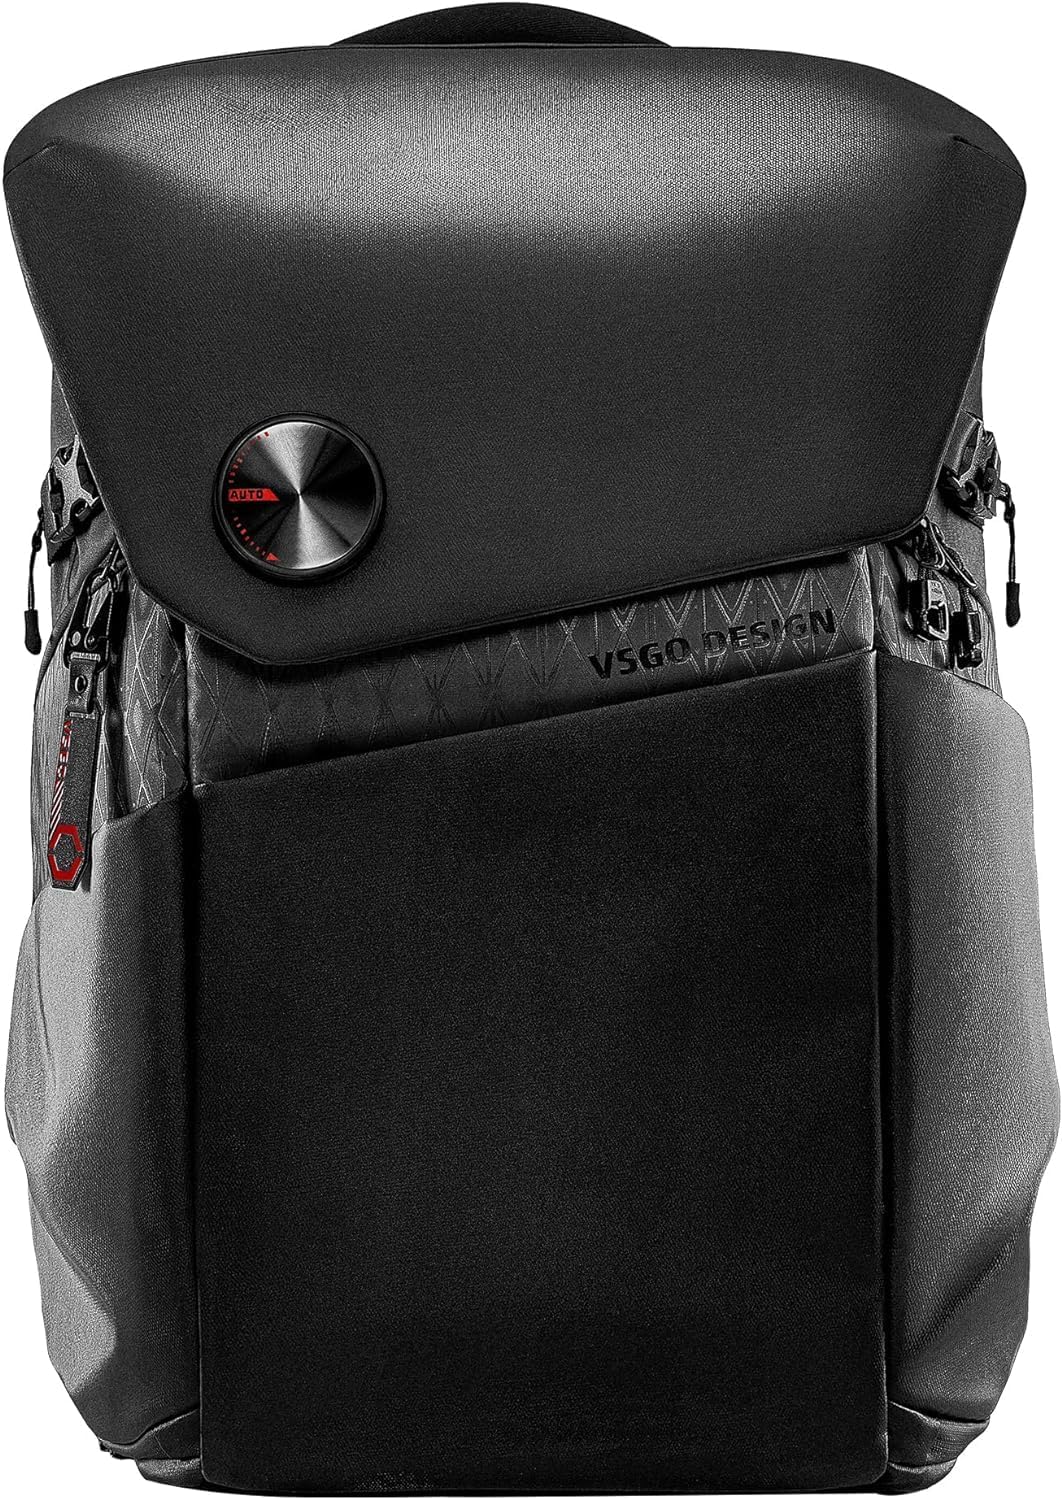
The VSGO Black Snipe 25L Photography backpack has become my new everyday photography backpack of choice. I’ve been using it to haul my gear to shoots, on trips, and to the office. There’s a great combination of style, comfort, and flexibility in this bag that sets it apart from the dozens of other camera bags that I’ve used. With a little discount you can nab it off of Amazon for about $225, and, while that’s not cheap, neither is the quality of the bag. Find out the reasons why I like this backpack so much in my video review here.
Thanks to VSGO for sending me a review sample of this bag. As always, this is a completely independent review. All of the thoughts and opinions expressed here are my own.
25L capacity – dividers for different photography packouts.
MagneticFidlock for main flap
Quick access to cameras from top or side.
Lightweight at only 1.85kilos
Water resistant, non scratch exterior.
Multiple attachment points for tripods (side or bottom).
Adjustable chest and waist straps.
Things I Like
Stable platform for standing the bag
Great feeling handle
The strong top divider will lock in place
Very sleek looking
Padding on straps and back very comfortable
Access to two separate cameras – top and side
Zip attach is also a tool
Many attach points for accessories, carry, attaching to luggage.
Very large laptop sleeve (up to 17.3”) with lock (have had iPads and laptops slip out of bags when that flap is thrown back)
Can be easily configured to handle BIG lenses and actually access them through the top.
Things I Don’t Like
Zippers can be fiddly
Double layer top zip makes for a tighter fit for gear
Not cheap
Conclusion
One of the closest comparisons I have is to the Peak Design Everyday 20L Backpack I reviewed about six years ago and have used for years. The VSGO 25L bag has better spaces, is more comfortable to use, has better access to the cameras and to orienting the space, and is typically a good $50+ cheaper. That’s a winning combination, and the reason why the VSGO Black Snipe 25L is my new everyday camera backpack of choice.
Keywords: VSGO, Black Snipe, Everyday Backpack, Everyday Backpack, Photography, 25L, Photography Backpack Review, Camera Backpack, Dustin Abbott, Review, Peak Design, Hands On, Real World, Photography, Backpacking, Hiking, Camera, Lenses, #letthelightin, DA
DISCLAIMER: This article and description contains affiliate links, which means that if you click on one of the product links, I’ll receive a small commission. As an Amazon Associate I earn from qualifying purchases.
SmallRig Camera Batteries with USB-C Charge Review
Dustin Abbott
October 21st, 2023
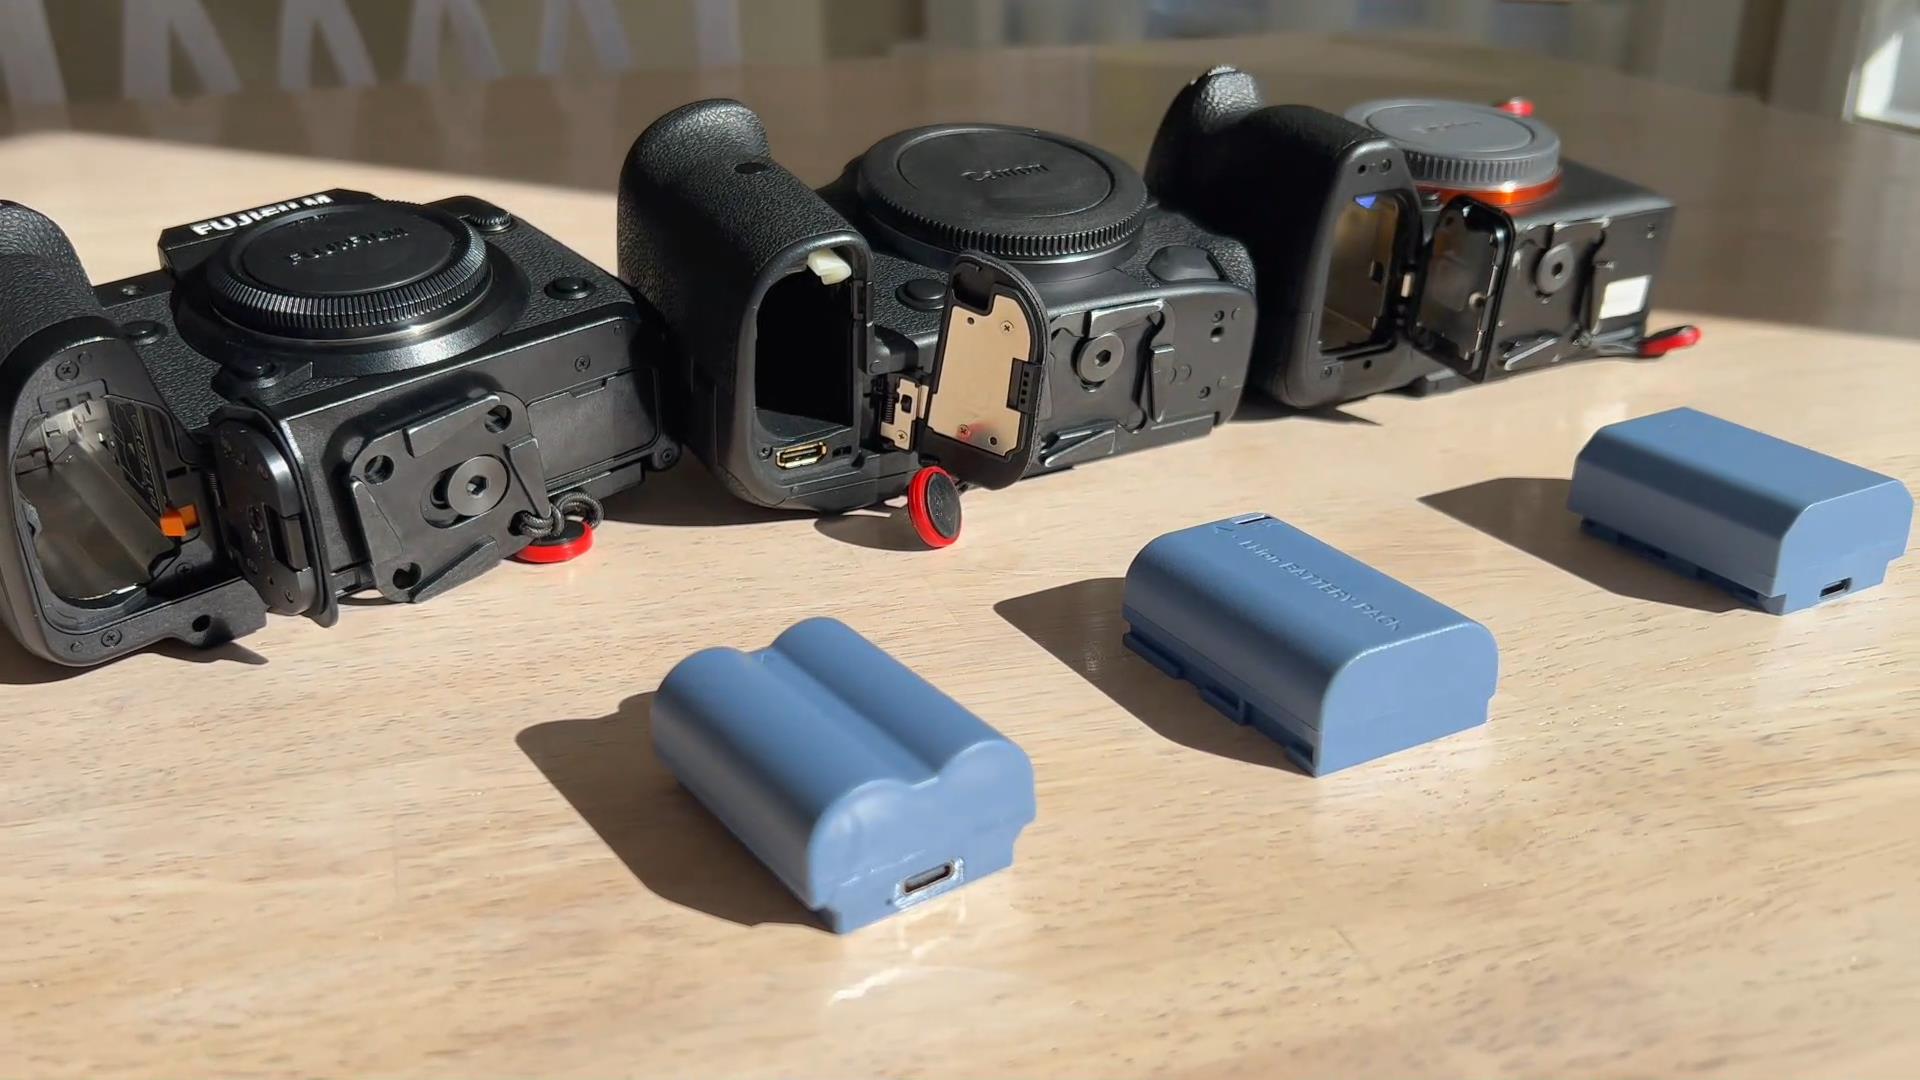
One of the first things one has to consider when buying a new camera is whether or not you need a backup battery or two. If you are buying into a new camera system, or if the same brand has updated to a new battery type, the answer is probably “yes”. One of the great frustrations that we sometimes haven’t considered when saving or planning for that new camera is the reality that it potentially uses batteries or a new memory storage card that we don’t have…and suddenly we are looking at hundreds of additional dollars in expenditure. I’ve been in situations before where my shooting was cut short by the reality that my battery had unexpectedly died, so I’ve learned to have backup batteries and charging solutions on hand…particularly if I’m doing paid work. I’ve been exclusively using batteries from SmallRig in my Fuji, Sony, and Canon cameras over the past six weeks, and I’m happy to report that they are an excellent way to get upgraded power at a price point usually close to half what the OEM batteries from Canon, Sony, or Fuji. You can get my full thoughts in this video:
A quick word on SmallRig. I started using SmallRig products about five years, though first as grip extenders and L-brackets for my Sony mirrorless cameras. It took some time before Sony came up with grips that were accommodating enough for those of us with larger hands, and SmallRig helped make my cameras much more ergonomic.
I’ve bought other SmallRig accessories over time, most recently a truly excellent mount for my Atomos Ninja monitor/recorder. My previous one was miserable and actually made me use my Ninja less frequently because it was so unstable mounted on my camera. The SmallRig one was much sturdier and better engineered while still coming at a very reasonable price, something that has, in my experience, been a hallmark of SmallRig.
Batteries are a different SmallRig product for me, but I was intrigued by the premise (and price). The premise was that the SmallRig batteries not only offered higher capacity (2400 mAh) but also the unique addition of a USB-C port so that they could be directly charged. This opens up so many additional possibilities, as while most modern cameras will allow you to charge the battery in camera (eliminating the need for a separate charger), that also means that your camera will be tied up for the multiple hours involved in a full battery charge.
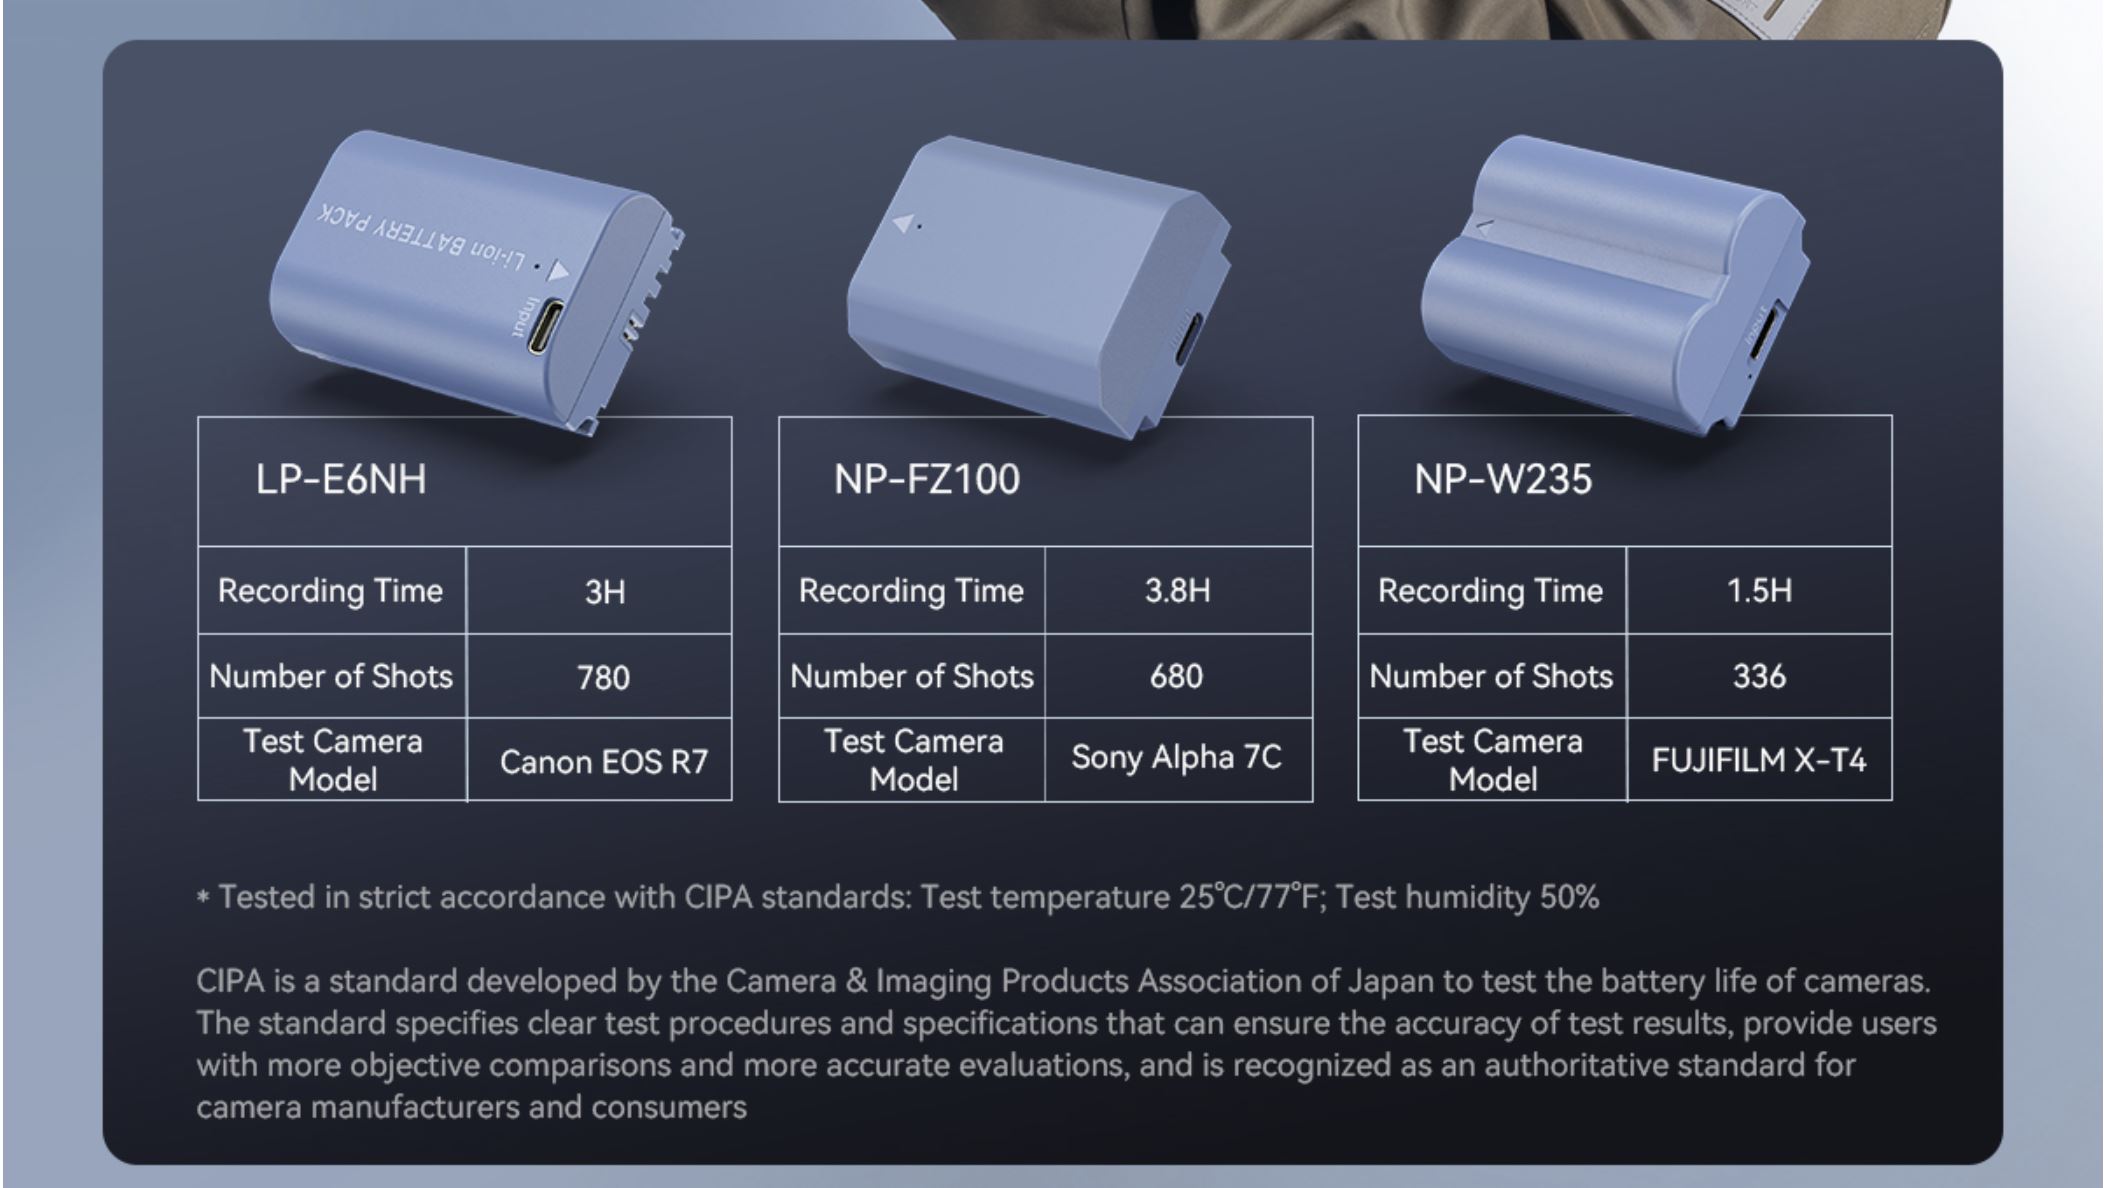
The USB-C port allows you to use a ubiquitous USB-C charge cable and connect it to a power brick, power bank, USB outlet, etc… No additional chargers needed. Not only that, but the SmallRig batteries can charge slightly faster via USB-C by accepting a little more current (5V 2.2Amp) and completely charge in 2.5 hours.
Real world use has been flawless. Unlike third party batteries that I’ve tried before from different companies, I have gotten no error messages or warnings on any of my cameras. They seem to function flawlessly. The 2400 mAh capacity is larger than all the OEM batteries I compared them to, ranging from 270mAh larger (Canon) to 120mAh larger on Sony.
So, in summary, you are getting more capacity, no use issues, an additional way to charge, and a price point that ranges from $30 less (Fuji) to $40 less (Canon). If you want more of my thoughts, check out my video review.
DISCLAIMER: This article and description contains affiliate links, which means that if you click on one of the product links, I’ll receive a small commission. As an Amazon Associate I earn from qualifying purchases.
The Canon R system (full frame mirrorless) launched with four lenses in the new RF mount and has subsequently had a fifth announced. Those lenses have an average MSRP in the USA of $1919, so this is most definitely NOT a budget lineup. If you remove the less expensive RF 35mm F1.8 Macro IS STM from the lineup (the lens we will address here), that average price jumps to $2274. The Canon RF 35mm F1.8 Macro IS STM is the the least expensive Canon RF-mount lens at the moment, so it makes a logical pairing with the Canon EOS RP – lowest point of entry into a mirrorless full frame camera. Lenses like the RF35M are definitely needed, as in both cases the average price of these lenses far exceeds the $1299 price of the EOS RP (and even the roughly $2000 the Canon EOS R is currently going for). The Canon RF 35mm F1.8 Macro combines a very useful focal length with a fairly large aperture (F1.8), Image Stabilization (IS), and a 1:2 reproduction ratio (0.50x magnification). This isn’t a full 1:1 Macro lens, but has enough macro ability for most people in most situations. It is reasonably compact and light, very sharp, and generally a very flexible lens. But is it the RF35M the lens for you? Find out by reading on.
There are few native RF mount lenses for the new Canon mirrorless bodies, but this is helped by how well EF mount lenses adapt to the system, which vastly extends the number of options with relatively little penalty. Still, the reality remains that native mount options are pretty slim near the launch of any new camera system, so that makes the RF35M particularly important for the simple reason that at $499 USD MSRP, it represents the sole lens that many new purchasers of the EOS R or EOS RP can afford. I reviewed the RF35M concurrent with my review of the Canon EOS RP, as I felt that the the “bargain” lens for the R system made for a logical pairing with the “bargain” camera.
Prefer to watch your reviews? You can get the details in my final video review, which also gives you a look at the video performance in a way that a text review cannot.
Canon RF35M Build and Design
The RF 35mm F1.8 is, in concept, just the kind of lens I would personally want in a new system. It is reasonably compact at only 2.9″ (74.4mm) in diameter and 2.5″ (62.8mm) in length and weighs in at a diminutive 10.8oz (305g). This makes it very comparable in size and weight to the Canon EF 35mm F2 IS, a lens that I’m actually a big fan of and have called “Canon’s underrated gem”. The RF35M is a great pairing on the EOS RP body, and both the camera and lens combined weigh less than, say, the Sigma 28mm F1.4 ART lens that I’m currently reviewing.
Beyond that, however, the combination of a 35mm focal length (one of the best walk-around focal lengths out there) along with the extremely close focus abilities of the RF35M make it an extremely versatile option. I view this lens in the same light as I do lenses like the Zeiss 50mm F2 Makro-Planar that are just useful on so many levels. The 35mm focal length in a macro lens, however, is both a blessing and a curse. As we will see in our image quality section, a wider focal length does lend itself both to more native distortion and perspective distortion when compared to the longer focal lengths more typical to macro lenses (often in the 90-180mm range). You can see in the photo below that at close focus distances of products you can see some of that distortion at play.
What you can also see is the importance of the IS (Image Stabilizer) in the lens. Canon has elected thus far to forego IBIS (In Body Image Stabilization) and continues to state that lens-specific IS provides the best results. That may in fact be true, but I would also point out that only 2 of the 5 lenses Canon has released (or is about to release) for the R system actually have IS. I shot the shot above at a miserly .6 second shutter speed – well outside the zone that one can successfully handhold a lens like this without IS (particularly at close focus distances). The shot isn’t perfectly stable, but usable. Results at further distances would be better still. The IS in the RF35M is rated at up to 5 stops of handholding.
Image Stabilization is obviously also very important for video work, as the Digital IS that Canon includes in more recent camera bodies is a poor substitute for true optical stabilization.
The RF35M has Canon’s typical consumer-grade build quality. It feels better than the budget EF 50mm F1.8 STM but way behind a lens like the Tamron 35mm F1.8 VC lens (which costs about $100 more). The RF35M unfortunately highlights the fact that Canon seems intent on persisting in one of their more foolish trends – not including weather sealing or a lens hood on non-L series lenses. This policy seems even more archaic when one considers that essentially all the competition at any price includes a lens hood, and I’ve also noted that weather sealing of some kind is now included on more lenses than not. Canon’s policy was fine back in the day when third party alternatives were budget options that were typically rough around the edges, but in the modern market, many third-party lenses are extremely competent and are often more polished than first party alternatives. I think Canon is doing itself a disservice here, as in many cases people will not purchase a separate lens hood (the EW-52 costs an additional $42) and thus never get the basic benefit of a lens hood (added flare resistance and protection of the lens).
I’ll also have to pass judgment on the presentation of the lens. The lens arrives in a nice enough cardboard box, but inside the lens is literally just wrapped in multiple layers of bubble wrap. No custom-molded foam or even plastic. It’s really “low-rent”, and I would knock this presentation even from a budget lensmaker releasing $100 lenses. Canon really needs to step up its game in this area; someone needs to send them the memo that the competition has gotten much, much better!
The body design of the RF35M is engineered plastics around a metal lens mount. It has a matte finish that is similar to other recent lenses (including the EF 50mm F1.8 STM), though the RF mount lenses have an additional stylish platinum accent area that matches where the lens mounts to the camera body.
There are two switches (On/Off for the IS and AF/MF) on the side of the barrel. There is also a manual focus ring located in the center of the lens. This being a mirrorless lens with an STM focus motor, there is not direct mechanical coupling to the lens elements, so manual input on the focus ring is routed through the focus motor (focus-by-wire). As per usual, there are limitations to this approach, including less tactile response and no hard stops in either direction. On a positive note, the camera body will show an electronic distance scale on either the viewfinder or the LCD when input is detected, so this helps. I’m not a huge fan of focus-by-wire, though in this age of mirrorless cameras, it seems to be the new reality.
There is a useful new physical control in the addition of a “control ring” to RF mount lenses. This is located near the front of the lens on all current RF lenses and it can be assigned a variety of different values. A couple practical ones to me include Aperture (you can use it essentially like an aperture ring) and (my current choice) Exposure Compensation. This adds another layer of physical control over the lens or camera, so I think you’ll find that you will want that Control Ring adapter for your EF lenses! I felt limited when I used the adapter without it, and loved the additional functionality when I used the control ring adapter with my EF glass. The control ring works well on the RF35M, providing a convenient way to control either lens or camera functionality. It has a different texture to the ring along with a slightly different visual look.
The RF35M has a rather small 52mm front filter thread which is fortunately fairly common. The lens barrel is quite a bit wider than this (over 20mm), which gives the lens a slightly different look from the front. The nine rounded aperture blades make for a stylish look with the aperture closed down a bit.
The RF35M achieves its 0.50x times magnification (1:2 reproduction ratio) at a minimum focus distances of 6.69″ (17cm), so the working distance is pretty close considering that over half of that is taken up by the length of the lens from the sensor. Your actual working distance will be about 3 inches from the front of the lens. A 1:2 reproduction ratio is called “half life size”, and some debate whether or not this constitutes a true macro lens (which is typically 1:1). The inner barrel extends about an inch at macro distances, and the amount of magnification you can achieve looks like this:
The build quality of the RF35M is probably best described as adequate. It gets the job done, and there is nothing fundamentally wrong with it, but there is also nothing particularly special about it. It is consumer grade, pure and simple, and, other than the control ring that will be standard on Canon’s RF lenses, Canon has done nothing to set the lens apart.
Canon EF35M Autofocus Performance
The RF35M employs Canon’s STM or Stepping Motor focus system. STM has become Canon’s de facto budget focus system, with higher grade RF lenses receiving Canon’s Nano-USM technology that is faster and quieter. STM’s strength is in the smooth way it achieves focus (particularly in video) where transitions are not abrupt. STM lenses rarely do the little micropulses that sometimes characterize faster focus systems.
In real-world use the STM focus motor used in the 35mm Macro is fairly quiet but not silent by any stretch. You can hear minor shuffling sounds during focus, and when doing focus pulls in video settings you can hear a light clicking or whirring. Focus speed is fast but not instantaneous like that of of the RF 24-105L (which I reviewed here). Accuracy was generally very good for stills photography.
One positive was how good autofocus was in extremely dark conditions (provided that you focus on an area of contrast). I shot this in an essentially a dark room, handheld, with values of 1/20th second at ISO 40,000 on the EOS RP (ISO 100 would have required a 40 second shutter speed). In other words, very, very dark. Despite that, the RF35M was able to successfully focus with fairly good speed.
This dramatically drops off if you don’t have an area of contrast, however, and I found when doing macro work that if I didn’t focus on an edge I got a surprising amount of hunting at macro distances. I shoot a LOT of product photography for my many reviews (and often in commercial work for companies), and this stood out to me as I was surprised by how much hunting I saw in that scenario even though I was using high end lighting.
In video work focus pulls are fairly smooth but also slower than usual. This is a focus motor that prioritizes smoothness over speed in that scenario. It worked better on the RP in Full HD mode (using Canon’s DPAF focus) than in 4K (which reverts to Contrast AF on the RP).
The STM focus of the RF35M is what I would consider fine for daily use but not what I would choose for action. I saw good accuracy, but I also noted that the focus system was not as sophisticated as what I’ve been seeing the better mirrorless lenses.
Canon RF35M Image Quality Breakdown
The “mixed bag” theme continues on into the image quality segment. The RF 35mm employs an optical formula of 11 elements in 9 groups. There are areas where the RF35M is very strong, and other areas where I’m left a little underwhelmed. The best way to get all of my insights is by watching this video segment:
When I did my brick wall test, I discovered a few areas that disappointed me. The first was a fairly heavy amount of vignette. This was also true of the Canon EF 35mm F2 IS, which also has about 3 stops of shading in the corners. I found that I had to move the “Midpoint” setting in software all the way to the end of the slider to compensate for the fact that the vignette ends almost right into the center of the frame.
For this reason, I found that the lens actually meters identically at F1.8 and F2. Vignette does lift a bit at F2, but it never really goes away. There is still some minor shading that remains even at small aperture like F8. Here are the values I put in to correct for the vignette and distortion at F1.8:
The second issue that I noted was some obvious barrel distortion. This can be seen even in normal images if there are straight lines in the scene:
This obviously is a negative factor for some macro shooters who need low distortion for their work, though it will correct fairly well by inputting a +7 into Adobe’s manual correction panel (see above).
I also found that when I compared the RF35M to my EF 35mm F1.4L II (both lenses at equal settings and apertures) that the image from the 35LII was clearly brighter. I had to compensate by nearly 1/2 stop to equalize the histograms (this was true at smaller apertures as well). This tells me that the light transmission from the RF35M could be better. Now, to be fair, the 35LII is a much more expensive lens, though some of these same observations could be made with the similarly priced Tamron 35mm F1.8 VC.
I’m going to use the image that I compensated a bit to compare to the 35LII for wide open image quality. Here’s where the picture improves for the RF35M. Both lenses are extremely sharp in the center of the frame, though the fantastic 35LII has the contrast advantage.
That difference is a little more apparent in the corners, where the superior contrast of the more expensive 35LII shows up. The 35LII employs a very expensive Blue Spectrum Refractive Optics technology that helps with that contrast.
I recognize that this is not a fair comparison because of the difference in price, but before I abandon my favorite 35mm lens, I will show one area where the RF35M wins. At closer focus distances the RF lens has a much flatter plane of focus, which allows it to achieve better edge results when compared with the 35LII even with both lenses stopped down.
The difference in wide aperture contrast comes from the RF lens having a bit more longitudinal chromatic aberrations (LoCA), which manifests as purple fringing before the plane of focus and green fringing after the plane of focus.
You can see that there is some LoCA, though not massive amounts. This does reduce contrast a bit at wide apertures, though real-world images at F1.8 look just fine:
Stopping down to F2.8 extends the high sharpness and contrast to everywhere save the extreme corners.
By F4 the RF35M is sharp from corner to corner. At smaller aperture values the RF35M is actually just as sharp as the much more expensive 35LII, and it produces highly detailed landscape results.
One area of strength is that the sunburst effect produced by the lens is very good when it is stopped down. I find this sunstar exceptionally appealing:
Flare resistance is decent thought not exceptional. At wider apertures the lens is prone to some “blooming” and ghosting, and at smaller apertures the ghosting artifacts become more pronounced.
At macro distances the lens does its job, with good detail and contrast (you typically want to stop down a little to increase depth of field at close focus distances).
The bokeh quality from the lens is also a bit of a mixed bag. At close focus distances the backgrounds melt away nicely, and I like what I see:
In the transition zone (the area past the plane of focus but before everything is completely defocused) the lens can feel a little busy.
The RF35M shows a little more edging on the bokeh than what I would like. You can see what I mean if I compare a defocused area from the Canon 35LII:
To be blunt, the RF35M didn’t quite meet my expectations. I continue to feel that it is a good, competent lens that is capable of producing very sharp results, but the overall rendering from the lens didn’t feel as special as the similarly priced Canon 35mm F2 IS, a lens that also has better performing autofocus and flare resistance. You can look at more images from the image gallery here and draw your own conclusions.
Conclusion
I was very enthusiastic by the time I ended my review of the RF 24-105mm F4L IS, as I considered it near the top of any 24-105mm lens I’ve previously reviewed. I’d also heard rave reviews of the 50mm F1.2L and 28-70mm F2L lenses (though at this moment I’ve not reviewed either of them yet myself). I have very fond memories of owning the similarly sized and priced EF 35mm F2 IS lens, so I had high expectations for this lens. What I found, however, was a lens that left me a little underwhelmed. It is competent, but not exceptional. I can live with some of the basic flaws (vignette and distortion), but I didn’t find the images I took with the lens to show any particular “sparkle”.
Don’t get me wrong; I think this is an important lens. It is the only reasonably priced native RF mount lens at the time of this review, and the focal length, aperture, and macro abilities make this a very versatile lens. It is highly functional and will get the job done in a lot of situations. For many users that will be enough, and I don’t want to discourage you away from the lens. But for those looking for something more exceptional in either build or performance, you might be better served looking elsewhere. One alternative is the Tamron 35mm F1.8 VC that I’ve mentioned a few times in this review. It has a higher grade build (aluminum alloy body) complete with weather sealing and nearly as high of magnification (0.40x vs 0.50x). It will also require you to use an adapter, however, as would the Canon EF 35mm F2 IS. Both of those lenses also have image stabilization and better autofocus for stills, though it should be noted that both will make a bit more noise during video autofocus. If you want a native mount lens, however, the RF 35mm F1.8 Macro IS STM is a good match in terms of size, and, for the most part, performance.
Purchasing your gear through B&H and these links helps fund this website and keeps the articles coming. You can also make a donation here if you would like. Visit my Amazon page for some of my gear of choice! Thank you for your support.
Great News! I can now offer a 5% discount on all purchases at Amplis Foto, Canada’s Leading Photographic Supplier. Please enter discount code: AMPLIS52018DA in your cart. It is good for everything in your cart, and is stackable with other coupons, too! It will take 5% off your entire order! Proceeds go towards keeping this site going and providing you with new reviews!
Keywords: Canon RF 35mm F1.8, Canon RF 35, Canon RF 35mm, Canon 35 1.8, Canon 35mmm 1.8, Canon RF 35mm F1.8 Macro IS STM, Canon 35mm Macro, Canon 35 Macro, Review, IS, STM, Canon EOS RP, EOS RP, EOS R, Canon EOS R, Canon RP, Canon EOS RP Review, EOS RP Review, Dustin Abbott, dustinabbott.net, Hands On, EOS R, Canon, RP, Autofocus, Video Test, Sample Images, Real World, 4K, 26 MP, Full Frame, Mirrorless, Camera, Review, Macro
DISCLAIMER: This article and description contains affiliate links, which means that if you click on one of the product links, I’ll receive a small commission. As an Amazon Associate I earn from qualifying purchases.
The Canon RF 35mm F1.8 Macro IS STM is the the least expensive Canon RF-mount lens at the moment, so it makes a logical pairing with the Canon EOS RP – lowest point of entry into a mirrorless full frame camera. The Canon RF 35mm F1.8 Macro combines a very useful focal length with a fairly large aperture (F1.8), Image Stabilization (IS), and a 1:2 reproduction ratio (0.50x magnification). This isn’t a full 1:1 Macro lens, but has enough macro ability for most people in most situations. It is reasonably compact and light, very sharp, and generally a very flexible lens. But is it the lens for you? You can can check out some photos from the lens down below and also stay tuned for my review coverage of the lens. You can get a good start by checking out my review of the Canon EOS RP, as the RF 35mm F1.8 was the primary lens I used in that review.
Purchasing your gear through B&H and these links helps fund this website and keeps the articles coming. You can also make a donation here if you would like. Visit my Amazon page for some of my gear of choice! Thank you for your support.
Great News! I can now offer a 5% discount on all purchases at Amplis Foto, Canada’s Leading Photographic Supplier. Please enter discount code: AMPLIS52018DA in your cart. It is good for everything in your cart, and is stackable with other coupons, too! It will take 5% off your entire order! Proceeds go towards keeping this site going and providing you with new reviews!
Keywords: Canon RF 35mm F1.8, Canon RF 35, Canon RF 35mm, Canon 35 1.8, Canon 35mmm 1.8, Canon RF 35mm F1.8 Macro IS STM, Canon 35mm Macro, Canon 35 Macro, Review, IS, STM, Canon EOS RP, EOS RP, EOS R, Canon EOS R, Canon RP, Canon EOS RP Review, EOS RP Review, Dustin Abbott, dustinabbott.net, Hands On, EOS R, Canon, RP, Autofocus, Video Test, Sample Images, Real World, 4K, 26 MP, Full Frame, Mirrorless, Camera, Review, Macro
DISCLAIMER: This article and description contains affiliate links, which means that if you click on one of the product links, I’ll receive a small commission. As an Amazon Associate I earn from qualifying purchases.
The Canon EOS RP is Canon’s second entry in the new R series of mirrorless cameras from Canada. This second full-frame mirrorless camera comes with a slightly reduced spec list and a price tag roughly $1000 less – making it one of the most affordable entry points into a full frame camera, period, and also the lowest point of entry into a mirrorless full frame camera. It’s a surprisingly competent camera on a number of levels, with great autofocus, great ergonomics, good image quality (with a few caveats), and Canon’s fantastic “Vari-Angle” touchscreen. There are some obvious areas where the camera has been held back to provide market separation from the EOS R, but the low price of entry makes it easy to forgive these when the resulting camera is really quite good. I’ve spent some time with the EOS RP along with the Canon RF 35mm F1.8 Macro IS STM – the least expensive Canon RF-mount lens at the moment – and I feel like I have a solid feel of where this camera excels, where it comes up short, and who it is for. Read on to find my conclusions.
Prefer to watch your reviews? You can see my full video review here:
Canon EOS RP Build and Handling
It was very interesting for me to discover that, despite having a smaller body (the RP is 132.5 x 85 x 70mm vs 135.8 x 98.3 x 84.4mm for EOS R) and less “advanced” controls than the EOS R, I actually preferred the ergonomics of the EOS RP. The reason for this is pretty simple. With the EOS R, Canon deviated from its tried and true ergonomics (typically the best in the business, for the most part) and experimented with some new “innovative” controls.
These included a touch sensitive control bar on the back and a multipurpose dial connected to the top-mounted LCD screen that served as both mode dial along with the secondary control dial. I personally found the touchbar not overly useful in the variety of different things I assigned to it and found that the multipurpose dial and the need to select its function via the screen to add unnecessary complexity. I was left wishing for a standard mode dial.
The EOS RP returns to Canon’s tried and true approach to ergonomics, and is, in my opinion, the better for it.
To get all of my observations on the build and handling, take a look at this overview video:
The EOS RP sports a lightweight magnesium alloy body that weights in at only 485g (1.07lb) with a memory card and battery inserted. Despite its smaller size and lightweight body, it manages for feel really fantastic in the hand, and, along with the EOS R, sports the best grips that I’ve encountered on mirrorless cameras. Though the RP is a little on the small side for my hands, I’m able to hold it and use it without wishing for a grip extender. I had my wife try the EOS RP and wasn’t surprised to find that she found it perfect. Canon gets high marks from me for a well-designed, comfortable grip that feels great in the hand.
The EOS RP utilizes the smaller capacity (and physically smaller) LP-E17 battery pack commonly found in Rebel series DSLRs. This battery pack is 7.5Wh compared to the 14Wh capacity of the larger LP-E6N battery pack used in the EOS R. As expected, it has a smaller shot rating as well. It is rated for 250 shots by CIPA (compared to the 370 on the EOS R). Fortunately the trend continues that the R series camera routinely outperform their battery rating, and I went through batteries much slower than expected. Still, purchasing a backup battery or two isn’t a bad idea.
Like the EOS R, the EOS RP does allow for in-camera battery charging via USB-C, though it continues to be in a fairly restrictive fashion. Charging comes with more restrictions than the Sony or Fuji mirrorless cameras I have on hand. I couldn’t just use a power bank to charge the EOS R’s battery, though I told that those banks with a “power delivery” function will charge it. Others have reported that some Apple chargers will also work, and Canon does make a PD-E1 power adapter that will allow you to AC charge it, though at $190 this doesn’t seem like an accessory that many people will go for. Another alternative is that if you have a laptop with a USB-C port the EOS R will charge from that (or at least does from my Dell XPS-13). I am left to wonder, however, why this is so much more complicated on Canon bodies than it is on, say, the Sony a7R3 or Fuji X-T3.
The side view with all the connection ports (shown above) is near-identical to that on the EOS R. You’ve got a remote shutter release port, a microphone and headphone jack, then a mini-HDMI and the aforementioned USB-C connection. The right side of the camera (grip side) has no side door, as the single SD card slot has been shifted to the battery compartment. I’m not a big fan of “memory-card-on-the-bottom”, as it is much more convenient when shooting on a tripod to have side access to the memory card, but thankfully the EOS RP’s layout is much better than that of, say, the Sony a6000 series cameras. The memory card slot runs a different direction than the battery itself, and is fairly easy to access. There is only one card slot, but at least it is a UHS-II compliant slot that allows you to leverage cards with faster write speeds. To be fair, I’ve never had a card failure during an event, but my personal preference is to have two card slots and write RAW files to one and JPEGs to another (which become a de-facto backup for me).
The EOS RP loses one great feature from the EOS R, and that is the cover that comes down over the sensor whenever the camera is powered down. This was particularly helpful for when you change lenses, assuring that dust doesn’t have easy access to the sensor. Canon chose this as one of the ways to separate the RP from the more expensive EOS R, so you’ll see more of the sensor when changing lenses.
The EOS RP has Canon’s fully articulating screen, which will undoubtedly make this camera a popular choice with vloggers and those that want a simple monitoring solution when facing the camera. The screen can be manipulated into a number of positions, and I find Canon’s articulating screens very useful. It is made further useful by the fact that Canon makes the best camera touchscreens in the business. They are more responsive than those from Sony or Fuji, and Canon’s menus are designed in such a way that they are easily accessible through touch. The RP’s touchscreen is a bit smaller (by necessity due to the smaller body), and is a 3″ vs 3.15″. It is also lower resolution at 1.04 million dots per inch compared to 2.1 million for the EOS R’s screen. You’ll notice this most when zooming into photos to check sharpness.
You can select a focus point by touching the screen where you want it, or even have it take a photo when you touch where you want the photo focused. I often use Canon’s touchscreens when doing my formal tests, as I find a soft tap on the screen introduces less vibration than using the shutter button. The EOS RP also supports Canon’s “Touch and Drag AF), which when you are using the Electronic Viewfinder allows you to use your thumb to slide it around on the LCD screen to move the focus area around. It’s genuinely useful, and does help somewhat to make up for the lack of a thumbstick…at least for selecting an autofocus point.
The back of the RP has a very similar layout to the EOS R minus the touchbar. There are eight buttons plus a directional pad. These include a Menus button, AF ON button, Exposure Lock, Magnify/AF Point, Info, Playback, Garbage, and a Q/Set button in the middle of the D-Pad. Canon has allowed for the ability to customize the EOS RP’s layout, and nearly all of these buttons can be assigned different values to make the camera work as you would like.
The viewfinder on the EOS RP is decent but certainly a downgrade from the EOS R. It is essentially lifted from the EOS M50, and is smaller (.39″ vs .5″ on the EOS R) and lower resolution (2.36 million dots per inch vs. 3.69 million). The EOS R’s viewfinder was one of the best that I’ve used, and the EOS RP has a decidedly average viewfinder by comparison. It works fine, but I did run into a couple of quirks.
Initially I found the viewfinder dark on the EOS RP that I tested. I tried looking for a menu setting, but the only menu setting seemed to only impact the brightness of the LCD screen, not the viewfinder. The two did not match at all, with the viewfinder looking very underexposed while the LCD screen showed correct exposure. After a lot of frustration and research, I finally stumbled on the solution…and it is a weird one. To change the brightness of the viewfinder, you have to be looking through it and then access that same menu setting called “Display Brightness” (it is in menu 2 under the “wrench” symbol). It controls whatever screen is active at the moment, so when you are looking through the viewfinder, it controls the viewfinder, but if you are looking at the LCD screen, it controls that. A little confusing. In my case I found that I had to maximize the brightness of the viewfinder to match the LCD at about 50% brightness. It seems like having separate controls in the menu for the LCD and viewfinder brightness would be more intuitive.
The second quirk is when using the articulating LCD screen. When you rotate it out to the side for video recording (and hold the camera close to your body for stability while looking down at the screen), it is easy to activate the sensor that switches between the LCD screen and the viewfinder, and it switches back and forth. You may need to disable that sensor if you plan on doing extensive video work, as it gets annoying. Mapping it to the My Menu may help.
RF mount lenses have been designed with additional electrical points to the camera compared to EF lenses, and this allows for expanded functionality. One of those functions is the inclusion of a new “control ring” located on RF mount lenses (at least those from Canon). The control ring is designed to add functionality to the camera itself (not just the lens), as like the other wheels, it can be assigned a variety of different values. A couple practical ones to me include Aperture (you can use it essentially like an aperture ring) and (my current choice) Exposure Compensation. Unlike most mirrorless cameras, the EOS RP has no dedicated Exposure Compensation dial…and I miss it. Mapping this to the Control Ring makes up for what is missing on the camera, which leads me to another point: you’re going to want that Control Ring adapter for your EF lenses! I felt limited when I used the adapter without it, and loved the additional functionality when I used the control ring adapter with my EF glass.
Canon has released three different adapters for adapting EF lenses to the RF mount, and two of them are very innovative. The cheapest of the three is the straight up EF to RF adapter, and it is nicely made and has some weather sealing. I’ll deal with this more under the autofocus section, but EF mount lenses adapt very well to the EOS RP. If you’ve been adapting Canon lenses to a Sony body, be prepared for a very different experience, as the lenses do very much perform natively (and, depending on the lens, maybe even better than native). It’s very reasonably priced at $99 USD.
The first of the innovative adapters is the control-ring adapter. It adds the control ring like the RF lenses have into the mix, which I think will be important because I feel that without that control ring the EOS R is one wheel short. The only challenge here is that the control ring is located at the very rear of the adapter (right near the camera), which will be the exact opposite position of where it is on RF mount lenses. Instead of reaching to the front of the lens, you’ll instead be reaching to the back of the lens. Still, I would consider this worth the extra money (it costs $199 USD) for the amount of frustration you’ll avoid from using the camera and your EF lenses without this basic area of control. I’ve tested this adapter and find it very practical to use. I actually prefer the location of the control ring via the adapter on most lenses save the the largest and heaviest, where it is too far away for you to reach for it while still supporting the camera with one hand (I tested the Sigma 60-600mm F4.5-6.3 Sport lens on the EOS R and definitely found this to be the case with it).
The final adapter could be very useful for some of your EF lenses that don’t take traditional filters, as it is a “Drop-in filter” adapter. You can get it with either a circular polarizer or ND (Neutral Density) filter, and this gives you a filter solution for any lens without worrying about vignette or different filter sizes. Very clever. Also clever is the fact that this adapter has a little wheel on the side that allows you to rotate the filter (obviously this will matter with either a C-PL filter or a graduated ND filter). The price varies on this adapter based on what kind of filter you order it with.
Kudos to Canon for thinking outside the box here, however, and using the adapter as a means of introducing some additional functionality rather than it just being a burden.
Like the EOS R, the EOS RP does NOT have a true In Body Image Stabilization (IBIS). It has a digital IS in video mode, but it’s of limited value. Canon has long contended that lens-specific IS is preferable. I’m not arguing that position in an absolute sense, but my experience with Sony’s IBIS is that it works very well with a wide variety of lenses, including my adapted manual focus lenses (like my beloved Zeiss Milvus 135mm F2) or even my classic M42 lenses. That’s been a major selling point for Sony, and Nikon has embraced it with the Z6/Z7 mirrorless bodies, so I don’t think Canon can continue to ignore that the market increasingly expects this technology included in mirrorless cameras. It’s worth noting that 2 out of the 4 lenses that Canon launched the EOS R with don’t have IS, and the recently announced RF 85mm F1.2L makes it 3 of the first 5 lenses that lack IS. If the the EOS RP (or EOS R) had IBIS, they all would have had IS!
I obviously did not expect the EOS RP to have IBIS when the EOS R did not, but I personally dispute Canon’s claim that lens IS is the way to go for a lot of reasons.
Despite this major misstep, I think the Canon EOS RP is mostly a joy to use. The wheels and buttons feel good and are well positioned, the grip feels fantastic in the hand, and the simplified ergonomic controls make using the camera a familiar and positive experience. The touchscreen is great for everything from changing settings to selecting focus points to navigating the menu, and Canon leaves Sony in the dust in this area. The EOS RP feels like a cohesive camera that is straightforward and easy to use, and I think the generally more positive user ratings of the RP over the EOS R reflect that.
Canon EOS RP Autofocus Performance
While the EOS RP has a slightly downgraded autofocus system from the EOS R on paper, there are practically few differences. This is still one of the most sophisticated applications of Canon’s Dual Pixel Autofocus (DPAF) so far, with some 4779 (vs 5655 on the EOS R) selectable AF points that, like the EOS R, cover essentially the whole sensor (100% of the vertical area and 88% of the horizontal).
I do think the idea of 4779 “selectable” phase detect AF points is somewhat misleading, as there is no way to set up the autofocus where you are selecting between 4779 different choices. Autofocus is divided up into 7 different options, including having the whole sensor active with tracking enabled, one point AF, Expand AF area (in a cross pattern), Expand AF area (Square around involving an additional AF point, Zone AF, and then two Large Zone AF modes, including Vertical and Horizontal Zones. Autofocus mode selection works pretty much the same as it always has; the AF point spread is just much more complete.
This amount of coverage is a huge, huge advantage over the Canon EOS 6D Mark II (the DSLR “equivalent” of the EOS RP), and one huge advantage of this type of focus system is that the need for calibrating focus on lenses (AFMA) is entirely eliminated. Autofocus accuracy is very, very good with all the tested lenses, and you now have the ability to compose pretty much anywhere you want on the frame with extremely high accuracy.
I purposefully used a variety of lenses via adapter on the EOS RP, including a number of third party lenses. All tested lenses worked extremely well via adapter with essentially native autofocus…or better. I say better because the reality is that some lenses that you might be limited to using on the center group only with a DSLR may in fact work much better with outer points here, and some have noted that some slower focusing lenses actually focus more quickly on the EOS RP. The exception to the rule seems to be with longer telephoto lenses where autofocus works fine, but it can be slow to make major focus changes. I feel that large telephotos still work better on DSLRs (more voltage driving focus?) There’s a little more noise in autofocus than the silent RF lenses, but that will obviously depend on the lens being adapted.
Here’s a few from the Canon 35mm F1.4L II (which is a true delight to use on the EOS RP; I love this lens!). I actually used a less expensive Commlite EF to RF adapter for these shots that works well if your budget is limited.
I shot some of my third party lenses as well, and my focus results via adapter was excellent as well.
I also tested some of my manual focus Zeiss and Voigtländer glass, which worked perfectly as well. EXIF data reports accurately the name of each lens. The RP is not in the same class as the EOS R for manual focus, however, for a couple of reasons. The first is that the RP does not get the excellent “Focus Guide” that the EOS R has. It was a very intuitive system for showing when accurate focus was achieved, but it got chopped here. You will need to rely on focus aids like focus peaking (color overlays) or magnifying the image in the viewfinder or LCD screen to visually confirm focus. That leads us to the second reason that MF isn’t as nice on the RP, and that is the simple fact that neither the viewfinder nor the LCD has as high of resolution, which means that your capacity for “zooming into the image” is reduced by the lack of resolution. Don’t get me wrong – mirrorless is definitely still the preferred platform for manual focus – but the EOS RP isn’t the EOS R in this regard.
Another nice feature (at least with RF lenses) is that when you begin to twist the manual focus ring a digital distance scale will show up in the viewfinder or the LCD.
I do really miss the IBIS (In Body Image Stabilization) of Sony bodies when manually focusing. That additional stability (particularly when magnifying the image) helps to hold things steady so you can focus on accurately achieving focus. So, as per the rest of the review, there is both good and bad to report.
Like the EOS R, you can use EF-S lenses on the EOS RP. The change to not having a mirrorbox means that there is no chance of any mirror hang with an EF-S lens, and so you can now put your EF-S lenses on the adapter. The camera will automatically switch to a 3888 x 2592 pixel crop mode (10 MP). This isn’t particularly high resolution, but what it does mean is that if you are new to full frame, you can leverage some of your APS-C lenses until you can afford some full frame options. Here’s a few from the EF-S 24mm F2.8:
You can also access that crop mode at any time should you want to frame tighter, though it will always be at that cropped resolution. The other advantage of finally being able to mount EF-S lenses is that they can help get a wide angle of view in 4K shooting, where Canon is still limited by an unfortunate 1.7x crop factor. A 10mm EF-S lens (like the inexpensive EF-S 10-18mm IS STM lens) would be very valuable both for the wide angle of view (17mm equivalent) and the Image Stabilization. The crop mode will become much more useful when Canon releases a high resolution R body.
Canon also touted the ability of the EOS R and EOS RP to autofocus with combinations yielding a maximum aperture of F11 like the Canon EF 100-400mm F4.5-5.6L IS II + Extender 2x III. I don’t have the 2x extender, though I did test it with the 1.4x III. Autofocus was fairly quick with the combination, though I would recommend using the focus limiter wisely as I found that major focus changes can be gradual while focus changes with the focus limiter enabled were fairly snappy. Accuracy seemed pretty good as well:
Autofocus with the native lenses is very fast (though the absolute speed will depend on the lens attached.) I found the RF 24-105mm F/4L IS is brilliantly fast on the EOS R, and I doubt it is any different on the RP. I brought in the the RF 35mm F1.8 Macro IS lens to review with the EOS RP (considering that it is the least expensive Canon RF mount lens at the time of this review). The RF 35 Macro is fast, though not in the same class as the 24-105. Canon also claims new levels of sensitivity in low light for the EOS R cameras. With the RF 50mm F1.2L they claim that the EOS R is sensitive down to EV-6 (which is essentially a dark room), while the EOS RP is sensitive down to -5 EV (which is still better than most cameras). Suffice it to say that there are few situations you won’t be able to focus the camera. I went into my utility room with the lights off, creating conditions that I could not make out objects in, and the EOS RP was able to focus surprisingly well…and that was with the 35mm F1.8 lens. One of the F1.2 lenses would allow for even better focus ability.
One advantage for the EOS RP over the R’s launch is that it does support Pupil Detection (akin to Sony’s Eye-AF) while using continuous AF (the EOS R initially only supported it in Single Shot mode). I don’t find the application of this as intuitive as Sony’s Eye AF (particularly after the Firmware 3.0 update), but I’m thankful that Canon has recognized the importance of attaching continuous AF to Pupil Detection.
EOS RP Framerate and Buffer
When Canon launched the EOS R, the specs for the burst rate were more than a little disingenuous. 8 FPS (frames per second), which would put it 1 FPS higher than the 5D Mark IV. But when you dug a little deeper, you discovered that if you want continuous autofocus during that burst, the FPS rating drops to 5 frames per second – a steep drop. The EOS RP looks worse at only 5 FPS, but the continuous autofocus figure only drops by 1 to 4 FPS. This isn’t great compared to the competition, obviously, but is also more palatable in a camera that costs $1000 less than the EOS R at launch.
Interestingly the EOS RP actually have better buffer ratings at 50 RAW | Unlimited JPEGs (compared to the 47 | 100 for the EOS R). This competitive but far from exceptional. This is clearly not an action camera, but there might be situations where someone who owns an RP wants to hold down the shutter for a while, and it will oblige.
One feature that the EOS RP has at launch that the EOS R didn’t is a built in interval timer for shooting time lapses or other scenarios where intervals are useful. It is fairly basic in operation, but I’m always glad for this option as it gives one an additional creative option for approaching a scene.
In conclusion, the autofocus system on the EOS RP is a serious step up for those coming from a Rebel or even a 6D Mark II, but the RP itself is no action camera. This is a general purpose camera that will be more user friendly/accurate for portraits or family shots, but shouldn’t be considered for those needing to capture high speed action.
Canon EOS RP Sensor Performance
The EOS RP has borrowed its 26.2 MP CMOS sensor from the Canon EOS 6D Mark II, which unfortunately is not among Canon’s best. I dived deep in comparing that sensor to the Canon 5D Mark IV (a camera I own), and then later compared the EOS R to the 5D Mark IV (the EOS R similarly borrows its 30MP sensor from the 5DIV). I used the 5D Mark IV as a benchmark for the EOS RP, as I have compared the 5DIV to a LOT of cameras since its release, including: Nikon D850, Sony a7RII, Sony a7RIII, Sony a7III, Sony a6400/a6500, Fuji X-T3, Canon EOS 6D, Canon EOS 6DII, and the Canon EOS SL2. That’s ten different cameras, so I have a pretty good idea of where it stands in relation to what’s on the market. The best way to see those conclusions is by watching the following episode where I break down the strengths and weaknesses.
High ISO Performance
It is in the area of ISO performance that the EOS RP’s sensor holds up best to competitors. The strongest camera that I’ve reviewed at high ISO values is the Sony a73, and, while the EOS RP won’t threaten that camera, high ISO performance is actually an area of strength. When I used equal settings (and the same lens via adapter on the EOS RP – the Canon EF 35mm F1.4L II, one of my favorites), I got fairly similar results between the EOS RP and the 5DIV. While the RP has roughly equal amounts of pixel noise and pixel roughness at higher ISO values, it also retains a little better contrast than the 5D Mark IV. Image quality at ISO 12,800 is still useful in many applications.
ISO 25,600 is still clean enough to be useful in many situations (events, reportage), though I would suggest capping it off there. Canon extended the native ISO range to 40,000 (one third stop beyond the 32,000 of the 5D Mark IV), but I’m not sure it is warranted. With both cameras at their limits, the noise is clearly rougher on the EOS RP though it has lower resolution.
Finally, if we compare the ISO 25,600 performance to the ISO 40,000 performance, there’s clear reasons to try to stay at 25,600 or lower.
All in all, though, this is a solid performance and will allow EOS RP users to get usable results even in low light situations.
Dynamic Range
The next section isn’t so positive. I typically run my comparison tests at both base ISO and then again at ISO 6400. I like looking at both as it gives you idea of how to best manage high ISO conditions. If a camera performs really well at pulling up shadows at high ISO values like ISO 6400, you have a valid option to underexposure shots at higher ISO values and then add brightness to the image in post and potentially get cleaner results than venturing into very high ISO values. That won’t be the case with the EOS RP.
Things started reasonably well, as I first compared the ability to pull down highlights in overexposed areas. What I found is that the camera performed well with a two-stop overexposure, allowing one to cleanly recover the highlights (the image on the right has had the exposure reduced by two full stops without any loss of highlight information).
Starting at three stops, however, you can see that some information in the highlights has been lost. You will most commonly run into this when trying to recover skies or patches of skin in portraits with blown out areas. Some of the texture information is permanently lost.
Sony/Nikon have an advantage in this area, as you can still get clean results with three full stops of overexposure. Their four stop recovery looks essentially like Canon’s three stop, giving them a roughly one stop advantage. The EOS RP’s attempt to recover a 4 stop overexposure looked fairly rough.
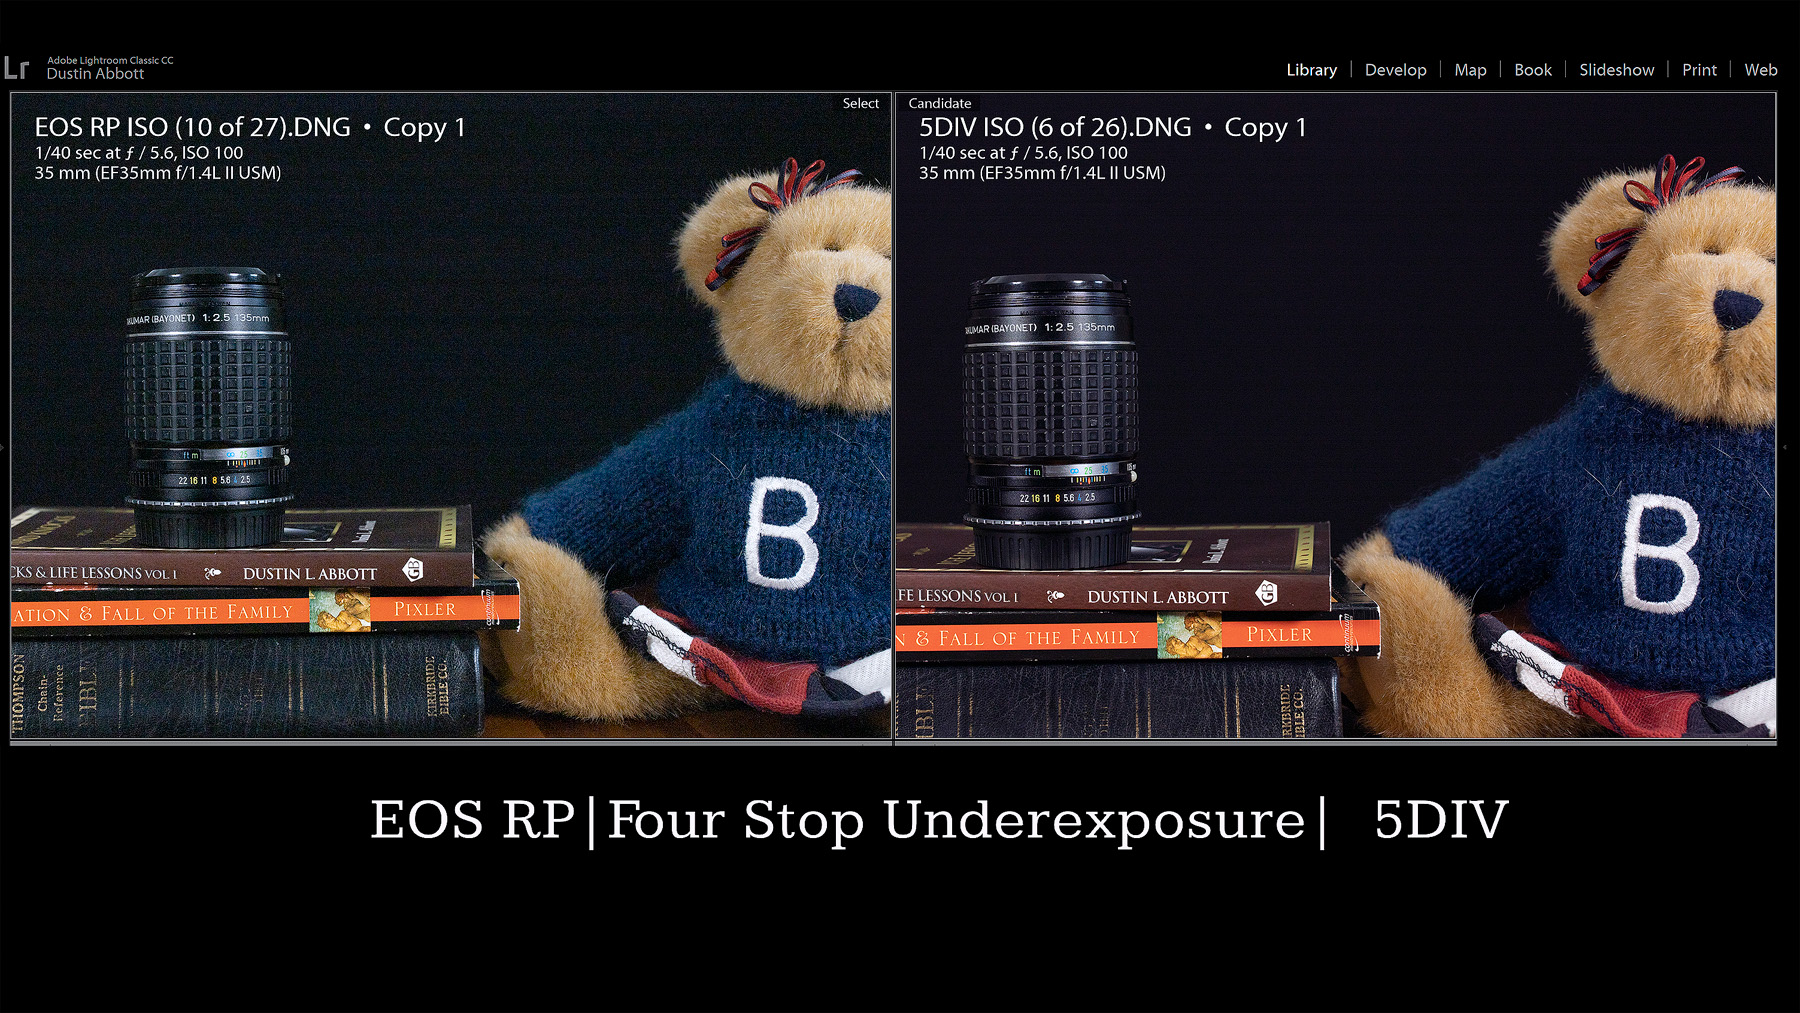
Where the main surprise came, however, is when recovering shadows. This is an area where the 5D Mark IV is fairly strong – within a half stop of Sony/Nikon. I was surprised to find that I started to see come color noise and banding even with a mild two stop shadow recovery.
By four stops the image is essentially destroyed:
The difference becomes very obvious when you compare this result with the 5D Mark IV, which lags a slight bit behind competitors like the Sony a73/a7R3.
Now here is where people argue, “Who cares? Real photographers don’t underexpose like this.” That’s true, but the problem is that there are a lot of real scenes where the dynamic range of the scene means that you might just be recovering shadows by 3 or 4 stops (I do it all the time with scenes that have a forest and a sky in the same frame). Modern cameras have largely enabled me to avoid bracketing exposures and all of the additional work and potential for image damage due to things moving between frames. The EOS RP really feels like a step back. Look what happens when I pulled up the “shadows” slider all the way on this real world image. Ouch!
This may be an extreme example, but I’ve certainly noticed the limits when editing everyday photos. This does invalidate the worth of the EOS RP for many shooters, but one does have to be aware of its limitations to get the most out of it. I typically recommend that photographers underexpose when shooting a scene with a wide dynamic range to preserve highlights, but that is probably not recommended with the RP. It does mildly better in recovering highlights than shadows, so any bias should be “to the right” rather than “to the left” (on a histogram).
Now, don’t get me wrong: the EOS RP is capable of taking beautiful photos (I’ll attach a few of them below, and you can see many more in the Image Gallery here), but there are areas where it clearly lags behind the competition. That may or may not impact your particularly photographic style, and, if it doesn’t, feel free to disregard these sections. This is a good camera, though one exceeded in capacity by others in some areas. If you are someone who does need strong dynamic range for your landscape, event, or portrait work, you may want to look elsewhere. Cameras are not “one-trick ponies”, however, and just because they don’t excel in one area doesn’t mean that they aren’t competent in other areas.
EOS RP Color
I’ve found that my work in comparing color science has been both popular and controversial. Here’s at least part of the reason why: people don’t all see color identically. This has become evident based on a number of photos that circulate around the Internet featuring a dress or sandals that people perceive to be very different colors. Part of this has to do with the way that people’s eyes process color (some have more red cones in the eye, others more green), but it also comes down to the reality that in the Internet age people view images on screens that vary widely in their color calibration and accuracy. Put simply: not everyone is seeing the same thing.
I use two displays in my personal desktop array. My primary display is a high-end BenQ SW271 (I reviewed it here), with my secondary display being an older Dell U2410. I calibrate both of them on a monthly basis using a Spyder5 Pro. I also view my photos regularly on the screen of my iPad Pro and my Dell XPS 13 laptop (which also has a high end 4K display). In short, I use a lot of high quality screens in my work, and, based on what I see on them (and from prints), I feel like Canon produces the best, most natural color.
I also know that not everyone agrees with me.
People will view the same video that I’ve produced comparing Canon and Sony color, or Canon and Nikon color, and will have completely different preferences. The anecdotal evidence I’ve received says that more people do prefer Canon, but a minority strongly prefer either Nikon or Sony (which are more similar than different in my findings).
In the case of the EOS RP, I found that Canon’s colors continue to be very good, and typically the auto white balance works quite well (Canon also has the advantage in things like “Anti-Flicker” technology that helps in tough lighting conditions). This shot (from the amazing Chateau Montebello) accurately captures the colors, mood, and lighting of the world’s largest log structure.
I did note in a side by side comparison with the Canon 5D Mark IV and all settings equal (white balance, same lens, same settings, scene, and lighting) that the EOS RP delivered a slightly cooler and ever-so-slightly less saturated image than the 5D Mark IV. It wasn’t enough to be detectable without such a controlled test, and I haven’t noticed anything unusual in normal use. Colors look pretty great:
At the end of the day a lot of “camera performance” depends on the glass (lenses) that you put in front of it. Canon is producing some stunning lenses in the RF mount, so plan on seeing a lot of gorgeous images taken with EOS RP bodies. As always, I recommend that you take a look at the image galleries to see a wide variety of images with the RF 35mm F1.8 Macro lens along with a number of adapted lenses.
Video Performance
Like many other areas of the EOS RP’s design and performance, video is an area that will raise some controversy (welcome to Canon and video!) The 1DxII and 5D Mark IV were’s Canon first DLSRs to allow one to record video in the very popular 4K resolution. There were two major shortcomings that were widely panned, however. The first was the Motion JPEG codec/wrapper that was the only option, and at an extremely high 500Mbs bitrate. There’s nothing wrong with the MotionJPEG codec if you have tons of space (it has very little compression and requires massive amounts of storage), a lot of processing power for editing the footage, and want exceptionally high quality for what you are doing. For typical YouTube or consumer use, however, it was serious overkill, and was the only option, which limited the usefulness of 4K for everyday use (whereas Sony and Panasonic have made it very accessible). The second issue was that 4K video was only recorded at a fairly massive 1.7x crop factor, which meant that you could neither get the full frame “look” and that getting wide angle shots was much more challenging.
I found the hyperbole over the top, and defended the quality of the footage you could get (which is very good) while panning the limitations imposed by this approach. But, on a practical level, I also bought Sony cameras particularly for their accessibility for video work. I voted with my wallet, as did a lot of other people. I did pay to have my 5D Mark IV upgraded to support C Log (a $100 addition to a $3500 camera), but I haven’t used it much because, well, Sony.
The EOS R improved on some of those areas, but not in others, and the RP unfortunately takes several steps backwards. This is perhaps to be expected in that the RP is much cheaper than the EOS R, but it also doesn’t exist in a vacuum, and basically every mirrorless camera released in the past 3-4 years is going to trump the EOS RP’s video specs. In 4K the RP is extremely limited, with one option: a 24 FPS 125kbps with that large 1.7x crop factor. One minor help here is that you can now use EF-S lenses (Canon APS-C) via adapter on the EOS RP, so using an APS-C lens like the Canon EF-S 10-18mm IS STM lens or the Tamron 10-24mm VC will allow you to still get wide angle shots (17mm equivalent on the wide end) and also adding image stabilization. As noted, there are no bitrate or framerate options (not even 30FPS). This was apparently due to concerns with heat dissipation for higher frame rates.
It gets worse.
In 4K mode the EOS RP also loses Canon’s biggest asset – the DPAF (dual-pixel AF) autofocus mode, resorting to a basic contrast AF that is noticeably inferior in my tests compared to the camera’s operation in Full HD (1080P) mode. The autofocus in 4K is, frankly, not very useful. Bottom line is that while the EOS RP does have 4K (whereas the Canon 6D Mark II does not), the 4K option is only useful in extremely limited situations. The EOS RP should really be treated more as a Full HD camera.
The RP also does not comes with Canon’s C-Log option like the EOS R, so I don’t consider this a serious option for videographers outside those that are just looking for basic footage to be used without critical editing. Even in full HD it is limited to a 60FPS maximum compared to the 120FPS than most alternatives offer for slow-motion footage. Surprisingly there is also no 24FPS option in Full HD. It has both a full/light option at 1080/30FPS, though both use the IPB compression.
Yes, on the video front is another area where having no true In Camera Image Stabilization (optical stabilization) is a liability. Canon does have a “Movie Digital IS” – a digital correction for camera shake – but in practice it really makes very little difference. It is certainly no replacement for an optical image stabilizer. So, unless you are working on a gimbal, you are probably going to need to use lenses with image stabilization to get decent results.
I’m somewhat disappointed on this front. Not because I expected any improvements relative to the EOS R (the RP is much cheaper), but because Canon was already behind the competition in this area. The even cheaper Sony a6400 destroys the EOS RP on the video front in every way.
Conclusion
Like most of Canon’s recent camera releases, the Canon EOS RP is a mixed bag. In some ways I am more inclined to be charitable to it, as I enjoy enjoying the camera due to have wonderfully familiar ergonomics and that it fits the hand so much better than many competitors and because the price point is so reasonable. For these reasons I suspect a lot of people will end up buying an EOS RP. I certainly would choose it over a Canon 6D Mark II for the simple reason that the autofocus system is better by orders of magnitude and the new RF lenses (while expensive) have been excellent. The seamless experience in using EF lenses via the Canon adapters is also compelling. But Canon’s “blind-eye” approach to what competitors offer has become somewhat vexing. The EOS RP’s sensor is not really competitive with much of anything (it is surpassed by a number of APS-C sensors in certain areas) and the video performance is near insulting…to me. Some people could care less about video, and others think that dynamic range is for bad photographers or obsessive internet pixel-peepers, so these limitations won’t matter to some. I think that those who are not put off by the EOS RP’s faults will find a camera that is genuinely fun to use, and, at $1299 in the US, the EOS RP represents the current lowest price of entry into the world of full frame mirrorless cameras. That alone will probably assure that Canon will sell a bunch of RP’s.
Pros:
Beautifully compact yet fully functional body
Inexpensive price for a full frame camera
Excellent grip and overall ergonomics (no gimmicks!)
RF lenses are excellent, and EF lenses work perfectly via adapter
Purchasing your gear through B&H and these links helps fund this website and keeps the articles coming. You can also make a donation here if you would like. Visit my Amazon page for some of my gear of choice! Thank you for your support.
Great News! I can now offer a 5% discount on all purchases at Amplis Foto, Canada’s Leading Photographic Supplier. Please enter discount code: AMPLIS52018DA in your cart. It is good for everything in your cart, and is stackable with other coupons, too! It will take 5% off your entire order! Proceeds go towards keeping this site going and providing you with new reviews!
Keywords: Canon EOS RP, EOS RP, Canon RP, Canon EOS RP Review, EOS RP Review, Dustin Abbott, dustinabbott.net, Hands On, EOS R, Canon, RP, Autofocus, Video Test, Sample Images, Real World, Canon RF 24-105, Canon RF 35mm F1.8 IS, 4K, 26 MP, Full Frame, Mirrorless, Camera, Review, Macro
DISCLAIMER: This article and description contains affiliate links, which means that if you click on one of the product links, I’ll receive a small commission. As an Amazon Associate I earn from qualifying purchases.
The Canon EOS RP is Canon’s second entry in the new R series of mirrorless cameras from Canada. This second full-frame mirrorless camera comes with a slightly reduced spec list and a price tag roughly $1000 less – making it one of the most affordable entry points into a full frame camera, period, and also the lowest point of entry into a mirrorless full frame camera. It’s a surprisingly competent camera on a number of levels, with great autofocus, great ergonomics, good image quality, and Canon’s fantastic “Vari-Angle” touchscreen. There are some obvious areas where the camera has been held back to provide market separation from the EOS R, but the low price of entry makes it easy to forgive these when the resulting camera is really quite good. Stay tuned for my final review and check back often for new photos added to these galleries. I’m also reviewing the Canon RF 35mm F1.8 Macro IS STM – the least expensive Canon RF-mount lens at the moment – as it provides a nice, reasonably-priced paring along with the versatility of a macro lens.
Purchasing your gear through B&H and these links helps fund this website and keeps the articles coming. You can also make a donation here if you would like. Visit my Amazon page for some of my gear of choice! Thank you for your support.
Great News! I can now offer a 5% discount on all purchases at Amplis Foto, Canada’s Leading Photographic Supplier. Please enter discount code: AMPLIS52018DA in your cart. It is good for everything in your cart, and is stackable with other coupons, too! It will take 5% off your entire order! Proceeds go towards keeping this site going and providing you with new reviews!
Keywords: Canon EOS RP, EOS RP, Canon RP, Canon EOS RP Review, EOS RP Review, Dustin Abbott, dustinabbott.net, Hands On, EOS R, Canon, RP, Autofocus, Video Test, Sample Images, Real World, Canon RF 24-105, Canon RF 35mm F1.8 IS, 4K, 26 MP, Full Frame, Mirrorless, Camera, Review, Macro
DISCLAIMER: This article and description contains affiliate links, which means that if you click on one of the product links, I’ll receive a small commission. As an Amazon Associate I earn from qualifying purchases.


 7Artisans AF 35mm F1.4 X-Mount Review
  Sony FE 50-150mm F2 GM Gallery
  Sony FE 50-150mm F2 G Master Review
  Viltrox AF 35mm F1.2 LAB FE Gallery


")


")


")


