Facebook Twitter Google+ YouTube Flickr 500px
See My Reviews

Skylum Luminar 2018 Photo Editing Software Review

Dustin Abbott

November 6th, 2018

Many photographers like myself have used Adobe’s Lightroom and Photoshop software for editing our photos for many years, but a few years back Adobe switched to a Cloud model that seemed a bit too much like renting software for a lot of photographers.  A number of photographers began looking for alternate pieces of software to edit their photos, and one of the lead alternatives that has emerge is Skylum Software’s Luminar editing software.  While I’m not personally unhappy with Lightroom and Photoshop (I subscribe to their Creative Cloud Photography Plan), I have spent some time with some alternative pieces of software like Luminar, Alien Skin Exposure X4, Capture Pro, and others.  Most pieces of software have their own strengths and weaknesses, which is true of Adobe products as well.  Luminar 2018 benefits from several things, however.  

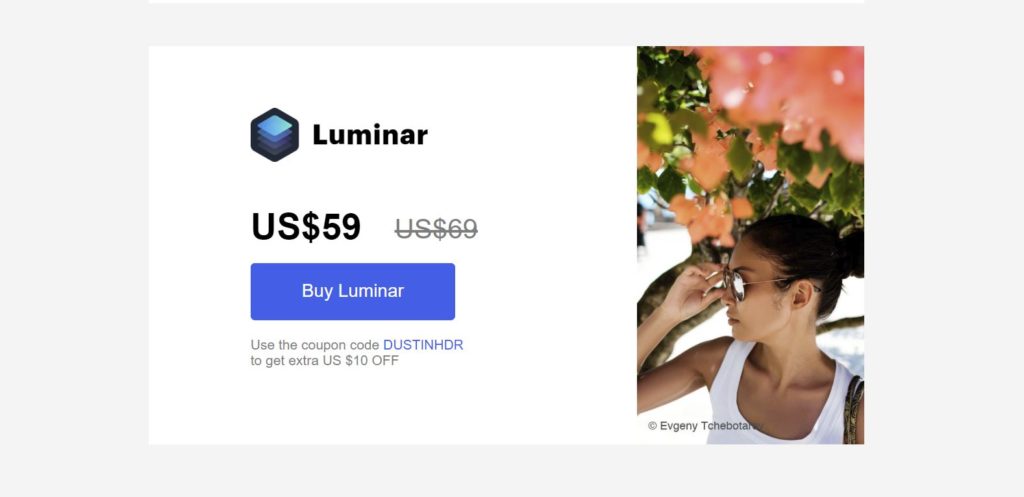
The first is price.  You can get Luminar 2018 for $69 USD/$99 CDN, though rumor has it that using the coupon code DUSTINHDR will drop that price by $10 USD/$15 CDN.  That positions it cheaper than alternatives.

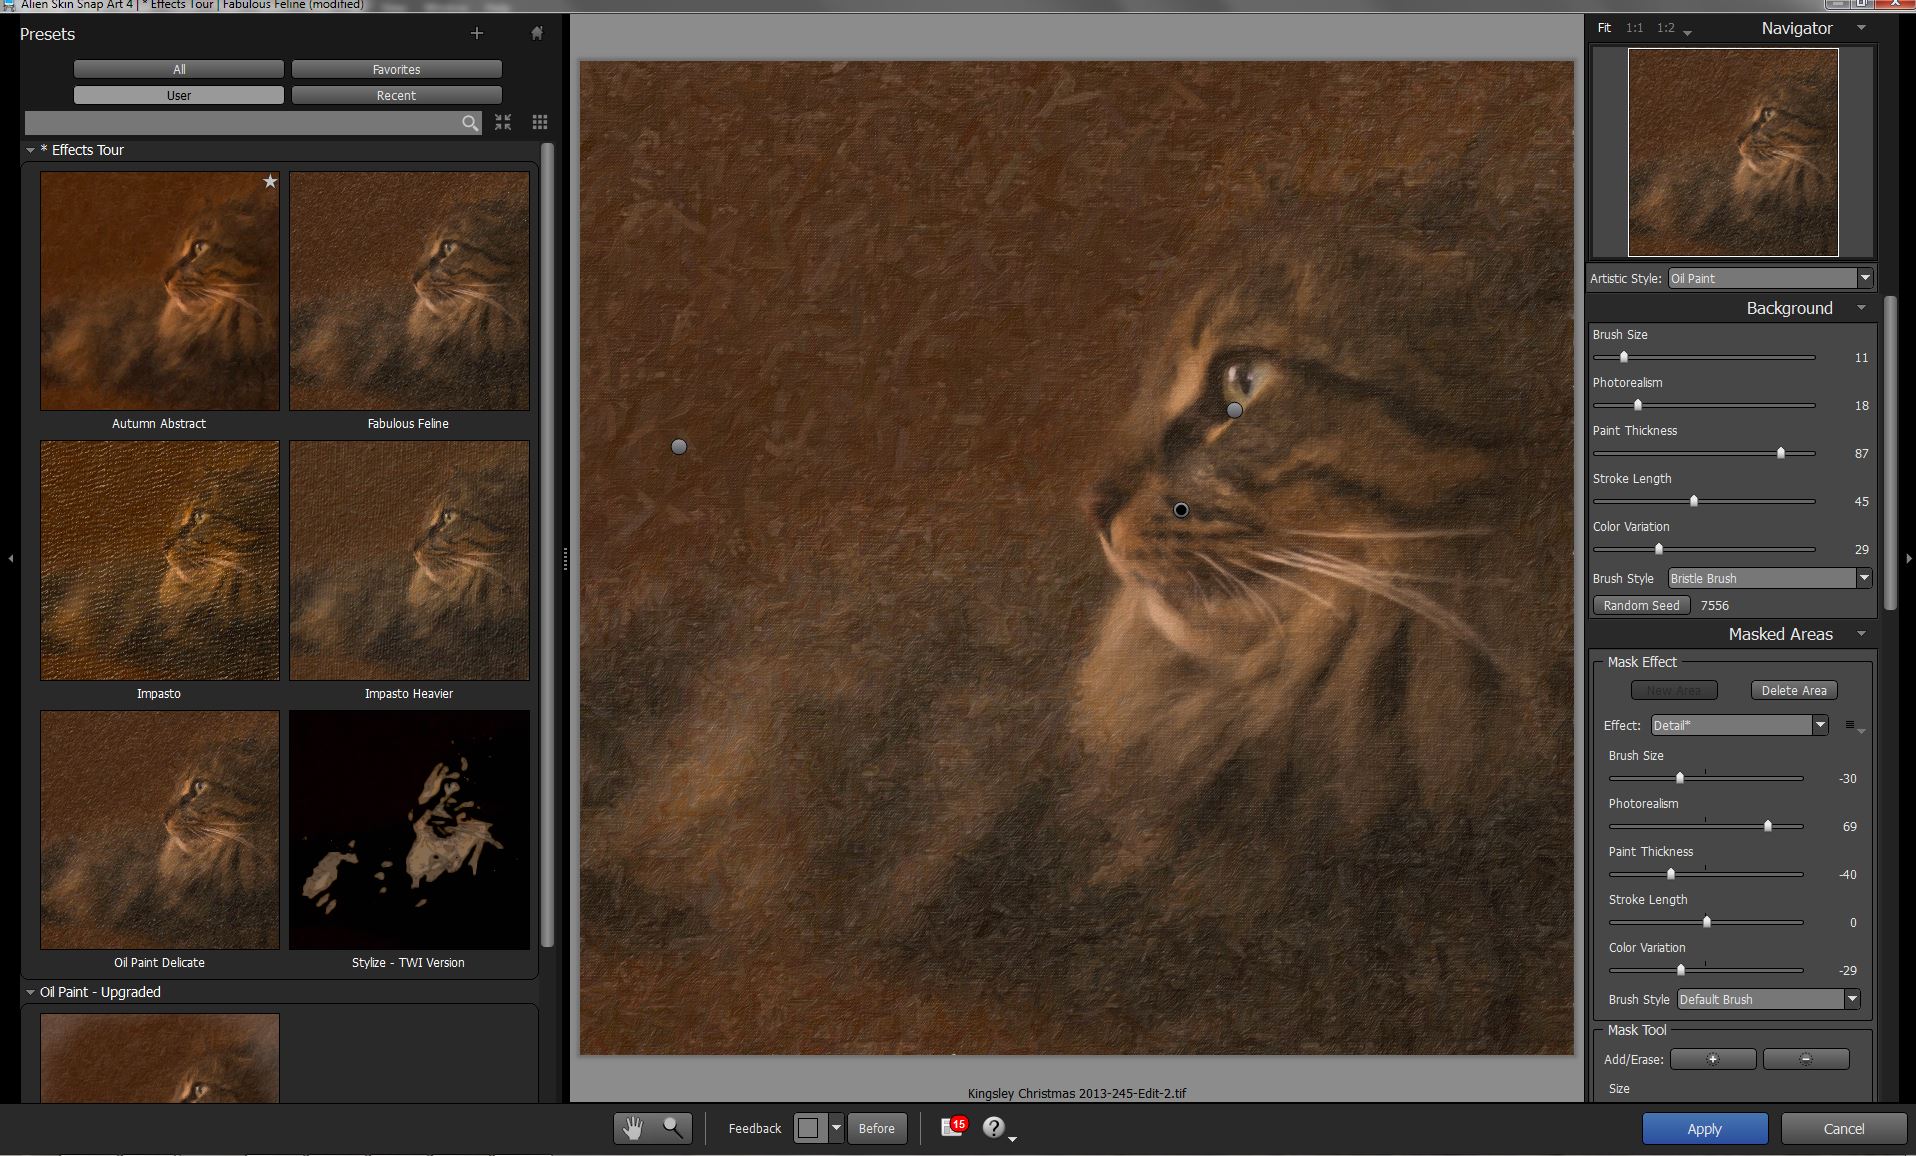
The second advantage is that it has a really friendly, easy-to-pick-up-and-use interface that allows you to choose a branched path of either using preset looks to transform your image at a click:

There are a variety of different categories of presets, and there’s a good chance you can get a look that you like from the mix without going deeper if you don’t want to.  One thing I like is that every preset has a strength slider along the bottom that allows you to control the intensity of the preset, something that Lightroom lacks.  Also unlike Lightroom is the option of adding layers and layering different effects/presets to get the final product you like.

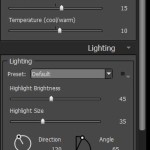
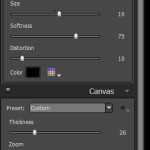
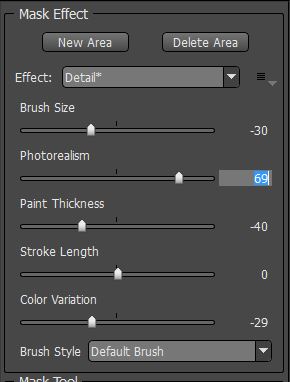
But you also have the option to jump in and really tweak the image with massive amount of controls.  Unlike Photoshop, however, these all work with sliders that allow you to monitor them real time.  One feature I really like is that you can choose a workspace based on the type of image, or you can create a custom workspace by either adding or removing filters.  The learning curve is really easy compared to Photoshop, and I found that I could do most everything I wanted within just a few minutes of first using the software.

For a closer look at how this all works, I would recommend that you want my video demonstration here:


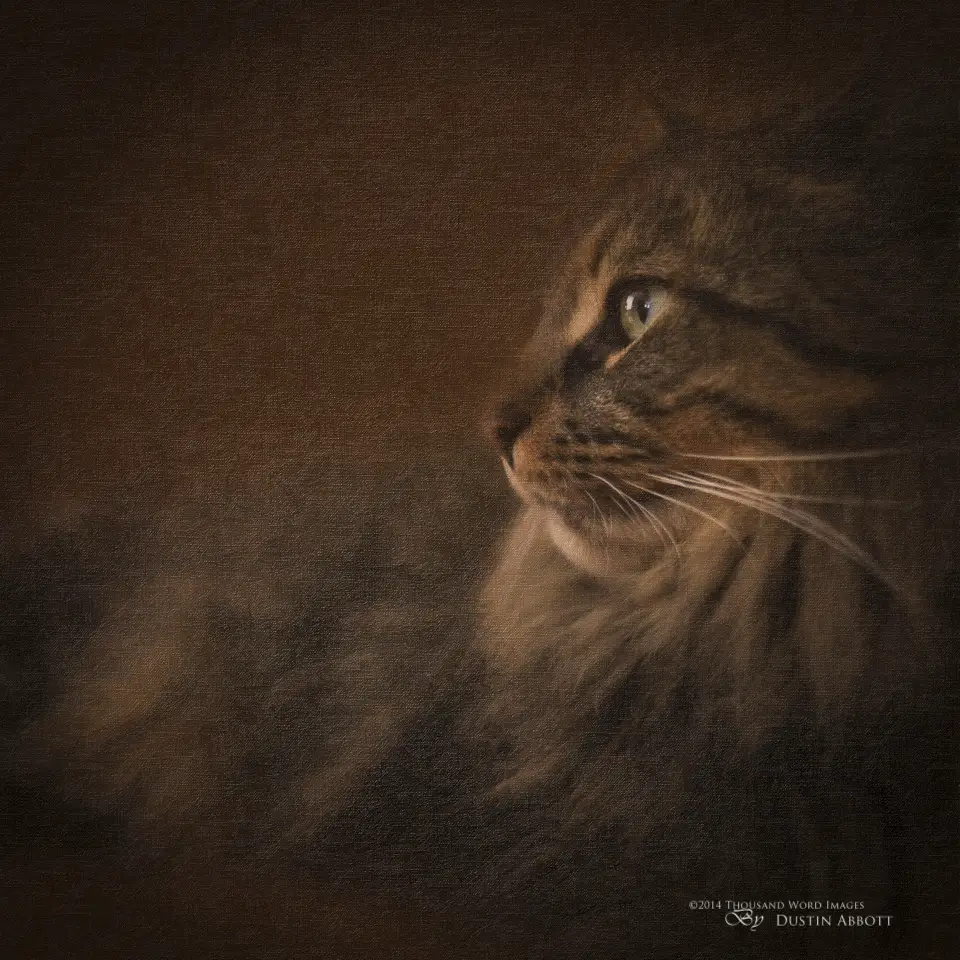
It’s nice, however, to be able to enable a portrait-oriented workspace if you are editing portraits for example.  I did the portrait edit below in about one minute:

A couple of the filters that I’m really fond of are the new Sky AI filter, which allows you to really make your skies stand out in your images with an easy to use slider.  You could achieve the same thing in Lightroom, but it would involve tweaking the highlights, removing luminosity in the correct color channels, and probably adding some white back in.  The screenshot below also shows a great tool that you can slide back and forth to see the original image along with your changes.  You can make the sky as vivid or natural as you like within a few seconds.

Here’s the before and after fully rendered:

Other similar AI tools I really like include a Foliage Enhancer, Golden Hour slider, and the Accent AI filter.  With about 20 seconds-worth of adjusting the sliders I could go from the original image to the vastly improved edited version.  Also interesting is the ability to apply LUTS (Look Up Tables), which would allow you to quickly create a common “look” across images.

The amount of controls is impressive, and it includes standard features like Lens Corrections, Transform tools, and advanced Crop options while also mixing in some Photoshop-like tools like Clone and Stamp, Free Transform, and the ability to create layers and blend them in a variety of ways.  It’s not nearly as robust as Photoshop, obviously, but it probably does enough for 90% of users.  

Like Photoshop, it currently does not have a Library-type component of cataloging, editing metadata, etc… (Photoshop utilized Bridge for that). There is an upcoming Luminar with Libraries version coming in December that will probably add more of that Lightroom-type functionality, and the good news is that if you buy the current version you get a free update to the newer version then.

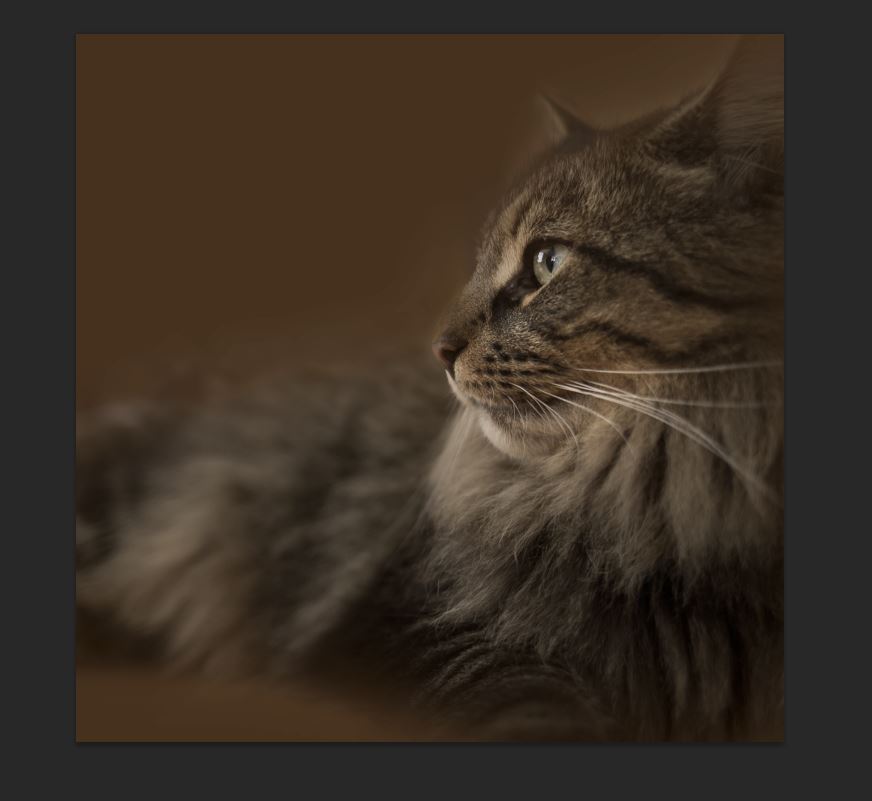
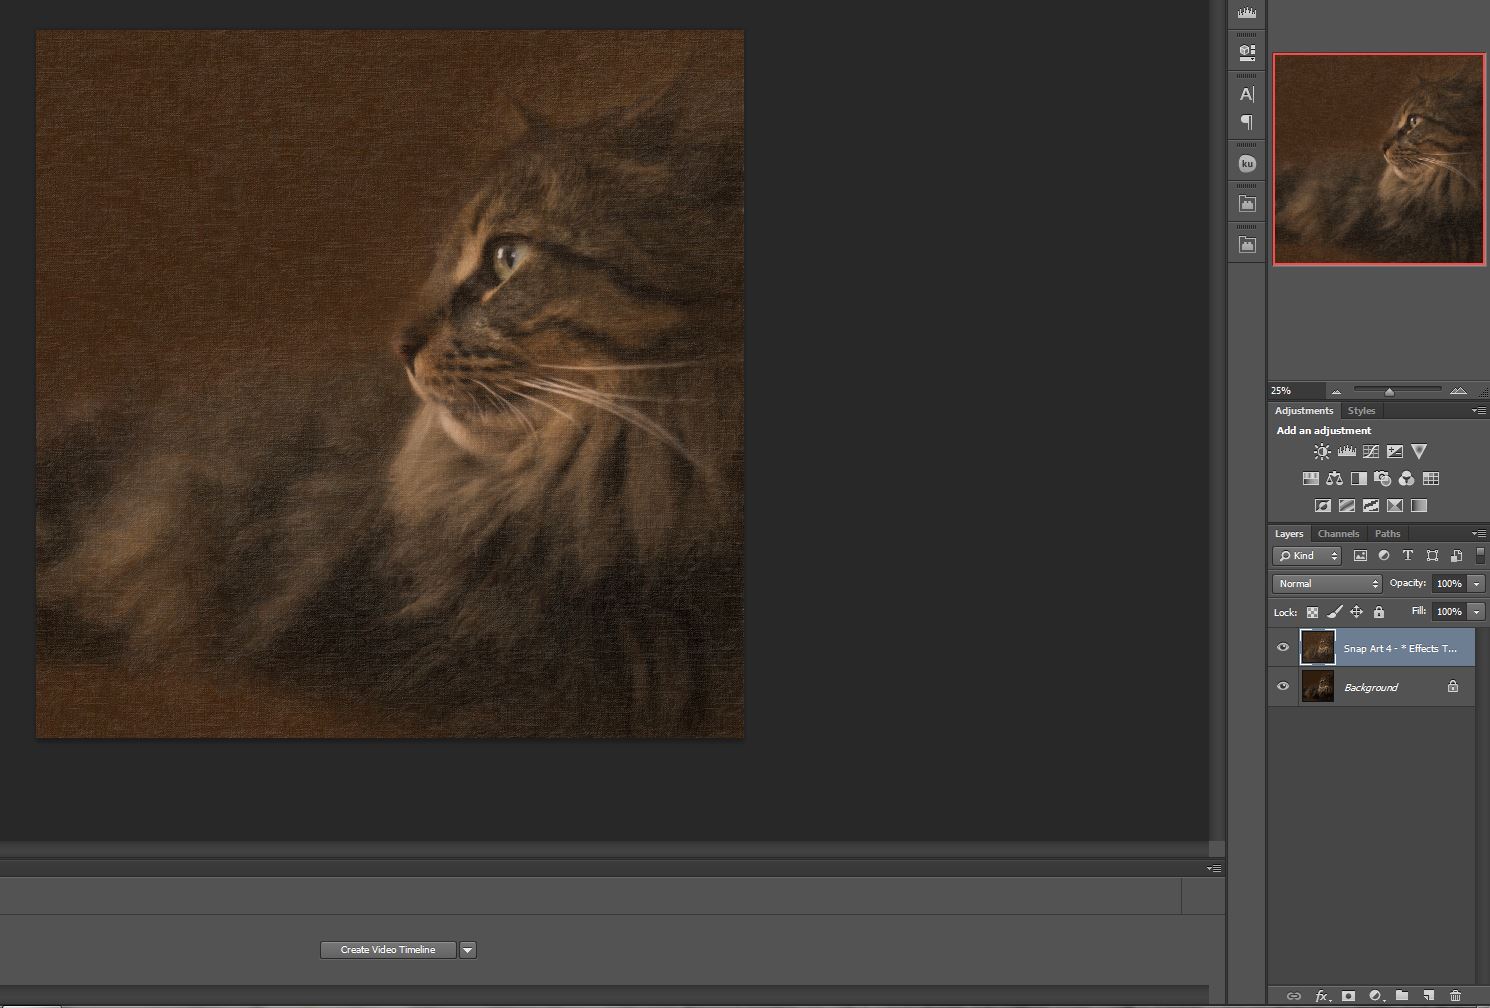
It is worth also noting that you can run Luminar as a Plug-In from Lightroom and Photoshop, too, which allows you to use it more as an external editor and thus use it to augment these programs rather then replace them, too.  This can be useful for doing something like adding an “Orton Effect”, but with a slider to easily control intensity.  Here’s an image where I added a bit of an Orton effect to soften things around the edges.

As for what I don’t like:  I personally miss the catalog/library component that makes Lightroom my starting point for all of my editing and organizing work.  I also find that the Luminar runs just a little slower than what Lightroom does for me.  There are moments when making certain changes that it needs a couple of seconds to render.  It behaves a little more like Photoshop in both opening and exporting images in the amount of time taken, but that is in part because of the different way that Lightroom functions.

At the end of the day, however, this is a pretty robust piece of software that combines a very easy-to-use interface with the ability to make a massive amount of changes to the look of an image.  I think a lot of photographers will appreciate the ability to easily pick up the software and create what they like, and it is priced very reasonably for the amount of functionality built into it.  All of the photos shown in this review I edited in Luminar in under 3 minutes each. If you are looking for a reasonable alternative to Photoshop/Lightroom, or perhaps an easy-to-use way to add an extra touch to your edits, then Luminar is well worth considering…and remember that using the code DUSTINHDR will knock that price down a little.

Check me out onMy Patreon:  | Google+: | Facebook: | Twitter: | Flickr: | 500px: | Sign Up for My Newsletter :

Use Code “DUSTINHDR” to get $10 off ($15 CDN) Luminar and/or AuroraHDR


Keywords: Luminar 2018, Luminar, Luminar Demonstration, Luminar Tuturial, Luminar 2018 Review, Luminar Review, Coupon Code, Dustin Abbott, Discount, Luminar Discount, Luminar Coupon Code, Sky AI, Sky Enhancer, Luminar with Libraries, Photoshop, Lightroom, Aurora HDR, Skylum

DISCLAIMER: This article and description contains affiliate links, which means that if you click on one of the product links, I’ll receive a small commission. As an Amazon Associate I earn from qualifying purchases.

Skylum AuroraHDR 2019 Review

Dustin Abbott

September 20th, 2018

HDR (High Dynamic Range) typically refers to blending together multiple exposures to either recreate what the eye can see in a particular scene or to produce a more dramatic end result.  There are both practical ways to use this technique along with artistic applications, though the latter can be somewhat polarizing.  The most recent software to help you achieve your HDR vision is from Skylum (formely Macphun) with their AuroraHDR 2019.  This robust software has a fairly easy learning curve (a lot can be done by just choosing from the many, many presets) but produces really stunning results.  Here’s an image I produced in just a few minutes using their presets:

AuroraHDR can be used as both a standalone piece of software or as a plugin for Adobe Lightroom/Photoshop/Elements or Apple Aperture.  You can also use it in conjunction with Luminar, Skylum’s own editing software. Watch this video if you would like to see me demonstrate how to use it both ways:

Those of you who don’t have expensive editing software might be particularly interested in AuroraHDR, as it actually has a lot of very robust editing tools that work with either bracketed images (different EV values) or even with a single image (for tonemapping).  Here’s an example of single image that I tonemapped and edited in AuroraHDR (in just a couple of minutes).  I’ll show you the original image first followed by the edited version:

I find HDR to be a necessary tool for some of my work for various companies when I want to highlight both what is in the room and what is outside.  Typically there is way too much of a variance in exposure value between outside and inside, so HDR is necessary to make it work.  I found that AuroraHDR produced nicely realistic results with a little richer color than alternate approaches with other software.

HDR also works well for city and architecture work, allowing you to both capture the building and a dramatic sky.

AuroraHDR delivers a nice blend of accessibility along with robust, Lightroom-style controls and sliders that will allow more advanced users to tweak to their heart’s content.  Whether you want subtle or more blatant looks, I think you will be able to easily create them in AuroraHDR.

Right now you can preorder the new software at a discounted price, but if you are reading this mini-review at a later date you can use the code DUSTINHDR to get 10% off Skylum products.  I think it is worth a look!

Pre-order AuroraHDR 2019 | | Purchase Luminar 2018: | If outside the preorder period, you can use Coupon Code DUSTINHDR for 10% off either AuroraHDR or Luminar.


Keywords: AuroraHDR, 2019, Aurora HDR 2019, AuroraHDR Review, Aurora HDR 2019 Review, Dustin Abbott, Demonstration, How-To, How to, Lightroom, Photoshop, HDR, High Dynamic Range, Landscapes, Architecture, Coupon Code, Discount

DISCLAIMER: This article and description contains affiliate links, which means that if you click on one of the product links, I’ll receive a small commission. As an Amazon Associate I earn from qualifying purchases.

How to Shoot and Process a Nightscape

Dustin Abbott

April 20th, 2015

34 Starry Skies Thumbnail

There are few people that don’t enjoy the mesmerizing images of the night sky filled with stars over a beautiful foreground scene.  It was a friend of mine, Royce Bair, who popularized the term “nightscape” for these type of images.  Some of my own nightscape images have numbered amongst my most popular images that I’ve shared.  Almost everyone likes these images, but fewer know how to shoot them.  It’s actually not as complicated as you might think, and in this short article that I am sharing in conjunction with my friends over at Alien Skin software I hope to demystify the process.

What Will I Need?

Here are the essentials:

  • A camera with good ISO performance.  This usually means either a DSLR or quality mirrorless equivalent.  Typically a full frame sensor will give the best results because of its superior light gathering ability.  I prefer the Canon EOS 6D for this type of work.
  • A good lens with (preferably) a large aperture and low coma.  Coma describes the distortion of distant points of light, particularly along the edge of the image circle.  Coma will make points of light (like stars) looking like flying ducks or flying saucers.  Not good!  My new favorite lens for this kind of work is the Tamron 15-30 f/2.8 VC (read my review here), and I also recommend the Samyang/Rokinon 14mm f/2.8 as a budget option (you can read that review here).
  • A good, steady tripod, particularly one that will allow you to adjust the camera up (towards the sky) even in portrait mode.  I chose the The Vanguard ABEO Pro 283AT with the Vanguard GH-300T Pistol Grip Ball Head (you can read my review in PhotoNews).

What you don’t need is a cable or remote release, for the simple reason that the optimum exposure is about 15-20 seconds.  Longer exposures (those 30 second or longer) will begin to show movement in the stars (star trails are a different kind of shot).  I also recommend having a good headlamp or flashlight for some light painting (and to help you see in the dark!)  There are also helpful apps like SkyLive that help you plan which nights are going to be your best bets for getting good results.

Shooting Tips

I Shoot the Stars

As cool as shooting the stars is, a good photographer knows that he/she will need a good foreground/background subject to anchor the night sky into reality.  Mountains are always good, along with rock formations, abandoned structures, a weathered tree, etc…  The area I live in is short on mountains, but has a number of old farmhouses that in the process of falling apart, and they work well for my purposes.  Here is a gallery of nightscapes that I have previously shared to give you an idea of what I am talking about.

I have found that a headlamp is more helpful than a flashlight during the setup stage simply because holding a flashlight leaves you with only one free hand.  The image above is a selfie I took with a single exposure – it shows a secondary nice purpose for using a headlamp.  I find that a typical camera setup will be:

  • ISO 1600-3200
  • Shutter Speed 15-20 seconds
  • 2 Second Timer mode
  • Aperture value f/2.8

It’s a good idea to find out where infinity focus is on your lens in advance, as you can’t always trust the hard stop (where you physically turn the focus ring to its maximum position).  During the daytime autofocus on the clouds and then look at the distance scale.  This should give you a pretty good idea of where true infinity focus is for your lens.  You can also choose a very bright star at night and use Live View 10x magnification and make sure that the point of light becomes small and hard rather than large and soft (out of focus).  I will typically then turn off autofocus on the lens to make sure that the camera doesn’t try to acquire focus after that and ruin your hard work.

If you have a foreground subject, it might be a good idea to shine your light on it and make sure that your composition is decent.  It can be hard to determine this in the dark as the camera probably won’t be able to truly simulate that extreme an exposure time.  Illuminating your foreground will give you some feedback on the LCD of your camera.  Take a test shot with those settings, and then review your result.  Sometimes ambient light provides all the light you need on your foreground, but if you need more, simply start a new exposure and then play your light over the foreground subject for a count of 3-4 seconds and then quickly get it off the subject.  Too much light will cause white outs, and you will be surprised by how little light is needed to make a big difference.  Larger foreground subjects may require a more elaborate lighting setup, but we will keep it simple here for our purposes.  Some trial and error will help you get a sense for your own unique setting.

Processing Nightscape Images

Once you have acquired your images, a few simple processing steps will make a big difference.  I’ve put together a little video processing tutorial that I will share with you that will help you get the most out of your nightscape images.  Here is the before photo that we will start with (I shot this with the Tamron 15-30 VC I mentioned above).

33 Starry Skies Original


Here is the final image when the processing steps in the video have been applied.  You can see how that the finished image has more visual punch both in the foreground and in the night sky.  I should note that this photo was shot in less than ideal conditions.  The SkyLive app I mentioned above gives you a rating based on the conditions of where you are shooting, and this night only received a 63% rating, so you can image how much brighter the stars would be on a good night.

33 Starry Skies Finished

I hope this little combination of photography and processing tips can help you to go out and make some amazing nightscape images of your own.  There are few types of photography that are more rewarding, and getting images like this are easier than what you might think!

Gear Used:

Canon EOS 6D DSLR Camera (Body Only)
Tamron SP 15-30mm f/2.8 Di VC USD Lens (Canon EF)
Adobe Photoshop Lightroom 5 Software for Mac and Windows (Boxed Version)
Adobe Photoshop Creative Cloud 1-Year Subscription
Alien Skin Exposure 7 (Use code “dustinabbott” to get 10% off)

Purchasing your gear through B&H and these links helps fund this website and keeps the articles coming. Thank you for your support.

B&H Logo

Great News! I can now offer a 5% discount on all purchases at Amplis Foto, Canada’s Leading Photographic Supplier. Please enter discount code: AMPLIS52014 in your cart. It is good for everything in your cart, and is stackable with other coupons, too! It will take 5% off your entire order! Proceeds go towards keeping this site going and providing you with new reviews!

DISCLAIMER: This article and description contains affiliate links, which means that if you click on one of the product links, I’ll receive a small commission. As an Amazon Associate I earn from qualifying purchases.

Horse Portrait Workflow Tutorial

Dustin Abbott

February 15th, 2015

One of the key challenges for the modern photographer is finding a way to distinguish their work from the homogeny of a million and one other photographers around them that are doing pretty much the same thing. I do believe that ultimately the old fashioned ingredients of talent and an eye for seeing the world in a unique and creative way are one’s greatest assets in making their work stand out (that, and being motivated enough to go the extra mile of getting out of bed early or investing a little more thought into planning and execution). But like it or not, it isn’t enough to be just a good photographer these days. You also need to have some post-processing skills. I’m a gear guy, and as a professional lens reviewer I am fortunate enough that I am able to use gear worth tens of thousands of dollars every year that doesn’t belong to me. Few people have that kind of opportunity, however, but here’s the good news: if you learn how to do a great job with post processing you can still produce stunning work that stands out even if your gear isn’t top drawer.

In this video workflow tutorial we are going to examine how we can take a relatively simple photo of a horse with a nearly high key background due to the snow beyond and turn it into what looks like a formal oil painting using a combination of Alien Skin Exposure and Snap Art. These are both amazing pieces of software for giving your photos that extra bit of magic that help to set them apart from the crowd.

In this workflow tutorial we will go from the original shot here:

11 Horse Portrait Original Ratio

To this “Formal” traditional portrait…all in about ten minutes.

12 Horse Portrait Final Original Ratio

Imagine the potential of this workflow for your portrait work! One final point for consideration: backdrops are expensive and not particularly easy to transport. The use of textures and Snap Art in your post processing can both save you money and a lot of effort when shooting on location.  Best of all, using the code “dustinabbott” will get you 10% off all Alien Skin products in their store.  Check out this video tutorial to see the magic happen.


Gear Used:

Canon EOS 6D DSLR Camera (Body Only)
Canon EF 100-400mm f/4.5-5.6L IS II USM Lens
Adobe Photoshop Lightroom 5 Software for Mac and Windows (Boxed Version)
Adobe Photoshop Creative Cloud 1-Year Subscription
Alien Skin Exposure 7 and Snap Art 4 (Use code “dustinabbott” to get 10% off)

Purchasing your gear through B&H and these links helps fund this website and keeps the articles coming. Thank you for your support.

B&H Logo

Great News! I can now offer a 5% discount on all purchases at Amplis Foto, Canada’s Leading Photographic Supplier. Please enter discount code: AMPLIS52014 in your cart. It is good for everything in your cart, and is stackable with other coupons, too! It will take 5% off your entire order! Proceeds go towards keeping this site going and providing you with new reviews!

DISCLAIMER: This article and description contains affiliate links, which means that if you click on one of the product links, I’ll receive a small commission. As an Amazon Associate I earn from qualifying purchases.

Creating a “Look” in Exposure

Dustin Abbott

September 17th, 2014

Sea of GrassIn this second part of the video tutorial on processing workflow, we will take the file that we created in our exposure blending tutorial into Alien Skin Exposure 6 to create a unique, high contrast “infrared” monochrome image that has a lot of visual “pop”!  In the spirit of the former tutorial, this video strives to demonstrate how you can easily (and quickly) customize an image and achieve your artistic vision. You can check out more over at Alien Skin’s blog. Use promo code “dustinabbott” to get 10% off any Alien Skin product.

Gear Used:

Canon EOS 6D DSLR Camera (Body Only)
Canon EF 16-35mm f/4L IS USM Lens
Adobe Photoshop Lightroom 5 Software for Mac and Windows (Boxed Version)
Adobe Photoshop Creative Cloud 1-Year Subscription
Alien Skin Exposure 6

Purchasing your gear through B&H and these links helps fund this website and keeps the articles coming. Thank you for your support.

B&H Logo

Great News! I can now offer a 5% discount on all purchases at Amplis Foto, Canada’s Leading Photographic Supplier. Please enter discount code: AMPLIS52014 in your cart. It is good for everything in your cart, and is stackable with other coupons, too! It will take 5% off your entire order! Proceeds go towards keeping this site going and providing you with new reviews!

DISCLAIMER: This article and description contains affiliate links, which means that if you click on one of the product links, I’ll receive a small commission. As an Amazon Associate I earn from qualifying purchases.

Why I Switched to HDR Pro for Natural Exposure Blending

Dustin Abbott

September 8th, 2014

Natural HDRHDR (High Dynamic Range) photography is a very polarizing photography topic…with good reason. When abused, HDR produces cartoonish images that are, frankly, appalling to photography purists. But a lot of the top landscape photographers have embraced the concept of exposure blending (using multiple exposures) to recreate what the human eye can see in any given situation. Here is a quick video tutorial of why I have switched to using Photoshop’s HDR Pro to achieve quick, natural exposure blending without halos or artifacts.  The great news is that photographers can get both Lightroom and Photoshop at a great price through the Creative Cloud Photography membership.

Gear Used:

Canon EOS 6D DSLR Camera (Body Only)
Canon EF 16-35mm f/4L IS USM Lens
Adobe Photoshop Lightroom 5 Software for Mac and Windows (Boxed Version)
Adobe Photoshop Creative Cloud 1-Year Subscription
Alien Skin Exposure 6

Purchasing your gear through B&H and these links helps fund this website and keeps the articles coming. Thank you for your support.

B&H Logo

Great News! I can now offer a 5% discount on all purchases at Amplis Foto, Canada’s Leading Photographic Supplier. Please enter discount code: AMPLIS52014 in your cart. It is good for everything in your cart, and is stackable with other coupons, too! It will take 5% off your entire order! Proceeds go towards keeping this site going and providing you with new reviews!

DISCLAIMER: This article and description contains affiliate links, which means that if you click on one of the product links, I’ll receive a small commission. As an Amazon Associate I earn from qualifying purchases.

Snap Art 4 Tuturial

Dustin Abbott

January 6th, 2014

“Fabulous Feline”:

In today’s tutorial I want to demonstrate how that you can take an ordinary “snapshot” style photo and turn it into a handsome piece of art through the use of Alien Skin Snap Art 4.  Best of all, I am including a coupon code for a discount copy of the software at the end of the tutorial!  We are going to start with this:

 004 King Original

…and end up with this:

 Fabulous Feline

So let’s get to work.  I will start with Lightroom, but you can imitate many of these steps in either a full version of Photoshop or even Elements.  The original shot, as you can see, has a quite a few flaws.  The horizon is off, there are some busy background elements, and the bright white of the baseboard tends to draw the eye.  But the pose is strong, as is the focus.  I knew this photo had potential.  My work in Lightroom was focused on improving the technical merits of the photo.  I leveled the horizon.  I changed the ratio to a square crop and tightened it in to both remove the white baseboard and get us closer to the fine detail on the cat’s face.  I added some exposure to the cat’s face along with some localized sharpness.  I then decreased the vibrance and saturation, while increasing the temperature to create a warmer photo.  The final stage in Lightroom was to add some vignetting.  Here is a snapshot of all the changes I made in Lightroom:

 004 King Lightroom History

Here is how those visual changes look:

 005 King LR Edit

One of the key things I want to highlight here is the power of a good crop.  I find this is particularly important when using a wider angle lens (this was shot with a 35mm lens).  Wide angle produces certain unflattering distortions, but a good crop can minimize or even remove distracting or unflattering elements and create a much more pleasing result.  The crop removed distracting elements and allows the strengths of the photo to shine.  But there are still a lot of distractions here.  Into Photoshop we go.

I personally use the most recent version of Photoshop (CC), but for this project I am using tools that have been around for most all versions of Photoshop and Elements.  What I want to accomplish in Photoshop is to exchange the busy background elements for a solid, complimentary color.  There are several ways of going about this.  I am going to highlight a simple one: create a fresh layer with the appropriate color, add a mask, and then paint away the portion of the image (the cat) that we want left untouched.  Let’s see what kind of result this produces.

I created a blank layer by clicking the icon that looks like a page (you can also use the keyboard shortcut SHIFT+CONTROL+N).

05 Color Layer

I then clicked on the color selector on the left.  That brings up the Color Picker tool.  If you hover your cursor over the image, however, you will see what looks like an eyedropper tool appear.  My goal is create a complimentary color, so I choose a dark brown portion of the cat’s face. 

07 Color Selector

Once I have my color chosen, I click OK and then go over to the toolbar and select the Paint Bucket tool.  Going back to my image (on the blank layer) I click once, and the image becomes a solid brown color.  Don’t panic!  We are now going to remove some of that paint to expose the cat.  Hard to do, though, when I can’t see the image!  So I will now do two things.  First, I am going to add a layer mask, and second, I will reduce the opacity of my color layer enough that I can see where I want to paint away the color layer.

08 Mask

09 Paint

I will then select my paint brush tool and black color (black = remove on a layer mask).  I have my brush settings at 0% Hardness, Opacity at 45%, and Flow at 43%.  I will reduce those even more as I get close the edges.  I am now going to paint away the brown color from the cat by painting on the mask (make sure it is highlighted in your layers palette on the right).  I prefer to go over areas several times and gradually, I will start to paint away the brown color.  The nice thing here is that because of the soft nature of the edges of this image (and what I want to do through Snap Art), I don’t have to be incredibly precise. Leaving just a slight tint of the color isn’t a bad thing as it will help blend the whole image together.

10 First Paint Results

Everything looks pretty good here until I raise the opacity of the paint layer back up.  Then I see there has been some overlap.  The area outside the fur looks unnaturally light compared with the rest of the background.  But this isn’t really a problem, because now we can do the fine work.  The great thing about using layer masks is that all I have to do is change the color the brush from black to white (white = add on a layer mask), decrease my brush size, and I can paint the brown back in!  I will also decrease my Flow on my brush so that I can feather in the results a little more.  It’s a wise idea to also zoom in and work on a finer level.  If it looks decent up close, it will probably look great at normal viewing sizes.  A great tip here is that hitting the letter “X” on the keyboard will switch the color from black to white so that you can make quick adjustments on the fly.  A couple of minutes of fine tuning produces a cleaner result that looks like this:

11 Final Paint Results

Great!  Now we have a less distracting, more focused image.  It isn’t perfect, but doesn’t have to be for what we are going to do.  For those familiar with Photoshop, a similar result could be obtained by using the Quick Selection or Polygonal Lasso tool and then refining the edge before painting.  Those will often produce a more precise result.  But our goal here is not so much about precision but rather a soft transition. Before I go into Snap Art, I will merge the two layers by right-clicking on one the layers and selecting Merge Layers.  

But here is where things get really good.  I am now going to take this image into Snap Art.  If you have found this tutorial a little overwhelming so far (and Photoshop is very overwhelming to the newcomer!), things are about to get much easier!  There are a couple of different ways to launch Snap Art, but I typically will select Filter > Alien Skin > Snap Art 4.  The new user interface in Snap Art 4 is a real dream to use because it renders the effects real time.  You can SEE what you are doing, while in Photoshop you often have to be able to predict the outcome of certain processes through familiarity.  When you arrive in Snap Art, you are greeted with renderings of how your photo will look using the various styles on the left, and then a huge range of ways to tweak that preset to your own style on the right.  (P.S. I took this screenshot after the process was already done, so what you see here is a “doubling up” on our actual image and the effect is a little heavy.  I wanted you to be able to see the user interface, though.)

16 Snap Art

I am most fond of the “Oil Paint” look, and it suits my purpose of creating a “formal portrait”.  I start with the Oil Paint preset and begin to make tweaks by just sliding the settings sliders on the right until I get what I want.  Here’s what my final results are in the basic settings (click any of them for a larger view):

You can also download these settings as a preset called “Fabulous Feline” here: Fabulous Feline Preset

But it gets better!  One of the most powerful aspects of Snap Art 4 is the ability to do masked areas very simply right in the program.  So, for example, I want the face of the cat to remain sharply defined, so I will paint more realism and definition into that area.  Here are my settings and the result:

14 Mask Settings

13 Masked Detail

I could add new masks for any other kind of tweaks I want to make, including making that boring brown area a little more abstract and textured.  It only takes a few seconds.  The best thing is that each one of these changes can be seen as you go. You don’t like it?  No problem, just undo it (Keyboard shortcut:  Control + Z).  When satisfied with all of my tweaks, I click “Apply”.

Here’s what I have now produced:

15 After Snap Art

My final step is that I added a layer mask to the Snap Art level and painted (very lightly) just a bit on the face of the cat.  I don’t want the texture of the canvas to detract from the fine detail there.  It’s subtle, but the details is what sets your work apart.  Now satisfied, I click “save” and bring the image back into Lightroom.  I add a bit of a vignette to focus the eye, and, voila!  We have gone from a snapshot to what looks like a formal portrait done by a skilled painter.  The distracting elements are gone, and the finished product is something a client/owner would probably be thrilled to hang on their wall.  Here’s the final product (click the image to view it larger):

Fabulous Feline

The key here is Snap Art’s easy ability to transform the boring color that I added in Photoshop into a rich texture with nuance and character.  The same has happened to the out of focus area of the cat’s fur.  We started with something simple and created art.  Now, the nature of a tutorial makes it seem like a long process, but when I was doing this shot, I invested no more than about 12 minutes into it.  12 minutes! But what a difference!

An investment into Snap Art could really set your portraiture work apart from the crowd.  What if I had started by shooting on a backdrop and didn’t have to eliminate the clutter of a snapshot?  I could turn a more technically perfect portrait into something very special in just a couple of minutes.  One of the great challenges in today’s competitive market is creating something more unique.  Here is a quick and easy way to add that unique quality to your portraiture.

If you are interested in giving Snap Art a try, there is a free 15 day trial available.  You can access the Alien Skin store here, and I have a special discount coupon for you as a part of this tutorial.  Just enter dustinabbott at checkout and receive 10% off anything in the store.  Happy processing!

[contact-form][contact-field label=’Name’ type=’name’ required=’1’/][contact-field label=’Email’ type=’email’ required=’1’/][contact-field label=’Website’ type=’url’/][contact-field label=’Comment’ type=’textarea’ required=’1’/][/contact-form]

DISCLAIMER: This article and description contains affiliate links, which means that if you click on one of the product links, I’ll receive a small commission. As an Amazon Associate I earn from qualifying purchases.