How wide can you go? 
I am a Canon shooter. I don’t see that changing any time soon. Canon is renowned for its range of telephoto lenses that are considered to be the best. Period. The truth of the matter is that Canon has been on a roll with many of its recent lens releases, starting back with the 70-300L, the new 24-70mm f/2.8L II, the amazing 200-400mm f/4L IS + 1.4x, refreshes on several of the other super-teles (300mm f/2.8L II and 400mm f/2.8L II), and even a series of non-L primes that have been very well reviewed (24mm f/2.8 IS, 28mm f/2.8 IS, 35mm f/2 IS, and 40mm f/2.8 Pancake). Great, right? It is, until you get to the other end of the equation – the wide angle…errr…angle. This has become perhaps the greatest challenge for Canon shooters, because frankly all of the options come with certain liabilities. My personal experience is that I have owned the Canon EF-S 10-22mm, a Tokina 12-24mm f/4 (both while shooting crop sensor bodies) and (currently) the EF 17-40L. All of these are good lenses, by the way, but none blew my mind. Another favorite is the Canon EF 16-35mm f/2.8L II, but despite its lofty price tag it has its own optical limitations.
Other current options are some 3rd party zooms from Tamron, Sigma, and Tokina, but none of them are considered superior to the options I’ve already presented. That leads us to prime lenses, of which there are some excellent options, including some Zeiss lenses, the Canon tilt-shift lenses (a bit more specialized), and Canon’s own 14mm f/2.8L II. If you can afford these, there are some great choices there, but most of these lenses start near the $2000 mark. None of that is a problem if you are a professional landscape photographer or have a lot of paying architectural work (or, I guess, are just rich!), but for many people the high asking price of these lenses effectively removes them from the equation. The vast majority of photographers simply don’t shoot extreme wide angle enough to prioritize that type of lens in their spending budget. And, as I wrote in this opinion piece for PhotoNewsFlash, an UWA (Ultra Wide Angle) lens is almost never going to be someone’s sole or even primary lens.
For these reasons and others, one of the most compelling options that I have come across in the arena of UWA’s is the Rokinon 14mm f/2.8 Aspherical. It has an extremely low price for its optical quality, and 14mm on a full frame body is EXTREMELY wide. The field of view on a full frame body is a whopping 114°. To give you a point of comparison, here is the difference between my 24mm Tamron (84°) 17mm Canon (104°) and the Rokinon at 14mm (114°). The difference even between 14mm and 17mm is stunning. I set up the tripod at a distance where the 24mm Tamron barely covered the bench. Look at how different the angle of view is with each successive shot:
-

-
Tamron 24-70 VC@ 24mm
-

-
Canon 17-40L @ 17mm
-

-
Rokinon 14mm @ 14mm
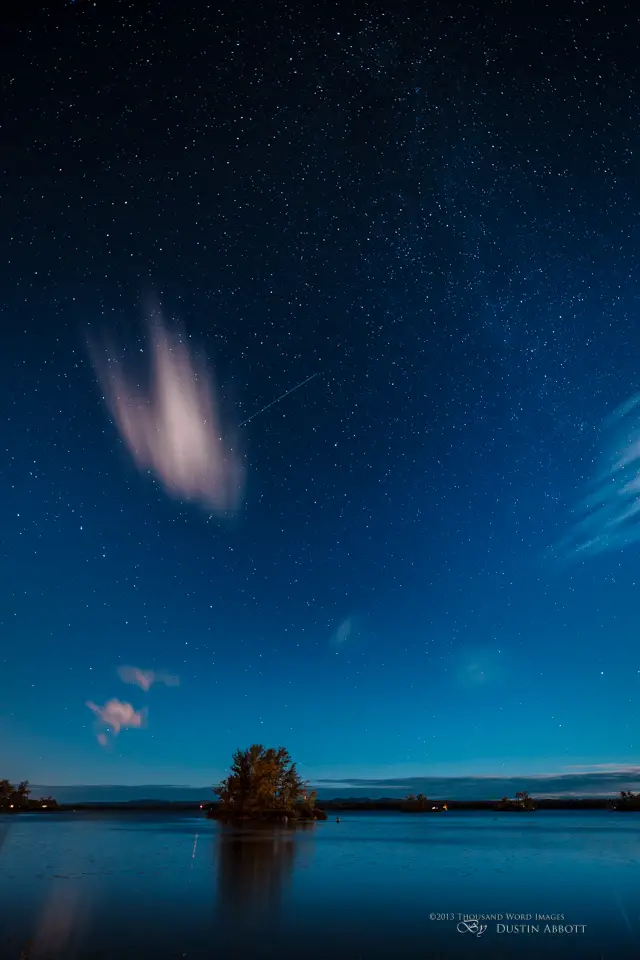
I recently shared this nightscape that I took with the Rokinon featured below, and one of the common questions I got was, “How many frames is this shot?” The assumption was that I HAD to have taken multiple frames and stitched them together into a vertorama to get this much information in the frame. When I responded that this was a single frame taken with the Rokinon, the immediate response was, “That is my next lens purchase.” Yep, if you want go to wide, really wide, I think this Rokinon may just be your best choice, but it is not for everyone. In this review I will do my best to be very frank about both the strengths and liabilities of this unique lens.
By the Numbers
First, let’s take a quick look at the basic design of the lens. I am reviewing a Rokinon branded lens, technically called the Rokinon 14mm f/2.8 ED AS IF UMC Super Wide Angle. I say Rokinon branded because the exact same lens is sold under a variety of brands, including Samyang, Bower, Vivitar, Pro Optic, Walimex…yeah, there’s a few! The parent company here is Samyang, based in Korea, and in the past 10 years this company has put some serious pressure on several established lenses because of the combination of great optics and low price…with certain caveats. We will address these more as we go, but you should know before we proceed that Samyang/Rokinon lenses to this point are always manual focus only lenses. In fact, this lens has no electronics in it, not even to control aperture or to convey any kind of information to the camera. Your camera will display a “f/00” where it typically shows aperture, and all focus and control of the aperture/iris are done manually. That may be a deal breaker for you right there, but if you read on you may discover it is less of an issue than you think. This is, of course, part of the reason why Rokinon has been able to undercut its competitors on price so much.
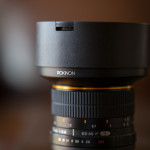
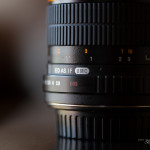
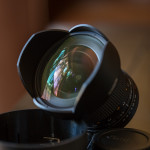
The lens construction itself is anything but cheap. The design, by nature, is probably dissimilar from any other lens in your bag. The barrel of the lens is actually quite slim (approximately the circumference of the EF 50mm f/1.8), but it swells out to accommodate the large, bulbous front element. Its lens cap, for example, is almost identical in circumference to my Tamron 24-70 VC lens which has an 82mm filter size. The lens is still relatively compact overall, but when you pick it up you will probably be surprised by its heft. It has a density that belies its dimensions due to a very sturdy construction of metal and higher end plastics. It weighs in at 552 grams, which places it between the 17-40L (475 grams) and the 16-35L II (640 grams). It comes in about a tenth of an inch shorter than the 17-40L. Its overall dimensions compare quite closely with the Canon 14mm f/2.8L II, although it is roughly 100 grams lighter. It feels substantial and far from “budget”. The finish has a light “flecked” design and the focus ring is nicely wide and the rubber feels like quality. It is nicely damped overall, although my copy has a point about midway through that has a bit of extra resistance. I have not heard others report a similar issue. The aperture ring appears to be plastic, but moves well and has nice, definite clicks for each aperture position. Only full stops are shown on the scale (from f/2.8 to f/22) but there are also clicks for half stops on the aperture ring. I have no reservations at all about the build quality of the lens; I feel like it will serve well for a long period of time. There is a distance scale between the focus and aperture rings.
-
-
The Rokinon
-
-
Many letter designations, but solid build quality under it all.
-
-
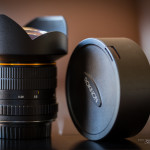
The lens cap is, well, huge!
-
-
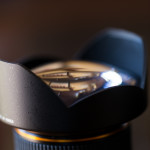
Bulbous front element.
-
-
Nicely rubberized focus ring.
-
-
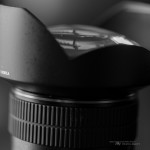
Metal hood is permanent.
Another aspect of the lens’ design must be discussed, and that is the bulbous front element. It is curved, meaning that the first principle drawback of the lens is exposed: it cannot take filters in a conventional way, and, in fact, any system of filters for a lens design like this will be an expensive workaround solution…and probably won’t cost a whole lot less than the lens itself. I tried to just hold one of my square Cokin based filters (Cokin P system) in front of the frame and found that even without a filter holder the filter only covered about 70% of the frame. The lens design has a built in petal shaped hood (made of metal), which is important because it provides the only protection for that protruding front element. You can’t put a UV filter over it like I do with all of my other lenses. The upside to this design is that whatever minor glare blocking that is provided by the hood will actually be of benefit; with each of my other wide angle options I have almost never had the hood with me; they tend to be wide, shallow, and not provide a lot of protection from stray light. I have considered them to be mostly a useless bother and have left the hood home in the box. I don’t know that the hood here actually shades the element any better, but at least it will be around while using the lens. I think my chief concern long term with the lens would be keeping that element protected in the field. It does come with a very deep (1 ½ inch/3.5cm) lens cap that slides over the outer hood assembly and locks in place in basically only one position. The lens cap is effective, but that leads me to another minor frustration for field use: I typically put the lens cap of the lens I am using in a pocket (pants or jacket) in the field, but the depth of this lens cap makes it a bit difficult to store. It is less of an issue if you have a camera bag with you, but it certainly is NOT convenient to store if you don’t have something like that along. A pants’ pocket is out of the question, and even a jacket pocket will be bulging with this puppy in it.
The lens mount is metal and is very sturdily constructed. It does not claim weathersealing, but its very lack of electronics makes me personally less concerned about the effect of weather on it. I have often shot with many of my vintage lenses in all kinds of weather without fear (or adverse effect) because of that very reason. You will have to make your own judgment call on that one, but I don’t intend to allow a lack of weathersealing to affect my use of this lens at all.
I shot for an extended period in persistent rain.
NO Electronics?
Unlike most all other modern lenses, there is no circuit board on the mount providing information to the camera body. I have used legacy lenses on my modern camera bodies quite a bit, and so I am very familiar with the process of manually focusing and manually controlling aperture. If you haven’t shot like this before, let me give you a rundown on how the process goes. First, while there isn’t electronic communication, you don’t have to worry about metering. Your camera will meter fine in all modes (even Auto mode), as it does not rely on a lens to provide that information. You will, however, have to manually set your aperture. This is, by the way, probably one of the best ways to actually learn the purpose of aperture settings. My understanding grew significantly when I began to use manual lenses. On modern lenses with automatic diaphragms you don’t actually see the iris open and close; aperture is just a number. But as you click through the aperture settings on a manual lens you see the correlation between an aperture setting and the opening size of the iris. As you begin to see how this affects shutter speed and depth of field while shooting you will probably learn a few things. One minor issue is that lenses with an automatic aperture control actually always meter with the lens wide open (largest aperture) and then close down when the shutter is clicked. The brightness in your viewfinder is whatever the maximum aperture of the lens is. Because you are stopping down in advance with the Rokinon, the viewfinder will darken slightly with each aperture position. There will be a marked difference between the viewfinder brightness at f/2.8 and f/22, but chances are for most typical aperture settings in the field you will hardly notice this (I certainly don’t). Live View is not effected, because your camera will be metering for the light source already and this will be reflected on the LCD screen. For most applications of this particular lens, however, you could set the aperture on f/5.6 and pretty much forget about it. The lens is incredibly sharp at this aperture and the depth of field is huge.
That last point helps address one of the other principle concerns about the lens – manual focus. For many applications I feel that the best approach is to just to prefocus the lens. Just think about your distance from your subject, and unless you are trying to shoot something up close, setting the focus ring at somewhere right before the 2 meter/7 foot mark means that pretty much everything from a couple of feet out to infinity will be in focus. It is when you are trying to use the lens wide open (f/2.8) and trying to focus on a subject ten feet or less away that focus becomes a challenge. In this sense, the lens is more challenging than any manual focus lens I have used before. Your magnification of your subject is so low that it always feels like you are far away, meaning that it is hard to visually confirm focus through the viewfinder. Live view focusing works much better for this type of shooting because you can increase magnification and fine tune focus.
I personally feel that the best way to use this lens for most applications is to familiarize yourself with its use and then primarily prefocus. Before serious use in the field, I would first put it on a tripod, start Live View on your camera, and starting from minimum focus work your way out and see at what point things come in focus in relation to the distance scale. I say this in part because quite a few users (myself included) have found that infinity focus actually comes sooner than the distance scale indicates. I don’t know that I would always trust the distance scale and its distances in the real world. But if you become familiar with approximately when things come in focus on your copy, it becomes very easy to replicate that in the field. Even after only a couple of weeks of use I have essentially a 100% keeper rate in terms of focus. If my subject is anywhere from five feet out to infinity, I just set the distance scale on my copy roughly just short of the 2 meter marking and never worry about it. Everything will be in focus. If I am using the lens to focus on something closer than that, I use Live View to fine tune focusing.
I really miss not having EXIF data. I often look for/sort images by the lens I took them with or some other piece of data in Lightroom, and there will be nothing to distinguish shots taken with the Rokinon. Shots simply show up as “Unknown Lens”. It will report ISO and shutter speed (both internal to the camera body), but nothing about aperture or focal length.
I should note that there is a version of the Nikon mount (AE) that comes with a focus confirm chip that will light up the selected focus point in the viewfinder when focus is achieved and will also report EXIF information (like the aperture, etc…) Some have reported success adding an inexpensive focus chip off Ebay that accomplishes something similar. They simply superglue the chip onto the mount at the appropriate spot to make contact with the body’s electronic contact points. Whether or not this is worth it will be up to you.
Optical Excellence
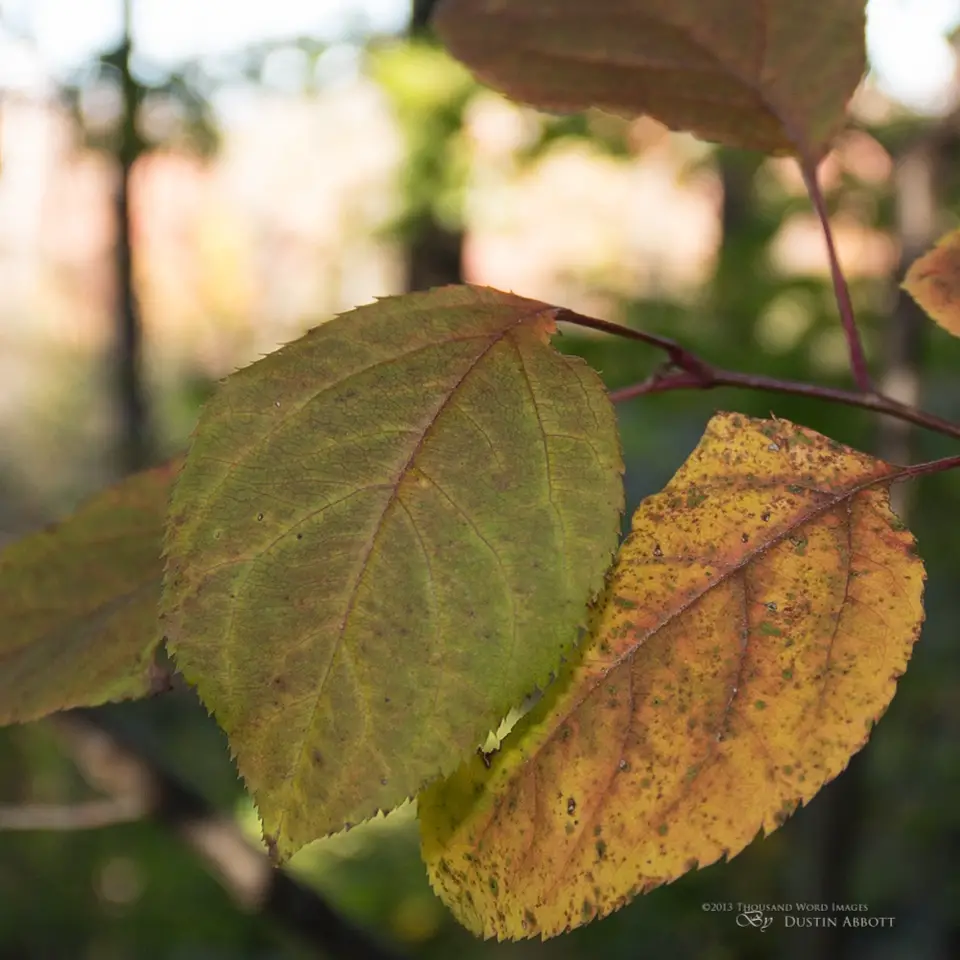
It is here that we get to the good stuff. The review to this point may seem like this lens is more trouble than it is worth, but that is far from being true for me. Rokinon states this lens’ optical design is 14 elements in 12 groups, including 2 Aspherical elements and 2 ED (extra low dispersion glass – to reduce chromatic aberrations.) However they put it together, the end result is AWESOME! This lens resolves more detail than any wide angle that I have seen. I am not a chart tester, but if you are interested I would recommend you compare the Samyang results in resolution to that of the Canon 17-40L and the Canon 16-35L II at Photozone. The Samyang/Rokinon just destroys them, particularly in the corners. And that is the primary reason that many landscape photographers are frustrated with those lenses; they just aren’t all that sharp in the corners, and that is often more important on this type of lens than, say, a wide aperture prime. The lens even displays a higher resolution at equivalent apertures than the Canon 14mm f/2.8 II, a lens that costs $2500 (the Rokinon typically costs less than $400). On a practical, field level, I can tell that it is just amazing to zoom into a huge scene full of detail to a pixel level and find individual leaves in sharp definition. It will leave you wishing that you could share your images in as large a format as possible so people could see all of that goodness.
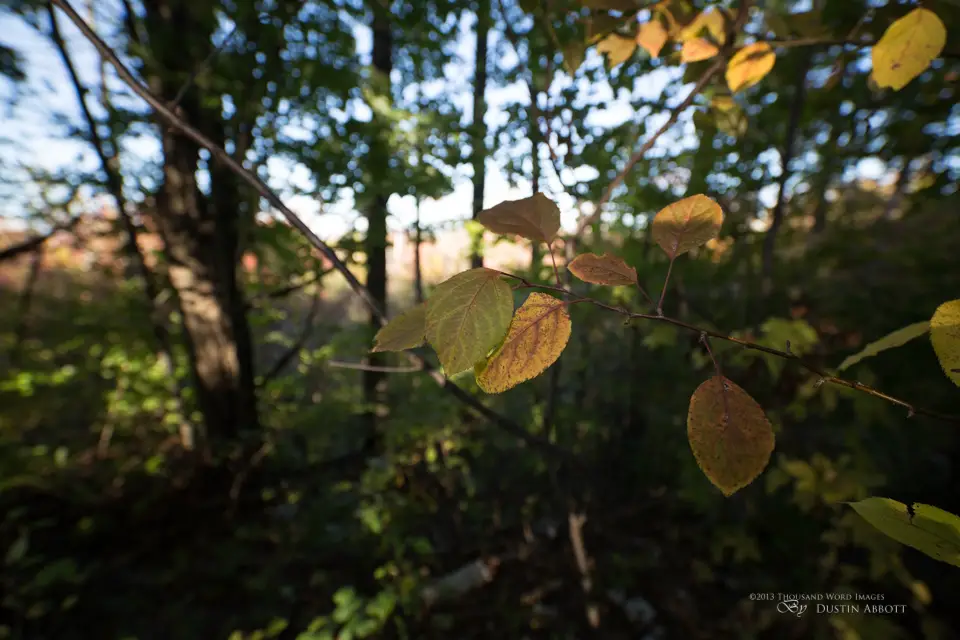
If you look beyond sharpness alone the lens continues to impress. Color rendition is excellent. Natural yet rich, without an oversaturated false look. Microcontrast is also excellent, which further enhances the apparent sharpness of the lens. Images come out looking stunning! I am considered a skilled post processor, and most the images in this review have been processed in some way. That being said, here is an image that is completely untouched to show just how good images can look straight out of camera:
It is also worth noting that a typical shortcoming for a wide angle lens is chromatic aberrations. The lens design also shines here, as chromatic aberrations barely register in chart testing and are simply nonexistent in field use. This is very important considering that this is a lens that will often be used in areas of high contrast. The optical design strongly deserves praise here. This more than 100% crop from a spot high up on the previous image shows both the excellent sharpness and complete lack of chromatic fringing around the branches.
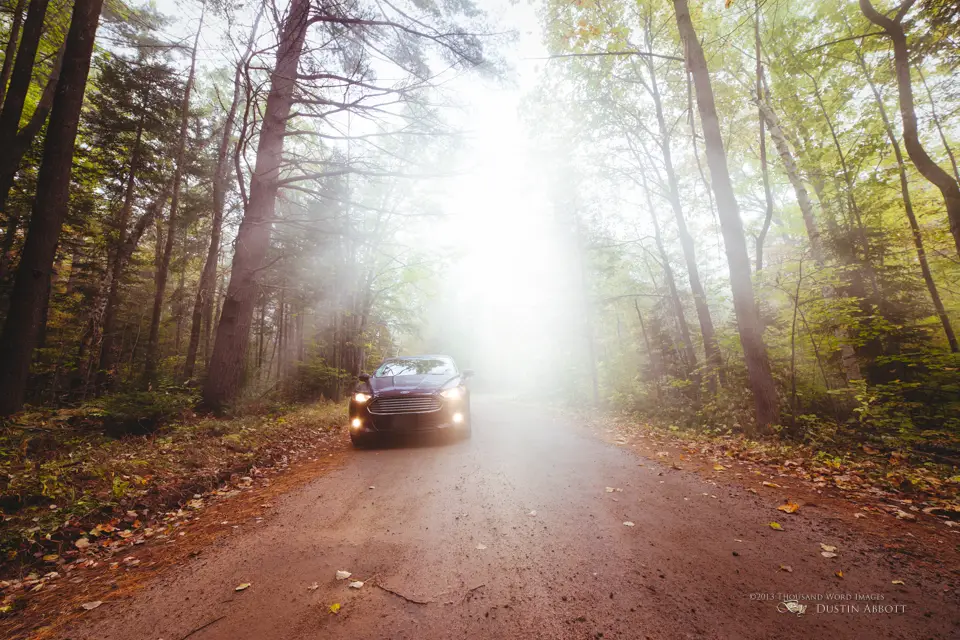
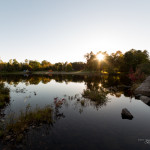
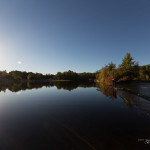
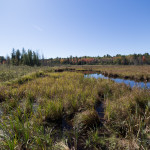
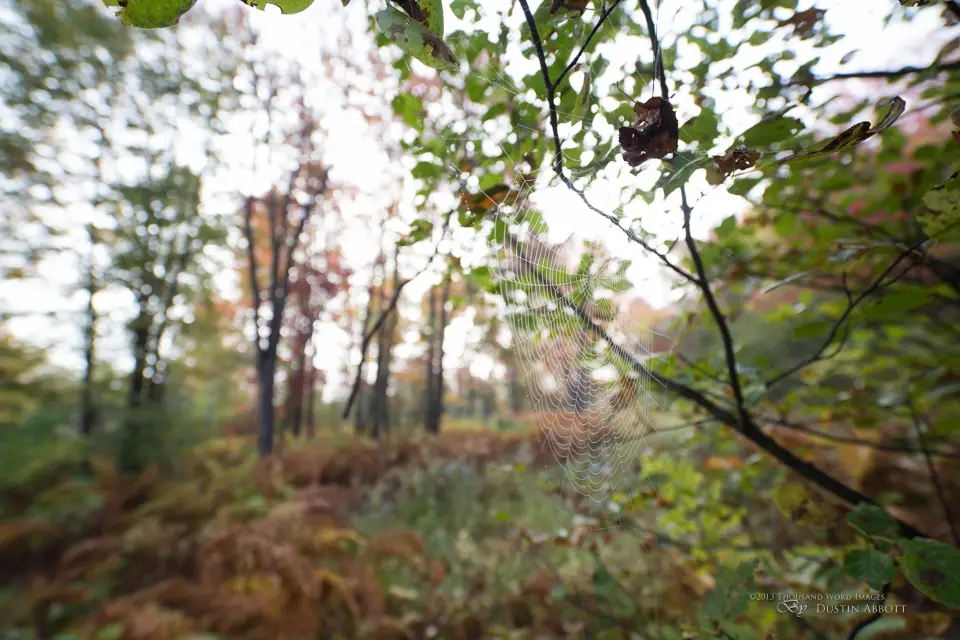
Another area of strength is the lens resistance to flare. I like to shoot into the sun, and some lenses just fair better than others. Some reviewers have complained about the lens’ lack of flare resistance, but I simply haven’t seen this AT ALL. I have found the lens very resistant to flare. I have seen very little ghosting, and contrast holds up very well. In fact, the difference between having the sun in the frame or just outside of it seems to make little difference to contrast, as seen in this series of shots. All of these shots have been left unedited to show the full effect of shooting into the sun at different times of day and in different lighting conditions. In each shot the sun is either in the frame or just outside of it.
-

-
Small ghosting object is the most I have been able to create
-
-
Evening sun – slight veil at the bottom .
-
-
Sun in the frame
-

-
Sun just outside the frame.
-
-
Sun just above the left corner of the frame
-
-
Morning sun
I have purposefully shot into the sun a lot, and have nothing to complain about in this regard. At most I have seen one small ghosting object that so far has been painless to remove in post – far different than my 17-40L. A slight veil can be seen on the bottom left in the second shot of this series. If you move the camera a bit you can completely eliminate this effect (move the effect out of frame), but I like it in some instances for the artistic value.
Distortion and Vignetting
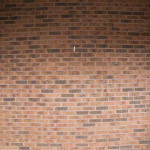
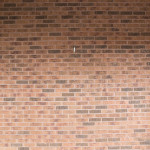
It is here that the reign of terror comes to an end. The Rokinon has its share of distortion – over 5% barrel distortion which means that it has significantly more than the Canon zooms (around 3.5% at their widest focal length) and is nearly three times worse than the Canon 14mm f/2.8 II’s 1.73%. To further complicate things, the distortion is a fairly complex one, commonly referred to as a “mustache style” because of its shape. The means that there are better choices for architecture out there. For many applications, though, a simple preset in Lightroom or Photoshop (I downloaded one through Adobe Lens Profiler) will correct the vast majority of this. Here is what a good ol’ brick wall shot looks like before/after the application of that preset (I have made no other changes). A helpful reader provided a link to a great profile that is labeled for a Nikon D600 but works a treat for full frame Canon cameras too.
-
-
Distortion Example
-
-
With Profile Correction
If you look closely, it still isn’t perfect after applying this profile. There are better ways to correct the distortion, but for most of my applications that is good enough. There are times, of course, that distortion has artistic value. Here are a couple of cases in point.
-

-
Your palace is leaning, O King!
-

-
In the Land of Giants
Vignetting is also fairly heavy, although once again a profile corrects this very easily in post. I haven’t actually noticed this a lot for field use, but I do automatically apply the preset on import into Lightroom so I don’t really see it much. Be aware that it is there, however, particularly wide open. I will shoot this lens most often at f/5.6, and it is no longer really a field issue by that aperture.
If there is a silver lining here, it is that due to the extremely wide field of view it is fairly easy to leave enough room with, say, an architectural type shot, to be able to correct distortion in post. You typically lose some of your edges when correcting distortion, but the angle of view is so wide that this probably won’t present an issue most of the time. I will say that I have not found either of these issues to be a deal breaker with the kind of photography I typically do, but I would not recommend this lens to someone whose primary interest is architectural work. I definitely do not recommend it to someone who wants to shoot interiors for real estate – the loss of time spent correcting distortion would quickly make you wish you had paid for the right tool for the job – a tilt-shift lens.
Close Focus? Kind Of…
The good news is that the lens can focus down to about .9 feet/.28m. Also encouraging is that the lens is nicely sharp at/near minimum focus distance. But let’s not kid ourselves; it would be hard to find a lens less well suited to macro type photography. Its maximum magnification barely registers on the charts. In fact, you will be shocked at how distant your subject still appears in the viewfinder. Rokinon hypes the close focusing ability a bit in their literature (even on the box), but the usefulness of that close of focus is diminished by the very nature of the lens. This shot shows the extremely low magnification of my subject (the center leaves) at that very close focus (less than a foot). The upside is shown in the crop; as always, resolution is great!
Yeah, it’s hard to believe that this is “macro mode”. If you zoom into the image, the detail is great (as seen in the wide open crop below), but the lack of magnification renders this pretty moot. This just isn’t the lens for close focus kind of work.
Bokeh quality is also not much of a priority with this type of lens, but, as you can see from this shot, it actually is fairly decent. There won’t be a tremendous amount of situations where this will be a consideration, though. This just isn’t that kind of lens.
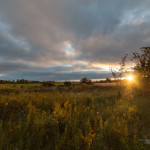
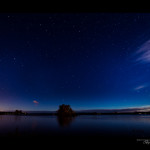
Nightscape King
The Rokinon has one more trick up its sleeve, and for certain photographers, it is a big one. Non photographers look at the word “coma” a little differently than photographers, but even most photographers don’t consider coma very much in their lens purchases. That is unless you like to shoot longer exposures at night. Coma refers to an optical aberration that result in points of light (like stars) becoming irregularly shaped. It can make them look more like flying saucers or even grow tails. It really degrades the look of a nightscape image, and those that are serious about shooting these types of scenes are very picky about this. It is for this reason above all that many very serious/professional photographers have chosen to add this lens to their kit. This is an issue even for Canon’s 14mm, and so many have chosen the Samyang/Rokinon over it. The combination of a huge angle of view, amazing sharpness, and extremely low coma makes this lens one of the most compelling choices for nightscapes out there. Night skies just appear so crisp and detailed. This is a type of photography that I hadn’t done much before, but I must confess that since getting my feet wet I feel strongly compelled to keep at it!
-
-
Stars come Alive
-

-
All of this in one frame!
-

-
The bright point of light is the moon.
-

-
Single image – the bright light is the moon.
Pros and Cons
As you can probably tell by this point, this lens is not for everyone. It has some severe limitations and drawbacks. So why am I planning on replacing my 17-40L (a perfectly competent lens) with one of these lenses? Two words: Image Quality. The amount of detail in the frame simply blows away my Canon. It is almost surreal to zoom into an image and see so much detail there. But is this the lens for you? Only you can answer that question, but here is a list of strengths and weaknesses to help:
Strengths
· The lens is wide. Really wide. You probably will be able to fit whatever you need to into the frame.
· The lens is sharp. Seriously sharp. Few if any in this class can match it.
· Incredibly low price compared to competition.
· Chromatic aberrations very low
· Very resistant to flare
· Excellent color rendition
· Excellent microcontrast
· Very low coma – great for nightscapes
· Robust build quality
Weaknesses:
· Manual Focus
· No electronic coupling, so manual aperture control and no EXIF data (except on certain Nikon mounts).
· Heavy, mustache shaped distortion. (Means that this probably isn’t a top choice for videographers.)
· No use of conventional filters.
· Moderately heavy vignetting
· Lens cap not easy to store in the field.
· Lens distance scale not always accurate.
Yeah, it’s a long list on either side. I personally find that the strengths far outweigh the weaknesses for my style of photography, but that may not be true for yours. I do believe that most users will find the lack of electronics less inconvenient than what they anticipate, but this may be a deal breaker for some. I would encourage those who primarily shoot architecture to look elsewhere, but if you are interested in landscape or general photography, this lens will probably work just fine.
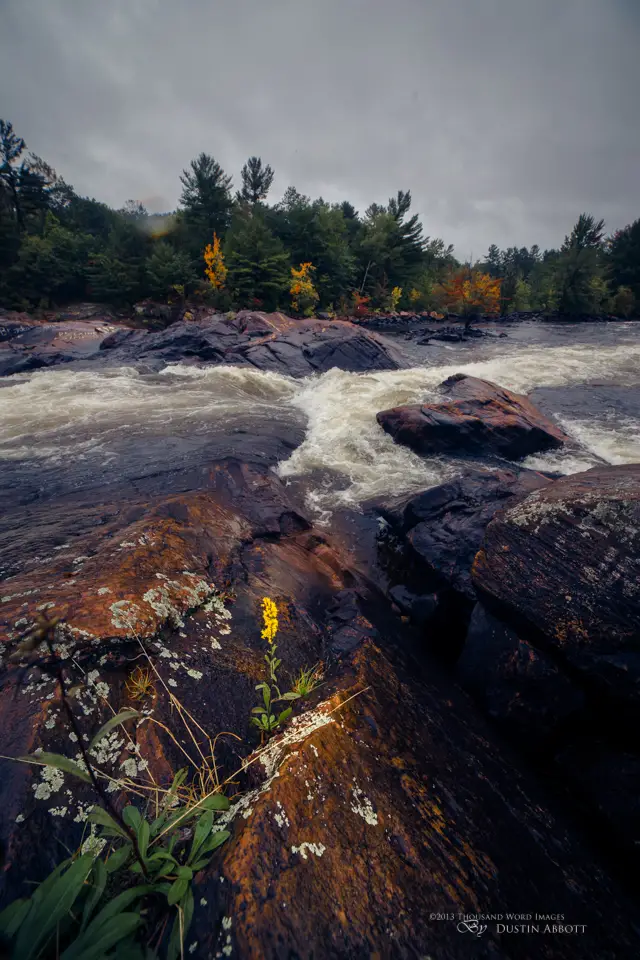
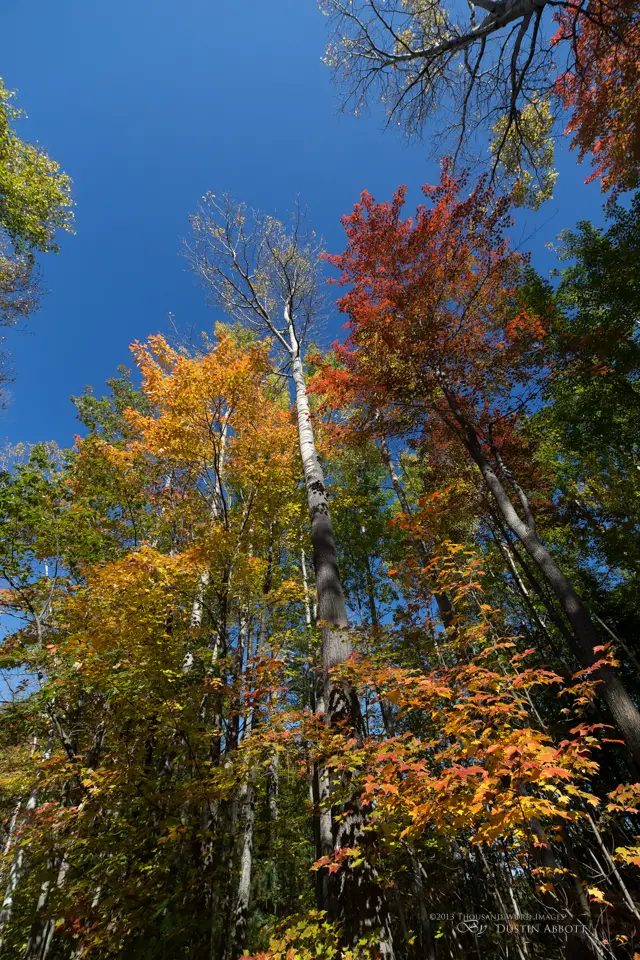
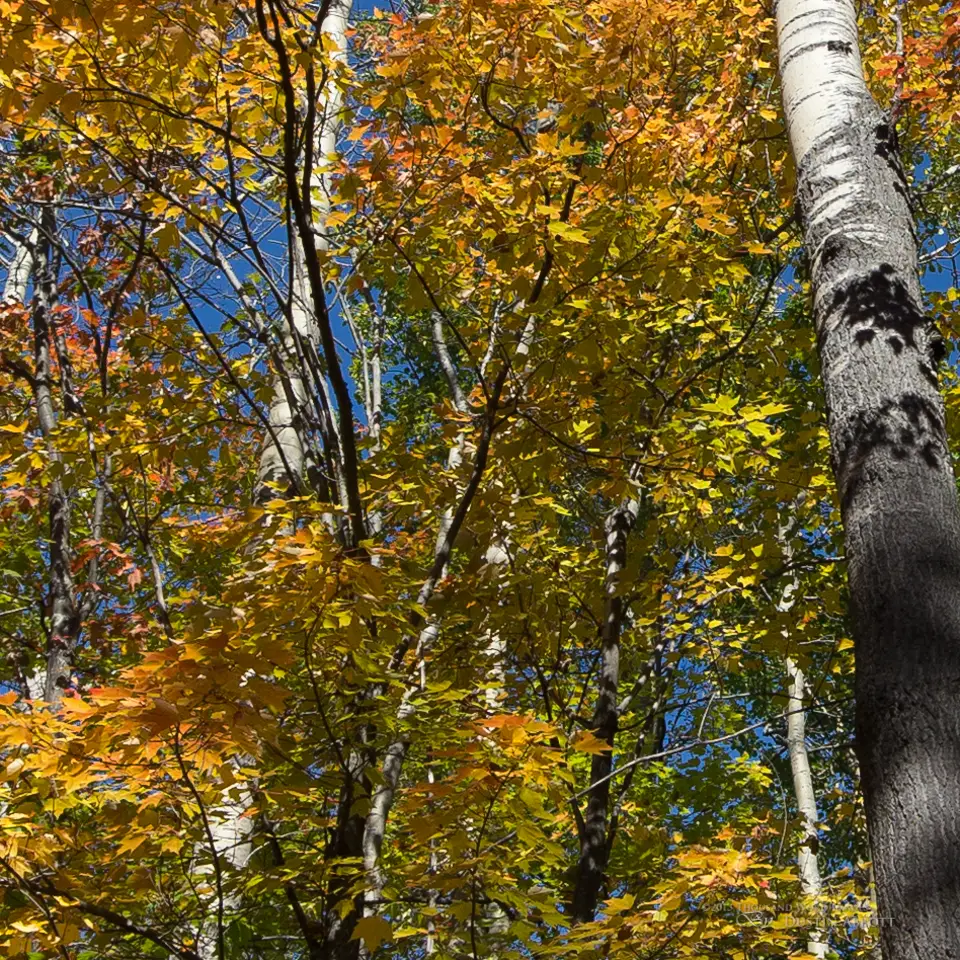
Conclusion
I have found that using this lens really stretches my creativity. It produces pictures that are very unique, and the response to every picture I’ve shared from this lens has been very strong. Ironically, I find that I keep shooting this stunning landscape lens in a portrait orientation, because I love the way that I can emphasize something unique in the foreground while retaining great detail throughout the remainder of the scene. This has been a perfect companion in autumn this year because the angle of view standing at the base of a tree/trees and looking up is so compelling. Put simply, I have just had a lot of fun shooting with this lens. So, despite its shortcomings, I plan on adding one to my bag. When I need to use filters for long exposures, I will simply use my Tamron 24-70mm VC, which is fairly wide on my full frame bodies. But when I want to go really wide or really creative, this will be my choice. It may be one of the best “fun for the money” choices out there.
In interest of full disclosure: the review copy of this lens was provided to me by Amplis Foto, the Canadian distributor of Rokinon products. I have received no form of compensation or coercion in this review, and, as always, I have striven to be as accurate and unbiased as I can. I was excited to review this lens and requested the lens myself; having reviewed it, I am still excited about it and will be purchasing a copy for myself.
Great News! I can now offer a 5% discount on all purchases at Amplis Foto, Canada’s Leading Photographic Supplier. Please enter discount code: AMPLIS52014 in your cart. It is good for everything in your cart, and is stackable with other coupons, too! It will take 5% off your entire order! If you want to go directly to this Rokinon, click here: Proceeds go towards keeping this site going and providing you with new reviews!
FOR MY AMERICAN READERS: I now have a relationship in place with B&H, one of the best photography retailers on the planet. I would appreciate if you could clink on the link below to buy this lens at a great price from them – and they have a cash back program that will save you more! There are many mount choices here, so click through and find the right one for you!
Rokinon 14mm Ultra Wide-Angle f/2.8 IF ED UMC Lens For Canon
The Big Gallery
Click on the image below to begin a large slideshow of images that I have personally taken with this lens over the past several weeks.
[sliderly id=1800 type=featuredimg colorbox=true width=500 height =300]
[contact-form][contact-field label=’Name’ type=’name’ required=’1’/][contact-field label=’Email’ type=’email’ required=’1’/][contact-field label=’Website’ type=’url’/][contact-field label=’Comment’ type=’textarea’ required=’1’/][/contact-form]
DISCLAIMER: This article and description contains affiliate links, which means that if you click on one of the product links, I’ll receive a small commission. As an Amazon Associate I earn from qualifying purchases.


 Sony FE 50-150mm F2 GM Gallery
  Sony FE 50-150mm F2 G Master Review
  Viltrox AF 35mm F1.2 LAB FE Gallery
  Viltrox AF 35mm F1.2 LAB FE Review