Neewer NW-ETZ vs Megadap ETZ21 Pro | Sony E to Nikon Z Adapter Showdown
Dustin Abbott
November 29th, 2024
Neewer NW-ETZ vs Megadap ETZ21 Pro | Sony E to Nikon Z Adapter Showdown
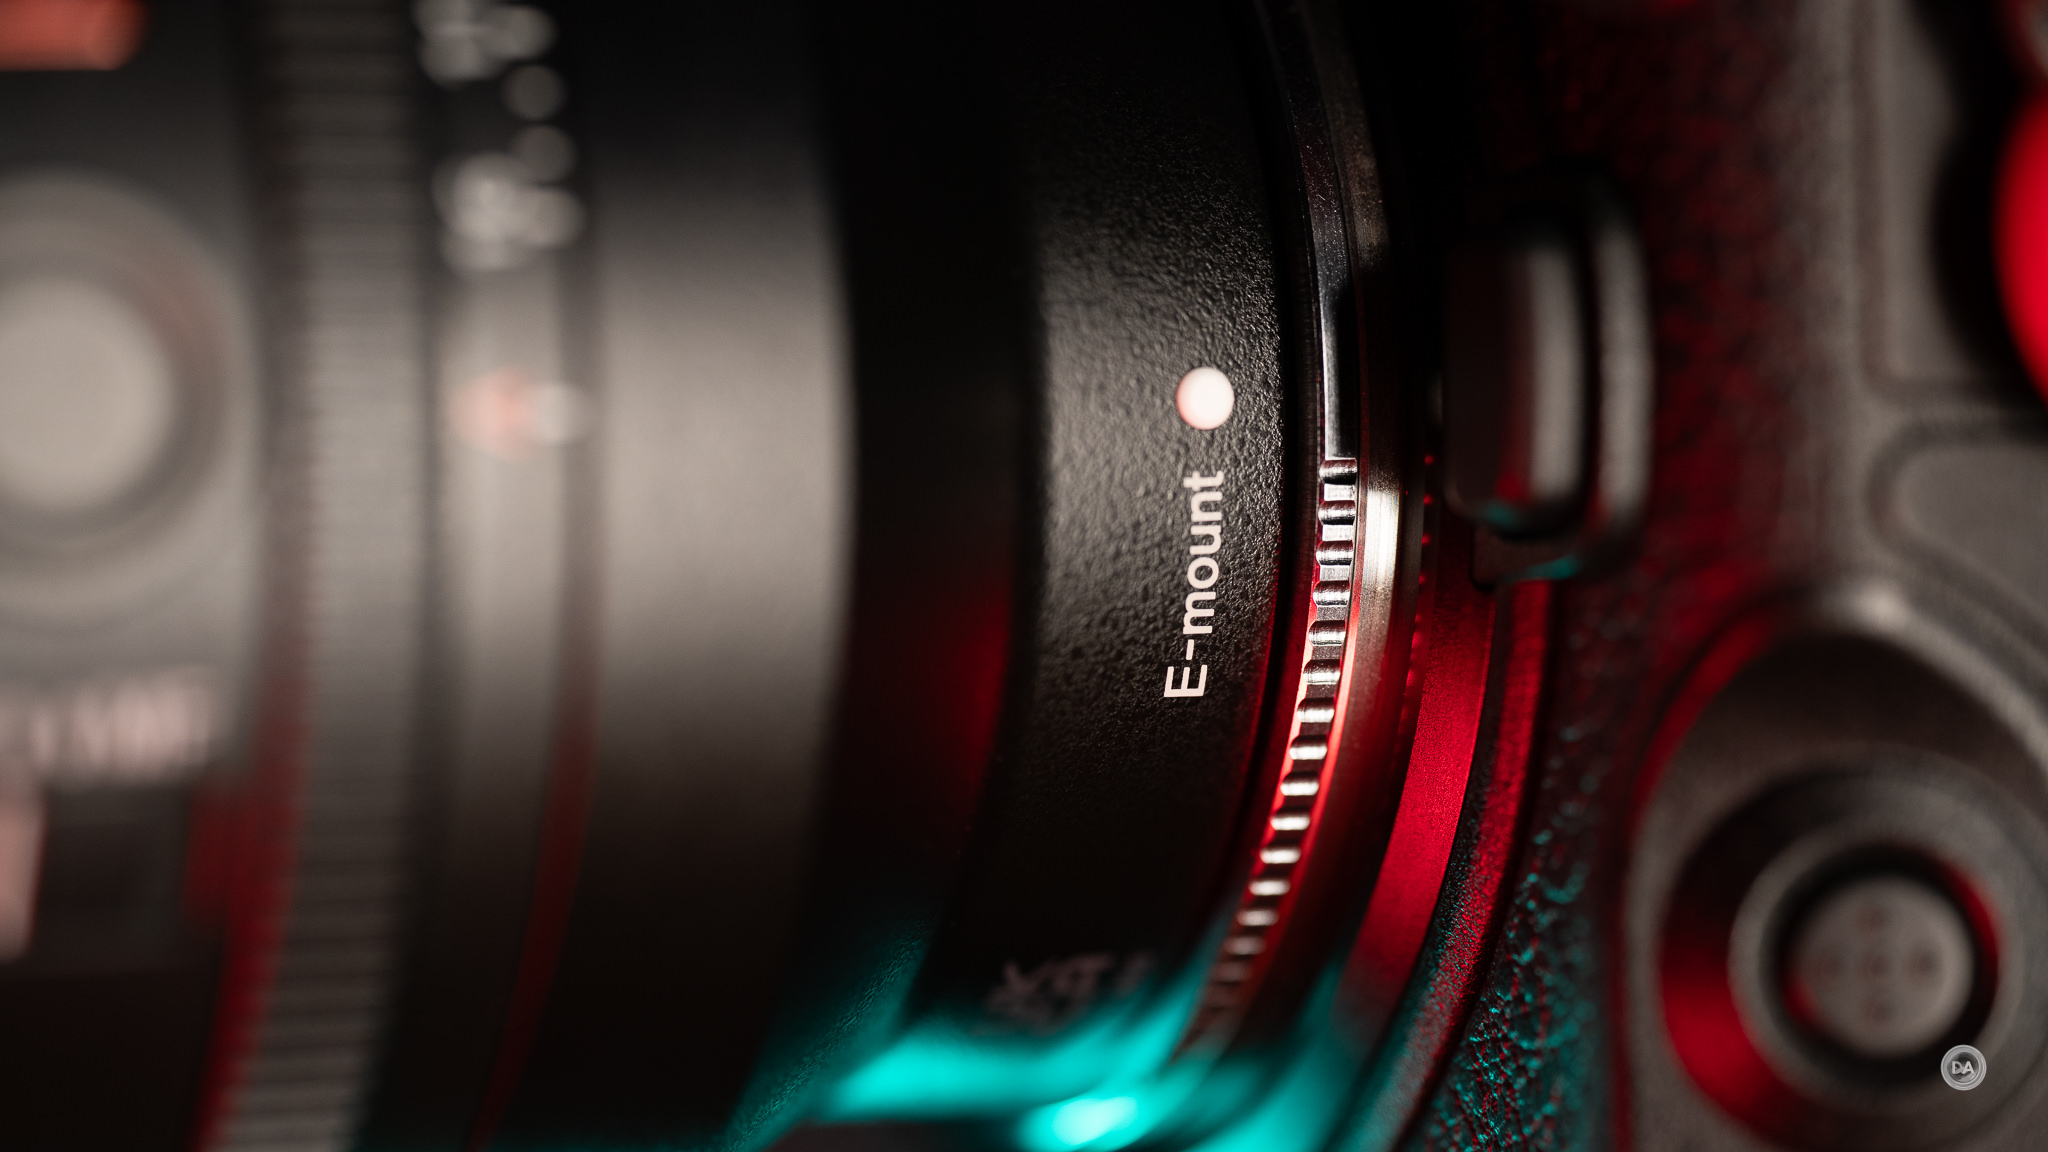
When I first started using Sony E-mount, I was coming off a period of more than a decade where I had used the Canon EF ecosystem exclusively. It was a delight to find that there were adapters that would allow me to use my Canon lenses on my Sony camera as well. I used and reviewed a number of popular adapters from brands like Metabones, Sigma, and Vello, but found that they all came with some serious limitations. Over time I tired of used my EF lenses adapted for two primary reasons: 1) size and weight. 2) Inadequate performance. My favorite of the adapters proved to be the Sigma MC-11, but it added 125g to the weight of every lens attached to it and added another 26mm in length. This was necessary to adapt a DSLR mount to a mirrorless design. The optical path needs to be in a completely different place, so the optics need to be moved further away from the sensor to achieve proper infinity focus. I found that there was a huge spectrum of performance, too, with some lenses working fairly well and others being very inconsistent. Video AF, in particular, was pretty rough where it existed at all.
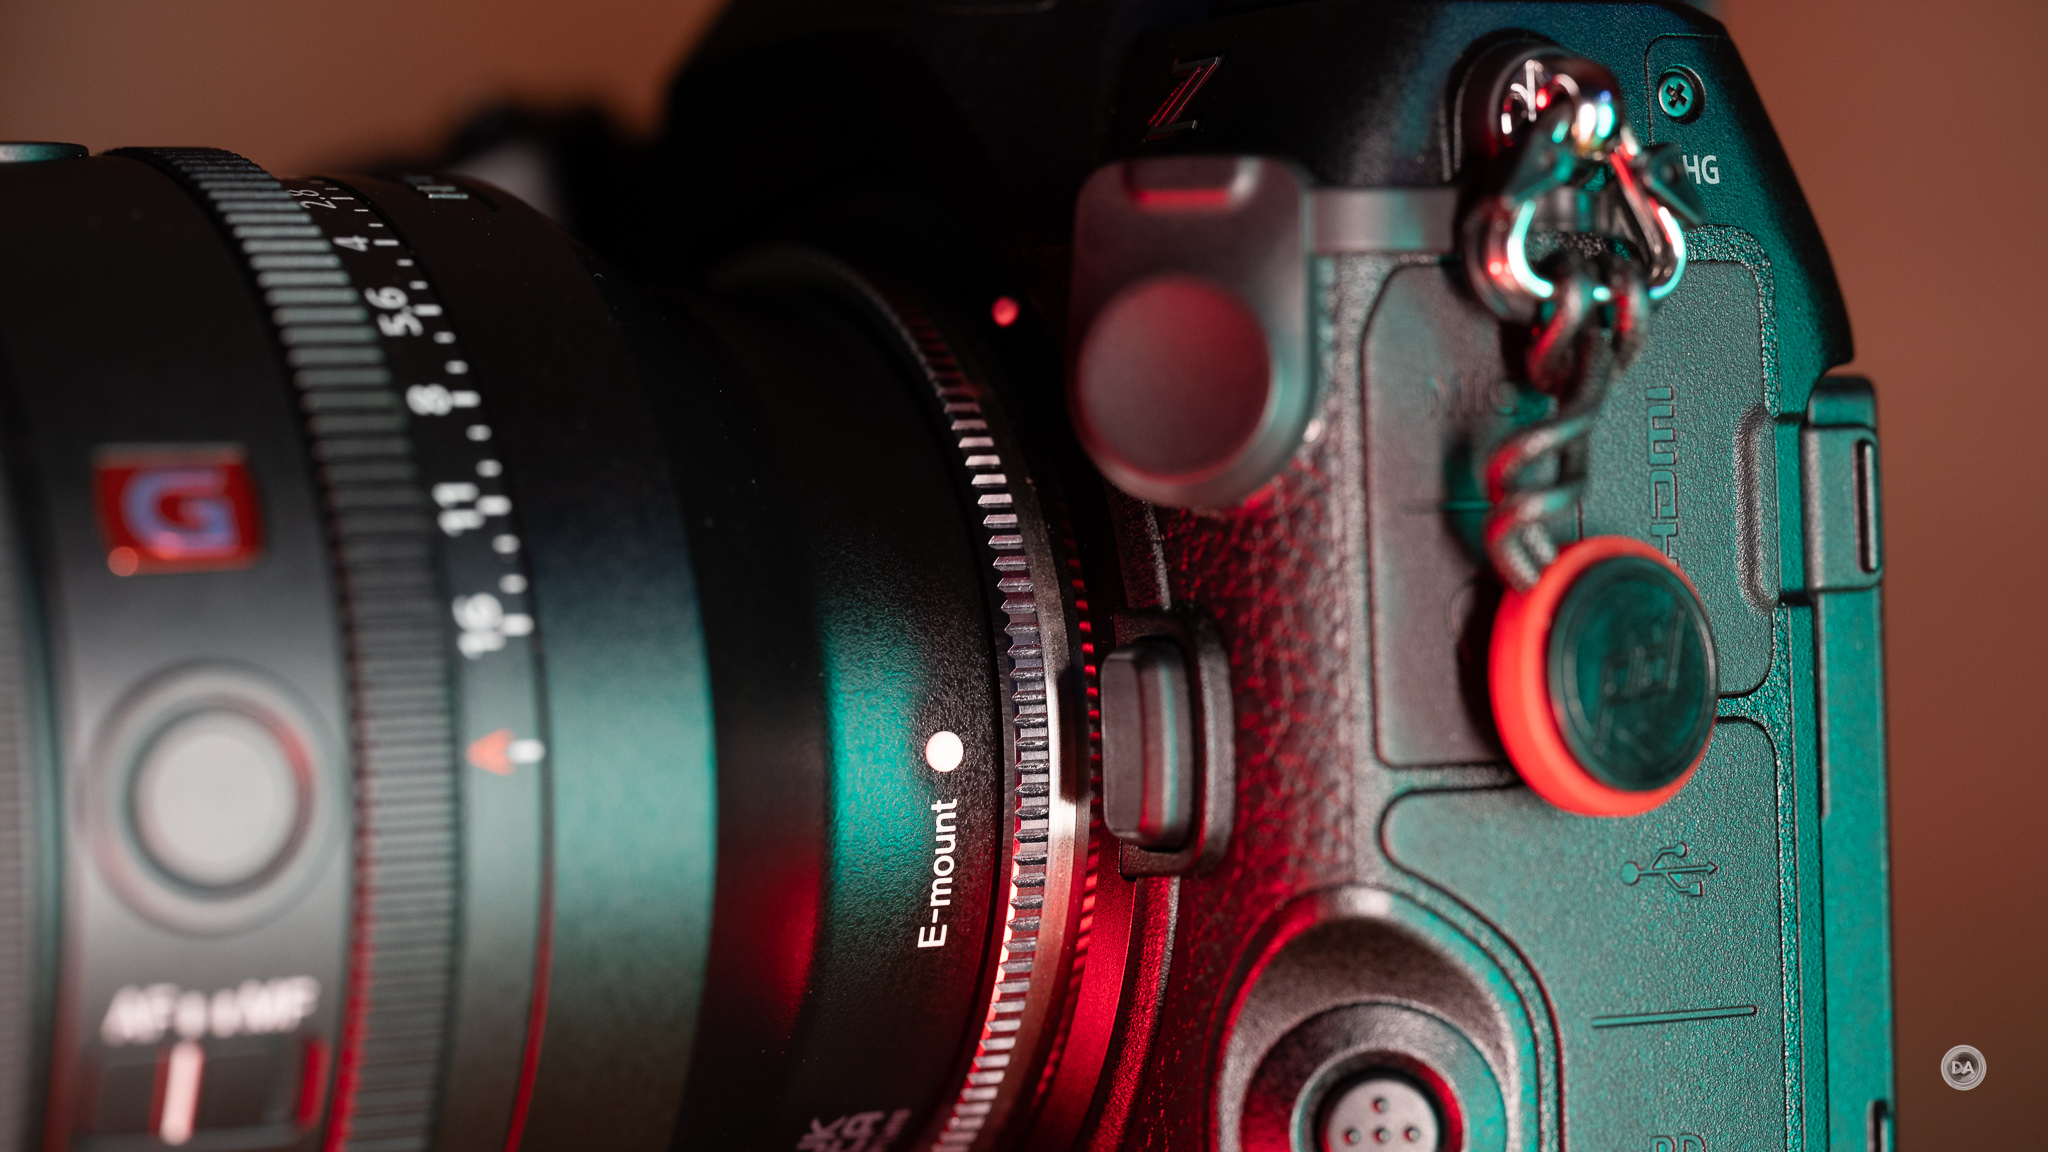
But over a series of reviews, I’ve been looking at very different types of adapters that now adapt one mirrorless lens mount (Sony E-mount) to another mirrorless lens mount (Nikon Z-mount). The rules are a bit different this time. For one, the “flange distance” between the two mounts is similar, so now the adapter itself is just a few millimeters thick (2mm, to be exact), adding almost no additional bulk to lenses. There is a bit of weight, but, at 43g for the Megadap ETZ21 Pro on my scale and 46g for the Neewer NE-ETZ, it’s a third of what we dealt with the EF to FE adapters. In my tests, the Megadap EZ21 Pro (my review here) has a few advantages over the Neewer NW-ETZ that I reviewed here, but also costs about $100 more. So which is the better buy? Find out my thoughts by watching the head to head video, or you can see a quick summary in the article below.
Thanks to Neewer for providing a review sample of the NW-ETZ and to Megadap for providing a review sample the ETZ21 Pro. As always, this is a completely independent review. All opinions and conclusions are my own.*The tests and most of the photos that I share as a part of my review cycle have been done with the 45MP Nikon Z8, which I reviewed here.
Both of these adapters have a simple premise – allow you to use Sony E-mount lenses – WITH AUTOFOCUS – on Nikon Z mount cameras. The claim includes transmitting EXIF data and information for VR (if your camera is so equipped). At their best, both adapters work really quite well, delivering some of the best autofocus I’ve seen from an adapted lens, though there’s always limits. Both add almost no bulk – just 2mm of additional thickness – and very little weight (43g for the Megadap, 46g for the Neewer).
So does they work? The answer is mostly yes, though with a few minor caveats which I detail in the individual reviews.
Reasons to Buy the Neewer NW-eTZ
Price – Costs $160 vs $250
Has a weather sealed option for $20 more
Provides focus confirmation for manual focus lenses even when they have no contacts (M42, M mount, etc…)
Reasons to buy the Megadap ETZ21 Pro
Better firmware process
Properly reports EXIF data
Provides more consistent autofocus performance
Works on APS-C/DX bodies
Works with more lenses
Conclusion
Both adapters have some unique strengths, but for most people I think the extra money for the Megadap is worth it. The Neewer shows promise, but it is a first gen adapter while Megadap is on the second variation of their second generation, and that longer development cycle shows. Megadap has squashed more bugs, and delivers a more consistent performance across a broader range of lenses. Megadap is an adapter company, period, and while Neewer has a great reputation for delivering excellent products at a strong value, their company is far more diversified. To me the Megadap adapter feels worth the extra $90, but it’s not my money to spend. It’s yours, and I hope the information in these comparisons has helped you make a more informed decision.
DISCLAIMER: This article and description contains affiliate links, which means that if you click on one of the product links, I’ll receive a small commission. As an Amazon Associate I earn from qualifying purchases.
When I first started using Sony E-mount, I was coming off a period of more than a decade where I had used the Canon EF ecosystem exclusively. It was a delight to find that there were adapters that would allow me to use my Canon lenses on my Sony camera as well. I used and reviewed a number of popular adapters from brands like Metabones, Sigma, and Vello, but found that they all came with some serious limitations. Over time I tired of used my EF lenses adapted for two primary reasons: 1) size and weight. 2) Inadequate performance. My favorite of the adapters proved to be the Sigma MC-11, but it added 125g to the weight of every lens attached to it and added another 26mm in length. This was necessary to adapt a DSLR mount to a mirrorless design. The optical path needs to be in a completely different place, so the optics need to be moved further away from the sensor to achieve proper infinity focus. I found that there was a huge spectrum of performance, too, with some lenses working fairly well and others being very inconsistent. Video AF, in particular, was pretty rough where it existed at all.
But over a series of reviews, I’ve been looking at very different types of adapters that now adapt one mirrorless lens mount (Sony E-mount) to another mirrorless lens mount (Nikon Z-mount). The rules are a bit different this time. For one, the “flange distance” between the two mounts is similar, so now the adapter itself is just a few millimeters thick (2mm, to be exact), adding almost no additional bulk to lenses. There is a bit of weight, but, at 46g on my scale, it’s a third of what we dealt with the EF to FE adapters. In my tests, the Megadap EZ21 Pro has a few advantages over the Neewer NW-ETZ that I’m, reviewing today, but also costs about $100 more. So is the Neewer NW-ETZ and its $160 price a better choice if you’re on a budget? Find out my thoughts by watching the video review below…or just keep reading.
Thanks to Neewer for providing a review sample of the NW-ETZ. As always, this is a completely independent review. All opinions and conclusions are my own.*The tests and most of the photos that I share as a part of my review cycle have been done with the 45MP Nikon Z8, which I reviewed here.
There will be some continuity between this review and another of the Megadap ETZ21 Pro, as I’ve spent time with both in an attempt to get up to speed as to which adapter works better.
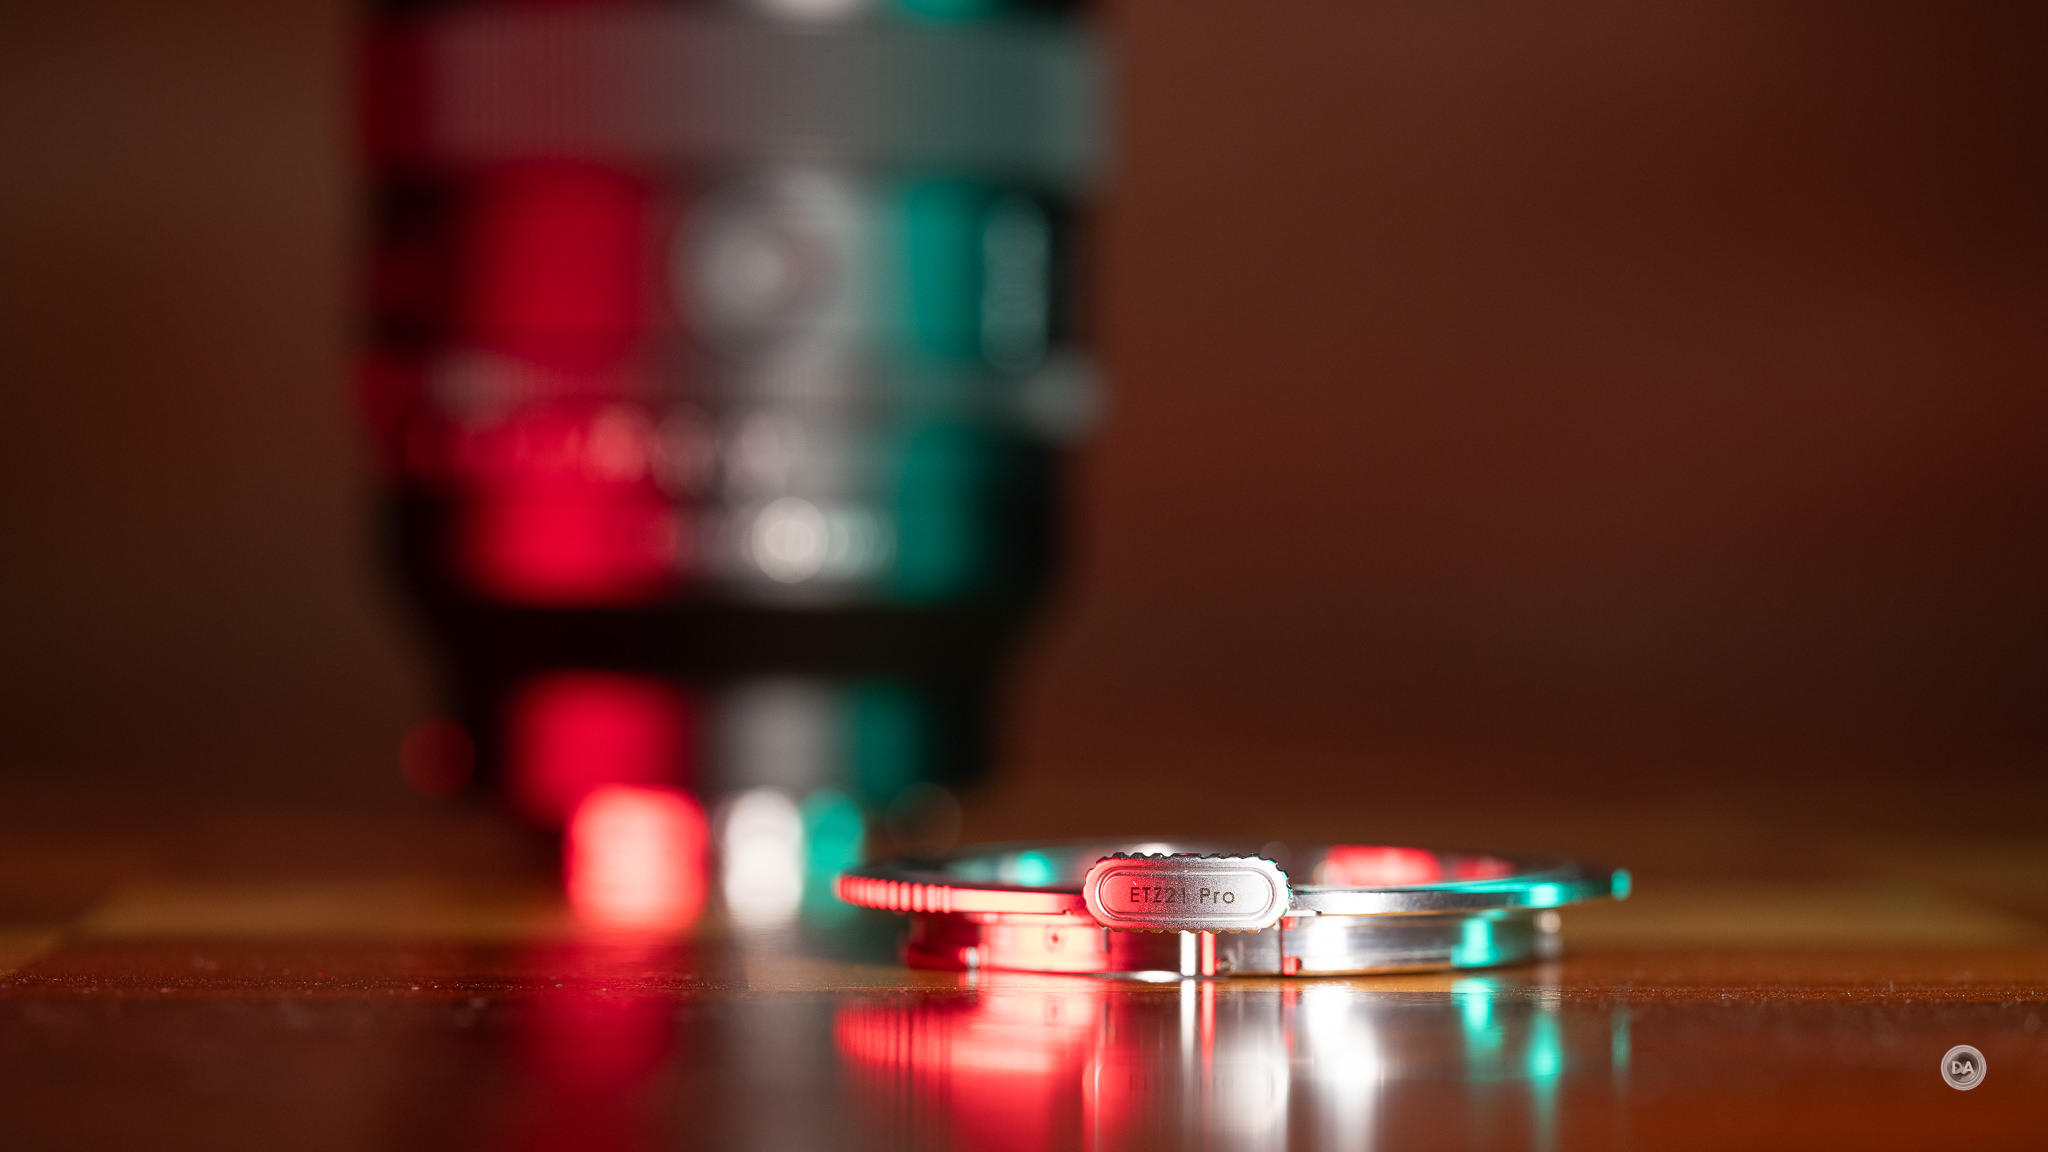
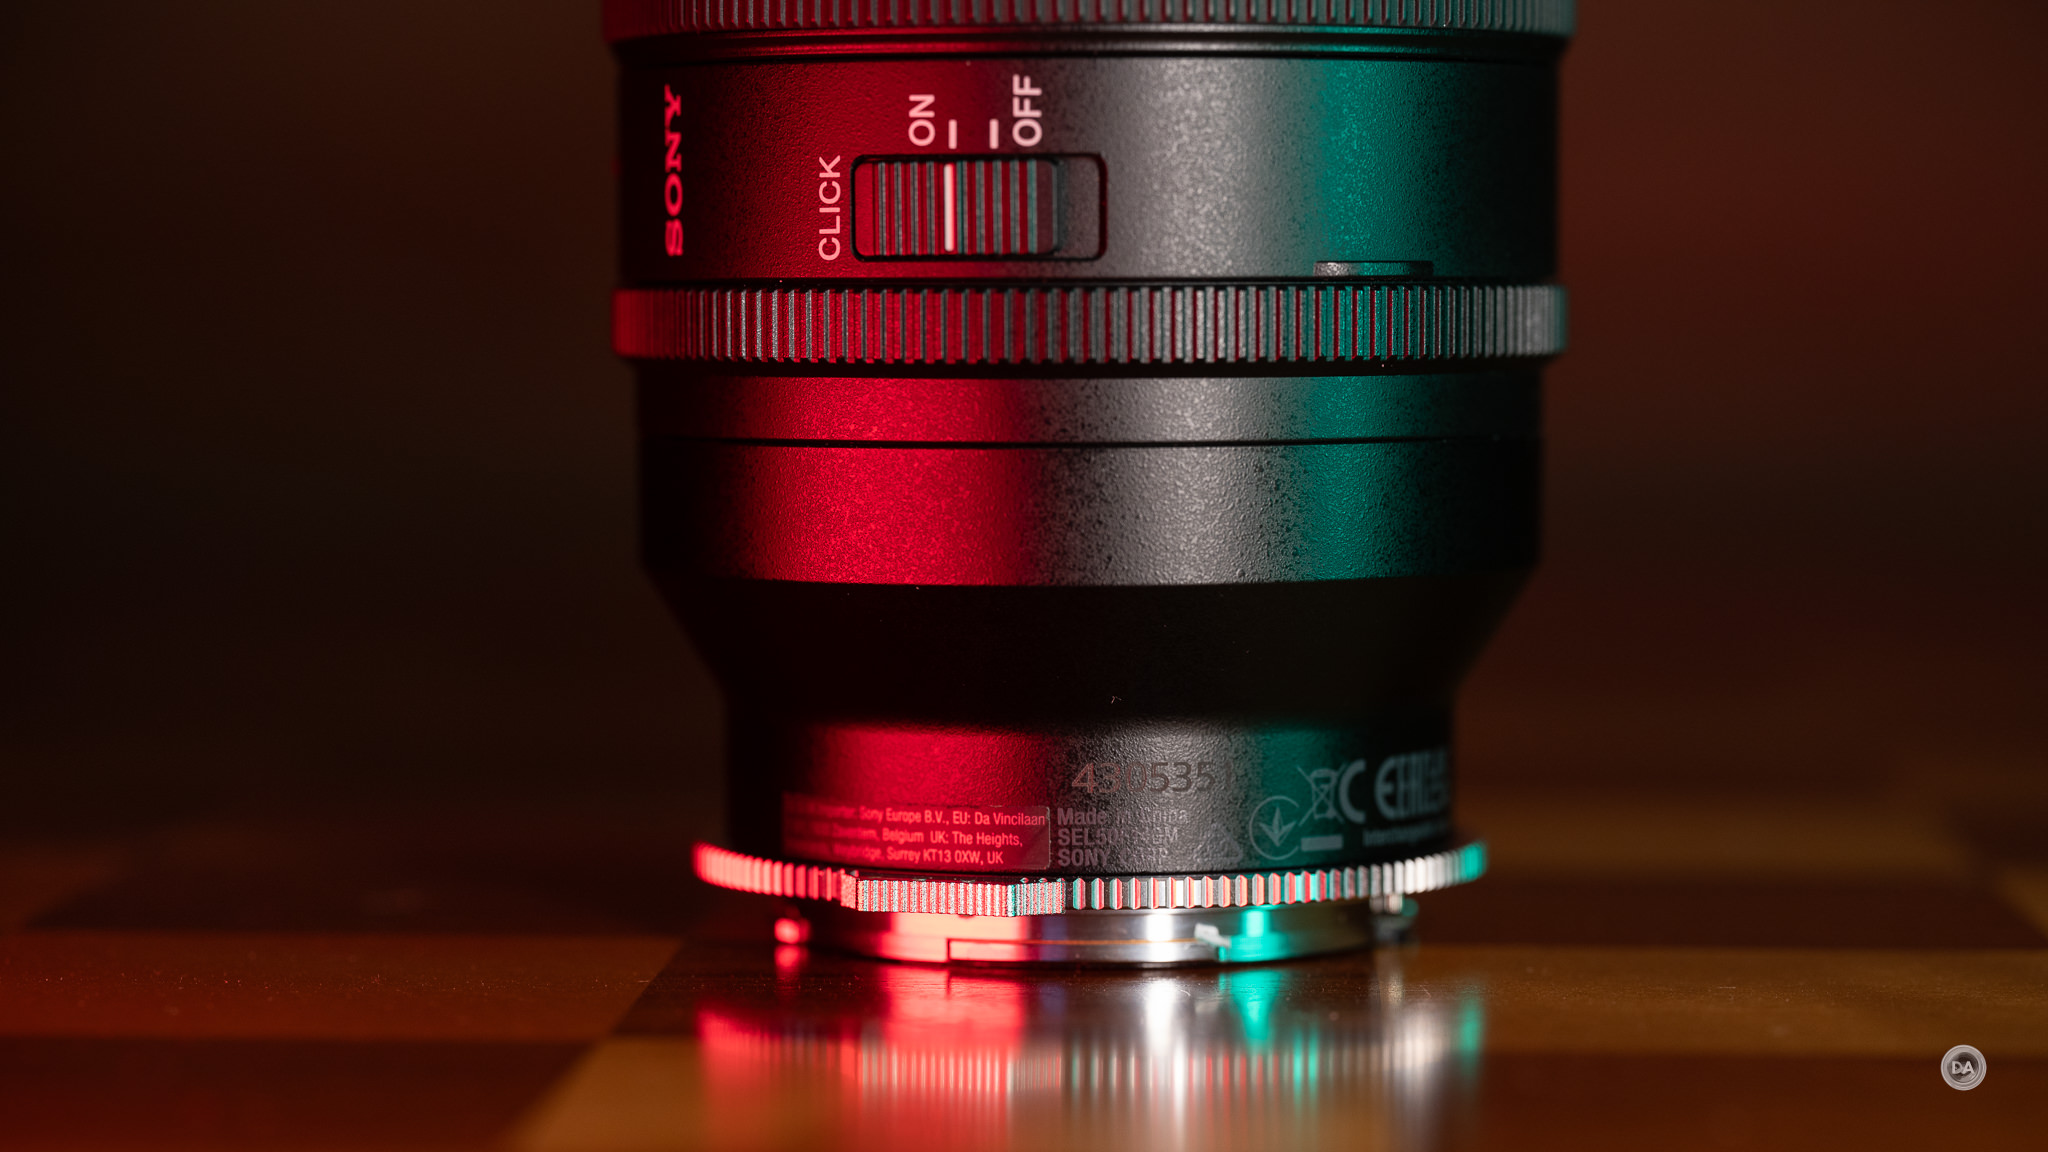
There are two versions of the NW-ETZ adapter; a regular version (like the one I’m testing here) and a Pro version that costs about $20 more. The primary difference to the Pro version seems to be the inclusion of a weather sealing gasket, which is a negative point I raised about the Megadap adapter in my review of that lens.
For some reason, however, user reviews tend to be higher for the cheaper adapter without the rubber gasket. Perhaps the fit is a little better without it, as functionally these should be the same.
The premise of the NW-ETZ adapter is pretty simple – it interprets the focus algorithms from the camera (Nikon Z) and translates them to the language of the lens (Sony E), and carries EXIF data and focus information back to the camera. The byproduct is that you can get effective autofocus from Sony E-mount lenses on a Nikon Z mount body…and there’s a lot of great Sony E-mount glass out there!
So does it work? The answer is a little more complicated than what I saw with the Megadap ETZ21 Pro in my review, as I saw a wider variety of performances. Initially, I actually thought that it might work better for stills, as I found that autofocus with the first two lenses that I used (Sony FE 35mm F1.4 GM and Tamron 35-150mm F2-2.8 VXDE) was arguably better than the Megadap.
But as I expanded out the pool of lenses that I used, I found that my results varied more widely. I’ll detail more about that in the review below.
Build and Design
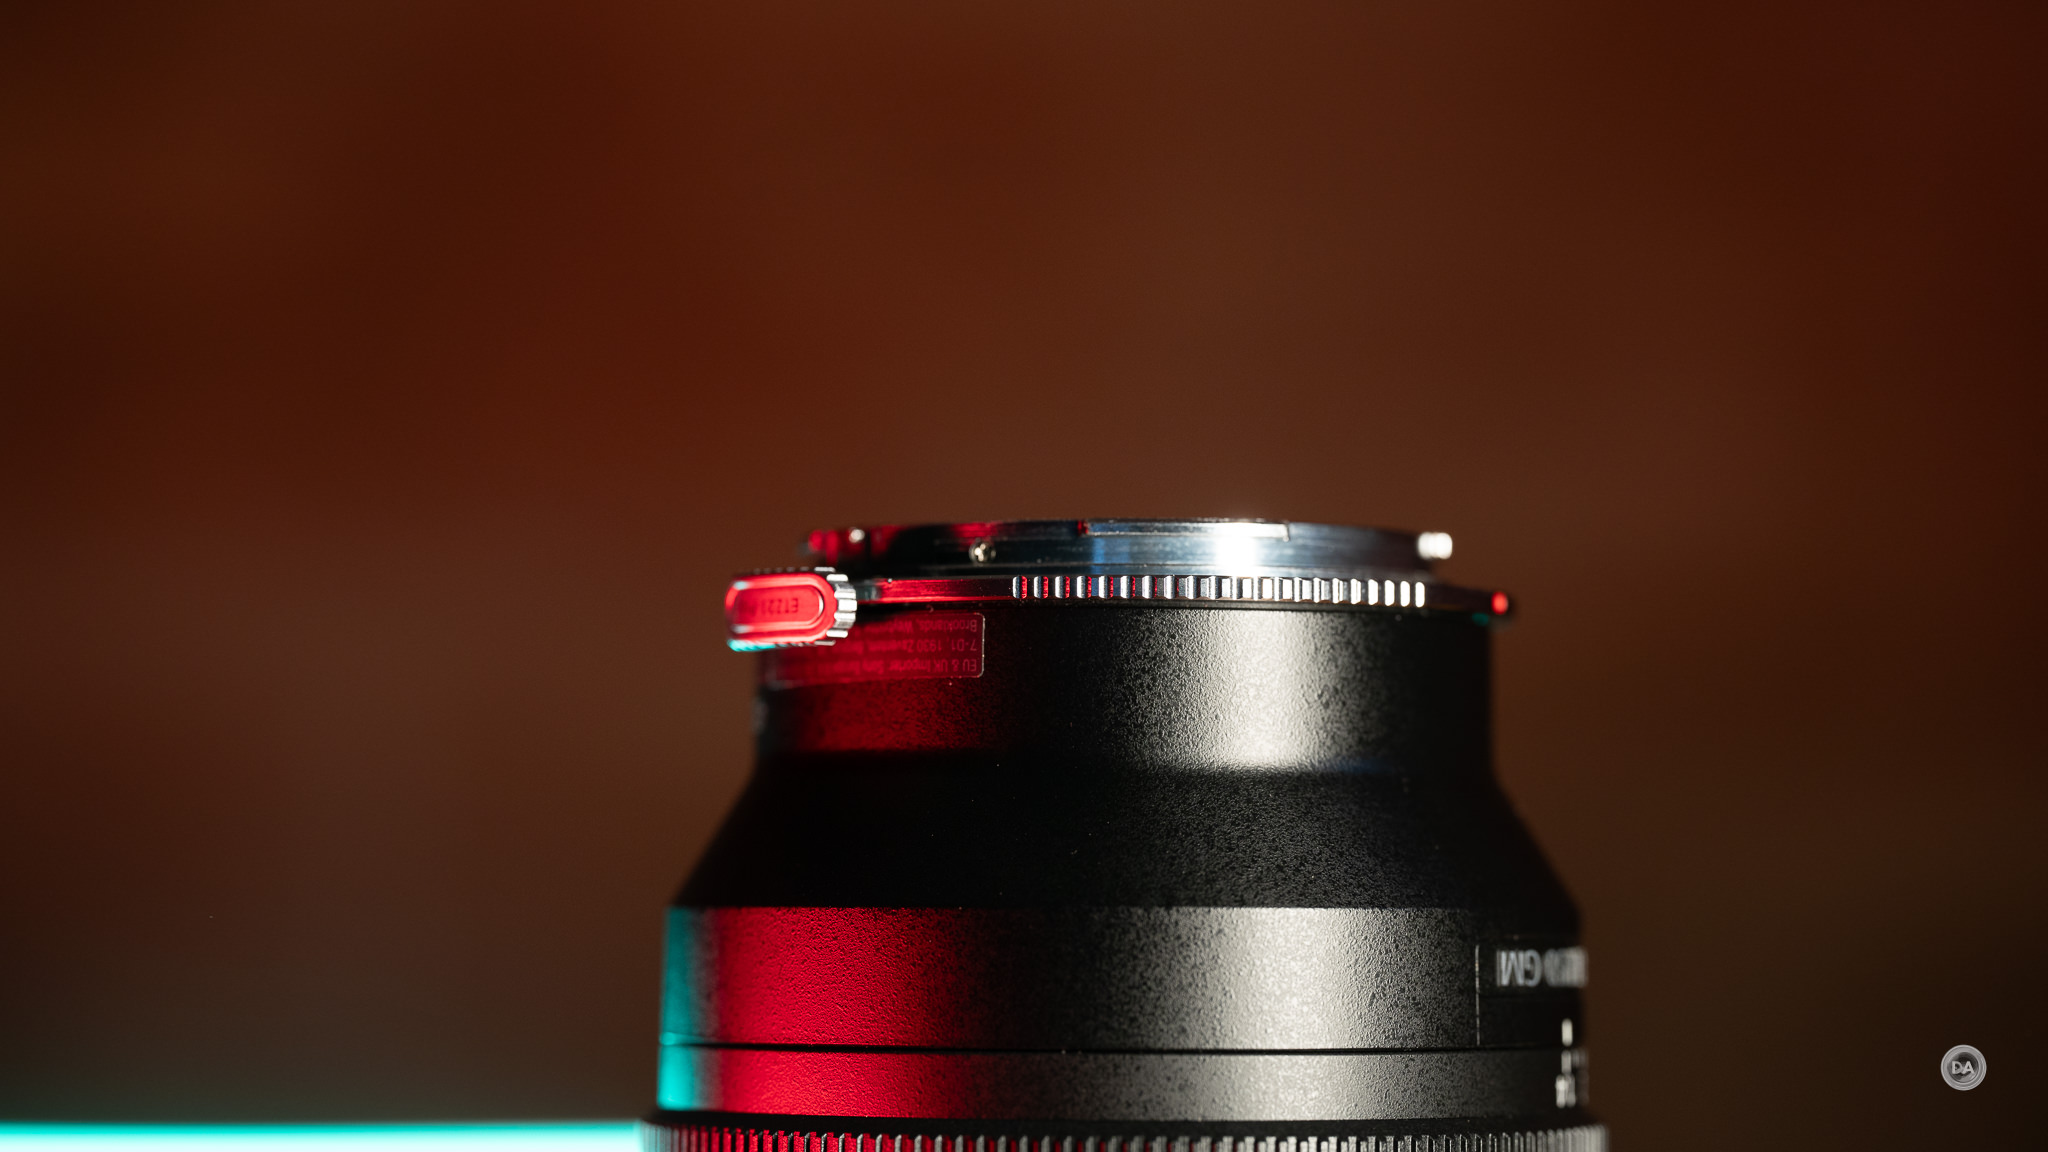
As noted previously this is a pretty simple device in some ways. Essentially it feels like a metal lens mount detached from a lens.
At just 2mm thick, it essentially just goes onto the lens like a second mount.
You really won’t notice that the adapter is there once mounted, and I found that in the half dozen lenses that I tested with it, mounting and unmounting lenses remained relatively simple. The fit of lenses will vary a bit, with some being tighter than others, but I never felt like I really had to force things.The adapter is very, very thin. Always be sure to power down the camera before removing anything, however.
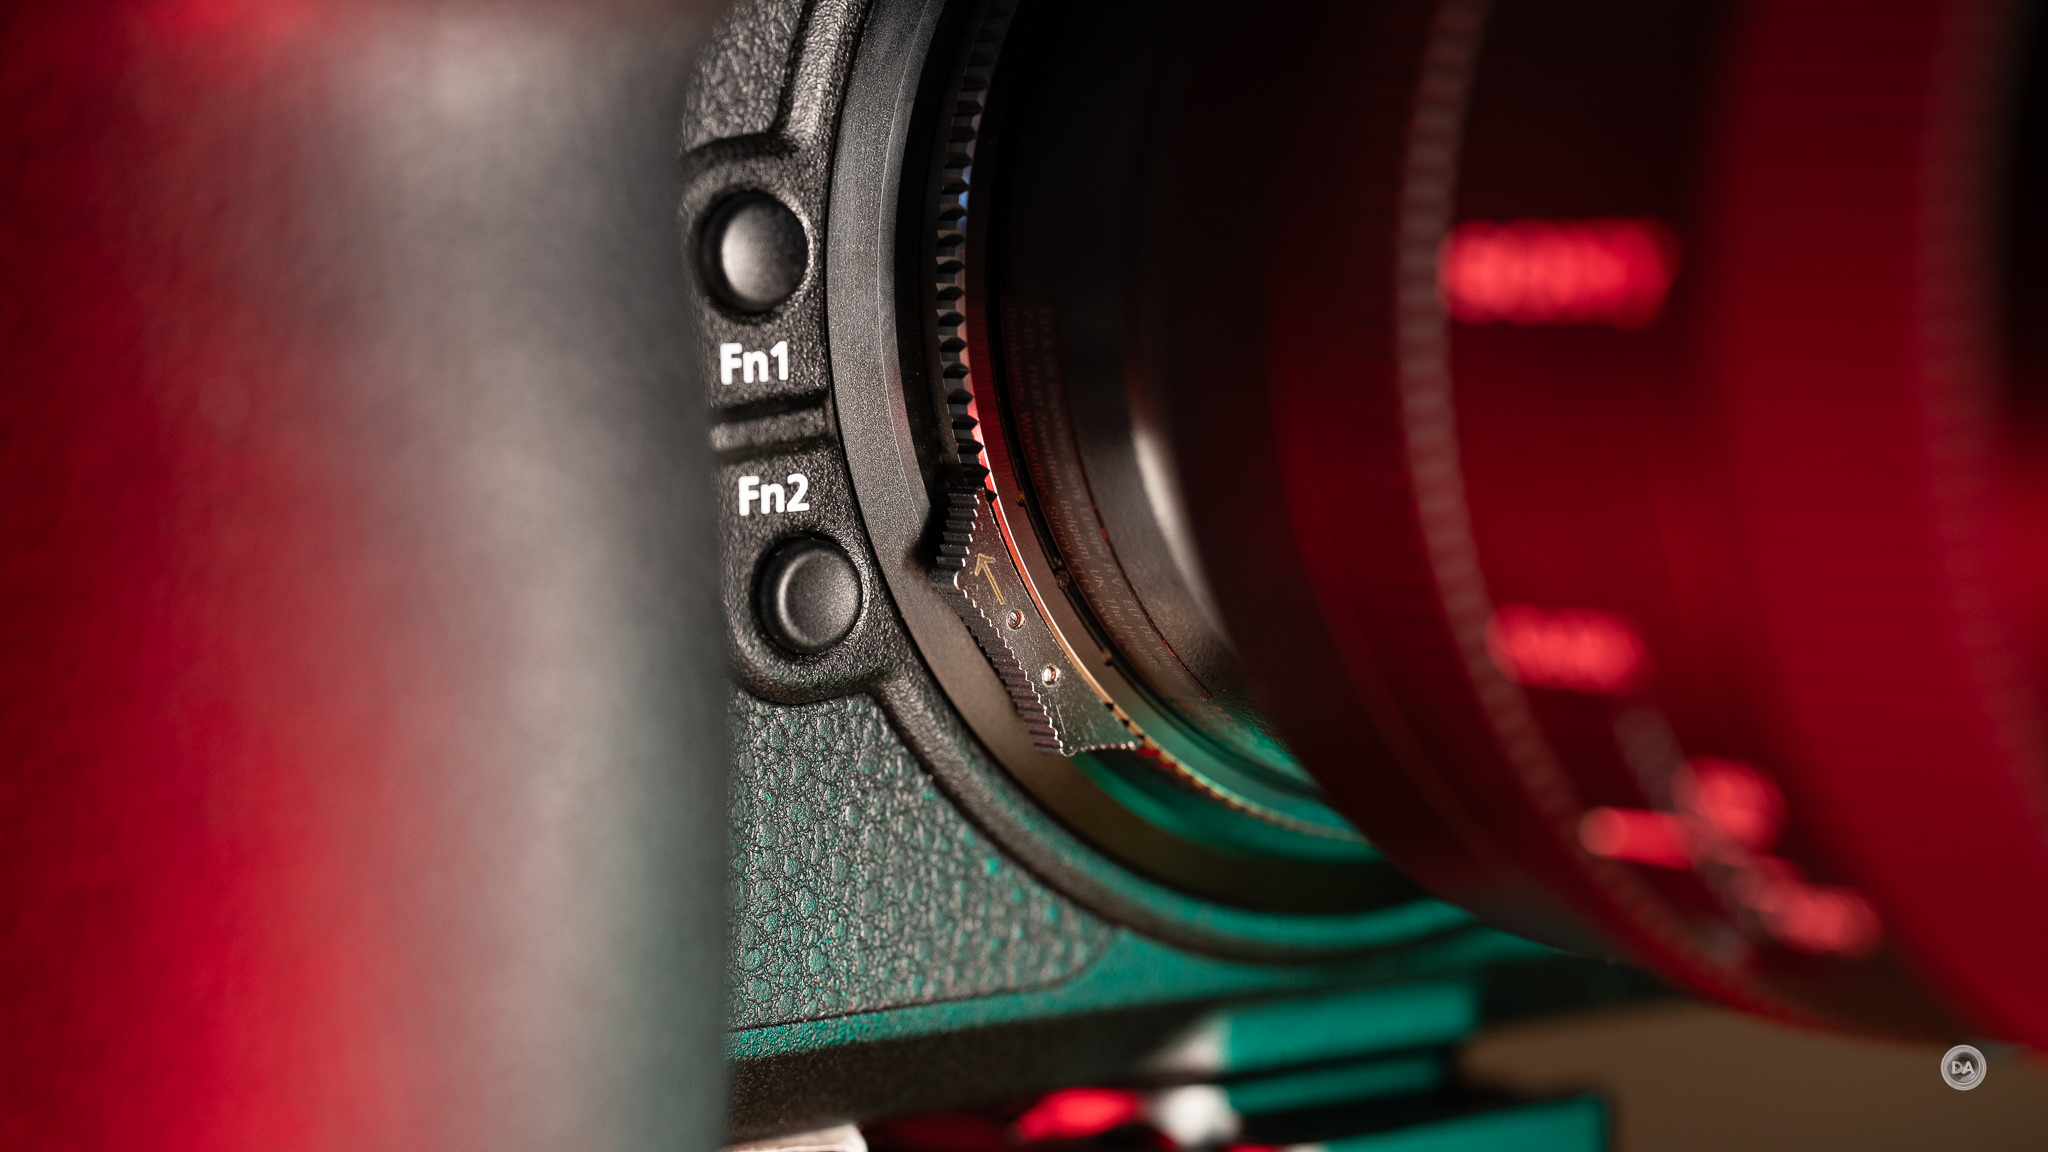
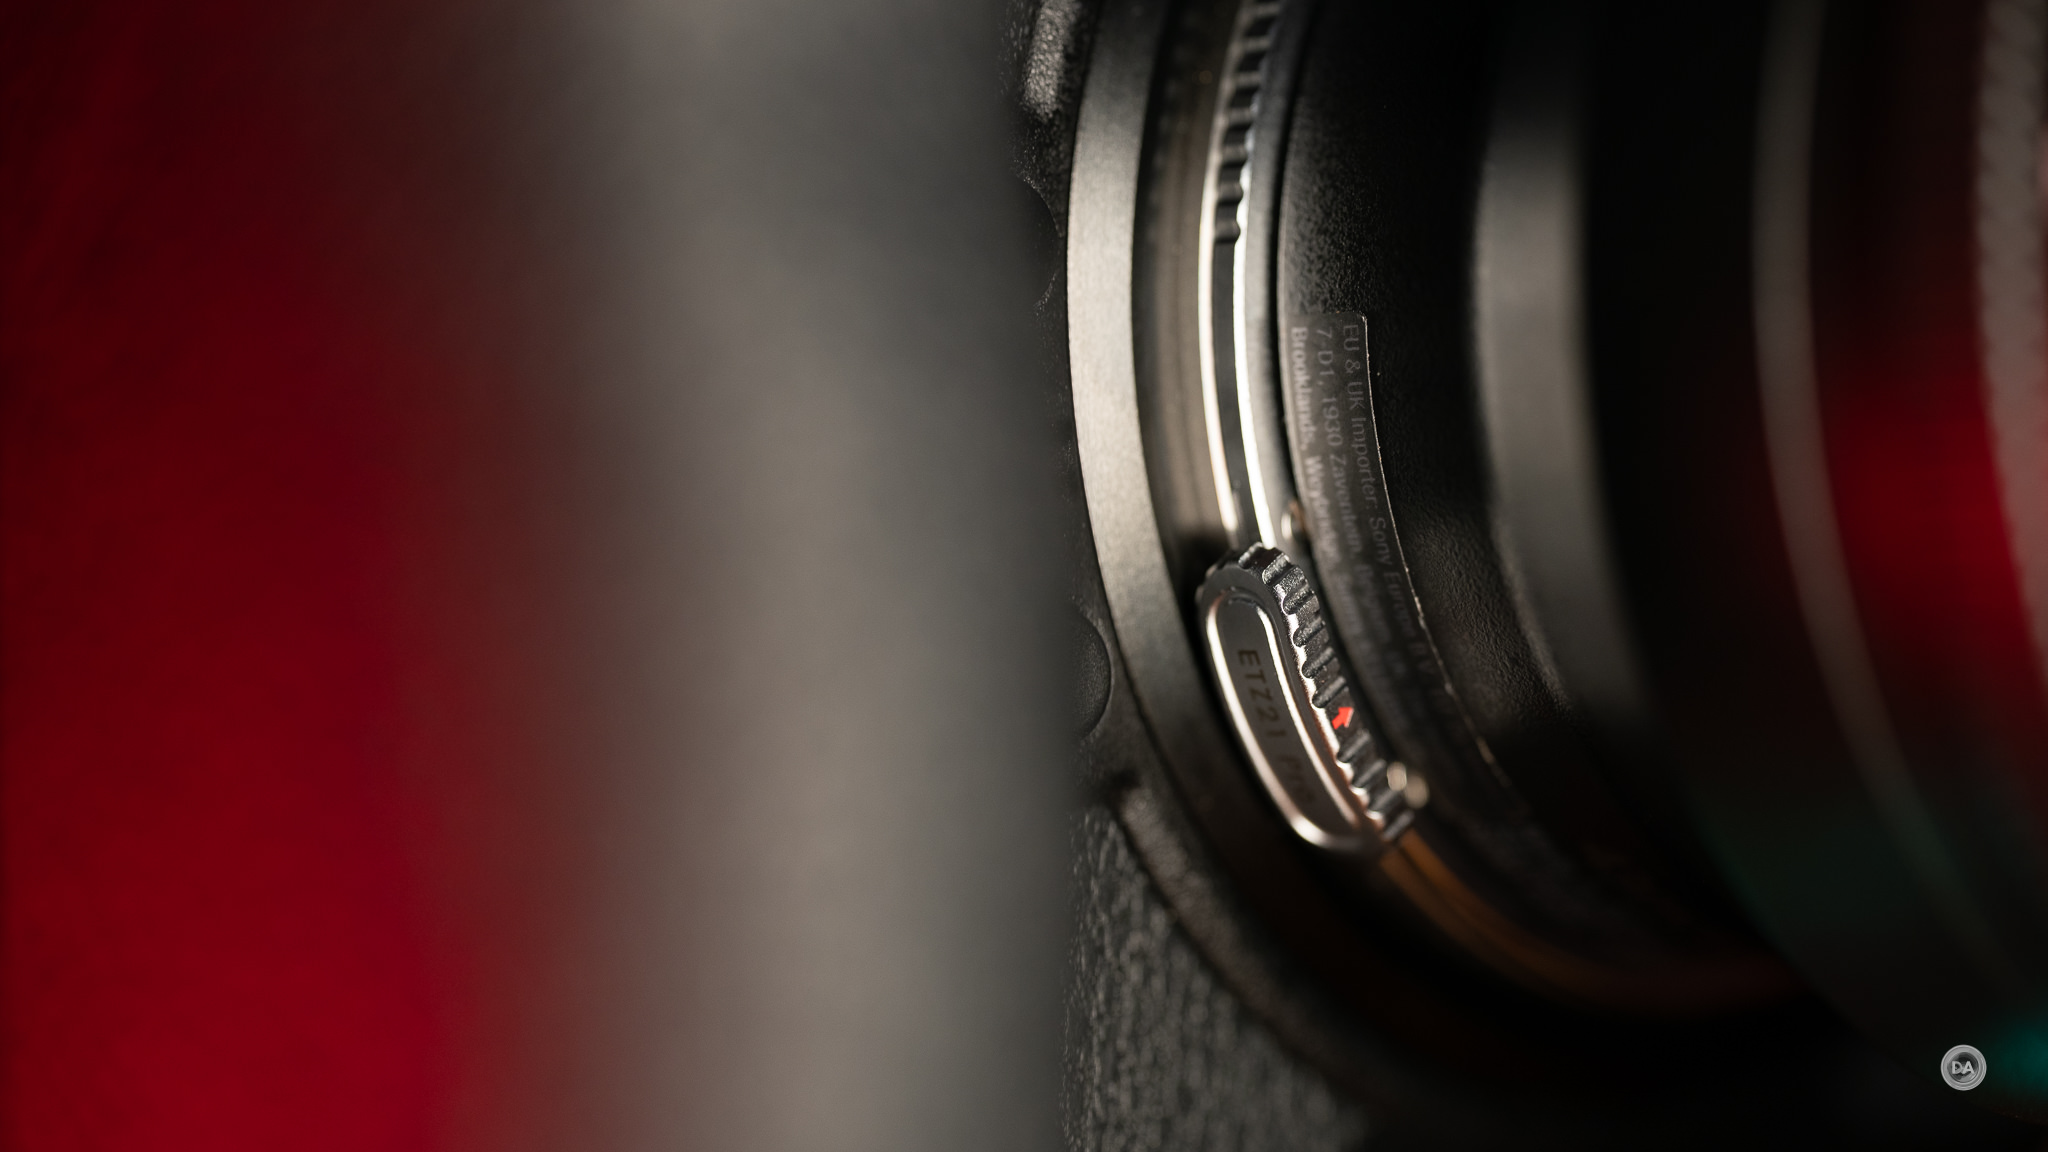
The release mechanism is different from the Megadap’s, as that release needs to be depressed while the NW-ETZ requires sliding the mechanism clockwise.
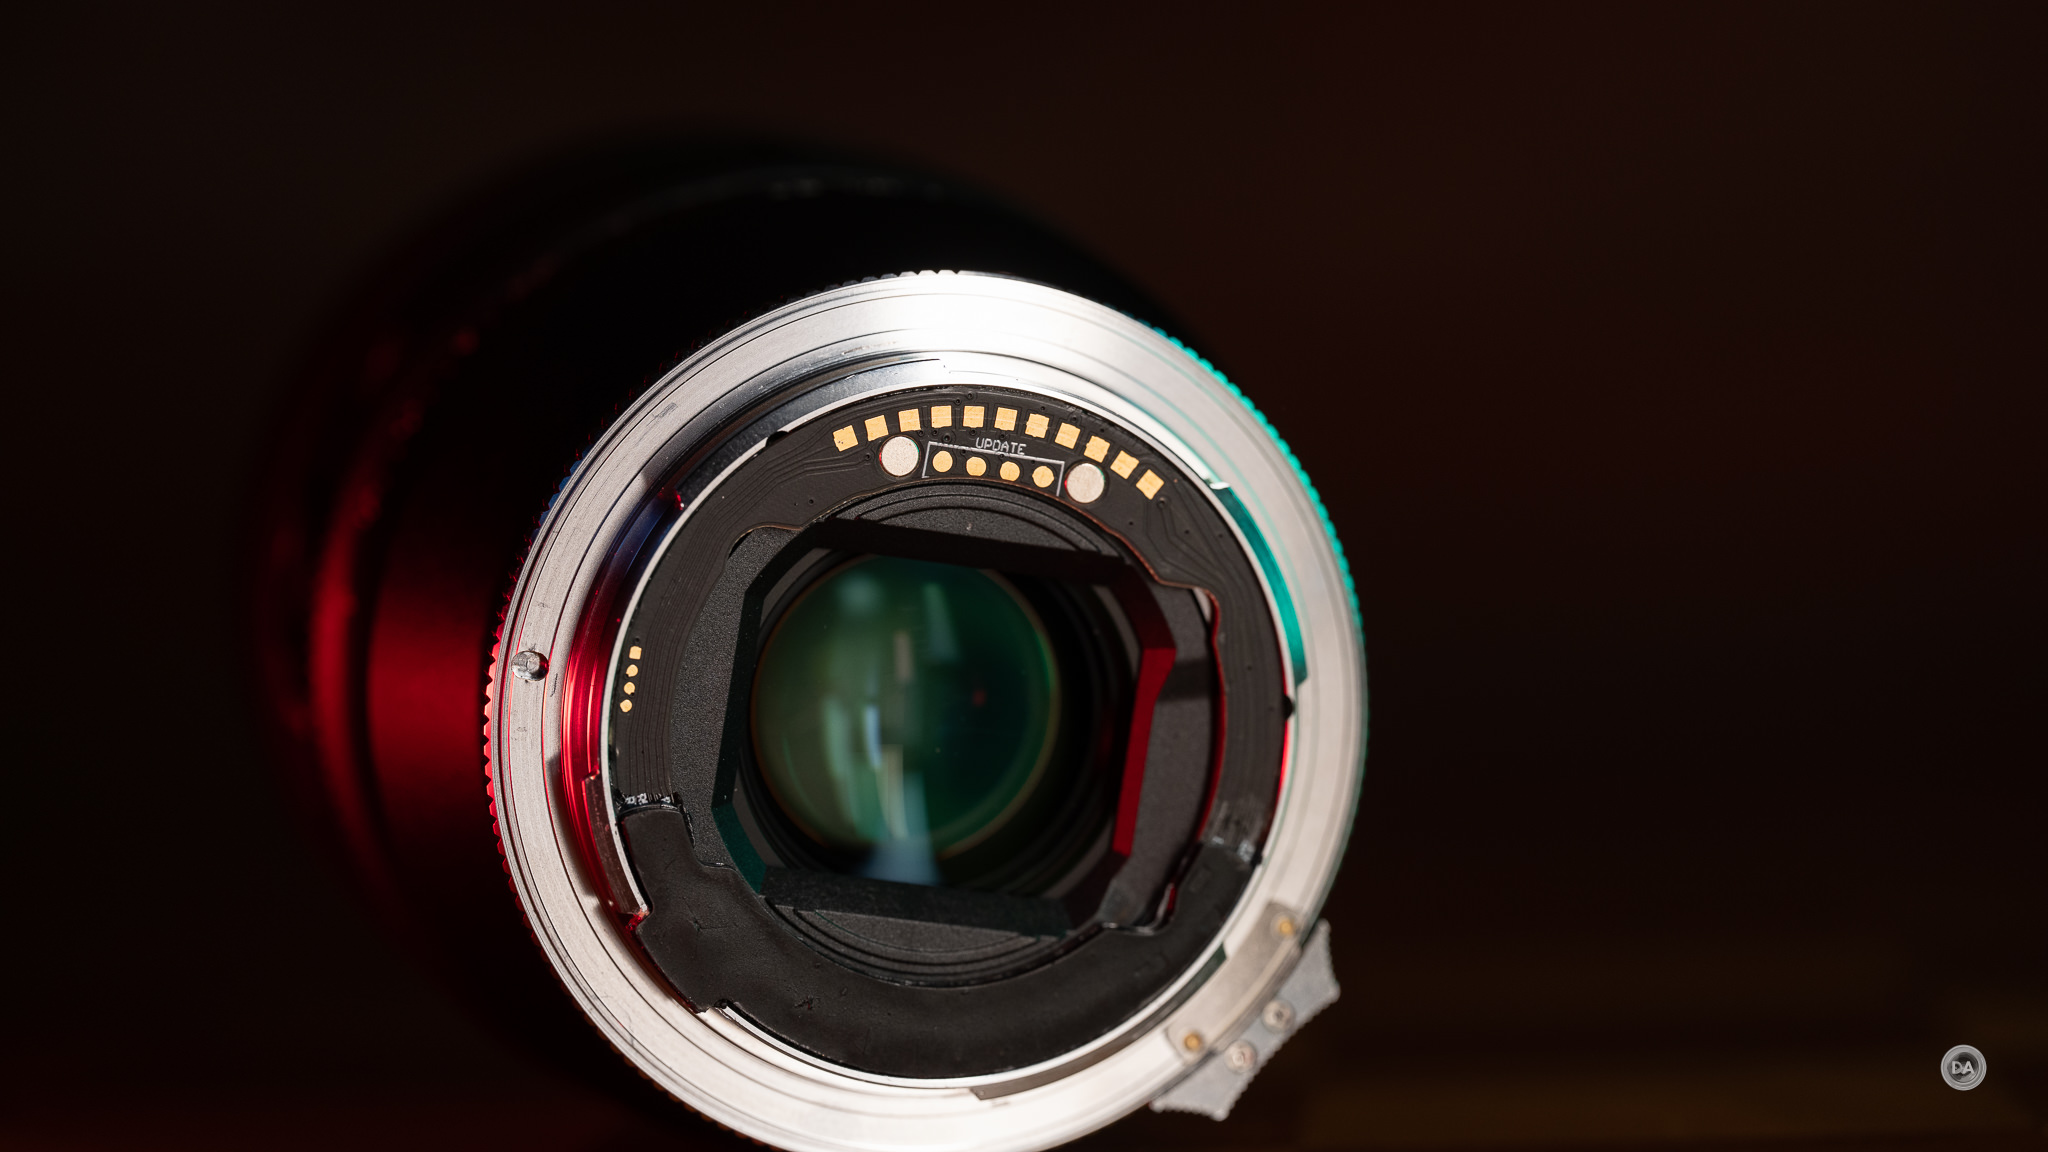
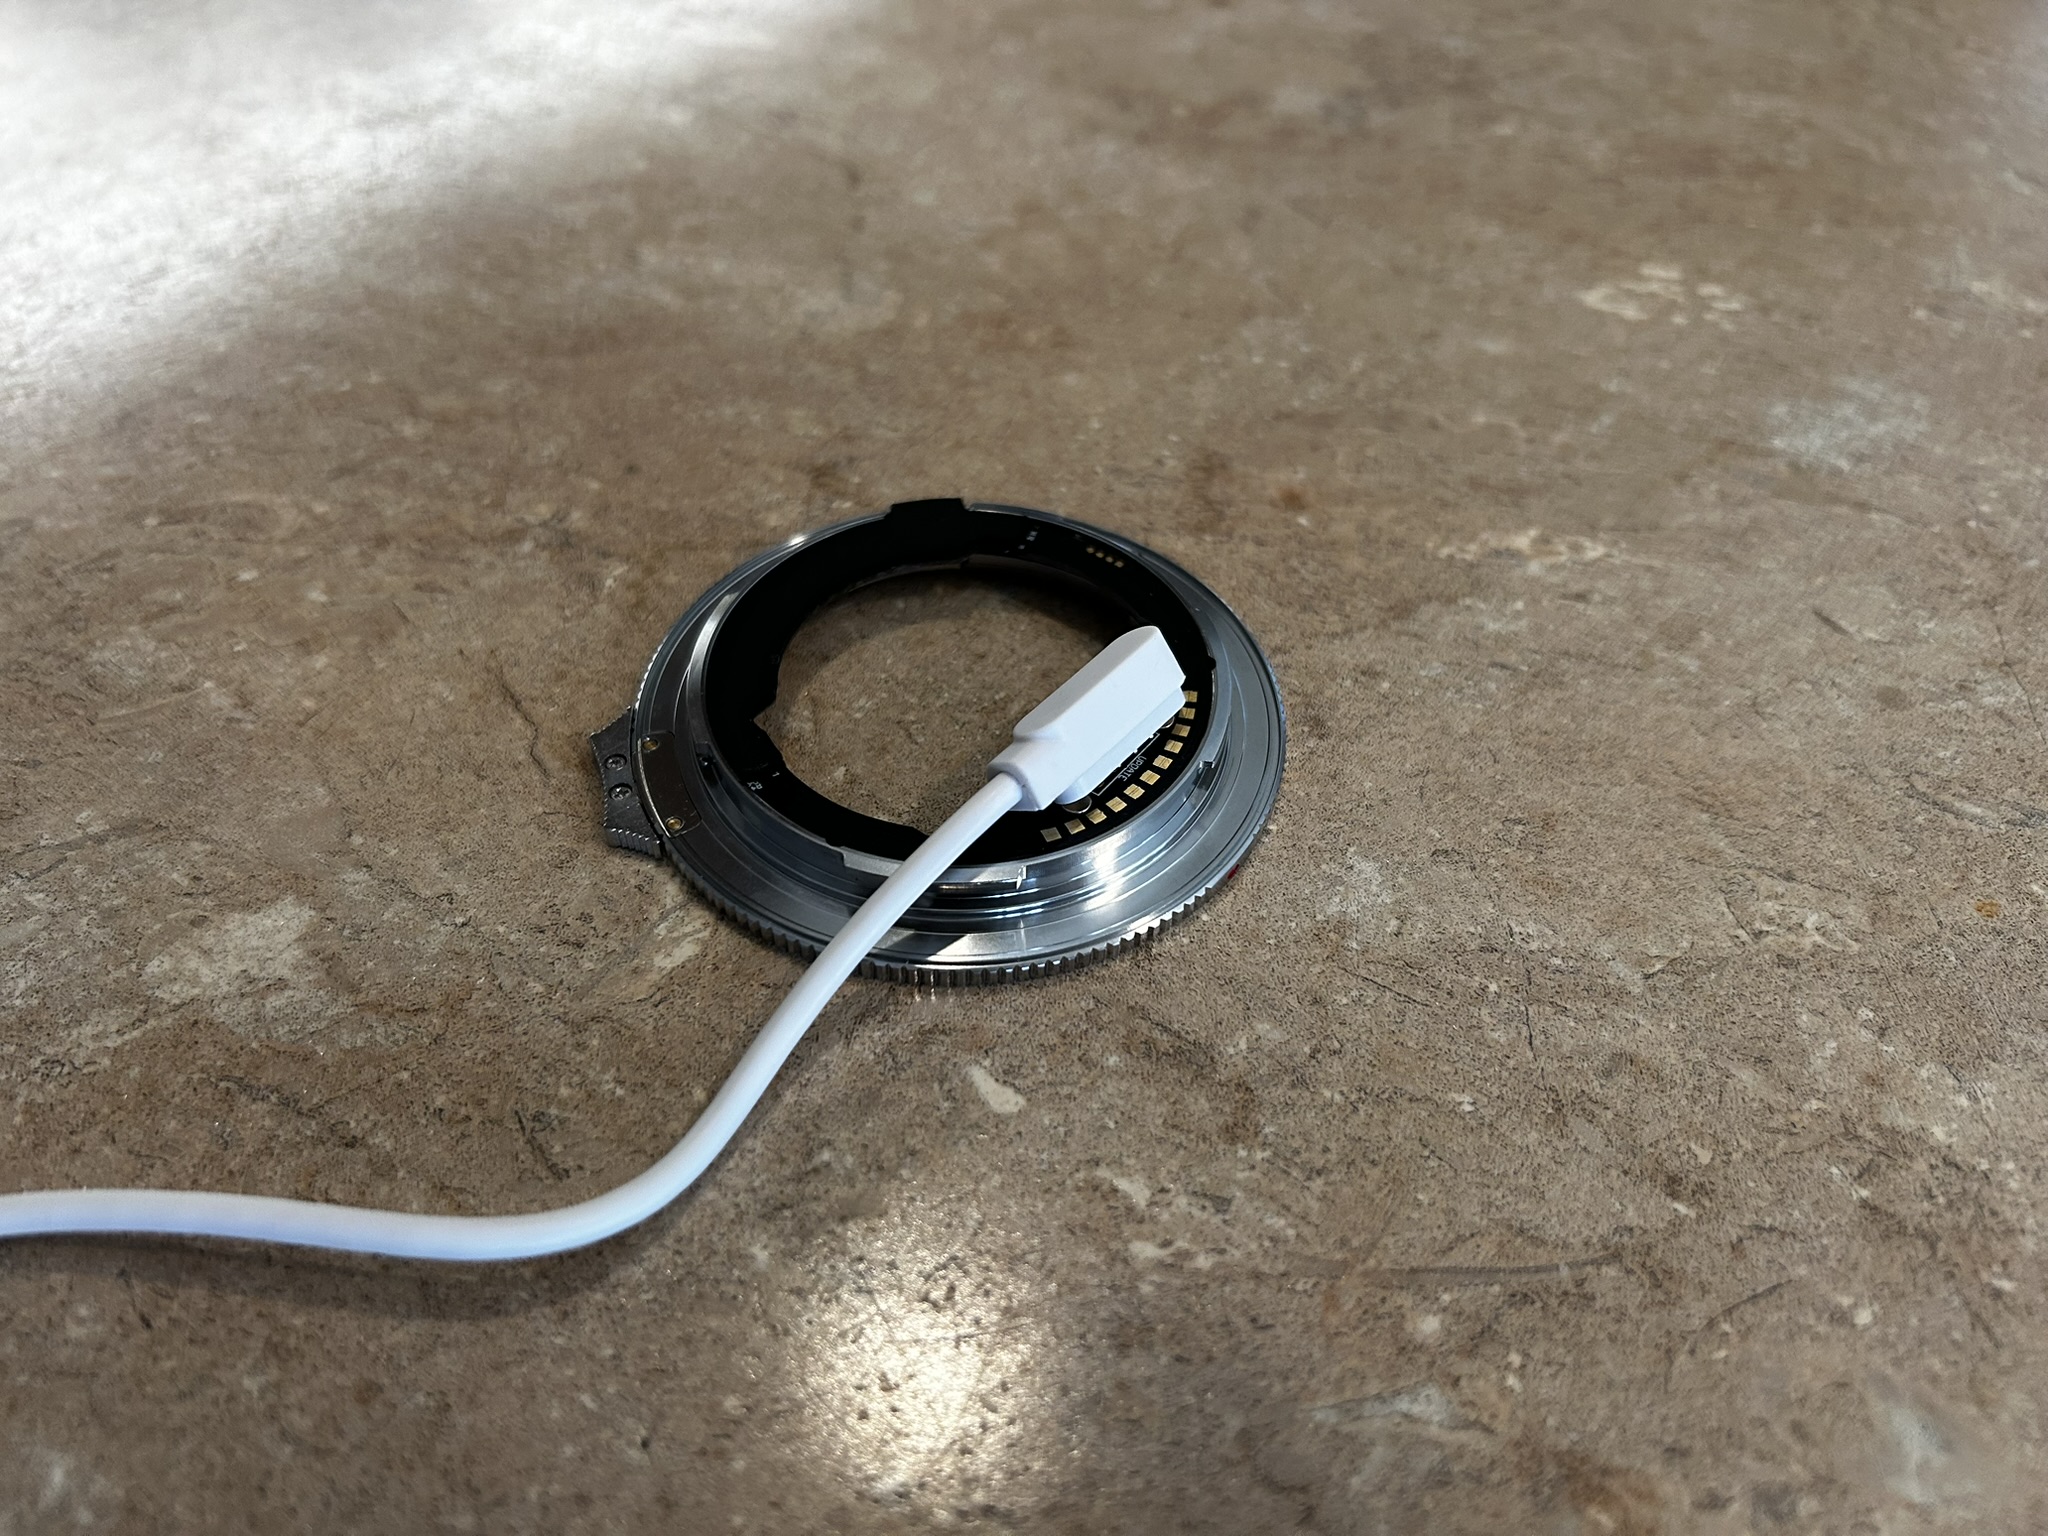
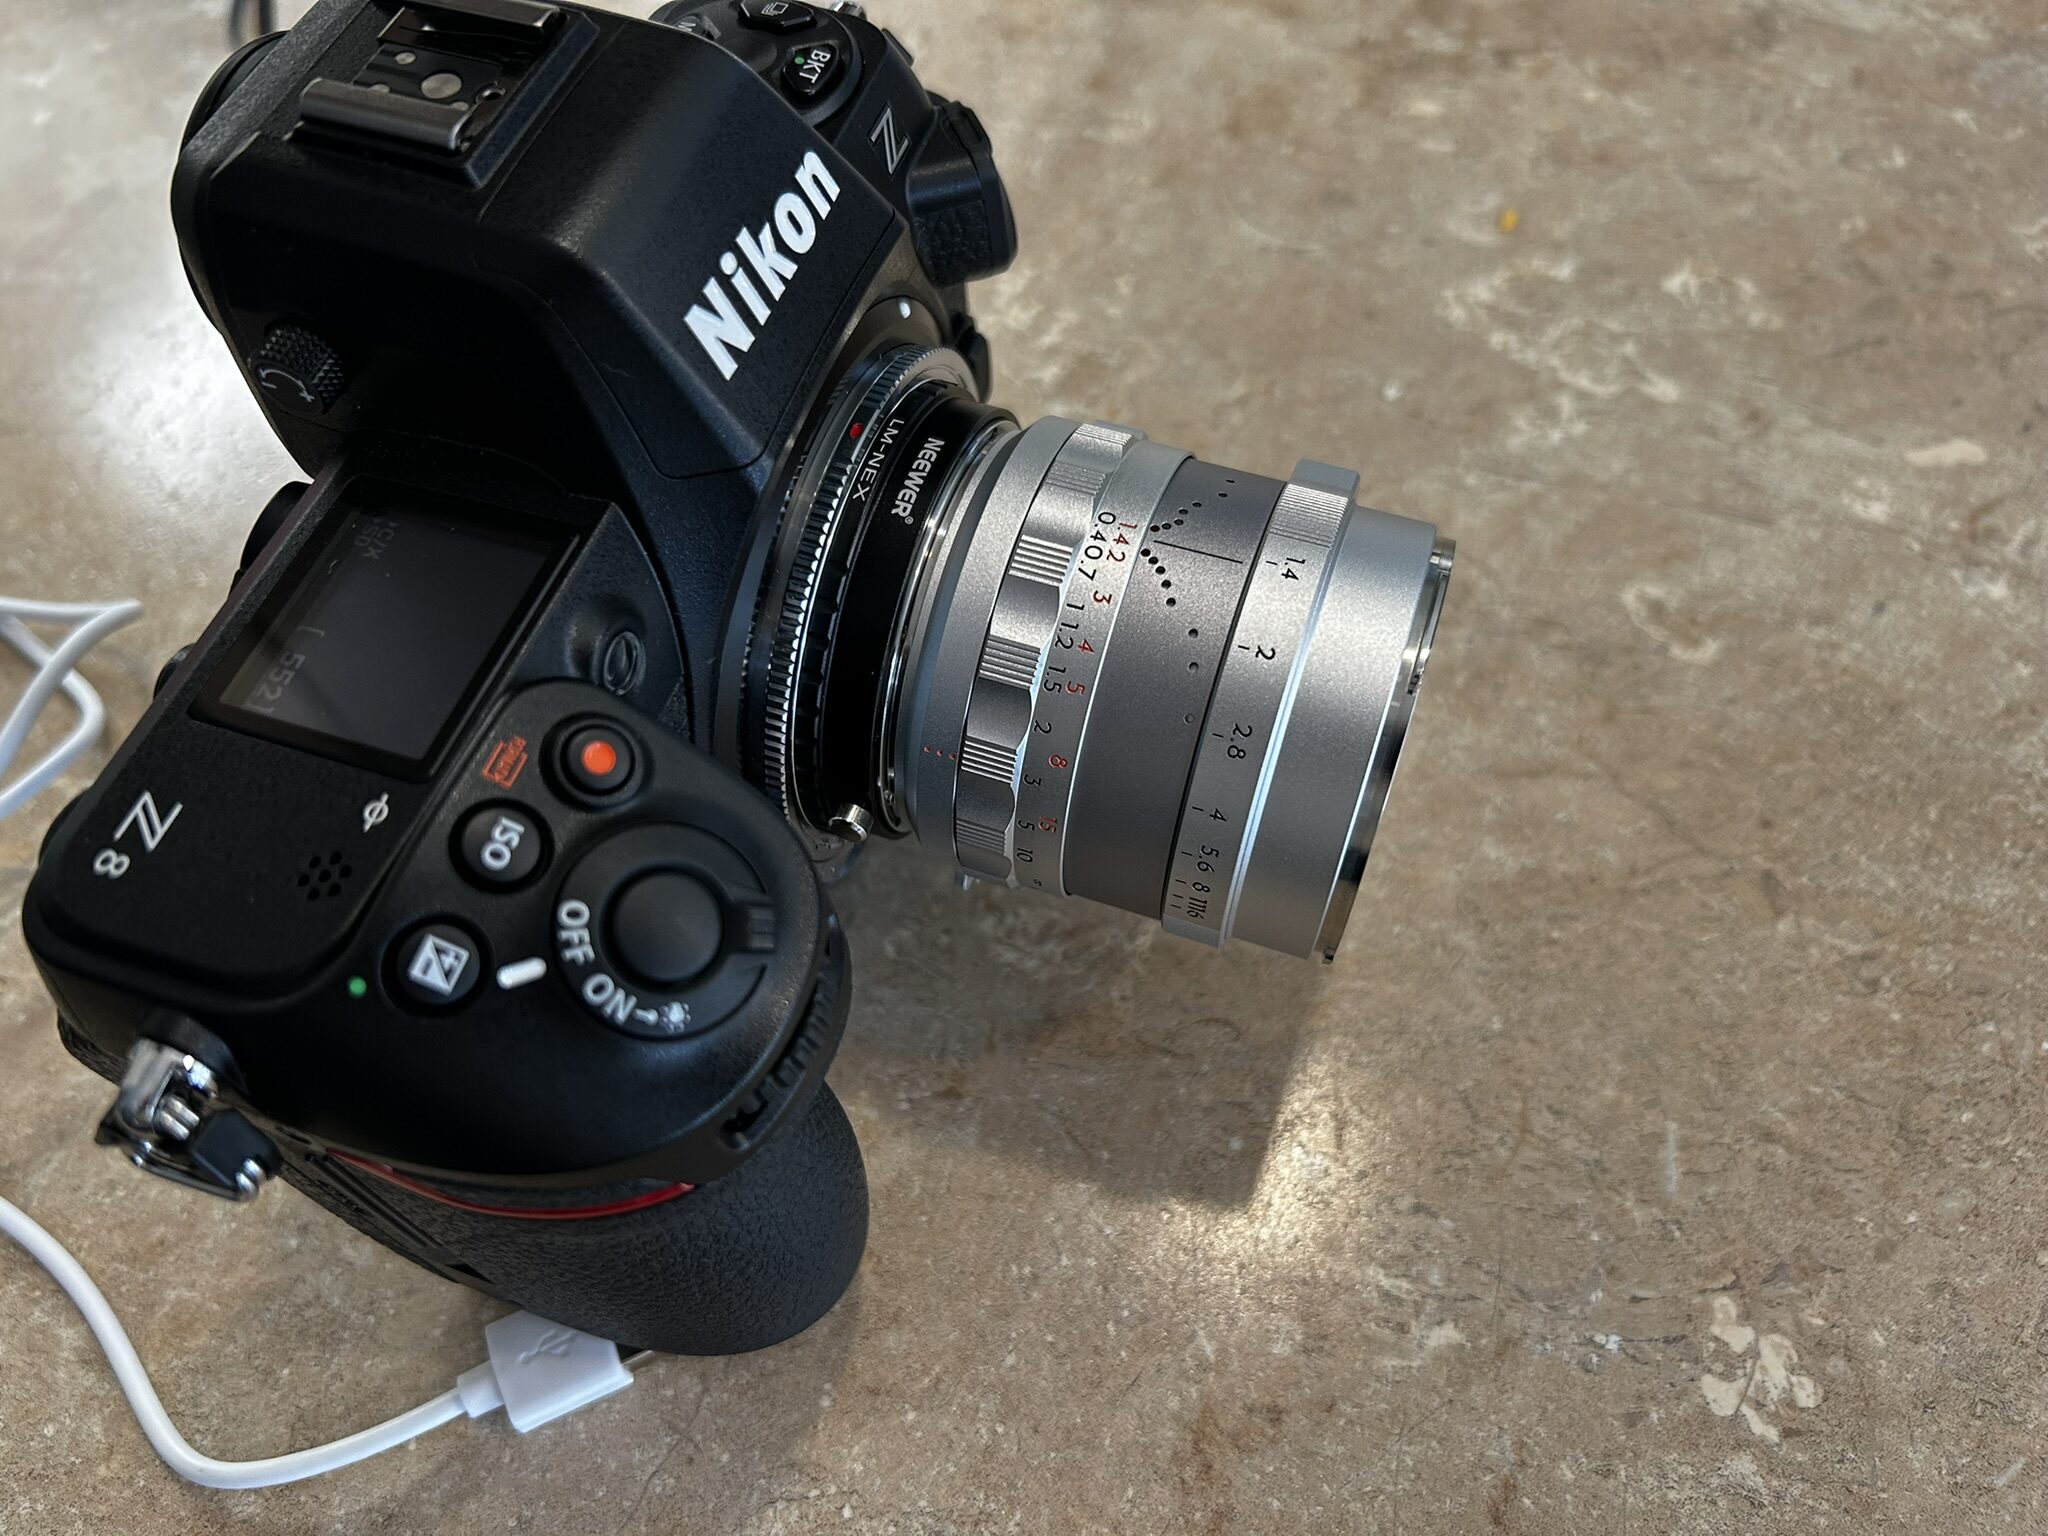
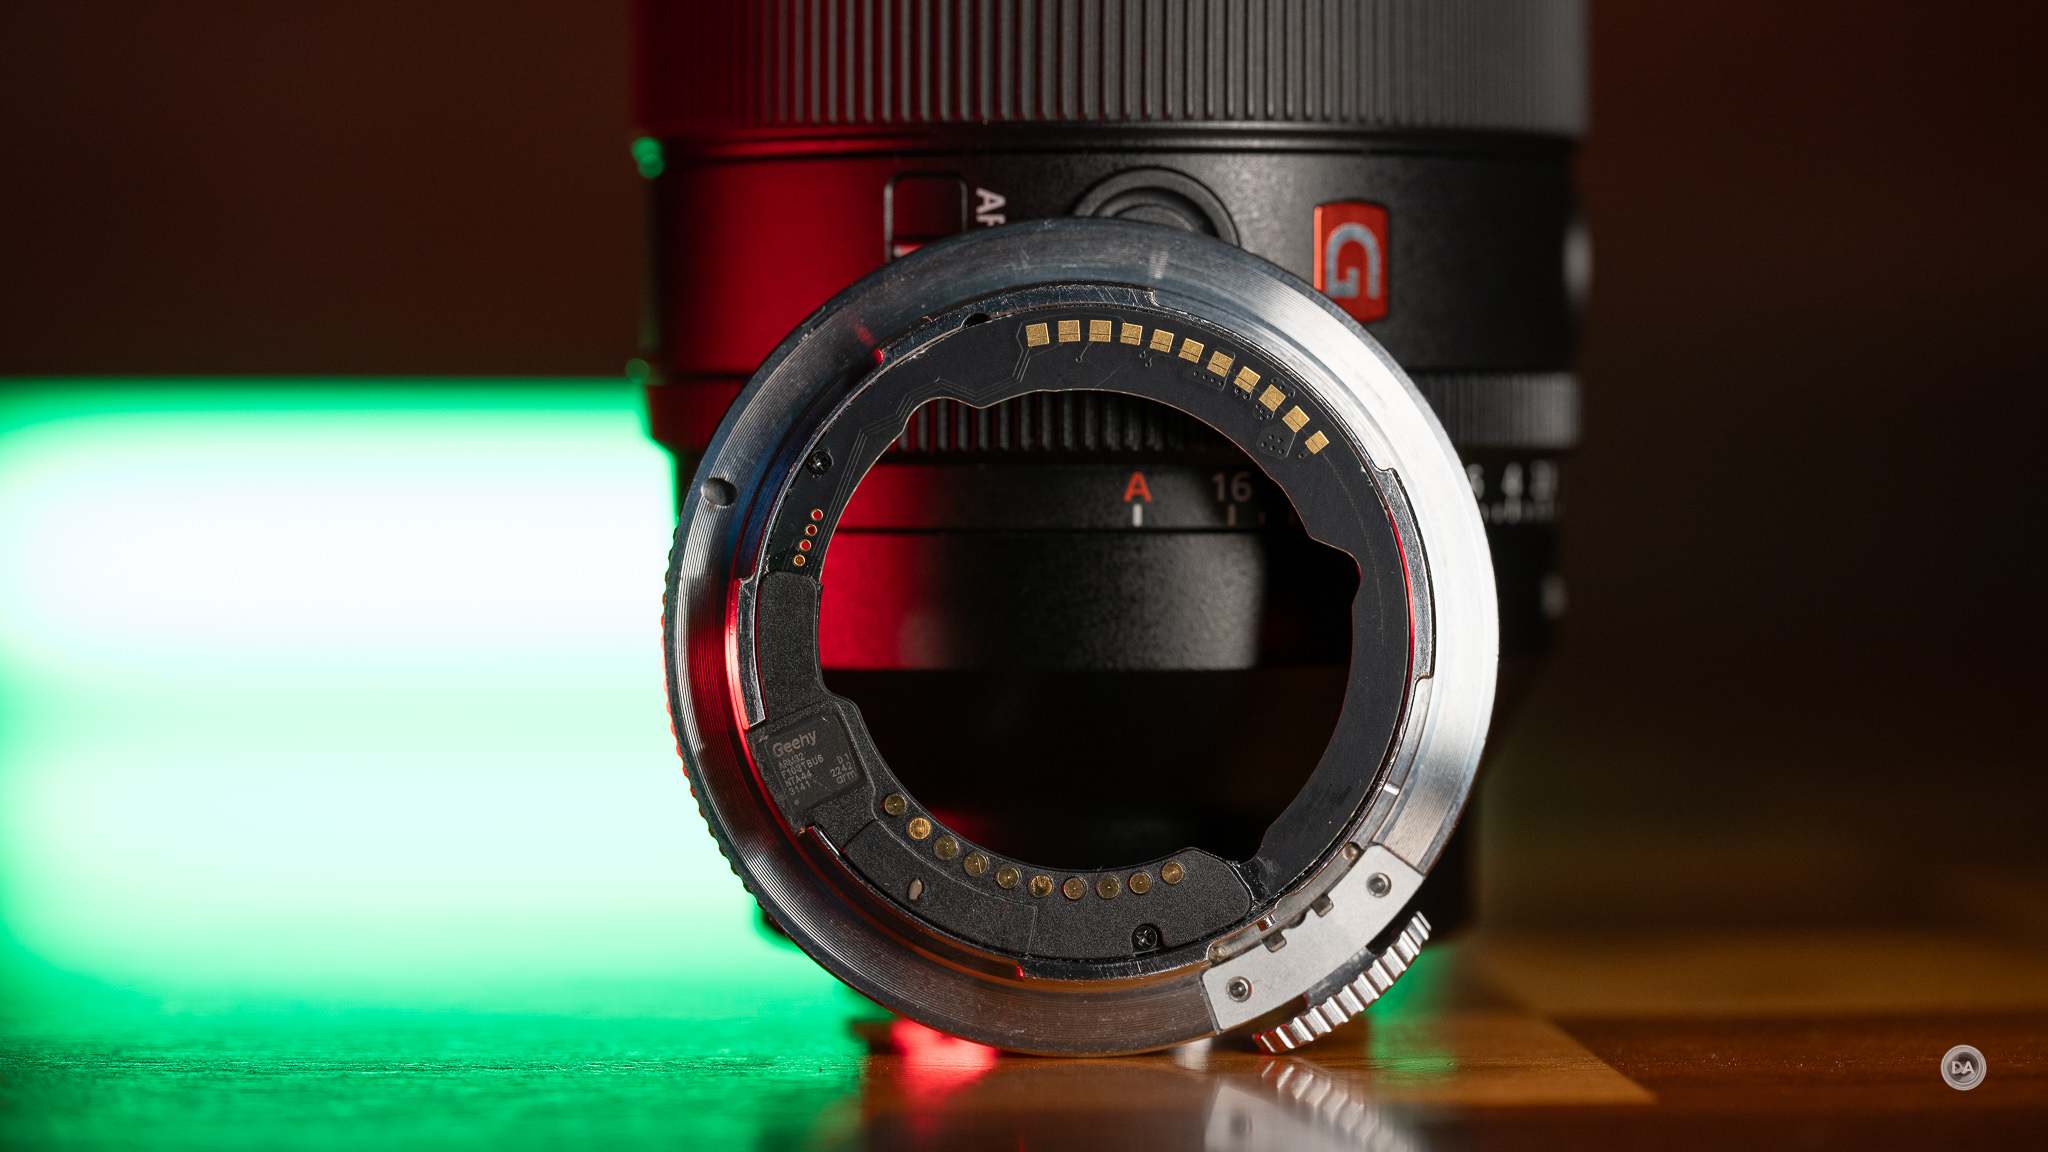
The magic of the adapter is the dual sets of electronic contacts front and back. On the backside you will see the electronic contacts for communicating with the Nikon camera. There is a second set of contacts that says, “Update” above it, and this is for doing firmware updates. There is an included cable that magnetically attaches to the larger circles and then data is transferred to the adapter. The other end of the cable is a USB-A connector.
I did do a firmware update, and found that the magnetic attachment wasn’t quite as strong as what I would have liked. You need to be sure that the cable doesn’t hang down in between the adapter and your computer, as it will pull the contacts away from having a firm connection. I actually held the cable tight to the adapter during the review.
The actual update was just a matter of dragging the firmware update file into the folder for the adapter that pops up once the connection is made. There isn’t really any kind of reaction, but if you let it sit for a minute, then eject the folder and reconnect, you’ll find that the update has in fact happened.
The front of the adapter has the pins that will come in contact with the Sony E-mount lenses.
Presumably there is some kind of processor hidden in there to do the focus algorithm conversions.
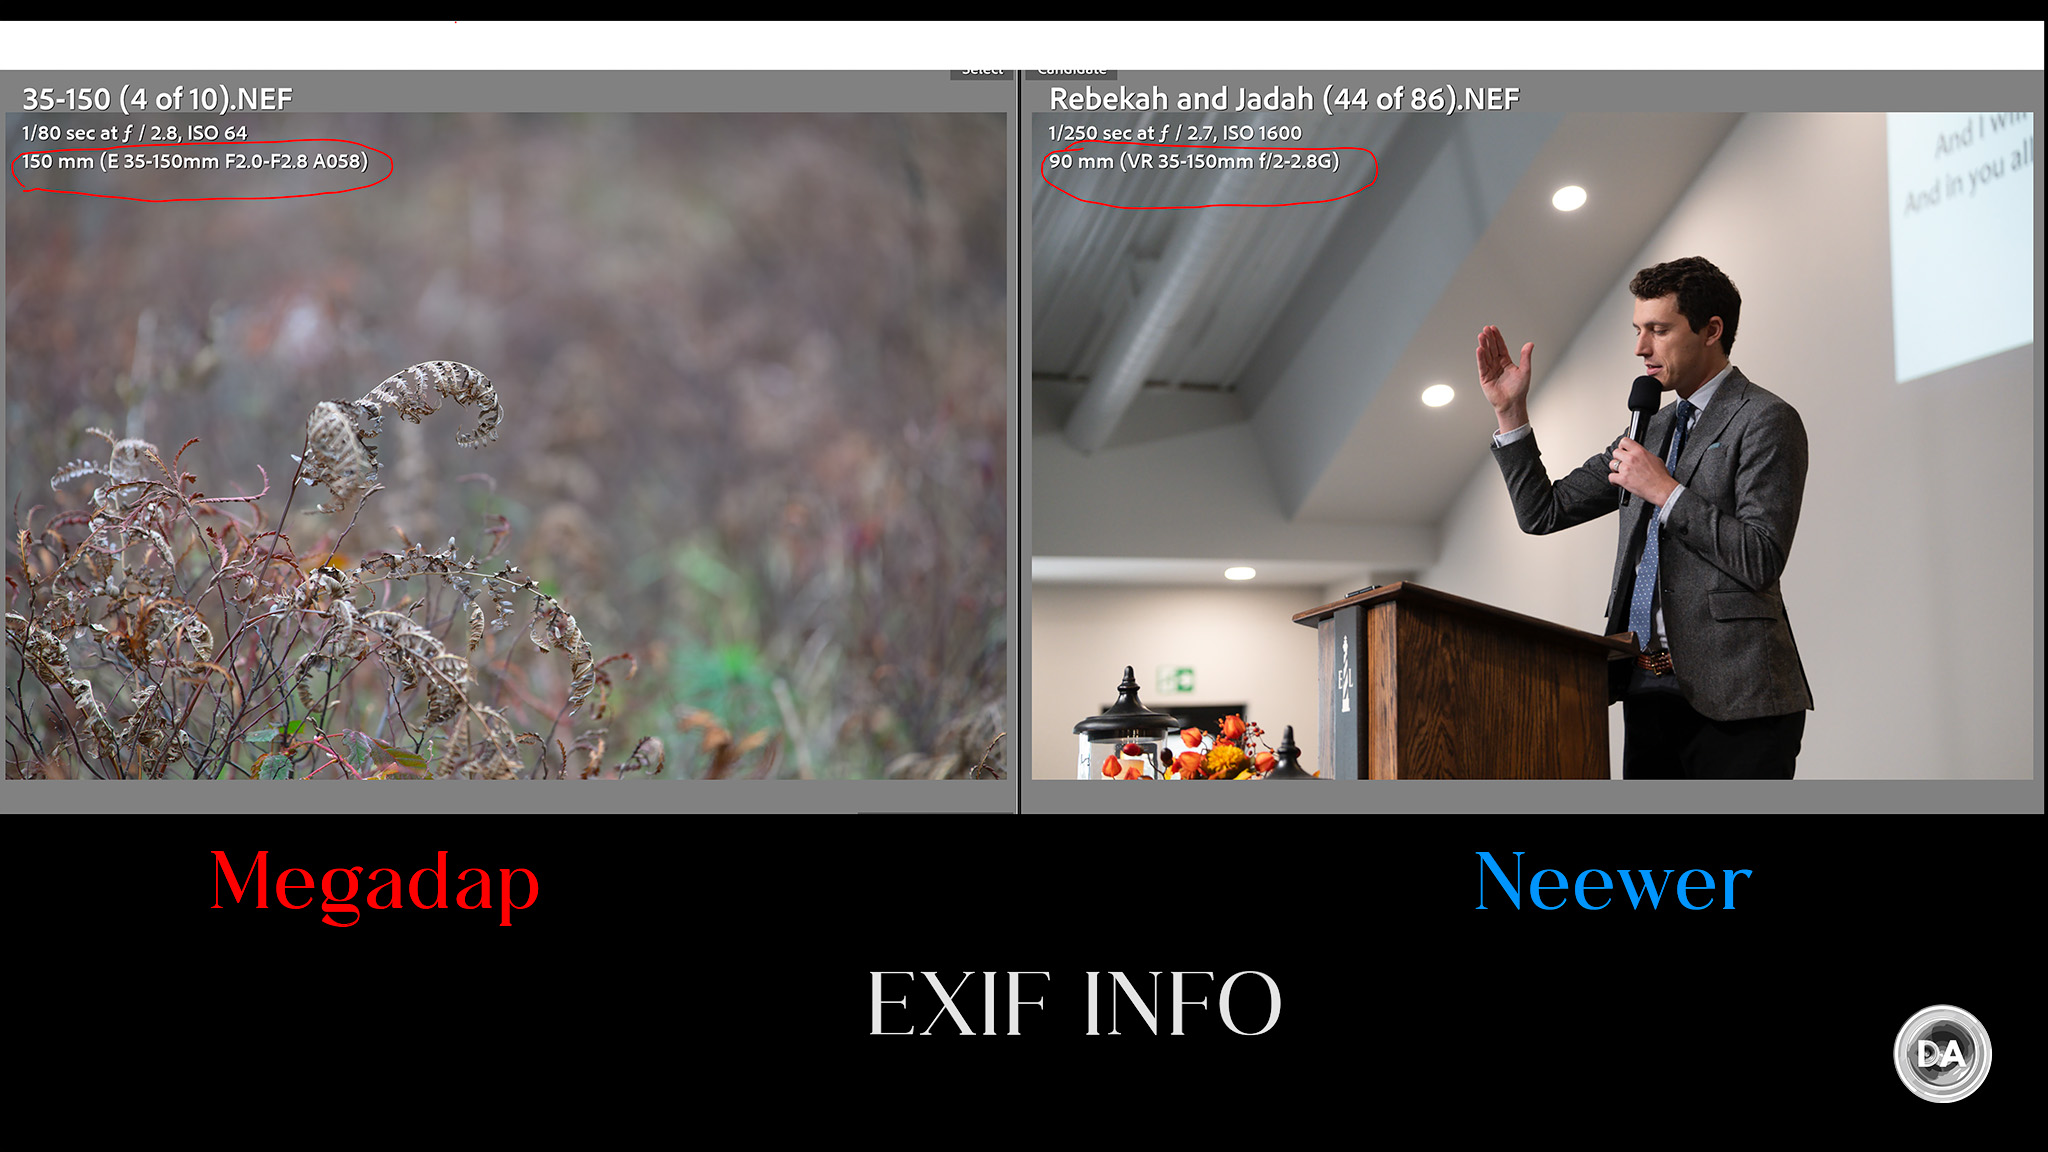
The Megadap adapter definitely bests the Newer in one regard: it accurately delivers the EXIF information, whereas the Neewer seems to try to find a Nikon equivalent.
Both of the images in the comparison were shot with the Tamron 35-150mm F2-F2.8 VXD, and the Megadap shows the proper lens designation (including A058, Tamron’s internal code for the lens), while the Neewer reported VR 35-150mm F2-2.8G, which is clearly not accurate (this is not a G lens, nor does it have VR). The Megadap also reported properly for the two Sony lenses I tested, the Sigma lens, and the Viltrox lens. The Neewer reported the Sony lenses as VR 35mm F1.4G and VR 50mm F1.4G, while the Megadap properly recorded them as FE 35mm and 50mm F1.4 GM, respectively.
Still, for a relatively low amount of money, you can mount your E-mount lenses on your Nikon camera and enjoy autofocus.
Manual Focus Aids?
The Neewer NW-ETZ has an additional trick up its sleeve that the Megadap lacks. If you attach manual focus lenses (even those without electronic contacts), the NW-ETZ serves to provide electronic communication, giving you focus confirmation and even allowing Nikon’s focus guide to work (which prompts you which direction to turn the manual focus ring to achieve proper focus).
I had a lot of fun with my Thypoch Simera 28mm F1.4 (an M-mount lens), but utilizing an adapter from M-mount to E-mount, and then using the NW-ETZ to complete the journey to Z-mount. It was easy to nail focus, and the focus confirmation proved very accurate.
You can see just how precise that focus was here:
Somewhat disappointing, however, is that even while my Z8 camera allows me to manually enter the EXIF information for a lens like this (and I went to the trouble to do so!), the adapter reported the lens as 50mm F1G – not correct in any detail!
But this was unquestionably a nice hidden feature, as this worked for any fully manual (no electronics) lens that I tried, whether it was E-mount, M42, or M-mount. Just use an additional adapter to E-mount (if needed), and the NW-ETZ provides the electronics. Pretty cool!
Stills Autofocus with the NW-ETZ
When reviewing the Megadap ETZ21 Pro, I found that my focus results were pretty consistent. Lenses with faster focus motors focused faster, obviously, and more confident autofocusing lenses worked better at the extremes. My findings are more nuanced with the NW-ETZ, as some lenses worked fantastically, while others didn’t really work particularly well.
I tested the Sony 35mm and 50mm F1.4 G Master lenses, the Tamron 90mm F2.8 Macro, 28-200mm RXD, and the 35-150mm VXD, the Sigma 85mm F1.4 DN, and the Viltrox AF 16mm F1.8 and 135mm F1.8 LAB.
What’s wild is that my results were not consistent within brands. Let’s start with the two Sony lenses. The 35mm F1.4 GM works pretty much like a native lens, with fast, accurate results.
The very similar 50mm F1.4 GM behaved very differently. It focuses slowly and gradually, and with close focus targets I almost exclusively got results like this:
I would have to use manual override (which works great on Nikon, by the way) to get focus in the right zone, where autofocus would mostly do its job, getting me this properly focused result.
So your perception of the adapter is really going to depend on which lens you have attached to it. My initial impression (based on the 35mm) was the Neewer adapter might be better than the Megadap, but when I switched the 50mm, I was changing focus options, checking connections, and wondering if I was using the same adapter.
So, on the positive list. Outside the 35mm GM, I had very good results with the Tamron 35-150mm VXD. We used the combination for a church service and baptism, and I got fairly similar results to what I would have gotten normally with the lens on a Sony body. Very slightly slower, perhaps a hair less accurate, but perfectly usable.
The Tamron 90mm F2.8 Macro VXD also worked brilliantly, delivering results not far from what I would expect from a native lens.
I even found that I didn’t have the issues with focus not wanting to grab a foreground subject, so in this regard I found that it worked better than what I saw with the Megadap.
But when I put the Tamron 28-200mm RXD, I got absolutely terrible results, with focus basically not happening regardless of what I did to try to coax it along. I basically was resorting to manual override to get anything in focus.
In the case of Tamron lenses (at least the three I tested), it seems like the adapter likes the newer VXD motor, but doesn’t like the older RXD motor of the 28-200mm.
Ironically, however, the STM focus motor of the Sigma 85mm F1.4 DN (definitely not the latest and greatest technology) worked fine, with the Sigma delivering good speed and precision.
Finally, the Viltrox 16mm F1.8 worked perfectly, delivering accurate results even against strong backlighting.
The new 135mm F1.8 LAB lens sports a VCM motor that is similar in technology to the Tamron VXD focus motor, but the 135 LAB refused to focus at all, instead emitting a whine and refusing to do anything.
In the video review you can see my formal tests with the 35GM and 50GM, and how radically different the result with these two similar lenses is.
In other words, the results were all over the map. When a lens works on the Neewer NW-ETZ, it tends to work really well, but results are obviously much more inconsistent. It’s still generally true that better focusing lenses are going to make the transition better. That makes sense, as really the adapter’s job is to send the correct communications from the lens to the AF system via the contacts, so a fast focusing lens should continue to be a fast focusing lens, with the only real slowdown being from the need to “reinterpret” the focus algorithms from one language (Sony) to another (Nikon). The wild card in the mix here is that a fantastically focusing lens like the Sony FE 50mm F1.4 GM isn’t really all that great via the Neewer adapter, but was pretty great via the Megadap adapter.
Now, to be fair, you could eventually get the focus results you wanted with most lenses (save those that just really refused to work), like this lovely shot with the 50GM below.
But in many situations I felt like I could achieve greater success with the Megadap adapter.
Video Autofocus
*These results will be easier to see in the video review for obvious reasons.
The good news is that if you have a lens that focuses well for stills, you will also get fairly decent video AF. I did a series of test with the two GM lenses, and found that AF didn’t pick me up at all as I walked towards the camera with the 50mm F1.4 GM attached via the NW-ETZ.
With the 35mm F1.4 GM the combo tracked me perfectly, and even quickly picked me when I stepped out and back into frame.
I then tested focus pulls with the more functional lens (35GM), and found that I could generally get decent focus pulse, but I found that I encountered more pulsing during focus pulls, which is generally a byproduct of focus not being confident enough to lock.
So, as before, you’ll get your best results for video AF when using more confident lenses. I wouldn’t call video AF “native” in performance, but I would call it good enough…so long as you are using one of the lenses that the adapter likes.
Conclusion
Switching to a new camera brand can be a daunting experience, as the sheer cost of selling what you have (typically at a significant loss) and then rebuying everything for the new brand is expensive. The Neewer NW-ETZ is an inexpensive ways to bridge that gap. You can keep using the lenses you love without adding any bulk and only minimal weight, and that weight is right up close to the camera where you won’t notice it anyway. I also really like the potential benefit for manual focus lenses and the idea of getting a focus confirmation chip as a free bonus.
After a stellar start, I was disappointed that I got somewhat inconsistent results as I widened my pool of lenses. On the lenses where the adapter worked well, it worked really well, delivering fast, accurate autofocus.
But in other cases, I was obviously much less impressed. The Megadap seems like the safer choice to me, though you will have to pony up an extra $100. Perhaps that’s because the Megadap is two generations in, while this is Neewer’s first shot. I think there’s a lot of potential here, because when it works, it works really well, but there are definitely some bugs left to squash.
Pros:
Love how compact the adapter is
Manual focus electronic confirmation is a nice bonus
Autofocus for stills (with lenses it likes) is generally very good
Was able to track some action during video capture
DISCLAIMER: This article and description contains affiliate links, which means that if you click on one of the product links, I’ll receive a small commission. As an Amazon Associate I earn from qualifying purchases.
Megadap ETZ21 Pro Sony E to Nikon Z Adapter Review
Dustin Abbott
November 25th, 2024
Megadap ETZ21 Adapter Review
When I first started using Sony E-mount, I was coming off a period of more than a decade where I had used the Canon EF ecosystem exclusively. It was a delight to find that there were adapters that would allow me to use my Canon lenses on my Sony camera as well. I used and reviewed a number of popular adapters from brands like Metabones, Sigma, and Vello, but found that they all came with some serious limitations. Over time I tired of used my EF lenses adapted for two primary reasons: 1) size and weight. 2) Inadequate performance. My favorite of the adapters proved to be the Sigma MC-11, but it added 125g to the weight of every lens attached to it and added another 26mm in length. This was necessary to adapt a DSLR mount to a mirrorless design. The optical path needs to be in a completely different place, so the optics need to be moved further away from the sensor to achieve proper infinity focus. I found that there was a huge spectrum of performance, too, with some lenses working fairly well and others being very inconsistent. Video AF, in particular, was pretty rough where it existed at all.
But here we are again looking at a new type of adapter, in this case adapting one mirrorless lens mount (Sony E-mount) to another mirrorless lens mount (Nikon Z-mount). The rules are a bit different this time. For one, the “flange distance” between the two mounts is similar, so now the adapter itself is just a few millimeters thick (2mm, to be exact), adding almost no additional bulk to lenses. There is a bit of weight, but, at 43g on my scale, it’s a third of what we dealt with the EF to FE adapters. And the performance seems to be better, too, with even some usable (though not flawless) performance for video. So is the Megadap ETZ21 Pro worth a $250 investment? Find out my thoughts by watching the video review below…or just keep reading.
Thanks to Megadap for providing a review sample of the ETZ21 Pro. As always, this is a completely independent review. All opinions and conclusions are my own.*The tests and most of the photos that I share as a part of my review cycle have been done with the 45MP Nikon Z8, which I reviewed here.
There will be some continuity between this review and another of the Neewer NW-ETZ adapter, as I’ve spent time with both in an attempt to get up to speed as to which adapter works better.
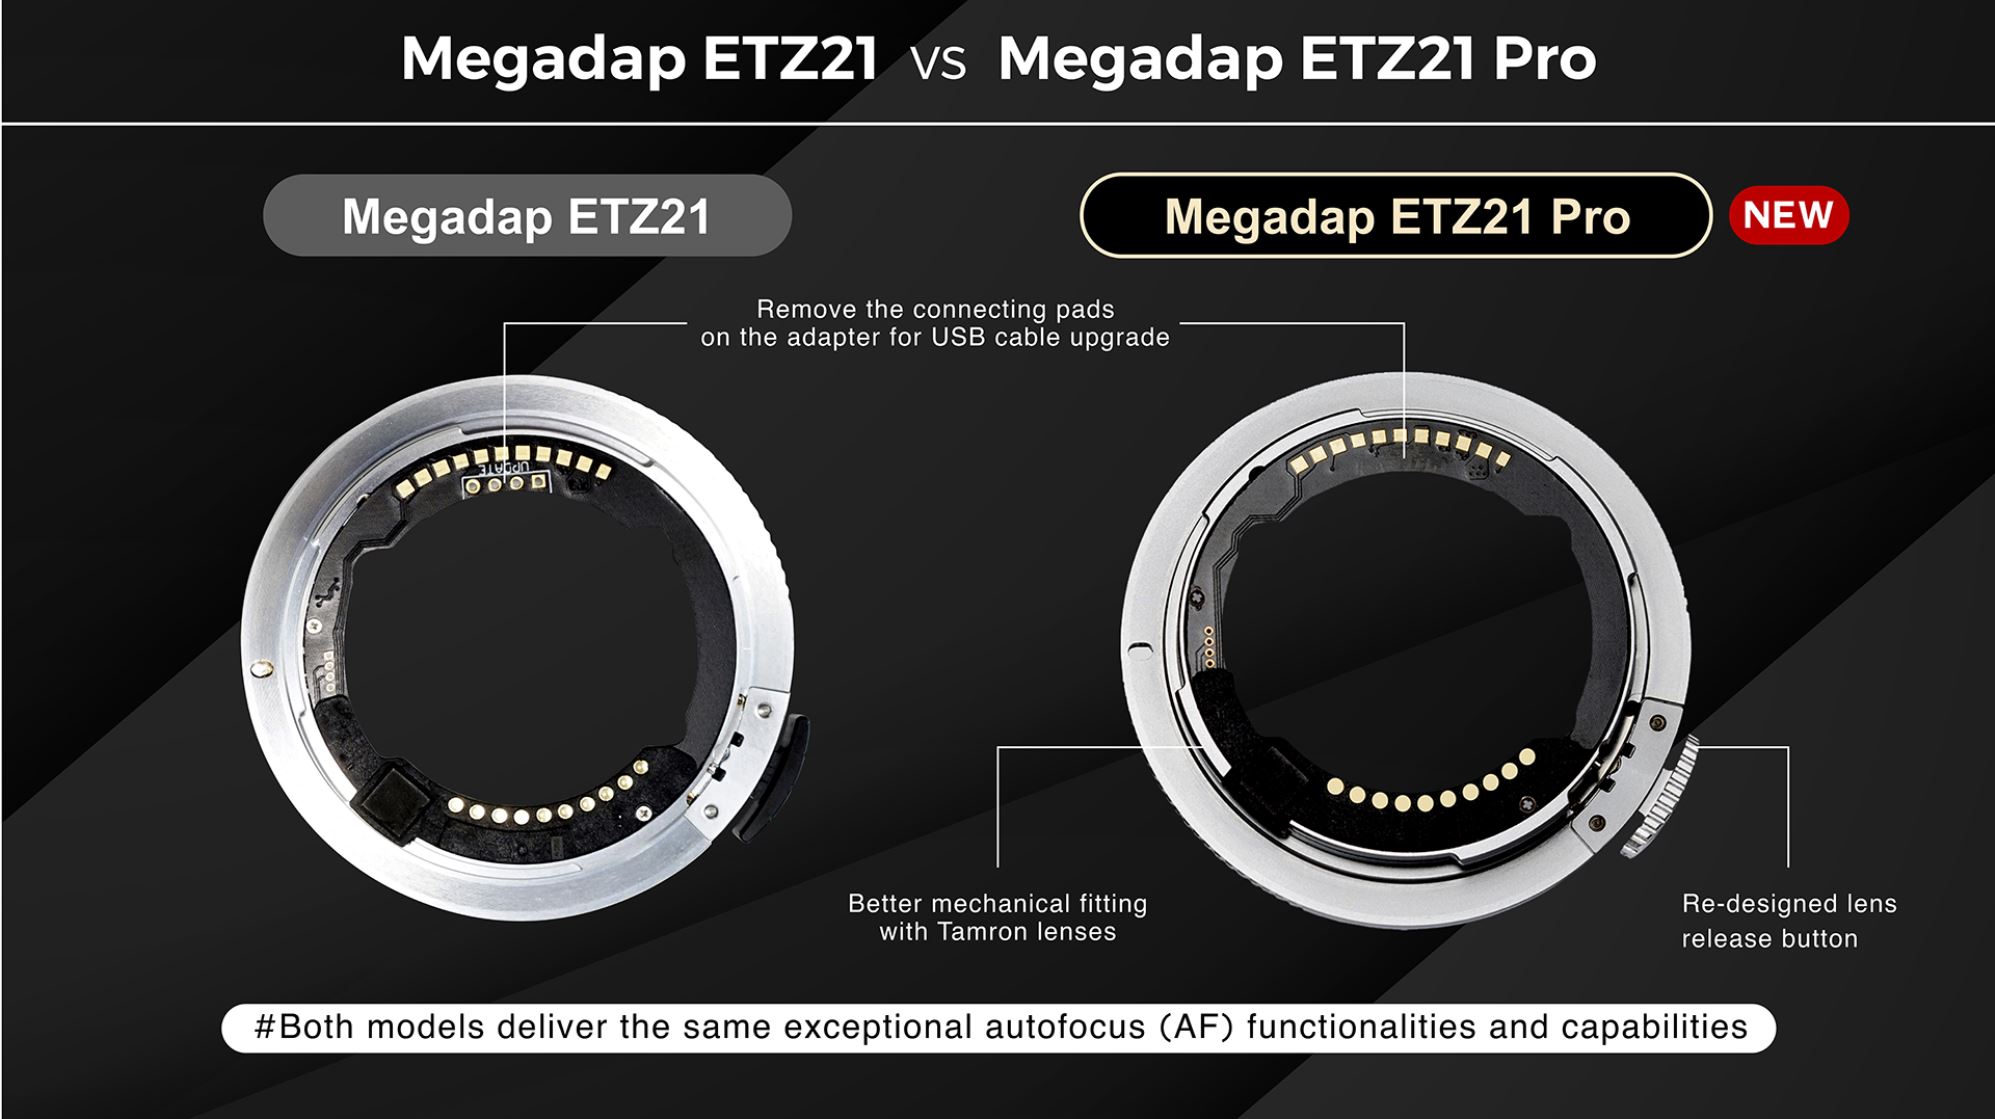
I’m reviewing the more recent ETZ21 Pro. There was previously an ETZ21 adapter as well that some of you may already own. What’s changed from the standard adapter to the Pro adapter?
There are two significant improvements. One is that rather than having to do firmware updates through a separate process, you can now run firmware updates through the camera body just as you would a Nikon lens. The second major improvement is to the mechanical design to allow for a better fit for Tamron lenses (and other third party lenses as well). There’s also a redesign to the lens release button to allow for a smoother mount/unmount process. Megadap repeatedly emphasizes that the performance of both adapters is the same, so this isn’t going to change the autofocus performances in any appreciable way.
In my research, I found that Megadap has released 5 firmware updates in the past year, which is encouraging, as that shows an ongoing commitment to improving their product not just via new releases. Improvements include squashing bugs with certain lenses, improving function, adding compatibility with new brands, and helping to eliminate issues like battery drain.
So does it work? The short answer is “yes”, and in many situations autofocus is remarkably ordinary. The shot above was taken with the ETZ21 Pro allowing my Sony FE 50mm F1.4 G Master (a beautiful lens!) to work on my Nikon Z8. And how precise is that focus at F1.4? Take a look here:
So let’s dive a little deeper.
Build and Design
As noted previously this is a pretty simple device in some ways. Essentially it feels like a metal lens mount detached from a lens.
At just 2mm thick, it essentially just goes onto the lens like a second mount.
You really won’t notice that the adapter is there once mounted, and I found that in the half dozen lenses that I tested with it, mounting and unmounting lenses remained relatively simple. Lenses fit well without any wobble. I prefer to remove the lens from the camera before removing the adapter from the lens, as there isn’t much left to grab from the camera mount once the lens is removed. The adapter is very, very thin. Always be sure to power down the camera before removing anything, however.
The improved release mechanism works nicely, and isn’t hard to depress for removing lenses.
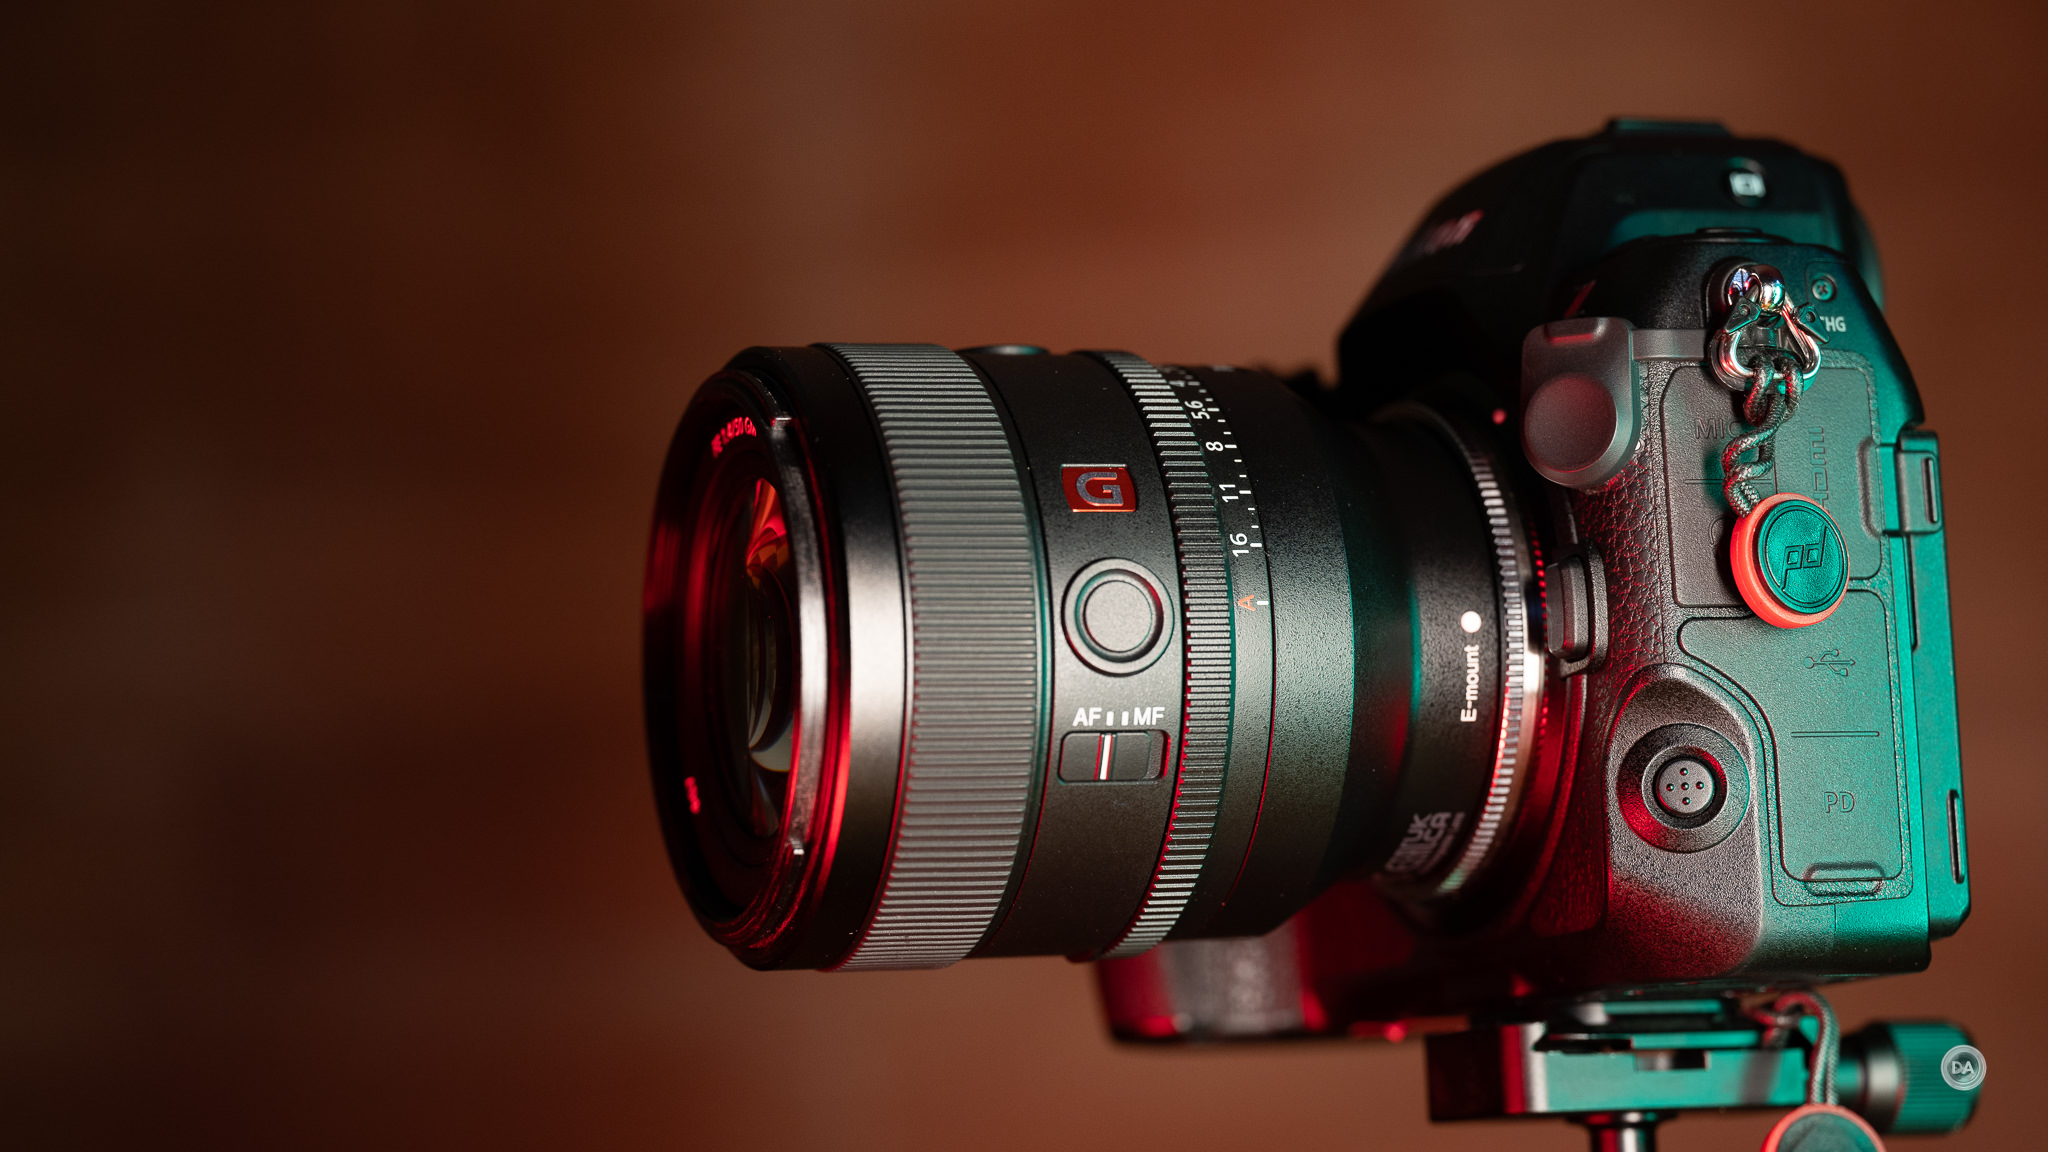
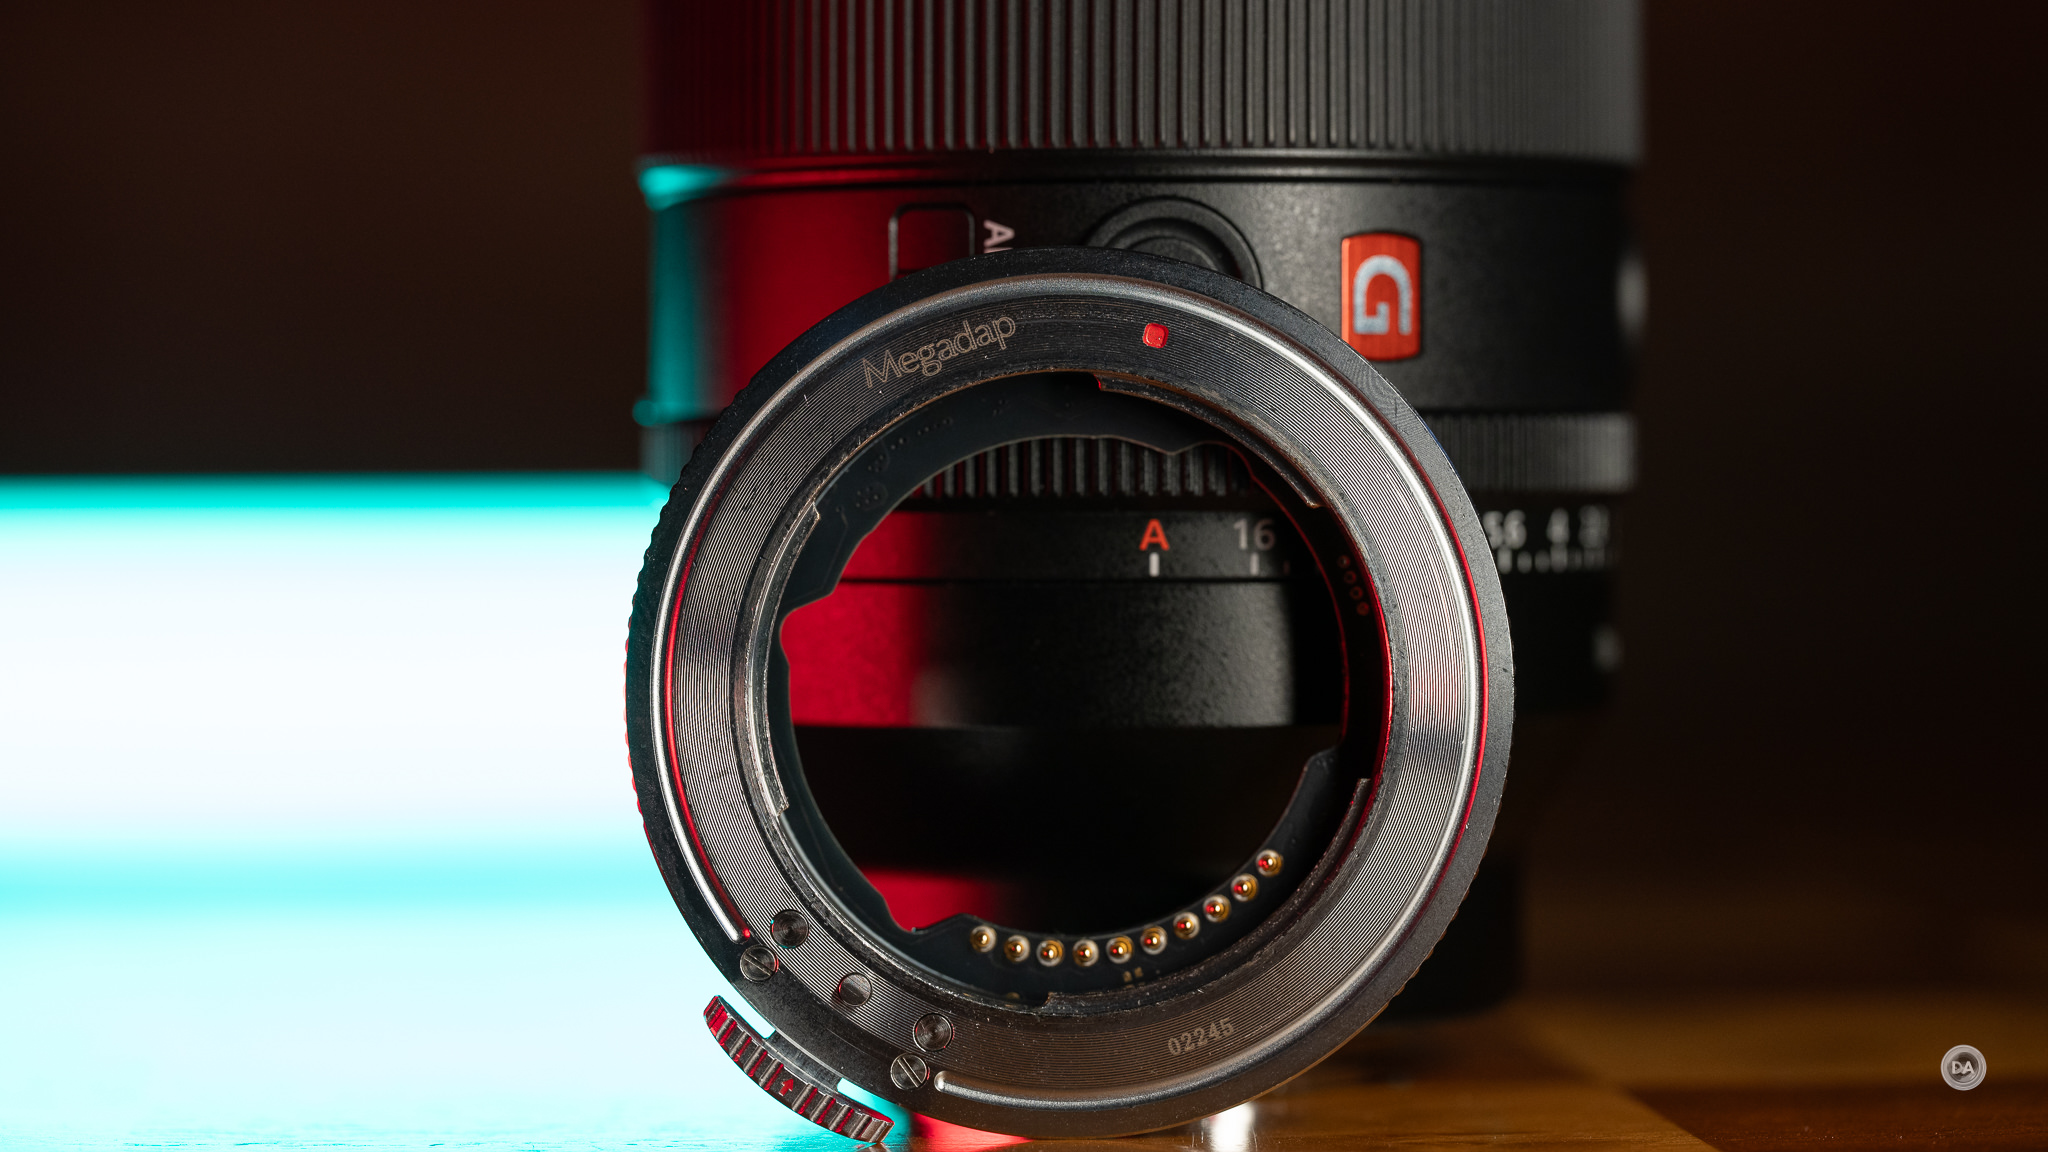
The magic of the adapter is the dual sets of electronic contacts you can see at the back of the adapter. One is the backside of the Sony contacts, while the most prominent contacts (on the top of the image below) are the Nikon Z-mount contacts.
The front of the adapter has the pins that will come in contact with the Sony E-mount lenses.
Presumably there is some kind of processor hidden in there to do the focus algorithm conversions, though I wasn’t able to find any information on that.
The Megadap adapter definitely bests the Newer in one regard: it accurately delivers the EXIF information, whereas the Neewer seems to try to find a Nikon equivalent.
Both of the images in the comparison were shot with the Tamron 35-150mm F2-F2.8 VXD, and the Megadap shows the proper lens designation (including A058, Tamron’s internal code for the lens), while the Neewer reported VR 35-150mm F2-2.8G, which is clearly not accurate (this is not a G lens, nor does it have VR). The Megadap also reported properly for the two Sony lenses I tested, the Sigma lens, and the Viltrox lens. The Neewer reported the Sony lenses as VR 35mm F1.4G and VR 50mm F1.4G, while the Megadap properly recorded them as FE 35mm and 50mm F1.4 GM, respectively.
Megadap reports that at the moment their adapter is the only one to work with Nikon DX (APS-C) cameras, though that will almost certainly change in the future.
One final observation – you will be covering the weather sealing gasket on your Sony FE mount lens, if so equipped, and the adapter itself has no gasket, so there is some possibility that your weather sealing may not be as complete with the adapter in place, so bear that in mind.
Stills Autofocus with the ETZ21 Pro
I’ve been interested in seeing how these adapters work with good Sony lenses, including the 35mm and 50mm GM lenses, but also how they work with some third party lenses, including popular lenses from Tamron, Sigma, and Viltrox.
Let’s start with a practical test. I took the the Sony 50mm F1.4 GM on a hike using the ETZ21 Pro on my Z8, and also had an inexpensive Yongnuo YN 33mm F1.4 mounted on a Sony body. Both combos, in theory, shake out to about the same thing, as the YN 33mm is an APS-C lens, leaving a 50mm equivalence. Autofocus in bare form would obviously favor the GM lens, which has multiple XD (Extreme Dynamic) linear motors whereas the Yongnuo has a more basic single STM focus motor. In many situations the adapted Sony lens worked about as well as the Yongnuo (which actually focuses quite well), with one exception that stood out to me. When attempting to focus on a close subject, the Megadap combo would often stick on the background, requiring me to try to find a more obvious (bigger, higher contrast) subject in about the same focus distance I wanted and then going back to the desired subject. If I didn’t do that, focus looked like this:
The correct focus (which I achieved by pointing the camera basically at the ground first and then returning to correct subject. Focus would lock accurately then.) looks like this:
It’s worth noting that the Yongnuo in shooting the exact same shot immediately locked on the correct focus point.
Now clearly the GM lens delivered a superior looking image than the cheaper lens, but it does go to show that even an inexpensive native lens is going to autofocus a little better than an adapted lens in this situation.
Still, however, I was able to get all the shots that I wanted on my hike, and the end results were accurately focused. Shots like these ferns that still provided a pop of green in the mid-November death of vegetation.
Or this bare branch with just enough moss growing on it to provide a nice subtle color contrast against the background.
These shots were all at F1.4, but I also had good results when shooting landscape shots at smaller apertures.
So, I think I can safely say that autofocus accuracy is not a problem. At the margins, however, I think you’ll find a few places where autofocus doesn’t quite match what’s possible with a native lens.
What’s interesting, however, is that if you have a high speed autofocus system on Sony, you will continue to get fast autofocus on Nikon via adapter. I compared the focus speed of the Nikkor Z 50mm F1.4 lens and that the of Sony 50mm F1.4 GM lens via adapter back to back on my Z8, and there was no question that the focus speed (and arguably confidence) in this test actually favored the GM lens.
That makes sense, as really the adapter’s job is to send the correct communications from the lens to the AF system via the contacts, so a fast focusing lens should continue to be a fast focusing lens, with the only real slowdown being from the need to “reinterpret” the focus algorithms from one language (Sony) to another (Nikon). So a faster focusing lens (Sony GM) bests a slower focusing lens (Nikkor Z 50mm) even if there is a slight slowdown due to focus algorithms.
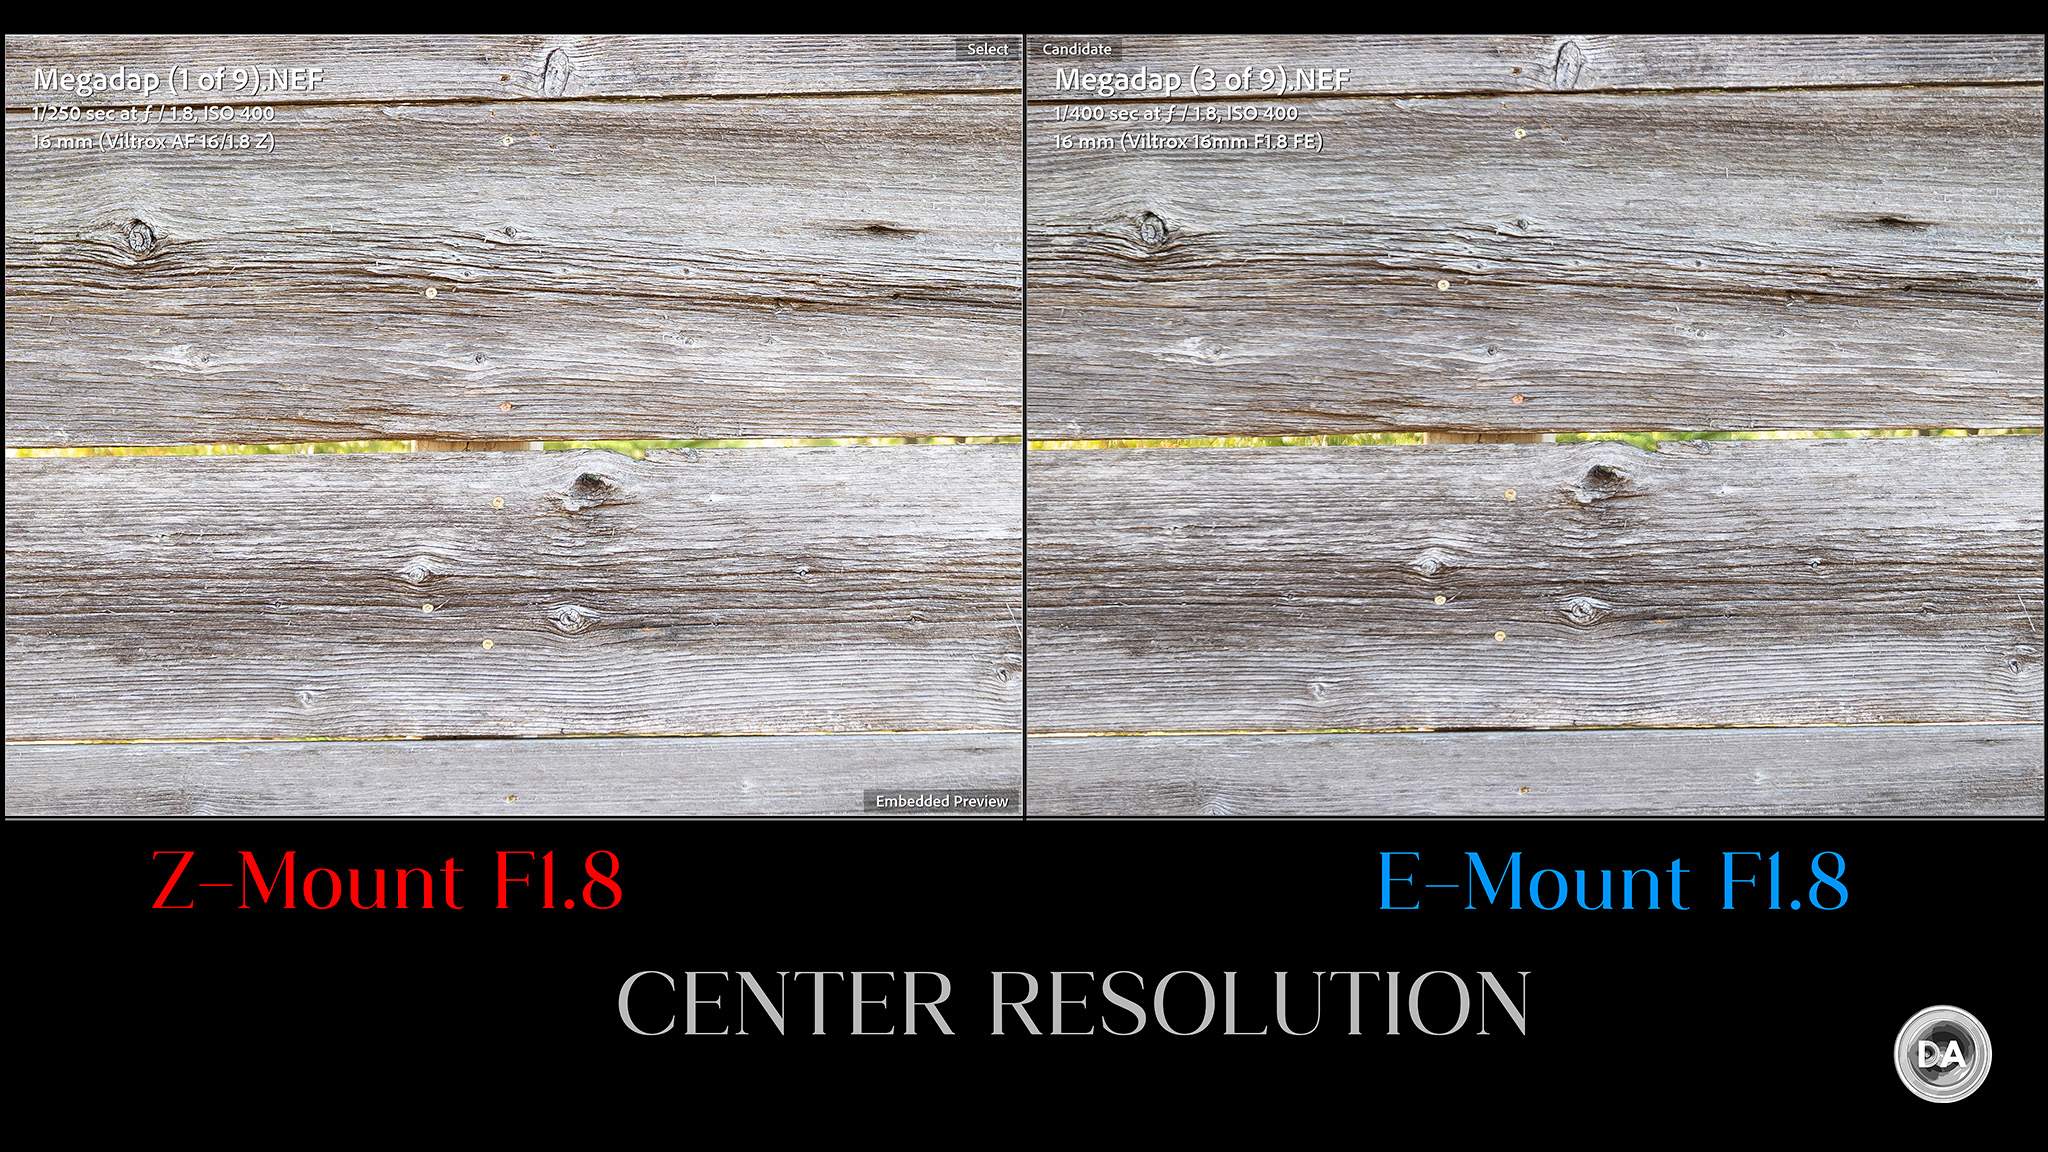
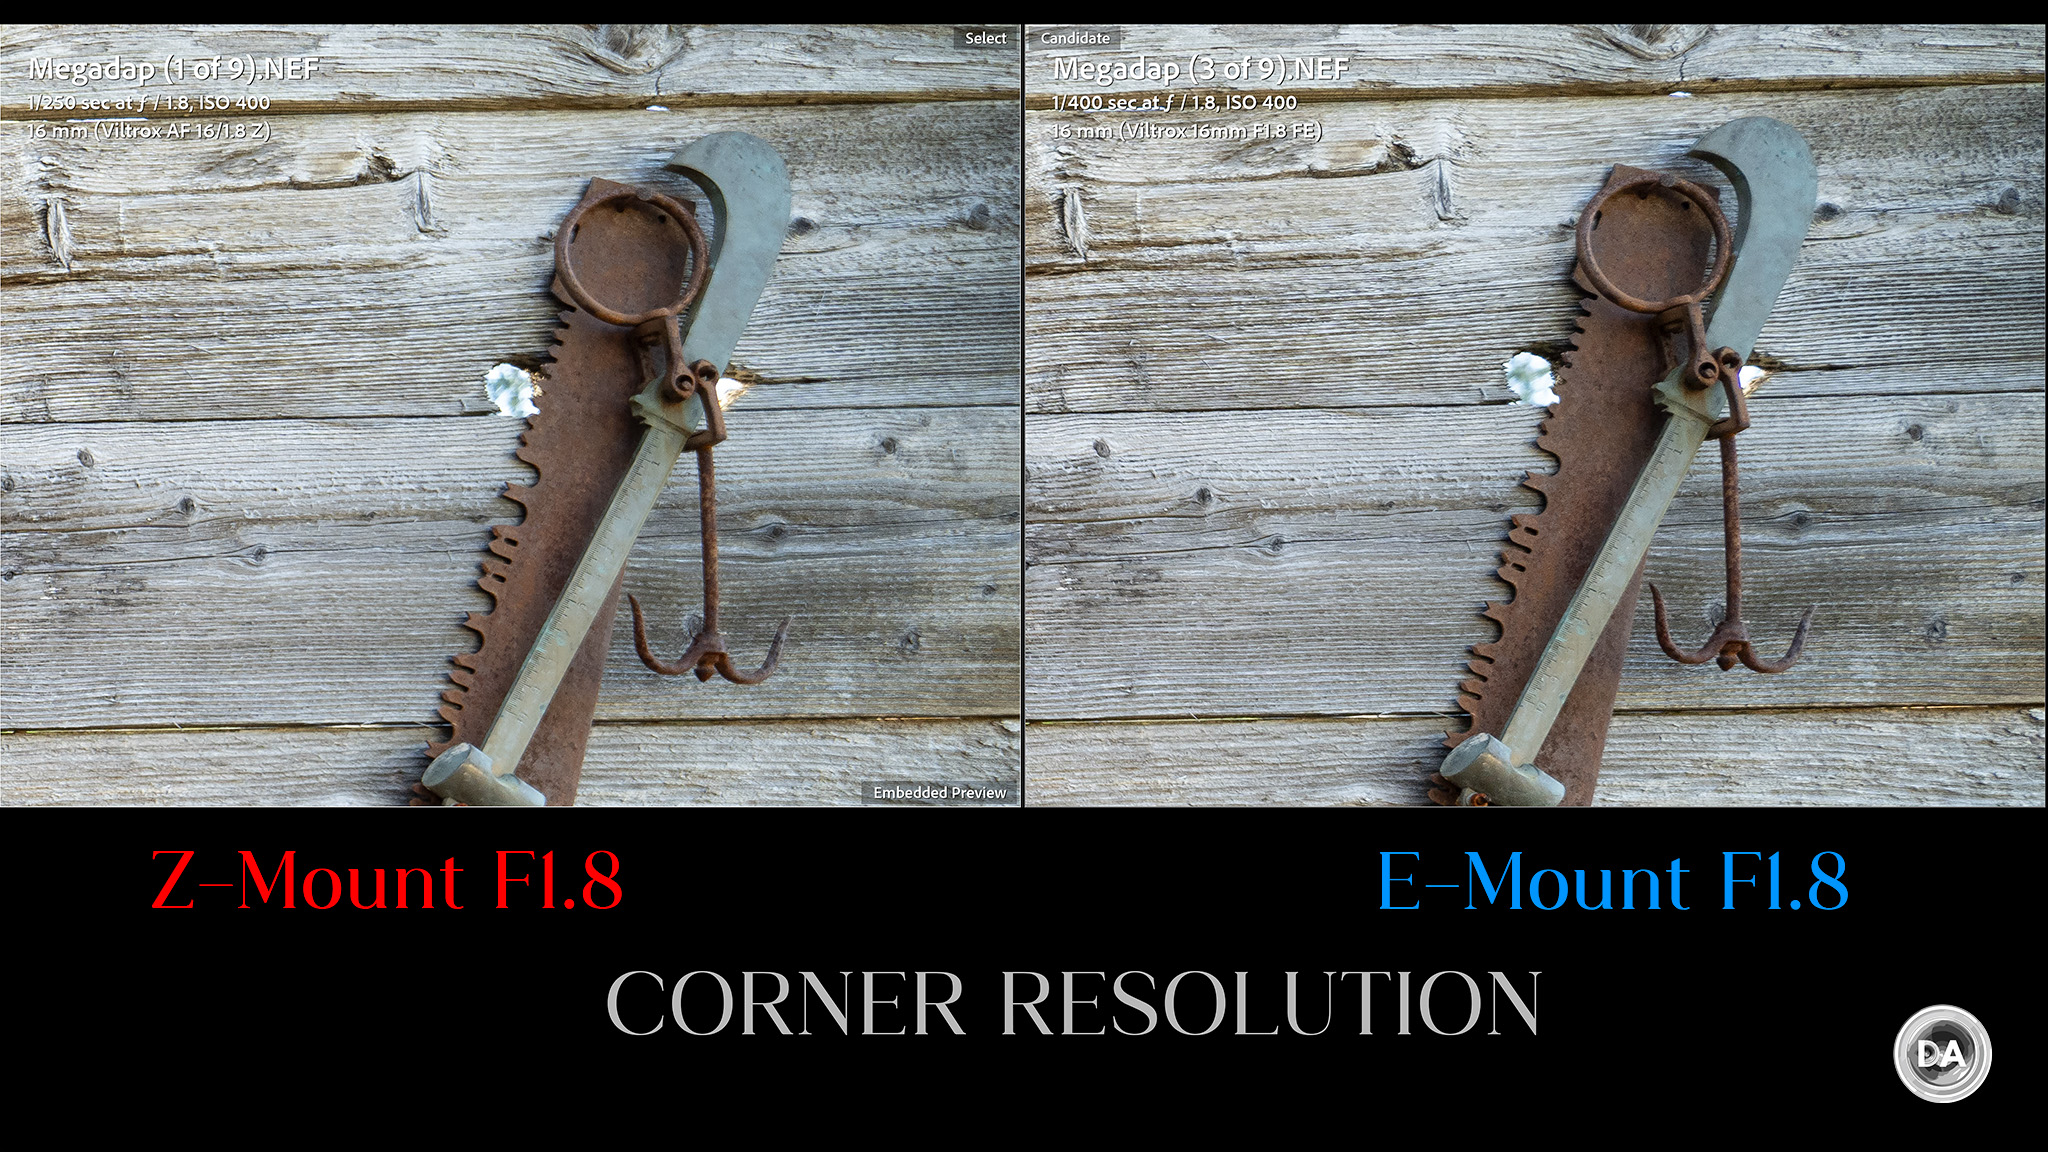
But what about the same lens? I had a unique opportunity to compare the Z-mount version of the Viltrox AF 16mm F1.8 with an adapter E-mount version of the same lens since I happened to have both of them on hand. In a pure focus test, I definitely found that the Z-mount version focused faster, with the adapted E-mount version being a little slower. Both would be fast enough for real world use, however.
I was also interested in seeing if the adapter affected the optical performance. In theory, it shouldn’t really affect sharpness, as there is no optical elements in the adapter themselves. No elements should mean no effect upon sharpness. As far as what I actually found, I don’t think there is any optical degradation. When I did a side by side comparison between the E-mount and Nikon Z-mount version of the Viltrox 16mm I found that there was just some give and take. I found the Z-mount version was a little sharper in the center…
…but the corner favored the E-mount version:
In other words, no consistent difference. I shot at different apertures and got similar results.
What I did find on a practical level was that when I was using the adapter I tended to get a bit of underexposure. I saw this when I compared the Viltrox 16mm lenses (the adapted lens metered at 1/400th, while the native mount lens metered at 1/250th), but I also saw it when just shooting during my hike. I ended up using exposure compensation for the second half of my hike and found that using 2/3rds of a stop of exposure compensation actually produced what I considered accurate exposure.
I didn’t see any kind of additional issues with flare or aberrations.
I was able to successfully use the Sony FE 35mm F1.4 GM (fast focus due to being a fast focusing lens), and got good results with the Tamron 35-150mm F2-2.8 VXD (fast, but not GM level fast), with good but slightly slower results coming with the Sigma 85mm F1.4 DN due to having a single STM focus motor.
Bottom line: the autofocus speed for stills you’ll get will depend a lot on the initial autofocus speed of the lens you’re adapting. Everything is slightly slower, but the better focusing lenses are fast enough that they are still fast even if you slow them down a bit.
At the same time, I wouldn’t want to rely on this combination for tracking fast action. Even with Nala trotting towards me at a moderately fast pace, I found that photos were fairly close but almost always backfocused a bit.
I think it is important to stay realistic about what adapted lenses can and cannot do. For most tasks, autofocus is plenty good enough. For fast action, with long telephotos, or for things like birding, I would say that using a native mount lenses is a smarter choice.
Video Autofocus
*These results will be easier to see in the video review for obvious reasons.
The good news is that you can still get autofocus during video capture, though there is a bit less confidence overall. I found that I encountered more pulsing during focus pulls, which is generally a byproduct of focus not being confident enough to lock. It would do a quick micropulse in the wrong direction sometimes.
I did a few tests walking towards the camera, and found that the results varied a bit. I did spot one principle difference with the Neewer NW-ETZ adapter, as I saw A) more reliable subject tracking with the Megadap adapter and B) seemed to get profile corrections in video with the Megadap but not the Neewer.
Using the Sigma 85mm F1.4 DN and its slightly slower autofocus motor I found that I got fairly decent tracking even at F1.4 as I walked towards the camera. Autofocus moved mostly smoothly with me and footage looked great. When I stepped out of frame, however, and focus moved to the background, autofocus did not pick me back up when I stepped back into frame.
I switched to the faster 50mm GM lens, and it was much more successful at picking me up when I stepped back in the frame.
So, as before, you’ll get your best results for video AF when using more confident lenses. This is definitely a far cry from the video AF experience I got back in the day adapting Canon EF lenses, though just know that if you put these adapted lenses in demanding situations you may be a bit disappointed, but for most work you’ll be just fine.
Conclusion
Switching to a new camera brand can be a daunting experience, as the sheer cost of selling what you have (typically at a significant loss) and then rebuying everything for the new brand is expensive. The Megadap ETZ21 Pro is a great way to bridge that gap, however, if you happen to be coming from Sony E-mount to Nikon Z. You can keep using the lenses you love without adding any bulk and only minimal weight, and that weight is right up close to the camera where you won’t notice it anyway.
Or perhaps you just have certain lenses that you love on E-mount but there isn’t an equivalent lens on Z-mount. The Megadap is a great way to use a favorite lens on two systems, or just keep an old friend to enjoy on a new platform.
Either way, this little adapter seems worth the money. It works effectively for stills other than not wanting to focus on a close subject periodically, and it even works surprisingly well for video, too, though perhaps not quite as seamlessly. My expectations were largely set by experience with former adapters, and I would say that the the Megadap ETZ21 Pro easily exceeded those. It’s a better adapting experience than any that I’ve personally experienced, matching even what I saw when adapting Canon EF to Canon RF mount using a Canon adapter. The fact that a third party adapter has pulled that off is pretty impressive, and I’ll personally enjoy using some of my favorite E-mount lenses on my Nikon camera(s) moving ahead.
Pros:
Love how compact the adapter is
Seems to enjoy a certain amount of first party support (firmware updates, lens profiles).
Improved lens release button makes adding or removing a lens easier
Autofocus for stills is generally very good
Was able to track some action during video capture
DISCLAIMER: This article and description contains affiliate links, which means that if you click on one of the product links, I’ll receive a small commission. As an Amazon Associate I earn from qualifying purchases.
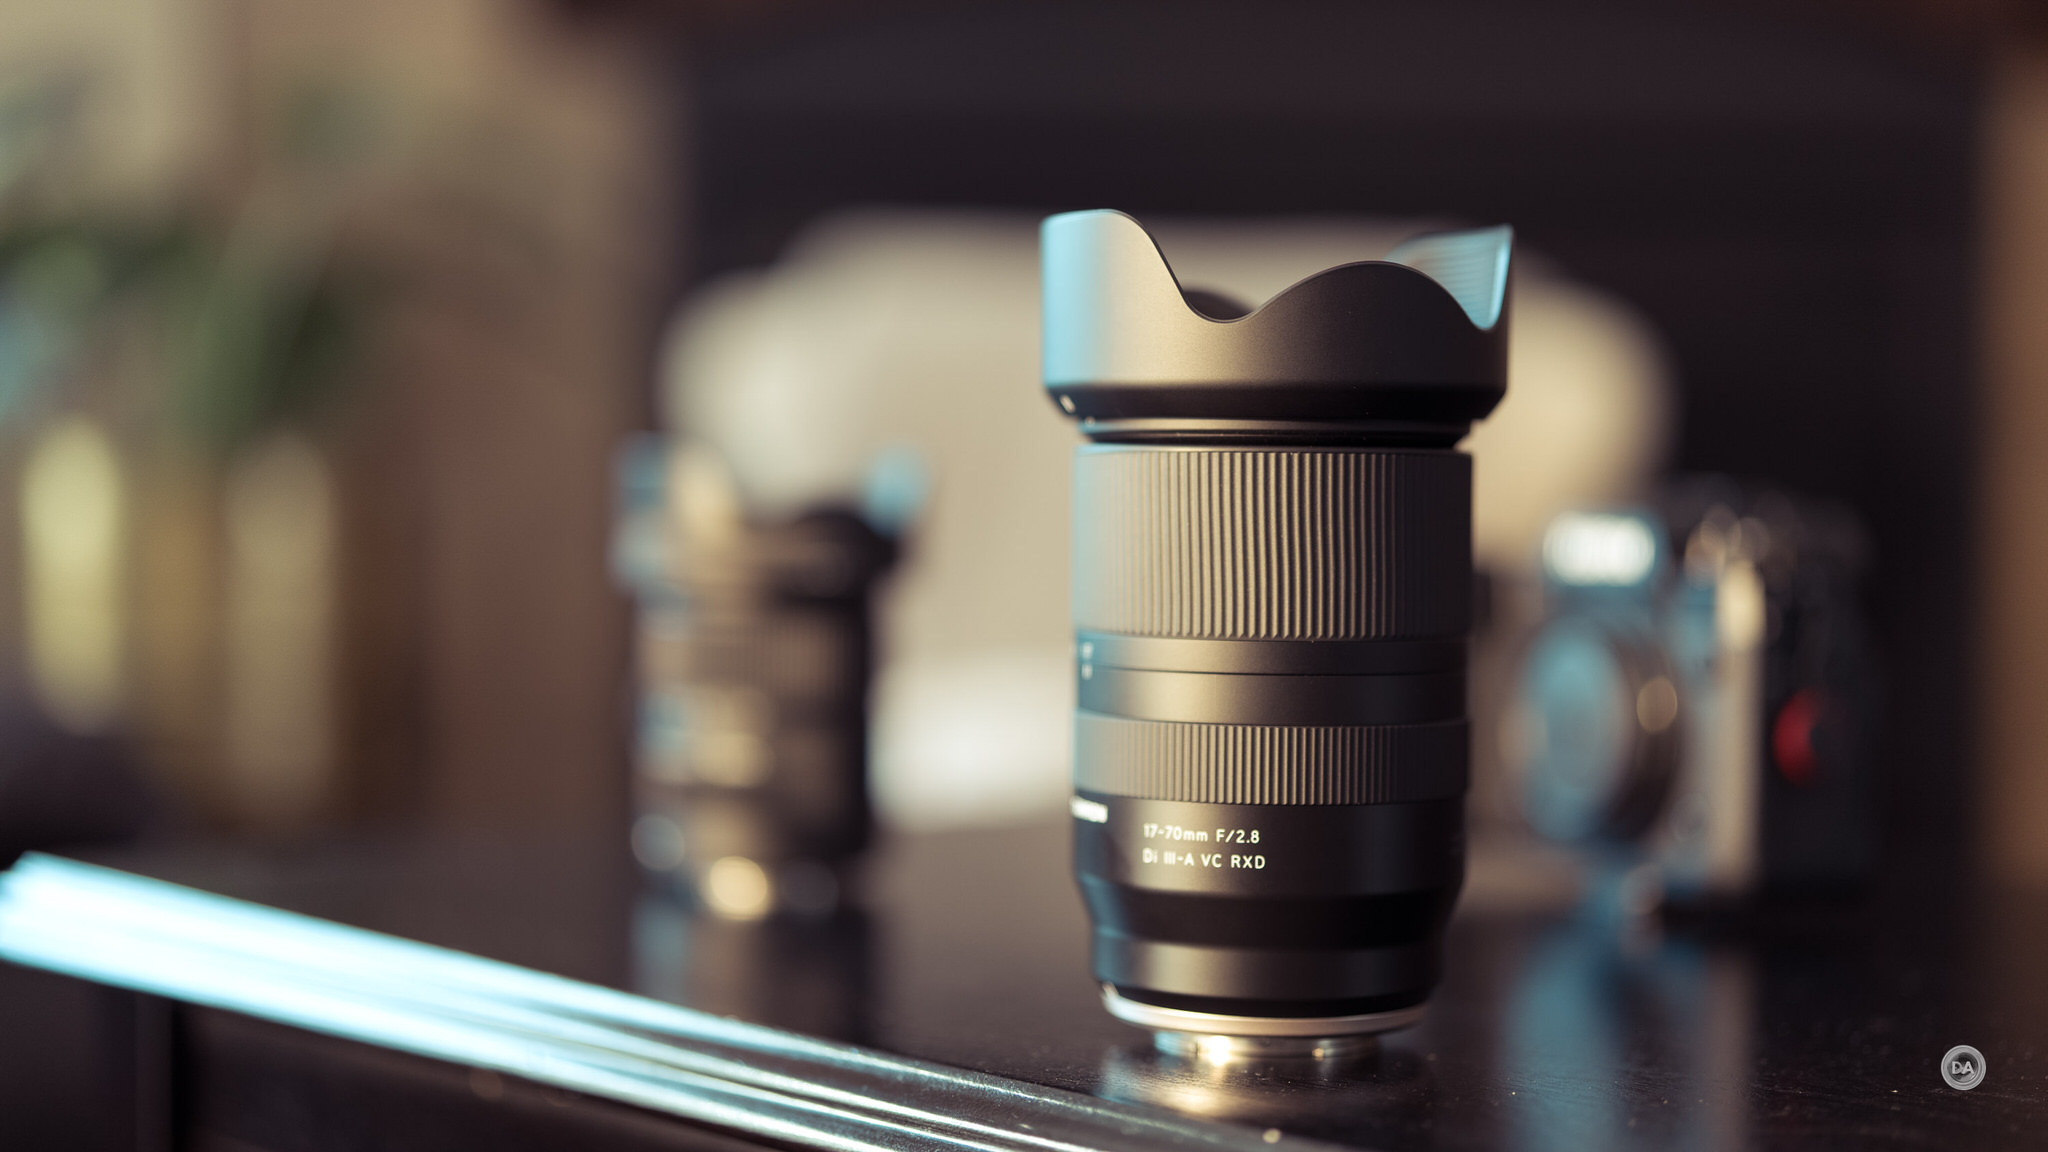
Sigma 18-50mm F2.8 vs Tamron 17-70mm F2.8 on Fuji X-Mount
Dustin Abbott
February 15th, 2024
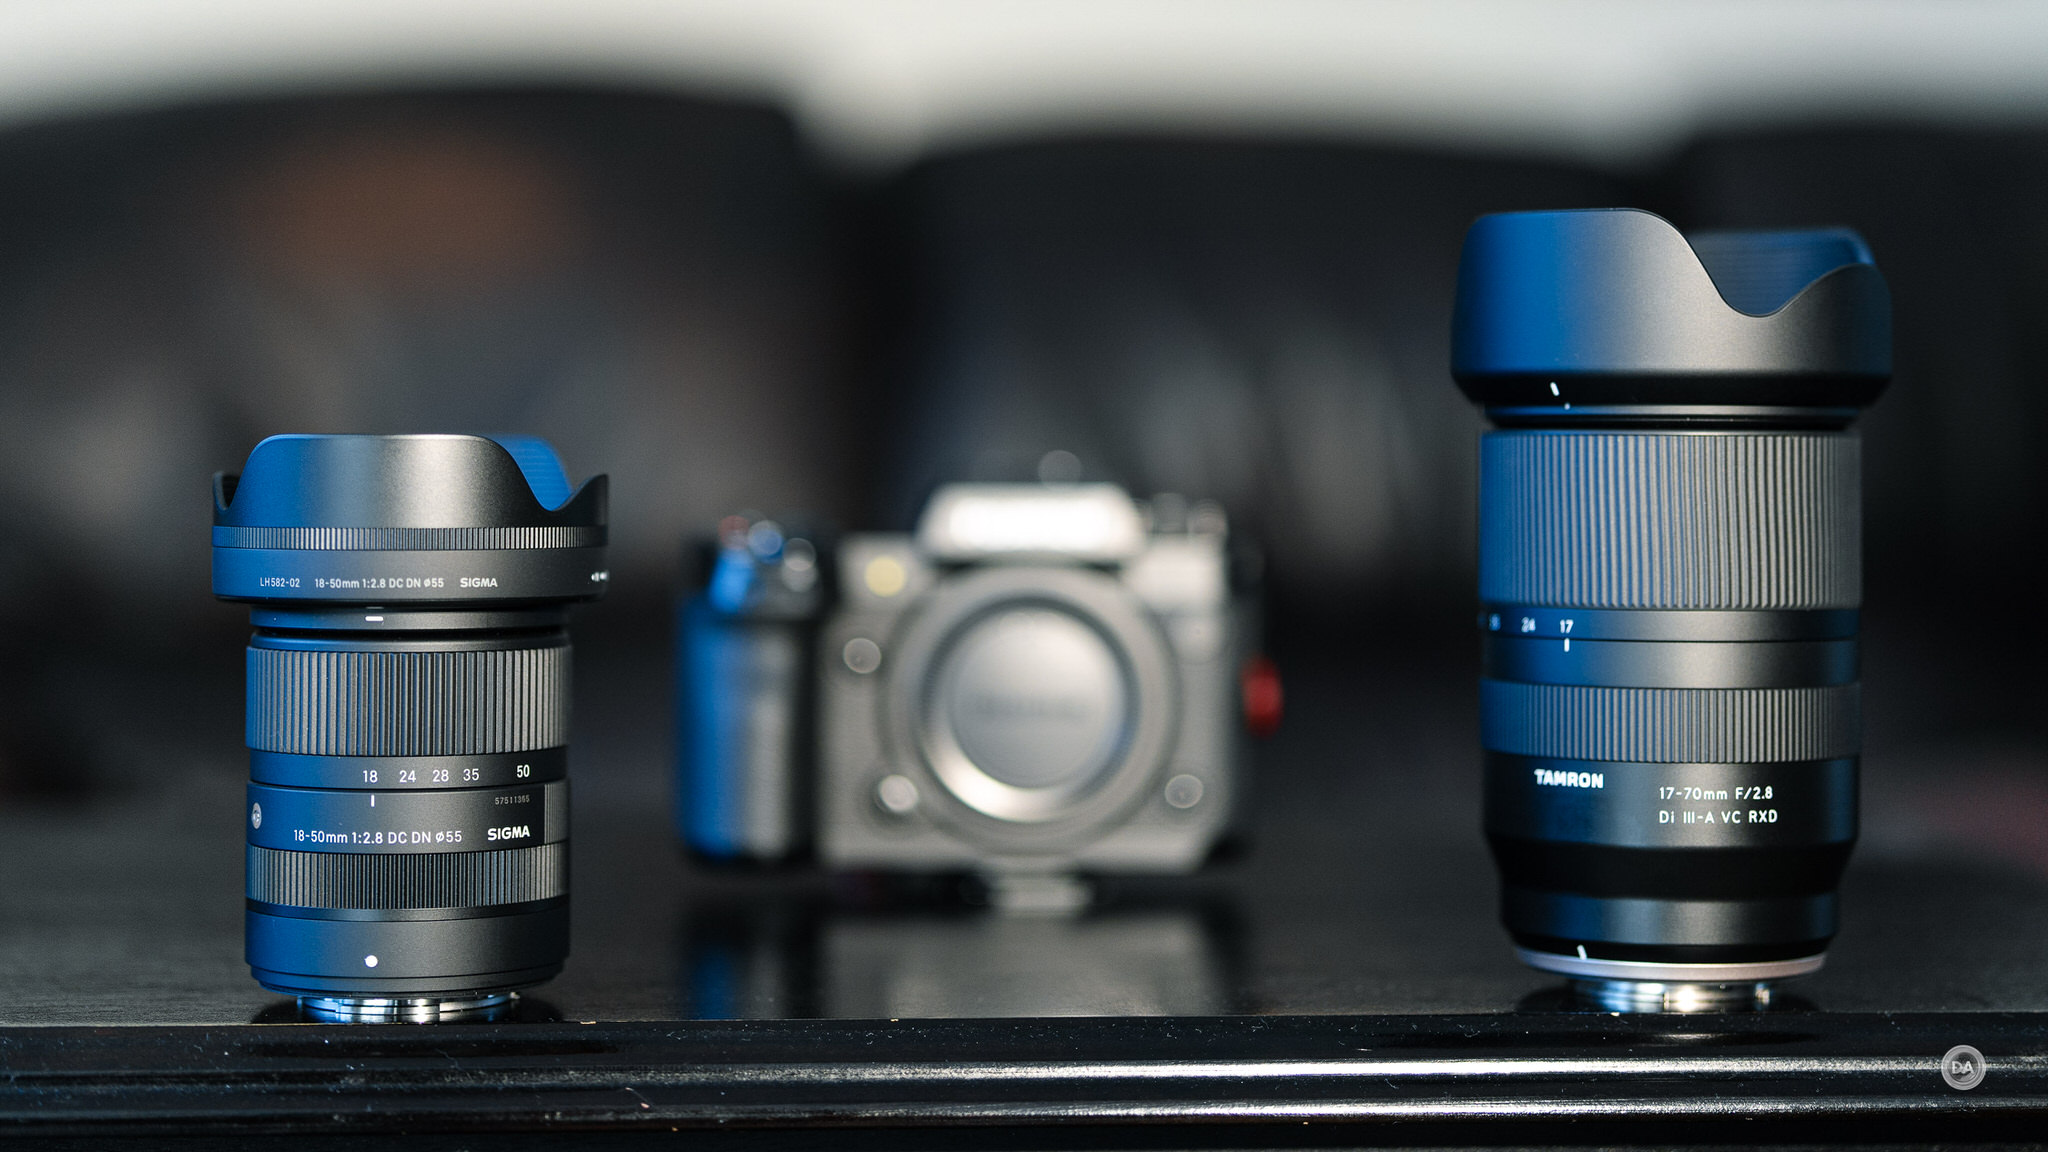
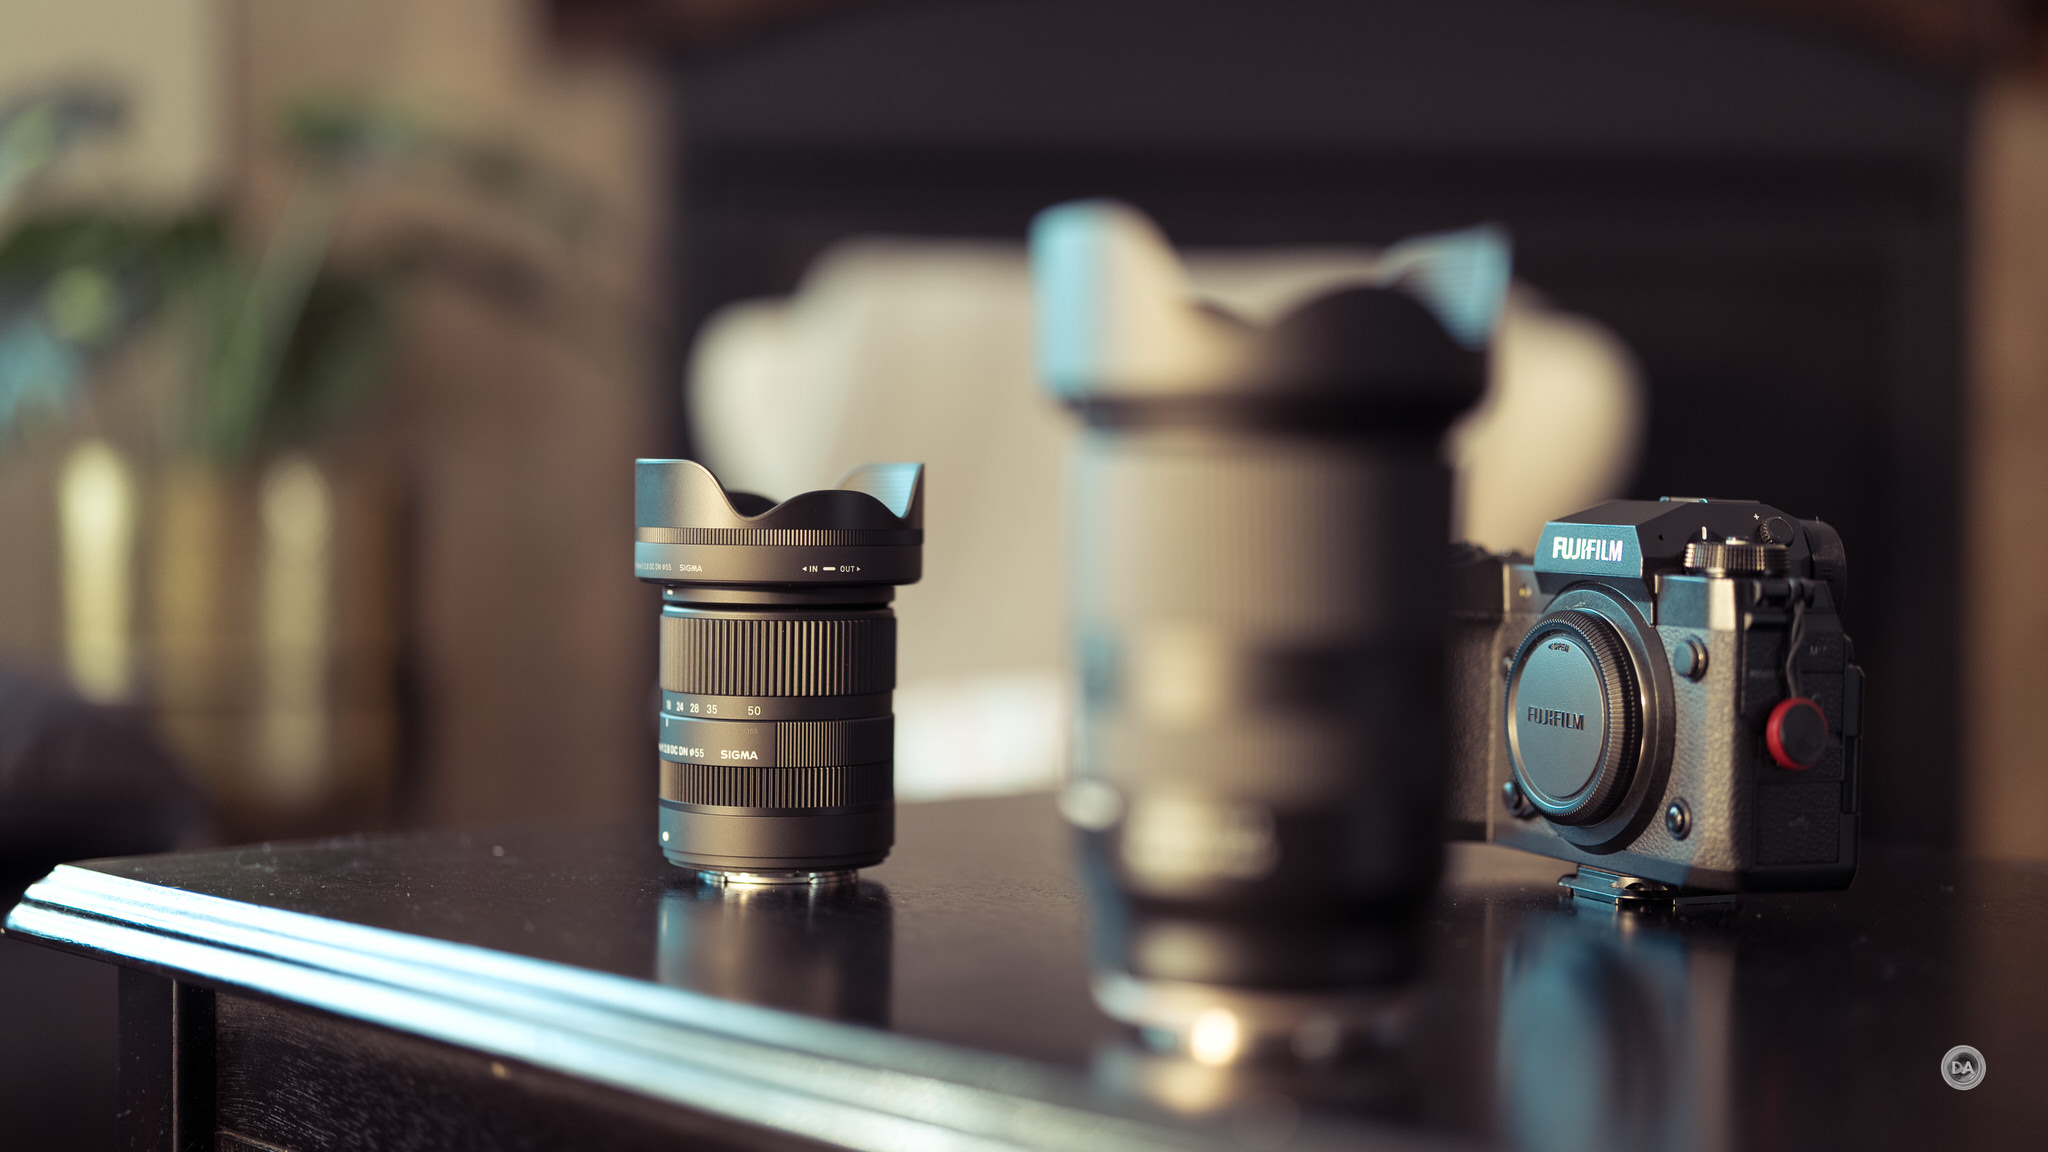
A fast aperture, standard zoom can often be the most important lens in any person’s kit. These are the types of lenses that cover 80-90% of most photographer’s needs, but do so in a more compelling way than most kit lenses. The constant maximum aperture of F2.8 helps in low light and creates a more shallow depth of field, and the focal length covers from moderately wide to short telephoto. The two main third party competitors on the Fuji X-mount platform come from Sigma (the Sigma 18-50mm F2.8 DN) and Tamron (the Tamron 17-70mm F2.8 VC RXD). I’ve spent extensive time with both lenses (I currently own both of them) and have been comparing them for months. My findings are summarized in this video review.
Thanks to TTArtisan for sending me a review copy of this lens. As always, this is a completely independent review. All opinions and conclusions are my own. I’m doing this review on a 40MP Fujifilm X-H2 camera.
Both of these lenses are critical and commercial successes. The Sigma has a 5 out of 5 star rating at B&H Photo with 112 reviews, while the Tamron has a 4.5 star rating with 54 reviews. Both companies took radically different approaches to this formula, however, as the Sigma is the smallest, lightest, and cheapest option (including the Fuji 18-55m F2.8-4 OIS and 16-55mm F2.8 LM WR options) while the Tamron is the largest lens in class but also has the largest zoom ratio and has both a constant F2.8 aperture along with an optical stabilizer.
You can find my full reviews of all of these lenses by clicking the appropriate link below:
DISCLAIMER: This article and description contains affiliate links, which means that if you click on one of the product links, I’ll receive a small commission. As an Amazon Associate I earn from qualifying purchases.
8 months ago I gave a glowing review of the Fuji X-mount version of the Viltrox Pro AF 75mm F1.2. It was a stunningly good lens that managed to deliver next level improvements to the build and optics. I knew then that a Sony E-mount version of the lens was inevitable, and it has finally arrived. In what has become typical Viltrox fashion, it’s not the same lens ported over, however, but Viltrox has managed to deliver some key improvements that makes the Sony E-mount version even better than the Fuji version was. This includes some new features like the ability to declick the aperture, a focus hold button, and their stylish new orange/red weather sealing gasket that they debuted on the amazing Viltrox AF 16mm F1.8 full frame lens (my review here).
The Viltrox Pro AF 75mm F1.2 (hereafter referred to as the Pro 75E to distinguish the Sony version) is the first in their new series of “Pro” lenses, with a rumored 27mm F1.2 soon to follow. The Pro series has a more upscale build and feature set along with truly premium options. The Pro 75E is an APS-C lens, so the crop factor of the camera it is mounted on will affect its apparent aperture. Sony’s E-mount has a crop factor of 1.5 which will make the lens behave something like 115mm on a full frame camera – a very, very intriguing focal length for portrait work, particularly with that extremely wide maximum aperture. There isn’t really any true competition for this lens on Sony, as dedicated portrait telephoto lenses with fast maximum apertures for APS-C just haven’t existed. You will love the Pro 75E; it has the ability to just crush backgrounds.
The only thing that held the Fuji version of the lens back was that the autofocus was only so-so (it has since been improved via firmware), but this new Sony version has the advantages of A) having had that additional development time to perfect the AF and B) the fact that Sony’s autofocus is better than Fuji’s at this point, particularly since my “APS-C” camera on Sony is the APS-C crop mode of the amazing Sony a7RV. It’s 26MP in APS-C mode matches that of the new Sony a6700 but with the superior ergonomics and autofocus of Sony’s bigger full frame bodies. I was blown away with how much better autofocus was on the new Sony version, particularly with action sequences. I could easily pick out a bird in flight at F1.2…and look at how amazing the results are!
Viltrox claims near APO levels of correction for chromatic aberrations, which I’ve definitely verified to be true. That’s extremely impressive in a lens with this wide of an aperture. This Pro 75E has a tremendous amount of “bite” even at F1.2, and at its best the lens produces images that look much, much more expensive than the price tag suggests.
It seems absurd to say, but the last few lenses from Viltrox have left me with as much anticipation for their new releases as any brand out there, and part of that is that they continue to deliver incredible value. The MSRP of the Pro 75E as it comes to market is $549USD (though if you buy it from the Viltrox store and use code DUSTINABBOTT you can get 10% any Viltrox product, including this lens), which makes this lens an absolute bargain relative to the performance. The Viltrox Pro AF 75mm F1.2 in Sony E-mount isn’t quite perfect, but it is as about as close as it gets. If you prefer to watch your reviews, you can check out my definitive video review…or just keep reading.
Thanks to Viltrox for sending me an evaluation copy of the 75mm F1.2. As always, this is a completely independent review.
Viltrox Pro AF 75mm F1.2 Build and Handling
As noted in the intro, Viltrox is trying to move up into the next level of lens design, and that shows up here in the design and features of the AF 75mm F1.2. The Fuji version of the lens was already a huge step up from previous Viltrox lenses, but the new Sony version is better still. From one angle, the lenses look fairly similar, distinguished only by the slightly different badging and the fact that the lens mount alignment point is in a different place.
Rotate the lens to either side, however, and you’ll see the additional features of the Sony E-mount version:
That carries on to the bottom of the lens, where Viltrox has moved to their new eye-catching orange-red weather sealing gasket.
I like this move just like I liked when Zeiss did the same in Zeiss blue. It feels stylish and unique, as if Viltrox is starting to develop their own identity. That weather sealing isn’t just external, by the way; this is a thorough weather sealing, with nine seal points showing in the cutout diagram here:
This is an internally focusing lens, so there is nothing that moves where dust might intrude. There’s also an HD-Nano multilayer coating on the front element to help with water and fingerprint resistance, making the front element easier to clean. As always, however, “moisture-proof” does not mean “water-proof”, so don’t go crazy!
The focus hold button behaves in the same fashion as Sony lenses and is a welcome control point. This puts the Pro 75E on equal footing with Sony’s more premium recent offerings on APS-C like the 15mm F1.4 G lens (my review here). The declick option for the aperture ring is very welcome, as it does allow for smooth aperture racks, though, as usual, there’s a slight lag as the aperture iris motor reacts to feedback from the ring.
The lens has a beautiful 11 bladed aperture that keeps a wonderfully circular shape as you close it down. You can see that even at F2.8 (2 1/3rds stop closed down) the aperture shape is nicely round.
There’s no getting around the fact that this is a very large lens that is, frankly, a better fit on my a7RV than it would be on the much smaller a6400 that I sold to help fund buying the a7RV!
It is 87mm/3.42″ in diameter (leaving a large but common 77mm front filter thread) and is 101mm/3.98″ in length – just like the Fuji version. It weighs 675g or 23.8oz – just slightly heavier than the Fuji version, which makes sense, as the Sony mount is a bit larger than Fuji’s X-mount. This is definitely a fairly large lens for APS-C. I don’t find the lens particularly heavy, but my wife complained about the weight. Your feelings on the weight of the lens will obviously have a lot to do with your tolerance for weight in lenses. You can see that the Pro 75mm’s dwarf the Viltrox 56mm F1.4 in between them:
For me, personally, the performance of the lens makes the weight well worth it.
The design language is consistent with what I’ve seen from Viltrox recently, though now we have a “PRO” badge on the side rather than the “C” or “DF-RBW” that’s been on the side of some of their lenses. Also new here is the AF/MF switch along with the focus hold button on the left side. I always prefer having an AF/MF switch on the lens as the most direct and logical way to control that function.
There is a “Viltrox” badge on the upper right side of the lens, and it feels like a nice balance to the Pro badge on the opposite side. The Click/Declick switch on the Sony version is now beneath that badge.
If you use the clicked version of the aperture you will find detents at each one third stop. There is an “A’ position past F22 that will allow you to instead control aperture from within camera if you aren’t an aperture ring person. Always lovely to see “F1.2” as an option on an aperture ring.
The manual focus ring is made of metal with tight ribbing. It moves smoothly and with nice damping, though I felt like there was the slightly bit of “drag” from the focus motor. I noticed a bit of stepping with the Fuji version, but that’s not the case here. Focus is smooth and the image will automatically magnify to help visually confirm focus.
Viltrox continues with a trend that other lens makers are now imitating by including a USB-C port in the lens mount that allows you to do firmware updates right to the lens. I’m a fan of this approach, as it eliminates the need for a separate dock or lens station for firmware updates, and I find the process a little more intuitive than even doing firmware updates through the camera. This allows Viltrox to future proof their lenses and continue to improve them through firmware.
There is no image stabilization, so you’ll have to rely on the stabilization from your camera body if it is so equipped. The a7RV that I used for my review has great IBIS, so I had nice stable results in my tests.
If you look in the front of the lens, you’ll find a LOT of glass!
One lingering Viltrox weakness remains, and that is in minimum focus and maximum magnification performance. MFD is 88cm (nearly 35″) and the resulting magnification is only 0.10x (is this the required magnification level for Viltrox lenses?)
On the plus side the up close performance is very strong even at F1.2, so there are still opportunities to get beautifully blurred out backgrounds, though it never seems you can get quite as close as what you would like.
The lens hood is petal shaped and made of plastic. Also included is a lens pouch with a padded leatherette bottom.
The only thing that anyone might object to in the build and handling department is the size of the Pro 75E. It is otherwise pretty exceptional.
Viltrox Pro 75E Autofocus Performance
The Viltrox Pro 75mm is equipped with a Lead Screw-type STM (stepping motor), which is the better of the two different STM designs. The challenge with a lens with such large elements is that they are heavier and thus require more torque to move. I think the focus motor is the same on the Sony E-mount version, but it just performs better in general on Sony. I was thoroughly impressed with the lens’ ability to quickly nail focus on birds on the wing, and the fast aperture options makes it easy to get high shutter speeds to freeze that action in place.
The Pro 75E seemed to work very nicely with the a7RV’s AI subject tracking, as I got amazingly well focused results on birds even when there was no visible eye available.
I was a little less successful with a lunging dog in the water because the splashes of water would sometimes confuse focus, but I certainly got some well focused results in my sequences despite that. Here’s one at F1.2:
As you might imagine, taking photos of slower moving subjects was incredibly easy. This cat was walking towards me, and I had no problem getting perfect focus on his eyes…and look at that background!
I purposely put some branches in the foreground when taking a “portrait” of this rooster, but as you can see that proved zero problem:
Here’s another from a little further
Depth of field was absolutely tiny when shooting across the table at my subject, but look at how well focused this shot is:
Likewise when further away focus was flawless at F1.2 (as was contrast…and color…and bokeh, but I get ahead of myself…)
This should work very well as a portrait lens (which should be the main reason to purchase one), and focus is now pretty much flawless for that application. My wife took this shot at F1.2 of me on my birthday, and even with my eyes faced down, focus is flawless.
For stills, the autofocus on the Viltrox Pro AF 75mm F1.2 is, well, rather pro.
Video AF isn’t quite as good, though obviously improved from what I saw on Fuji. Focus pulls were fairly good and smooth, but there was sometimes a little “bounce” where focus went a little too far on the initial focus rack and had to come back a fraction to lock. I found focus transitions in video footage where I moved from one subject to another to be a little better…even at F1.2, where depth of field is very shallow.
My “hand test” where I test the transitions from my face to my hand was better. There was more confidence with these more definite subjects, and I didn’t see any hunting. Focus went confidently from my hand to my eyes and vice versa. The focus pulls were smooth, but there is some obvious focus breathing that makes the transitions a little more jarring.
In a static shot where focus just needed to stick with the action (like flowers or grasses blowing in the wind), I had perfect results. I’ve also used the lens a few times for my YouTube video segments, and it tracked my eye perfectly with zero hunting during the extended clips.
I’ve saved one of my most amazing anecdotes until last. The photo above probably doesn’t blow your mind, right? But here’s what is amazing about it. I saw some dragonflies buzzing around and wanted to take a photo of them, but the one that remained immediately flew up into a cedar. I thought, “Now here is a real test!”. I set the camera on “Insect Detection”, had the Viltrox at F1.2, and aimed it at the cedar and let the AF find the dragonfly. Here’s a crop of that image above:
Is that not amazing? Kudos to both Viltrox and Sony here. I’m impressed!
Viltrox Pro 75mm F1.2 Image Quality
Viltrox has pulled out all the stops with this lens and has included a number of exotic elements in the optical construction (4 high-refractive elements and 3 Extra-low dispersion elements), leaving an MTF results that looks quite good at F1.2 and great when stopped down to F8 (this is the X-mount MTF chart, but the E-mount looks the same):
The Viltrox Pro AF 75mm F1.2 was one of the first lenses that I reviewed on the ultra-high resolution of the new Fuji 40MP APS-C sensors, and frankly it spoiled me a bit. It gave me the false impression that lenses were going to be able to handle that tremendous pixel density (the equivalent of a full frame 90MP camera!) without issue. I’ve reviewed 7 or 8 X-mount lenses on either the X-T5 or X-H2 since, and discovered that this is not at all the case. Most lenses struggle to show good resolution at that high of a pixel count. So I already knew that the Pro 75E would be exceptional, particularly considering that Sony doesn’t have any APS-C sensors with nearly as high of resolution. The 26MP that I’m reviewing on here is as high as it gets. The Viltrox Pro AF 75mm F1.2 handles this level of resolution with ease…even shooting landscapes at F1.2:
A big part of what makes this lens so exceptional is that it provides effortless levels of contrast at any focus distance; it isn’t just “optimized” for a certain distance. Some lenses practically demand that you shoot them in their “sweet spot” in order to get reasonable performance, but the Pro 75E can handle the infinity distance above as easily as it does extremely close results like this:
I chose the image above as it is a perfect opportunity for some chromatic aberrations. High contrast edges with a fade towards edges that should be white. Many previous Viltrox lenses struggled with chromatic aberrations (particularly longitudinal chromatic aberrations), but the Viltrox Pro 75mm showed almost no fringing to be found in either my formal tests or real world results. Here’s a gull flying against a bright sky, shot at F1.2. Note the crop and the complete absence of fringing.
Viltrox claims Apochromatic levels of chromatic aberrations, but without suggesting that this is an APO design. I’m not quite sure how they are accomplishing it, but there’s something special going on here.
I’m also satisfied with the control of LaCA (lateral chromatic aberrations) that typically show up along the edges of the frame with high contrast transition points. Here we can see that even at F8 there is essentially a perfect transition from black to white near the edge of my test chart.
I also found no fringing in real world images along the edges of the frame – nothing here but sharp, precise transitions in contrast. You can see from this landscape image and its crop that there is no lateral fringing near the edges of the frame.
For those interested, the move to Sony has allowed us to evaluate how much of the full frame circle that the lens covers as E-mount is shared across both full frame and APS-C cameras. For those hoping that this secretly a full frame lens, I’m afraid you’ll be disappointed. Here’s how the full frame image circle looks like:
If I manually crop, I can get very slightly wider than the standard APS-C crop (bottom left), but not much wider:
If we move on to vignette and distortion we find mostly good news. There is next to no distortion at all (I did no correction) and (in an emerging trend as I test more third party lenses on both Fuji and Sony), I see less vignette than I did on Fuji. I needed a +55 to correct for the vignette.
In some images I definitely wanted the vignette corrected, but in others I found that a bit of vignette helped draw the eye to the subject and was part of the “look” of an image.
While there appeared to be some vignette correction on Fuji, I don’t think the same is true here. I looked at JPEGs and the vignette appeared as uncorrected as it was in the RAW files.
Other than the vignette, the Viltrox AF Pro 75mm F1.2 STM has passed our early tests with flying colors.
We’ll move on to inspecting our test chart. My formal tests were done on the APS-C mode of the Sony a7RV, which results in 26MP of resolution. I use a high end tripod and two second camera delay to ensure vibration doesn’t affect images. Here’s a look at the test chart that we will examine at high magnification:
If we take a look at crops (at about 170%) at F1.2 from the center, mid-frame, and lower right corner, we find that center and mid-frame performance is fantastic with the corners only lagging a little behind.
Even a very mild stop down to F1.4 starts to improve vignette and allow for even more contrast in the corners, which now look pretty excellent:
In real world results, detail looks pretty much perfect even at F1.2:
This shot of a rooster at F1.6 shows unbelievably good detail and contrast:
Obviously smaller apertures like F4-F8 will be pretty much perfect across the frame.
But what makes the Viltrox Pro AF 75mm F1.2 exceedingly rare is that it isn’t just very sharp; it also has lovely rendering. The bokeh remains quite soft and attractive despite the very high level of detail and contrast. At closer focus distances the F1.2 aperture and longer focal length has the ability to just completely melt away the background, making for beautiful images:
Move a little further away and more of the background is visible, but you’ve got a very 3D look to your subject that, frankly, looks a little Zeiss-like:
But even at further distances where the background is more obvious, it still melts away in such a way that the subject is allowed to pop:
Perhaps the only thing you could complain about is that the geometry has a fair bit of “cat-eye” look towards the edges of the frame, but it also gives a bit of a “swirl” effect that has been highly prized by a lot of photographers for its artistic look.
I guess the solution to the “cat-eye” bokeh is to just shoot images with “cat bokeh”:
In the past I haven’t found Viltrox color rendition to be top tier, but I think we’ve got an upgrade in the optical glass being used in this Pro series, as color rendition has been very pleasing to me.
Skin tones also looked nice and natural. Here’s another birthday shot of me with my birthday/Father’s Day gift – a new Milwaukee battery powered lawnmower (I’ll have a bit of content about it on my channel if you’re interested).
I found flare resistance to be fairly good for a lens with such a large maximum aperture. In this F1.2 shot you can see that contrast has held up pretty well, that there is no light-induced fringing, and the only negative is a bit of a ghosting blob in the lower middle of the image.
If I just shoot at the midday sun at F11, I got a bit more of a ghosting pattern, but nothing extreme.
All told, the optical performance of the Viltrox Pro 75mm F1.2 is just fantastic. I’ve seen very few lenses designed for APS-C that are competing at this level, and none with this large of a maximum aperture. Typically with F1.2 lenses you are dealing with a soft, dreamy look at F1.2 that only becomes crisp when stopped down a fair way, but Viltrox has managed to deliver beautiful optics from wide open. Yes, the lens is big and heavy, but not so overwhelmingly so that it is unusable. The image quality easily justifies the size, however. This lens is incredible! You can check out more photos by visiting the image gallery here.
Conclusion
The Viltrox AF Pro 75mm F1.2 STM is as welcome on Sony E-mount as it was on Fuji X-mount. I really like this particular focal length, as it gives you more compression to backgrounds than the 56mm does but is short enough to be more flexible than either an 85mm or 90mm lens. I’ve often wondered why more lens makers don’t make portrait oriented primes in the 100-110mm range, as I think this is a really great spot for portrait work. There are very few lenses for Sony E-mount in this particular space, and fewer still that are purpose designed for APS-C. Sony doesn’t make an APS-C prime longer than 50mm, and thus only covers this focal length with zooms that have a MUCH smaller maximum aperture. There just aren’t any Sony-branded APS-C lenses that can make images like this:
That obviously makes this lens very valuable, and the fact that the autofocus on Sony is good enough to keep up with birds in flight (even at F1.2!) only adds to the value:
And finally, there is that value proposition. At at price tag of $549 USD, this is a LOT of lens for the money. It is priced extremely competitively relative to its performance, which, to me, makes this perhaps THE portrait lens of choice for Sony APS-C shooters. It is also great for street, art prints, landscapes, and general subjects. It’s pretty much good at everything. So yes, I wholeheartedly recommend this lens. I think the Viltrox Pro 75E is simply amazing.
Pros:
Next level build quality
Inclusion of weather sealing
Aperture can be declicked
AF/MF switch plus focus hold button
STM focus motor provides accurate focus even at F1.2
Keywords: Viltrox, Viltrox AF, Viltrox 75mm, Viltrox 75mm, F1.2, f/1.2, STM, Viltrox AF 75mm F1.2, Viltrox 75mm Review, Viltrox AF 75mm F1.2 Review, E-mount, Sony, Review, Sony a6700, Sony a6600, Sony a6400, Sony a7RV, Bokeh, Portrait, Dustin Abbott, Tracking, Hands On, Video Test, Sharpness, Autofocus, Build, Real World, Letthelightin, DA, #letthelightin, #DA, #Photography
DISCLAIMER: This article and description contains affiliate links, which means that if you click on one of the product links, I’ll receive a small commission. As an Amazon Associate I earn from qualifying purchases.
8 months ago I gave a glowing review of the Fuji X-mount version of the Viltrox Pro AF 75mm F1.2. It was a stunningly good lens that managed to deliver next level improvements to the build and optics. I knew then that a Sony E-mount version of the lens was inevitable, and it has finally arrived. In what has become typical Viltrox fashion, it’s not the same lens ported over, however, but Viltrox has managed to deliver some key improvements that makes the Sony E-mount version even better than the Fuji version was. This includes some new features like the ability to declick the aperture, a focus hold button, and their stylish new orange/red weather sealing gasket that they debuted on the amazing Viltrox AF 16mm F1.8 full frame lens (my review here).
The Viltrox Pro AF 75mm F1.2 is the first in their new series of “Pro” lenses, with a rumored 27mm F1.2 soon to follow. The Pro series has a more upscale build and feature set along with truly premium options. The Pro 75E is an APS-C lens, so the crop factor of the camera it is mounted on will affect its apparent aperture. Sony’s E-mount has a crop factor of 1.5 which will make the lens behave something like 115mm on a full frame camera – a very, very intriguing focal length for portrait work, particularly with that extremely wide maximum aperture. There isn’t really any true competition for this lens on Sony, as dedicated portrait telephoto lenses with fast maximum apertures for APS-C just haven’t existed. You will love the Pro AF 75mm F1.2; it has the ability to just crush backgrounds.
The only thing that held the Fuji version of the lens back was that the autofocus was only so-so (it has since been improved via firmware), but this new Sony version has the advantages of A) having had that additional development time to perfect the AF and B) the fact that Sony’s autofocus is better than Fuji’s at this point, particularly since my “APS-C” camera on Sony is the APS-C crop mode of the amazing Sony a7RV. It’s 26MP in APS-C mode matches that of the new Sony a6700 but with the superior ergonomics and autofocus of Sony’s bigger full frame bodies. I was blown away with how much better autofocus was on the new Sony version, particularly with action sequences. I could easily pick out a bird in flight at F1.2…and look at how amazing the results are!
Viltrox claims near APO levels of correction for chromatic aberrations, which I’ve definitely verified to be true. That’s extremely impressive in a lens with this wide of an aperture. This Pro AF 75mm has a tremendous amount of “bite” even at F1.2, and at its best the lens produces images that look much, much more expensive than the price tag suggests.
It seems absurd to say, but the last few lenses from Viltrox have left me with as much anticipation for their new releases as any brand out there, and part of that is that they continue to deliver incredible value. The MSRP of the Pro AF 75mm as it comes to market is $549USD (though if you buy it from the Viltrox store and use code DUSTINABBOTT you can get 10% any Viltrox product, including this lens), which makes this lens an absolute bargain relative to the performance. The Viltrox Pro AF 75mm F1.2 in Sony E-mount isn’t quite perfect, but it is as about as close as it gets. If you want more information, you can watch my definitive video review, read my text review, or just enjoy the photos below.
Keywords: Viltrox, Viltrox AF, Viltrox 75mm, Viltrox 75mm, F1.2, f/1.2, STM, Viltrox AF 75mm F1.2, Viltrox 75mm Review, Viltrox AF 75mm F1.2 Review, E-mount, Sony, Review, Sony a6700, Sony a6600, Sony a6400, Sony a7RV, Bokeh, Portrait, Dustin Abbott, Tracking, Hands On, Video Test, Sharpness, Autofocus, Build, Real World, Letthelightin, DA, #letthelightin, #DA, #Photography
DISCLAIMER: This article and description contains affiliate links, which means that if you click on one of the product links, I’ll receive a small commission. As an Amazon Associate I earn from qualifying purchases.
In January 2021 I released my review of this lens for Sony E-mount cameras. At the time, no Tamron lenses were available on Fuji X-mount, and I spoke in my conclusion about how a lens like the Tamron 17-70mm F2.8 Di III-a VC RXD actually gave Sony an advantage – it’s the kind of lens I call a “system seller”. On paper it has pretty much everything: a great focal range (25.5-105mm full frame equivalent), a large maximum aperture through the zoom range (F2.8), optical stabilization (Vibration Compensation, or VC), and a fast focus system (RXD). But that advantage is no longer on Sony alone, as this was one of the first lenses to come to Fuji X-mount from Tamron once Fuji began opening up their platform to third party lenses. That’s an amazing focal range to have a constant aperture of F2.8 over, covering from this at 17mm:
…to this at 70mm:
It also is a great value. The current price at B&H Photo is $699 USD, which is a full $500 cheaper than the Fujinon XF 16-55mm F2.8 LM WR (my review here) or $200 less than the Fujinon XF 18-120mm F4 PZD (my review coming soon). The Tamron doesn’t perfectly align with either of those lenses, but they are the closest competitors I can point to on the platform. Sigma has also made their 18-50mm F2.8 DC available on Fuji X-mount (my review here), but the main reasons to consider the Sigma would be price ($549 USD) and compact size as the Tamron 17-70mm VC has the advantage in focal range, weather sealing, and also includes an optical stabilizer. I’ve been interested in revisiting some of these third party lenses on X-mount for two primary reasons: 1) to see how autofocus performs on a new platform and 2) to see how the lens’ optics survive the very pixel dense 40MP Fuji X-Trans sensor on some of their new cameras.
I found the 17-70mm VC a little big for the Sony a6400 body that I reviewed it on previously, but my Fujifilm X-H2 (my review here) is more like a full frame camera is size and the lens is a perfect fit on the X-H2.
Tamron loves its initials in their lens names, so let’s sort out that alphabet soup. Di III is their designation for a mirrorless lens design, and, in this case, the addition of -A at the (Di III-A) refers to their development for APS-C mirrorless. VC is Vibration Compensation, which is Tamron’s name for their proprietary OIS (image stabilization) system. It’s worth noting that neither of the Fuji alternatives (both of which cost more) come with built in stabilization. RXD refers to the focus motor, which is similar to the linear motors employed on many of Fuji’s better lenses. In short, this lens is pretty loaded with quality features under its skin even if there aren’t a lot of external features on the barrel.
So does the Tamron 17-70mm F2.8 VC RXD impress me as much on Fuji as it did on Sony? You can watch my conclusions in my video review, or just read on to find out…
Thanks to Tamron USA for sending me an loaner of the lens. As always, this is a completely independent review. I have used both my personal Fujifilm X-H2 (my review here) and a loaner of the X-S20 (my review here) for this review.
Tamron 17-70mm VC Build, Handling, and Features
As noted, the Tamron 17-70mm VC is more like a full frame sized lens. You can’t make this large of a zoom range (4.11x zoom ratio) with this large of a constant maximum aperture (F2.8) without making a larger lens even when designing for the smaller APS-C sensor. The lens is 74.6mm (2.9″) in diameter (about average), but is fairly long at 119.3mm (4.7″). Like most of Tamron’s mirrorless lenses the 17-70mm VC has a 67mm front filter thread. That makes the Tamron longer than the XF 16-55mm F2.8 (106mm), though that lens is considerably wider (83.3mm) and weighs more at 655mm. The 17-70mm F2.8 is 525 grams (1.2 lb). Here’s a look at how the specs break down:
The lens extends an additional 27mm when zoomed to 70mm, so when zoomed out and and the hood attached, this is not a small lens:
So not small, but it’s worth noting that the weight is light enough that the lens balances fine on most Fuji bodies, though it will obviously be a better match for the larger X-T or X-H bodies.
That bright maximum aperture of F2.8 helps the versatility of this lens, as it makes it more useful in lower light conditions or as an event/wedding zoom. While the depth of field is more equivalent to a full frame F4 lens, the F2.8 aperture will always have the light gathering capability of an F2.8 lens (regardless of whether attached to APS-C or Full Frame), meaning that the shutter speed of an F2.8 lens on APS-C would be the same as the shutter speed under identical conditions of an F2.8 lens on a full frame camera.
As has been Tamron’s design philosophy thus far, the design language is clean, modern, and without distractions. That’s the nice way of putting it. The glass half empty approach is to note that there are no features on the outside of the lens. No AF/MF switch, no aperture ring – just the zoom and focus rings. Aperture rings were rare on Sony in the past, but the aperture ring has been a very common design element on Fuji. It is also rare, in my experience, for a lens equipped with an optical stabilizer to not have an ON/OFF switch for it mounted on the barrel.
All we have on the barrel is the two rings. The position of the two rings on the 17-70mm is reversed relative to the 11-20mm, which is unfortunate for those who will buy both lenses to use as a kit. The closer (and narrower) of the two is the manual focus ring. You will have to select manual focus from within the camera, though this is common on Fuji cameras and is fairly simple if you have a body that has the Focus Mode lever or button on the front. This (like all mirrorless lenses) is focus-by-wire, meaning that focus input on the focus ring is routed through the focus motor to move the elements. Manual focus feel is fairly light and without a lot of tactile feedback. Typical manual focus aids are all available, as Tamron lenses on Fuji function largely like native lenses.
The zoom ring is close to the front of the camera. It is fairly wide and has a rubberized, ribbed texture. It moves smoothly through the zoom range without any sticking points. The inner barrel will extend about 27cm at the 70mm position, and is fully retracted at the 17mm position. The inner barrel extends smoothly and without any wobble.
Tamron has included a shallow, petal-shaped lens hood with deep ribs inside that disrupt stray light bouncing around. It’s plastic and lightweight, but the quality of the plastics is apparent by feel. It doesn’t feel as cheap as some hoods that I see. It feels like it could take a few bumps without cracking (in fact my test copy and X-H2 came off my tripod while shooting some tests. It fell a couple of feet to the carpeted floor, landing on the lens hood. No harm, no foul, though to be safe I’ll be having Tamron check out the lens to make sure that it remained properly centered). All of the product shots were taken post-fall, so you can see that the lens weathered that bump well.
The lens’ housing is a nice grade of engineered plastics with a satin finish. There’s a platinum-colored accept ring right near the lens mount. Nothing fancy on the outside, but the lens “look” is clean and it looks nice mounted on the camera.
As noted, however, the good stuff is inside. There’s a rubber gasket at the lens mount that is the outer evidence of the weather sealing inside, and this is diagram from Tamron shows that there are a total of seven seal points in the lens. This is capped off by a nice fluorine coating on the front element, which not only helps protect it from scratches but also makes it water and fingerprint resistant and thus easier to clean.
Tamron’s recent trends regarding MFD (minimum focus distance) hold true here, as the lens sports two different MFDs for wide (0.19m/7.5″) and telephoto (0.39m/15.5″). You can get to nearly 0.21x magnification on the wide end and right over 0.19x on the telephoto end. I find the figure on the wide end less useful, however, as you have to get to within only 6-7cm of your subject to achieve that magnification, meaning that there is a STRONG chance of shading your subject with the lens. Distortion and field curvature is also exaggerated that close, leaving only a small “sweet spot” where focus is achieved. Here’s a look at the MFD at 17mm, then 70mm, and then the result at 17mm:
You can see that the field curvature is exaggerated up close. The magnification is a little lower at 70mm, but it’s a little easier to get:
Unfortunately image quality isn’t quite as strong up close at 70mm, but I still found close up images looked quite nice:
We’ve got a nine bladed aperture that prioritizes keeping things circular. Here’s a look at the bokeh geometry from F2.8 – F5.6:
The geometry looks pretty good, with fairly consistently circular shapes across the frame. Despite the rounded aperture iris the lens manages to produce a nice sunstar effect at 17mm when stopped down:
The inclusion of IBIS (In-Body-Image-Stabilization) has become much more common in Fuji cameras in the past three years, but that doesn’t change the fact that there are still a lot of Fuji cameras without IBIS. That makes the inclusion of Tamron’s VC (Vibration Compensation) important for stills, yes, but even more so for getting stable handheld video footage. Because I tested the lens on two cameras with IBIS (X-H2 and X-S20), I can’t turn either of the stabilization systems off independently, so I can’t really tell what the VC is doing and what IBIS is doing. I was able to handhold 70mm at shutter speeds of 1/4th of a second and get stable results:
I also had a nicely stable platform for video. Walking with the camera still doesn’t have anything like the smoothness of a gimbal, but it was better than what I’ve seen in many other such situations. If you don’t have a camera with IBIS, however, the stabilization of the 17-70mm VC could be a game changer for you.
The Tamron 17-70mm RXD lacks an aperture ring, and the exterior finish doesn’t come across as premium as Fuji’s own nicer lenses, but there are a lot of positives here as well. Stabilization, weather sealing, close focus performance – these are all very important in real world situations.
Autofocus and Video Performance
The Tamron 17-70mm F2.8 has Tamron’s excellent Rapid eXtra-silent stepping Drive (RXD).
In design, it looks like the linear motors designed by Fuji or Sony. I’ve been interested to see how the RXD works on Fuji (I’ve previously tested on Sony). Like the 11-20mm F2.8 that I tested first, I found that the RXD motor is pretty much flawless for stills, with fast, quiet focus on either the X-H2 or X-S20 bodies that I used for the review.
This is a far cry from some of the older Fuji lenses I’ve used, with noisy focus motors that were slow and rough. Quality of focus is more akin to the newest Linear Motor equipped lenses. I never really heard the focus motor, and focus accuracy was excellent even in less than ideal light (this is a 1/35th of a second shot, ISO 1600, F2.8):
Eye AF detection for people shots were generally excellent. I attended the wedding of a friend (not in a official capacity), but supplemented their photos with my own. I used the X-H2 and 17-70mm F2.8 for the “people photos”, and I got well focused results across the many images I took:
This certainly would work as a great lens to have mounted on at least one body for shooting weddings, giving you the ability to cover from wide to telephoto with an F2.8 aperture and accurate autofocus.
I also got accurately focused results of Nala as she stalked through the tall grasses.
I also used the “Insect Detection” mode and tracked some bee action at my hive.
I also had zero problems with smaller apertures and shooting landscapes. I got a lot of beautiful landscape shots with the lens and didn’t have any issue with pulsing or hunting at smaller apertures.
Here’s another:
I have no complaints for stills. Focus was fast, quiet, and accurate.
Video focus pulls were less stellar, however, which follows a trend that I’ve seen with Tamron lenses on Fuji thus far. There is some visible stepping in the actual pulls; the initial focus move, a split second pause, and then the final adjustment. I didn’t see any of this on the Sony version of the lens, so it is probably more of a Fuji problem in general, as I do tend to see more stepping on Fuji than other platforms.
There is a moderate amount of focus breathing. The results from my “hand test” were a little better, as the focus changes are smaller, but I still saw a bit of stepping. More subtle focus transitions during video capture were relatively smooth, but did show some steps. I’m hoping this is something that can improved either through firmware updates to the camera or lens in the future.
So, for stills I can give an unreserved “thumbs up”, but would encourage a little caution if your video style includes big autofocus pulls.
Tamron 17-70mm VC Image Quality
The 17-70mm F2.8 VC sports an optical formula of 16 elements in 12 groups, with 5 of those being exotic elements (molded glass aspherical, hybrid aspherical, and Low Dispersion). Here’s a look at the optical design and MTFs:
If you understand MTF diagrams, you will note that these are very good looking MTFs for a standard zoom…particularly one with an extra-large zoom range. 17mm shows a very consistent performance across the frame, with 70mm presenting as sharper in the center but a little weaker in the corner. The transition to the 40MP sensor of Fujifilm X-H2 is a brutal one, however, as that is more pixels packed onto a sensor this size than ever before. All of the flaws will be apparent here.
Here’s a look at the vignette and distortion at 17mm:
When I reviewed the Tamron 11-20mm, I was surprised to see considerably more vignetting on the Fuji version than I had on the Sony version. I thought it was some kind of testing fluke at the time, but I’m seeing the same here, so this is an obvious trend. The optical design is the same as the Sony version, so I must surmise that the additional vignette has to do with Fuji. X-mount is several millimeters smaller in diameter than the Sony E-mount, so it is possible that there is some additional vignetting for the simple reason that the original design is for a larger mount and the transition to a smaller mount is introducing more vignette.
Or I’m completely wrong.
What I do know is that I saw about two stops of vignette at 17mm on the Sony version, and I see closer to 4 stops here (I had to max out the correction slider and you can still see a little darkness in the extreme corners). I had a similar jump on the Tamron 11-20mm. There is also some barrel distortion that isn’t quite linear in correcting (a slight wave pattern). The amount of distortion isn’t huge, however, and I used a +6 to correct it. Tamron seems to enjoy full in-camera correction support on Fuji, so use the standard profile in camera for JPEGs and Video for a cleaner still result. As always, RAW images will require using the correction profile, which does in fact do a cleaner job in correcting the distortion than my manual correction.
As is typical for a lens like this, the distortion pattern flips to a pincushion style distortion on the telephoto, though this distortion is even more linear and easier still to correct for. Vignette was also lower.
I used a -9 to correct the distortion and a +70 to correct the vignette. There’s nothing that is a dealbreaker here due to good corrections.
The 17-70mm VC does suffer from some longitudinal chromatic aberrations that show up as fringing before and after the plane of focus. This will rob the lens of some contrast. Fringing is more obvious on very high resolution bodies because the fringing occupies more pixels thus becomes more obvious when viewed at 100%. If you aren’t zooming into the image it won’t be more obvious, however.
You can see it in the out of focus region, though its not obvious or ruining the image.
I could see trace amounts of lateral chromatic aberrations on my chart (fringing in dark to light transitions near the edge of the frame) if I magnified to 200%, they were too insignificant to see in real world use, and a one click correction either in camera in (for RAWs) in software will clean those up nicely:
Let’s move on to resolution and contrast. I do my examinations at 200% magnification, as this clearly shows lens strengths and flaws for you to see. This is an extreme torture test, exaggerating strengths and weaknesses. The good news is that real world results always look a little better (mostly because you don’t view them at 200%!)
A note on sharpening: Adobe Lightroom (my home base for cataloging, testing, and displaying images) doesn’t always play well with Fuji X-Trans sensors. They are fairly notorious for looking “wormy” when applying sharpness, and thus require a deft touch to produce good results. Using Adobe’s “Enhance” option helps, though at the cost of tripling the stored file size (files are typically north of 150MB). I have worked hard to develop a sharpness preset for my X-H2 images that sharpens using a different technique than I typically use for my other cameras. By utilizing both techniques I can produce a demonstrably better result, though at the cost of additional work and storage size. I don’t do this for all images, but I will for the main test subjects below.
First, here’s my test chart:
We will start with F2.8 crops (near 200%) at 17mm from the center, mid-frame, and extreme lower right corner. Stopping down to F5.6 further improves contrast a bit as aberrations clear up.
We can see a fairly consistent performance across the frame (as suggested by the MTF), with good sharpness in the center of the frame, mid-frame, and only a mild drop in the corners. Contrast isn’t off the charts, and that is in part because of the challenge of performing on a much higher resolution sensor than the last time I tested the lens. That’s the challenge of such a high resolution sensor on APS-C, though it’s not quite so dire in the real world. I compare results at 200% here. Out in the real world at a more typical 100% magnification things look better…even when shooting a landscape at F2.8:
Stopping down to F4 produces little difference in the center or mid-frame, but I did see some improvement in the outer third of the image frame. Stopping on down to F5.6 increases contrast a bit more, and image quality is quite strong across the frame even on this high resolution beast:
Real world results at F5.6 are very nice with nice contrast and detail across the frame.
At 24mm I found resolution and contrast just a little bit higher all across the frame. Contrast in particular is noticeably better.
Contrast and detail edge up very slightly at 35mm, and real world results look nice:
I really love this image of an unscripted moment with the bride and groom.
There is a tiny regression at 50mm with contrast dropping a bit, though the difference would be hard to spot without having the images side by side. Contrast improves again by F4 and F5.6. Here’s an F2.8 shot:
That trend continues at 70mm, where the results are noticeably softer on the copy I tested. That leaves more room for improved image quality when stopping the lens down, and there’s a much bigger difference between F2.8 and F5.6 than at other focal lengths.
That slightly reduced contrast look can have a flattering effect for portraits, however.
Stopped down to smaller apertures and the lens produces detailed images at 70mm:
In my Sony review I was very impressed by the sharpness of the lens and less impressed by the bokeh, but on this high resolution body my opinion is slightly different. I’m less blown away by the sharpness but find the bokeh quality better than I remembered. This image shows a very soft profile on the bokeh.
I shot this high ISO image on the lower resolution X-S20 at 24mm, and while the background isn’t strongly blurred out, the transition to defocus looks fairly good.
Here’s one more that looks fairly nice.
The one negative that remains true is that if there are bright specular highlights in the image (like Christmas lights), you will see some concentric circles in the “bokeh balls”. That’s obviously not a desirable trait.
Flare resistance is quite good. Tamron utilized their premium BBAR lens coatings here, which tend to be extremely effective in resisting flare artifacts. In this sequence of photos you can see flare resistance at 17mm (at F11), then at 70mm F11 (the worst result I could find), followed by a real world shot with the sun right at the edge of the frame.
Even doing video pans across the sun produced very little negative effects.
While I didn’t have a chance to test coma on Fuji due to forest fires negatively impacting our air this summer, I did test it on Sony. “Coma performance is quite good, with night sky images looking clean other than a bit of “star-stretching” in the corners.”
For the money you certainly aren’t going to beat this image quality in a standard zoom on Fuji. It’s a full $500 cheaper than the closest competitor – the Fuji XF 16-55mm F2.8. I think the Fuji delivers slightly richer colors, but outside of that, the Tamron is very competitive, and I would definitely take it over a lens like the XF 16-80mm F4 in terms of sharpness. At the least, the Tamron brings intriguing new option to the Fuji X platform with a bigger zoom range than some and a larger aperture than others. There’s a lot of good optically, and little major issues. You can check out more photos by visiting the image gallery page here.
Conclusion
The Tamron 17-70mm F2.8 Di III-A VC RXD is a welcome addition to the Fuji X-mount standard zoom options. In most other cases you have to choose between maximum aperture (16-80mm F4 or 18-120mm F4) or lack of stabilization (16-55mm F2.8), but with the Tamron you get both the larger maximum aperture along with the optical stabilization. It has a very compelling zoom range that covers a lot of subjects, and the close focus abilities and good magnification are also useful.
This is the kind of lens that you can pretty much glue onto your camera and use it for everyday photography, travel, and more. It can handle most subjects, and that constant maximum aperture of F2.8 is obviously going to be useful when going into lower light situations.
The price point in the US is $699 USD, currently, and it is a lot of lens for the money. The Tamron 17-70mm VC should definitely be on your list if you’re looking for a fast standard zoom and can’t afford the premium 16-55mm F2.8. Fuji opening up its platform to lenses like this is a huge plus for consumers like us…and expect Fuji’s next standard zoom to be all the better for the competition!
Pros:
Great zoom range
Maintains F2.8 aperture
Good build with weather sealing
Fast, quiet, and accurate autofocus
Good image stabilization (VC)
Consistently good optics
Good flare resistance
Excellent price
Cons:
Concentric rings in bokeh highlights (onion bokeh)
DISCLAIMER: This article and description contains affiliate links, which means that if you click on one of the product links, I’ll receive a small commission. As an Amazon Associate I earn from qualifying purchases.
Tamron 17-70mm F2.8 Di III-A VC RXD X-Mount Gallery
Dustin Abbott
July 11th, 2023
In January 2021 I released my review of this lens for Sony E-mount cameras. At the time, no Tamron lenses were available on Fuji X-mount, and I spoke in my conclusion about how a lens like the Tamron 17-70mm F2.8 Di III-a VC RXD actually gave Sony an advantage – it’s the kind of lens I call a “system seller”. On paper it has pretty much everything: a great focal range (25.5-105mm full frame equivalent), a large maximum aperture through the zoom range (F2.8), optical stabilization (Vibration Compensation, or VC), and a fast focus system (RXD). But that advantage is no longer on Sony alone, as this was one of the first lenses to come to Fuji X-mount from Tamron once Fuji began opening up their platform to third party lenses. That’s an amazing focal range to have a constant aperture of F2.8 over, covering from this at 17mm:
…to this at 70mm:
It also is a great value. The current price at B&H Photo is $699 USD, which is a full $500 cheaper than the Fujinon XF 16-55mm F2.8 LM WR (my review here) or $200 less than the Fujinon XF 18-120mm F4 PZD (my review coming soon). The Tamron doesn’t perfectly align with either of those lenses, but they are the closest competitors I can point to on the platform. Sigma has also made their 18-50mm F2.8 DC available on Fuji X-mount (my review here), but the main reasons to consider the Sigma would be price ($549 USD) and compact size as the Tamron 17-70mm VC has the advantage in focal range, weather sealing, and also includes an optical stabilizer. I’ve been interested in revisiting some of these third party lenses on X-mount for two primary reasons: 1) to see how autofocus performs on a new platform and 2) to see how the lens’ optics survive the very pixel dense 40MP Fuji X-Trans sensor on some of their new cameras.
I found the 17-70mm VC a little big for the Sony a6400 body that I reviewed it on previously, but my Fujifilm X-H2 (my review here) is more like a full frame camera is size and the lens is a perfect fit on the X-H2.
Tamron loves its initials in their lens names, so let’s sort out that alphabet soup. Di III is their designation for a mirrorless lens design, and, in this case, the addition of -A at the (Di III-A) refers to their development for APS-C mirrorless. VC is Vibration Compensation, which is Tamron’s name for their proprietary OIS (image stabilization) system. It’s worth noting that neither of the Fuji alternatives (both of which cost more) come with built in stabilization. RXD refers to the focus motor, which is similar to the linear motors employed on many of Fuji’s better lenses. In short, this lens is pretty loaded with quality features under its skin even if there aren’t a lot of external features on the barrel.
So does the Tamron 17-70mm F2.8 VC RXD impress me as much on Fuji as it did on Sony? You can watch my conclusions in my video review below, read my text review here, or just enjoy the photos.
Thanks to Tamron USA for sending me an loaner of the lens. As always, this is a completely independent review. I have used both my personal Fujifilm X-H2 (my review here) and a loaner of the X-S20 (my review here) for this review.
DISCLAIMER: This article and description contains affiliate links, which means that if you click on one of the product links, I’ll receive a small commission. As an Amazon Associate I earn from qualifying purchases.


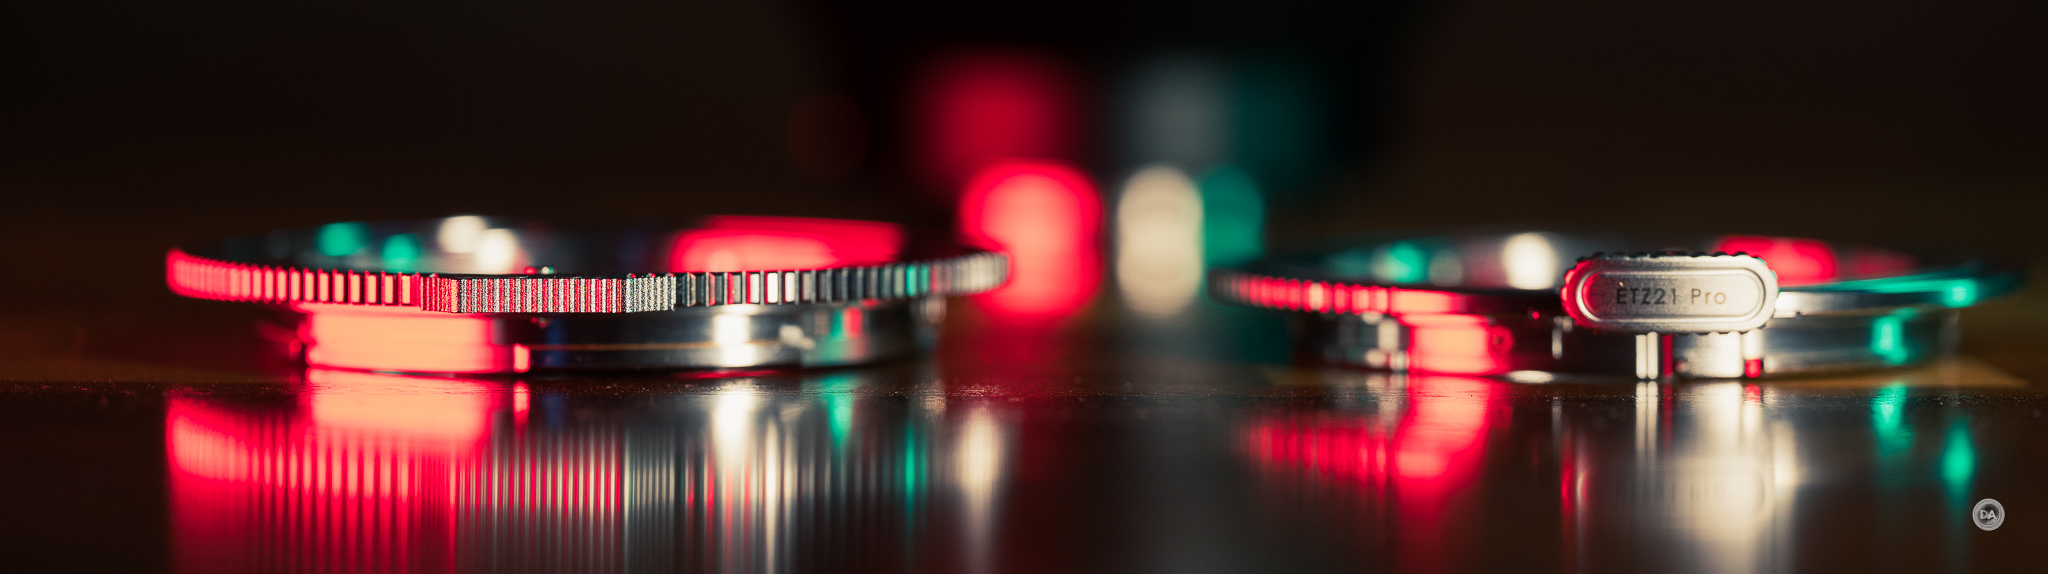


 7Artisans AF 35mm F1.4 X-Mount Review
  Sony FE 50-150mm F2 GM Gallery
  Sony FE 50-150mm F2 G Master Review
  Viltrox AF 35mm F1.2 LAB FE Gallery