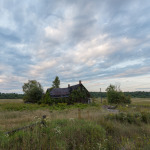
 In this second part of the video tutorial on processing workflow, we will take the file that we created in our exposure blending tutorial into Alien Skin Exposure 6 to create a unique, high contrast “infrared” monochrome image that has a lot of visual “pop”! In the spirit of the former tutorial, this video strives to demonstrate how you can easily (and quickly) customize an image and achieve your artistic vision. You can check out more over at Alien Skin’s blog. Use promo code “dustinabbott” to get 10% off any Alien Skin product.
Gear Used:
Canon EOS 6D DSLR Camera (Body Only)
Canon EF 16-35mm f/4L IS USM Lens
Adobe Photoshop Lightroom 5 Software for Mac and Windows (Boxed Version)
Adobe Photoshop Creative Cloud 1-Year Subscription
Alien Skin Exposure 6
Purchasing your gear through B&H and these links helps fund this website and keeps the articles coming. Thank you for your support.
Great News! I can now offer a 5% discount on all purchases at Amplis Foto, Canada’s Leading Photographic Supplier. Please enter discount code: AMPLIS52014 in your cart. It is good for everything in your cart, and is stackable with other coupons, too! It will take 5% off your entire order! Proceeds go towards keeping this site going and providing you with new reviews!


