I’ve had a long lasting love affair with vintage glass. Even though my contemporary lens collection features dozens of great lenses, I still have 6 or 7 vintage lenses that I enjoy taking out periodically. Some of those include classic SMC Takumars and Zeiss lenses, while others include some of the cult classics like Soviet Helios and Jupiter lenses. The latter category I have prized because of their unique “swirly” bokeh. These lenses are often optical designs derived from Carl Zeiss, and almost all of the lenses I own are based on the old M42 screw mount. Many of these lenses have gotten some revival in the mirrorless era, as they can be fairly easily adapter and mirrorless cameras have manual focus aids that make using them easier than ever. There is a subset of photographers who are turned off by modern lenses that are perfectly corrected, and they are more interested in lenses with some individuality and character.
I’ve wasted a lot of time down the eBay rabbit hole trying to find some of these classic gems at a reasonable price, but some of them are surprisingly expensive. The Zeiss Biotar 75mm F1.5 can cost thousands of dollars. But what if you could get a modern version of that exact lens for under $300? If that sounds intriguing, join me in exploring the unique TTArtisan 75mm F1.5 in either my video review or my text review…or just enjoy the photos in the gallery.
Thanks to TTArtisan for sending me a review loaner of this lens. As always, this is a completely independent review. *The tests and most of the photos that I share as a part of my review cycle have been done with the Sony a7RV along with the Sony Alpha 1 that serve as my benchmark cameras for Sony lenses.
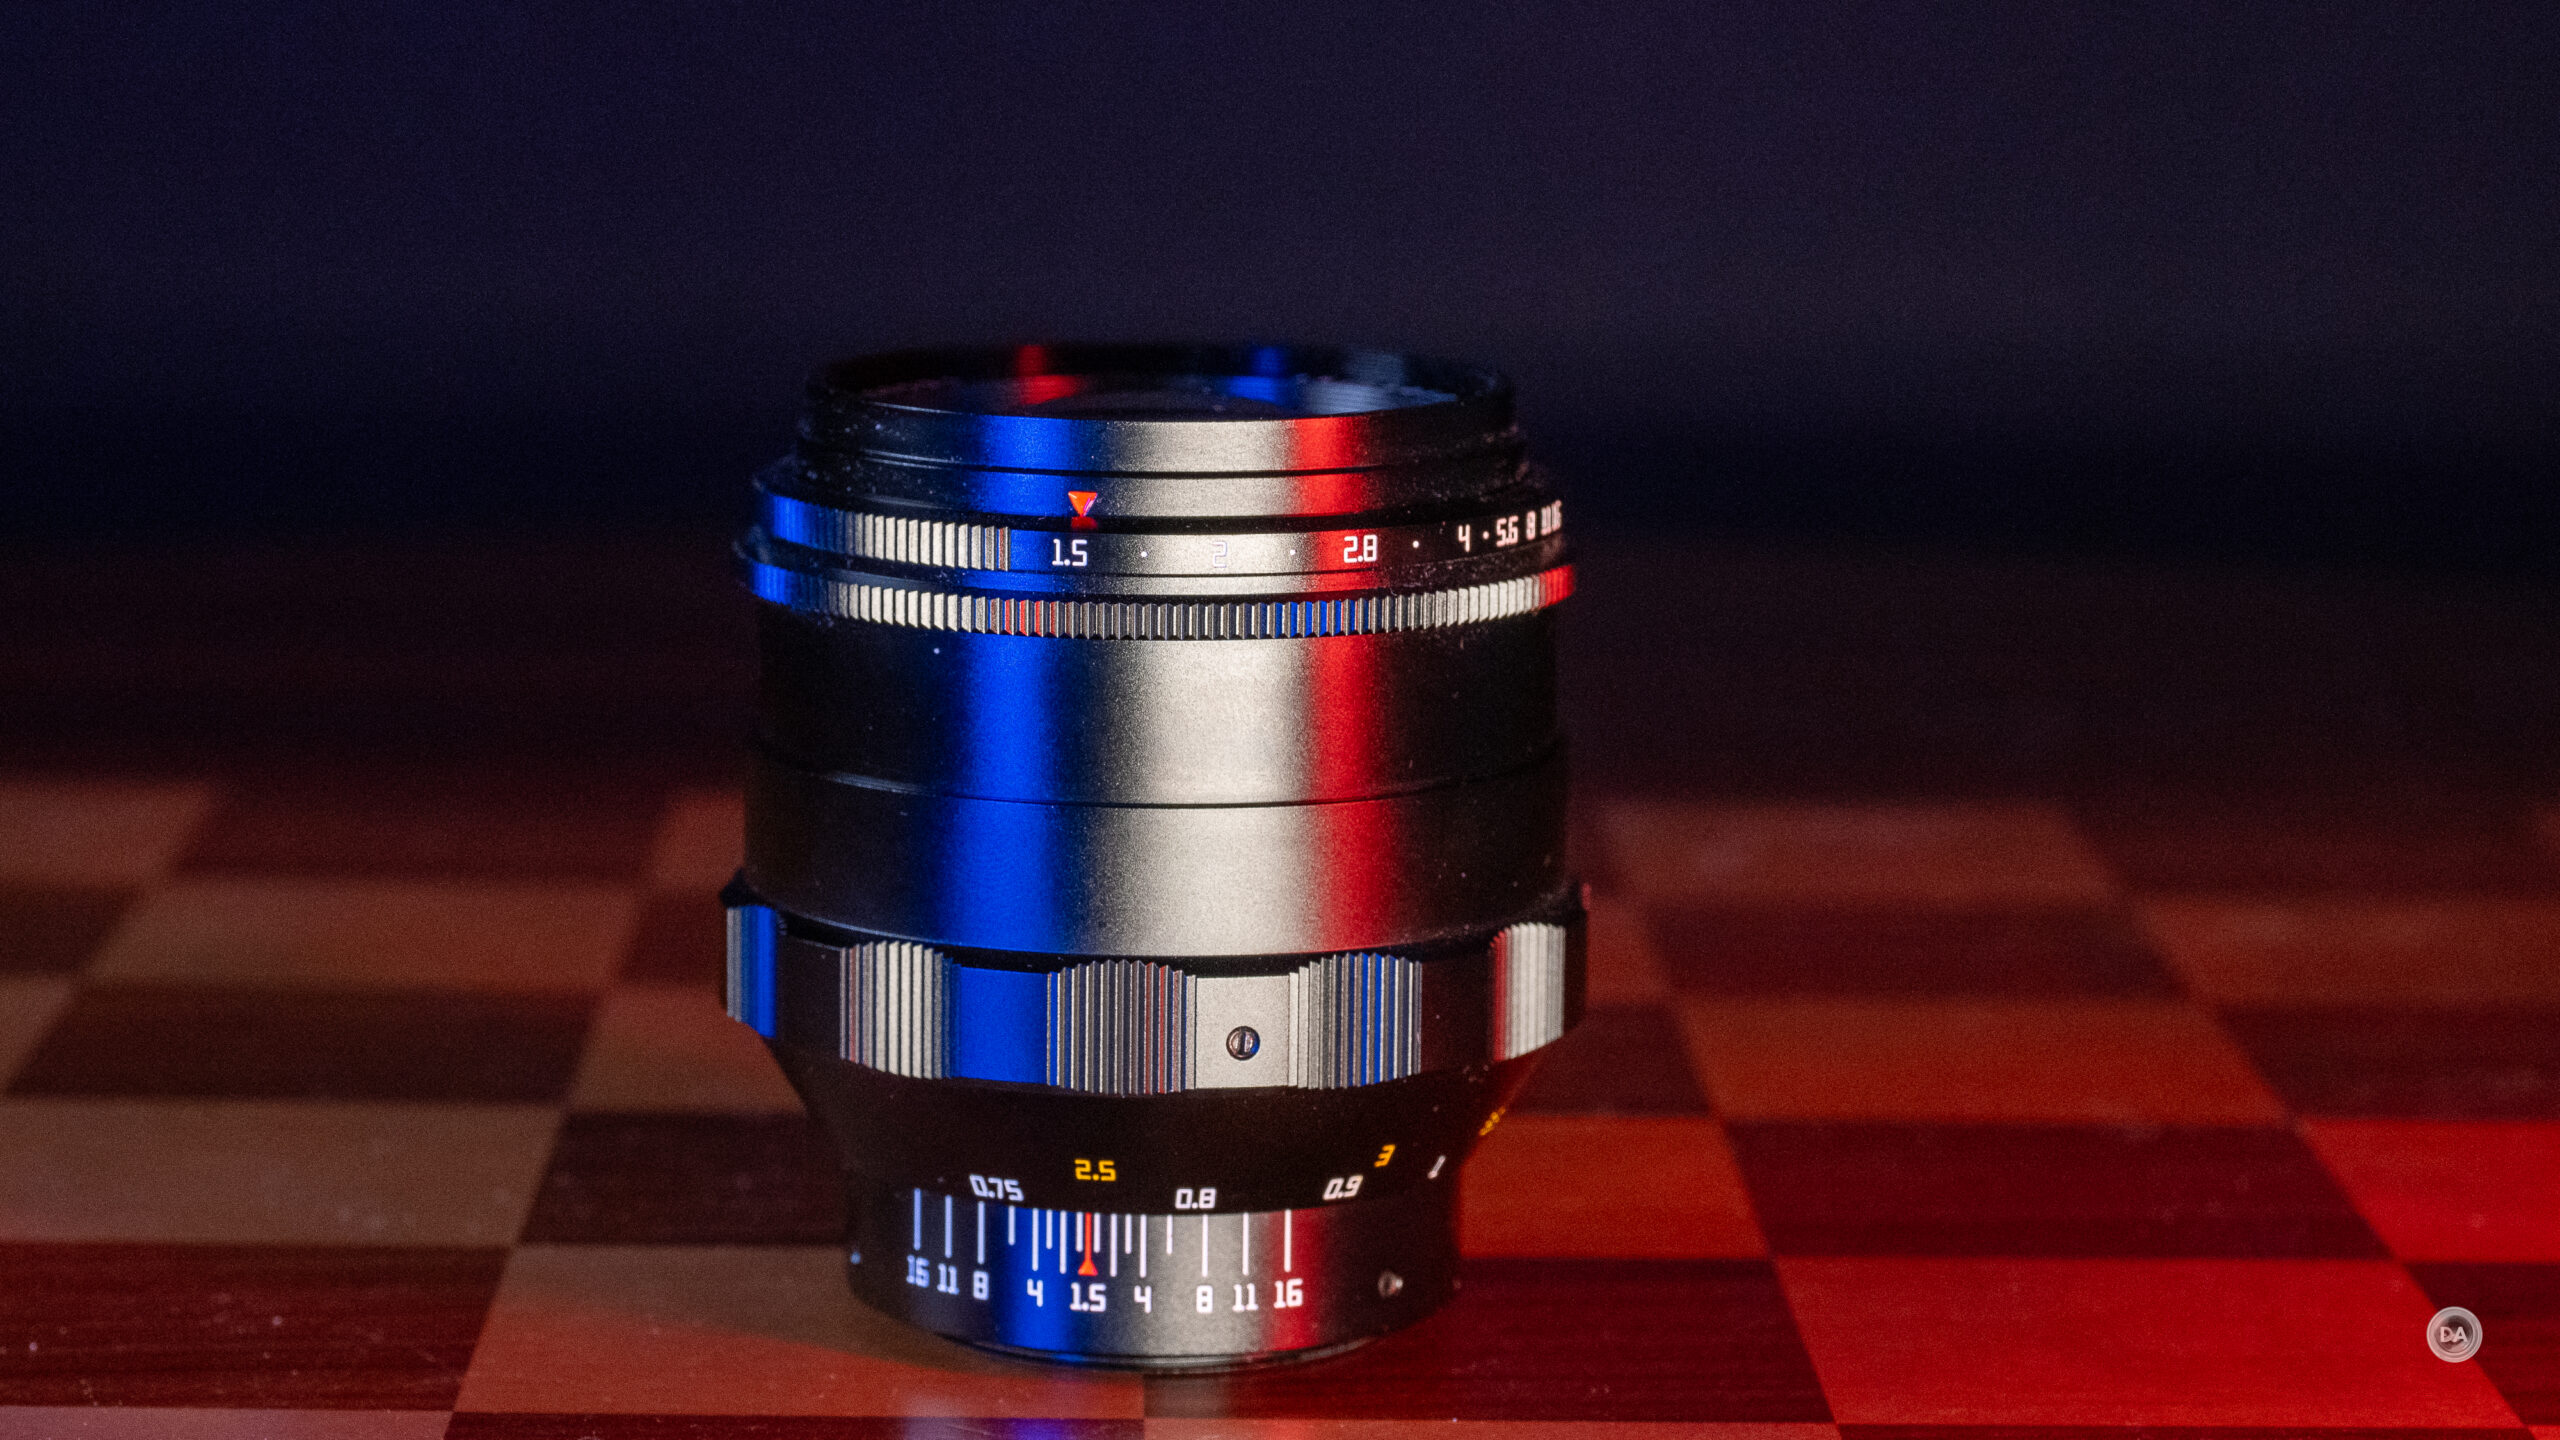
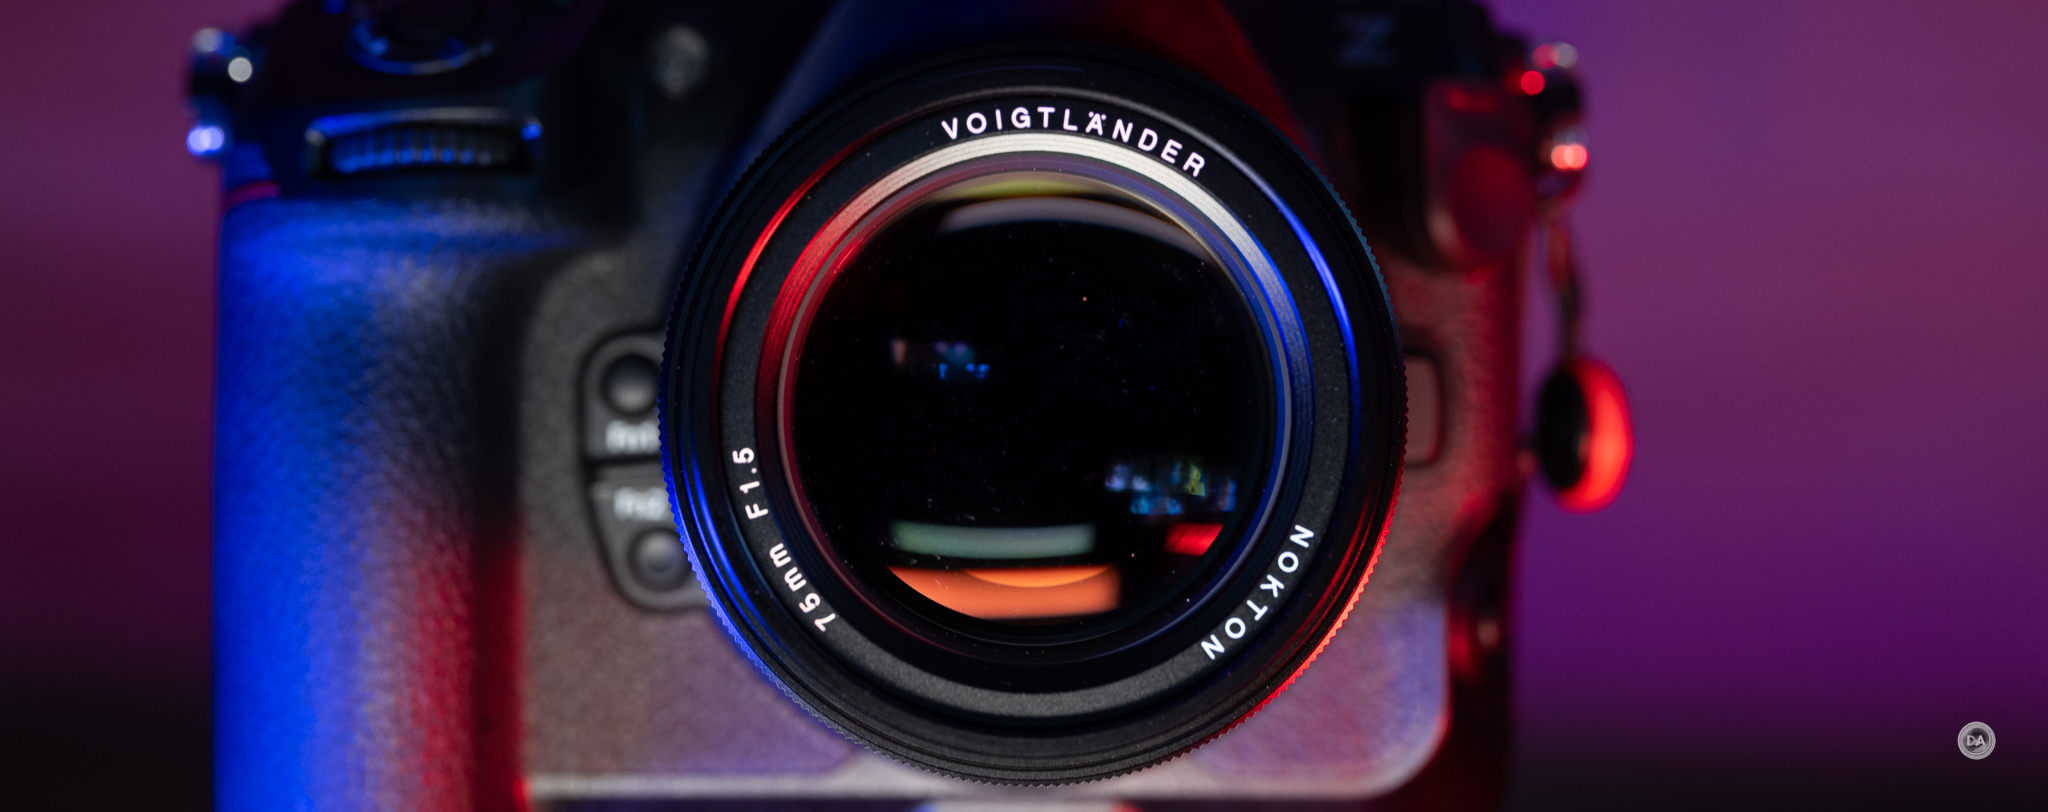
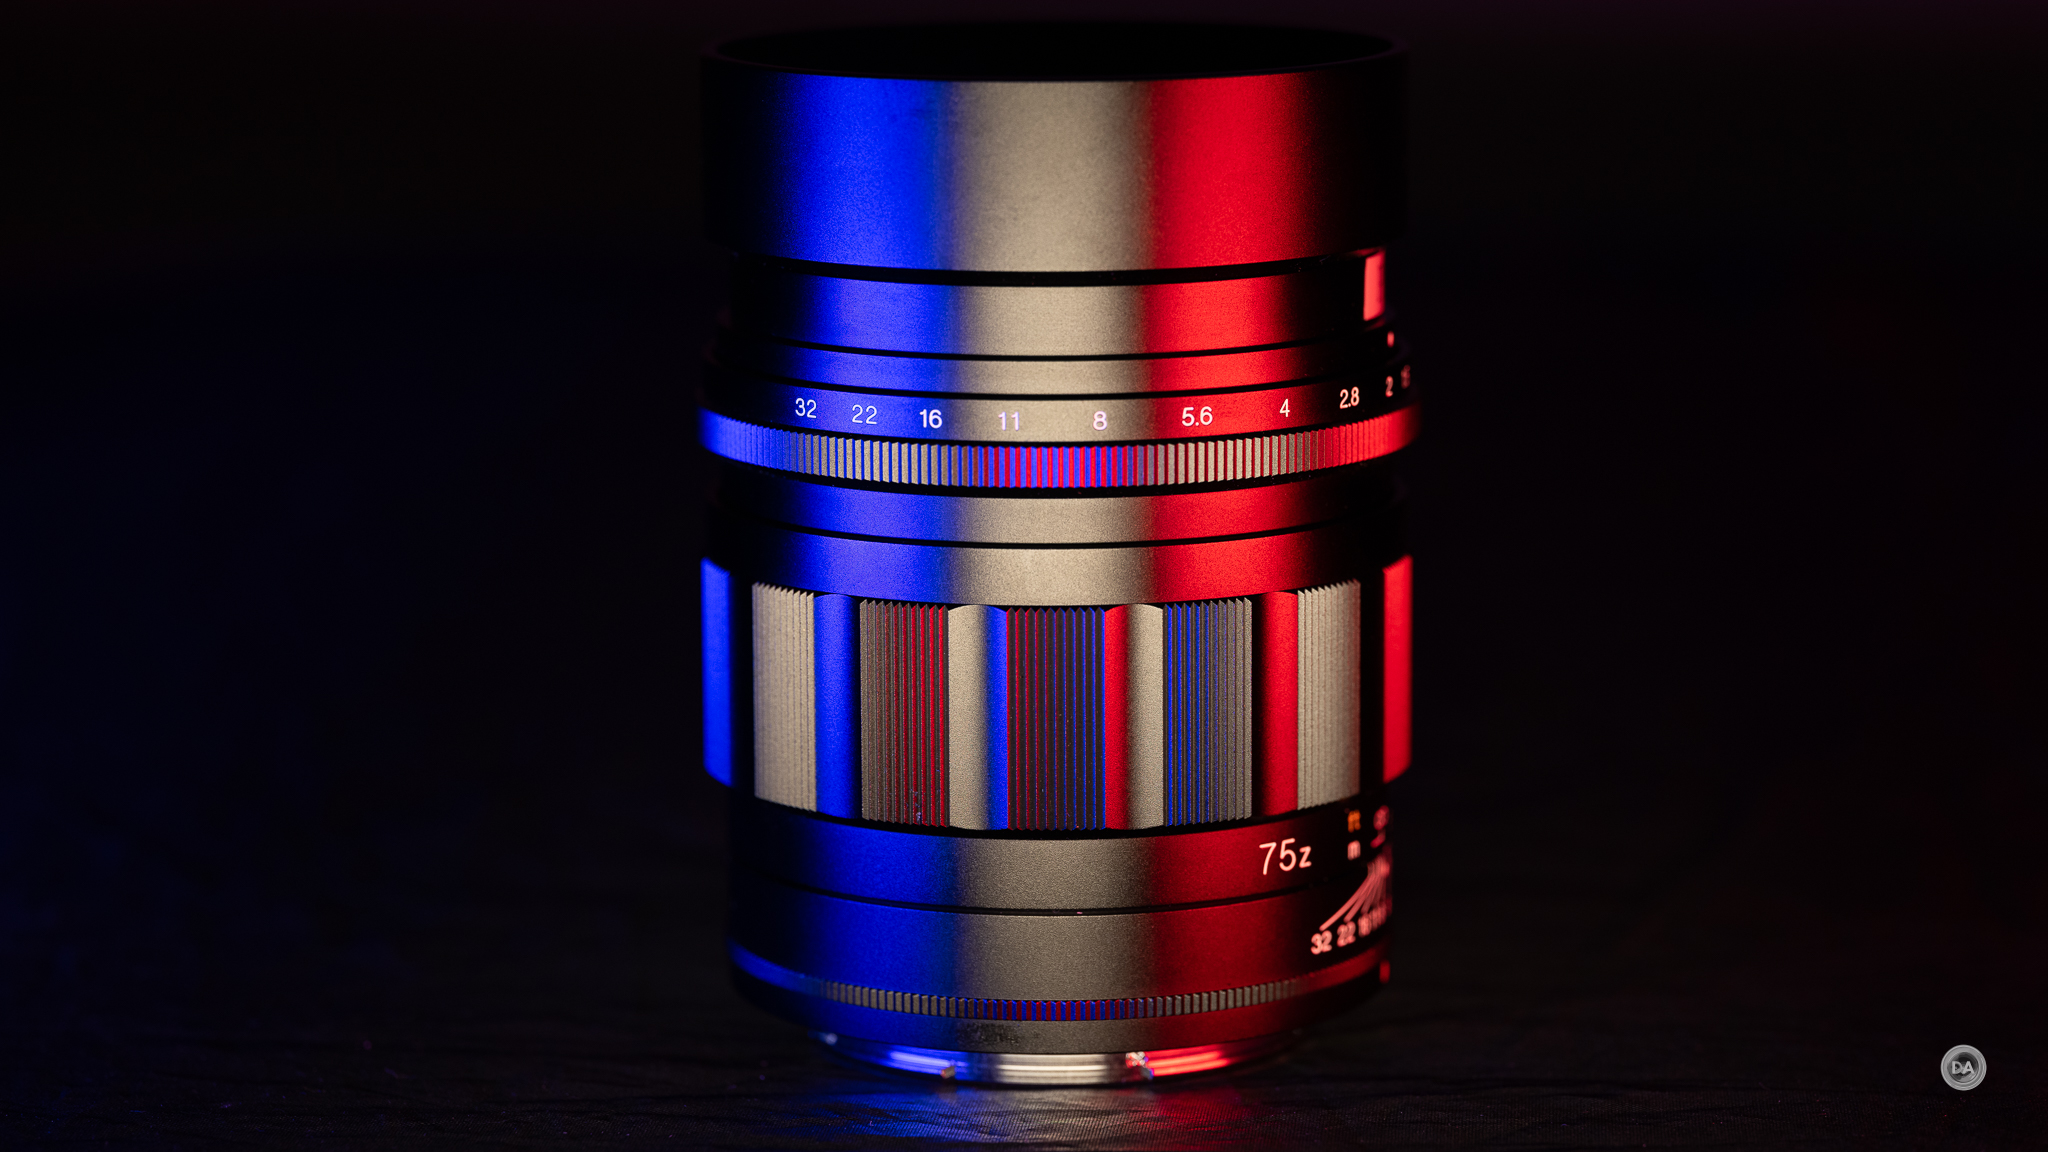
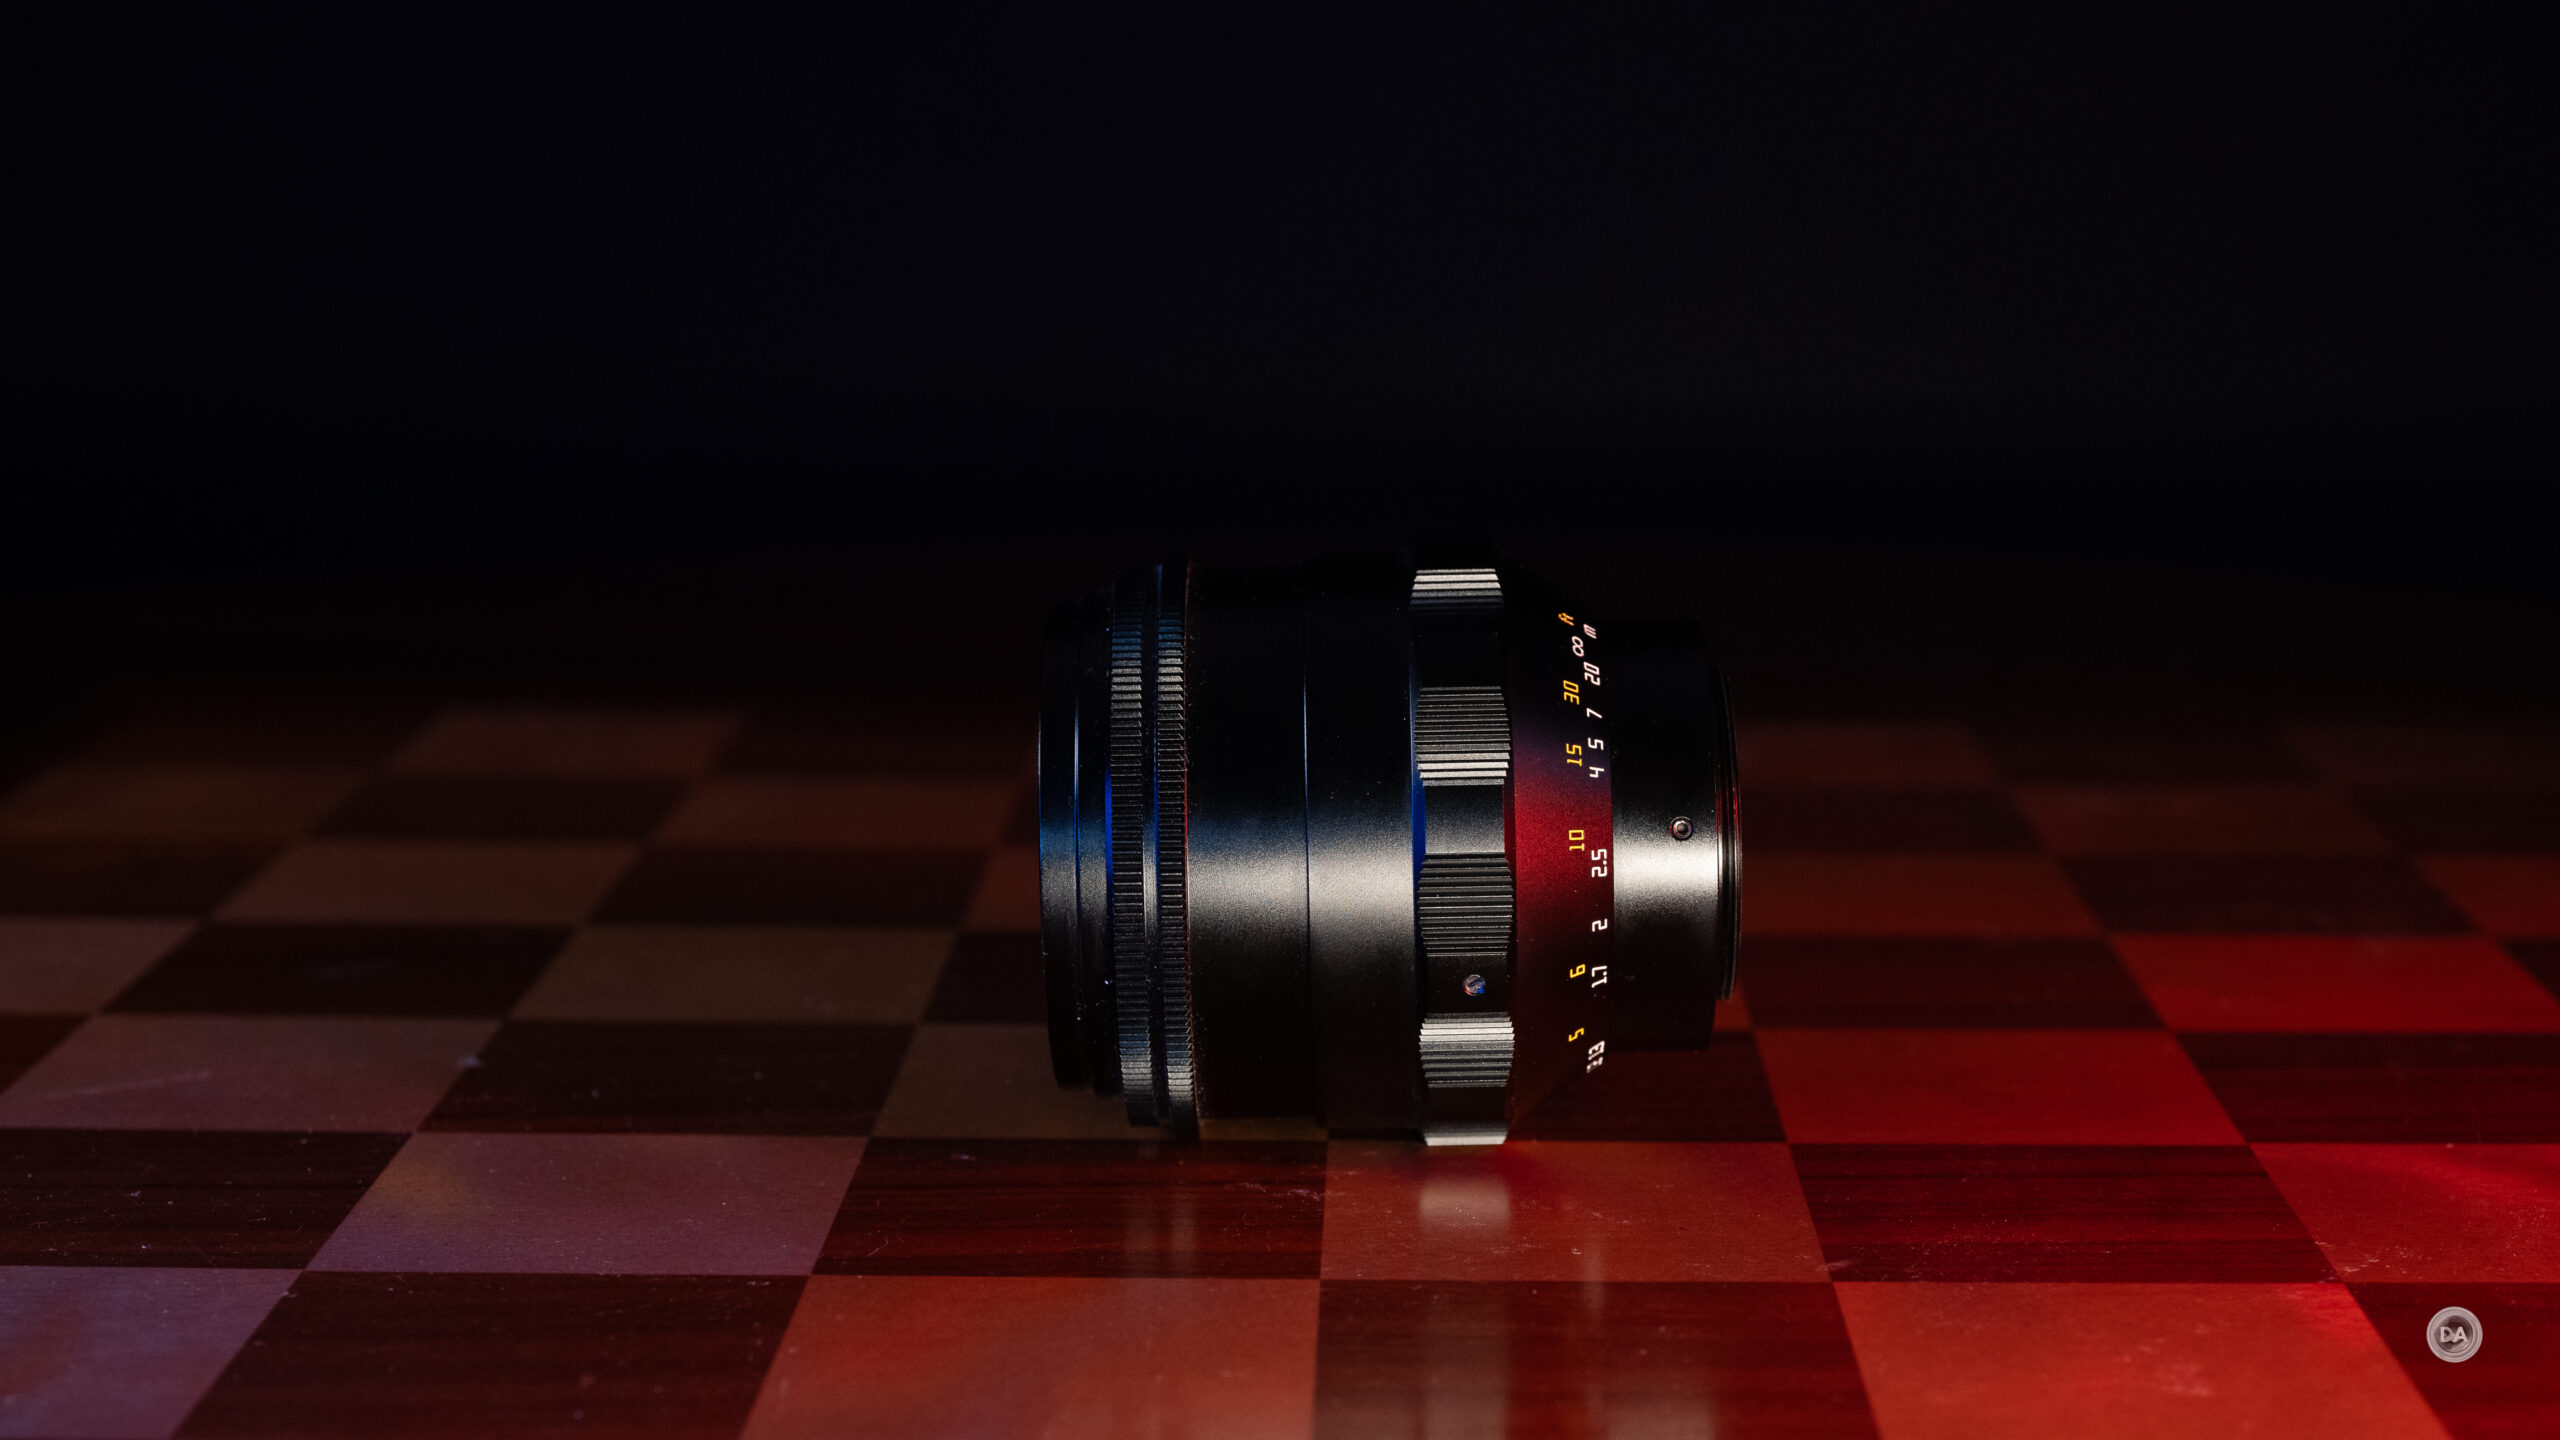
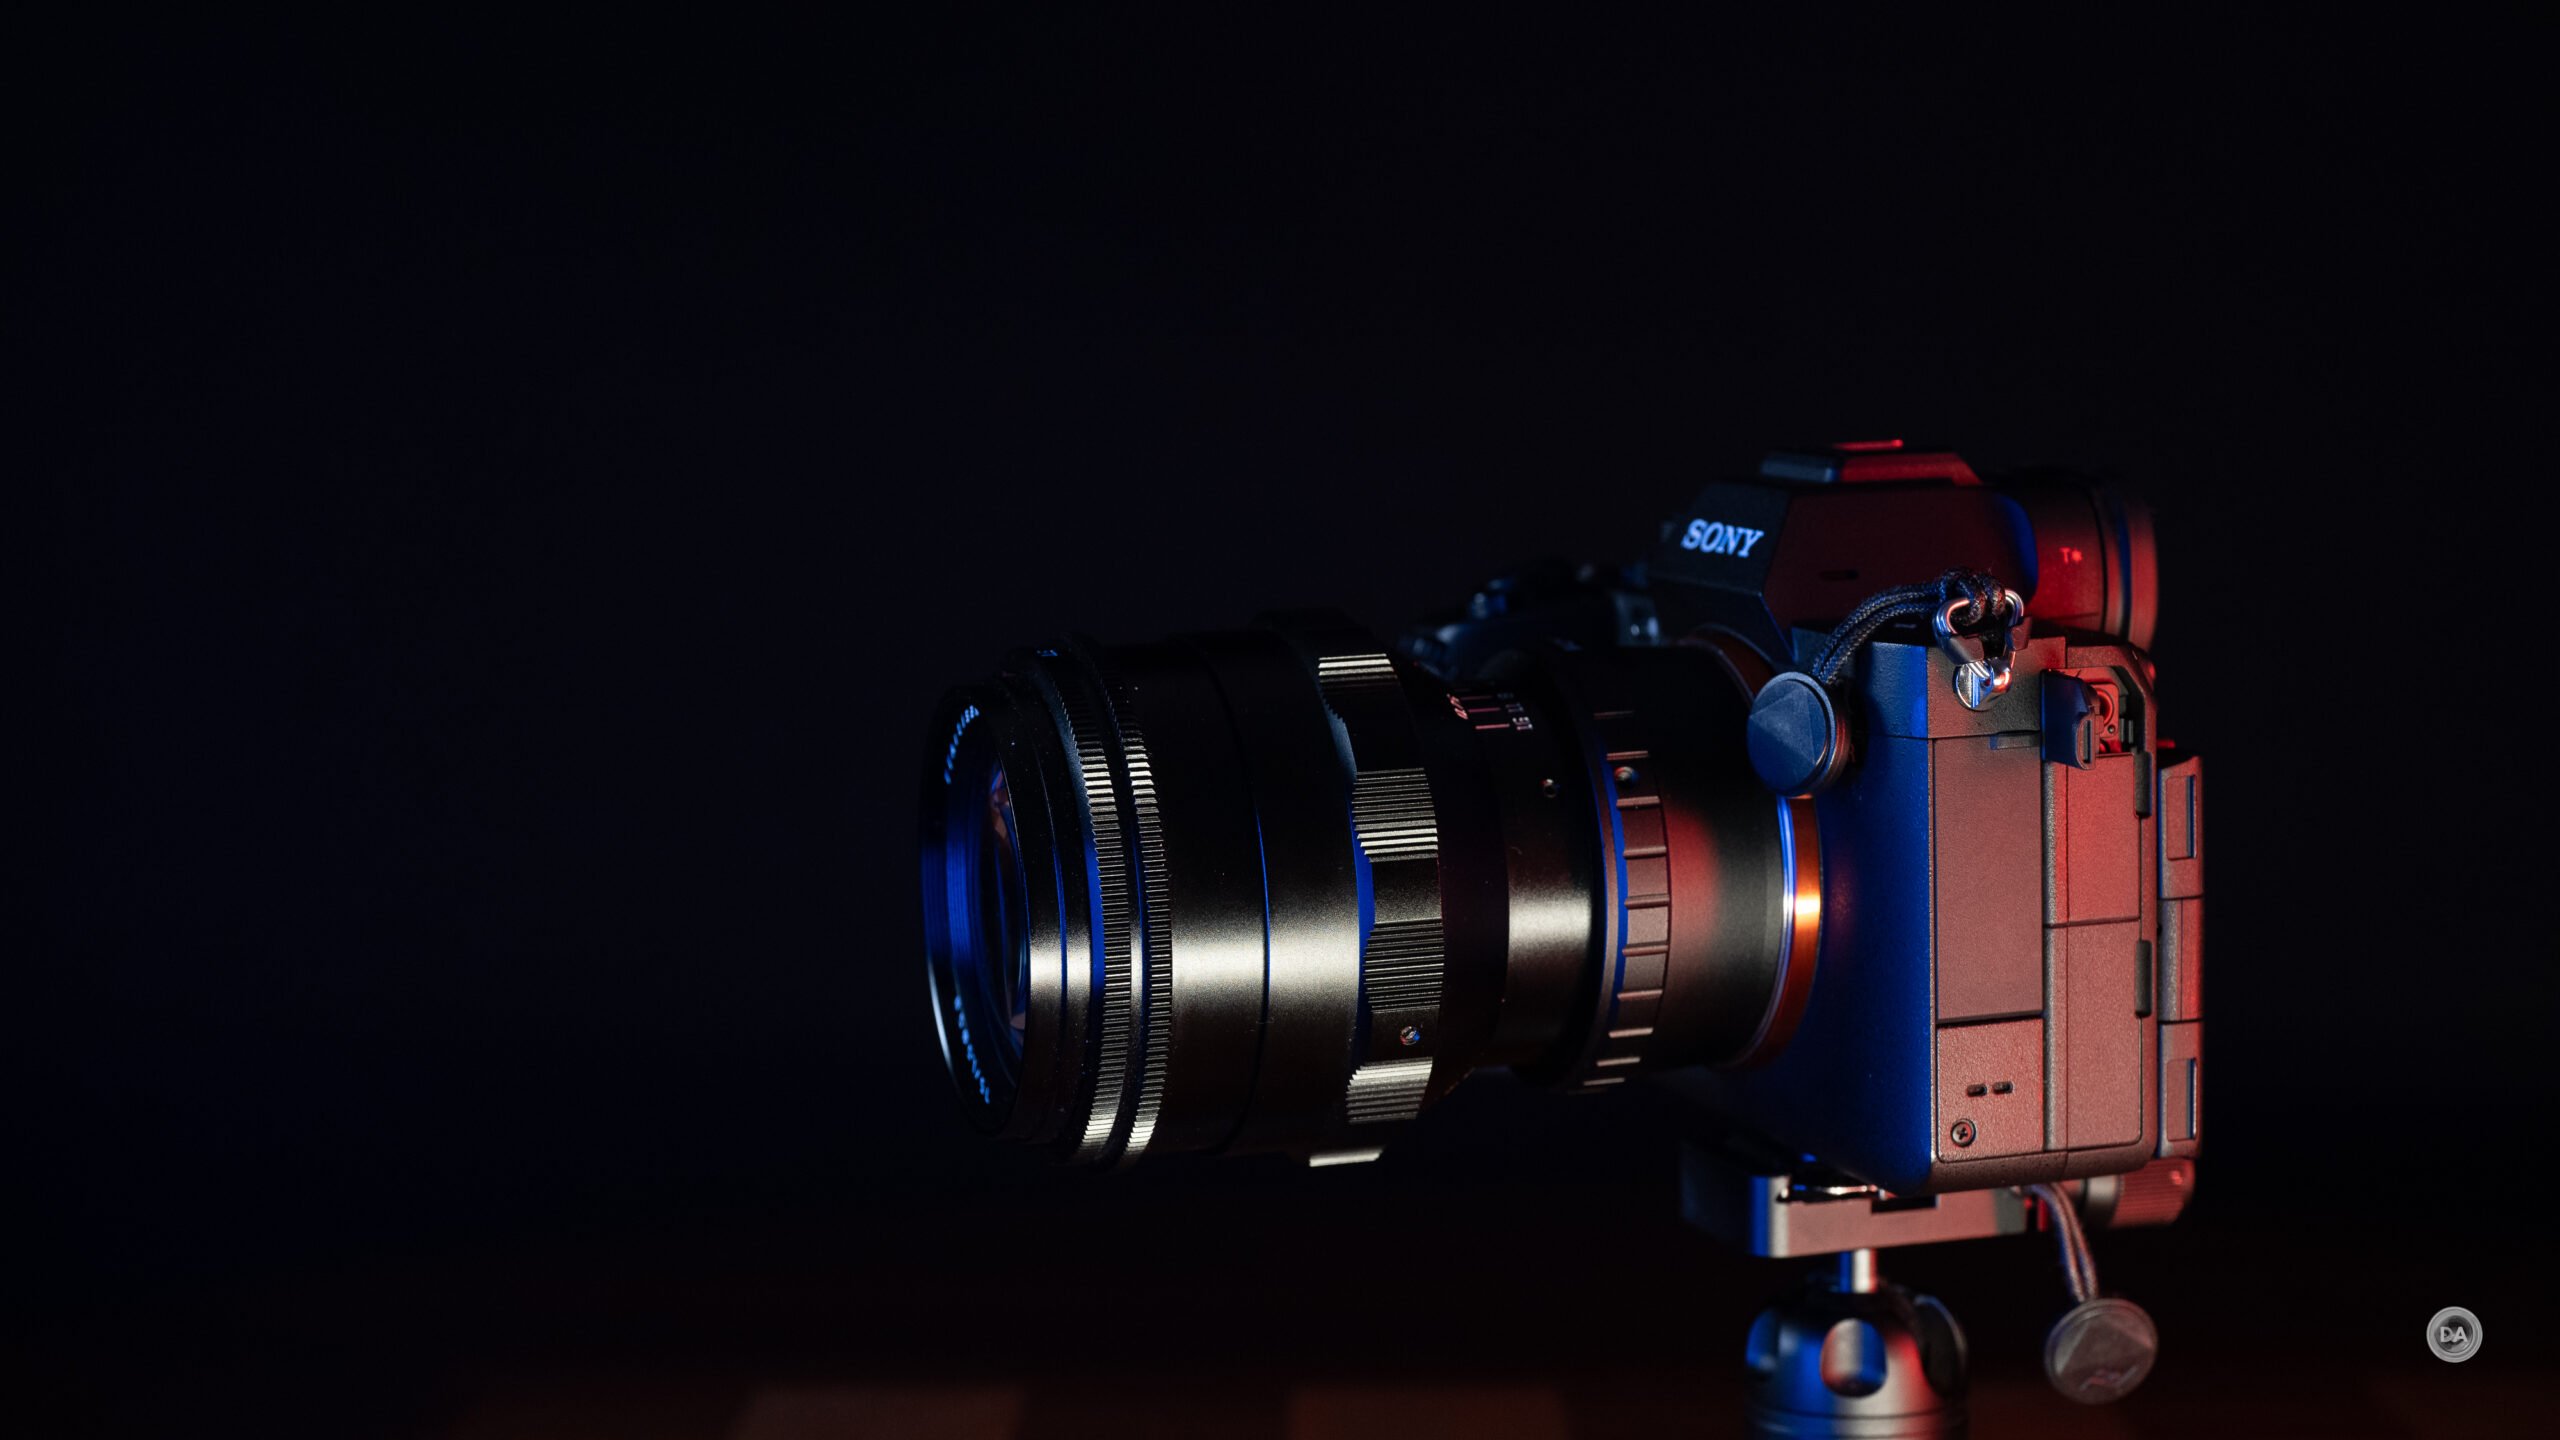
TTArtisan has chosen one of the three different housing designs this optical formula had in the past, which is often called the “Fat Version” that was sold from 1952-1967. The end result is a stubby lens that reminds me a lot of the recent Voigtländer Nokton 75mm F1.5 that I reviewed earlier this year. It has the scalloped focus ring, all metal body, and anodized finish of that lens.
This is built around that same old M42 mount, so that comes with both blessings and curses that we will explore. The upside is that the M42 is easily adaptable to a wide variety of lens mounts, up to and including Fuji’s medium format GF mount. I used to mostly use M42 glass on Canon EF mount, where the adapters would be quite slim, but because of the different flange distance on mirrorless cameras, you have to use much thicker adapters to get the optics where they need to be. You can see that the Vello adapter I used here is pretty chunky, which adds a fair bit of length to the overall package, unfortunately.
Initially the lens didn’t lineup quite right for me, but fortunately they have thought about that, as you can mount the lens to your camera, and then use the included allen key to loosen three screws near the lens mount, which will then allow you to rotate the lens to the proper position before tightening it back down.
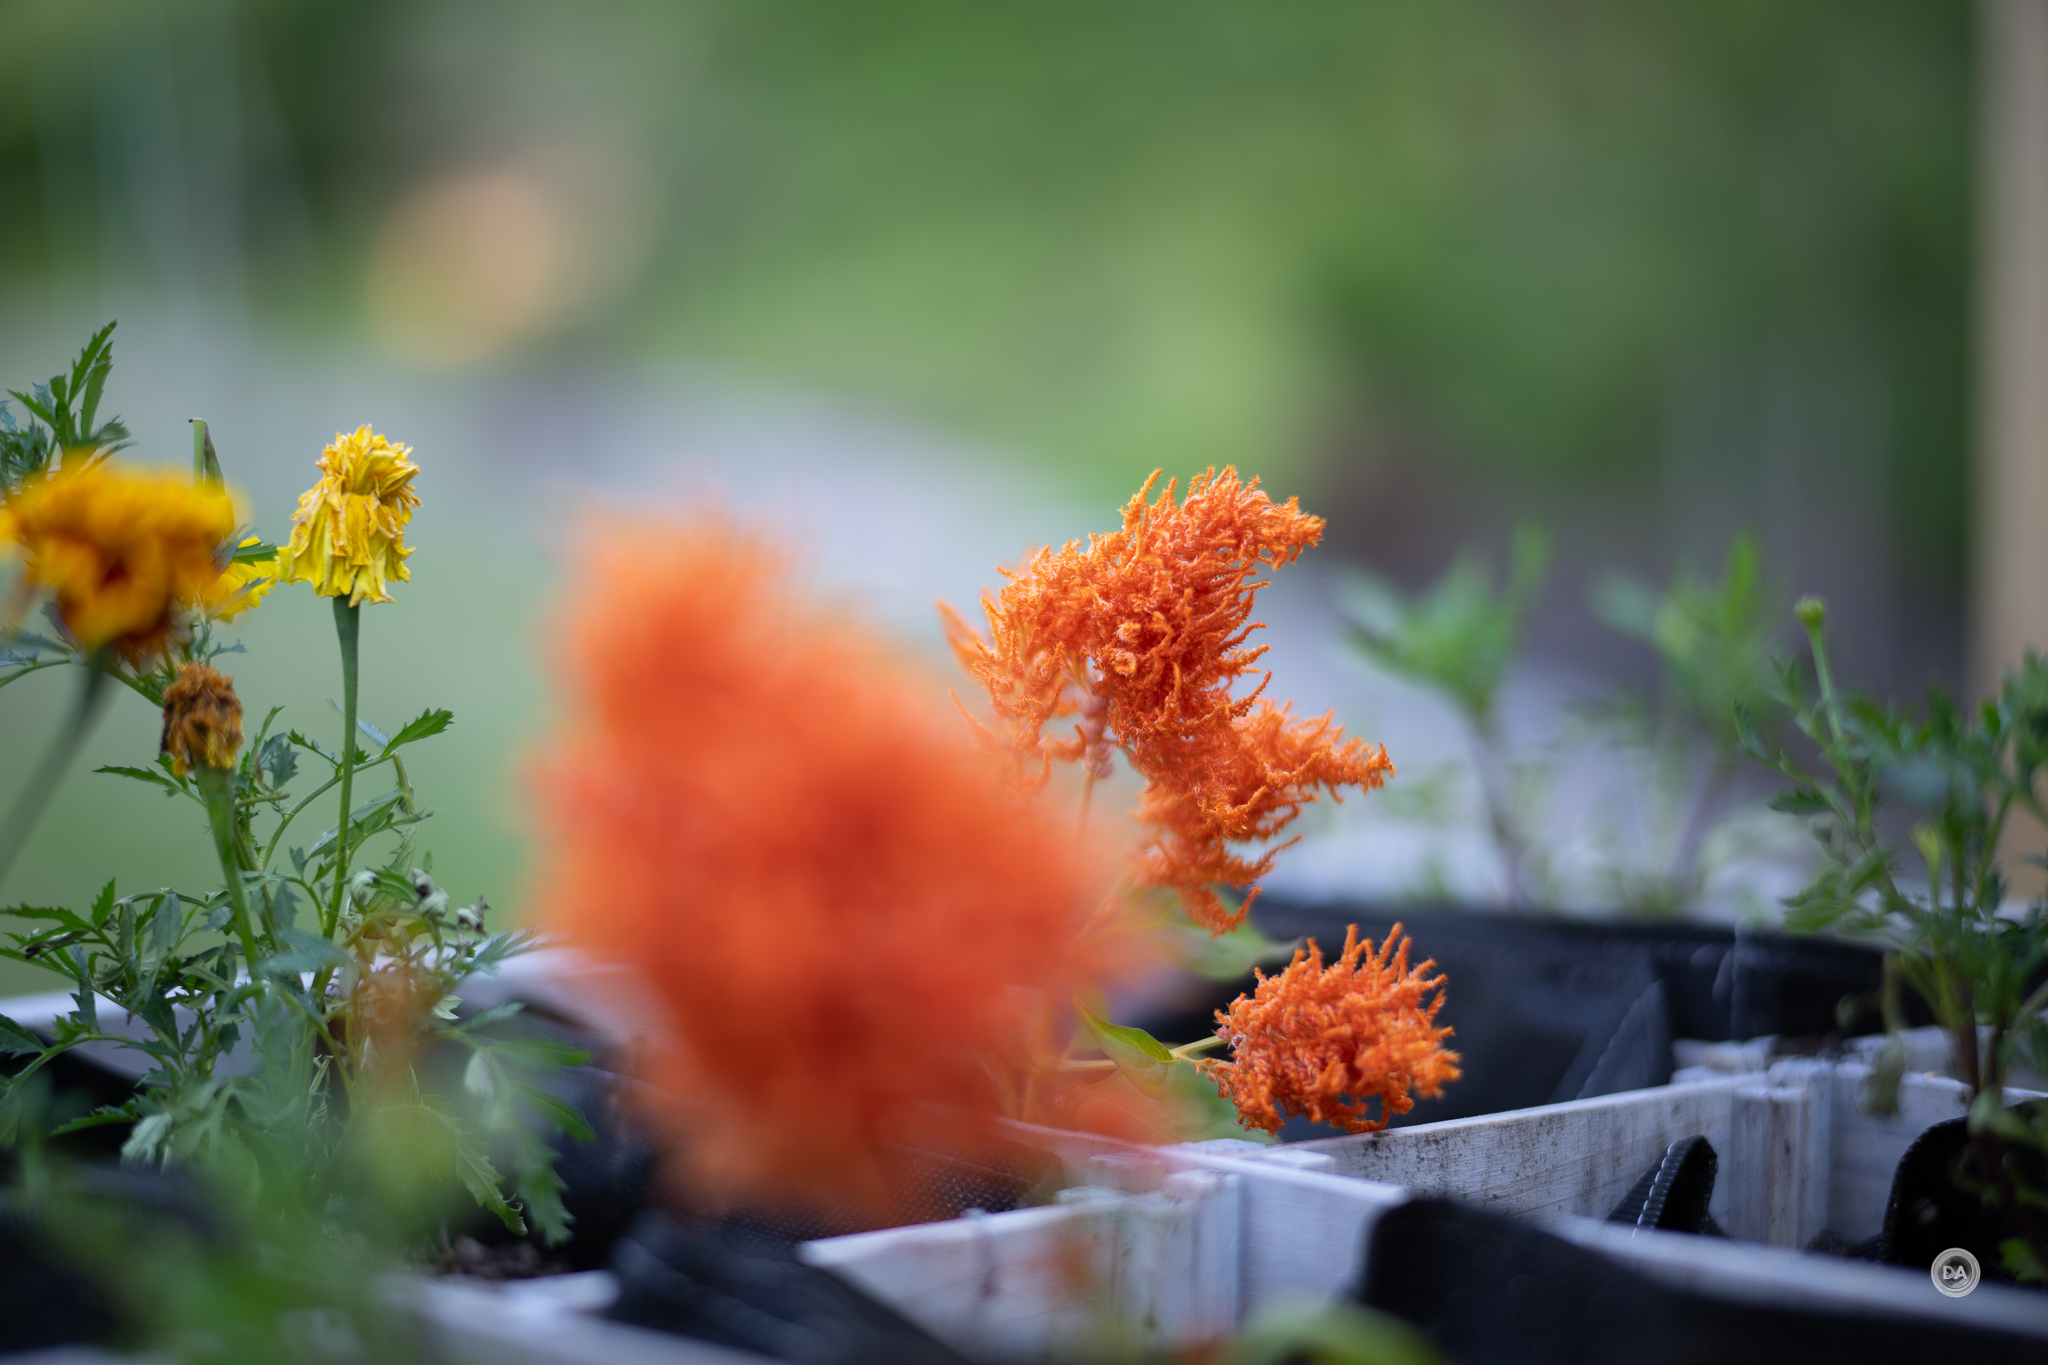
It’s a good solution to a common problem with lenses like this. There’s no question this is an interesting lens with a lot of character. See that character in the images below.
Keywords: TTArtisan, 75mm, F1.5, swirl, swirly bokeh, TTArtisan 75mm review, M42, Sony Alpha 1, Sony a7RV, Fuji, Nikon, Canon, Review, mirrorless, Full Frame, Sports, Tracking, Dustin Abbott, Real World, Comparison, Handling, Focus, Portraits, Resolution, High ISO, Image Quality, Sample Images, Photography, 61MP, #letthelightin, #DA, #Alpha1, #A7RV
DISCLAIMER: This article and description contains affiliate links, which means that if you click on one of the product links, I’ll receive a small commission. As an Amazon Associate I earn from qualifying purchases.
I’ve had a long lasting love affair with vintage glass. Even though my contemporary lens collection features dozens of great lenses, I still have 6 or 7 vintage lenses that I enjoy taking out periodically. Some of those include classic SMC Takumars and Zeiss lenses, while others include some of the cult classics like Soviet Helios and Jupiter lenses. The latter category I have prized because of their unique “swirly” bokeh. These lenses are often optical designs derived from Carl Zeiss, and almost all of the lenses I own are based on the old M42 screw mount. Many of these lenses have gotten some revival in the mirrorless era, as they can be fairly easily adapter and mirrorless cameras have manual focus aids that make using them easier than ever. There is a subset of photographers who are turned off by modern lenses that are perfectly corrected, and they are more interested in lenses with some individuality and character.
I’ve wasted a lot of time down the eBay rabbit hole trying to find some of these classic gems at a reasonable price, but some of them are surprisingly expensive. The Zeiss Biotar 75mm F1.5 can cost thousands of dollars. But what if you could get a modern version of that exact lens for under $300? If that sounds intriguing, join me in exploring the unique TTArtisan 75mm F1.5 in either my video review or the text review that continues below.
Thanks to TTArtisan for sending me a review loaner of this lens. As always, this is a completely independent review. *The tests and most of the photos that I share as a part of my review cycle have been done with the Sony a7RV along with the Sony Alpha 1 that serve as my benchmark cameras for Sony lenses.
TTArtisan has chosen one of the three different housing designs this optical formula had in the past, which is often called the “Fat Version” that was sold from 1952-1967. The end result is a stubby lens that reminds me a lot of the recent Voigtländer Nokton 75mm F1.5 that I reviewed earlier this year. It has the scalloped focus ring, all metal body, and anodized finish of that lens.
This is built around that same old M42 mount, so that comes with both blessings and curses that we will explore. The upside is that the M42 is easily adaptable to a wide variety of lens mounts, up to and including Fuji’s medium format GF mount. I used to mostly use M42 glass on Canon EF mount, where the adapters would be quite slim, but because of the different flange distance on mirrorless cameras, you have to use much thicker adapters to get the optics where they need to be. You can see that the Vello adapter I used here is pretty chunky, which adds a fair bit of length to the overall package, unfortunately.
Initially the lens didn’t lineup quite right for me, but fortunately they have thought about that, as you can mount the lens to your camera, and then use the included allen key to loosen three screws near the lens mount, which will then allow you to rotate the lens to the proper position before tightening it back down.
It’s a good solution to a common problem with lenses like this. Let’s take a closer look at the performance.
Build and Handling
The TTArtisan 75mm F1.5 Swirl has classic good looks. The lens has some heft to it, weighing in at roughly 570g (20oz). I measure the lens at roughly 73mm in diameter and about 72mm in overall length. The lens will grow an additional 10mm in length when focused to the minimum focus distance (externally focusing).
We have a common 58mm front filter thread on the front of the lens.
There are two rings on the lens. The first is the manual focus ring, which is the widest part of the lens and has easy to grip metal knurls.
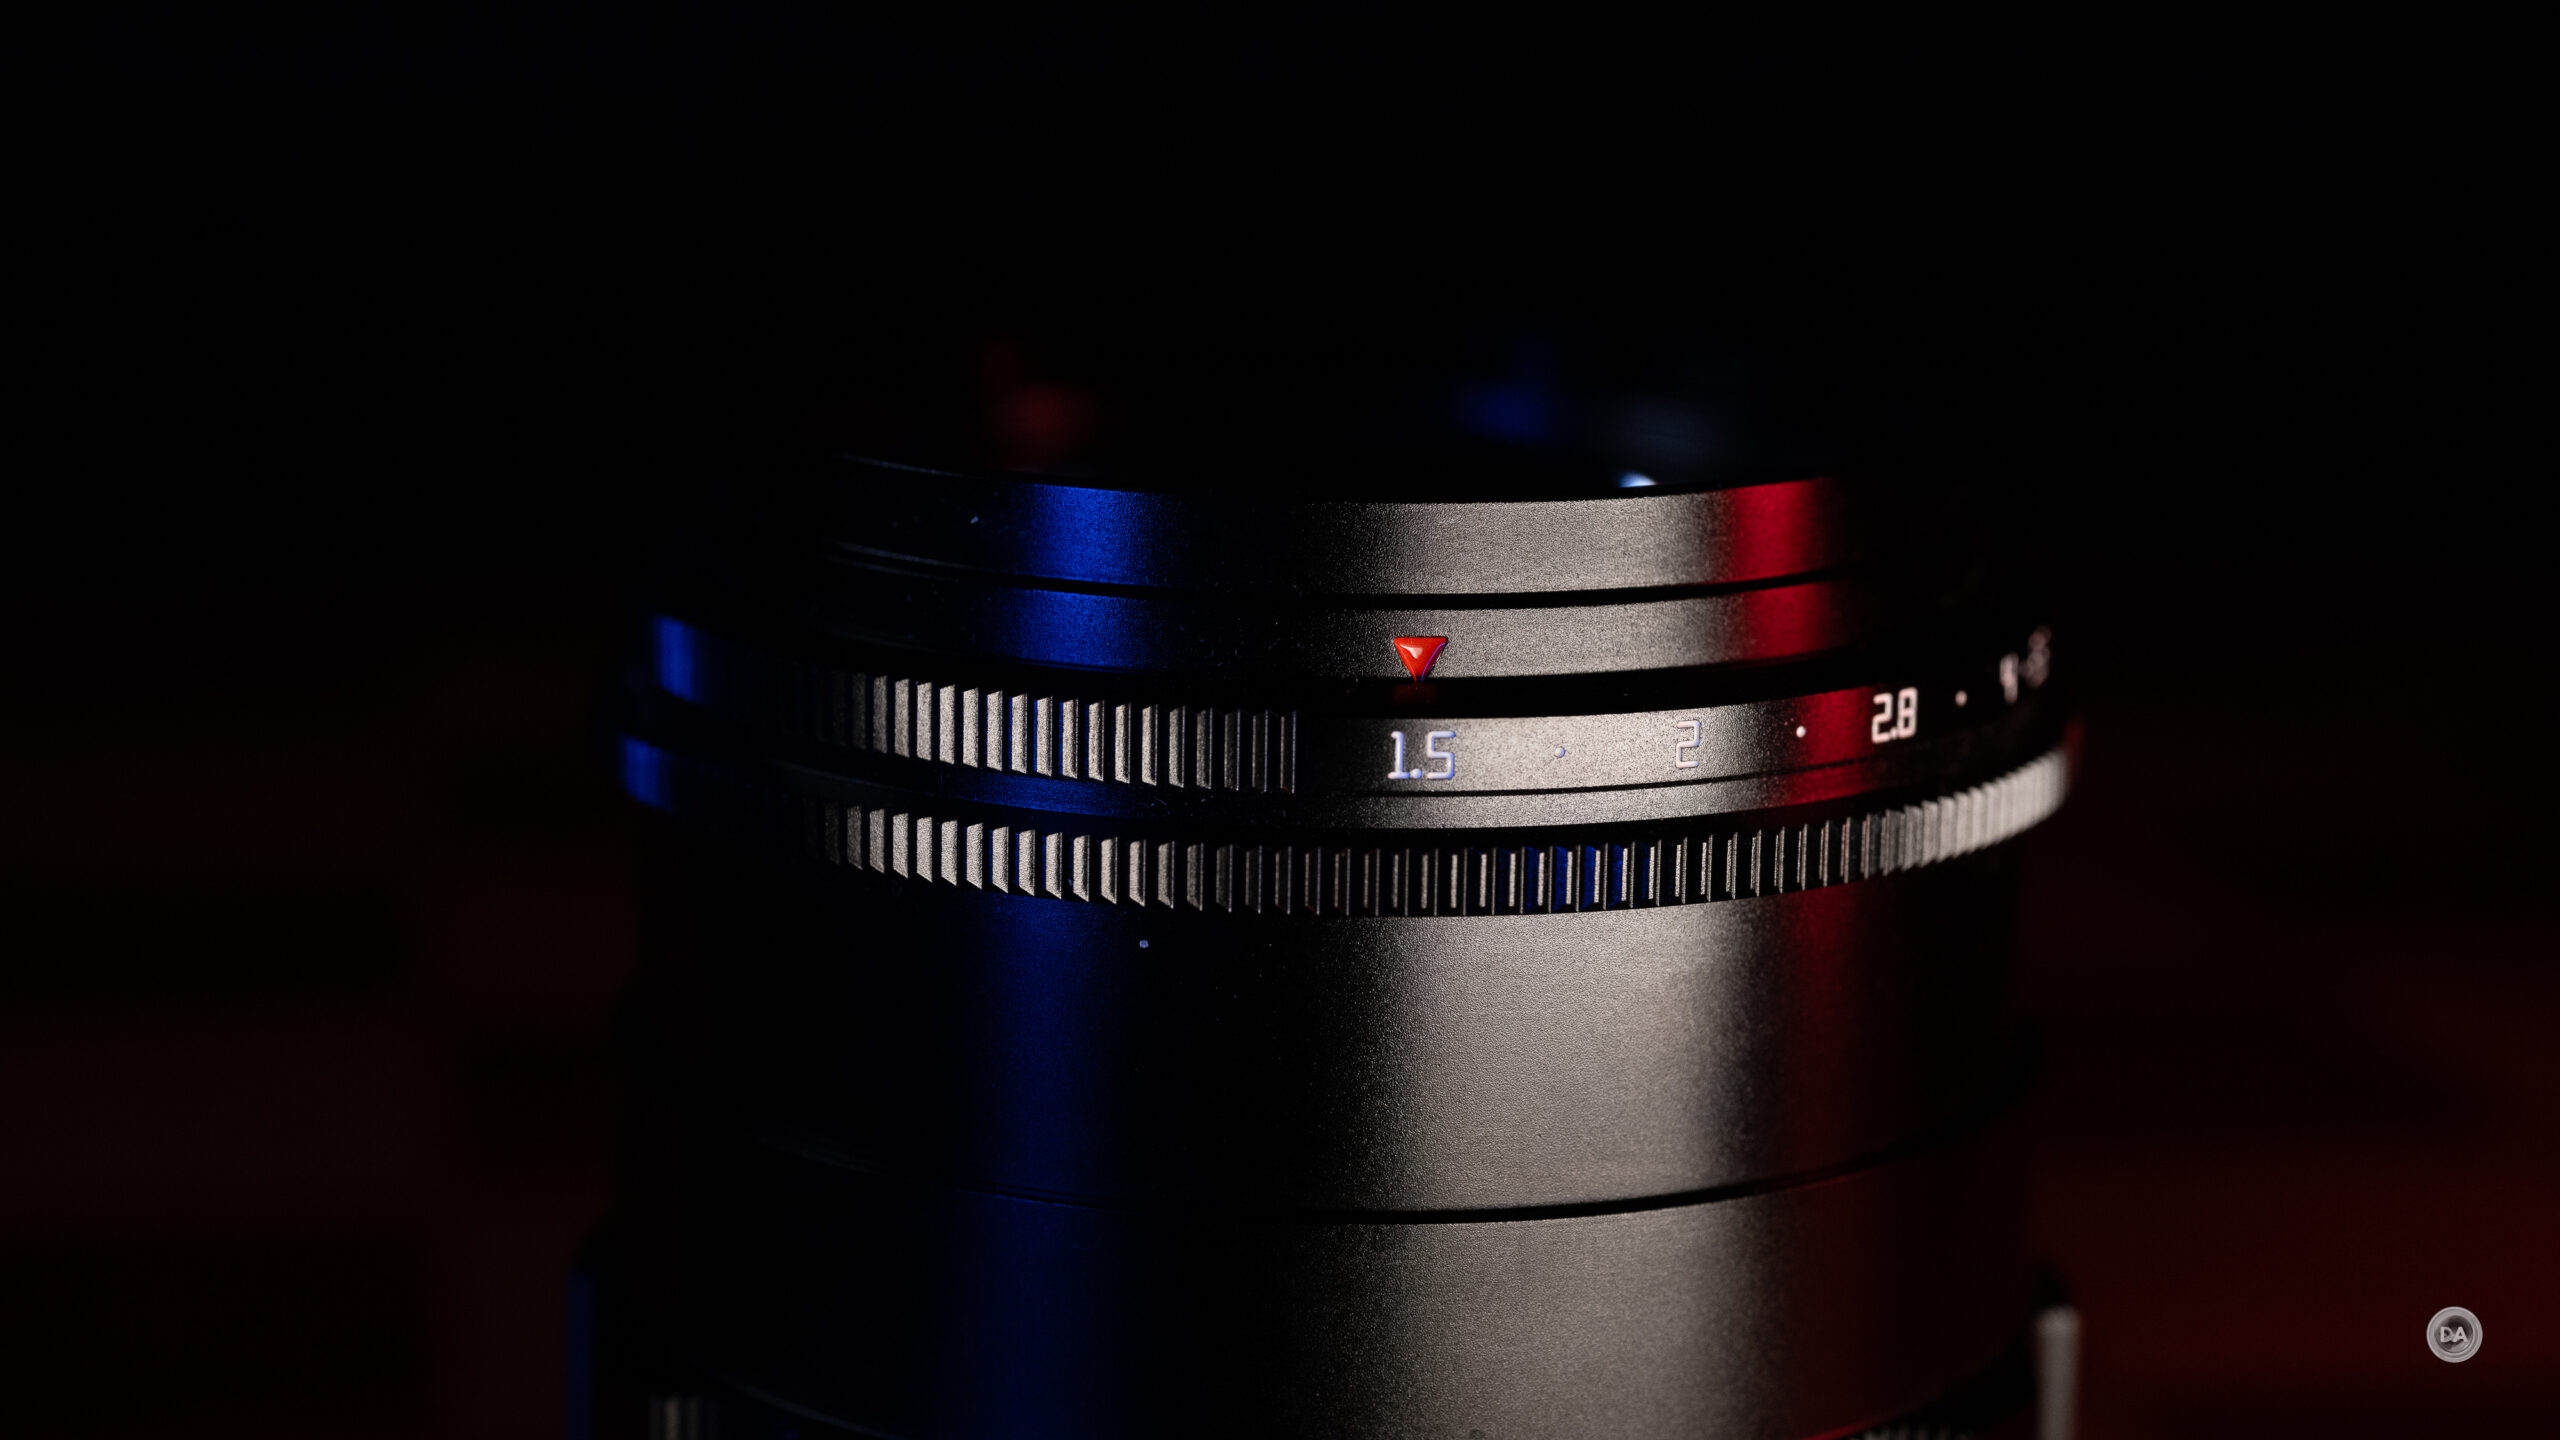
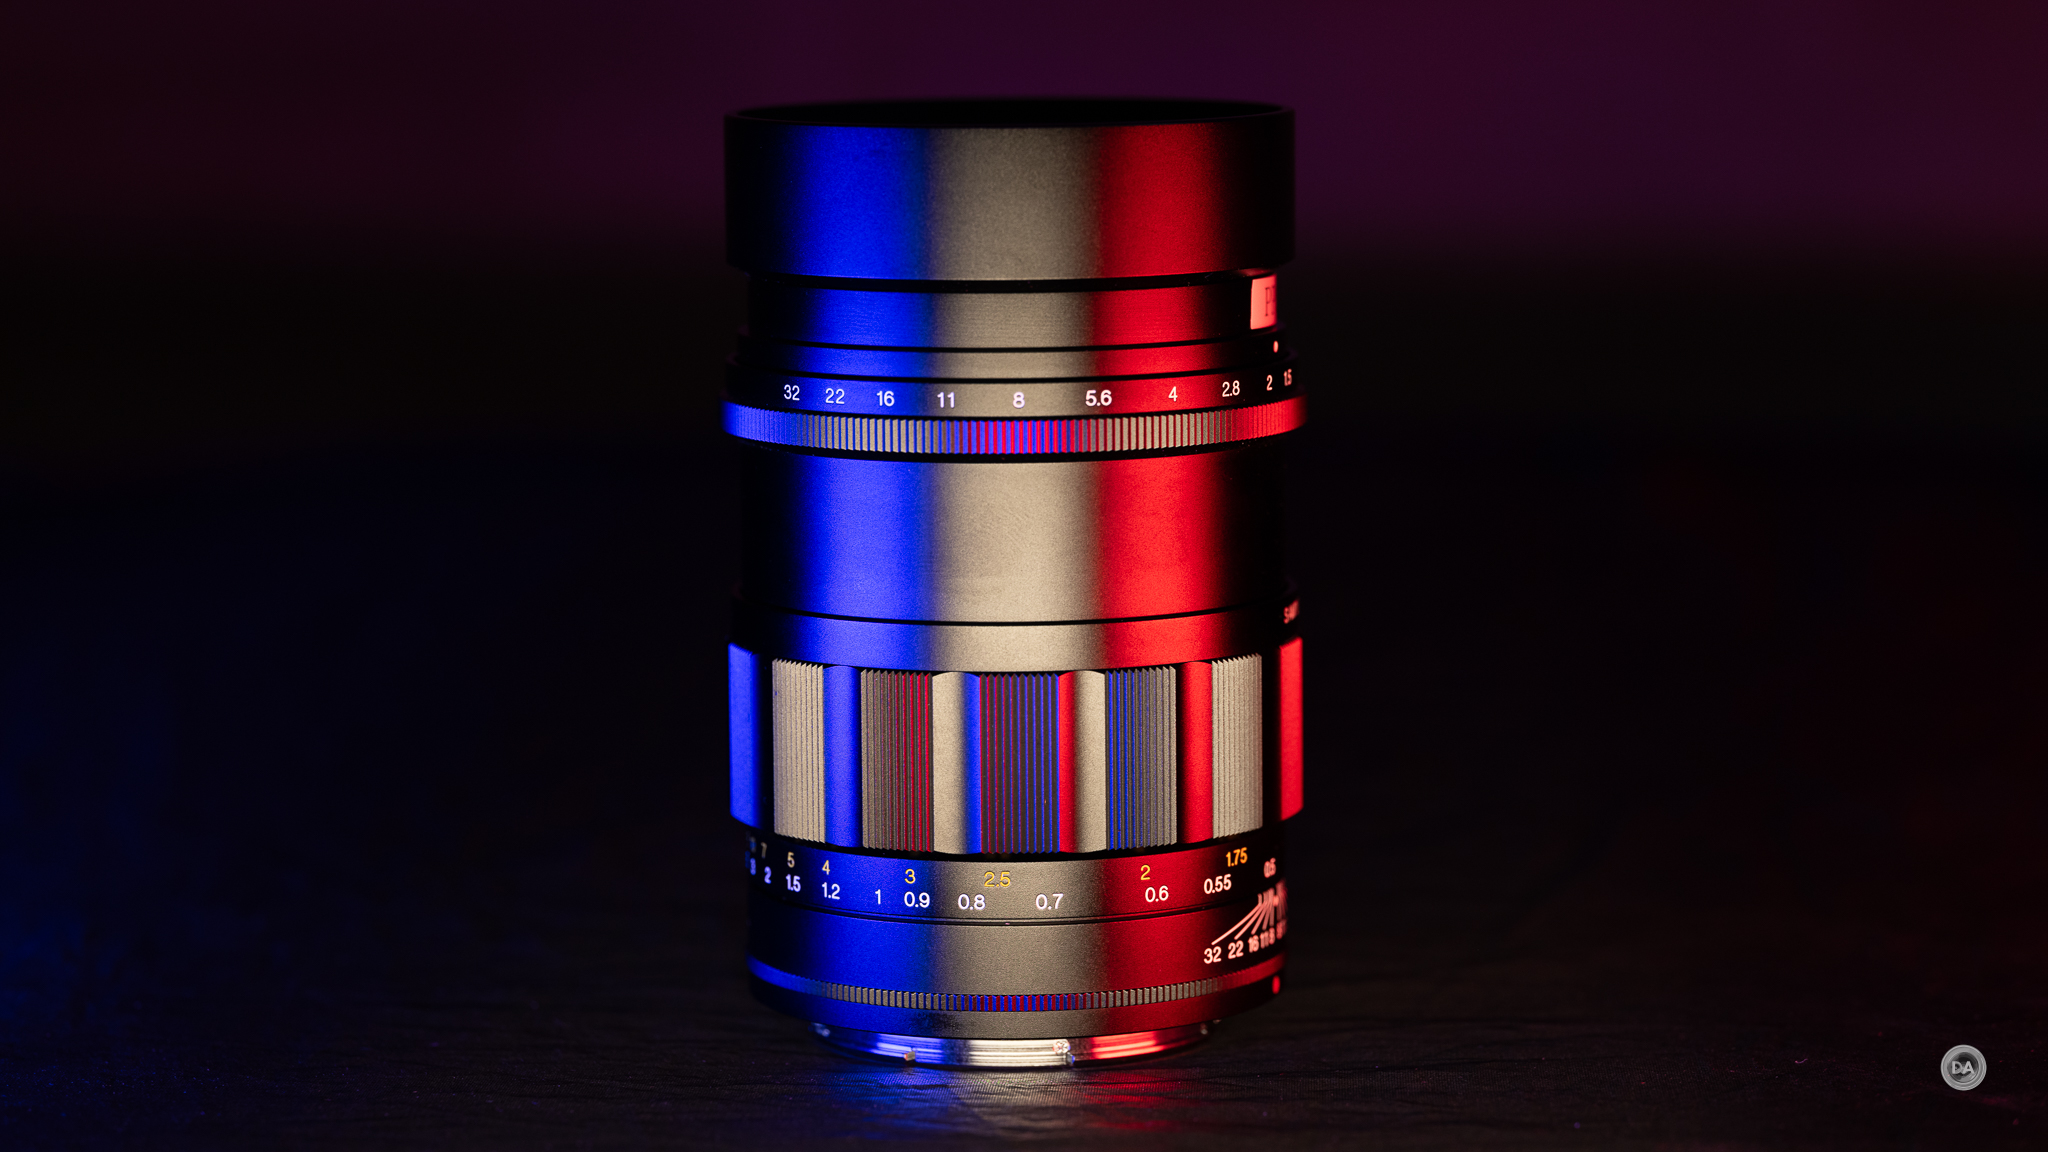
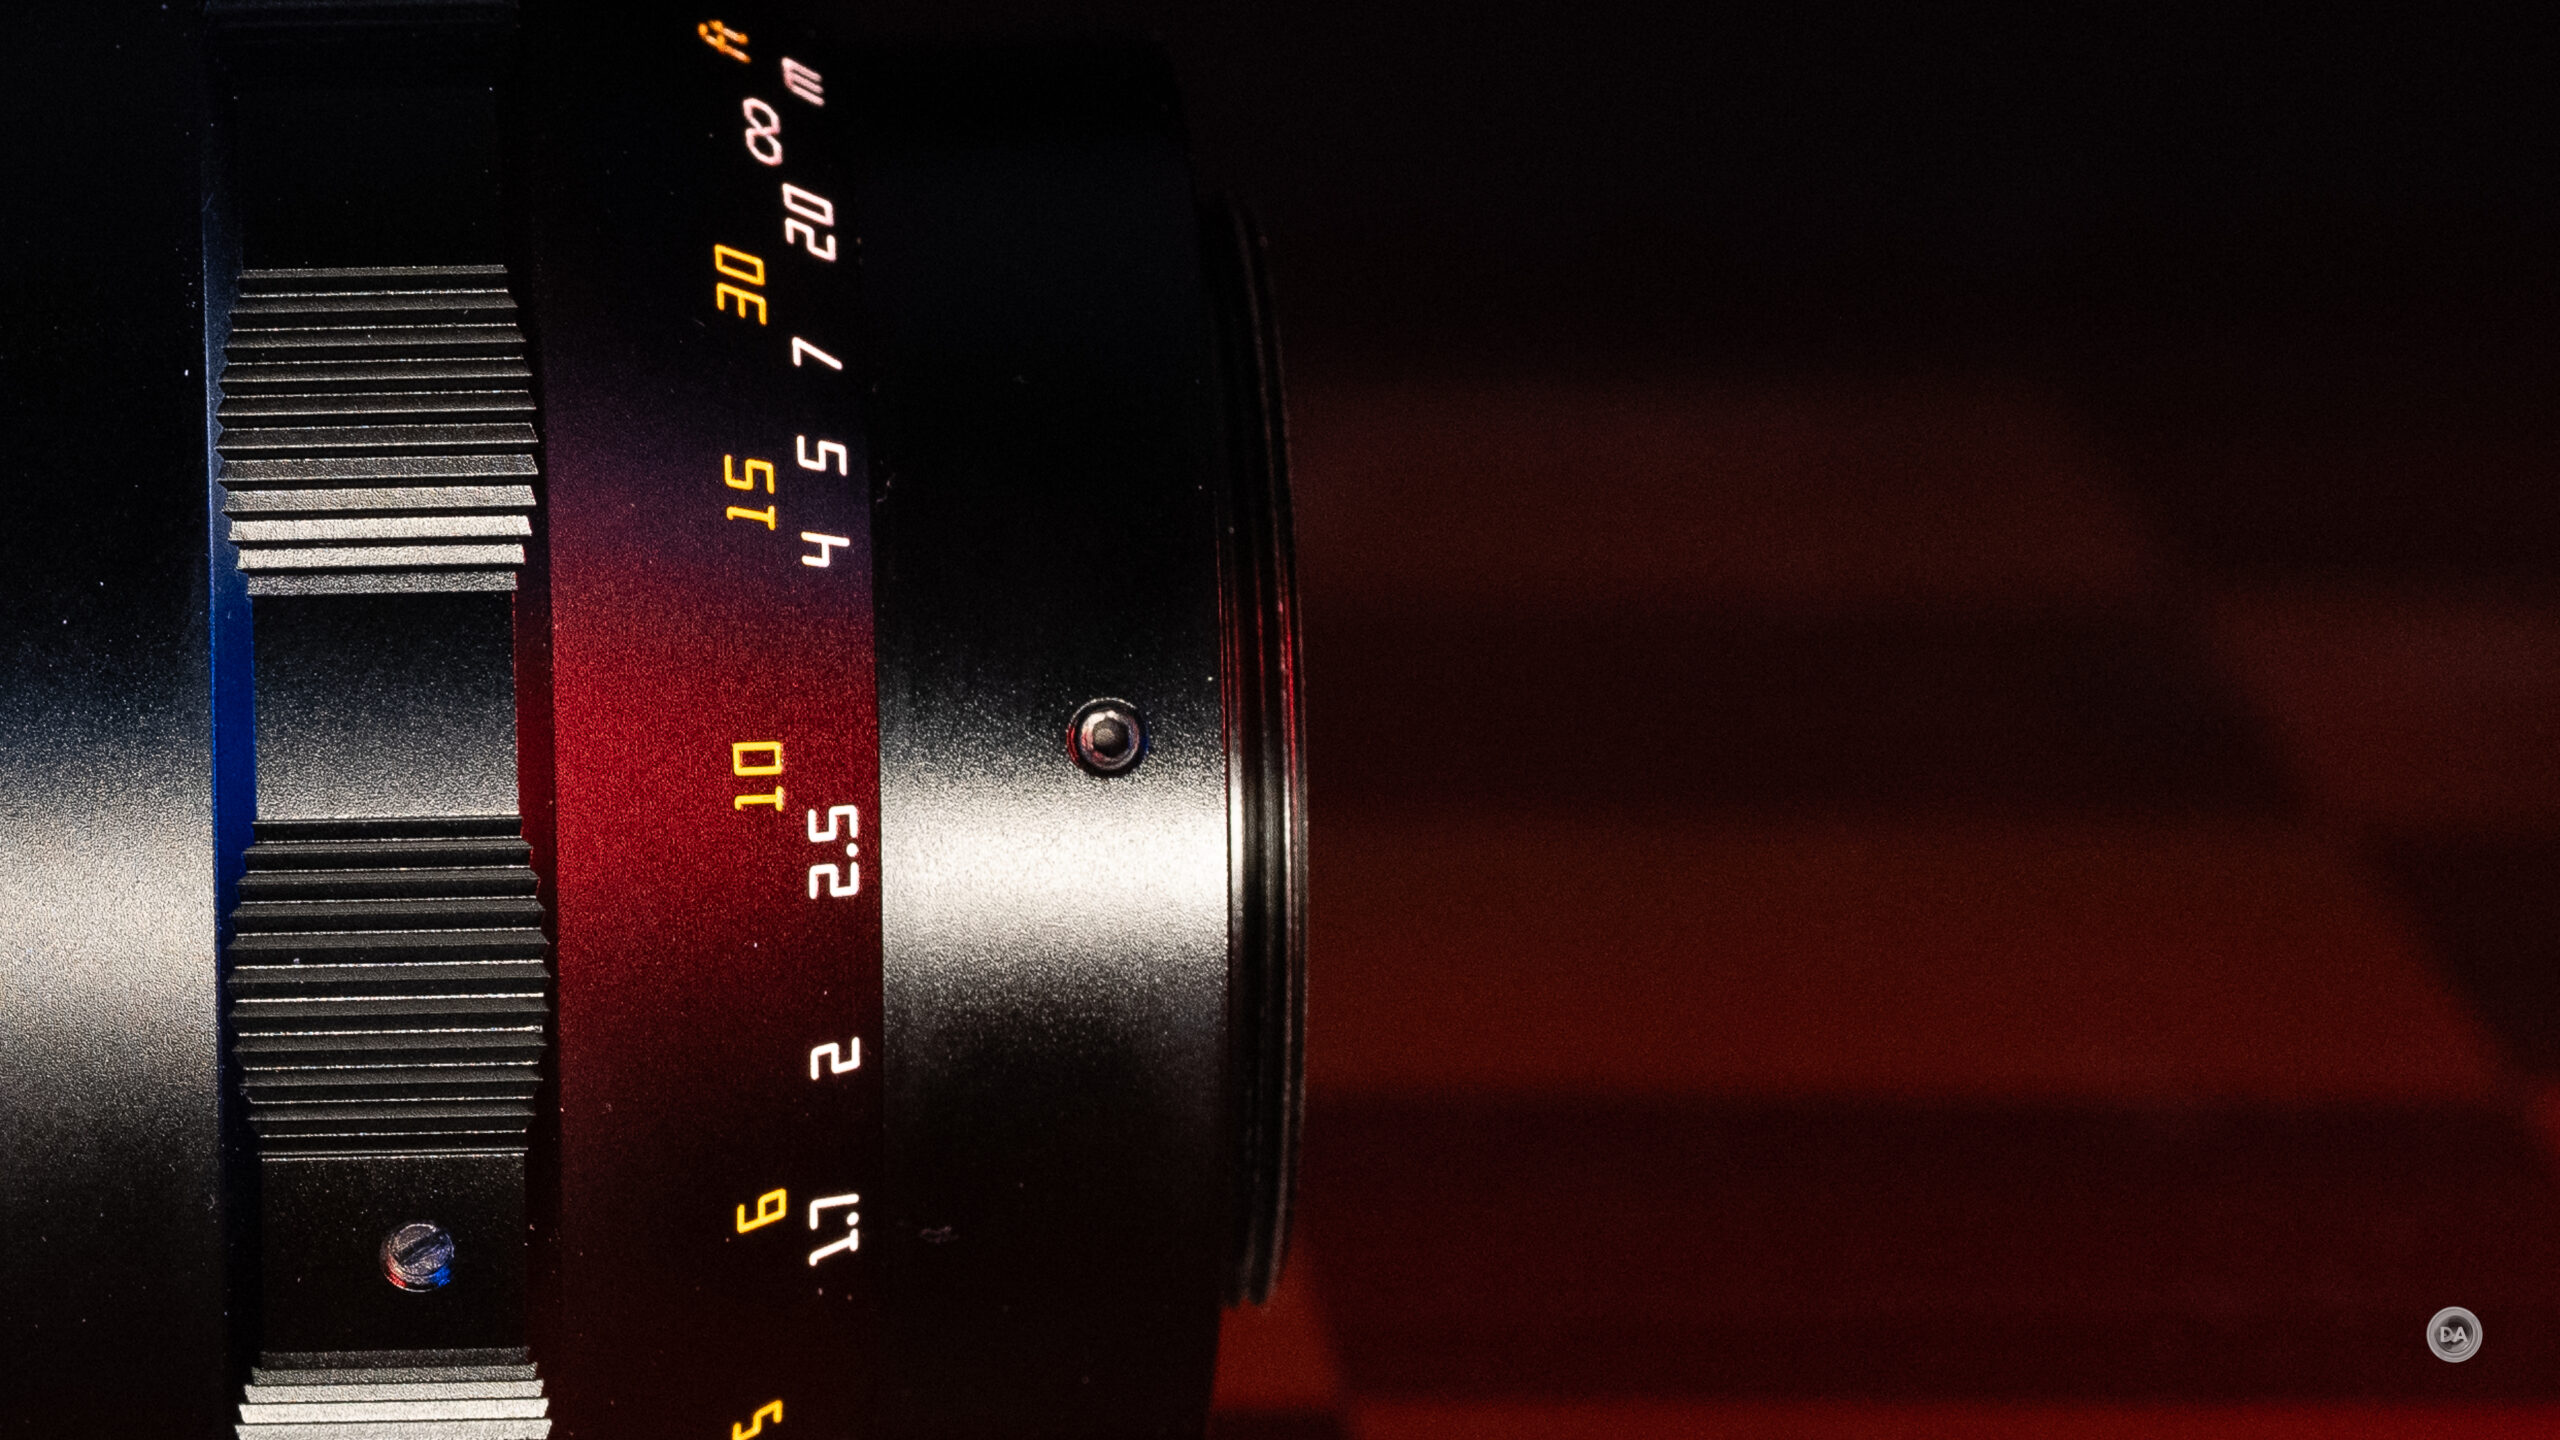
There are etched distance markings with metric in white and Imperial distances in yellow. The lens barrel before the ring has hyperfocal markings (from F1.5 to F16) on it.
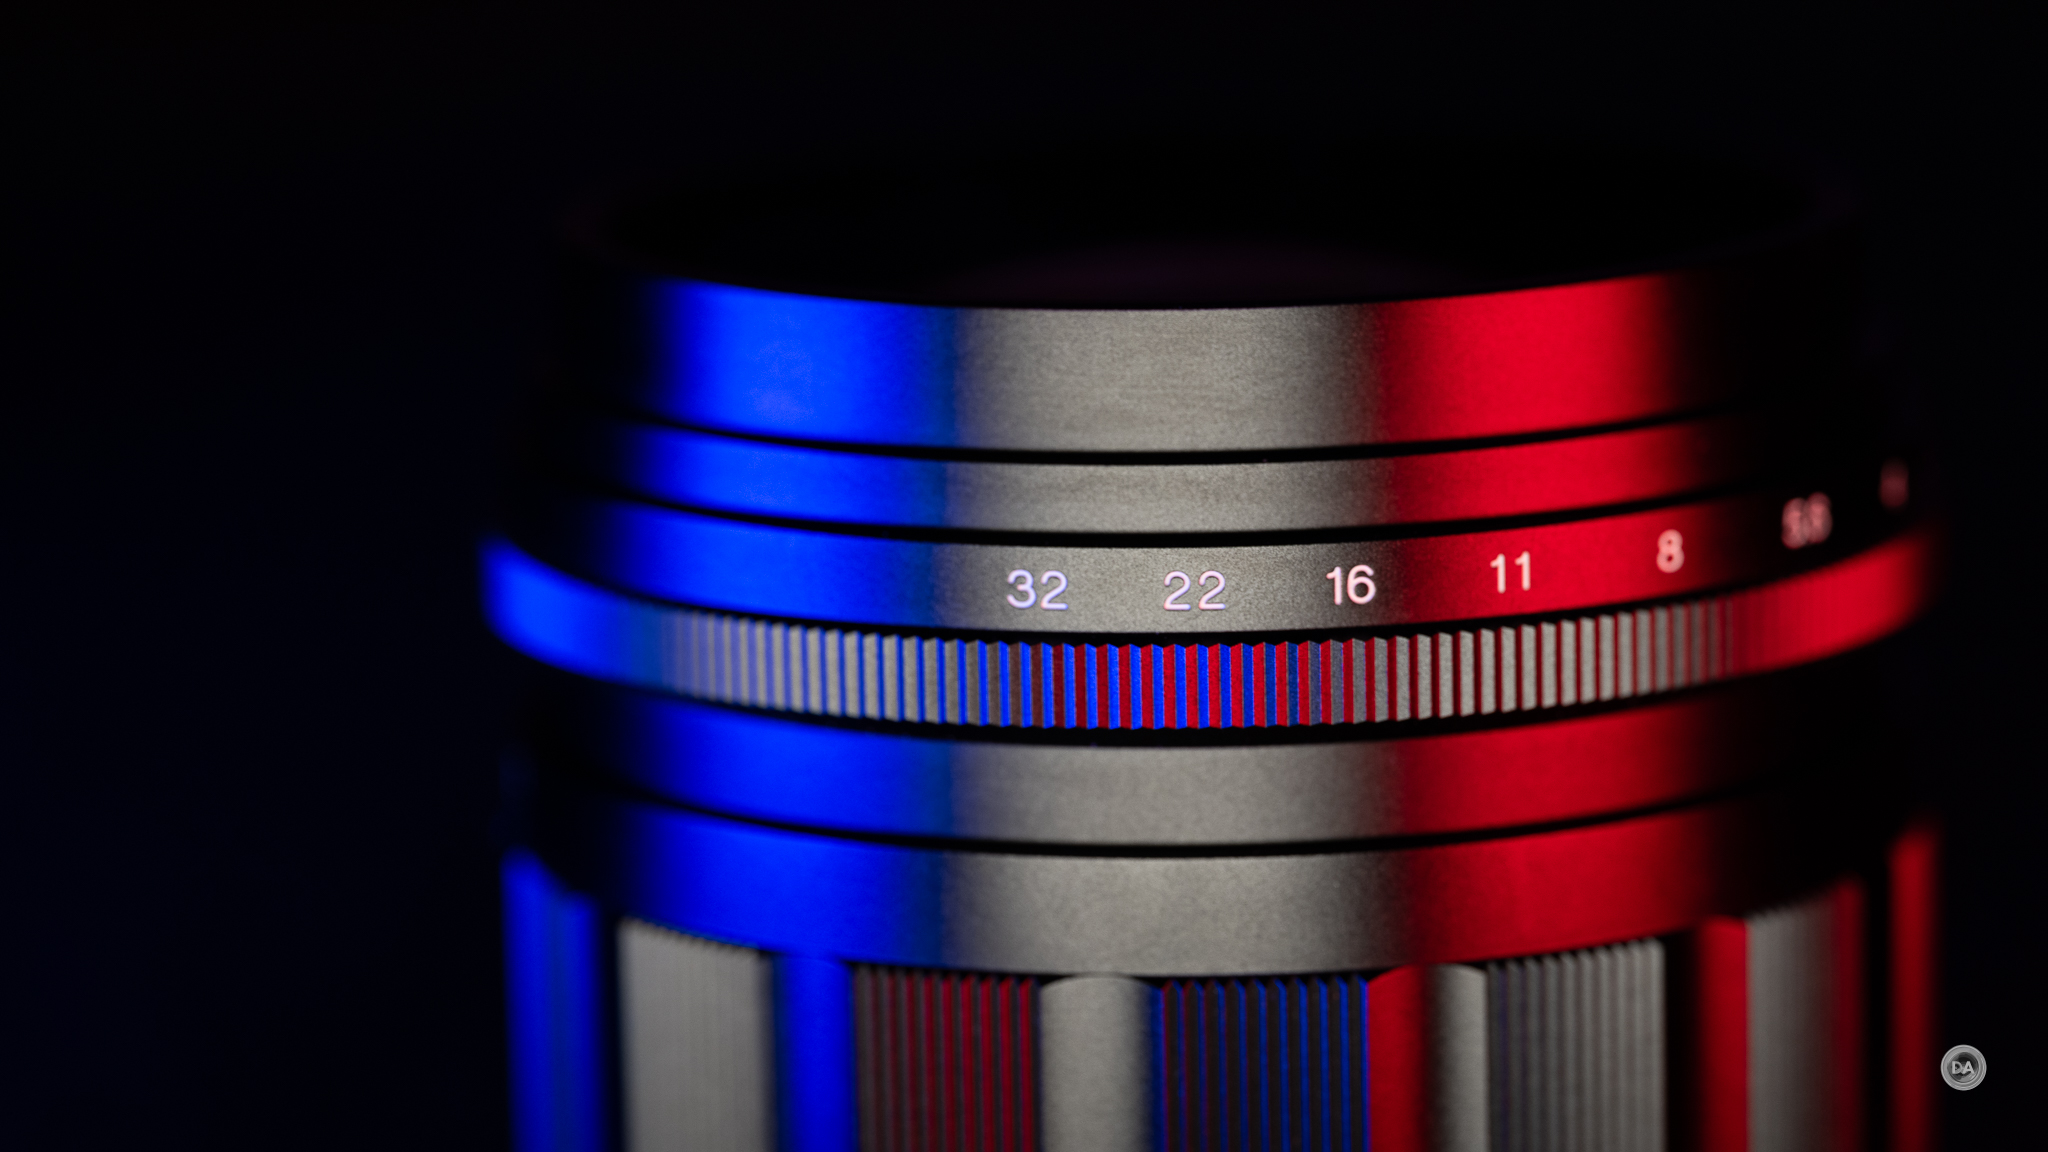
The second ring is near the front, and it a manual aperture ring. This is a clicked aperture with detents at the half stop position from F1.5 to F5.6, then only full stops. There are markings for each full aperture (starting at F1.5, then F2, F2.8, etc…). The aperture ring moves with nice precision.
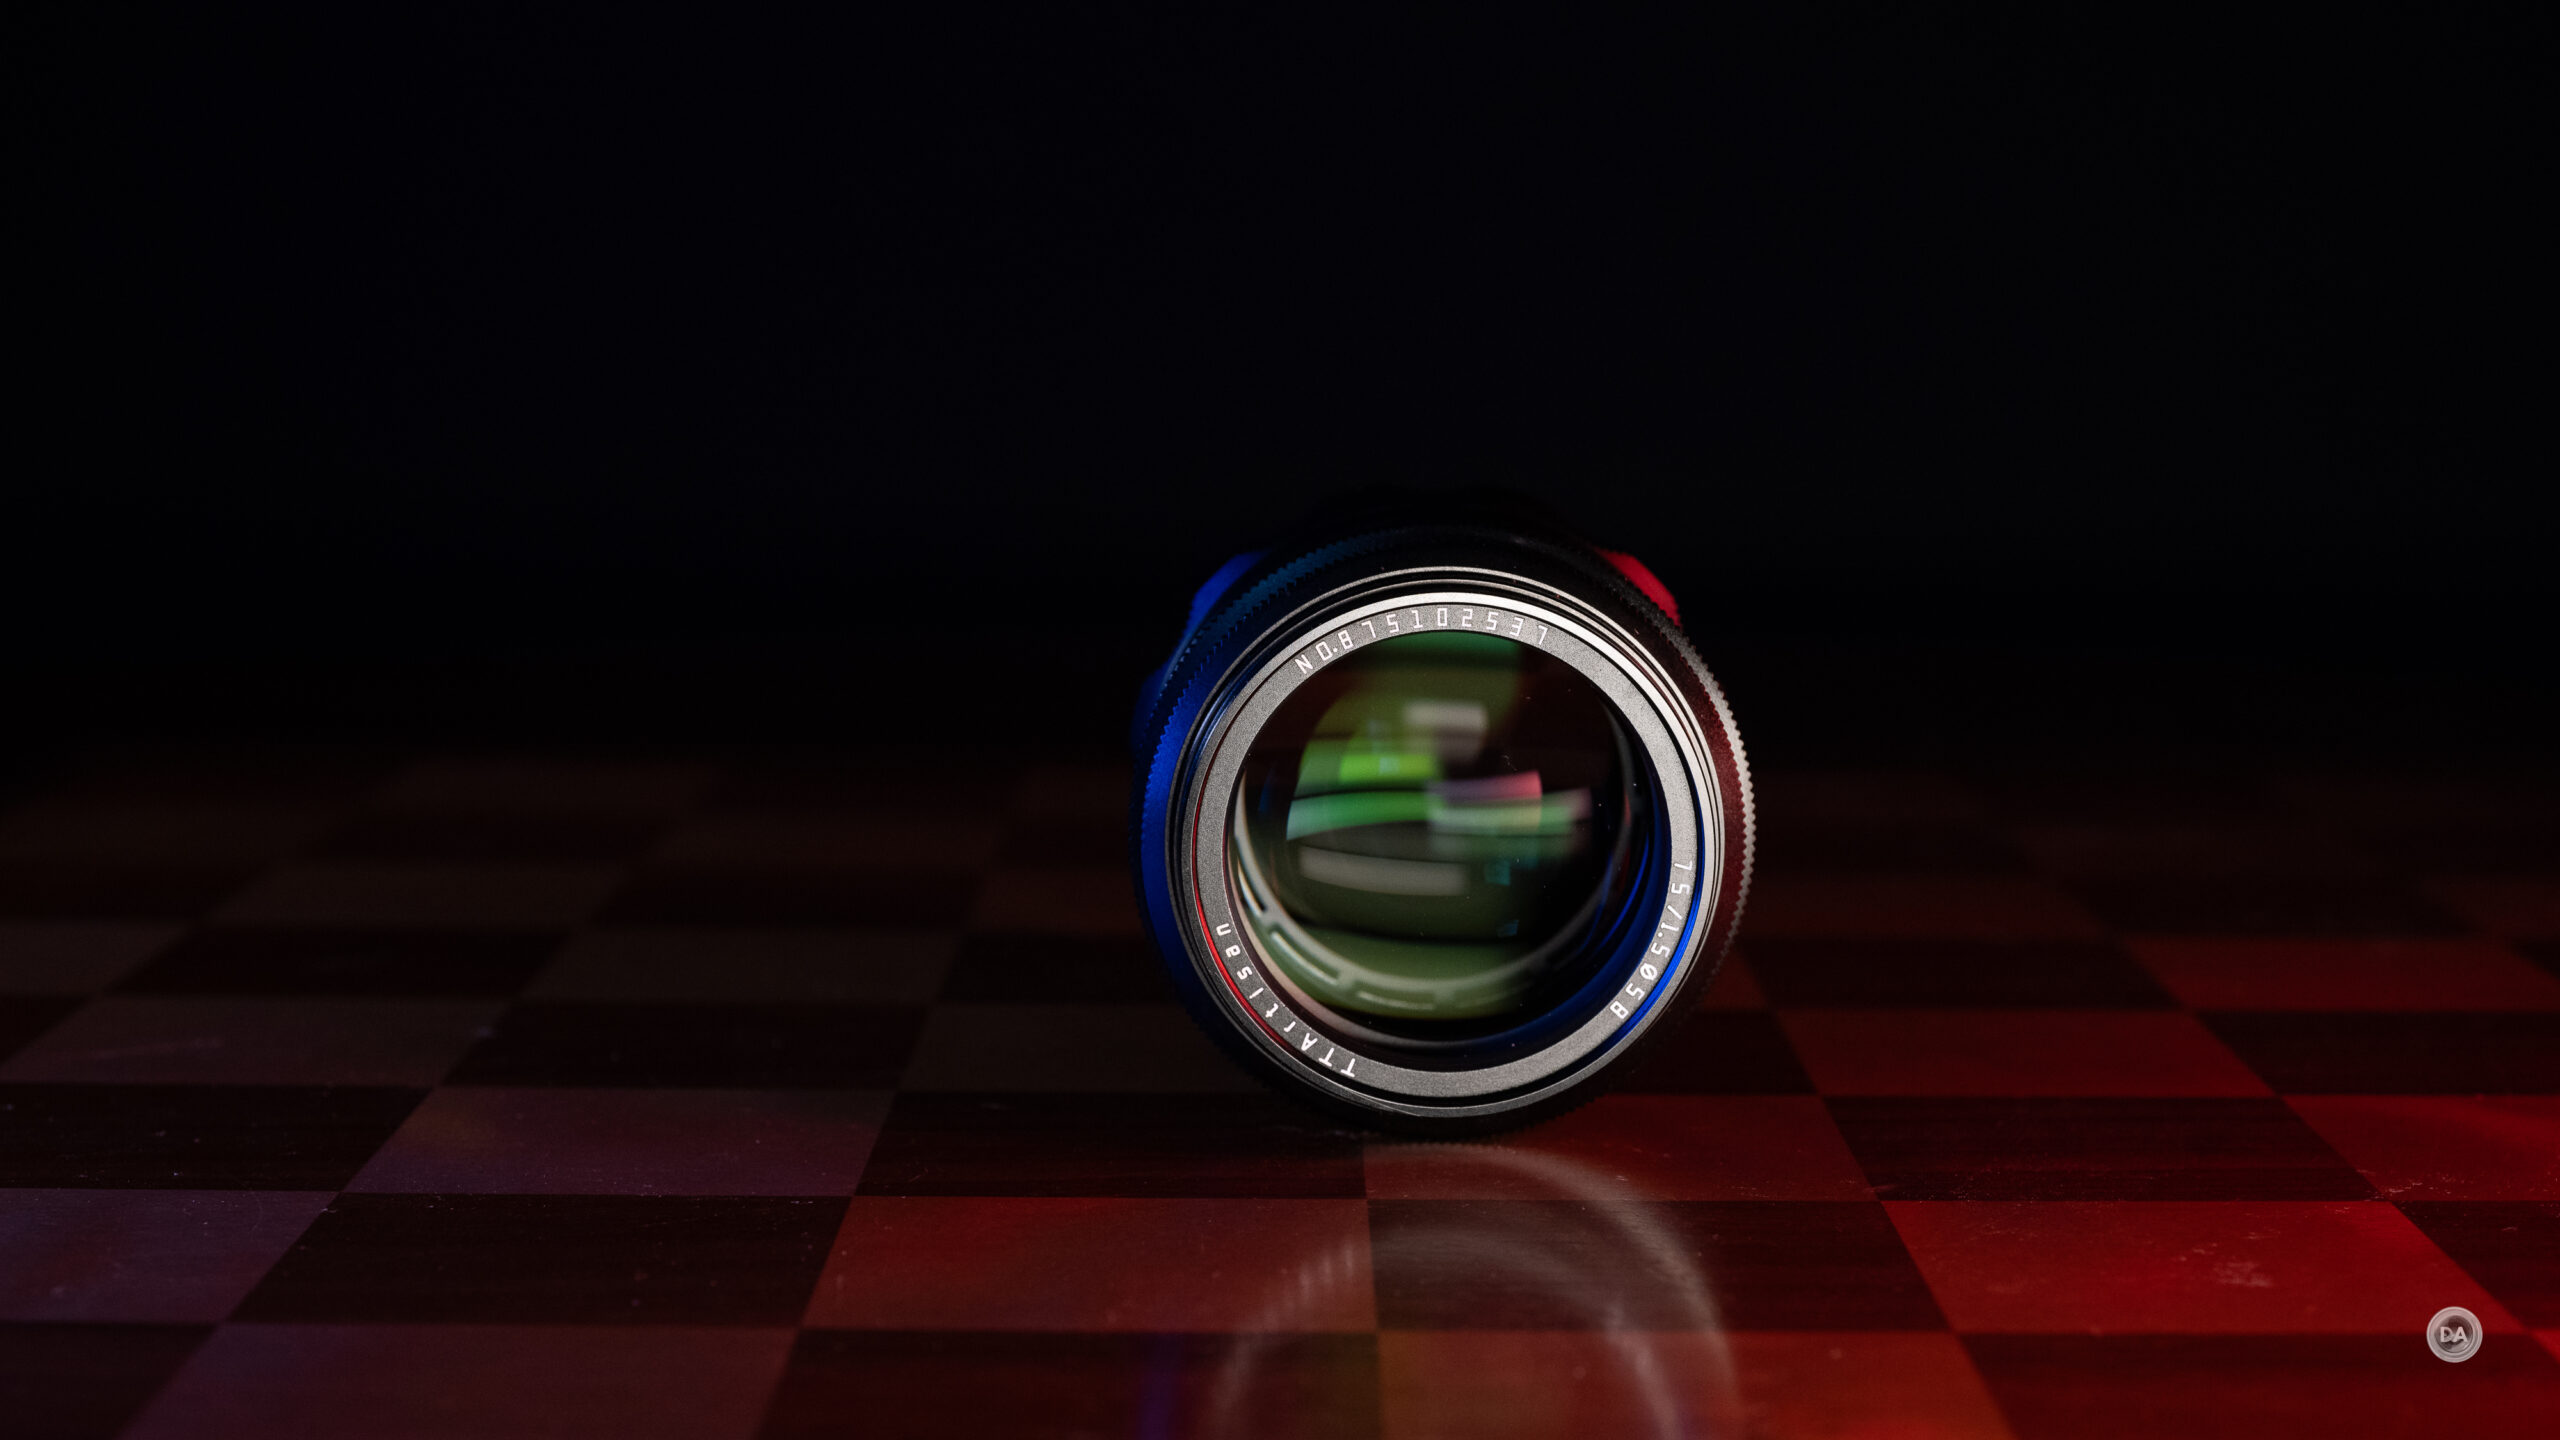
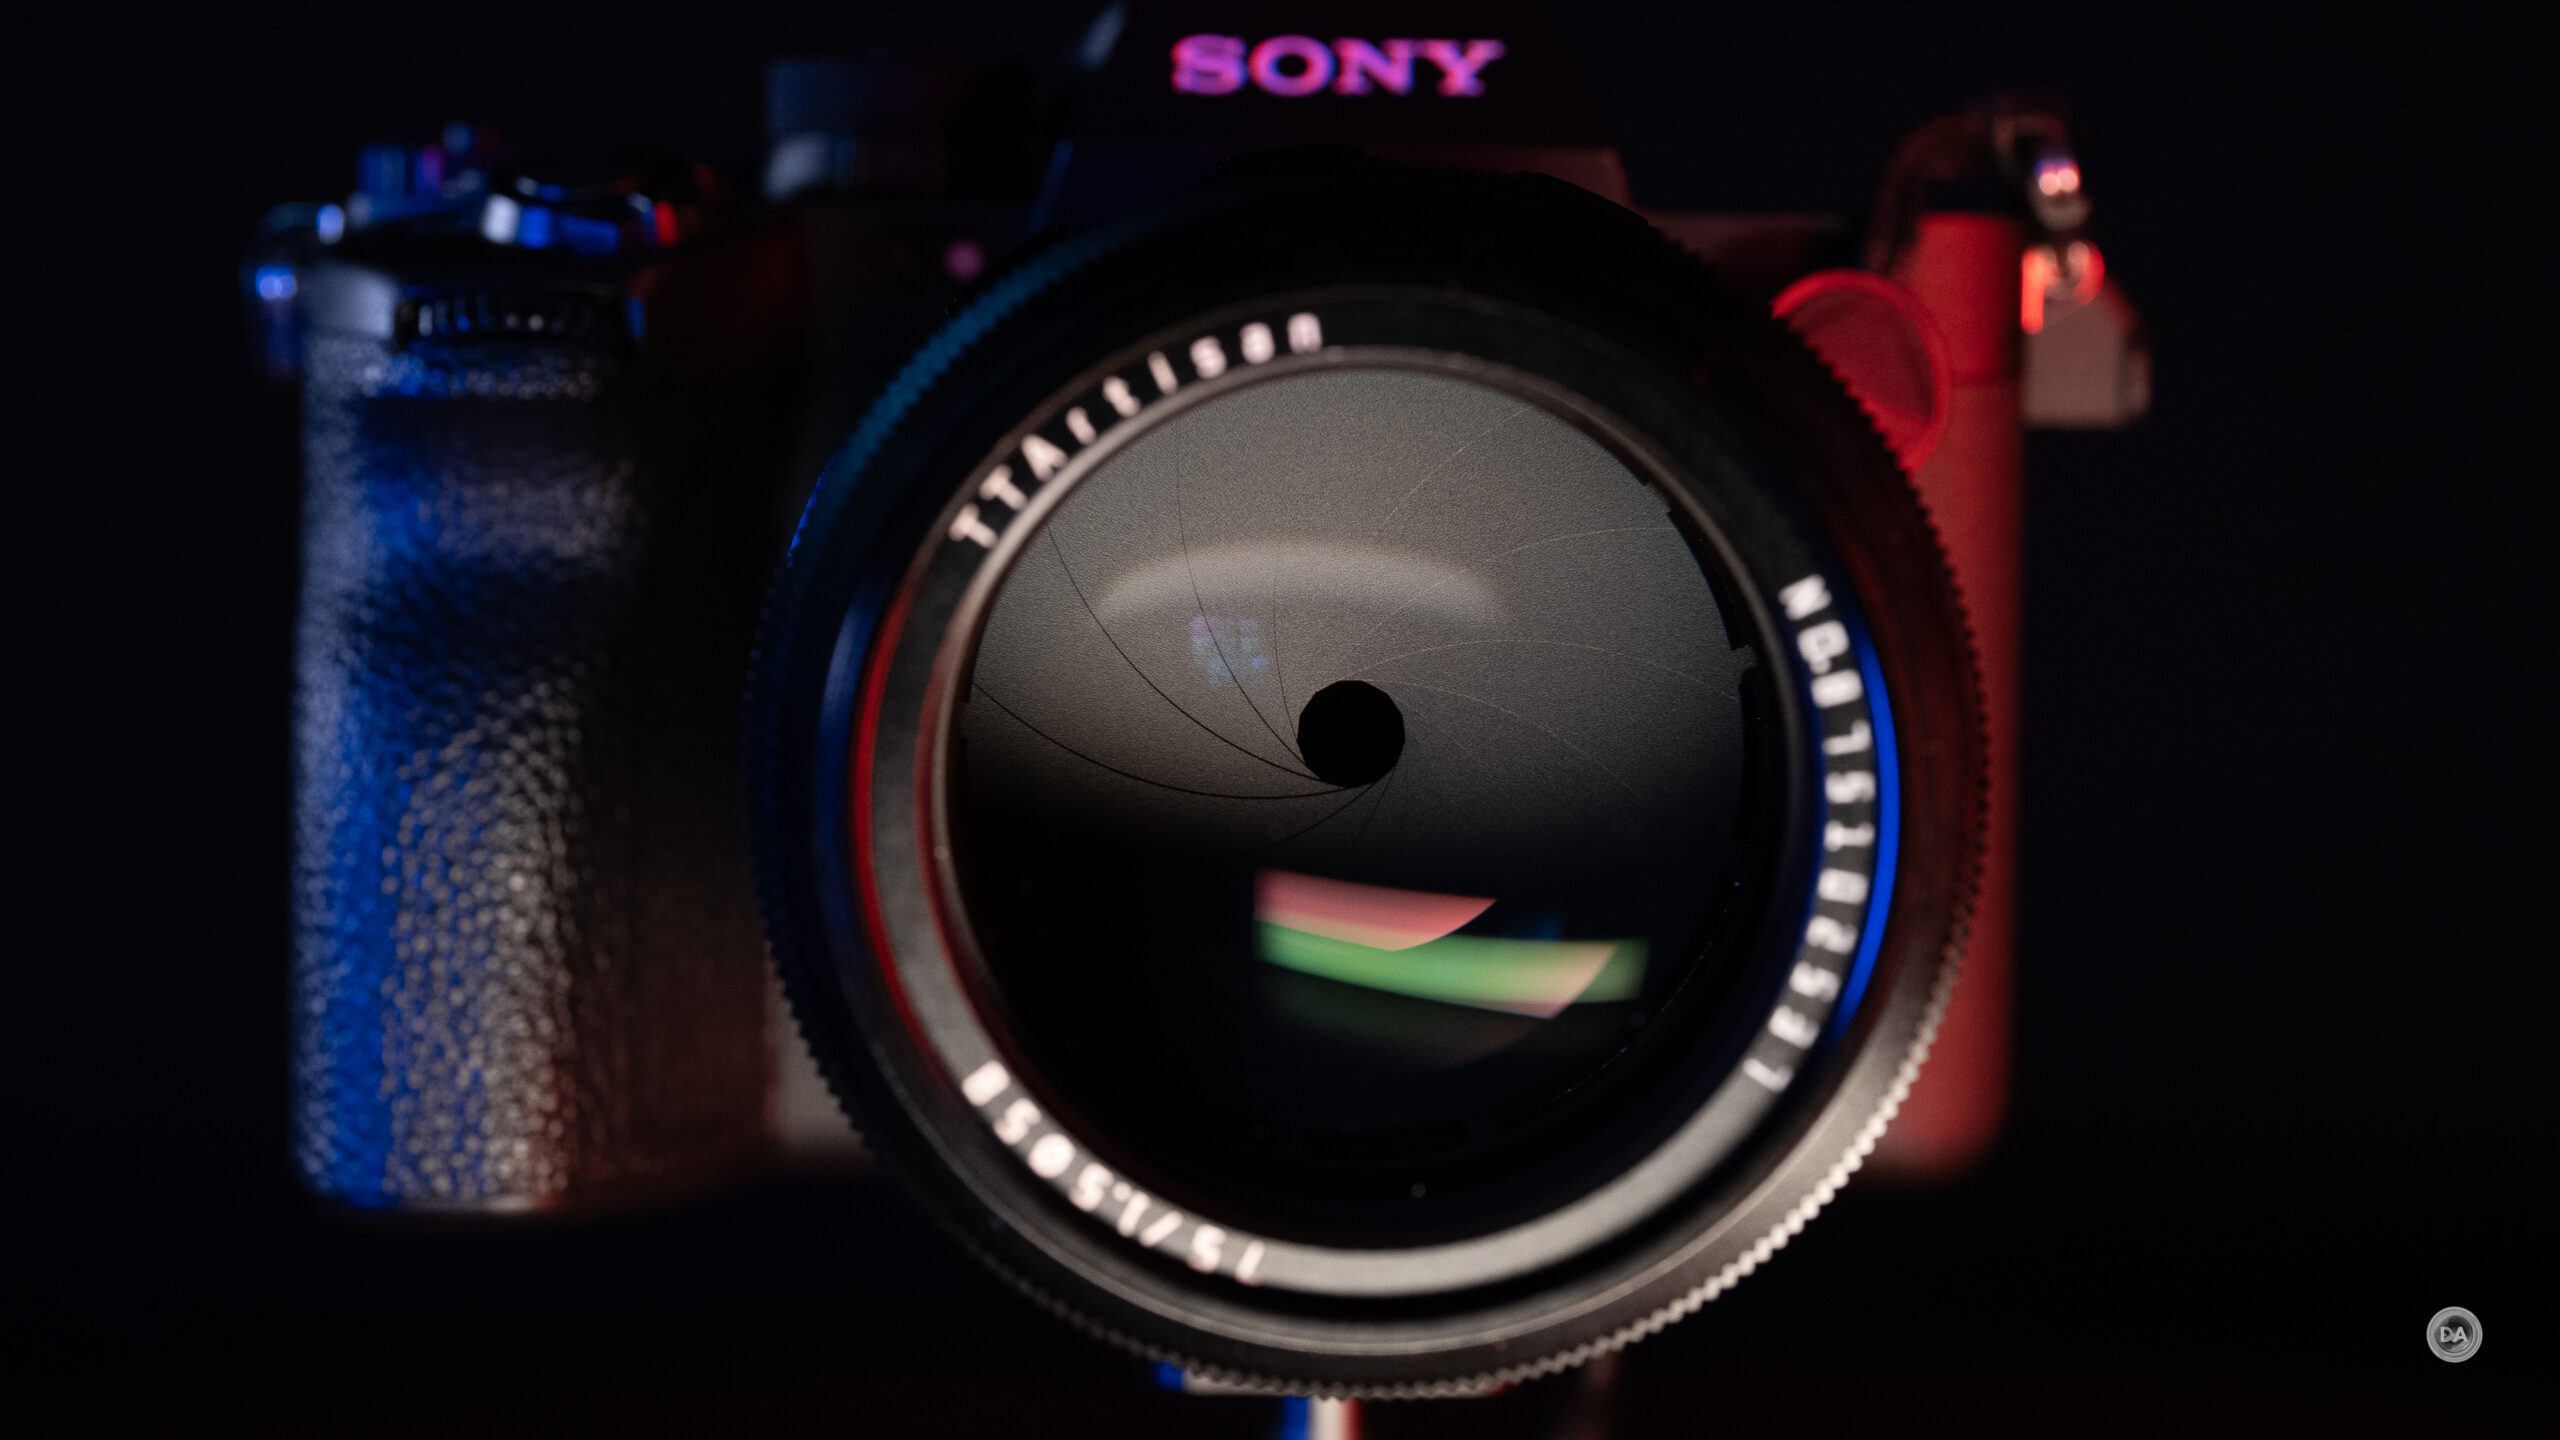
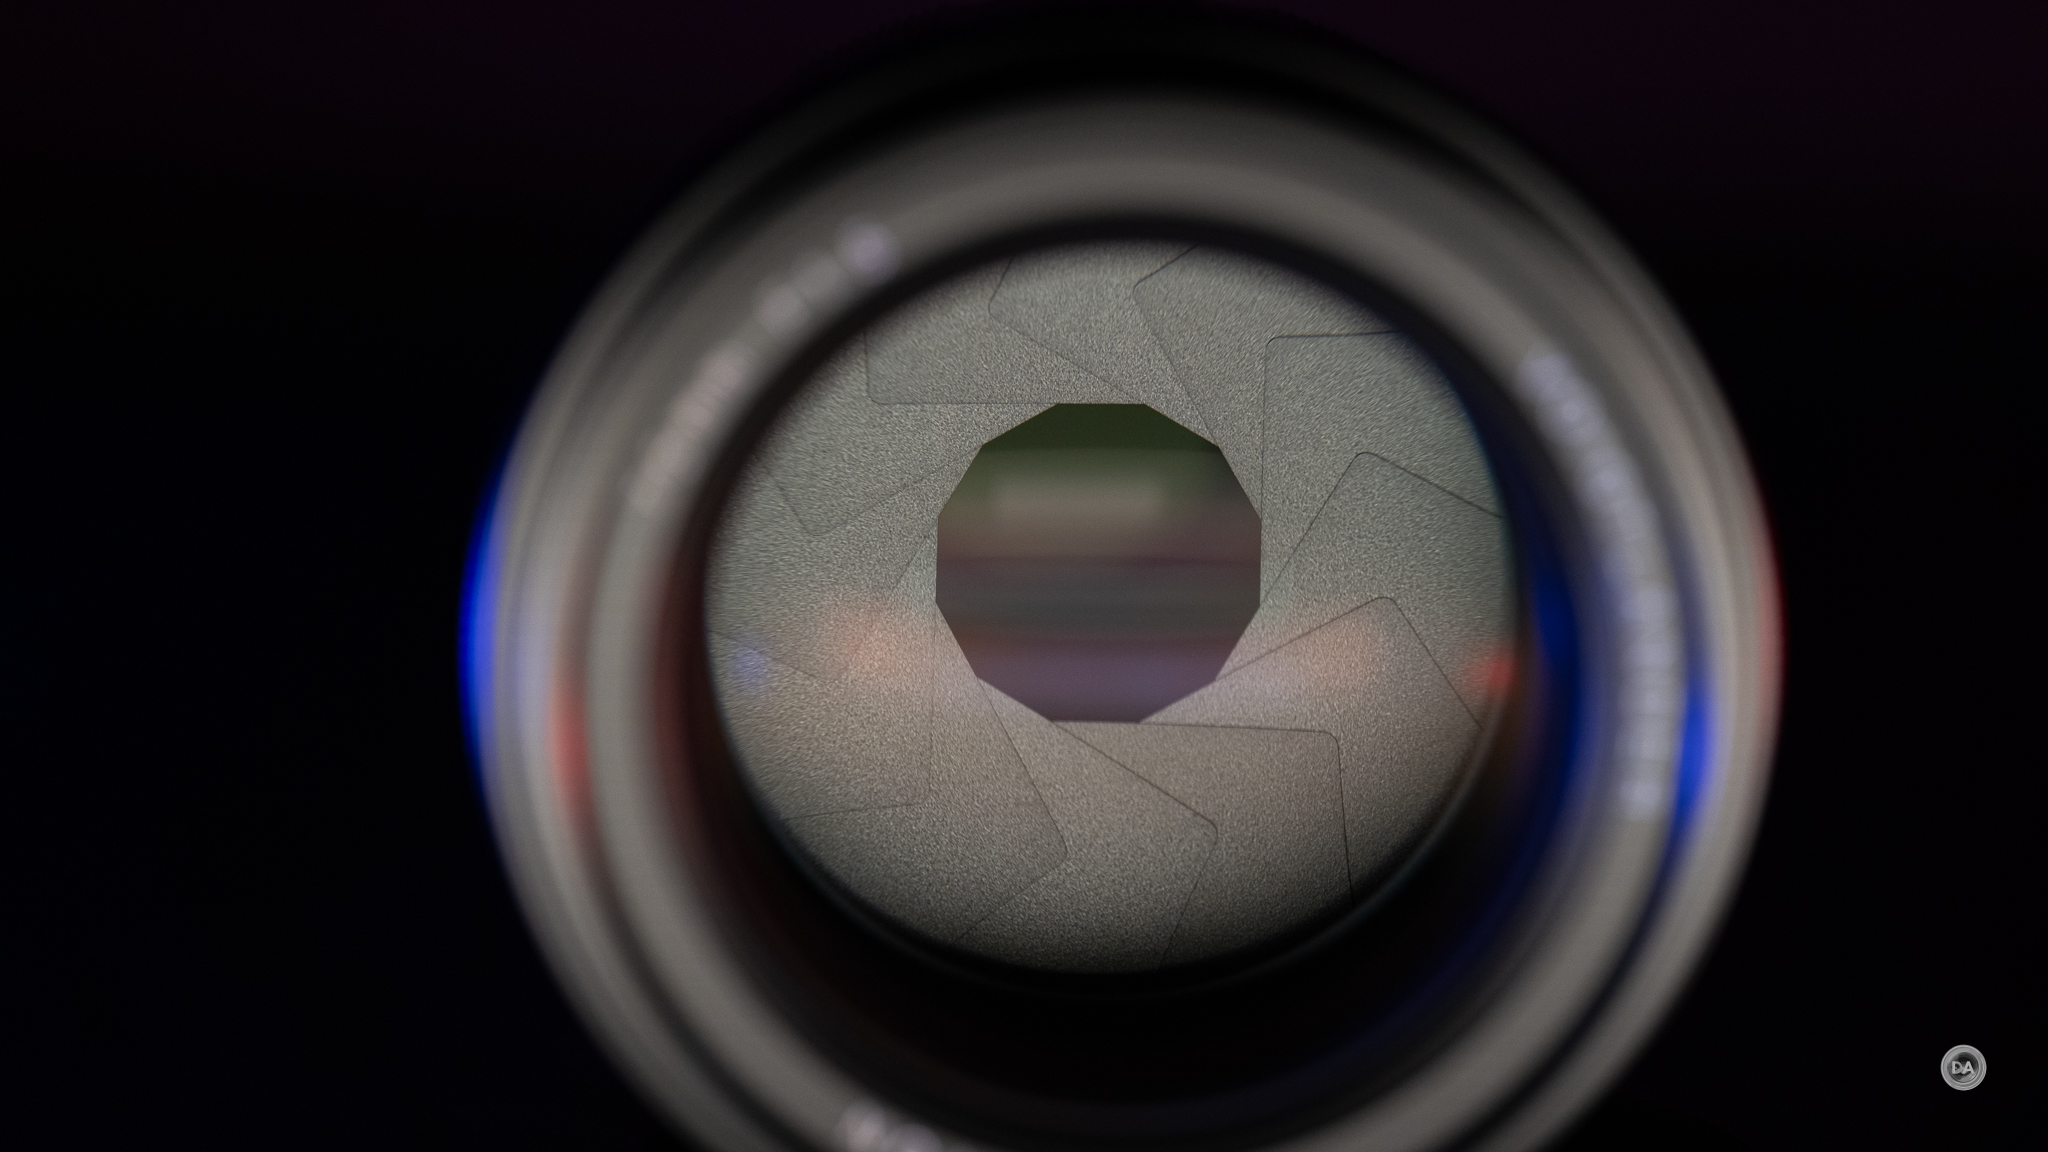
There are thirteen rounded aperture blades inside that make for a pretty sexy looking aperture.
Minimum focus distance is 75cm, and the resulting magnification is not particularly high (probably in the 0.10x range).
There is no weather sealing, no electronics, or anything particularly modern. You’ll need to manually set the focal length for in-camera stabilization if your camera is so equipped. You will also miss a lot of EXIF data (only the camera based information like shutter speed and ISO will be recorded, though if you are shooting on Nikon you’ll have a chance to manually input some of that information).
The front cap is an old school threaded variety.
All told this is a nicely made lens that focuses nicely, has good aperture control, and costs a whole lot less than grabbing one of the classic lenses it emulates.
Manual Focus on Sony (Alpha 1 and a7RV)
When I first moved to Sony bodies, I found them a wonderful platform for manual focus. They had IBIS (in-body-image-stabilization), good viewfinders, and much more manual focus aids than the DSLRs that I was accustomed to. Since that point, however, essentially the whole industry has shifted to mirrorless cameras, so those advantages aren’t as distinct anymore. But I still found the TTArtisan 75mm F1.5 Swirl an easy lens to use on my Sony bodies and found that I could easily nail focus despite the large maximum aperture and narrow depth of field. Here’s a few reasons why:
EVF. An electronic viewfinder has a lot of advantages over an optical viewfinder when it comes to using manual focus lenses. You have the ability to see overlays, magnify the image to confirm focus, and as a byproduct I really didn’t have any misses. I don’t always love Sony’s viewfinders due to them going a bit weird when you half-depress the shutter for stabilization, but focus is still really easy due to the EVF.
Effective IBIS (Steadyshot Inside). Sony was a pioneer with IBIS, and while other companies have caught up and even surpassed them, having the ability to stabilize the viewfinder or LCD screen image while focusing makes manual focus much easier. You can hold that image still while you pull focus to the perfect point.
Useful manual focus aids. Sony’s options include the ability to have a color overlay to help to show what is in focus, though I will note that this works better when shooting at larger apertures and at close to medium distances. At longer distances where more is in focus, the color overlays can just become distracting, and just because a lot is in focus doesn’t yet mean that focus is where you want it. I prefer the secondary method, which is to enable an automatic magnification of the focus area whenever you turn the focus ring. This allows you to visually confirm focus is where you want it, and it is pretty foolproof. Sony’s system will both automatically magnify the focus area when you turn the focus ring and then also switch back to the full view when you go to depress the shutter so that you can ensure your composition is still what you want.
I own four different brands of camera (Sony, Canon, Nikon, and Fujifilm), and I can safely say that manually focusing on each of them is really quite easy…even when focusing on very shallow depths of field.
It is worth noting that the beautiful focus ring also makes doing focus pulls during video a treat. There’s nothing quite like a well calibrated true manual focus ring for smooth pulls.
TTArtisan 75mm F1.5 Swirl Image Quality Breakdown
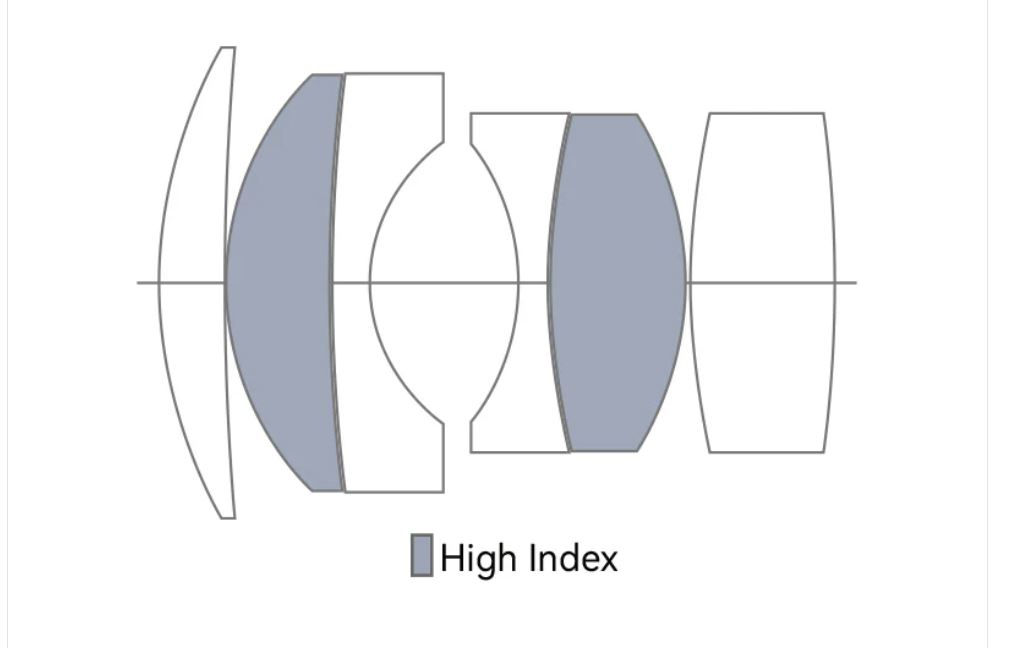
This “swirl” lens has an extremely simple optical design of 6 elements in 4 groups. Two of those are HR elements.
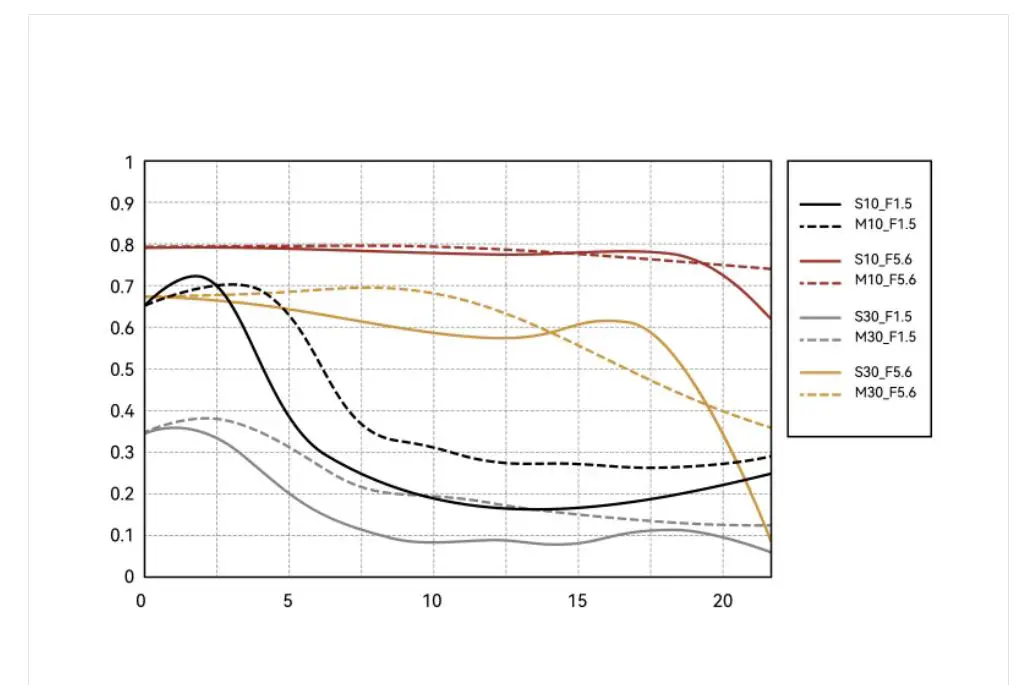
Lenses like this are all about the rendering, the “look”, and not about their technical proficiency. I haven’t seen an MTF chart that looks this bad in a long, long time!
There’s a huge disparity between the wide open performance and the stopped down performance. The corners are particularly weak, but that’s essentially part of the design. The “swirl” that is so desirable in these lenses actually comes from uncorrected aberrations in the sagittal plane. In fact, most of the unique and desirable qualities we like about vintage glass come from optical defects, which is why modern lenses often feel fairly “clinical” by comparison. There’s a lot of defects in this image…but that’s a big part of the charm!
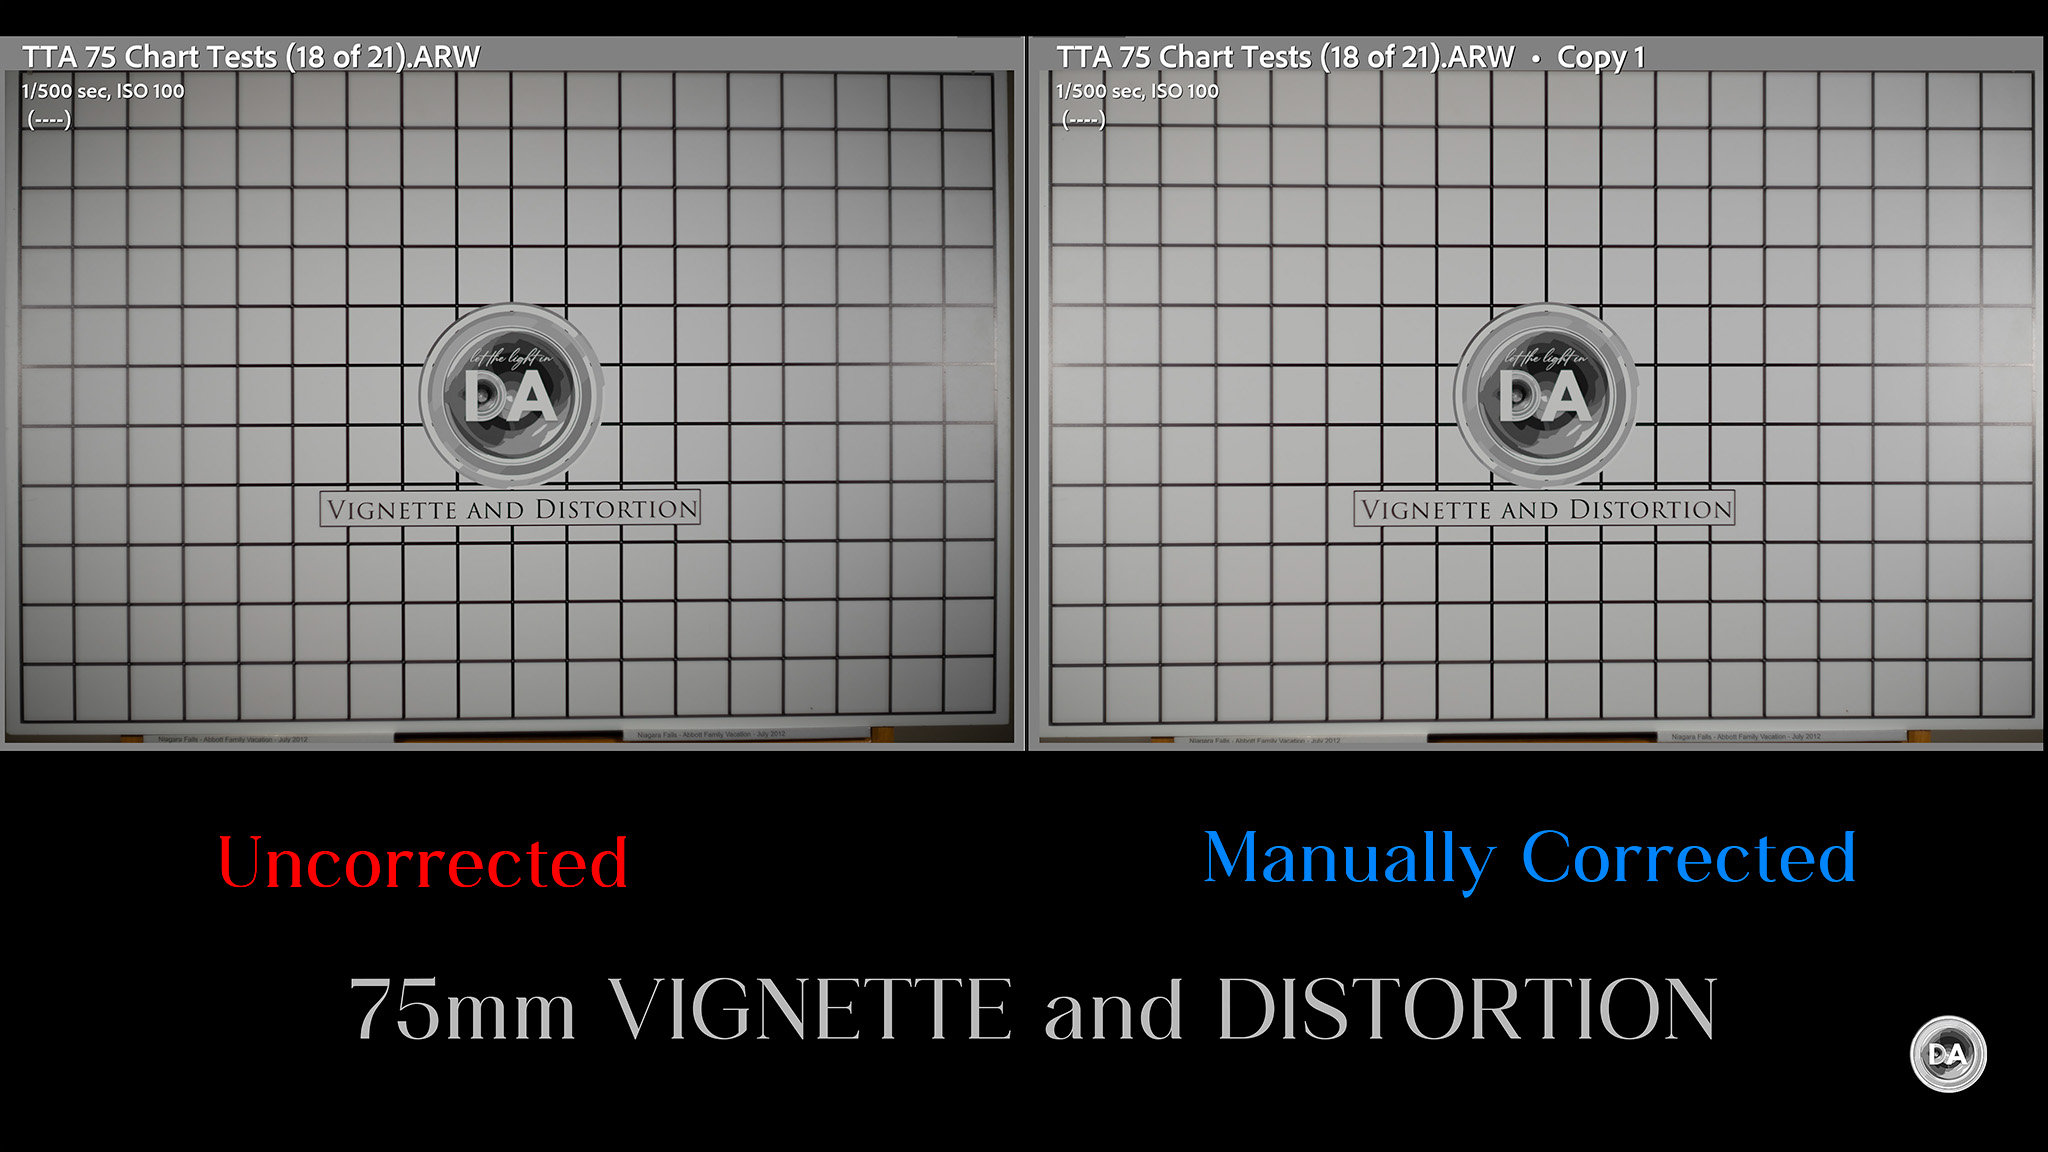
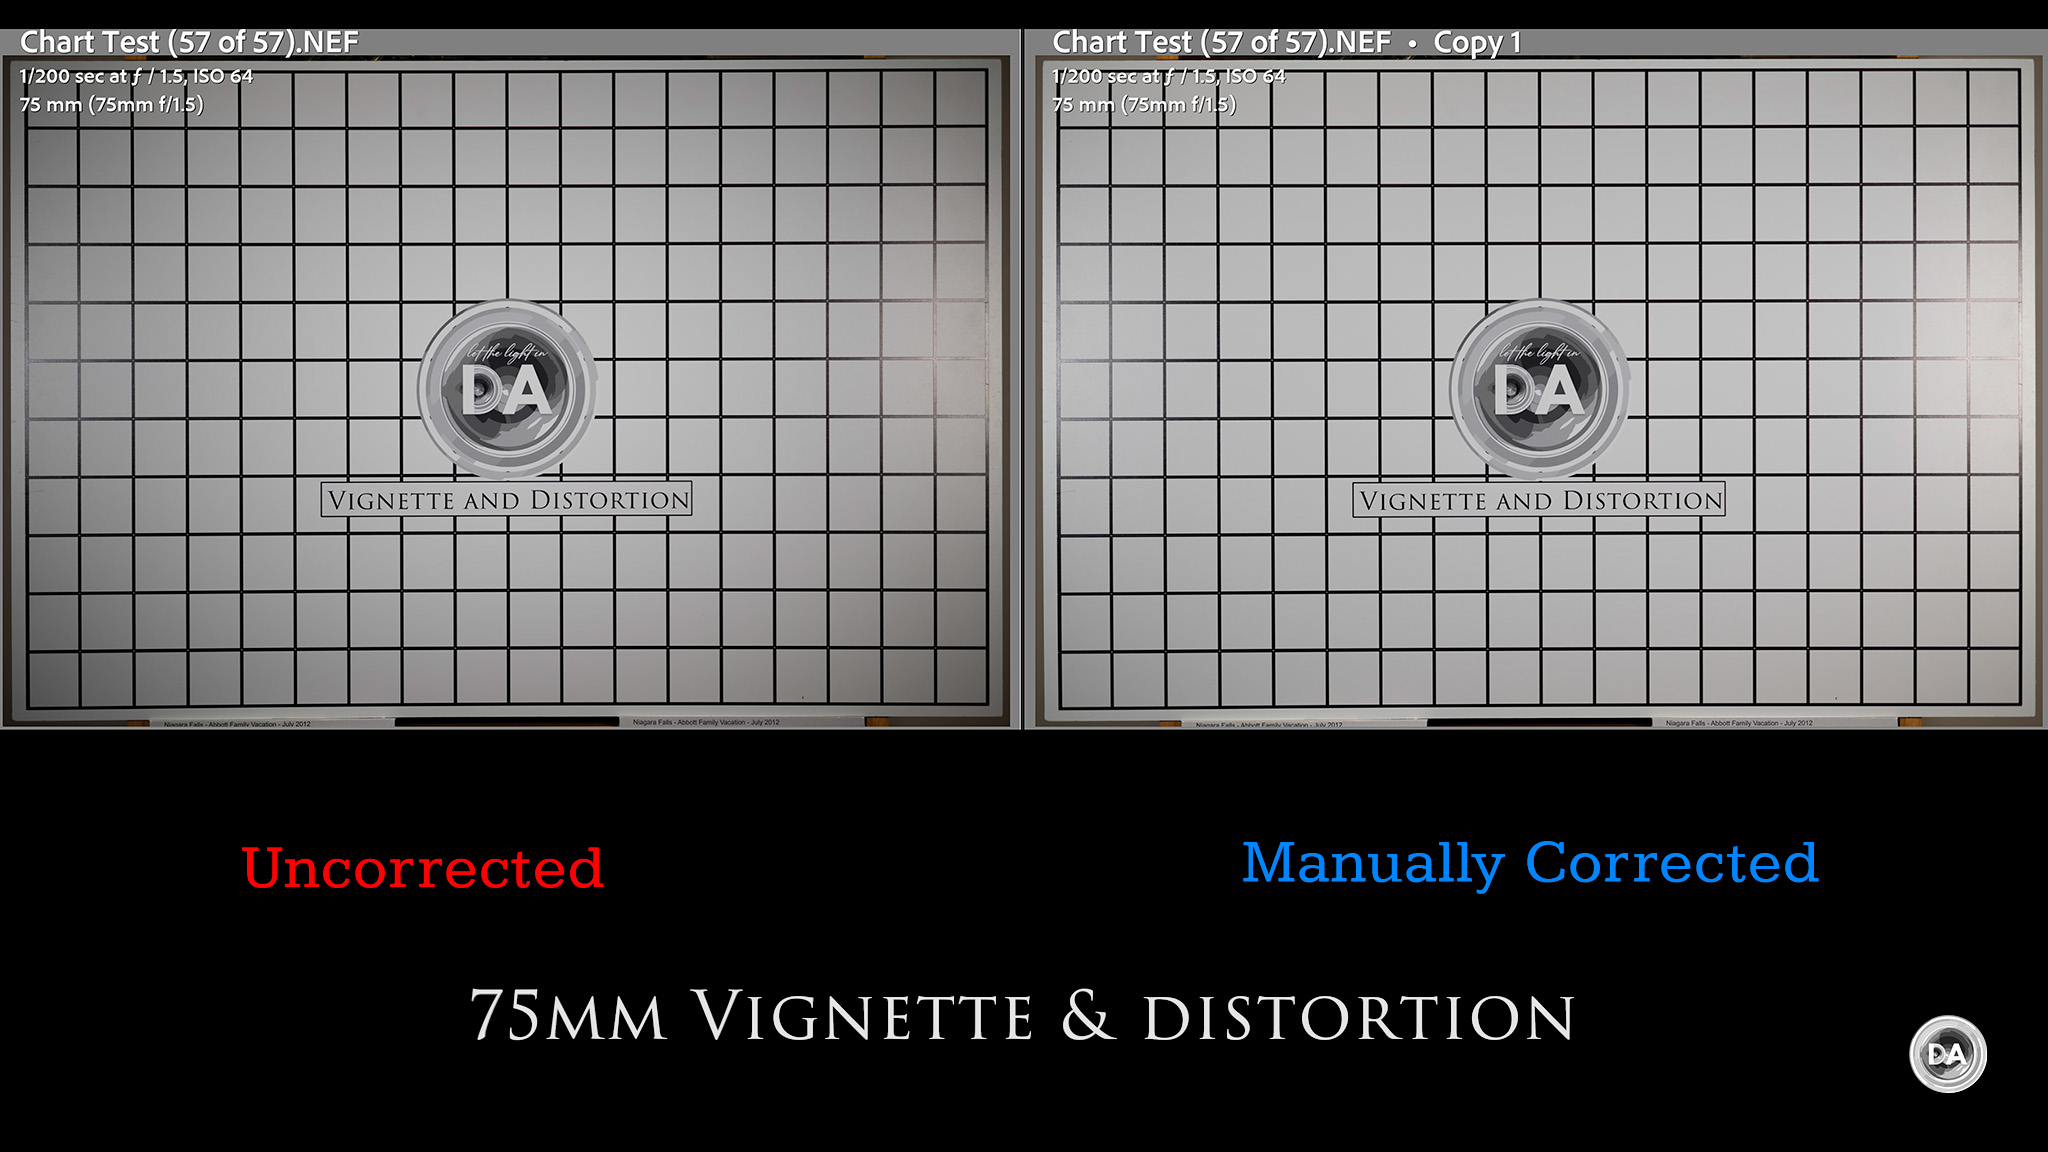
On the technical side of things, there is relatively little distortion and vignette.
There is a very small amount of barrel distortion (+3 to correct) and under 2 stops of vignette (+45 to correct). Neither metric is bad at all, which is good, as obviously lenses without electronics like this won’t get any kind of in camera corrections.
Not so good, however, is color fringing, particularly in high contrast situations. This is not a lens that will always hold up well when there are brighter lights in the frame. You’ll also see some color fringing before and after the plan of focus, and a general spherical aberrations that softens contrast (what we often euphemistically call “dreamy rendering”).
Other shots in lower contrast situations look better.
Stopping down a bit helps with the fringing in most situations.
Control of Lateral CA was pretty much perfect. The transition from black to white is flawless near the edge of the frame.
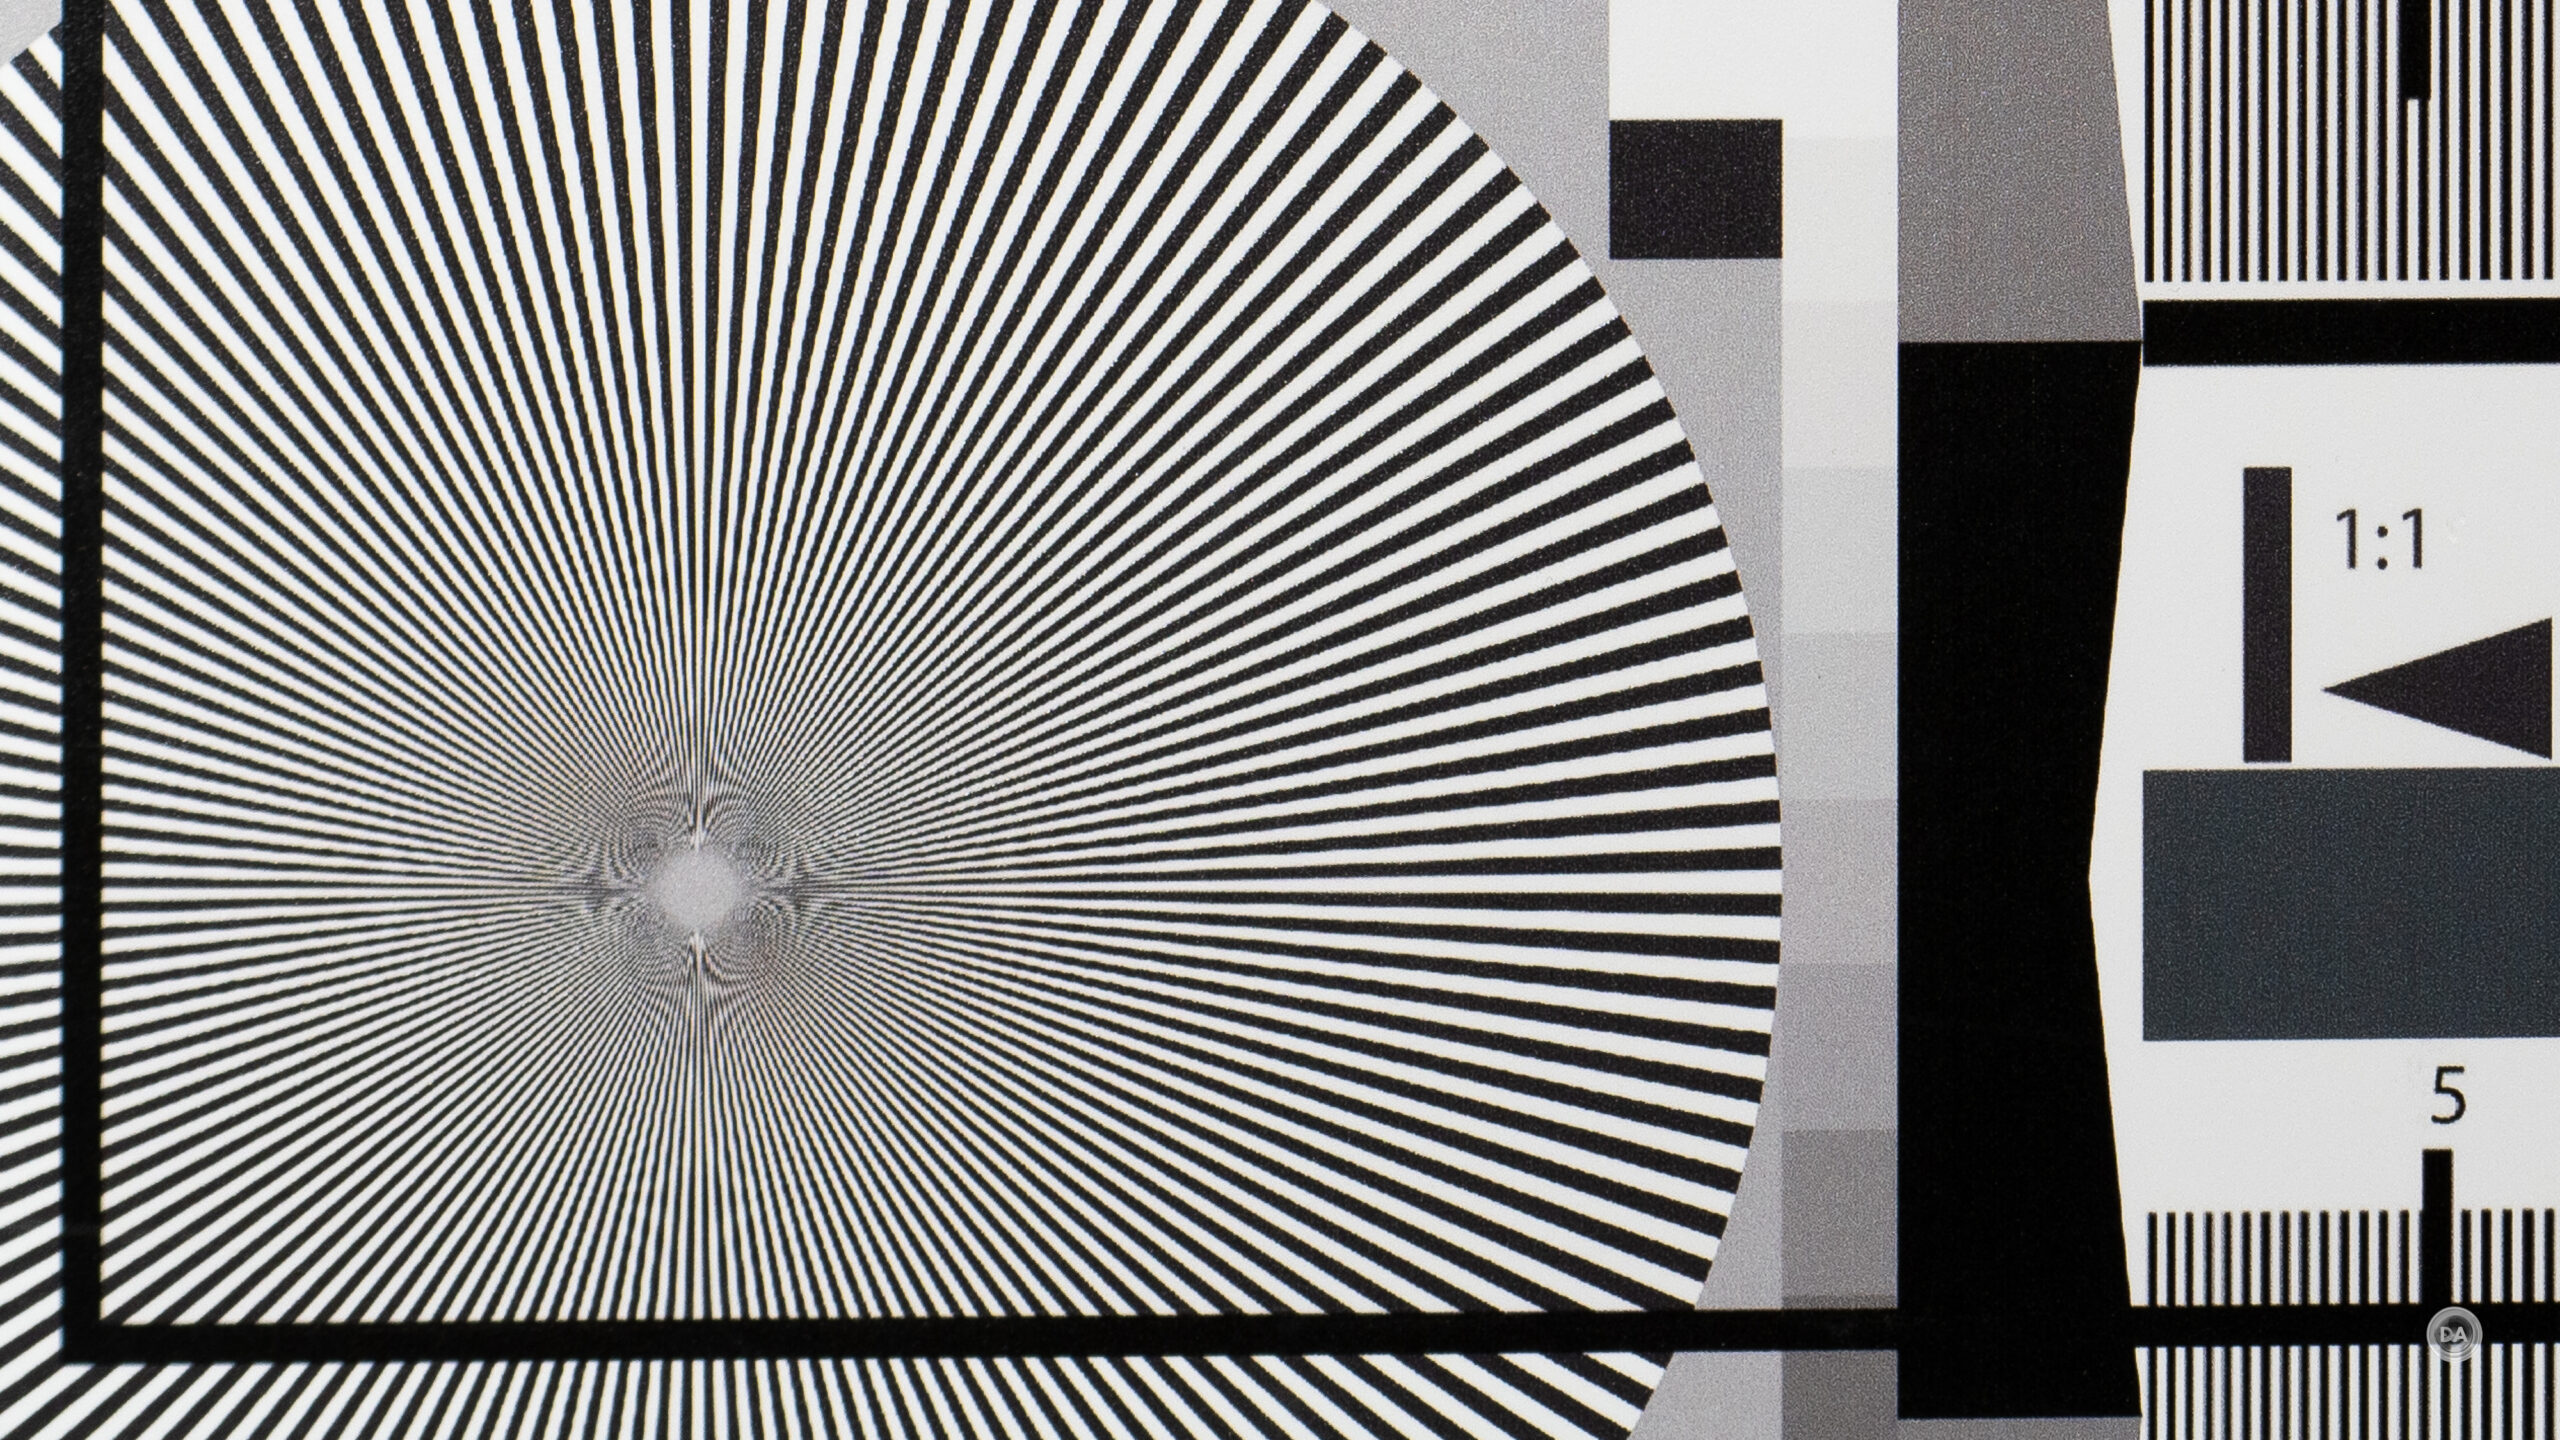
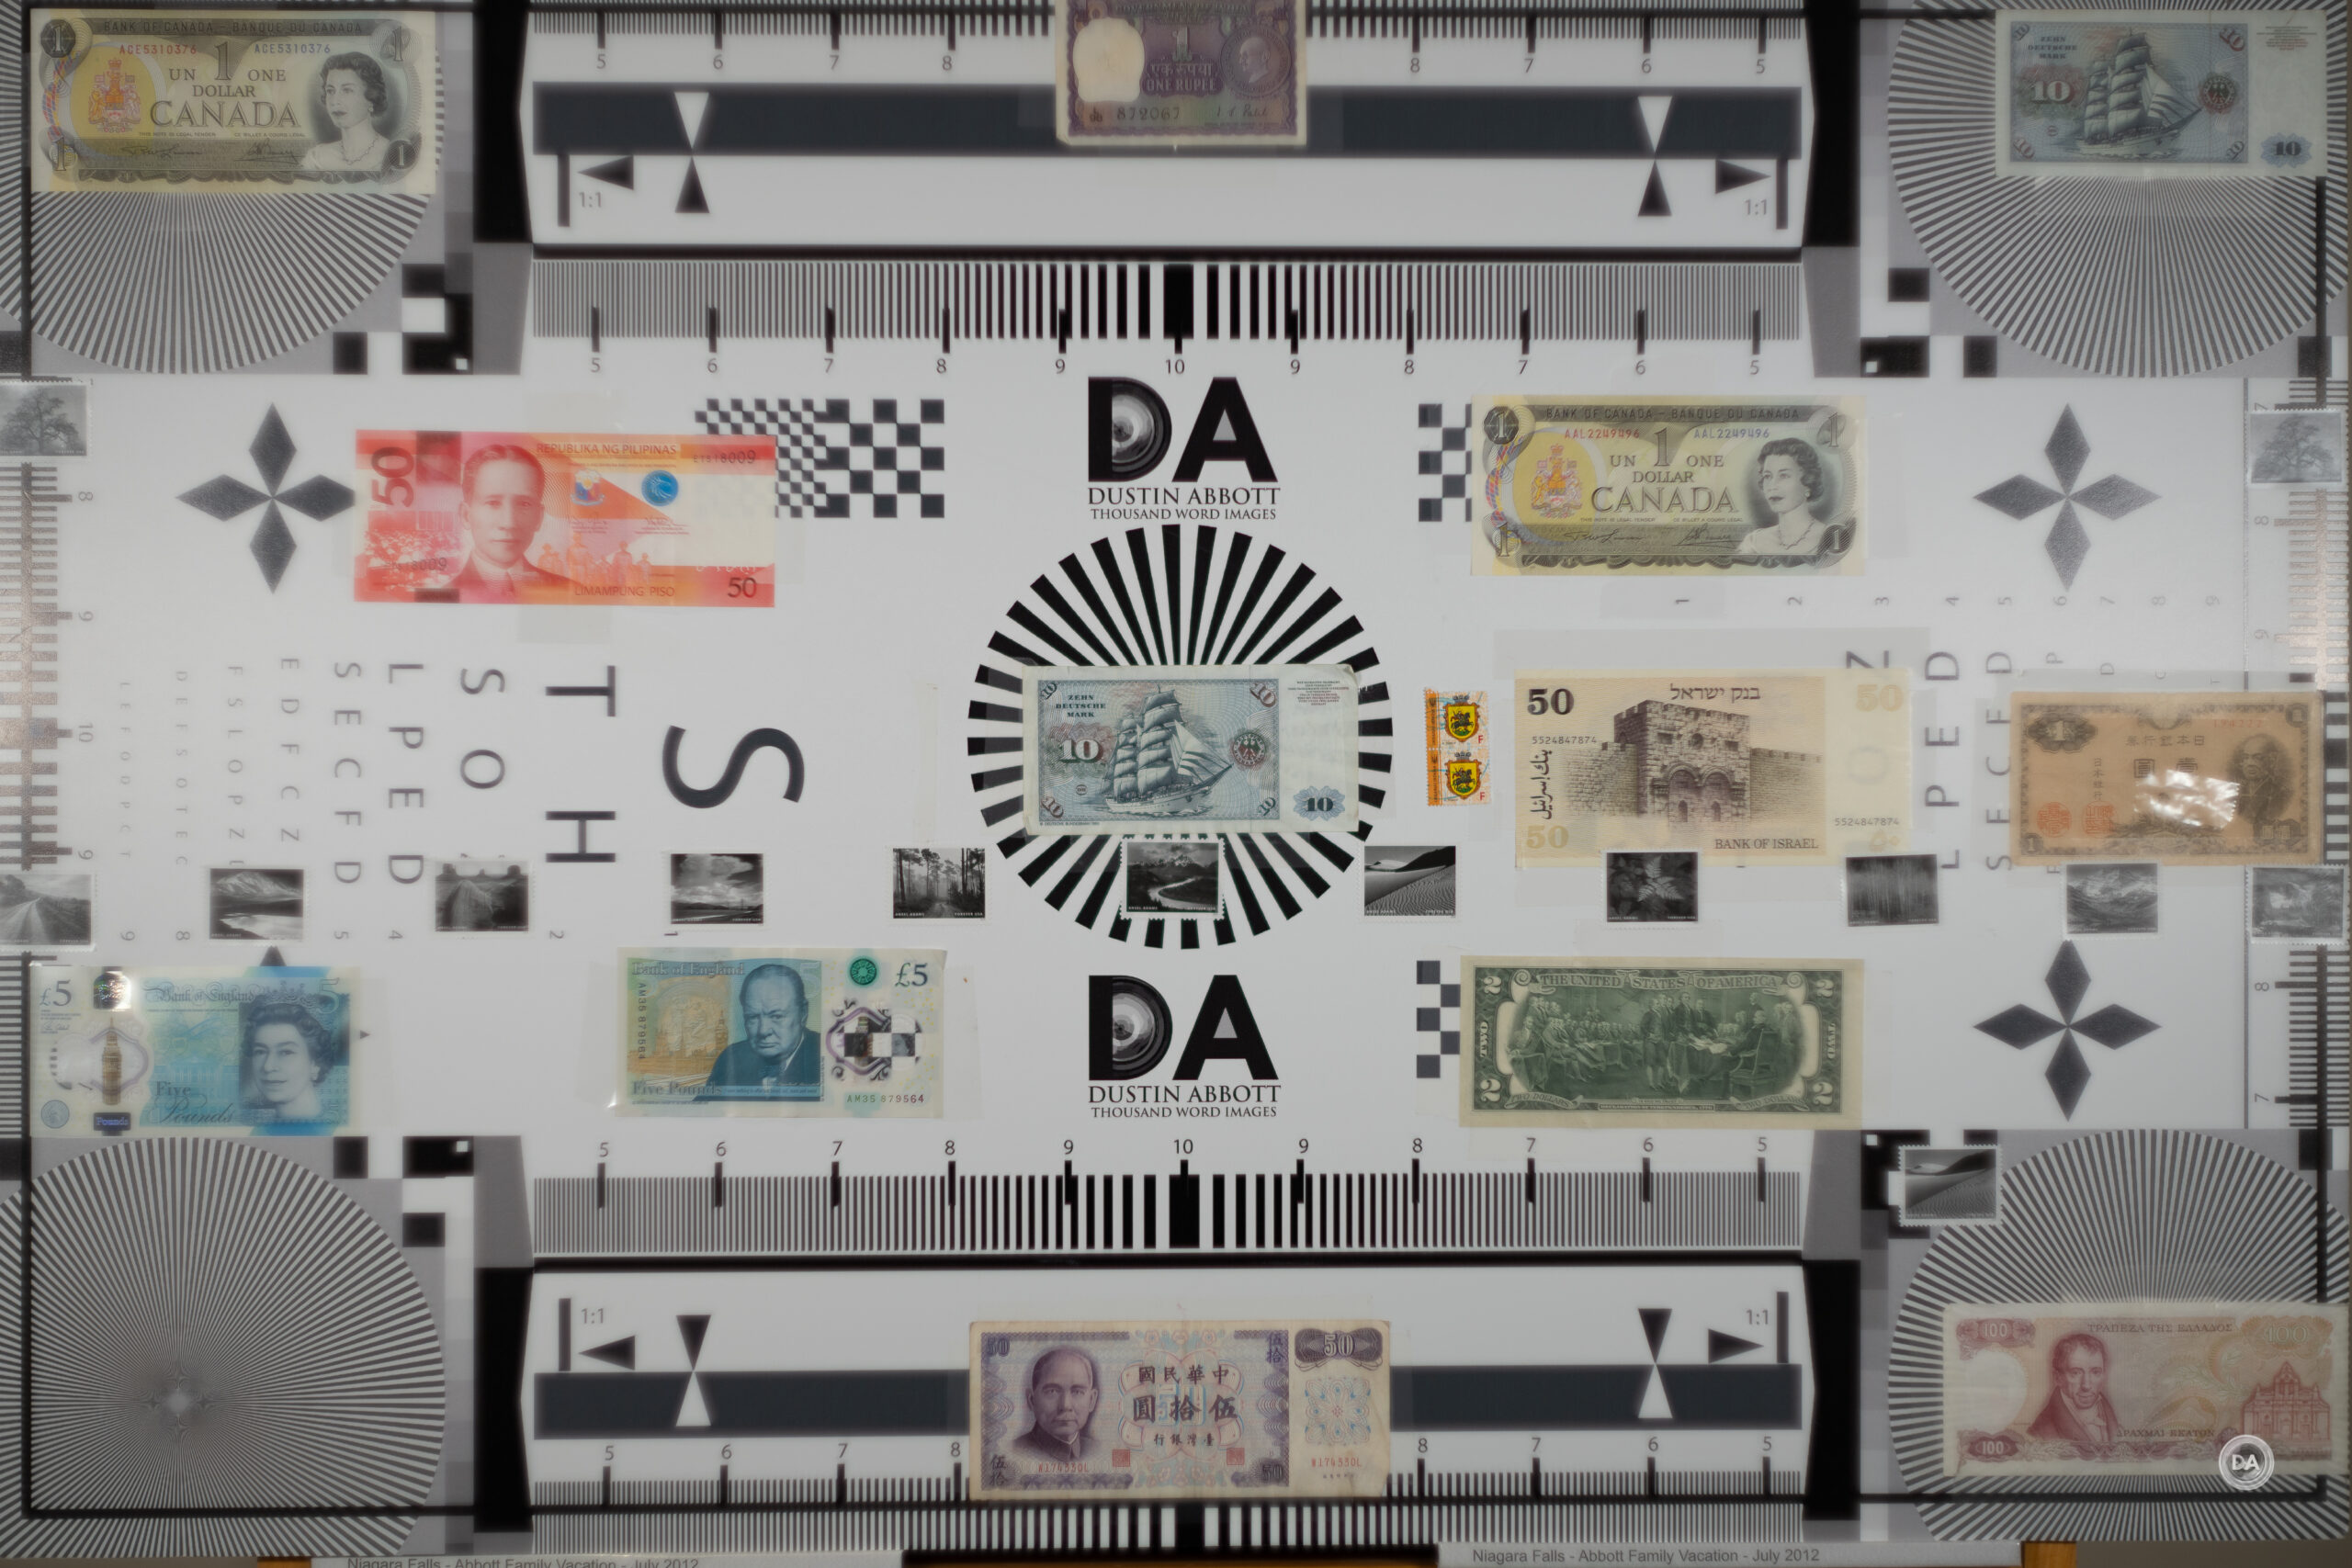
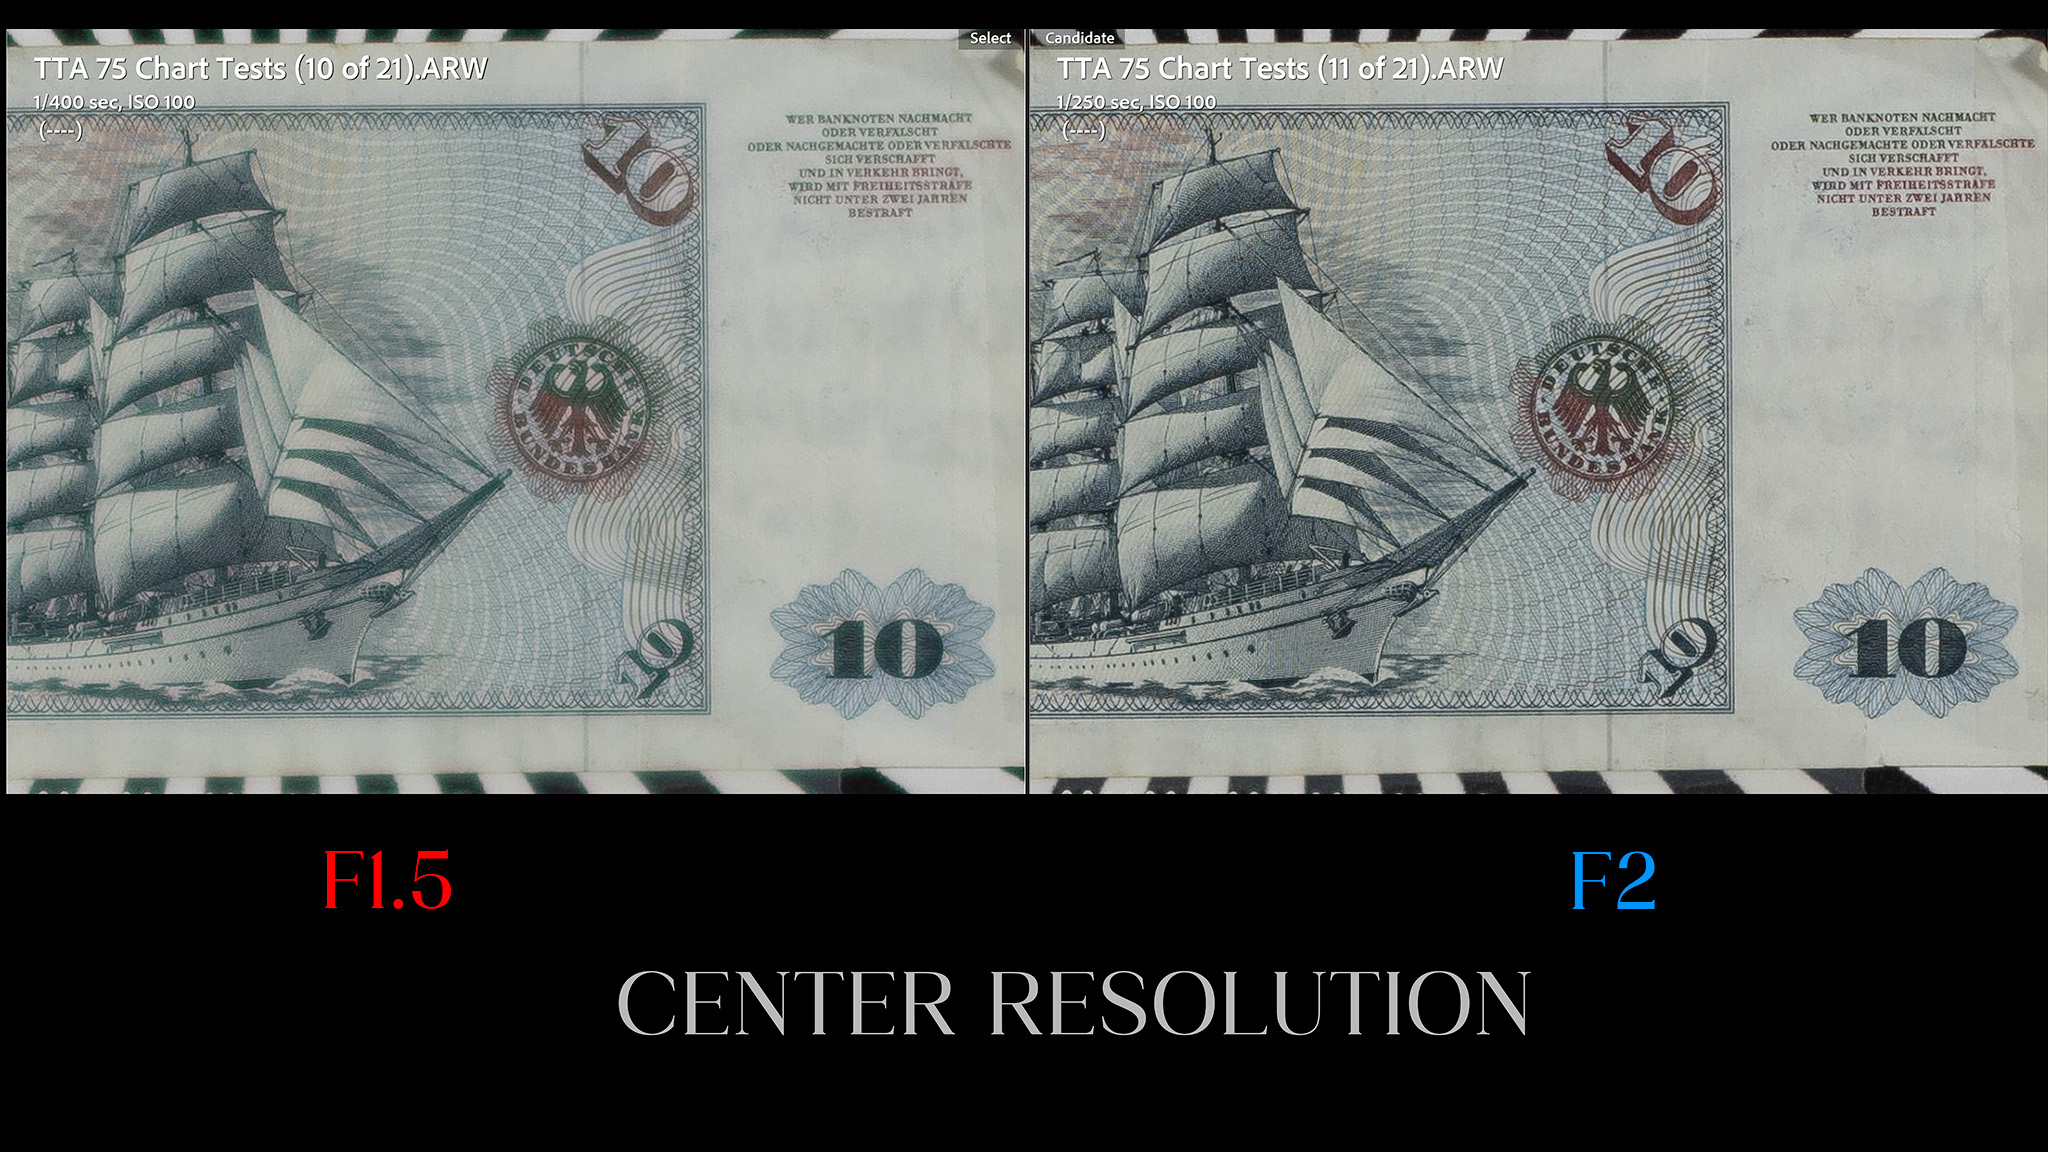
We can clearly guess that at large apertures, this is not going to be a very sharp lens, particularly when we consider that I am testing on a much higher resolution point than any classic lens had to deal with. All of my chart tests are shot on the 61MP Sony a7RV sensor with crops shown at roughly 200% magnification. Here’s a look at the test chart, which looks a bit like it is warping due to the unique optical signature of this lens.
And here are the F1.5 crops from across the frame:
There’s actually a decent amount of detail in the center of the frame, but you can also see that some fringing is reducing contrast, giving the textures a bit of a “bloom” to them. The midframe and corners are softer still, but it is mostly due to having very low contrast.
That’s all part of the unique look of the lens, however.
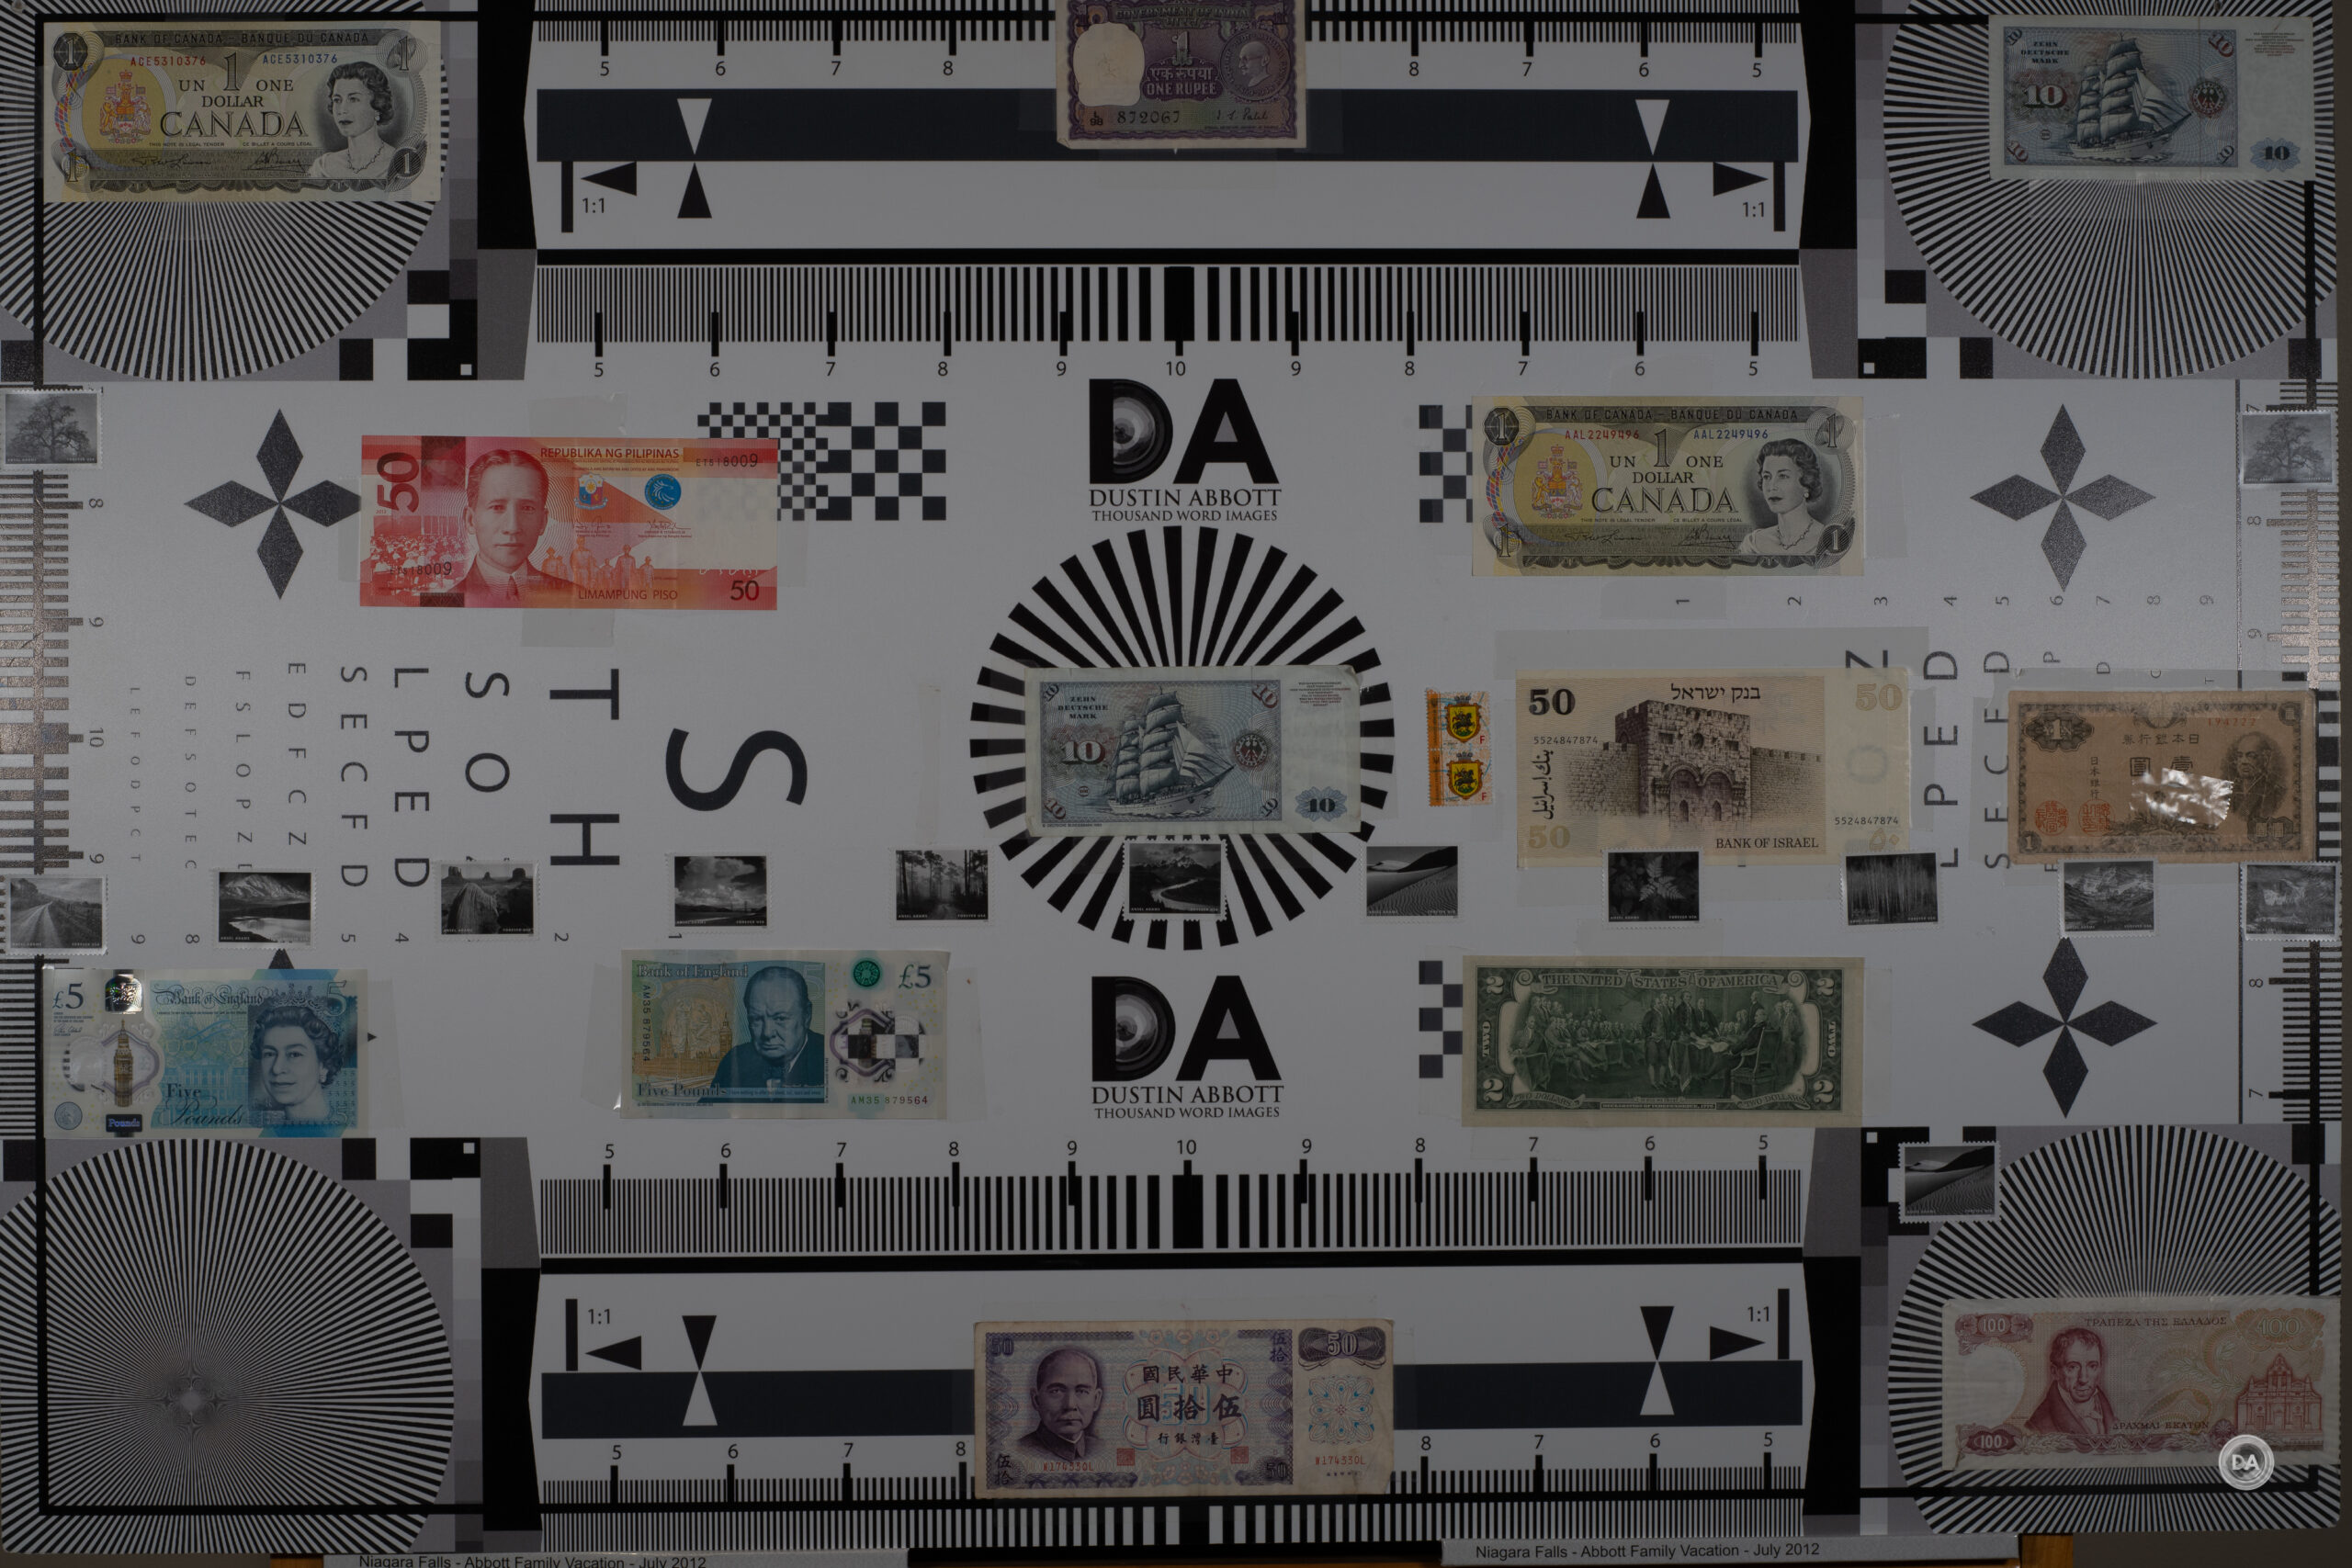
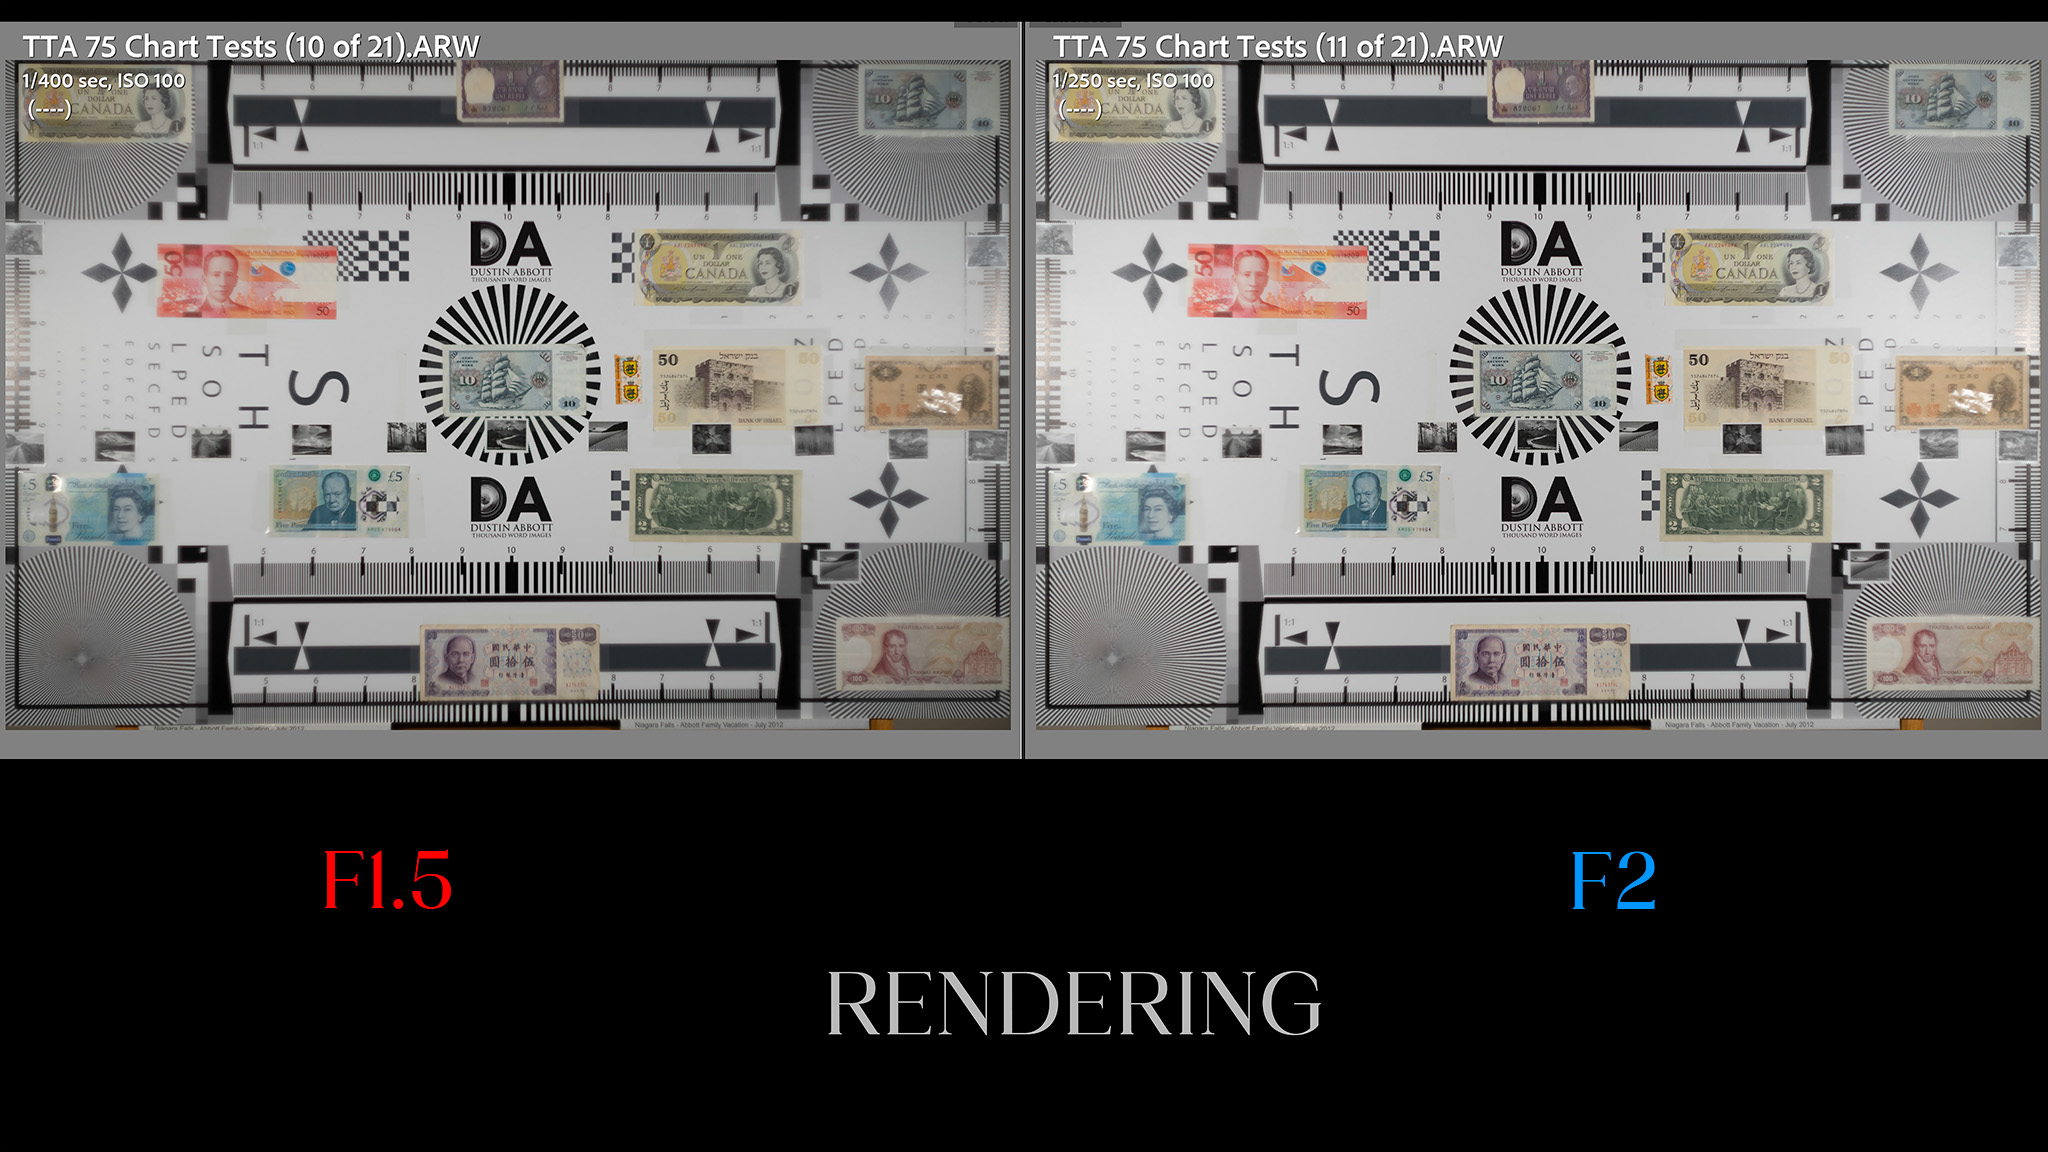
I did note some of the typical quirks with metering as I stopped the lens down for my test chart results. I found that I needed to bias results sometimes to keep metering accurate. As I got into the smaller apertures, it was not unusual to get underexposed results like below if I didn’t.
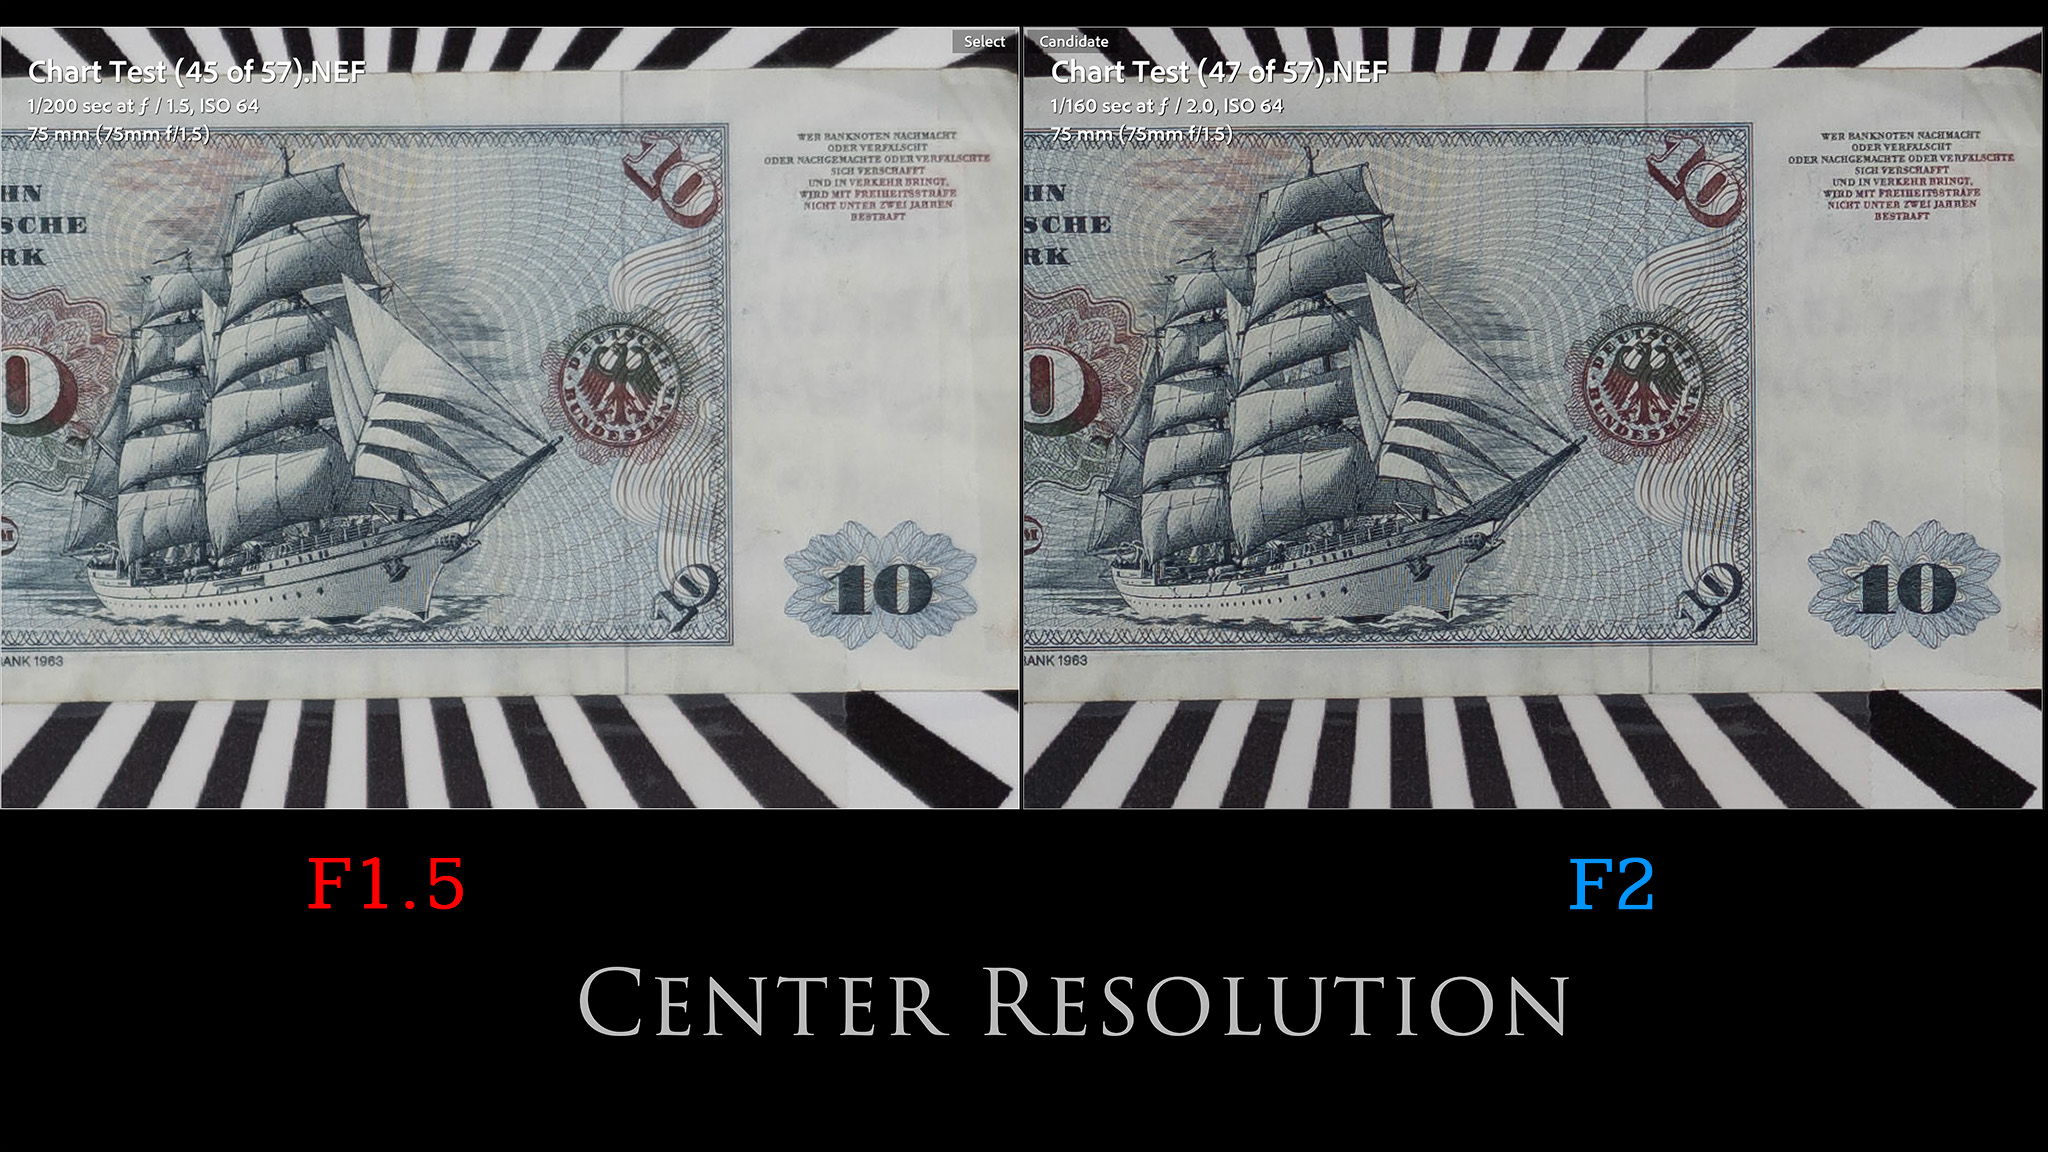
Stopping down to F2 will increase contrast a bit and eliminate a lot of the fringing. You can see that the whole image looks cleaner and brighter.
If we look in the center of the frame, we can see that the resolution and contrast have picked up considerably. It’s like a whole new lens.
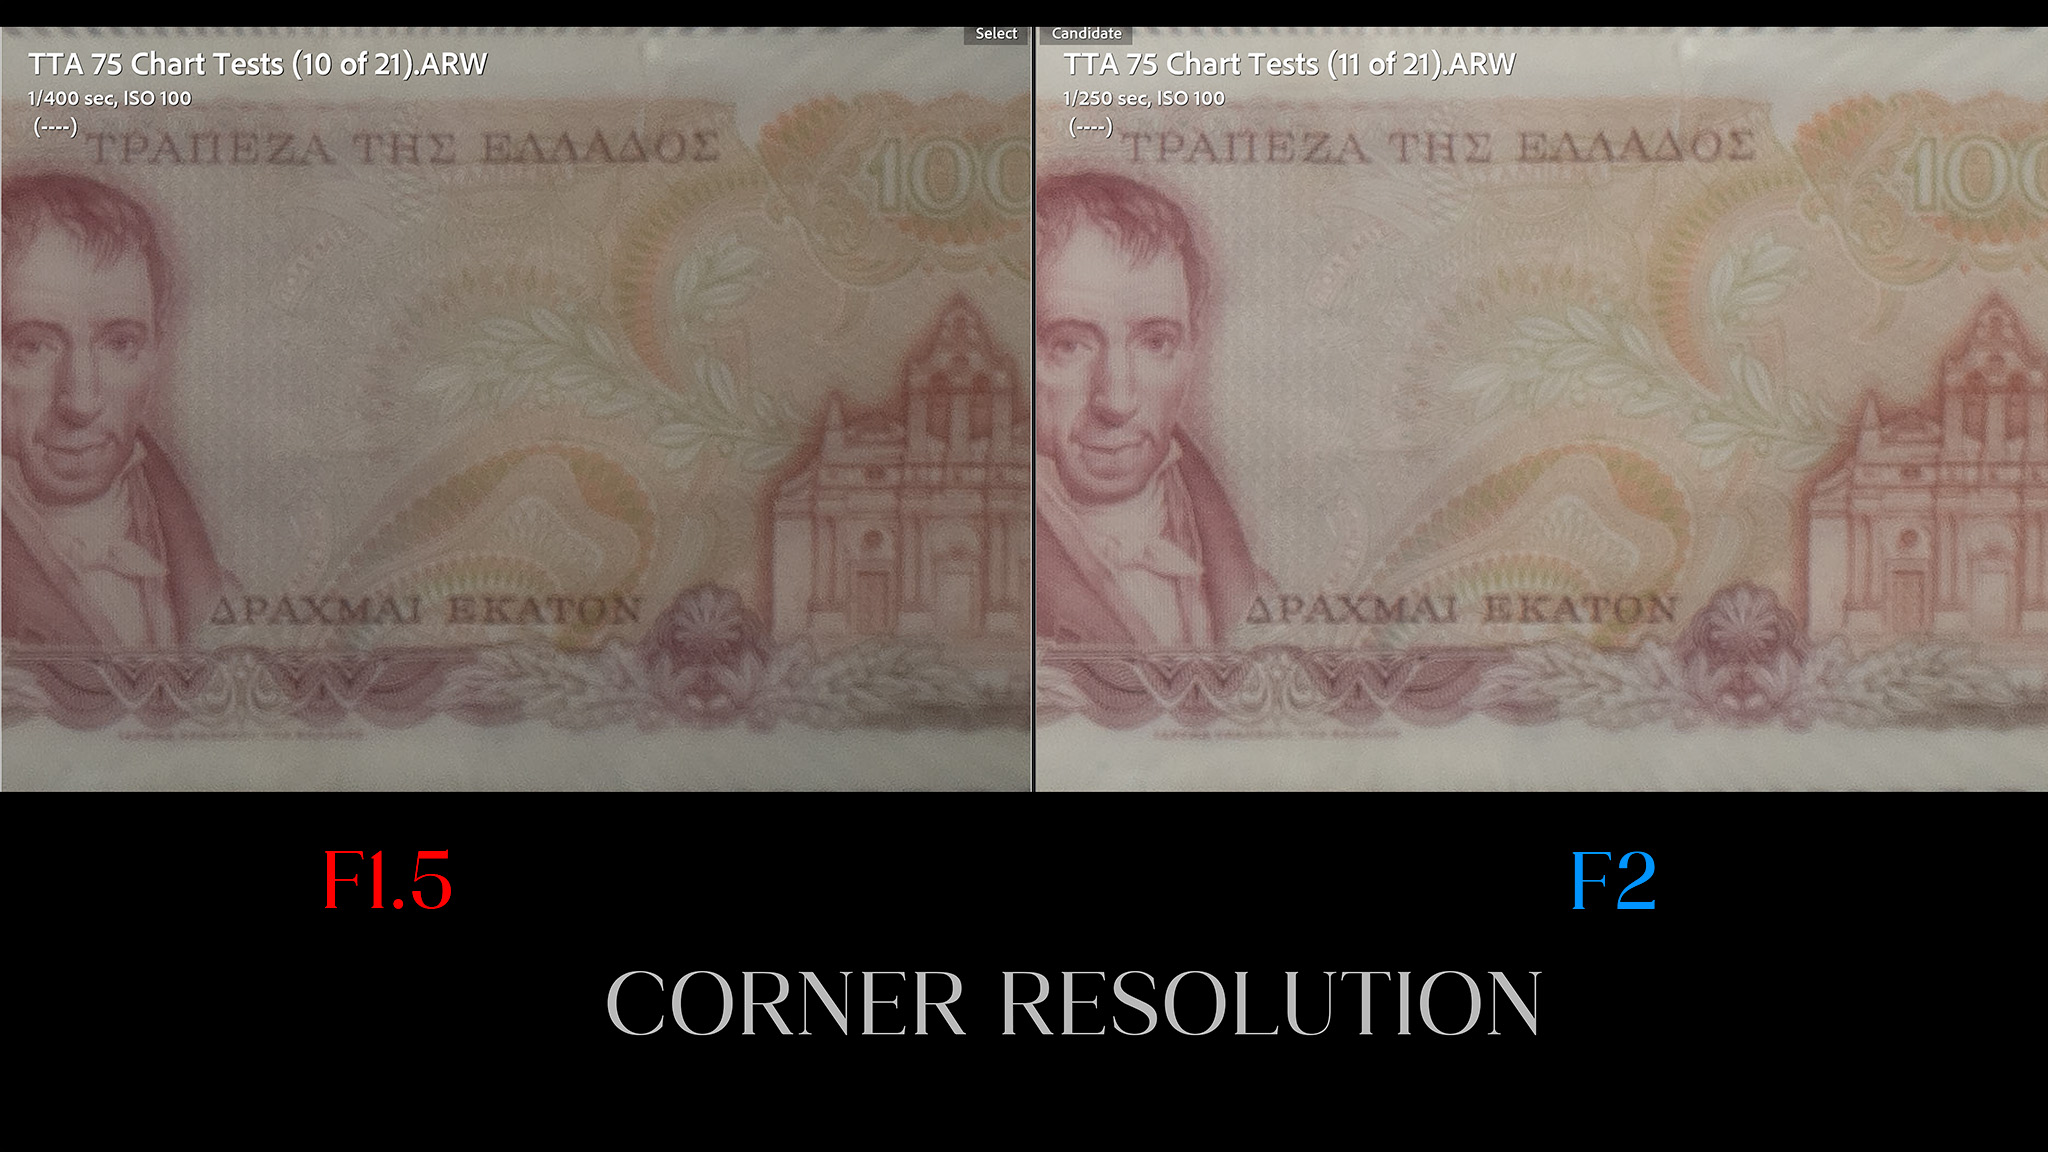
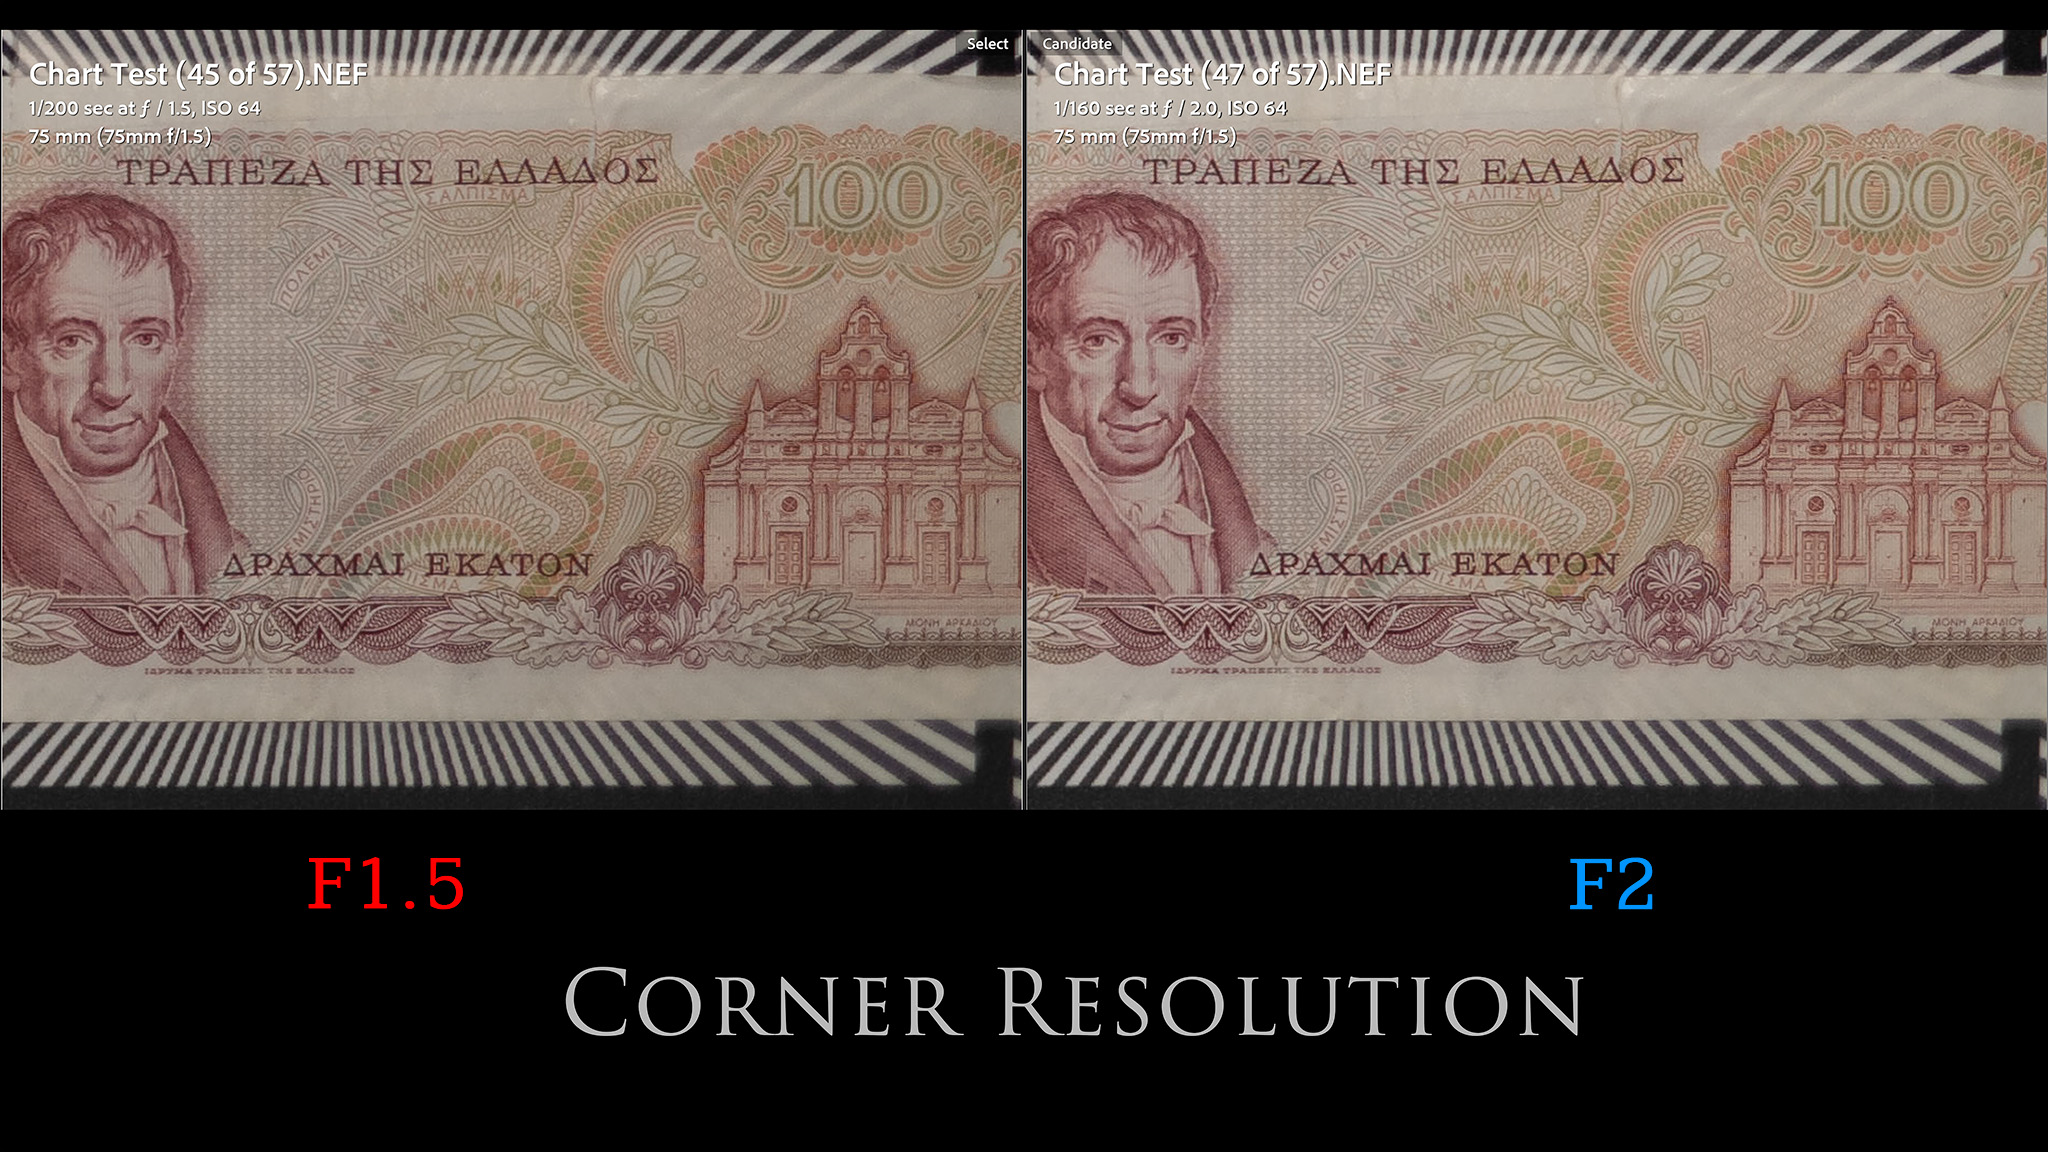
The corners are a different story, however, as, while they are brighter, then look like they are in a fog and the sun is just starting to come out a bit!
Corners never get pin sharp, though they are pretty decent by F5.6:
Landscape apertures of F4-F8 look pretty good other than the extreme edges of the frame.
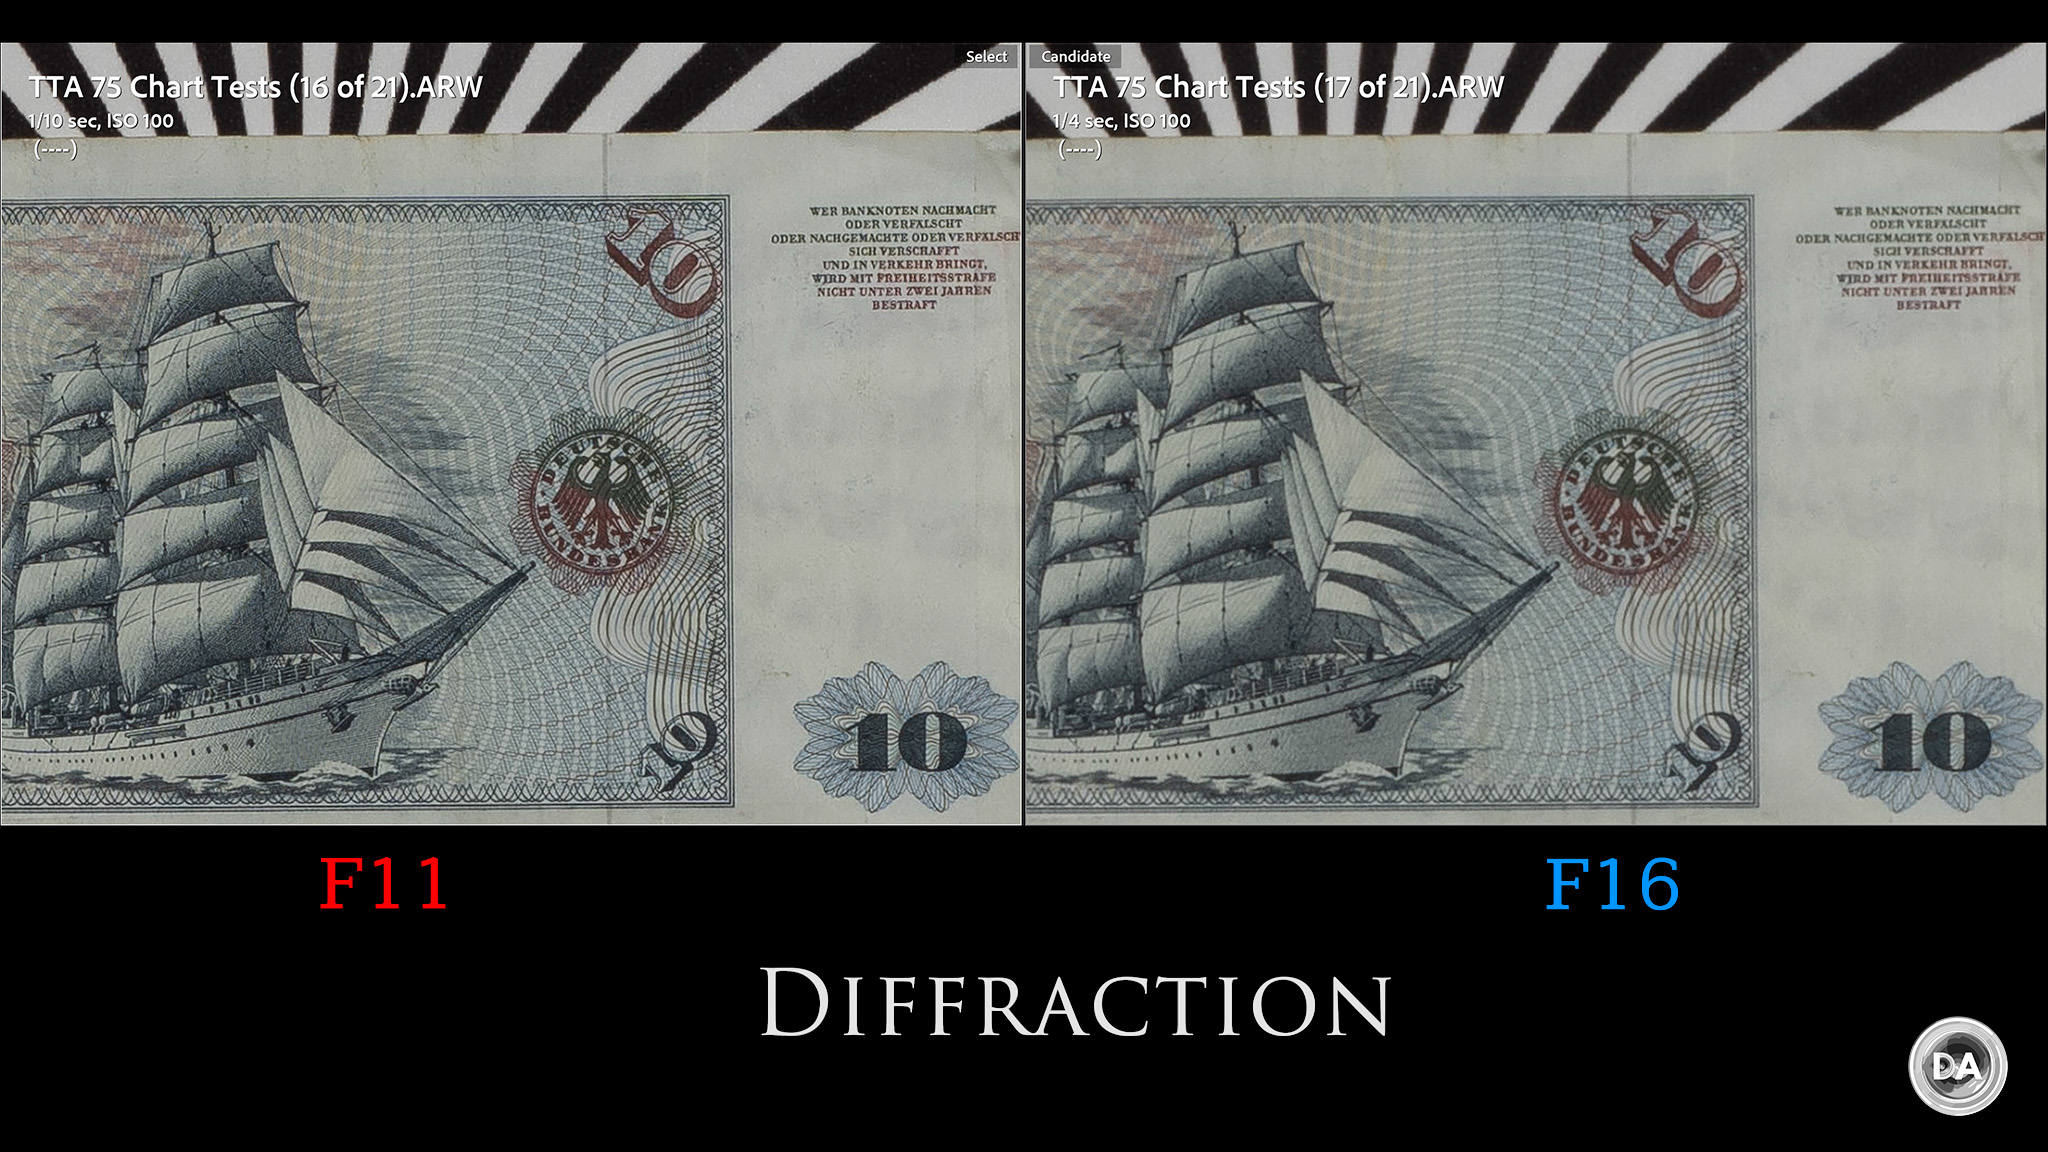
As expected on a high resolution body, diffraction will hit after F8, softening the image a bit at F11 and more so at F16, which is minimum aperture.
So sharpness and contrast will vary dependent on the aperture you choose, which does give you some flexibility with the kinds of images that you can create with the lens.
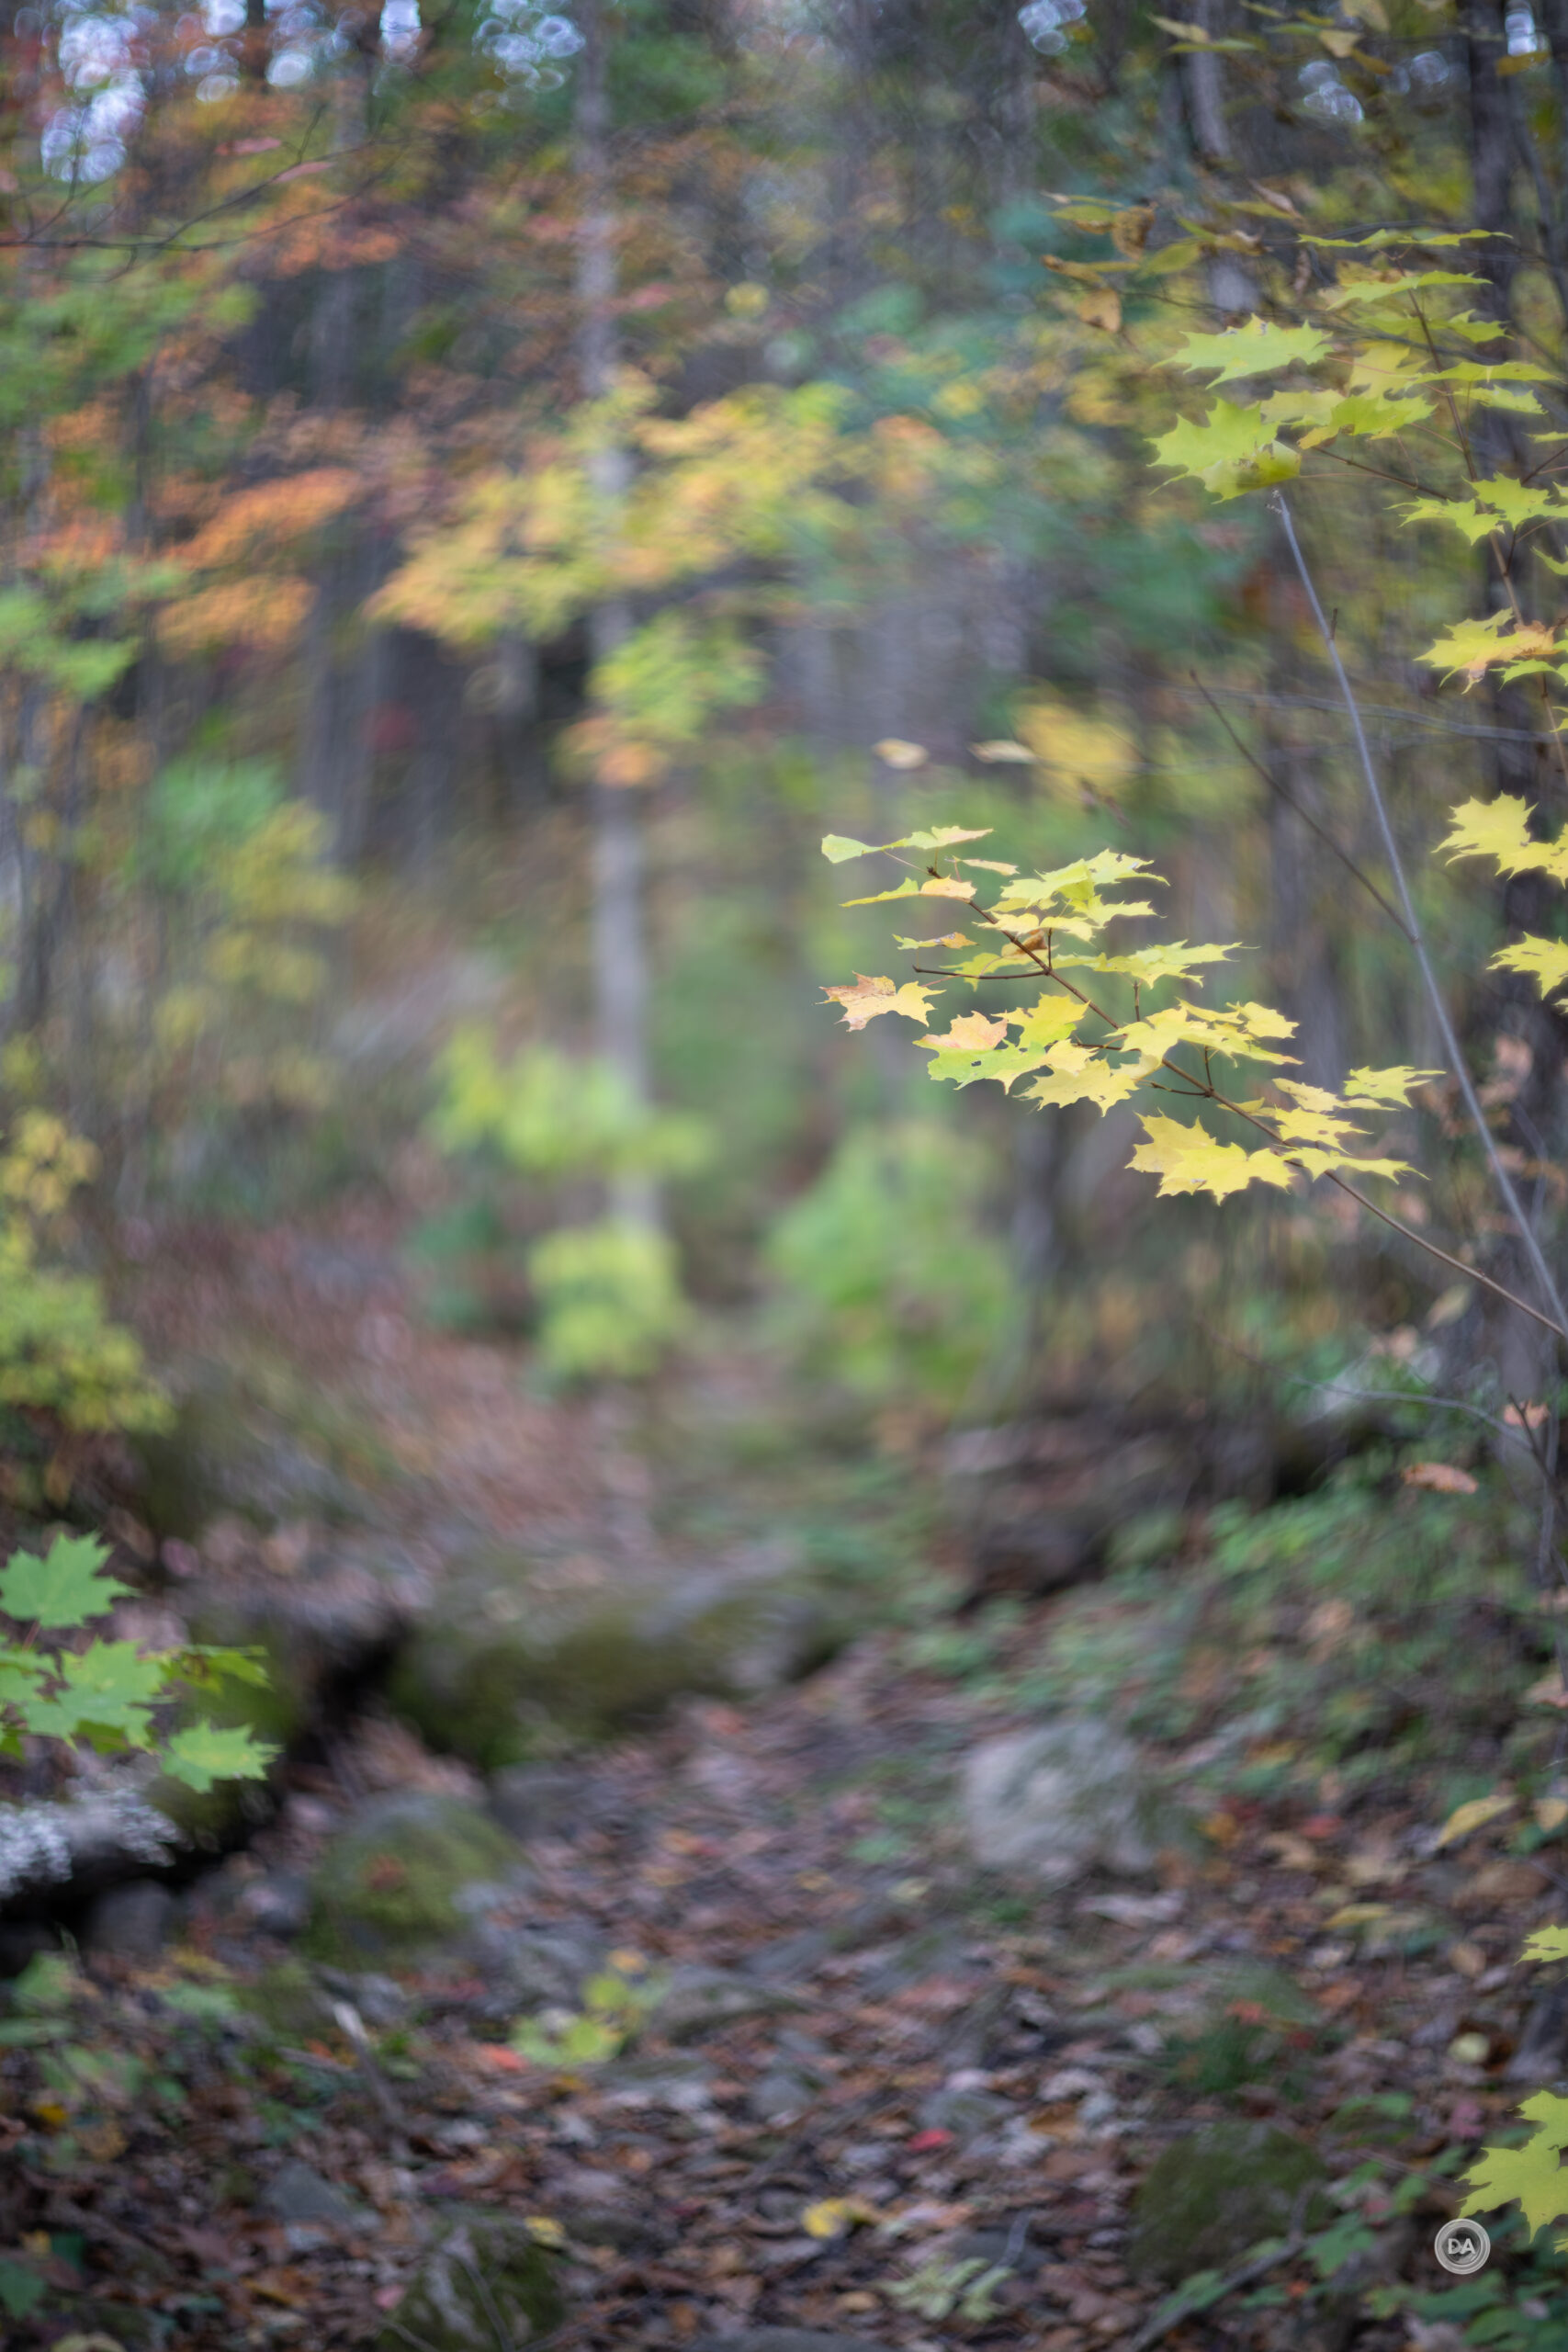
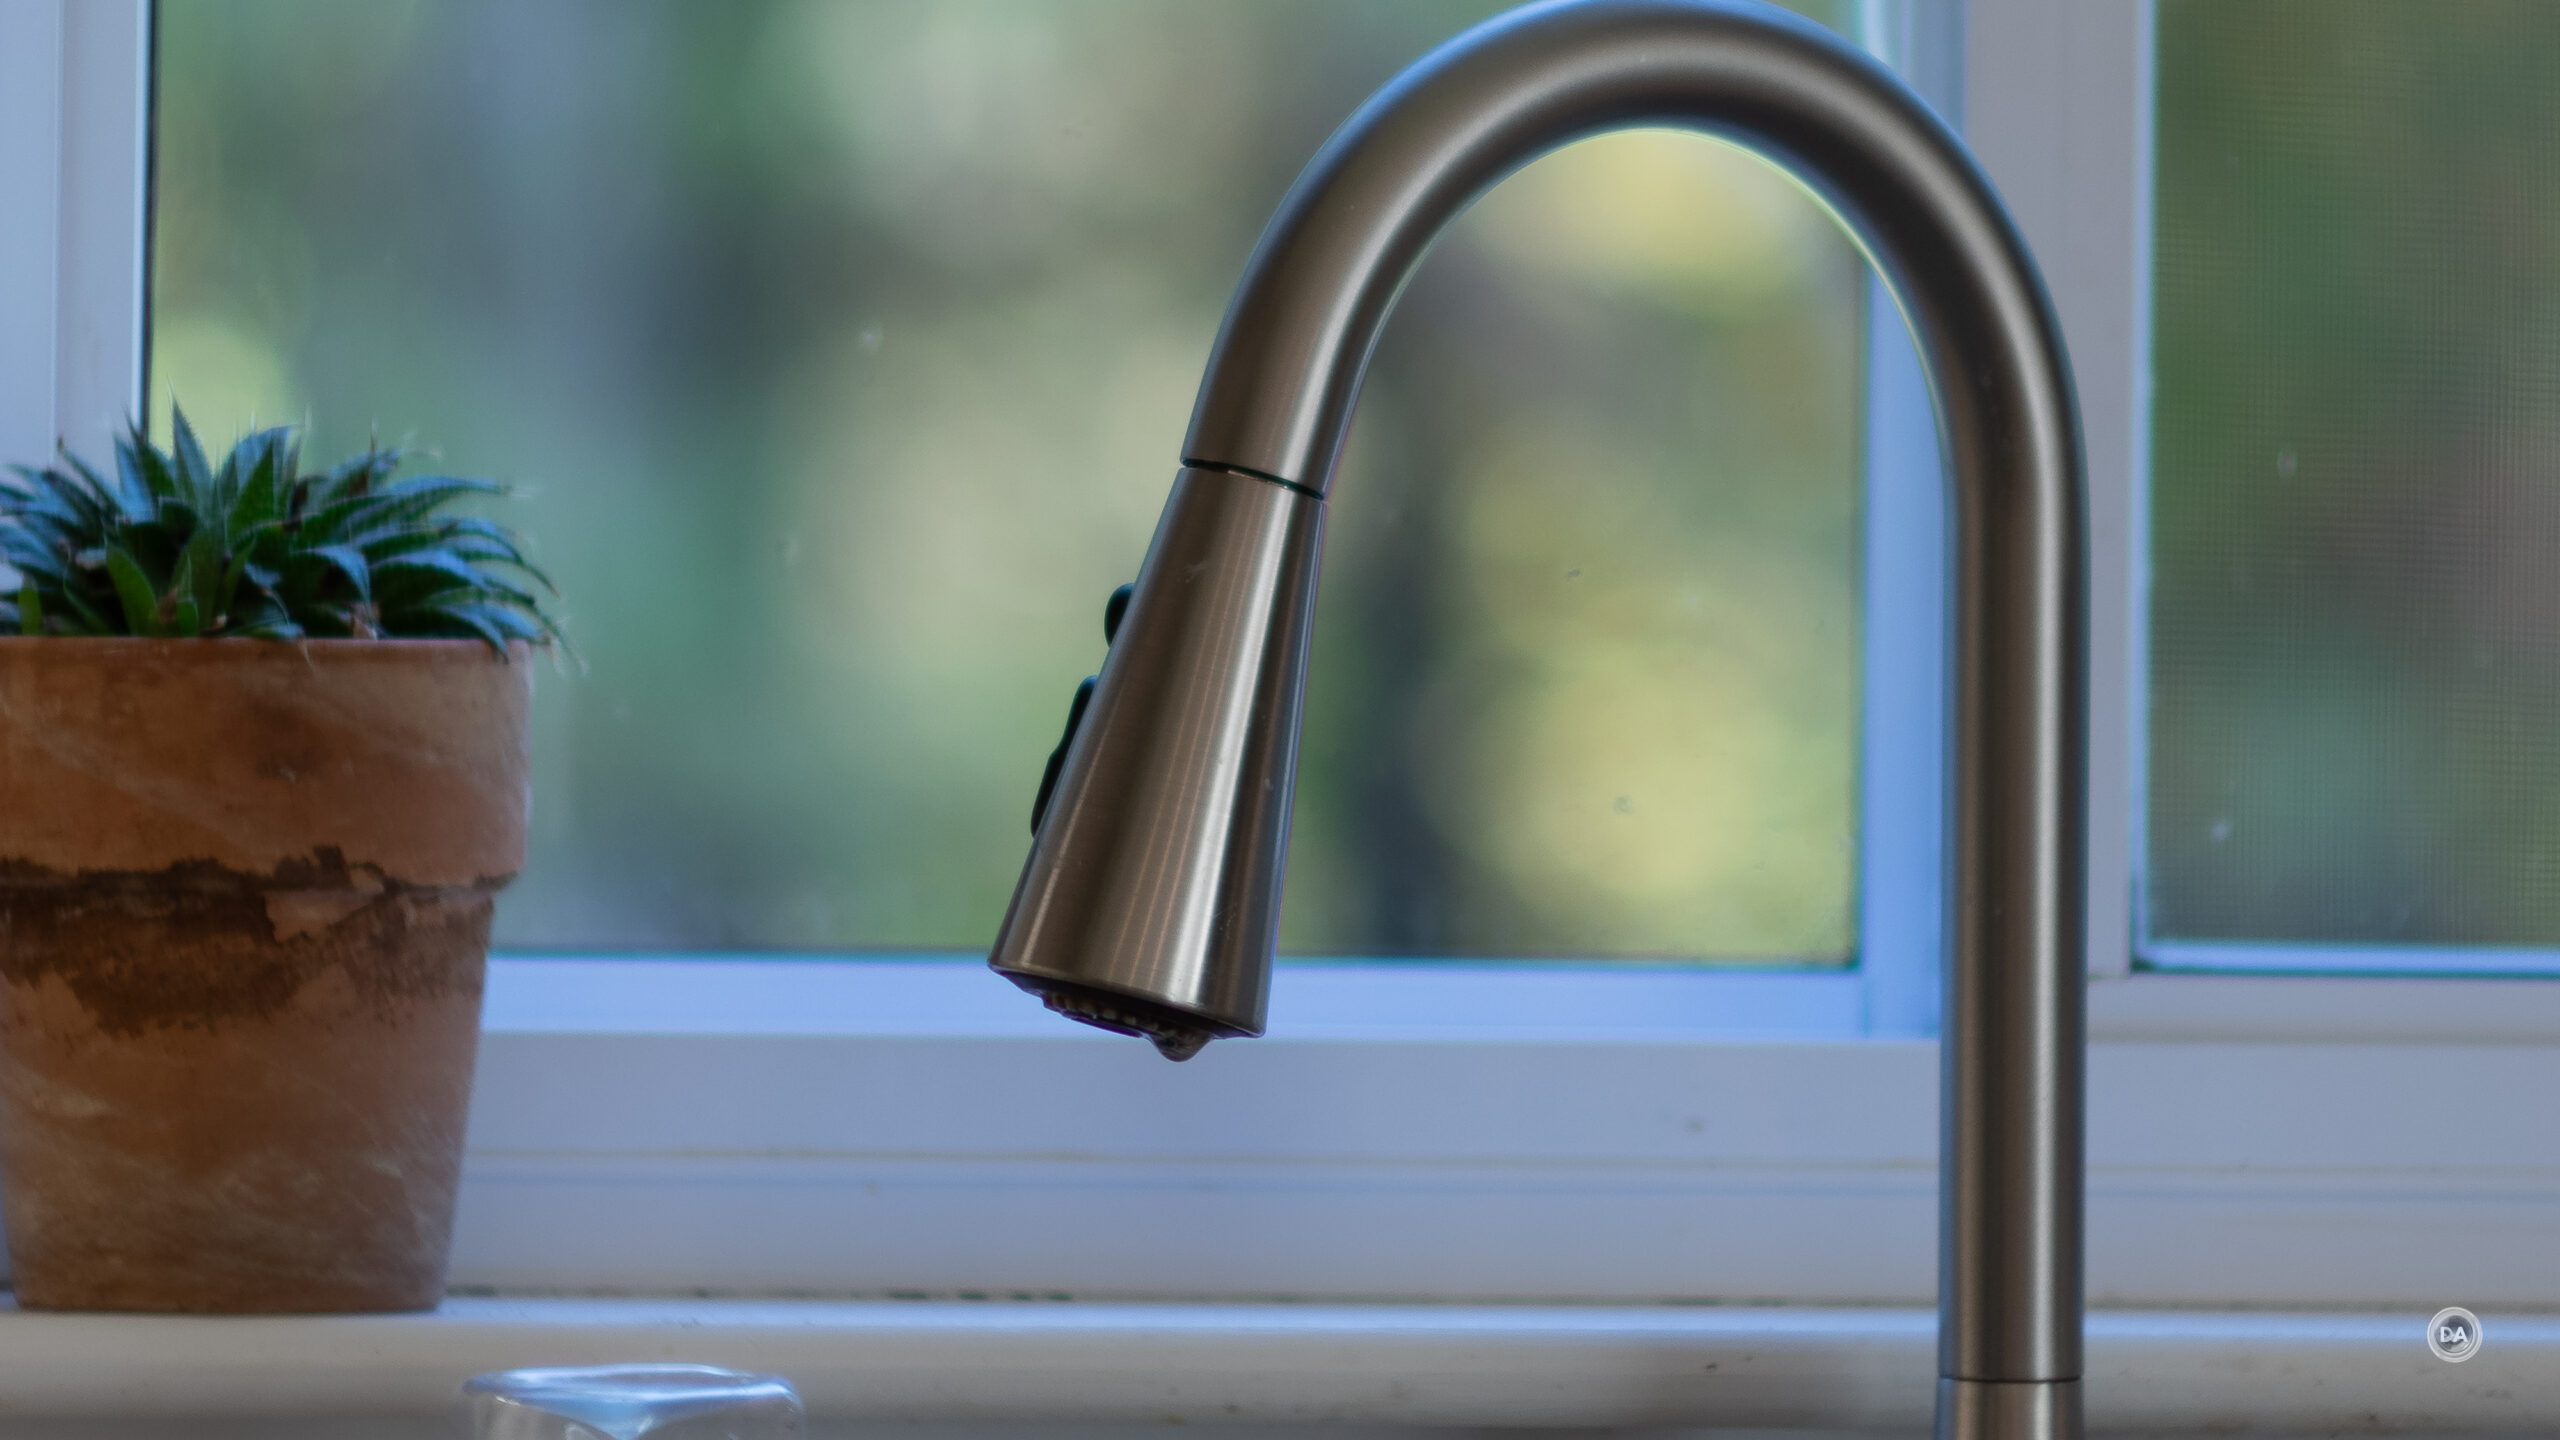
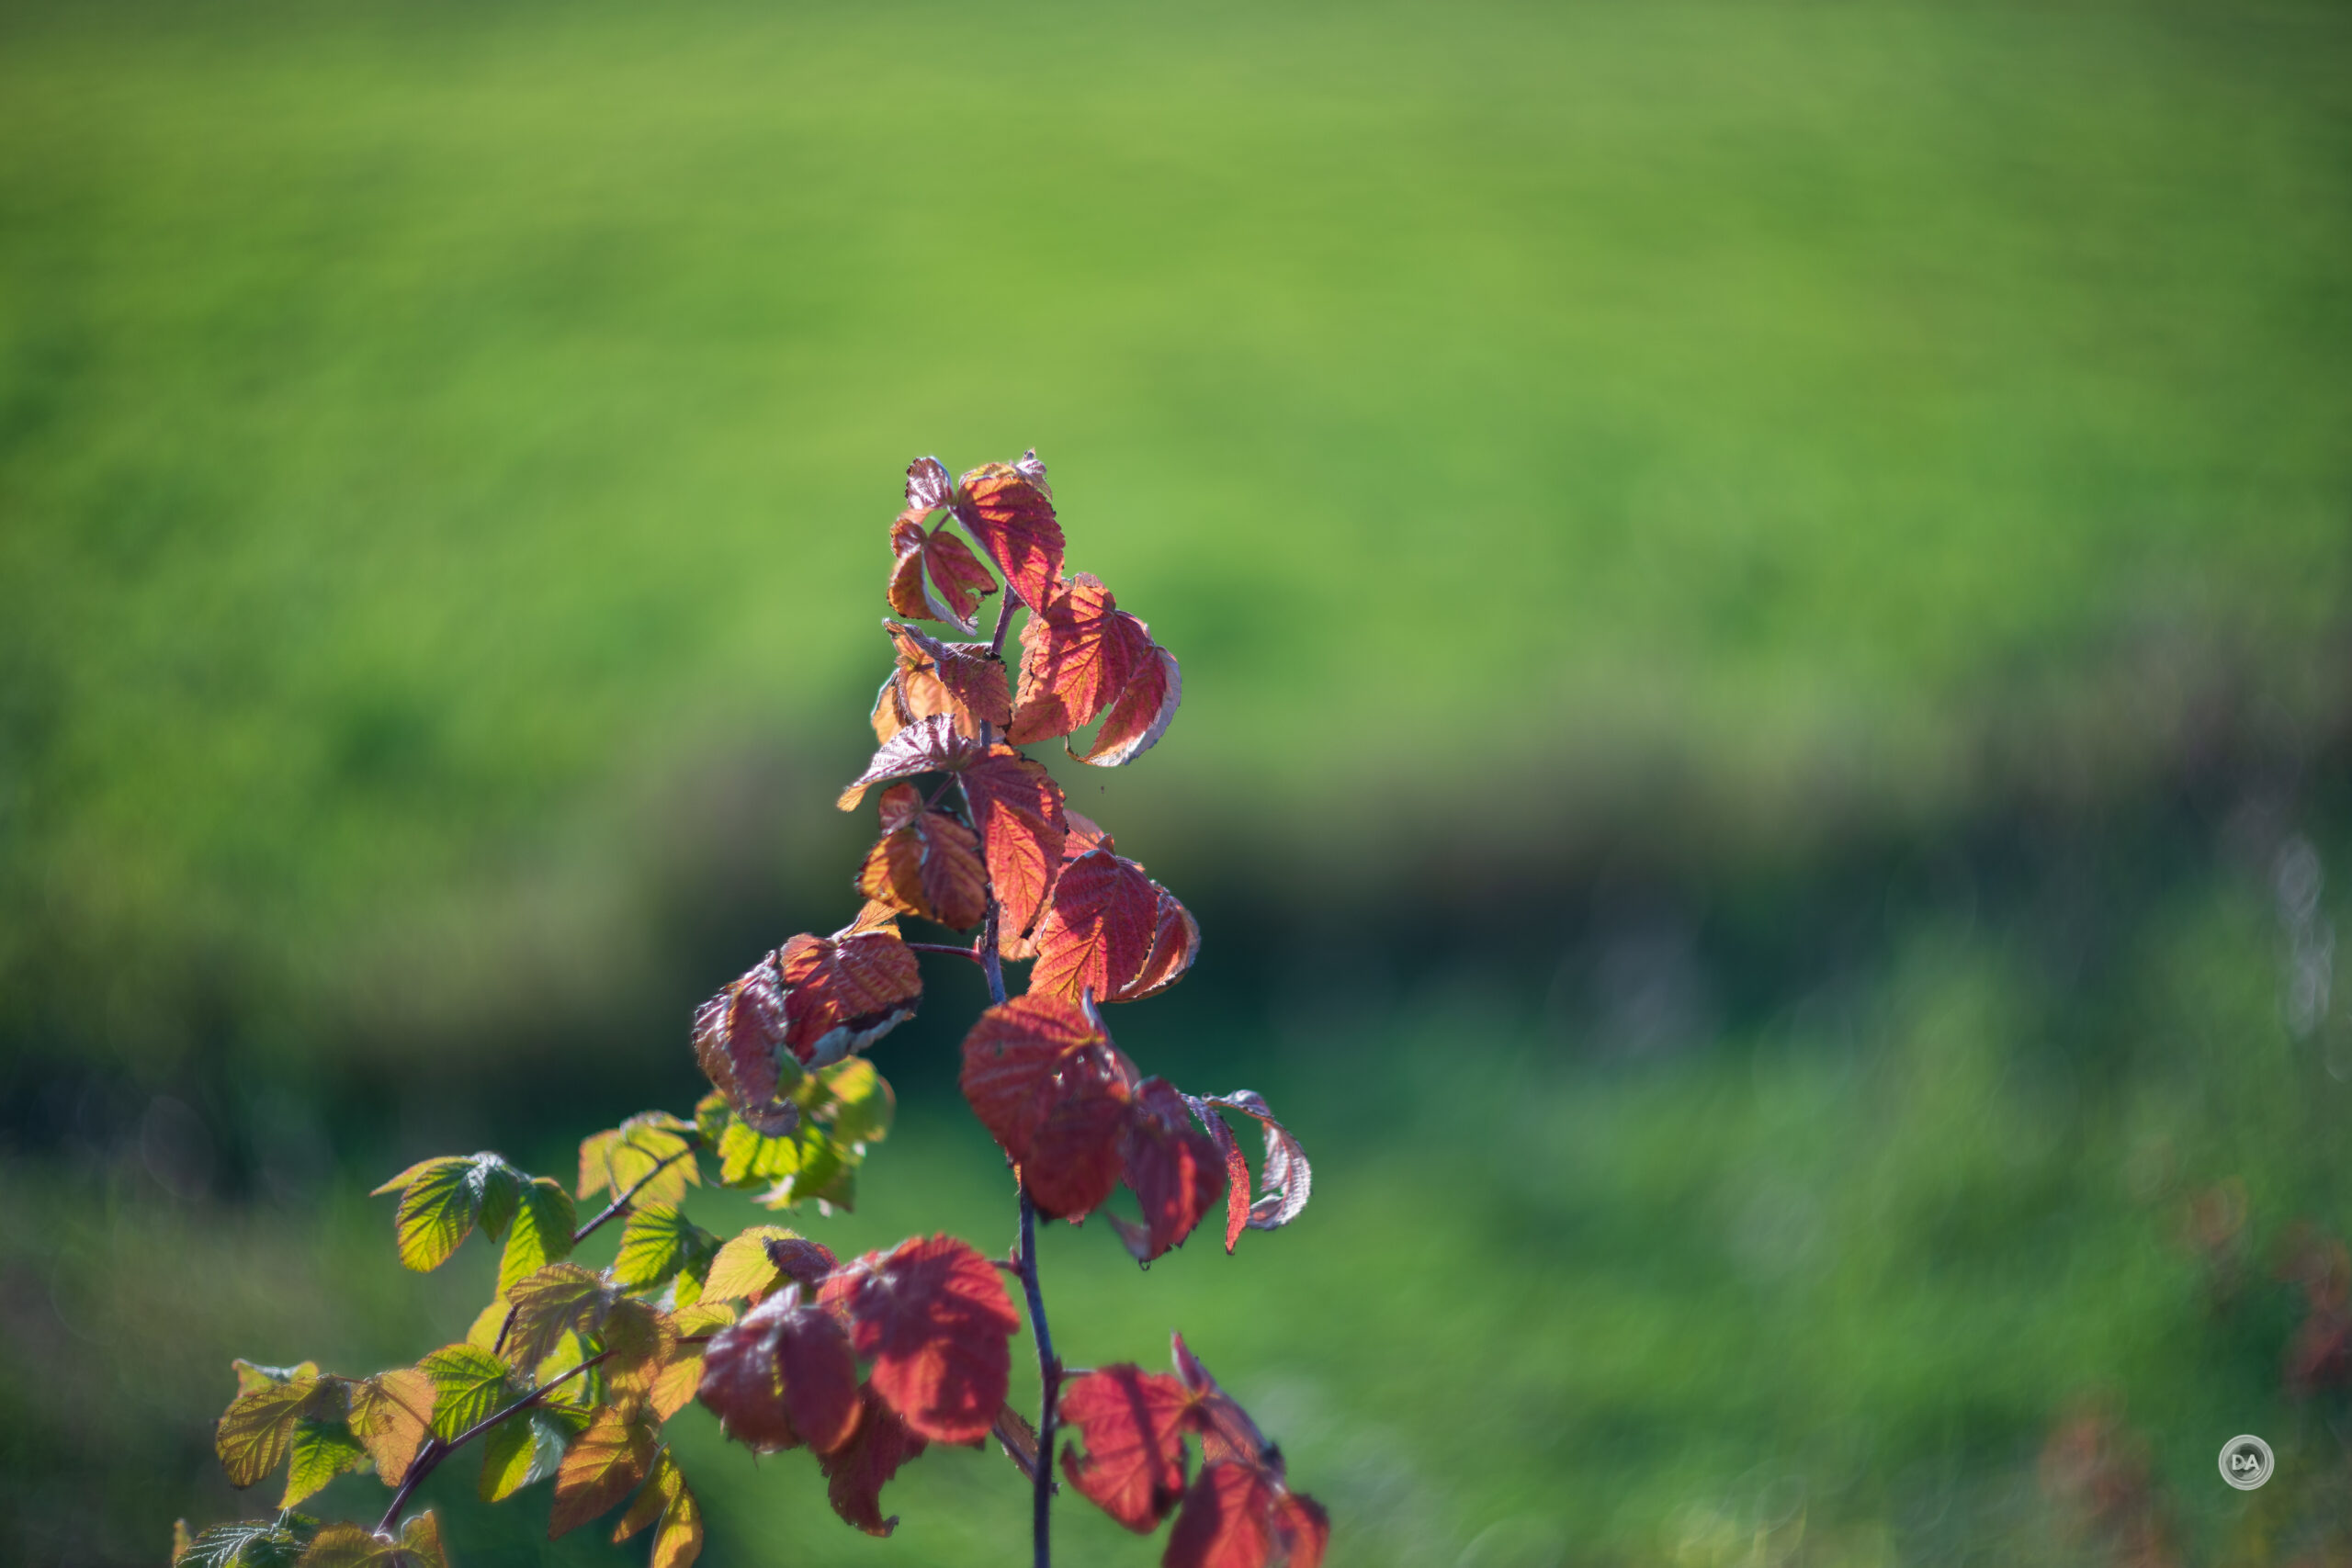
But if you are buying this lens for sharpness, you’ve missed the point. This is a lens that is more about what’s out of focus than what is in focus. So let’s talk about that bokeh. First of all, the lens is very capable of producing soft, creamy bokeh. Here’s a look at a scene where I’ve pulled focus back to minimum so everything is out of focus.
There’s actually a specific difference where the swirl is most pronounced. That will be shooting at F1.5 and a medium distance of about two meters.
If I focus further, we can see that there is relatively little swirl effect, so it really only works with the background, not the foreground.
On a practical level, this effect works best when there is something on either side of the subject to serve as the bokeh subject. Putting your subject near the center of the frame works better than composing in the rule of thirds zone, as the plane of sharpness is mostly located in the center of the frame and you can get better subject separation. I put my subject in the rule of thirds for this shot, but it doesn’t work as well.
The effect will be more pronounced with a larger sensor. Medium format users will see the biggest effect, while APS-C cameras will crop off a lot of the swirly look. You can obviously get a fair bit of the effect on full frame as well (as shown in this review).
Stop down a bit, and you can get a more conventional image, like this:
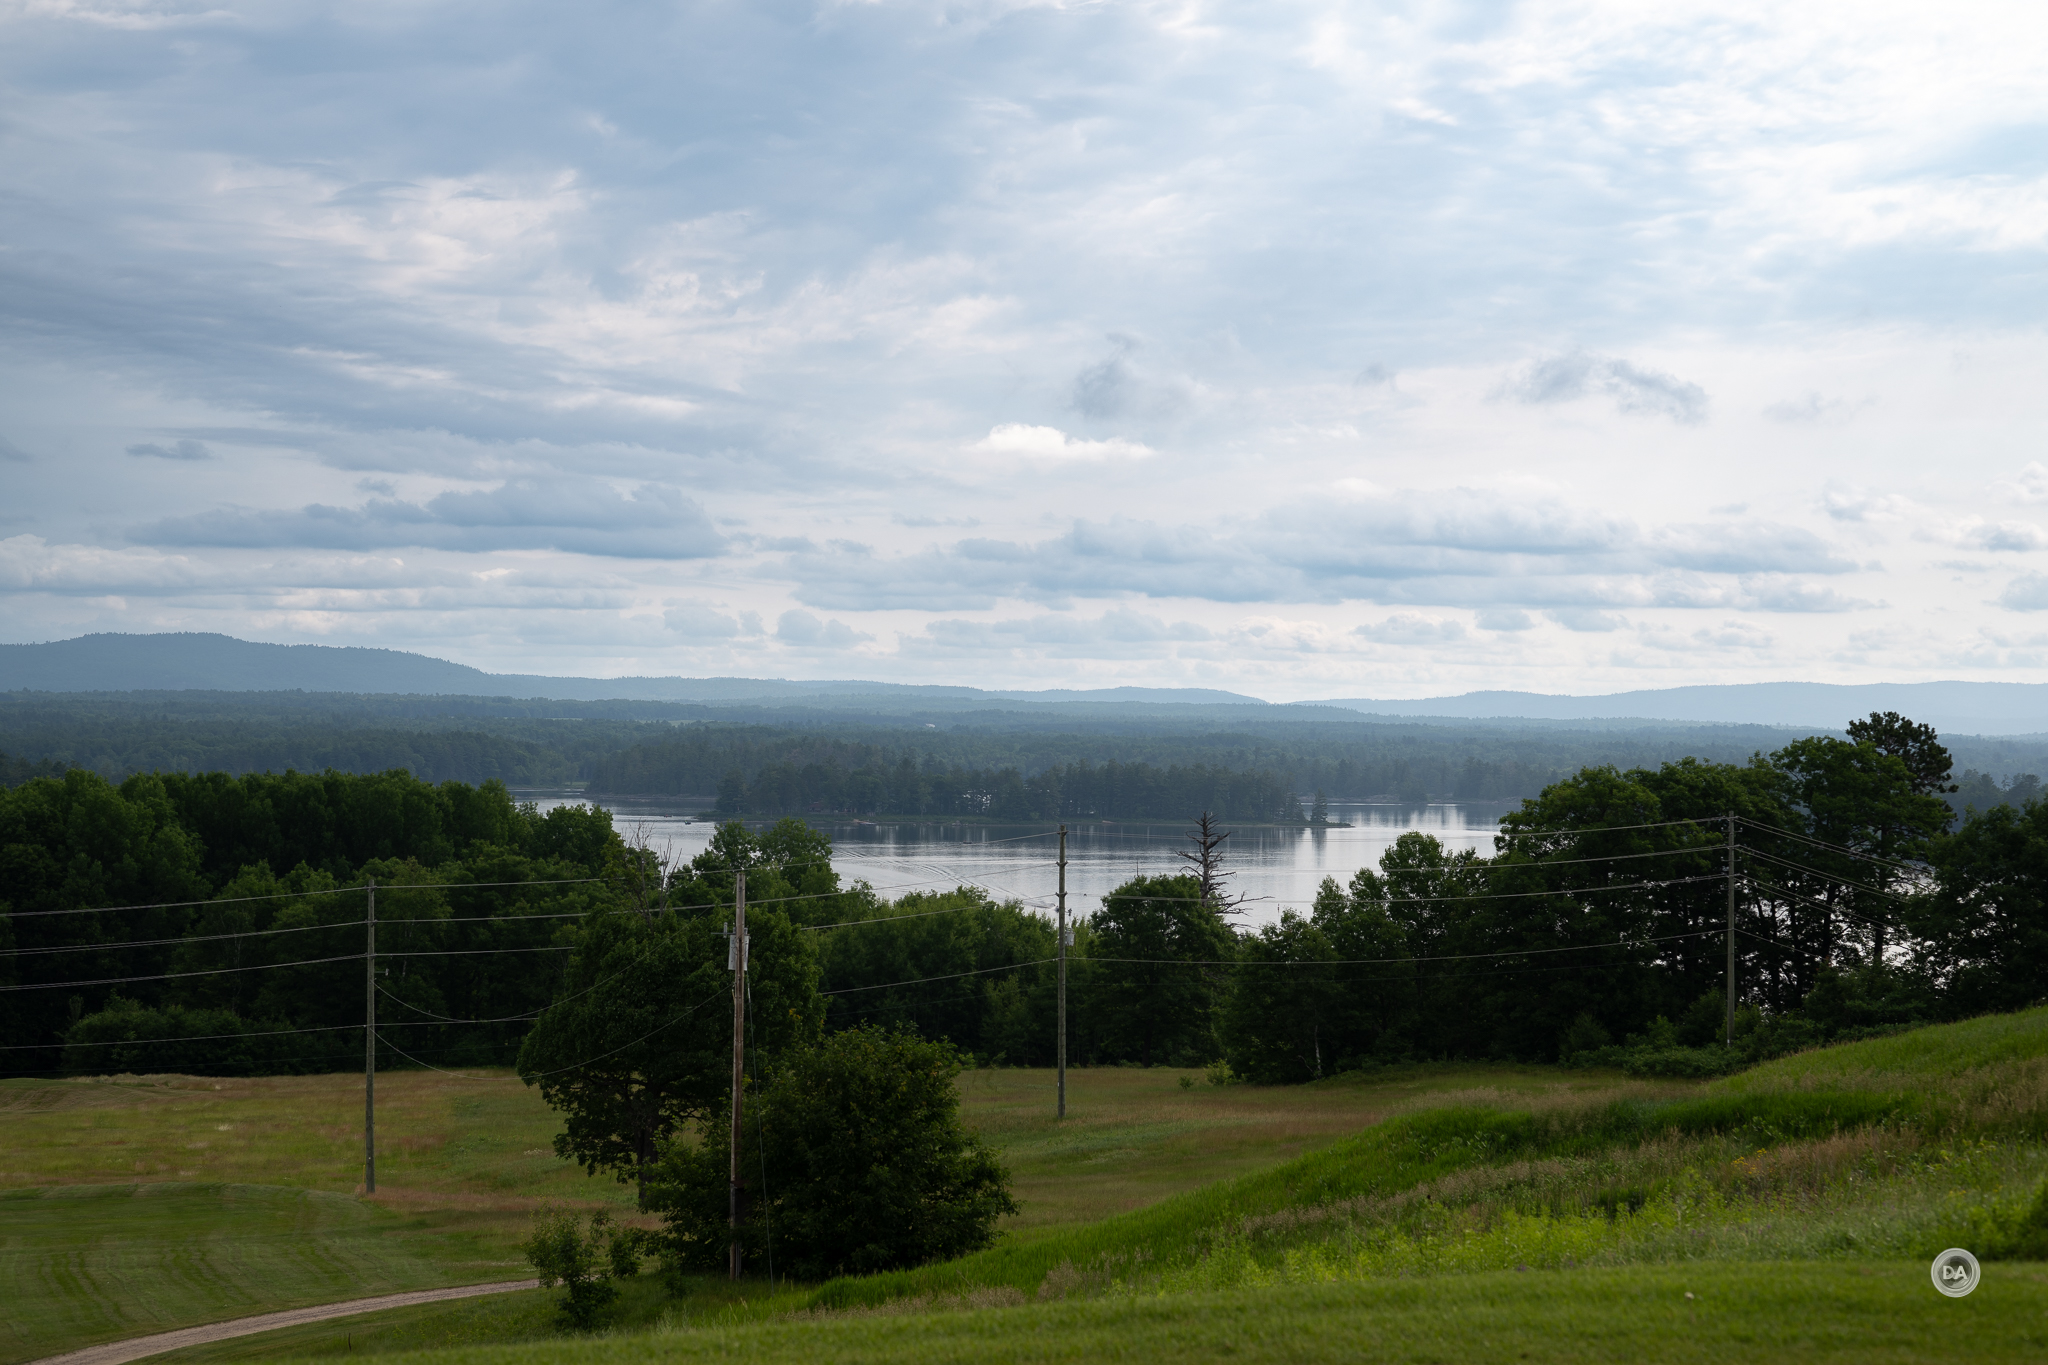
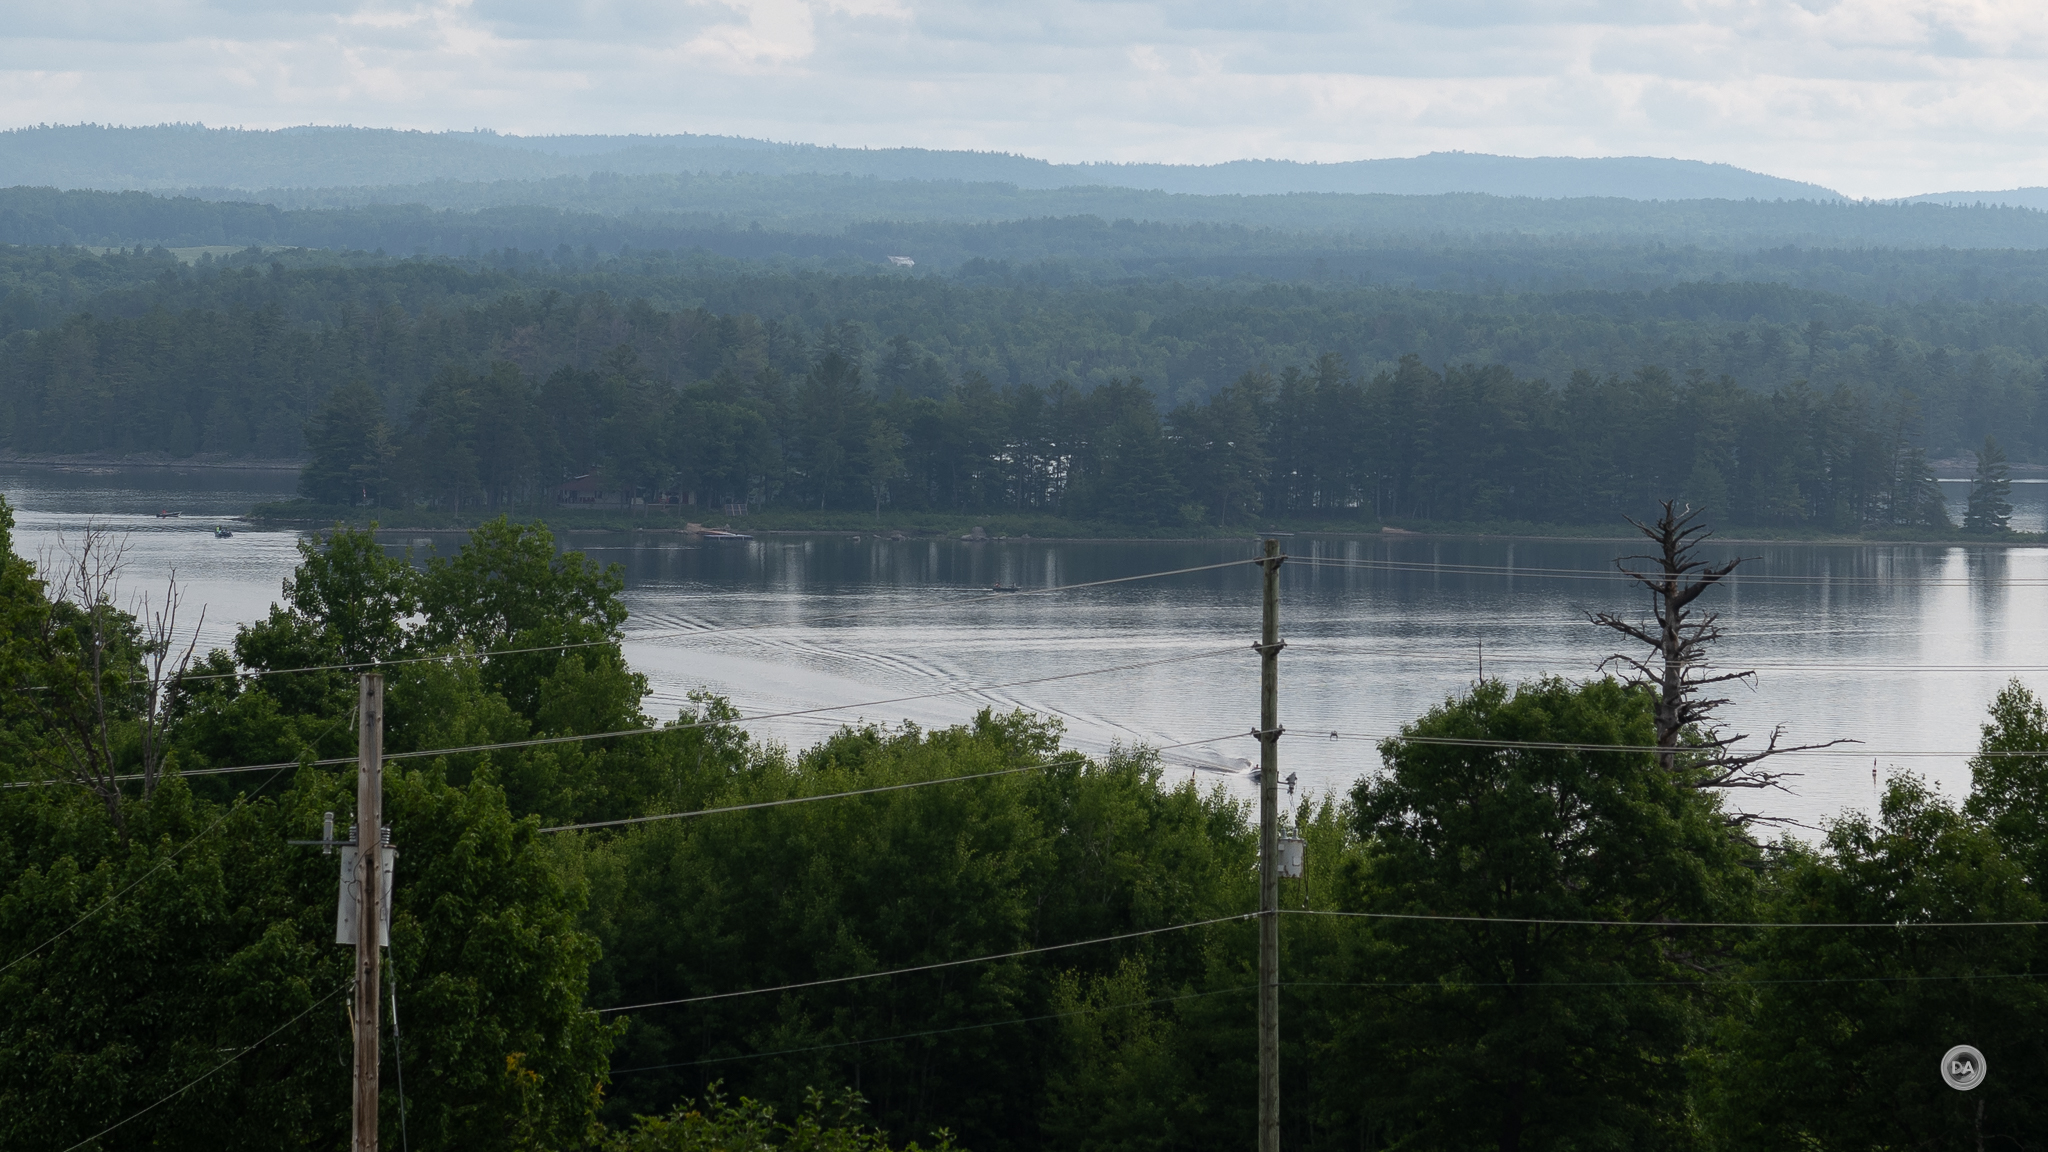
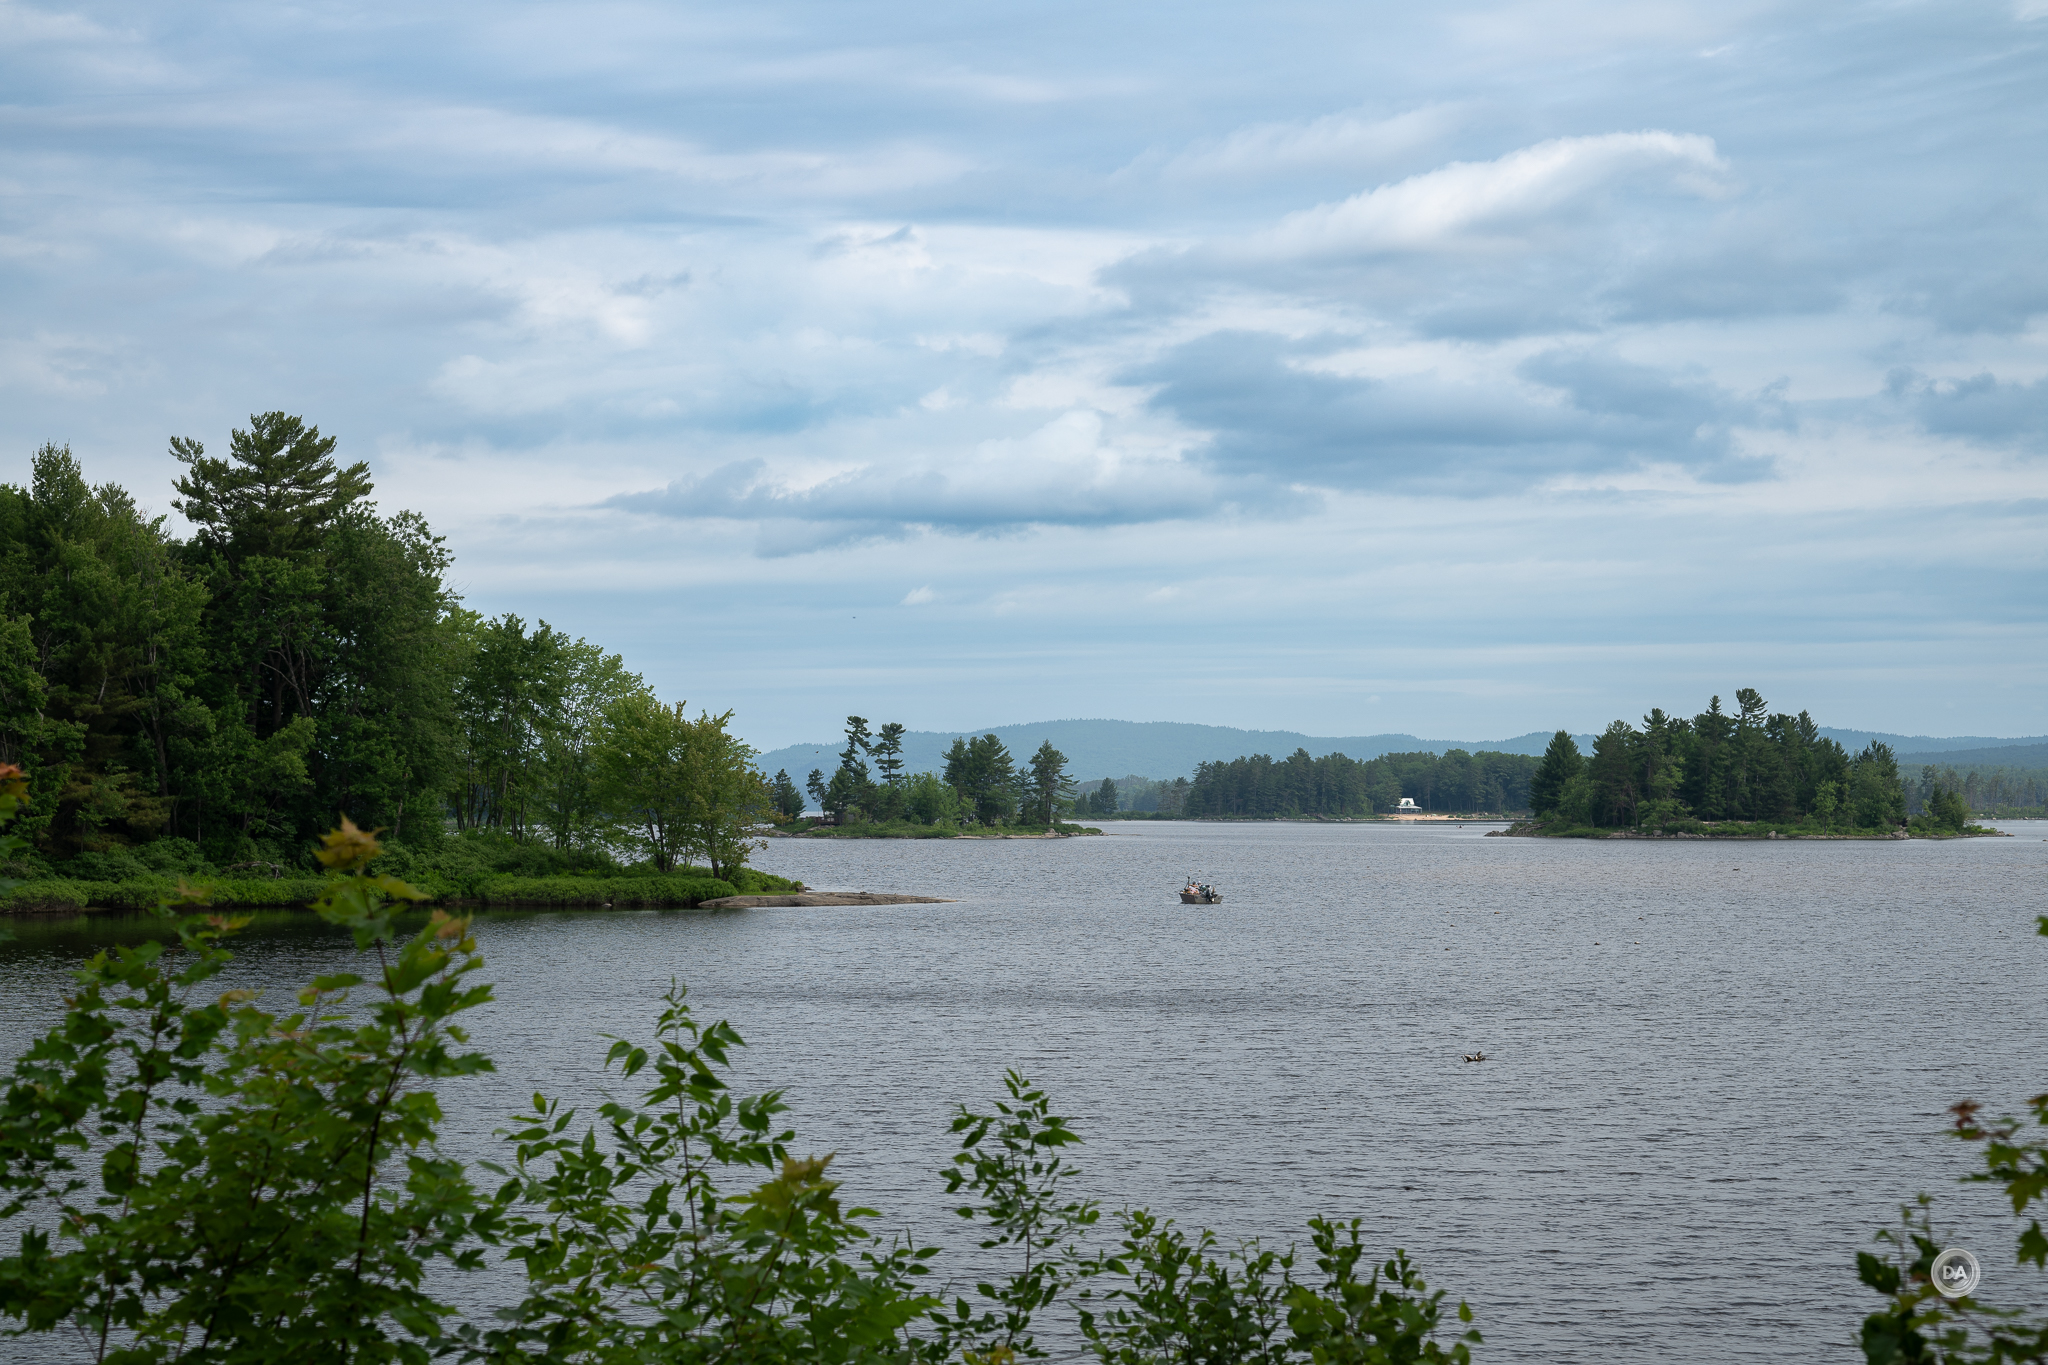
Likewise for landscape shots. Shooting at F5.6 or F8 makes for a pretty conventional looking image.
Flare results are going to be situational. In certain positions there’s a general veiling over a shot, like this:
At wider apertures you may see a ghosting artifact like this:
At its best, you can get some fairly artistic effects that really go along with the vintage charm of the lens.
I would say the results are generally better than some of the vintage glass I’ve used, but not as corrected as a modern lens with effective coatings.
I would say that color is good in most situations. Here, for example, it looks great:
It’s also great here.
But if you are shooting high contrast scenes at large apertures, the general lack of contrast can make colors look a little dull.
I would say that this is both part of the charm and the liability of a lens with vintage sensibilities. Use the TTArtisan 75mm F1.5 “Swirl” to its strengths, and you can get much more interesting images than a conventional lens. Use it poorly, and you’ll just get low contrast, mushy images that neither you or your audience will enjoy. You can see more images by visiting the lens image gallery here.
Conclusion
I’ve definitely intentionally sought out some of the “swirl” lenses myself in the past. It is great to see TTArtisan bringing back some of these fun and interesting optics to a modern audience in the TTArtisan 75mm F1.5.
This lens has to be evaluated with a different set of criteria than my typical lens review, because by definition this swirl lens in embracing certain optical flaws that make for visually interesting results.
Yes, you can get conventional looking results with this lens at small apertures, but that’s not really the reason to buy it.
The real reason to buy this lens is to fully embrace the swirly flaws and to shoot the kinds of images you’ll never get with almost all modern lenses. And with a price tag of just $270 USD, you don’t have to break the bank to get it. Just remember to pick up a cheap adapter for your preferred mount if you don’t already have one!
Pros:
The swirl!
Nicely built lens
Well executed focus and aperture rings
Low distortion
Bright aperture
Good sharpness when stopped down
Nice color in some situations
Unique and special rendering
Much cheaper than trying to find a vintage lens that does the same thing
Keywords: TTArtisan, 75mm, F1.5, swirl, swirly bokeh, TTArtisan 75mm review, M42, Sony Alpha 1, Sony a7RV, Fuji, Nikon, Canon, Review, mirrorless, Full Frame, Sports, Tracking, Dustin Abbott, Real World, Comparison, Handling, Focus, Portraits, Resolution, High ISO, Image Quality, Sample Images, Photography, 61MP, #letthelightin, #DA, #Alpha1, #A7RV
DISCLAIMER: This article and description contains affiliate links, which means that if you click on one of the product links, I’ll receive a small commission. As an Amazon Associate I earn from qualifying purchases.
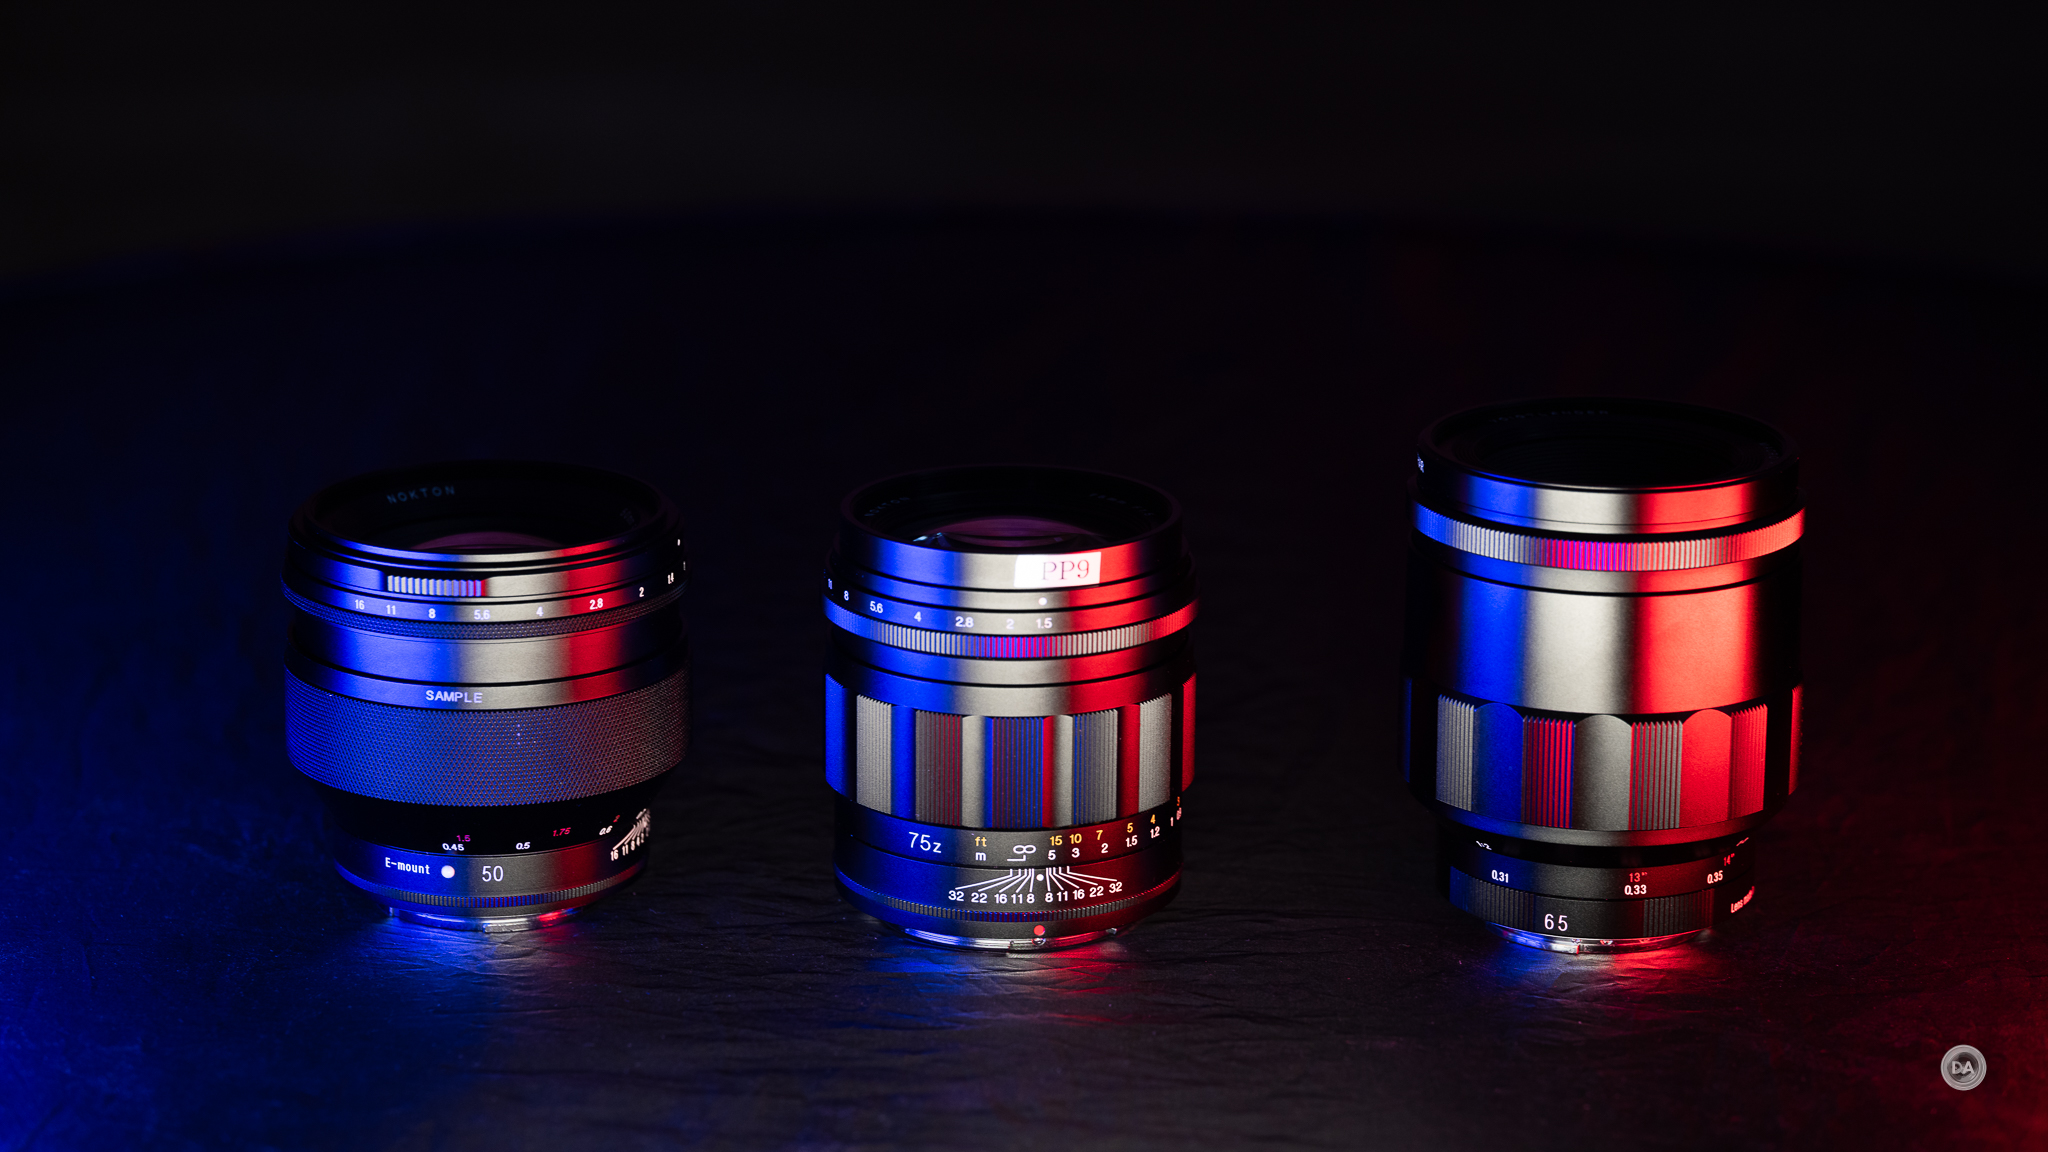
Ahhh, it is nice to be reviewing another Voigtländer lens! My last Voigtländer review was back in 2020, and it was actually a review of the APO-Lanthar 50mm F2 that a subscriber had personally loaned me because I had no access to Voigtländer products here in Canada because of their not having a Canadian distributor (at least that I was aware of) and a complication with sending their products across the border from the US. Fortunately that has all changed for the better, and early this year I received an email that I was very happy to get – a “hello” from JCL Sales Group, the distributor for Voigtländer in Canada. They wanted to know if I was interested in doing more Voigtländer reviews, to which I responded, “absolutely!”
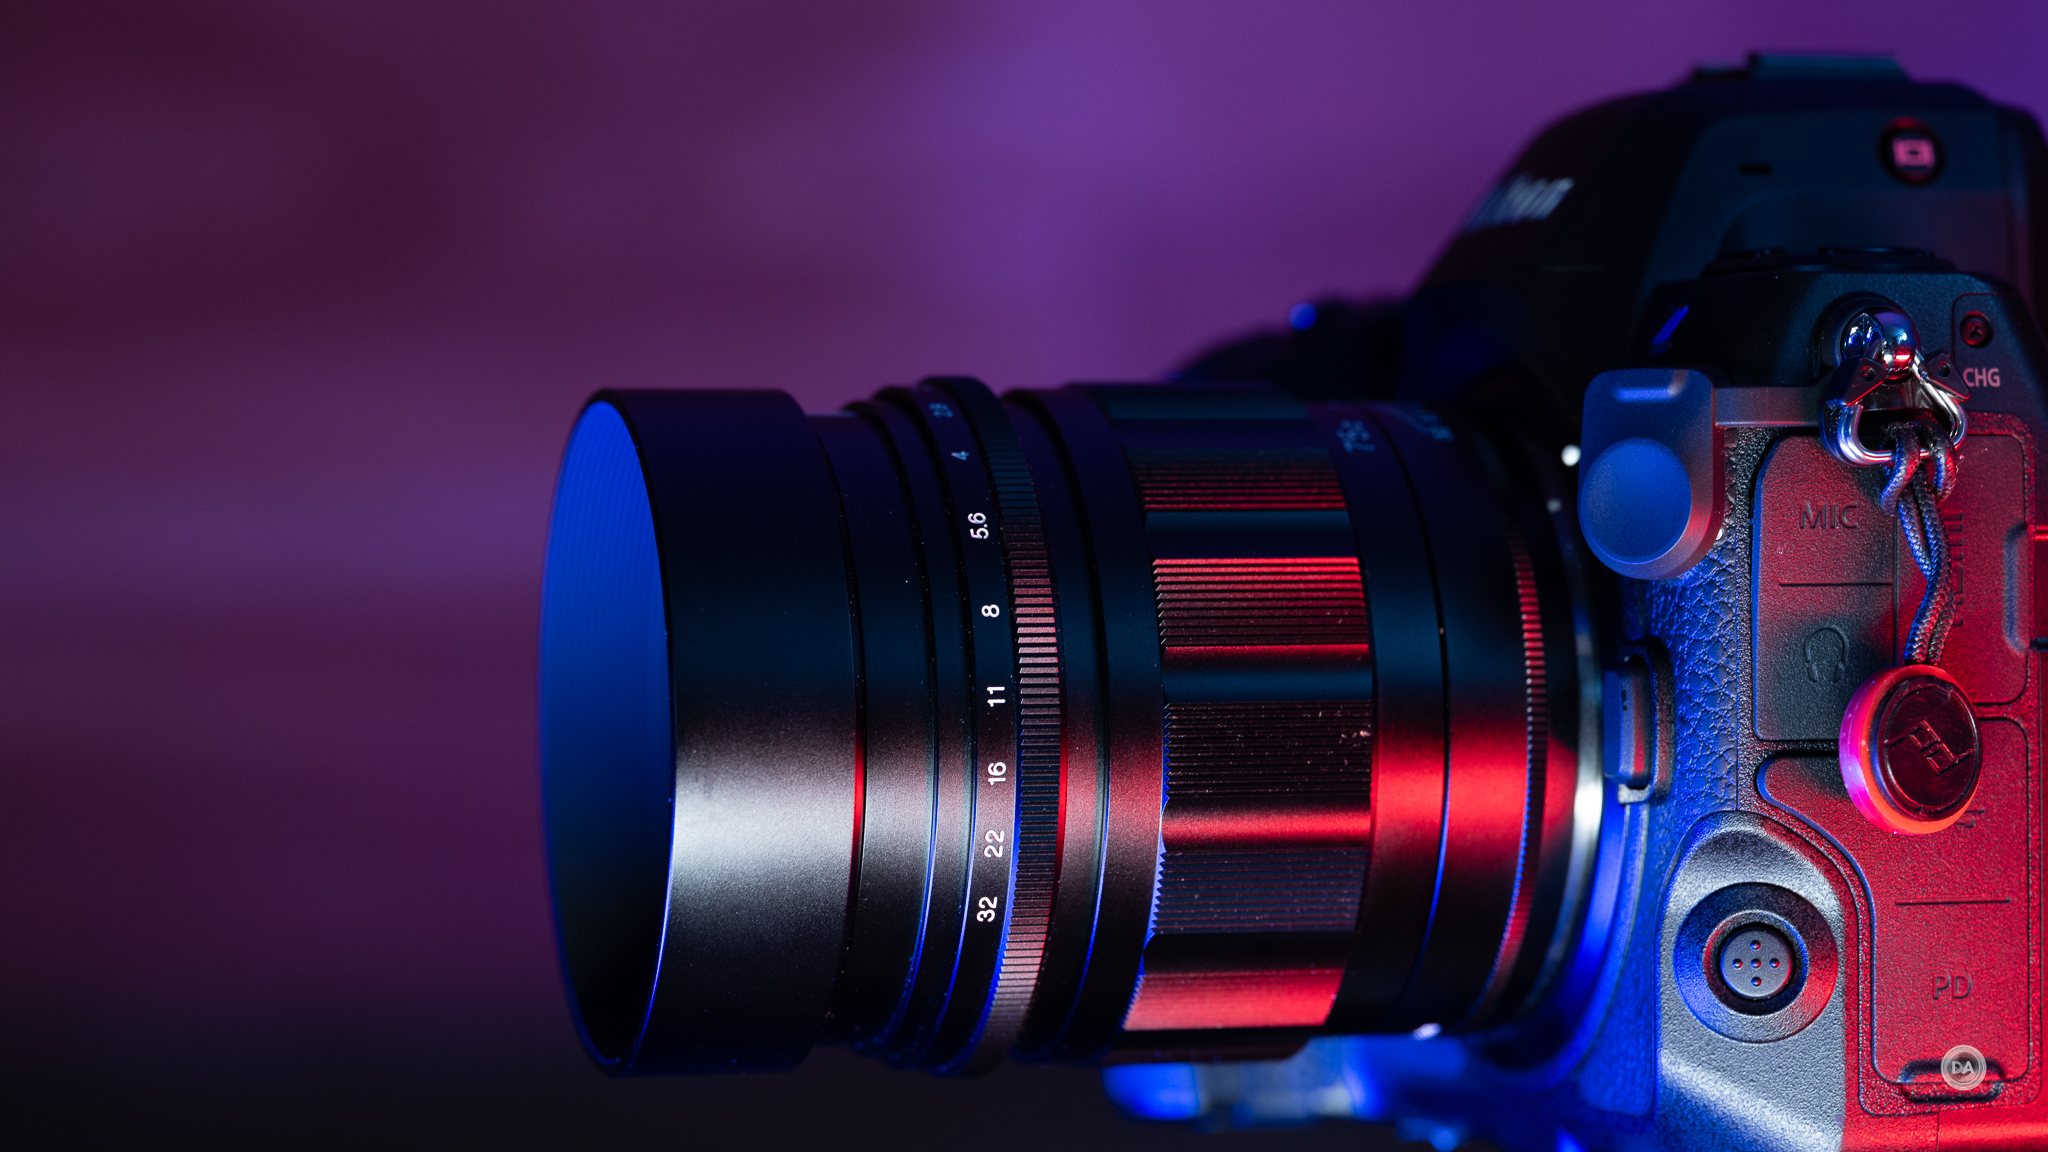
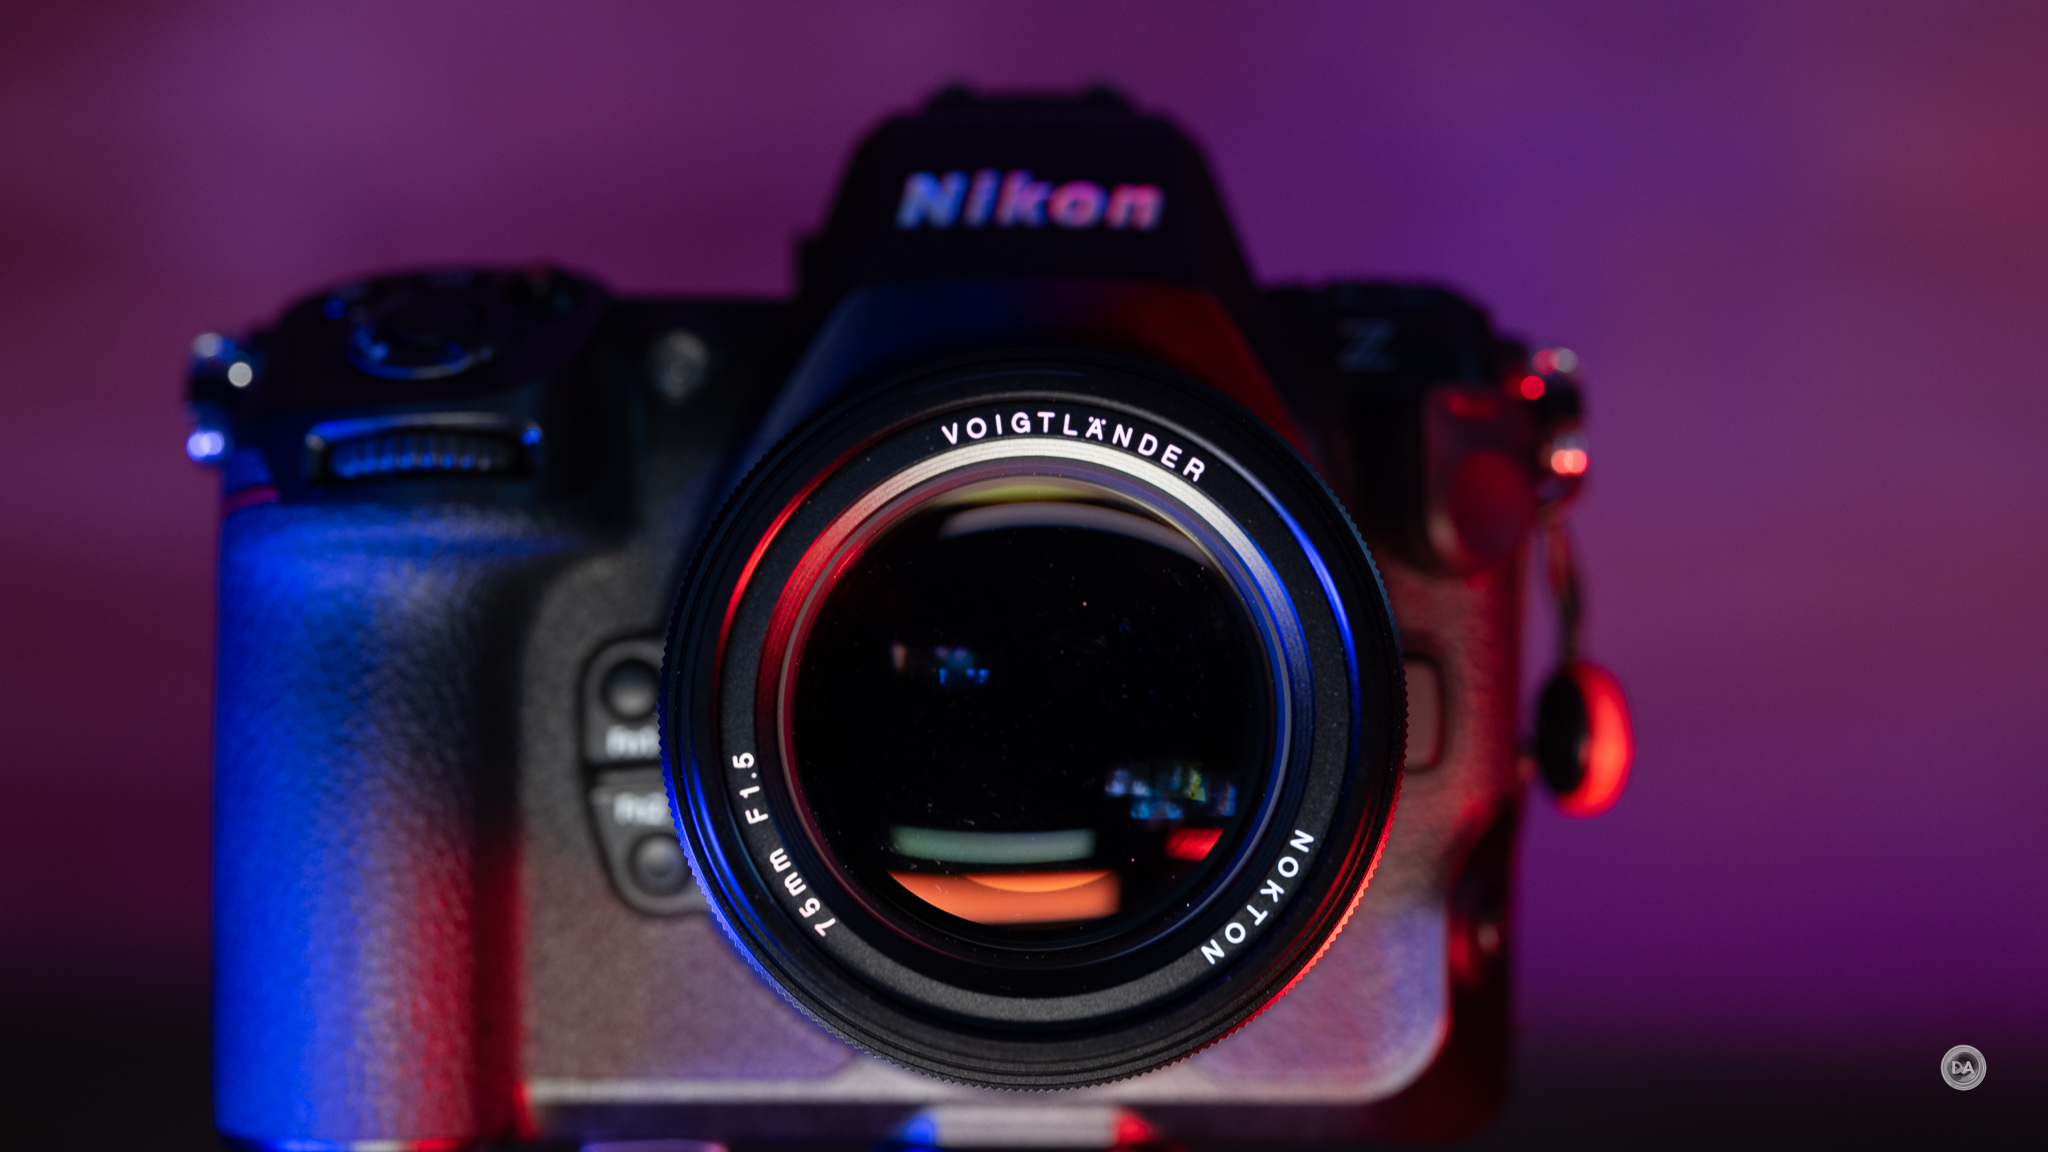
I’ve got a bit of soft spot for Voigtländer lenses, having owned three of them and currently using one that I do own (APO-Lanthar 65mm F2 Macro) on a regular basis. That has only grown since Zeiss has seemingly transitioned away from producing non-cine camera lenses, leaving Voigtländer as the only company filling that unique niche of premium manual focus lenses. Voigtländer is actually the oldest surviving lens maker, and is a company that traces its roots to Vienna, Austria, in the mid 1700s. Like Zeiss (a German company), the more modern lenses have been produced in Japan by Cosina, and there is just something special about their optical glass that produces gorgeous colors. Today’s review is of one of their newest lenses – the Voigtländer Nokton 75mm F1.5. I’m reviewing it in Nikon Z-mount, though I know that a Sony E-mount (and perhaps other mounts) are on the way. If you want my full thoughts on this lovely new lens, you can either watch my video review below…or just keep reading.
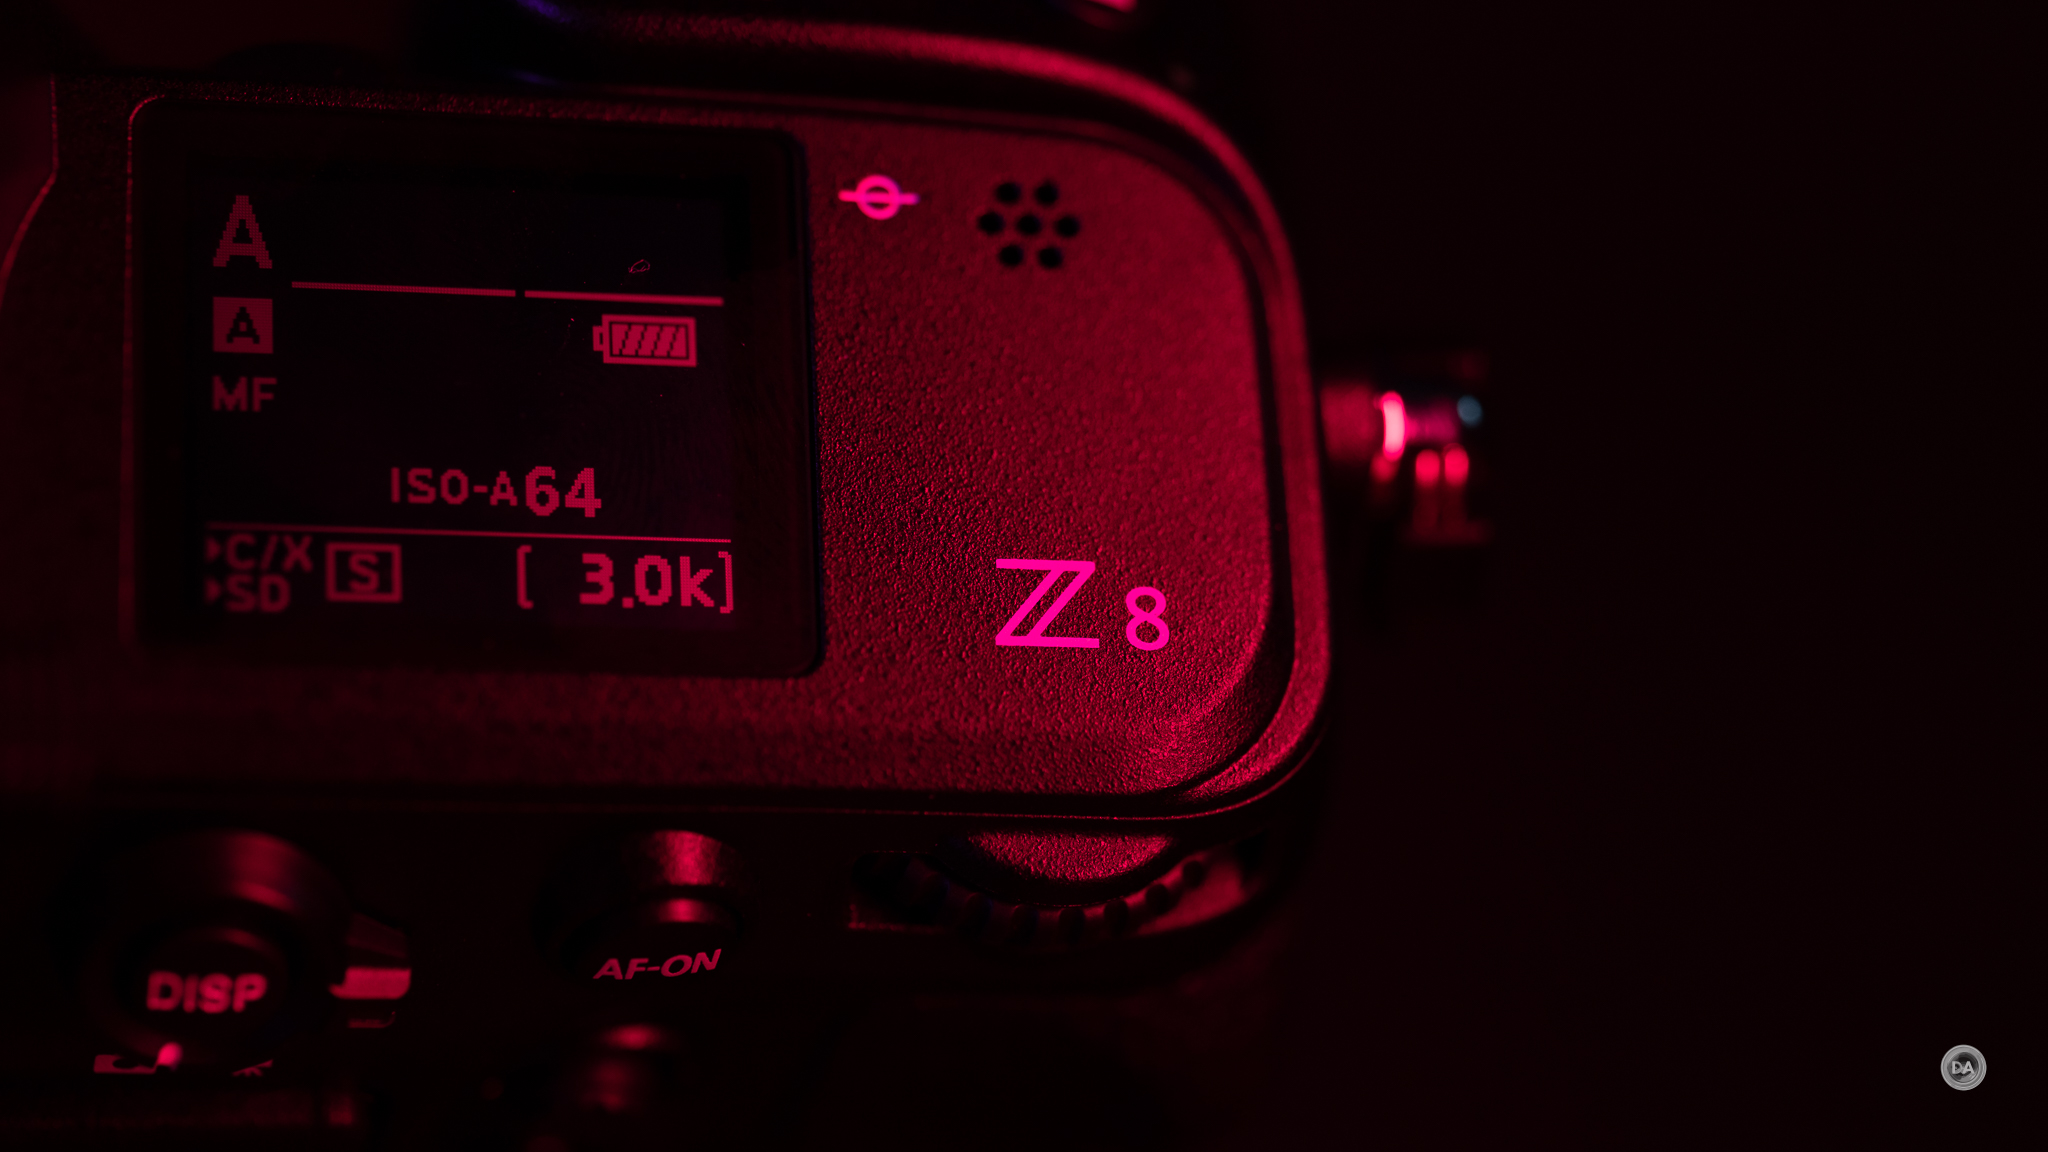
Thanks to JCL Sales Group for sending me a review loaner of this lens. As always, this is a completely independent review. All opinions and conclusions are my own.*The tests and most of the photos that I share as a part of my review cycle have been done with the 45MP Nikon Z8, which I reviewed here.
Voigtländer lenses follow a tried and true formula that has been true across the four different mounts that I’ve tested them on. This includes a premium build that is all metal and glass, well executed aperture and focus rings, electronic contacts to communicate EXIF data and to enable more manual focus aids, but no weather sealing. Their lenses tend to be more like classic Zeiss lenses in build but typically smaller and less extreme in size. All of this is true here, and while the Nokton 75mm isn’t a small lens, it is only moderately sized.
There are two aspects of Voigtländer lenses that I enjoy: 1) the beautiful manual focus action and 2) the uniquely beautiful rendering and image quality.
So is the new Nokton 75mm F1.5 worth the roughly $900 USD price tag? Read on to find out.
Build and Handling
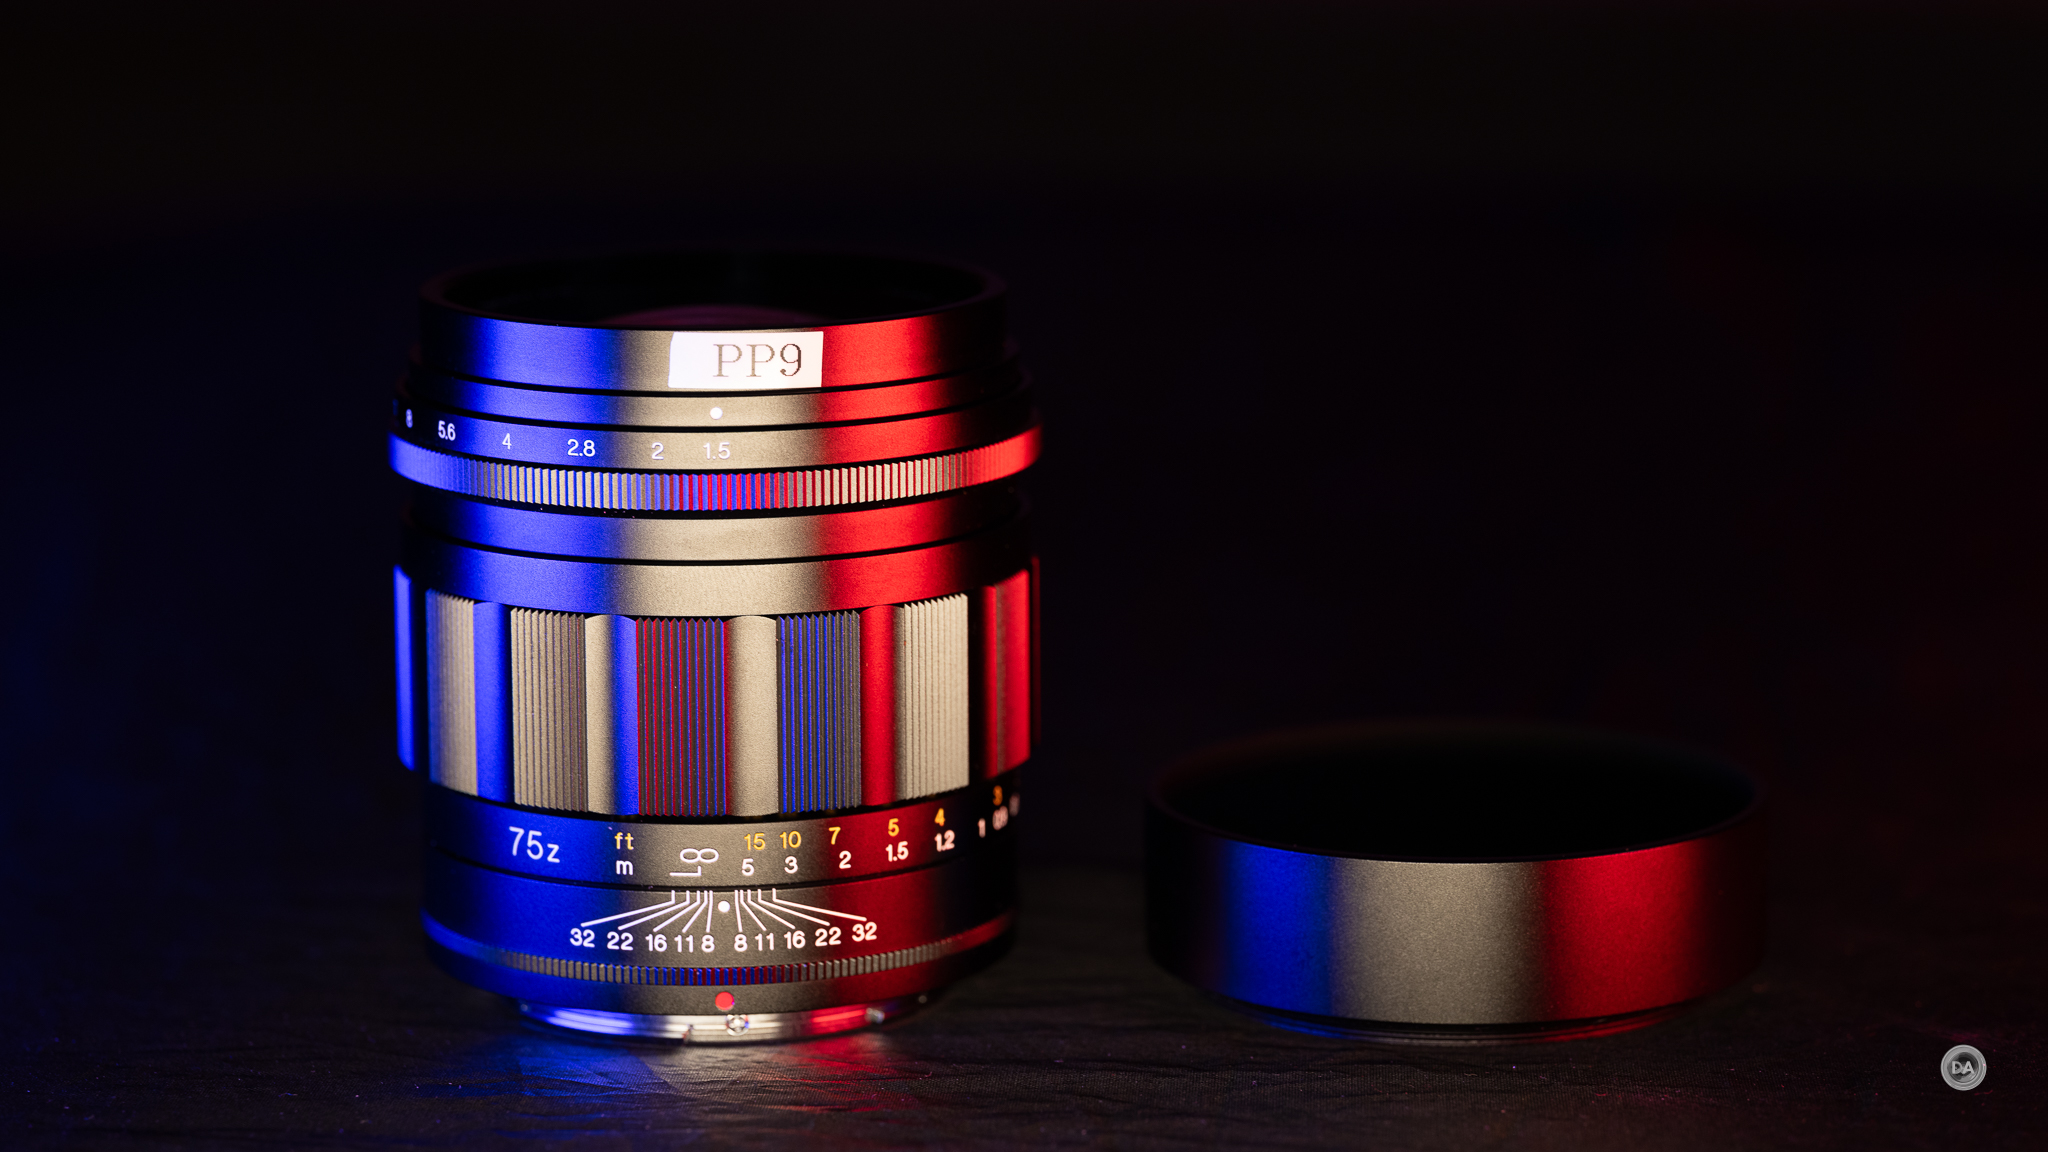
There are essentially two different variations of the Voigtländer design language in use right now. We have a classic “knurled” style to the manual focus ring as seen on this Nokton 75mm F1.5 (and my older APO-Lanthar 65mm F2) and then also a diamond pattern grip surface seen on the Nokton 50mm F1.0 (shown here in Sony e-Mount).
The Nokton 75mm is the classic anodized metal look that is broken up by 3 different textured grip surfaces. Closest to the lens mount in a thin ring of ridges that is just a textured area for grabbing the lens and twisting it to remove it from the mount. This area is not moveable.
This section of the barrel also has the hyperfocal markings from F8 to F32 for those who like to utilize that method for focus.
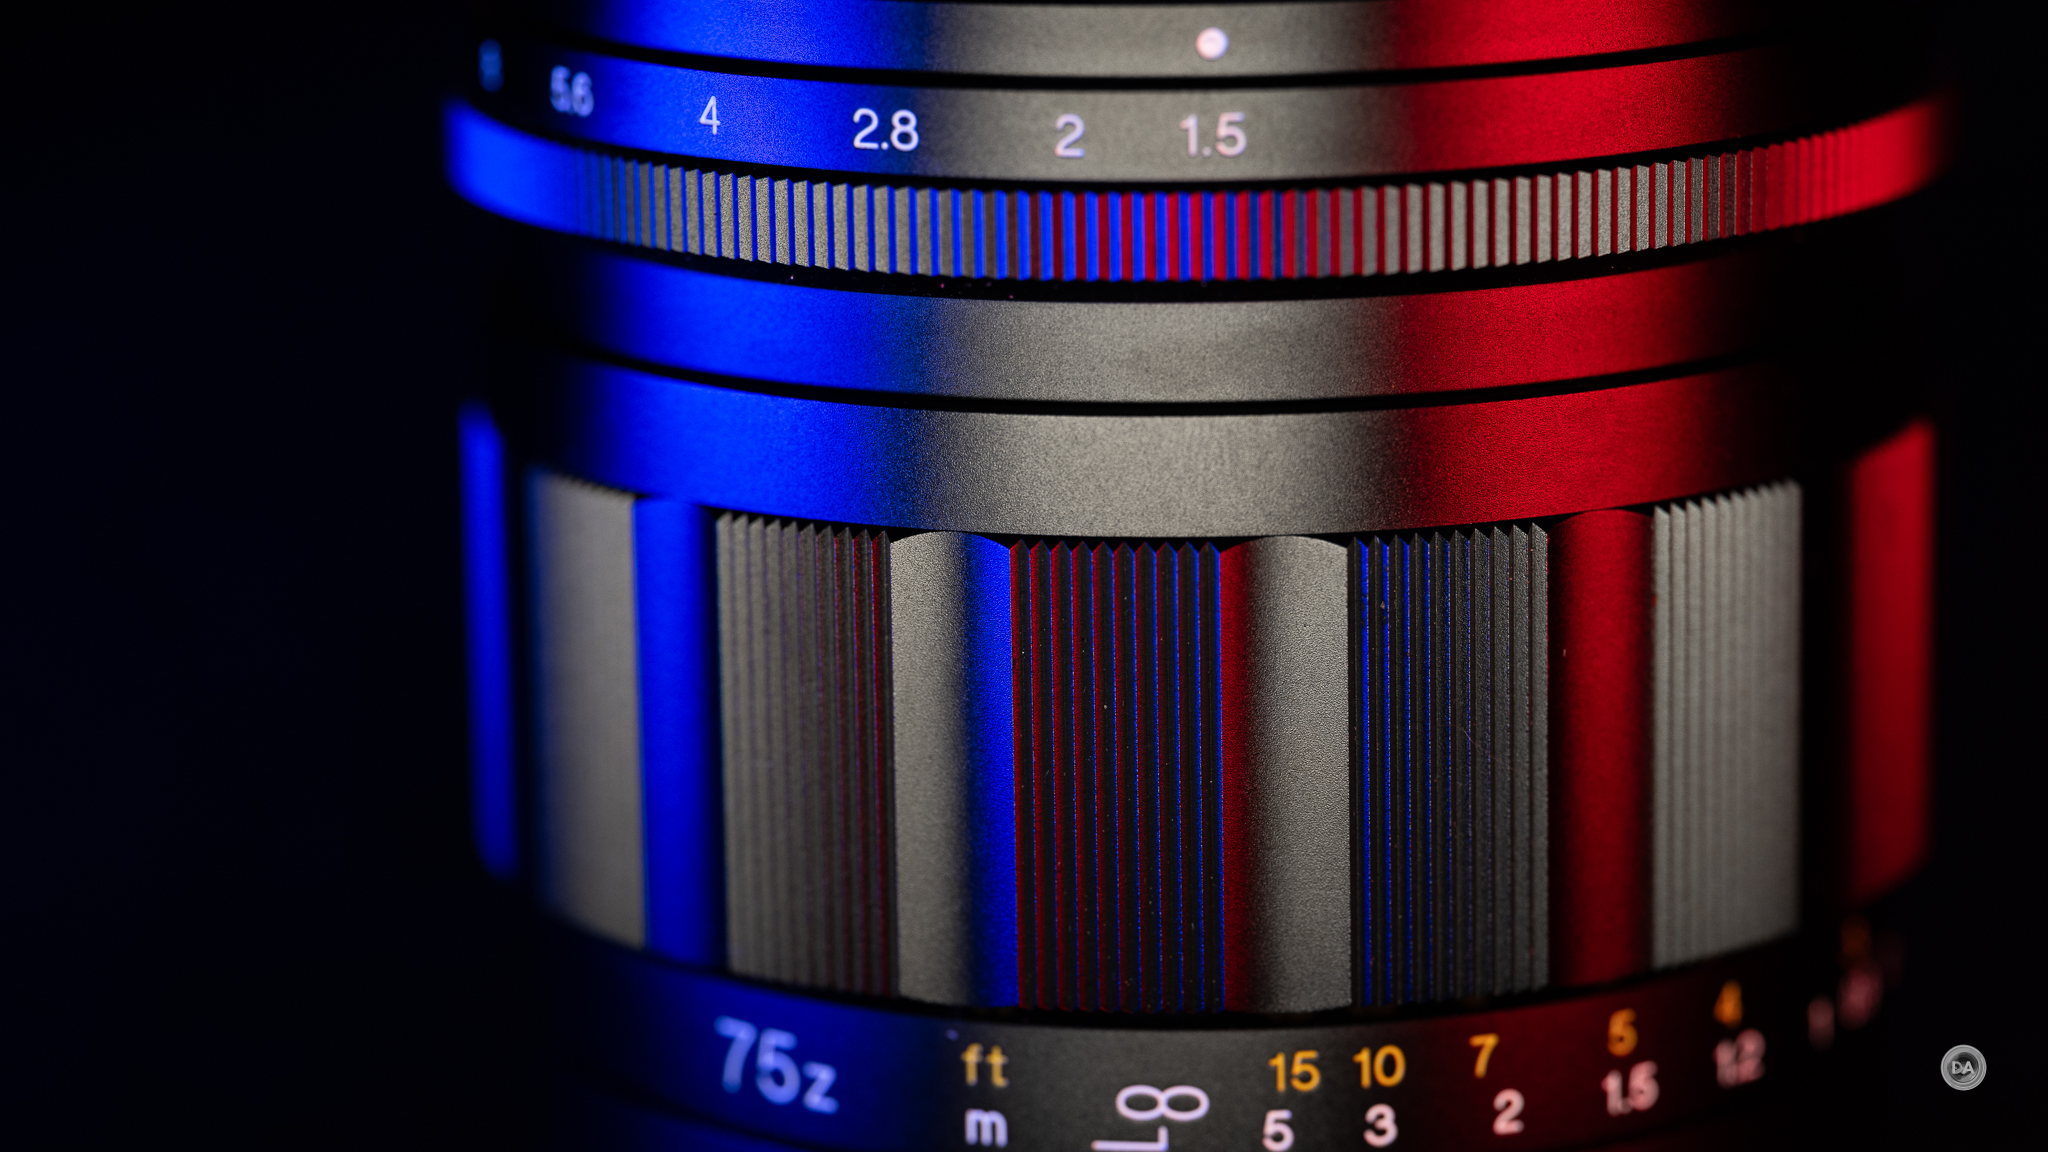
The next section is the manual focus ring. As noted, this has a knurled grip pattern and moves with the perfectly damped smoothness that Voigtländer is famous for. These focus rings are beautifully engineered, with the perfect balance between enough resistance for precision and enough freedom for smooth, gliding focus. There is roughly 180° of focus throw (rotation), which is about perfect, in my opinion. It’s long enough to allow for precision, but not so long that you have to make multiple rotations of the wrist to make major focus changes.
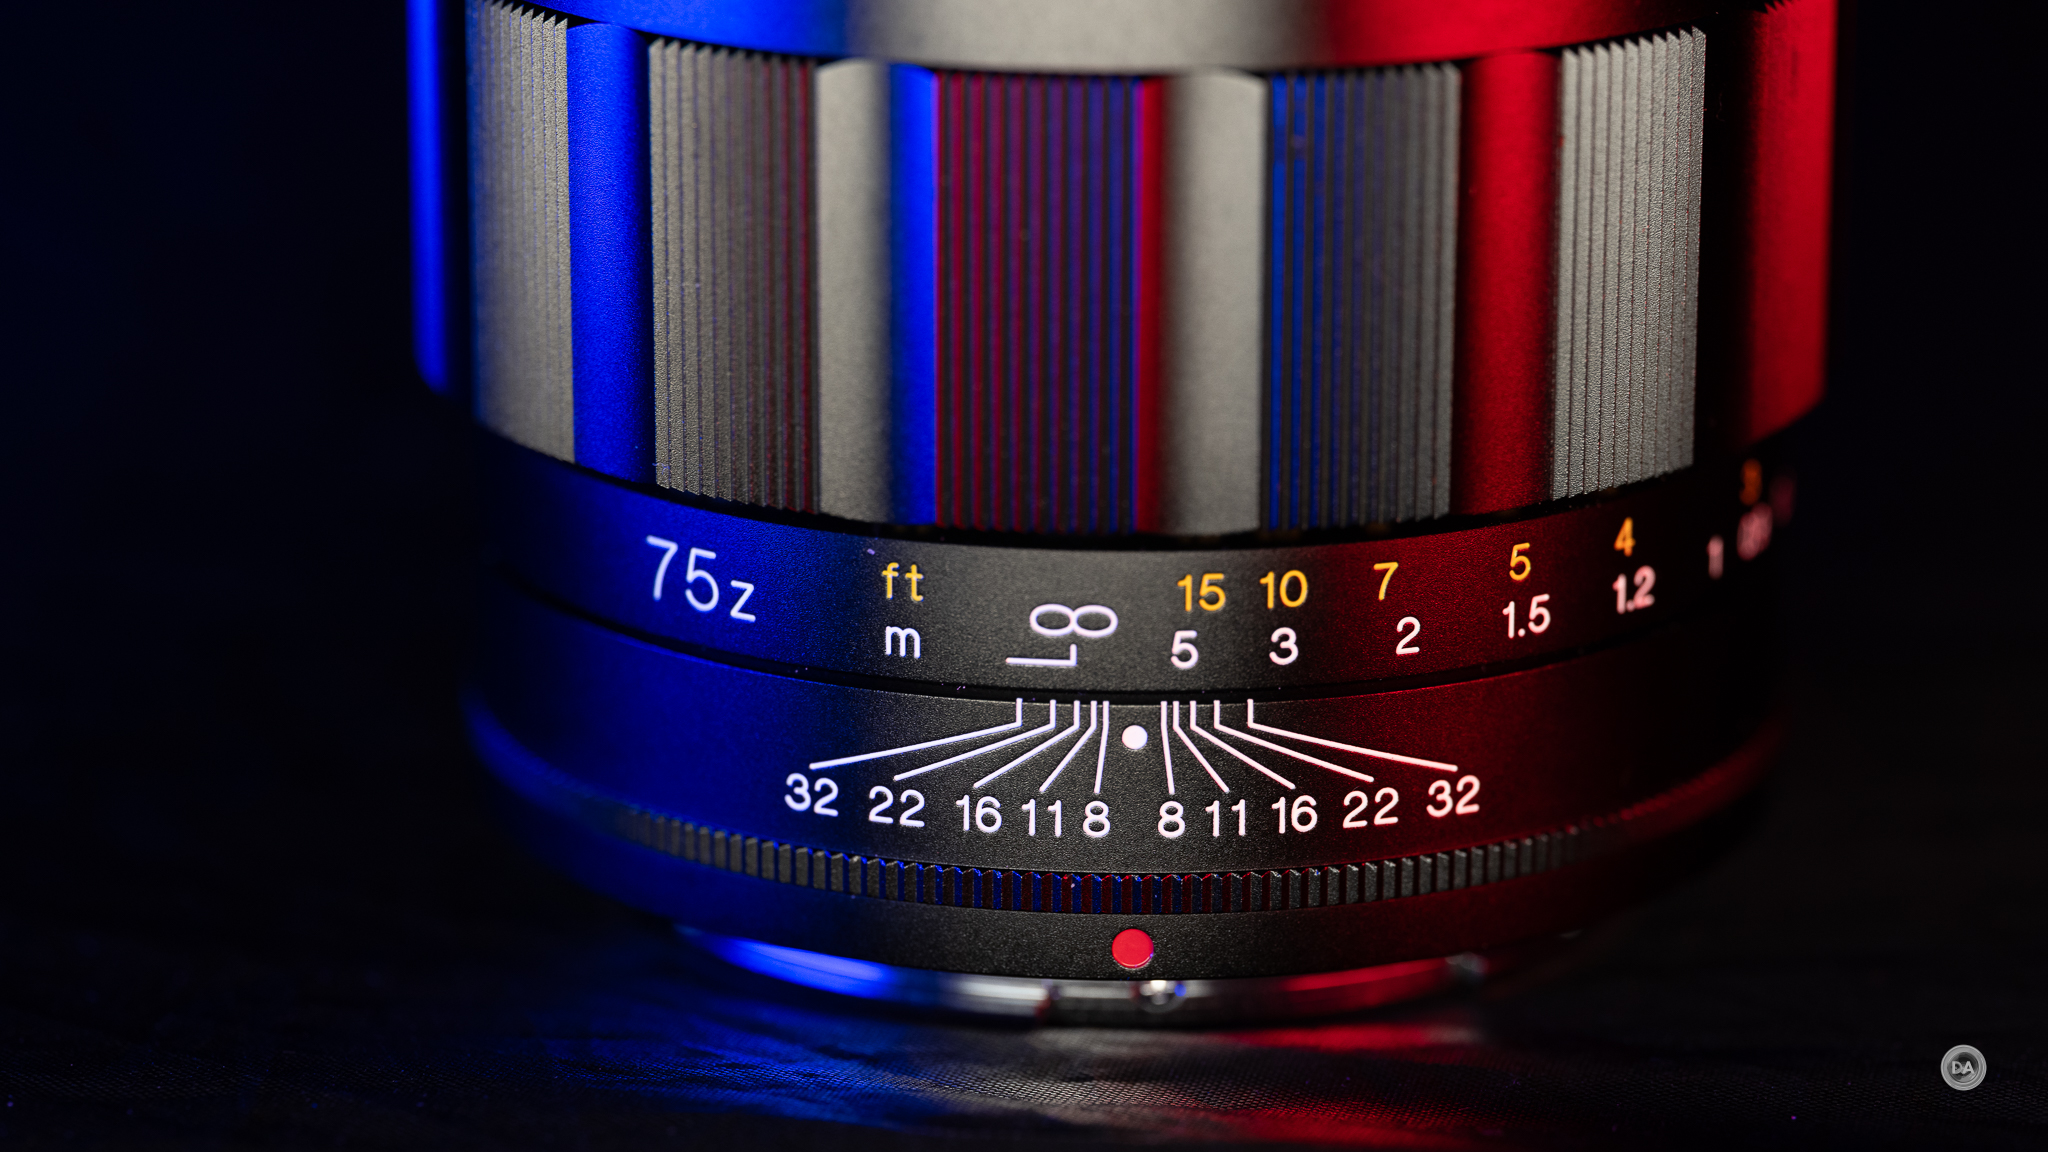
Markings are etched and painted, with yellow for Imperial (feet) and white for metric (Meters). The inner barrel will extend about 16mm during focus (this is not an internally focusing lens), with the extension coming towards the minimum focus side (the lens is fully retracted at infinity focus).
The third ring is the aperture ring, and it is located closest to the front of the lens. The aperture ring is clicked (there is no declick option) with detents on the one-third stop aperture positions. The aperture range on the lens is unusually large, going from F1.5 to as small as F32. That means this aperture ring has longer travel than usual, but it feels very precise.
The aperture iris itself has a high blade count of 12. This is appreciated, as Voigtländer works with straight blades in their apertures, so a higher blade count helps retain a more circular shape at smaller apertures. There are ten blades in my APO-Lanthar 65mm, and I do see the shape sometimes.
Up front we have a somewhat uncommon 62mm front filter thread size along with some badging regarding the lens designation.
There is an included narrow lens hood that threads onto those metal filter threads, but fortunately the filter threads are repeated inside the hood so that you can continue to use filters when the hood is attached. A threaded lens hood can’t reverse for storage, so you’ll either choose to not use the hood or leave it threaded on all the time. The short length of it doesn’t means it isn’t much of a liability to leave it attached all the time. If you want to use a rotating filter like a circular polarizer, you will probably want to leave the hood off, however, as there just isn’t much room to reach in there and rotate the filter with the hood mounted.
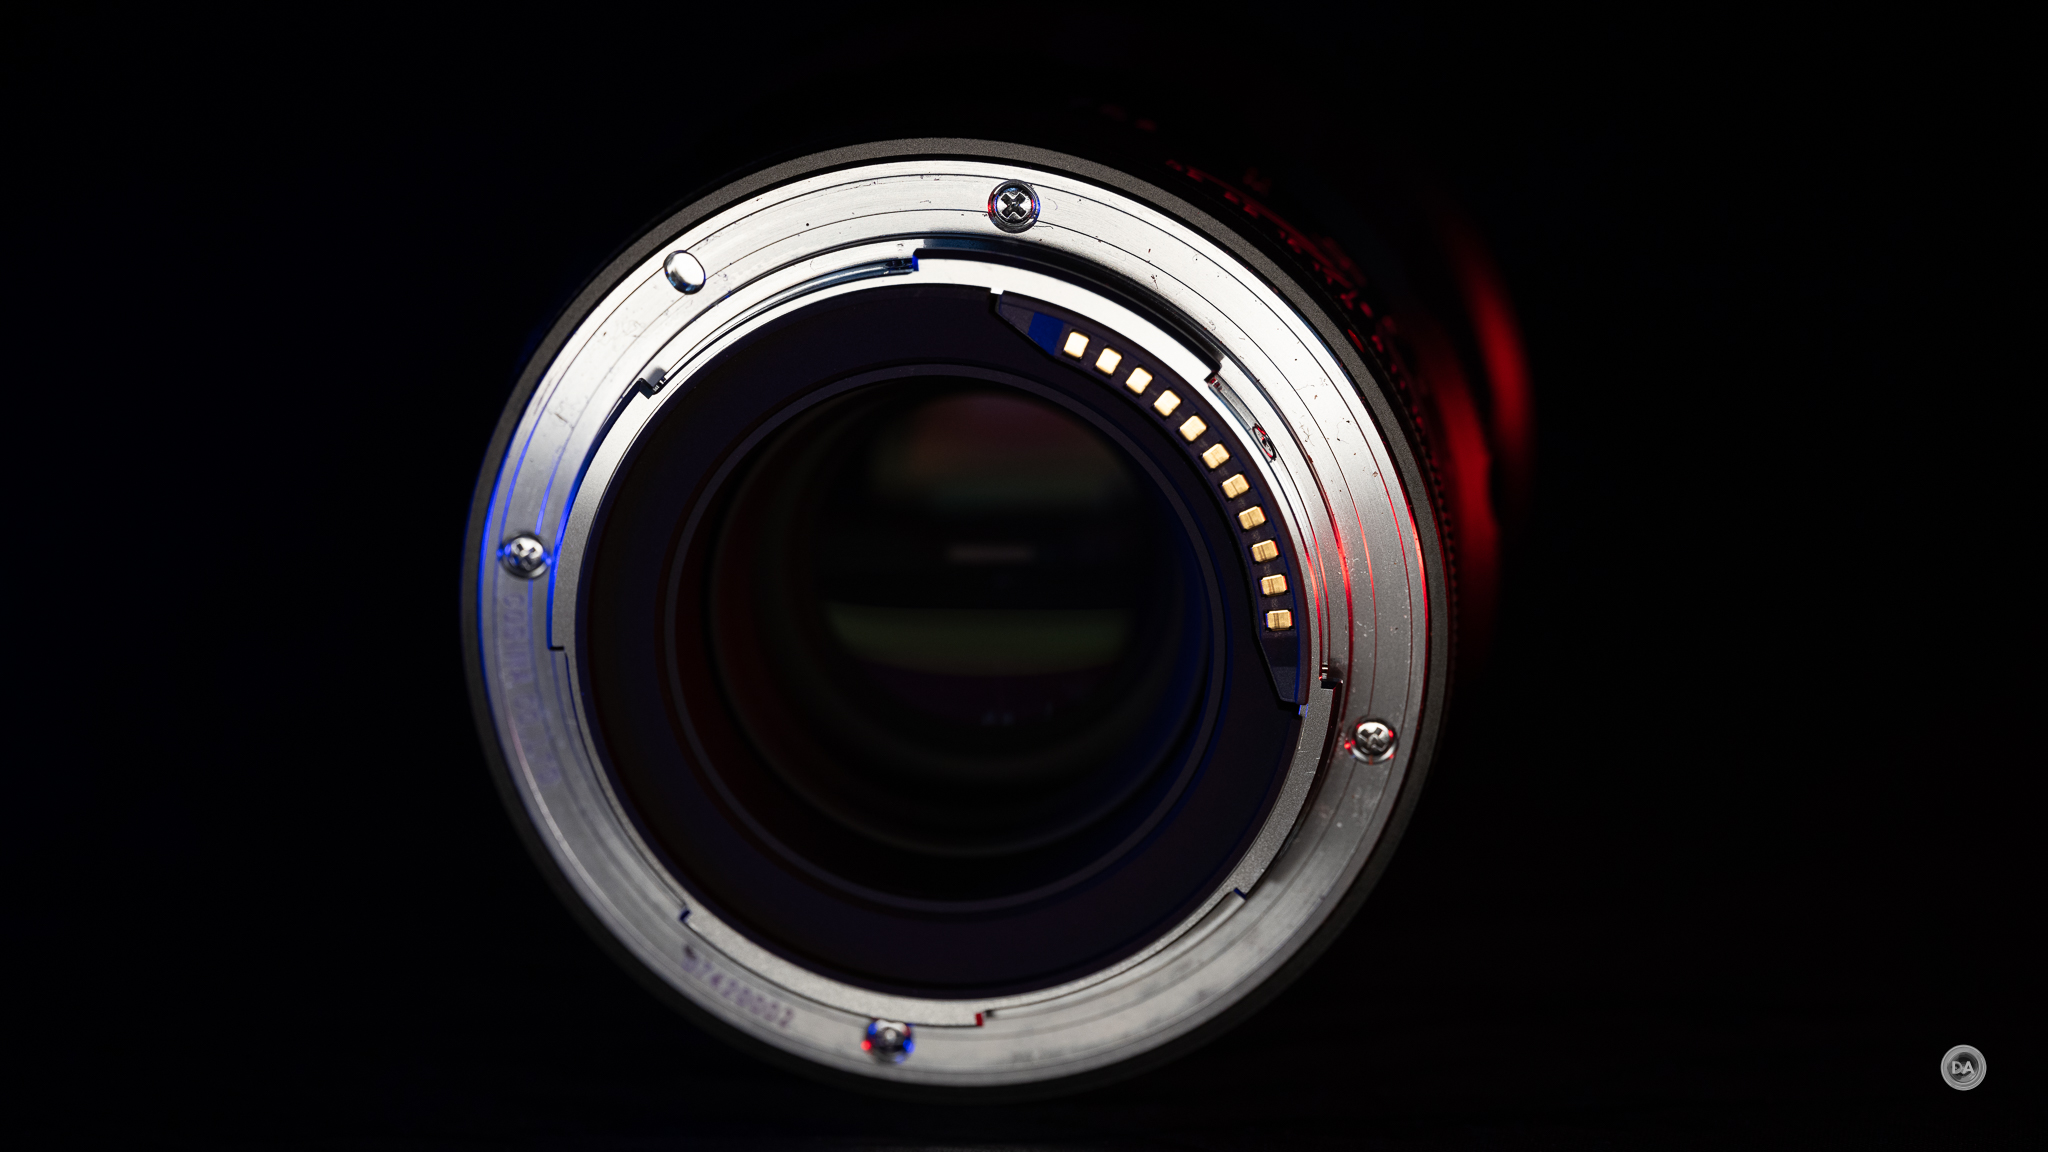
At the rear of the lens you fill the electronic contacts that will communicate all relevant information to the camera. That will include EXIF information, information for IBIS (camera stabilization, if so equipped), and information for various manual focus aids. The lens basically handles as normal save that there is no autofocus nor the ability to change the aperture from within the camera.
I see no weather sealing gasket there, and no weather sealing is claimed for the lens.
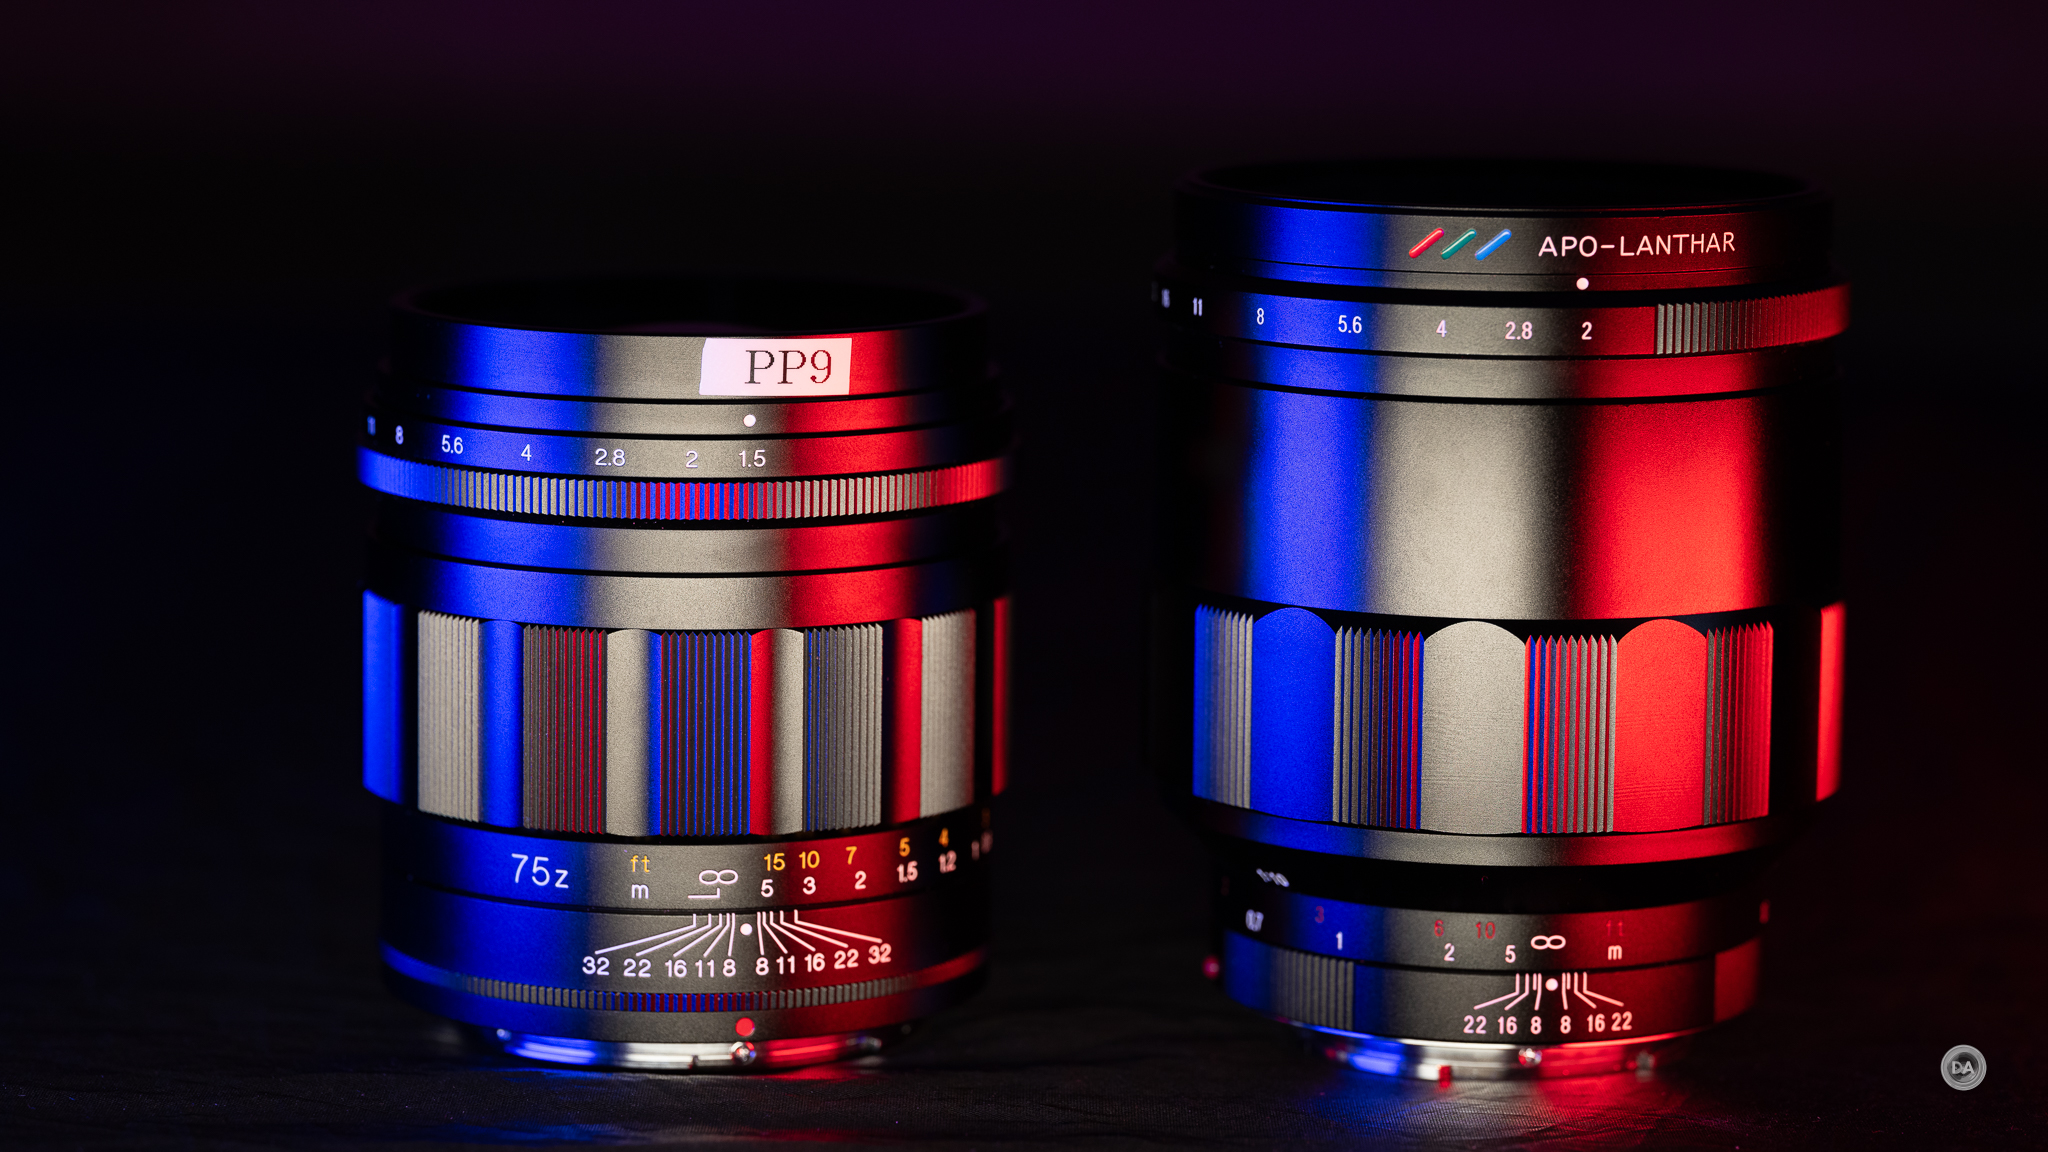
The Nokton 75mm is on the small side of medium in terms of size. It is 74mm (2.9″) in diameter x 75.9mm (3″) in length. Due to the solid construction the weight is a little more substantial at 530g (18.7oz). It’s an easy fit on my more robust Z8 body, but still small enough to work fine on smaller cameras as well. You can see that it is substantially smaller than my 65mm F2.
The minimum focus distance is 50cm. This is considerably closer than most 85mm lenses, which tend to only allow focus as close as 80-85cm. The resulting magnification is higher than those lenses (typically 0.12-0.14x magnification) at a very useful nearly 0.21x times (1:4.8).
This allows for some interesting closeups with very shallow depth of field at F1.5!
All in all, the Voigtländer Nokton 75mm F1.5 was pretty much exactly what I expected. A very solid build with gorgeous engineering, but without any of the modern features that I typically evaluate in a lens at this price point ($899 USD). You buy a Voigtländer lens for different reasons that you buy a Sigma, and there is nothing here that will disappoint those who love and appreciate quality manual focus lenses.
Manual Focus on Nikon (Z8)
My recent purchase of the Nikon Z8 is the first time that I personally owned a Nikon body. I did a lot of research ahead of buying the Z8, and felt like it was the best fit for my needs. While manual focus was not a primary consideration in my purchase, I’ve actually really enjoyed the various Nikon focus aids and the overall focus experience on Nikon. Here’s a few reasons why:
Clear, useful EVF. On paper, the EVF of the Z8 is nothing special, but, in practice, it works very well. I’ve got much higher resolution viewfinders on Sony cameras, but Sony viewfinders do some weird things when the shutter is half depressed. And I typically want the shutter half depressed when manually focusing, as this helps stabilize the viewfinder while I focus. Nikon’s viewfinder is clear and makes it easy to see focus moving as I turn the manual focus ring.
Effective IBIS (VR). I’ve been impressed with the real world stability of Nikon’s in camera VR. It works effectively and allows for both a stable viewfinder experience as a I focus and also stable results when I take the shot. To my knowledge, no manual focus lens to this point has included lens-based image stabilization, so having effective in-camera stabilization is very important.
Useful manual focus aids. There are three primary manual focus aids that I’ve utilized when manually focusing, including the onscreen focus confirmation box (put it where you want focus to be, and it will turn green when proper focus has been achieved), magnification of the image to visually confirm focus, and focus overlays (peaking). With some lenses Nikon includes a directional arrow that points you the direction you need to turn the focus ring to focus in the right direction, but that isn’t always the case. I’ve found that the focus box is quite accurate, though, and it makes manual focus fairly easy.
My one complaint is that it feels like magnification could be handled a little more effectively. Some camera brands allow for an automatic magnification of the focus area when you start to turn the focus ring (Sony, for example, and this is true with Voigtländer lenses that are true manual focus lenses but have electronic contacts). Nikon doesn’t do that, and so you have to manually choose to magnify the image. Also, when you’ve magnified the image and gone to depress the shutter, the camera does not automatically return to normal view to help assure that your composition is correct. This has to be handled manually as well. This just adds additional time to the focus process if you desire to visually confirm focus.
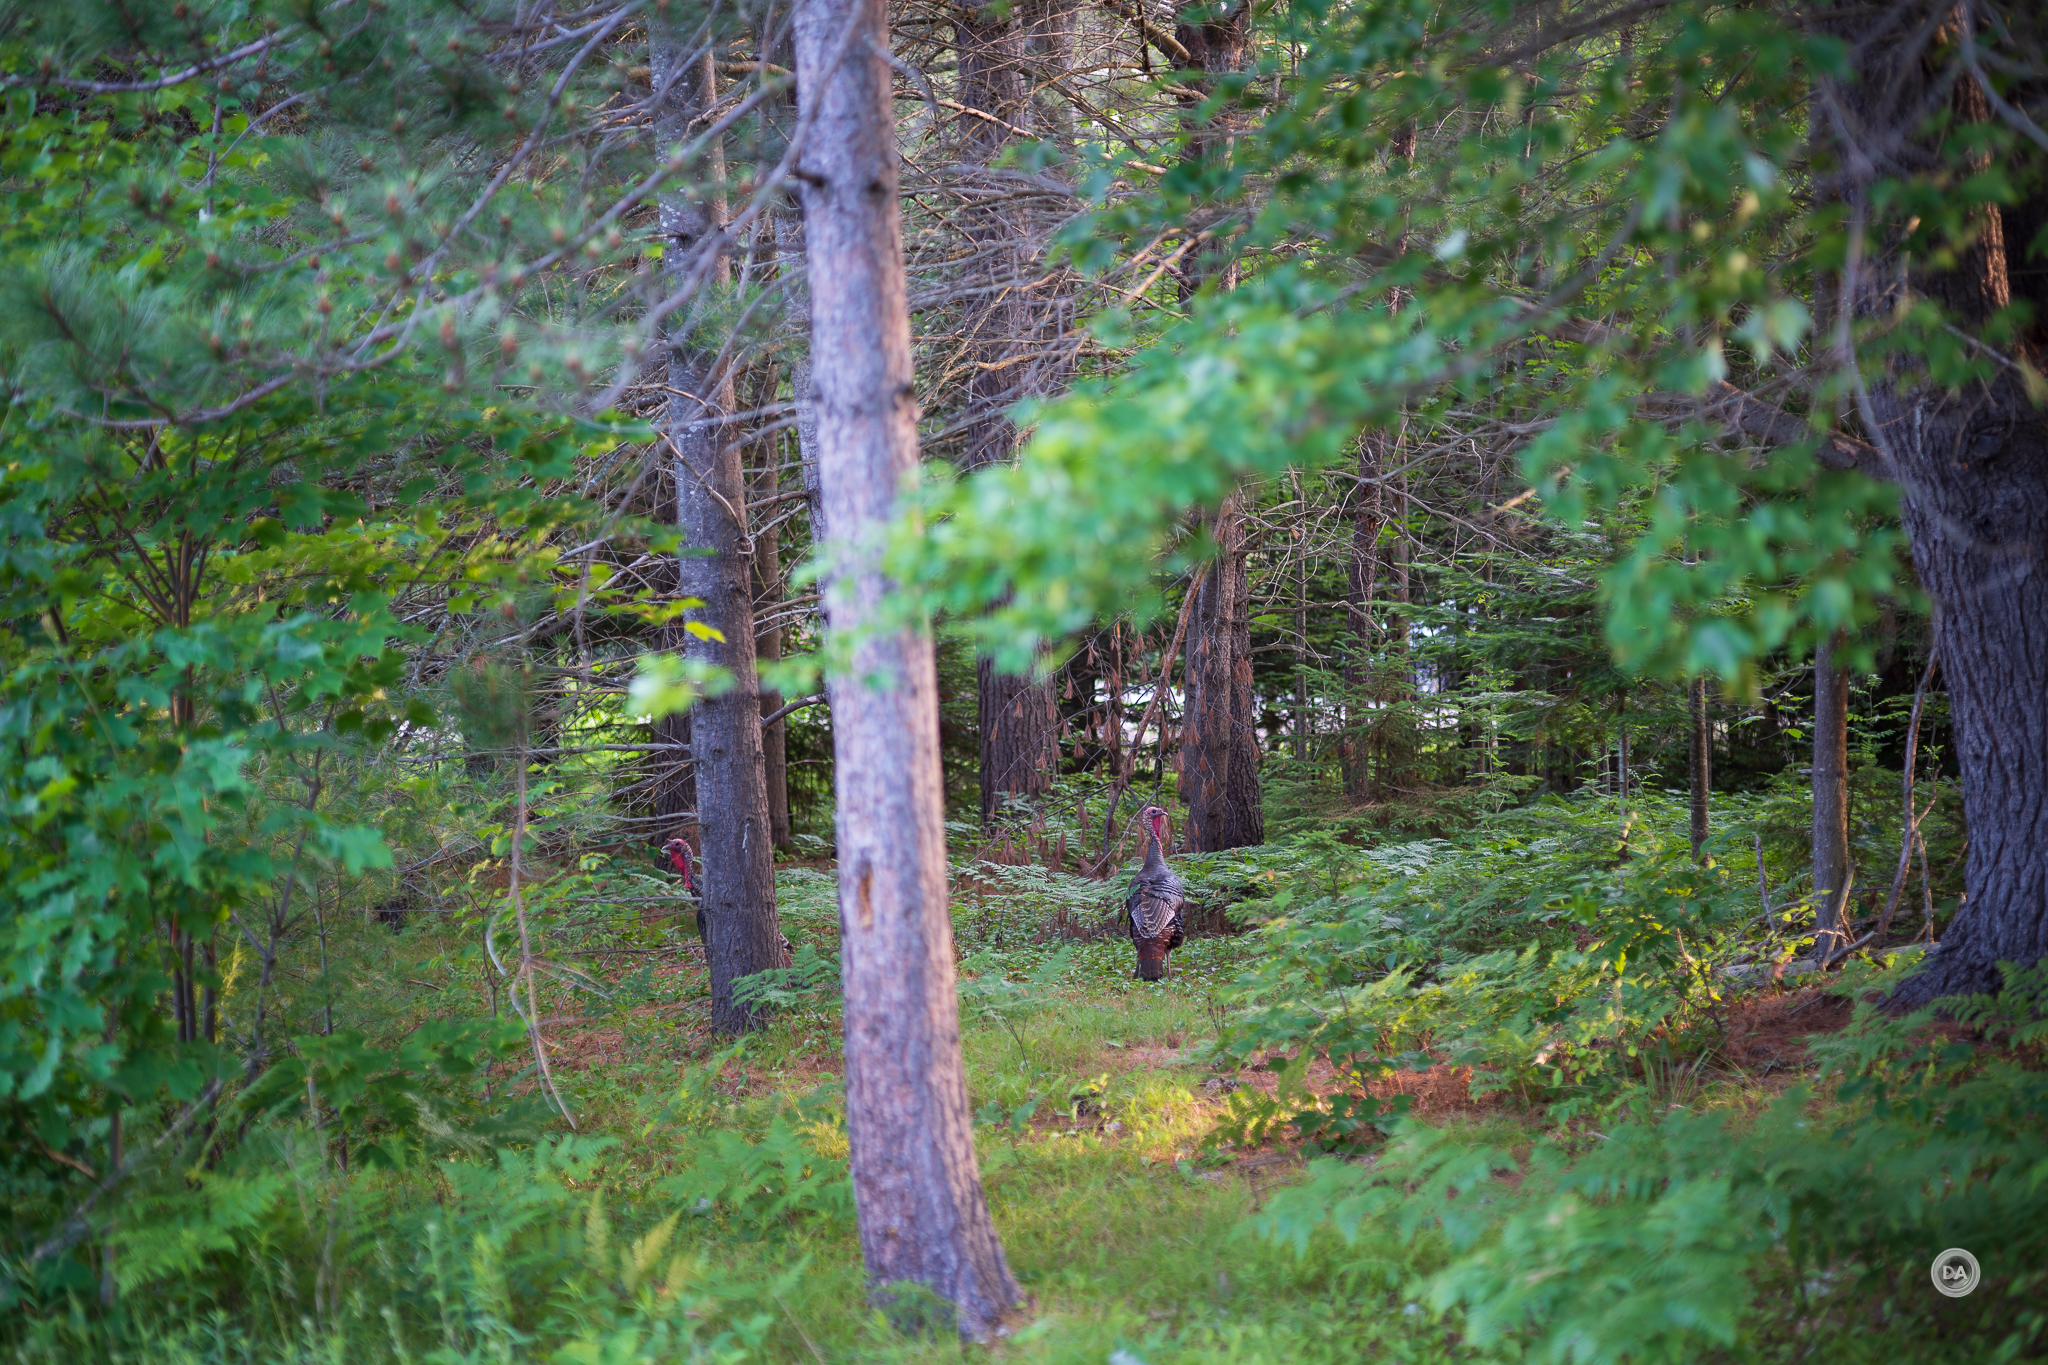
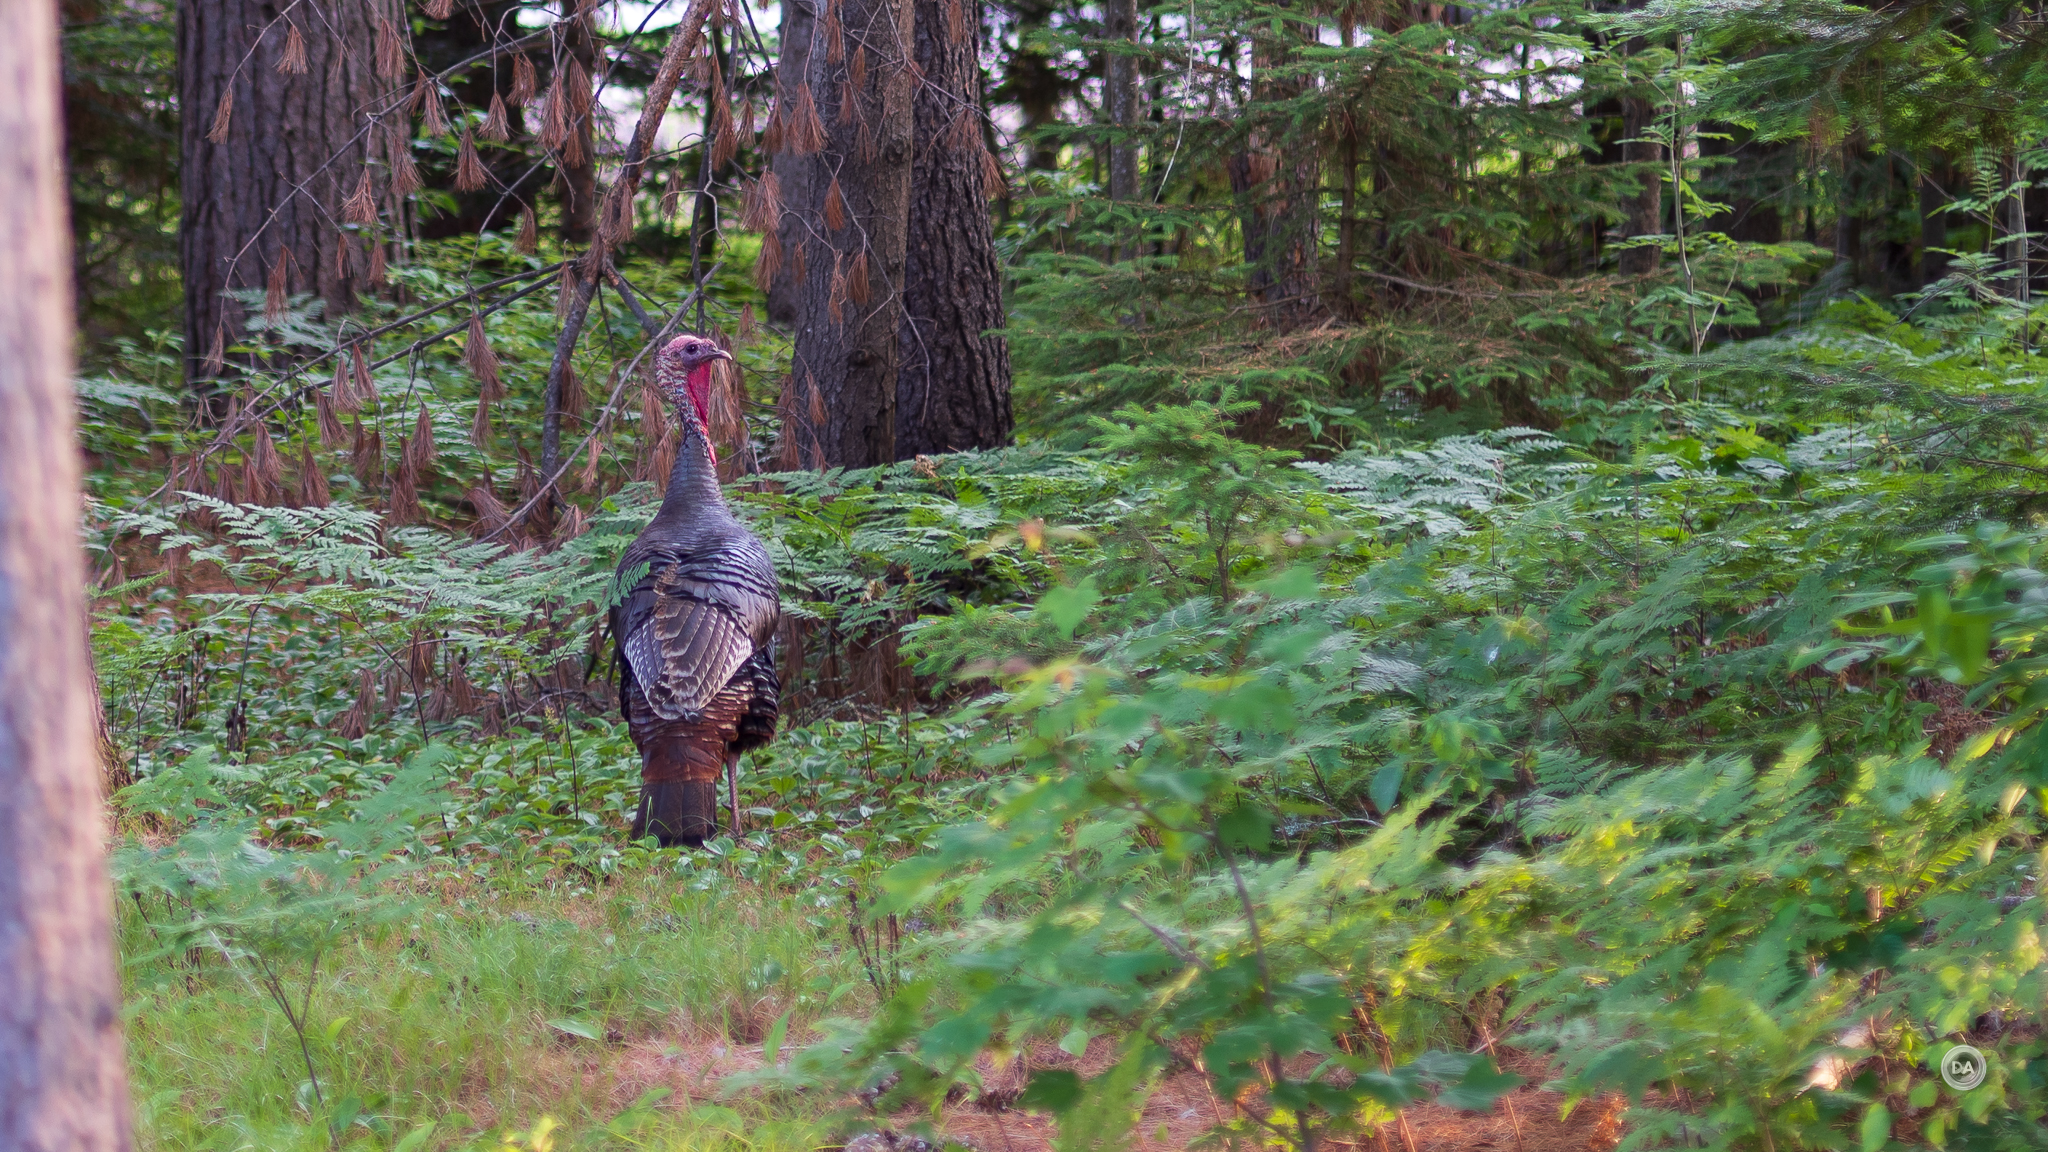
In general, however, I enjoyed using the Nokton 75mm on Nikon. I got good stabilization, good focus accuracy, and the lens seemed to work well in general on my Z8. While I certainly wouldn’t choose a manual focus lens for action, I was able to use the green box focus confirmation and snap this quick photo of a turkey at F1.5, and, as you can see from the crop, focus is nailed.
It is worth noting that the beautiful focus ring makes doing focus pulls during video a treat. There’s nothing quite like a well calibrated true manual focus ring for smooth pulls.
Image Quality Breakdown
The term “Nokton” in the name of this lens is a reference to “nocturnal”, and emphasizes its ability in low light due to the bright maximum aperture. The optical formula here is relatively simple, with just 7 elements in 6 groups. Of those elements, one is an aspherical element, while three are unique low dispersion elements.
There are some Voigtländer lenses that are exquisitely sharp, while others like the Nokton 40mm F1.2 that have more of a dual personality – a bit “dreamy” at large apertures while extremely sharp when stopped down. The Nokton 75mm F1.5 falls somewhere in between, in that it is quite sharp even wide open, but not to the level of my APO-Lanthar 65mm F2, and then is extremely sharp when stopped down. What I find to be fairly universal among Voigtländer lenses is the gorgeous color rendition. I love their optical glass, and there’s something about the look of the images right out of the camera that is special. I often find that I do next to no processing or tweaking to images, as it is rather hard to improve on what is already there.
You really notice this when shooting more shallow depth of field shots, as the blend of the beautiful colors, defocused area, and then even the nature of the vignette creates very artful images.
On the technical side of things, there is little to no distortion but a meaningful amount of vignette.
There is the tiniest amount of pincushion distortion (-1 to correct) and about two stops of vignette (+58 to correct). Nothing significant to see.
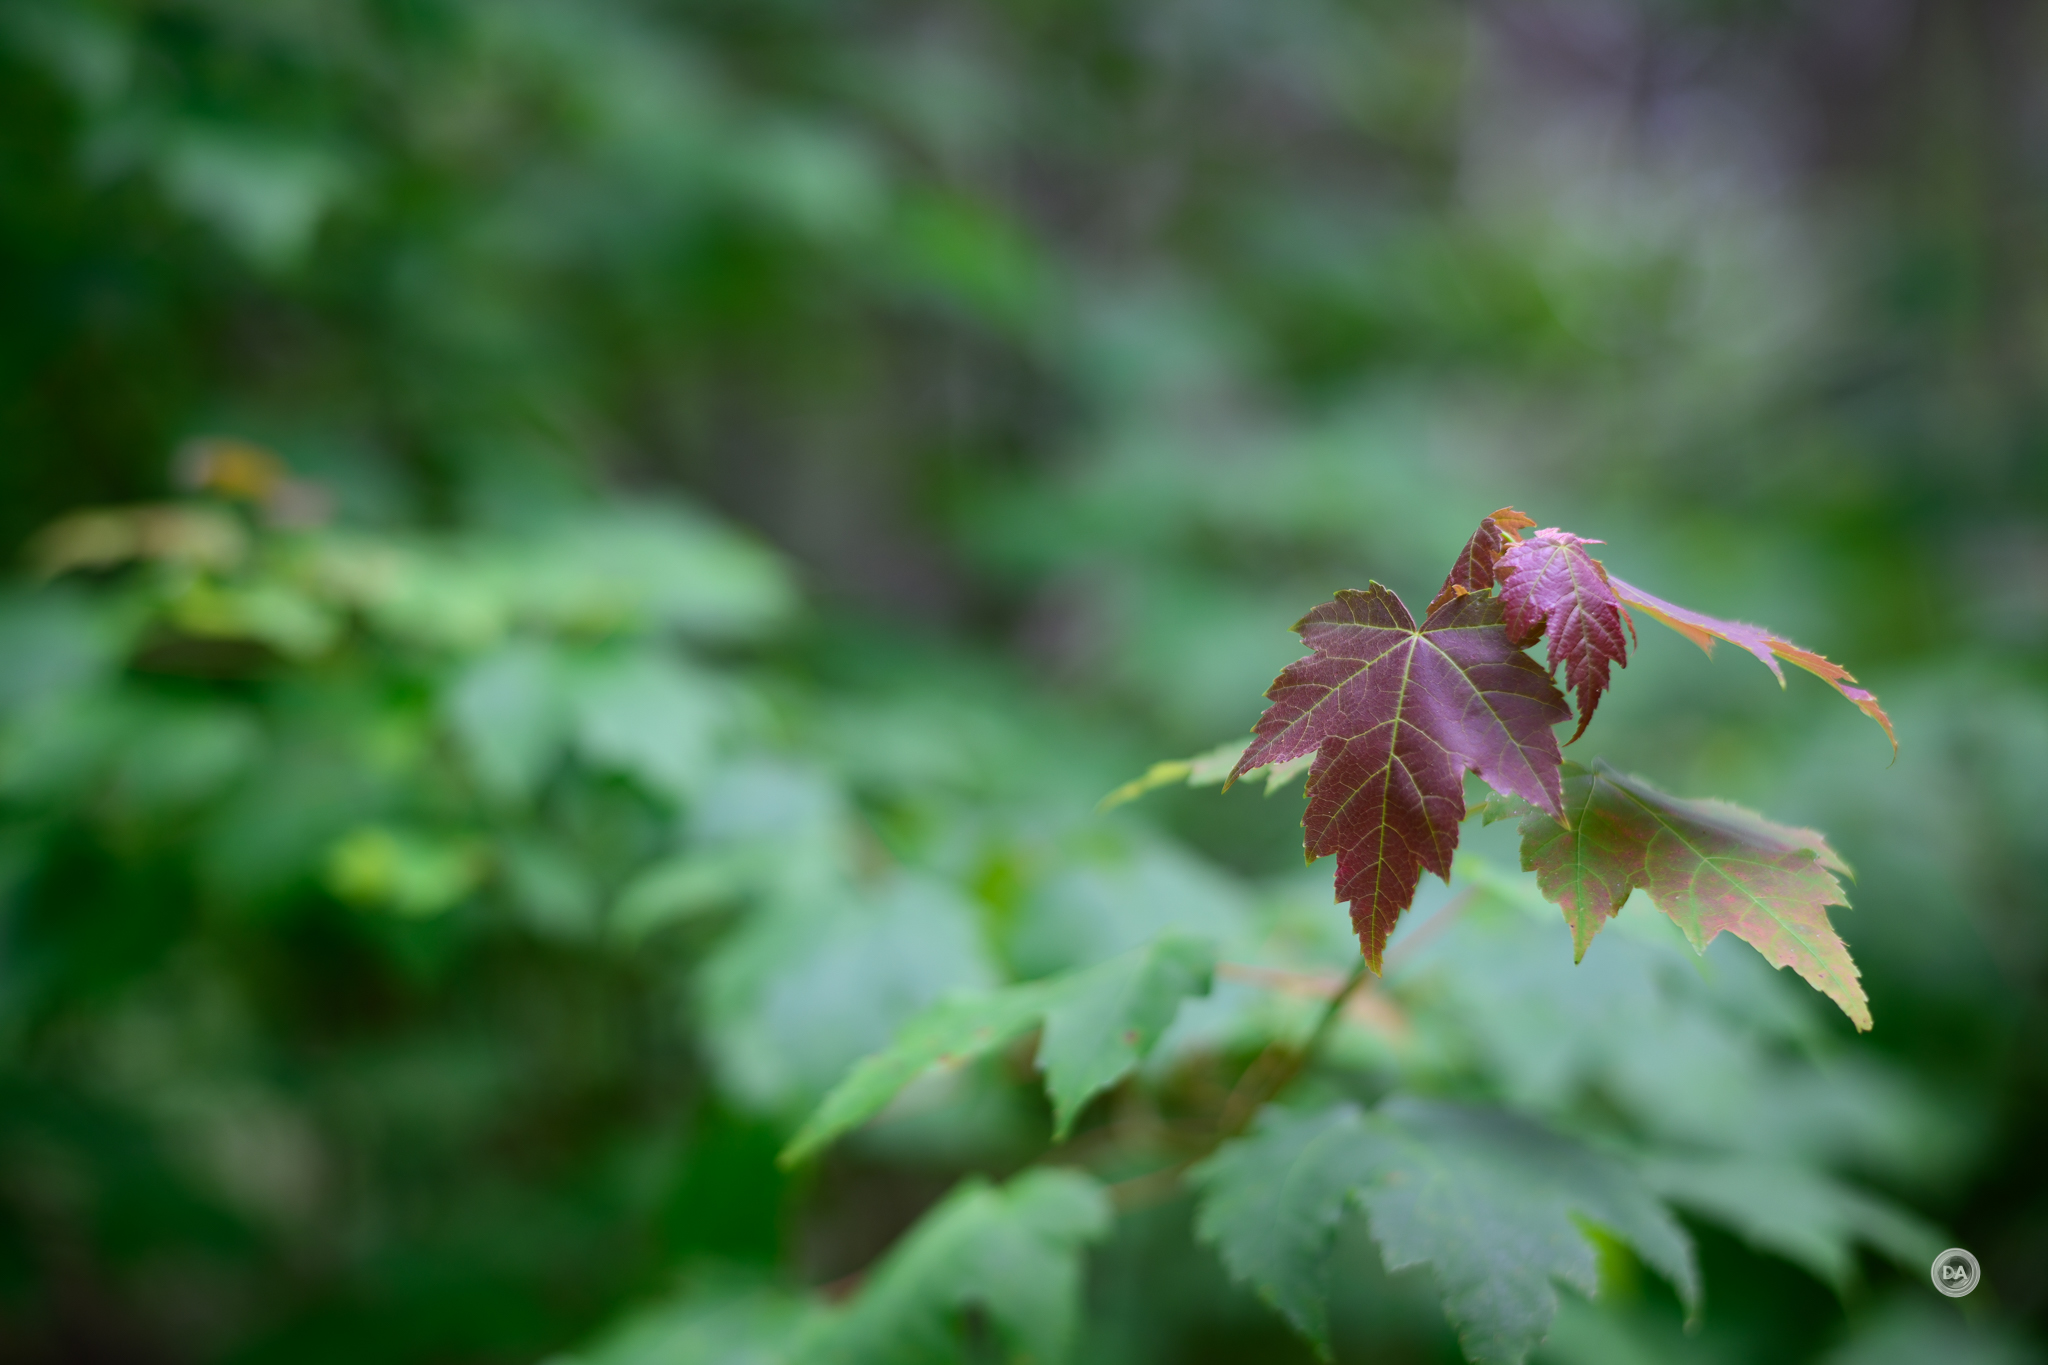
This is not one of their Apochromatic designs, so it isn’t entirely free of fringing, but I saw little color fringing (LoCA) either before or after the plane of focus.
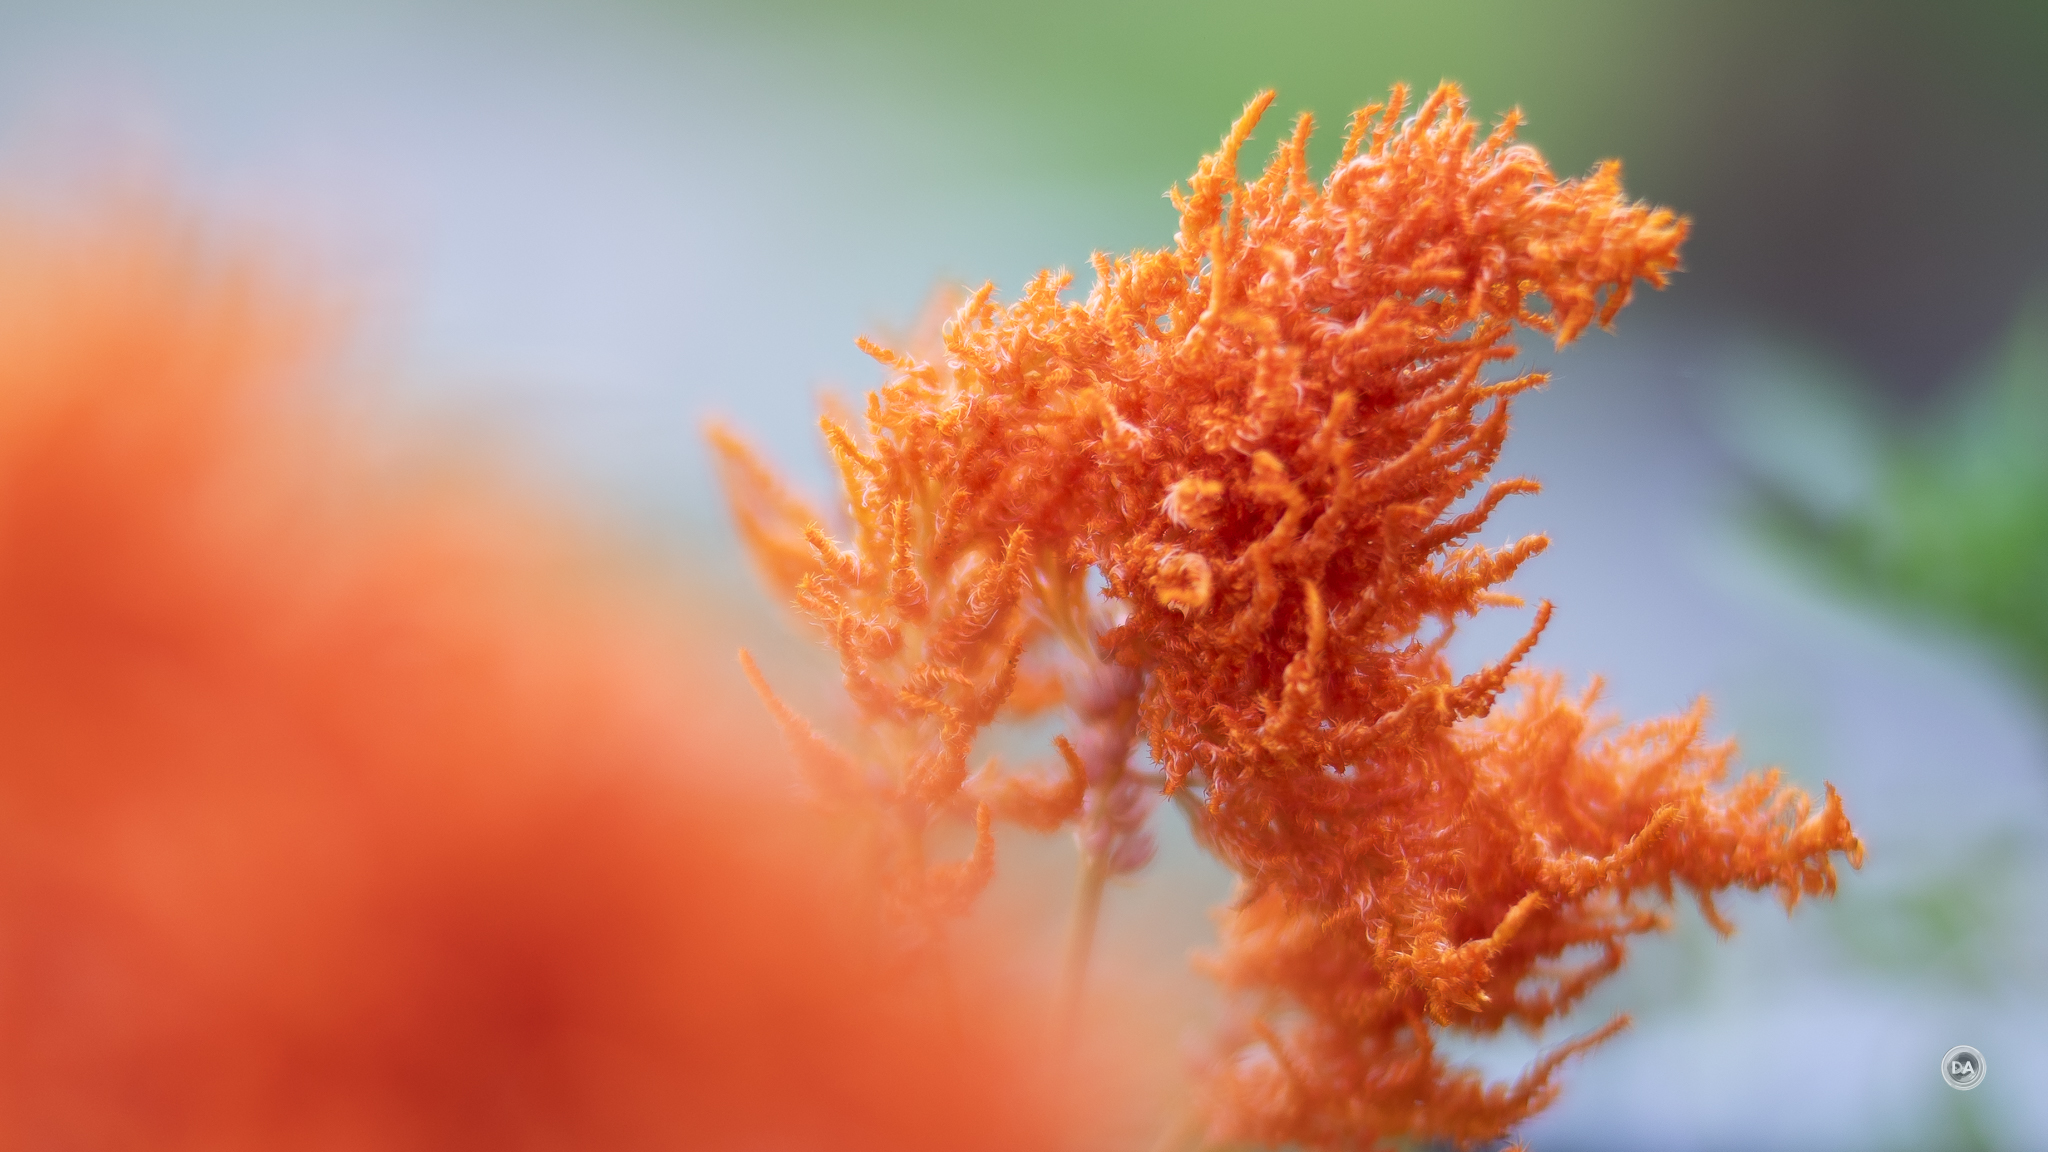
That was true in real world shots, too. What I did see is a little bit of “blooming” around some of the edges of things like these flowers, which does produce a very slight “dreamy” effect, though nothing like the 40mm F1.2.
Control of Lateral CA was pretty much perfect. The transition from black to white is flawless near the edge of the frame.
A great start! So how about sharpness and contrast? All of my chart tests are shot on the 45MP Nikon Z8 sensor with crops shown at roughly 200% magnification. Here’s a look at the test chart.
And here are the F1.5 crops from across the frame:
Center detail is good, but contrast isn’t great. The mid-frame looks the weakest of the bunch, as the corners rebound surprisingly well. The corner performance is probably the most standout.
Other than the bit of bloom on the textures, I found that real world sharpness at F1.5 was very usable.
Stopping down to F2 definitely increases contrast and also there is some increase in resolution. The center of the frame has obviously higher contrast.
Though corners were already strong, contrast looks obviously better there at F2 as well.
By F2.8 results are high contrast and detail across the frame.
From F4-F8 image quality is pristine all across the frame. There is high contrast and detail everywhere I look in the frame. Landscapes look fantastic due to the rich colors and excellent contrast. That excellent optical glass really shines!
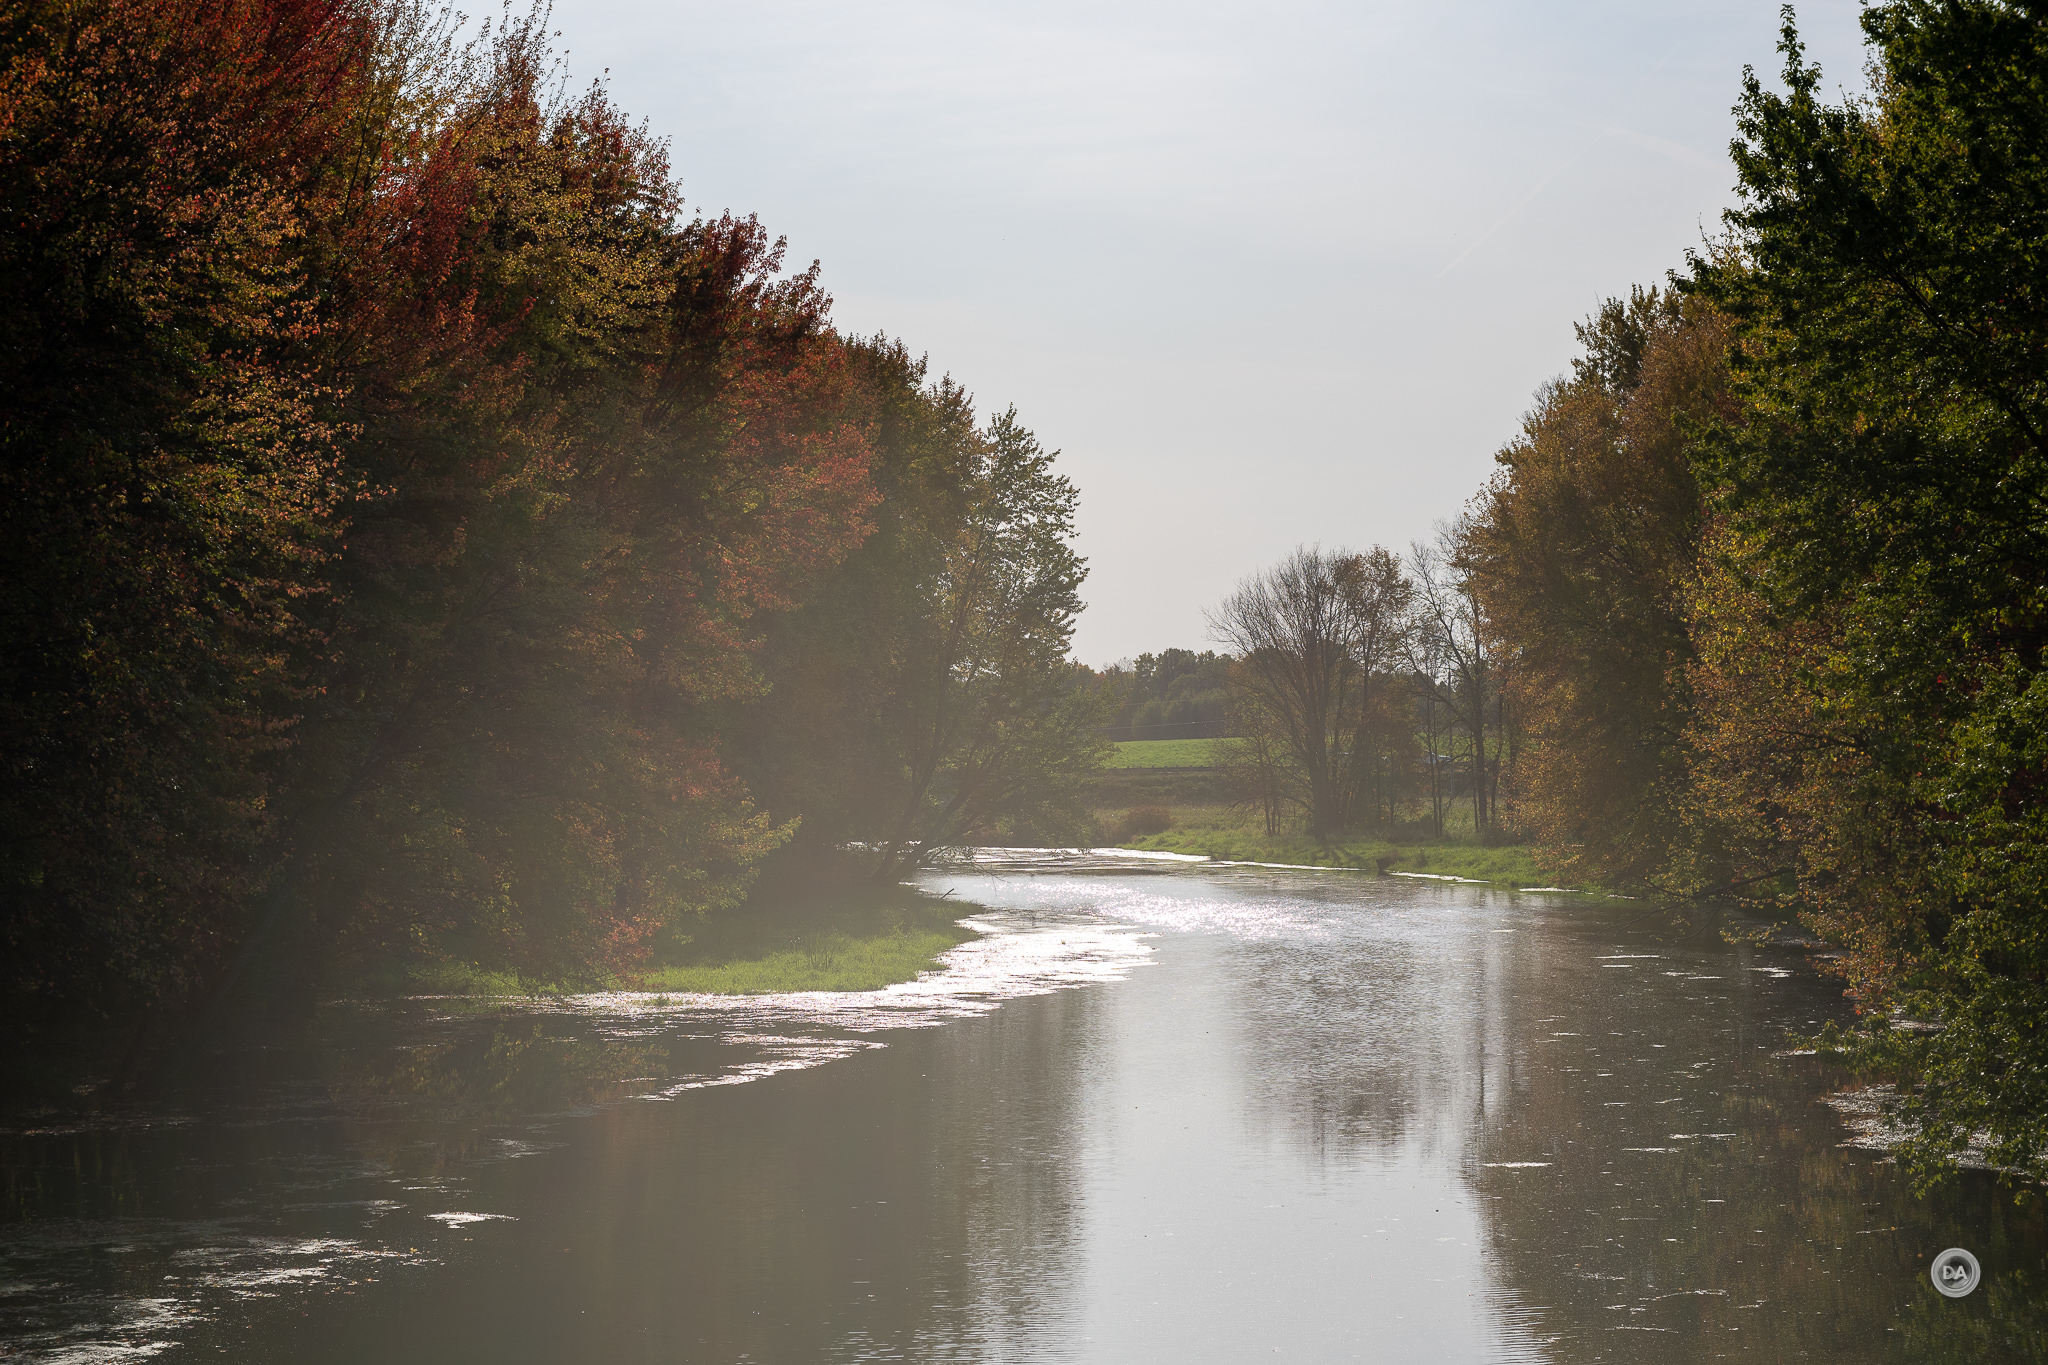
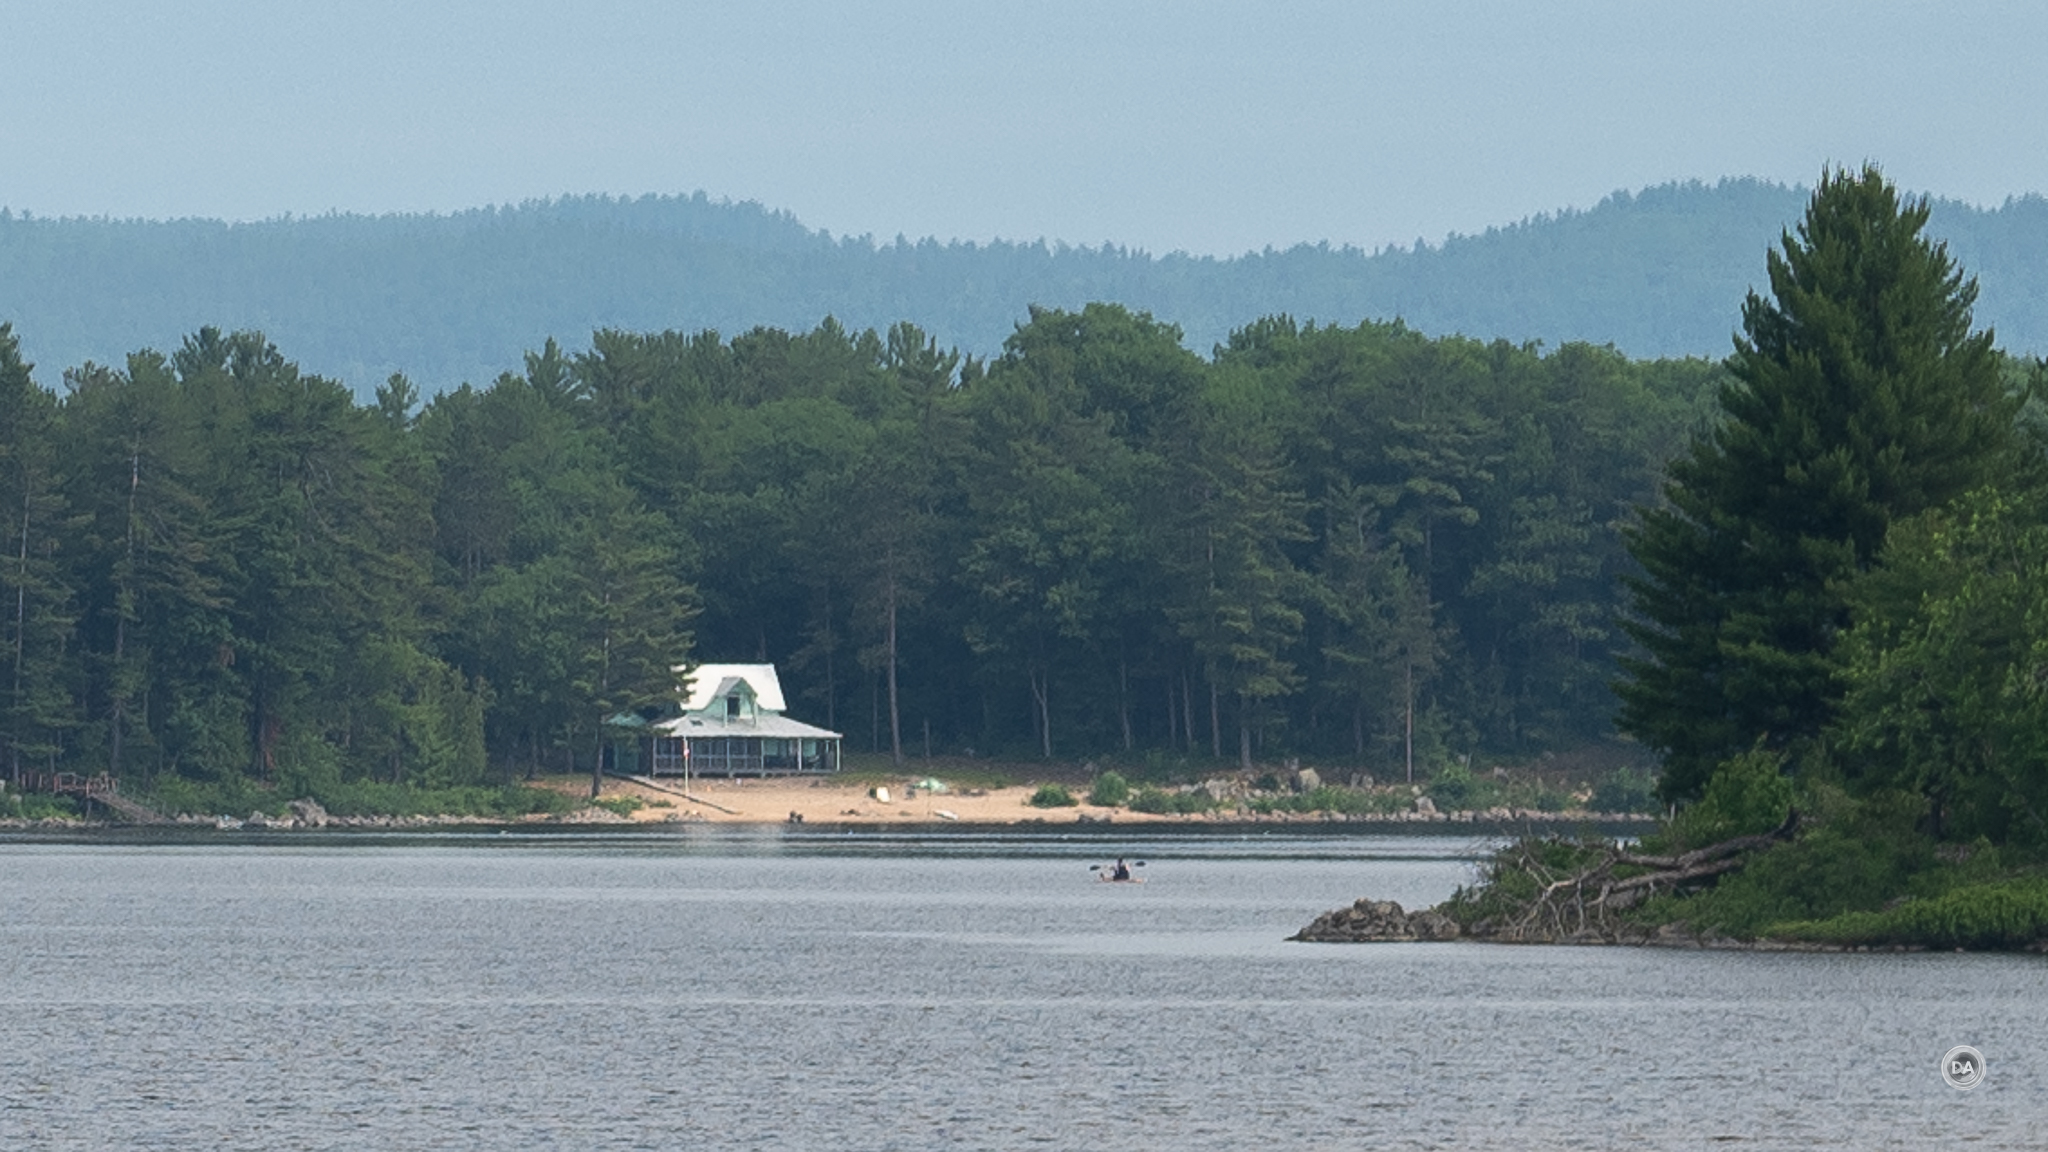
The Nokton 75mm really has the ability to delineate fine details. Take this F5.6 shot of a river scene. If you look to the left of the island on the right of the frame you might see a little dot.
Zooming DEEP into the image reveals that the dot is a kayaker, and you can even make out the towel of someone on the beach in front of the cottage beyond.
That’s at nearly 300% magnification, and the fact that this much detail is visible is pretty impressive.
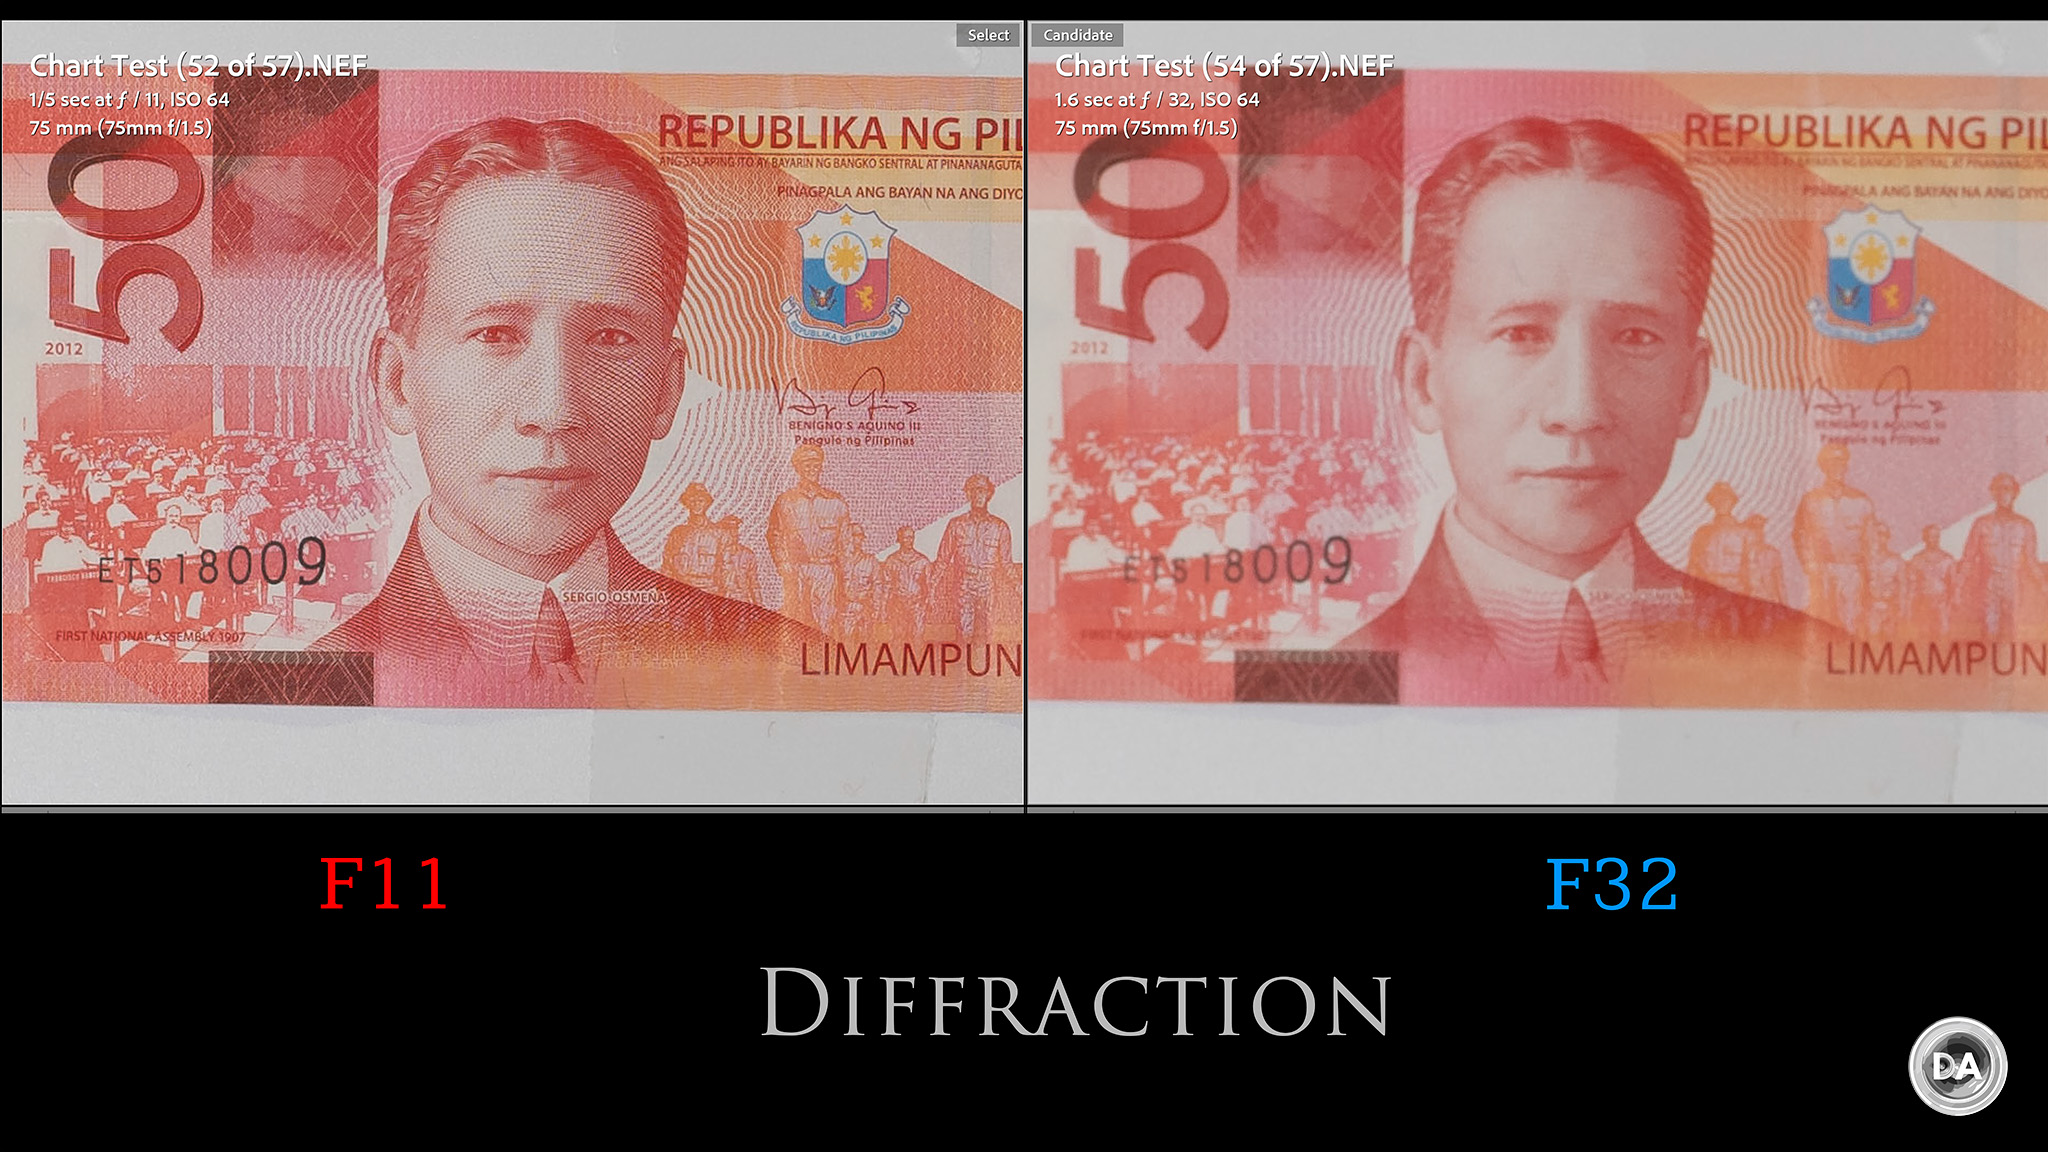
Minimum aperture is a very small F32 (unusual for a lens with such a large maximum aperture). Sharpness is strong through F11, but at smaller apertures (F16 and beyond), diffraction will begin to soften the image.
The Nokton 75mm F1.5 is a lens capable of very useful sharpness wide open and exceptional sharpness when stopped down.
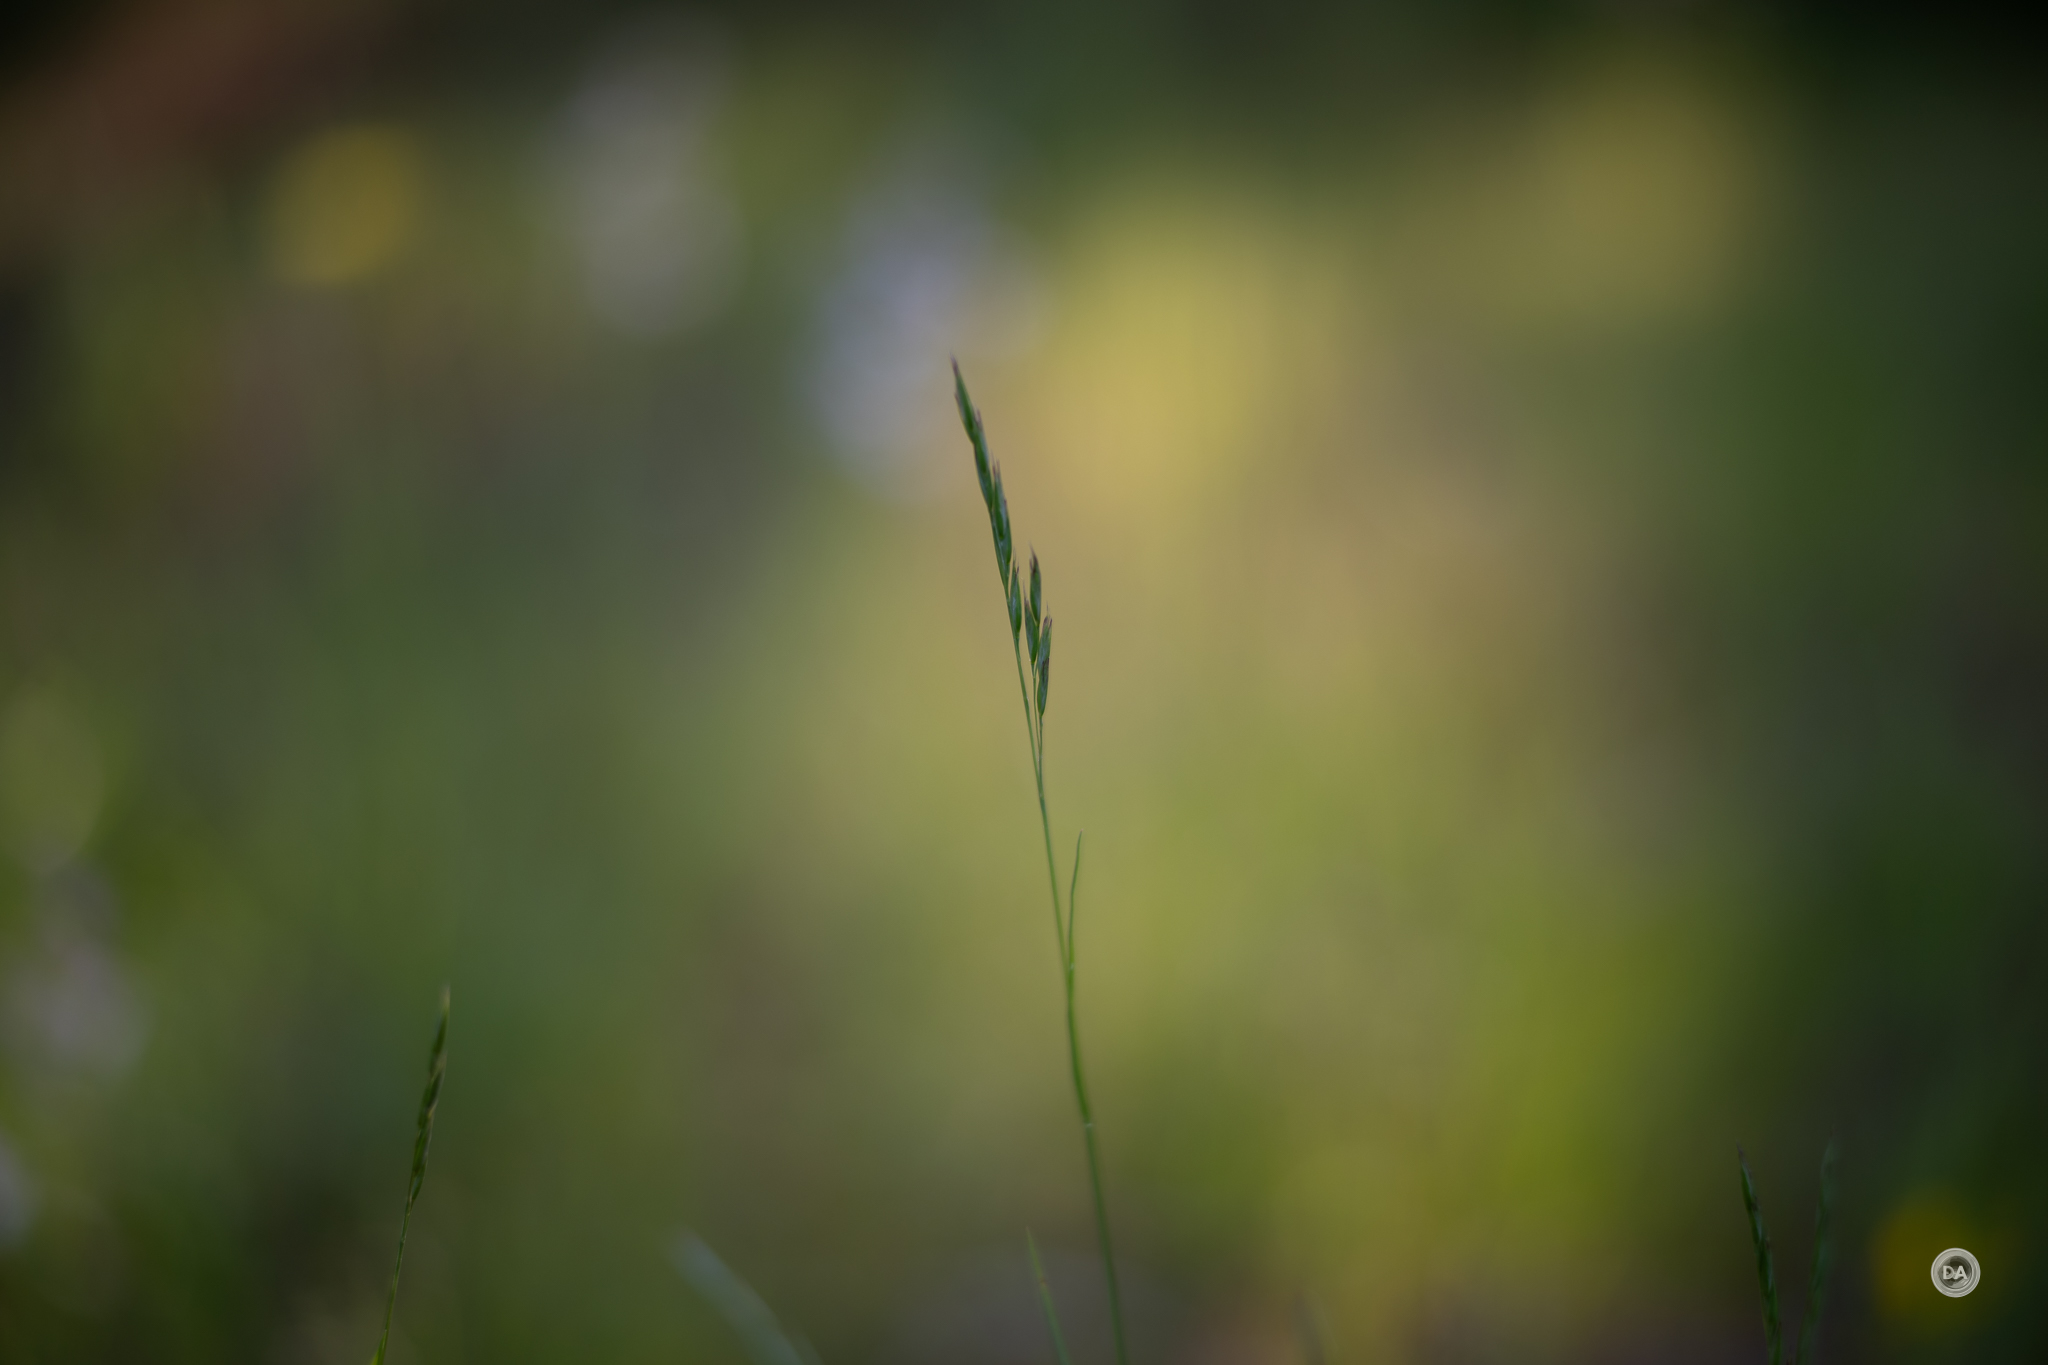
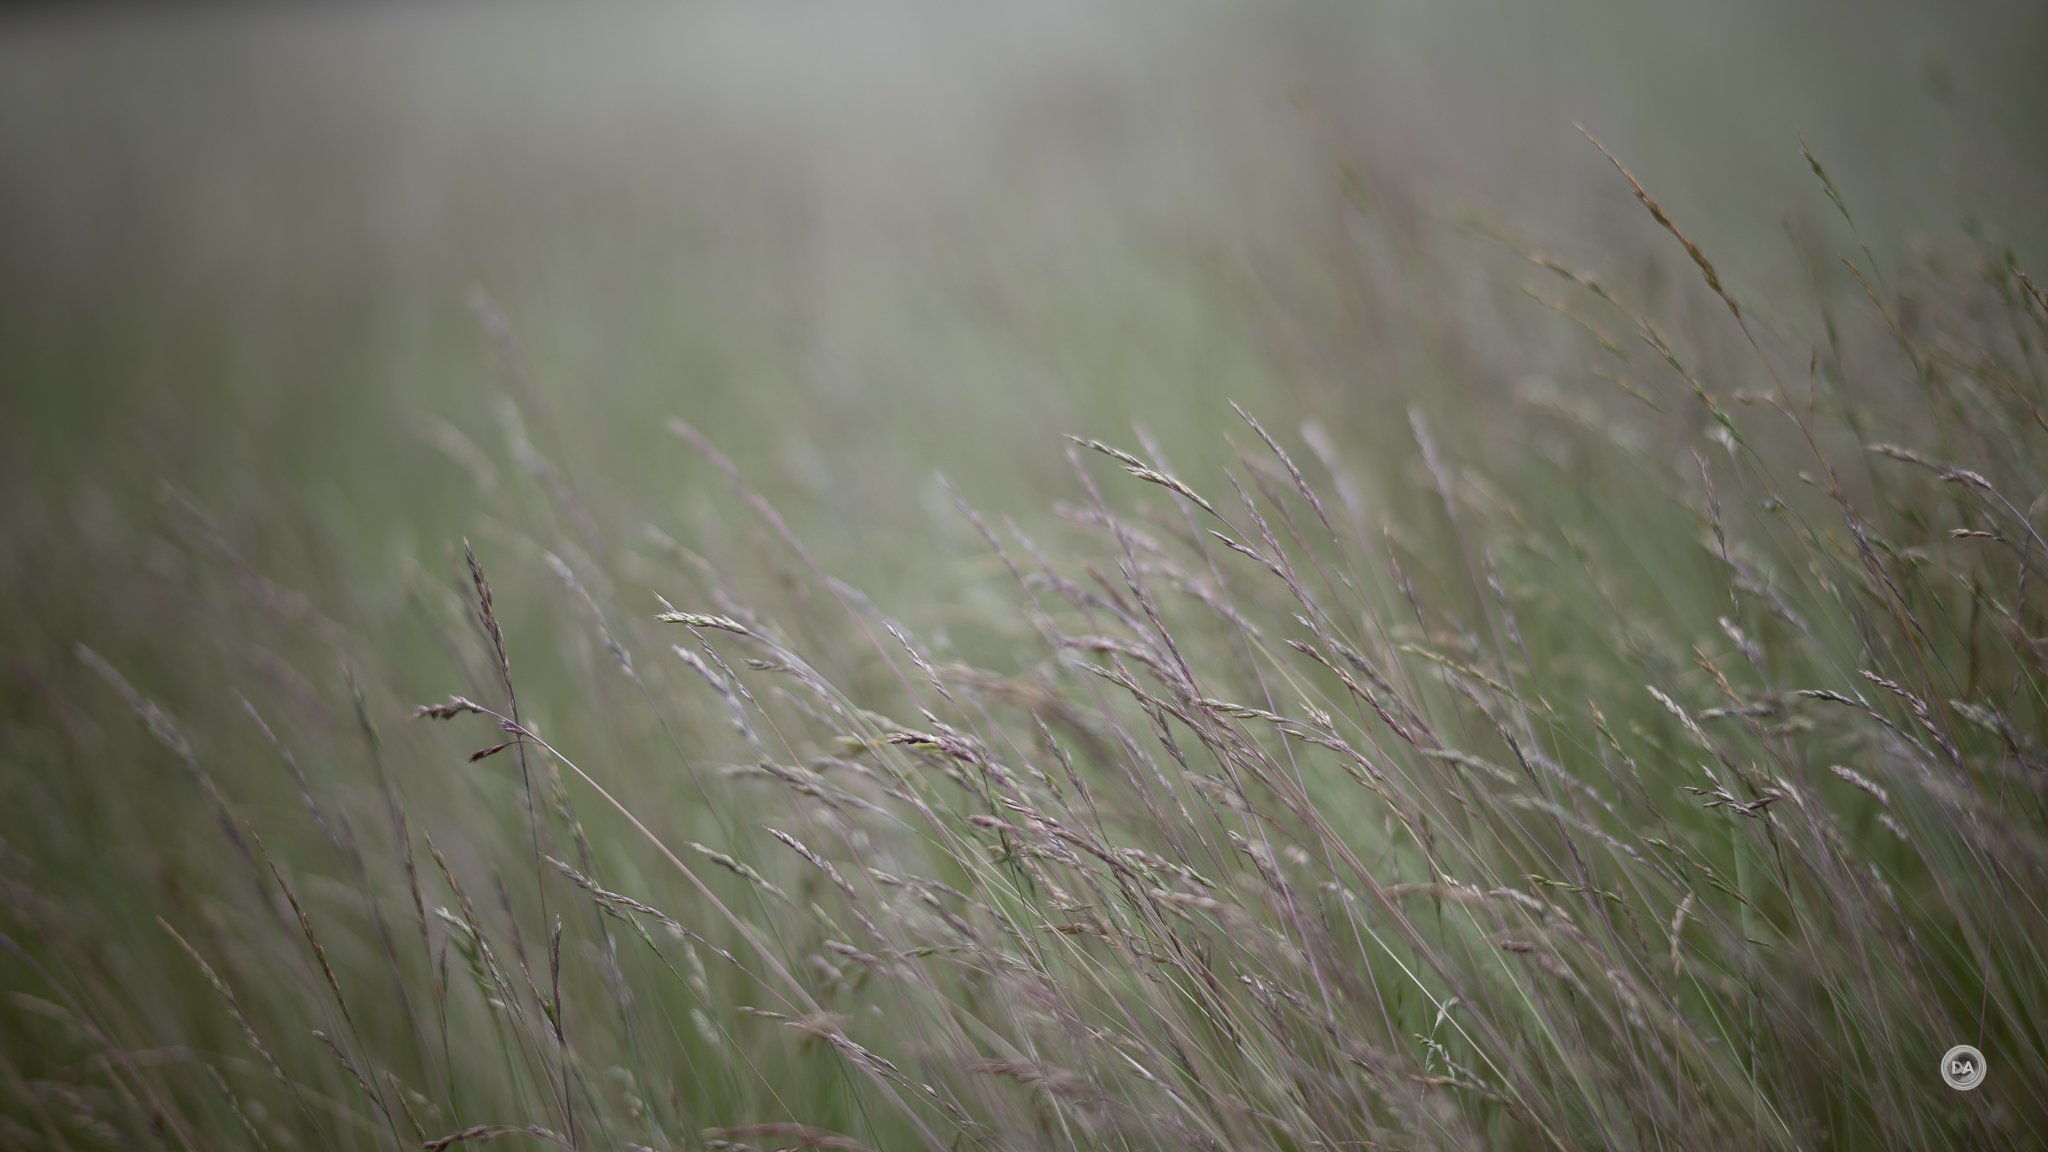
But that may not be the biggest reason to purchase the lens. If sharpness is all you are looking for, there are alternative lenses that can achieve similar levels of sharpness. The better reason to choose the Nokton 75mm is for the overall rendering – that unique blend of color, out of focus rendering, and “look” to images that is just special.
That’s right out of camera without editing. The general look of the image, even with a simple subject, is just great.
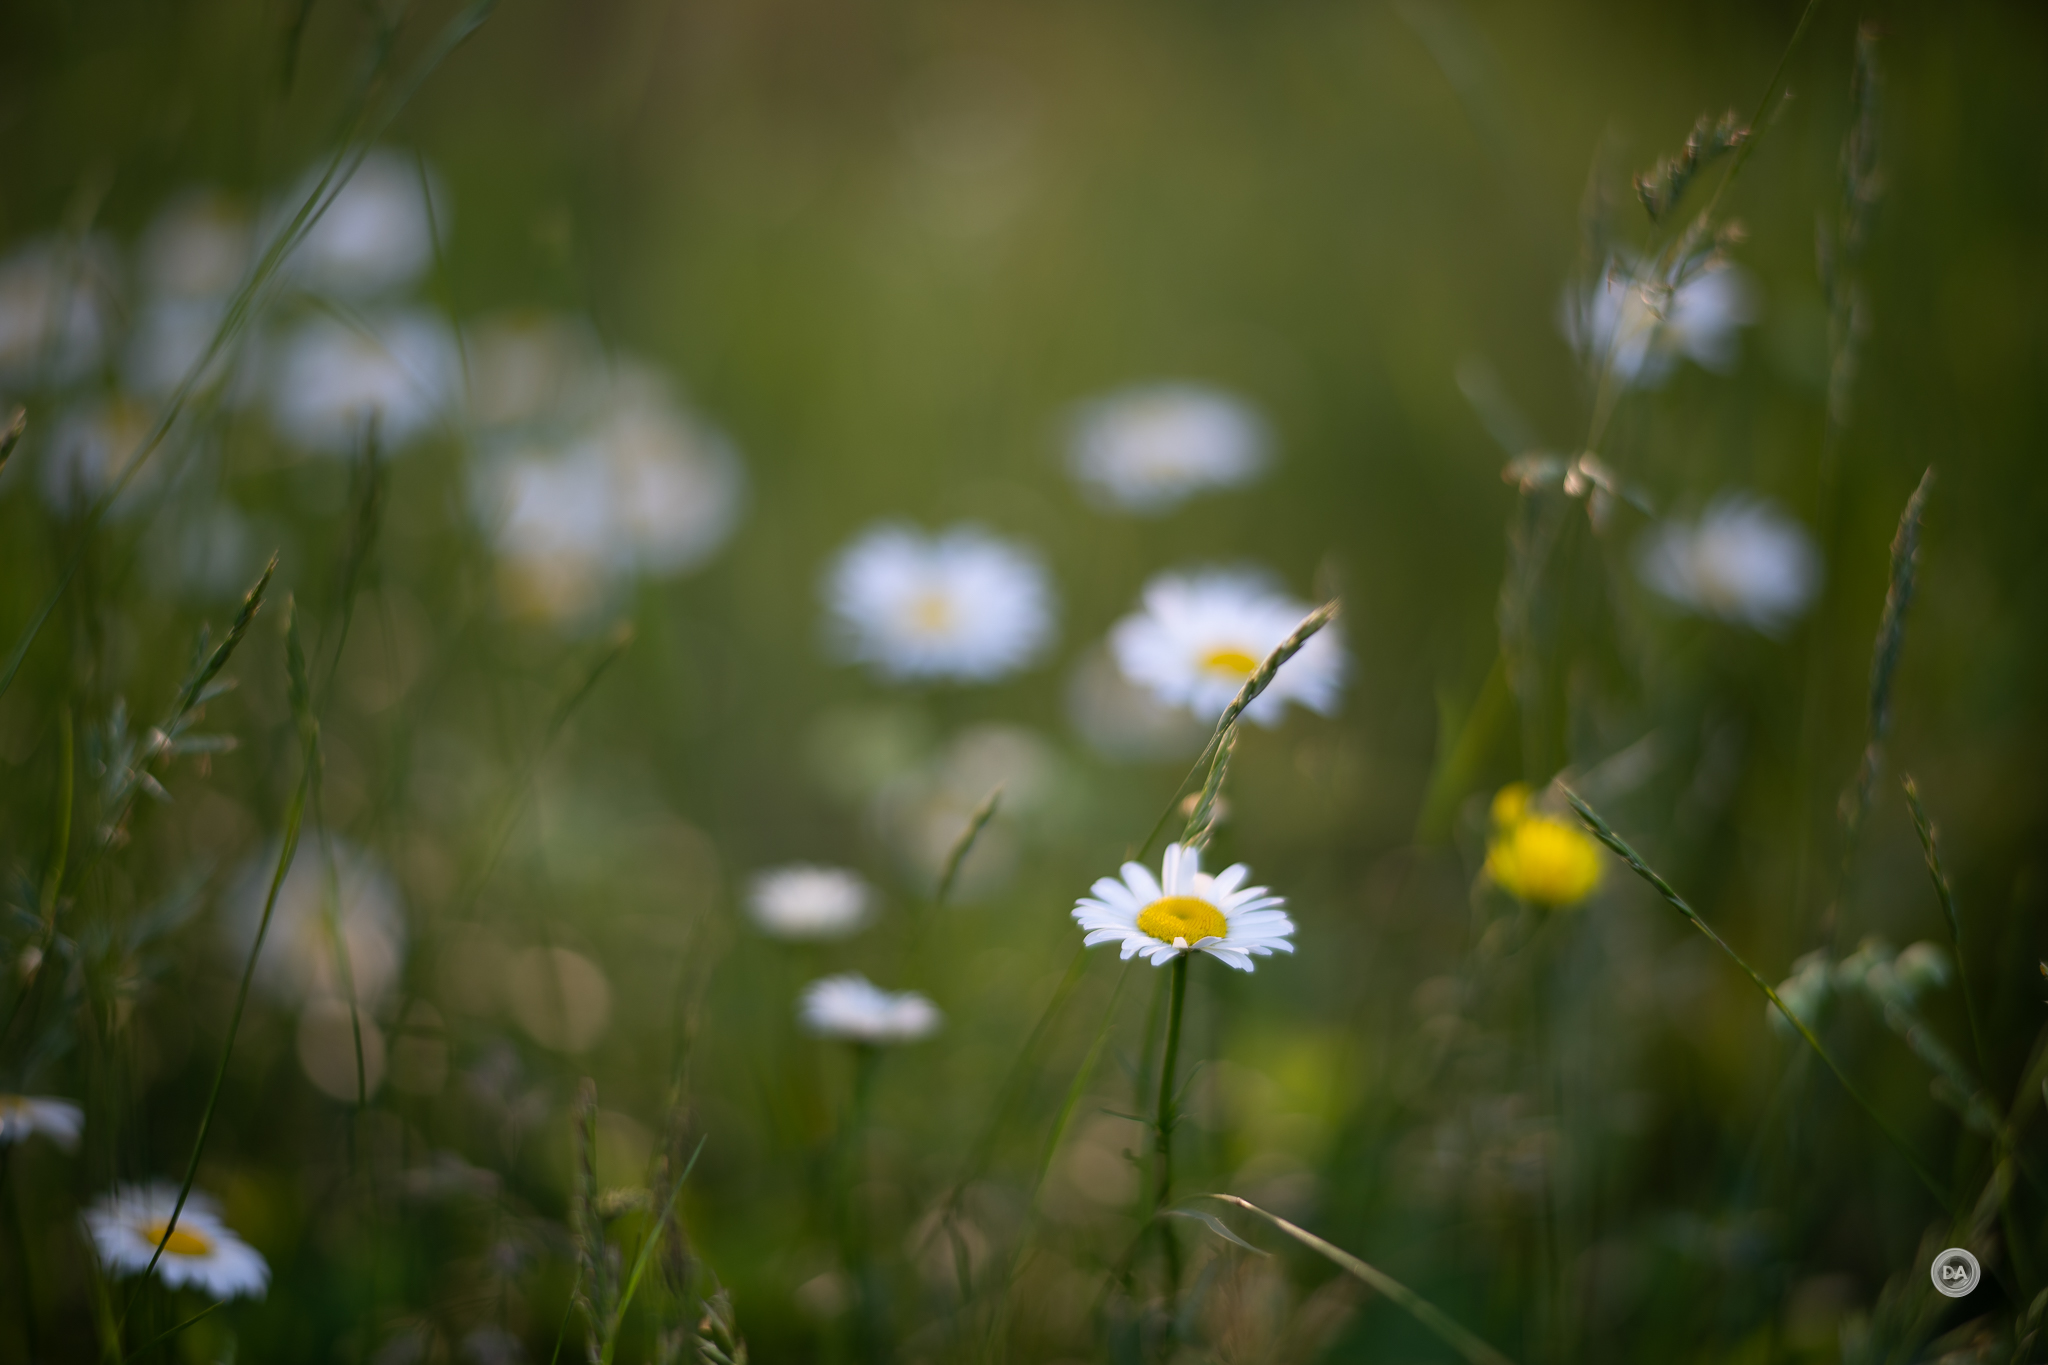
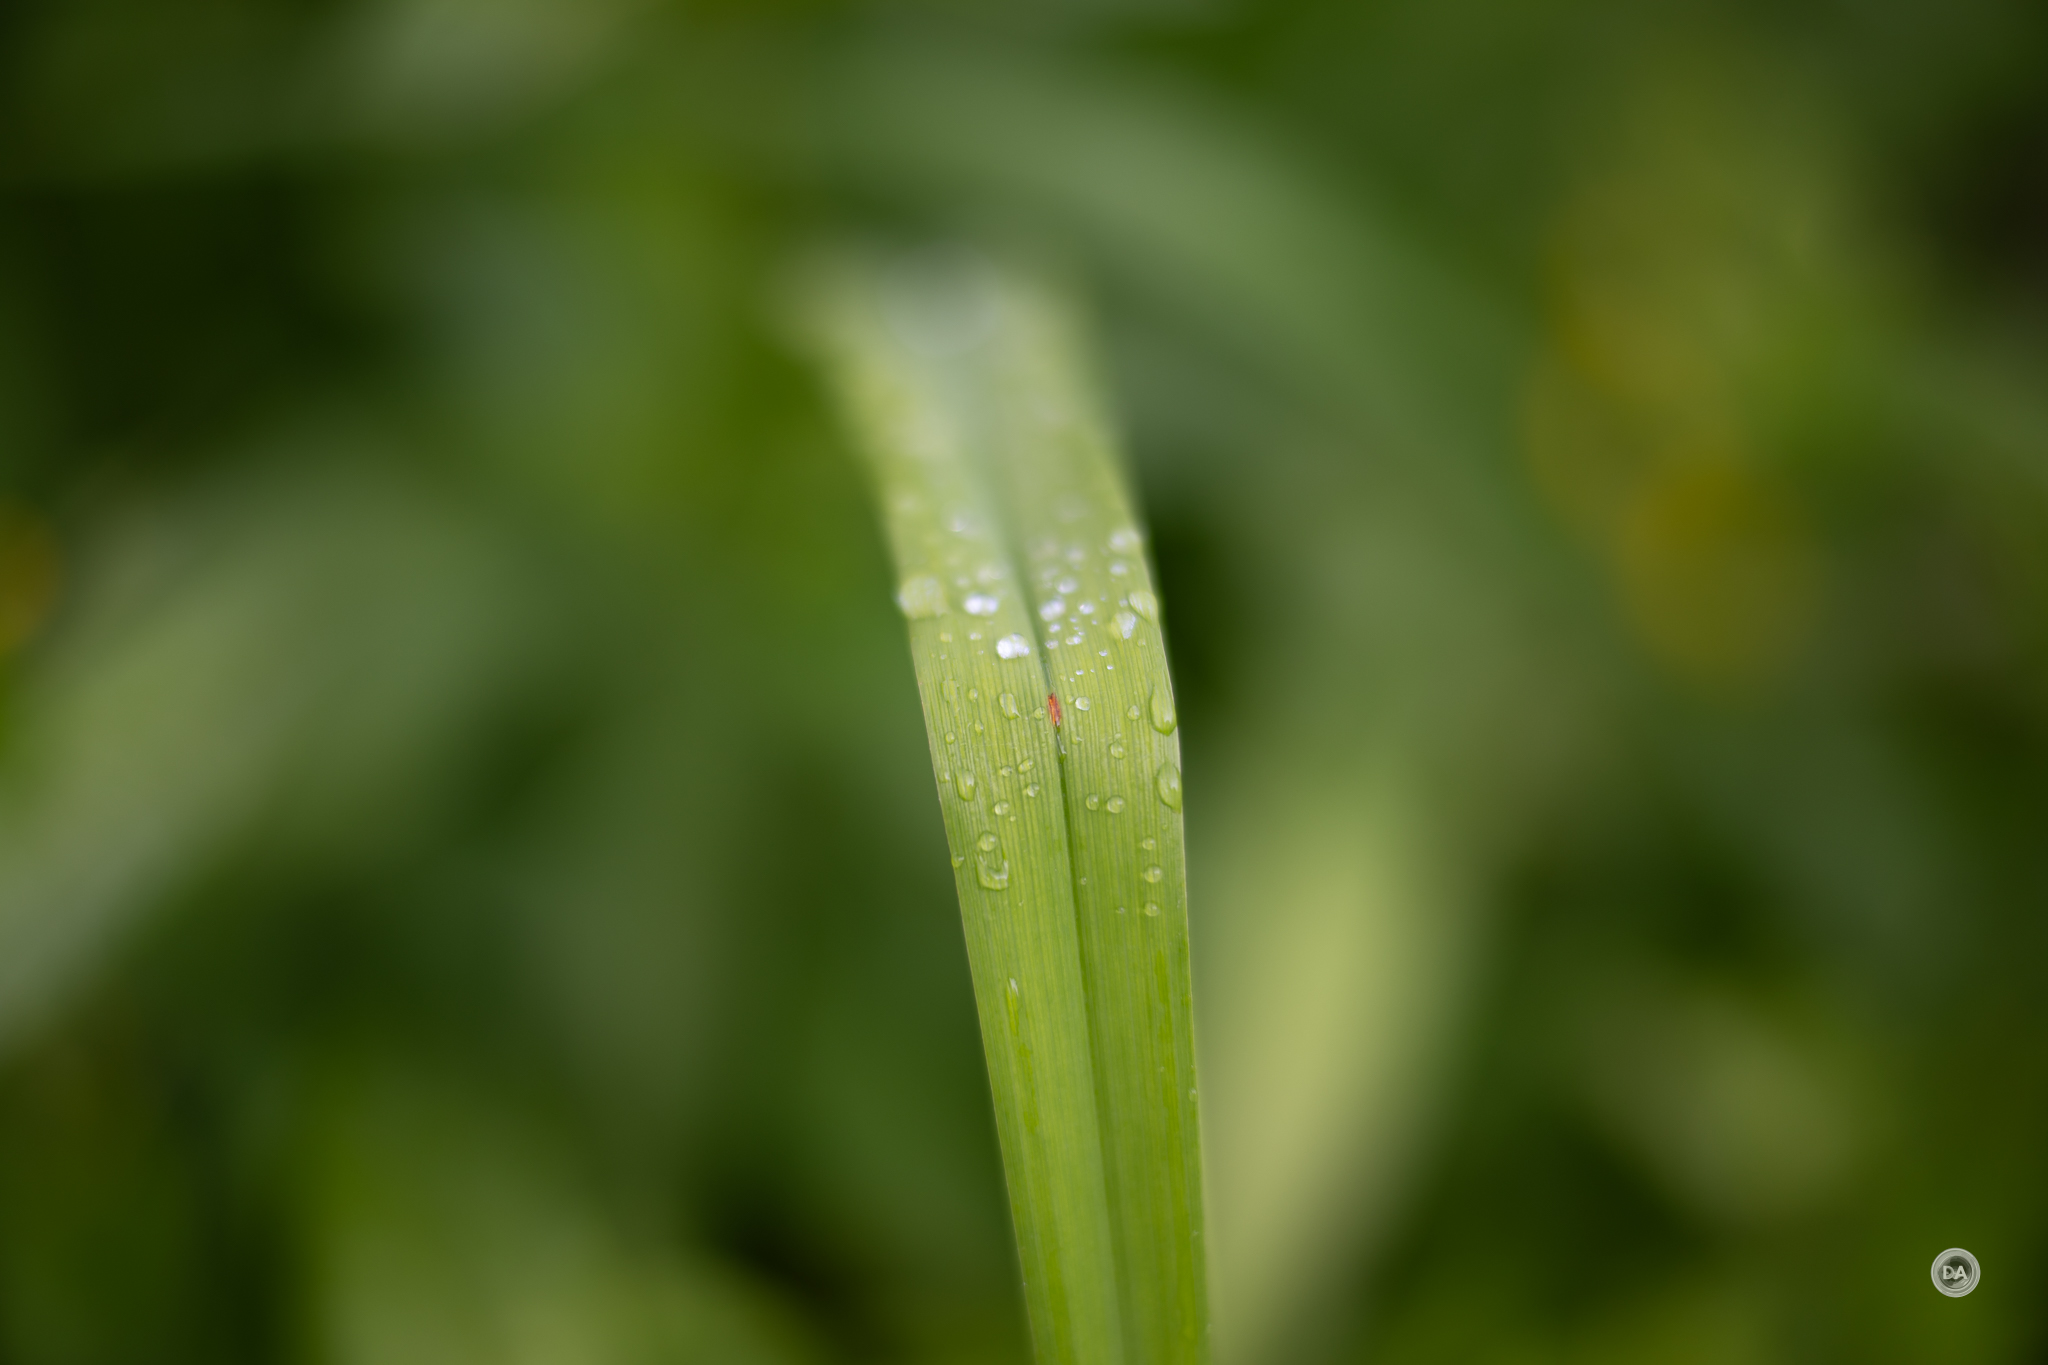
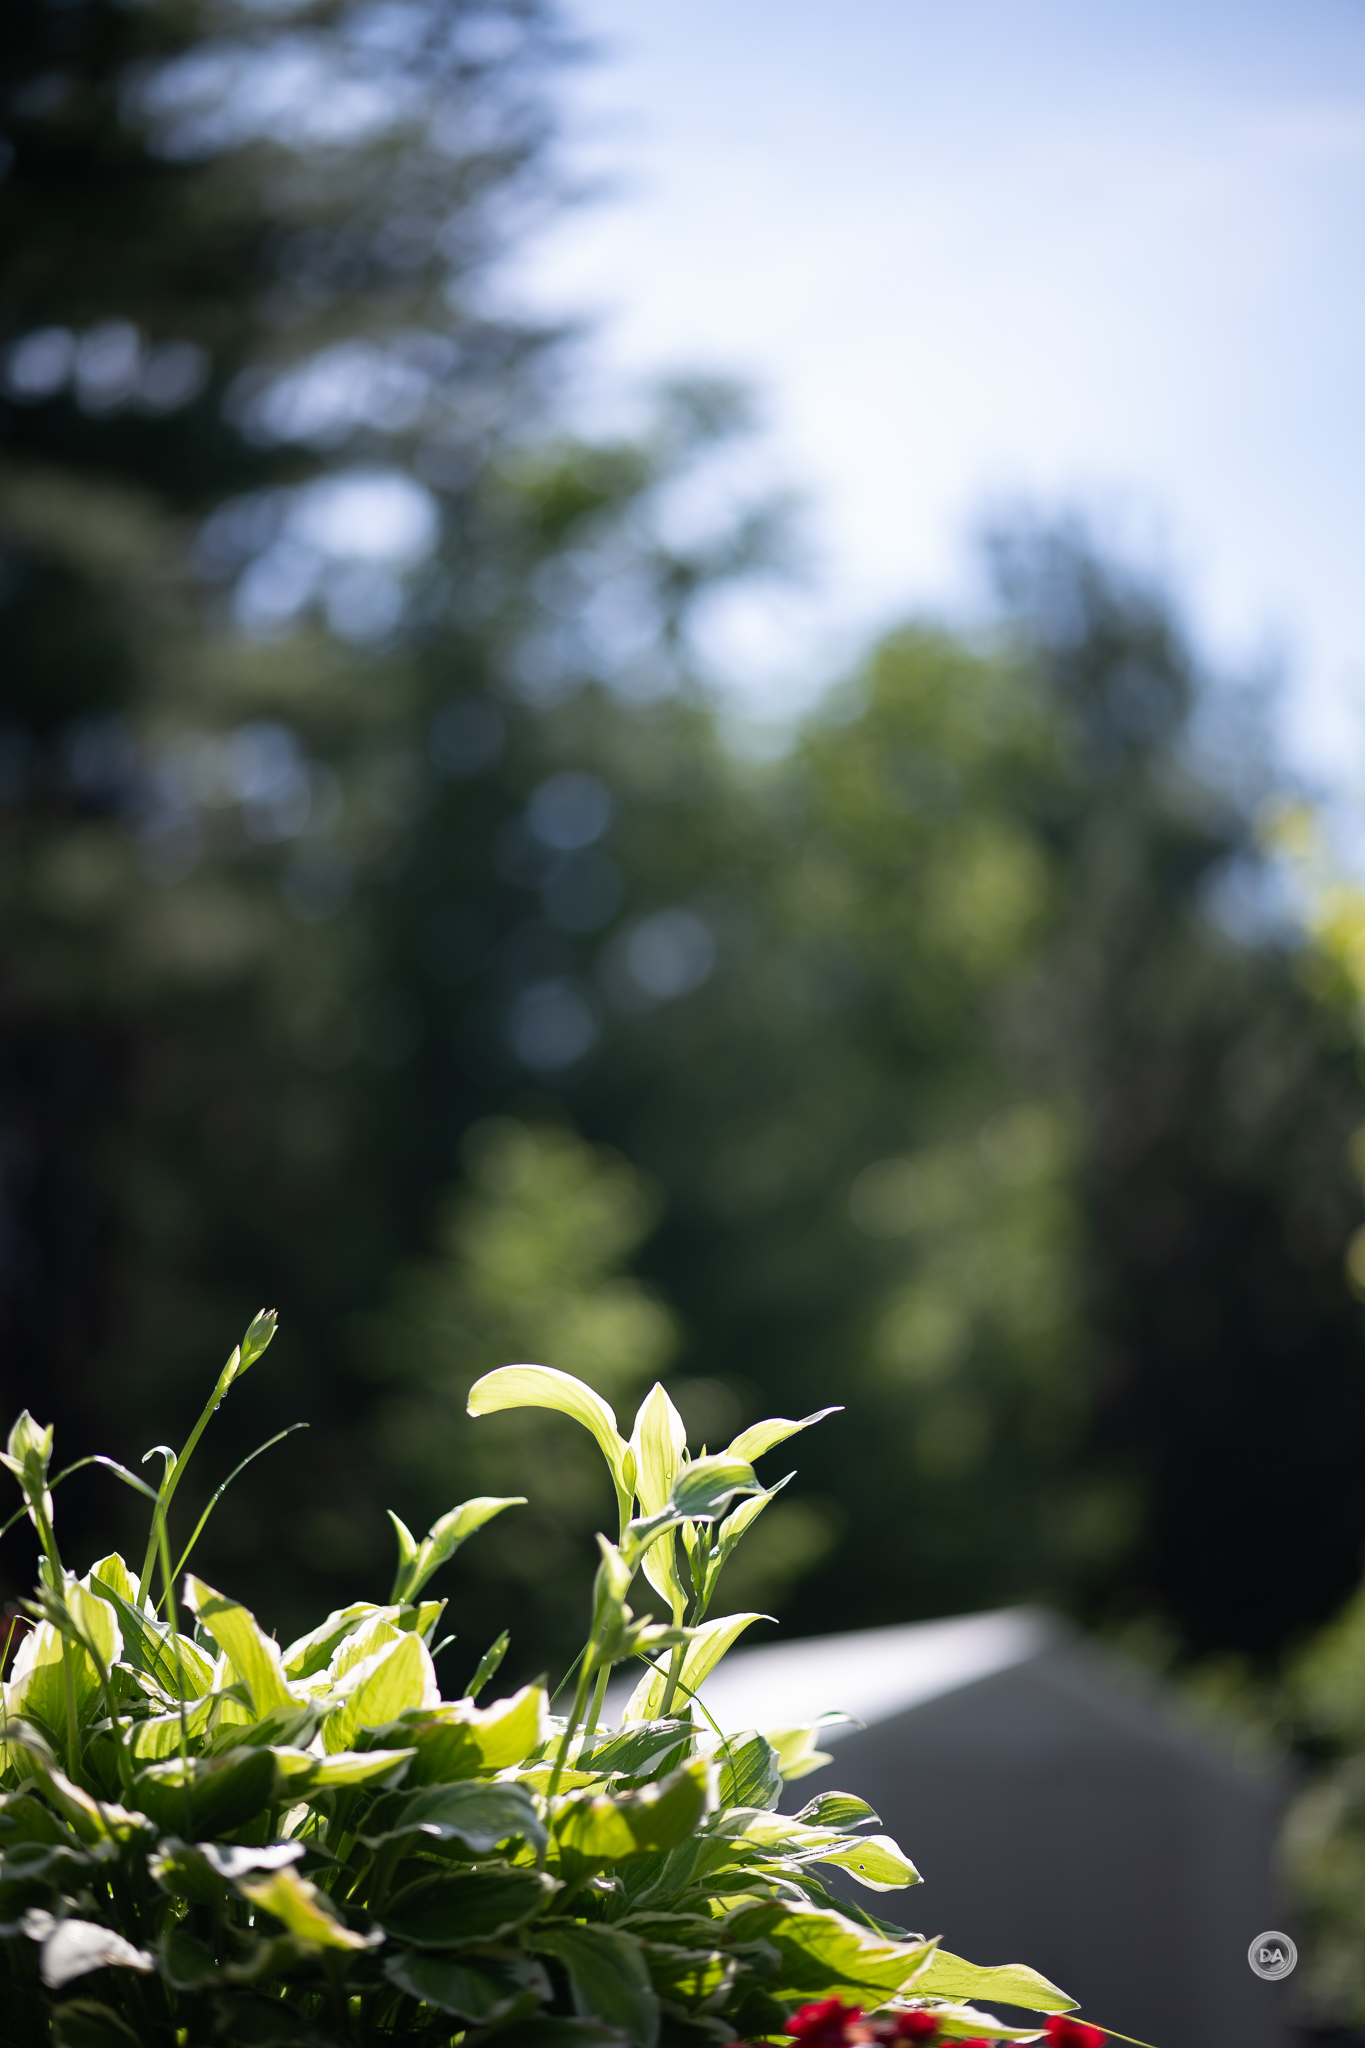
Look at how beautiful the greens are here :
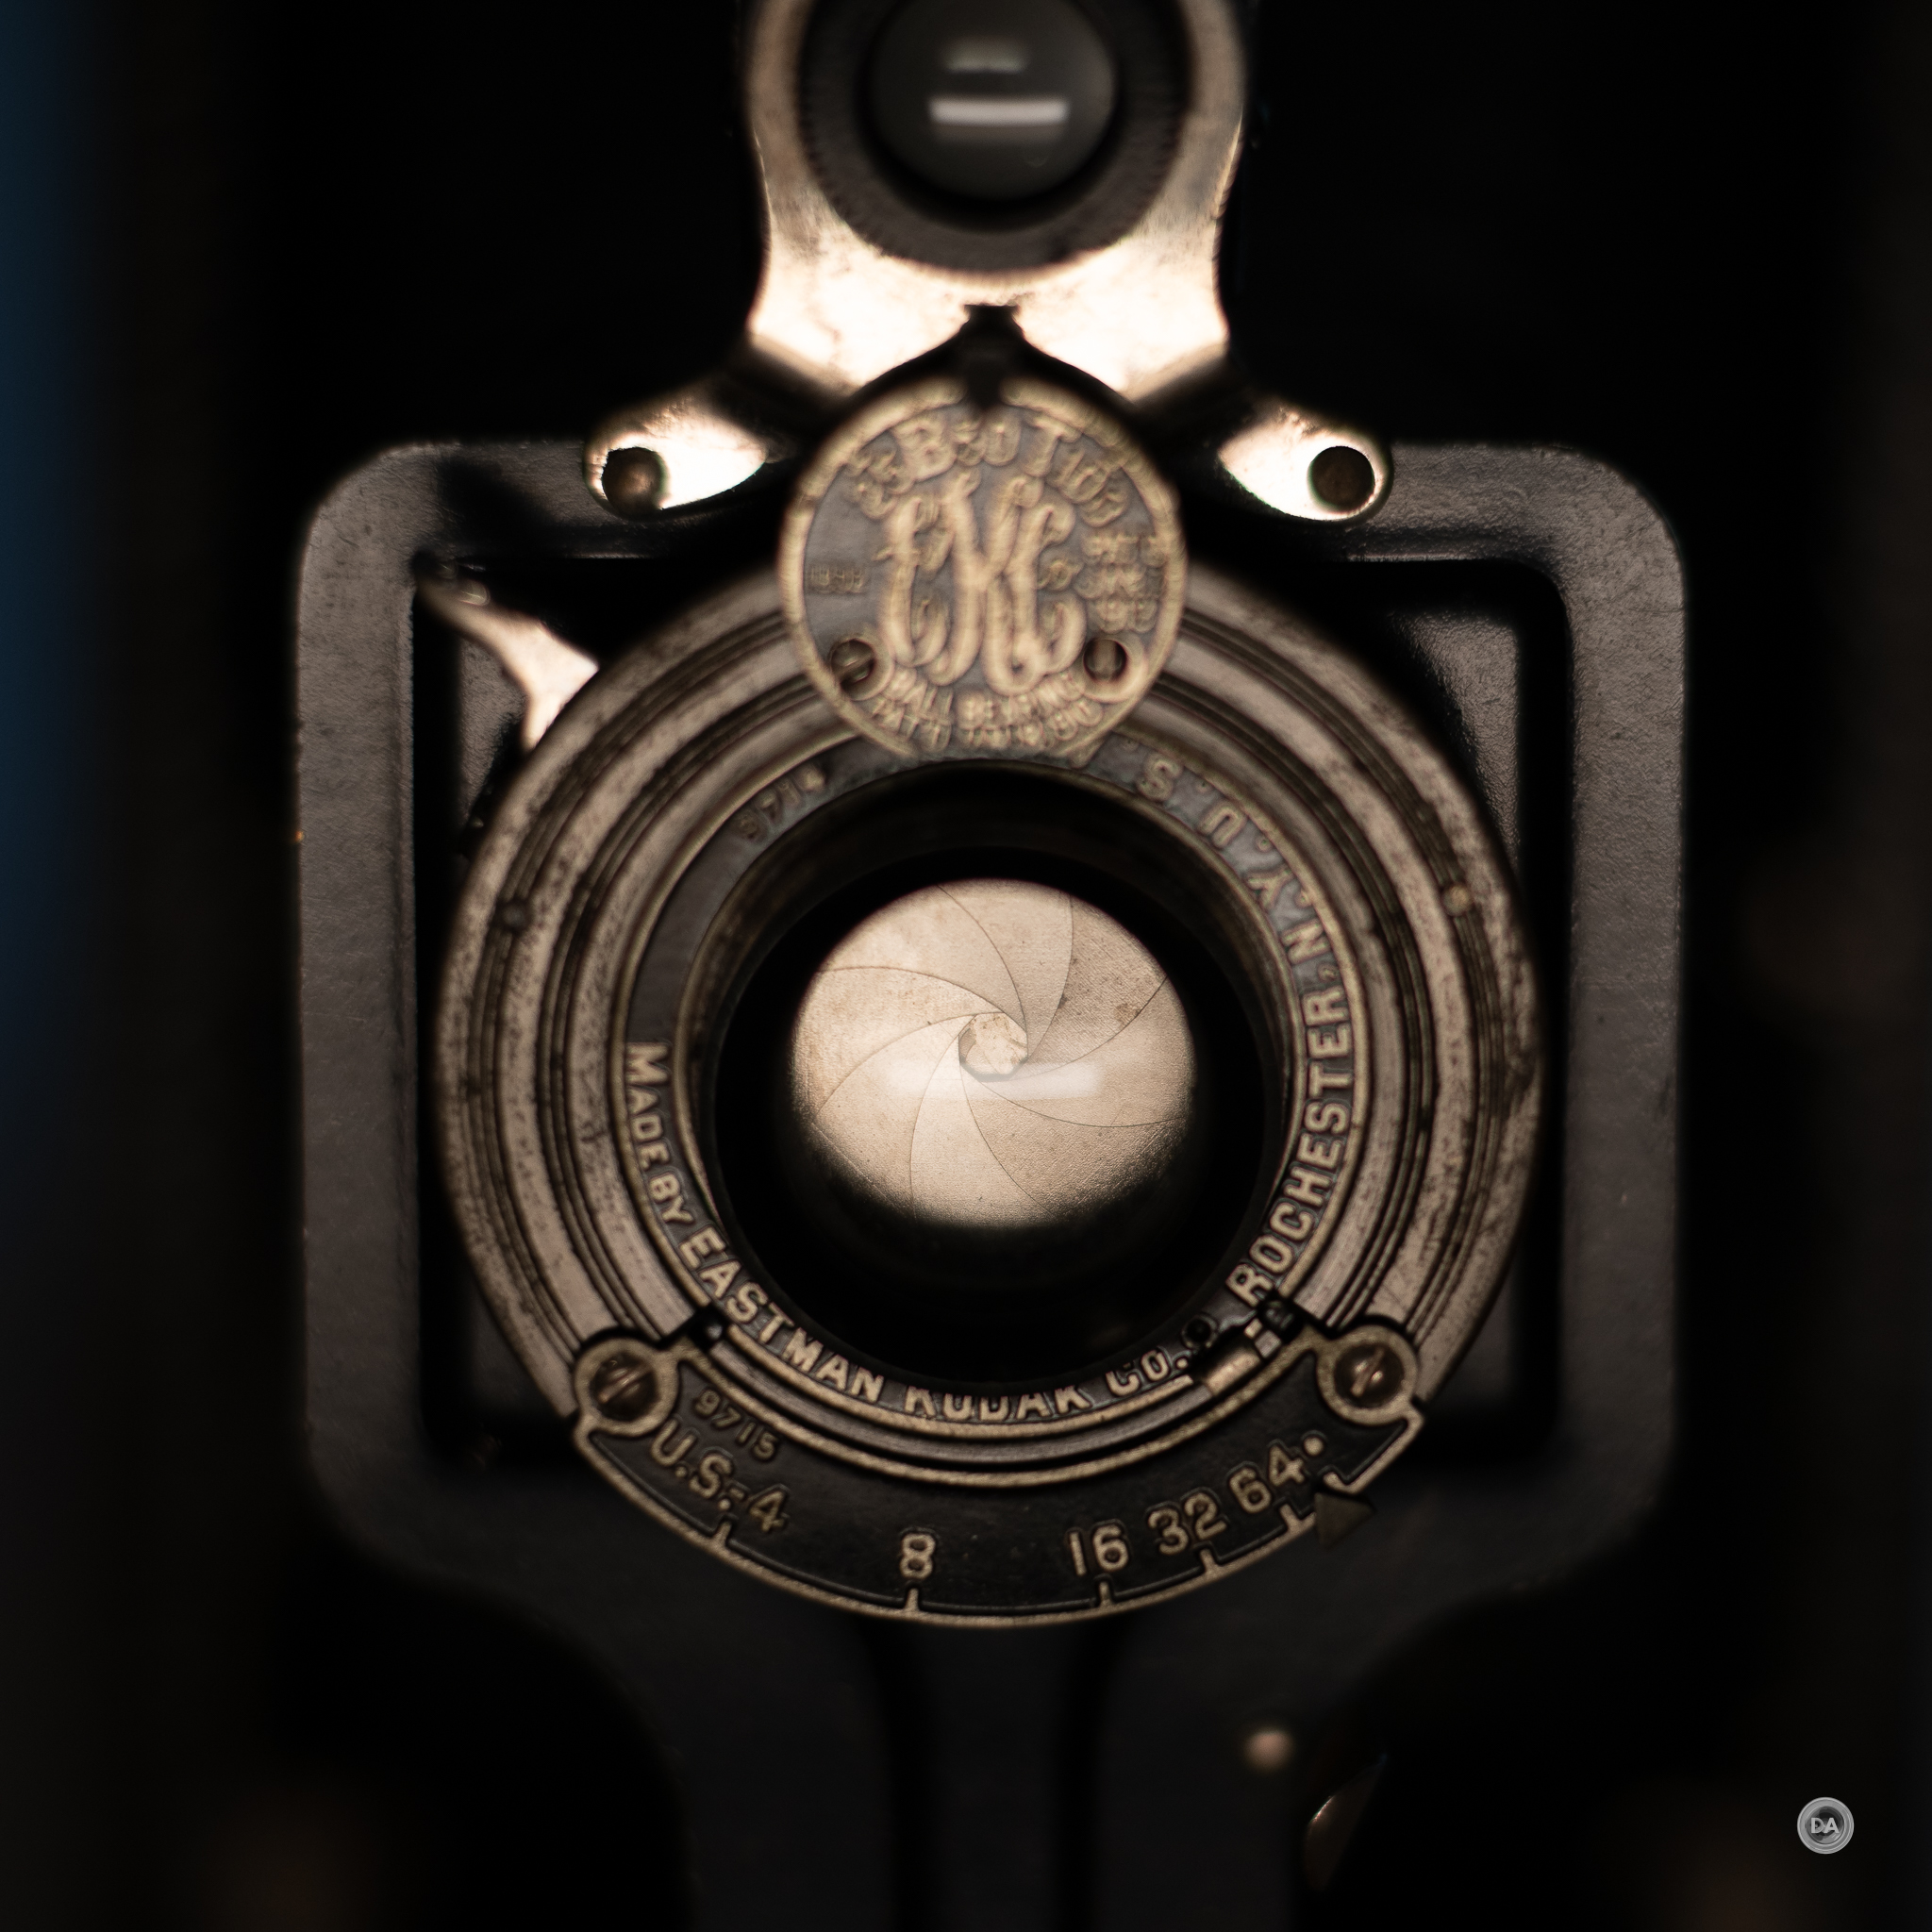
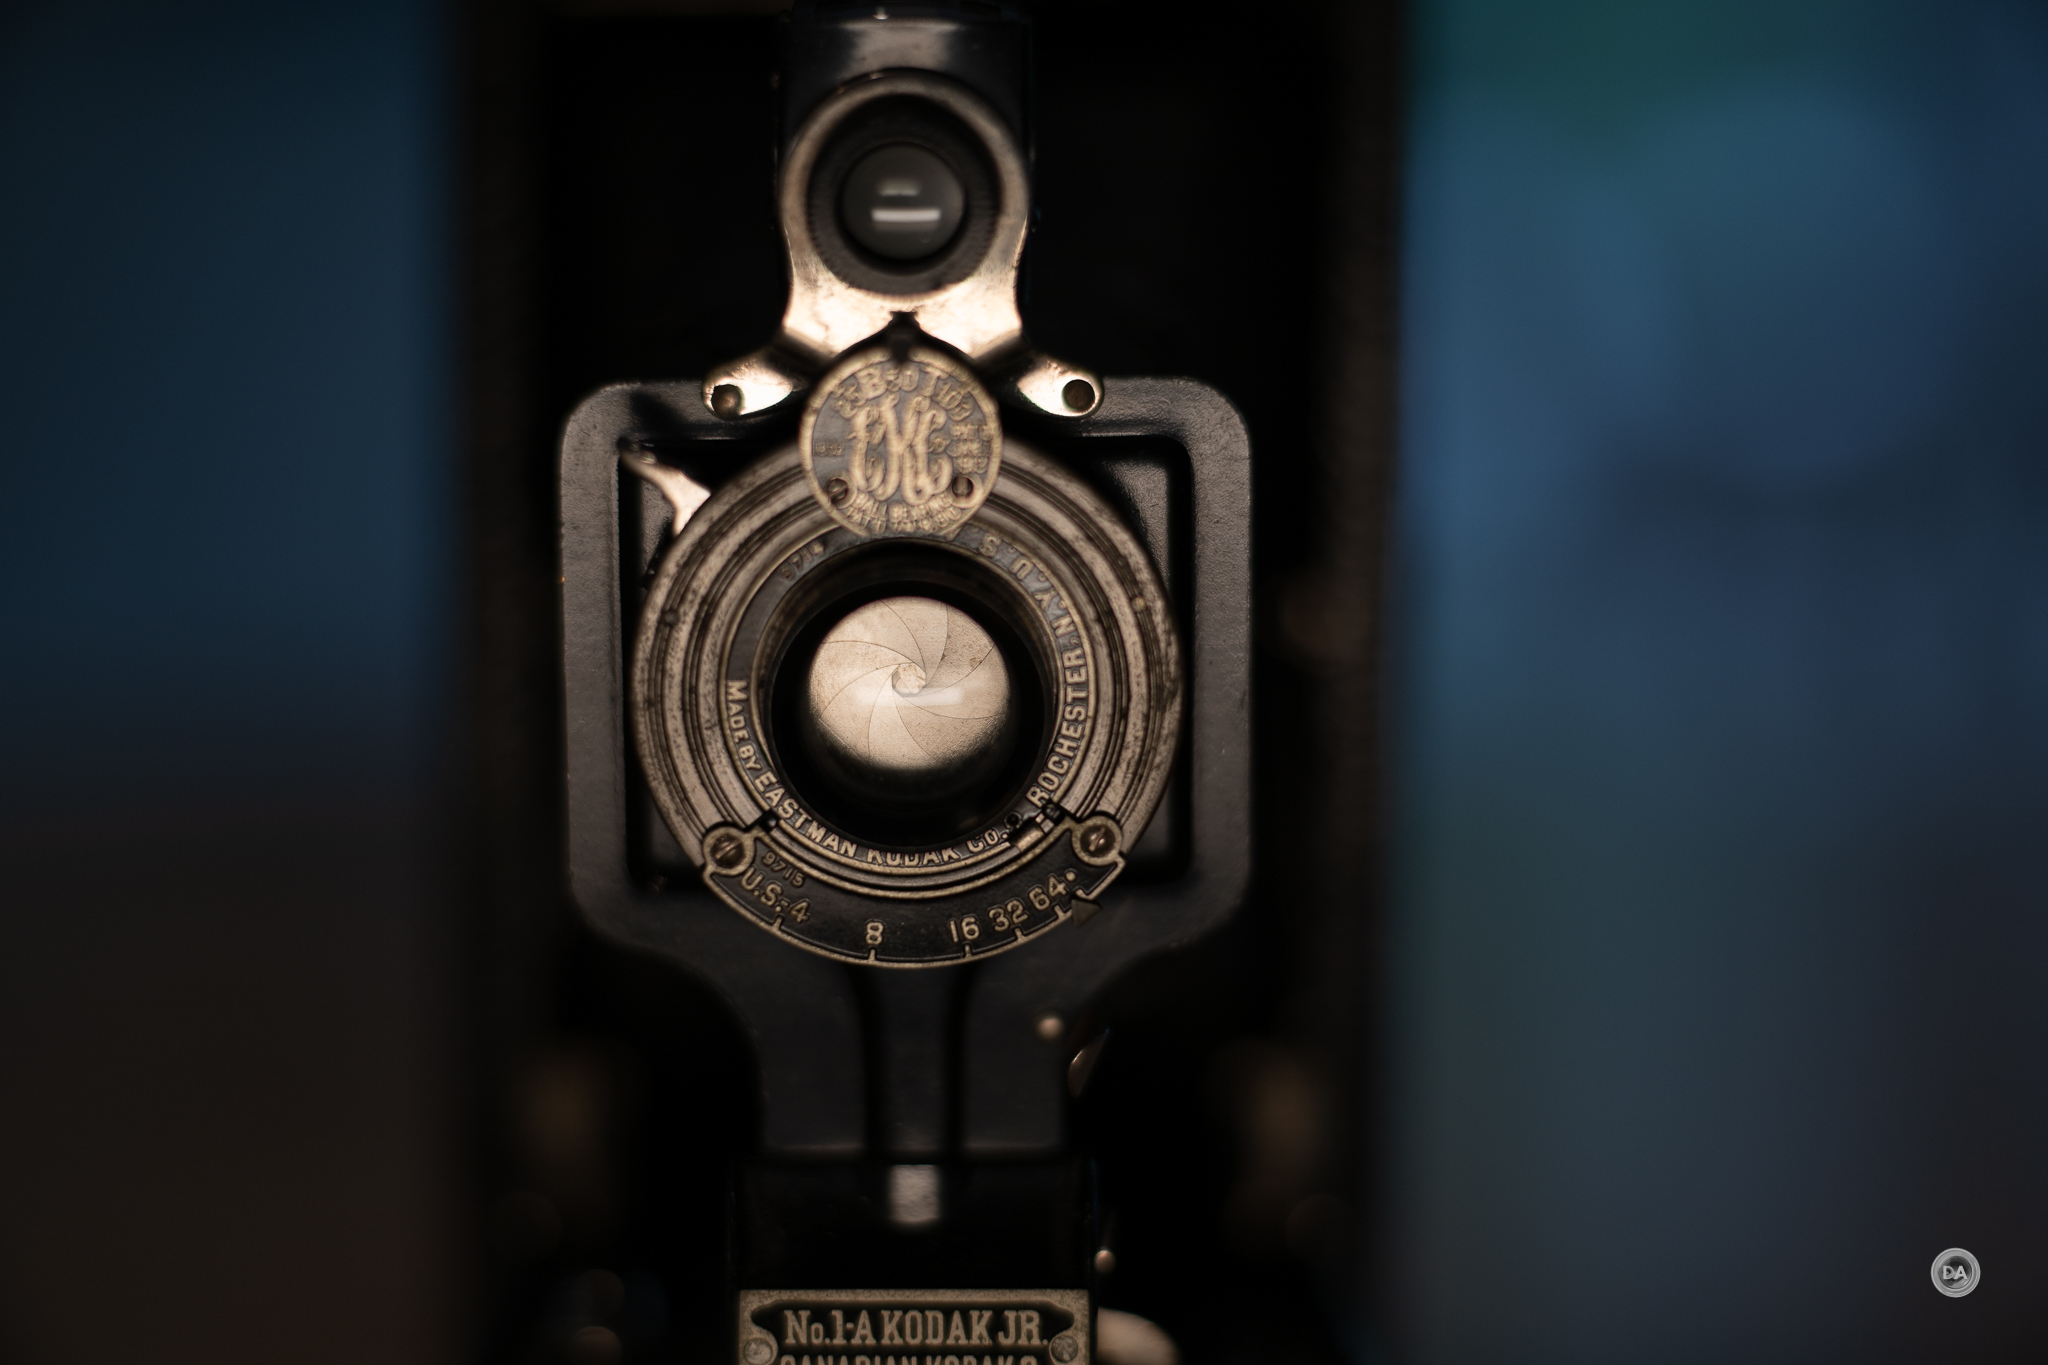
Here’s another unedited shot of a close-up of one of my vintage bellows cameras.
I’m not saying there aren’t situations where I wouldn’t want to remove some vignette, but in many cases, like with a Zeiss lens, the vignette is intentionally part of the look. In many images it just works, like this F1.5 shot of some roses.
The only fly in the ointment for some may be the straight aperture blades and the effect this has on specular highlights (bokeh balls). You will see those straight blades, though the high blade count makes this less of an issue. Here’s a look at what F2.8 looks like:
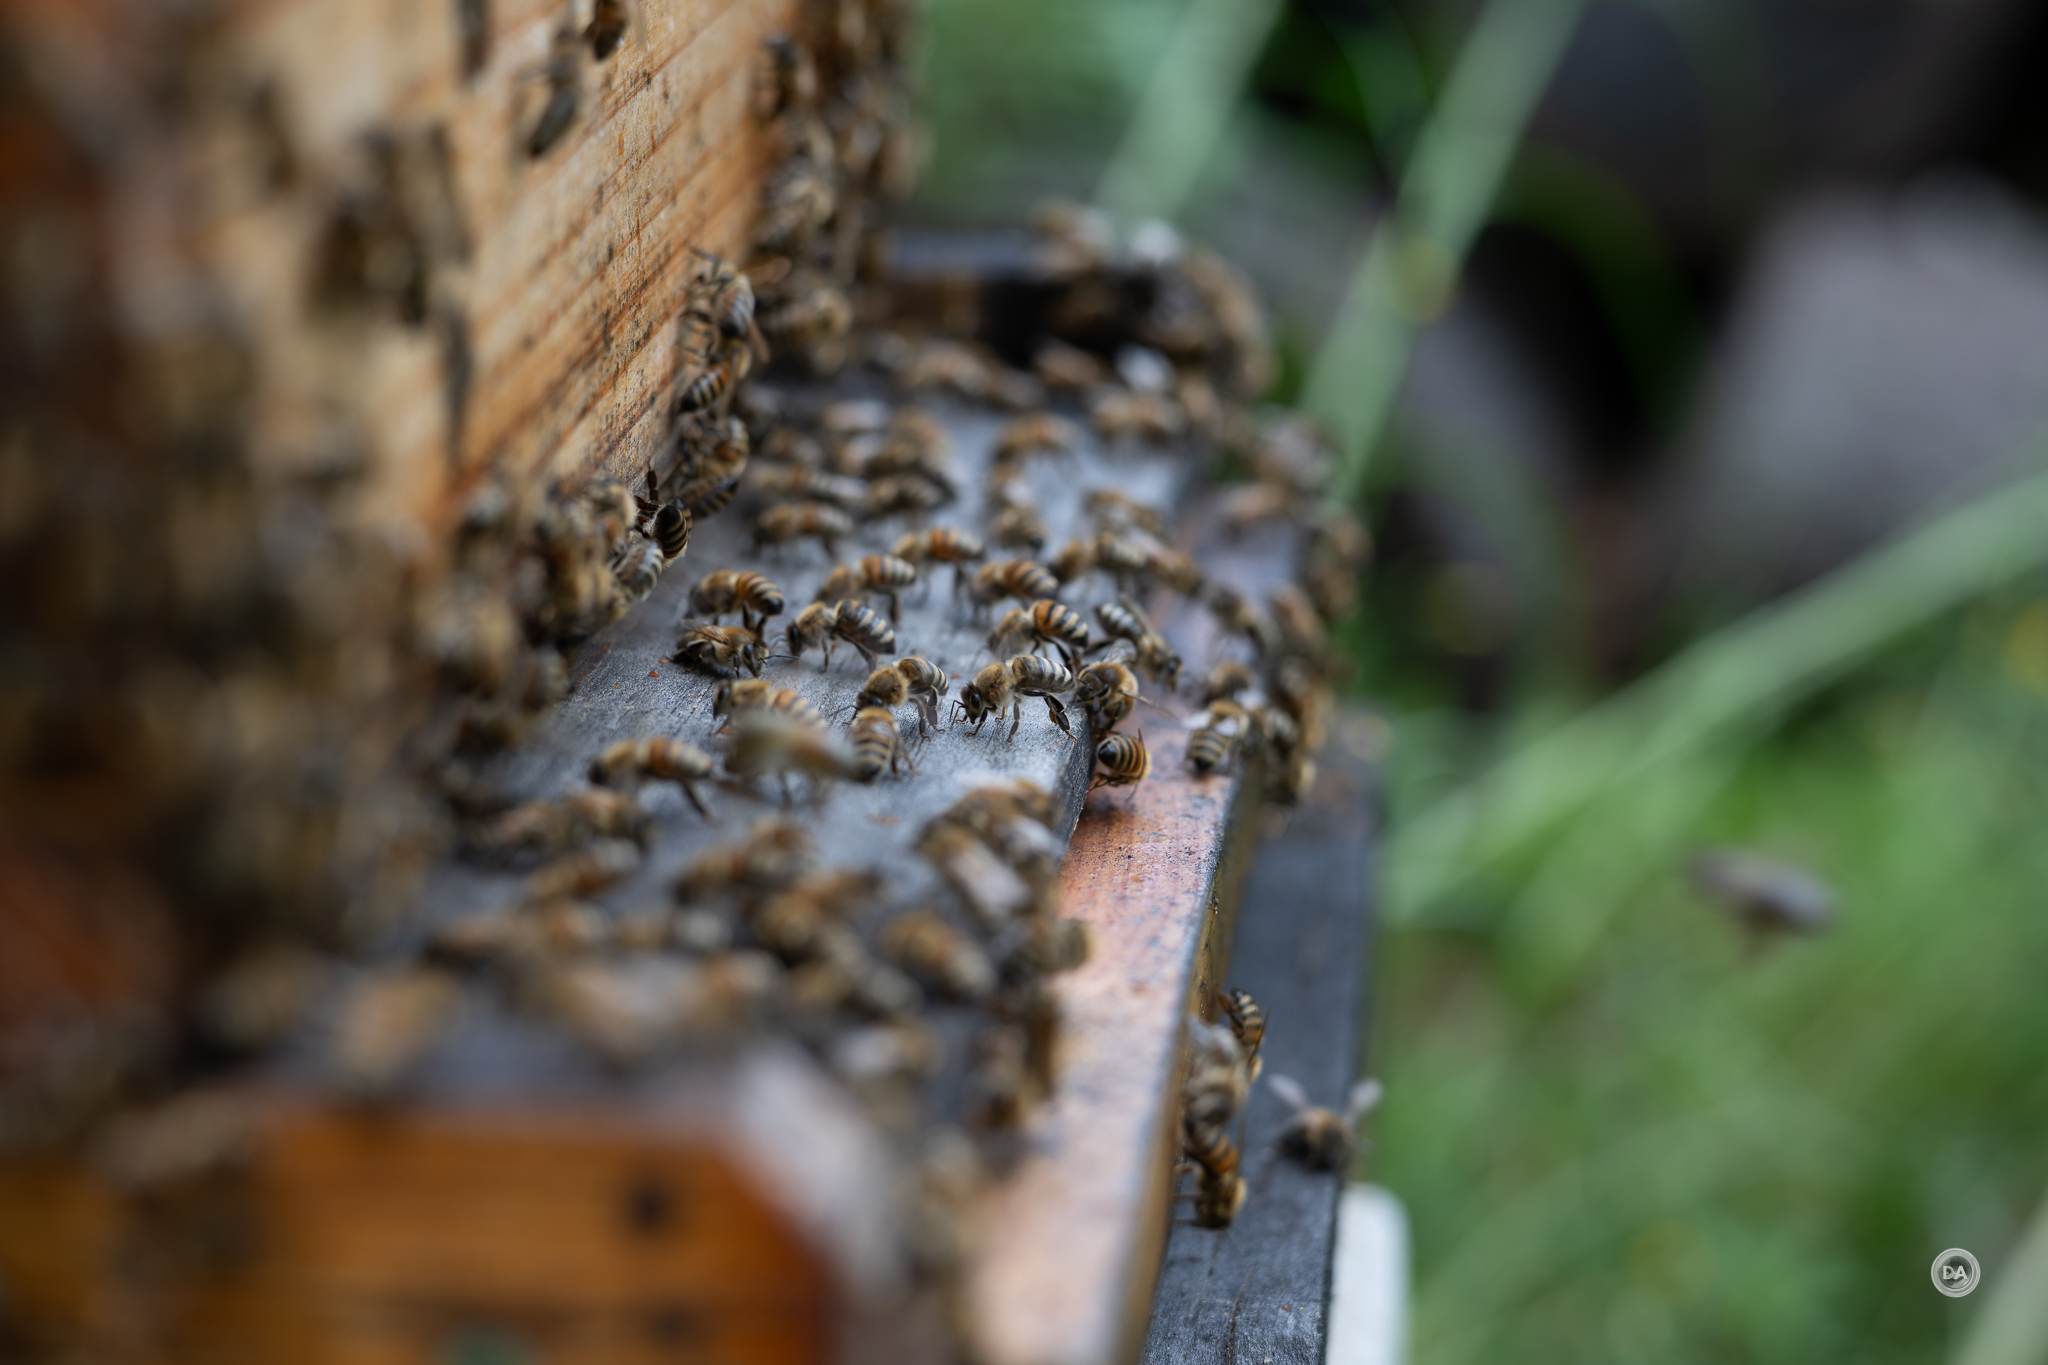
The “Nokton” part of the equation means that this lens is useful for shooting in dim lighting conditions. The bright maximum aperture of F1.5 (oddly not F1.4) allows for good light gathering, and manual focus assures that autofocus won’t complicate things in dim lighting.
I could put focus exactly where I wanted when I shot these bees in front of one of my hives. It was a hot day, and these middle aged worker bees were tasked with cooling the hive. They poise themselves in front of the hive entrance, anchor down, and flap their wings at a very high rate to help produce air flow into the hive. Pretty amazing!
Flare resistance is so-so. It is fairly easy to compose without getting too much negative from a bright light source wide open. The final image in this series is shot with the sun right out of frame, and you can see that there is no negative impact. But at certain angles you will see some ghosting patterns and a bit of loss of contrast. When stopped down the straight aperture blades aren’t much of an advantage, as the sunstar just looks busy to me. When panning the camera across the sun at small apertures I also saw a bit of flashing with the sun at certain angles.
That being said, it isn’t flare-prone in normal shooting conditions, and, while I could create some negative effects if I tried (the coatings aren’t perfect!), I also wasn’t really impacted under normal shooting conditions.
All in all, this is a strong optical performance. Yes, there is a little less contrast at F1.5, but that’s by design to allow for a special kind of “look”, and I find that it works well in real world shots. Images in general just look beautiful from the Voigtländer Nokton 75mm F1.5.
As you can probably tell, I’ve enjoyed my time spent with the Voigtländer Nokton 75mm F1.5. It’s been fun to not only get to use a beautiful new Voigtländer optic, but also to get to explore it on what is a completely new platform for me. The Nokton 75mm and my new Nikon Z8 have been excellent companions, and have produced a lot of very nice images for me.
The Nokton 75mm F1.5 is a beautifully made lens that is small enough to be a nice fit on most all Nikon Z-mount bodies. As per usual, the focus and aperture rings are perfectly executed, making manual focus and general handling great…if you love manual focus lenses.
Manual focus lenses have long been for a certain niche market. Many photographers have no interest in a lens without autofocus, and that’s okay. Voigtländer has managed to remain successful in the modern era because they are in touch with their actual audience. I certainly wouldn’t want to shoot exclusively with manual focus lenses, and I don’t like them for all types of photography, but I do love them for many of the kinds of shots that I’ve shared in this review. Shooting still subjects, taking my time, and enjoying the process of watching focus glide along until it hits the perfect spot where you want it to be. Years ago I wrote an article for Digital Photography School called, “Why Every Photographer Should Use a Manual Focus Lens.” The premise of that article was that using a good manual focus lens helps you become a better photographer. It makes you consider depth of field and its relationship with aperture, think more about composition and focus, and slows you down so that you can become a little more deliberate and even artistic in your thought process. If you’re interested in manual focus, and think that 75mm might be an interesting focal length, then the Voigtländer Nokton 75mm F1.5 should definitely be on your short list of potential new lenses.
DISCLAIMER: This article and description contains affiliate links, which means that if you click on one of the product links, I’ll receive a small commission. As an Amazon Associate I earn from qualifying purchases.
Ahhh, it is nice to be reviewing another Voigtländer lens! My last Voigtländer review was back in 2020, and it was actually a review of the APO-Lanthar 50mm F2 that a subscriber had personally loaned me because I had no access to Voigtländer products here in Canada because of their not having a Canadian distributor (at least that I was aware of) and a complication with sending their products across the border from the US. Fortunately that has all changed for the better, and early this year I received an email that I was very happy to get – a “hello” from JCL Sales Group, the distributor for Voigtländer in Canada. They wanted to know if I was interested in doing more Voigtländer reviews, to which I responded, “absolutely!”
I’ve got a bit of soft spot for Voigtländer lenses, having owned three of them and currently using one that I do own (APO-Lanthar 65mm F2 Macro) on a regular basis. That has only grown since Zeiss has seemingly transitioned away from producing non-cine camera lenses, leaving Voigtländer as the only company filling that unique niche of premium manual focus lenses. Voigtländer is actually the oldest surviving lens maker, and is a company that traces its roots to Vienna, Austria, in the mid 1700s. Like Zeiss (a German company), the more modern lenses have been produced in Japan by Cosina, and there is just something special about their optical glass that produces gorgeous colors. Today’s review is of one of their newest lenses – the Voigtländer Nokton 75mm F1.5. I’m reviewing it in Nikon Z-mount, though I know that a Sony E-mount (and perhaps other mounts) are on the way. If you want my full thoughts on this lovely new lens, you can either watch my video review below, read the text review, or just enjoy the photos in the gallery.
Thanks to JCL Sales Group for sending me a review loaner of this lens. As always, this is a completely independent review. All opinions and conclusions are my own.*The tests and most of the photos that I share as a part of my review cycle have been done with the 45MP Nikon Z8, which I reviewed here.
Voigtländer lenses follow a tried and true formula that has been true across the four different mounts that I’ve tested them on. This includes a premium build that is all metal and glass, well executed aperture and focus rings, electronic contacts to communicate EXIF data and to enable more manual focus aids, but no weather sealing. Their lenses tend to be more like classic Zeiss lenses in build but typically smaller and less extreme in size. All of this is true here, and while the Nokton 75mm isn’t a small lens, it is only moderately sized.
There are two aspects of Voigtländer lenses that I enjoy: 1) the beautiful manual focus action and 2) the uniquely beautiful rendering and image quality.
DISCLAIMER: This article and description contains affiliate links, which means that if you click on one of the product links, I’ll receive a small commission. As an Amazon Associate I earn from qualifying purchases.
The TTArtisan 21mm F1.5 ASPH is the second lens I’ve reviewed from Chinese lensmaker TTArtisan. The first was an 11mm F2.8 Fisheye lens, which is hardly a conventional lens. That lens was good enough, however, that I was open to testing another TTArtisan lens. A 21mm F1.5 lens is slightly more conventional, though the maximum aperture designation of 1.5 is something I tend to see more with cine lenses that are measured in T-stops; an aperture value of F1.4 is typically the standard for stills lenses. While a maximum aperture of F1.5 is rare, rarer still is a wide aperture, wide angle prime for full frame cameras that costs less than $250 USD.
The TTArtisan 21mm is available in Leica L-mount (black and silver), Sony E-mount, Canon RF-mount, and Nikon Z-mount, so it covers most of the bases of the major modern mirrorless cameras. It is a fully manual lens (manual focus, manual aperture, and no electronics), so developing for multiple mounts is much simpler. I’ve done my review in a Canon RF mount and on my 45MP Canon EOS R5. Typically the R5 is a great platform for manual focus, as its innovative Focus Guide works well and the in-body-image-stabilization helps deliver good results in a variety of settings. The lack of electronics in the TTArtisan 21mm means that the Focus Guide doesn’t work, however, so I’m left with more traditional focus overlays and magnifying the image…which is still a far cry simpler than manual focus on any DSLR!
So is this a lens worth considering? The answer is slightly complicated, so let’s dive in and find out. If you would prefer to watch your reviews, you can watch the video review below.
Thanks to TTArtisan for sending me a loaner copy of the lens for review. This (as always) is a completely independent review.
TTArtisan 21mm F1.5 Build and Handling
Like many such lenses, the TTArtisan has a fairly nice build and is made all of metal, so, although very compact (63 [D] x 73 mm [L]), it weighs in at a moderate 412g, heavier than what you would expect by the dimensions. The aperture ring is clicked, moves nicely, and has one half stop detents. The manual focus ring also moves smoothly with nice damping and has a fairly generous 170° of focus throw/rotation.
Up front there is a slightly unique design. The front diameter of the lens is quite narrow and has a fixed, petal shaped lens hood. You can use a fairly small diameter compression lens cap that fits over the top of the lens hood. It works fine, but this configuration leaves no allowance for using filters.
Not to worry, though, as TTArtisan has included an adapter that screws in and allows you to use traditional screw-in filters in a reasonably common 72mm size. There is a second lens cap that is a flat, screw-in type. I don’t love the screw-in design as it is a much slower process to take it on and off, but I appreciate that they have given an option for those wanting to use filters.
The Canon RF and Nikon Z mounts are wider than the others, and this leads to a somewhat unconventional lens profile where the widest point on the lens is the flared out portion near the lens mount. Sony E-mount, for example, will have a more standard barrel width (about 7mm narrower).
The trend among many of these Chinese lens makers is to have aperture irises with high blade counts. This is frequently a good thing, as apertures with higher blade counts tend to do well in retaining a circular shape. In this case, however, having a high blade count of ten is possibly a detriment. It’s a nice enough aperture iris, with good, even geometry, though the blades here are straight rather than rounded. Even at F2 you can see the edges of the blades. Here’s a more obvious look at F5.6:
The challenge I found with the high blade count here is that creating sunstars was somewhat difficult. I typically capture them for my reviews at F11, but in many situations I simply wasn’t getting the sunburst effect.
I had to stop down to F16 and squeeze the sun through tree branches to get a proper sunstar effect. Since the blade count is even, the number of points on the star equal the number of blades (ten), but it looks pretty nice here:
The problem was that the lens is quite flare prone at smaller apertures, meaning if I allowed too much sun through, this was the result:
That’s obviously an optical weakness we’ll touch on in a moment.
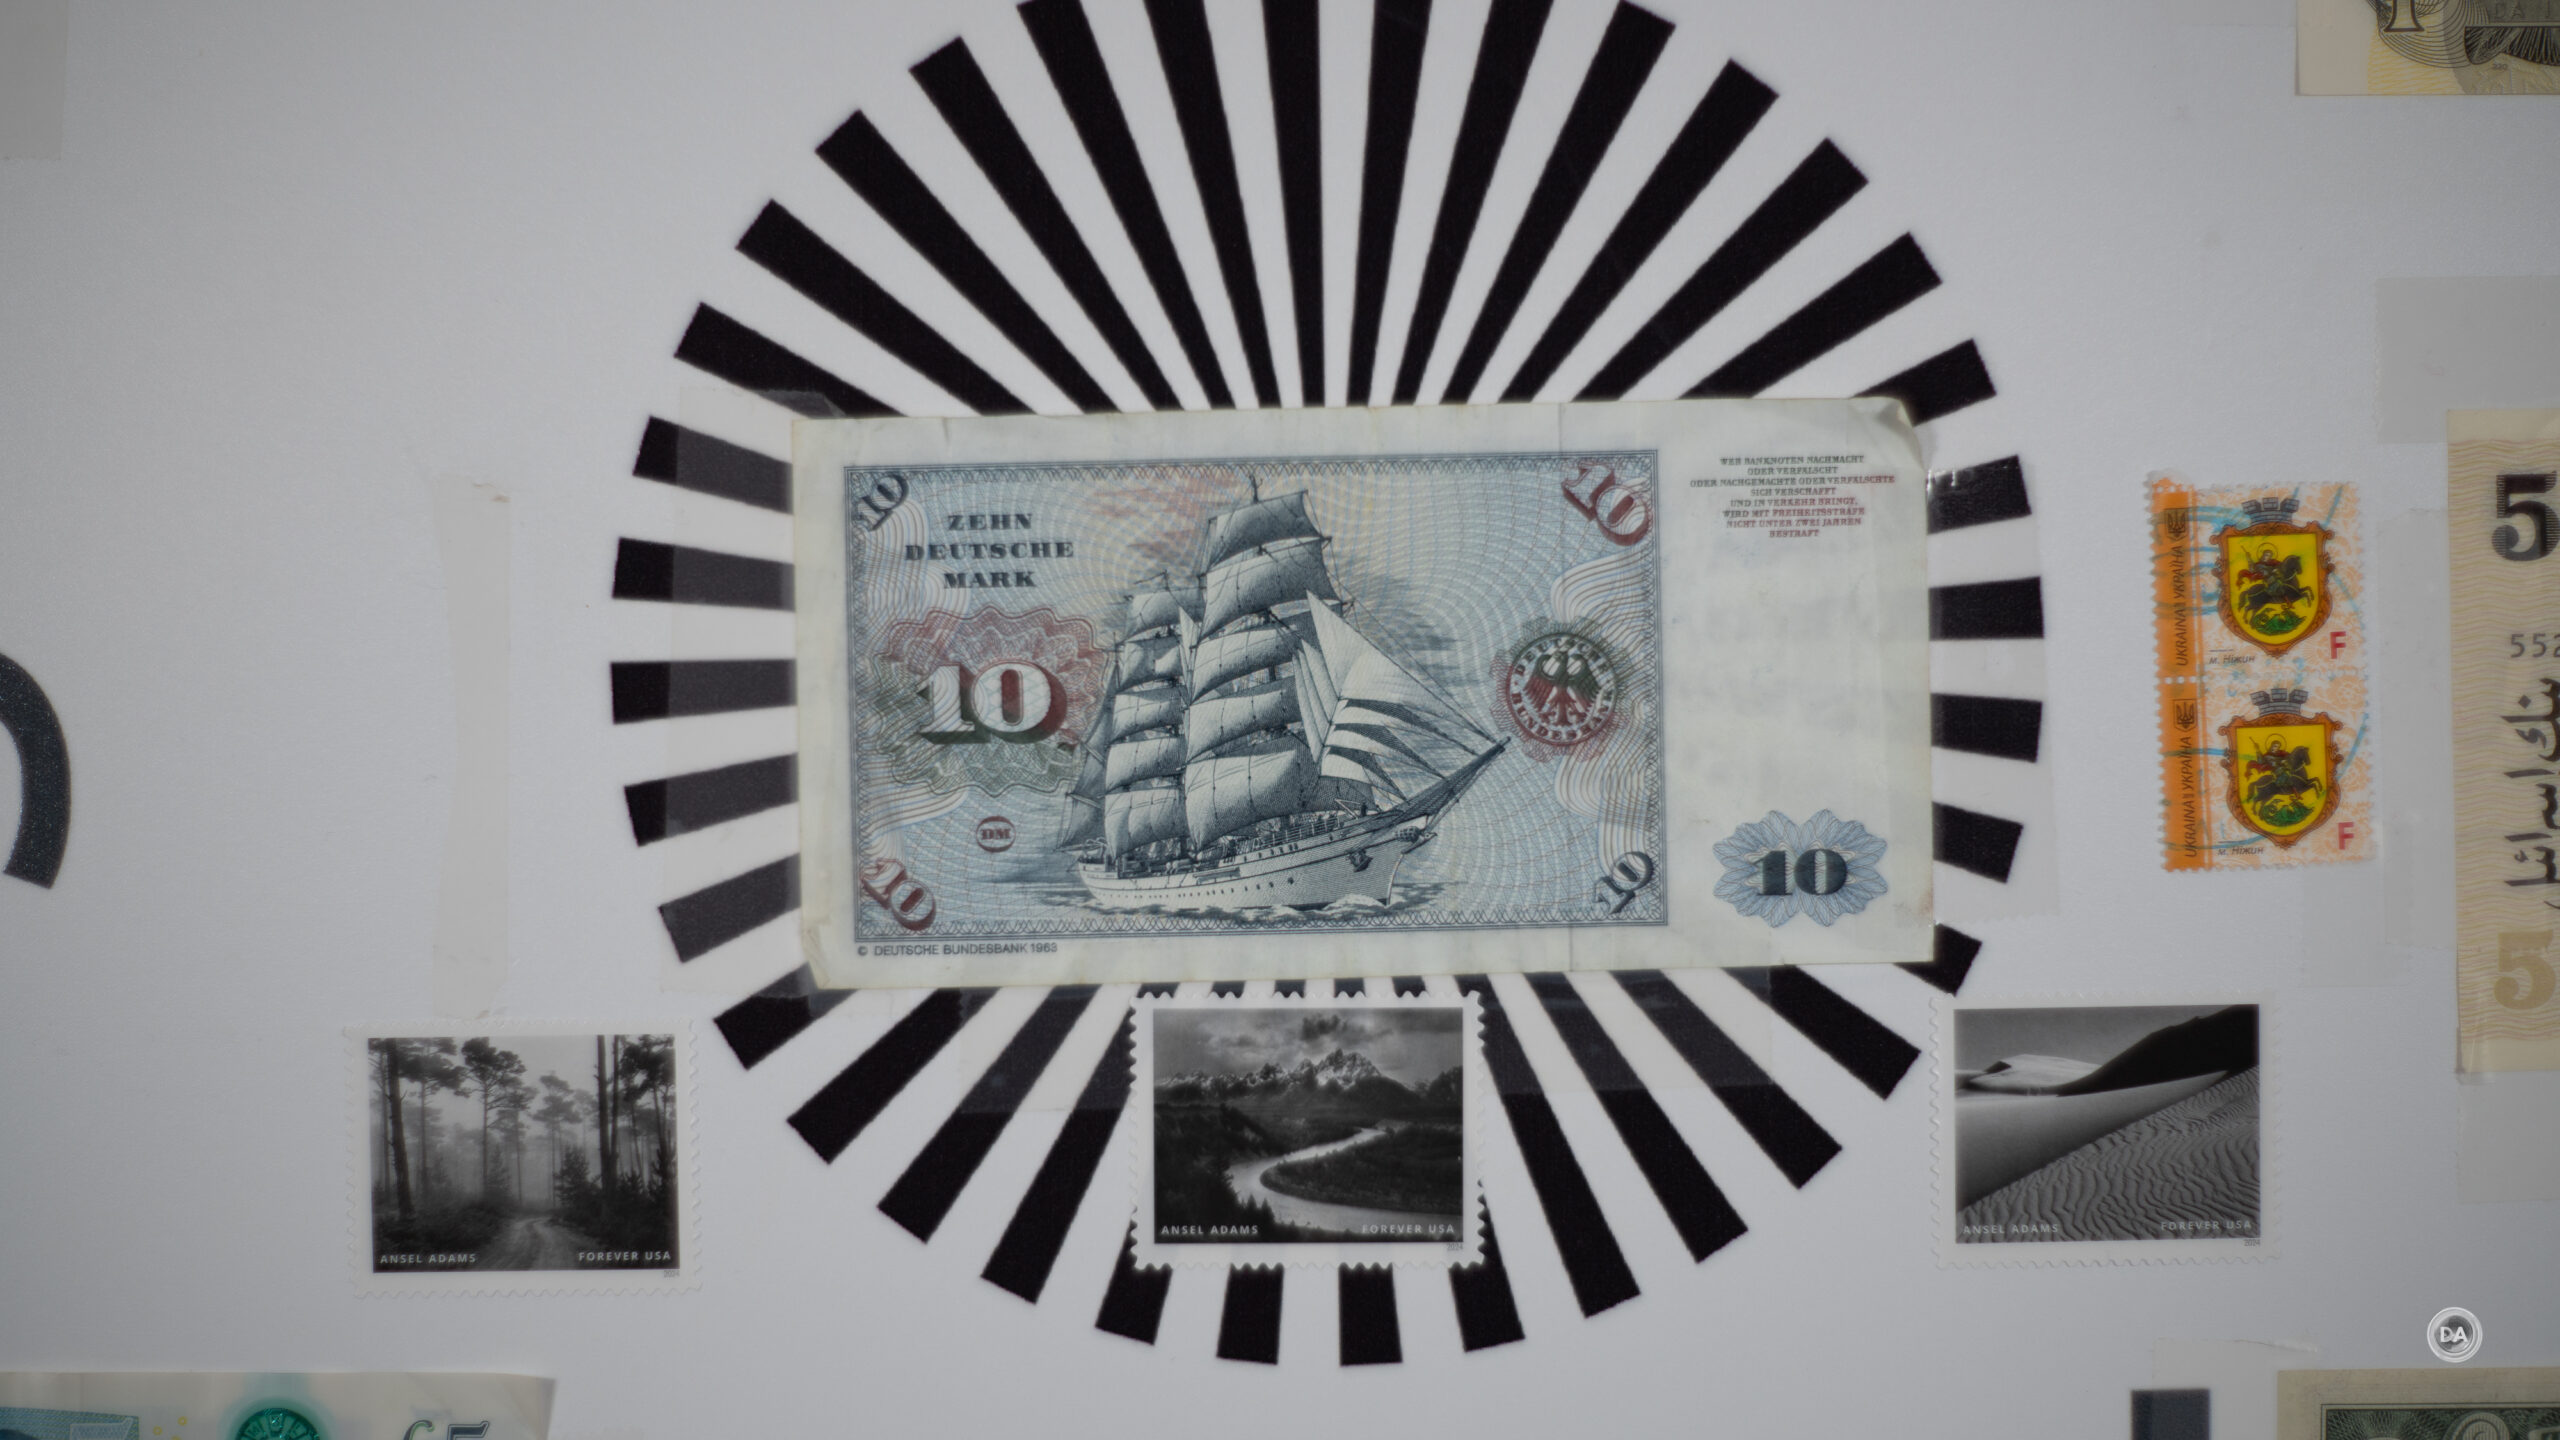
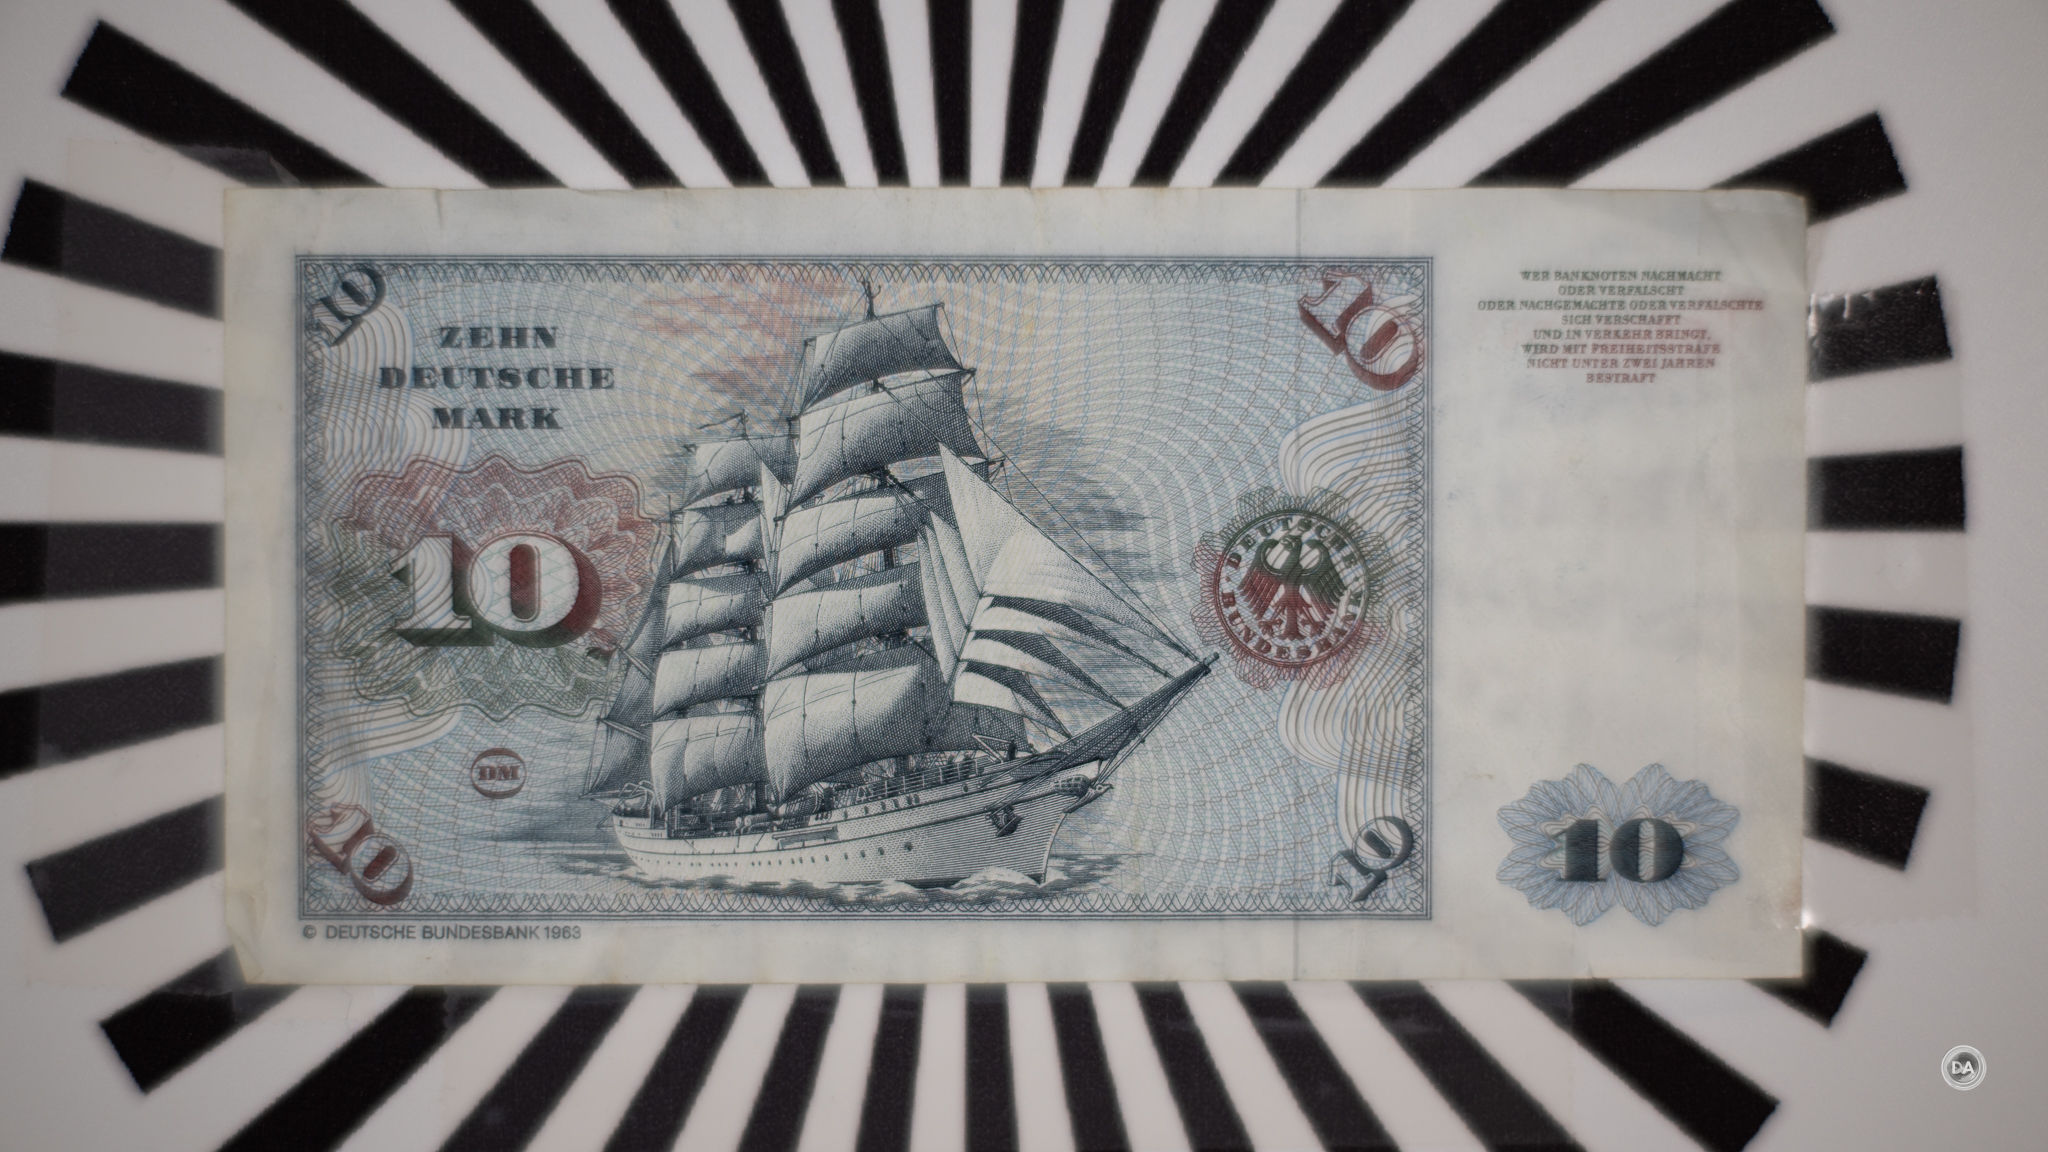
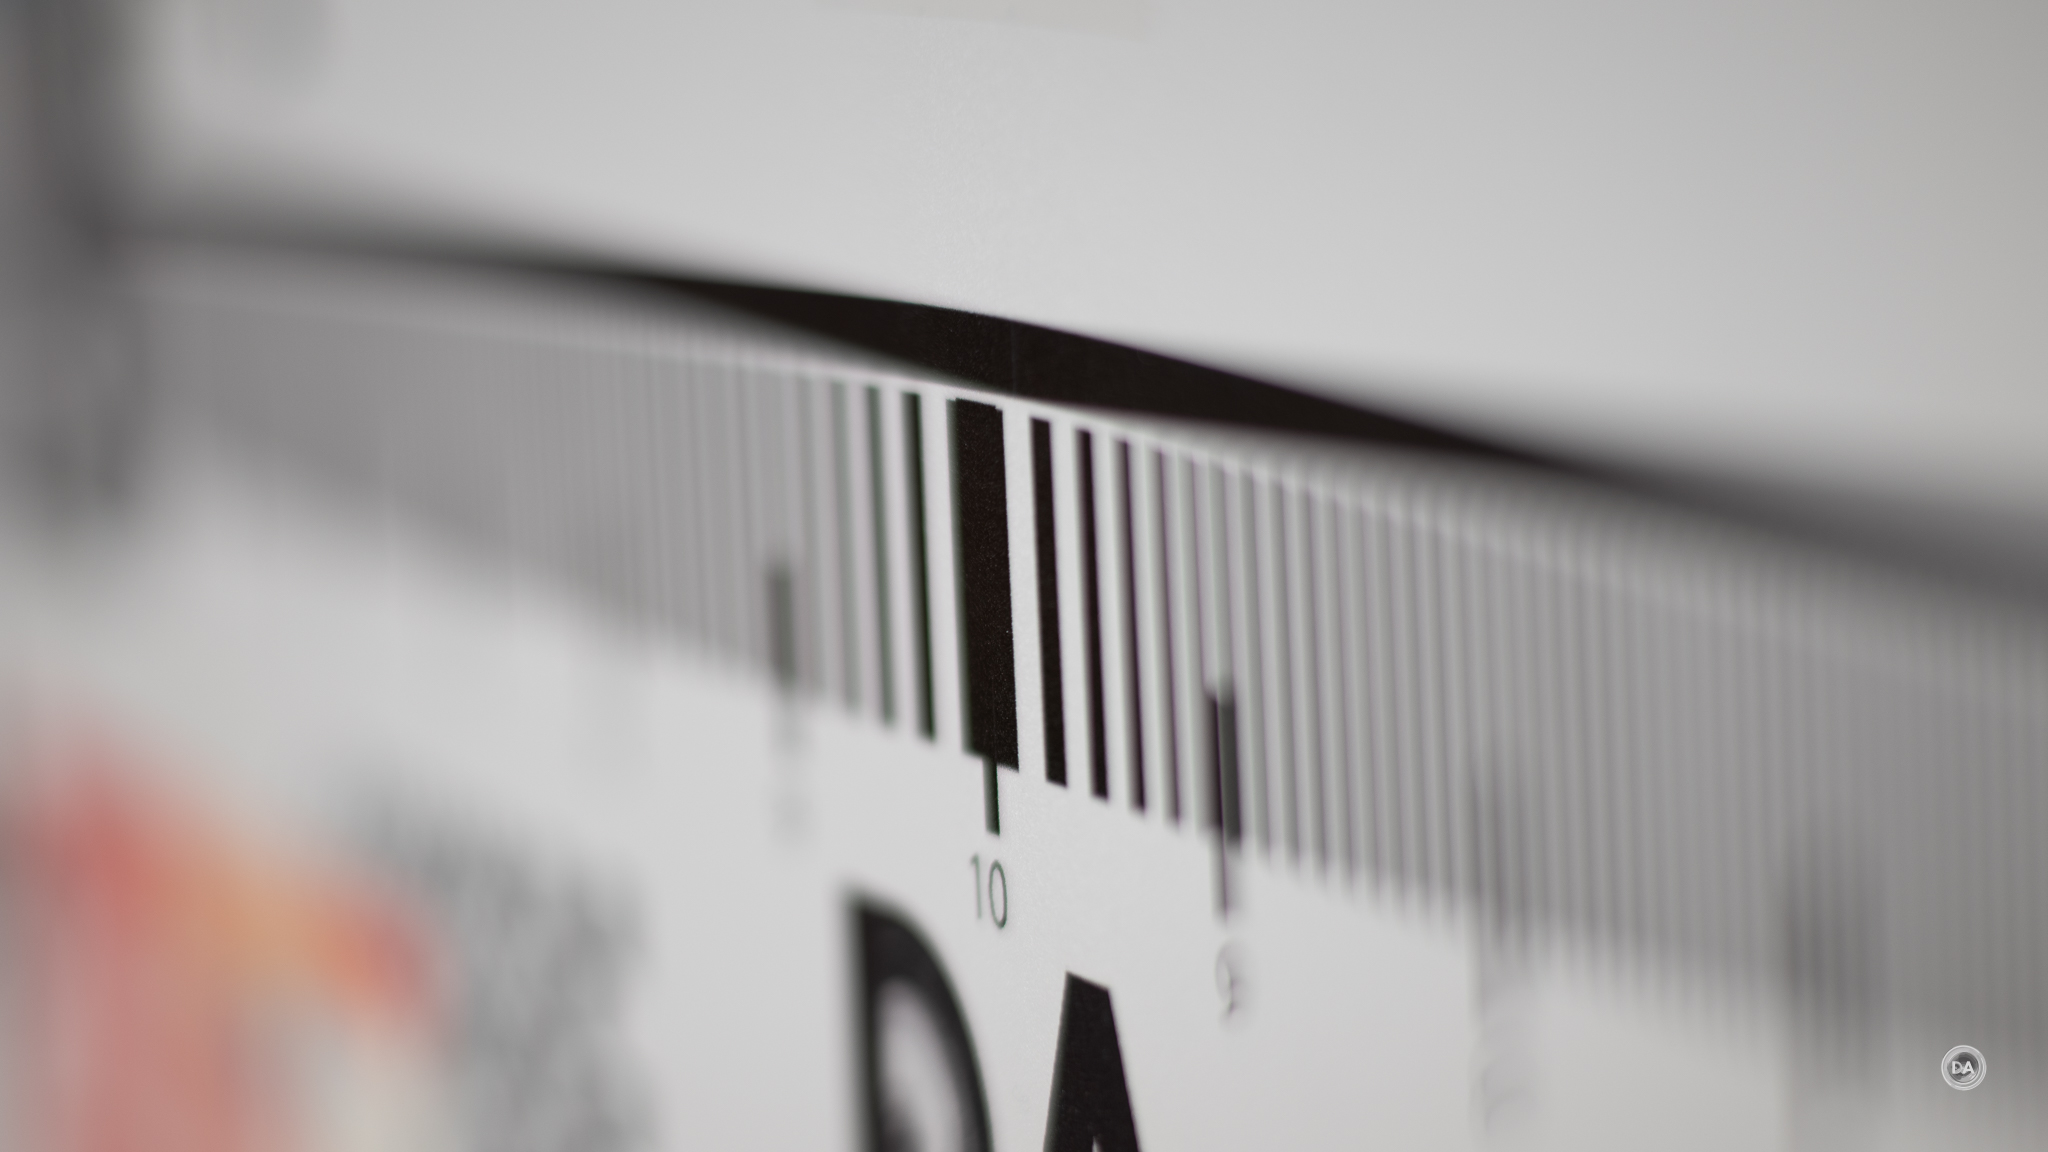
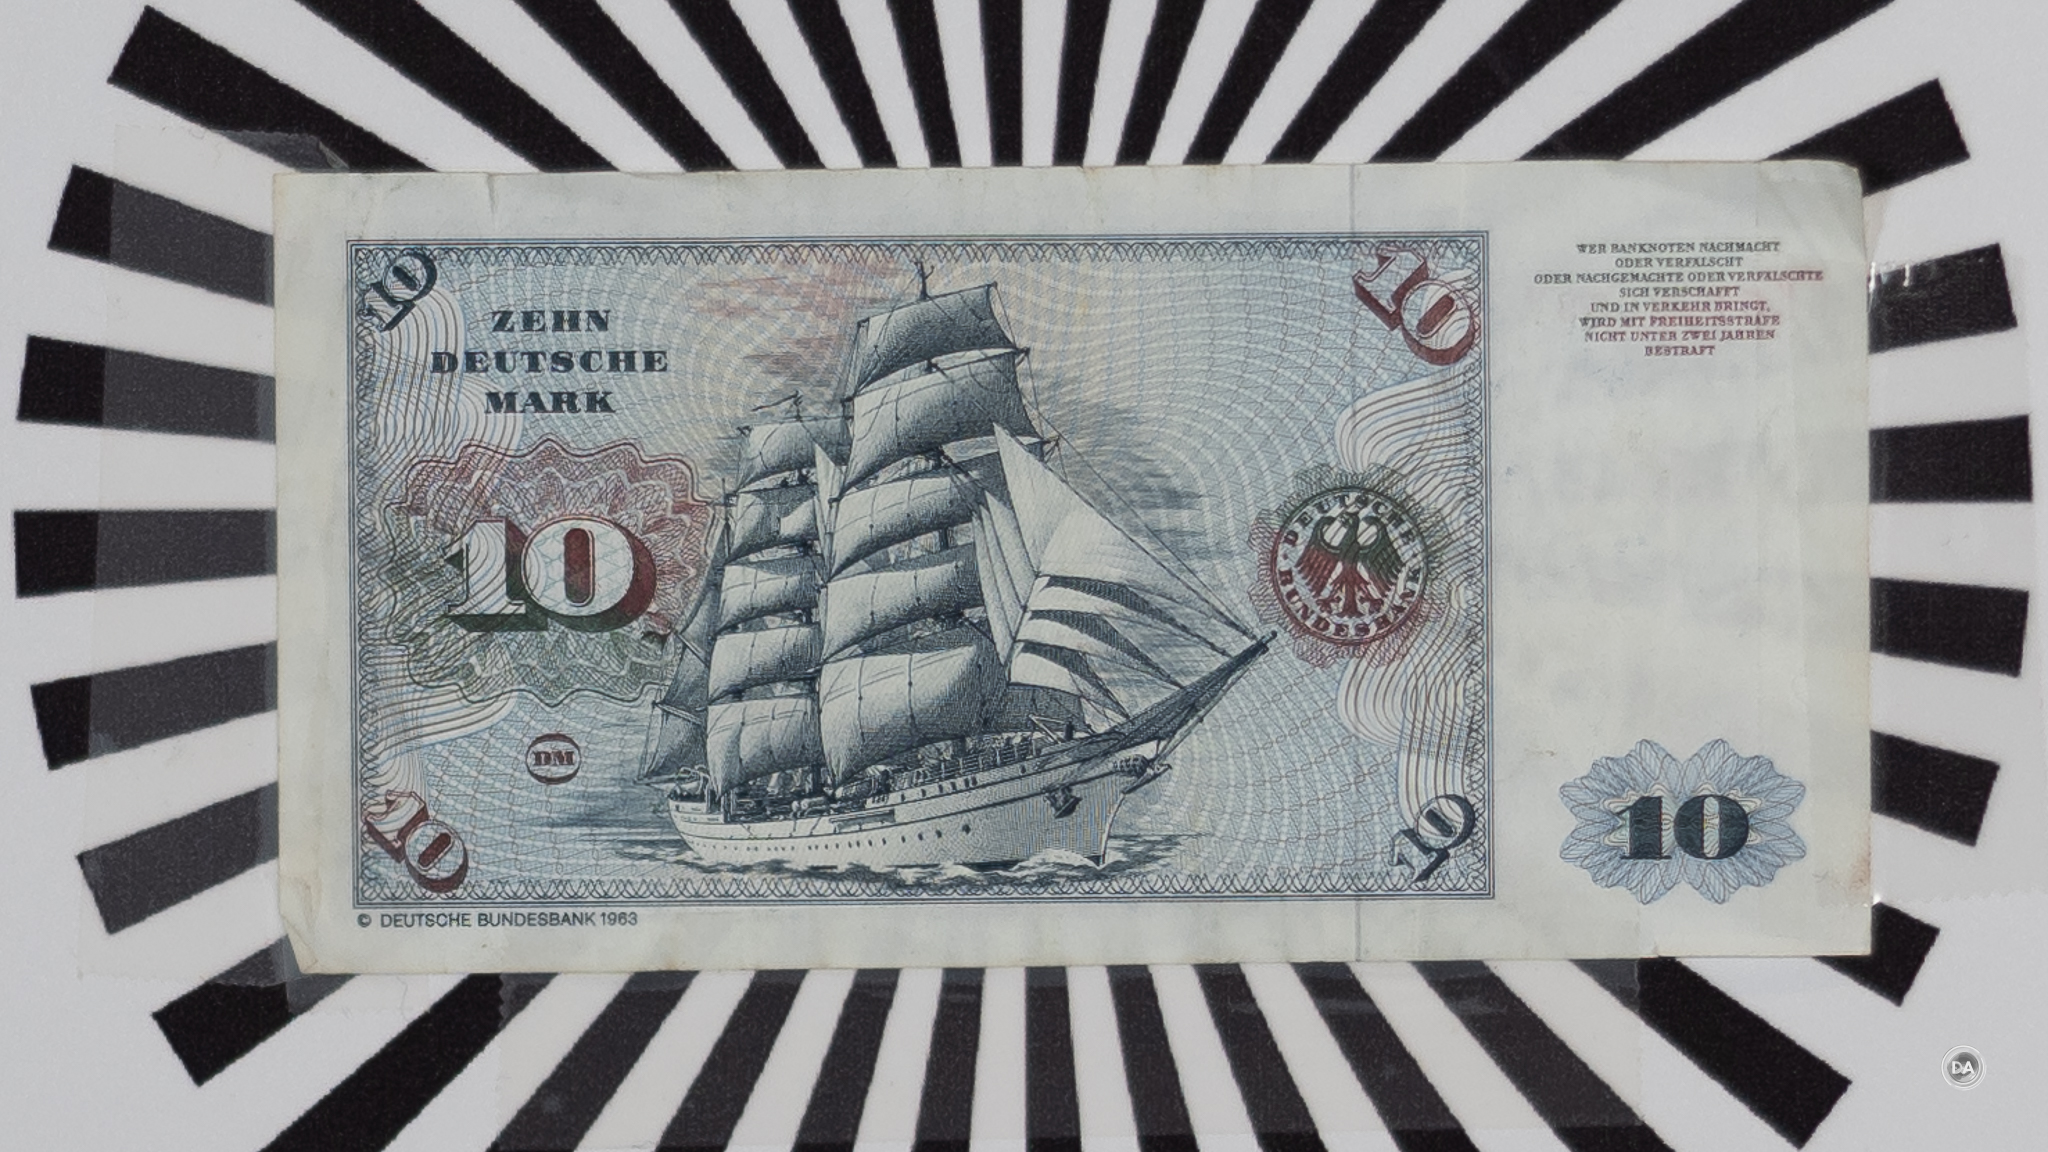
As for the aperture shape for bokeh, there isn’t going to a lot of opportunities to create bokeh highlights for a couple of reasons. The first is obvious, in that while the lens has a wide maximum aperture (F1.5), it also has a wide focal length of 21mm. Wide angle lenses excel more at having a lot IN focus rather than a lot OUT of focus. This is complicated by the second reason, and that’s one unique to this lens. It can only focus down to 50cm (the Leica version M version is 70cm!!), which is an extremely long figure for a lens with this wide a focal length. The Zeiss Loxia 21mm F2.8 can focus twice as closely (25cm), for example, and the Sony 20mm F1.8 G can focus down to 18cm. The byproduct of this is that the magnification figure of the TTArtisan 21mm F1.5 is one of the worst I’ve ever seen. This is as close as I could get to the old Deutschmark that I use to test this:
I’m going to estimate that at something like 0.06x or lower. Usually the only opportunities you have to really get any kind of bokeh (defocused background) with a wide angle lens is by getting very close to your subject. That’s not really going to happen here. This is as close as I could get to my subject to try to get some bokeh highlights…and the result was not particularly impressive!
I would treat the wide aperture here as an asset for light gathering and not for bokeh gathering! This is the best image I could produce for bokeh in my test period…
I like the image, but not because of the tremendously blurred background or high magnification of the subject!!
The lens is built around a nice metal lens mount, though you’ll note again the lack of electronics.
This means that there will be no transfer of information from the lens (EXIF data), and also means that if your camera has IBIS, you’ll need to set the focal length manually. Not an insurmountable problem, obviously, but certainly not an asset either. This is an old school lens, and that means handling more things manually.
TTArtisan 21mm F1.5 Image Quality
Reporting on the image quality from the TTArtisan 21mm is a slightly difficult proposition. It delivers a decidedly more “vintage” image quality performance in both good and bad ways. Put succinctly, the lens is not strong in certain metrics where many modern lenses excel, including high correction of aberrations, flare resistance, and biting sharpness and contrast at wide aperture values. The strength is that colors have a vintage vibe that really works nicely in certain situations. From a testing perspective, this will be a hard lens to give high marks, but from a “feel” perspective, I suspect that there will be many who simply like the look of the color rendering and even optical flaws from the lens. This image, for example, really appealed to me despite being a fairly “standard” image, and that was largely due to the unique color rendering that I find very appealing.
The final factor to bear in mind as we proceed is that this is a sub $250 USD lens, so we probably shouldn’t it to perform like a $1000+ lens (and it doesn’t!) What’s more, I am reviewing the lens on one of Canon’s most demanding sensors – the 45MP Canon EOS R5. Some of these flaws will be a little less noticeable with a lower resolution camera. Probably most people that have spent $4000 on their camera (like me) aren’t going to pair it with $245 lenses. The 26MP of the EOS RP or 20MP of the EOS R6 are going to be more natural pairings for this lens.
The first major flaw you will encounter is a very severe amount of vignette. I’m seeing 3+ stops in the extreme corners, and I’ve noticed that the vignette persists fairly strongly even into smaller aperture values.
I had to use around a +90 to correct for the vignette, and the midpoint all the way to zero. I used a +7 to correct the barrel distortion, but you can see that it is slightly non-linear so there’s a little overcorrection on the vertical lines to get the horizontal lines straight.
You will need to correct for vignette at most all apertures to some degree if you want no corner shading. I’m curious as to whether other mounts have similar amounts of vignette, as I have noted that Canon RF mount lenses seem to have a consistently high degree of vignette. Most of those that I’ve reviewed have been native Canon lenses, so perhaps that’s just Canon’s currently design philosophy, but it has stood out to me.
The vignette along with the preset aperture (the camera doesn’t get to open the aperture during focus and metering because it is all manual and with no electronics) have produced some really varied metering results for me. I have found that both exposure and white balance can be affected by this, with wide open results often trending really cool and slightly overexposed while stopping down produces more neutral white balances but often underexposed metering. This seems to be particularly true when the sky is in the frame (when there is a wide dynamic range to exposure). Here’s a case in point:
The shots were taken within seconds of each other, but they metered differently and had a very different white balance. That variability makes it a little difficult to just correct for via exposure compensation in camera, as the metering isn’t really consistent enough to just bias in one direction or the other. You’ll essentially have to learn the quirks of the lens and adjust for it via familiarity. The good news is that modern cameras have a lot of versatility in their sensors, so most of the time you can just compensate in post.
This will be a tough lens to just shoot JPEGs with, as there is no in-camera correction, and the vignette is typically too strong to leave unaddressed.
Chromatic aberrations are fairly well controlled, though, with minimal amounts of lateral CA (along the edges of the frame) and only a bit of longitudinal CA (found before and after the plane of focus). You can see a bit of green fringing after the plane of focus in this shot:
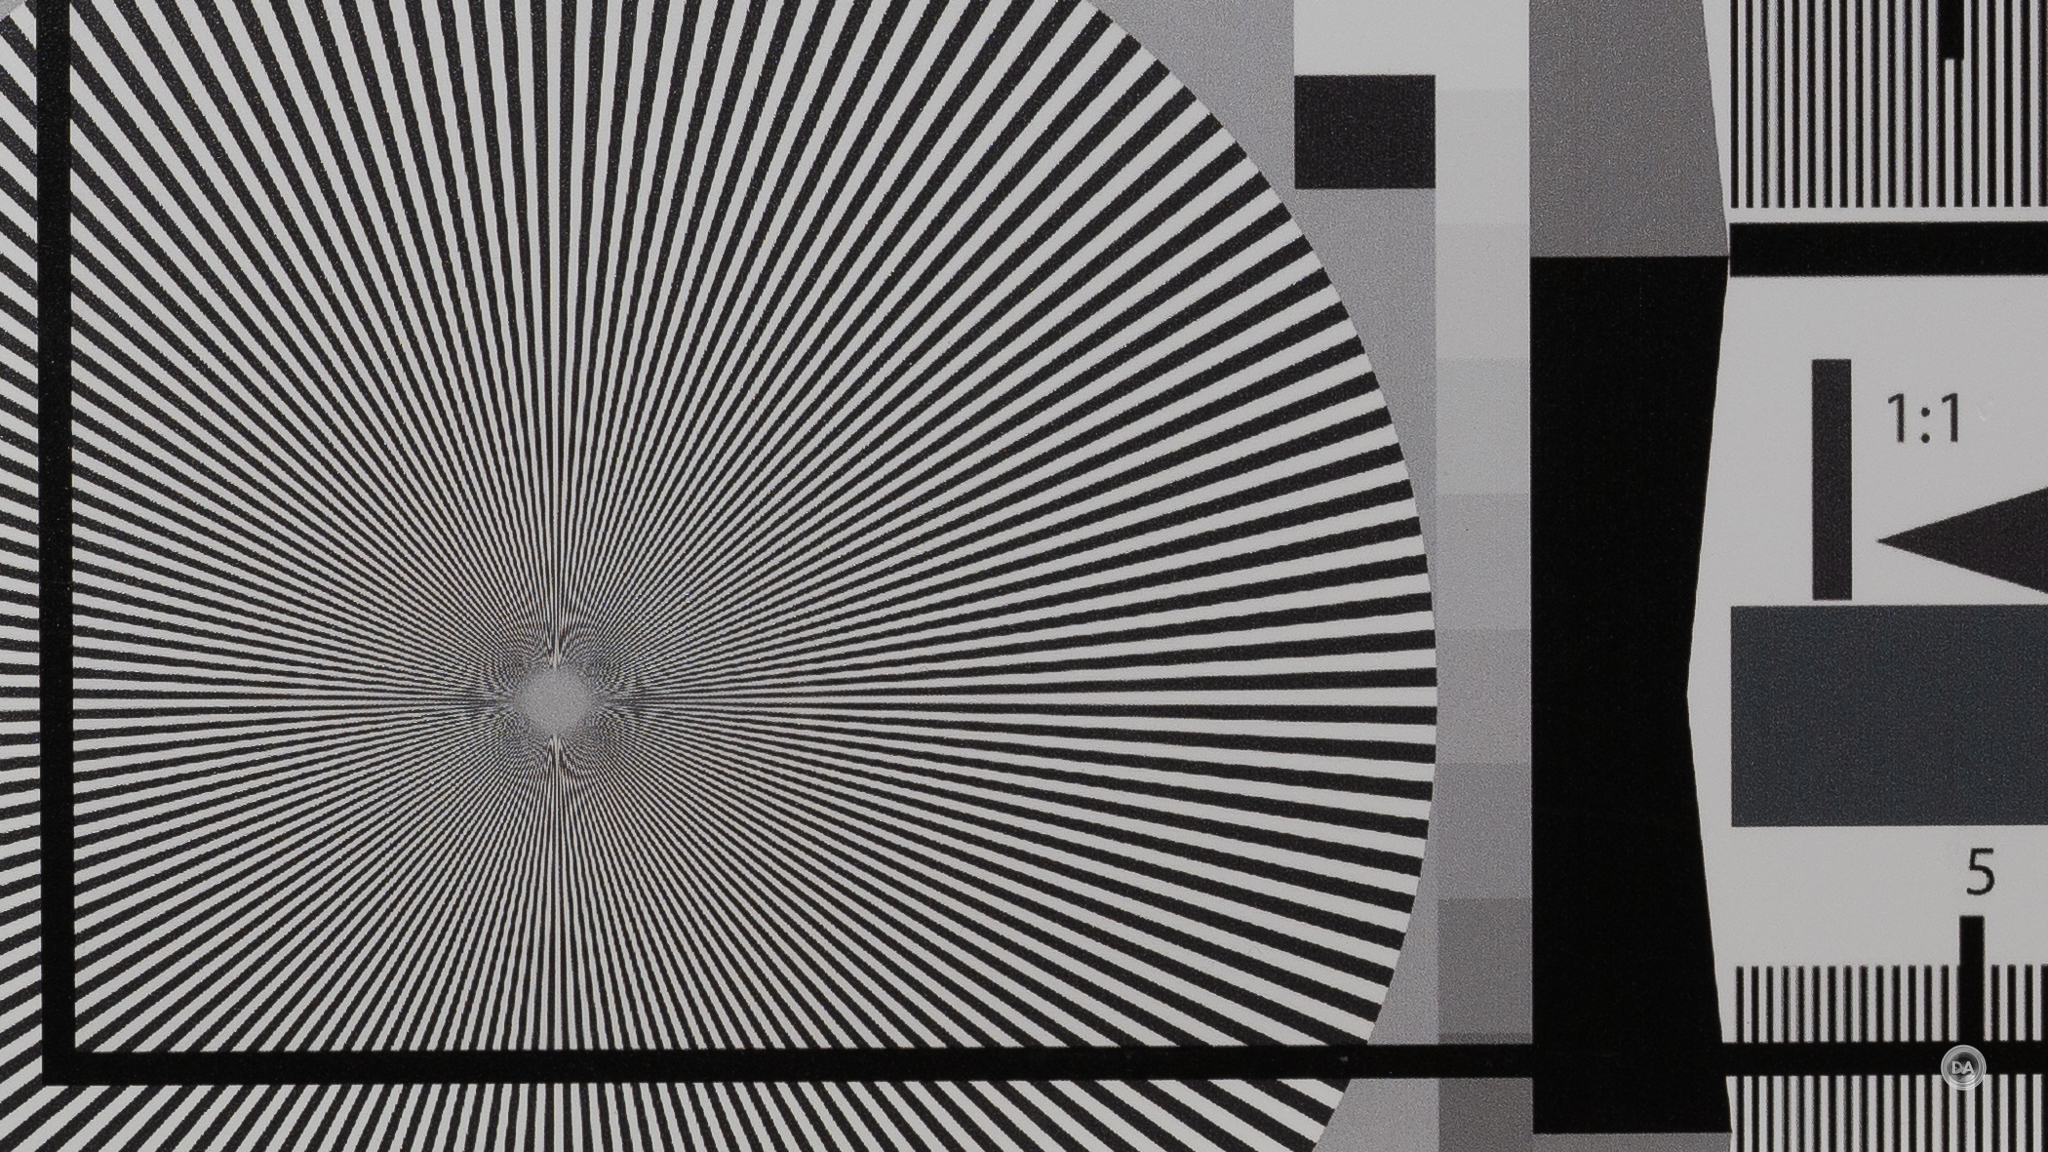
What isn’t well corrected, though, are the basic spherical aberrations that reduce contrast. The lens has decent resolution over the center two thirds of the frame at wide apertures, but contrast is low. It looks like a bit of Vaseline has been smeared over the lens. Here’s the test chart that crops and details will be taken from:
Here are crops from across the frame at F1.5 (wide open):
You can see the fairly low contrast I mentioned, and also that resolution falls off in the corners. This agrees with the MTF charts, that show (in the grey lines) that corner resolution is extremely low at maximum aperture. It reaches as low as about 25% acuity in the corners, whereas the recent Samyang AF 24mm F1.8 I reviewed has about 70% acuity at F1.8 in the extremely corners.
The dark black lines show a better performance at lower resolution (typical), which is why I mention that the EOS R5’s sensor may be a little much for this lens to handle. What’s interesting on the MTF, however, is the yellow lines, which show the TTArtisan 21mm stopped down to F8. They show a near identical pattern but about 50% better (center acuity goes from about 48% to roughly 77%, which edge acuity comes up from 25% to about 40%, though the F8 dropoff in the corners is even more pronounced right near the edge. This is consistent with what I found in my testing.
So, if you don’t speak MTF, let me show you what I mean. In this shot of a tulip, the crop from the middle of the frame (image 2 below) is fairly good. Contrast is pretty good, and detail is as well. If we move down the image to the base of the tulip (image 3, still about the same plane of focus), there’s a lot of bleeding and hazy, indistinct textures.
One other thing to note is that the TTArtisan 21mm is not at all good wide open at infinity distances, even in the center of the frame. The low contrast just destroys its ability to render fine details. As we’ve just seen, up close it can do fairly well if you stick to the middle two thirds of the frame, but that’s just not true at infinity. The center is pretty bad, but the edge of the frame (image 3) looks like an impressionists rendering.
If you stop the lens down to F5.6 and shoot the same scene, however, the center results are radically better and even the edge result now looks pretty decent.
Bottom line, this is a pretty nice budget landscape lens if you use it at smaller apertures. The center gets razer sharp even on my 45MP EOS R5, but the edge and corner performance never gets exceptional.
There’s some obvious center improvement at F2 vs F1.5, though its still marginal in the midframe and corner. By F2.8 the center performance is very good, the midframe good, but the corners, while much improved, are still fairly weak. By F5.6 the corners look radically better than what they did at F1.5:
That looks pretty good, but perhaps some field curvature keeps us from see the corners looking that good in the real world. I also noted some decentering in my test lens, with the top left corner in no way matching this performance we’ve just seen in the lower right corner. Decentering is not uncommon in budget lenses, obviously, that aren’t held to as high of manufacturing standards.
Used to to its strengths, however, the TTArtisan 21mm produced some really nicely colored, highly detailed images for me, like this:
…or this:
One of those strengths is not flare resistance, however. This is a very flare-prone lens. One typical flaw will be the giant ring, which I don’t hate:
Stop way down and put the sun in the right (wrong?) spot, and you get disaster:
Be careful in composition and pay extra attention to the position of the sun to get best results.
As I noted earlier, there aren’t going to be a lot of situations to great bokeh with this lens, but there will be a few. I felt like this result wasn’t too bad, though there is definitely a tendency towards outlining in the bokeh, which tends towards busyness.
I though this image produced a reasonable three dimensional result that I liked:
I liked this one less, however, as there simply isn’t enough separation of the subject from the background to produce a really appealing image.
How about coma? I was unsurprised to find that coma at F1.5 was fairly strong, with star points near the edge of the frame growing “wings” (see image 3 below):
Stopping down to F2 and F2.8 helped somewhat, but near the corners the coma remains. I did some improvements most places in the frame:
If you have no better option, then definitely use the TTArtisan 21mm for shooting the night sky, but there are better options out there.
In summation, the TTArtisan 21mm F1.5 isn’t going to optically appeal to everyone, but I think the price and the unique color rendering might make it appeal to some. You are certainly not going to find a lens with this wide of an aperture in this wide of a focal length for any cheaper price. Check out the image gallery here to see more photos and draw your own conclusions.
Conclusion
The TTArtisan 21mm F1.5 ASPH is a welcome lens if nothing else that the ecosystems of Canon RF and Nikon Z are notably limited in inexpensive third party offerings. There’s more options on the Leica mounts, and many options on the Sony FE front, but thus far third party development for Canon and Nikon’s full frame mirrorless systems have been slim. The TTArtisan 21mm is not a world-beater in any metric, but it can produce nice images when used wisely, and the price point of $239 makes this a true value proposition, particularly when you consider how useful the focal length is and how unusually wide the maximum aperture is.
It does come with some quirks, however. The lack of electronics always adds a few layers of frustration, and the inconsistent metering was a bit of pain. The heavy vignette makes this more of a lens to be used when shooting RAW, as it will be easier to correct for some of these flaws in post, and RAWs provide more flexibility for editing than JPEGs. There won’t be any in-camera corrections that help JPEGs.
Optically this is a mixed bag. You can forget shooting infinity subjects before F2.8 if you care at all about image quality, and corners never quite get pin-sharp. The TTArtisan 21mm F1.5 is also quite flare-prone and suffers from a lot of vignette. The minimum focus distance and resulting magnification is truly terrible. But it also gets nicely sharp when stopped down and delivers some really interesting colors.
Put simply, the TTArtisan 21mm F1.5 is not a lens for everyone, but if you have just bought into a new mirrorless system and don’t have much left over for lenses, it can deliver really good results for the bargain price. Just learn how to use it within its strengths, and you can easily produce some stunning images on a budget. Those with deeper pockets can go for a more traditional and versatile lens, but necessity is the “mother of invention”, so if cash is tight, the TTArtisan 21mm F1.5 ASPH might just be worth a look.
Pros:
Nice build quality for such a budget lens
Aperture and focus rings work well
Includes filter option
Larger maximum aperture than most lenses at this focal length
Intriguing color rendition
Good center and midframe sharpness at smaller apertures
Truly inexpensive – good value for money
Comes in a variety of lens mounts
Cons:
Terrible MFD and magnification
Wide open contrast is low, making the lens appear a bit “soft”
Purchasing your gear through B&H and these links helps fund this website and keeps the articles coming. You can also make a donation here if you would like. Visit my Amazon page for some of my gear of choice! Thank you for your support.
Great News! I can now offer a 5% discount on all purchases at Amplis Foto, Canada’s Leading Photographic Supplier. Please enter discount code: AMPLIS52018DA in your cart. It is good for everything in your cart, and is stackable with other coupons, too! It will take 5% off your entire order! Proceeds go towards keeping this site going and providing you with new reviews!
Keywords: TTArtisan 21mm F1.5, TTArtisan 21mm F/1.5, F1.5, ASPH, TTArtisan, 21mm, TTArtisan 21 1.5, Review, TTArtisan 21mm F1.5 Review, TTArtisan 21mm Review, Canon EOS R5, EOS, R5, EOS R5, EOS R6, mirrorless, full frame, EOS R5 Review, Canon R5 Review, Manual Focus, Dustin Abbott, Real World, Comparison, Handling, Bokeh, Landscapes, Resolution, High ISO, Image Quality, Sample Images, Photography, 45Mpx, Canon
DISCLAIMER: This article and description contains affiliate links, which means that if you click on one of the product links, I’ll receive a small commission. As an Amazon Associate I earn from qualifying purchases.
The TTArtisan 21mm F1.5 ASPH is the second lens I’ve reviewed from Chinese lensmaker TTArtisan. The first was an 11mm F2.8 Fisheye lens, which is hardly a conventional lens. That lens was good enough, however, that I was open to testing another TTArtisan lens. A 21mm F1.5 lens is slightly more conventional, though the maximum aperture designation of 1.5 is something I tend to see more with cine lenses that are measured in T-stops; an aperture value of F1.4 is typically the standard for stills lenses. While a maximum aperture of F1.5 is rare, rarer still is a wide aperture, wide angle prime for full frame cameras that costs less than $250 USD.
The TTArtisan 21mm is available in Leica L-mount (black and silver), M-mount (ditt0), Sony E-mount, Canon RF-mount, and Nikon Z-mount, so it covers most of the bases of the major modern mirrorless cameras. It is a fully manual lens (manual focus, manual aperture, and no electronics), so developing for multiple mounts is much simpler. I’ve done my review in a Canon RF mount and on my 45MP Canon EOS R5. Typically the R5 is a great platform for manual focus, as its innovative Focus Guide works well and the in-body-image-stabilization helps deliver good results in a variety of settings. The lack of electronics in the TTArtisan 21mm means that the Focus Guide doesn’t work, however, so I’m left with more traditional focus overlays and magnifying the image…which is still a far cry simpler than manual focus on any DSLR!
So is this a lens worth considering? That really comes down to your tastes, and perhaps these images will help you decide. If you would prefer to watch your reviews, you can watch the video review or check out my full text review.
Purchasing your gear through B&H and these links helps fund this website and keeps the articles coming. You can also make a donation here if you would like. Visit my Amazon page for some of my gear of choice! Thank you for your support.
Great News! I can now offer a 5% discount on all purchases at Amplis Foto, Canada’s Leading Photographic Supplier. Please enter discount code: AMPLIS52018DA in your cart. It is good for everything in your cart, and is stackable with other coupons, too! It will take 5% off your entire order! Proceeds go towards keeping this site going and providing you with new reviews!
Keywords: TTArtisan 21mm F1.5, TTArtisan 21mm F/1.5, F1.5, ASPH, TTArtisan, 21mm, TTArtisan 21 1.5, Review, TTArtisan 21mm F1.5 Review, TTArtisan 21mm Review, Canon EOS R5, EOS, R5, EOS R5, EOS R6, mirrorless, full frame, EOS R5 Review, Canon R5 Review, Manual Focus, Dustin Abbott, Real World, Comparison, Handling, Bokeh, Landscapes, Resolution, High ISO, Image Quality, Sample Images, Photography, 45Mpx, Canon
DISCLAIMER: This article and description contains affiliate links, which means that if you click on one of the product links, I’ll receive a small commission. As an Amazon Associate I earn from qualifying purchases.


 GOOVIS ART Head Mounted Display Review
  Laowa AF 12mm F2.8 Zero D Review (Z-Mount)
  Nikkor Z 35mm F1.2 S Review
  Kase AF 85mm F1.4 Review