Tamron SP 90mm f/2.8 Di Macro 1:1 VC USD Review
Dustin Abbott
December 31st, 2013
Ready to Challenge the Big Dogs?
I recently wrote about the great flexibility of a good macro lens, particularly a stabilized one. That article will be coming out in the next PhotoNews Flash. But to summarize: when you buy a good macro lens you have also bought an excellent portrait lens along with a lightweight stabilized medium telephoto. You have also purchased one of the sharpest lenses available…and that is true at any distance, not just macro.
I am personally no stranger to good macro lenses. I have had the good privilege to own the Canon EF 60mm f/2.8 Macro lens when I shot crop bodies, and currently own the excellent Canon EF 100mm f/2.8L Macro IS lens. I have used a few others briefly, and have also spent a lot of time shooting with extension tubes on both modern lenses as well as my vintage glass. I have shot thousands of macro shots and have a good frame of reference on what a good macro lens should offer.
Tamron is also no stranger to macro lenses. They have offered a variety of macro lenses in the past and in fact currently offer no less than four different macro lenses. The direct predecessor of the lens being tested became something of a cult favorite because of its combination of excellent optics and bargain price. Like many of Tamron’s lenses prior to 2010, the SP 90mm f/2.8 Macro 1:1 lens was lauded for its optics and price, while knocked for its slower AF speed and handling (including a barrel that extended to almost twice its length during focus). Despite those limitations, I have read many reputable sources (including DXOMark) use the adjective “legendary” to describe it.
Modern photographers have become spoiled enough to expect more, though. We want it all: handling, optics, build quality, AF, oh, and by the way, keep that price down, too. How has Tamron done rebuilding the classic (yea, even legendary) 90mm macro lens?

Pretty well, it turns out. The Tamron SP 90mm f/2.8 Di VC USD Macro 1:1 (the full title….whew!) is a stellar lens that improves on its predecessor in almost every way.
-

- Some extra height variance from difference in rear cap thickness.
-
- Hoods are very different!
-

- Thanks for including focus limiter!
-

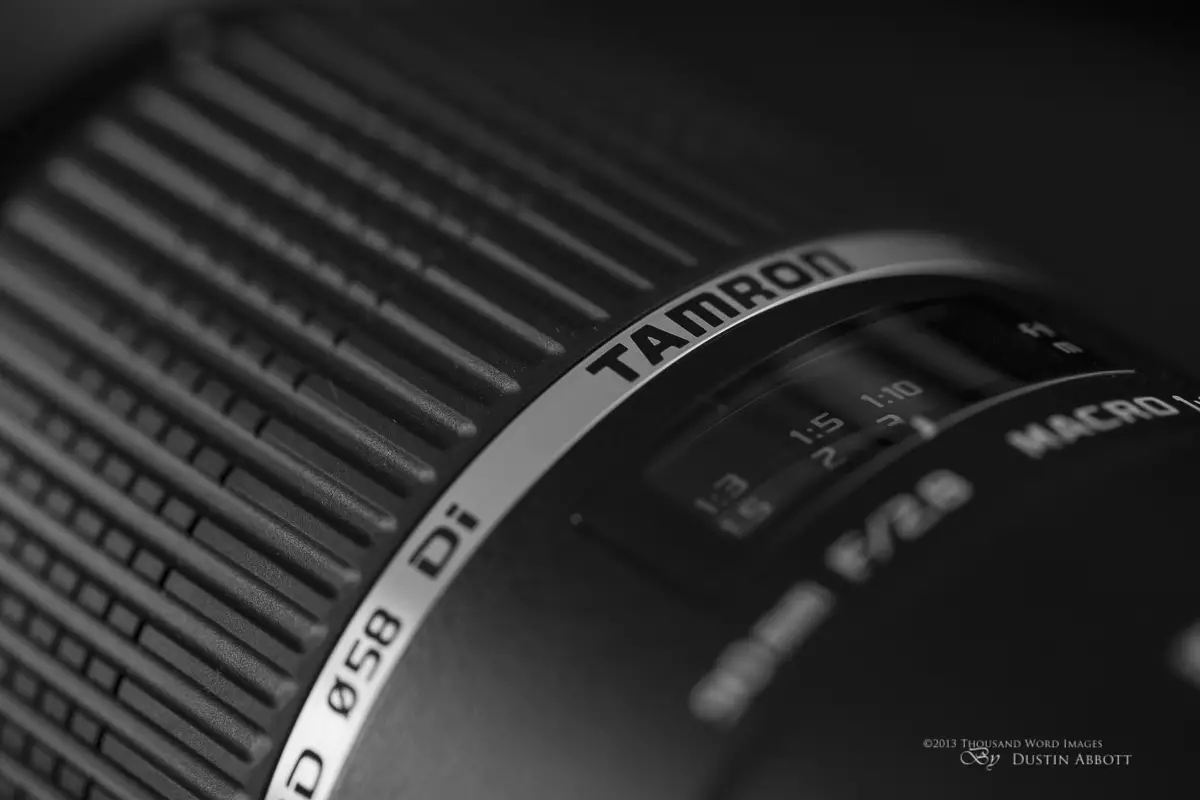
- Focus Distance windo
-
- Nice, clean design.
-

- Three switches on left side.
The Vital Statistics
First off, I am happy to be reviewing the lens after it has been on the market for about a year. Why? Because unlike many of the reviews at the time of release, I have the privilege of being able to examine the lens without the chief criticism: price. The North American price at release was $749, a roughly $250 jump over its predecessor’s price. Not terrible. That only tells part of the story, though, because the early report on the price in Europe (where several of the early reviews were done) was much higher…as much as £929+ (Pounds) while its predecessor was selling for roughly £360. Ouch. The street price turned out to be lower, but still, that price actually put it higher than first party offerings from Nikon and Canon. That price has stabilized to a more realistic level over the initial months on the market, and the current price in the US is $699, or roughly a $200 premium over the older model. The new lens offers a lot of extra perks for that $200. Meanwhile, in the UK, the price is currently £439 vs £299 for the older model. The current street price makes this lens even more highly competitive.
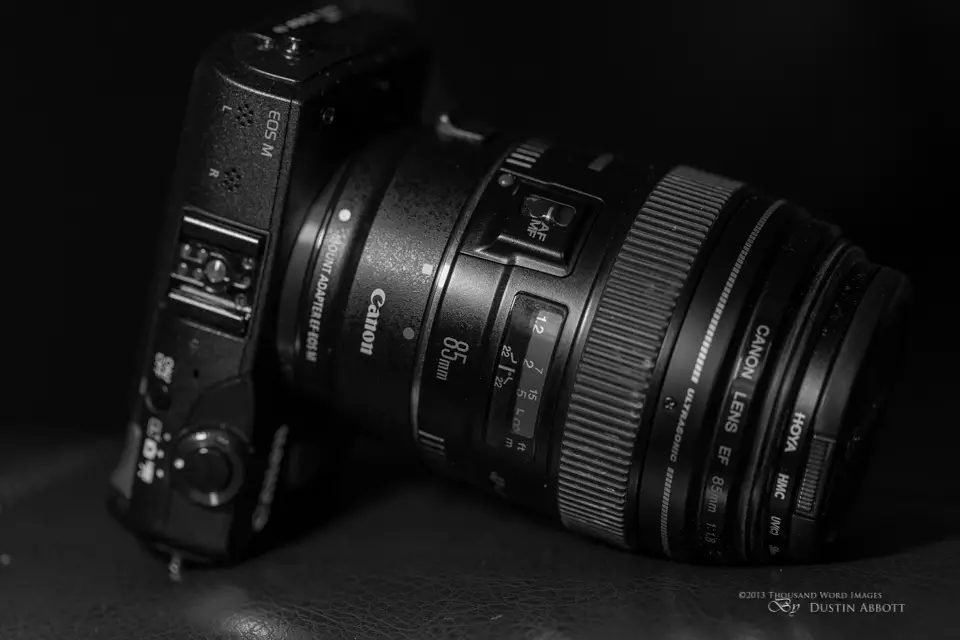
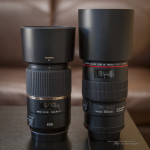
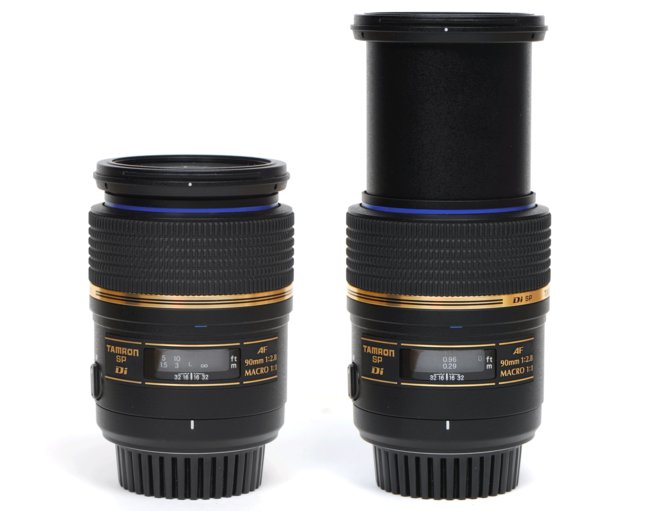
I will be doing a lot of direct comparisons to the Canon 100L Macro IS lens, as it is the natural competitor on the system that I shoot. Both Nikon and Sigma offer competitors in this class as well, and I will touch on them briefly later on. As you can see from these photos, the lenses share a somewhat similar design. The Tamron is 4.8 inches (122.9mm) and weighs 19.2 oz. (550 grams). The Canon is also 4.8” (123mm) and weighs just a bit more – 22.1 oz (625g). The Canon tapers somewhat as it has an area earmarked for a tripod collar (although said collar is not provided). The Tamron maintains a fairly constant thickness but, as the weight difference suggests, is slightly less dense than the Canon. One interesting difference is that the Canon hood is considerably longer than the Tamron, so the length with the hoods in place is more notably different. The lens hood is included.
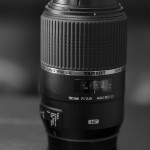
The Tamron has a nice feel in the hand but is primarily constructed of high density plastics (as is the Canon). I would put its construction slightly below that of the Canon, though, as the 100L has a slightly more premium feel. The Tamron has a very nicely damped, very wide focus ring that feels great and is placed well (it falls to hand very naturally ). It has a distance window and, like the Canon, it has three switches on the left hand of the barrel. The first (and one of the most important), is the focus limiter switch. It has three positions: Full, .5m to Infinity, and .3m to .5m (Macro) range. I’ll touch more on the importance of this in the section on AF. The second switch is the AF/MF selector. Note that this Tamron does feature a full time manual override, so you can grab that focus ring at any point. The final switch is for the VC, or Vibration Compensation, Tamron’s proprietary stabilization system (and it has proven to be an excellent one!)
One important final element on the lens is a rubber gasket around the metal mount. This is the visual clue that this lens is weathersealed, or, in Tamron speak, has “dust and moisture resistance”. What does that mean? It doesn’t mean that the lens is waterproof, but it does mean that you should be able to shoot in just about any weather condition without worrying too much about your expensive lens being destroyed. It was winter when I used the lens for about a month and a got a sense of it for this review, and I can attest that I had no problems with the lens while shooting in -30C temperatures, in snow, or in freezing drizzle. All functionality remained unchanged. This is a significant advantage over its predecessor and means that this lens will appeal to a more “pro” audience or more hardcore amateur that is willing to get out in lousy weather.
The “Legendary” Original (photo courtesy of ePhotozine)
What isn’t immediately evident but is, to me, a huge deal, is that the new lens in internally focusing. The older lens would extend significantly during focus (see above). The new lens does not change length at all during focus or at any other time in operation. What you see is what you get!
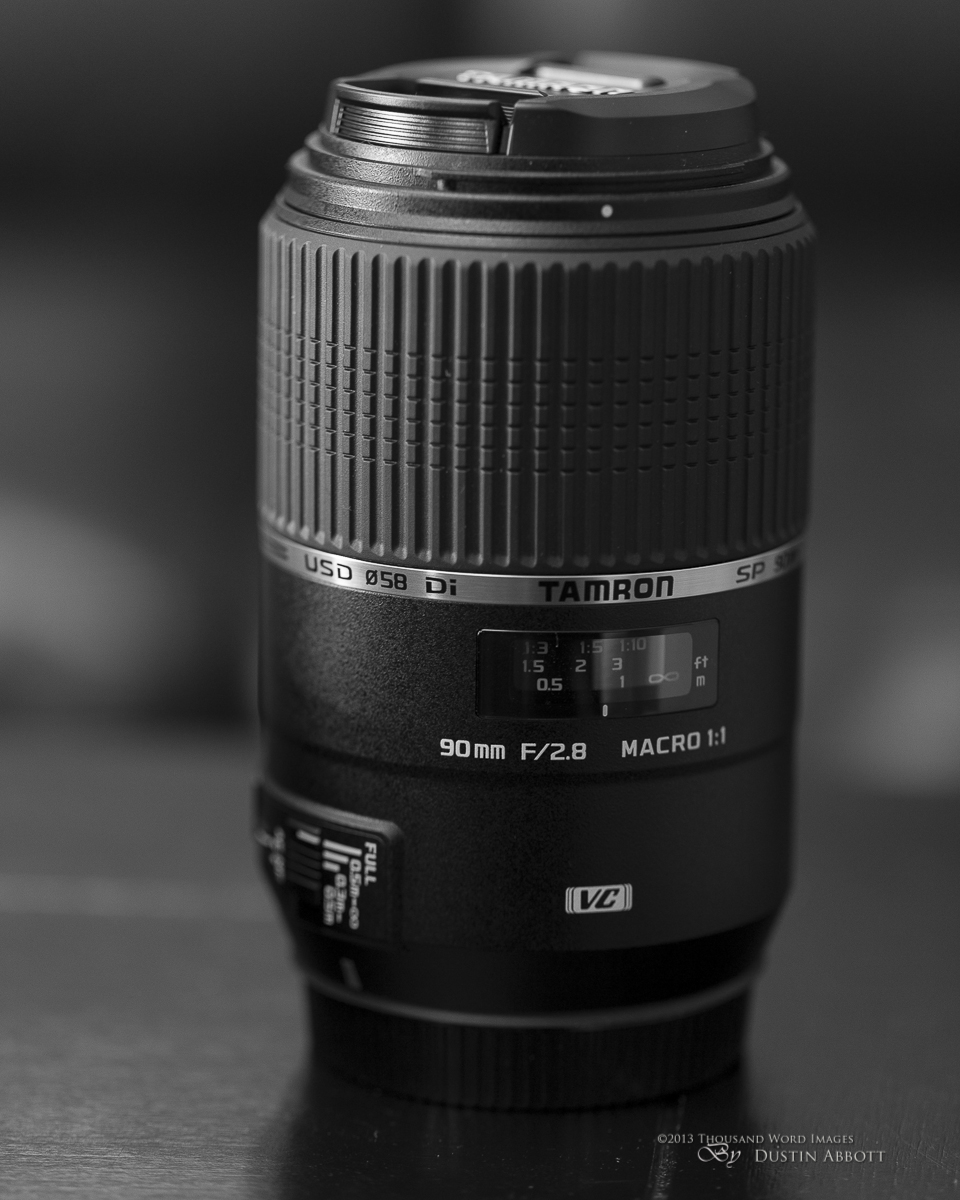
Nice, clean design.
Not only is this a more elegant solution, but it has the additional benefit of the front element being able to be sealed (weatherproofing) and not drawing dust into the lens during the barrel’s extension. It also means that there is no disturbing change in the lens’ length when either trying to approach an insect/animal or trying to setup a shot. The new lens is about an inch longer (25mm) but is actually more compact during typical use. This is one of the key areas that the lens has been modernized.

AF (Autofocus) Quality
Older Tamron lenses relied on micromotors in their AF systems that tended to be a bit slower to focus and very “buzzy” in operation. Several years ago Tamron developed their USD (Ultrasonic Silent Drive) AF system that have demonstrated a marked improvement over earlier systems. My experience with USD has been very good. I find that the USD equipped lenses seem to be just a hair slower to focus than Canon lenses with USM motors, and that the noise level is often actually lower than the Canon systems. This lens is quite similar, although I do sometimes get a split second hesitation before final focus lock is achieved. I also noticed (as have other reviewers) that Live View focus is sometimes slower than it should be. I do have high expectations in this area, however, as a I have a kit full of lenses with great AF. Overall the lens focuses quickly, and more importantly, accurately. When I magnify photos at 1:1 pixel level I find focus to consistently be where I wanted it…like on these lashes, for example.
-

- Quick Christmas morning portrait using only natural light.
-

- Check out the detail on my point of focus!
For those that are interested, I got a very repeatable result of a +7 AFMA through Reikan FoCal on the lens. Please note that this figure is body specific, and very likely will NOT be the proper number for your camera body.
My conclusion, unsurprisingly, is that the Tamron’s AF is great but not quite at the level of my Canon L series macro – although the difference is very, very minute. I doubt that anyone will really be disappointed in the lens’ AF, and a quick perusal of user reviews at various sites show a host of people that are really, really pleased with their lens’ performance.
One excellent addition to this lens is the addition of the focus limiter switch. This is an area that has been sometimes overlooked by third party manufacturers, but I was really glad to see its inclusion here. I have even heard people complain about the slow AF on the Canon 100L, when in reality its focus is very fast. But macro lenses have a MUCH broader range of focus than other lenses because of the many stages of close focus. Without a focus limiter there will be occasions when the AF doesn’t have a point of high enough contrast to initially lock onto and will hunt through its entire range of focus to find a focus point. On most lenses that can happen very quickly, but a macro lens has a much greater range to hunt through, leaving you sometimes frustrated while the lens works through either tele or macro range when you need to shoot the opposite. On some lenses I rarely use the focus limiter, but I definitely use it on a macro lens. When shooting tele distances (anything beyond half a meter), simply use the middle switch. It removes the macro range from the equation and makes sure that you don’t waste time hunting if you miss your initial lock. The opposite applies when shooting macro – you don’t want to be hunting towards infinity focus. Put the lens in the third position and enjoy the faster focusing times that result. I use my Canon lens the same way, and kudos to Tamron for including this very important feature on this lens.
Add to this that the focus ring is very, very nice on the Tamron. It is wide, nicely ribbed and moves beautifully. You can manually focus at any time. For those that are interested in doing video work, I found the Tamron to be an excellent choice for video. The focus ring is great, and the VC makes for a nicely stable image even handheld. It was a very pleasant surprise in this regard.
Here is a little series of action shots taken with the Tamron from a sledding day:
-

- Snow is very hard to focus on on a bright day, but I was able to freeze action by…
-

- …locking onto my subjects quickly and shooting.
-

- Proof that this lens can focus and freeze action just fine, thank you!
-

- Ummm, where are you going?
-

- Another wipeout!
-

- Sledding fun…and that metal sled was fast!!
Image Quality
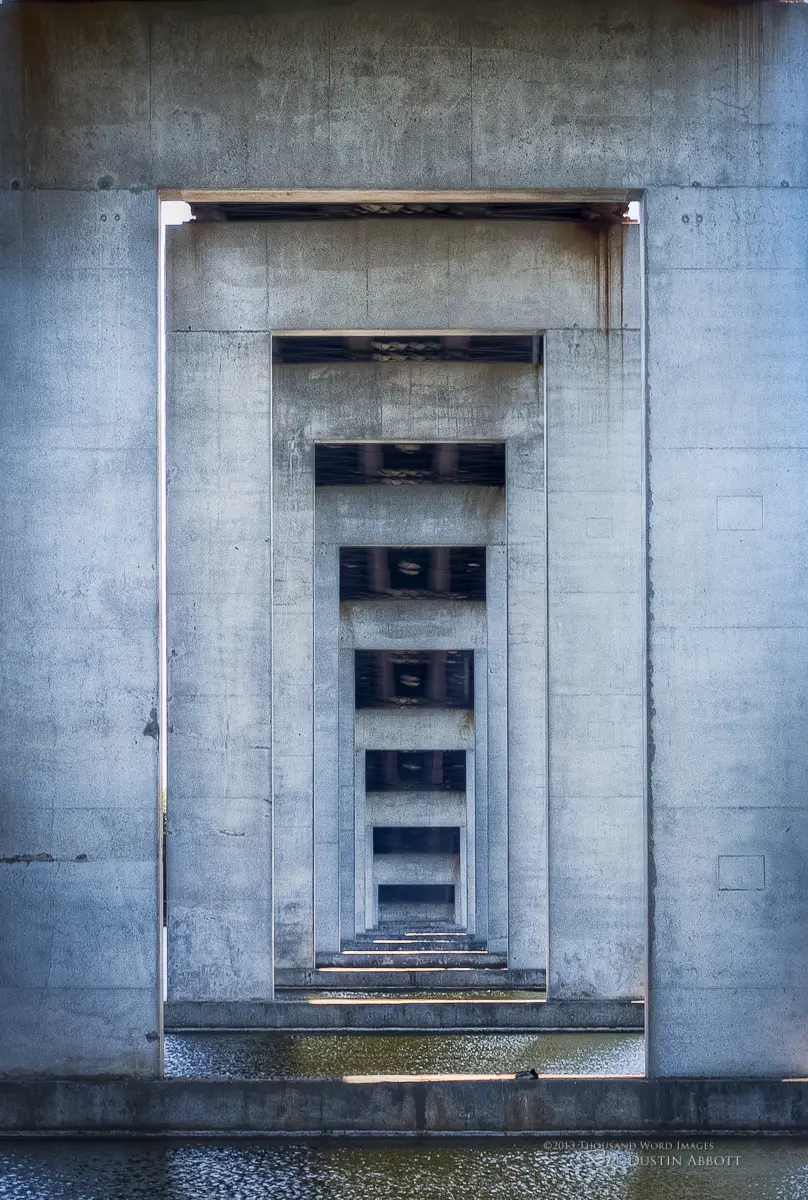
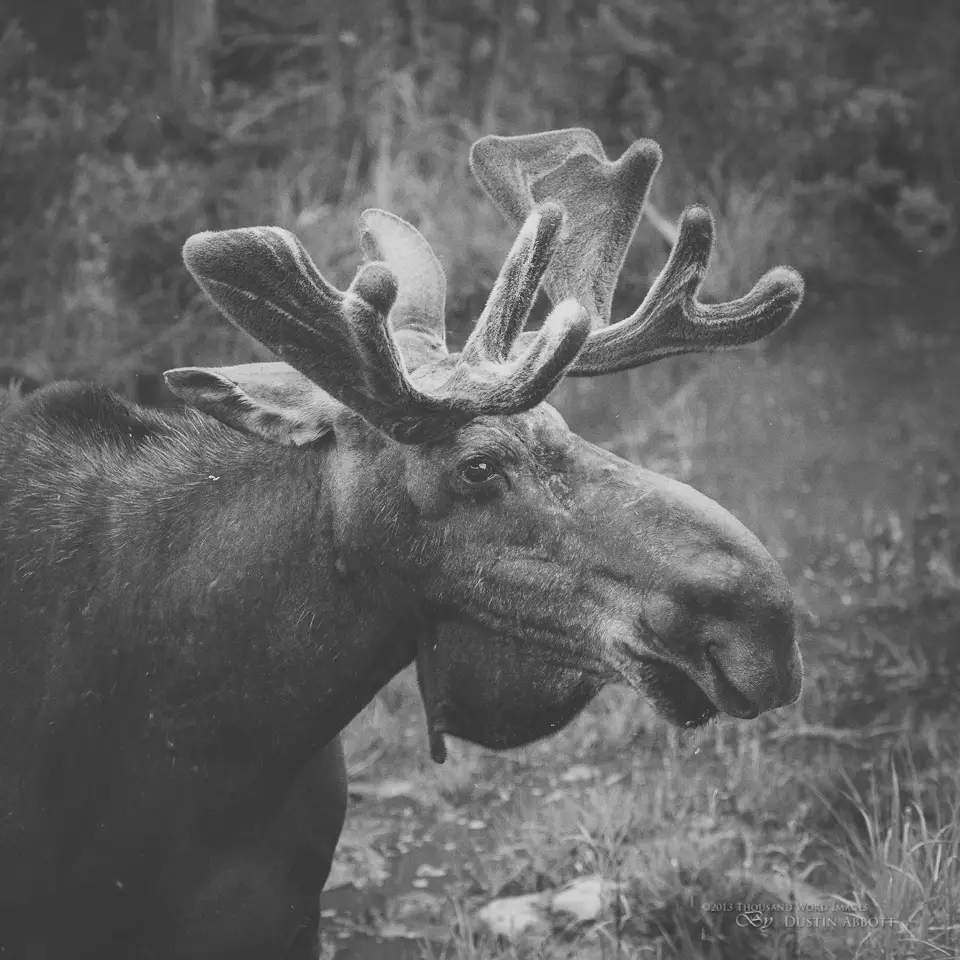
Macro lenses tend to be, by nature, very sharp lenses. They have to be to resolve the very fine detail of small things. Some manufacturers (ahem, Zeiss) call lenses macro that only provide 1:2 life size detail, but this lens is a true 1:1 macro lens. That means that you can fill the frame with very small things. It can focus down to 90mm, which means that you can get very close to something and still focus. The Tamron VC improves on its predecessor’s already stellar IQ, and the images produced are very, very sharp. The advantages of this show up at every focus distance, and I have been really impressed by the look of some “ordinary” images like this one that show a great 3D like quality and separation from the background.

Great for casual kid shots
I shot a series of holiday images using a pocket watch, a little “treasure chest”, and a Christmas tree and was very, very pleased with the fine detail.

The lens is very sharp wide open, even towards the corners, and the extreme corners reach excellent range by f/5.6. Peak center sharpness is around f/4. If you would like the chart testing results, take a look at Photozone’s results here and ePhotozine’s here. (P.S. Photozone finds that the Tamron outresolves my Canon in every statistic, and that is a huge accomplishment!)
Image sharpness and color rendition are significant high points with this lens. I hope to demonstrate that through the series of images that I will share throughout this review and in the final gallery. Many of you who have read my other reviews know that my style is to provide more “field results” and leave the chart testing to others more qualified. Winter is, unfortunately, not a ripe time for a lot of traditional macro work where I live, as flowers, insects, and even leaves are pretty much nonexistent. Still, I have found some subjects to share at macro or near macro distance to demonstrate the fine detail that this lens can resolve.
-

- Remains of a weed.
-

- Seed pod burst open
-

- Morning Tea
-

- Got the time?
-

- Very narrow depth of field
-

- Seasonal Decorations
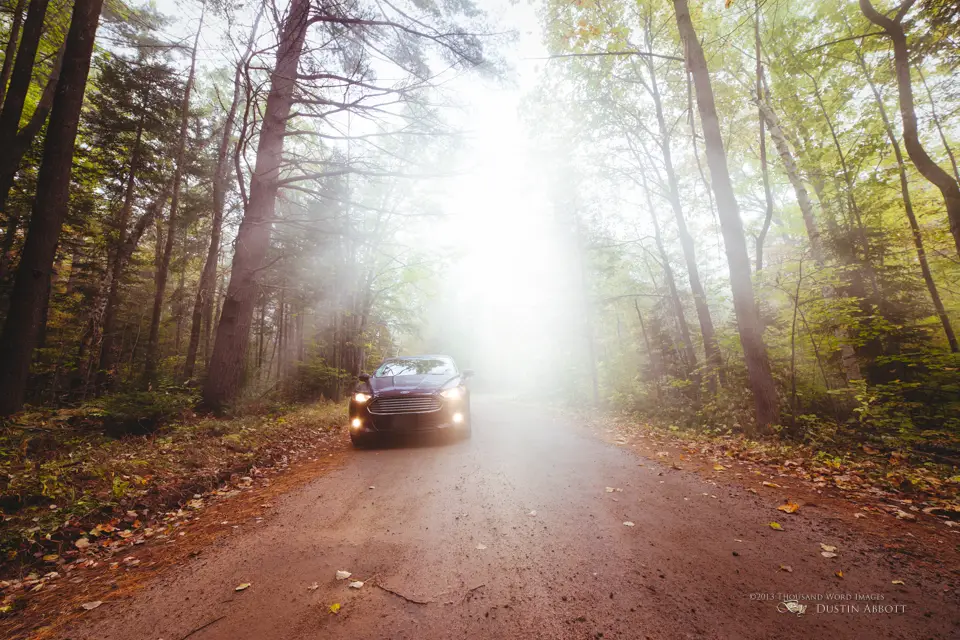
Distortion is completely negligible with the lens (as is true with most macro lenses), so there is absolutely nothing to be concerned about in field conditions here. Chromatic aberrations are well controlled through Tamron’s use of two XLD (Extra Low Dispersion) elements, one LD (Low Dispersion) element, along with new coating called “eBand”. This is another area of improvement over the already excellent results from its predecessor. Part of my shooting style involves a lot of shots into the sun, and I did not hesitate for a moment to use the lens in this fashion. The new coating proved its worth as I was scarcely able to produce ghosting of any kind despite shooting directly into the sun.
Another little trick I like to use is to stop down to f/11 and isolate the sun through branches or on the corner of buildings and produce beautiful sunbursts. The Tamron produces exceptionally nice sunbursts.

It has a nine bladed aperture iris that retains a nice circular shape even when stopped down. Look at this series featuring a Christmas decoration and tree that demonstrates how that the circular highlights remain, well, circular! This is important with a macro lens, as you will often stop down the lens quite a bit when shooting at macro length.
-

- Bokeh @f/2.8
-

- Bokeh @f/4
-

- Bokeh @f/5.6
-

- Bokeh @f/8
-

- Bokeh @f/11
The bokeh quality of the lens is generally very good (as is often the case with macro lenses), although the highlights do take on an elliptical shape towards the edges. I don’t feel that it is quite as creamy as the bokeh from my 100L (considered one of the best out there), but as you can see from these images, it produces very nice bokeh. The transition zone is handled well, and that is a personal priority for me. Far more images will feature transition bokeh than the typical OOF (out of focus) highlight “bokeh balls”. The lens transitions from focus to defocus nicely.

This lens does have some minor vignetting wide open that clears up to negligible levels by f/4. This is perhaps the easiest optical imperfection to clear up. It is minutely better than the Canon 100L in this regard despite having a smaller front element (58mm) than the Canon (67mm). Speaking of which: that small front element means that adding filters is quite cheap, and for those interested in using a circular polarizer, you will be happy to note that the front element does not rotate during focus.
Image quality in every area is a true high point for this lens. It compares very favorably to the 100L, which is one of the best macro lenses ever made.
Image Stabilization (VC)
This is another area of tremendous advantage for the new lens over its predecessor. Tamron has a bit of magic with their Vibration Compensation. Quite frankly it is the best system I have used. That was particularly noticeable when I went from the Tamron 70-300VC (a sub $400 lens) to the Canon 70-300L (a $1500 lens). The Canon is a better lens in almost every area save this one. I have actually been disappointed in Canon’s stabilizer because I was spoiled by the Tamron. The VC in the 90mm Macro just does the job. It can only be heard operating if you put your ear right next to the lens barrel with the VC engaged; otherwise it is silent (the Canon 70-200mm f/4L IS is the worst offender that I have used in this regard – it was like angry bees in the lens barrel). It is as if it magically locks your subject in the viewfinder and makes you feel like you have all the time in the world to compose and shoot. I can’t praise the operation and effectiveness of Tamron’s system enough.
This played a huge part in my use of the lens handheld to shoot video over the holidays. 90mm is in the medium telephoto range, but my video footage is so solid that you would scarcely know that it was handheld (other than the jerks when I would chase a subject). I found doing focus follow very easy by just grasping the focus ring. It is, in fact, one of the easiest lenses to use in this situation that I have personally come across. It is just a great size to cradle, focus, and shoot with.
The nature of macro photography is that image stabilizers work less effectively at macro distances (for all lenses). Tamron claims a 4 stop advantage for the VC, but expect that to be drastically reduced at macro distances. Think more a maximum of 2 stops on a good day. Still, I have had good success in shooting handheld shots at macro distances. Just know that the depth of field is so narrow at macro distances that acquiring and then holding focus long enough for a shot will take some practice. There is no question that the VC makes a difference here, but don’t expect miracles. Here is an example of a handheld macro I took with this lens:

Overall, Tamron’s VC works as well as anything I have personally seen. It makes a huge difference in framing any kind of shot, even casual shots with your family. This series of images were all taken below the recommended handholdable limit for this focal length. I wasn’t concerned for a moment…


Conclusion
Buying a good macro lens is a great investment. You get an amazing portrait lens (the 90-105mm range covered by most macro lenses is a very flattering perspective). It is amazingly sharp (you can always add blur, but adding sharpness is a very different matter!), has great color rendition, and the close focus distance means that you can get in and frame tight headshots or even closer detail shots in a way you can’t with most other telephotos. Macro lenses with weathersealing make great nature/landscape lenses. You can go from a deep depth of field landscape to capturing a narrow depth of field detail shot without changing lenses. That great resolving power is huge for this application. A stabilized medium telephoto like this is a great event/general purpose lens for both stills and video. I can say without hesitation that everyone should have a good macro lens even if they aren’t all that interested in shooting tiny objects. They are very flexible tools. I recently traveled with just this lens along with a 35mm prime and didn’t feel limited in the least. Here’s a variety of situations in which the lens excels:
-

- Nice transition bokeh. I could get close for this one…
-

- …and shoot from a distance for this one.
-

- Great landscape option.
-

- Exceptional color and great flare resistance.
-

- Right into the sun? No problem!
-

- One for Canada
-

- The moody side of Tamron
-

- Great for casual kid shots
-

- Portraits of family…
-

- Yes, it even takes good pics of cats
-

- Winter temperatures haven’t slowed it down.
-

- Nice, soft bokeh here.
-

- Flare handled nicely
-

- A little more formal portrait.
-

- Winter beauty.
But what about this lens? Let’s look at the pros and cons.
Pros:
-
Highly Effective Vibration Compensation
-
Internally focusing
-
Weathersealed construction
-
Optical excellence in every measurable way
-
Inclusion of a focus limiter
-
Price
-
6 Year Warranty in North America; 5 Year in Europe
-
Quality build
Cons:
-
Bokeh is perhaps a tad worse than the predecessor
-
AF still slightly slower than the best systems; can hunt a split second before final lock
-
Build feels slightly cheaper than the Canon 100L
The biggest con for the lens at introduction (price) is now a plus. At the moment, using Amazon.com prices, the Canon 100L is $1049 while the Tamron VC is $699. The Sigma 105mm OS comes in very close to the Tamron’s price ($669), while the Nikon 105mm VR is currently $845.99. That being said, the price for the Canon is somewhat deceiving. Holiday discounts have just ended, and this is the highest price I have seen in some time. Refurbished copies routinely surface for around $600-700. But, with all fairness, the Tamron also just had a $100 rebate end, meaning that it was recently available for $599 in the US. But you see why the price dropping was very important for the Tamron. It allows it to compete on merit without the negative of an equal or (gulp!) higher price than the first party offerings (pretty much unheard of). I suspect at this new price point the lens will do very well. As you can see, the list of pros is much greater than the cons.
I have no problem recommending this lens. I would personally be very interested if I did not already have a macro lens that I love in my kit. This lens runs neck and neck with my Canon, and if I were just entering the market and looking at the price/production ratio, I very possibly would have gone with the Tamron. I still think the Canon is a slightly better lens, but the difference is minimal. If you would like to save hundreds of dollars by going with the Tamron, know that you are missing very little. If I were considering the older Canon 100mm macro (without a stabilizer) at $499 vs. the Tamron, I would consider the extra money spent on the Tamron well worth it. It is one of the best macro options on the Canon system and possibly the best on the Nikon and Sony systems. It isn’t cheap, but it is a lot of lens for the money and represents a significant improvement over its “legendary” predecessor in almost every way. Tamron is on a roll right now, and I hope they keep it up. As a photographer, and a consumer, I consider competition a good thing! If you would like to buy from the people that I buy from, click here: They will treat you right!
Disclaimer: The lens tested was a retail copy of the lens loaned to me by Tamron Canada for review purposes. My review has not been subsidized or influenced by Tamron, but is entirely my own opinions formed by my personal experiences with the lens. I tested the lens in an EF mount on a Canon 6D body.
Great News! I can now offer a 5% discount on all purchases at Amplis Foto, Canada’s Leading Photographic Supplier. Please enter discount code: AMPLIS52014 in your cart. It is good for everything in your cart, andis stackable with other coupons, too! It will take 5% off your entire order! If you want to go directly to the new Tamron 150-600 VC, click here: Proceeds go towards keeping this site going and providing you with new reviews!
FOR MY AMERICAN READERS: I have now have a relationship in place with B&H for my American readers. B&H is one of the leading photography retailers on the planet, and they offer not only great prices but a cash back program. Click here in the mount of choice to get a great price on this lens.

Dustin Abbott uses Alien Skin products.
Final Gallery:
Click on the image below to see all the photos plus a few extras:
[sliderly id=2211 type=featuredimg colorbox=true width=500 height =300]
DISCLAIMER: This article and description contains affiliate links, which means that if you click on one of the product links, I’ll receive a small commission. As an Amazon Associate I earn from qualifying purchases.
 Sigma 17-40mm F1.8 DC | ART Gallery
  Sigma 17-40mm F1.8 DC | ART Review
  Viltrox Pro AF 85mm F1.4 FE Gallery
  Viltrox AF 85mm F1.4 PRO FE Review